Discussion


akirk said:
very neat solution...
however - as an alternative - I would consider these they grip well and adapt to different thickness of handles - but critically, they allow you to put the broom back by just pushing it against the clip - rather than having to lift the broom above and then let it drop down which in a business might be considered sub-optimal H&S

Thanks. Had no idea these existed. however - as an alternative - I would consider these they grip well and adapt to different thickness of handles - but critically, they allow you to put the broom back by just pushing it against the clip - rather than having to lift the broom above and then let it drop down which in a business might be considered sub-optimal H&S
loughran said:
Mr Whippy said:
I’m looking to buy a small plane.
What’s the practical difference between a low angle or block plane vs a 4 bench plane?
Is it just size and weight, with the option of a shallower or steeper angle because it’s bevel up and you can hone accordingly?
I’ve got a 4 1/2 bench and 5 1/2 bench, and it feels like a 4 bench will be another similar plane.
Am I better with a low angle bench plane to ‘fill the gap’ so to speak, or is a 4 bench still important to have for smoothing?
I've always thought that the choice between a 4 and a 4-1/2 smoother is a matter of personal preference. They both do the same job, The 4 is the smallest practical smoother * the 4-1/2 is heavier which will suit some Powerfully Built woodworkers, What’s the practical difference between a low angle or block plane vs a 4 bench plane?
Is it just size and weight, with the option of a shallower or steeper angle because it’s bevel up and you can hone accordingly?
I’ve got a 4 1/2 bench and 5 1/2 bench, and it feels like a 4 bench will be another similar plane.
Am I better with a low angle bench plane to ‘fill the gap’ so to speak, or is a 4 bench still important to have for smoothing?
I use a 4 because my first plane was a Stanley 4 and my Lie Neilsen 4 has a bronze body which I think looks nicer than the 4-1/2 ductile iron body. I can't imagine needing both.
- Stanley (and Lie Nielsen] made a number 1, 2 and 3 bench planes. The number 1 is so small, 140mm long, there is a view it was originally designed to be a sample product made so Stanley salesmen could carry it in a sample case. They fetch good money these days.
As for block planes, they're just a different animal to a smoother. They generally come with either a 20 degree or 12 degree blade angle. I would say that they are more usually used for planing surfaces that are narrower than the sole width. Edges of cabinet doors and finer work etc. The 12 degree low angle is intended to deal with end grain but has the advantage of having a lower profile than the 20 degree so fits in my hand more comfortably.
I wouldn't be without a 60-1/2.
Bye the bye, if you're planing end grain, dampening the wood slightly makes things easier. A bit of spit works well.

Both seem ok. A faff to set lateral blade angle vs a bench plane but this seems par for the course.
The block plane blade was honed at 25deg with a rubbish micro-bevel, probably a 28deg leading edge, so 41deg installed.
Also had about 0.75mm of leading edge skew so that took some honing out!
Given it’s 39deg vs a bench plane at 45deg, am I really gaining much with the standard bevel of 25deg for end grain and smoothing difficult/against the grain?
Would I be better taking it down to a 20deg angle?
In use it’s been better on my oak. I’m flattening rough sawn oak boards to a near flat finish and want to smooth them vs sand flat.
Tear out was a real issue in areas with the bench planes, and seems improved with the block, but not by a huge amount.
My concern is if I go too shallow on the blade it’ll just skip over the surface.
I’m using the Rider ‘scary sharp’ board and papers to do final honing but they stop at 2500grit.
Not sure if 5000g might be a better level.
Part of me wishes I’d bought a low angle bench plane now, but the small block plane does feel very handy and more refined in any case, when I then pick up the 4.5 again it feels ridiculously big.
That said, weirdly, I find my 5.5 a nicer plane than the 4.5 for its width. A better balance.
I can see why the 4 is popular being that bit narrower for its length!
Mr Whippy said:
......
I’m using the Rider ‘scary sharp’ board and papers to do final honing but they stop at 2500grit.
Not sure if 5000g might be a better level.
Leather strop with polishing compound. I'm using blue grade ATM because that's what I have in The Shed, but green grade is the more usual recommendation. I’m using the Rider ‘scary sharp’ board and papers to do final honing but they stop at 2500grit.
Not sure if 5000g might be a better level.
My finest stone is 4000 grit but I seldom use it. I generally hone to 1200, then strop. Takes seconds.
Same for chisels. Works great for me.
Error_404_Username_not_found said:
Mr Whippy said:
......
I’m using the Rider ‘scary sharp’ board and papers to do final honing but they stop at 2500grit.
Not sure if 5000g might be a better level.
Leather strop with polishing compound. I'm using blue grade ATM because that's what I have in The Shed, but green grade is the more usual recommendation. I’m using the Rider ‘scary sharp’ board and papers to do final honing but they stop at 2500grit.
Not sure if 5000g might be a better level.
My finest stone is 4000 grit but I seldom use it. I generally hone to 1200, then strop. Takes seconds.
Same for chisels. Works great for me.
Mr Whippy said:
Well I bought a Rider 69 1/2, along with a rider 3 in 1 shoulder plane.
Both seem ok. A faff to set lateral blade angle vs a bench plane but this seems par for the course.
The block plane blade was honed at 25deg with a rubbish micro-bevel, probably a 28deg leading edge, so 41deg installed.
Also had about 0.75mm of leading edge skew so that took some honing out!
Given it’s 39deg vs a bench plane at 45deg, am I really gaining much with the standard bevel of 25deg for end grain and smoothing difficult/against the grain?
Would I be better taking it down to a 20deg angle?
In use it’s been better on my oak. I’m flattening rough sawn oak boards to a near flat finish and want to smooth them vs sand flat.
Tear out was a real issue in areas with the bench planes, and seems improved with the block, but not by a huge amount.
My concern is if I go too shallow on the blade it’ll just skip over the surface.
I’m using the Rider ‘scary sharp’ board and papers to do final honing but they stop at 2500grit.
Not sure if 5000g might be a better level.
Part of me wishes I’d bought a low angle bench plane now, but the small block plane does feel very handy and more refined in any case, when I then pick up the 4.5 again it feels ridiculously big.
That said, weirdly, I find my 5.5 a nicer plane than the 4.5 for its width. A better balance.
I can see why the 4 is popular being that bit narrower for its length!
I think there is more information on the internet about sharpening woodworking tools than any other subject under the sun. I have 3 score years under my belt and with a fair wind only another one to go so i really don't have enough time left to start discussing micro bevels. Both seem ok. A faff to set lateral blade angle vs a bench plane but this seems par for the course.
The block plane blade was honed at 25deg with a rubbish micro-bevel, probably a 28deg leading edge, so 41deg installed.
Also had about 0.75mm of leading edge skew so that took some honing out!
Given it’s 39deg vs a bench plane at 45deg, am I really gaining much with the standard bevel of 25deg for end grain and smoothing difficult/against the grain?
Would I be better taking it down to a 20deg angle?
In use it’s been better on my oak. I’m flattening rough sawn oak boards to a near flat finish and want to smooth them vs sand flat.
Tear out was a real issue in areas with the bench planes, and seems improved with the block, but not by a huge amount.
My concern is if I go too shallow on the blade it’ll just skip over the surface.
I’m using the Rider ‘scary sharp’ board and papers to do final honing but they stop at 2500grit.
Not sure if 5000g might be a better level.
Part of me wishes I’d bought a low angle bench plane now, but the small block plane does feel very handy and more refined in any case, when I then pick up the 4.5 again it feels ridiculously big.
That said, weirdly, I find my 5.5 a nicer plane than the 4.5 for its width. A better balance.
I can see why the 4 is popular being that bit narrower for its length!

I'm not altogether sure that I know what a micro bevel is. I remember them emerging in the 90's and they sound cool but I've never felt the need.
For my low angle block plane I grind at 25 degrees as per the manufacturers spec and hone at maybe one degree off that. I grind on the edge of a wheel so the grinding angle is concave and hone with the back and the front (cutting edge) of the grinding angle in contact with the stone. sometimes I lift the blade a little I don't use a guide.
Low angle planes are not designed to cope with difficult grain, you should have better luck with a well tuned standard bench plane or failing that, take things a step further and fit a York pitch frog which increases the blade angles up to 50 degrees, or even a Middle pitch which will take the blade up to 55 degrees.
Or invest in a Festool Rotex 150.
With very fine cutting angles the edge will become blunt more often and be more susceptible to damage, cue the discussion about blade metallurgy and the advantage of an A2 steel, cryogenically treated and hardened to 60-62 over perhaps an S53 steel, treated in a vacuum furnace and hardened to HRC64.
There is no reason why you shouldn't take your blade down to 20 degrees, give it a try and see how it feels. If the blades are readily available and not too expensive buy another and have a different grind on each. Remember, it's important to have the back of the blade completely flat. If you can flatten the back of the blade to a mirror finish you're more than half way there.
Have fun.
Cheers for the replies.
Lots of food for thought on what stuff I might need to use.
I think at this point simply sanding them with my RO to get a final finish is the best bet.
I may have to buy a strop and compound then. I didn't want to have to buy more tools, but perhaps it's going to be the only way to get the blade to that next level so it'll make working on the toughest grains merely hard work, rather than a nightmare!
Mr Whippy said:
Cheers for the replies.
Lots of food for thought on what stuff I might need to use.
I think at this point simply sanding them with my RO to get a final finish is the best bet.
I may have to buy a strop and compound then. I didn't want to have to buy more tools, but perhaps it's going to be the only way to get the blade to that next level so it'll make working on the toughest grains merely hard work, rather than a nightmare!
Doesn't need to be anything fancy. I bought thick leather offcuts on ebay for about a quid each. I just tack it down to the bench when needed. But nearly any old bit of stiff leather scrap will do fine. Small block of compound will last for years too. Lots of food for thought on what stuff I might need to use.
I think at this point simply sanding them with my RO to get a final finish is the best bet.
I may have to buy a strop and compound then. I didn't want to have to buy more tools, but perhaps it's going to be the only way to get the blade to that next level so it'll make working on the toughest grains merely hard work, rather than a nightmare!
Ok I’ll take a look at doing a DIY strop setup.
I had a bash at getting my 5.5 blade (an original as new Stanley blade) better.
It’s now much improved but I think my sharpening board is letting the side down a bit and I need to look at a better flatter smoother solution.
Just the inconsistent ‘wear down’ pattern when doing the back bevel at various points on the board, clearly it’s not a flat enough surface and I think a bit is to do with it deflecting under load.
I’ve never seen so many wood shavings since buying a few planes!
I currently use an Axminster/Rider sharpening board.
The first one wasn’t great, they sent a replacement and it’s mostly flat but still ever so slightly concave. I’d expected these to be as flat as can be.
But my issue now is that if you’re pressing down it deflects a bit.
You can clearly see that the marker pen is removed differently depending where on the board I hone.
If I’m lengthwise on the board with the blade tip equidistant between the closer together rubber backing pads, it seems good.
But if you run two strips width wise, it’s like the board bends down at one side of strip more than at the other.
Part of me is tempted to remove the backing pads and mount it solidly to a thick lump of plywood to remove the deflection factor.
Mr Whippy said:
I currently use an Axminster/Rider sharpening board.
.....
Part of me is tempted to remove the backing pads and mount it solidly to a thick lump of plywood to remove the deflection factor.
That would probably work fine. .....
Part of me is tempted to remove the backing pads and mount it solidly to a thick lump of plywood to remove the deflection factor.
But I suspect you're spending money needlessly.
Like Embe I have a chunk of glass from the scrap offcuts bin at a local joinery firms shed. That's stuck to a wooden cutting board that Mrs. 404 didn't like using cheap double sided tape.
And I've never bought Scary Sharp abrasives and don't plan to. Pack of assorted wet & dry paper from the local handy shop does fine. Although I did invest in a double sided diamond plate (400 and 1200 grit IIRC) which was cheap as chips and surprisingly good to use.
The kitchen worktop idea is good too, but it doesn't need to be granite (as cool as that sounds). Common or garden Melamine worktop offcuts, or the bit from where the sink goes, would be more than good enough.
It's your money and your business but I think it's possible to overthink this stuff.
(Of course buying tools is a joy in itself. A box of left handed drills arrived only this morning
)It’s a tough one on spend vs return.
For £20 for a square of materiel, I genuinely expected a rock solid super smooth and flat surface.
I’m somewhat baffled the brief was missed given the fairly simple requirements can be met with a bit of worktop off-cut for instance.
While waiting for my flatter replacement I’d just planed a patch of plywood flat and dead smooth and found that quite adequate for honing on.
Will definitely do a DIY leather strop.
Edited by Mr Whippy on Friday 31st March 18:49
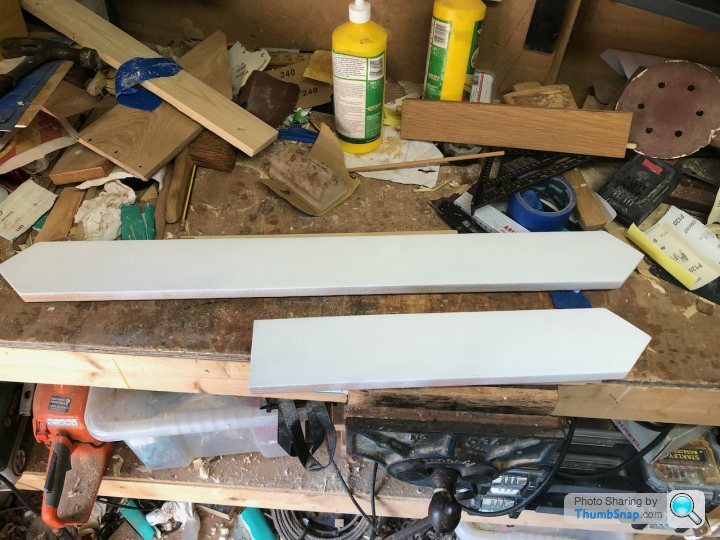
Fairly straightforward project this one. Yes I know my bench is a bloody mess.
First get some oak and paint one side.
Put on some Oramask 813 masking paper and cut out the letters that you want on the CNC.
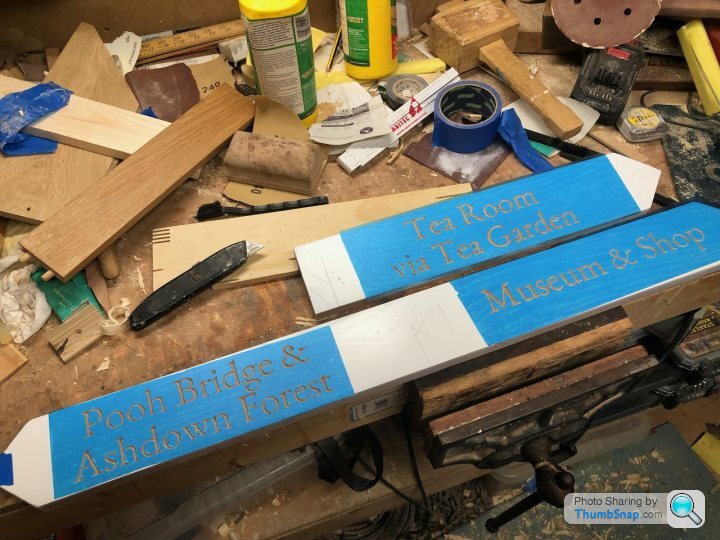
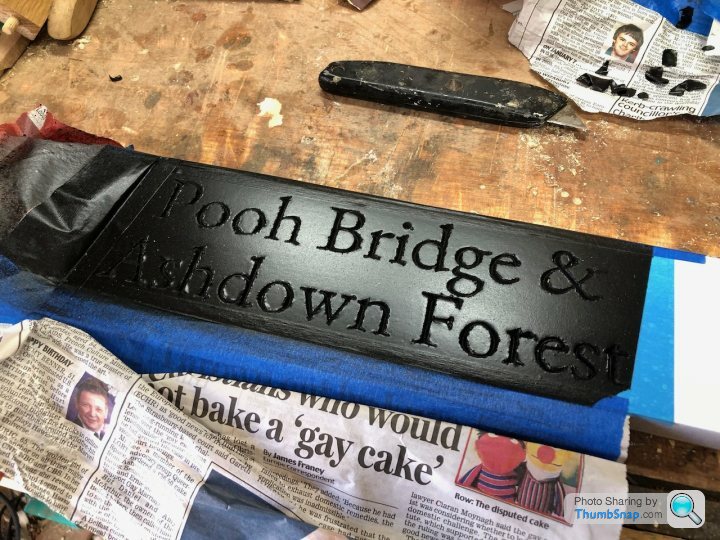
Some paper as further mask (Gay cake anyone ?) - get your rattle can of graffiti paint and paint the piece you've cut out.
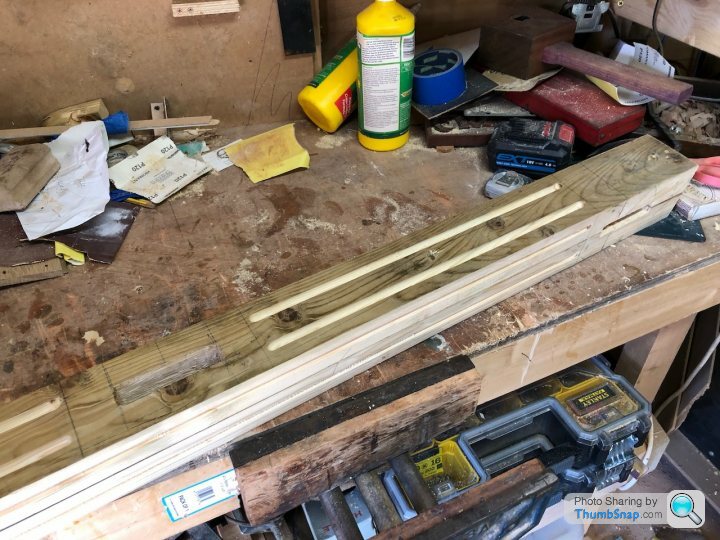
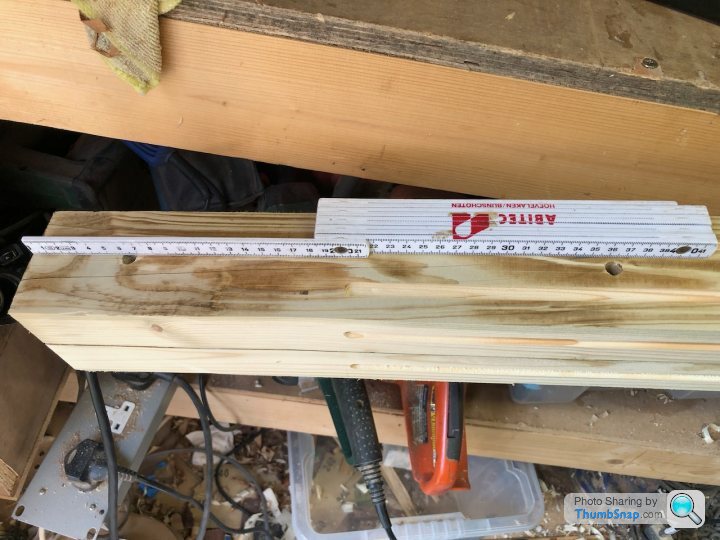
Grab two treated fenceposts and cut grooves to match the customers requirements as well as cutting a mortice for a sign to slide in half way down.
At the top end, cut a couple of half lap joints for the top sign to recess into.
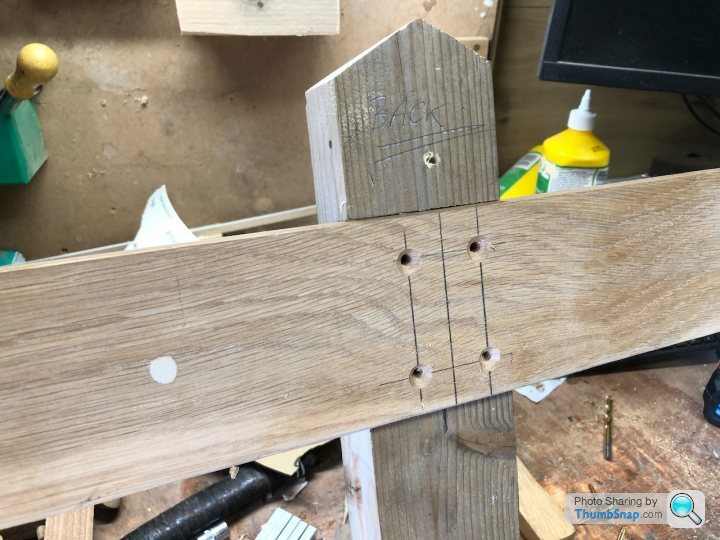
Take the two halfs and glue them together having screwed in the top sign marker.
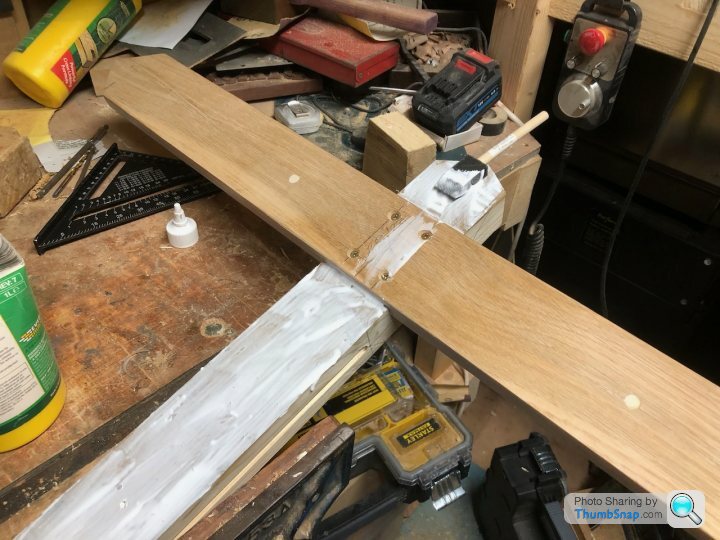
Add some recessed screws at regular intervals to aid joining the two pieces, using clamps until the glue sets.
Having inserted the lower sign and fixed with full length dowels, give it a sand and a paint.
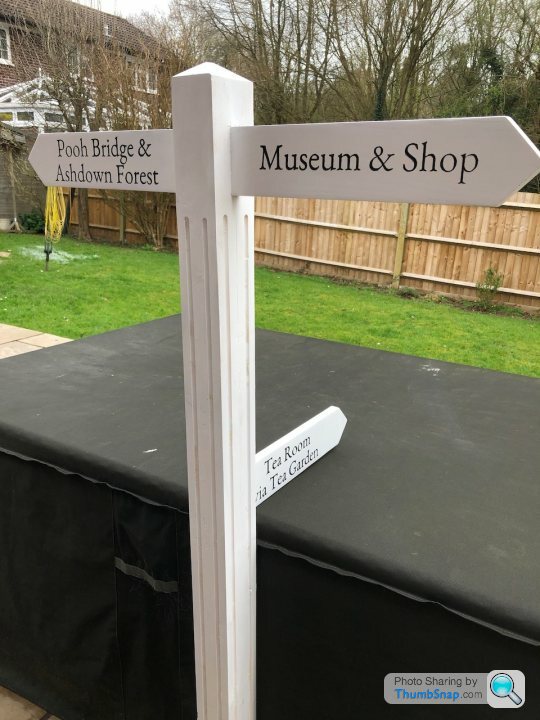
Drop off at the new owners and see how it looks on a dry fit. It'll be fixed in place next week.

First get some oak and paint one side.
Put on some Oramask 813 masking paper and cut out the letters that you want on the CNC.
Some paper as further mask (Gay cake anyone ?) - get your rattle can of graffiti paint and paint the piece you've cut out.
Grab two treated fenceposts and cut grooves to match the customers requirements as well as cutting a mortice for a sign to slide in half way down.
At the top end, cut a couple of half lap joints for the top sign to recess into.
Take the two halfs and glue them together having screwed in the top sign marker.
Add some recessed screws at regular intervals to aid joining the two pieces, using clamps until the glue sets.
Having inserted the lower sign and fixed with full length dowels, give it a sand and a paint.
Drop off at the new owners and see how it looks on a dry fit. It'll be fixed in place next week.
crmcatee said:
Fairly straightforward project this one. Yes I know my bench is a bloody mess.
First get some oak and paint one side.
Put on some Oramask 813 masking paper and cut out the letters that you want on the CNC.
Some paper as further mask (Gay cake anyone ?) - get your rattle can of graffiti paint and paint the piece you've cut out.
Grab two treated fenceposts and cut grooves to match the customers requirements as well as cutting a mortice for a sign to slide in half way down.
At the top end, cut a couple of half lap joints for the top sign to recess into.
Take the two halfs and glue them together having screwed in the top sign marker.
Add some recessed screws at regular intervals to aid joining the two pieces, using clamps until the glue sets.
Having inserted the lower sign and fixed with full length dowels, give it a sand and a paint.
Drop off at the new owners and see how it looks on a dry fit. It'll be fixed in place next week.
Straightforward you say, but an incredibly professional looking product, I can imagine there's a good market for signposts that look that good.First get some oak and paint one side.
Put on some Oramask 813 masking paper and cut out the letters that you want on the CNC.
Some paper as further mask (Gay cake anyone ?) - get your rattle can of graffiti paint and paint the piece you've cut out.
Grab two treated fenceposts and cut grooves to match the customers requirements as well as cutting a mortice for a sign to slide in half way down.
At the top end, cut a couple of half lap joints for the top sign to recess into.
Take the two halfs and glue them together having screwed in the top sign marker.
Add some recessed screws at regular intervals to aid joining the two pieces, using clamps until the glue sets.
Having inserted the lower sign and fixed with full length dowels, give it a sand and a paint.
Drop off at the new owners and see how it looks on a dry fit. It'll be fixed in place next week.
This time next year Rodney etc,
Monday morning book club.
I don't know about you but I have a fair few woodworking books. Some that I'd recommend.
My first book is/was my first woodworking book. I started at Jacob Kramer, the Leeds art college, in 1979 where they ran a 3 year course in furniture design and cabinetmaking. The college had excellent and well recognised graphic design and fashion/textile courses but tucked away in the basement, unseen by many, there was a large, well equipped furniture department with machine shops, workshops, drawing studios and even a Jewellery workshop.
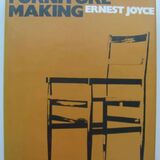
In the first week we were expected to order a copy of Joyce.
Joyce was to be our bible.
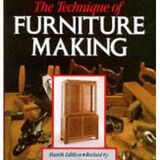
The Technique of Furniture Making by Ernest Joyce, first published in 1970, deals with pretty much every detail of furniture making up to that point in history. It's comprehensive, covering tools, materials, techniques and examples of construction in detail. To coin a phrase... it's old school.
The original editions have a mustard coloured dust sleeve and then in 1987 it was revised by Alan Peters and brought a little more up to date.
I still consult my copy on occasion all these years later and despite being a book from a different era it's an excellent reference and worth having a copy if you enjoy books on woodworking.
I don't know about you but I have a fair few woodworking books. Some that I'd recommend.
My first book is/was my first woodworking book. I started at Jacob Kramer, the Leeds art college, in 1979 where they ran a 3 year course in furniture design and cabinetmaking. The college had excellent and well recognised graphic design and fashion/textile courses but tucked away in the basement, unseen by many, there was a large, well equipped furniture department with machine shops, workshops, drawing studios and even a Jewellery workshop.
In the first week we were expected to order a copy of Joyce.
Joyce was to be our bible.
The Technique of Furniture Making by Ernest Joyce, first published in 1970, deals with pretty much every detail of furniture making up to that point in history. It's comprehensive, covering tools, materials, techniques and examples of construction in detail. To coin a phrase... it's old school.
The original editions have a mustard coloured dust sleeve and then in 1987 it was revised by Alan Peters and brought a little more up to date.
I still consult my copy on occasion all these years later and despite being a book from a different era it's an excellent reference and worth having a copy if you enjoy books on woodworking.
Those books and the fingerboard look great. I remember someone saying to me once "the difference between a pro and a good amateur is that a good amateur practices until he gets it right, a pro practices until he can't get it wrong". Good work chaps.
I've had mixed success with the woodwork books I've bought over the last two years or so, they've nearly all been very poor, So having a recc is much appreciated.
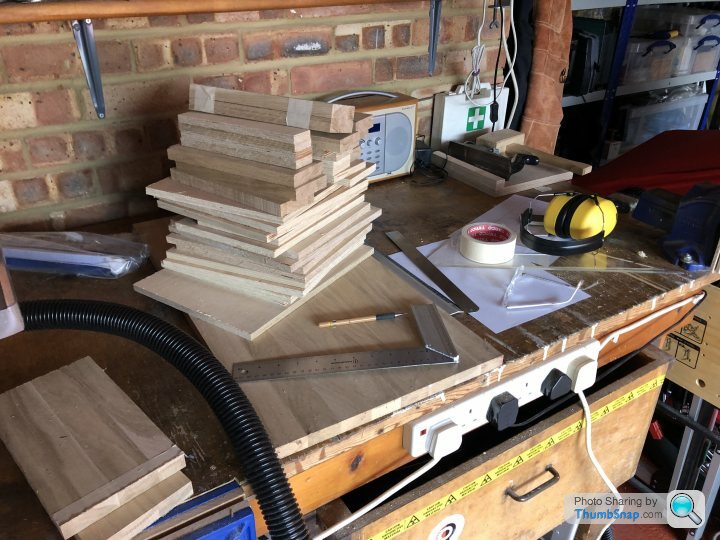
I call my router, in a probably deranged homage to Robert Oppenheimer, "the destroyer of work". It takes an absolute age to set up a cut, with clamps, diy fences, temporary stop ends etc and then something usually moves and it all goes wrong. I've therefore decided I need a router table, I've never used one before, but they look good on youtube. I've no real room for anything full size, and the affordable (cheap) ones look a bit pants, so I thought making one would be a better option. With the magic of google I've found a small bench fold uppable one and (cheating, I know) downloaded a plan.
I thought I'd try and get by with offcuts I had lying around, but have had to buy some ply (have you seen the price of ply these days?!). Having a plan means I've been able to cut most of the pieces prior to assembly, which is about as far as I've got. It might be compact, but it's going to be heavy, I can barely lift the pile of pieces. I'm a little concerned about the quality of the ply too, - I didn't want to stretch to birch ply and so went for bog standard 12mm hardwood ply, - it doesn't look great and even a strip of masking tape is enough to lift the top veneer. I'm sure the quality used to be better than that.
I may be too busy hiding eggs and eating chocolate to get started this weekend, but will post up some pics of the finished article, assuming I get that far. Here's the pile of pieces, ready to go:
I've had mixed success with the woodwork books I've bought over the last two years or so, they've nearly all been very poor, So having a recc is much appreciated.
I call my router, in a probably deranged homage to Robert Oppenheimer, "the destroyer of work". It takes an absolute age to set up a cut, with clamps, diy fences, temporary stop ends etc and then something usually moves and it all goes wrong. I've therefore decided I need a router table, I've never used one before, but they look good on youtube. I've no real room for anything full size, and the affordable (cheap) ones look a bit pants, so I thought making one would be a better option. With the magic of google I've found a small bench fold uppable one and (cheating, I know) downloaded a plan.
I thought I'd try and get by with offcuts I had lying around, but have had to buy some ply (have you seen the price of ply these days?!). Having a plan means I've been able to cut most of the pieces prior to assembly, which is about as far as I've got. It might be compact, but it's going to be heavy, I can barely lift the pile of pieces. I'm a little concerned about the quality of the ply too, - I didn't want to stretch to birch ply and so went for bog standard 12mm hardwood ply, - it doesn't look great and even a strip of masking tape is enough to lift the top veneer. I'm sure the quality used to be better than that.
I may be too busy hiding eggs and eating chocolate to get started this weekend, but will post up some pics of the finished article, assuming I get that far. Here's the pile of pieces, ready to go:
I've never thought about getting a book on woodworking; for making stuff, I did get one on routers when I first got one as I wanted to be safe.
I completely understand the Oppenheimer quote - very apt. Much less so now but I guess that's years of working with them.
On router tables I did buy a Trend one many many years ago and it's still in occasional use; the only thing missing was the router was mounted upside down in it and adjustments up and down had to be done using the locking mechanism on the router itself which to be honest was A: A bit of a faff, and B: not that accurate having to support a router, push it up and then lock it in place when it's the right depth. In true bodge style I got an car jack (courtesy of my mate in the car trade) and it sits below the router and by unlocking the rise/fall on the router, I can crank the handle and it'll go up and down accurately - stop, lock it in place and crack on. Works really well although I had to raise up the router table with a couple of blocks to get the jack underneath the router.
If there's interest I'll get a picture next time I use it.
Gassing Station | Homes, Gardens and DIY | Top of Page | What's New | My Stuff