Discussion


loughran said:
Agreed, that's a great result. I have a pencil sized hole (9/32) drilled in one end of my marking gauge which I find makes it a really useful tool. It's not always you need a scribed line and a pencil line is less invasive.

I’m finding this more and more, I just want reference lines.I did buy a nice cutting marking gauge which is very nice but a lot of the time I find I’m using calipers to check when I’m where I want to be at the final smoothing, and the splintering edges you get with a cutter as you pass into the cut edge seem less nice/accurate/refined.
I also need to make a decent tool to check for flatness. My 1m metal ruler is surprisingly wibbly.
Any ideas on best wood to use for a 1.2m level checking tool?
I’ve made winding sticks from siberian larch and they’ve remained square to each other so might go with that but it’s a big step up from 45cm to 1.2m!
Mr Whippy said:
Any ideas on best wood to use for a 1.2m level checking tool?
I’ve made winding sticks from siberian larch and they’ve remained square to each other so might go with that but it’s a big step up from 45cm to 1.2m!
I would suggest a three inch fence stob. I’ve made winding sticks from siberian larch and they’ve remained square to each other so might go with that but it’s a big step up from 45cm to 1.2m!
Try to find an old discoloured one as it will probably have moved all it's going to move.
I think the timber is spruce. It rips and planes up true very nicely. It's what I have used for all the wooden planes I have made and seems to be very stable, albeit I've only ever used short offcuts not long sections.
Also, they're not terribly expensive, which is nice.
HTH.
Mr Whippy said:
Any ideas on best wood to use for a 1.2m level checking tool?
I’ve made winding sticks from siberian larch and they’ve remained square to each other so might go with that but it’s a big step up from 45cm to 1.2m!
I would think some sort of aluminium extrusion would beat timber as a stable straight edge, perhaps you could create winding strips using a modern material whilst keeping an eye on how things were..I’ve made winding sticks from siberian larch and they’ve remained square to each other so might go with that but it’s a big step up from 45cm to 1.2m!
https://blog.lostartpress.com/2014/06/20/a-cool-wa...
These winding sticks have ebony inserts to provide contrast.
https://www.davidstanley.com/catalogue/lot/a871ceb...
I like that they were called winking strips.

If I were to make a pair of winding sticks from timber I'd most likely choose some old wood that has had many seasons of seasoning.... expanding and contracting until it had reached some sort of dimensional equilibrium.
Or just make the sticks from what you have to hand and when they turn from being straight and square, chuck them away and try again.
My ‘big shelf’ (2m) became two smaller shelves (1m each), and with a No 5.5 plane is an easy exercise.
I’m guessing I’d need a 90cm long plane (wooden?) to have any hope of flattening a 2m board.
Another shelf was split along its length into two shallow shelves for a kitchen wall at the end of my island.
Interesting. The board I rip cut which was flat and dimensioned had one side dip down by about 5mm.
Unstable. So both shelves needed to end up thinner to bring the pair back to true.
One flattened nicely, but the one that bent, once flattened on one side then bent again once I did the convex side… a bit more material lost to reflatten.
The big shelf I cross cut into two, I used my plunge saw and track for a nice cut… hmmm. Serious pinch. I had to
Stop the saw and proceed with a hand saw.
I had originally bought two 8ft rough sawn oak boards and I think, simply put, one was “ok” and one has been a nightmare.
One of my 1m shelves. Supposedly dimensioned
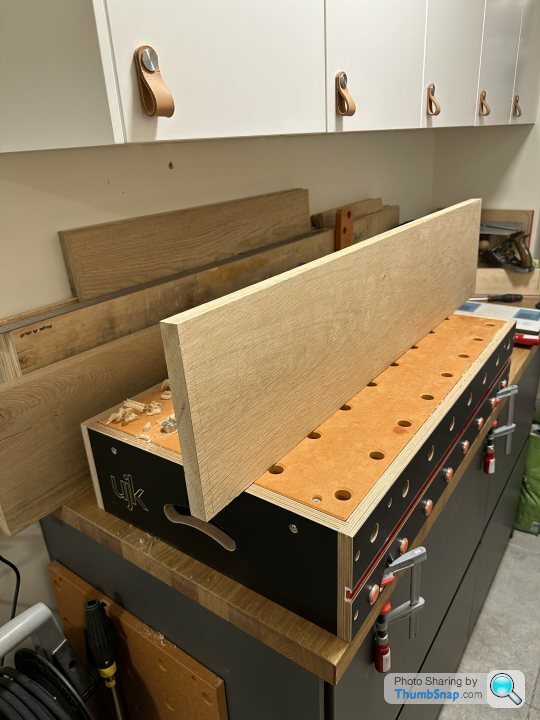
Annoyingly, these Axminster benches aren’t really too great, this second orange top is better than the one it came with, but even so it dips about 0.75mm in the middle, so actually my big shelves are about 0.5-0.75mm fatter in the middle than the ends.
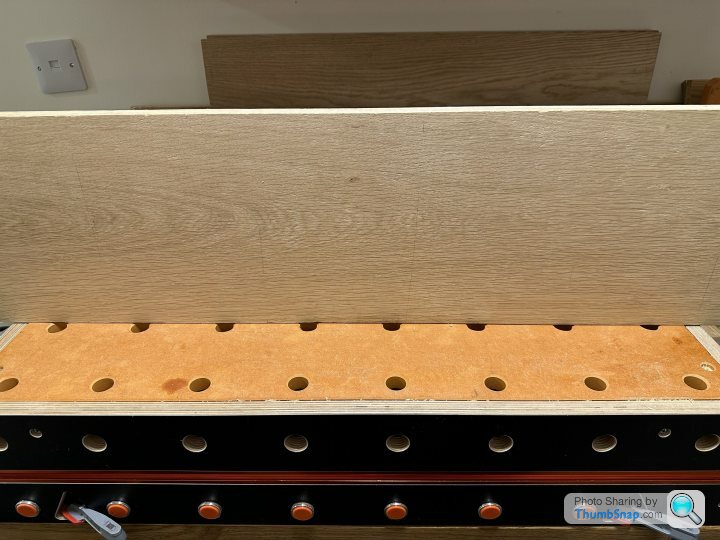
I have a bunch of plywood so think I’m going to cut that down into 3” strips, then glue up into a work surface that’s actually flat. Also lower. And then drill in holes using the current top as a guide.
All this for deep single piece oak shelves. No one seemed to do more than 20cm deep.
I’m guessing I’d need a 90cm long plane (wooden?) to have any hope of flattening a 2m board.
Another shelf was split along its length into two shallow shelves for a kitchen wall at the end of my island.
Interesting. The board I rip cut which was flat and dimensioned had one side dip down by about 5mm.
Unstable. So both shelves needed to end up thinner to bring the pair back to true.
One flattened nicely, but the one that bent, once flattened on one side then bent again once I did the convex side… a bit more material lost to reflatten.
The big shelf I cross cut into two, I used my plunge saw and track for a nice cut… hmmm. Serious pinch. I had to
Stop the saw and proceed with a hand saw.
I had originally bought two 8ft rough sawn oak boards and I think, simply put, one was “ok” and one has been a nightmare.
One of my 1m shelves. Supposedly dimensioned
Annoyingly, these Axminster benches aren’t really too great, this second orange top is better than the one it came with, but even so it dips about 0.75mm in the middle, so actually my big shelves are about 0.5-0.75mm fatter in the middle than the ends.
I have a bunch of plywood so think I’m going to cut that down into 3” strips, then glue up into a work surface that’s actually flat. Also lower. And then drill in holes using the current top as a guide.
All this for deep single piece oak shelves. No one seemed to do more than 20cm deep.
The production of chopping boards continue. This is the second one for Mrs B. Well received and I really quite like the Zebra stripe affect. Mahogany and Oak. The Mahogany was actually from my old stairs. Wish I'd kept more of that wood...Some of it went to the tip, which is a crying shame. Handle is just an distressed steel bow handle from Amazon. Got something a bit different coming for the next board.
One more to come and this one even has pieces of the old chopping board its replaced in it.
Also working on the TVU (TV unit) and finishing off Dylan's chair which is a year old project now. Very embarrassing, but like real world projects, its had its issues.
One more to come and this one even has pieces of the old chopping board its replaced in it.
Also working on the TVU (TV unit) and finishing off Dylan's chair which is a year old project now. Very embarrassing, but like real world projects, its had its issues.
Edited by bakerstreet on Saturday 23 March 19:33
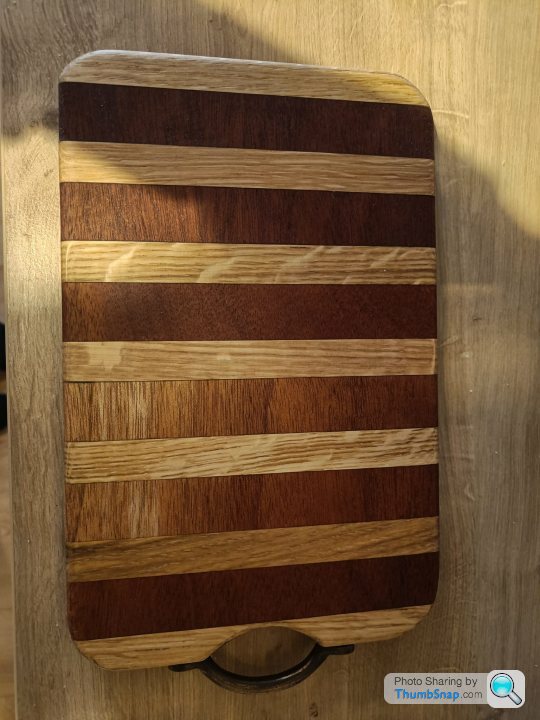
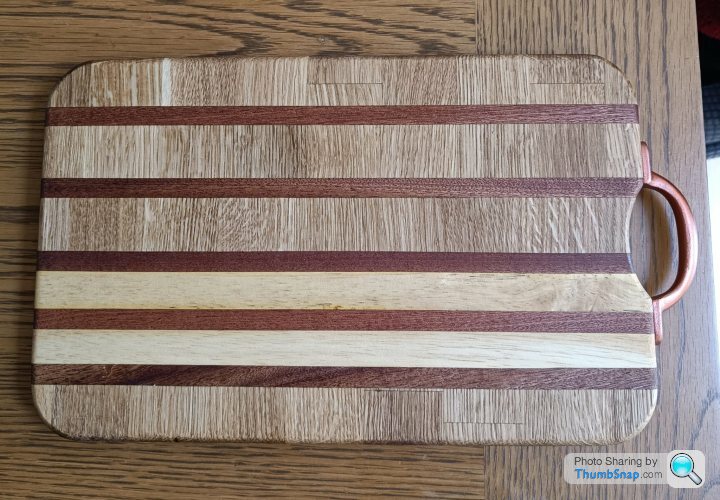
Last of the chopping boards completed for Mrs B. Really pleased with this one and its probably one of the best ones (If not the best)
I have no idea what the lighter timber is. Pine, Beach or Spruce maybe? Its actually section of our old chopping board which I cut up on the circular saw.
The other parts are an old Oak Block worktop and the thinner strips are Sapele bought from Facebook Market.
OH requested a copper handle, so I just sprayed a back bow handle from B&Q with some copper spray paint (Ebay)
Assembly was the usual Ultimate Tight Bond 3 glue and then all clamped together using Sash clamps. The glued board is then run through by planer, trimmed so its square, routered, oiled and handle fixed on.
Got some others in progress for a family friend's Birthday. Will post those up once done.
Some cracking work in here as always!
My latest ended up being a case of something that took 3 times longer than expected, and I’ve got another 2 to make!
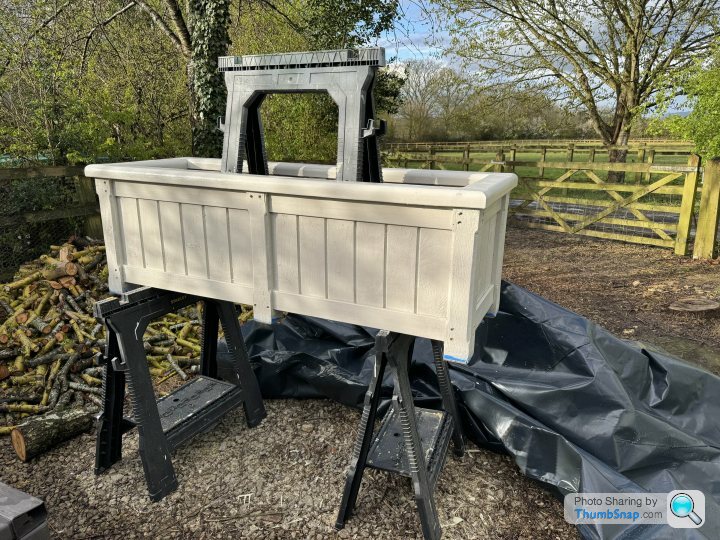
Disappointed with quality of available wood planters, and thick section treated tongue n groove I set about making my own.
Opted for, 3x3 fence posts, treated 3x2 and 22x150 gravel boards just to see if I could make them look presentable.
Excuse the messy workshop, got a load of hardwood to process / materials for making new doors when I get round to it in the way.
I’ve also probably abused a couple of my tools given how wet (preservative) the stuff was.
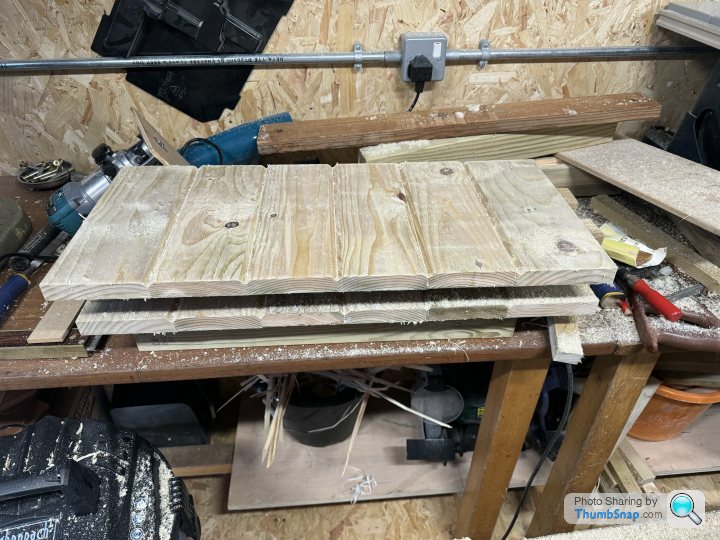
Gravel board, one pass thru planer thicknesser, glued n screwed into panels + pass of 45 degree router bit to give it the tongue / groove look.
Dry assembly - 4 haunched tennons, 4 normal, and 4 thru mortises.
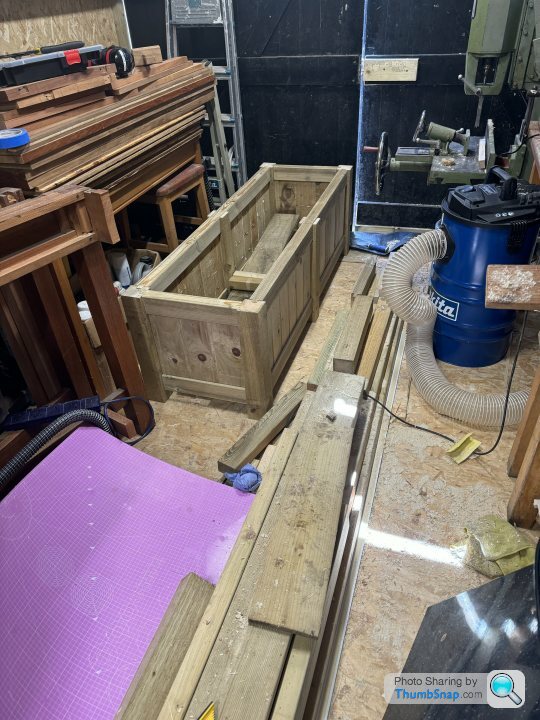
With added top and big old radius on it. I was going to dowel the joints, but got fed up with how long it was taking to construct, opted for screws which I’ll plug the holes on (to ensure nothing moved whilst the glue doing its foamy thing)
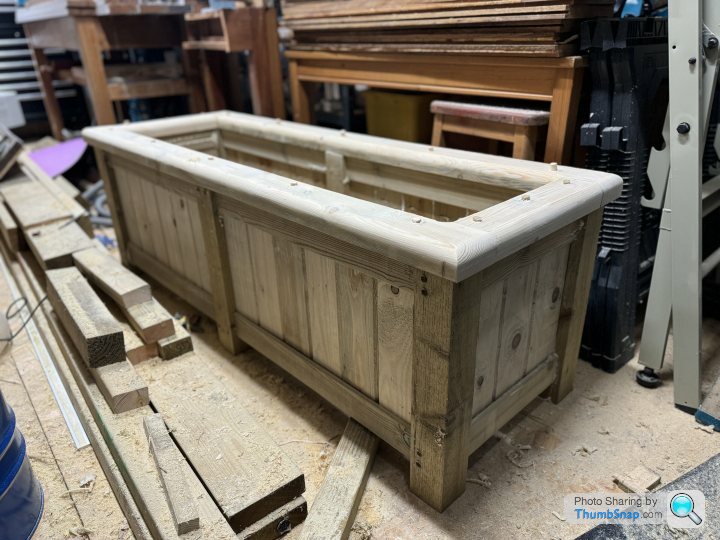
Finally, painted (with added rain) at this point figured it was missing something so went with a stop chamfer to legs and /inside of panels.
Inside will get a coat of proper creosote + DPM liner ontop with drainage in the bottom.
All in, £59 in materials each and I finally got to use my new to me mortiser, I think I’d have given up if I didn’t have it!
Just 2 more to go! Oh and due to the amount of preservative… currently weighs somewhere around 50kg… not an easy lift.
My latest ended up being a case of something that took 3 times longer than expected, and I’ve got another 2 to make!
Disappointed with quality of available wood planters, and thick section treated tongue n groove I set about making my own.
Opted for, 3x3 fence posts, treated 3x2 and 22x150 gravel boards just to see if I could make them look presentable.
Excuse the messy workshop, got a load of hardwood to process / materials for making new doors when I get round to it in the way.
I’ve also probably abused a couple of my tools given how wet (preservative) the stuff was.
Gravel board, one pass thru planer thicknesser, glued n screwed into panels + pass of 45 degree router bit to give it the tongue / groove look.
Dry assembly - 4 haunched tennons, 4 normal, and 4 thru mortises.
With added top and big old radius on it. I was going to dowel the joints, but got fed up with how long it was taking to construct, opted for screws which I’ll plug the holes on (to ensure nothing moved whilst the glue doing its foamy thing)
Finally, painted (with added rain) at this point figured it was missing something so went with a stop chamfer to legs and /inside of panels.
Inside will get a coat of proper creosote + DPM liner ontop with drainage in the bottom.
All in, £59 in materials each and I finally got to use my new to me mortiser, I think I’d have given up if I didn’t have it!
Just 2 more to go! Oh and due to the amount of preservative… currently weighs somewhere around 50kg… not an easy lift.
That planter is awesome. Well played with the haunched tenons, I haven't attempted the like yet. Beautiful high strength joint.
I keep seeing wooden planters outside garden shops and thinking they look crappy.
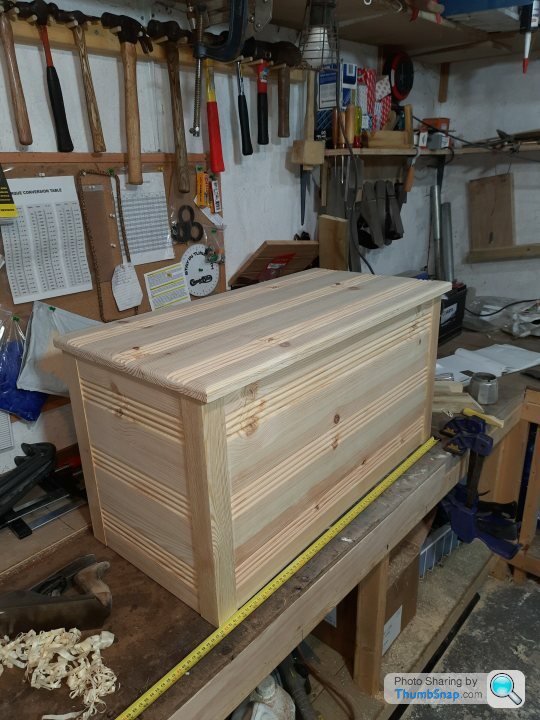
I finished the blanket chest for my friend today. No power tools used except for an electric sander briefly. The corner joints are blind dadoes because aesthetically I don't really like externally visible joints. I prefer a cleaner look. They took a bit of doing and I had to modify my homemade rebating plane because the steel dragged like mad until I filed a relief both sides.
The wood is mostly cheap white pine but the corner columns are Canada redwood. There is no metal anywhere in it. The bracing battens under the lid are secured with glued softwood dowels which I also made, using a dowel cutter that I made. Simplest thing ever - I'll show you soon.
There is no finishing treatment yet, I'm leaving that to the new owner. I'm not a fan of painted wood and even less of varnish but she is going to give it a doing with some old fashioned hard furniture wax and a soft cloth.
Sounds ideal to me.
(Sorry, my shed is a tip).
I keep seeing wooden planters outside garden shops and thinking they look crappy.
I finished the blanket chest for my friend today. No power tools used except for an electric sander briefly. The corner joints are blind dadoes because aesthetically I don't really like externally visible joints. I prefer a cleaner look. They took a bit of doing and I had to modify my homemade rebating plane because the steel dragged like mad until I filed a relief both sides.
The wood is mostly cheap white pine but the corner columns are Canada redwood. There is no metal anywhere in it. The bracing battens under the lid are secured with glued softwood dowels which I also made, using a dowel cutter that I made. Simplest thing ever - I'll show you soon.
There is no finishing treatment yet, I'm leaving that to the new owner. I'm not a fan of painted wood and even less of varnish but she is going to give it a doing with some old fashioned hard furniture wax and a soft cloth.
Sounds ideal to me.
(Sorry, my shed is a tip).
Thanks for the comments Naturally the sister has sent me a picture of something made from pallets and said "could have saved yourself some time!" Nice to share with those who have an eye for the construction.
That's an impressive piece! Even more so with hand tools only!
I'm a patient guy, often persevering where others would have given up a long time ago, but attempting such without power tools, nah you've found my limit there!
The blind dados, I'm guessing they must be like a really long tenon otherwise there cant be much meat left between the groove and the outer surface?
Naturally the sister has sent me a picture of something made from pallets and said "could have saved yourself some time!" Nice to share with those who have an eye for the construction. That's an impressive piece! Even more so with hand tools only!
I'm a patient guy, often persevering where others would have given up a long time ago, but attempting such without power tools, nah you've found my limit there!
The blind dados, I'm guessing they must be like a really long tenon otherwise there cant be much meat left between the groove and the outer surface?
Yes, in effect they're like long (or wide) tenons. The housings (mortises?) are nominally 12mm wide, the size of the steel in the plane, but my inaccuracy means they're actually just about bob-on half an inch.
They can't be too deep without risking the adjacent housings getting a bit too close together so again, half an inch.
The "long tenons" cut fairly easily with straight edge, gents saw and shoulder plane to match the grooves.
Half inch by half inch isn't much, but given the length of the joint it's more than secure enough once glued up with Titebond.
I did actually attempt the grooves with a router but quickly gave it up. It wasn't going well and scared the carp out of me. So I went back to the hand tool. With care and a little patience they turned out easier than I thought. A lot of fiddling about with straight edges and clamps, but not hard.
The #80 cabinet scraper was invaluable for smoothing down the knotwood and it made a decent job levelling the t&g joints. They mostly didn't really need the jointer plane and besides I didn't want to remove any more than a minimum of wood. I thought the plane would have been a bit violent.
The roundovers on the edges of the lid were dead easy to do with the #5 plane, so long as I remembered to do the end grain first, then the adjacent profile removes the little bits of splitting at the corners.
loughran said:
My go to wood filler, if I were ever to use wood filler, would be Ronseal Multi-purpose Wood Filler, the one with the purple lid.
It comes in 6 different colours, is very fine, dries nice and quickly and doesn't shrink back.
Thanks for the recommendation! Can't understand why I haven't picked this stuff up before, filled the grain nicely. It comes in 6 different colours, is very fine, dries nice and quickly and doesn't shrink back.
Cheers!
Can't remember if I have posted any photos of the current project. Internally referred to as the TVU (TV Unit), but its starting to take shape
The infills are set into the uprights and cross pieces with 10mm grooves cut into the timber using my home made router jig.
The frame was glued and screwed together and sadly, this really hasn't worked out too well as its not very square. In fact its so bad, I contemplated ripping it apart and starting again using dowels and/or a biscuit joiner. However, I've decided to power through instead as the front part is mostly true.
My sideboard doors were made up using single pieces of 12mm MDF with 6mm pieces glued to the front to create a shaker door. The net result of this were the doors were quite heavy. The TVU drawer front and cupboard door are what I would consider proper shaker doors. 18mm MDF pieces with grooves and the infill is 9mm MDF panel. Lighter and stronger. I am really quite pleased with these. They need a few mm taking off, but overall they have come out quite well.
I've cut all the panels for the draw box along with the shelf for the cupboard. I'm dreading the drawer runners if I'm honest. Using Still on the hunt for a dining table to use for the top. If I can't find one locally, its going to have to be new Oak Block from WorktopExpress. In some ways thats easier, but does cost more.


New sofa is being delivered mid May, so hoping to have this completed by then. Will probably have to buy more paint. Not looking forward to that as it was colour matched to our existing funiture and the tin was £80!
The infills are set into the uprights and cross pieces with 10mm grooves cut into the timber using my home made router jig.
The frame was glued and screwed together and sadly, this really hasn't worked out too well as its not very square. In fact its so bad, I contemplated ripping it apart and starting again using dowels and/or a biscuit joiner. However, I've decided to power through instead as the front part is mostly true.
My sideboard doors were made up using single pieces of 12mm MDF with 6mm pieces glued to the front to create a shaker door. The net result of this were the doors were quite heavy. The TVU drawer front and cupboard door are what I would consider proper shaker doors. 18mm MDF pieces with grooves and the infill is 9mm MDF panel. Lighter and stronger. I am really quite pleased with these. They need a few mm taking off, but overall they have come out quite well.
I've cut all the panels for the draw box along with the shelf for the cupboard. I'm dreading the drawer runners if I'm honest. Using Still on the hunt for a dining table to use for the top. If I can't find one locally, its going to have to be new Oak Block from WorktopExpress. In some ways thats easier, but does cost more.
New sofa is being delivered mid May, so hoping to have this completed by then. Will probably have to buy more paint. Not looking forward to that as it was colour matched to our existing funiture and the tin was £80!
 Are the increasing number of projects being posted connected to everyone’s workshops getting a little warmer and us woodworkers emerging from hibernation?
Gassing Station | Homes, Gardens and DIY | Top of Page | What's New | My Stuff