Discussion


I've seen a few storage units made with plywood recently that look real smart. Some with coloured veneer etc.
If I were to make something similar, what sort of plywood should I be looking at?
Also, any tips for cutting out precise square holes for doors etc? I'm guessing most of the kitchen units will be CNC cut?
I made a storage unit recently out of MDF and the holes were absolutely rubbish, but hidden by the doors being bigger and sitting on top. I'd like to replace it with something more modern looking.
marksx said:
I've seen a few storage units made with plywood recently that look real smart. Some with coloured veneer etc.
If I were to make something similar, what sort of plywood should I be looking at?
Also, any tips for cutting out precise square holes for doors etc? I'm guessing most of the kitchen units will be CNC cut?
I made a storage unit recently out of MDF and the holes were absolutely rubbish, but hidden by the doors being bigger and sitting on top. I'd like to replace it with something more modern looking.
Birch ply is very good. You can normally get a veneer of your choice laid up on it. Get in touch with a good specialist timber and panel supplier, and they should be able to sort you out. If I were to make something similar, what sort of plywood should I be looking at?
Also, any tips for cutting out precise square holes for doors etc? I'm guessing most of the kitchen units will be CNC cut?
I made a storage unit recently out of MDF and the holes were absolutely rubbish, but hidden by the doors being bigger and sitting on top. I'd like to replace it with something more modern looking.
Cutting tidy square holes can be done with a router with a template and either a flush cut bit or a guide bush on the router itself. You can cut the hole undersize with a jigsaw or something first, and then trim to final size with the router and template. The corners of the hole will end up with a small radius equal to the radius of whatever bit you use.
I made Utility storage units very similar to this from painted ply:
https://www.tidbits-cami.com/garage-storage-cabine...
https://www.tidbits-cami.com/garage-storage-cabine...
My mission, were to I accept it? Make a cover for my sub-woofer. It's been happily sat as it is for the last 16 years but it's no use rushing into these things, preparation is the key; challenge on!
An innocent piece of maple, blissfully unaware of its fate.

The executioner prepares his tools.
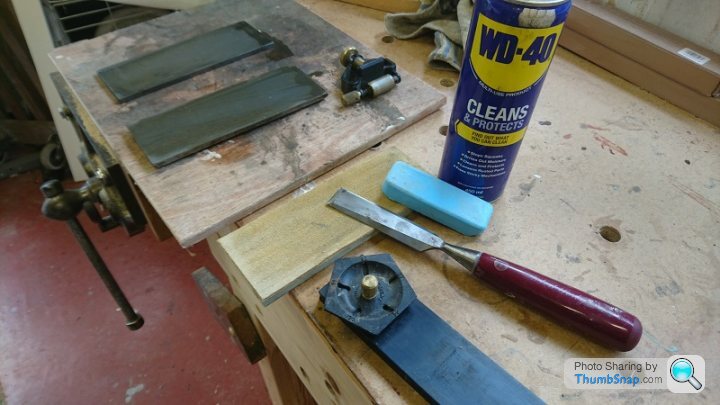
Marking out for the stainless grill.

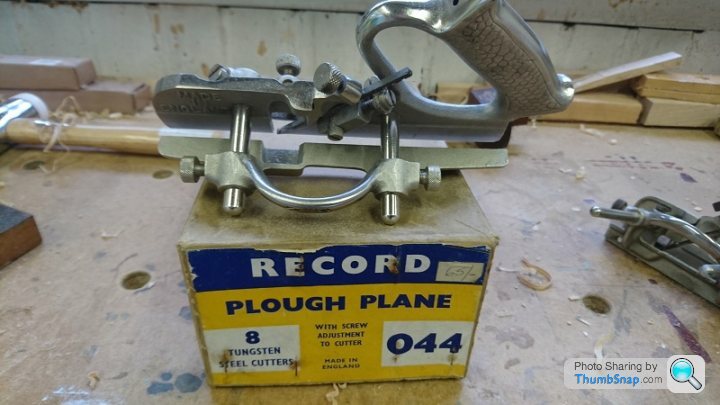
The kerf on my S&J tenon saw was just the right width for the grill but cutting a groove into long grain, in maple didn't appeal, so unleash the plough planes;
The one with the box I got off eBay, the smaller one was on a shelf at my workshop gathering dust, I always wondered what it did!

I'm trying to stick to hand tools but I was buggered if I was going to cut the stainless by hand.
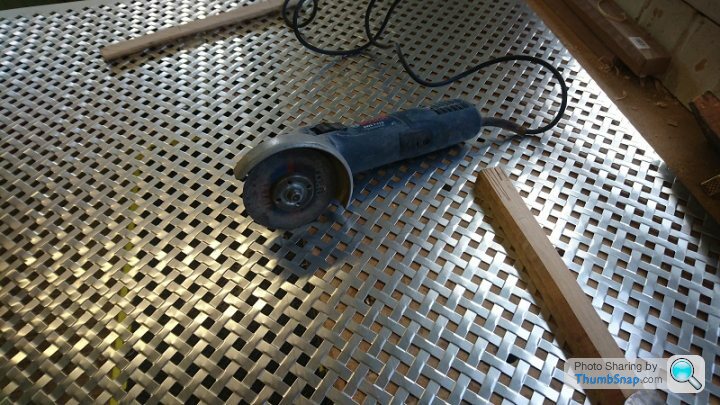
Yay tail vice!

Right then, let's see what this wenge timber is like; unlike any timber I've worked with, though I haven't much experience with exotics, admittedly.

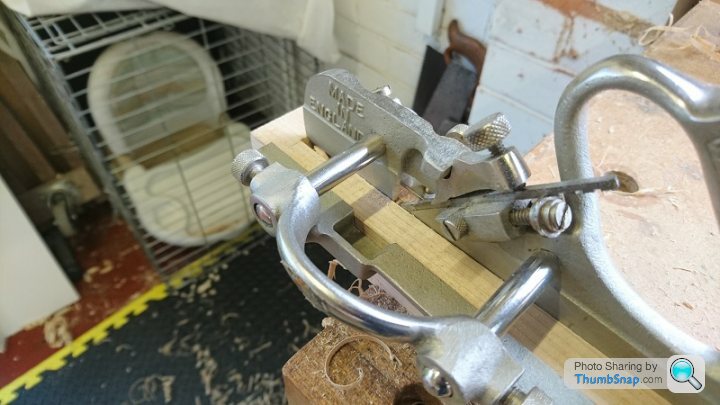
Let's see how the plough plane goes on with it.

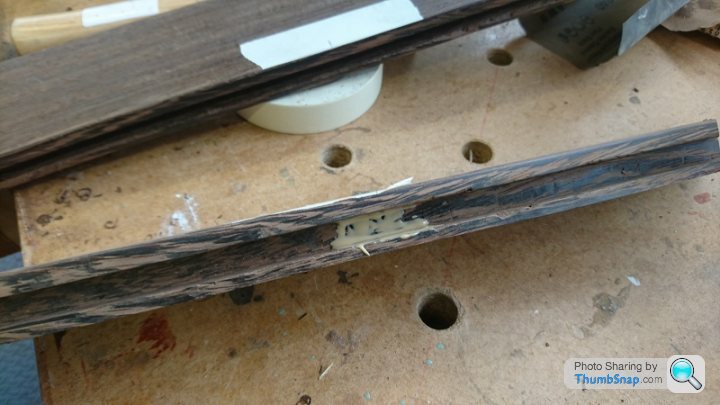
So far so go..........b d, it's split!
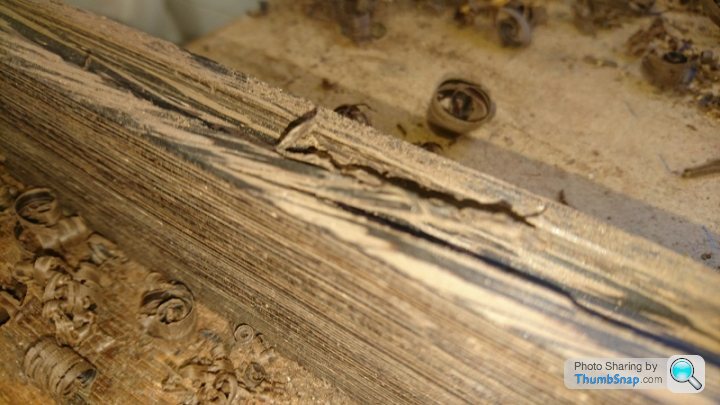
Superglue man to the rescue!
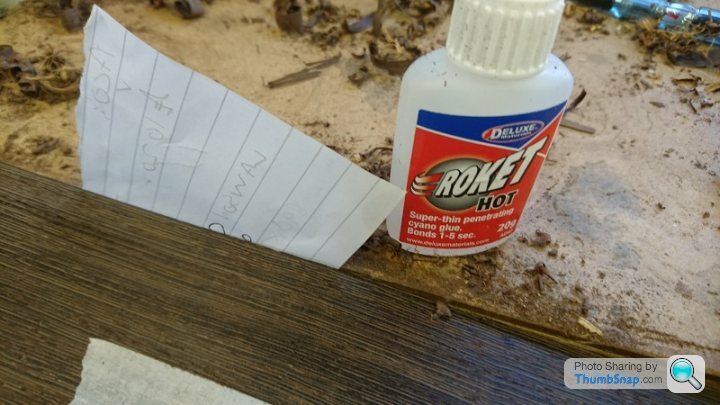
Made it!

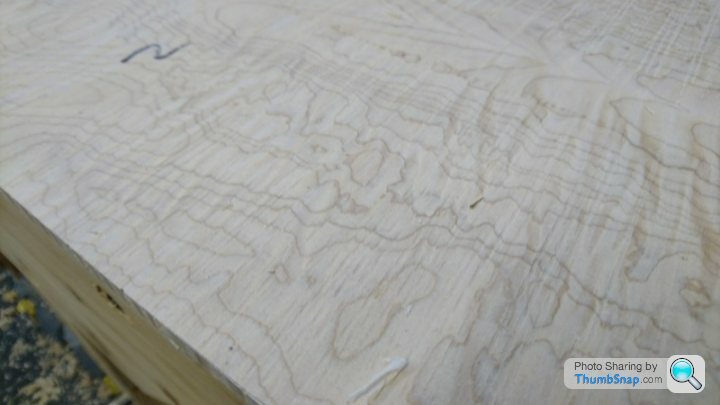
Time to clean up the top, a piece of book matched flame maple off eBay, meant for a guitar top. I got there first!
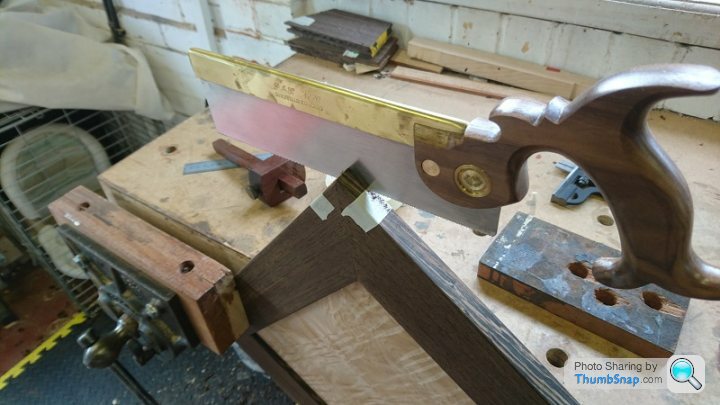
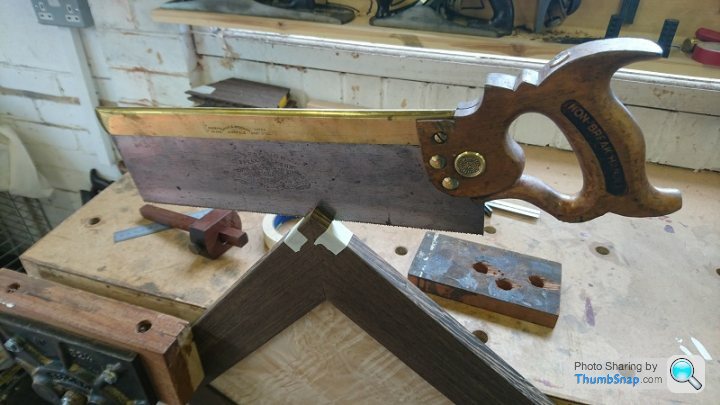
See if we can sort out the mitres, the wenge really didn't like having its end grain planed on the shooting board. Reading various forums, I'm not alone with this problem.
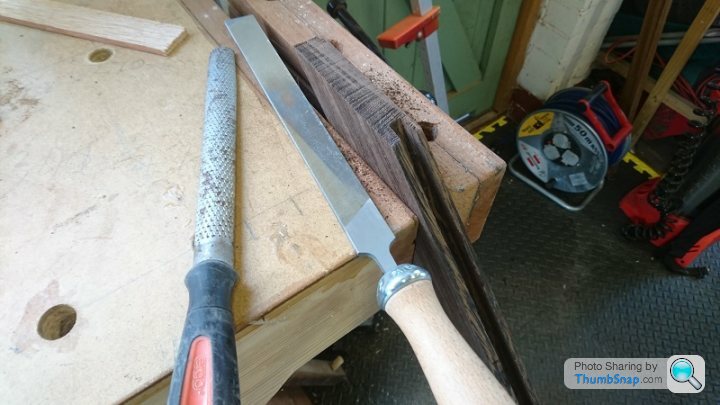
I was willing to try anything! I do have a lovely DeWalt crosscut with a 96t Freud blade, it would have taken 2 minutes to get 8 flawless mitres, as it was I took over an hour faffing about with planes, files, chisels, prayers and I'm still not 100% happy with my efforts.

Right, time to glue up, can't spend anymore time on the mitres, maxed out my skill/experience. A little glue in the centre of the panel to stop it sliding around but still allow for expansion/contraction.

Let's do some sanding! Notice the leather gloves, I wore these all the time when working the wenge, apparently the splinters can be very nasty.

Some splines for the corners; marking gauge, rip tenon then crosscut tenon to give the required width. The blonde colour of the maple doesn't really stand out as I'd hoped, annoying as I'd made a point of doing all the sanding beforehand so the wenge dust wouldn't stain them. Maybe the pva leached the colour out of the wenge into the maple, not sure.


Done! Overall pleased with it, was fun to do and I think it looks quite good. The wenge frame around the top could maybe have been a little slimmer but it was governed by the size of the flame maple I had. The wenge itself was interesting to work with and contrasts nicely with the maple. Thanks for looking!


An innocent piece of maple, blissfully unaware of its fate.
The executioner prepares his tools.
Marking out for the stainless grill.
The kerf on my S&J tenon saw was just the right width for the grill but cutting a groove into long grain, in maple didn't appeal, so unleash the plough planes;
The one with the box I got off eBay, the smaller one was on a shelf at my workshop gathering dust, I always wondered what it did!
I'm trying to stick to hand tools but I was buggered if I was going to cut the stainless by hand.
Yay tail vice!
Right then, let's see what this wenge timber is like; unlike any timber I've worked with, though I haven't much experience with exotics, admittedly.
Let's see how the plough plane goes on with it.
So far so go..........b
d, it's split!Superglue man to the rescue!
Made it!
Time to clean up the top, a piece of book matched flame maple off eBay, meant for a guitar top. I got there first!
See if we can sort out the mitres, the wenge really didn't like having its end grain planed on the shooting board. Reading various forums, I'm not alone with this problem.
I was willing to try anything! I do have a lovely DeWalt crosscut with a 96t Freud blade, it would have taken 2 minutes to get 8 flawless mitres, as it was I took over an hour faffing about with planes, files, chisels, prayers and I'm still not 100% happy with my efforts.
Right, time to glue up, can't spend anymore time on the mitres, maxed out my skill/experience. A little glue in the centre of the panel to stop it sliding around but still allow for expansion/contraction.
Let's do some sanding! Notice the leather gloves, I wore these all the time when working the wenge, apparently the splinters can be very nasty.
Some splines for the corners; marking gauge, rip tenon then crosscut tenon to give the required width. The blonde colour of the maple doesn't really stand out as I'd hoped, annoying as I'd made a point of doing all the sanding beforehand so the wenge dust wouldn't stain them. Maybe the pva leached the colour out of the wenge into the maple, not sure.
Done! Overall pleased with it, was fun to do and I think it looks quite good. The wenge frame around the top could maybe have been a little slimmer but it was governed by the size of the flame maple I had. The wenge itself was interesting to work with and contrasts nicely with the maple. Thanks for looking!
What's the consensus on the many pillar drills that are available for £70 to £100? I presume most come from a small number of factories in China and are just different colours.
I've built some outdoor wooden items like bird boxes, raised beds and a wood store but I'd like to try my hand at some other projects, one being a wine rack to fit into the bottom of our pantry. I've seen a few plans online for instance:
https://www.etsy.com/ie/listing/711548693/12-bottl...
and
https://www.craftsmanspace.com/free-projects/woode...
Both of them require repeated, accurate drilling for the dowels. A pillar drill would look to be the right tool for the job but are the cheap ones going to be rubbish? Or is there a better way to do it like the drill stands which take a regular drill and clamp it (eg https://www.machinemart.co.uk/p/clarke-cds3-drill-...
wolfracesonic said:
My mission, were to I accept it? Make a cover for my sub-woofer. It's been happily sat as it is for the last 16 years but it's no use rushing into these things, preparation is the key; challenge on!
An innocent piece of maple, blissfully unaware of its fate.
The executioner prepares his tools.
Marking out for the stainless grill.
The kerf on my S&J tenon saw was just the right width for the grill but cutting a groove into long grain, in maple didn't appeal, so unleash the plough planes;
The one with the box I got off eBay, the smaller one was on a shelf at my workshop gathering dust, I always wondered what it did!
I'm trying to stick to hand tools but I was buggered if I was going to cut the stainless by hand.
Yay tail vice!
Right then, let's see what this wenge timber is like; unlike any timber I've worked with, though I haven't much experience with exotics, admittedly.
Let's see how the plough plane goes on with it.
So far so go..........bd, it's split!
Superglue man to the rescue!
Made it!
Time to clean up the top, a piece of book matched flame maple off eBay, meant for a guitar top. I got there first!
See if we can sort out the mitres, the wenge really didn't like having its end grain planed on the shooting board. Reading various forums, I'm not alone with this problem.
I was willing to try anything! I do have a lovely DeWalt crosscut with a 96t Freud blade, it would have taken 2 minutes to get 8 flawless mitres, as it was I took over an hour faffing about with planes, files, chisels, prayers and I'm still not 100% happy with my efforts.
Right, time to glue up, can't spend anymore time on the mitres, maxed out my skill/experience. A little glue in the centre of the panel to stop it sliding around but still allow for expansion/contraction.
Let's do some sanding! Notice the leather gloves, I wore these all the time when working the wenge, apparently the splinters can be very nasty.
Some splines for the corners; marking gauge, rip tenon then crosscut tenon to give the required width. The blonde colour of the maple doesn't really stand out as I'd hoped, annoying as I'd made a point of doing all the sanding beforehand so the wenge dust wouldn't stain them. Maybe the pva leached the colour out of the wenge into the maple, not sure.
Done! Overall pleased with it, was fun to do and I think it looks quite good. The wenge frame around the top could maybe have been a little slimmer but it was governed by the size of the flame maple I had. The wenge itself was interesting to work with and contrasts nicely with the maple. Thanks for looking!
An innocent piece of maple, blissfully unaware of its fate.
The executioner prepares his tools.
Marking out for the stainless grill.
The kerf on my S&J tenon saw was just the right width for the grill but cutting a groove into long grain, in maple didn't appeal, so unleash the plough planes;
The one with the box I got off eBay, the smaller one was on a shelf at my workshop gathering dust, I always wondered what it did!
I'm trying to stick to hand tools but I was buggered if I was going to cut the stainless by hand.
Yay tail vice!
Right then, let's see what this wenge timber is like; unlike any timber I've worked with, though I haven't much experience with exotics, admittedly.
Let's see how the plough plane goes on with it.
So far so go..........b
d, it's split!Superglue man to the rescue!
Made it!
Time to clean up the top, a piece of book matched flame maple off eBay, meant for a guitar top. I got there first!
See if we can sort out the mitres, the wenge really didn't like having its end grain planed on the shooting board. Reading various forums, I'm not alone with this problem.
I was willing to try anything! I do have a lovely DeWalt crosscut with a 96t Freud blade, it would have taken 2 minutes to get 8 flawless mitres, as it was I took over an hour faffing about with planes, files, chisels, prayers and I'm still not 100% happy with my efforts.
Right, time to glue up, can't spend anymore time on the mitres, maxed out my skill/experience. A little glue in the centre of the panel to stop it sliding around but still allow for expansion/contraction.
Let's do some sanding! Notice the leather gloves, I wore these all the time when working the wenge, apparently the splinters can be very nasty.
Some splines for the corners; marking gauge, rip tenon then crosscut tenon to give the required width. The blonde colour of the maple doesn't really stand out as I'd hoped, annoying as I'd made a point of doing all the sanding beforehand so the wenge dust wouldn't stain them. Maybe the pva leached the colour out of the wenge into the maple, not sure.
Done! Overall pleased with it, was fun to do and I think it looks quite good. The wenge frame around the top could maybe have been a little slimmer but it was governed by the size of the flame maple I had. The wenge itself was interesting to work with and contrasts nicely with the maple. Thanks for looking!
 Another epic adventure in woodworking, battling belligerent timbers. Well done with the wenge, it can be attractive but often a pig to work and as you say, the splinters can go bad quite quickly if you get one under the skin.
Lovely piece of maple but on a more practical note do the metal grilles not vibrate a bit when the sub is doing its job ?
Harpoon said:
A pillar drill would look to be the right tool for the job but are the cheap ones going to be rubbish? Or is there a better way to do it like the drill stands which take a regular drill and clamp it (eg https://www.machinemart.co.uk/p/clarke-cds3-drill-...
Haven't tried the drill stands, but did buy a cheap benchtop drill press. It is OK, but not great. The table is small and pressed steel rather than cast, so supporting bigger bits of work can be a fiddle unless your bench is clear and you've got suitable supports ready. Throat hasn't been a problem, but the max vertical travel of the chuck isn't huge. It's a long way from using a really good huge, quiet, heavy old pillar drill, but when you need to make a series of holes at a precise angle, then it's definitely useful. For less precise work, a hand held drill requires a lot less set up.loughran said:
Lovely piece of maple but on a more practical note do the metal grilles not vibrate a bit when the sub is doing its job ?
Don’t know yet I may, now you’ve mentioned it run a bead of clear silicone between the grill and the frame to stop any resonance that may occur; I shall see at the weekend!
Harpoon said:
What's the consensus on the many pillar drills that are available for £70 to £100? I presume most come from a small number of factories in China and are just different colours.
I've built some outdoor wooden items like bird boxes, raised beds and a wood store but I'd like to try my hand at some other projects, one being a wine rack to fit into the bottom of our pantry. I've seen a few plans online for instance:
https://www.etsy.com/ie/listing/711548693/12-bottl...
and
https://www.craftsmanspace.com/free-projects/woode...
Both of them require repeated, accurate drilling for the dowels. A pillar drill would look to be the right tool for the job but are the cheap ones going to be rubbish? Or is there a better way to do it like the drill stands which take a regular drill and clamp it (eg https://www.machinemart.co.uk/p/clarke-cds3-drill-...
I have this cheapo https://smile.amazon.co.uk/Lumberjack-DP13-Hobby-B...I've built some outdoor wooden items like bird boxes, raised beds and a wood store but I'd like to try my hand at some other projects, one being a wine rack to fit into the bottom of our pantry. I've seen a few plans online for instance:
https://www.etsy.com/ie/listing/711548693/12-bottl...
and
https://www.craftsmanspace.com/free-projects/woode...
Both of them require repeated, accurate drilling for the dowels. A pillar drill would look to be the right tool for the job but are the cheap ones going to be rubbish? Or is there a better way to do it like the drill stands which take a regular drill and clamp it (eg https://www.machinemart.co.uk/p/clarke-cds3-drill-...
It works well enough for me, for larger bits I do have to lift quite often though.
I tend to avoid using a clamp when doing repetitive work, as it is to much faff undoing and doing up clamps. I make some form of jig and line the wood up to that. Was drilling about 100 holes for a frame and used a couple of tool rack magnets (https://smile.amazon.co.uk/Piece-Magnetic-Tool-Holder-Storage/dp/B00M76KH80/ref=sr_1_59_sspa?crid=2ANLLNP3MPJHZ&keywords=magnetic+tool+rack&qid=1581525333&sprefix=tool++rack+magnets%2Caps%2C168&sr=8-59-spons&psc=1&spLa=ZW5jcnlwdGVkUXVhbGlmaWVyPUEzUkhFQkJXUUg0SExKJmVuY3J5cHRlZElkPUEwODY3NjMxMVRQT05JMzBWSUtVQiZlbmNyeXB0ZWRBZElkPUEwNDE4Njk1MzNQRUdOVkQ2OEgyRSZ3aWRnZXROYW1lPXNwX2J0ZiZhY3Rpb249Y2xpY2tSZWRpcmVjdCZkb05vdExvZ0NsaWNrPXRydWU=) on the cast iron table.


loughran said:
A chest of drawers in oak from me this week, work in progress.


that's a lovely looking chest of drawers 
takes me back to my days of cabinet making
I was once asked to make a large chest of drawers in mahogany for someone who happened to have a lot of mahogany,
and who then offered to pay me in wood
I agreed to do the job as a favour and ended up getting large quantities of well seasoned mahogany and oak in return.
reading this thread is making me wish I hadn't hung up my tools.
loughran said:
A chest of drawers in oak from me this week, work in progress.
Very nice, do you use a formula to calculate the diminish on the drawer heights , or just go by eye and do you cut the largest one first so if you make a balls up of it you can use it for the next size down? That would be my method

 I do cut the larger drawer fronts first, error forever sitting on my shoulder.
I like diminishing drawers, they can give a piece a personality and allow it to stand in a room with confidence. Many years ago I was taught the ratios of the Golden section and have often tried using those ratios when designing furniture... with varying levels of success.
One one hand the Golden section was used by Greek, Roman and Islamic architects to develop some of the most beautiful buildings man has ever produced.
On the other hand, the Golden section attempts to reduce the human aesthetic to a mathematical equation... which doesn't often work for me. Instead, I'm more likely to arrive at my proportions by eye these days. I use setting out rods for a chest of drawers like this and fiddle with the proportions on and off for a couple of days before committing myself to cutting up timber.
This is quite a step apart from some of the amazing work on here.... just after some advice on how best to make this work. I am thinking of using cams and dowel pins. The is a sliding pull out 'tray' too which needs to be on draw runners obviously.
Any thoughts? Plan is to make it out of solid oak worktop stock.

Thanks
Any thoughts? Plan is to make it out of solid oak worktop stock.
Thanks
Do you mean cam and dowels like flat pack furniture? Does it need to come apart? If not I’d probably just use dowels and glue, buy yourself some dowel markers and away you go. You could use biscuits or dominoes but they’re quite specialist bits of kit if it’s just a one off.
Edited by wolfracesonic on Friday 21st February 18:46
wolfracesonic said:
Do you mean cam and dowels like flat pack furniture? Does it need to come apart? If not I’d probably just use dowels and glue, buy yourself some dowel markers and away you go. You could use biscuits or dominoes but they’re quite specialist bits of kit if it’s just a one off.
Yeah those are the type of fasteners I was thinking of. I dont think it really needs to come to bits but I suppose it could be handy if it did.Edited by wolfracesonic on Friday 21st February 18:46
I had thought about using biscuits but as you say, it seems a bit still to spend 100 on a cutter that I might only use once in a blue moon.
Thanks for you advice.
Gassing Station | Homes, Gardens and DIY | Top of Page | What's New | My Stuff