My Garage Build
Discussion


Day 4 (bank holiday monday)
Not a huge amount of progress today due to lunch guests. Tasks were:
- Treating the back wall panels with another coat of flameproofing liquid. One panel now done with the target 3 coats, 1 coat to go on the other. Back wall panels can be installed soon.
- Built the final side panel (but not clad)
- Made the temporary platform above the attic trusses safer as I will be working on it a lot
- Devised a jig for fitting the remaining joists on the non hipped part of the roof. Essentially this will allow me to work alone and fit the joists without an assistant. I will take a picture of it tomorrow
- Spotted that my dodgy measuring of the attic trusses yesterday left one of them in the way of some of the joists, no real loss of attic space by removing it so I have. Annoyed at myself for not spotting it yesterday.
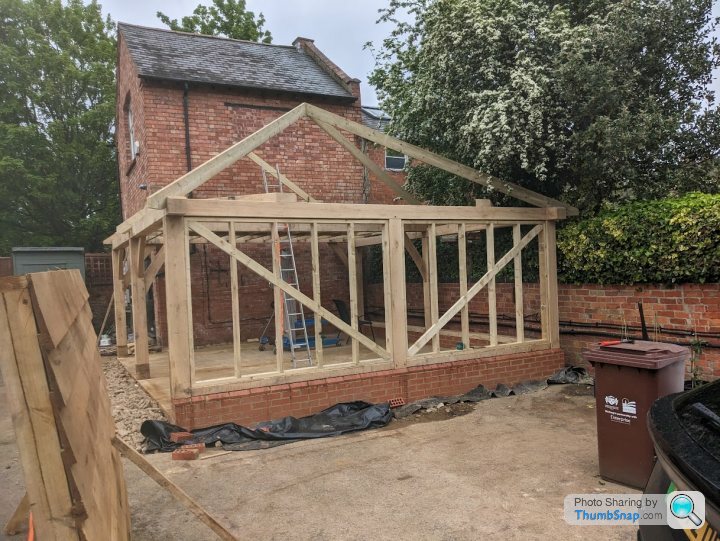
DIfficult to see from the picture but each panel is slightly recessed so the cladding will go between the vertical beams, different to the suggested builds / library photos but think it will look better and shows of the frame. I may ultimately put some kind of draft proofing round the edges but probably won't.
Tomorrow the roof slates, ridge tiles and battens arrive. Hope to at least have all the joists installed by the end, if not the membrane etc
Ben
Not a huge amount of progress today due to lunch guests. Tasks were:
- Treating the back wall panels with another coat of flameproofing liquid. One panel now done with the target 3 coats, 1 coat to go on the other. Back wall panels can be installed soon.
- Built the final side panel (but not clad)
- Made the temporary platform above the attic trusses safer as I will be working on it a lot
- Devised a jig for fitting the remaining joists on the non hipped part of the roof. Essentially this will allow me to work alone and fit the joists without an assistant. I will take a picture of it tomorrow
- Spotted that my dodgy measuring of the attic trusses yesterday left one of them in the way of some of the joists, no real loss of attic space by removing it so I have. Annoyed at myself for not spotting it yesterday.
DIfficult to see from the picture but each panel is slightly recessed so the cladding will go between the vertical beams, different to the suggested builds / library photos but think it will look better and shows of the frame. I may ultimately put some kind of draft proofing round the edges but probably won't.
Tomorrow the roof slates, ridge tiles and battens arrive. Hope to at least have all the joists installed by the end, if not the membrane etc
Ben

BigBen said:
I can't recall why I chose trade oak other than the salesperson was helpful and not a knob.
The wall was built by the groundworkers. The roof will be DIY and I suspect around £2k with that cost dominated by choice of tiles. This excludes time off work for any fall related injuries I may sustain in the process.....
Thankyou. I’ll be referring to this thread as inspiration & an instruction manual to diy myself. Best of luck with the remaining build.The wall was built by the groundworkers. The roof will be DIY and I suspect around £2k with that cost dominated by choice of tiles. This excludes time off work for any fall related injuries I may sustain in the process.....
Today was a mixed bag. I made a good start by going to a roofing shop and learning about hidden gutters I also bought the flashing I will use to seal the roof against the wall which it abuts. The staff in the roofing shop was a bit taken aback by someone asking no doubt simple questions about the products but was very helpful (if I suspect cynical about how I will manage, which he may not be wrong about.)
I then got the remainder of the joists fitted to the 'apex' part of the roof. As per my post yesterday I had made a jig which set the distance between joists which made it managable for a lone worker even if two would have been better.
Next job was to fit the central joist between the two sides of the hip, it was then I noticed it was hanging rather too far off the main beam, certainly further than could be fixed with a mallet which is what has worked with most of the rest of the build. This meant something had gone wrong across the roof to the tune of 20cm or so. Another check of the palns and it became clear this had come back to bite me.
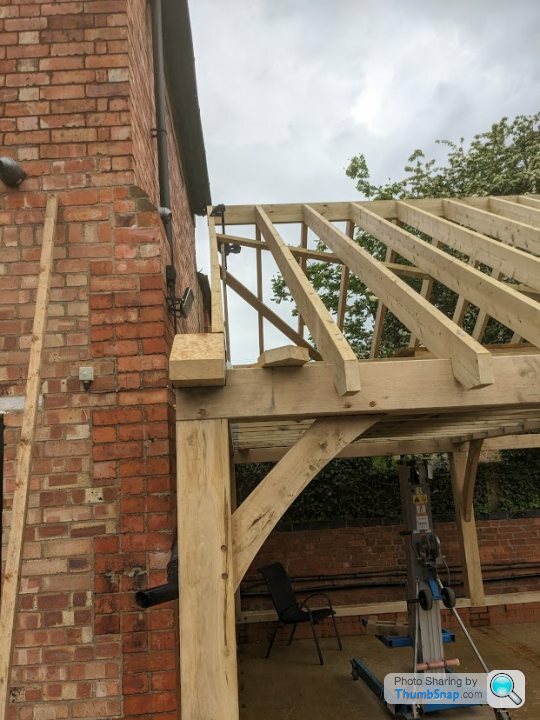
Notice the joists on the left are not flush with the end of the garage, this is because they are sitting in two cut outs which if the main beam was the right way round would be 20cm to the left of the image. This was very very annoying as I hadn't spotted it much earlier, i.e. yesterday, but not the end of the world.
Next task was to unscrew the bottom of each joist then using my trusty mallet whack them all about 20cm to the left. To make it more fun some of the screws (they are big bu**ers) were properly stuck so needed me to get a breaker bar out. My other concern was when all the screws were out the roof totally collapsing, so I installed some bracing to prevent this. I did manage to get it all aligned but it took most of the afternoon by the time it was sorted.
I finished up by pre-drilling the remaing joists and putting up a scaffold tower so they are ready to install in the morning when hopefully it will be raining a bit less.
The tiles also arrive tomorrow so it is frustrating not to be ready for them.
I then got the remainder of the joists fitted to the 'apex' part of the roof. As per my post yesterday I had made a jig which set the distance between joists which made it managable for a lone worker even if two would have been better.
Next job was to fit the central joist between the two sides of the hip, it was then I noticed it was hanging rather too far off the main beam, certainly further than could be fixed with a mallet which is what has worked with most of the rest of the build. This meant something had gone wrong across the roof to the tune of 20cm or so. Another check of the palns and it became clear this had come back to bite me.
BigBen said:
We decided that it would be quicker to lift the beam and chisel out the champher on the receiving beams, in the event I am not sure it was but it was certainly less painful as manually rotating it.
Notice the joists on the left are not flush with the end of the garage, this is because they are sitting in two cut outs which if the main beam was the right way round would be 20cm to the left of the image. This was very very annoying as I hadn't spotted it much earlier, i.e. yesterday, but not the end of the world.
Next task was to unscrew the bottom of each joist then using my trusty mallet whack them all about 20cm to the left. To make it more fun some of the screws (they are big bu**ers) were properly stuck so needed me to get a breaker bar out. My other concern was when all the screws were out the roof totally collapsing, so I installed some bracing to prevent this. I did manage to get it all aligned but it took most of the afternoon by the time it was sorted.
I finished up by pre-drilling the remaing joists and putting up a scaffold tower so they are ready to install in the morning when hopefully it will be raining a bit less.
The tiles also arrive tomorrow so it is frustrating not to be ready for them.
CharlesdeGaulle said:
JeremyH5 said:
This is a very impressive job, we are not worthy
I'm mildly reassured that he made a mistake earlier. I feel (very slightly) less inadequate now. But yeah, it's an impressive effort.

JeremyH5 said:
CharlesdeGaulle said:
JeremyH5 said:
This is a very impressive job, we are not worthy
I'm mildly reassured that he made a mistake earlier. I feel (very slightly) less inadequate now. But yeah, it's an impressive effort.
Aluminati said:
Step flashing in the wall ? I’ve got some ally soakers laying about somewhere that might help.
Yes, at least that is the plan. I have some lead alternative stuff (I know it is not as good but I also know my limits) Actually a roofing question whilst you are here. As you can hopefully see in some of the pictures the wall of the ajoining building has a 'step' at the front end such that my hidden gutter comes up against a corner. What do I do in this area?
My instinct is to make a wooden gully that guides it round the corner which I would then line with the lead replacement stuff. Would that be good enough?
Today's progress does not look like lots but has been very satisfying.
First job of the day was to collect Mrs Big Bens car from a local ish garage. We left very early as the tiles were due to arrive. Naturally whilst at said garage the call came "I am outside your house with the tiles". I requested he drove round the back to drop them, it then became apparent he was in an full size articulated lorry (I was told it would be a normal builders merchant type truck). I asked him to wait 5 mins, for what I knew was a 10 minute journey, but it seems today was "crash your car in Northampton day" and it took nearly half an hour. As I neared home it dawned on me some of the massive jam was potentially my delivery truck blocking the road so I ditched the car and got an e-scooter home......
Next job was fitting the rest of the roof joists and tidying up a few I was not happy with. Luckily I had a freind to help today so that sped things up and we had all the joists in by lunchtime.
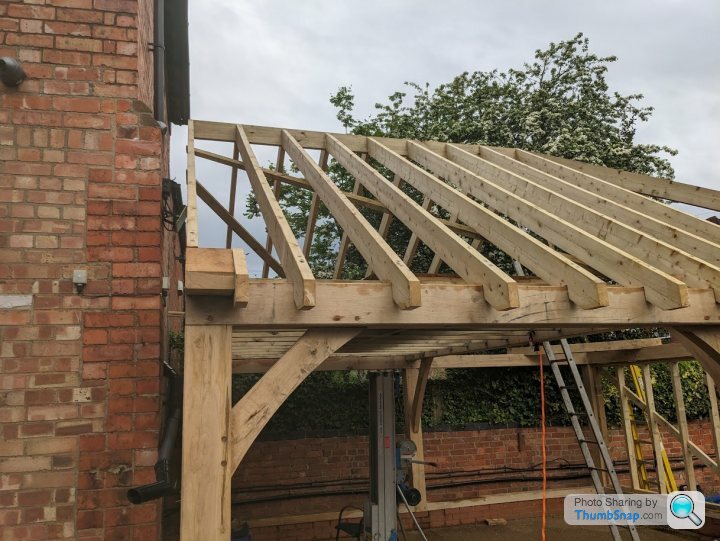
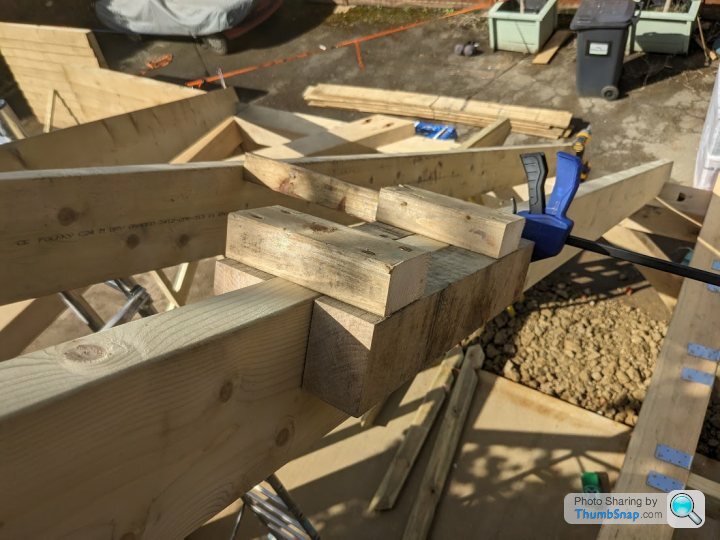
At this point I will share a picture of my joist spacing jig. It was originally made for the ridge beam and when used in conjunction with a bit of wood of identical length at the base allowed me to install joists single handed (still not as easy as with a mate.) In the picture shown I added a side bar which matches the spacing of the hip roof sections again to be used with an identical spacer at the base of the rafters:
 [url]
[url]
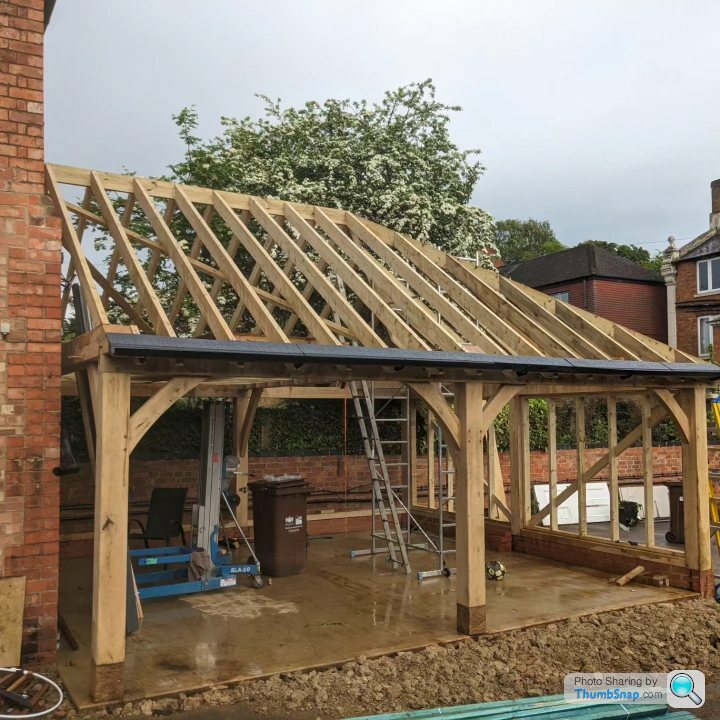
After lunch the afternoon was spent fitting guttering and soffit membrane protection boards. The latter are something that is apparently used in roofing that I didn't know about until a few weeks ago. The purpose is to give an edge to the waterproof membrane which will be under the tiles on the roof. They are made of quite thin plastic and are easy to cut to angles at the hipped ends.
Installing the guttering (only roughly for now) gives me a reference point for the first row of tiles which should slightly overhang the gutter
 |https://thumbsnap.com/uLDmsgLf[/url]
Tomorrow will be spent installing and battening the roofing membrane and possibly even installing a few tiles.....
First job of the day was to collect Mrs Big Bens car from a local ish garage. We left very early as the tiles were due to arrive. Naturally whilst at said garage the call came "I am outside your house with the tiles". I requested he drove round the back to drop them, it then became apparent he was in an full size articulated lorry (I was told it would be a normal builders merchant type truck). I asked him to wait 5 mins, for what I knew was a 10 minute journey, but it seems today was "crash your car in Northampton day" and it took nearly half an hour. As I neared home it dawned on me some of the massive jam was potentially my delivery truck blocking the road so I ditched the car and got an e-scooter home......
Next job was fitting the rest of the roof joists and tidying up a few I was not happy with. Luckily I had a freind to help today so that sped things up and we had all the joists in by lunchtime.
At this point I will share a picture of my joist spacing jig. It was originally made for the ridge beam and when used in conjunction with a bit of wood of identical length at the base allowed me to install joists single handed (still not as easy as with a mate.) In the picture shown I added a side bar which matches the spacing of the hip roof sections again to be used with an identical spacer at the base of the rafters:
[url]After lunch the afternoon was spent fitting guttering and soffit membrane protection boards. The latter are something that is apparently used in roofing that I didn't know about until a few weeks ago. The purpose is to give an edge to the waterproof membrane which will be under the tiles on the roof. They are made of quite thin plastic and are easy to cut to angles at the hipped ends.
Installing the guttering (only roughly for now) gives me a reference point for the first row of tiles which should slightly overhang the gutter
|https://thumbsnap.com/uLDmsgLf[/url]Tomorrow will be spent installing and battening the roofing membrane and possibly even installing a few tiles.....
BigBen said:
Aluminati said:
Step flashing in the wall ? I’ve got some ally soakers laying about somewhere that might help.
Yes, at least that is the plan. I have some lead alternative stuff (I know it is not as good but I also know my limits) Actually a roofing question whilst you are here. As you can hopefully see in some of the pictures the wall of the ajoining building has a 'step' at the front end such that my hidden gutter comes up against a corner. What do I do in this area?
My instinct is to make a wooden gully that guides it round the corner which I would then line with the lead replacement stuff. Would that be good enough?
 t to be honest) when your slate/tile overhangs the eave is should fit roughly in the centre of the gutter. If I remember correctly, you are Cambridge way, if you want me to whizz up Saturday morning for a couple of hours to give you a crash course, no problem. Much tea and digestives will be required.
:Edit:
Wooden gutters lined with lead alternative are making my teeth itch

Edited by Aluminati on Wednesday 10th May 19:29
Gassing Station | Homes, Gardens and DIY | Top of Page | What's New | My Stuff