Restoration Blog as promised.
Discussion


God - has it really been 5 months since an update!!! 
i'll try and get up written up in the next 2 weeks. It's been a hard time working every night after work and every weekend and it's coming together. I'm on holiday next week so will try and get the photo's collated and uploaded.
apologies for the delay
i'll try and get up written up in the next 2 weeks. It's been a hard time working every night after work and every weekend and it's coming together. I'm on holiday next week so will try and get the photo's collated and uploaded.
apologies for the delay
ad551 said:
Brilliant thread! I love stuff like this (especially when the problems belong to someone else!  (sorry))
Me too! (sorry))Can I ask what sort of paint you will be using on the lime rendered walls? I'm doing something very similar (not cob though!)
BTW, I thought cob buildings were impossible to get a mortgage on. "Non standard construction", I think they call it.
Grandad Gaz said:
Me too!
Can I ask what sort of paint you will be using on the lime rendered walls? I'm doing something very similar (not cob though!)
BTW, I thought cob buildings were impossible to get a mortgage on. "Non standard construction", I think they call it.
I have used clay paint on the Walls as it is breathable as per lime wash but much more hard wearing - the texture is fantasic too and shows the imperfections and contours of wall beneath it which reflects the light beautifully. Can I ask what sort of paint you will be using on the lime rendered walls? I'm doing something very similar (not cob though!)
BTW, I thought cob buildings were impossible to get a mortgage on. "Non standard construction", I think they call it.
Mortgage wasn't a problem and we used a normal high street lender (building society) with a full survey carried out by Campdavid on here which answered any query they had.
I believe an update is slightly overdue 
I'll do the update room by room as there is rather a few photo's and more work done than anticipated.
Old Lounge & New Lounge:
The last update showed the uncovered fire damaged ceiling and the plasterer was just finishing. So where to begin?
Well the walls were given a light sand once they had dried. A few cracks appeared which was to be expected as the lime plaster takes a long time to dry and harden so with a wet sponge and the results of the sanding it is very easy to mould it together to seal them.

A few coats of clay paint were applied which looks fantastic and has a texture and finish that is unlike other paints.


The beams were a constant source of dust so these gaps were sealed before they were painted with Jacobean Black. By this point we have moved in (the royal wedding weekend) and have a single radiator trying to heat downstairs……


Speaking of radiators, 3 of these arrived…..

I ever so slightly underestimated the weight of these. The father in law and myself attempted to move them and couldn’t even get one end off the floor so a call was put into a couple of mates who came to help and joke about us being too weak to lift a radiator. This also failed…..
The next hour was spent getting a neighbour to join us, jokes at our expenses, attempting to lift followed by “bloody hell how heavy is this!”. Eventually with 4 neighbours including two firemen and 8 of us in total we just about managed to get them into the house.
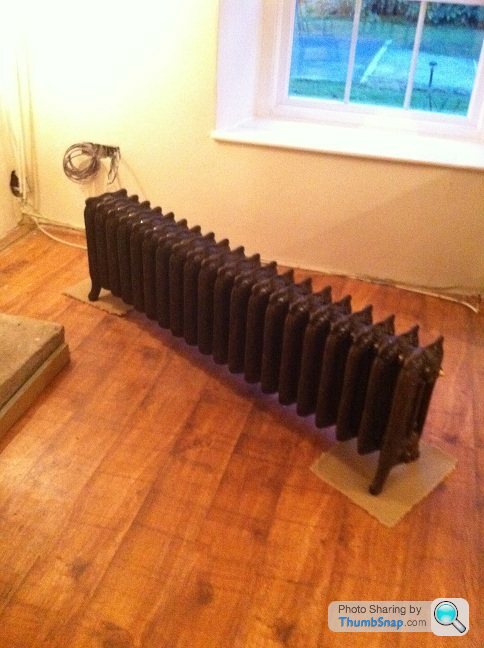

We opted for these as i wasn't happy hanging rads back on the walls and felt these were more in keeping with the property.

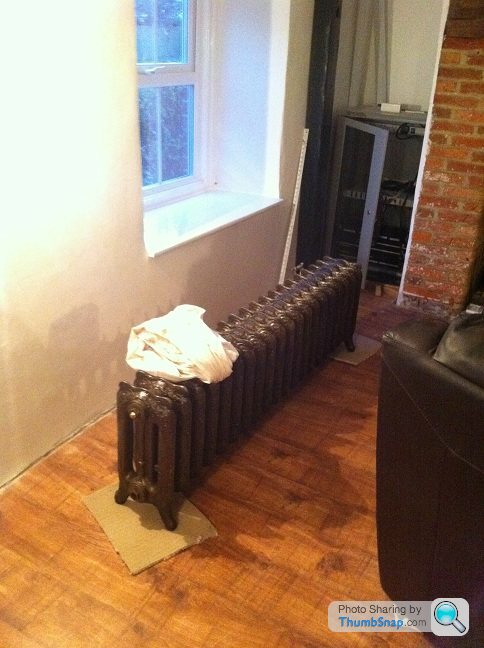
These got plumbed in by a Ph’er and then the skirting added. This was fun as there wasn’t a straight edge or plumb line in sight. Before this was done, the comms cupboard arrived and hours of punching cables ensued. Once this was done the column hiding the heating pipes was refitted and I created the rest of the door frame to enable us to fit a door and hide it all from view.


As I was dusting off my woodworking skills not seen since my school days I also knocked up a column to go into the other lounge to enclose the 4 pipes that were bulging out of the wall before (as seen in previous postings) as we had left them exposed so as to not dry out the cob as was happening before.

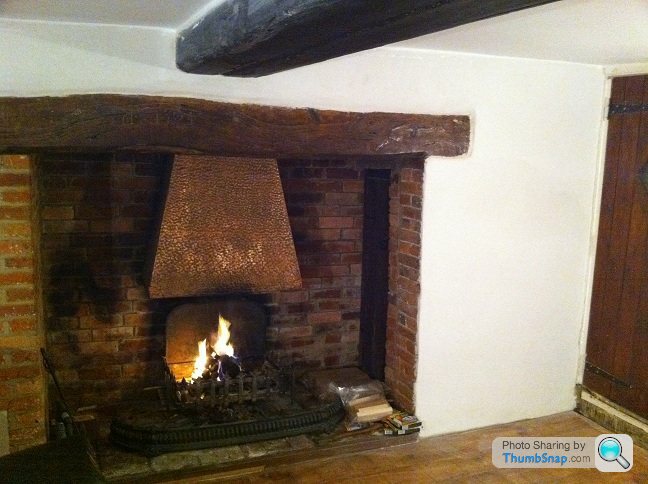
The woodburner arrived much to the cats curiosity and was fitted with no fuss in about half a day along with an iron frame and fireboards. It’s now starting to feel like a house again well one room .
.

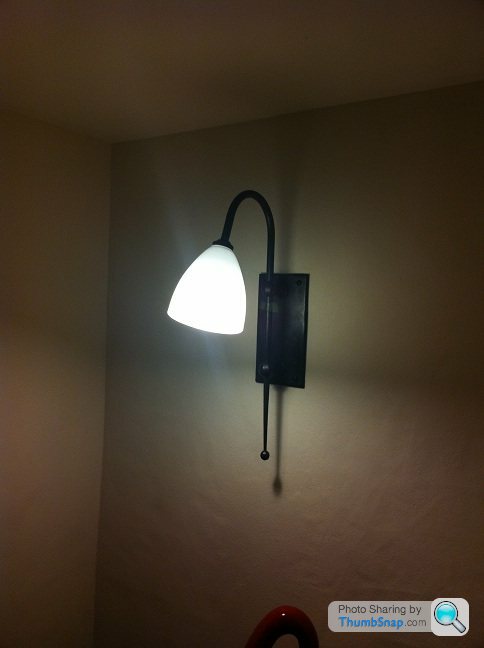
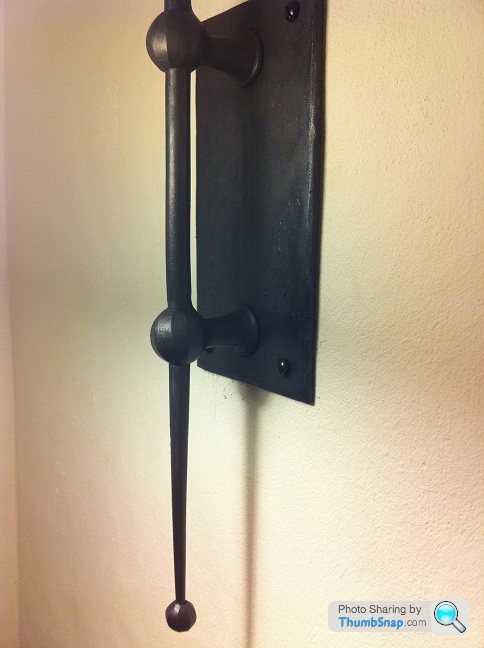
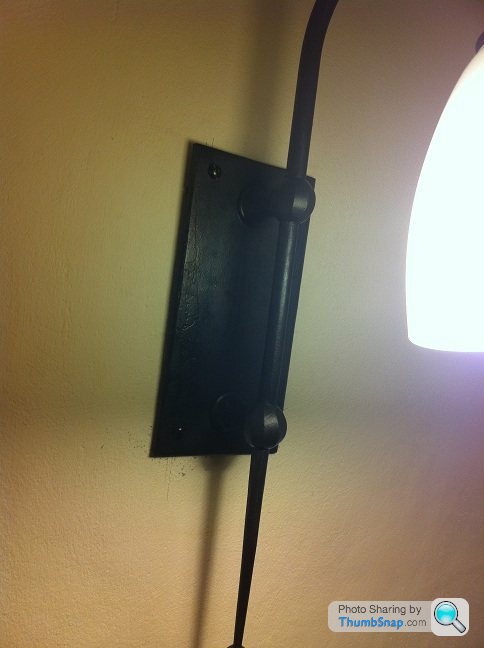
We had commissioned an Ironworks company to make some wall lights for us and were really happy with the quality and although very were a few hundred plus per light you certainly get what you pay for and would happily recommend them.


The floor had taken a battering by this point so this was sanded and sealed and again we were amazed by the results – these photo’s show how it actually looks once dried so all in all this room is almost done bar a few final touches such as doors, the inglenook woodburner, stairway door frame, more doors and blinds/curtains etc.


The next update will be much sooner this time
I'll do the update room by room as there is rather a few photo's and more work done than anticipated.
Old Lounge & New Lounge:
The last update showed the uncovered fire damaged ceiling and the plasterer was just finishing. So where to begin?
Well the walls were given a light sand once they had dried. A few cracks appeared which was to be expected as the lime plaster takes a long time to dry and harden so with a wet sponge and the results of the sanding it is very easy to mould it together to seal them.
A few coats of clay paint were applied which looks fantastic and has a texture and finish that is unlike other paints.
The beams were a constant source of dust so these gaps were sealed before they were painted with Jacobean Black. By this point we have moved in (the royal wedding weekend) and have a single radiator trying to heat downstairs……
Speaking of radiators, 3 of these arrived…..
I ever so slightly underestimated the weight of these. The father in law and myself attempted to move them and couldn’t even get one end off the floor so a call was put into a couple of mates who came to help and joke about us being too weak to lift a radiator. This also failed
…..The next hour was spent getting a neighbour to join us, jokes at our expenses, attempting to lift followed by “bloody hell how heavy is this!”. Eventually with 4 neighbours including two firemen and 8 of us in total we just about managed to get them into the house.
We opted for these as i wasn't happy hanging rads back on the walls and felt these were more in keeping with the property.
These got plumbed in by a Ph’er and then the skirting added. This was fun as there wasn’t a straight edge or plumb line in sight. Before this was done, the comms cupboard arrived and hours of punching cables ensued. Once this was done the column hiding the heating pipes was refitted and I created the rest of the door frame to enable us to fit a door and hide it all from view.
As I was dusting off my woodworking skills not seen since my school days I also knocked up a column to go into the other lounge to enclose the 4 pipes that were bulging out of the wall before (as seen in previous postings) as we had left them exposed so as to not dry out the cob as was happening before.
The woodburner arrived much to the cats curiosity and was fitted with no fuss in about half a day along with an iron frame and fireboards. It’s now starting to feel like a house again well one room
.We had commissioned an Ironworks company to make some wall lights for us and were really happy with the quality and although very were a few hundred plus per light you certainly get what you pay for and would happily recommend them.
The floor had taken a battering by this point so this was sanded and sealed and again we were amazed by the results – these photo’s show how it actually looks once dried so all in all this room is almost done bar a few final touches such as doors, the inglenook woodburner, stairway door frame, more doors and blinds/curtains etc.
The next update will be much sooner this time
Edited by Herbs on Sunday 15th April 20:55

How time passes when you are having fun (or not as the case may be )!!
Well a quick update on the kitchen as promised although I will do a recap as it has been so long.
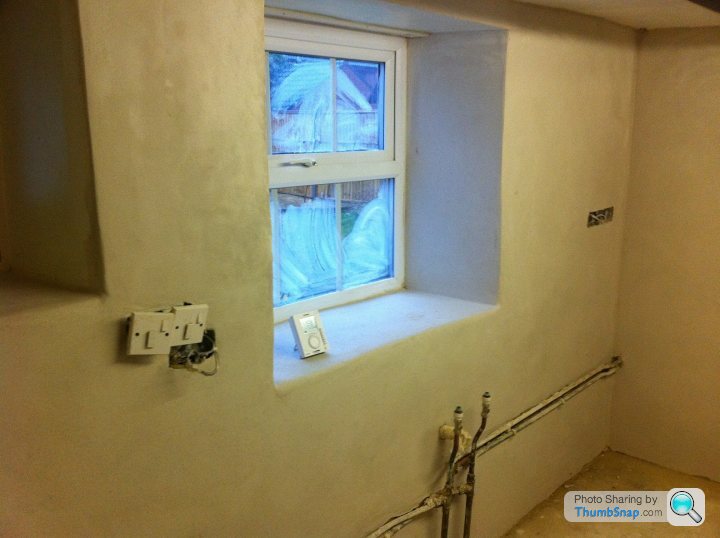
We had to hire a breaker to remove the 2+” inch thick concrete they kindly put on the kitchen walls and managed to lift the 3 layers of flooring that was down taking it back to the concrete slab.
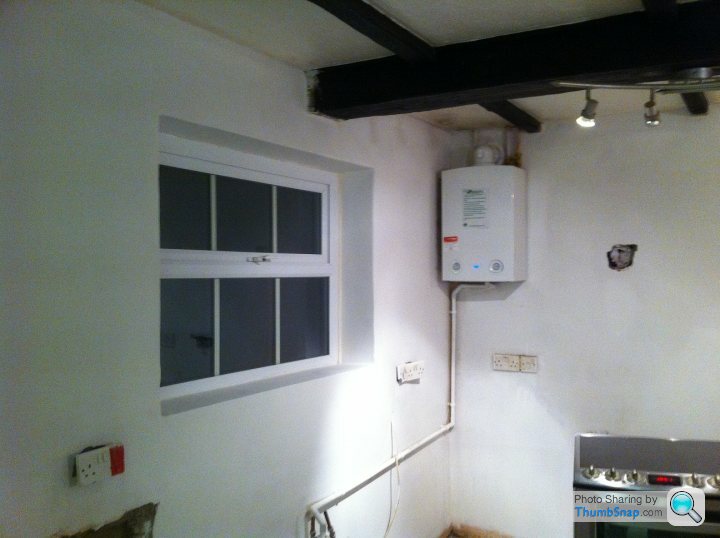
The walls were lime plastered except the ones in the 20th century extension which was multi-finished. The new boiler was fitted providing some much needed hot water and heat – fed up of working in temps hitting -5 degrees inside and having to open doors and windows in the depths of winter with snow on the ground to let heat in!! I love the quirks of solid walls.
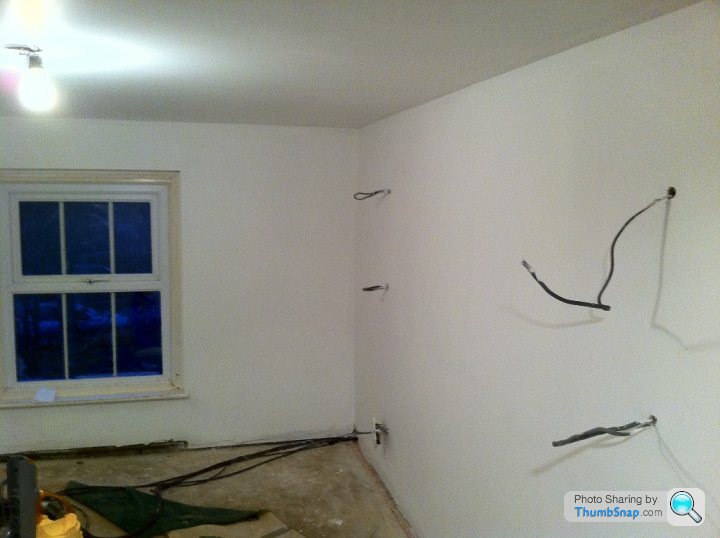
Anyway I digress, CAT 6 cables were run to two points in the room as were twin coax then the walls were built up with 4 layers of lime and left to dry for 4 weeks before being covered with clay paint – which was chosen for its breathability and hardness compared to lime wash, it also gives a lovely matt finish that you cannot achieve with modern paints.
The beams were repainted and finally the flagstone floor was delivered and laid. Another cast iron radiator was fitted along with skirting and what was salvageable of the old kitchen has been refitted whilst the rest of the house is done. We finally had a place where we can amost sit and eat civally
We cannot wait to buy new furniture instead of using the temporary bits and pieces.
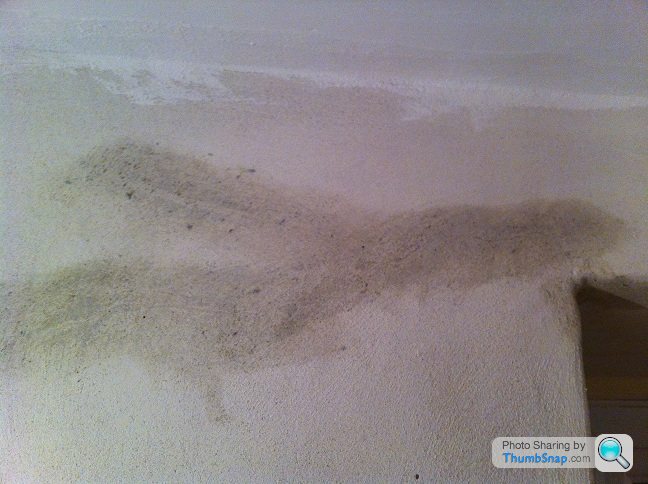
The one problem we hoped to solve by this unfortunately wasn’t as you can see in the photo’s below how one wall wasn’t drying out – this was the water which was being trapped in the wall before. To cut a long story short it involved the drains being replaced and discovering the rear external wall unsurprisingly enough also being covered in non-breathable materials (that’s another story)


)!!Well a quick update on the kitchen as promised although I will do a recap as it has been so long.
We had to hire a breaker to remove the 2+” inch thick concrete they kindly put on the kitchen walls and managed to lift the 3 layers of flooring that was down taking it back to the concrete slab.
The walls were lime plastered except the ones in the 20th century extension which was multi-finished. The new boiler was fitted providing some much needed hot water and heat – fed up of working in temps hitting -5 degrees inside and having to open doors and windows in the depths of winter with snow on the ground to let heat in!! I love the quirks of solid walls.
Anyway I digress, CAT 6 cables were run to two points in the room as were twin coax then the walls were built up with 4 layers of lime and left to dry for 4 weeks before being covered with clay paint – which was chosen for its breathability and hardness compared to lime wash, it also gives a lovely matt finish that you cannot achieve with modern paints.
The beams were repainted and finally the flagstone floor was delivered and laid. Another cast iron radiator was fitted along with skirting and what was salvageable of the old kitchen has been refitted whilst the rest of the house is done. We finally had a place where we can amost sit and eat civally
We cannot wait to buy new furniture instead of using the temporary bits and pieces.
The one problem we hoped to solve by this unfortunately wasn’t as you can see in the photo’s below how one wall wasn’t drying out – this was the water which was being trapped in the wall before. To cut a long story short it involved the drains being replaced and discovering the rear external wall unsurprisingly enough also being covered in non-breathable materials (that’s another story)
Very interesting progress...
I may have missed it, and of course they're not a priority, but have you plans for the roof, and the windows? I do get a slight hint of 50's council house, and really doesn't do the work on the rest of the house justice!
I may have missed it, and of course they're not a priority, but have you plans for the roof, and the windows? I do get a slight hint of 50's council house, and really doesn't do the work on the rest of the house justice!
Edited by prand on Tuesday 4th December 15:47
Next Update:
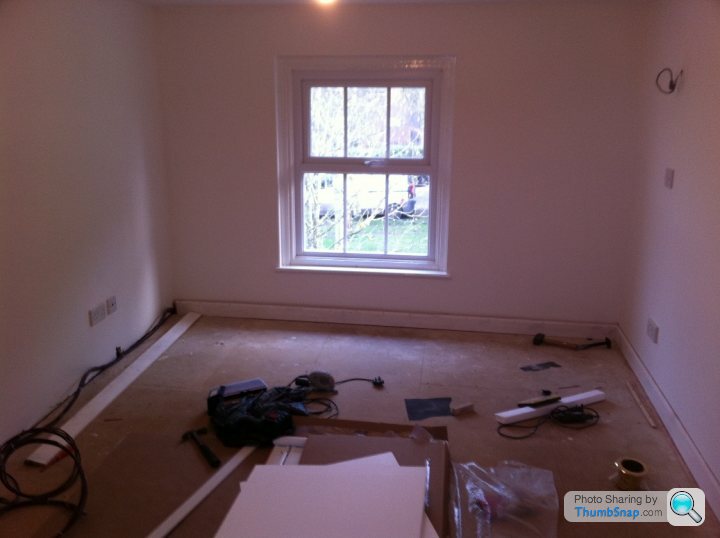
Moving upstairs to our bedroom which you last saw previously in the thread as having a wall rebuilt and being plastered. SWMBO decides that we should refit the en-suite before finishing the bedroom so that when the carpet gets laid it won’t get damaged – who am I to argue?.....
Firstly the bedroom window was stripped right back to wood and re-glossed before the whole room was painted.


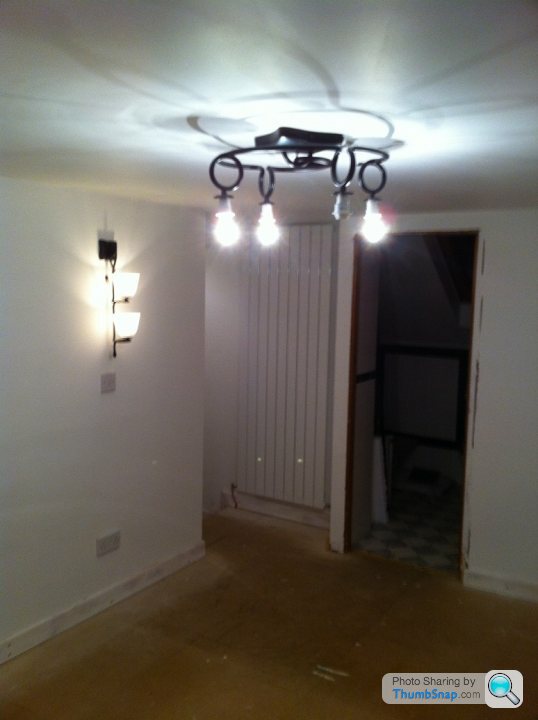
The cat 6 was then run behind the skirting as was the surround sound cables with the TV mounted on the wall.
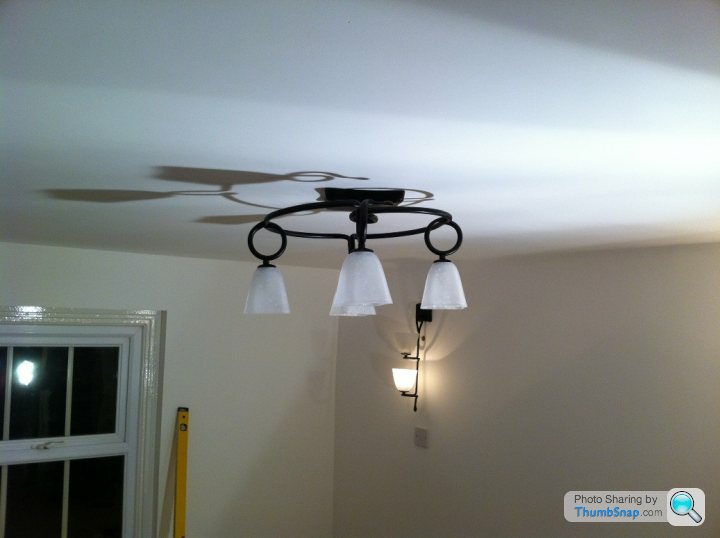
We found some more wrought iron lights and fitted these as the main light and bedside lamps.


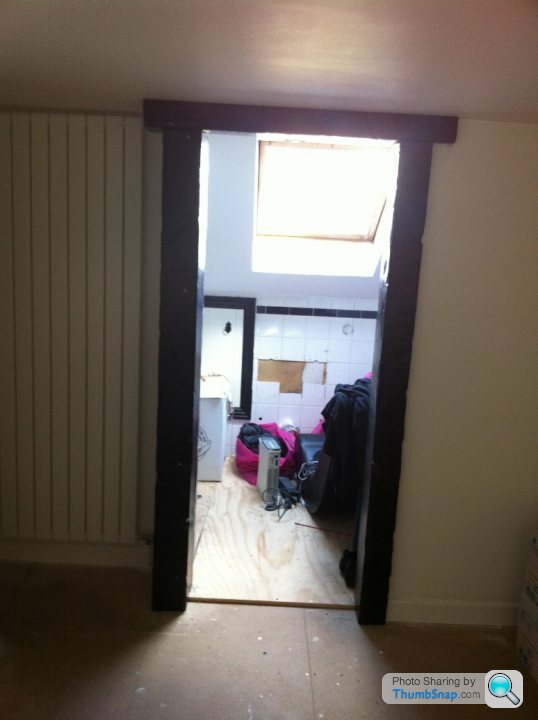
The bedroom is accessed via a 12ft corridor which has a couple of steps in. Mounted at the top of these steps was the radiator meaning that by the time you got to the lower part the rad appears halfway up the wall and looked s t. The door architrave to the En-suite needed to be replaced at the same timeso I decided I would build something more in keeping with the rest of the house.

We decided that as this room was in the more modern part of the building we could go for a good blend of traditional and modern so decided to install a vertical radiator which sits nicely in the corner without overhanging the step but not looking too out of place.

On the subject of steps we had to lift the top step to secure the floor and remove the flex which was causing an annoying squeak. Once the step was lifted you could see the old external wall which the step spanned, the squeak was caused by the steps not actually secured properly and just resting on the top of the mud wall. Surprises were starting not to surprise us as this point although the excellent plumbing did manage too!!
Points given if you can explain their decision making progress

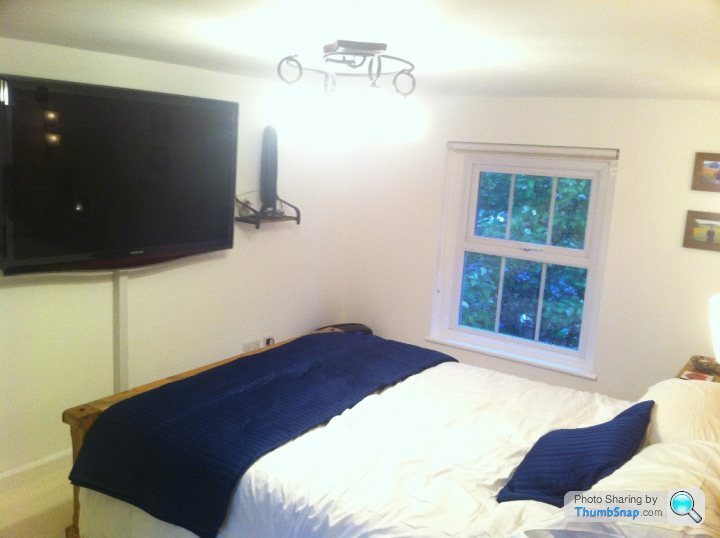
I needed to make up some shelves to put the surround sound and DVD player on so I cheated slightly by purchasing some pine ones from IKEA and set about making my mark on them which I was pleased with the outcomeOur TV unfortunately didn’t fit in the lounge downstairs meaning that our 40” from the bedroom is now residing in the lounge and the 55” LCD is at the end of the bed!


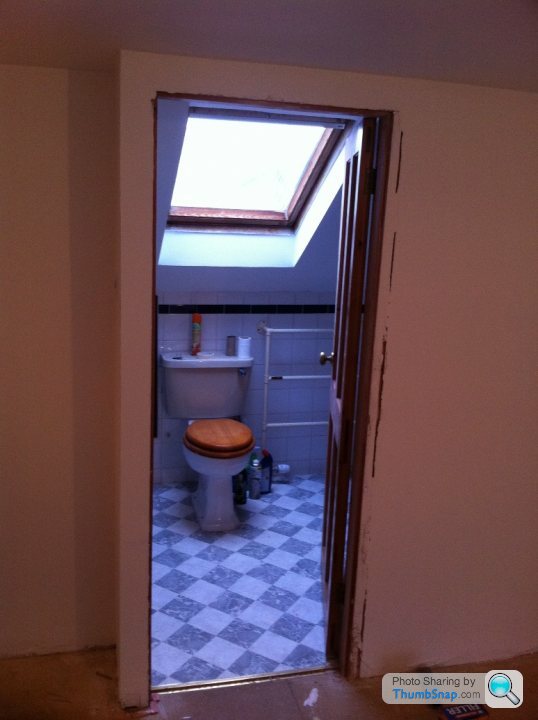
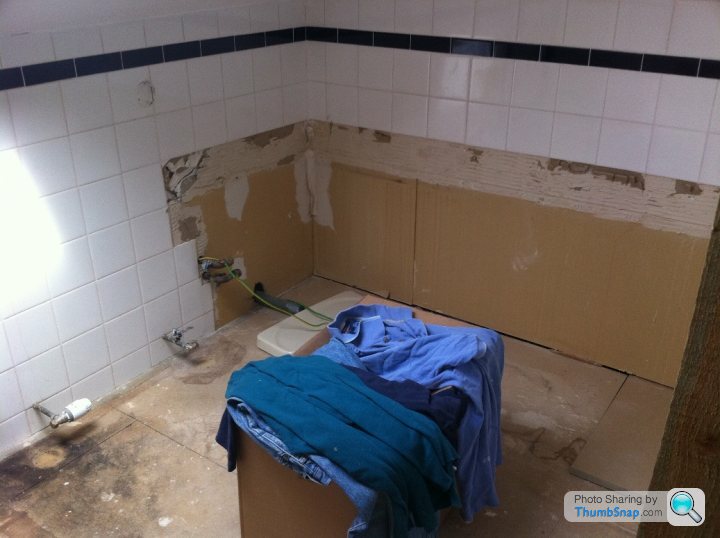
Onto the En-suite which although dated was fully functional, we decided after much deliberating that this would be the one room in the house that could get away with being both modern & hi tech without impacting on the property overall (the bedroom works well as a transgression between this and the rest of the house. After countless hours on the net and scouring Houzz (a fantastic website) we decided to redo everything totally, the room had already been replastered to remove the artexing so we set about removing the existing suite. Once this was done the floor was overboarded with marine ply.


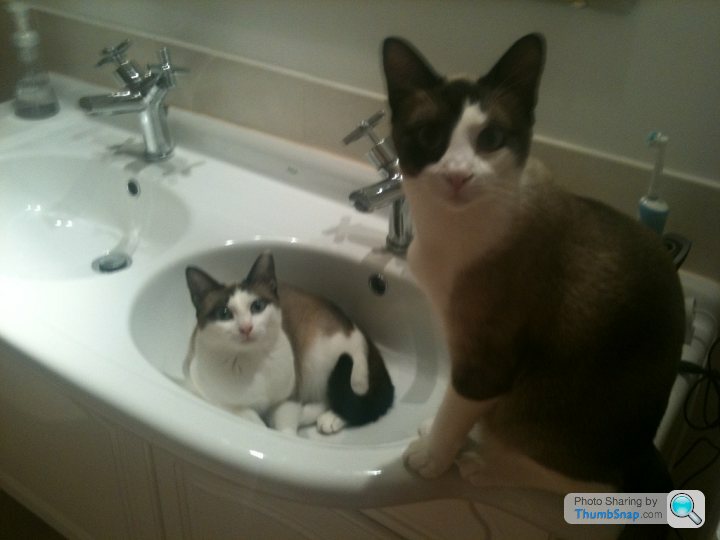
After a laborious weekend doing the floor and running electricity to the bath, we got up to go to work and discovered we had lost one of our housecats. After 10 minutes of calling for it we heard faint mewing coming from under the floor……
The little fker had squeezed through the cutout in the floor for the drain pipe for the bath and couldn’t get back out cue a panicking Mrs Herbs. The only way to get it out was to lift the section of floor we put down then use a jigsaw to enlarge the hole. 
Mmmm - jigsaw and scared cat in enclosed space what could go wrong……
The joists run parallel to the room so after attempting to get the cat away from the hole, I enlarged it only to find no bd cat.
The bloody thing had gone deathly quiet and with an open breezeblock cavity one end and god only knows what the other as we know it spans the old external wall and changes height at least twice it wasn’t looking good.
After 20 minutes we hear scrabbling underneath the bedroom so somehow it managed to navigates way across the joists......
At this point of being late for work and dealing with an increasingly upset Mrs, the fking floor which I had spent all weekend laying had to be lifted along with the floor underneath (I was thinking at this point about the old practice of burying cats in walls to bring luck and ward off evil spirits and wondering whether it worked or not).
Taking that route would probably mean no more dinners for me from Mrs Herbs (amongst other things ) so the floor was lifted and after chucking a load of cat treats down the hole we eventually coaxed the thing out much to Mrs Herbs relief.


Moving upstairs to our bedroom which you last saw previously in the thread as having a wall rebuilt and being plastered. SWMBO decides that we should refit the en-suite before finishing the bedroom so that when the carpet gets laid it won’t get damaged – who am I to argue?.....
Firstly the bedroom window was stripped right back to wood and re-glossed before the whole room was painted.
The cat 6 was then run behind the skirting as was the surround sound cables with the TV mounted on the wall.
We found some more wrought iron lights and fitted these as the main light and bedside lamps.
The bedroom is accessed via a 12ft corridor which has a couple of steps in. Mounted at the top of these steps was the radiator meaning that by the time you got to the lower part the rad appears halfway up the wall and looked s
t. The door architrave to the En-suite needed to be replaced at the same timeso I decided I would build something more in keeping with the rest of the house. We decided that as this room was in the more modern part of the building we could go for a good blend of traditional and modern so decided to install a vertical radiator which sits nicely in the corner without overhanging the step but not looking too out of place.
On the subject of steps we had to lift the top step to secure the floor and remove the flex which was causing an annoying squeak. Once the step was lifted you could see the old external wall which the step spanned, the squeak was caused by the steps not actually secured properly and just resting on the top of the mud wall. Surprises were starting not to surprise us as this point although the excellent plumbing did manage too!!
Points given if you can explain their decision making progress
I needed to make up some shelves to put the surround sound and DVD player on so I cheated slightly by purchasing some pine ones from IKEA and set about making my mark on them which I was pleased with the outcome
Our TV unfortunately didn’t fit in the lounge downstairs meaning that our 40” from the bedroom is now residing in the lounge and the 55” LCD is at the end of the bed! Onto the En-suite which although dated was fully functional, we decided after much deliberating that this would be the one room in the house that could get away with being both modern & hi tech without impacting on the property overall (the bedroom works well as a transgression between this and the rest of the house. After countless hours on the net and scouring Houzz (a fantastic website) we decided to redo everything totally, the room had already been replastered to remove the artexing so we set about removing the existing suite. Once this was done the floor was overboarded with marine ply.
After a laborious weekend doing the floor and running electricity to the bath, we got up to go to work and discovered we had lost one of our housecats. After 10 minutes of calling for it we heard faint mewing coming from under the floor……
The little f
ker had squeezed through the cutout in the floor for the drain pipe for the bath and couldn’t get back out cue a panicking Mrs Herbs. The only way to get it out was to lift the section of floor we put down then use a jigsaw to enlarge the hole. Mmmm - jigsaw and scared cat in enclosed space what could go wrong……
The joists run parallel to the room so after attempting to get the cat away from the hole, I enlarged it only to find no b
d cat.The bloody thing had gone deathly quiet and with an open breezeblock cavity one end and god only knows what the other as we know it spans the old external wall and changes height at least twice it wasn’t looking good.
After 20 minutes we hear scrabbling underneath the bedroom so somehow it managed to navigates way across the joists......
At this point of being late for work and dealing with an increasingly upset Mrs, the f
king floor which I had spent all weekend laying had to be lifted along with the floor underneath (I was thinking at this point about the old practice of burying cats in walls to bring luck and ward off evil spirits and wondering whether it worked or not). Taking that route would probably mean no more dinners for me from Mrs Herbs (amongst other things
) so the floor was lifted and after chucking a load of cat treats down the hole we eventually coaxed the thing out much to Mrs Herbs relief.Gassing Station | Homes, Gardens and DIY | Top of Page | What's New | My Stuff