Another special tool required
Discussion


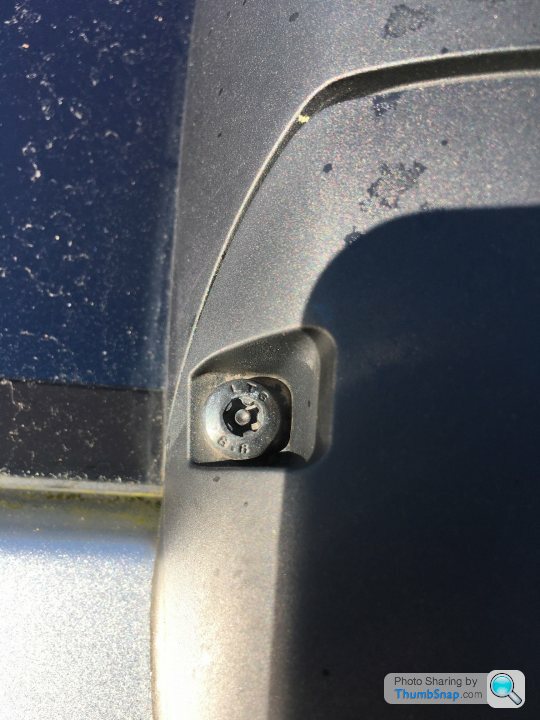
So, lockdown boredom.
There is a little black screw holding on a black plastic cover on the top of my Discovery. I assume this is the aerial.
One of the screws is rusty (as you would expect on a 4 year old car!!!).
It's hard to see but irritating nonetheless and a lot easier to meddle with than all the corrosion underneath.
Or so I thought.
I decided to remove it and see if I had a suitable replacement.
At a quick glance I could see that it was a star with a pin up the middle.
No problem as I had previously bought a security bit set.

I tried several which looked like the correct size but none dropped into the hole.
Hmmm?
Is the hole in the tool too wee for the pin in the screw?
I don't fancy my chances of drilling it bigger as these tools should be quite hard.
After a closer look without my glasses and applying of my O Level arithmetic I realised that my tools are all six pointed and the screw on the car is five pointed.
DOH! - Another special tool required.
Plan B
I think I'll attempt to treat the rust in situ and dab some black paint on it.
There is a little black screw holding on a black plastic cover on the top of my Discovery. I assume this is the aerial.
One of the screws is rusty (as you would expect on a 4 year old car!!!).
It's hard to see but irritating nonetheless and a lot easier to meddle with than all the corrosion underneath.
Or so I thought.
I decided to remove it and see if I had a suitable replacement.
At a quick glance I could see that it was a star with a pin up the middle.
No problem as I had previously bought a security bit set.
I tried several which looked like the correct size but none dropped into the hole.
Hmmm?
Is the hole in the tool too wee for the pin in the screw?
I don't fancy my chances of drilling it bigger as these tools should be quite hard.
After a closer look without my glasses and applying of my O Level arithmetic I realised that my tools are all six pointed and the screw on the car is five pointed.
DOH! - Another special tool required.
Plan B
I think I'll attempt to treat the rust in situ and dab some black paint on it.

 k with this..."
Discovery 4?
LRcat gives part number XYP500240.
http://new.lrcat.com/#!/12728/53806/54449/4305/544...
Brit-cars website (might be slow to load) says M5x14mm.
https://www.brit-car.co.uk/product.php/170362/5497..._discovery_3_4_
Replace with something stainless steel?
LRcat gives part number XYP500240.
http://new.lrcat.com/#!/12728/53806/54449/4305/544...
Brit-cars website (might be slow to load) says M5x14mm.
https://www.brit-car.co.uk/product.php/170362/5497..._discovery_3_4_
Replace with something stainless steel?
paintman - thank you for that info. Very informative.
It is a Disco 4 with part no 18A984A
I was thinking that I would replace the screws with one from my assorted stainless steel collection.
But, while I originally dismissed Turn7's comment, on looking at the diagram it's not clear what it screws into.
The other option appears to be fitted with a nut from underneath while mine appears to have a mounting bracket with captive threads.
I will need to have a better look to ensure that I can get to that without stripping off the interior trim or worse, have it rattling around the roof somewhere.
It seemed like a good idea.......
 i0AAOSwo6lWOxVM
So, to bring this to it's conclusion.
I bought the 5 pointed torx bits and had a go at removing the offending rusty screw.
However, it appeared to be lifting the top plastic cover with it and the thread that I could see exposed below looked bigger than it should have been. I suspect it was the part that the screw was screwed into.
At this point I chickened out and tightened it back in.
Sanded it as best I could with limited access, treated it to some Hydrate 80 and painted it with some matt black enamel.
It'll have to do.
Thanks for the hints and tips
Gassing Station | Home Mechanics | Top of Page | What's New | My Stuff