DIY camper the VW way.
Discussion


Really nice job, puts a lot of the pro conversions to shame - love the bare ply look, it's so much more attractive than furniture board.
Green and grey would look good, but as the van's red that would be the logical choice.
BTW - what are those floor fasteners called and where do you get them (the ones you bolt the furniture to)?
Green and grey would look good, but as the van's red that would be the logical choice.
BTW - what are those floor fasteners called and where do you get them (the ones you bolt the furniture to)?
Thanks for the kind words chaps. I do like some of the finishes on the furniture boards, but also loved some of the functional looking ply conversions that I'd seen. There are a lot of pro companies out there who do a superb job and put a lot of effort into the details of their work, however, there are also some 'pro' companies which make things look ok on first glance but on closer inspection their work does not justify the cost of their services. I never imagined doing my own units and bed but as the conversion continued, I just decided to get some better tools and have a go myself. At least I know how everything has been built.
Mark, those fasteners are headed threaded inserts. They're screw in rather than push fit and have a headed finish to them to fit over the lino. I mistakenly purchased some non-headed ones which are now gathering sawdust. They're much better than just securing units in with a few screws and angle brackets or cabinet blocks.
Mark, those fasteners are headed threaded inserts. They're screw in rather than push fit and have a headed finish to them to fit over the lino. I mistakenly purchased some non-headed ones which are now gathering sawdust. They're much better than just securing units in with a few screws and angle brackets or cabinet blocks.


LeighW said:
You're making a very nice job. I've just bought a T5 to convert, so this is an interesting thread. I've changed the wheels, had windows fitted, started adding sound deadening, and am about to tackle the wiring, so there is still a looong way to go. 
Leigh, if you're enjoying it though, it goes quickly! I remember being right at the start of mine, pulling out the wheelchair lift and it dawned on me how much I had to do. Getting some solid ideas early on will save you having to undo or trying to do stuff later when most of the work is complete. Think about where you want cables to go, and get them routed in prior, or during insulation time. Make everything accessible in case you need to get to it later. Put the cables on top of the insulation.I kinda wished i'd ran speaker cables into the tailgate, however I did run 12v lighting cables into it, so may use that to pull some speaker cabling through. Its about the only place I can think of adding some extras into the rear.
Chicken Chaser said:
LeighW said:
You're making a very nice job. I've just bought a T5 to convert, so this is an interesting thread. I've changed the wheels, had windows fitted, started adding sound deadening, and am about to tackle the wiring, so there is still a looong way to go.
Leigh, if you're enjoying it though, it goes quickly! I remember being right at the start of mine, pulling out the wheelchair lift and it dawned on me how much I had to do. Getting some solid ideas early on will save you having to undo or trying to do stuff later when most of the work is complete. Think about where you want cables to go, and get them routed in prior, or during insulation time. Make everything accessible in case you need to get to it later. Put the cables on top of the insulation.I kinda wished i'd ran speaker cables into the tailgate, however I did run 12v lighting cables into it, so may use that to pull some speaker cabling through. Its about the only place I can think of adding some extras into the rear.
LeighW said:
Thanks mate. I spent ages researching and planning what to do, even before I found a van to convert. I've nearly done the insulation now, and I'm waiting for my split charge and hookup system to arrive from extremevans, so next it's out with the front seats and half the dash to get the wires through, then run wires to where I'll need them, then seal in the insulation and line and fit the ply panels etc. A full side conversion is my plan (lwb furniture kit from evomotion design). Anyhow, enough of me cluttering your thread, keep up the good work!
Good luck with it, get a thread on the go!Just thought i'd update with the finished product. Had a couple of trips in the van, everything has been tested and works well. There isnt much i'd change (except for remembering to camp with some wheel blocks when the surface isnt level!) but I think I need a table inside the van as well as outside. I've got the outside stuff, need to buy myself an awning so that we've got space to put stuff when we go away from sites.
Plan on sorting out a table of some sort, with a couple of rails on the side of the kitchen unit.
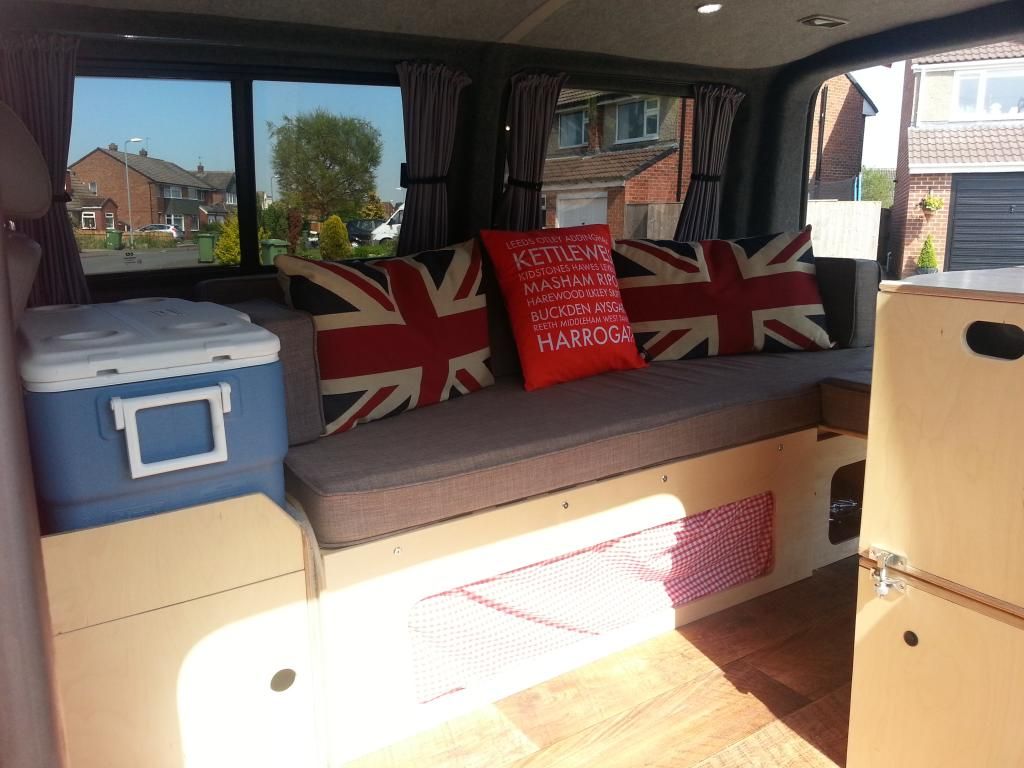
Still havent sorted the curtains under the bed, (material put there for mock up only) but I actually like the ease of getting stuff out from under the bed, even if it doesnt look as good!
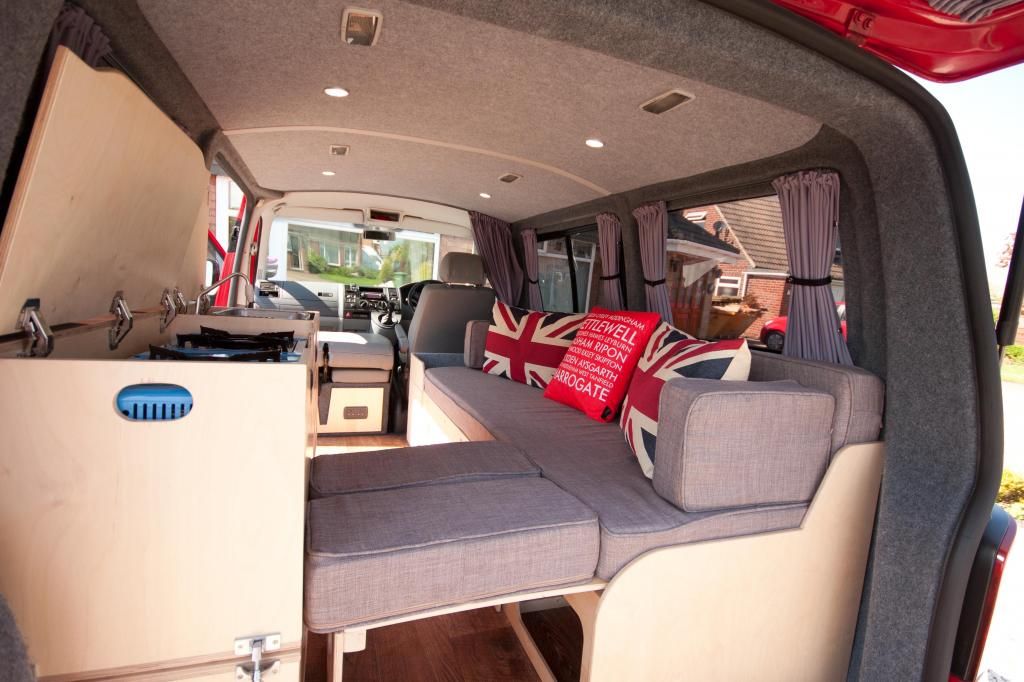
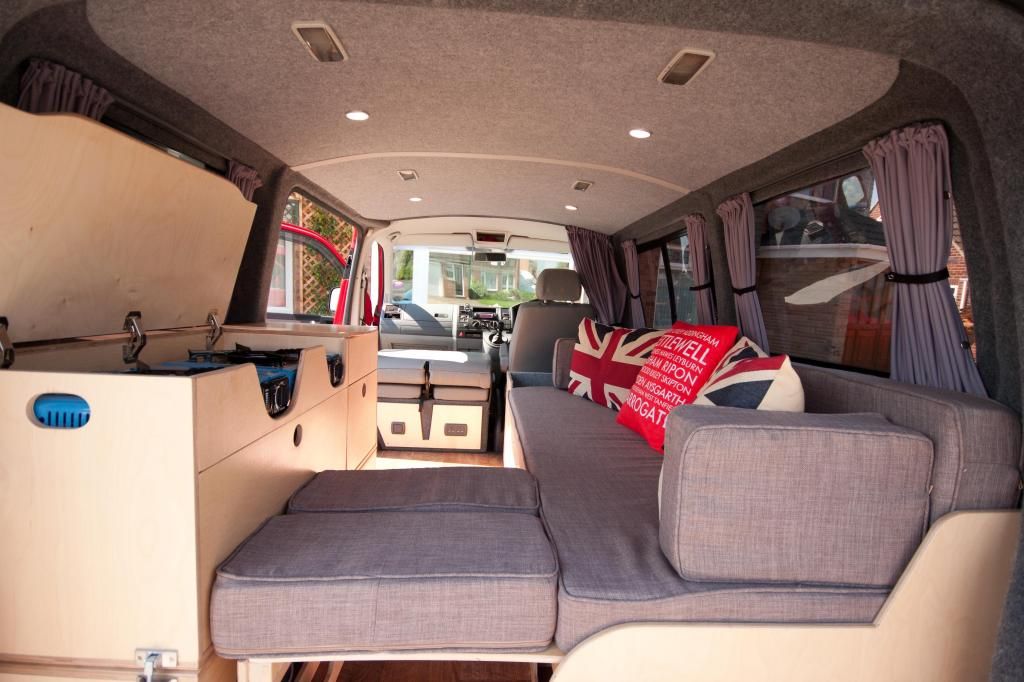
Coolbox fits just nicely. Handy location when a beer is required!
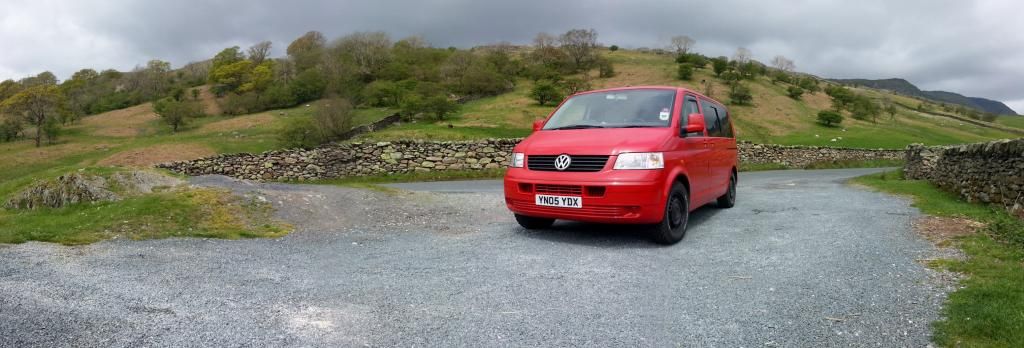
Action shot:
Plan on sorting out a table of some sort, with a couple of rails on the side of the kitchen unit.
Still havent sorted the curtains under the bed, (material put there for mock up only) but I actually like the ease of getting stuff out from under the bed, even if it doesnt look as good!


Coolbox fits just nicely. Handy location when a beer is required!

Action shot:

Tampon said:

Brilliant work, looks fantastic.
But I would take the Union Flag cushions back, they are upside down, picky I know, but it's not right.
Wish I had kept my Devon Moonraker now, still comes up on the insurance data base, XAY 264S, cost 8000 new when I bought it.
For some reason when I press the pound sign, before 8000 it disappears when I go to preview, gremlins me thinks.
Hi, first off I'd like to say what a great job you've done! I've been wanting to build a bed for my t5 and have been looking to all kinds of designs and ideas. As I use my van for mountain biking hving enough room for 2 bikes and for 2 people to sleep is my biggest problem. In the summer we usually pitch the tent next to the van but during the winter it's not so fun. I've settled on a design similar to this for my van as I will have plenty of room to chuck the bikes in with the bed in the (closed) position and still have enough room (with some clever packing) to get the bikes in with the bed pulled out. I've made some measurements for the bed based on leaving myself enough room for the bikes. I'm looking at a length of 6'2" and a width of 4' approx. How do these dimensions compare to yours? Thanks ☺
What an amazing build, well done! I'm just about to start constructing my own bed and units, both to be removeable when not in use and I love the idea of this bed. How has the front board stood up against bowing out etc as mentioned earlier? Also, are there a couple of extra long slats in the wall side lump, that catch on the front when it's lifted to lift the back too, if that makes sense?
dienamic said:
What an amazing build, well done! I'm just about to start constructing my own bed and units, both to be removeable when not in use and I love the idea of this bed. How has the front board stood up against bowing out etc as mentioned earlier? Also, are there a couple of extra long slats in the wall side lump, that catch on the front when it's lifted to lift the back too, if that makes sense?
If you send me an email address through to me I'll do what I can to get some shots of how I built it. In short, the bed has been excellent with over 3 weeks worth of nights away.Hi Chicken Chaser, new to forum down to seeing the work on your van. I too would like to know re the bed and how it lifts as one. Also what size did you cut the slats from ikea down too. I was going to use old pallets but would spend the money to get this better look. Thank you in advance I can't email you until 24hrs have past
Gassing Station | Tents, Caravans & Motorhomes | Top of Page | What's New | My Stuff