Replacing Door Seals
Discussion


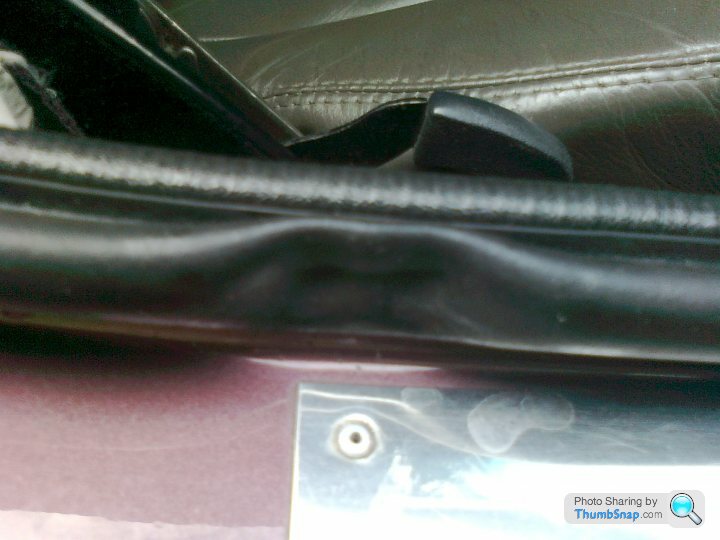
I have to replace the door seals, as the bit that runs along the top of the screen and seals against the targa has split. Bigly, as someone famous said.
Replacing them looks fairly straightforward, but I'm baffled by the bit that runs along the door sills sealing against the inside of the door frame.
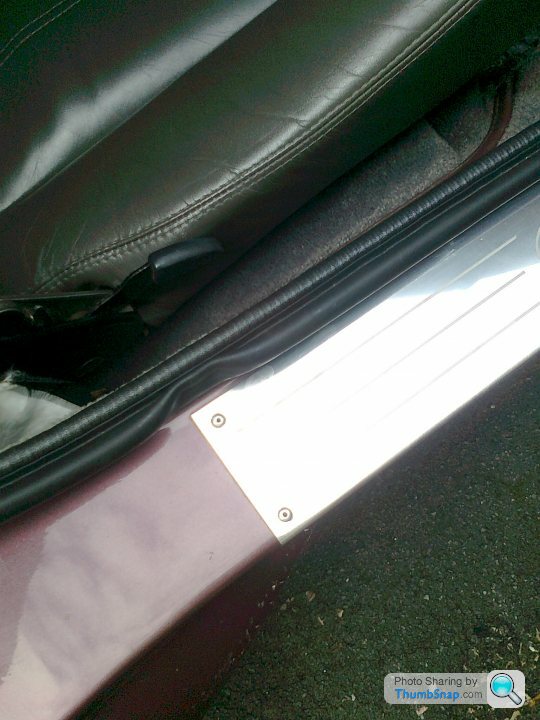
There are a couple of places at the front corner and the back corner (on both sills) where the rubber has been scalloped away. It looks like it's been done on purpose. I can't see for the life of me what the cutouts are for.
Can I just leave the seal intact. If I can, it looks like a five minute job to replace it. Assuming I can find some rivets the right size to fix the ends!
Replacing them looks fairly straightforward, but I'm baffled by the bit that runs along the door sills sealing against the inside of the door frame.
There are a couple of places at the front corner and the back corner (on both sills) where the rubber has been scalloped away. It looks like it's been done on purpose. I can't see for the life of me what the cutouts are for.
Can I just leave the seal intact. If I can, it looks like a five minute job to replace it. Assuming I can find some rivets the right size to fix the ends!
I started at one door removing the little rivets which I replaced with very small black self tapping screws. Fitted the seal down the door, along the sill then up the A post to the windscreen. Made sure the seal was properly pushed into the corners as I went. Along the screen down, down the other side etc. Before cutting made sure the seal was properly pushed down all the way along.
Once you get started its fairly straightforward. I used a rubber mallet to ensure the seal was correctly tapped down on to the bodywork as it can be tight in places. You can use some padding with a hammer, just don't damage the seal as they are expensive!
Once you get started its fairly straightforward. I used a rubber mallet to ensure the seal was correctly tapped down on to the bodywork as it can be tight in places. You can use some padding with a hammer, just don't damage the seal as they are expensive!
N7GTX said:
I started at one door removing the little rivets which I replaced with very small black self tapping screws. Fitted the seal down the door, along the sill then up the A post to the windscreen. Made sure the seal was properly pushed into the corners as I went. Along the screen down, down the other side etc. Before cutting made sure the seal was properly pushed down all the way along.
Once you get started its fairly straightforward. I used a rubber mallet to ensure the seal was correctly tapped down on to the bodywork as it can be tight in places. You can use some padding with a hammer, just don't damage the seal as they are expensive!
Did you nibble bits of the seal out at the front and the back of the door though?Once you get started its fairly straightforward. I used a rubber mallet to ensure the seal was correctly tapped down on to the bodywork as it can be tight in places. You can use some padding with a hammer, just don't damage the seal as they are expensive!
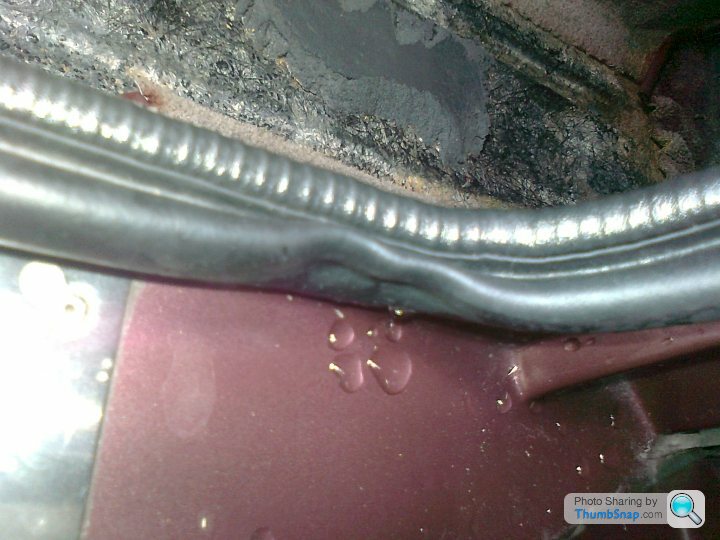
I'm curious about this one too. Sure I read before that the pinched bits at the front and back of the sill length were there to allow any pooled water to drain away rather than splash over and down the carpet side. To be honest the only purpose they appear to serve to me is to allow a cold draught in front and back when on the move !
Also what I've read on multiple posts on here. The rubbers are either scalloped or pinched (as mine are) in these areas to prevent the ingress of water.
As water doesn't leak inside my car and the rubbers are pinched (and glued within the pinch, I believe) I can only assume they work!
As water doesn't leak inside my car and the rubbers are pinched (and glued within the pinch, I believe) I can only assume they work!
pb450 said:
Also what I've read on multiple posts on here. The rubbers are either scalloped or pinched (as mine are) in these areas to prevent the ingress of water.
As water doesn't leak inside my car and the rubbers are pinched (and glued within the pinch, I believe) I can only assume they work!
The glued bit makes sense. Mine look like they *could* be glued - but I'd have to rip the seal off and take it apart to check, and I'm not going to do that until I know what I have to do to put the replacement back on As water doesn't leak inside my car and the rubbers are pinched (and glued within the pinch, I believe) I can only assume they work!

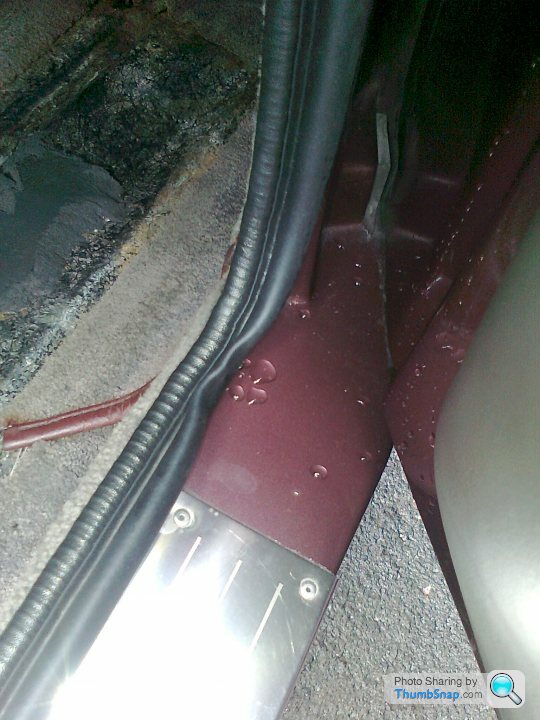
I don't get the idea they stop water coming in, even though it is stated in the bible. As I see it a hole in the seal is only going to let rain water and spray in, along with a cold draught and what my mrs calls 'TVR bum'. Where else can water leak in from? Inside the door shell perhaps if rain or washing water makes its way past the window seals, but even if you do have water sloshing about inside the shell surely this will be positioned over the sill and drain outside anyway?
I simply replaced what was already there and did not know about this 'pinched' part front and rear of the sill.
But, water does collect at those 2 points and tries to drip on to the carpet. So, I have fitted a brand new seal from TVR Parts, the new better sealing one apparently, and after washing the car, water sits in the seal. I can only assume you do this 'pinching' or gluing yourself?
Anyone got a pic showing this mod?
Don't have a picture to hand, but there is a picture on page 325 in the second edition of the "bible".
When I replaced my door seals, I installed them on the car first, then cut 50mm slits in the bottom of the seal in two areas fore and aft under the door. Squirted adhesive up into the seal. Used a couple of G cramps to squeeze the seal together to creat the crimped shape at those points. Worked a treat.
When I replaced my door seals, I installed them on the car first, then cut 50mm slits in the bottom of the seal in two areas fore and aft under the door. Squirted adhesive up into the seal. Used a couple of G cramps to squeeze the seal together to creat the crimped shape at those points. Worked a treat.
Thanx for that. I have just tried pouring water down the seal into the groove while pinching the seal between finger and thumb. It seems you must get the rubber part below the level of the rigid part that holds it to the car? Or the restriction will act like a dam and water will pour into the footwell?
The rubber seal is sliced underneath and glue injected to make the indent in the door seals where needed.
I replaced my split door/windscreen seal with new but did not make the indents and ended up with wet foot well carpets which I had never suffered from. I fixed by pulling up seal at the door corners, small puncture/slice in to bottom of the rubber seal, super glue and small spring clamp (left over night) no more water ingress.
I replaced my split door/windscreen seal with new but did not make the indents and ended up with wet foot well carpets which I had never suffered from. I fixed by pulling up seal at the door corners, small puncture/slice in to bottom of the rubber seal, super glue and small spring clamp (left over night) no more water ingress.
Okay, this is what I've done. Cut a slice under the seal in two places, inserted some glue, then used a couple of clothes pegs to hold it until set.
It rained all night long with some heavy downpours so the perfect test. This morning I dreaded opening the door expecting to see the floor swimming. It was absolutely dry

Thank you for the info.
It rained all night long with some heavy downpours so the perfect test. This morning I dreaded opening the door expecting to see the floor swimming. It was absolutely dry
Thank you for the info.
JonathanT said:
I used superglue when I did mine. I cut a slit underneath, pulled the seal down (towards the ground) and glued in place. The images above might not have the seal pulled down far enough....
I agree. In the end the water sometimes still pooled where the seals were scrunched up. So I cut out a very short section which acted as a drain. That worked.Edited by JonathanT on Friday 28th May 18:48
Gassing Station | Chimaera | Top of Page | What's New | My Stuff