Anyone Replaced F430 Exhaust Tips?
Discussion


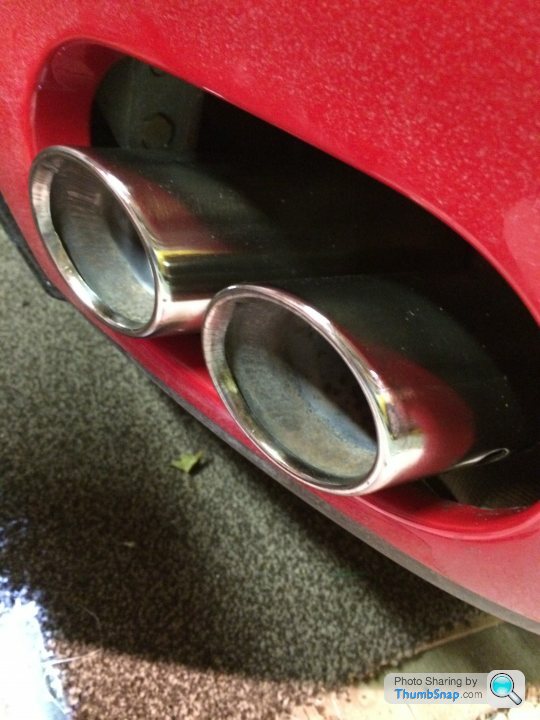
I have been reliably informed by a knowledgable, fellow P/H member that one of my exhaust tips is rattling - They've told me that there is a fix for this but as the tips are a little bit discoloured I'm thinking of replacing the parts / necessary exhaust section in order to keep the car mint. Has anyone else had this work done with a Ferrari Main Dealer and if so how much did it cost?
Finally, I only got the car 8 months ago from a Ferrari Main Dealer, so it's still under Ferrari's 2 Year Manufacturer Warranty - To save me trudging through the paperwork, does anyone know if this particular repair is covered?
Many thanks in advance
Finally, I only got the car 8 months ago from a Ferrari Main Dealer, so it's still under Ferrari's 2 Year Manufacturer Warranty - To save me trudging through the paperwork, does anyone know if this particular repair is covered?
Many thanks in advance
It will be covered but I guess they'll just weld it back on. Are you sure it's the tips? Mine broke the little saddle which connects to the bracket.....the first bolt you come to from the tip back. That was two years ago, never a problem since.
No need to replace, I polish mine with a spindle mounted clloth bobbiin in a drill, always looks like new.
No need to replace, I polish mine with a spindle mounted clloth bobbiin in a drill, always looks like new.
Thanks Corinthian and davo456gt, I'm pretty sure it is the tips but will of course get this checked. The car's due an annual service in April, so will no doubt get this inspected at the same time - all being well it will be covered by warranty.
I'll try what both of you suggest with regards to the cleaning (I guess that will be considerably cheaper the replacing) - Just one thing, does wire wool not cause scratching to the surface?
I'll try what both of you suggest with regards to the cleaning (I guess that will be considerably cheaper the replacing) - Just one thing, does wire wool not cause scratching to the surface?
I wondered if the tips are stainless steel, in which case, it's better not to use anything with steel ( or specifically iron content ) to avoid contamination. It's safer to start gentle first, use autosol paste, if that doesn't do it, try an abrasive fine emery flap wheel, if you don't have a drill, use a scotch brite hand pad, then polish again.
May be of use:
mwstewart said:
Tailpipe Restoration
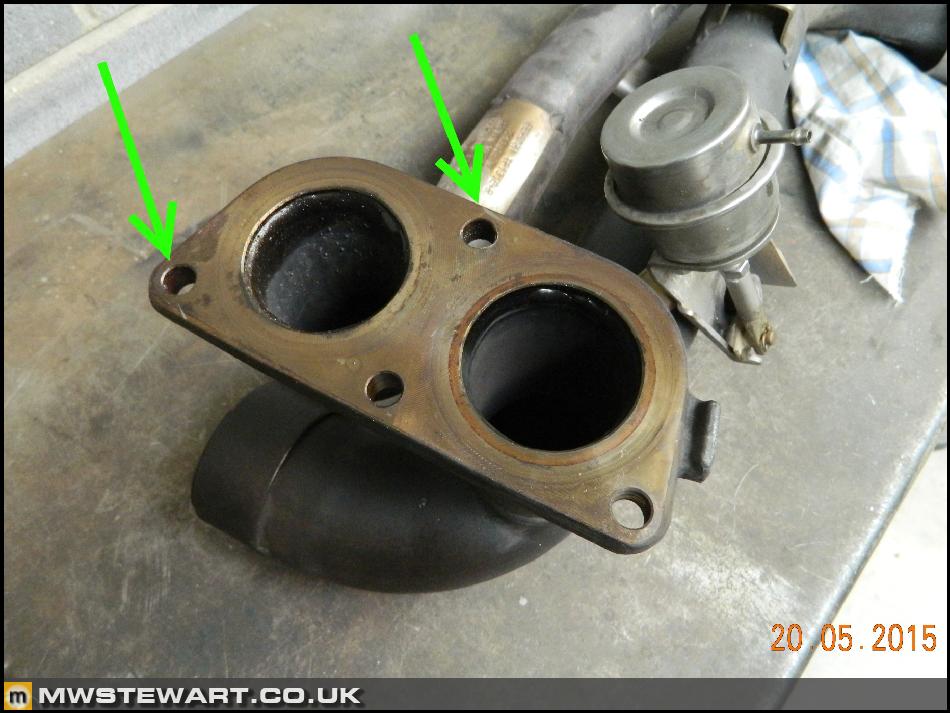
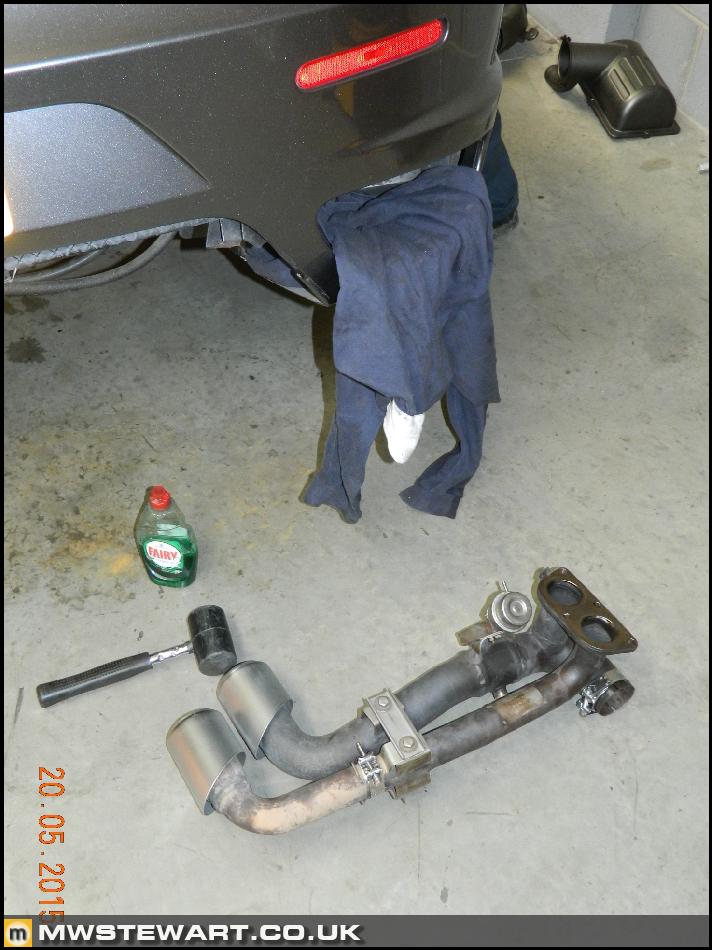
The four remaining studs in the rear tailpipe sections snapped last year when I removed the silencer. I attempted to drill them out in situ this week but it was game over as soon as the bit reached the lower section which is welded them to the flange; the metal has become too hard from welding to easily drill out. In view of this I opted to remove the tailpipe sections and use an angle grinder to cut off the welds (green arrows), and then for reassembly I will use stainless bolts rather than steel studs. My car came with Capristo brackets fitted so the other two studs were already removed (if they were ever fitted at all - I don't know).
I decided to restore anything on the parts I had removed to make future maintenance easier. The AccuSeal clamps fitted at the factory are advertised as being stainless steel but really it is just the clamp section itself - the fastening hardware is steel and hence a recipe for disaster.

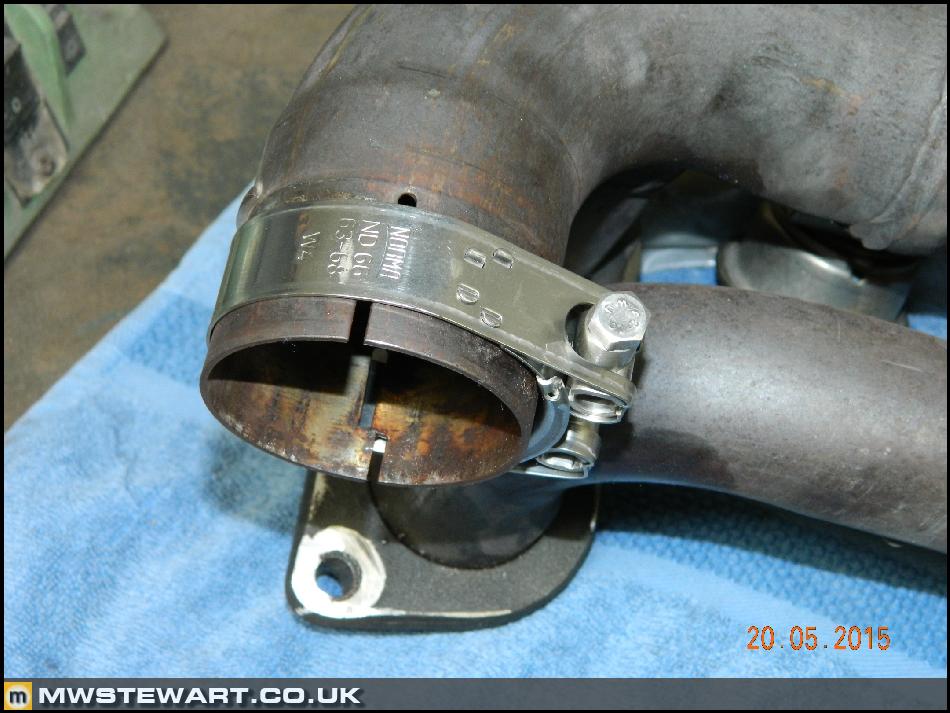
I replaced the AccuSeal clamps with 100% stainless Mikalor clamps. The smaller two are 47-51mm.
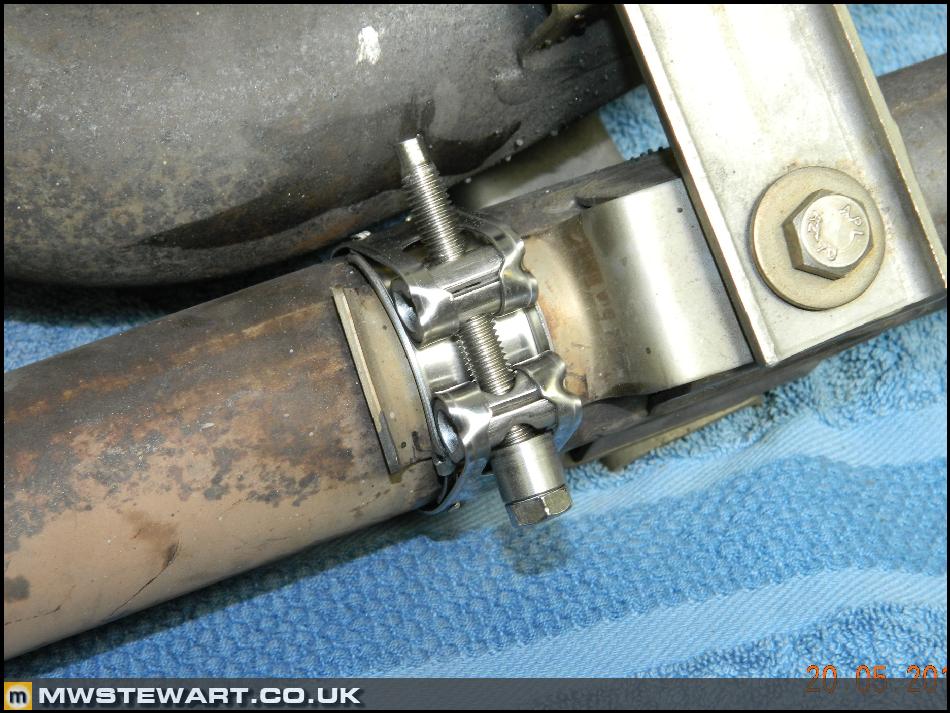
The larger are 63-68mm - the originals have to be cut off with a grinder as they are tacked to the exhaust. The Mikalor clamps don't cover the slits but this isn't an issue as there is 25mm of sealing surface behind them.
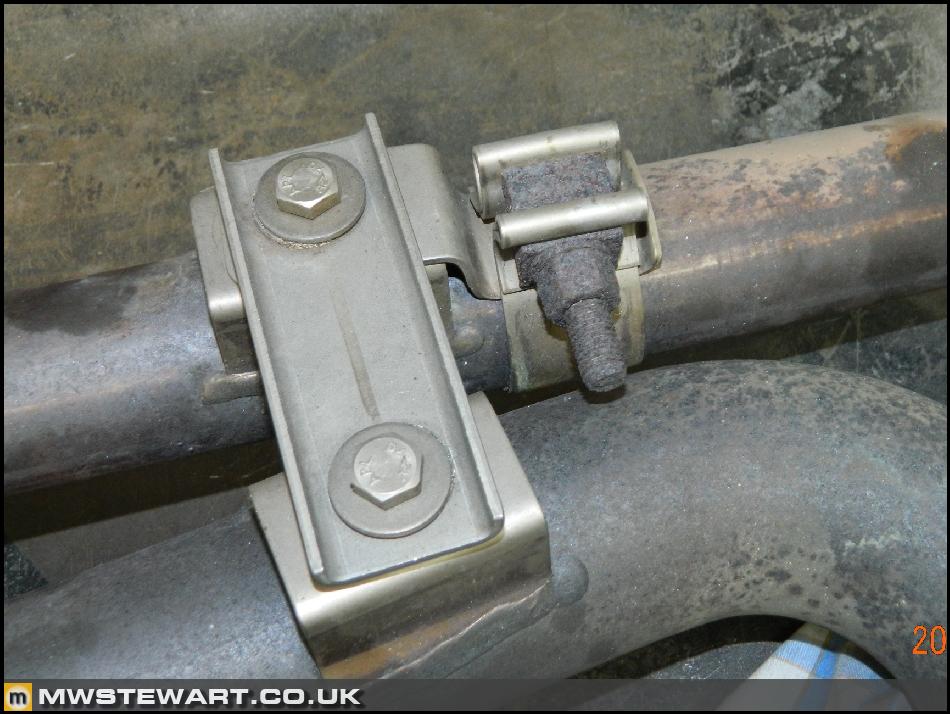
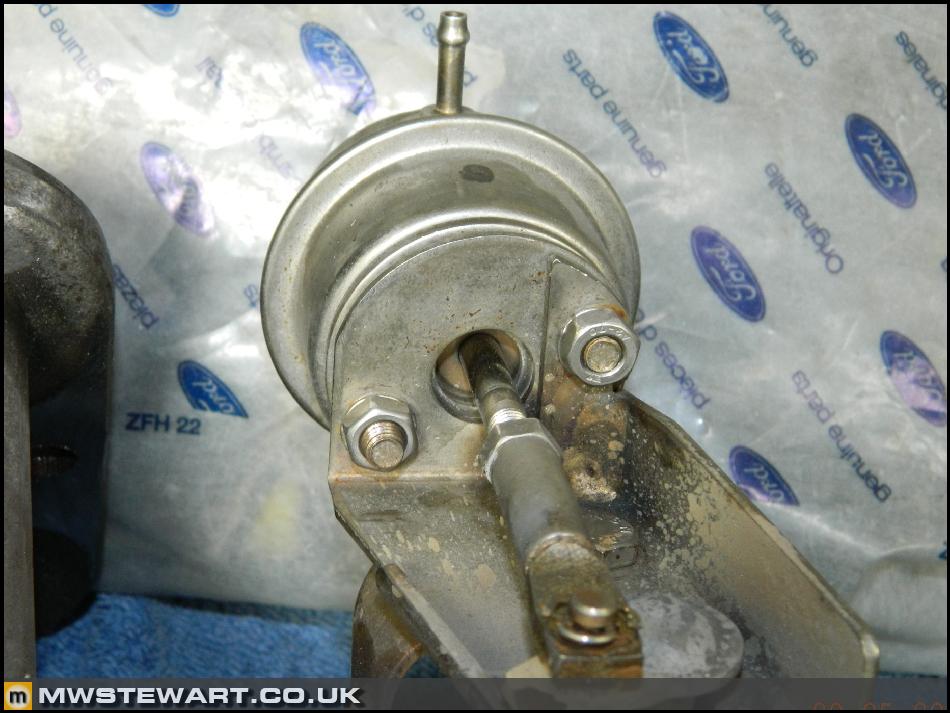
The exhaust valve actuators are also stainless steel but come fitted with copper plated lock nuts which also corrode heavily. I replaced them with stainless nuts and stainless shake-proof washers.
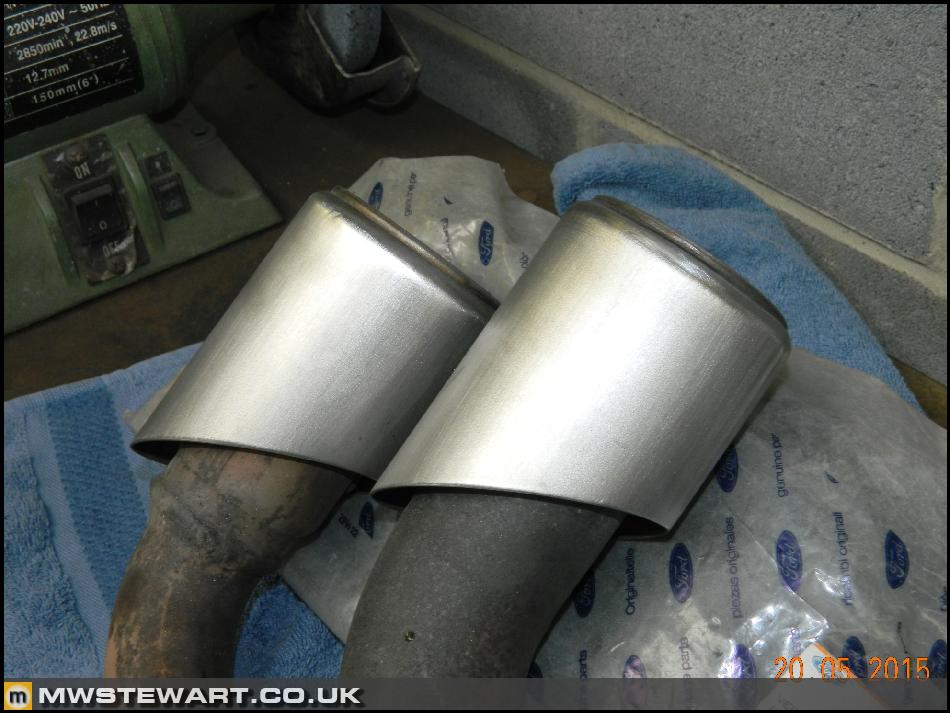
I refreshed the stainless exhaust tips with 80 grit wet and dry paper. I am careful to use the paper horizontally to each the tip in order to create a brushed effect.
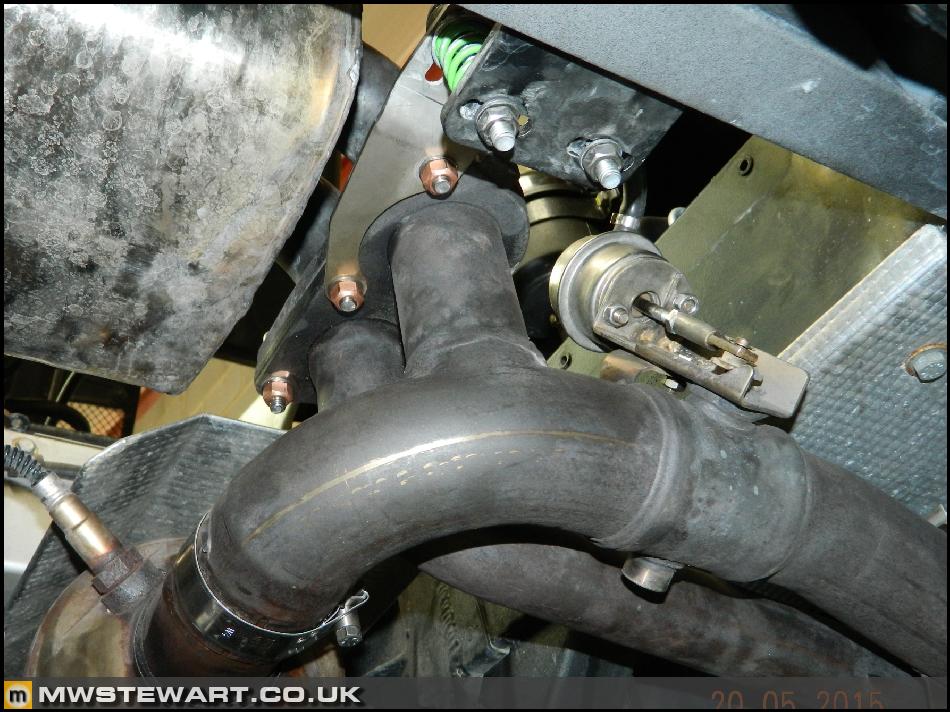
Refitting the exhaust is a doddle and the rear bumper can stay on; I place a rag in the exhaust wells to protect the body and then pivot the exhaust around the 90 degree bend before the tips and it slides in without touching any of the bodywork. I used fairly liquid on the joints to make the whole thing easier to assemble. It only takes five minutes to adjust as the rear silencer ties everything together leaving only a little bit of adjustment via the joins behind the cats.
A shot from underneath showing the new hardware and Capristo brackets.
The four remaining studs in the rear tailpipe sections snapped last year when I removed the silencer. I attempted to drill them out in situ this week but it was game over as soon as the bit reached the lower section which is welded them to the flange; the metal has become too hard from welding to easily drill out. In view of this I opted to remove the tailpipe sections and use an angle grinder to cut off the welds (green arrows), and then for reassembly I will use stainless bolts rather than steel studs. My car came with Capristo brackets fitted so the other two studs were already removed (if they were ever fitted at all - I don't know).
I decided to restore anything on the parts I had removed to make future maintenance easier. The AccuSeal clamps fitted at the factory are advertised as being stainless steel but really it is just the clamp section itself - the fastening hardware is steel and hence a recipe for disaster.
I replaced the AccuSeal clamps with 100% stainless Mikalor clamps. The smaller two are 47-51mm.
The larger are 63-68mm - the originals have to be cut off with a grinder as they are tacked to the exhaust. The Mikalor clamps don't cover the slits but this isn't an issue as there is 25mm of sealing surface behind them.
The exhaust valve actuators are also stainless steel but come fitted with copper plated lock nuts which also corrode heavily. I replaced them with stainless nuts and stainless shake-proof washers.
I refreshed the stainless exhaust tips with 80 grit wet and dry paper. I am careful to use the paper horizontally to each the tip in order to create a brushed effect.
Refitting the exhaust is a doddle and the rear bumper can stay on; I place a rag in the exhaust wells to protect the body and then pivot the exhaust around the 90 degree bend before the tips and it slides in without touching any of the bodywork. I used fairly liquid on the joints to make the whole thing easier to assemble. It only takes five minutes to adjust as the rear silencer ties everything together leaving only a little bit of adjustment via the joins behind the cats.
A shot from underneath showing the new hardware and Capristo brackets.
They do look very good actually Davo456gt - Will give that a go.
mwstewart - Thank you for the detailed info.... If I'm honest, I'm not really much of a "hands on" person so doubt I'd be able to successfully do it. If the boiler stops working or a fuse blows in our house, it's always my wife who fixes it - I could try her with this but I think I may be pushing it!
mwstewart - Thank you for the detailed info.... If I'm honest, I'm not really much of a "hands on" person so doubt I'd be able to successfully do it. If the boiler stops working or a fuse blows in our house, it's always my wife who fixes it - I could try her with this but I think I may be pushing it!
Edited by allister on Wednesday 30th December 23:53
Gassing Station | Ferrari V8 | Top of Page | What's New | My Stuff