New project car, kit car newb
Discussion


FNG said:
I wonder if mikeveal is thinking of the Blackbird engine, which definitely was renowned for oil starvation issues. The Fireblade engine wasn't.
I have 2 modified sumps I believe the one on it is modified plus I had all of AB performance's Blackbird spares - for £200 which includes some kind of sumpAfter halving the wing, week or so I got as far as drilling out the nose and allowing the alloy tubes from the wings to feed into a wider tube I bought to fit in the nose.
Also sorting some support that is fixed directly to the frame so the nose itself doesn't carry 100% of the weight, rather it sits on tubing or something.
Need to sort the infill problem by one of 2 ways, either trimming down the existing wings v carefully to meet the nose ( with the angle of attack fixed ) or make up some infill which I can attach just to the nose.
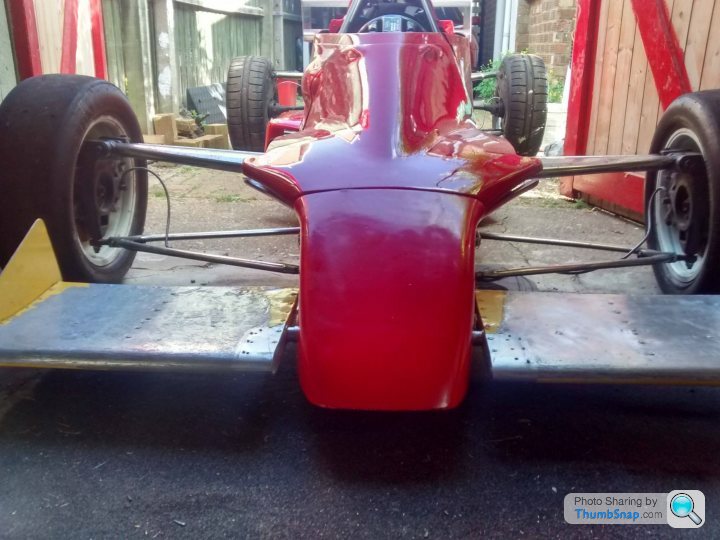
I've have feedback both ways so have yet to make my mind up on that. Both have merits
Also sorting some support that is fixed directly to the frame so the nose itself doesn't carry 100% of the weight, rather it sits on tubing or something.
Need to sort the infill problem by one of 2 ways, either trimming down the existing wings v carefully to meet the nose ( with the angle of attack fixed ) or make up some infill which I can attach just to the nose.
I've have feedback both ways so have yet to make my mind up on that. Both have merits
Hi Hutch
Not quite originally joined seamlessly, the centre rod on both sides is firmly rivetted to both sections of wing and was one piece but still had a gap covered by a section of sheet so not exactly seamless to start with/ meeting in the middle so I could trim it, don't think its that much.
Supposedly Formula Ford originally from the ad, from the guy I know and hes all formula race stuff so don't doubt it was.
I guess I could do both ways.
Just received through post thin 1.2mm alloy sheet ( its more for surrounding the rad) but so cheap I will have tons spare I could put toward this?
I can either make up with that to the edges OR trim it, either is possible I think.
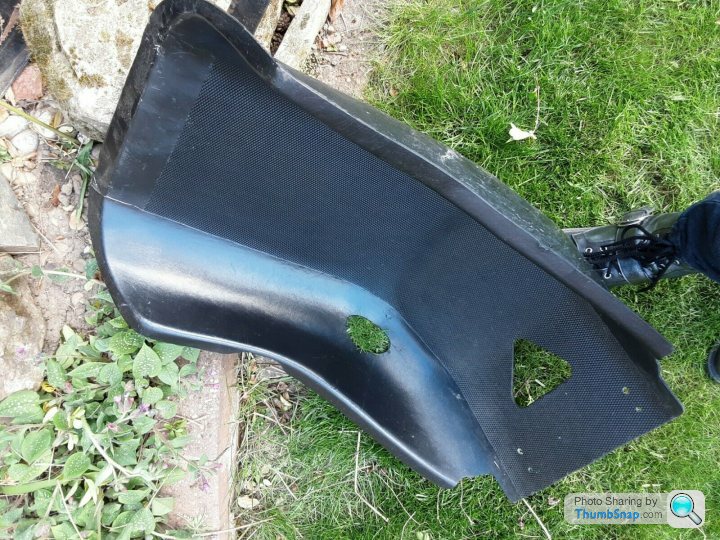
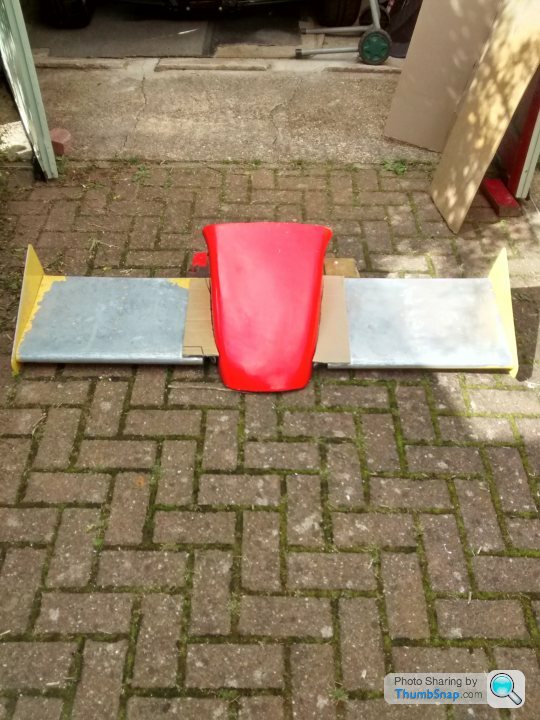
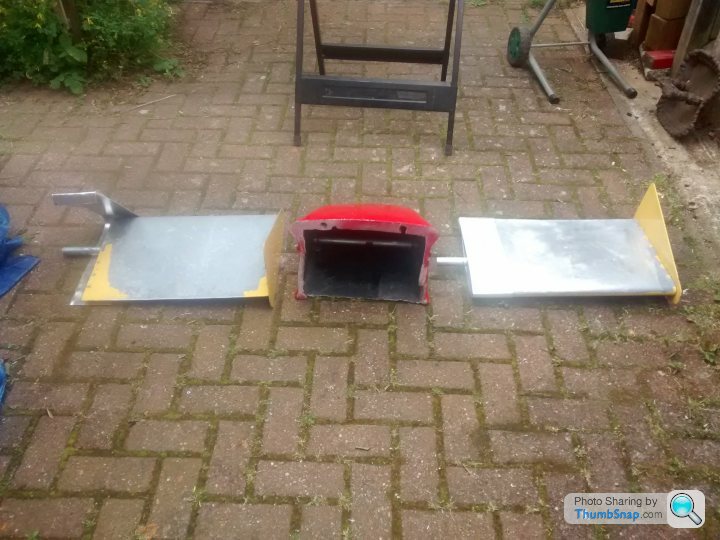
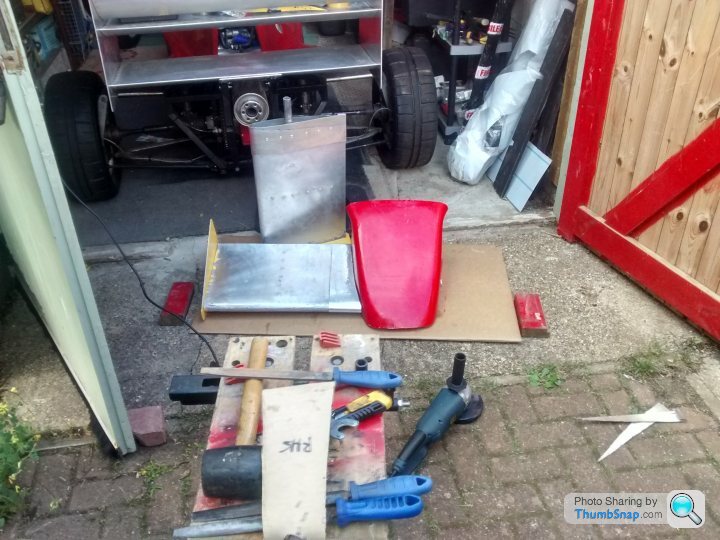
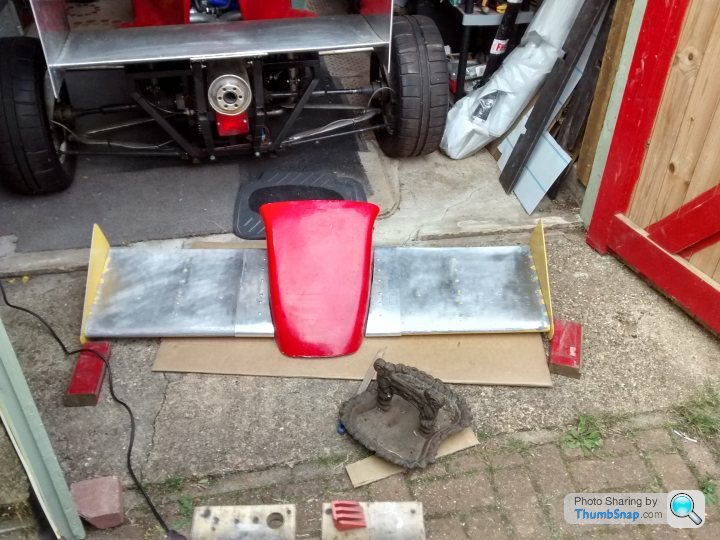
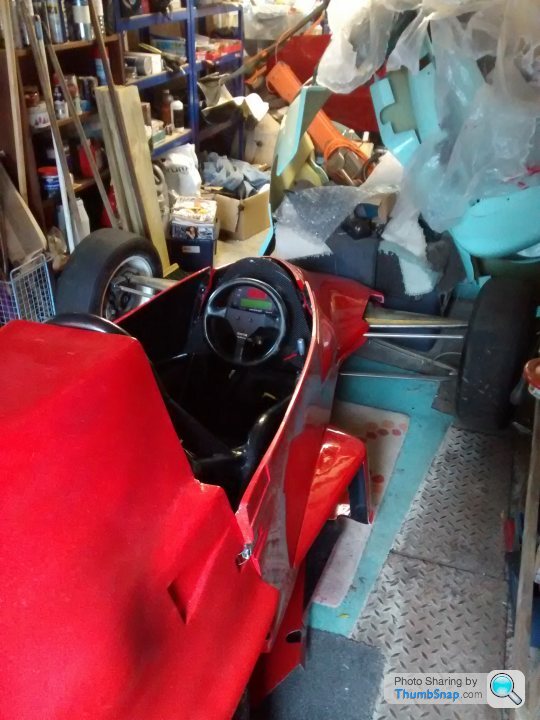
This was the bargain £6 seat I had ( I collected at the same time I went to pick up some other bodywork pieces from a different seller )
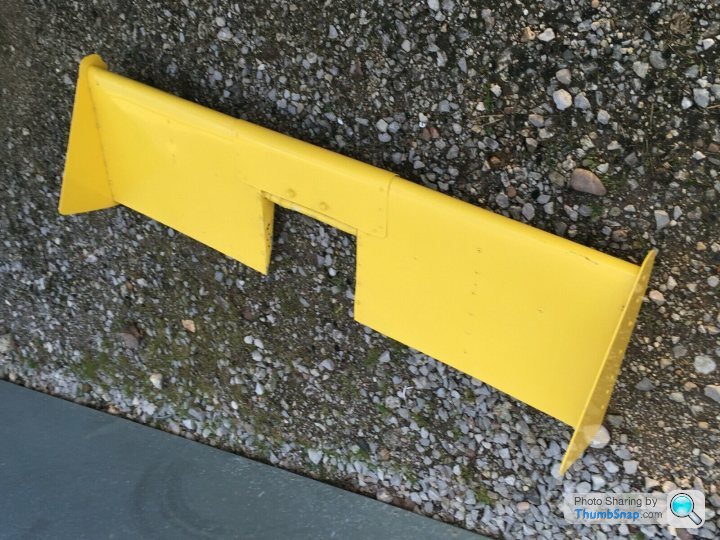
Original wing also before I took apart to fit my nosecone
https://www.ebay.co.uk/itm/Formula-Ford-race-car-s...
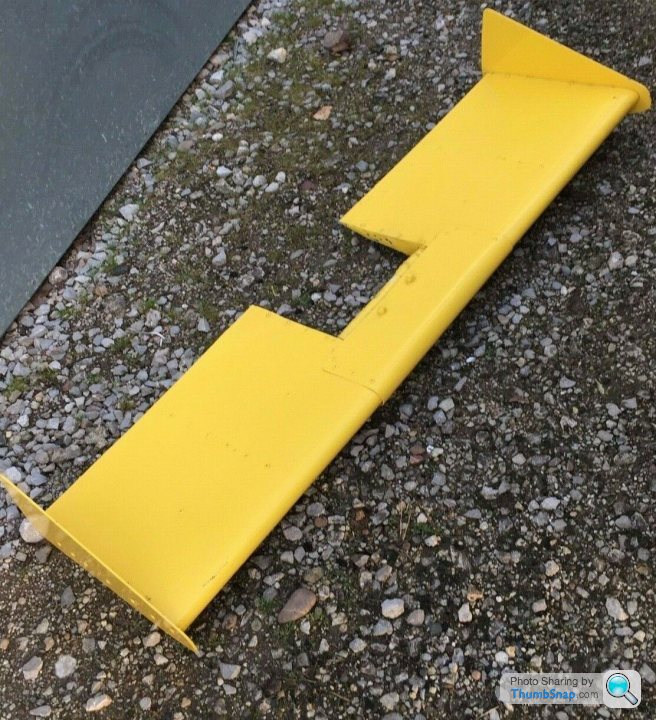
Original wing also before I took apart to fit my nosecone
https://www.ebay.co.uk/itm/Formula-Ford-race-car-s...
Mechanics and tuning are something to come, thats important but there are some fine details I want to sort out too that are possible in my hands without just offloading someone else to do which will cost me in the longer run
This is what I've only recently been doing.
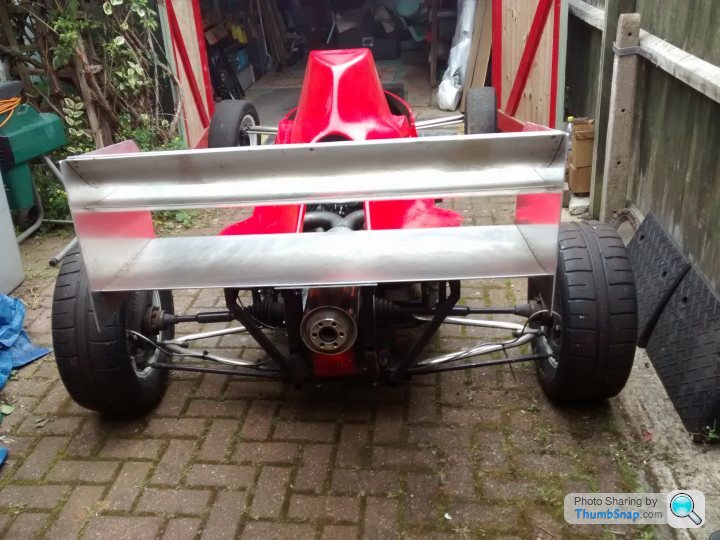
The rear wing was for me far too superficially mounted and too much flex. Past owner had quickly mounted directly to the thin aircraft alloy wing and you could literally push it and cause it to reflect.
I took leftover 3mm alloy from doing the endpieces and had enough to cut into a rectangle and then used far more rivets across entire length of the wing - so it stabilises and supports the wing as a mounting point.
Just prior to drilling and rivetting
Also went from 2 rivets for each of the 4 brackets, to 8 using mostly 4.2x14mm alloy rivets. Probably at least 42 rivets in place the wing now instead of just 8 !
Its really solid now, barely moves at all.
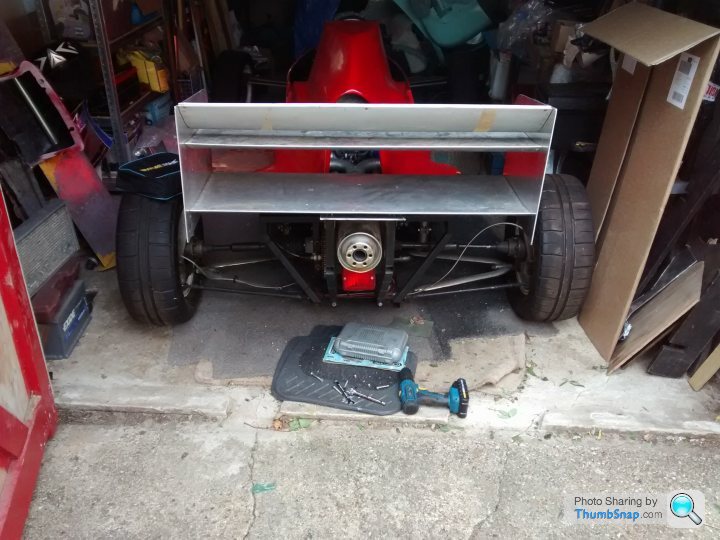
Engine has been previously started but concerned with state of cooling system so removed and yet to replace with a new rad which I have to sort mounting setup etc, may do this now I just finished properly sorting that horrible wing movement.
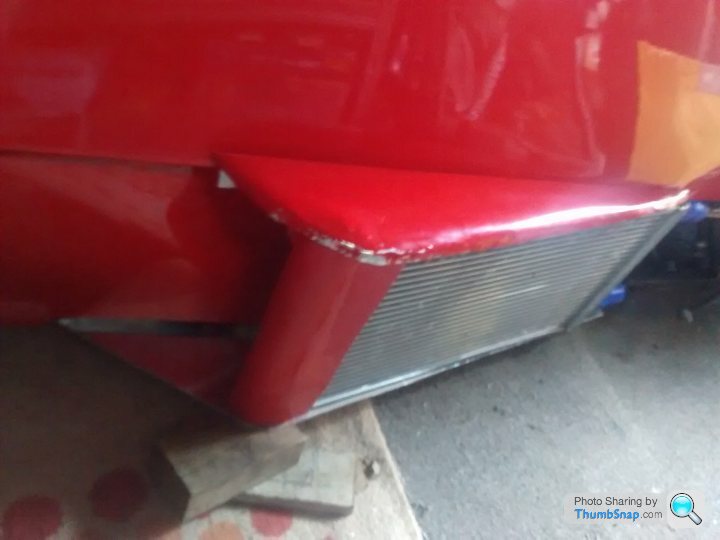
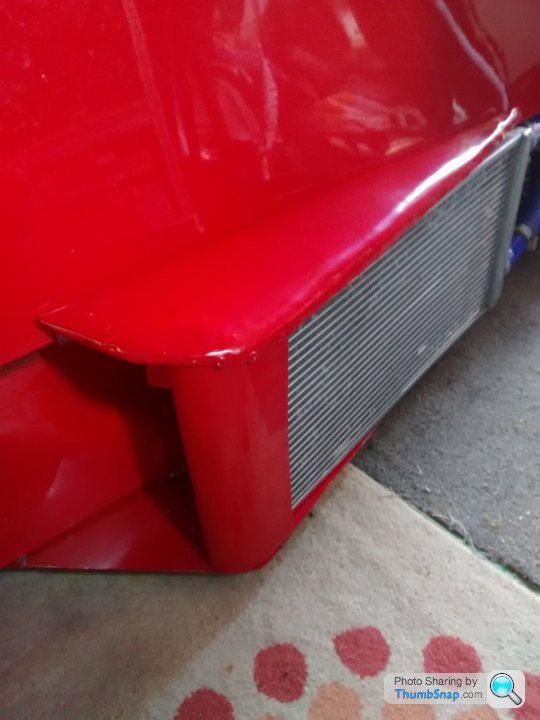
I've already got some thin sheet to make up a bespoke cowlng cover for the rad on this side, already roughly put a floor in place as you saw from earlier pics so looking to replicate the style of the cowlings in sheet ( needs to be a bit taller for the fiat cinquecento rad I got ).
I'm taking it to MK cars when I can get my arse in gear for a review on the mechanicals and review.
Tbh not 100% my fault on this as I need to get a westfalia towbar for my hatch but they been out of stock.
This is what I've only recently been doing.
The rear wing was for me far too superficially mounted and too much flex. Past owner had quickly mounted directly to the thin aircraft alloy wing and you could literally push it and cause it to reflect.
I took leftover 3mm alloy from doing the endpieces and had enough to cut into a rectangle and then used far more rivets across entire length of the wing - so it stabilises and supports the wing as a mounting point.
Just prior to drilling and rivetting
Also went from 2 rivets for each of the 4 brackets, to 8 using mostly 4.2x14mm alloy rivets. Probably at least 42 rivets in place the wing now instead of just 8 !
Its really solid now, barely moves at all.
Engine has been previously started but concerned with state of cooling system so removed and yet to replace with a new rad which I have to sort mounting setup etc, may do this now I just finished properly sorting that horrible wing movement.
I've already got some thin sheet to make up a bespoke cowlng cover for the rad on this side, already roughly put a floor in place as you saw from earlier pics so looking to replicate the style of the cowlings in sheet ( needs to be a bit taller for the fiat cinquecento rad I got ).
I'm taking it to MK cars when I can get my arse in gear for a review on the mechanicals and review.
Tbh not 100% my fault on this as I need to get a westfalia towbar for my hatch but they been out of stock.
Bit more fabbing, its coming on quite well now to point I will hook cooling in again and try and start up again
Thin metal sheet bashed up to assimilate the fibre versions as I didn't have one for rad side and now its taller anyway ( allowing for cheaper mini car rads and better cooling), some more painting and finished to do
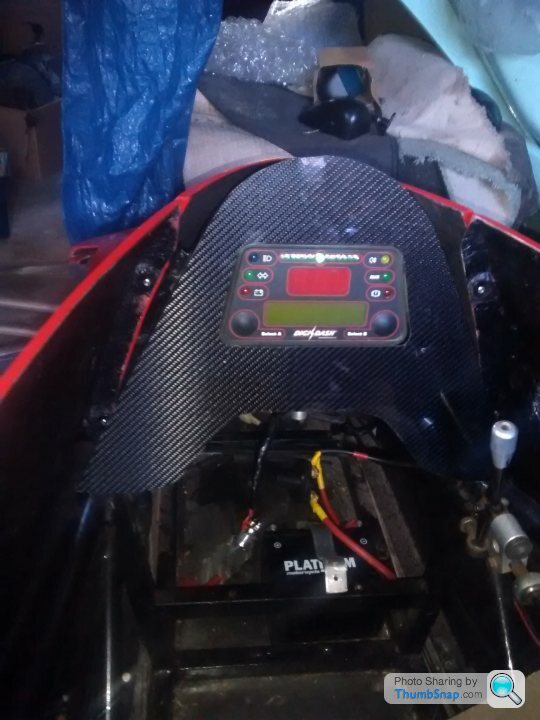
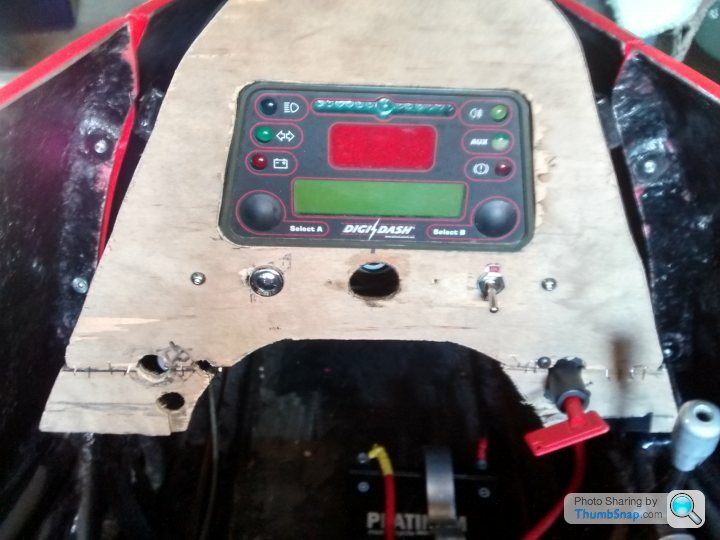
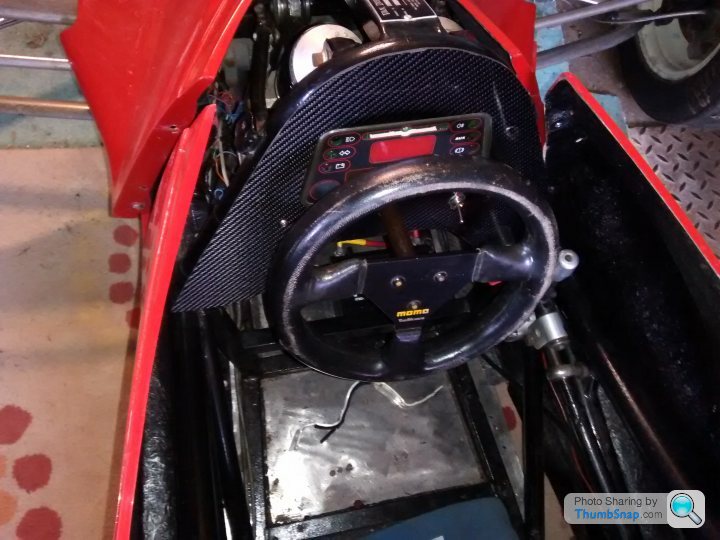
Also I smoothed up the hole around the dash so it now actually goes around the digi entirely rather than just mocked up close - just got to get the balls to decide where the other holes in it will go for controls
Thin metal sheet bashed up to assimilate the fibre versions as I didn't have one for rad side and now its taller anyway ( allowing for cheaper mini car rads and better cooling), some more painting and finished to do
Also I smoothed up the hole around the dash so it now actually goes around the digi entirely rather than just mocked up close - just got to get the balls to decide where the other holes in it will go for controls
Edited by daytonavrs on Tuesday 27th July 20:33
A few more amateur build diary pics
Also one of the front wing end plates was precariously loose - so drilled out with my new cobalt bits in 4mm then used similar alu thick rivets to resecure and that end piece is on solid as a rock now instead of doing its best rocky impersonation.
Also mocked up the old plywood to get a better feel for where I want to vandalise my carbon panel now and the side radiator bit is better secured and self supporting but I need to order a few more small nuts and bolts to finish that off ( prefer that to rivetting, I don't think it works well with fibre panels I found on the other side ).
( My previous building assistance/ electrician cut it too short then apologised which is why it looks like something from Highlander )
I've decided I'm leaving some space for the lower carbon to be profiled more if its too low by having the few required switches closer to the digidash. Or more switches down there if needed for something
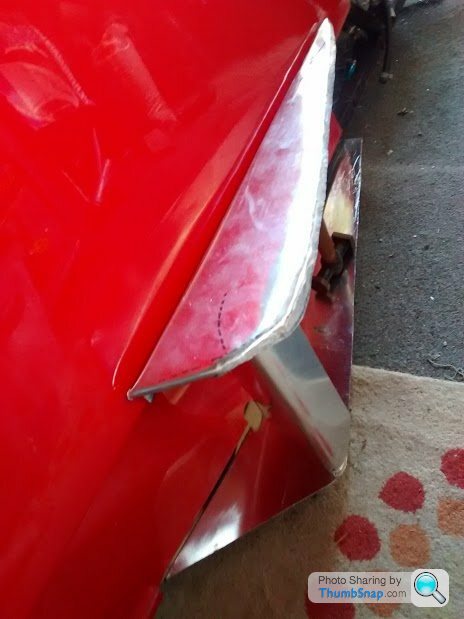
Also de-rivetted ( is that a word?) the inner end sections of the front wing as shown I'm cutting some rectangular metal pieces which I will fold around then rivet temporarily in place then cut to shape then rivet the end pieces again so they profile the nose better.
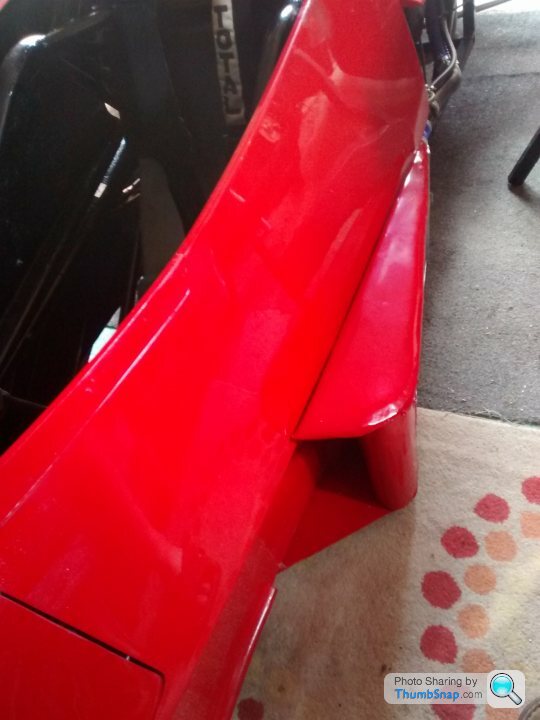
Also one of the front wing end plates was precariously loose - so drilled out with my new cobalt bits in 4mm then used similar alu thick rivets to resecure and that end piece is on solid as a rock now instead of doing its best rocky impersonation.
Also mocked up the old plywood to get a better feel for where I want to vandalise my carbon panel now and the side radiator bit is better secured and self supporting but I need to order a few more small nuts and bolts to finish that off ( prefer that to rivetting, I don't think it works well with fibre panels I found on the other side ).
( My previous building assistance/ electrician cut it too short then apologised which is why it looks like something from Highlander )
I've decided I'm leaving some space for the lower carbon to be profiled more if its too low by having the few required switches closer to the digidash. Or more switches down there if needed for something
Also de-rivetted ( is that a word?) the inner end sections of the front wing as shown I'm cutting some rectangular metal pieces which I will fold around then rivet temporarily in place then cut to shape then rivet the end pieces again so they profile the nose better.
Part finished extending to one side and riveted it down, in order to trim around the nose shortly after some careful double checking and measuring again.
Also cut a second rectangle ready to finish the other side of wing side shortly.
Added some u pieces inside the nouse to help support and secure the inner tubing, bodged in with rivets and epoxy that to the wing for now ( so the inner section no longer moves). I might look to add security with an extra screw and bracket or piece of wood right in the middle so there is no chance of the centre tubing moving as its not desirable for the wing angle to move in flight !
The idea of the extra material as probably mentioned is this extra metal will be sacrificial rather than trimming it down ( and potentially screwing up the existing wing and having no recourse). Not as good to look at but easier to trim down to fit.
Thanks for input
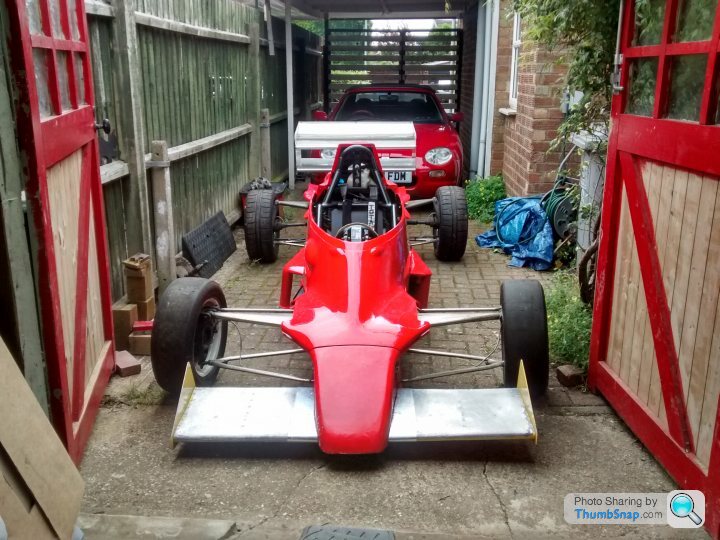
It was a bit of a gamble but I felt I would try and get the original bodywork to fit, and it worked 95%
There is a bit wrong with the under lower engine cover won't work without butchering the original panels ( I have them!) or either leave em off, or continue with fabrication.
I have more important things like focus on getting the car running, and see if its even suited to me!
I've been more enjoying this as on occasional distraction build over covid
( would have been more progress if I'd been given period off like some opted, but I didnt)
As I'm getting on a bit ( near 50s) and get occasional back problems I am wondering if this will suite and have had my eye on more road legal like a fury BEC but before I make any rash decision I do want to run the car.
I'm going to get a trailer and have some checks/finishing done when possible by MK or similar ( was going to be AB ).
The engine has ran so I know it runs...
More recently I was disturbed by the state of the coolant fluid gloop ( possibly due to std rad and lack of proper coolant used prevoiusly) so drained all that and looking to refresh that shortly now have all the tubing pretty much in place
Only thing I don't have is a bleed pipe up to the overflow tank ( from bike) I think I need to get some suitable tubing that will work on both ends ( car rad slightly wider pipe reduced to the smaller bike filler tank.
Also need to get the rad more tightly mounted ( have original rubber mounts and have to drill a hole in the side fairing) etc. Its currently sitting on the channel / side intake I built but not really secure.
Also need to bleed out the brakes properly.
Also looking to tweak the gear change as its the original car engine based by looks of it and has side to side movement, not needed for the up/down gearchance, just looking to change out the spherical bearing for a more simple arrangement that just allows the lever to pivot.
+Will probably need a carb tune ( have a kit somewhere carbtune if I can get to fit)
Just bits and pieces, its damn close but was thinking to just take it away to have looked over and finalised.
Edited by daytonavrs on Tuesday 17th August 21:44
For that right side gap where the rad should be, got to get a bespoke oil pipework for the far side as its too short on oem pipes - looking to extend the oil cooler in that gap as its currently sitting on the framework, out of the way of air flow by whoever mounted it before!
No idea what size got to get a hydraulic firm to make me up, the flange seperates easy enough but not sure the exact size of the male end of the connection, the reinforced pipe itself is about 1cm thick the thread is about 5/8" but that doesn't seem to be a common AN size so best someone makes it up for me.
No idea what size got to get a hydraulic firm to make me up, the flange seperates easy enough but not sure the exact size of the male end of the connection, the reinforced pipe itself is about 1cm thick the thread is about 5/8" but that doesn't seem to be a common AN size so best someone makes it up for me.
Gassing Station | Kit Cars | Top of Page | What's New | My Stuff