tipo 184 build diary
Discussion


back on it now, been ages since i did anything to the build, work has been mega busy and using the garage to store equipment from my job, which i swore i wouldn’t do, i couldn’t get into the garage.
after my eye injury taking a bit longer to get better i’ve cleared the garage and have started again
have to refresh my memory of where i got up to and what bolt goes where
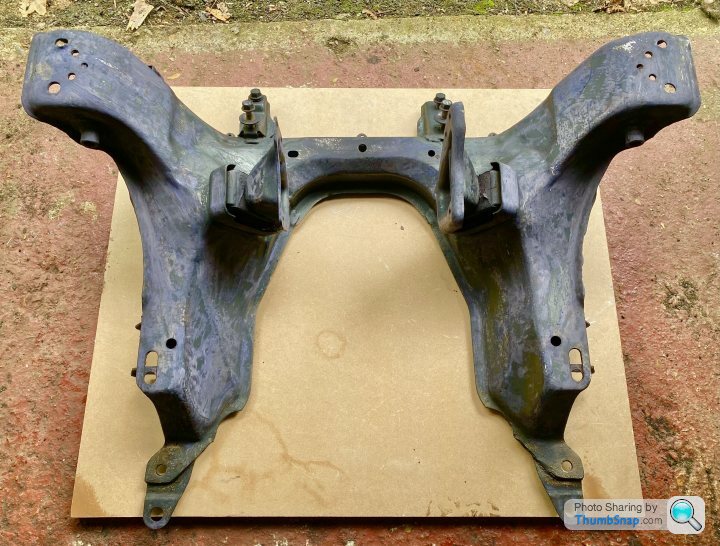
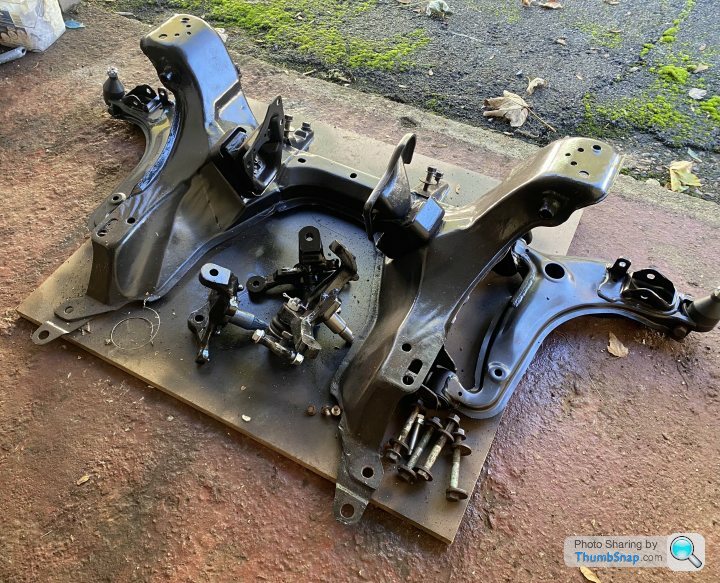
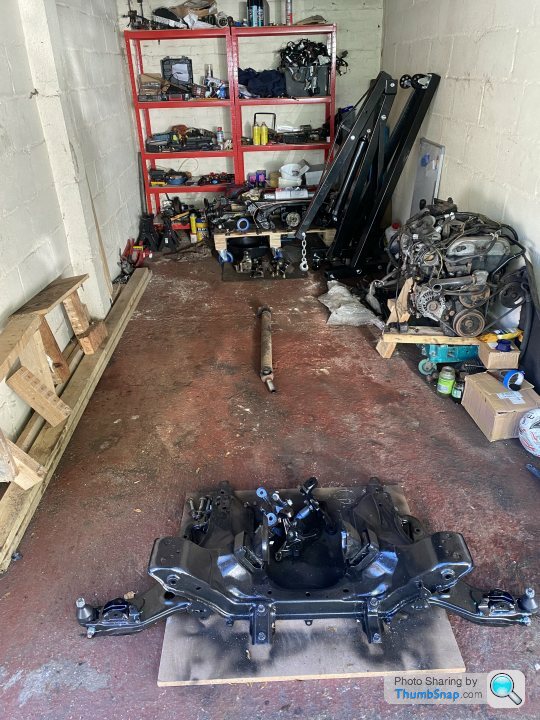
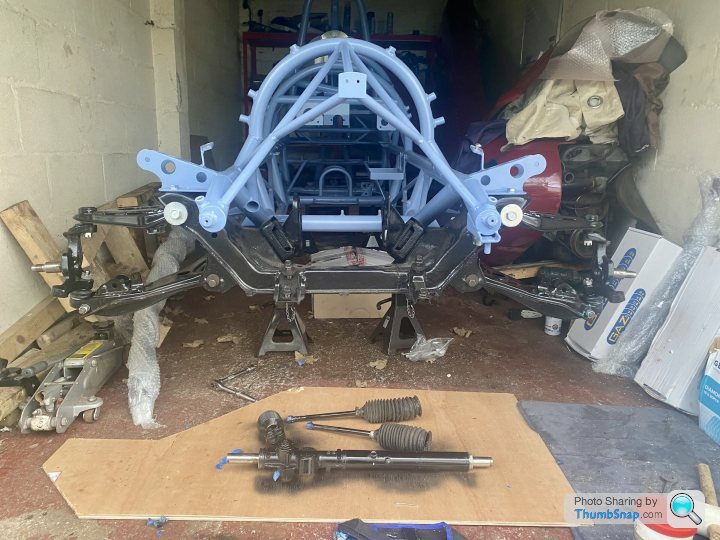
started on the front sub frame, finished grinding down the rust ( with safety glasses on!)
put rust converter on it ready for the hammerite
after my eye injury taking a bit longer to get better i’ve cleared the garage and have started again
have to refresh my memory of where i got up to and what bolt goes where
started on the front sub frame, finished grinding down the rust ( with safety glasses on!)
put rust converter on it ready for the hammerite
2hr today
sprayed the subframe underneath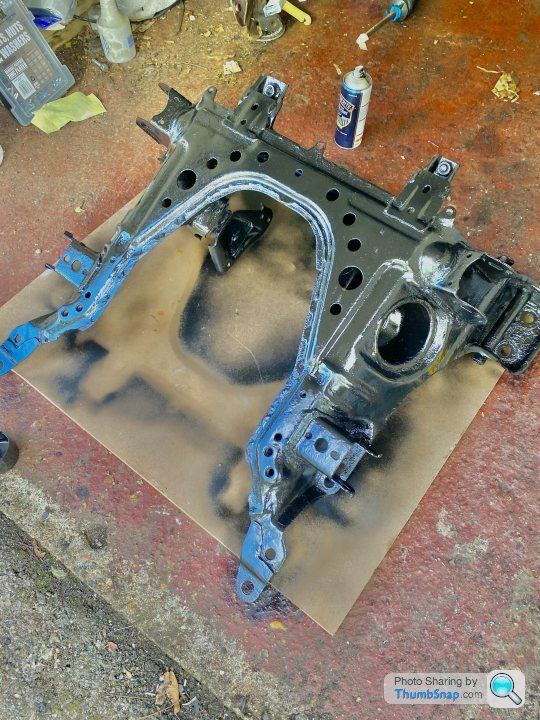
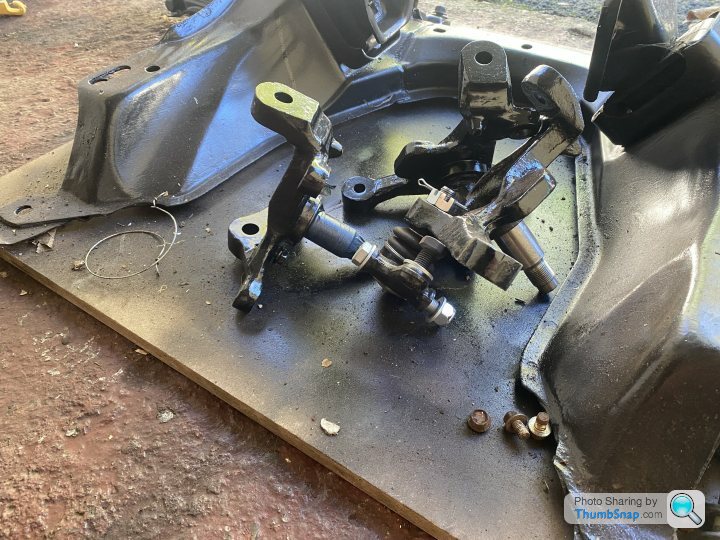
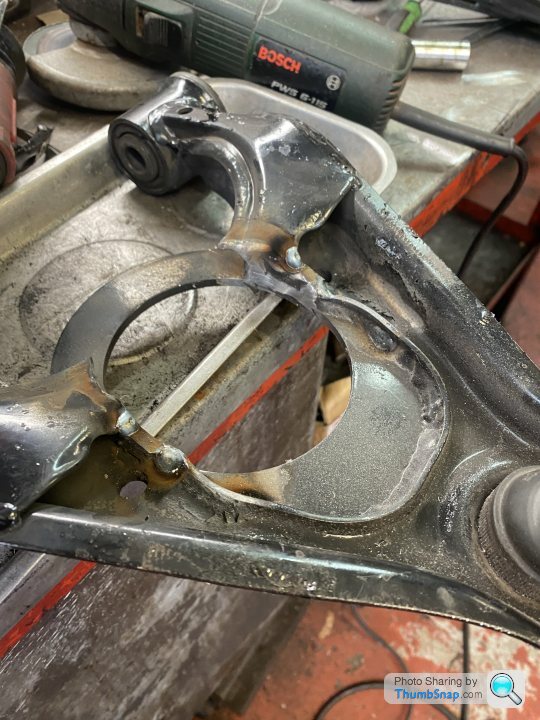
next was to grind down the second hand knuckle i bought from ebay
and the hubs
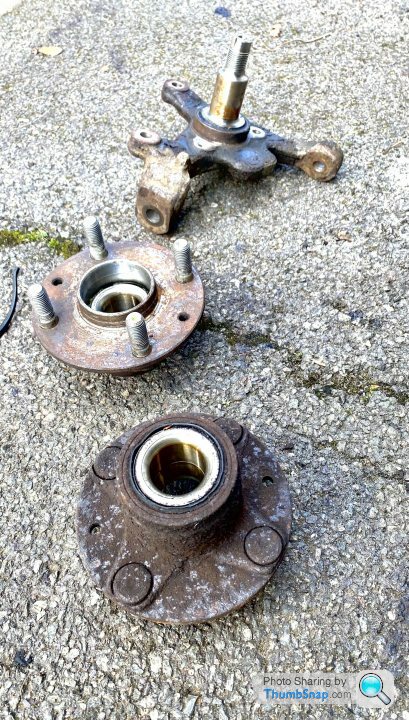
started cleaning up the hubs but i thought i would just buy new ones as they’re not very expensive
managed to snap off the last bolt which holds the dust shield , so a trip to my local garage to get it tapped out
sprayed the subframe underneath
next was to grind down the second hand knuckle i bought from ebay
and the hubs
started cleaning up the hubs but i thought i would just buy new ones as they’re not very expensive
managed to snap off the last bolt which holds the dust shield , so a trip to my local garage to get it tapped out
sooo, after a long summer with no work on the car due to family and work i’ve got back on to it,
bought a set of hubs from ebay, only needed one ,but couldn’t rember which side ! so a seller on ebay was doing a deal for both left and relight so i got them
got one all finished
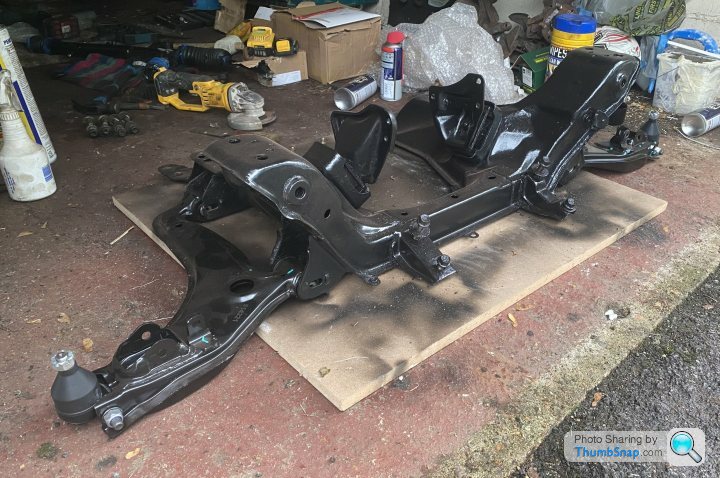
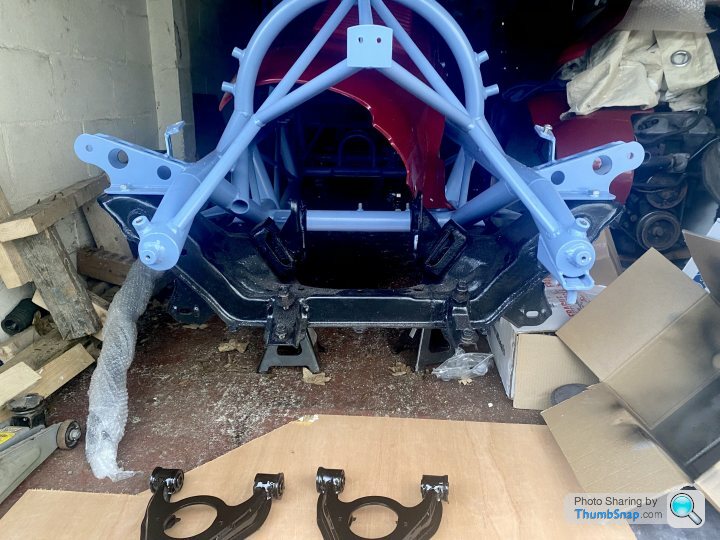
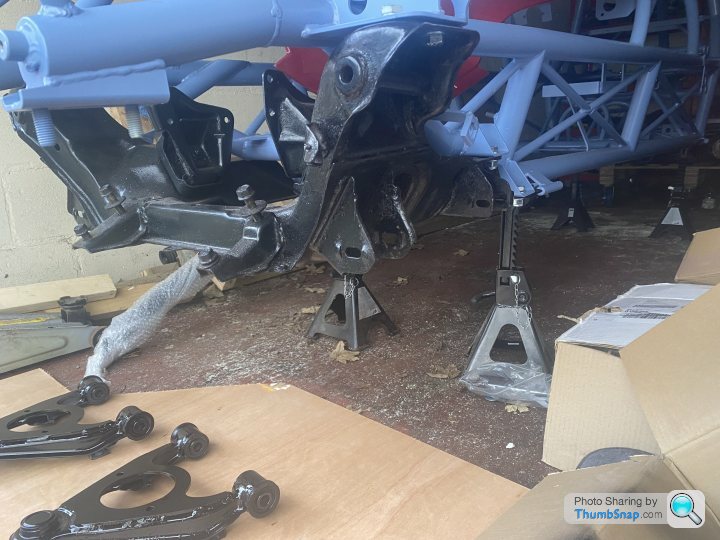
next was finish spraying the front sub frame
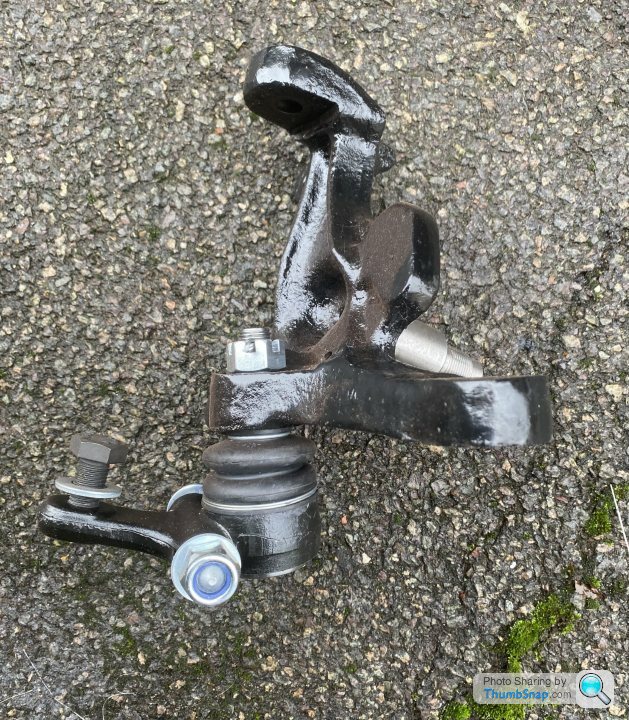
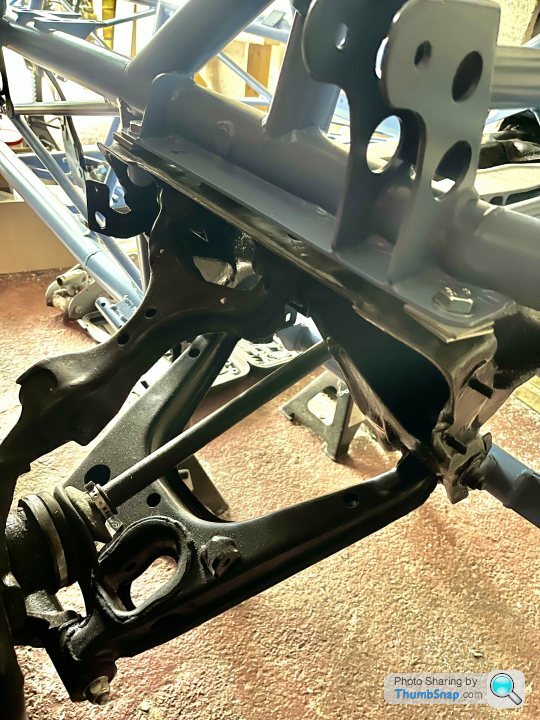
bought new lower arms , they come with ball joints pre fitted , i already bought some so they will be surplus
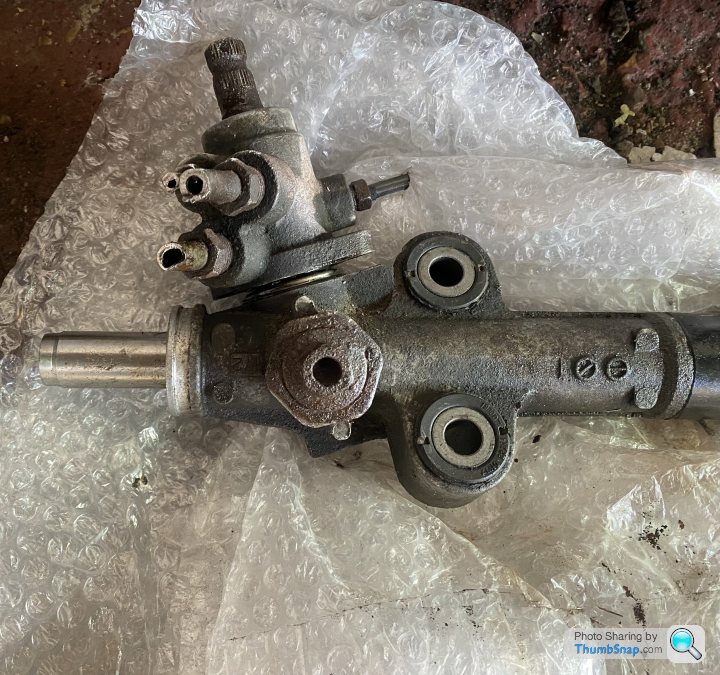
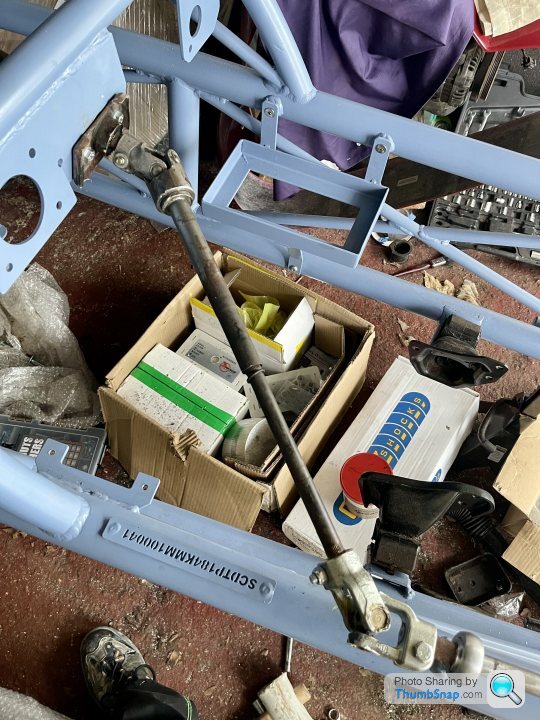
next was the steering rack
the build video doesn’t mention it really , but if you look the power steering is completely taken out , so i wasn’t sure if you delete everything, after watching another youtube video how to do it properly you have to open up the rack and cut off a metal ring inside
so i’ve bought another rack from ebay for £ 45 to have a go at it , if i can’t do it my local garage said they will do it for me
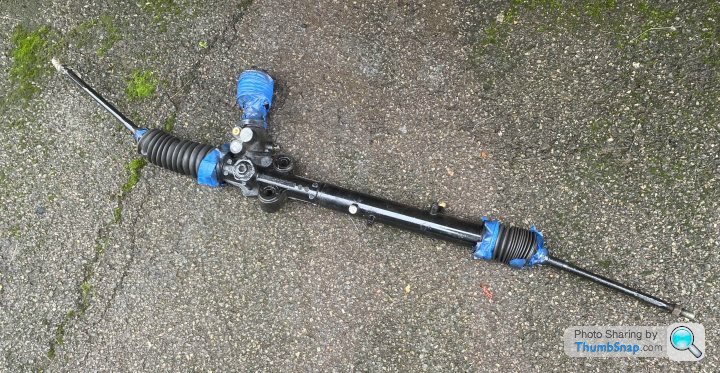
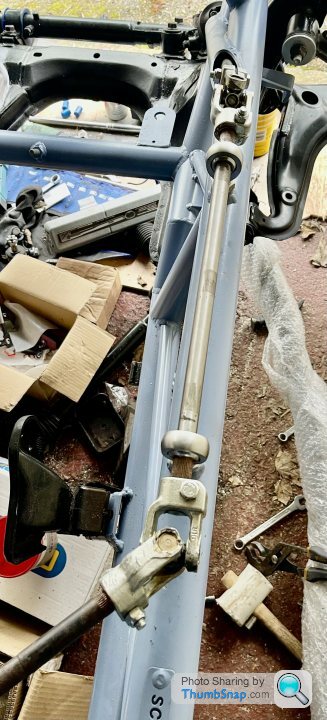
so i finished this rack first without the ring delete , i will open up the second hand one first before i do this one
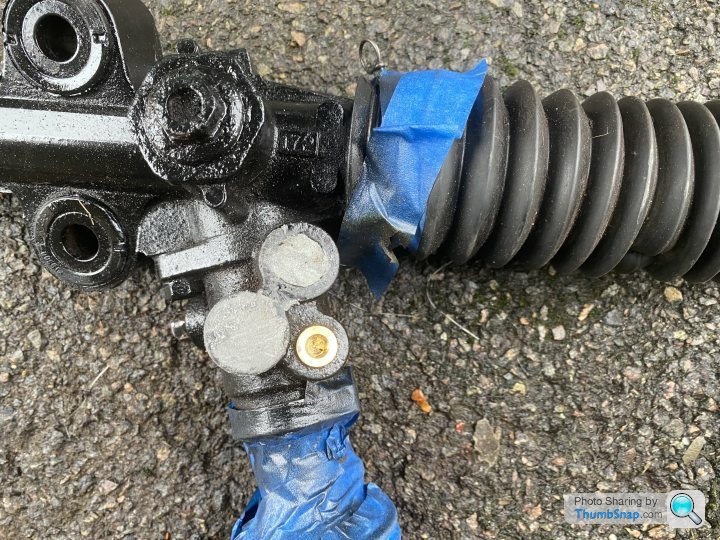
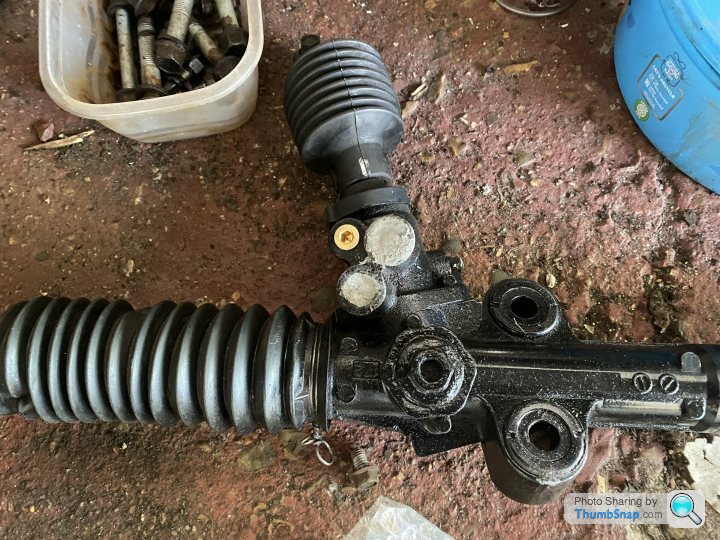
this is the holes you need to either plug up with bolts or just fill in with jb weld or similar, i got some metal putty from machine mart and it’s set solid once it gets mixed and air dried
front all sprayed up
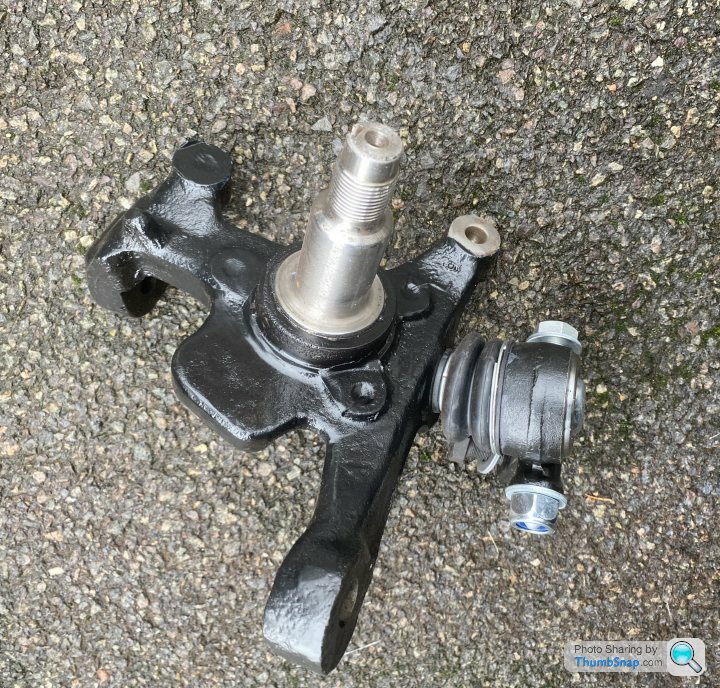
hubs done , even the ones i don’t need i’ve finished off

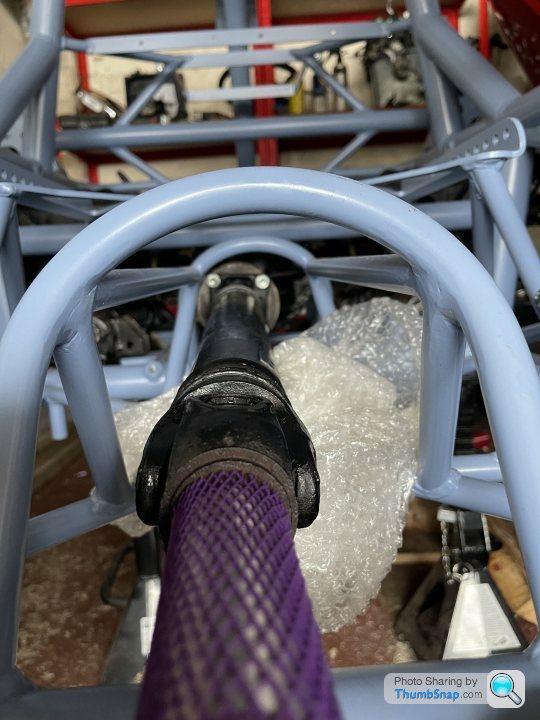
prop shaft ready for exchanging
second steering rack done, just got to re fit steering knuckle, bought a secondhand one from ebay for £45 so now have two without power steering
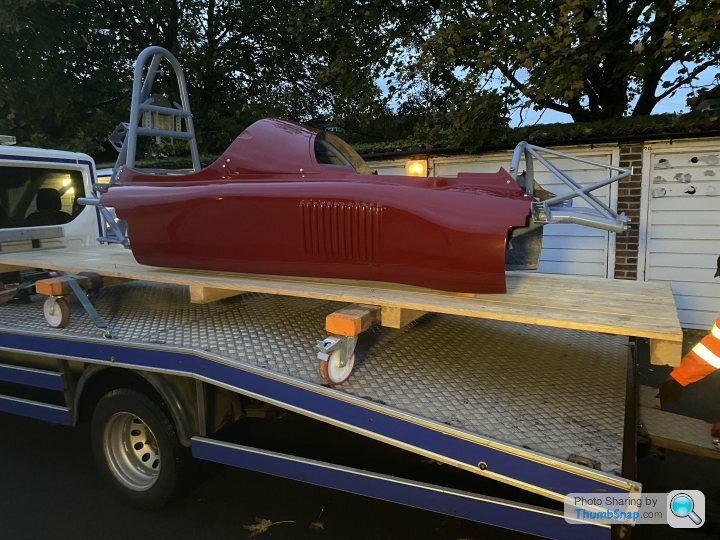
cleaned out the garage ,was getting messy and i need it clean for the delivery tomorrow ! that’s right, i’ve ordered the starter kit and wheels and suspension so i can get on with the next phase , getting it rolling
tuesdays delivery got cancelled,which was a bit unfortunate as i had booked the day off and primed a couple of mates to help with the frame
darren rung me and advised that it comes on a pallet and has wheels attached , he would need the wheels back ,so we need to set the frame on axle stands and trolly jack
so now delivery was today. , was told afternoon so i finished work at 12pm and waited for a call
driver called 1 hr before so he was due to arrive at my garage at 4.30 pm
managed to get hold of one of my mates who was available to help
the pallet is huge ! it’s about 15 ft long
so we had to cut off about 3 foot from the front and rear to get it into the garage
take front and rear clams off , screws holding on the wheels were rounded off ,so crow bar had to come out , doing this all in the dark with just phone torches to see what we were doing
the driver was very helpful ,so must pass on my thanks to him.
i’ll get better photos tomorrow of it crammed into a single garage when it’s daylight
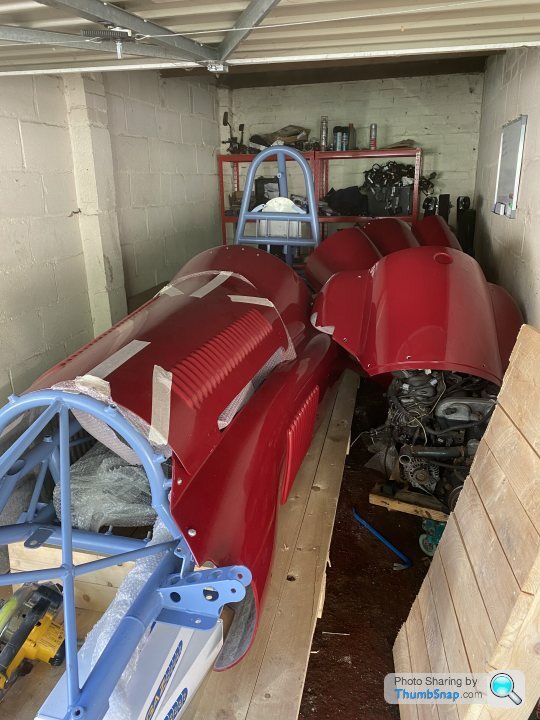
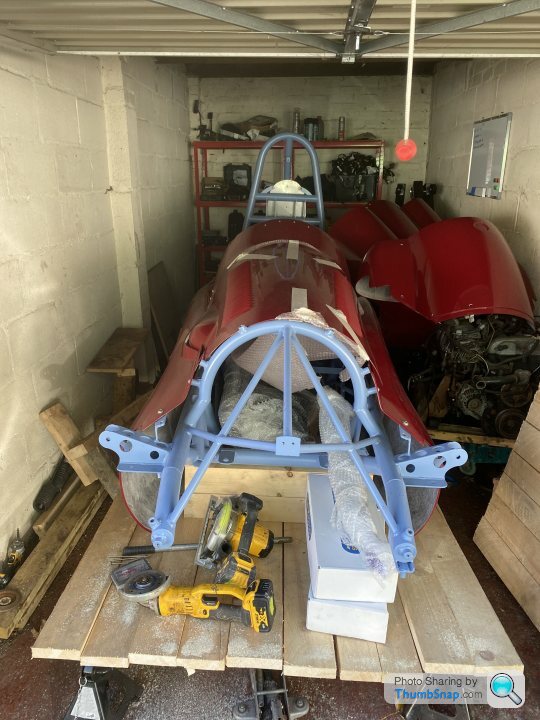
been awhile since i did anything as work with the run up to xmas was mega busy ,
got the chassis off the wooden pallet and on to axle stands ready for the second stage of building.
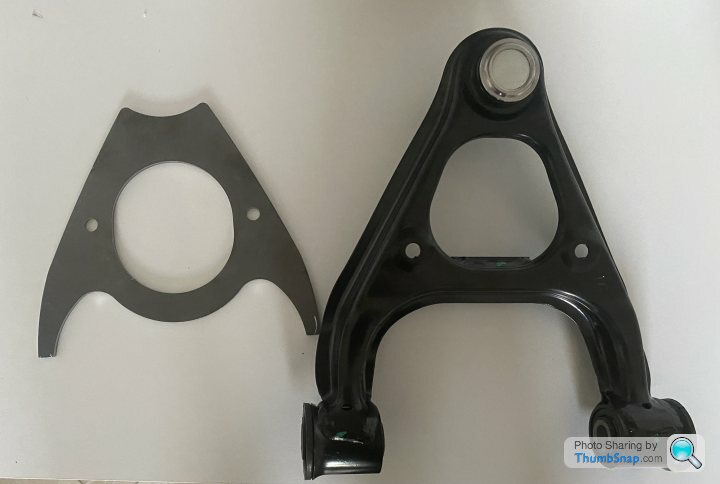
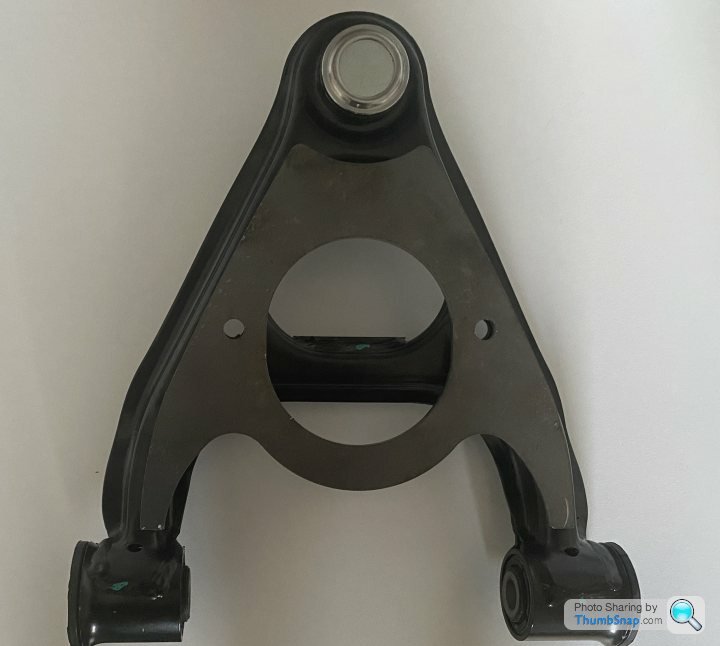
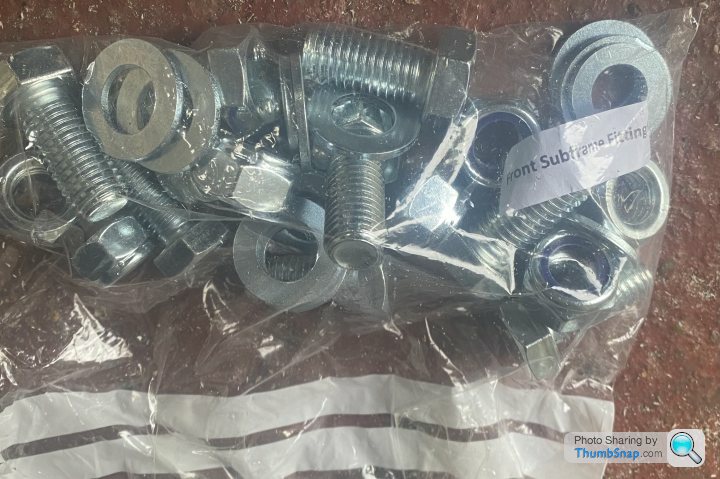
in the boxes of nuts and bolts etc was these round steel plates, not sure what they were for so called darren, it turns out that instead of them providing new top wishbones, which is mentioned in the build video,they now give you these plates to do yourself
i had to order new top wishbones because i thought i didn’t need the original ones.
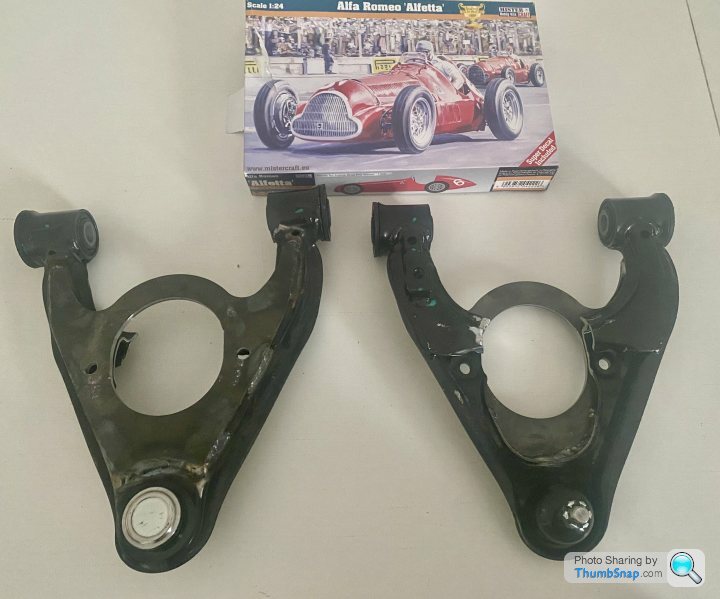
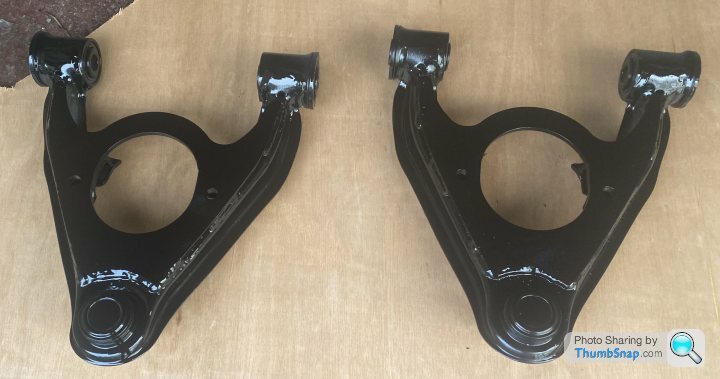
i have no welding skills ,never done it before ,so i asked my local garage to do them, he will do them for free when he had time, turns out it was this week ,he had them for ages and then closed for xmas.
they are done now and i went passed a charity shop that had this model airfix type car, so iam now building two cars !
got the chassis off the wooden pallet and on to axle stands ready for the second stage of building.
in the boxes of nuts and bolts etc was these round steel plates, not sure what they were for so called darren, it turns out that instead of them providing new top wishbones, which is mentioned in the build video,they now give you these plates to do yourself
i had to order new top wishbones because i thought i didn’t need the original ones.
i have no welding skills ,never done it before ,so i asked my local garage to do them, he will do them for free when he had time, turns out it was this week ,he had them for ages and then closed for xmas.
they are done now and i went passed a charity shop that had this model airfix type car, so iam now building two cars !

2hrs today
got a quite week this week at work so i went today to carry on with the front
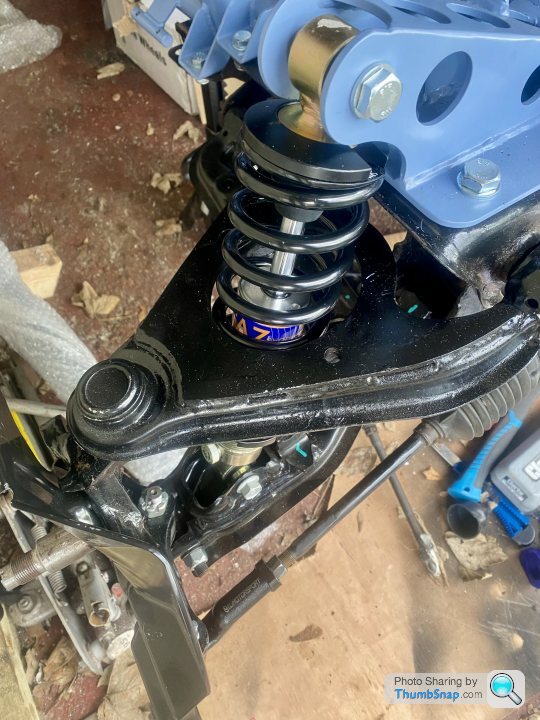
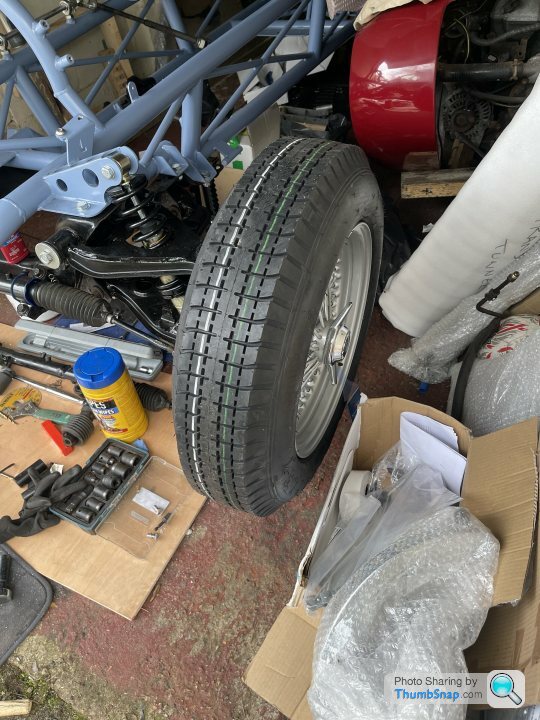
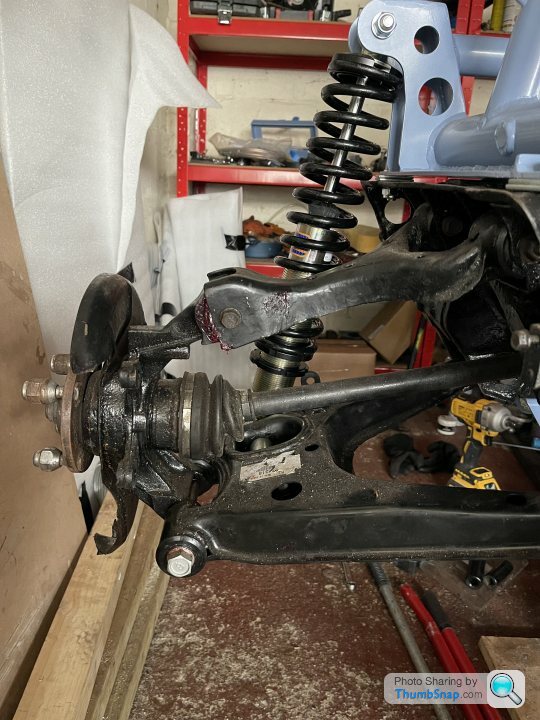
got the gaz shocks fitted today on the front
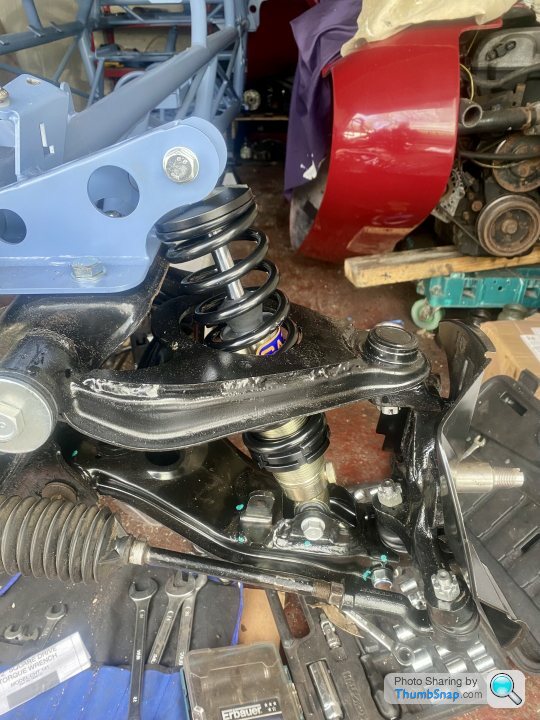
next was new hubs fitted
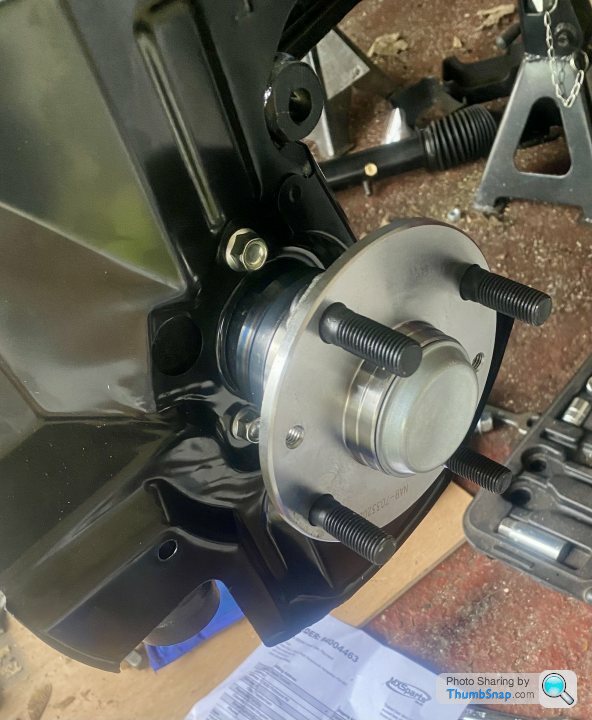
followed by fitting the new brake discs and hub adapters
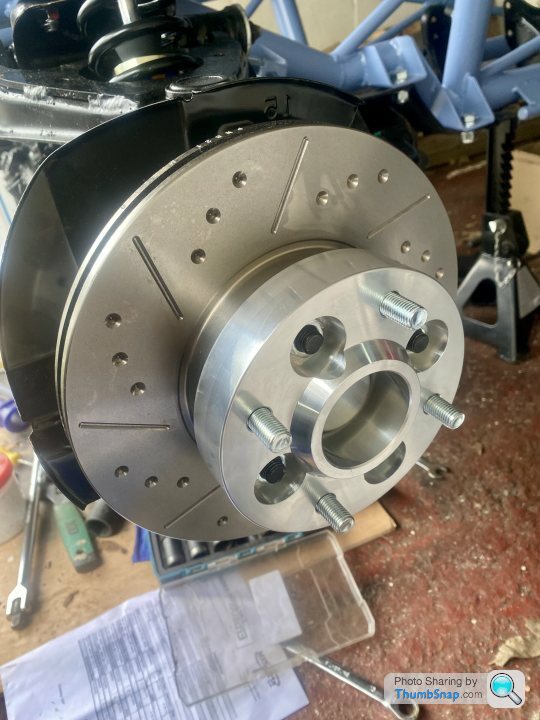
started fitting front callipers but i only bought two new calliper bolts ,so only can do one side
ordered two more for the front and four for the rear as they are different for front and rear
also tourqued up the front bolts and nuts everywhere and put on the split pins
30 mins
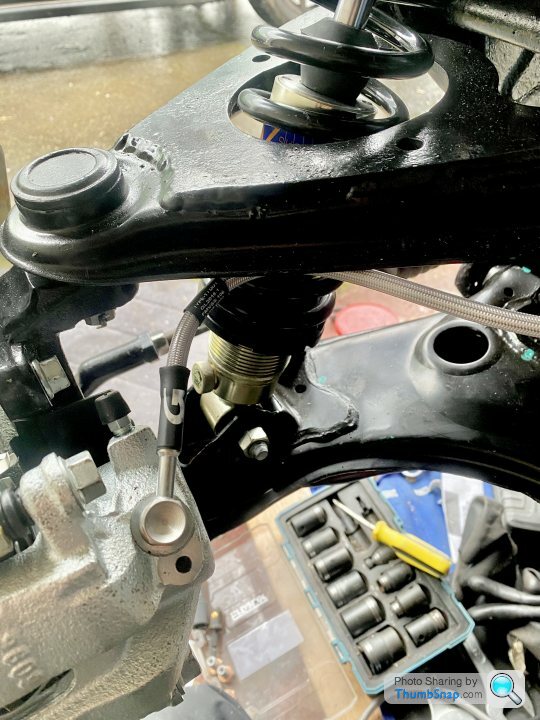
rained off work so went to the garage to put on the other two calliper bolts on, also fitted the brake pads and braided hoses
last week i went to the dowsett unit to look at a finished tipo and the demonstrator chassis ,
as i have never seen a finished one, i only bought my kit unseen , only from the website and build youtube
darren showed me all that i needed to see and answered a few unknown questions i had , very helpful and they have a good set up there
i spent about 2 hrs i think .
i bought the brake kit and the closing panel set while i was there also
30 mins
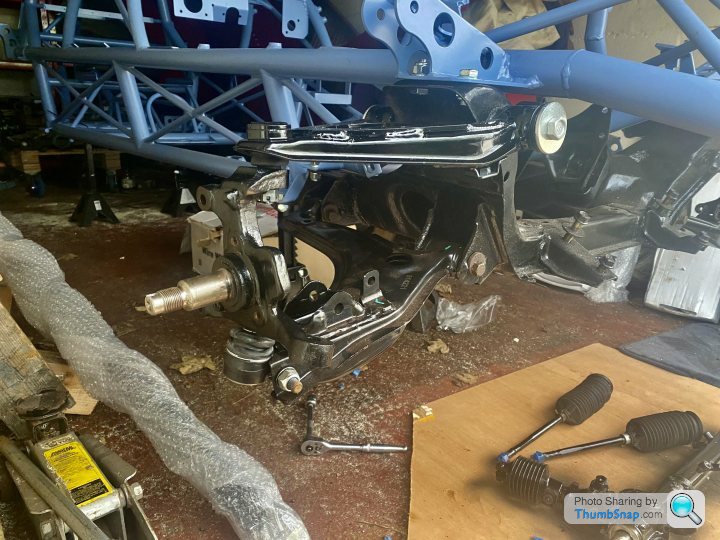
went to the car today during my lunch break to cut off the metal wings from the steering rack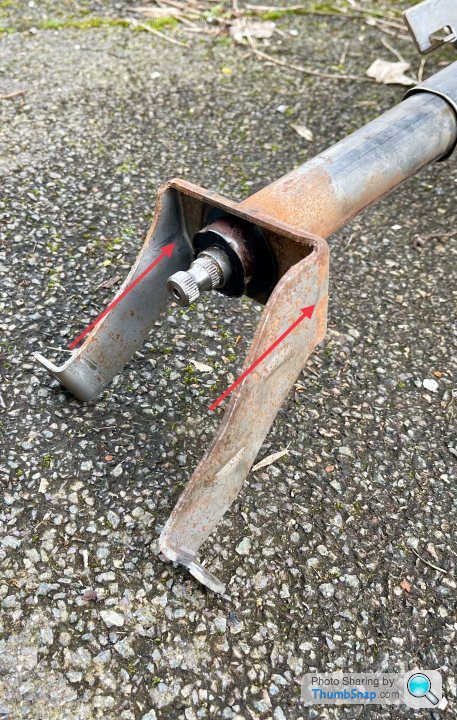
next i fitted it to the chassis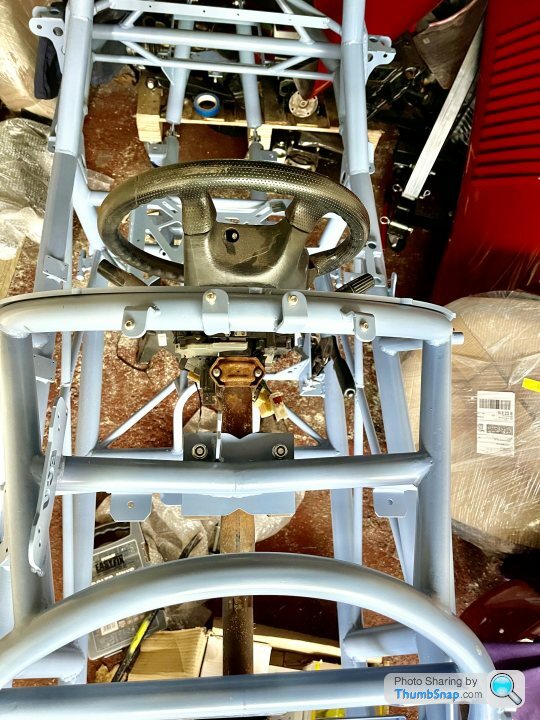
done it like this as i haven’t taken off my steering wheel yet, i need to hook up the steering rods to turn the wheels to get it out of the garage, plus i have something to pull against when i need the wheel off
i still have to drill out the lugs that hold on the indicator stalk and the ignition system which will be re used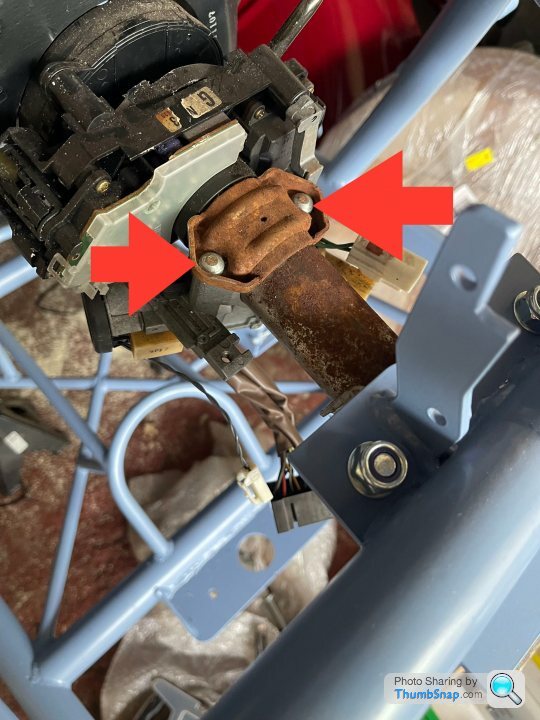
2 hrs
drilled out the two nuts that hold on the ignition barrel, was quite easy to do ,only broke one drill bit
next was to get the steering rack on, it took ages to do ,i put the expandable steering rack all the way in and worked backwards towards the front(if that make sense!) then once everything is in , you tap the rack back up to the steering wheel
swearing at it helped
still can’t get off the steering wheel from the hub , every time i tug back on it ,it moves the chassis on the axle stands, so i’ll remove it once the car is on the ground
30 mins
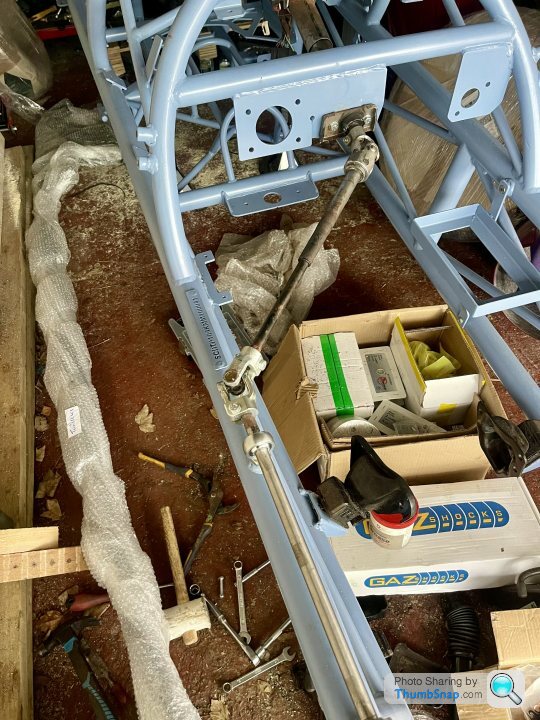
Went to take the steering wheel off today
Had to tie a rachet strap around the wheel and onto the rear frame to get it off as it wasn’t budging with me yanking on it.
Once it’s off the indicator hub slides off
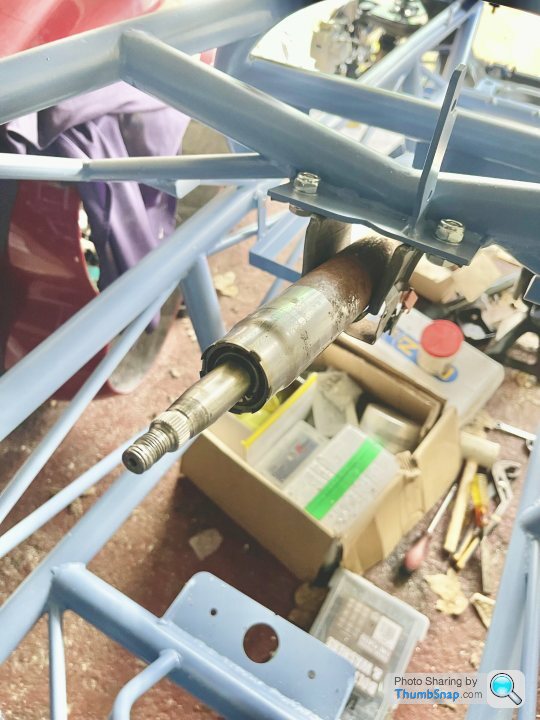
Took a couple of better pics of the union joints also
The collapsible column will have to come off to get the closing panel on so I can straighten it then
Went to take the steering wheel off today
Had to tie a rachet strap around the wheel and onto the rear frame to get it off as it wasn’t budging with me yanking on it.
Once it’s off the indicator hub slides off
Took a couple of better pics of the union joints also
The collapsible column will have to come off to get the closing panel on so I can straighten it then
2 hrs
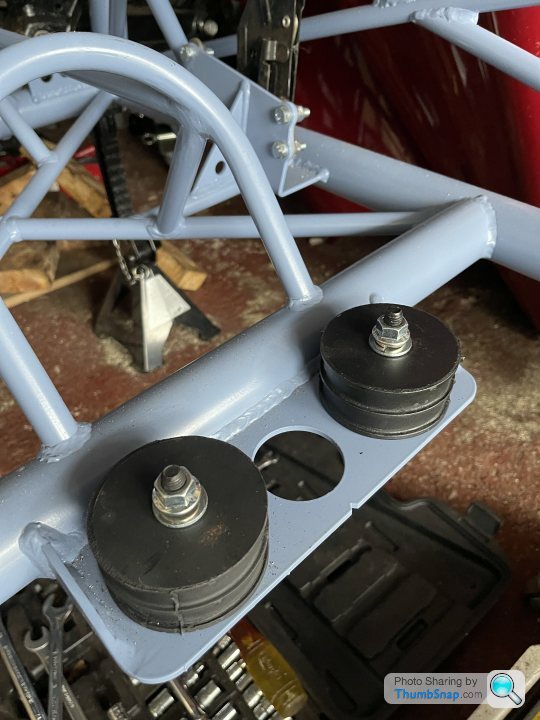
had a couple of hours on it on friday, had a brain fart day, i got my coil over clamps from amazon, they were to wide to clamp the springs, so went to machine mart and got a better set
these fitted but you couldn’t compress the spring and then fit it over the shock.
i thought i needed a motorbike coil over clamp as the tipo coil overs and shocks are small in diameter
went to my local garage and they were looking at them for a bit ,then he just pulled the top up and the springs went on !!
even he was baffled for a bit so it wasn’t just me. during all this one of the top hat washers from the coil overs got lost! i searched everywhere for about 1 hr ,only for it to turn up when my misses turned out my work trousers for the wash !
so i fitted rear shocks and springs,
differential was next , just 4 bolts
gear box bobbins
rear discs and pcd adapters
gear box bobbins
rear suspension on
diff in
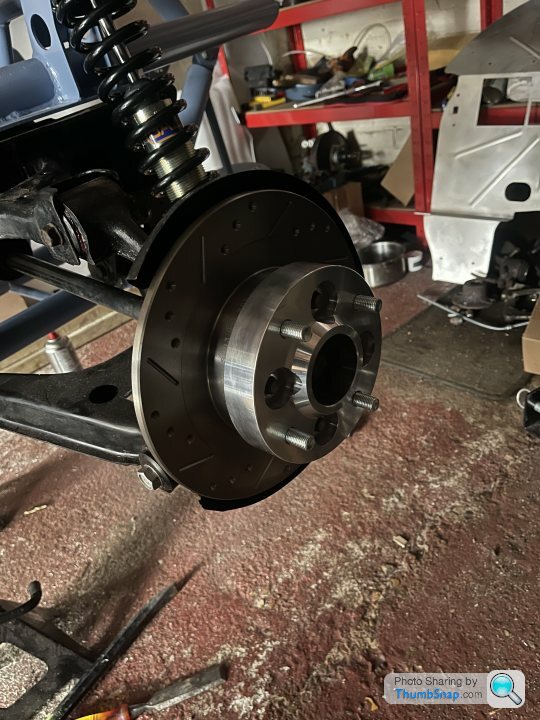
rear discs
had a couple of hours on it on friday, had a brain fart day, i got my coil over clamps from amazon, they were to wide to clamp the springs, so went to machine mart and got a better set
these fitted but you couldn’t compress the spring and then fit it over the shock.
i thought i needed a motorbike coil over clamp as the tipo coil overs and shocks are small in diameter
went to my local garage and they were looking at them for a bit ,then he just pulled the top up and the springs went on !!
even he was baffled for a bit so it wasn’t just me. during all this one of the top hat washers from the coil overs got lost! i searched everywhere for about 1 hr ,only for it to turn up when my misses turned out my work trousers for the wash !
so i fitted rear shocks and springs,
differential was next , just 4 bolts
gear box bobbins
rear discs and pcd adapters
gear box bobbins
rear suspension on
diff in
rear discs
20 mins today
wanted to unwrap the differential fitting kit and work it out where it goes, the build video doesn’t really show it properly ,you see it briefly
i emailed dowsett how to do it and they replied straight away explaining it
it looks like i might have to take off the rear subframe to get a section off, this is what was confusing me (‘red arrow ) really don’t want to take it all apart !
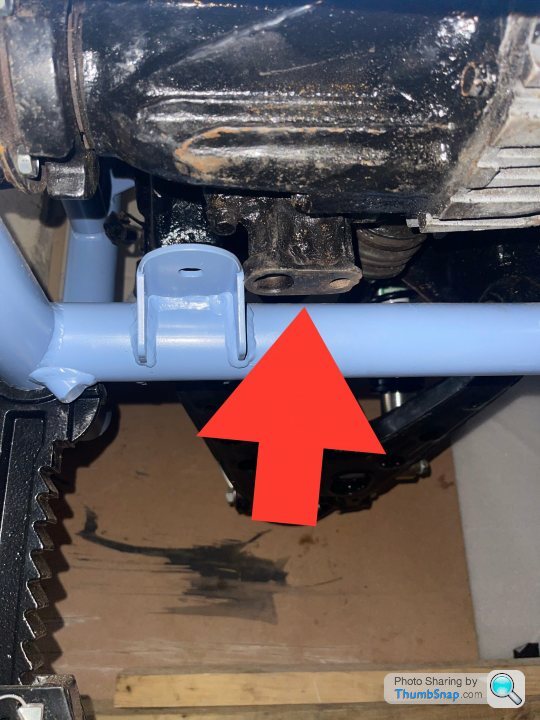
this has to be removed, the nut at the front looks rounded to me today so i’ll have to work out how to get it off
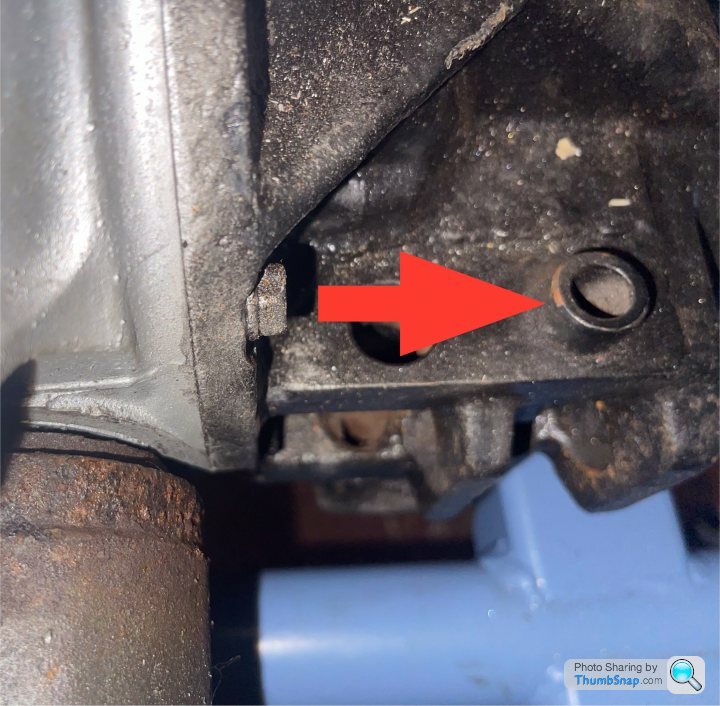
this top hat sleeve has to come off also ,there’s two but ones already out
wanted to unwrap the differential fitting kit and work it out where it goes, the build video doesn’t really show it properly ,you see it briefly
i emailed dowsett how to do it and they replied straight away explaining it
it looks like i might have to take off the rear subframe to get a section off, this is what was confusing me (‘red arrow ) really don’t want to take it all apart !
this has to be removed, the nut at the front looks rounded to me today so i’ll have to work out how to get it off
this top hat sleeve has to come off also ,there’s two but ones already out
Edited by tricky360 on Tuesday 19th March 18:06
Gassing Station | Kit Cars | Top of Page | What's New | My Stuff