My "building a cobra" thread
Discussion


Megaflow said:
Sorry, I am confused. The title seems to suggest you are building an AC Cobra kit, but with a Z3 donor and the kit is just two fibre glass moldings. Where is the rest, chassis, etc?
The kit just replaces the rear panels (quarters/boot/bumper) and also the front end (bonnet/wings/bumper) The rest of the car remains the same, including the doors. Mont Blanc said:
Megaflow said:
Sorry, I am confused. The title seems to suggest you are building an AC Cobra kit, but with a Z3 donor and the kit is just two fibre glass moldings. Where is the rest, chassis, etc?
The kit just replaces the rear panels (quarters/boot/bumper) and also the front end (bonnet/wings/bumper) The rest of the car remains the same, including the doors. There's 7 mouldings in all, one of which is only required if making a top-mount fuel filler cap arrangement.
Biggy Stardust said:
Mont Blanc said:
Megaflow said:
Sorry, I am confused. The title seems to suggest you are building an AC Cobra kit, but with a Z3 donor and the kit is just two fibre glass moldings. Where is the rest, chassis, etc?
The kit just replaces the rear panels (quarters/boot/bumper) and also the front end (bonnet/wings/bumper) The rest of the car remains the same, including the doors. There's 7 mouldings in all, one of which is only required if making a top-mount fuel filler cap arrangement.
Oldie but a goodie...I remember it first time around.
https://www.amazon.co.uk/Car-Born-Kit-DVD/dp/B0001...
https://www.amazon.co.uk/Car-Born-Kit-DVD/dp/B0001...
Edited by Milkyway on Tuesday 13th February 15:21
Today's job in between rainstorms was to make a few holes for the front indicators & stitch drill for the headlights. I make it about 90 holes each- 2 drill bits were worn out in the process.
Having seen the splintering of the 22mm hole using a spade bit I'll move to using a cone bit for the rest of the larger holes.
Scrump asked about lessons learned from the last cobra- one such lesson is to keep the 2 offcuts from the headlights as there will be a good use for them later. The terrible marking & drilling of the indicator has now been refilled & redrilled- I have no idea how I did it so badly first time.
Edited by Biggy Stardust on Wednesday 14th February 13:12
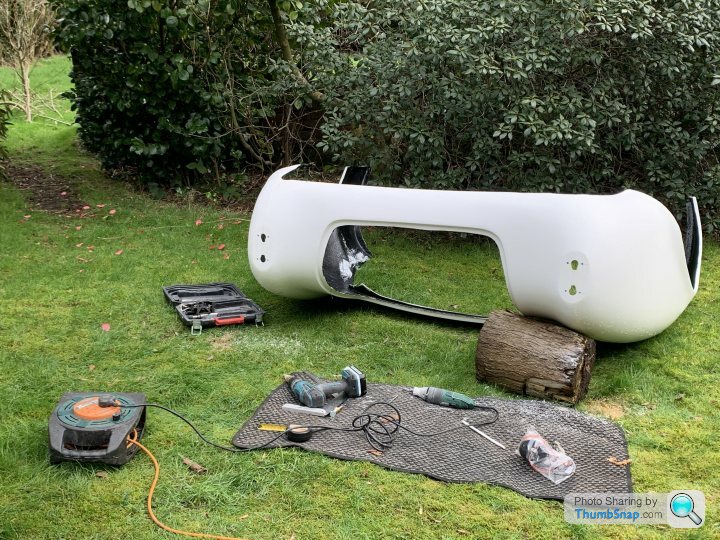
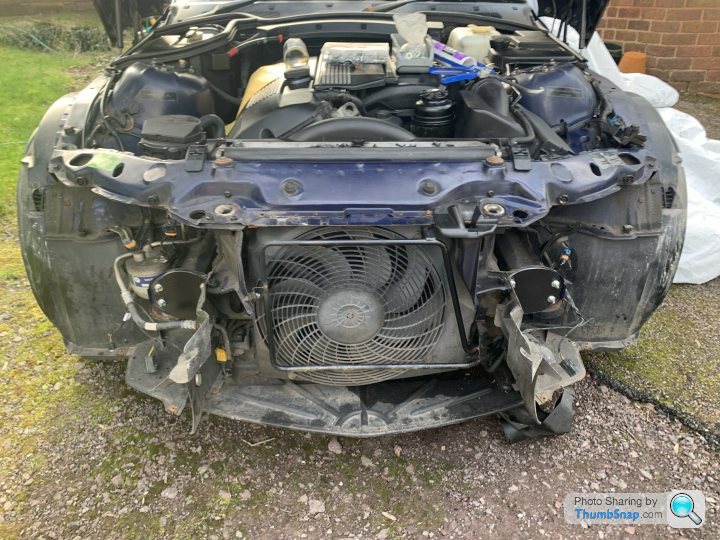
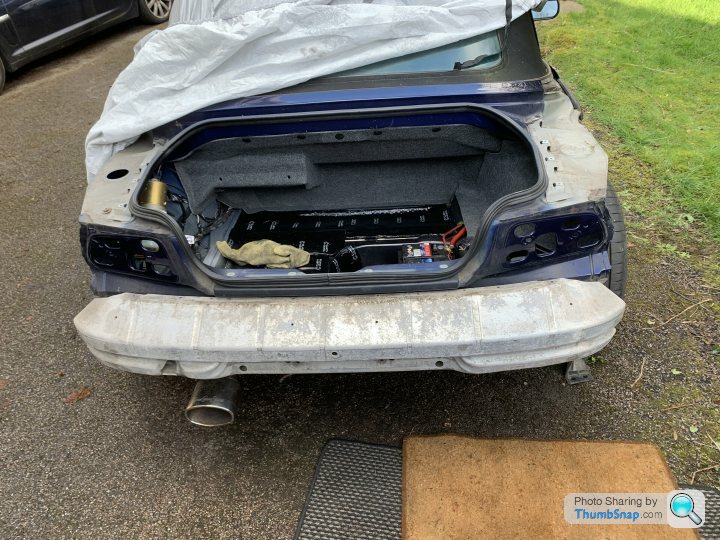
The next stage was removing the front bumper assembly. The outer cover was held on with about 20 little plastic clips, some of which were practically invisible. Two of the plastic clips had been replaced with rivets for some bizarre reason & needed to be drilled out; I love people who bodge repairs.
There were also a few screws where 25 years of exposure to the elements had pretty much rusted them into place but a mixture of WD40 & brute force got them out. I now have a bumper & reinforcing assembly for sale.
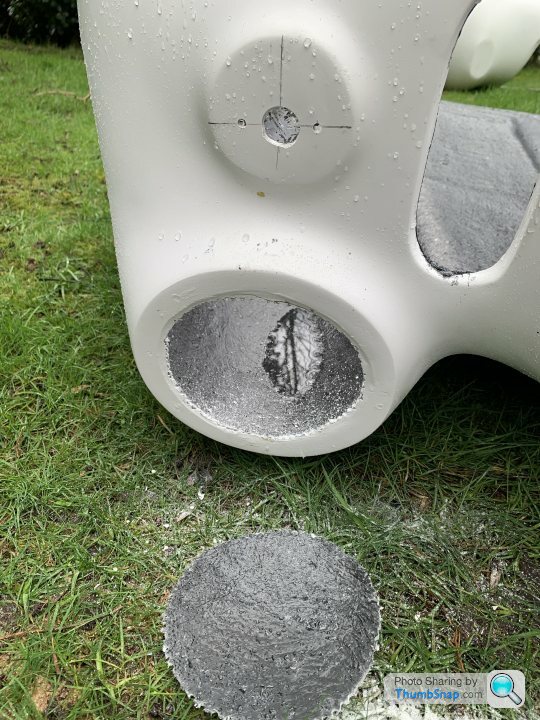
I mentioned in a previous post that the fibreglass circles cut for the headlights would be used at a later point: this is that point. The two circles either side of the fan will be a rust trap. The two circles will be trimmed to size & bolt holes drilled. After the tubes are cleaned, galv sprayed & painted the circles will get a mastic 'gasket' and be bolted into place to seal the tubes.
There were also a few screws where 25 years of exposure to the elements had pretty much rusted them into place but a mixture of WD40 & brute force got them out. I now have a bumper & reinforcing assembly for sale.
I mentioned in a previous post that the fibreglass circles cut for the headlights would be used at a later point: this is that point. The two circles either side of the fan will be a rust trap. The two circles will be trimmed to size & bolt holes drilled. After the tubes are cleaned, galv sprayed & painted the circles will get a mastic 'gasket' and be bolted into place to seal the tubes.
Biggy Stardust said:
I mentioned in a previous post that the fibreglass circles cut for the headlights would be used at a later point: this is that point. The two circles either side of the fan will be a rust trap. The two circles will be trimmed to size & bolt holes drilled. After the tubes are cleaned, galv sprayed & painted the circles will get a mastic 'gasket' and be bolted into place to seal the tubes.
Not the most exciting job I'll ever do but pleasing nevertheless.
A glance into my future reveals a great deal of cleaning.
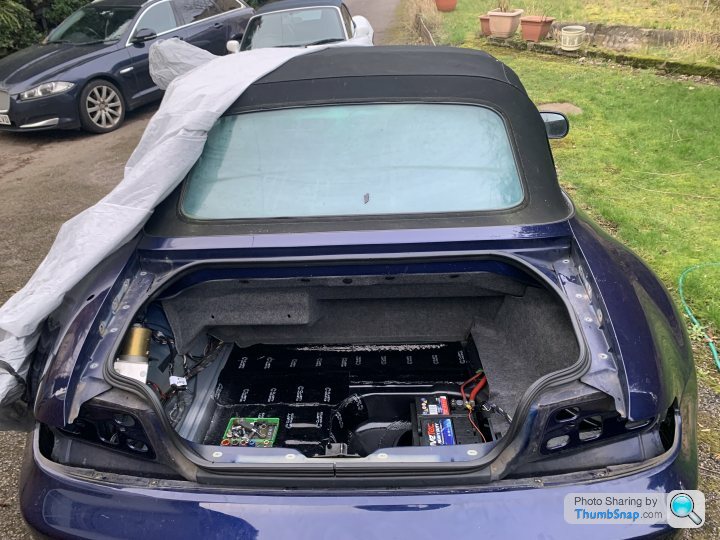
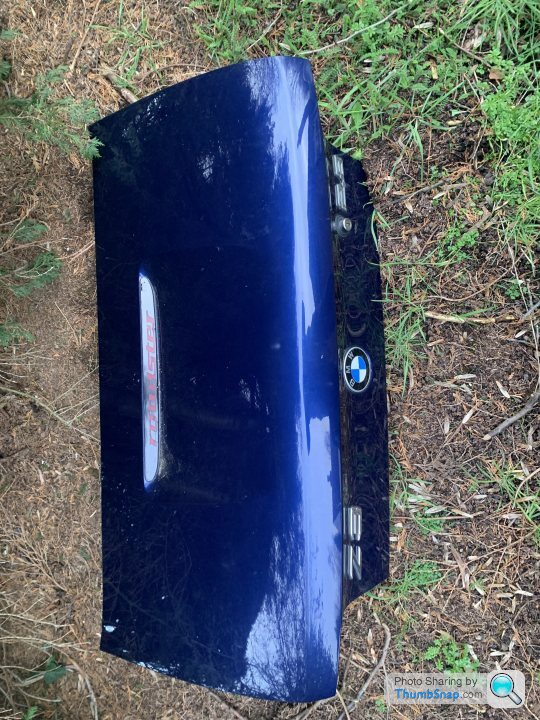
As I had some time & was sick of cleaning I decided to take the bootlid off as this is one of the steps prior to removing the rear wings. Detach the two props, undo six bolts, chop the lid wiring and voila- done.
Edited by Biggy Stardust on Monday 19th February 16:28
Todays effort was to put the bonnet right way up on a table & chop out the air scoop. Stitch drilling that many holes is a bit of a pain but just going straight in with the saw is far too risky for my taste. The fibreglass has completely ruined a drillbit in the process.
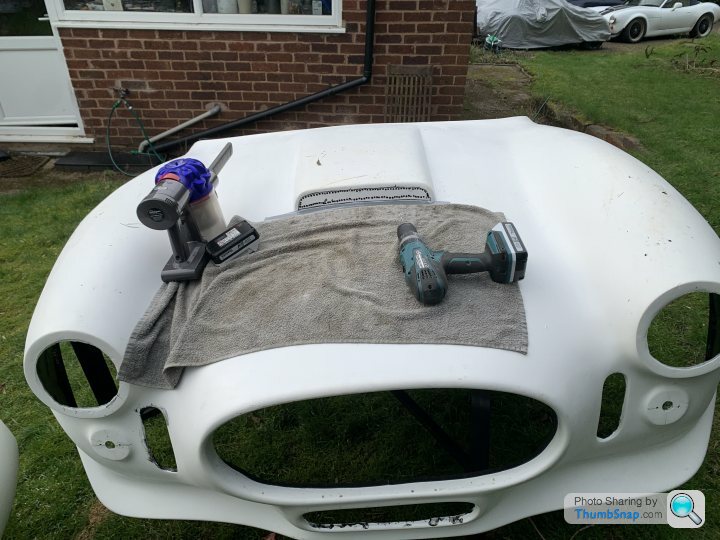
The purpose of the towel was to prevent the drill chuck from damaging the rest of the bonnet when drilling.
Next a very gentle hack in with the saw to remove the centre piece.
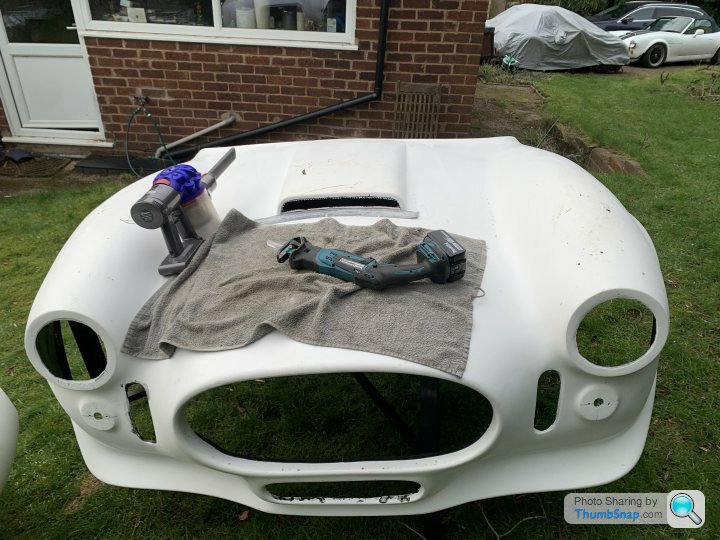
The next step will be smoothing with the big dremel & the detail sander but as I've spent a long time drilling & I'm conscious of the joys that vibration white finger can bring I'll save that to another day.
The purpose of the towel was to prevent the drill chuck from damaging the rest of the bonnet when drilling.
Next a very gentle hack in with the saw to remove the centre piece.
The next step will be smoothing with the big dremel & the detail sander but as I've spent a long time drilling & I'm conscious of the joys that vibration white finger can bring I'll save that to another day.
Although I've marked the bonnet centreline, the badge holes don't actually lie on this line; that would make the cobra seem to be leaning forward. Instead, the upper hole has its right edge on the line and the lower hole its left edge. A tiny detail that doesn't really matter but it matters to me.
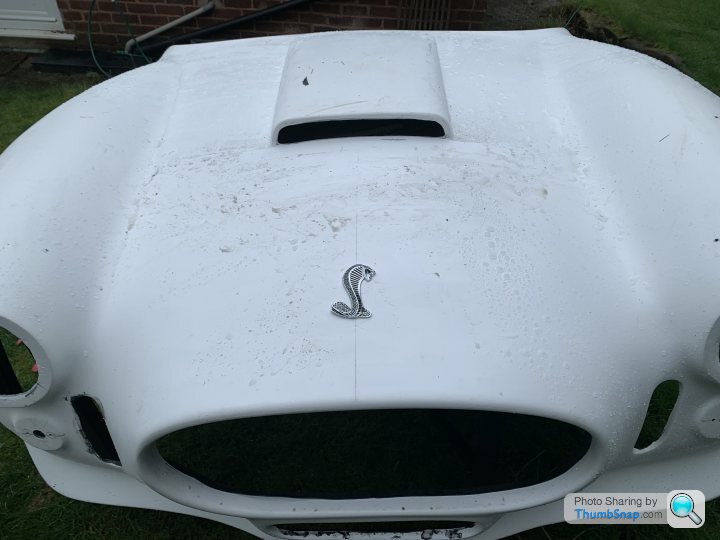
Bonnet scoop now mostly smoothed.
Bonnet scoop now mostly smoothed.
Edited by Biggy Stardust on Wednesday 21st February 14:37
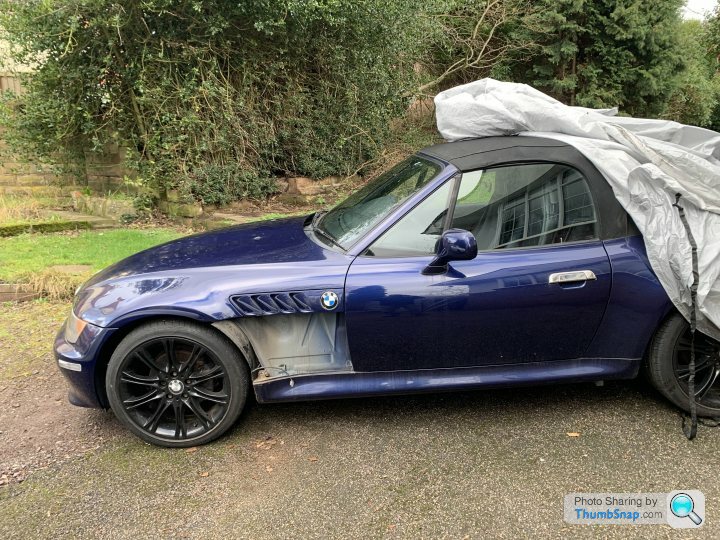
Apart from drilling a couple of holes in the bumper for spotlights the main job today was removal of one of the rear wings.
To do this I had to remove the arch liner; to do this I needed to remove the wheel. This is where the problems started:
A couple of days ago I'd established that every wheelnut on the car was so tight that I couldn't undo them. Not with socket set, not with spider wheelbrace, not with either of my impact guns nor my pneumatic wrench. Fortunately a friend loaned me the biggest breaker bar I'd ever seen. Even with 100+ kg of me standing on the end of it the nuts wouldn't budge. Finally, fearing sheared bolts I started jumping up & down on the bar, at which point there was a horrible groaning noise on the bolts & they eventually freed.
I found tiny remnants of copperslip on some of the bolts so presume that rather than being corroded into place they'd simply been overtightened by some ham-fisted Kwikfit apprentice or similar.
A quick inspection shows a surprising lack of rust on the bits I'll be keeping. The suspension has seen better days but as I'll eventually be replacing it that won't be a problem.
Then removal of a couple of rusted bolts, a little wiggling & the arch liner came free. Five minutes with a torch found the remaining bolts; I had to chisel away some paint before the socket would fit on them plus some of the bolts were an utter nightmare to access but eventually the wing would come away. Sometime in the past a previous owner had seen fit to apply plenty of tiger seal to the top edge and so an extra couple of minutes making sure nothing got bent during removal.
I started some cleanup but rain threatened to stop play so the wheel's back on, as is the cover. I'll continue another day.
Edited by Biggy Stardust on Friday 23 February 14:58
Another day, another corner.
The wheel came off easily enough now that I'd freed everything with the big breaker bar and the arch liner removal just needed a couple of bolts to be freed from where they'd more or less rusted into place. What fun.
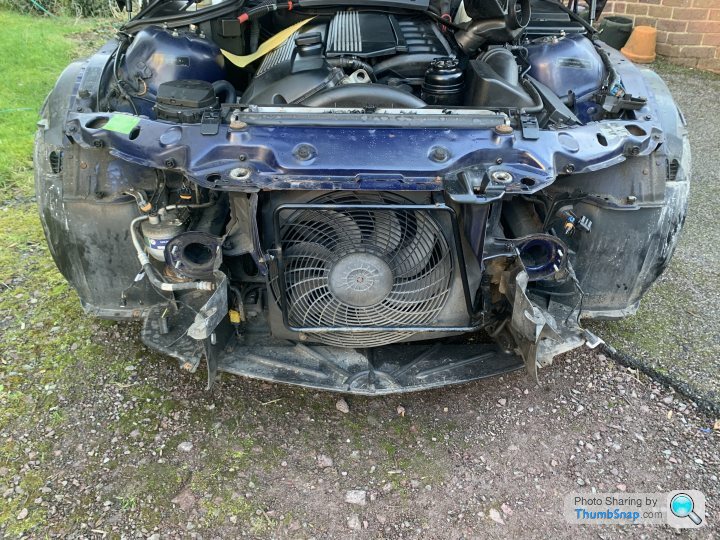
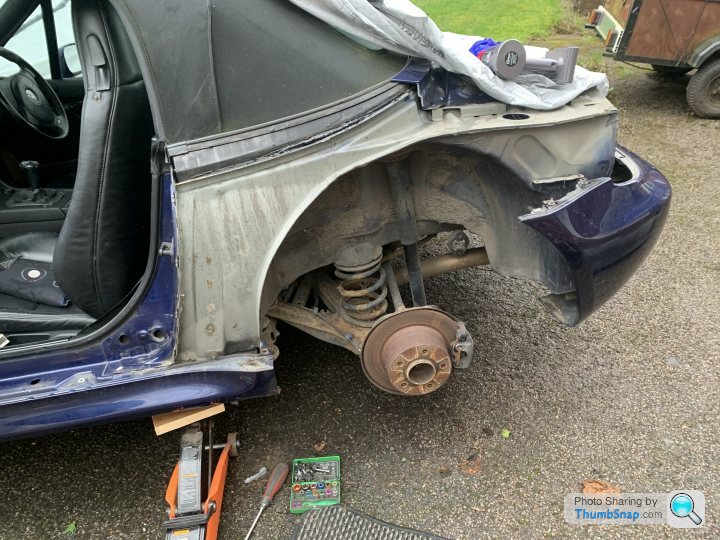
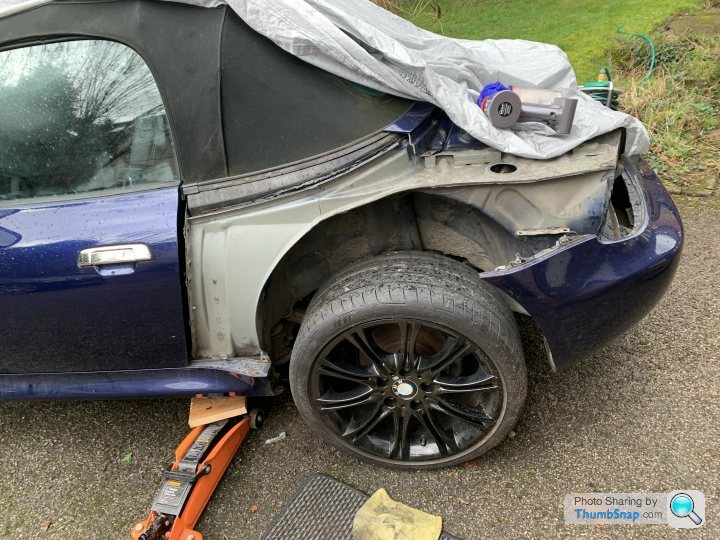
For removal of the rear wing I encountered more rusted bolts in inaccessible locations. I also finished up having to remove the entire bumper support frame in order to access 2 small plugs that would otherwise be impossible to remove. Eventually the plastic bumper cover came away.
In the process I uncovered the two big steel weights that BMW see fit to attach to the back of the car.
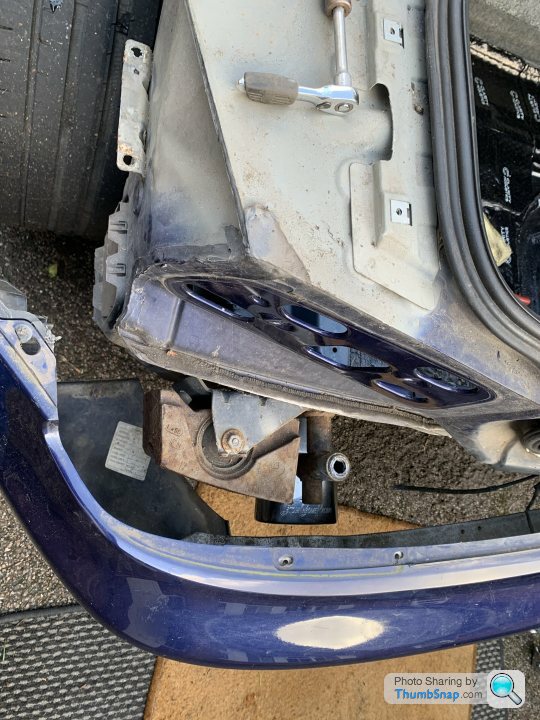
At 6.5kg each there was no question about it; unbolt, remove & throw away. 13kg is a huge weight saving on a car this light. This is on top of the 110kg saving on the body panels & 10kg on the spare wheel & carrier.
In order to remove the sill I needed to remove the front wing as well. It was pretty much rotten at the bottom so not worth saving. This sill came off with great difficulty due to the amount of hammerite & waxoyl gluing it into place but eventually it all came away.
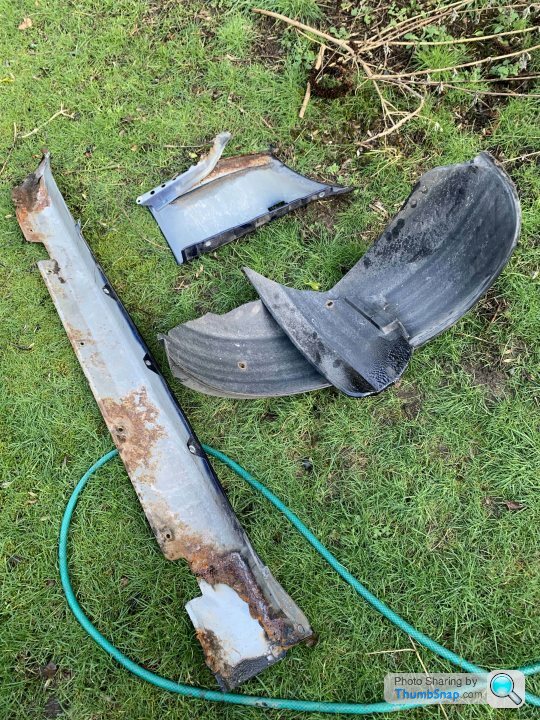
And I'm left with this & a lot of cleaning. Tomorrow might see a quick blast with the jetwash.

The wheel came off easily enough now that I'd freed everything with the big breaker bar and the arch liner removal just needed a couple of bolts to be freed from where they'd more or less rusted into place. What fun.
For removal of the rear wing I encountered more rusted bolts in inaccessible locations. I also finished up having to remove the entire bumper support frame in order to access 2 small plugs that would otherwise be impossible to remove. Eventually the plastic bumper cover came away.
In the process I uncovered the two big steel weights that BMW see fit to attach to the back of the car.
At 6.5kg each there was no question about it; unbolt, remove & throw away. 13kg is a huge weight saving on a car this light. This is on top of the 110kg saving on the body panels & 10kg on the spare wheel & carrier.
In order to remove the sill I needed to remove the front wing as well. It was pretty much rotten at the bottom so not worth saving. This sill came off with great difficulty due to the amount of hammerite & waxoyl gluing it into place but eventually it all came away.
And I'm left with this & a lot of cleaning. Tomorrow might see a quick blast with the jetwash.
Edited by Biggy Stardust on Tuesday 19th March 22:51
Due to an unfortunate combination of poor weather & innate laziness, not much got done on the car over the last few days. The front wheels came off & the front arch liners were removed. What was revealed was a rusty front anti-roll bar & wishbones. The wishbones will benefit from a coat of hammerite but the ARB is in a sorry state; a breakers' yard provided a bar in massively better condition so that can be fitted in place of the rusty piece of scrap. It just needs cleaning up and some hammerite on the brackets.
Edited by Biggy Stardust on Thursday 29th February 16:09
Gassing Station | Kit Cars | Top of Page | What's New | My Stuff