3428TM Build Log
Discussion


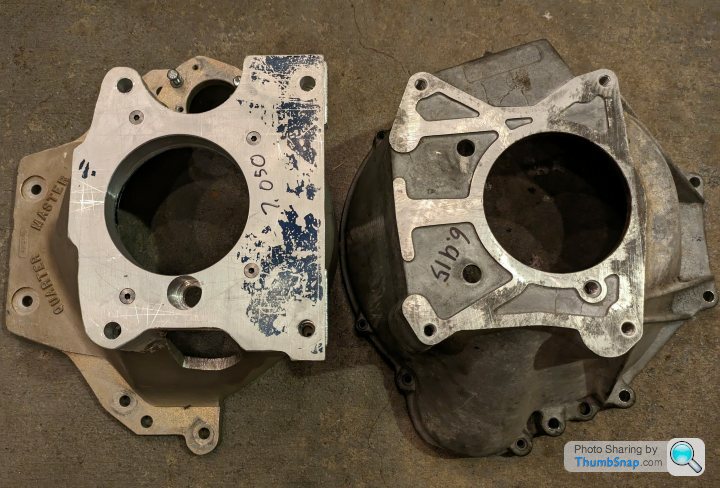

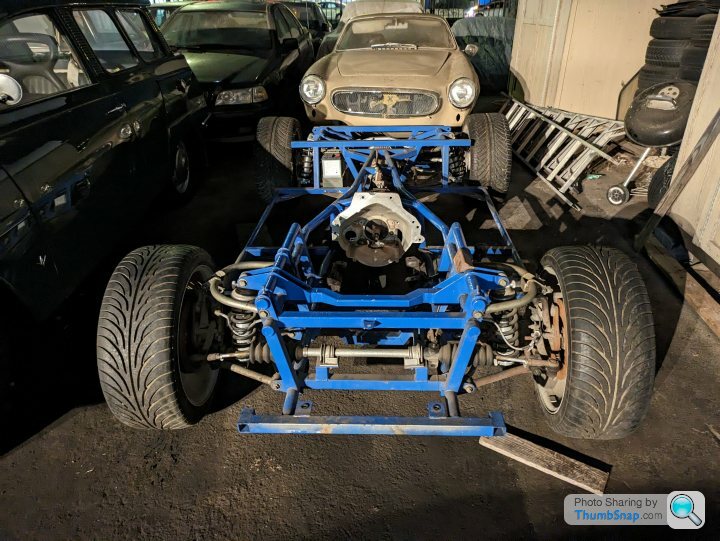
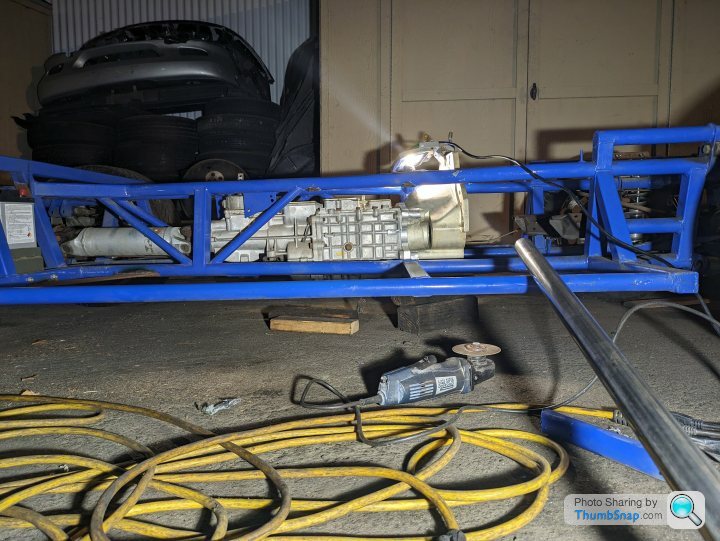
Adapter plate is finished. Going to start pulling the body off Monday. These photos are intended to illustrate how much of an obstruction this would been in the under body air flow. I could have faired it in, but that's not an acceptable compromise. This way, the car will have decent ground clearance, guided underbody aero, and I will have dropped a large mass as low as it'll reasonably go. Also, moving the starter back is another way of pulling one heavy item closer to the CG. Besides, having the ring gear as the second lowest part of the undercarriage, after the bellhousing, to be dangling under the car, and the flywheel covered only by a piece of .070 Aluminium made me incredibly nervous.
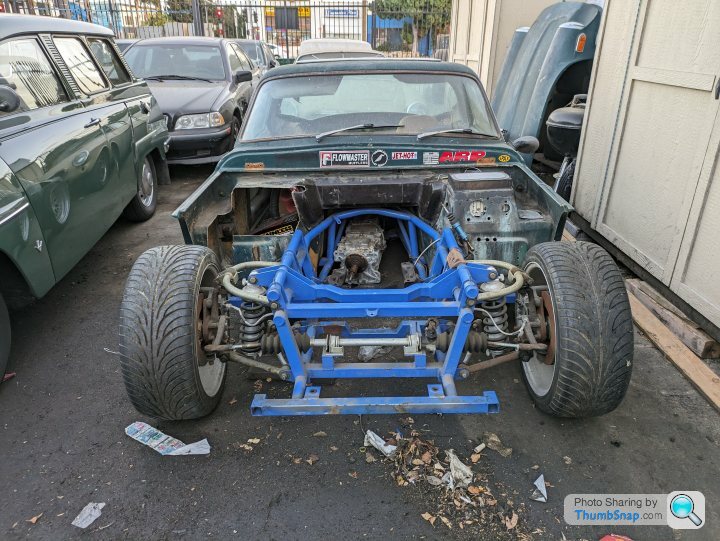

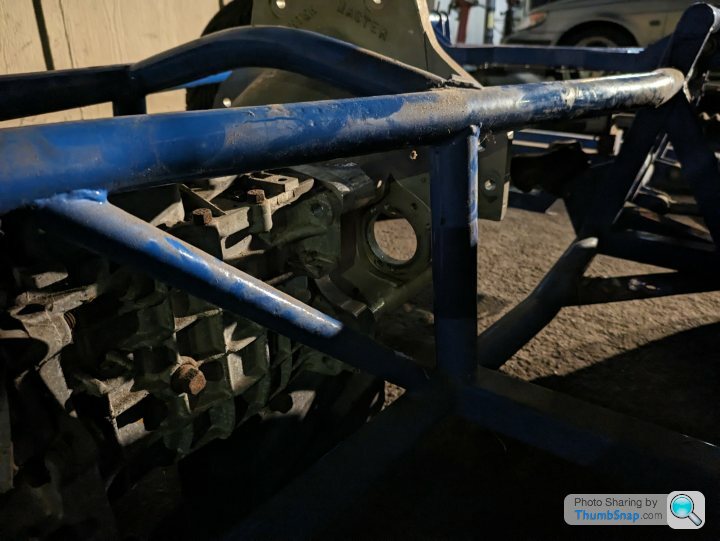
On the right side, I'm going to have to alter the chassis tubing to allow the starter to fit. I emailed the starter/bellhousing manufacturer about a starter that can be oriented in a less obtrusive a way. (With the solenoid above or below it.) That would let me keep the upright tube in place.
On the left, it looks like the outside end of the clutch fork may foul the corresponding upright frame member. That may push me into a hydraulic throwout bearing. Or into modifying the frame, or modifying the clutch fork.
On the left, it looks like the outside end of the clutch fork may foul the corresponding upright frame member. That may push me into a hydraulic throwout bearing. Or into modifying the frame, or modifying the clutch fork.
Edited by Slow M on Saturday 28th October 17:54

Slow M said:
m I assuming correctly that your strategy for a flat tire is similar to mine?
no , re the complete lack of a spare,or spray can , my carefully thought out and technically complicated and thorough strategy is to pretend i didn't see it , and drive it anyway .its a Zen thing.

ivanhoew said:
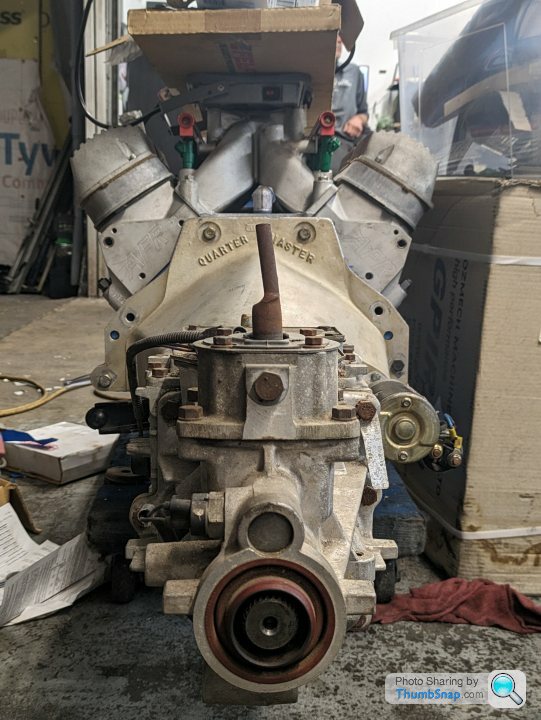
That almost looks like the starter would go in 180 degrees round , but i guess not quite enough room .
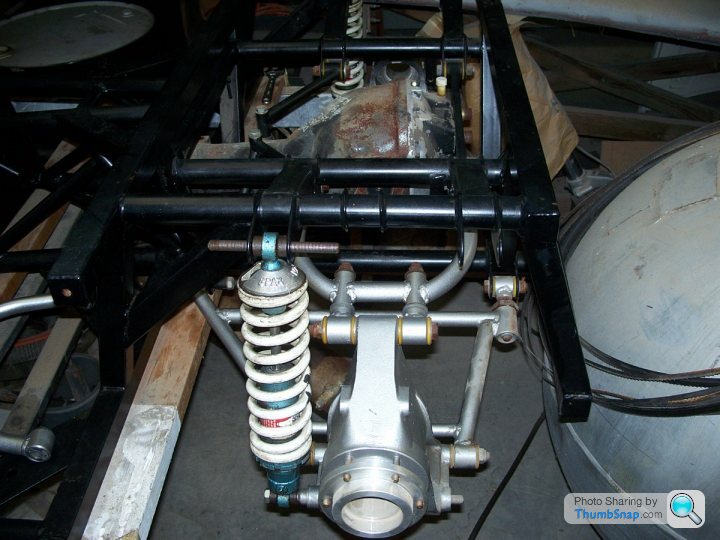
The starter sits inboard of the block outline. 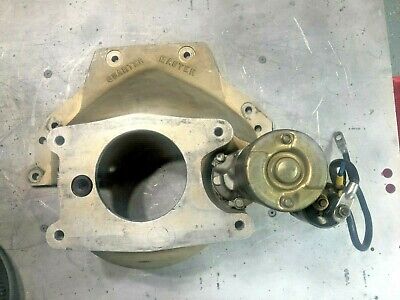 It's easier to see in this image. It has a slight offset (internal idler gear), but it engages with a MUCH smaller ring gear.
 Progress report:

I was racking my brain, last night, about the best way to reinforce the chassis, as the factory opted to leave a number of rectangular sections longingly looking for a little extra triangulation. Then I remembered that I had these photos of a chassis supposedly modified by Bill Jongbloed, in the same manner as he used for his own car.
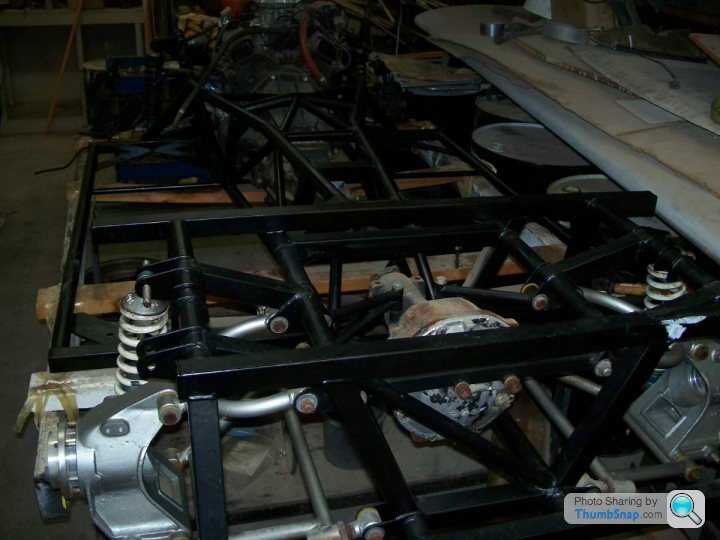


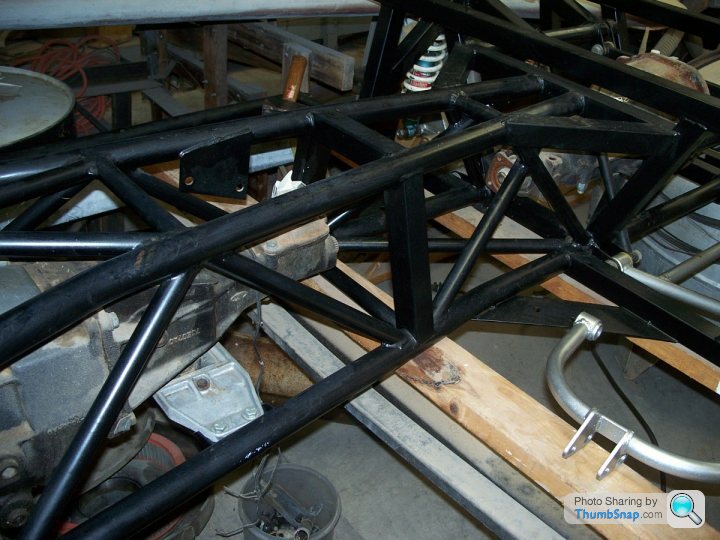
A little bit of that seems to be overkill, which I only say because I have rudimentary understanding of moment frames.
Nevertheless, I'll probably end up with a very similar result.
I was racking my brain, last night, about the best way to reinforce the chassis, as the factory opted to leave a number of rectangular sections longingly looking for a little extra triangulation. Then I remembered that I had these photos of a chassis supposedly modified by Bill Jongbloed, in the same manner as he used for his own car.
A little bit of that seems to be overkill, which I only say because I have rudimentary understanding of moment frames.
Nevertheless, I'll probably end up with a very similar result.
Edited by Slow M on Thursday 2nd November 17:58
In case it helps Bernard , two other things i did to my car were ,i welded a tube connecting the ends nears the chassis on the front lower wishbones .this made the steering 176.485% lighter .
Also i installed a bit of 2x1 box section ally across the chassis , positioned to sit directly above the nose of the diff casing , with a couple of mm clearance , and cut to follow the shape of the diff casing casting .
This was to control the diff trying to lift its nose and take stress of my rudimentary diff mountings , since my car was a 2500 m and only had the poxy gt6 diff , which i replaced with a lsd tuscan diff .
regards
robert.
Gassing Station | TVR Classics | Top of Page | What's New | My Stuff