Discussion


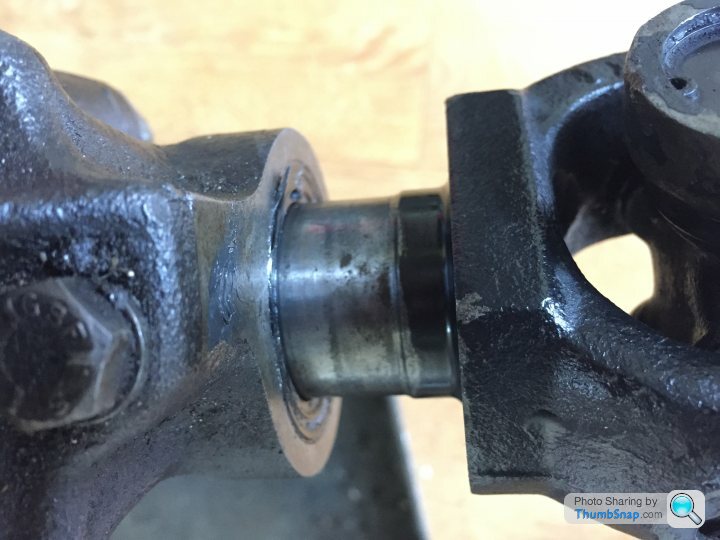
Fitting the diff and prop shaft today and with the diff in position and all nuts and bolts tight, to get the prop shaft to line up it had to be eased out of its splined housing in the gearbox, rearwards towards the diff, this left about a 4cm gap as can be seen in pictures below. Wondering if this is correct orientation or am I missing something? just got that 'it doesn't look right' feeling about it.
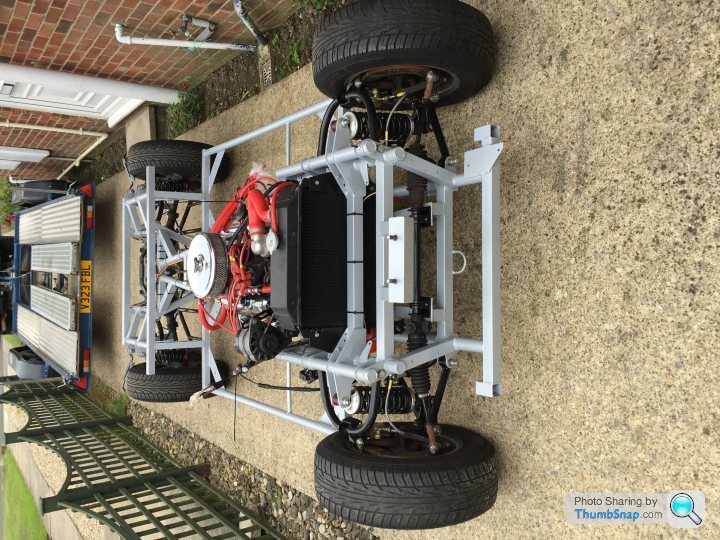
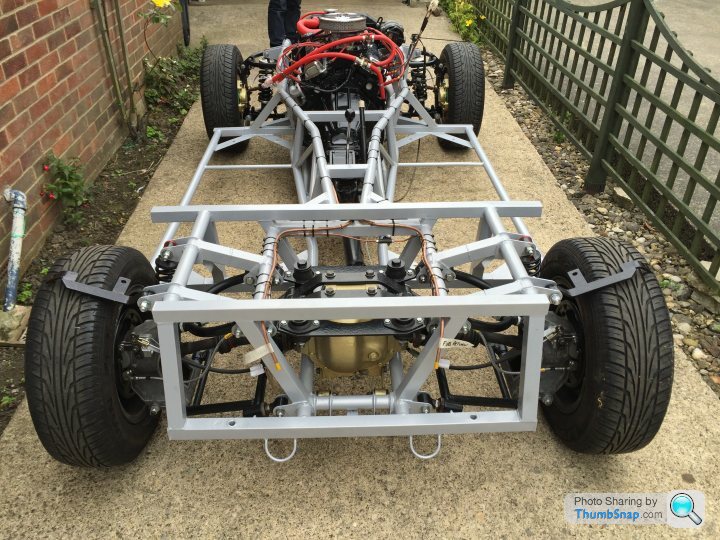
Just refitting the braking system, got to fit the rad and a few other tidy up jobs but then chassis work is complete. The nut that sits behind the grease cap on the stub axle, holding in the D washer and bearing, is there a torque setting for this? As dependant on how tight it is, seems to affect the rotation of the hub.
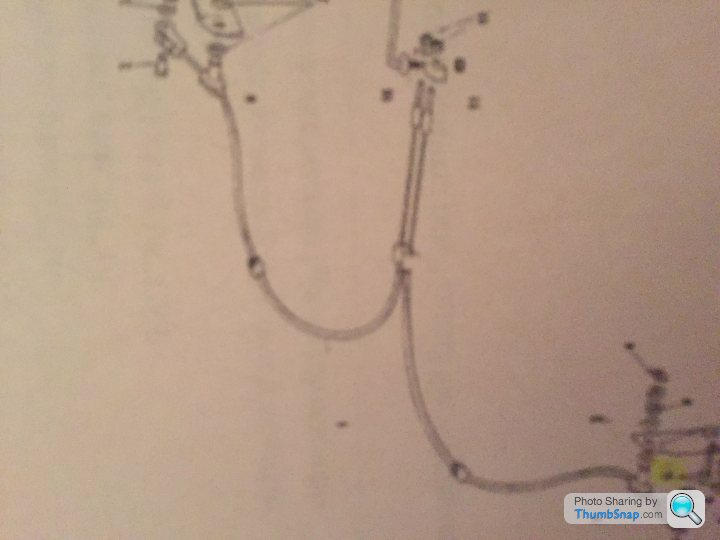
Anyone know what the handbrake cable is from or a replacement item? Everything thus far has been triumph but the handbrake assembly appears not to be. Fitted handbrake today and the outer sleeving is flaking/torn, with everything else being fresh and restored it will really annoy me if I fit this and leave it in poor condition!
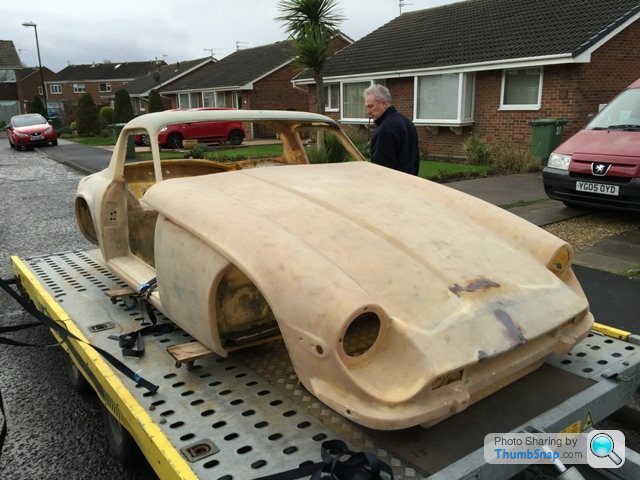
OK I will get in touch with the refurbishment companies and the usual sources into the new year. Took a little extra leave over Christmas and progressed quite while. Barring brake pipes, hand brake cables and fuel lines, everything is back on chassis and work on body started. Few pictures below.
I refurbished calipers and fitted new stainless pistons and seals.
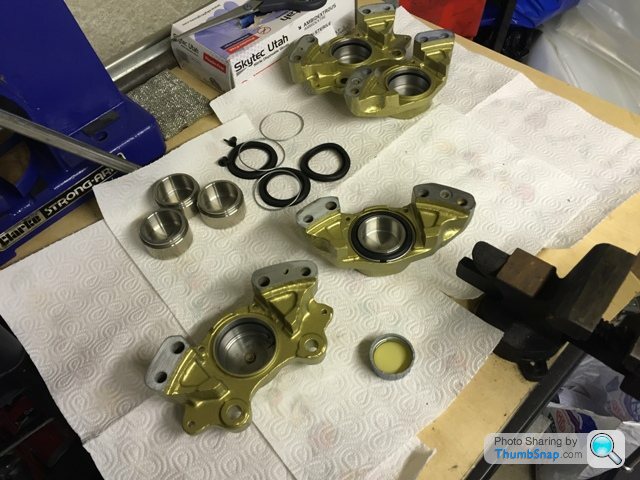
Fitted with new discs and EBC Green Stuff pads.
 [url]
[url]
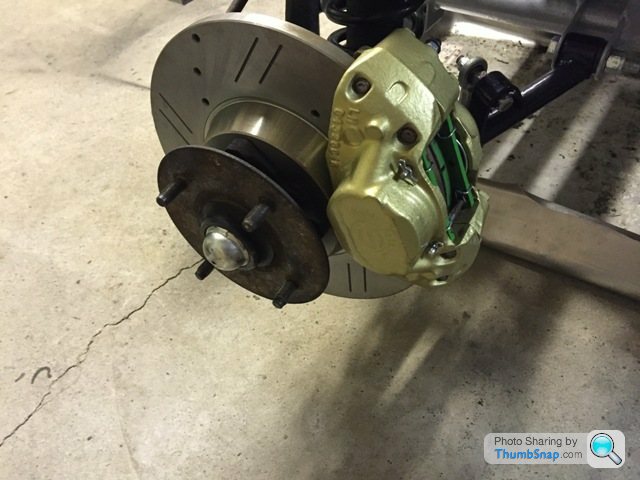
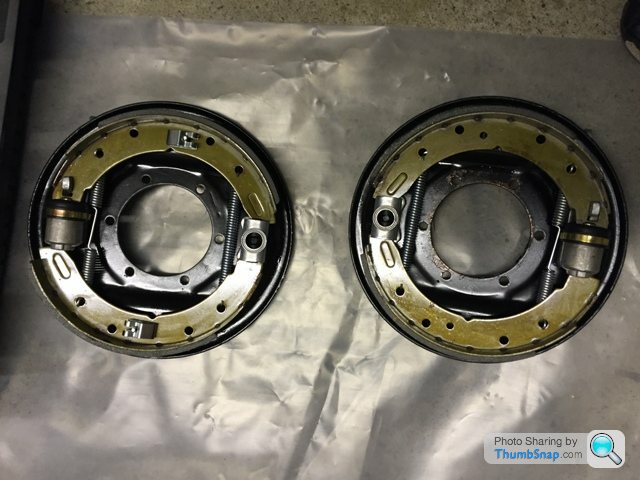
Refurbished and rebuilt rear drums, the RH one in photo is incorrect, trial and error for a while with these for me!
 |http://thumbsnap.com/NSEqQJTO[/url][url]
Bonnet frame was removed and had been fibre glassed in, every where it had been glassed in was rotten, every where it hadn't was solid!
 |http://thumbsnap.com/DMdAAmfr[/url][url]
Body returning from being blasted.
 |http://thumbsnap.com/Yn5KeGpv[/url]
I need to drag the chassis out and give it a good clean down, paint a few more things and then it will be complete, I cant imagine I will have time for this until start of summer. Then start final touches on body before my skills run out and its off to a professional for the finish.
I refurbished calipers and fitted new stainless pistons and seals.
Fitted with new discs and EBC Green Stuff pads.
[url]Refurbished and rebuilt rear drums, the RH one in photo is incorrect, trial and error for a while with these for me!
|http://thumbsnap.com/NSEqQJTO[/url][url]Bonnet frame was removed and had been fibre glassed in, every where it had been glassed in was rotten, every where it hadn't was solid!
|http://thumbsnap.com/DMdAAmfr[/url][url]Body returning from being blasted.
|http://thumbsnap.com/Yn5KeGpv[/url]I need to drag the chassis out and give it a good clean down, paint a few more things and then it will be complete, I cant imagine I will have time for this until start of summer. Then start final touches on body before my skills run out and its off to a professional for the finish.
I was pleased with the blasting, as the car had so many layers of paint having previously been resprayed differing colours, I don't think I could have achieved the same level of removal by sanding. It needs finishing touches, the guy was able to use a very fine glass bead for the majority, switching to soda when needed. His advice was to go over the full car with 180 and then a finer finishing grit. A lot of the rear was mainly filler or 'high rise' he called it. The rear had been in a shunt and the new end molded on perfectly well, but instead of sanding down the high points, they seem to have built up the low points.
Regards the vented discs, when I started this project I had all sorts of fabulous ideas such as wilwoods, a roll cage, flared arches, high lift cams, but then had a stop and think, I'd be altering everything I loved about the driving experience, I loved it for exactly what it was. The Tuscan does a fine job of delivering the thrilling sports car performance, but I liked stepping back in time with the M, so decided to leave everything standard but give a new lease of life and a tart up!
Regards the vented discs, when I started this project I had all sorts of fabulous ideas such as wilwoods, a roll cage, flared arches, high lift cams, but then had a stop and think, I'd be altering everything I loved about the driving experience, I loved it for exactly what it was. The Tuscan does a fine job of delivering the thrilling sports car performance, but I liked stepping back in time with the M, so decided to leave everything standard but give a new lease of life and a tart up!
Well after two years finally got the chassis in a position to receive the body. Dropped it off today for the paint process. Still a few things to smarten up on the chassis such as each front corner upright assembly needs refreshing and may route some pipes differently when weight settles.
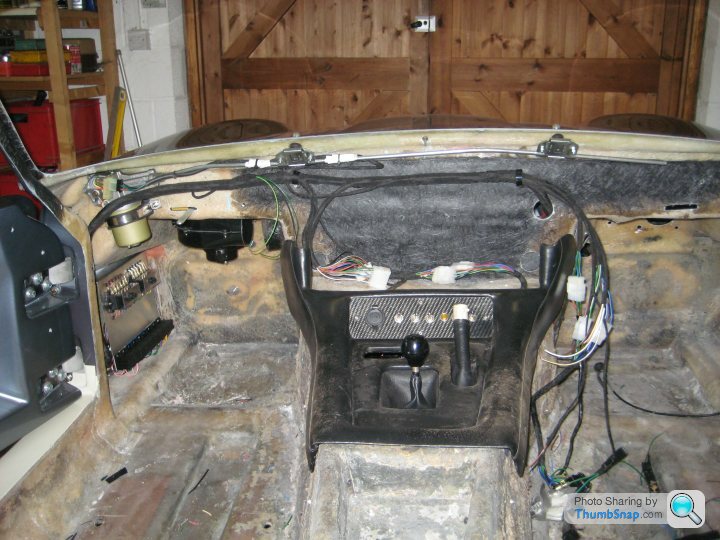
I am hoping to get the body back completed with the chassis in the next few month and just starting to plan ahead. What would be the best way to progress with the next steps. It requires a full new wiring loom, the fuel lines plumbed to tank and the interior upholstery fitted.
I am thinking it would be best to fit minimal of interior such as dash and centre console, fit and plumb in the fuel tank and then start the wiring? Seen as the wiring will run under the carpets and behind the dash and require the gauges. Then once wiring is done I can start a full interior fit.
Looking for advice from those with experience which is the best order. My target for completion is the Spa Classic, May. This will be tight.
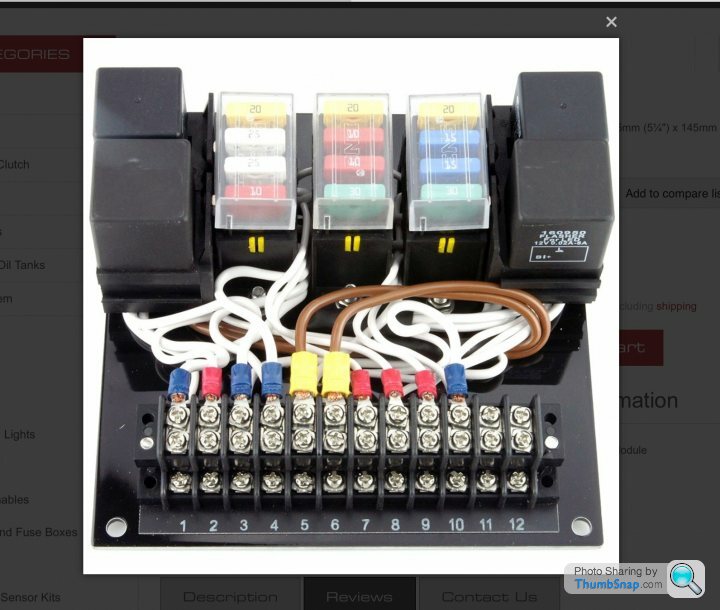
Ok, thank you. My idea for the wiring was to create separate looms as you said. Quick release plugs a plenty. I aiming for all items to be plug and play style so if anything needs to be removed in future it's done with ease. For example a rear light cluster on its own plug, so this can be simply unplugged, unscrewed and then it's out. I may also try this with engine harness so effectively it's a plug and play item. I will most likely locate fuse box in footwell and try to keep wires hidden and tidy in engine bay, I'm not particularly bothered regards keeping it looking period electrical wise, I'd prefer ease of use and efficiency.
Another thing to think of is I am based Oxfordshire and the car north east, travelling back and forth to the car, buying tools and materials and the rarity of time off work, it maybe more cost effective and a better use of time, given the deadline, to give it to an expert at the obvious loss of money. What a garage could accomplish in a few weeks can well take me a few month just to get the time off!
Another thing to think of is I am based Oxfordshire and the car north east, travelling back and forth to the car, buying tools and materials and the rarity of time off work, it maybe more cost effective and a better use of time, given the deadline, to give it to an expert at the obvious loss of money. What a garage could accomplish in a few weeks can well take me a few month just to get the time off!
I'm ok with soldering, crimping, plug assembly etc. It's the actual knowledge, like you mentioned, of what needs to go where, what requires what and so on that I have very little of. I have been reading and researching a lot but the penny yet to drop. My father is an electrician by trade, his advice was 'I can tell you two things about electricity. The first is it flows like water and takes the path of least resistance. The second is ... it's magic'.
I like your idea of getting a rather standard wiring completed and then in my own time adding the plugs and connectors as I have time. In fact as I typed that and re read it, my head nodded, so some part of my brain somewhere is happy with that!
The project is over two years in now, mainly due to lack of time off work to get stuff done. I think I'd rather be in a position in the future hundreds of pounds down, lacking knowledge, but the windows down, exhaust burbling, engine revving, blasting through Belgium in a convoy of classic TVRs.
I'll email around and get a few quotes and see who can fit me in! Thanks for taking time to reply.
I've just had a browse on their website, something like this . . .
I watched the accompanying video on their website and it does seem a good bit of kit. Have you used one before?
Looks as though it would save a lot of time and is another very good option. I still need to explore and research further the basics of wiring, to get a better understanding as I have a lot of questions in my head I don't have answers too.
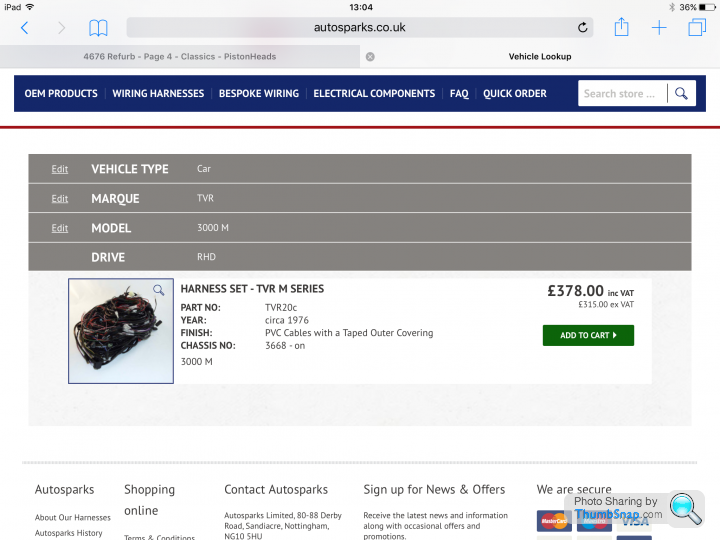
I have contacted autosparks regards their loom, from what I can see I'd still need a fuse relay module as this appears to just be the harness. However this would be ideal if it comes with labelling.
I am part of the Facebook groups and I have emailed Adrian to ask his advice and what he can supply. I may well take you up on the offer when I am home and come ask a few questions Neil as I really want to complete the wiring myself but also want to hit the deadline! My main fear is not knowing what needs to connect to what and then being stuck with a half finished job, clueless, having wasted time.
I am part of the Facebook groups and I have emailed Adrian to ask his advice and what he can supply. I may well take you up on the offer when I am home and come ask a few questions Neil as I really want to complete the wiring myself but also want to hit the deadline! My main fear is not knowing what needs to connect to what and then being stuck with a half finished job, clueless, having wasted time.
I have emailed autosparks regards their loom and what I want to do. Looking at the pictures of the Loom it looks to be built to OEM. However I have an electronic ignition and want to move fuse/relays to footwell rather than engine side bulkhead as original, so the loom becomes more bespoke which they can cater for as long as I can correctly relay what I require to them.
I am awaiting replies from a few companies as it's the festive period they won't be in work until the new year so plenty of time to weigh up my options and get some research done.
I am awaiting replies from a few companies as it's the festive period they won't be in work until the new year so plenty of time to weigh up my options and get some research done.
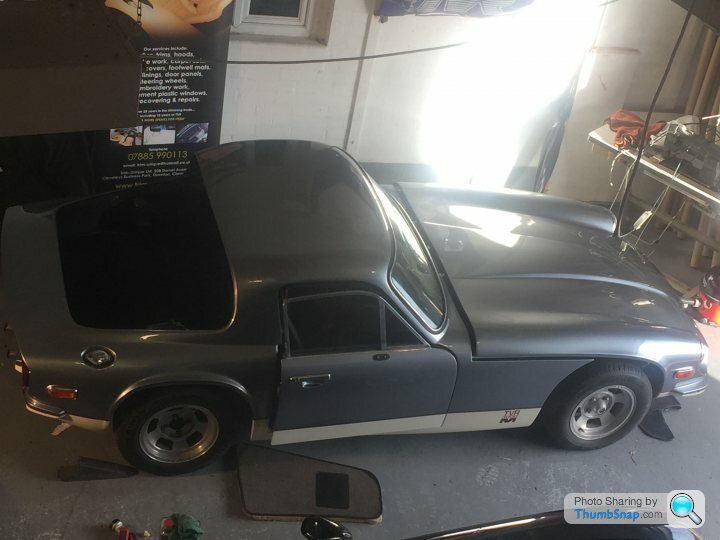
Things have progressed quite fast due to approaching deadline. She's now fully painted, wiring harness fitted and I have begun to rebuild and fit trim. I am organising upholstery and MOT and should be finished for first week in May, fingers crossed. Not many good photos as I was working at a steady speed and didn't stop to take them, I'll get a few more next time!
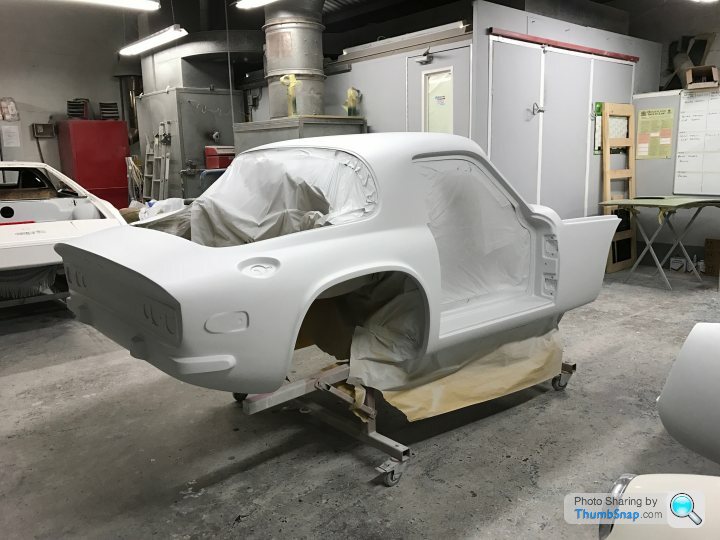
The shape being finalised before paint.
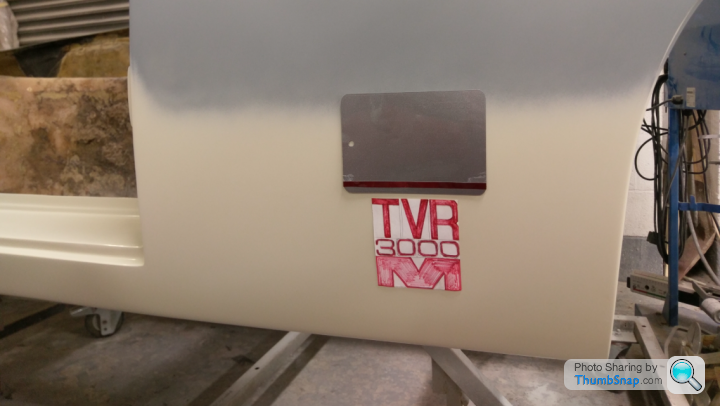
Choosing the colours and positions of logo.
The wiring harness being fitted.
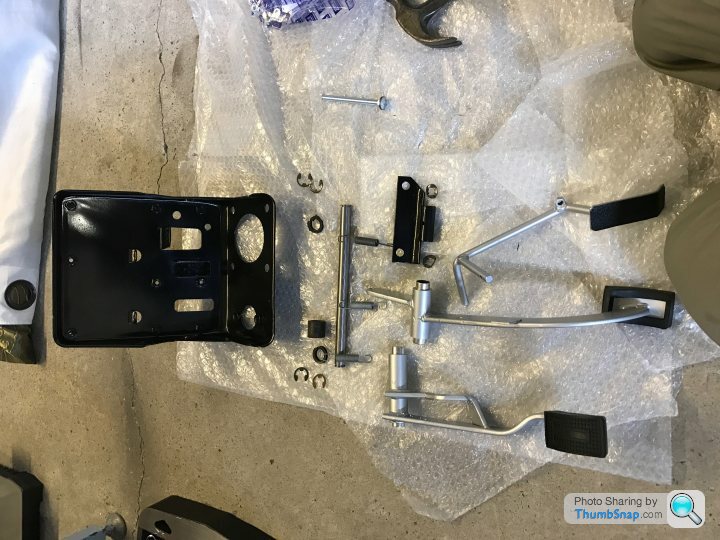
Rebuilding pedal box.
Sound deadening going down before tank fit.

I now have the tank and steering column fitted, as well as fibre glossing in the tank straps and bonnet springs. A stainless steel grille made (I have sikalfexed this on but not entirely happy so likely to visit it again with a fibreglass tissue). All lights are fitted. The car tuned over for the first time in over two year so very happy. I still have to fine tune steering column and fiitment of pedal box, refit the bonnet, connect fuel tank to lines, manufacture a new dashboard, rebuild doors and fit kick plates and door top trim after a polish! Oh and the seats too! Hoping to progress through the majority of this over the bank holiday weekend.
One problem I do have is my brake fluid reservoir is full of gunk, I have ran it through dishwasher four times and can not get it out of second chamber. Thinking I require a new reservoir, I believe it is from a Cortina but I can not source one.
The shape being finalised before paint.
Choosing the colours and positions of logo.
The wiring harness being fitted.
Rebuilding pedal box.
Sound deadening going down before tank fit.
I now have the tank and steering column fitted, as well as fibre glossing in the tank straps and bonnet springs. A stainless steel grille made (I have sikalfexed this on but not entirely happy so likely to visit it again with a fibreglass tissue). All lights are fitted. The car tuned over for the first time in over two year so very happy. I still have to fine tune steering column and fiitment of pedal box, refit the bonnet, connect fuel tank to lines, manufacture a new dashboard, rebuild doors and fit kick plates and door top trim after a polish! Oh and the seats too! Hoping to progress through the majority of this over the bank holiday weekend.
One problem I do have is my brake fluid reservoir is full of gunk, I have ran it through dishwasher four times and can not get it out of second chamber. Thinking I require a new reservoir, I believe it is from a Cortina but I can not source one.
TVRMs said:
Easter work program looks very ambitious, I'll be happy if I can collect mine from trim next week ready for final build 
Ambitious indeed, in fact so ambitious it came and went and is now a distant memory with the car still not complete! New target is end of the year. It’s quite close now with final details (fingers crossed) being finished by HHC ready for MOT.
Took a different turn as I ended up in Afghanistan, but every cloud and the trip came with a monetary bonus which allowed me to farm more work out. Body work and paint was completed by Option1 then on my return I took the car to Lee at Trim Unique, before jetting off to work in USA, who completed the interior to an excellent standard, I’d heard he was good and he took what I asked for and added his own touches to give me something I couldn’t even imagine. He even put up with me relaying messages to him through my father every week pushing to get it done!
I’ve had the original wolfrace wheels refurbished, just need to give them a quick polish and I’ve ordered original size Vredestien tyres.

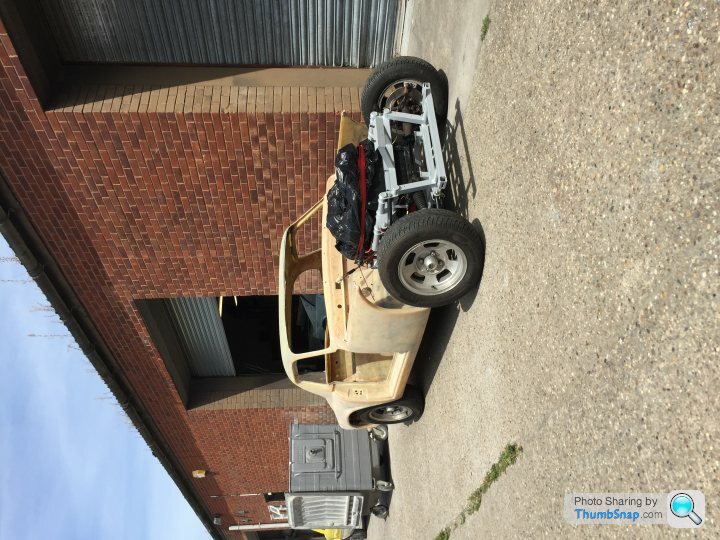
iPad playing tricks on me as usual and pictures upside down

TVRMs said:
Looking good.
If it makes you feel any better, ours isn’t finished either but should be tucked up in our garage around Christmas.
That’s good news. I’d quite like to see your car and the engineering that has gone into making everything fit and getting the power down, hopefully catch it at a show next year. I had a walk around my car at HHC and made a list of things that will need fettling once ‘complete’. Even though MOT will be done and she’ll be on the road, (or SORN until summer!) don’t think it will be truly finished for a while yet, but all fun and games! If it makes you feel any better, ours isn’t finished either but should be tucked up in our garage around Christmas.
Gassing Station | TVR Classics | Top of Page | What's New | My Stuff