Discussion


DAKOTAstorm said:
I've just had a browse on their website, something like this . . .
I watched the accompanying video on their website and it does seem a good bit of kit. Have you used one before?
Looks as though it would save a lot of time and is another very good option. I still need to explore and research further the basics of wiring, to get a better understanding as I have a lot of questions in my head I don't have answers too.
I wired a vixen from scratch with one.I watched the accompanying video on their website and it does seem a good bit of kit. Have you used one before?
Looks as though it would save a lot of time and is another very good option. I still need to explore and research further the basics of wiring, to get a better understanding as I have a lot of questions in my head I don't have answers too.


If you want a reliable system that works then this is what I would go for. The thing to avoid is to over think the system and to make it more complex than it needs to be. You will hear stories of the requirement for additional relays, lists of fuses etc etc. Its best to logically think things through and fit a neatly thought out system with the minimum of connections. It is worth buying a professional crimping kit and also a very good quality soldering set. IE the type with thermostatic control and a big power unit. That way you can professionally crimp and solder joints properly. I used the CBS kit and also 3 additional relays (main beam, Dipped beam and heated front screen. I also used an additional 6 way fuse board for the circuits required which aren't on the module. Even considering this I have 3/4 ways spare for accessories. I also used an earth busbar in the cabin which allows linking of main earth points
The system can be built in 3 sections…Front loom, Dash and rear loom. that way you can run all your wires to the module / switches and then connect up neatly from there
I see you are in the NE. Happy to give you some advice if you are worried about tackling the work yourself.
Are you on Facebook? If so then ask to join Adrian@ and there are currently a couple of ongoing wiring projects where you can get valuable advice and look at pics.
I am struggling posting pics on this site currently due to Photobucket hosting problems but will be happy to post you some detailed pics of what you should be aiming for and what to avoid.
Most circuits flow from positive through a switch to the item and then to earth.
Some circuits use a small current through the switch to trip a relay which allows a big current to directly power the item..Then to earth.
Just wire 1 circuit at a time and the rest will work itself through.
The dash looks complex but in reality is quite easy just looks a bit busy because that is where everything is read from.
Start with the rear loom. this one is easy to plan and run.
N.
Edited by Dollyman1850 on Monday 26th December 22:01
Edited by Dollyman1850 on Monday 26th December 22:04
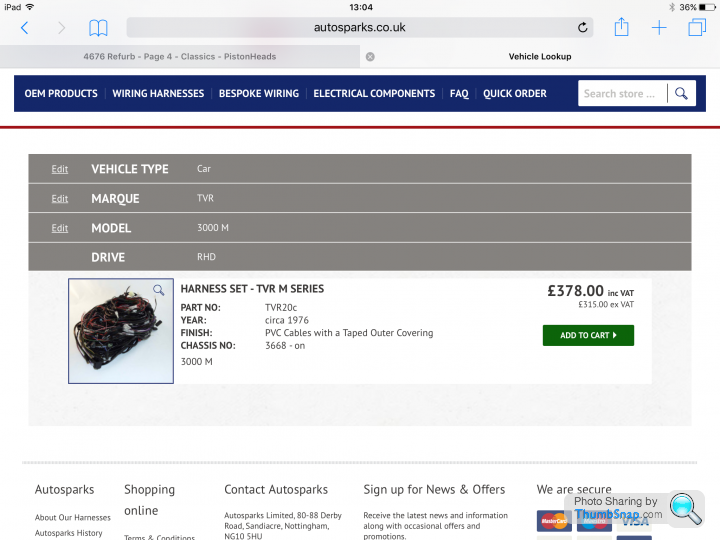
I have contacted autosparks regards their loom, from what I can see I'd still need a fuse relay module as this appears to just be the harness. However this would be ideal if it comes with labelling.
I am part of the Facebook groups and I have emailed Adrian to ask his advice and what he can supply. I may well take you up on the offer when I am home and come ask a few questions Neil as I really want to complete the wiring myself but also want to hit the deadline! My main fear is not knowing what needs to connect to what and then being stuck with a half finished job, clueless, having wasted time.
I am part of the Facebook groups and I have emailed Adrian to ask his advice and what he can supply. I may well take you up on the offer when I am home and come ask a few questions Neil as I really want to complete the wiring myself but also want to hit the deadline! My main fear is not knowing what needs to connect to what and then being stuck with a half finished job, clueless, having wasted time.
aero340 said:
Another option you may consider Rapid fit looms, SEVEN STYLE MODULAR LOOM. you can add extras to the loom from the supplier or modify your self .interior light and the likes.
kev.......
Auto sparks provide car specific lim and you have the option to add additional wiring for radio, fans ariels etc kev.......

I have emailed autosparks regards their loom and what I want to do. Looking at the pictures of the Loom it looks to be built to OEM. However I have an electronic ignition and want to move fuse/relays to footwell rather than engine side bulkhead as original, so the loom becomes more bespoke which they can cater for as long as I can correctly relay what I require to them.
I am awaiting replies from a few companies as it's the festive period they won't be in work until the new year so plenty of time to weigh up my options and get some research done.
I am awaiting replies from a few companies as it's the festive period they won't be in work until the new year so plenty of time to weigh up my options and get some research done.
Had my Vixen "rewired" using an anyfit kit car loom while it was being rebuilt many years ago. Big mistake! All modern style thin cables, lots of spare bits left dangling and bits of the old loom soldered in, best option start again using correct colour coded cables of the period and only put in what is needed and in the right places, but not this year!
timelord said:
Had my Vixen "rewired" using an anyfit kit car loom while it was being rebuilt many years ago. Big mistake! All modern style thin cables, lots of spare bits left dangling and bits of the old loom soldered in, best option start again using correct colour coded cables of the period and only put in what is needed and in the right places, but not this year!
Whats wrong with modern cable? Thinner, better insulated and all the same colour coding available?N
Dollyman1850 said:
timelord said:
Had my Vixen "rewired" using an anyfit kit car loom while it was being rebuilt many years ago. Big mistake! All modern style thin cables, lots of spare bits left dangling and bits of the old loom soldered in, best option start again using correct colour coded cables of the period and only put in what is needed and in the right places, but not this year!
Whats wrong with modern cable? Thinner, better insulated and all the same colour coding available?N
I agree with Alistair as to keeping it period in as much as possible but at the same time upgrading to create reliability where the original wiring had its shortcomings.
I spent a weekend at the NEC looking at so many cars both OE and Restored to get ideas.
I was actually amazed at the various standards i saw some where amazing but Many where nearly after thoughts great paint great engine and oh we need to wire this up and looked a dogs dinner.
I even saw one Mini which was getting a lot of attention and it shined like a Diamond had enough modified bits on to send the suppliers child to college and several signs on the car Please do not touch.
I then looked close at the wiring and wow it was a Dogs Dinner.
Beside it was another OE Restored Mini with all the correct wiring done beautifully and looked a work of art which in fairness the early Minis loom really was neat well thought out and designed to fit plug and play in a production line.
I ended u spending over an hour on the Suffolk Jaguar stand looking over the period cars they build and looked at how they did it and i guess learned more there than anywhere as they do a nice period set up that is in keeping with the age of the cars.
It was that approach Phil and Myself took with Phil making sure everything worked and checking what i did and teaching me as we went along plus insuring i understood what and why we did things and me being the pain in the ass wanting to keep everything as neat as possible.
This took a long time about 14 days together with me working on it on and off in between to tidy things up.
However those 14 Saturdays where more like going to Night school and learning and making at the same time and Having a Mate with that much patience Priceless.
Here are some pictures of what we ended up with certainly not TVR Factory original but a period look using mostly period materials.
Maybe these pictures will help
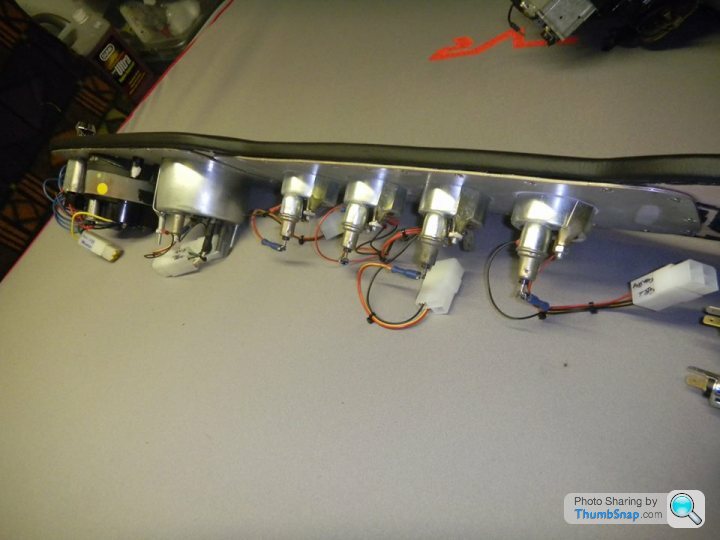
Dash we pre wired
Rear Loom we also added extra earth points
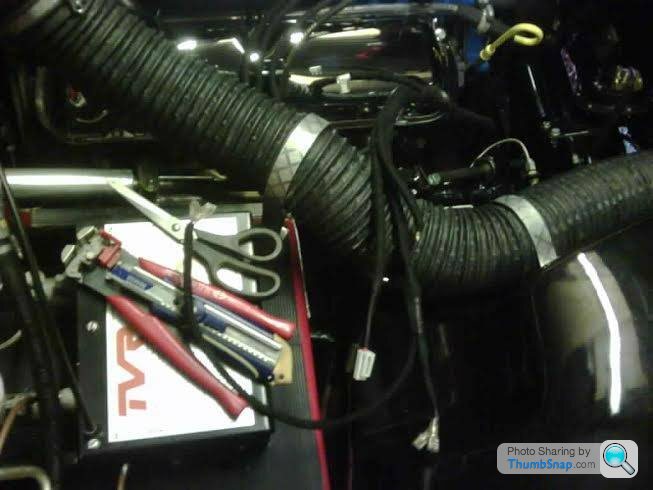
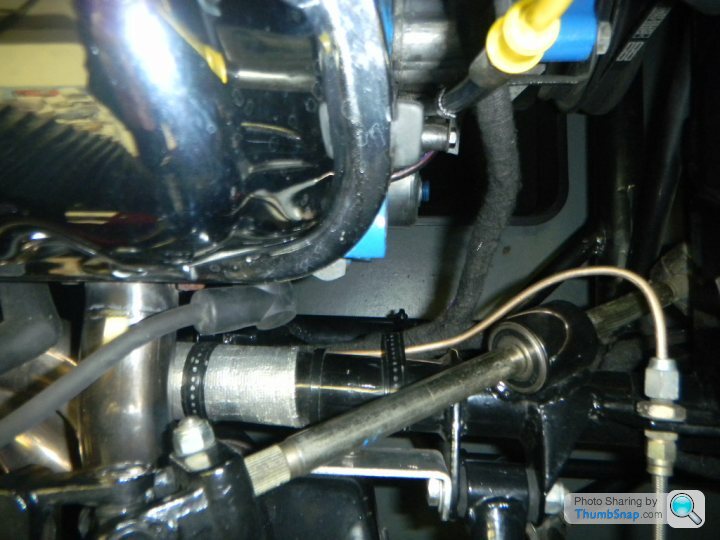
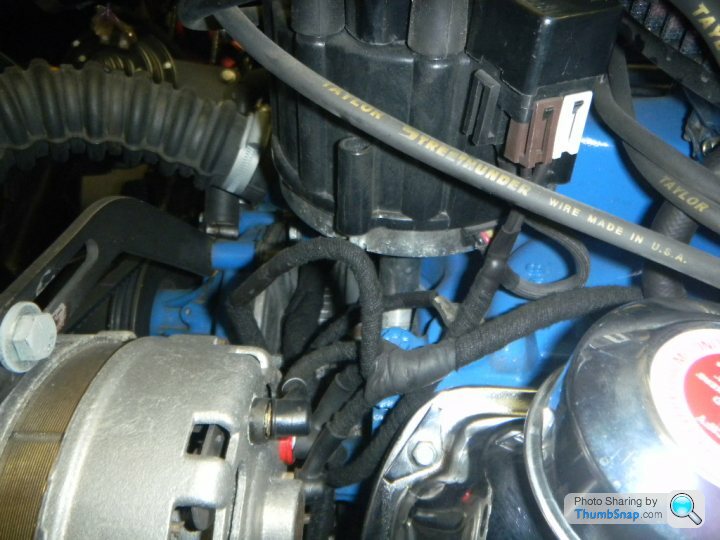
This is the alternator loom ready to go on as we went old school electrics with a period Autolite system

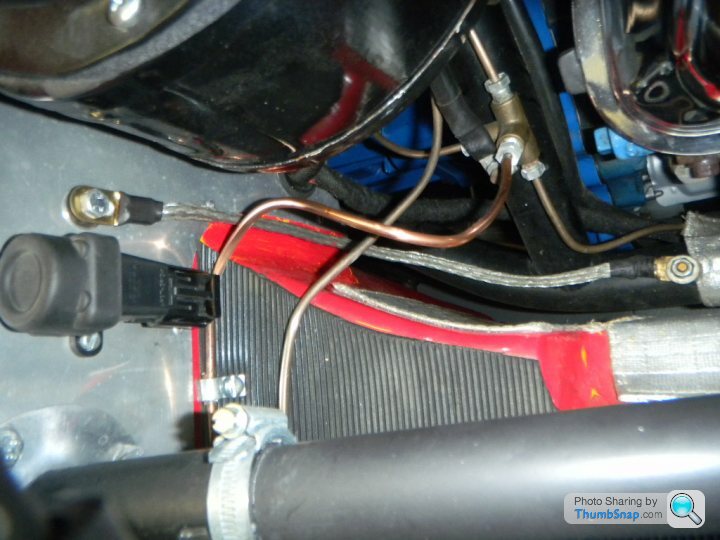
This was finishing off the loom once we knew all was working
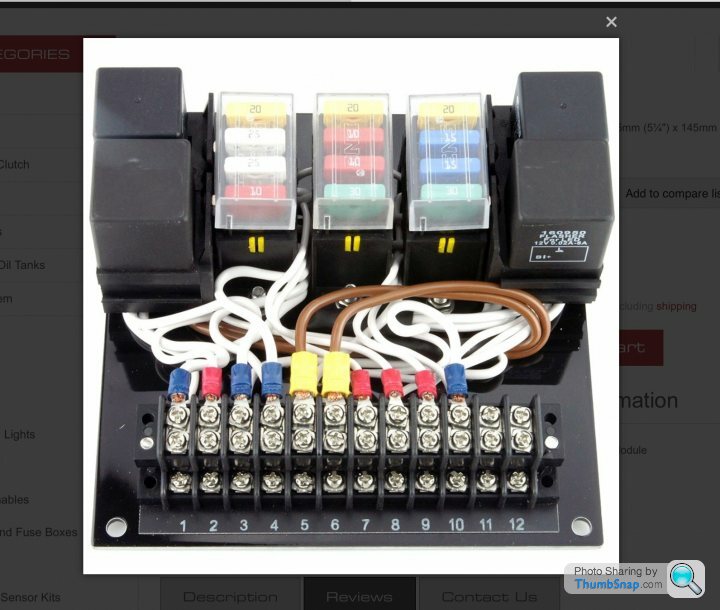
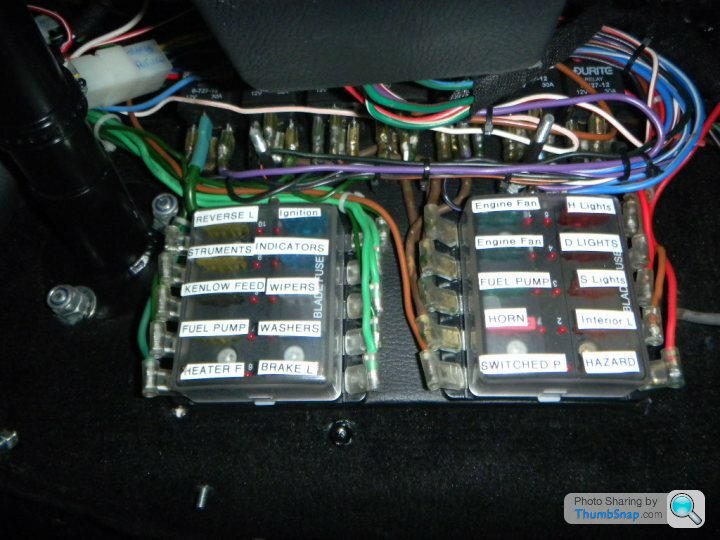
Fuse box we have under the dash the lights light up if a fuse blows rather tight in there but a neat as we could the Flag connectors where a Godsend one side permanent live the other side switched live
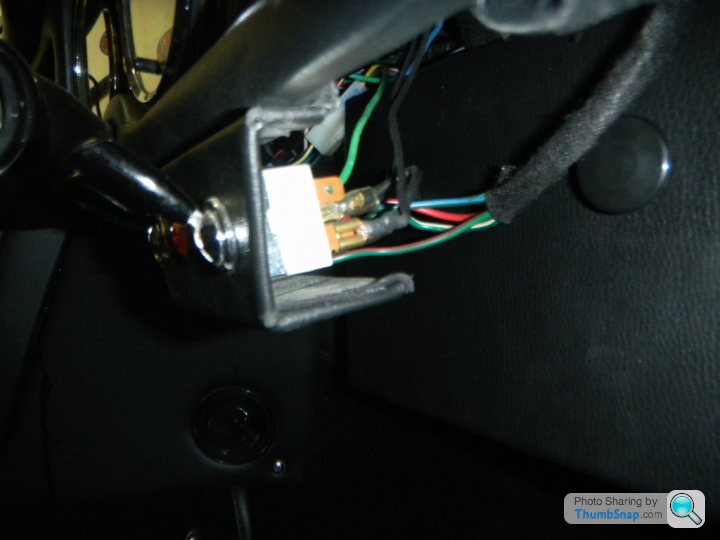
Wipers and fan override switch with indicator light to show its on
When cover is on the fuse box its hardly noticeablethe screw on knobs are actually Bakelite Kettle knobs
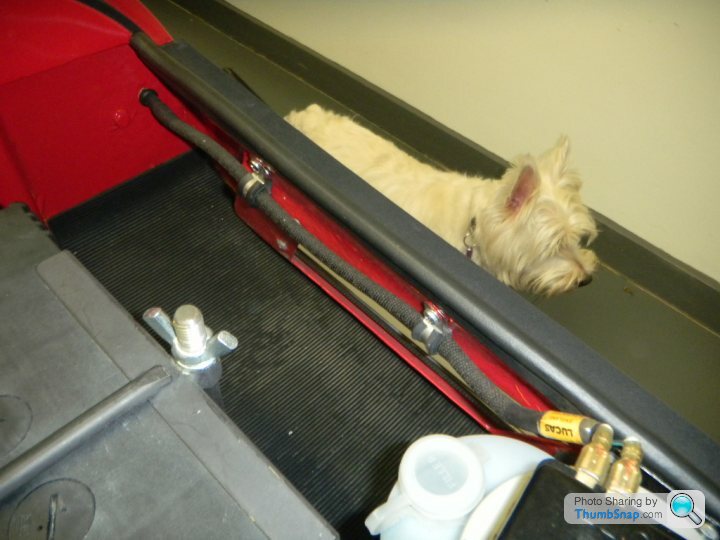
Loom was attached with a period strapping rather than tie clips just to give a more quality finish
Earth Straps not OE but i used as them as i liked the period look
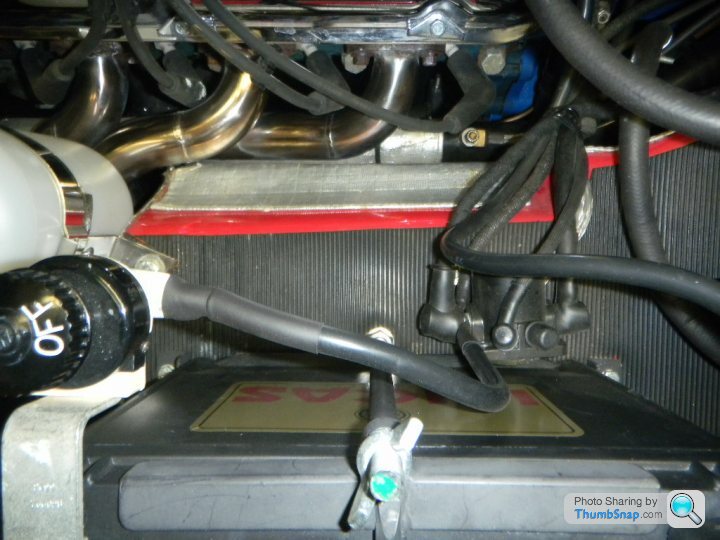
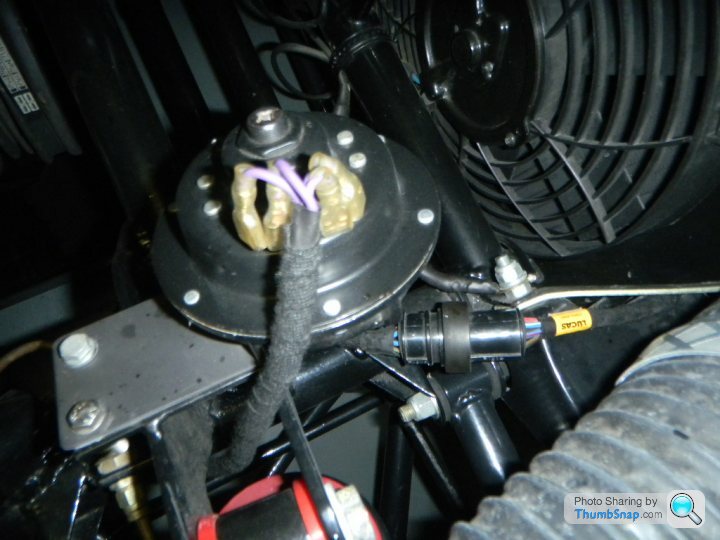
Voltage Regulator this was the bain of my life to get right Phil was away and we actually wired the car to take the modern alternator and then once all was tested switched Phil wisely had a couple of Saturdays off at this stage
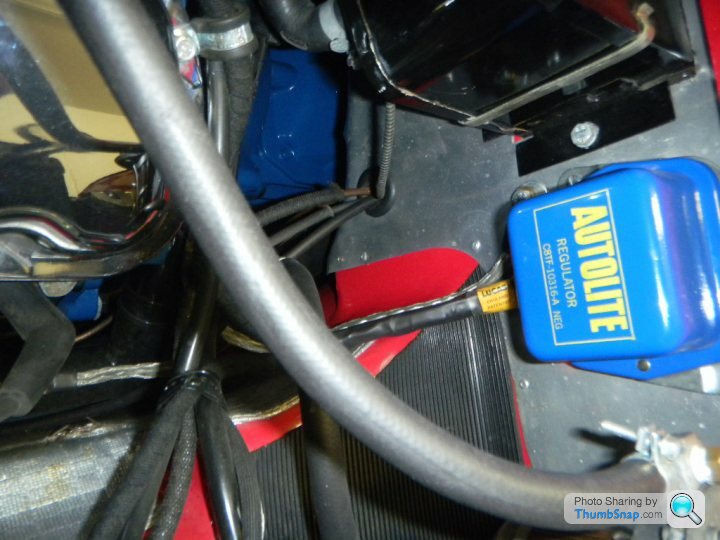
Autolite Voltage Regulator this was the bain of my life to get right Phil was away and we actually wired the car to take the modern alternator and then once all was tested switched Phil wisely had a couple of Saturdays off at this stage
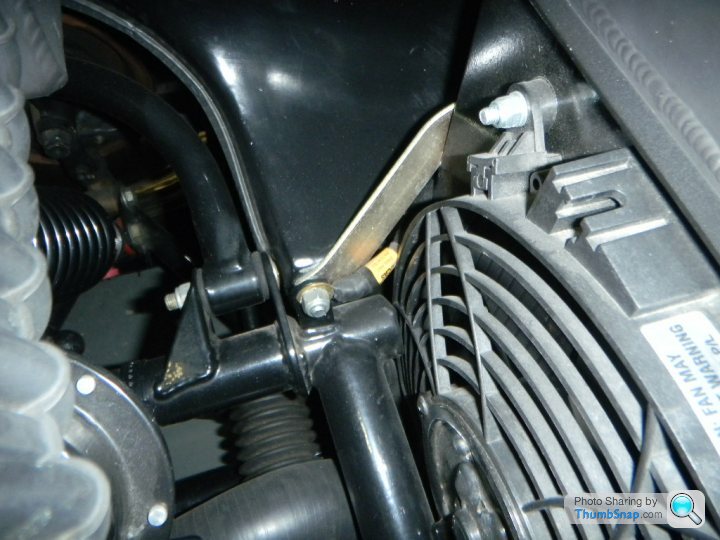
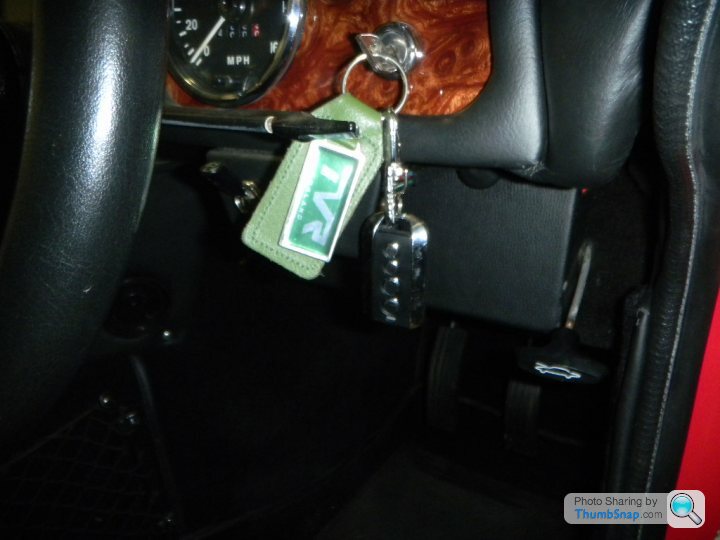
Bonnet release Plug although i dont yet have a quick release bonnet i still fitted this as it makes life easier anyway
A couple of original features that are not connected up the fuse box hides the bolts that hold the main fuse box under the dash these can be undone and allow the unit to drop down

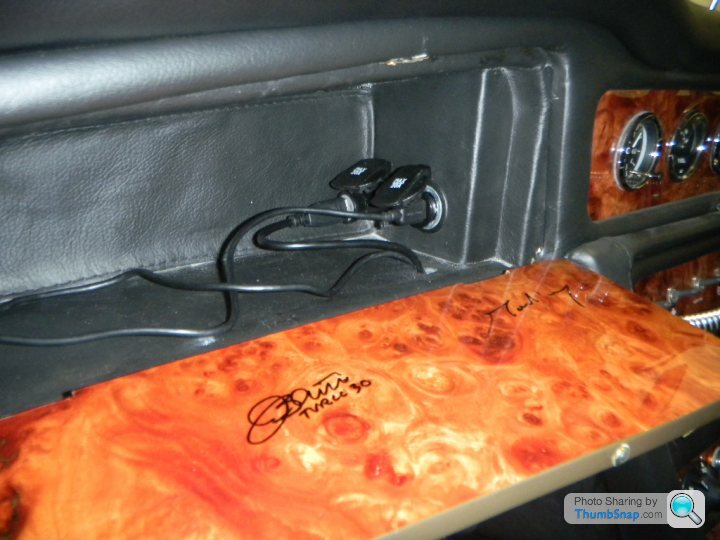
Some extra sockets in the Glove Box my one regret was not putting one in the back behind the seat as well
All told great fun and a fantastic way to learn everyone needs a Phil Thanks Mate
Andrew
I spent a weekend at the NEC looking at so many cars both OE and Restored to get ideas.
I was actually amazed at the various standards i saw some where amazing but Many where nearly after thoughts great paint great engine and oh we need to wire this up and looked a dogs dinner.
I even saw one Mini which was getting a lot of attention and it shined like a Diamond had enough modified bits on to send the suppliers child to college and several signs on the car Please do not touch.
I then looked close at the wiring and wow it was a Dogs Dinner.
Beside it was another OE Restored Mini with all the correct wiring done beautifully and looked a work of art which in fairness the early Minis loom really was neat well thought out and designed to fit plug and play in a production line.
I ended u spending over an hour on the Suffolk Jaguar stand looking over the period cars they build and looked at how they did it and i guess learned more there than anywhere as they do a nice period set up that is in keeping with the age of the cars.
It was that approach Phil and Myself took with Phil making sure everything worked and checking what i did and teaching me as we went along plus insuring i understood what and why we did things and me being the pain in the ass wanting to keep everything as neat as possible.
This took a long time about 14 days together with me working on it on and off in between to tidy things up.
However those 14 Saturdays where more like going to Night school and learning and making at the same time and Having a Mate with that much patience Priceless.
Here are some pictures of what we ended up with certainly not TVR Factory original but a period look using mostly period materials.
Maybe these pictures will help
Dash we pre wired
Rear Loom we also added extra earth points
This is the alternator loom ready to go on as we went old school electrics with a period Autolite system
This was finishing off the loom once we knew all was working
Fuse box we have under the dash the lights light up if a fuse blows rather tight in there but a neat as we could the Flag connectors where a Godsend one side permanent live the other side switched live
Wipers and fan override switch with indicator light to show its on
When cover is on the fuse box its hardly noticeablethe screw on knobs are actually Bakelite Kettle knobs
Loom was attached with a period strapping rather than tie clips just to give a more quality finish
Earth Straps not OE but i used as them as i liked the period look
Voltage Regulator this was the bain of my life to get right Phil was away and we actually wired the car to take the modern alternator and then once all was tested switched Phil wisely had a couple of Saturdays off at this stage
Autolite Voltage Regulator this was the bain of my life to get right Phil was away and we actually wired the car to take the modern alternator and then once all was tested switched Phil wisely had a couple of Saturdays off at this stage
Bonnet release Plug although i dont yet have a quick release bonnet i still fitted this as it makes life easier anyway
A couple of original features that are not connected up the fuse box hides the bolts that hold the main fuse box under the dash these can be undone and allow the unit to drop down
Some extra sockets in the Glove Box my one regret was not putting one in the back behind the seat as well
All told great fun and a fantastic way to learn everyone needs a Phil Thanks Mate
Andrew
Edited by Andrew Gray on Thursday 29th December 13:08
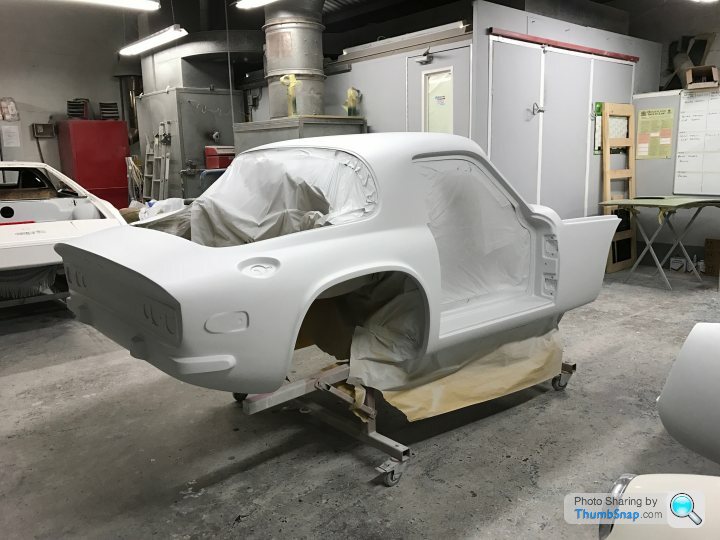
Things have progressed quite fast due to approaching deadline. She's now fully painted, wiring harness fitted and I have begun to rebuild and fit trim. I am organising upholstery and MOT and should be finished for first week in May, fingers crossed. Not many good photos as I was working at a steady speed and didn't stop to take them, I'll get a few more next time!
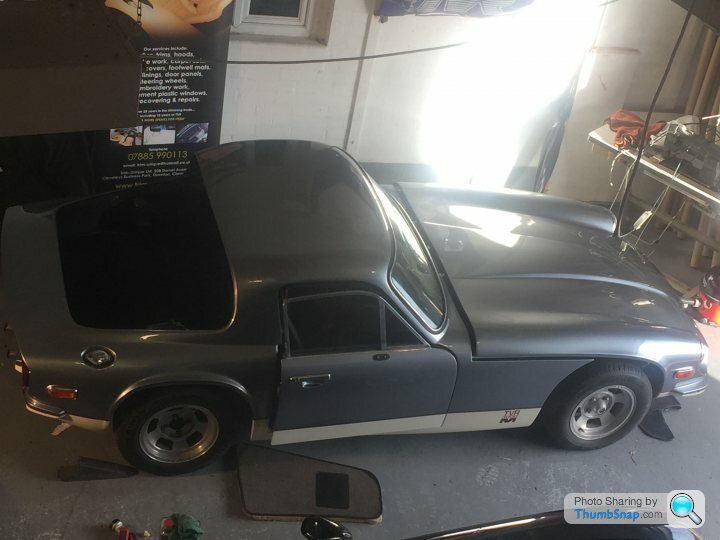
The shape being finalised before paint.
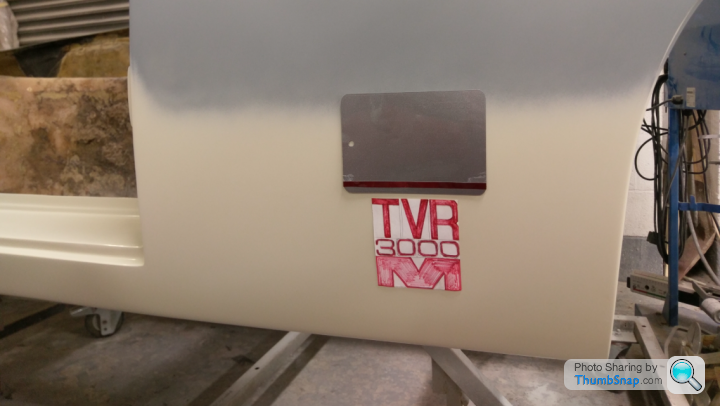
Choosing the colours and positions of logo.
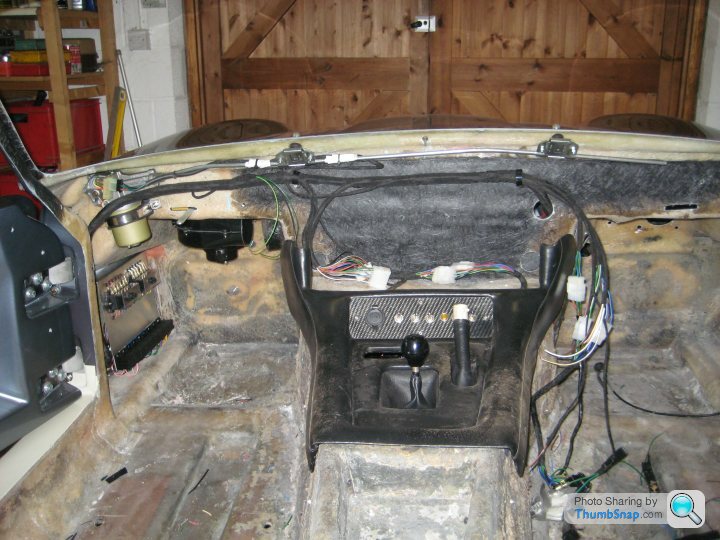
The wiring harness being fitted.
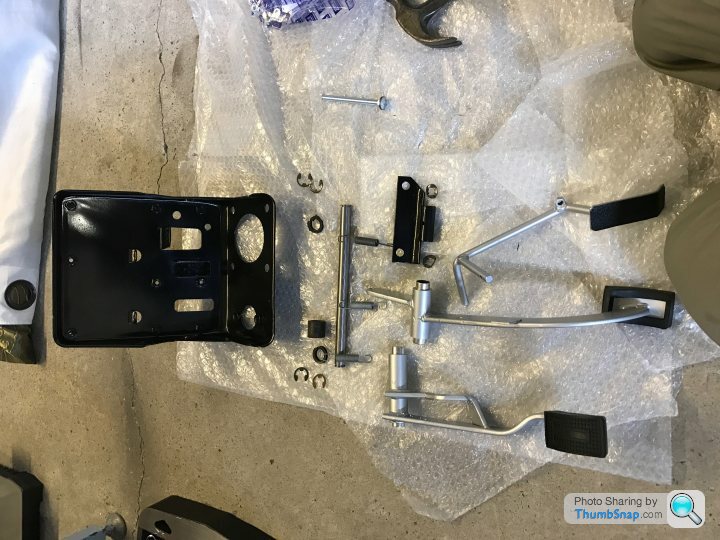
Rebuilding pedal box.
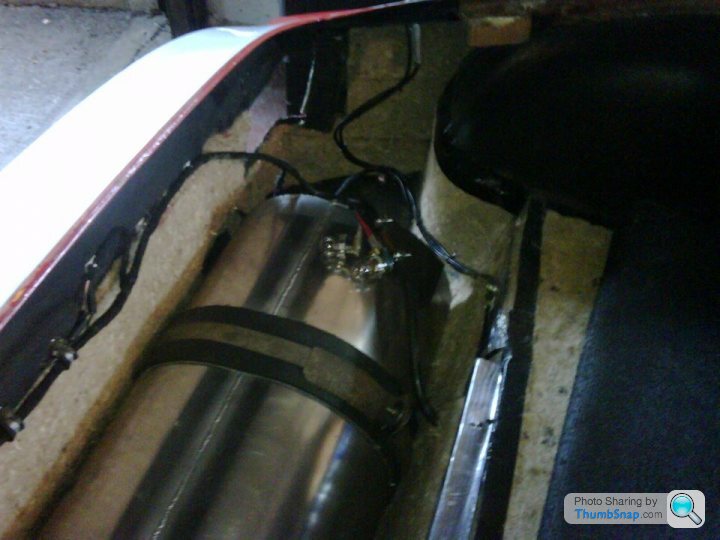
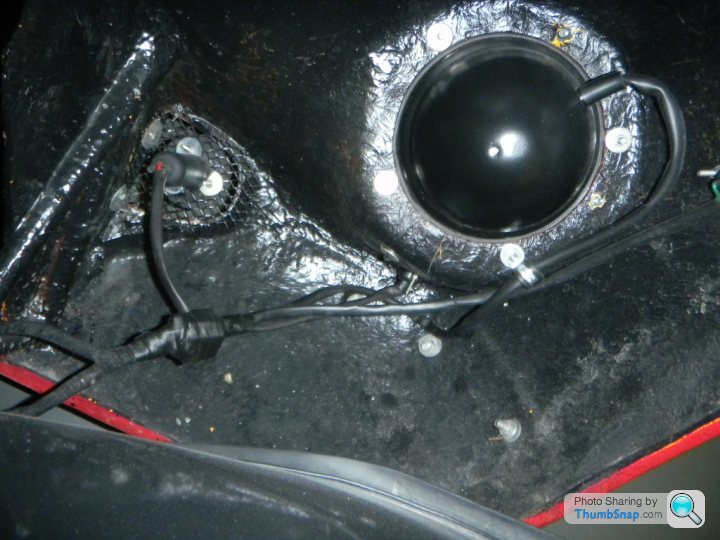
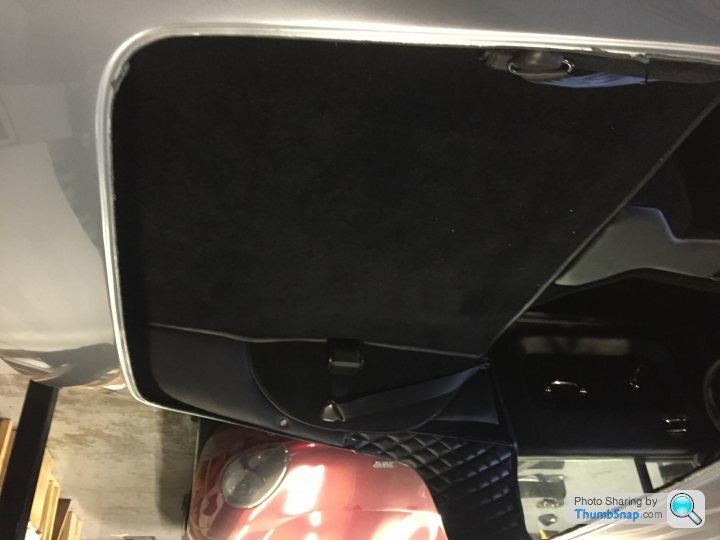
Sound deadening going down before tank fit.

I now have the tank and steering column fitted, as well as fibre glossing in the tank straps and bonnet springs. A stainless steel grille made (I have sikalfexed this on but not entirely happy so likely to visit it again with a fibreglass tissue). All lights are fitted. The car tuned over for the first time in over two year so very happy. I still have to fine tune steering column and fiitment of pedal box, refit the bonnet, connect fuel tank to lines, manufacture a new dashboard, rebuild doors and fit kick plates and door top trim after a polish! Oh and the seats too! Hoping to progress through the majority of this over the bank holiday weekend.
One problem I do have is my brake fluid reservoir is full of gunk, I have ran it through dishwasher four times and can not get it out of second chamber. Thinking I require a new reservoir, I believe it is from a Cortina but I can not source one.
The shape being finalised before paint.
Choosing the colours and positions of logo.
The wiring harness being fitted.
Rebuilding pedal box.
Sound deadening going down before tank fit.
I now have the tank and steering column fitted, as well as fibre glossing in the tank straps and bonnet springs. A stainless steel grille made (I have sikalfexed this on but not entirely happy so likely to visit it again with a fibreglass tissue). All lights are fitted. The car tuned over for the first time in over two year so very happy. I still have to fine tune steering column and fiitment of pedal box, refit the bonnet, connect fuel tank to lines, manufacture a new dashboard, rebuild doors and fit kick plates and door top trim after a polish! Oh and the seats too! Hoping to progress through the majority of this over the bank holiday weekend.
One problem I do have is my brake fluid reservoir is full of gunk, I have ran it through dishwasher four times and can not get it out of second chamber. Thinking I require a new reservoir, I believe it is from a Cortina but I can not source one.
DAKOTAstorm said:
Things have progressed quite fast due to approaching deadline. She's now fully painted, wiring harness fitted and I have begun to rebuild and fit trim. I am organising upholstery and MOT and should be finished for first week in May, fingers crossed. Not many good photos as I was working at a steady speed and didn't stop to take them, I'll get a few more next time!
The shape being finalised before paint.
Choosing the colours and positions of logo.
The wiring harness being fitted.
Rebuilding pedal box.
Sound deadening going down before tank fit.
I now have the tank and steering column fitted, as well as fibre glossing in the tank straps and bonnet springs. A stainless steel grille made (I have sikalfexed this on but not entirely happy so likely to visit it again with a fibreglass tissue). All lights are fitted. The car tuned over for the first time in over two year so very happy. I still have to fine tune steering column and fiitment of pedal box, refit the bonnet, connect fuel tank to lines, manufacture a new dashboard, rebuild doors and fit kick plates and door top trim after a polish! Oh and the seats too! Hoping to progress through the majority of this over the bank holiday weekend.
One problem I do have is my brake fluid reservoir is full of gunk, I have ran it through dishwasher four times and can not get it out of second chamber. Thinking I require a new reservoir, I believe it is from a Cortina but I can not source one.
All looking good, like the sound proofing around the tank area.The shape being finalised before paint.
Choosing the colours and positions of logo.
The wiring harness being fitted.
Rebuilding pedal box.
Sound deadening going down before tank fit.
I now have the tank and steering column fitted, as well as fibre glossing in the tank straps and bonnet springs. A stainless steel grille made (I have sikalfexed this on but not entirely happy so likely to visit it again with a fibreglass tissue). All lights are fitted. The car tuned over for the first time in over two year so very happy. I still have to fine tune steering column and fiitment of pedal box, refit the bonnet, connect fuel tank to lines, manufacture a new dashboard, rebuild doors and fit kick plates and door top trim after a polish! Oh and the seats too! Hoping to progress through the majority of this over the bank holiday weekend.
One problem I do have is my brake fluid reservoir is full of gunk, I have ran it through dishwasher four times and can not get it out of second chamber. Thinking I require a new reservoir, I believe it is from a Cortina but I can not source one.
Easter work program looks very ambitious, I'll be happy if I can collect mine from trim next week ready for final build
TVRMs said:
Easter work program looks very ambitious, I'll be happy if I can collect mine from trim next week ready for final build
Ambitious indeed, in fact so ambitious it came and went and is now a distant memory with the car still not complete! New target is end of the year. It’s quite close now with final details (fingers crossed) being finished by HHC ready for MOT.
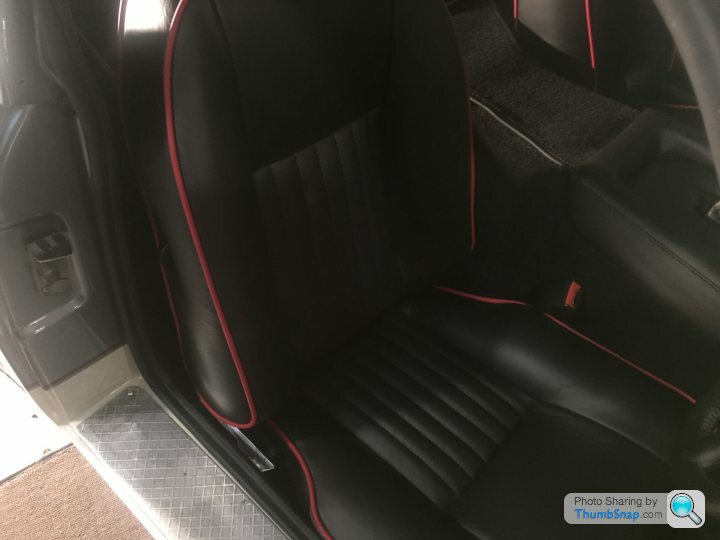
Took a different turn as I ended up in Afghanistan, but every cloud and the trip came with a monetary bonus which allowed me to farm more work out. Body work and paint was completed by Option1 then on my return I took the car to Lee at Trim Unique, before jetting off to work in USA, who completed the interior to an excellent standard, I’d heard he was good and he took what I asked for and added his own touches to give me something I couldn’t even imagine. He even put up with me relaying messages to him through my father every week pushing to get it done!
I’ve had the original wolfrace wheels refurbished, just need to give them a quick polish and I’ve ordered original size Vredestien tyres.

iPad playing tricks on me as usual and pictures upside down

TVRMs said:
Looking good.
If it makes you feel any better, ours isn’t finished either but should be tucked up in our garage around Christmas.
That’s good news. I’d quite like to see your car and the engineering that has gone into making everything fit and getting the power down, hopefully catch it at a show next year. I had a walk around my car at HHC and made a list of things that will need fettling once ‘complete’. Even though MOT will be done and she’ll be on the road, (or SORN until summer!) don’t think it will be truly finished for a while yet, but all fun and games! If it makes you feel any better, ours isn’t finished either but should be tucked up in our garage around Christmas.
Gassing Station | TVR Classics | Top of Page | What's New | My Stuff