2 Door Range Rover project
Discussion


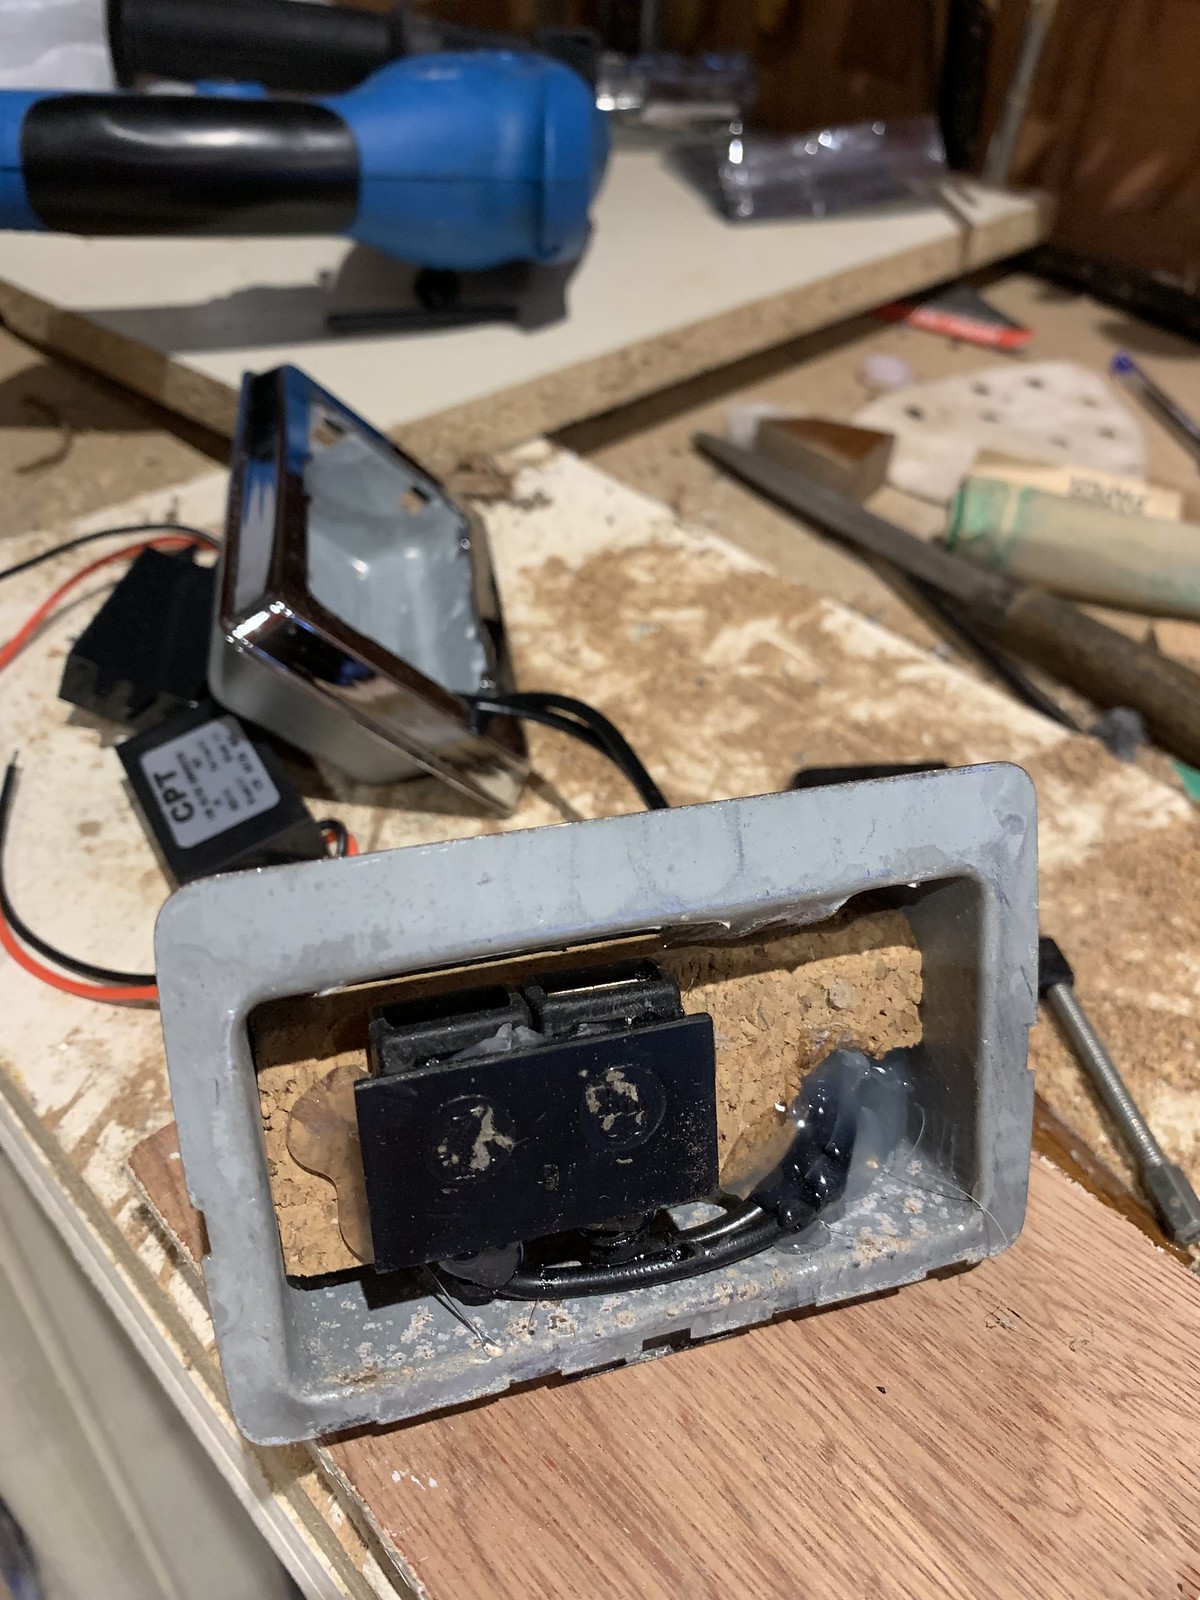
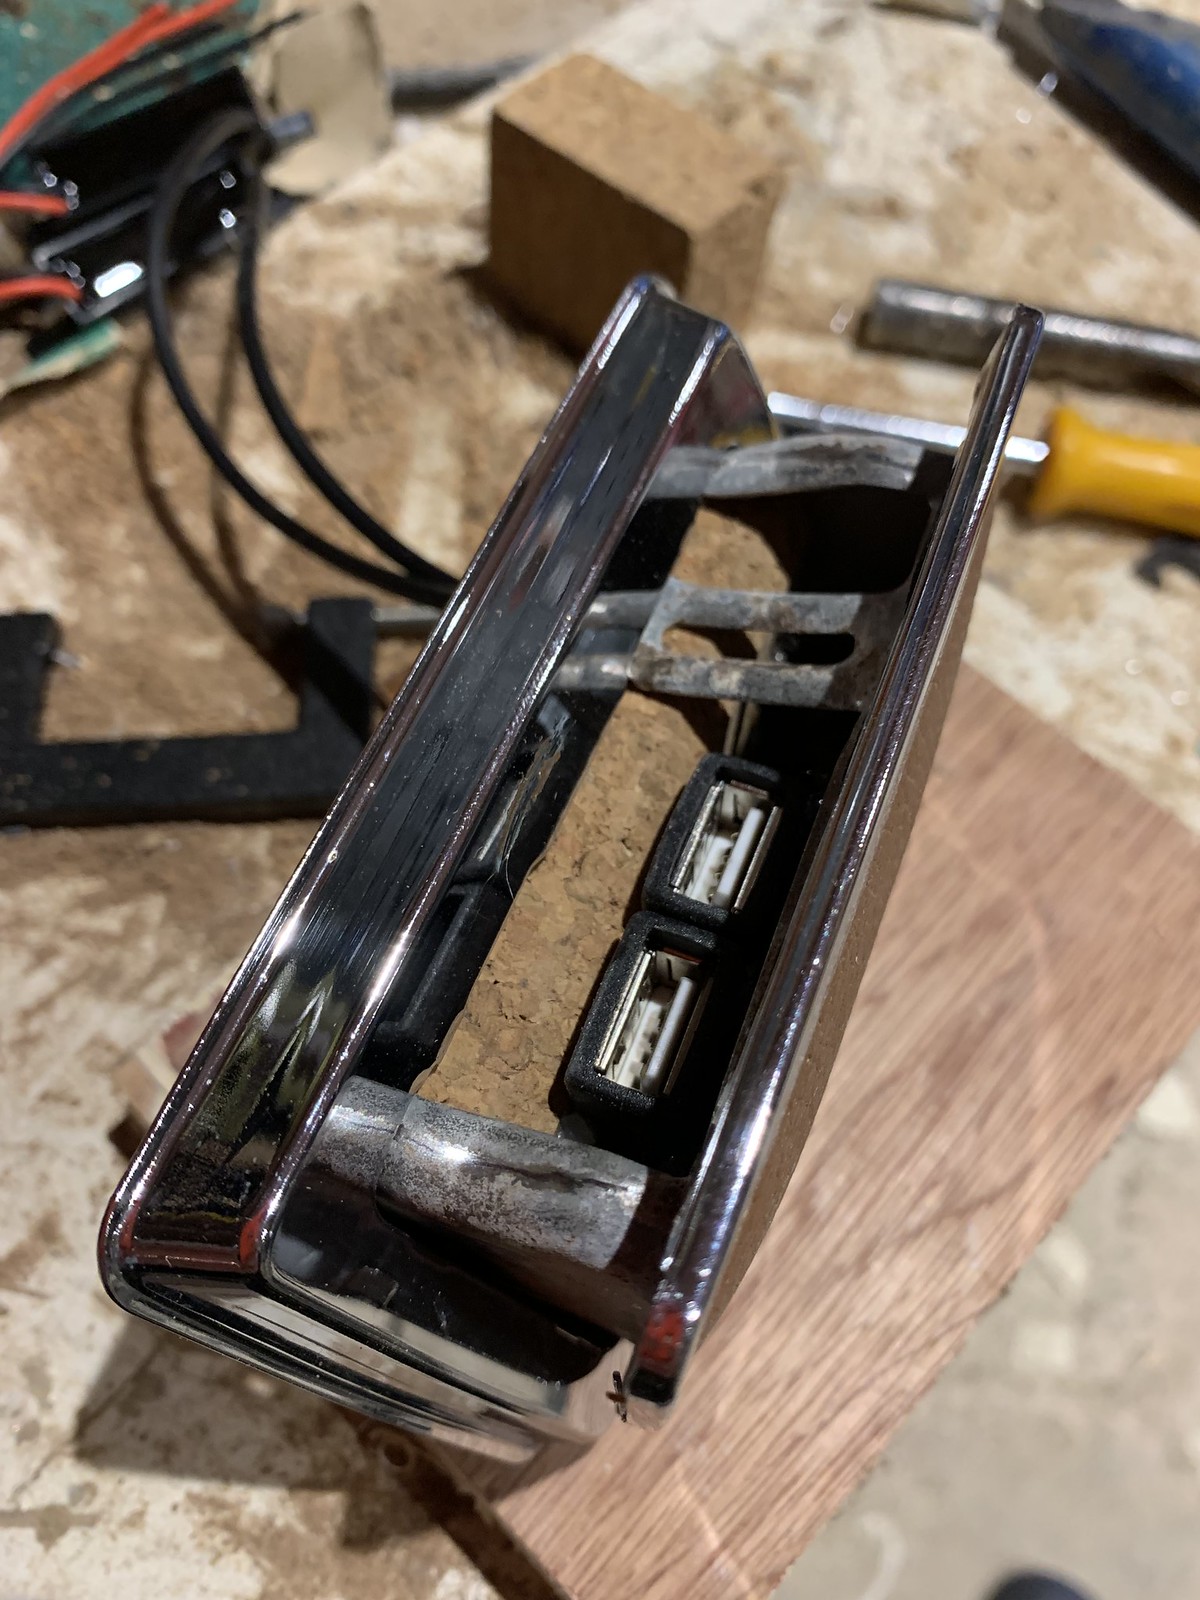
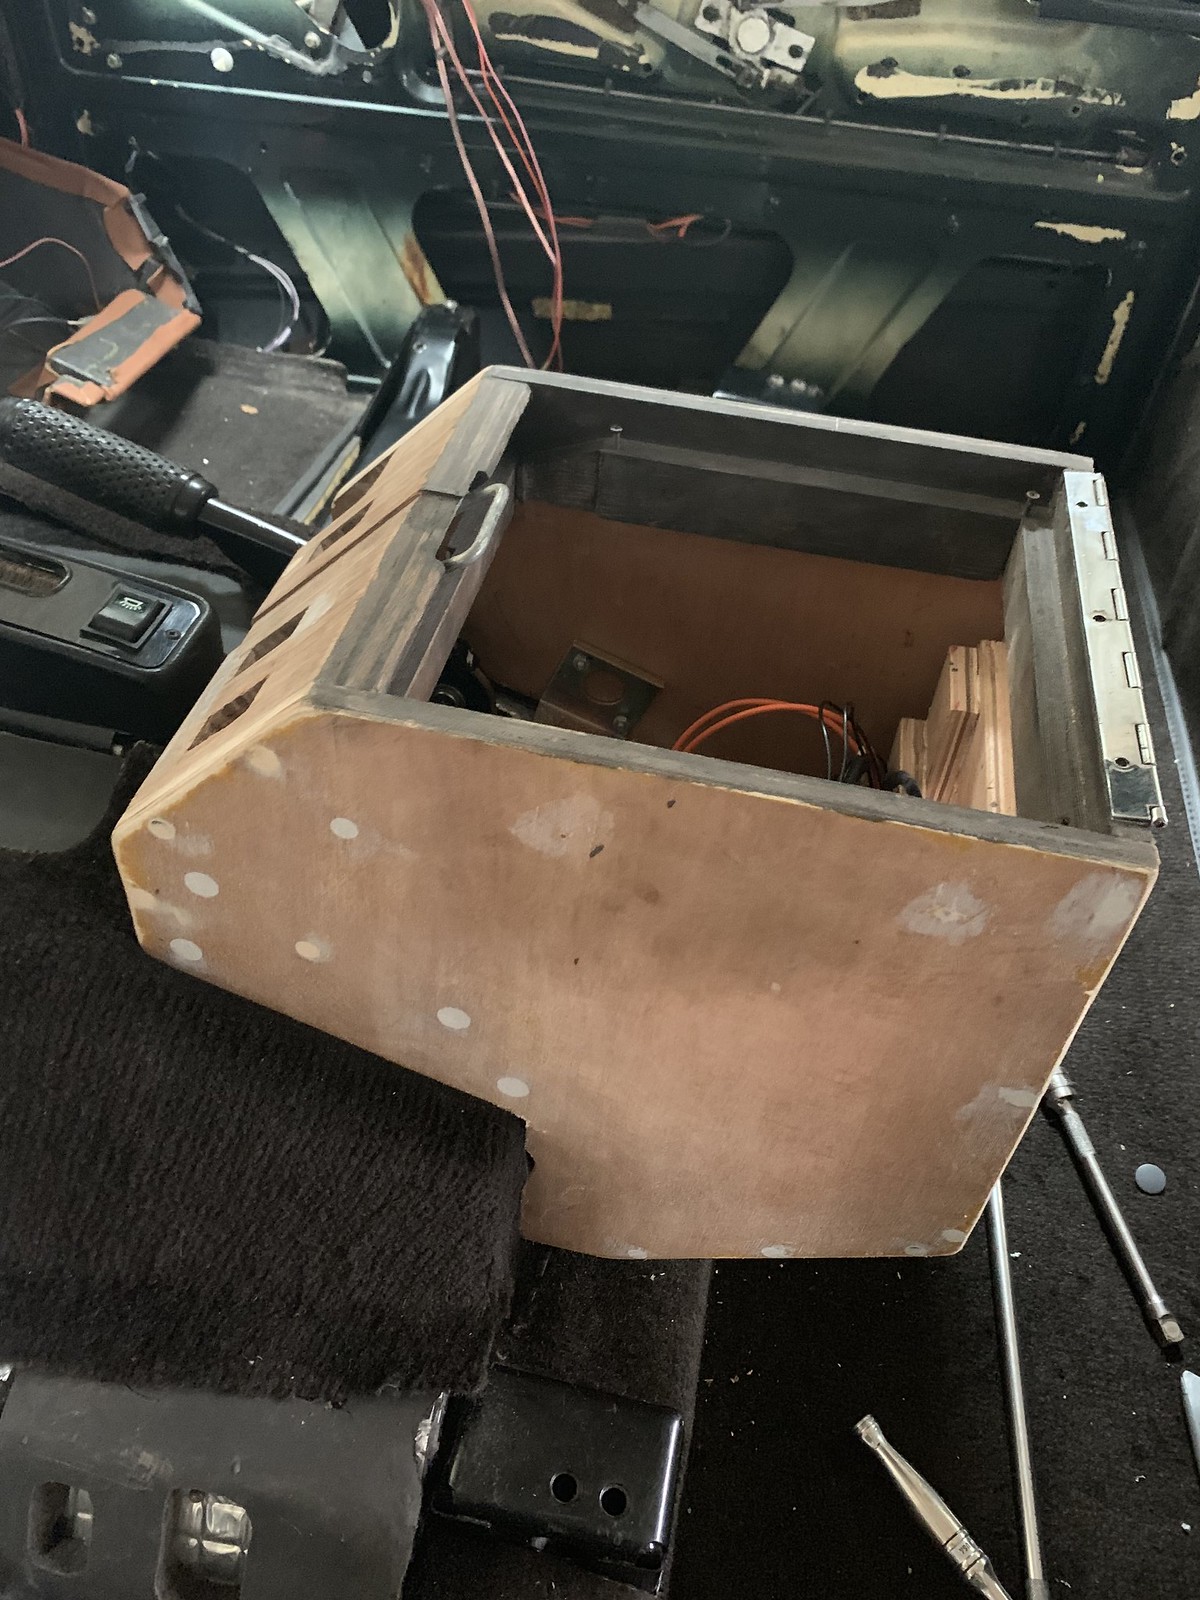
The new cubby box has been built and as the children won’t be smoking in the back of the car the rear facing ashtray was somewhat redundant so I thought it would be more useful to be turned into a usb charging point.
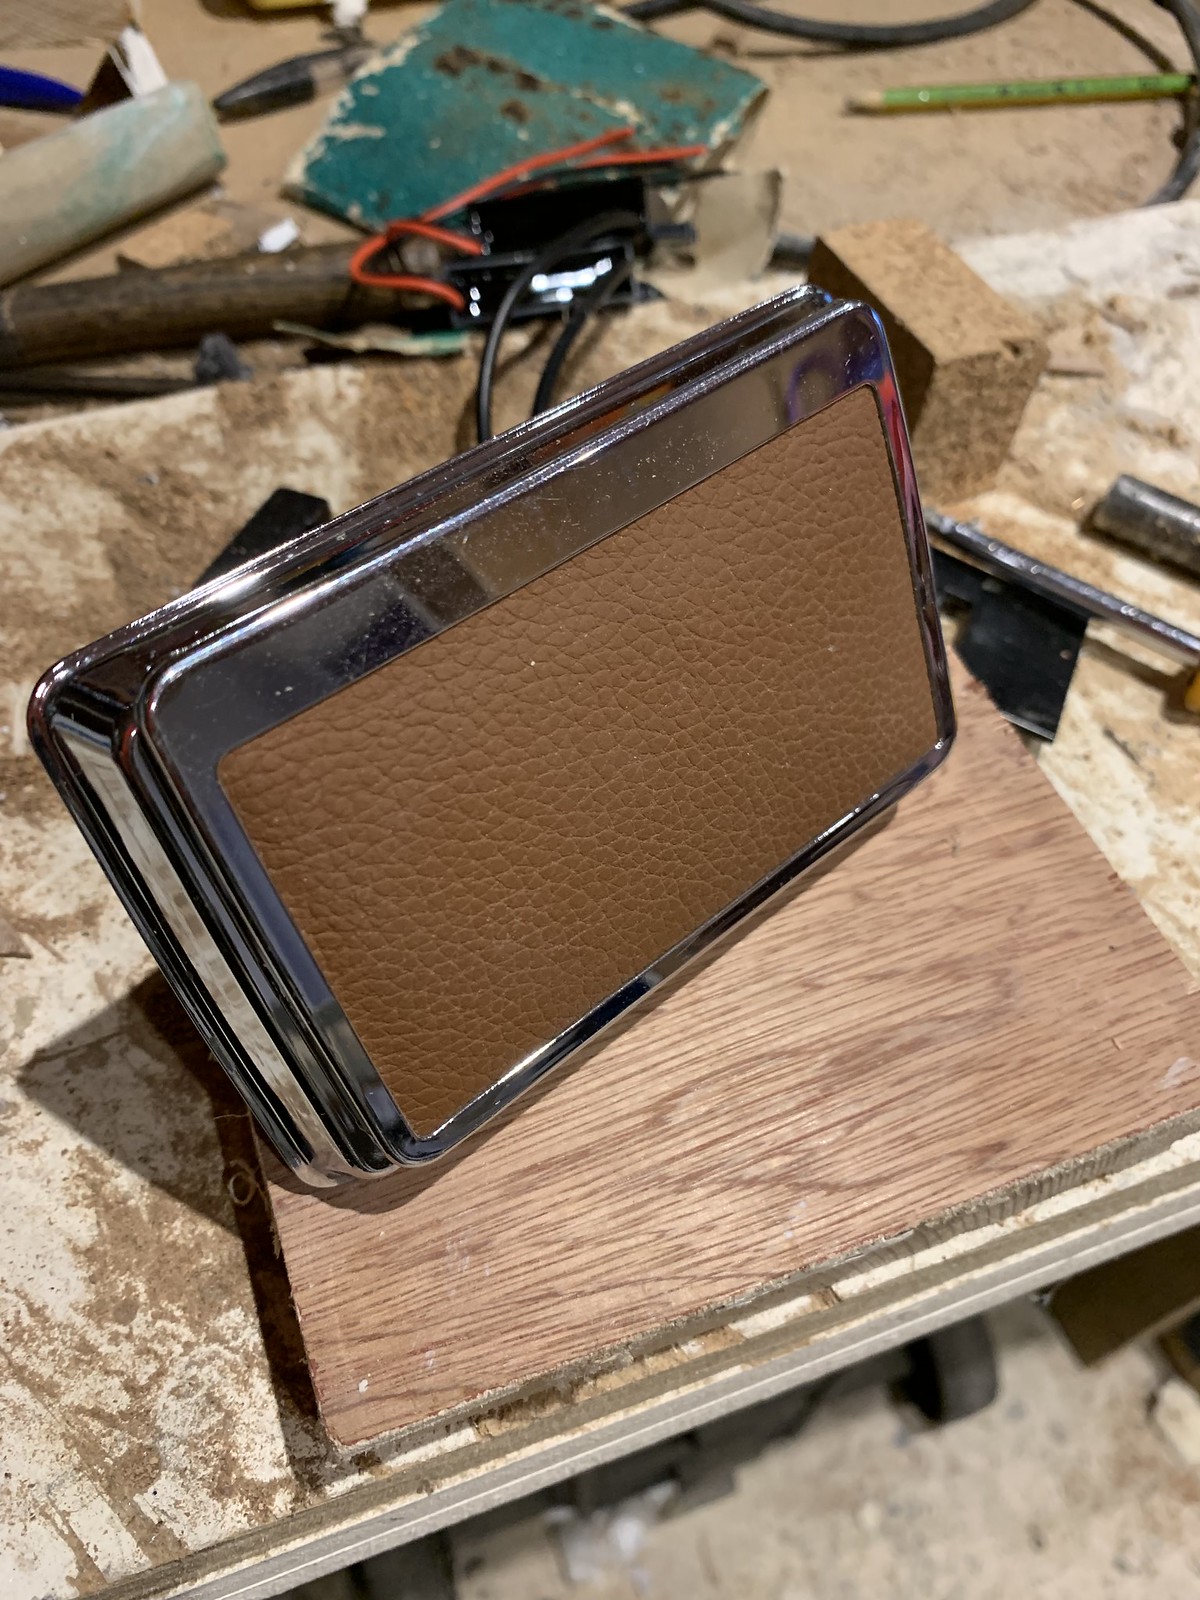
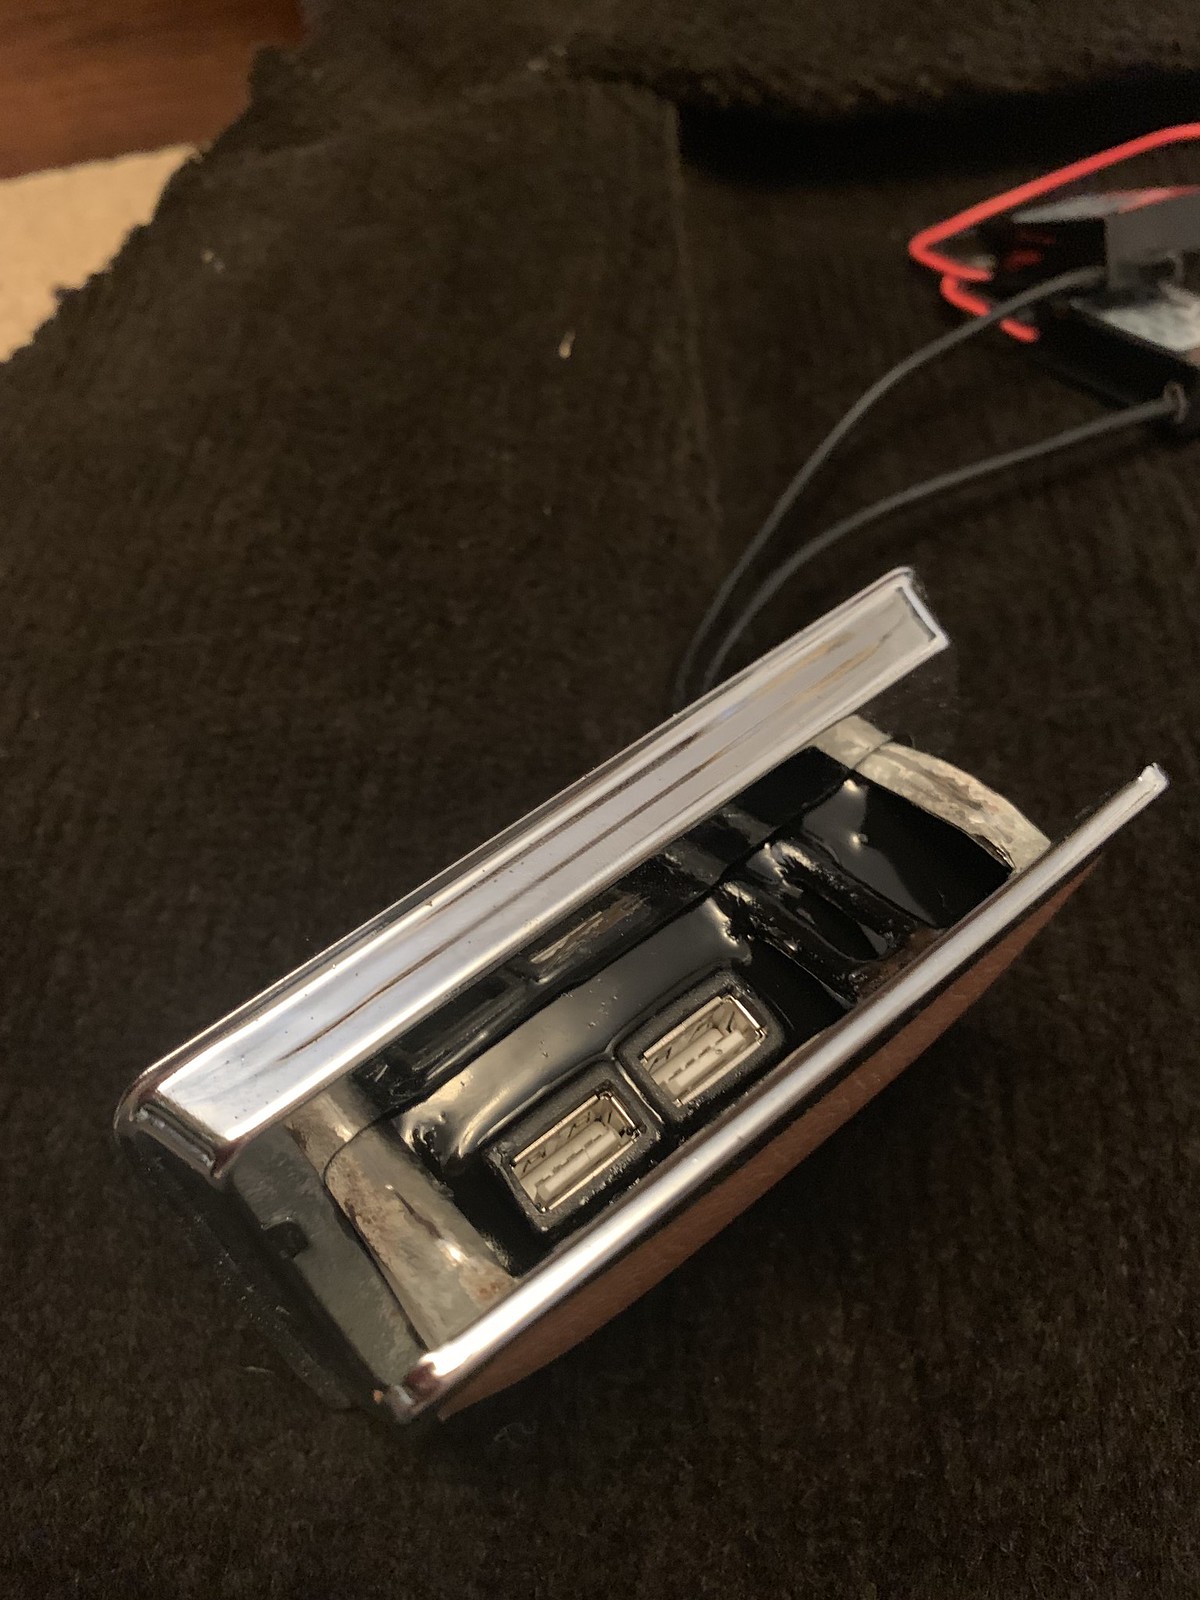
I sourced a pair of inline USB sockets, glued them to a plastic plate to hold them together and bonded that to a cork block, cut to fit in the ashtray. It was then all reassembled along with a new leather facing patch to match the new interior and then packed with electronic potting compound to finish.
Also had a shot at walnut veneering the glove box hatch
Slow progress as of late as the reassembly needs to be done as best as possible. Currently in the final stages of fitting the dash. These never fitted well in the first instance so getting a good finish between a 1972 top dash and the 80s aircon lower sections and a 90s veneer vent panel along with it all being trimmed has been somewhat of a challenge!!
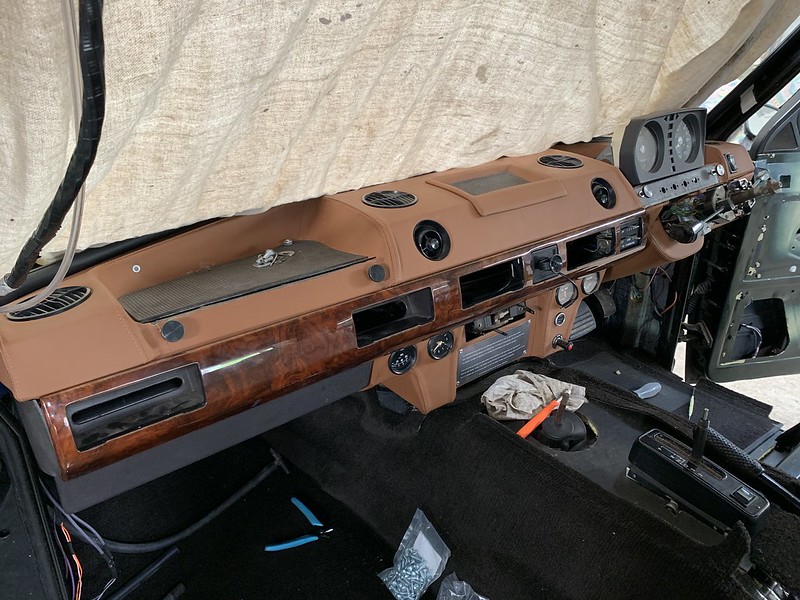

Hoping to get the car off to the trimmer this week but trying to complete a few details prior to this.
The tailgate has been getting the attention so far this week. The ultimate plan is to simply replace the upper tailgate in its entirety with a new aluminium one although I am still mulling over taking the original one apart, fixing and powder coating.
The lower tailgate is new and doesn’t have any of the correct fittings for the later top cap which locks seals better than the early ones and also has the tangs for lifting and lowering without getting dirty. Nor does it have the indents for the swinging number plate. The number plate itself is an issue as you cannot get the hinges any more and at the time of buying the lamps you also couldn’t get the lamp seals.
So, long story short, the number plate is going to resemble the Suffix A set up but not be moveable.


I’ve fabricated nylon pads that are the same dimensions as the absent hinges and used layers of rubber sheet trimmed to fit the lamps to create the seal.
The plan today (joys of the modern smart phone means that my office can be wherever I am most days) is to finish fitting the centeal locking mechanism to the upper tailgate, realign both upper and lower so that they fit correctly and then blast a load of wax oil into the two sections of the lower tailgate.
The tailgate has been getting the attention so far this week. The ultimate plan is to simply replace the upper tailgate in its entirety with a new aluminium one although I am still mulling over taking the original one apart, fixing and powder coating.
The lower tailgate is new and doesn’t have any of the correct fittings for the later top cap which locks seals better than the early ones and also has the tangs for lifting and lowering without getting dirty. Nor does it have the indents for the swinging number plate. The number plate itself is an issue as you cannot get the hinges any more and at the time of buying the lamps you also couldn’t get the lamp seals.
So, long story short, the number plate is going to resemble the Suffix A set up but not be moveable.
I’ve fabricated nylon pads that are the same dimensions as the absent hinges and used layers of rubber sheet trimmed to fit the lamps to create the seal.
The plan today (joys of the modern smart phone means that my office can be wherever I am most days) is to finish fitting the centeal locking mechanism to the upper tailgate, realign both upper and lower so that they fit correctly and then blast a load of wax oil into the two sections of the lower tailgate.
Later style cap to lower tail gate now fitted. They are more pleasant to use than the earlier style and seal better.

Rear plate fitted and lower tailgate adgusted to fit better.

Also removed the lettering. Have the original raise letters to fit in due course.
Upper tailgate is an original Suffix A steel. In good condition for the age bit has developed that classic banana bow from years of being push closed in the centre so it’s almost impossible to get the ends to catch the latches. Net result is I’ve ordered a new aluminium one from Famous Four today and the plan with the original is to take it apart, reshape, powdercoat, reassemble and put it into the dry storage with all the original 1972 interior so that it remains possible to simply convert the car back to factory if desired.
Rear plate fitted and lower tailgate adgusted to fit better.
Also removed the lettering. Have the original raise letters to fit in due course.
Upper tailgate is an original Suffix A steel. In good condition for the age bit has developed that classic banana bow from years of being push closed in the centre so it’s almost impossible to get the ends to catch the latches. Net result is I’ve ordered a new aluminium one from Famous Four today and the plan with the original is to take it apart, reshape, powdercoat, reassemble and put it into the dry storage with all the original 1972 interior so that it remains possible to simply convert the car back to factory if desired.

Thanks. Much appreciated. It’s obviously not going to be everyone’s cup of tea but I’ve owned these cars for 20 years and have been driven around in them for 45 and the purpose of this car is to take all the bits that I like that have been done over the years by the likes of Monteverdi, Wood and Picket or Overfinch etc and see which ones fit and work well and which are a bit too OTT and also do the same with my own ideas from 20 years of driving them.
And so far I’ve not had to resort to any of the remanufactured parts as over the last 9 years I’ve been buying lots of NOS original parts.
Plan for today is to reinstall the transmission tunnel lugs that the carpet affixes to, trim where the carpet needs to fit under the earlier heater design and test fit the bespoke cubby.


Test fit of the cubby went well. All seems in order before it’s trimmed.


Dig out the door sill covers and realised they were somewhat worse for wear so set about sanding them down to remove as many of the nicks and scratches as possible and wire wooling. Still pondering whether to black anodise them?
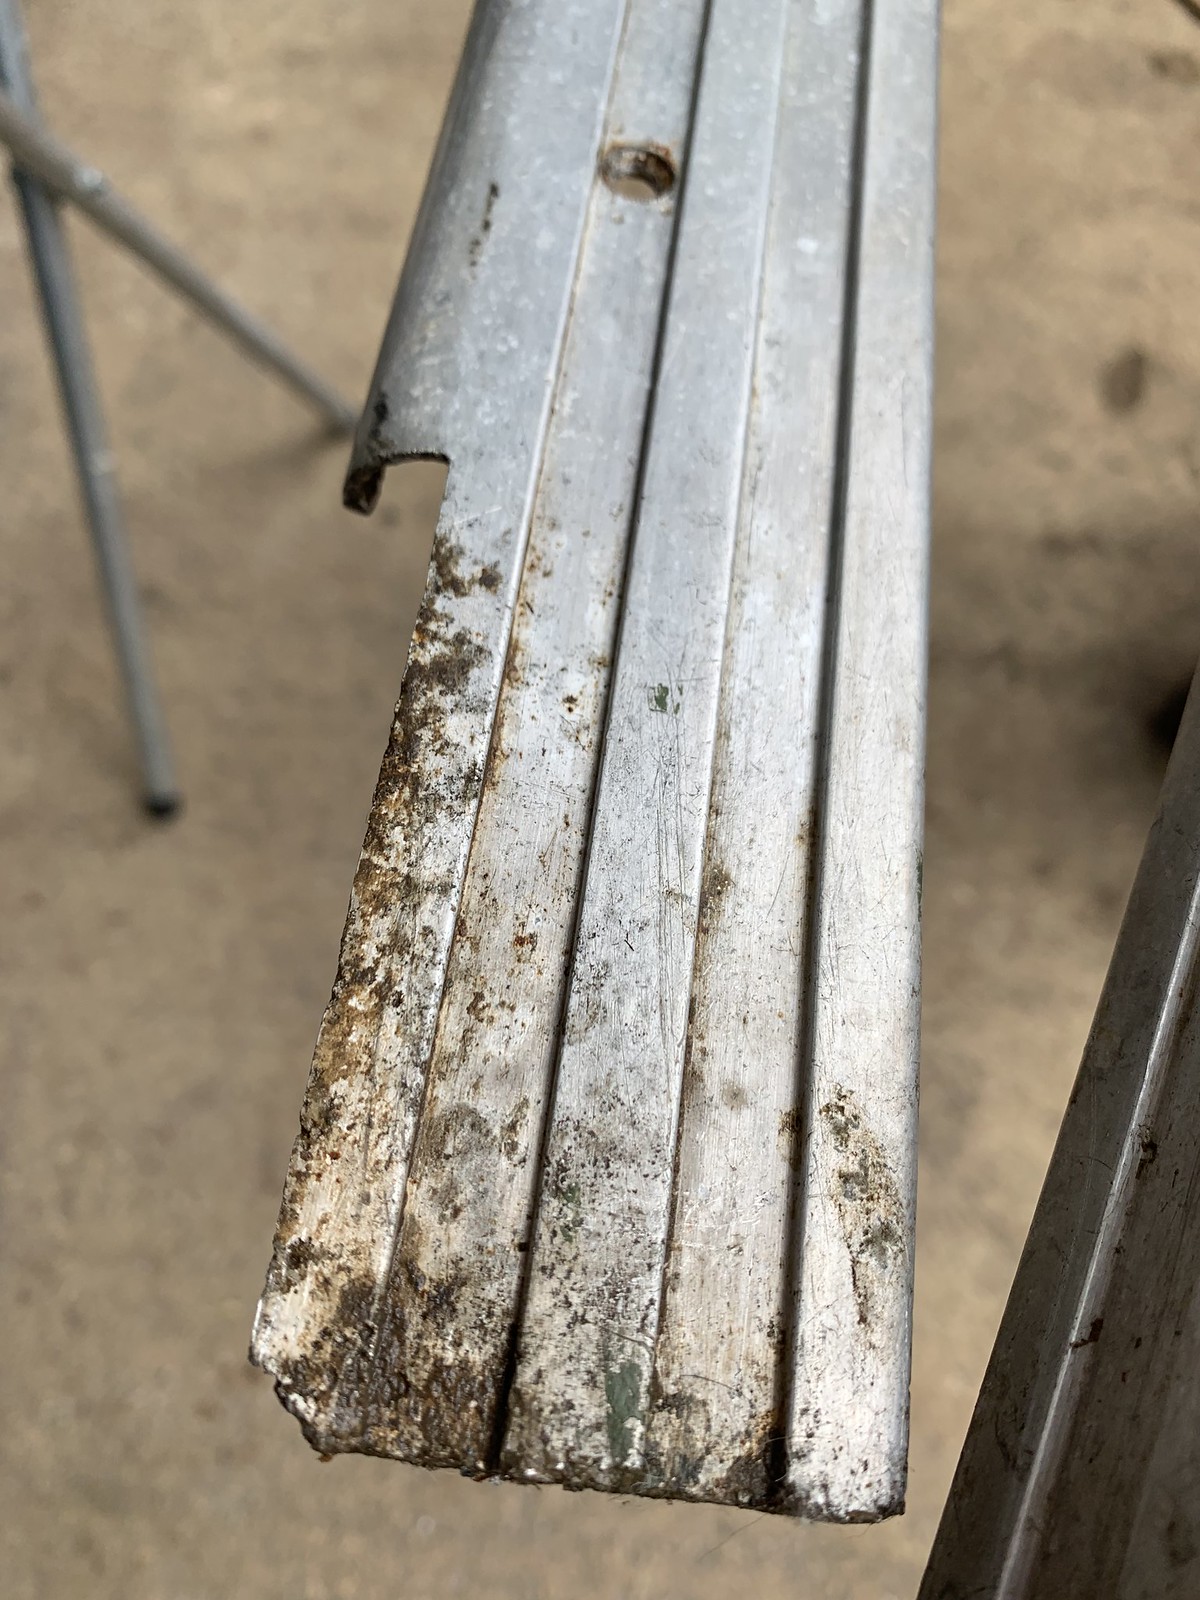


Dig out the door sill covers and realised they were somewhat worse for wear so set about sanding them down to remove as many of the nicks and scratches as possible and wire wooling. Still pondering whether to black anodise them?


Well. I wish I had not decided to change the upper tailgate.
I went for the ali tailgate that is meant to be the exact replacement and from a reputable firm. In short, is it b ks!
ks!
The instructions are written by someone who clearly died half way through and finished off by someone else who didn’t bother to check where the previous person got up to.
The bloke who sling it together didn’t tighten up the screws where they need to be tightened but over tightened the hinge screws that never needed to be in there or tightened so that they were buggered and the tailgate flexed due to lose screws.
So, tightening up the lose screws was on thing but having to dig out an M6 tap and die to fix the mess of some gibbon was not amusing. As for why they have used M6 which are completely the wrong screw for the fixing is beyond me. And then to supply an M6 bolt that is too long is just stupid.
And then that is before we get to the stop channel that’s been fitted. Why would anyone not want to retain the original look and use the proper top finishing strip? That was the first oddity but then if you’re going to fit a bit of guttering that you design to fit between the frame and the glass then at least go the next step and ensure the gibbon responsible for doing so actually bothers to apply the curve required and fit it properly.
Crap instructions. Crap construction by a gibbon. Crap little stop gutter.
This is exactly why British manufacturing died in the 70s. st gibbons screwing things together carelessly overseen by st management with no idea how to manage.
Frankly, I should have slung the thing back. It’s 2019 not 1979.
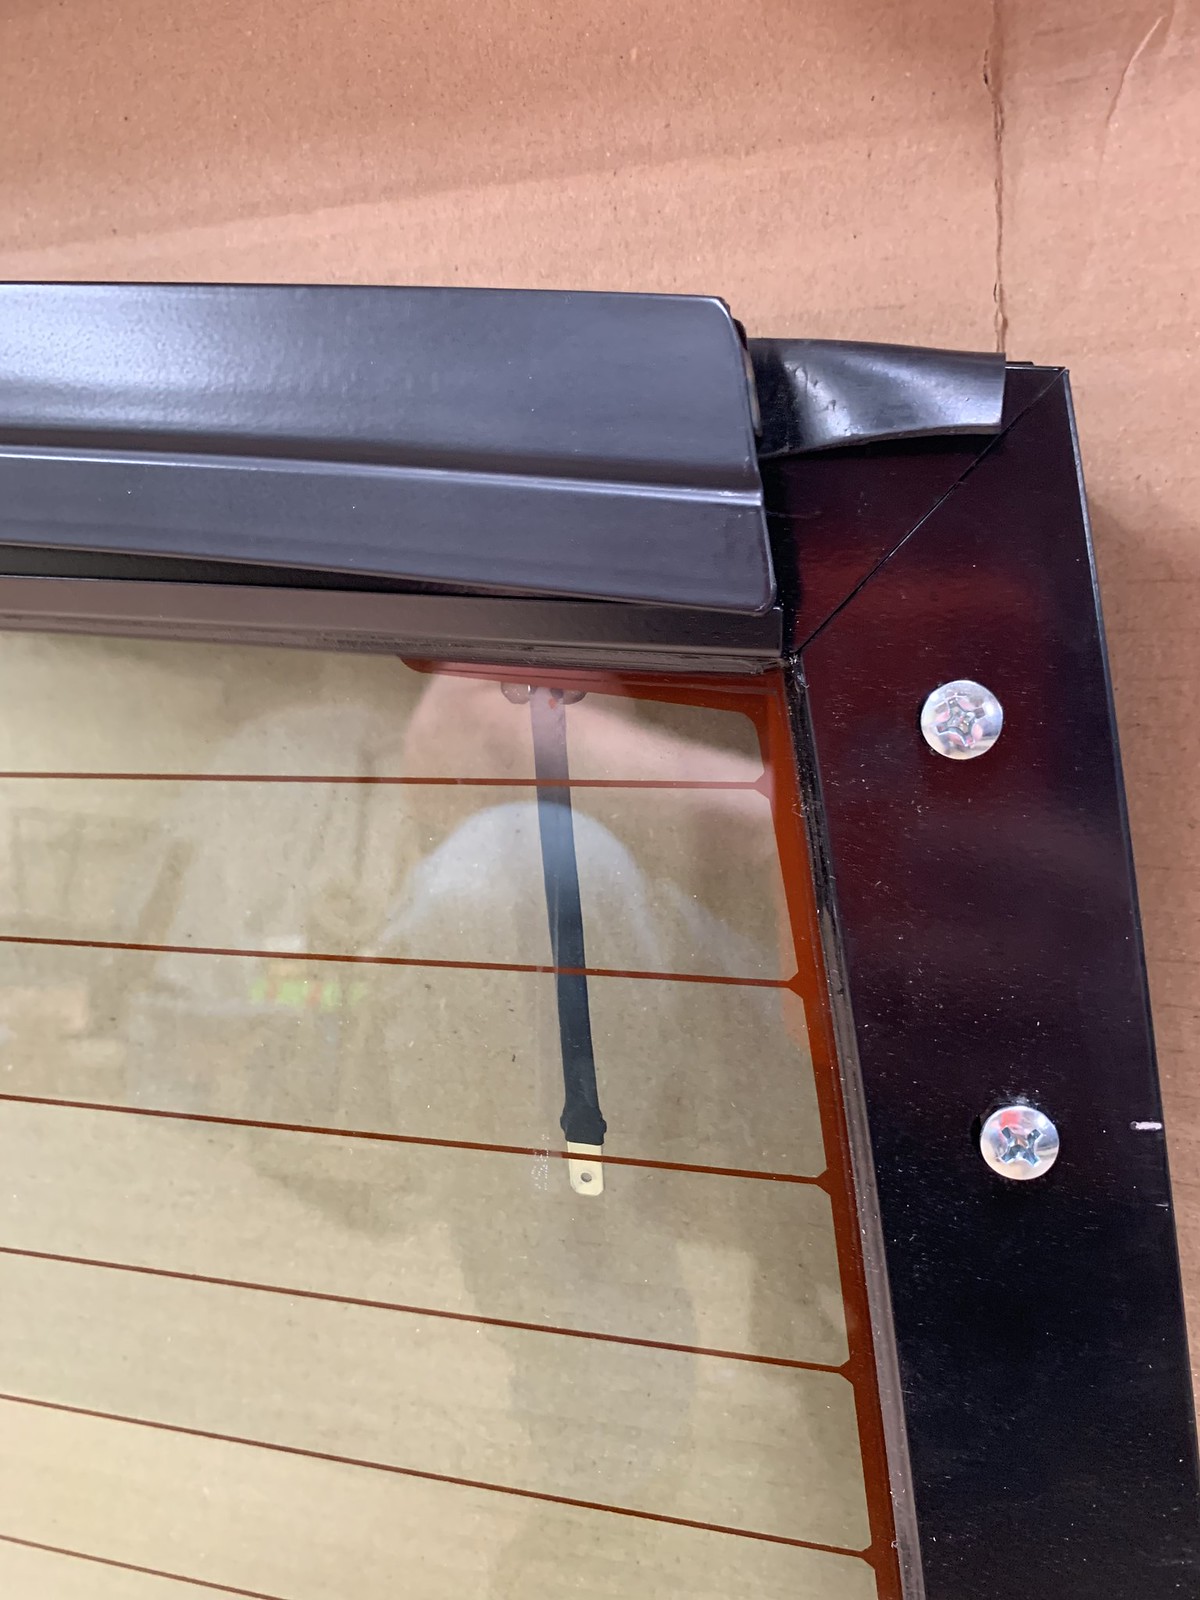
This was trying to fit the proper stop rail. The correct rubber should have been supplied. Who in 2019 wants to pay big bucks for something that simply doesn’t look correct? Fifteen years ago no one probably cared when they were patching up an old banger but the world has changed somewhat.
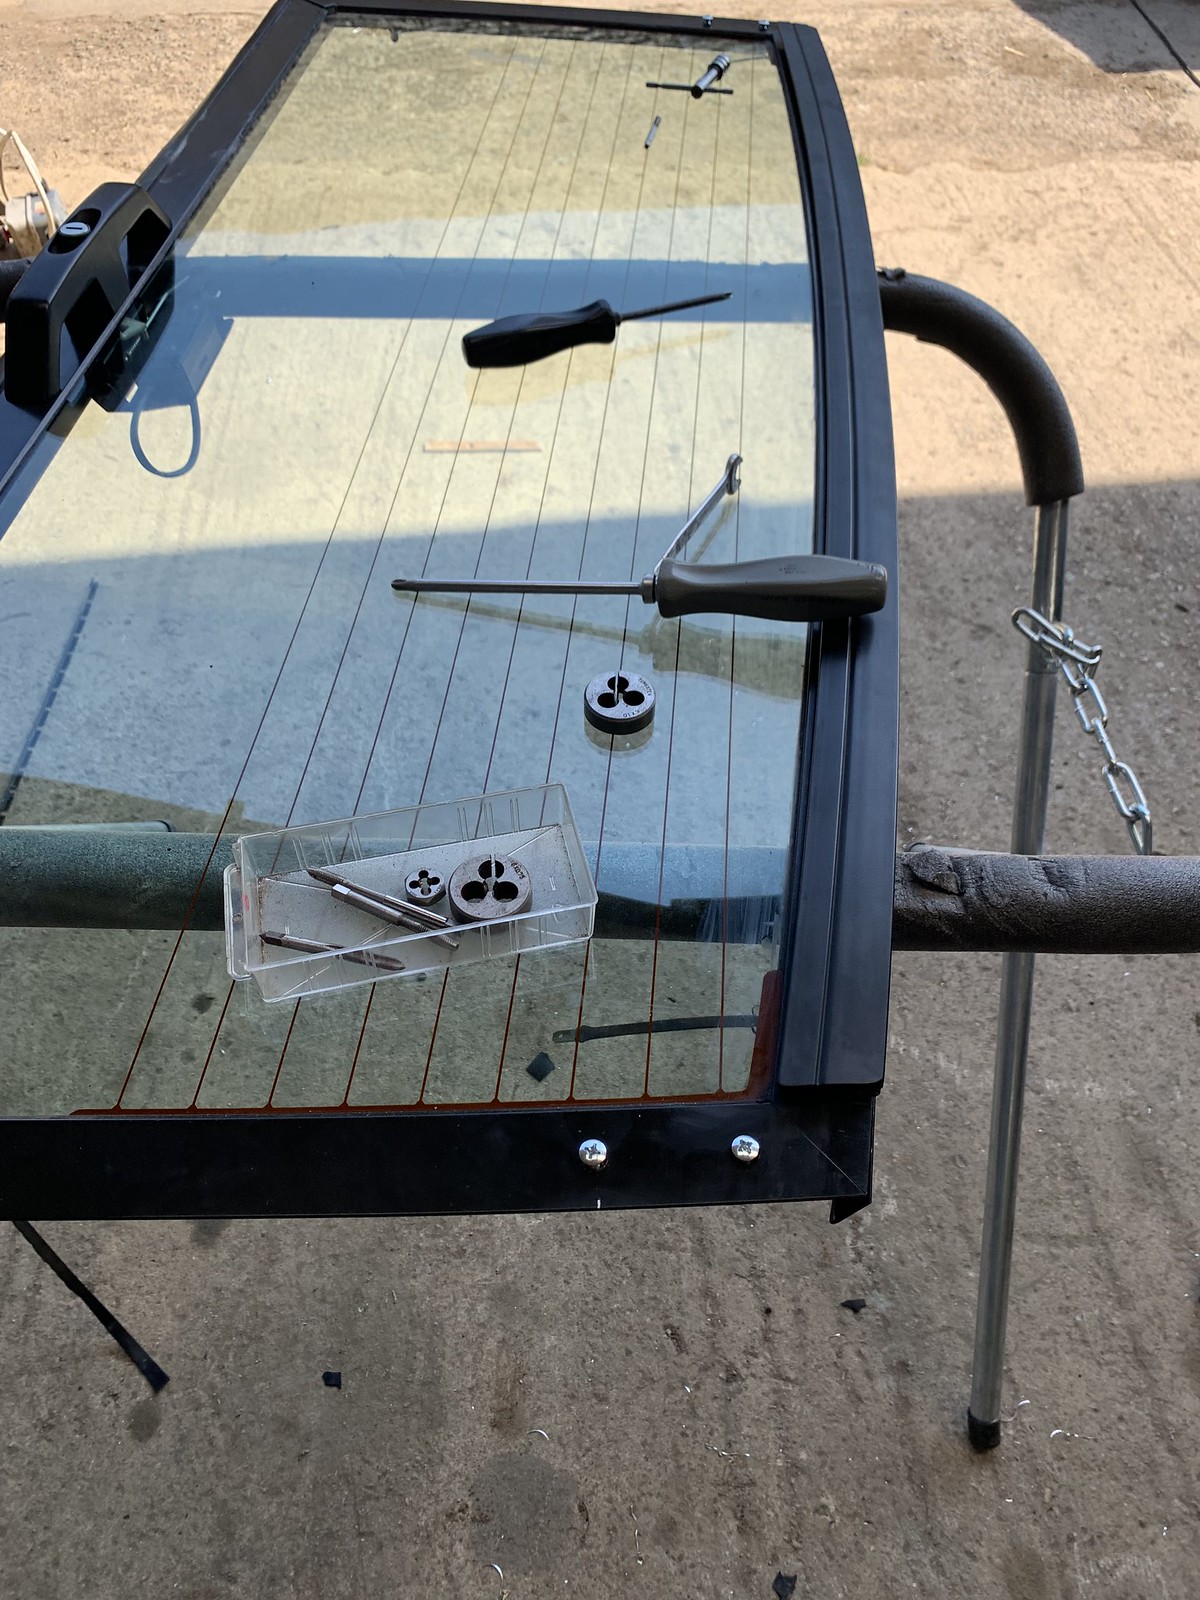
At that point I hadn’t appreciated that the hinge bolts were fubared into the frame. I’d noticed they were the wrong colour and also the wrong head size but who expects them to be the wrong length and driven so far in that they’ve buggered it!
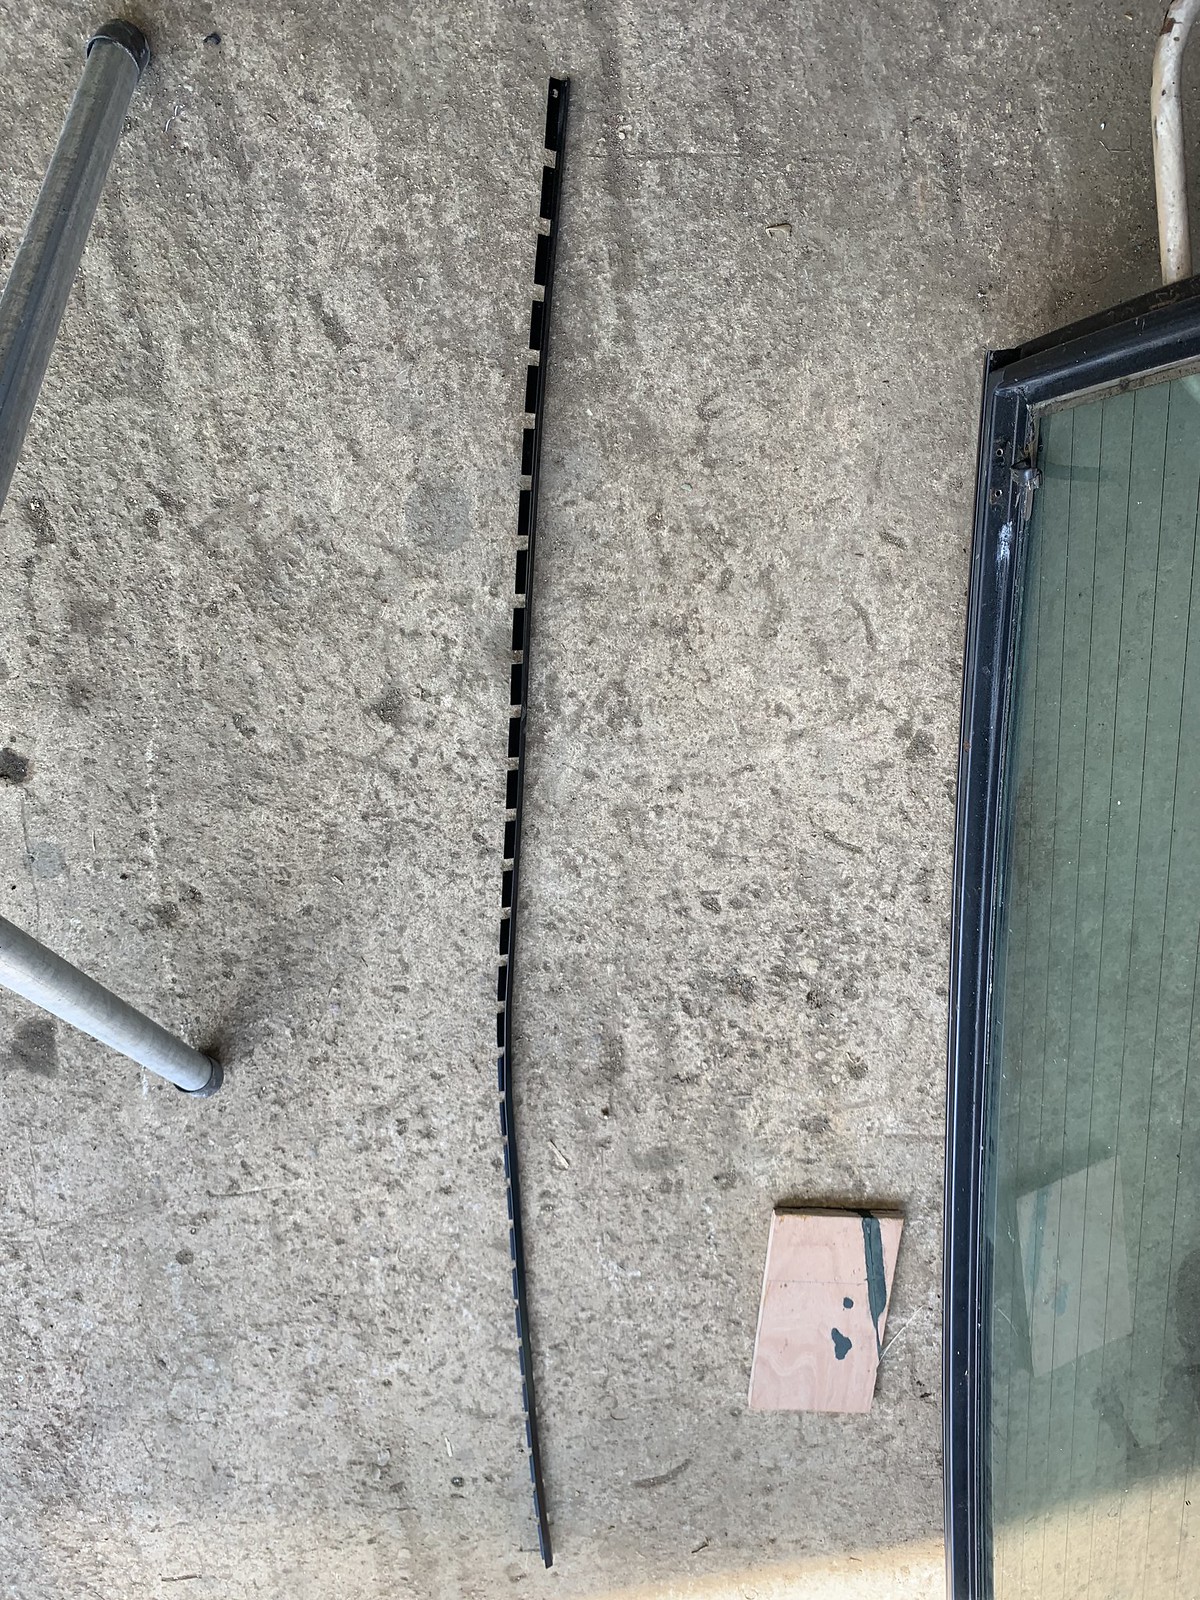
Their stop rail. It took me less than a minute after removing it to apply a gentle curve that matched the screen curve. The gibbon who slung this together couldn’t be arsed, just pushed it in straight, slapped in some silicon sealant and didn’t give a crap that it wasn’t fitted evenly.
Fixing the byproduct of arming a gibbon with an electric screwdriver.
I’ve lost two days on this and probably most of tomorrow when the car was due to go to the trimmers in the morning. Piss poor British engineering in 2019.
I went for the ali tailgate that is meant to be the exact replacement and from a reputable firm. In short, is it b
ks!The instructions are written by someone who clearly died half way through and finished off by someone else who didn’t bother to check where the previous person got up to.
The bloke who sling it together didn’t tighten up the screws where they need to be tightened but over tightened the hinge screws that never needed to be in there or tightened so that they were buggered and the tailgate flexed due to lose screws.
So, tightening up the lose screws was on thing but having to dig out an M6 tap and die to fix the mess of some gibbon was not amusing. As for why they have used M6 which are completely the wrong screw for the fixing is beyond me. And then to supply an M6 bolt that is too long is just stupid.
And then that is before we get to the stop channel that’s been fitted. Why would anyone not want to retain the original look and use the proper top finishing strip? That was the first oddity but then if you’re going to fit a bit of guttering that you design to fit between the frame and the glass then at least go the next step and ensure the gibbon responsible for doing so actually bothers to apply the curve required and fit it properly.
Crap instructions. Crap construction by a gibbon. Crap little stop gutter.
This is exactly why British manufacturing died in the 70s. s
t gibbons screwing things together carelessly overseen by st management with no idea how to manage. Frankly, I should have slung the thing back. It’s 2019 not 1979.
This was trying to fit the proper stop rail. The correct rubber should have been supplied. Who in 2019 wants to pay big bucks for something that simply doesn’t look correct? Fifteen years ago no one probably cared when they were patching up an old banger but the world has changed somewhat.
At that point I hadn’t appreciated that the hinge bolts were fubared into the frame. I’d noticed they were the wrong colour and also the wrong head size but who expects them to be the wrong length and driven so far in that they’ve buggered it!
Their stop rail. It took me less than a minute after removing it to apply a gentle curve that matched the screen curve. The gibbon who slung this together couldn’t be arsed, just pushed it in straight, slapped in some silicon sealant and didn’t give a crap that it wasn’t fitted evenly.
Fixing the byproduct of arming a gibbon with an electric screwdriver.
I’ve lost two days on this and probably most of tomorrow when the car was due to go to the trimmers in the morning. Piss poor British engineering in 2019.
The tailgate wasn’t latching on either side. There wasn’t enough adjustment in the tailgate hinges or the latch plates.
The only solution was to make new plates with the lugs positioned further forward and lower.


I also stripped the paint off the lower tailgate locking plates which had previously been painted.

And, harah, the tailgate closes. It’s still not quite right and in due course I’m going to make another set with the lugs a couple of mm further forward again.

The only solution was to make new plates with the lugs positioned further forward and lower.
I also stripped the paint off the lower tailgate locking plates which had previously been painted.
And, harah, the tailgate closes. It’s still not quite right and in due course I’m going to make another set with the lugs a couple of mm further forward again.
Gassing Station | Readers' Cars | Top of Page | What's New | My Stuff