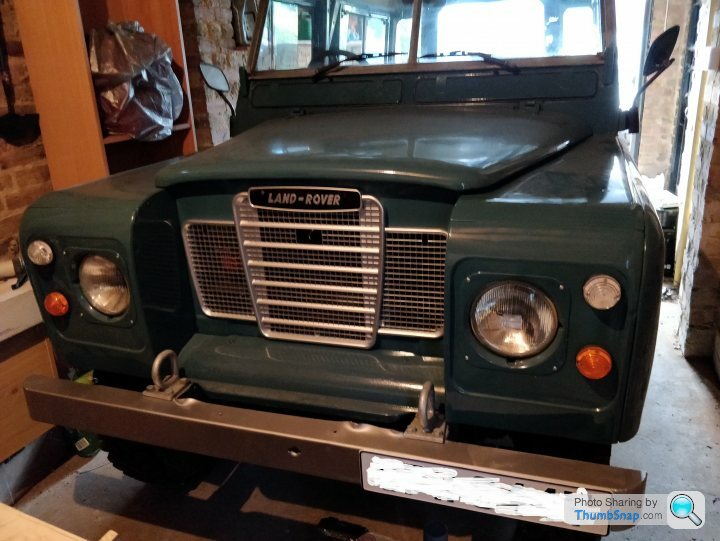
1983 Land Rover Series 3
Discussion


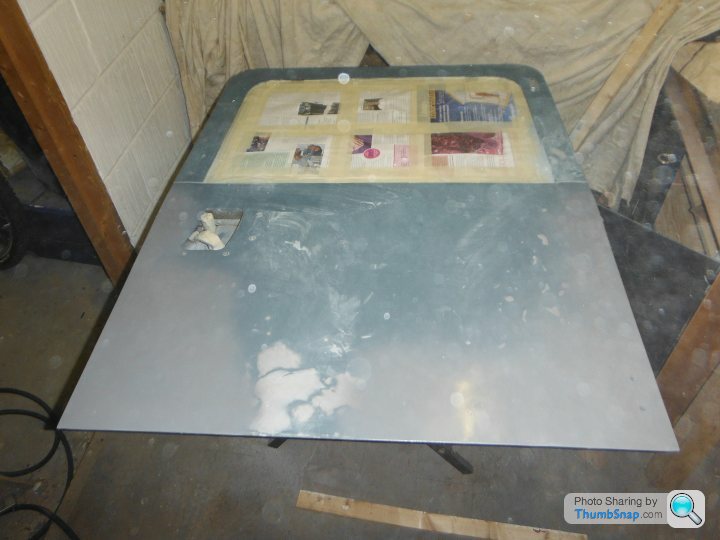
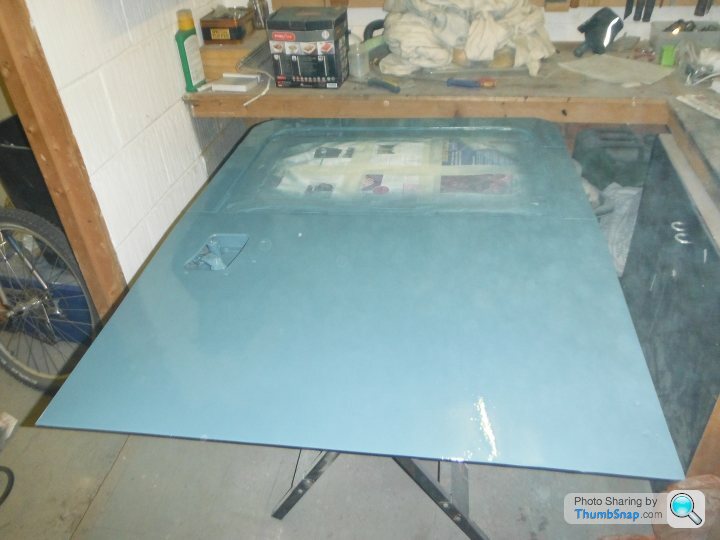
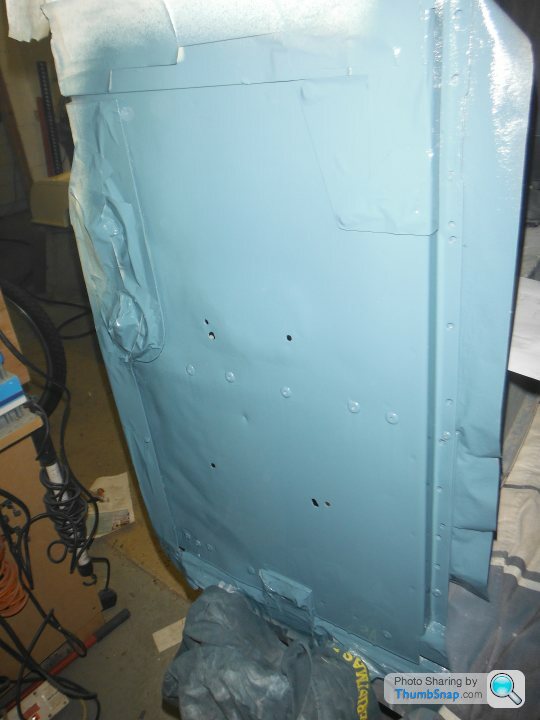
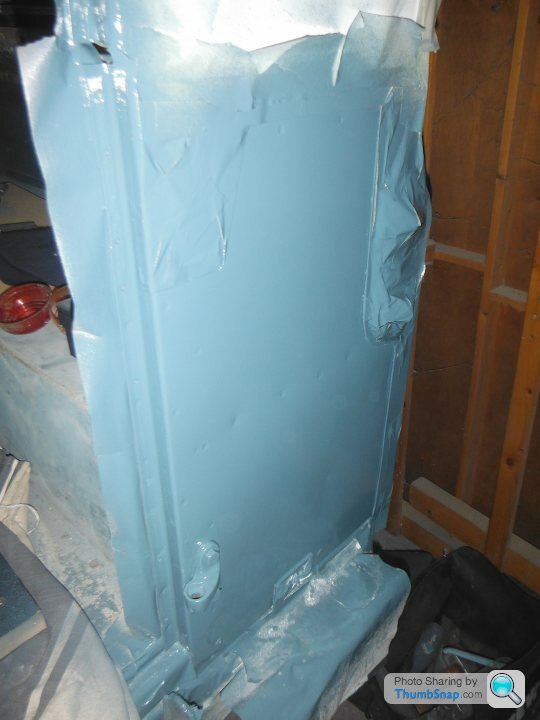
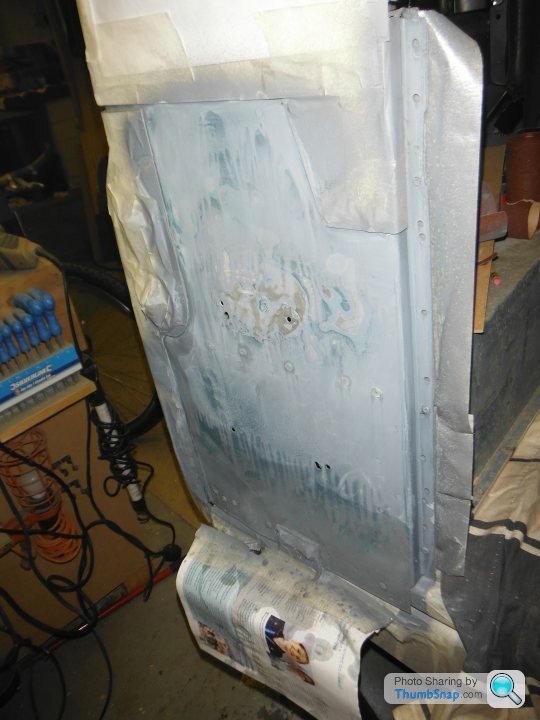
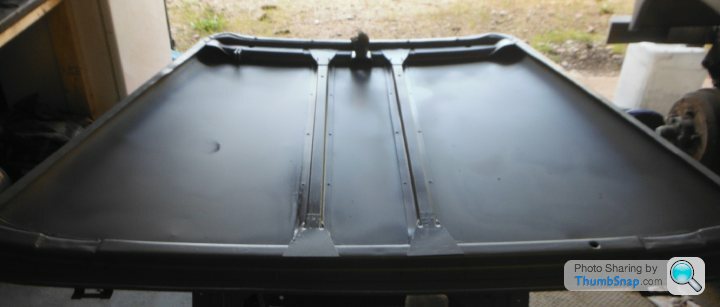
The first colour coats were the rear door. I chose that as I could easily remove it from the vehicle and rest it on trestle tables. I filled a few dings and filled and smoother some of the corder dents. On reflection, they look pretty good now and I can’t even tell where the repairs are.
The first coat of etch looked like oil was getting mixed in with primer, so I drained the tank and after a few attempts it looked ok, but not great. I ended up using rattle cans on some of the last of the offending areas.
The ribbing was actually in quite a good state for a series land rover. I filled some on the pin prick sized holes and some of the dents (Probably where the door has been closed on something)
Any rusty areas of metal was painted with red oxide and then etched primed. Looking back, painting some with ribbed sections can hide bad spraying as the paint pools and can’t run very far! I was fairly happy with the cour coats on the inside and the outside of the door, but looking at layer efforts on the car, its not as glossy as I would have liked and I know I’m capable of.
The door then sat on trestles for about 8 months before I refitted. I’m now in the process of trimming the rear door with sound deadening and a custom trim panel. More of that later.
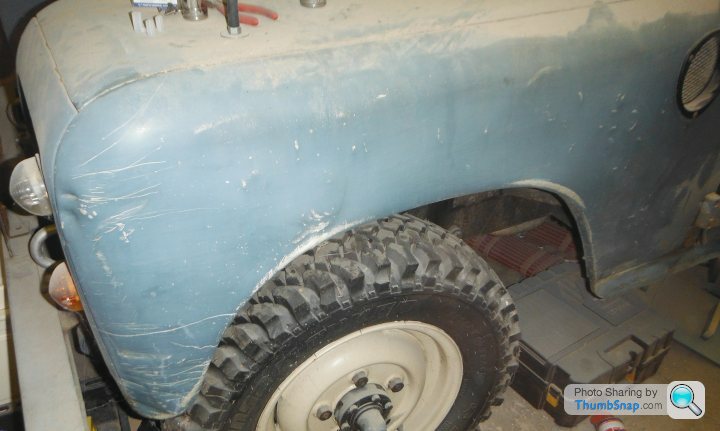
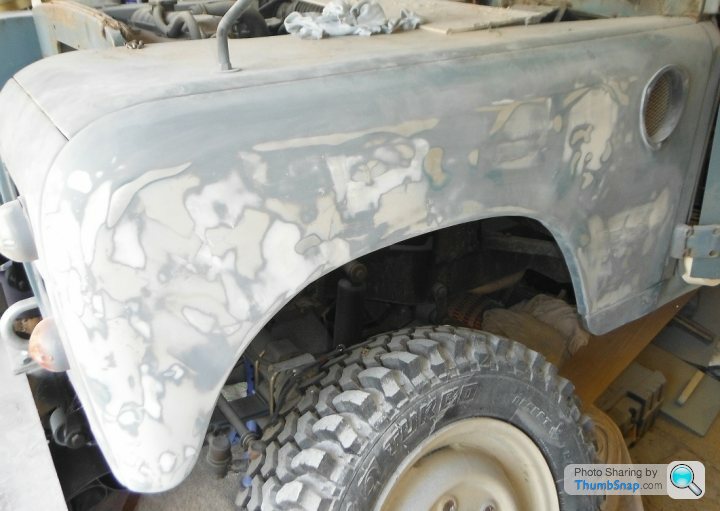
Painting the rest of the car was very difficult and made harder as I didn’t do it all in a single hit, which was a massive mistake. I really only ever worked on the car in 2-4hr blocks.
I spent a lot of time filling and and sanding the front wings. Should have just replaced the bloody things with plastic panels. The passenger side also had issues with different paints reacting with each other and I tried some isolator, but that didn’t work either. I struggled so much with the paintman etch primer, I moved to some cheaper tetrosol etch primer from Ebay. Was easier to apply and seemed to get a better finish. Getting consistent pressure out the gun was also an issue, which I struggled to get to grips with throughout the entire project.
[/url] |https://thumbsnap.com/9hi8XMwZ[/url]
[/url]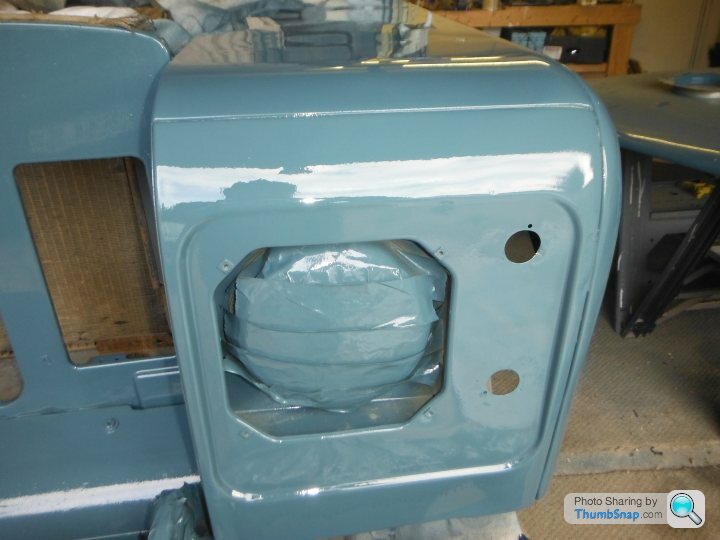 |https://thumbsnap.com/FH1Y5CPi[/url]
[/url]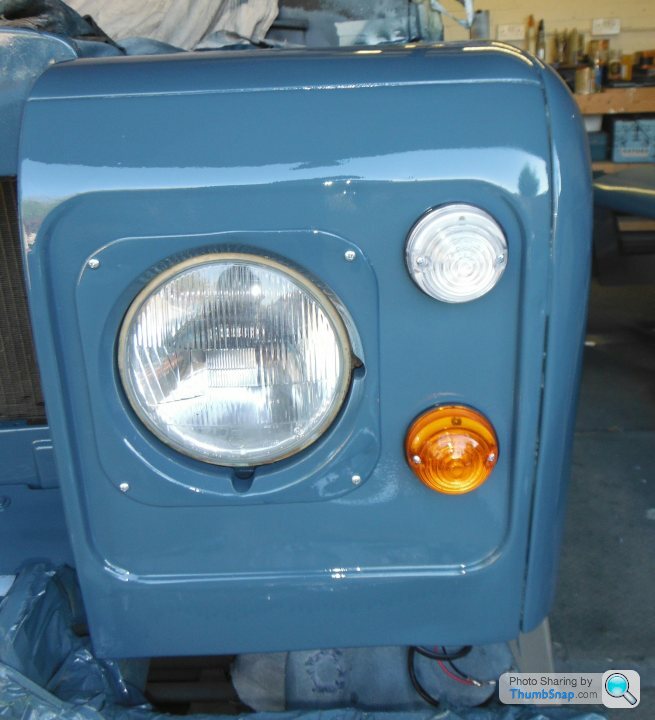 |https://thumbsnap.com/h143wAoN[/url]
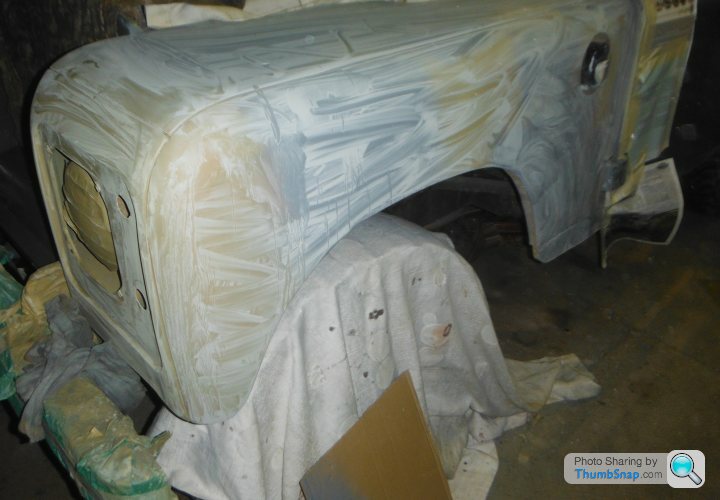
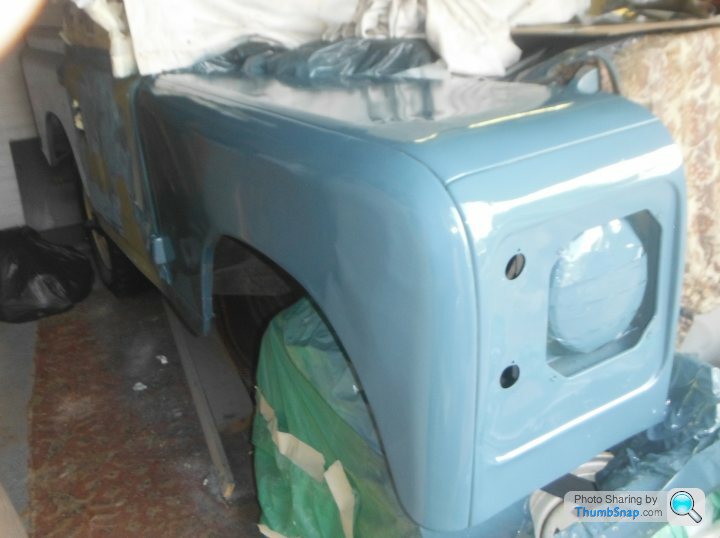

The rear ¾ panels were also a bit of a mess. I didn’t like the aftermarket square plastic fog lamp, so I removed the lamp and filled the hole. To provide a backing, I used chicken wire glued to the bodywork with polyurethane sealant. I was still using relatively thick filler, but I moved to thinner stiff later on, which was much easier to work with.
The bodywork round the rear number plate was damaged and had several holes, but I managed to fill and sand that so it actually looked quite decent.

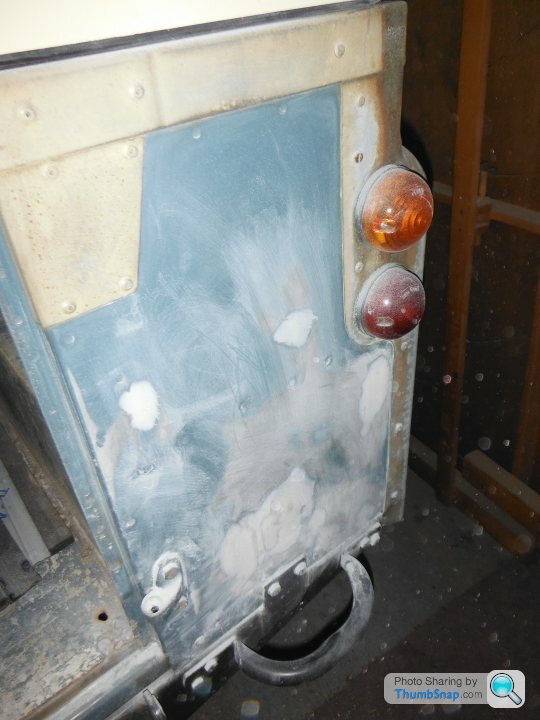

I replaced all the lights with new ones as LR lights are cheap as chips at £2.50 each. I didn’t paint the body cappings as I think it looks naff.
The passenger side rear wing has received quite a thump at some point and been reshaped to a reasonable standard, but I managed to improve it and sanding it back down and filling the smaller cracks. Took a long time!
I used to apply a coat of etch primer as a guide coat so I could see how the bodywork was looking. I think it helped, but it did mean that I was using a lot of paint. Despite hours of filling and sanding and priming, the wings still have several imperfections. Series LR wings are single skin and that means that thye bend alot, which makes it trickeier to sand down.
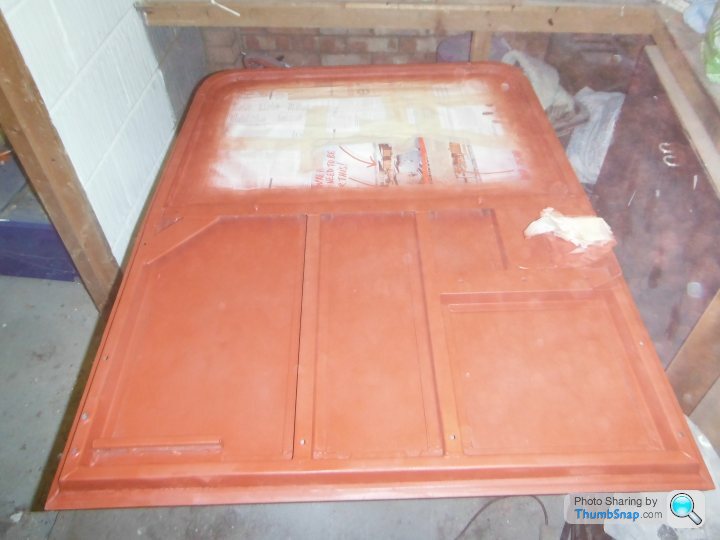
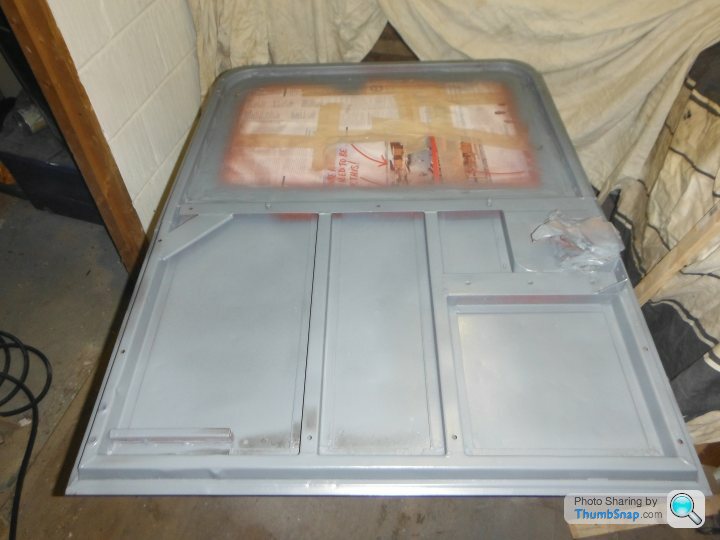
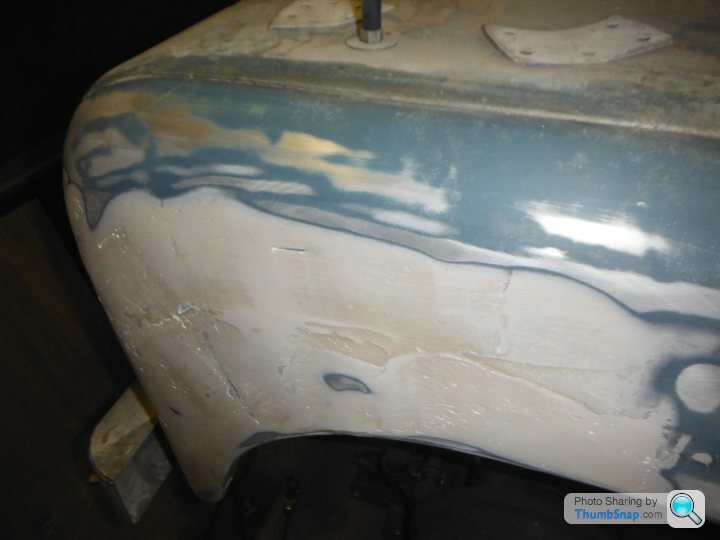
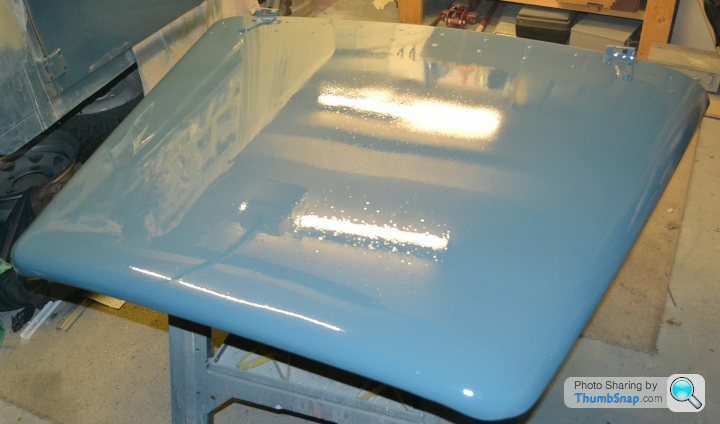
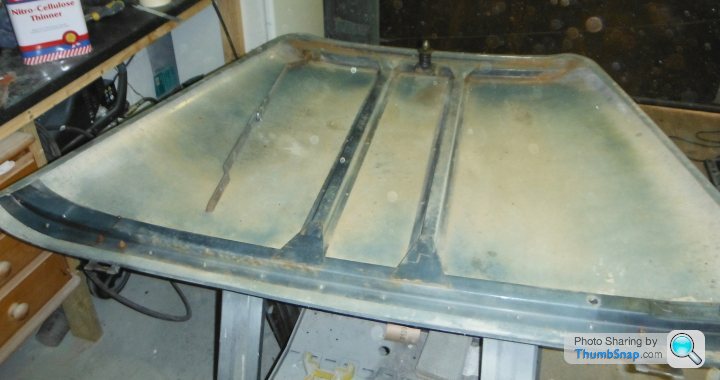
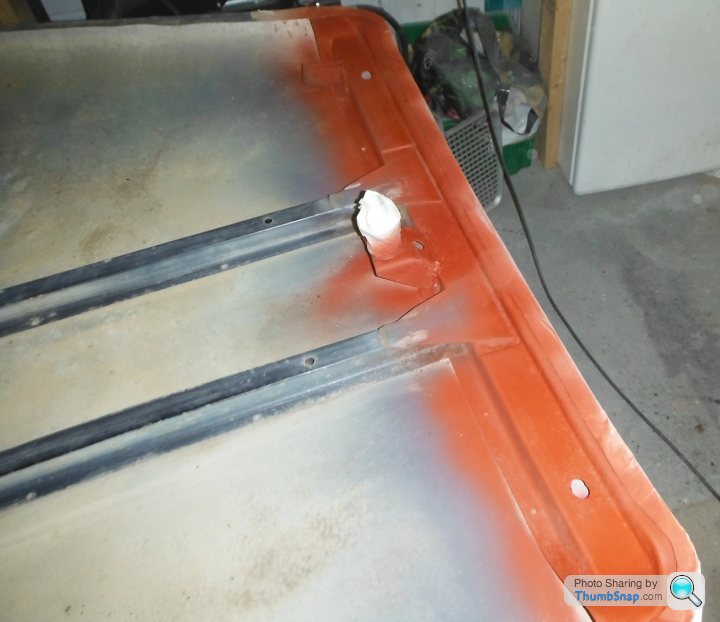
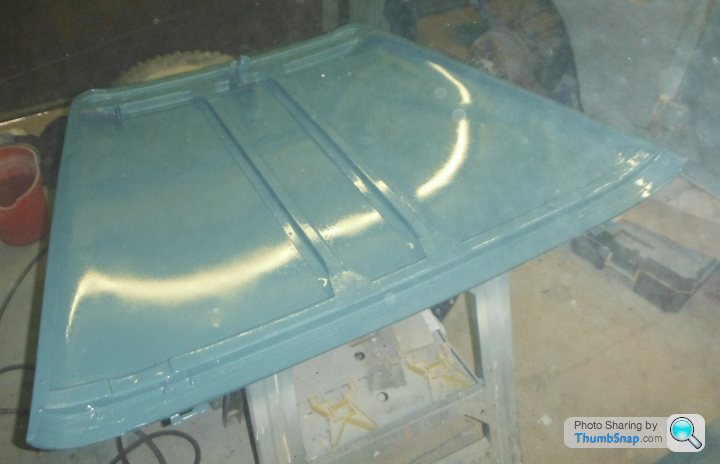
The Bonnet was actually in quite good shape. Once again the ribs can rot out. Mine were all fairly solid with only surface rust. I sanded the ribs down and treated it to a coat of red oxide and then etch primer.
Bonnet looked pretty good after painting, but once again, it took several coats to get right and I’m still not 100% happy with the finish. The whole car would benefit from a machine polish.


I spent a lot of time filling and and sanding the front wings. Should have just replaced the bloody things with plastic panels. The passenger side also had issues with different paints reacting with each other and I tried some isolator, but that didn’t work either. I struggled so much with the paintman etch primer, I moved to some cheaper tetrosol etch primer from Ebay. Was easier to apply and seemed to get a better finish. Getting consistent pressure out the gun was also an issue, which I struggled to get to grips with throughout the entire project.
[/url]
|https://thumbsnap.com/9hi8XMwZ[/url][/url]
|https://thumbsnap.com/FH1Y5CPi[/url][/url]
|https://thumbsnap.com/h143wAoN[/url]The rear ¾ panels were also a bit of a mess. I didn’t like the aftermarket square plastic fog lamp, so I removed the lamp and filled the hole. To provide a backing, I used chicken wire glued to the bodywork with polyurethane sealant. I was still using relatively thick filler, but I moved to thinner stiff later on, which was much easier to work with.
The bodywork round the rear number plate was damaged and had several holes, but I managed to fill and sand that so it actually looked quite decent.
I replaced all the lights with new ones as LR lights are cheap as chips at £2.50 each. I didn’t paint the body cappings as I think it looks naff.
The passenger side rear wing has received quite a thump at some point and been reshaped to a reasonable standard, but I managed to improve it and sanding it back down and filling the smaller cracks. Took a long time!
I used to apply a coat of etch primer as a guide coat so I could see how the bodywork was looking. I think it helped, but it did mean that I was using a lot of paint. Despite hours of filling and sanding and priming, the wings still have several imperfections. Series LR wings are single skin and that means that thye bend alot, which makes it trickeier to sand down.
The Bonnet was actually in quite good shape. Once again the ribs can rot out. Mine were all fairly solid with only surface rust. I sanded the ribs down and treated it to a coat of red oxide and then etch primer.
Bonnet looked pretty good after painting, but once again, it took several coats to get right and I’m still not 100% happy with the finish. The whole car would benefit from a machine polish.
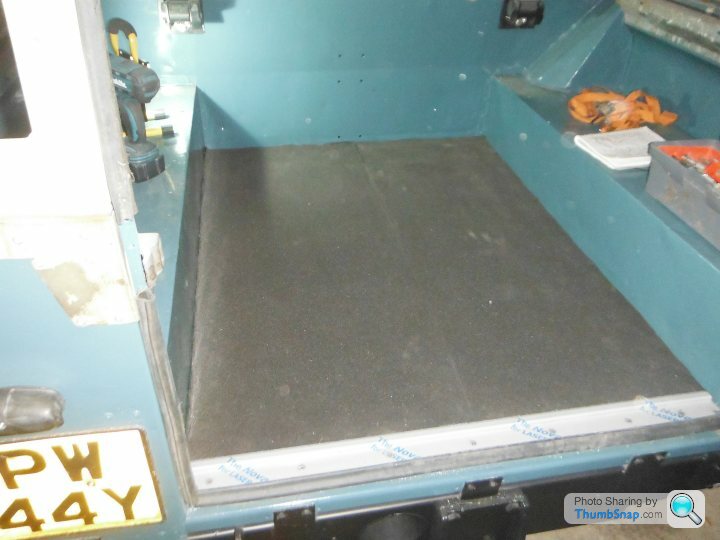
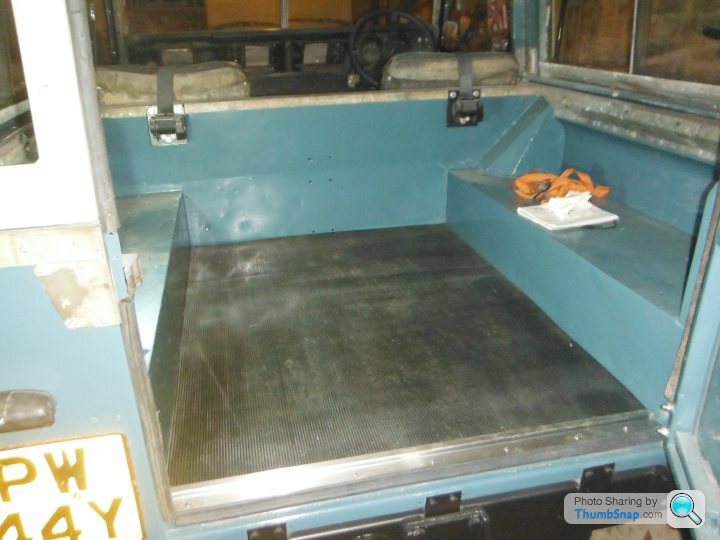
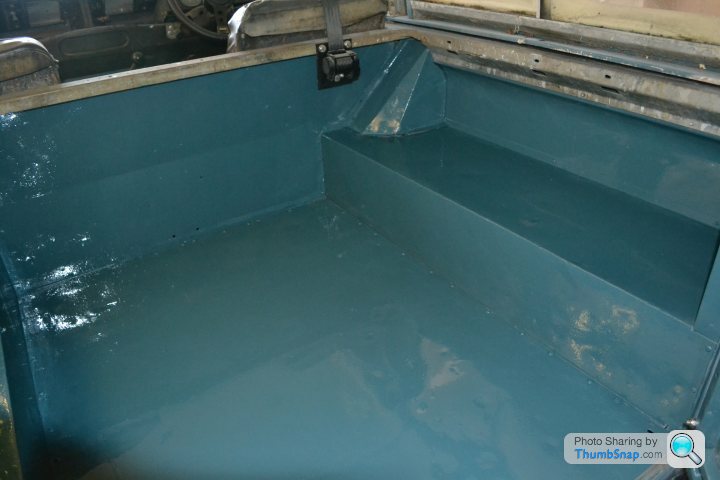
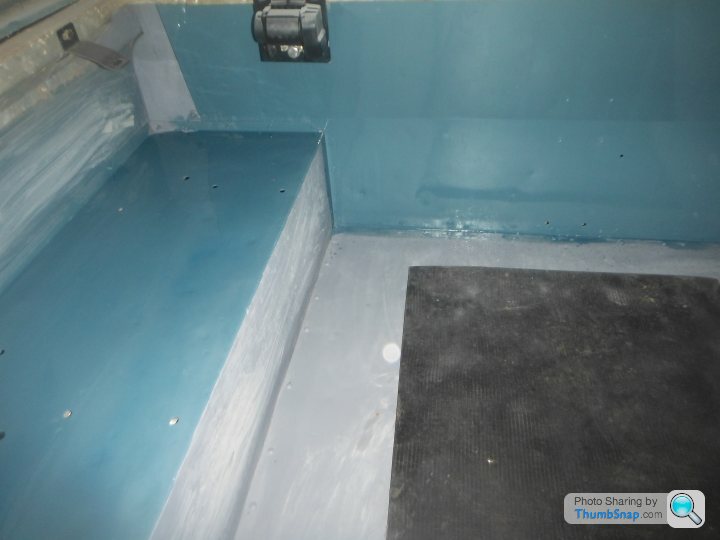
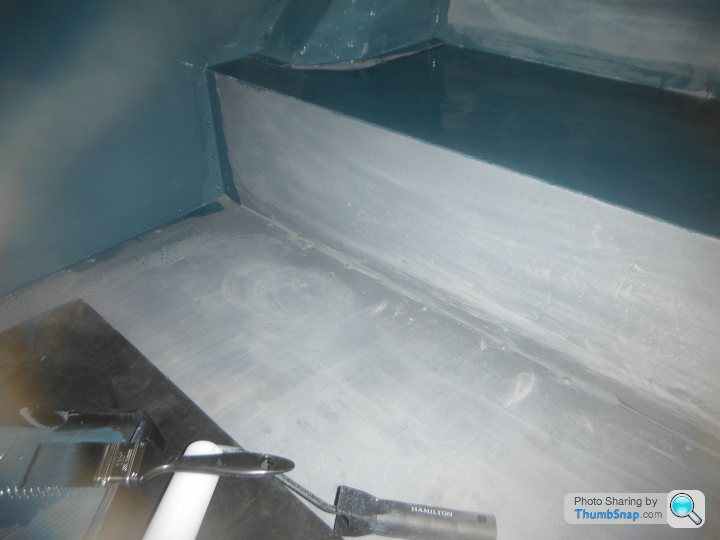
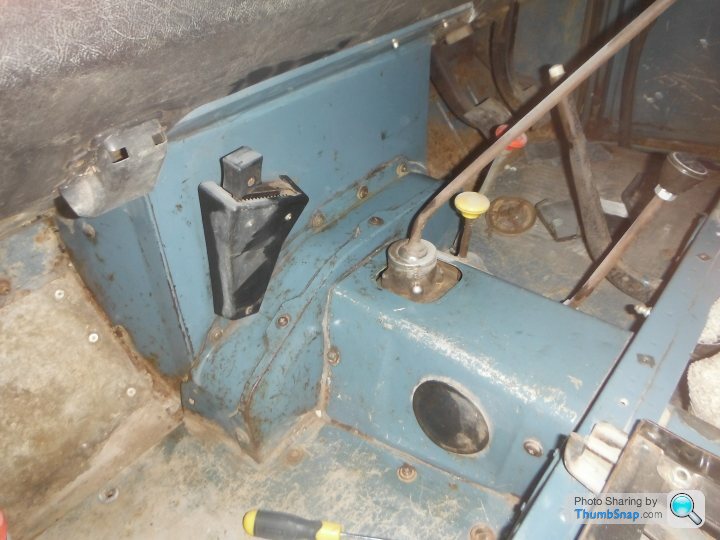
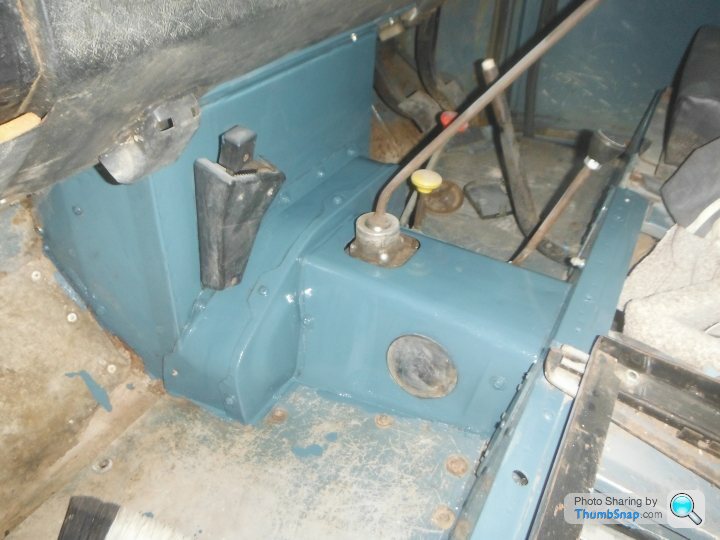
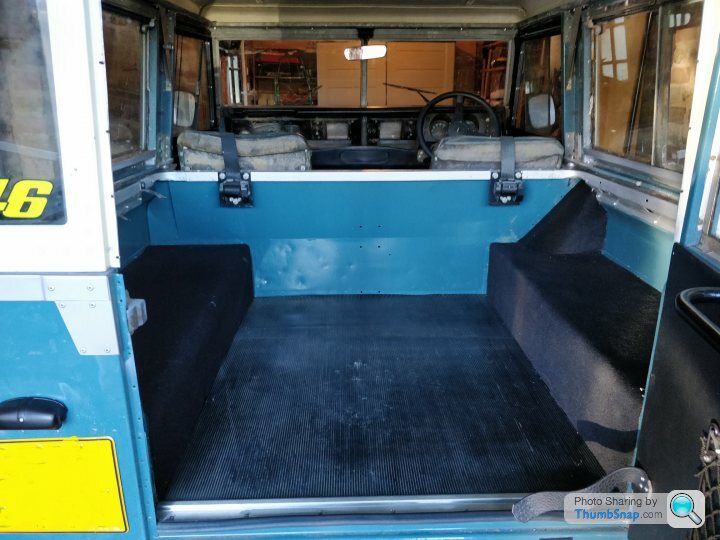
Like many series LRs, mine was ex farm owned and the load bay was a mess. Lots of bare ali and hardly any blue paint left. I’ve never liked it. Some people will argue that the general patina is better, but I’m not in that camp.
I started out with standing it down using an electric sander then rubbing it down with wet and dry. Didn’t bother with filling any of the scrapes as my plan was to paint it and then put some matting down.
I had used the gun enough now to know that I didn’t want to spray inside the cab, so just rolled the etch primer and top coat on. Worked pretty well, but there is some blue where there isn’t meant to be any blue and thats annoying. Looks much better than before and it was much easier to do than the outside of the car. New paint also keeps the dust down too.
Fast forward several months and I put down some basic 6mm sound deadening and load mat with a defender door seal and load mat retaining strip. Finished it off quite nicely. The plan is to use better quality sound deadening on the arches and the trim with matching rubber matting. Main bulkhead will probably sound deadened and then trimmed with automotive carpet. I’m just trying to quieten the vehicle down a bit.
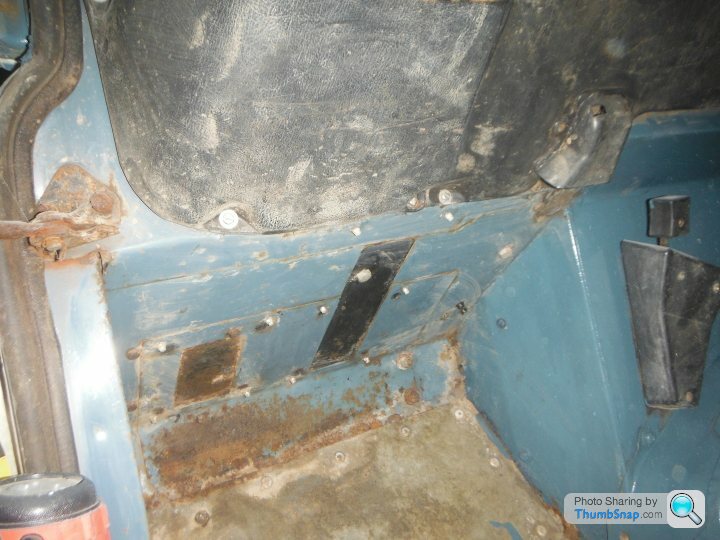
I never really had any plans to paint the interior, but I was getting so frustrated with the outside of the car, I just gave it a light sand and wiped it down with panel wipe out and painted the doors and the interior with a brush. The front was simialr to the load bay. Back to bare ali places and pretty scruffy. I did use some red oxide in places and then just painted over it with top coat.
It really needed more sanding, but it looks much better than it did before.
I will eventually paint the gear sticks and the handbrake in gloss back. Dashboard also needs a clean with shoe polish.


It really needed more sanding, but it looks much better than it did before.
I will eventually paint the gear sticks and the handbrake in gloss back. Dashboard also needs a clean with shoe polish.
There was some overspray on the rear cross member, which was proving to be difficult to get off, so I bought some Buzzweld CIO (Chassis In One) and just masked up the bodywork and sprayed it straight on. Buzzweld are relatively new to chassis coatings, but it really is good stuff. Car looked immediately much cleaner.


EggsBenedict said:
Sent me off to the classifieds....
Good effort!
Is it still running the 2.25 diesel?
My old one had a 2.25 petrol and that was hideous enough - your local rice puddings won't be too scared.....
I had a disco 2 with a TD5 engine in it - that was a good engine!
Yes, mine is still running the original 2.25 diesel. Its pretty slow and only had 55bhp when new and it was mated to a gearbox that limits the car to about 60mph and the overdrive doesn't add a lot of speed. Good effort!
Is it still running the 2.25 diesel?
My old one had a 2.25 petrol and that was hideous enough - your local rice puddings won't be too scared.....
I had a disco 2 with a TD5 engine in it - that was a good engine!
The TD5 is a nice lump. My other LR is a DIscovery 3 and sometimes I wish I had bought a D2 instead. Much simpler and less things to go wrong.
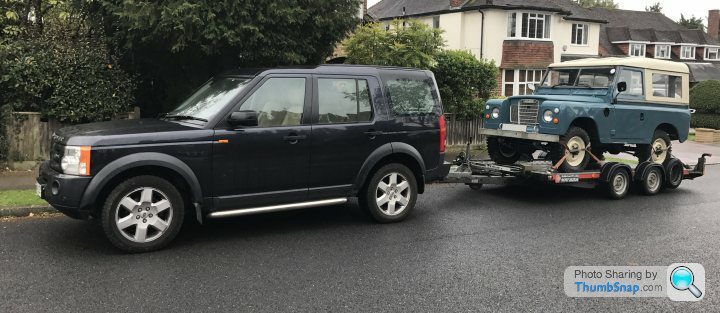
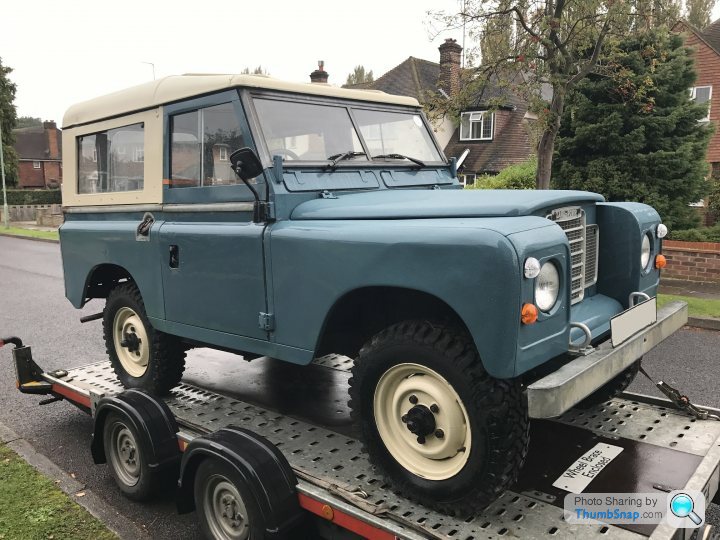
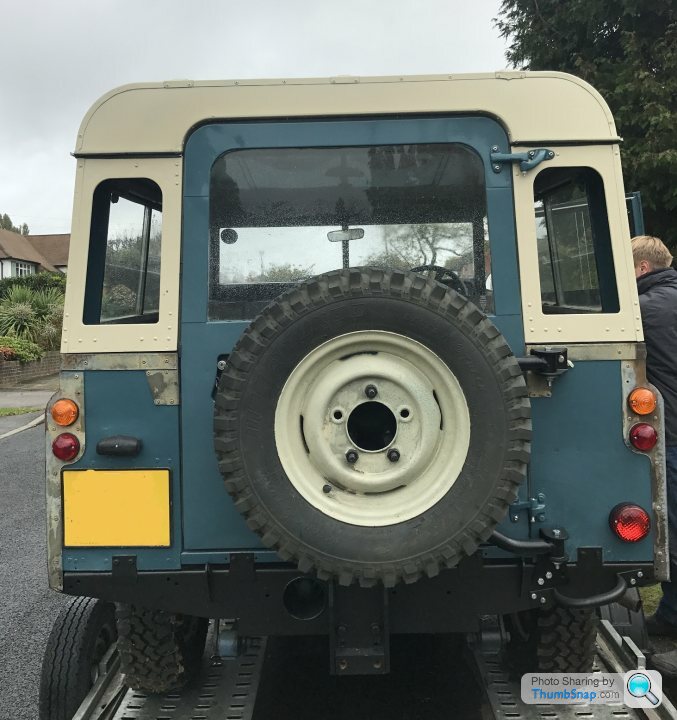
Below are the photos from when I moved it from my garage to parents house. Was expecting my OH to take the boy out somewhere, but they both stayed and the little guy enjoyed being part of the land rover loading team. I like the photo of him driving it and when asked what he enjoyed about his day he said, he got to drive daddy's land rover.
This is the first time that I had seen the car in daylight.
Some of the colours are a bit off, but it still looks much better than when I bought it in 2012

Little bit of an update.
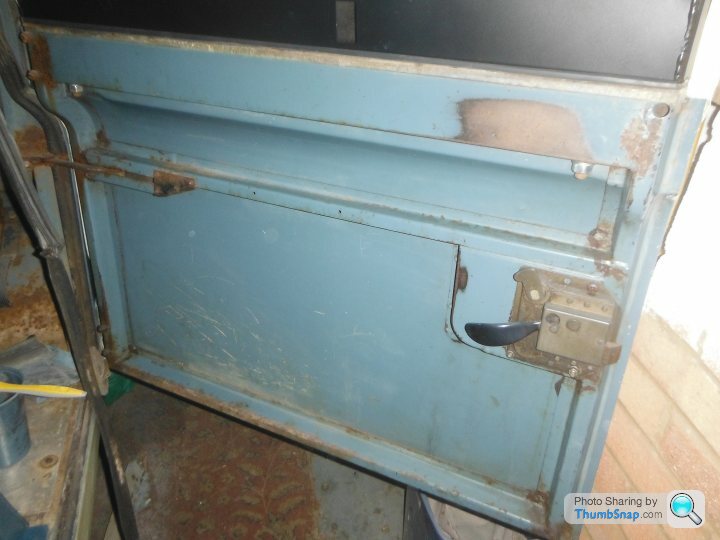
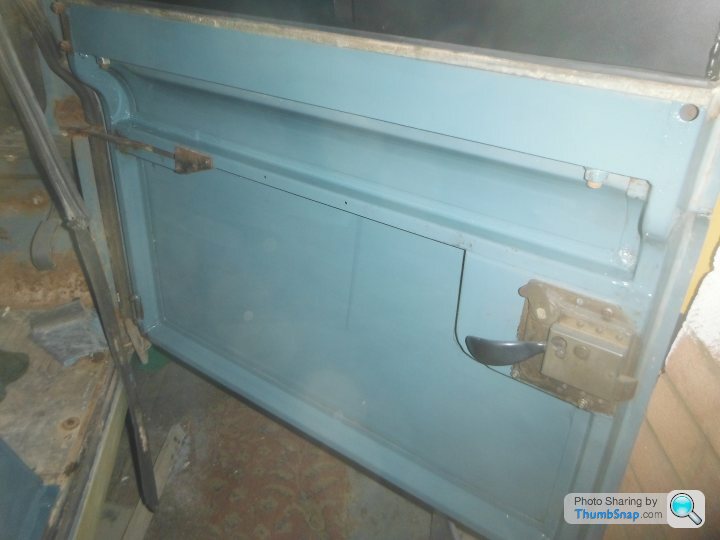
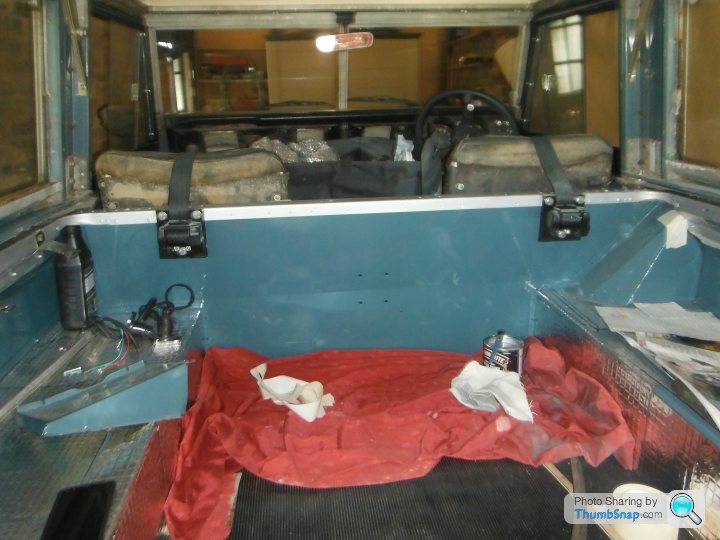
Rear door now has insulation and a new trim panel added, which cleans up the look nicely. Its just 6mm ply board which has been stained and then wrapped in vinyl (Leatherette).

The top handle is an original Land Rover item that has been sanded down, treated with red oxide and painted gloss black. Didn't want to buy a new one and I got the old one for a tenner on ebay.
I'm not that happy with centrally mounted net pocket. I looked at various options including an old Mini door pocket, but being plastic they take up valuable space and could get broken by what ever I end up carrying in there.I struggled to find two net pockets that fitted side by side, so I thought I would mimic the single net pocket that features on modern defender rear doors.
The door check stay snapped off years ago, so I have replaced it with a cheap leather belt bolted to the door trim panel and the arch. Both sides have a 50mm square 2mm steel plate acting as a large one piece washer.
Trim panel will eventually feature a fire extinguisher, 600mm breaker bar and a LED torch. Its just need some extra bits on it to make it look less plain.
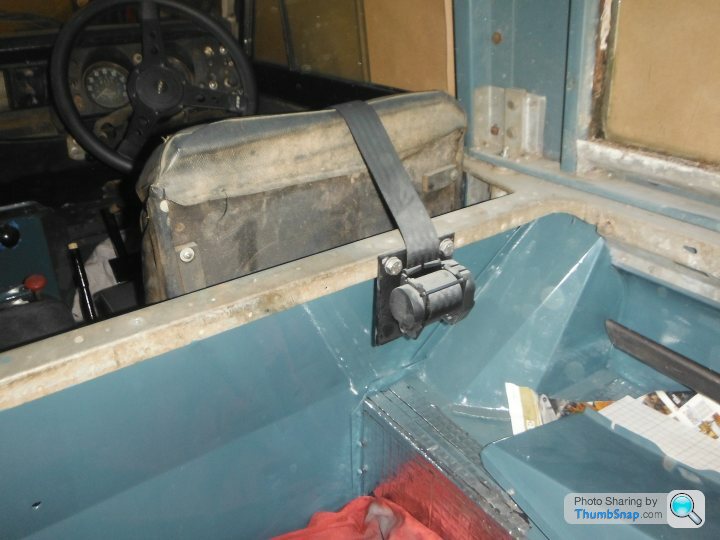
Last night, I bolted up the seat belt mounts and also polished the upper and lower dash and that has made quite an improvement to look of the interior. Will eventually paint the gearstick handbrake and the pedals. The original dash was pretty filty and I recon it will need a couple of goes with the polish, but its starting to look pretty good.

Rear door now has insulation and a new trim panel added, which cleans up the look nicely. Its just 6mm ply board which has been stained and then wrapped in vinyl (Leatherette).
The top handle is an original Land Rover item that has been sanded down, treated with red oxide and painted gloss black. Didn't want to buy a new one and I got the old one for a tenner on ebay.
I'm not that happy with centrally mounted net pocket. I looked at various options including an old Mini door pocket, but being plastic they take up valuable space and could get broken by what ever I end up carrying in there.I struggled to find two net pockets that fitted side by side, so I thought I would mimic the single net pocket that features on modern defender rear doors.
The door check stay snapped off years ago, so I have replaced it with a cheap leather belt bolted to the door trim panel and the arch. Both sides have a 50mm square 2mm steel plate acting as a large one piece washer.
Trim panel will eventually feature a fire extinguisher, 600mm breaker bar and a LED torch. Its just need some extra bits on it to make it look less plain.
Last night, I bolted up the seat belt mounts and also polished the upper and lower dash and that has made quite an improvement to look of the interior. Will eventually paint the gearstick handbrake and the pedals. The original dash was pretty filty and I recon it will need a couple of goes with the polish, but its starting to look pretty good.
eggchaser1987 said:
Very nice, I miss mine so much. It was my first car I had and I learnt so much driving it.
It got used and abused when I drove it and never let me down until it failed an mot with a rotten chassis.
The obligatory picture, when I first got it and about 18 months later

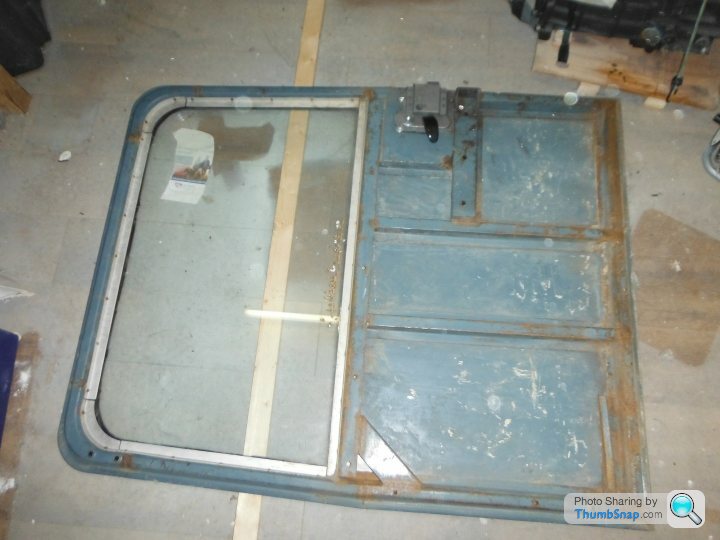
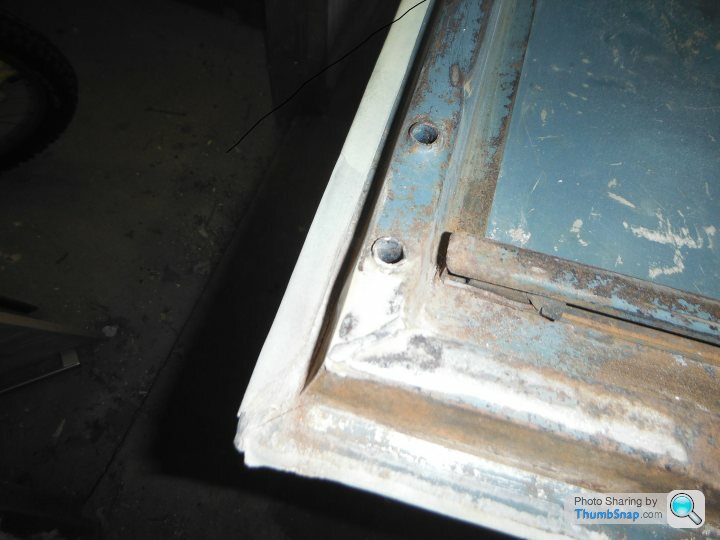
That looks very nice. I've never seen those rear windows before. I've since been told that finding genuine station wagon rear panels is quite hard now and mine were in a very bad state when I collected them. Three or four layers of paint, which I spent ages sanding down. Also made the mistake of taking out the rear windows and its been difficult to get them back in. It got used and abused when I drove it and never let me down until it failed an mot with a rotten chassis.
The obligatory picture, when I first got it and about 18 months later
Thanks bakerstreet, I think I can confidently say that the windows were not original and the previous owner added them in. I was lucky and didn't really have to look for any panels.
Front bumper after driving into a rock on a competition on the other hand, but I did wait a few months as I managed to straighten it almost by reversing with a tow rope around a tree and the corner of the bumper.
Front bumper after driving into a rock on a competition on the other hand, but I did wait a few months as I managed to straighten it almost by reversing with a tow rope around a tree and the corner of the bumper.
eggchaser1987 said:
Thanks bakerstreet, I think I can confidently say that the windows were not original and the previous owner added them in. I was lucky and didn't really have to look for any panels.
Front bumper after driving into a rock on a competition on the other hand, but I did wait a few months as I managed to straighten it almost by reversing with a tow rope around a tree and the corner of the bumper.
The bumper on mine is original and actually in quite a good state apart from small part where it has been used to pry something against it. Just ordered some silver paint in an attempt to tart it up, as now all the paintwork is done, the bumper looks pretty out of place and scruffy, so the plan is to remove my freshly stuck on number plate and camel trophy sticker, give it a light sand with some wet and dry, etch primer and them some silver paint. Front bumper after driving into a rock on a competition on the other hand, but I did wait a few months as I managed to straighten it almost by reversing with a tow rope around a tree and the corner of the bumper.
Going with autotek spray paint, as I have used it several times on other areas of the car and seems pretty good. Also got some more sound deadening to add to the arches then its rubber mats on top of that and hopefully I will be able to mats stick to the sound deadening (shiney surface)
Went to the British Motoring Museum Land Rover show at Gaydon at the weekend and this has given me a bit of encouragement.
sanded down the front bumper with a it of wet and dry and sprayed it with some autotek etch primer. Will be finished off in AutoTek alloy wheel paint hopefully this week.
Looking back at some of the photos, I really need to do something with the tub cappings. If I like the look of the alloy wheel paint that I'm using for the bumper, then I may use that on the cappings. If not, I will try some galvanised effect spray paint, but will use the same etch primer that I'm using for the bumper.
On the same night that I did the bumper, I also applied some more sound deadening to the arches. Used Silent Coat this time, which had smaller sheets than the last stuff I bought, but the Silent Coat feels much better and that is just based on me tapping the arches with my knuckle.

I'm still undecided on what material to finish the arches in. Part of me thinks I should use rubber matting to match the floor, but then I think I would like carpet. I also have a roll of carpet that I bought for something else....decisions decisions.
Going to spend a solid week working on it in the next month or to. A close friend of mine gets married in October and I would like to take it to that.
sanded down the front bumper with a it of wet and dry and sprayed it with some autotek etch primer. Will be finished off in AutoTek alloy wheel paint hopefully this week.
Looking back at some of the photos, I really need to do something with the tub cappings. If I like the look of the alloy wheel paint that I'm using for the bumper, then I may use that on the cappings. If not, I will try some galvanised effect spray paint, but will use the same etch primer that I'm using for the bumper.
On the same night that I did the bumper, I also applied some more sound deadening to the arches. Used Silent Coat this time, which had smaller sheets than the last stuff I bought, but the Silent Coat feels much better and that is just based on me tapping the arches with my knuckle.
I'm still undecided on what material to finish the arches in. Part of me thinks I should use rubber matting to match the floor, but then I think I would like carpet. I also have a roll of carpet that I bought for something else....decisions decisions.
Going to spend a solid week working on it in the next month or to. A close friend of mine gets married in October and I would like to take it to that.
Stayed overnight at my mums last night, which allowed me to spend more time working on the car.
Made a decent amount of progress. Applied a couple of top coats to the bumper. Fairly happy with the finish. Towing eyes don't match up that well, so will spray the same colour as the bumper at later date. Didn't realise how out of place they looked until I took the tape off them.
Looks much better than before.
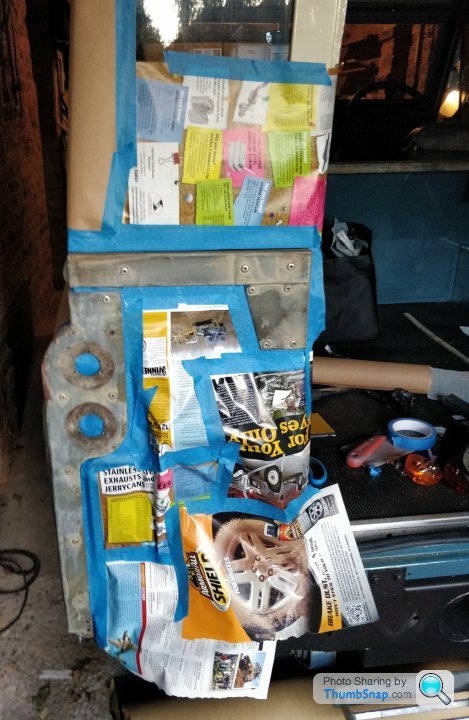
The body and tub cappings looked pretty tired when compared to the new paint, so I masked and taped those up. Used proper blue bodywork masking tape this time and its much better than the normal beige stuff that you get from Screwfix or B&Q. More expensive though as you get less tape for the same money.
Used brown paper roll for the larger sections and old land rover mag pages for smaller sections. Always surprised by how long masking takes. Yes, you can remove those corner pieces, bet the passenger side is in a bit of a state as it was in a shunt, so I fear whats underneath it. New paint should improve the look of it.
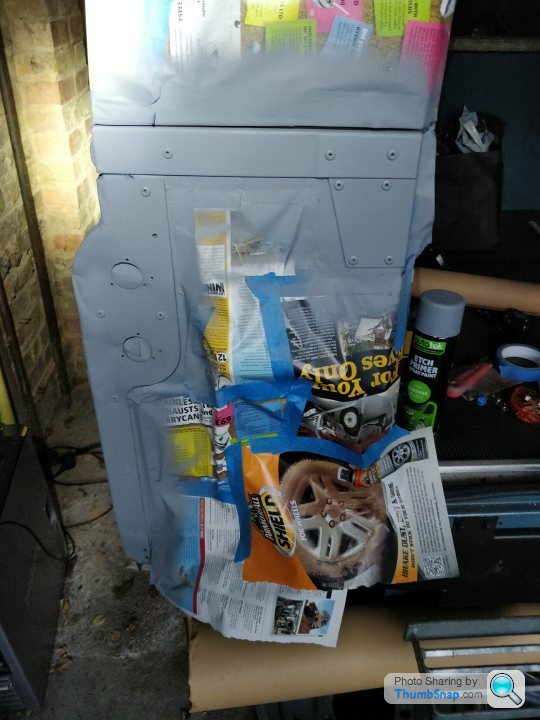
Rubber the cappings down with 1200 and 2500 grit wet and dry, wiped down with panel wipe and add then applied two coats of autotek etch primer. To eliminate contamination issues, I used autotek alloy wheel paint. (matches the bumper) Bit too shiney for the cappings and the purists would say I dictate that I should have removed the cappings and had them re-galvanised. However, I don't have the time or the inclination to do that. Few in progress shots.

Interior cappings also had 30 years of weathering and farm use. Rubbed them down with some 2500 grit wet and dry and gave them a wipe with panel wipe.
Did think about spraying them, but masking up would have been a real pain, so decided to go a bit old school and just use some hammerite silver smooth paint. Its coming up quite well, but will need a couple of coats. Some could argue its a bit bright, but it was letting the side down when you look at it against the new blue paint.

Will post up some more pics when I have finished the interior and exterior cappings. Doing top coats on the driver side external cappings tonight as I don't want to leave the tape on for a week whilst I'm on holiday.
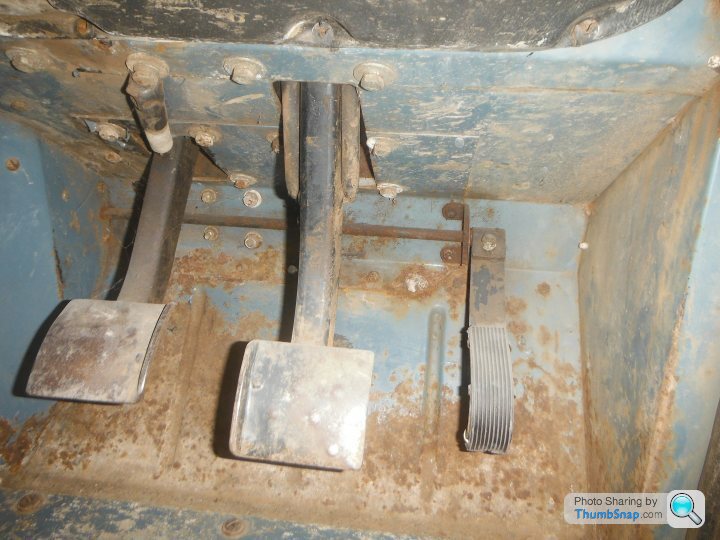
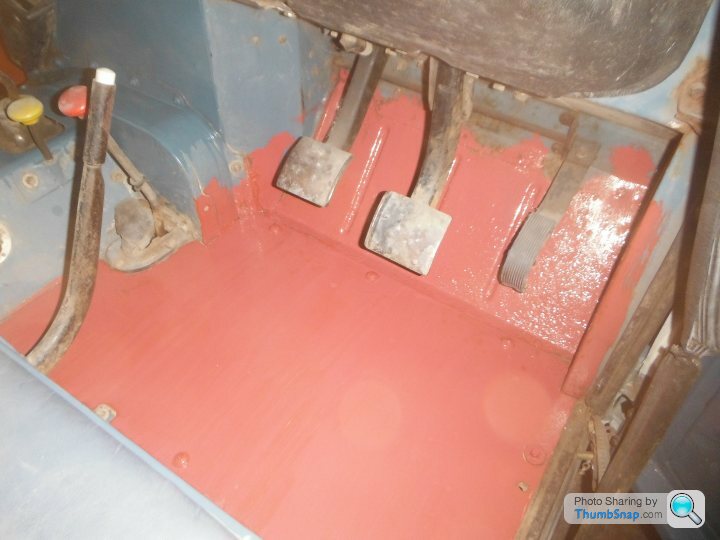
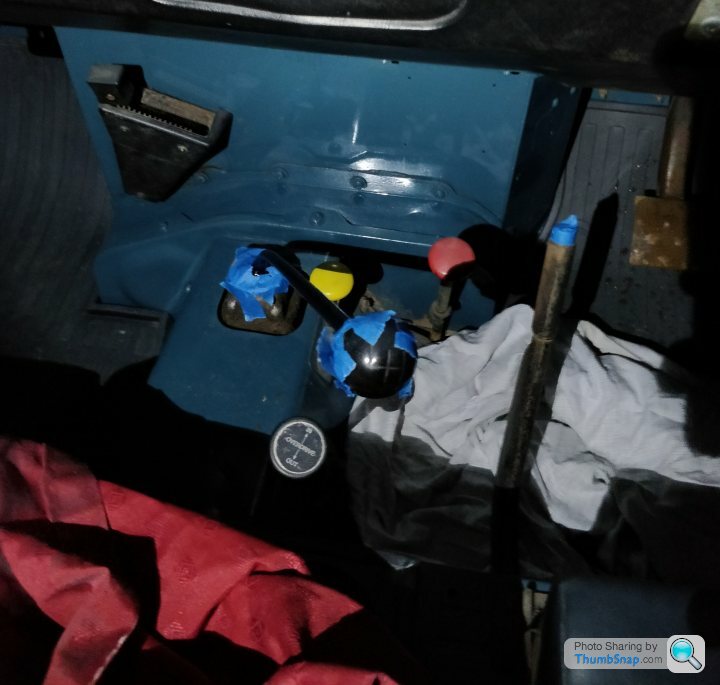
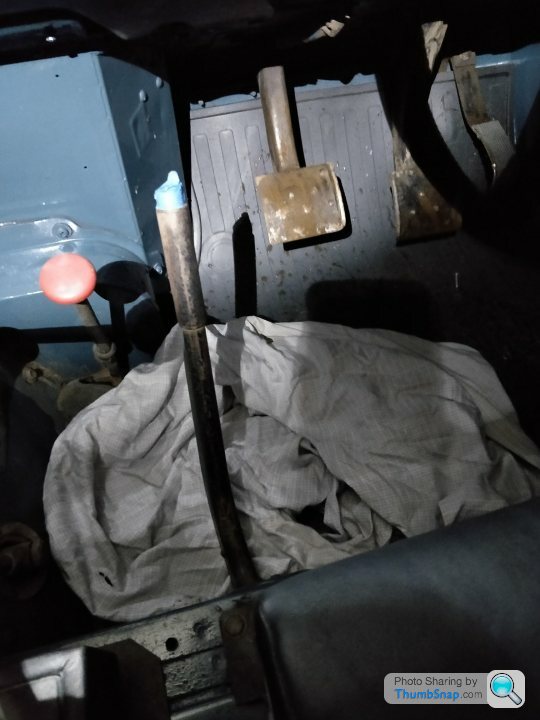
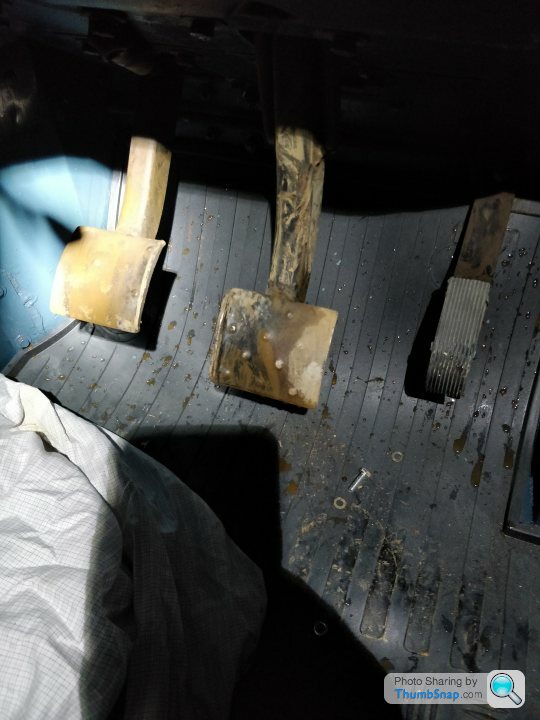
Gear lever and pedals have always looked a bit past it. Gave them a light sand and painted them with Whickes gloss black paint (what i had in the cupboard) Probably not the right product for the job, but they are looking much better for it. Having looked at the pedals, they would probably look better in matt, so may re-paint those.


Sorry about the poor pics. It was getting dark and I was working using a torch light, so taking photos was a little challenging.
Going to get some plastic all in one paint from buzzweld and paint the floor mats. They are covered in overspray from painting the bodywork. Should have removed them, but its a lesson learned.
Once I have finished the cappings, I'm moving onto carpeting the arches, then I shall paint the external windscreen surround. Slowly getting there, but there is argument that it may never be finished...
Made a decent amount of progress. Applied a couple of top coats to the bumper. Fairly happy with the finish. Towing eyes don't match up that well, so will spray the same colour as the bumper at later date. Didn't realise how out of place they looked until I took the tape off them.
Looks much better than before.
The body and tub cappings looked pretty tired when compared to the new paint, so I masked and taped those up. Used proper blue bodywork masking tape this time and its much better than the normal beige stuff that you get from Screwfix or B&Q. More expensive though as you get less tape for the same money.
Used brown paper roll for the larger sections and old land rover mag pages for smaller sections. Always surprised by how long masking takes. Yes, you can remove those corner pieces, bet the passenger side is in a bit of a state as it was in a shunt, so I fear whats underneath it. New paint should improve the look of it.
Rubber the cappings down with 1200 and 2500 grit wet and dry, wiped down with panel wipe and add then applied two coats of autotek etch primer. To eliminate contamination issues, I used autotek alloy wheel paint. (matches the bumper) Bit too shiney for the cappings and the purists would say I dictate that I should have removed the cappings and had them re-galvanised. However, I don't have the time or the inclination to do that. Few in progress shots.
Interior cappings also had 30 years of weathering and farm use. Rubbed them down with some 2500 grit wet and dry and gave them a wipe with panel wipe.
Did think about spraying them, but masking up would have been a real pain, so decided to go a bit old school and just use some hammerite silver smooth paint. Its coming up quite well, but will need a couple of coats. Some could argue its a bit bright, but it was letting the side down when you look at it against the new blue paint.
Will post up some more pics when I have finished the interior and exterior cappings. Doing top coats on the driver side external cappings tonight as I don't want to leave the tape on for a week whilst I'm on holiday.
Gear lever and pedals have always looked a bit past it. Gave them a light sand and painted them with Whickes gloss black paint (what i had in the cupboard) Probably not the right product for the job, but they are looking much better for it. Having looked at the pedals, they would probably look better in matt, so may re-paint those.
Sorry about the poor pics. It was getting dark and I was working using a torch light, so taking photos was a little challenging.
Going to get some plastic all in one paint from buzzweld and paint the floor mats. They are covered in overspray from painting the bodywork. Should have removed them, but its a lesson learned.
Once I have finished the cappings, I'm moving onto carpeting the arches, then I shall paint the external windscreen surround. Slowly getting there, but there is argument that it may never be finished...
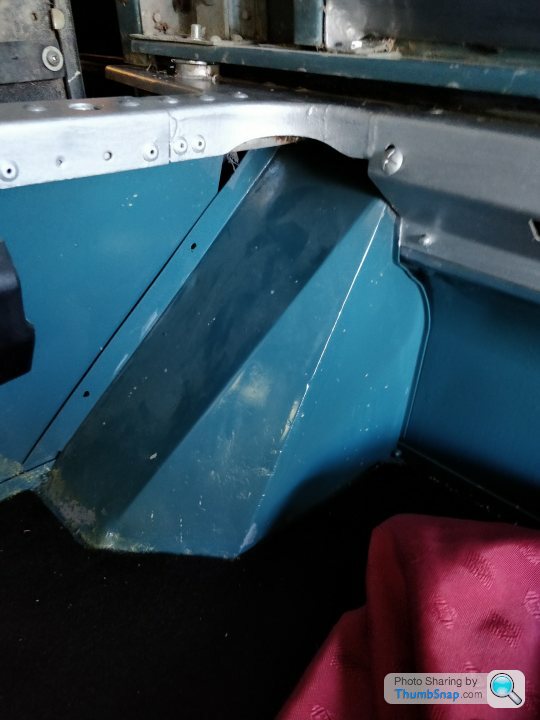
Attempted trimming one of the arches in marine carpet. I was expecting it to be easier…
I was fairly happy with the carpet fit, but I made the mistake gluing the entire carpet and arch and that made it a pig to fit the carpet. Will do it bit by bit next time.
I also added double sided tape in an attempt to stop the carpet liftinng over time. That was a daft idea as I had to pull the carpet off several times before finally pushing it down and it just ruffled the tape. Won’t bother on the other arch.
Did the carpet trimming by eye and I think it could have done with about 5mm off the length, but I don’t think anyone will notice when all the seats are eventually fitted.
I have enough carpet to do the other arch, but not enough to do the bulkhead, so I may pause at that point and revisit the re-trimming in a few months
New roller shutter is being fitted to the garage in the next few weeks, so Land Rover will be moved by the end of November and that means changing the door mirrors to Defender mirrors as it really will be quite tight to get it in on the old series mirrors. Also the old series mirrors are pretty useless and you can’t really see anything out of them. Not expecting removal of the doors to be an easy task.
Once the carpet is fitted to the other arch, I shall move onto painting the windscreen frame.
Many other things to do, but I’m getting there.
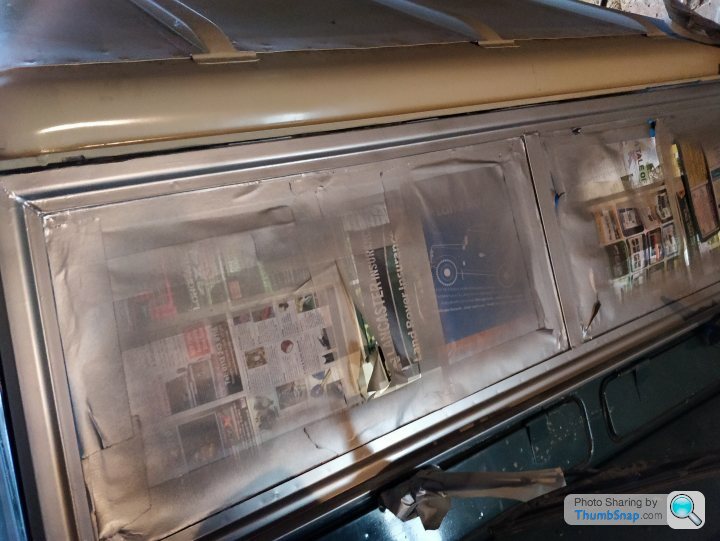
Windscreen surround is now painted. Doesn't look like a factory finish, but its much better than what it was and I used the same alloy wheel paint thats been used on the bumper and the body cappings so at least it matches other parts.
As per usual it took longer to mask everything up than it did to spray it. Rubbed it down with 800 grit wet and dry and then gave it two goats of etch followed by two coats of colour. It's come up quite well, but it the windows need a decent clean.


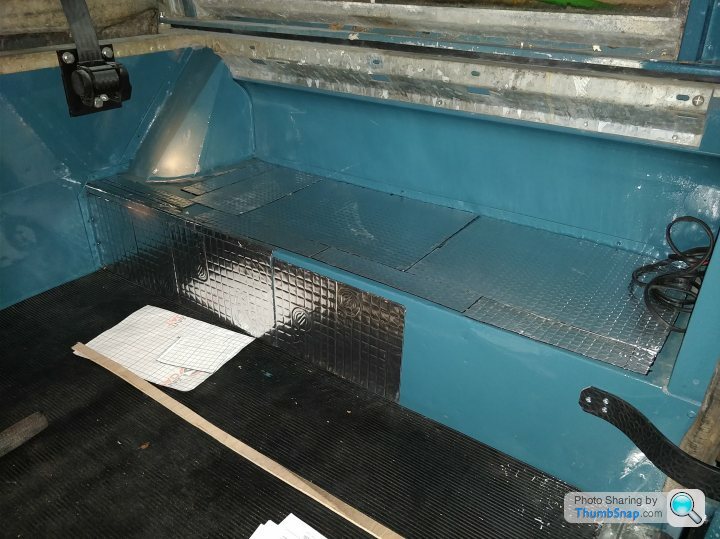
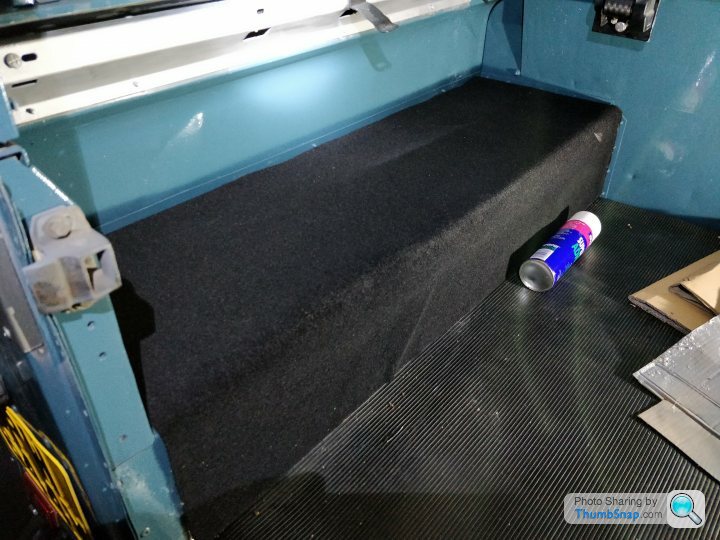
Drivers side load bay arch has now been trimmed with carpet and sound deadening. The fuel filler panel was quite tricky and needed a few small pieces added to fill out the gaps. Used proper high temp automotive contact adhesive and it works really well. Much better than the Screwfix no nonsense stuff I was using before.


Really pleased with the finished product. The end goal is carpet the bulkhead as well, but that can wait till another time. Lights have also been fitted, so its look quite car like now.
I also painted the dasj air vents and the drivers door mat. Not the greatest finish, but better than mat being covered in marine blue overspray.
My mum has offered to pay for a full servicec on the engine as a birthday present, but the engine is such a dog, I'd rather have a donation to brakes as they are in real need of attention and I wont have the space at the new garage to do them and drive way has too much of a slope.
Next visit will be painting the dash metal work and trying to sort the lights.
More sound deadening to be added to the under seat storage.
Going to try and start the car up so I can roll it out the garage and fit the Defender mirrors.
I have set myself a deadline of 5th of Jan so I can drive my eldest to his 4th birthday party. Still a few things to do, but I think its achievable.
As per usual it took longer to mask everything up than it did to spray it. Rubbed it down with 800 grit wet and dry and then gave it two goats of etch followed by two coats of colour. It's come up quite well, but it the windows need a decent clean.
Drivers side load bay arch has now been trimmed with carpet and sound deadening. The fuel filler panel was quite tricky and needed a few small pieces added to fill out the gaps. Used proper high temp automotive contact adhesive and it works really well. Much better than the Screwfix no nonsense stuff I was using before.
Really pleased with the finished product. The end goal is carpet the bulkhead as well, but that can wait till another time. Lights have also been fitted, so its look quite car like now.
I also painted the dasj air vents and the drivers door mat. Not the greatest finish, but better than mat being covered in marine blue overspray.
My mum has offered to pay for a full servicec on the engine as a birthday present, but the engine is such a dog, I'd rather have a donation to brakes as they are in real need of attention and I wont have the space at the new garage to do them and drive way has too much of a slope.
Next visit will be painting the dash metal work and trying to sort the lights.
More sound deadening to be added to the under seat storage.
Going to try and start the car up so I can roll it out the garage and fit the Defender mirrors.
I have set myself a deadline of 5th of Jan so I can drive my eldest to his 4th birthday party. Still a few things to do, but I think its achievable.
hidetheelephants said:
A popular upgrade at the moment seems to be a Tdi with the turbo removed; it produces a useful amount of extra power over the 10/11J, but not so much that it pops bits of the drivetrain and detuning it means it's (theoretically) going to be unburstable.
I know this is an old thread. But I do not understand this mod at all. It's not difficult to keep the turbo and without it, it is just a low compression under powered diesel without that fat torque curve. And probably makes hardly any more power than the 2.5 NaD did. Just a more expensive conversion and a nosier engine (direct injection is less refined than the indirect injection).300bhp/ton said:
I know this is an old thread. But I do not understand this mod at all. It's not difficult to keep the turbo and without it, it is just a low compression under powered diesel without that fat torque curve. And probably makes hardly any more power than the 2.5 NaD did. Just a more expensive conversion and a nosier engine (direct injection is less refined than the indirect injection).
Agree with this. Did a 200TDi conversion in my old series 3. Pretty much bolt up/plug and play. Only expensive bit was the exhaust (Steve Parker - think that was the name) exhaust and all was good! It's an 'old' thread because it was started when I bought the vehicle in 2012. I update it when I've done work to the car.
I'm still unsure which engine to go for. Sensible choice is the 300tdi mated to an LT77. Alternative is I go full bore and fit a V8 but its much more involved with bodywork mods. I like the idea of the V8 burble, but I've heard a couple of 300tdi 90s running un-silenced exhausts and they sound pretty good for a diesel.
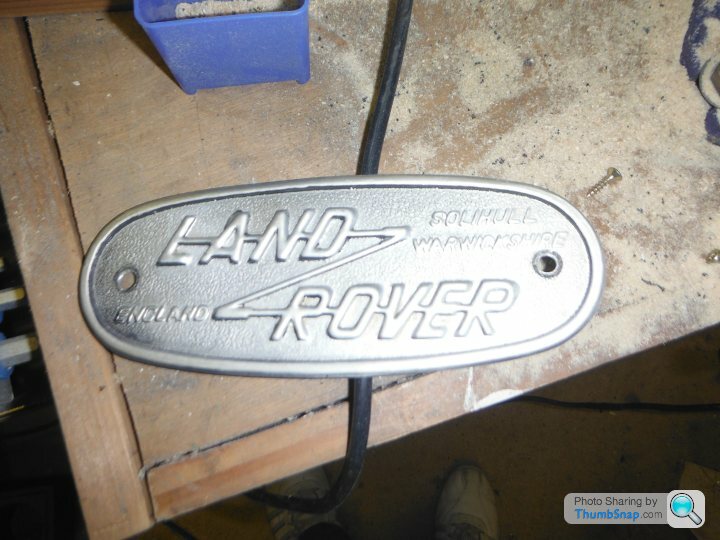
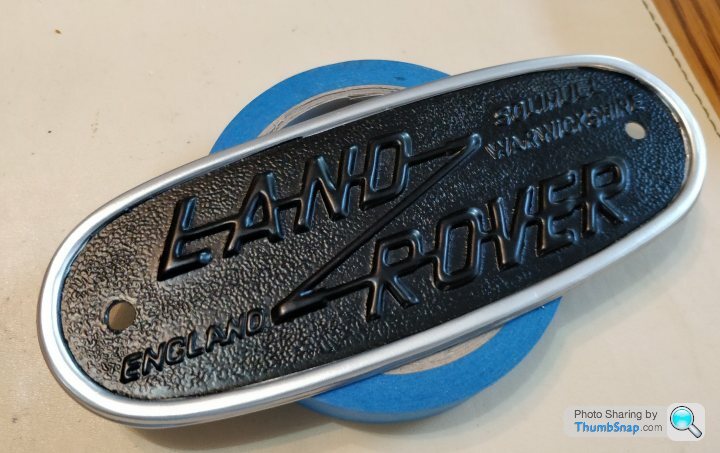
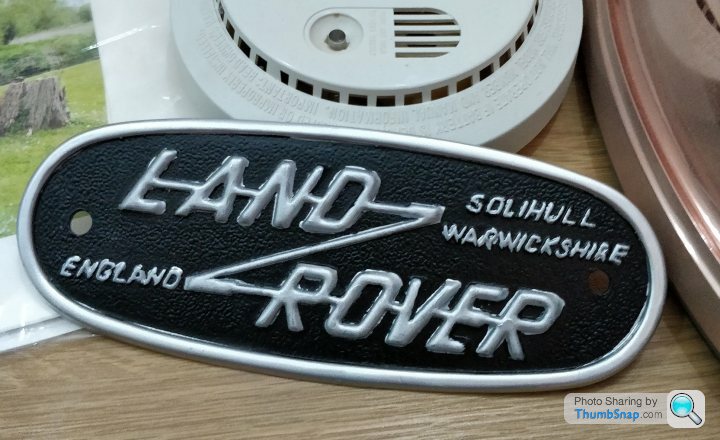
I've restored the badge using model paint. Harder than I expected and I'm not 100% satisfied with the result. I started a thread on it on the FB group and loads of suggestions came up. Wish I'd done a thread before I painted the badge.
 |https://thumbsnap.com/ehlqLcTw[/url]
[url]


This will be the final thing I will fit to the car.
I've painted the black metal parts of the dash. Will give it a second coat in a week or so. It won't look great, but will look much better than it did.n
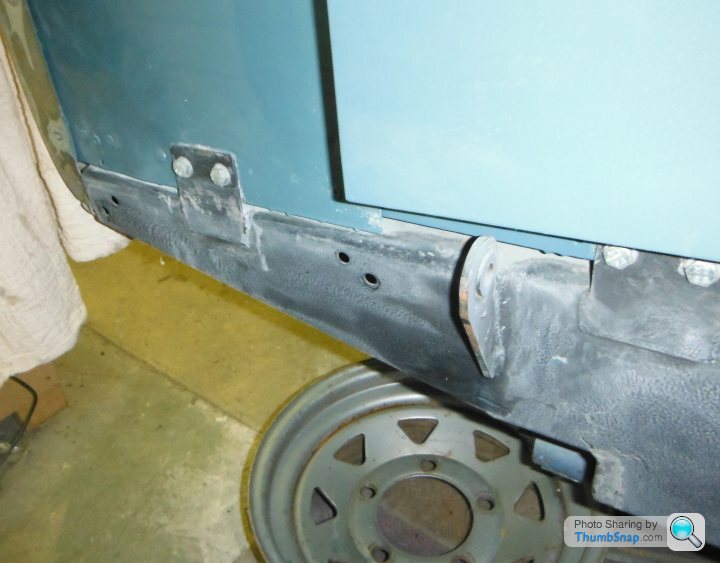
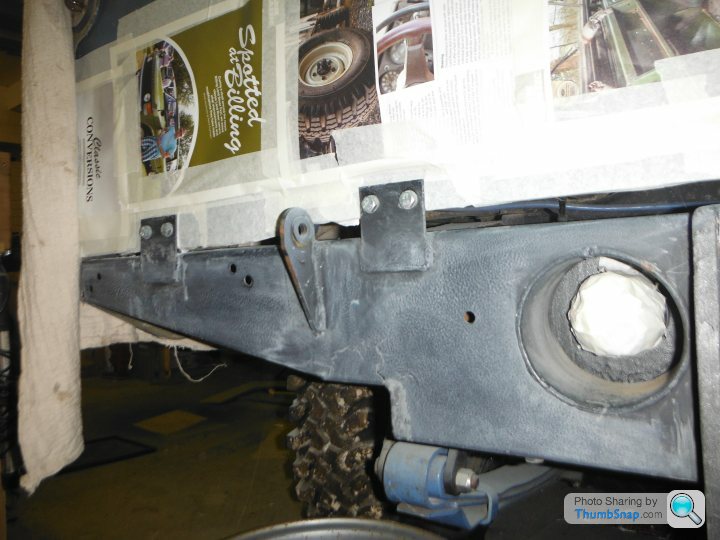
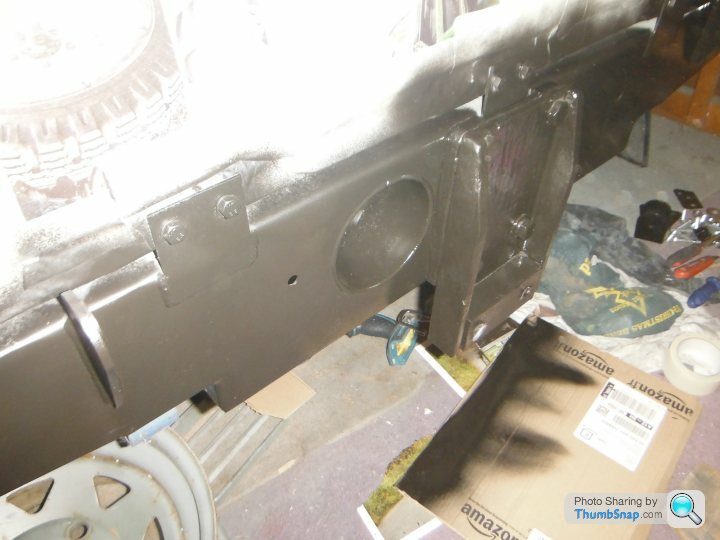
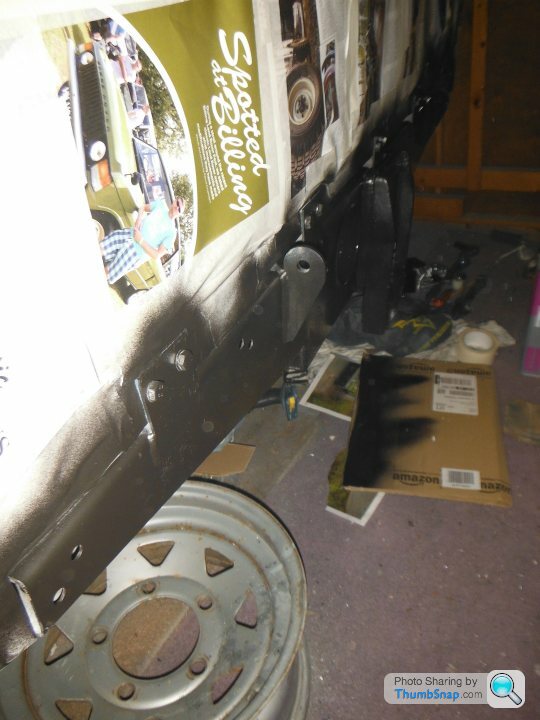
Rear step and tow ball looked pretty scruffy against the freshly painted cross member so they have been rubbed down and etch primed. Used what ever black spray paint I had on the shelf. Will paint the step in alloy wheel silver to match the body cappings and see how it stands up. The step makes getting in and out of the load bay much easier and I wouldn't be with out it.
Sound deadening has been added to the load bay side of the bulkhead. Only started it to finish the packet off, but I have ordered more sound deadening. The silent coat stuff is pretty easy to apply and not that expensive. Will add some to the passenger doors and add vinyl wrapped ply trim panels to match the rear door. Should look quite neat.
I re-stuck the passenger side carpet with the pukka trim adhesive. Much better this time. The screwfix bargain basement contact adhesive is rubbish compared to the decent automotive stuff.
SPare wheel will be re-painted as it has a lot of marine blue oversray. Long term, I'm going for banded defeder steel weels running 235/85/R16. Buying the 205s was a waste of money as they look rubbish on the car.
I'm still unsure which engine to go for. Sensible choice is the 300tdi mated to an LT77. Alternative is I go full bore and fit a V8 but its much more involved with bodywork mods. I like the idea of the V8 burble, but I've heard a couple of 300tdi 90s running un-silenced exhausts and they sound pretty good for a diesel.
I've restored the badge using model paint. Harder than I expected and I'm not 100% satisfied with the result. I started a thread on it on the FB group and loads of suggestions came up. Wish I'd done a thread before I painted the badge.
|https://thumbsnap.com/ehlqLcTw[/url][url]This will be the final thing I will fit to the car.
I've painted the black metal parts of the dash. Will give it a second coat in a week or so. It won't look great, but will look much better than it did.n
Rear step and tow ball looked pretty scruffy against the freshly painted cross member so they have been rubbed down and etch primed. Used what ever black spray paint I had on the shelf. Will paint the step in alloy wheel silver to match the body cappings and see how it stands up. The step makes getting in and out of the load bay much easier and I wouldn't be with out it.
Sound deadening has been added to the load bay side of the bulkhead. Only started it to finish the packet off, but I have ordered more sound deadening. The silent coat stuff is pretty easy to apply and not that expensive. Will add some to the passenger doors and add vinyl wrapped ply trim panels to match the rear door. Should look quite neat.
I re-stuck the passenger side carpet with the pukka trim adhesive. Much better this time. The screwfix bargain basement contact adhesive is rubbish compared to the decent automotive stuff.
SPare wheel will be re-painted as it has a lot of marine blue oversray. Long term, I'm going for banded defeder steel weels running 235/85/R16. Buying the 205s was a waste of money as they look rubbish on the car.
Gassing Station | Readers' Cars | Top of Page | What's New | My Stuff