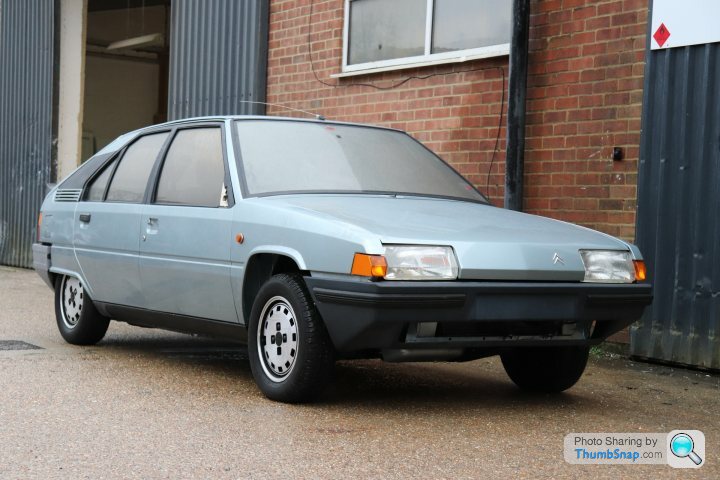
1985 Citroen BX 19GT overhaul
Discussion


For all you sitting there thinking "Corrr, I'd love a BX GT! Shame there are only 12 left......"
[url]http://www.carandclassic.co.uk/car/C782204#.V8CnrurbsAI.gmail[/urll]
I think it's under-priced personally. A £2k car, easily, and within a couple of years it'd probably be more like a £3k car.
As for the GT project, no movement recently I'm afraid. I really need to pull my finger out!
[url]http://www.carandclassic.co.uk/car/C782204#.V8CnrurbsAI.gmail[/urll]
I think it's under-priced personally. A £2k car, easily, and within a couple of years it'd probably be more like a £3k car.
As for the GT project, no movement recently I'm afraid. I really need to pull my finger out!
Yeah just got back from Amsterdam. Saw some things I'll never not see! No BXs though....
Not a huge amount on progress on the BX GT as work has been extremely busy. That said, I have managed to move it forward in some areas. It'll now start on the key using an old Weber carb from a 1.6 model, and all appears to be well there. Will do a proper update soon.
Cheers
Not a huge amount on progress on the BX GT as work has been extremely busy. That said, I have managed to move it forward in some areas. It'll now start on the key using an old Weber carb from a 1.6 model, and all appears to be well there. Will do a proper update soon.
Cheers
When I clicked on this thread it took me straight to the pics at the top of this page for some reason and I thought "bloody hell - that is a MINT BX". I then went back to read the whole lot from page one 

Well in Kitchski you've got a lot more skill and patience than I could ever hope for. Keep it up
Well in Kitchski you've got a lot more skill and patience than I could ever hope for. Keep it up
Edited by J.C... on Sunday 4th June 09:10
This thread (like all my threads) is running behind, so I'll do my best to catch it up in small chunks, because the BX GT is progressing. Not as fast as it should do, unless continental drift is the measurement by which it's judged.
This was September 2016, and I sat down to change some bulbs:
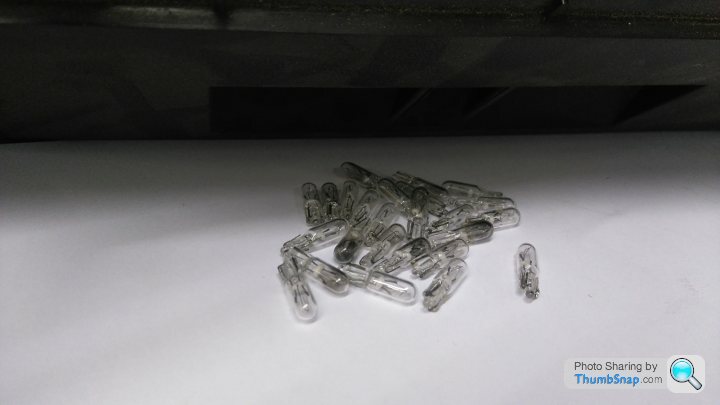
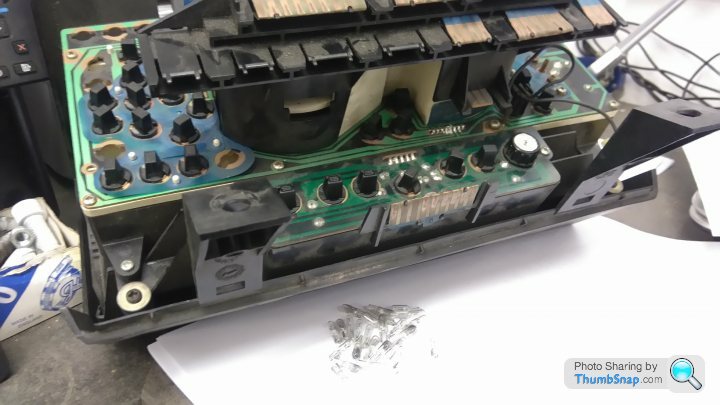
I just changed all of them, rather than try to figure out which ones were blown. And I also forgot to take a picture of them all lit up at night. Winner.
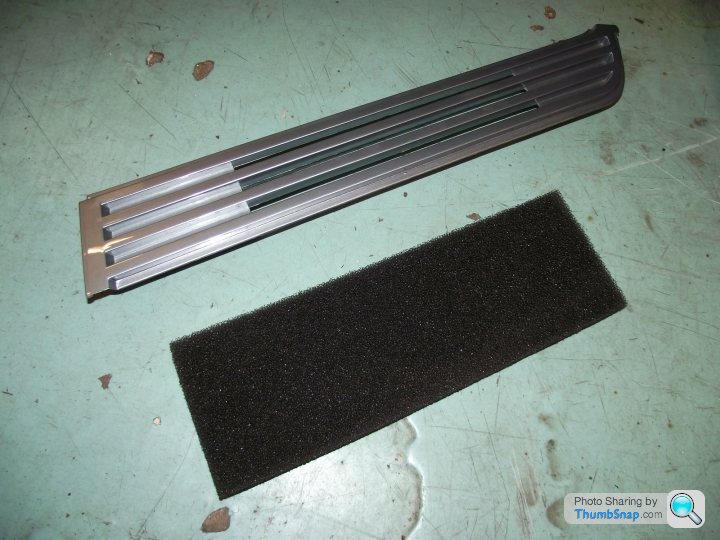
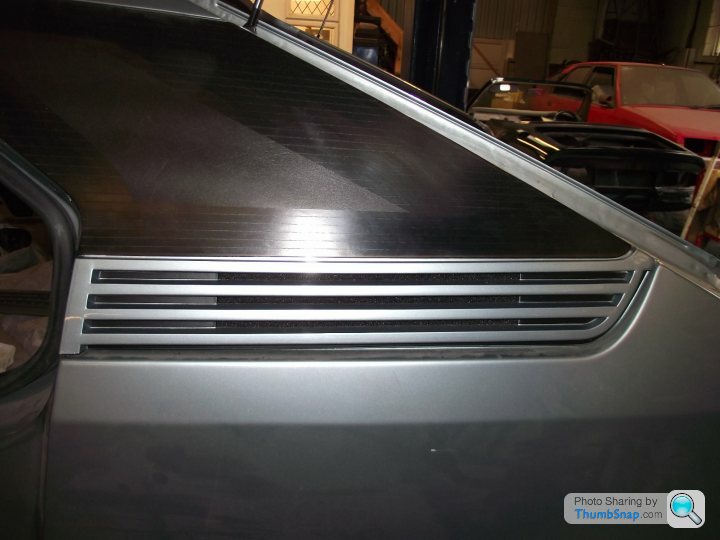
Moving into October, I decided to finally fit the rear-quarter vents. They'd been loosely attached for a while, but I needed to find some of the ventilation foam that is sandwiched behind vent and bodywork. I'd drawn a blank for a long time (hence why they weren't fitted), but a chance convo on a Facebook page got me chatting to a guy who had a stash of foam, and wanted to know if it was the right stuff for a BX. He sent me some free as a tester, so I could let him know whether it was a yay or a nay. Result:
The vents weren't ready to go on, though. Oh no. I had some excruciatingly boring work to do first!
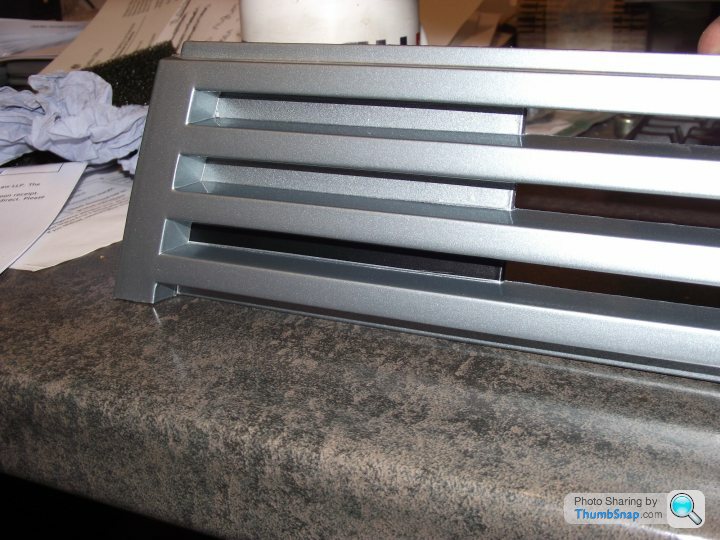
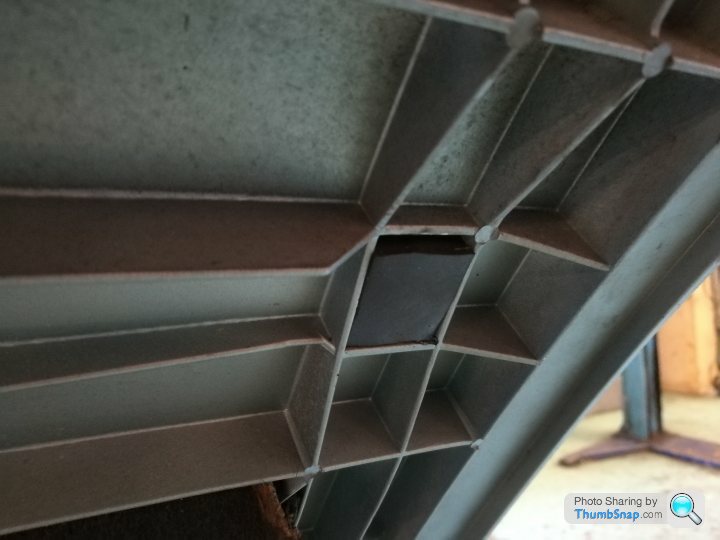
Those vents. Bloody hell! I can see why people skip that bit, but they look wrong from a distance otherwise, so I had to sit down and carefully apply vinyl strips inbetween all the slots. Annoyingly, the earlier mk1 vents (as fitted to my red 16 TRS) are two piece, and the black backing clips to the painted vent. But this one? Nah. Pig.
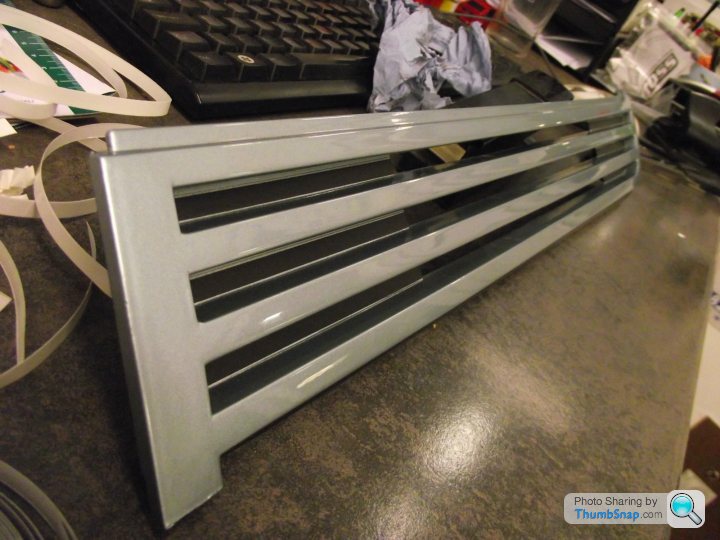
Especially this bit:
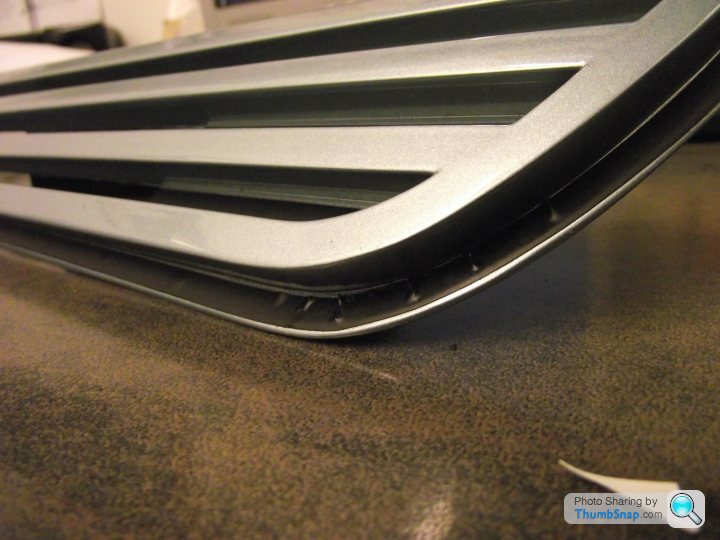
Those bumps can stay, I'm done with that!
Foam in place...
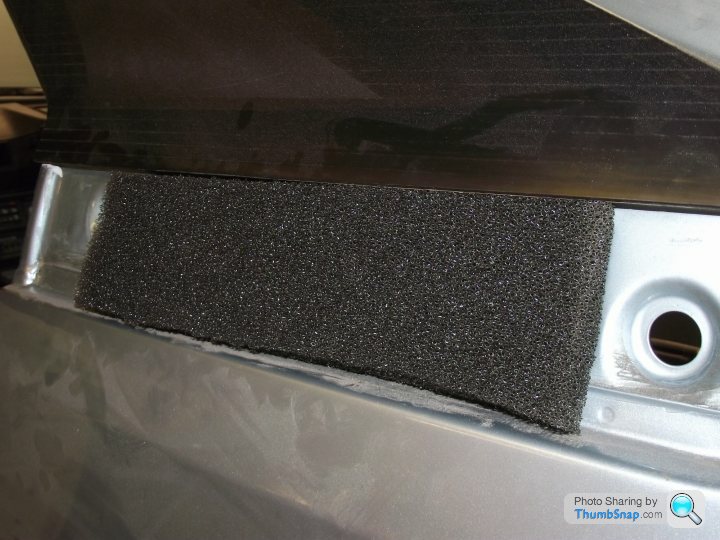
Vent attached over the top:
Happy days! The doors will be able to shut without popping the sunroof open!
This was September 2016, and I sat down to change some bulbs:
I just changed all of them, rather than try to figure out which ones were blown. And I also forgot to take a picture of them all lit up at night. Winner.
Moving into October, I decided to finally fit the rear-quarter vents. They'd been loosely attached for a while, but I needed to find some of the ventilation foam that is sandwiched behind vent and bodywork. I'd drawn a blank for a long time (hence why they weren't fitted), but a chance convo on a Facebook page got me chatting to a guy who had a stash of foam, and wanted to know if it was the right stuff for a BX. He sent me some free as a tester, so I could let him know whether it was a yay or a nay. Result:
The vents weren't ready to go on, though. Oh no. I had some excruciatingly boring work to do first!
Those vents. Bloody hell! I can see why people skip that bit, but they look wrong from a distance otherwise, so I had to sit down and carefully apply vinyl strips inbetween all the slots. Annoyingly, the earlier mk1 vents (as fitted to my red 16 TRS) are two piece, and the black backing clips to the painted vent. But this one? Nah. Pig.
Especially this bit:
Those bumps can stay, I'm done with that!
Foam in place...
Vent attached over the top:
Happy days! The doors will be able to shut without popping the sunroof open!

The admin here is done for the day, and I'm waiting for parts for other jobs, so it's a good opportunity to tick another 'to-do' box off, and update the BX GT. I might even be able to bring it up-to-date (though I'm promising nothing!)
We're quite a long way behind where the starts, and where we are today, so bear with me. And in an attempt to inject some excitement to this, it's worth pointing out that the thread is now beginning to reach its conclusion. There's a time frame involved, as well as emotions, jeopardy and stress. This process started about six and a half years ago, and just goes to show how time flies when you're enjoying yourself! Or, indeed, pulling your hair out and crying into a bottle because you've found a bracket that you had zinc-plated, but can't remember for the life of you where it goes, as although you're a BX geek, they only used this particular bracket in an 18month production run, and none of your other cars have it. And you didn't take a picture.
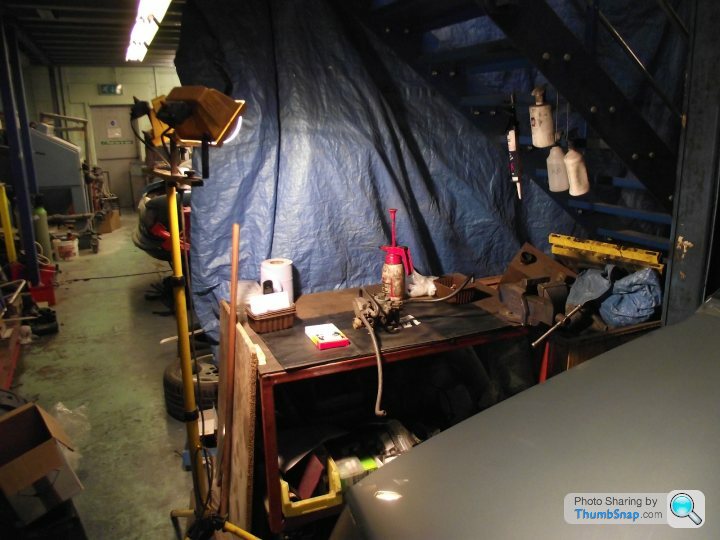
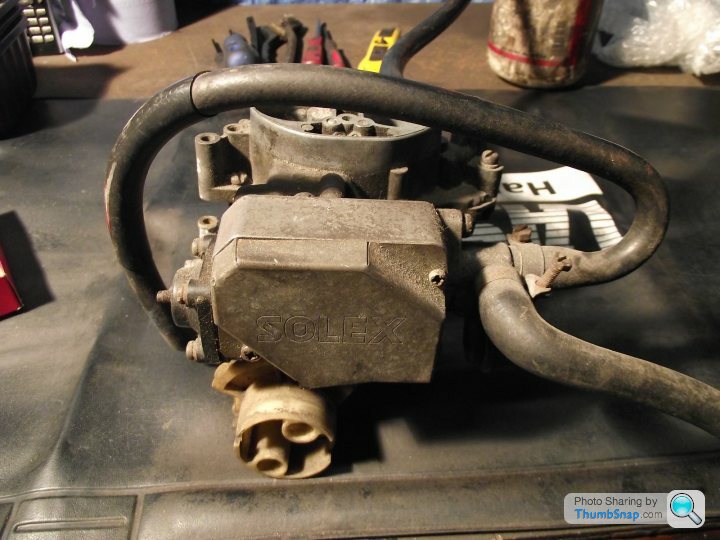
What I did take pictures of, is the carb rebuild. During a snowy afternoon just over two years ago, I set up camp in the corner of the workshop and made a start on the Solex Z1 rebuild. It was very dark (because the snow had covered all the windows) and it was about -3c. Ideal. Luckily, the halogen lamps did give off some heat:
You might remember that way back when, at the beginning of all this, the BX wasn't running brilliantly. It drove OK, but it had two problems. Problem number one was a sticking throttle, where if you pumped the throttle pedal a few times before an attempt to start (as you had to do, if you wanted any chance of hearing the engine running) the revs would hang at around 3000rpm, which was less than ideal.
Second issue was a chronic lack of power. The power graph produced at the rolling road looked thus:
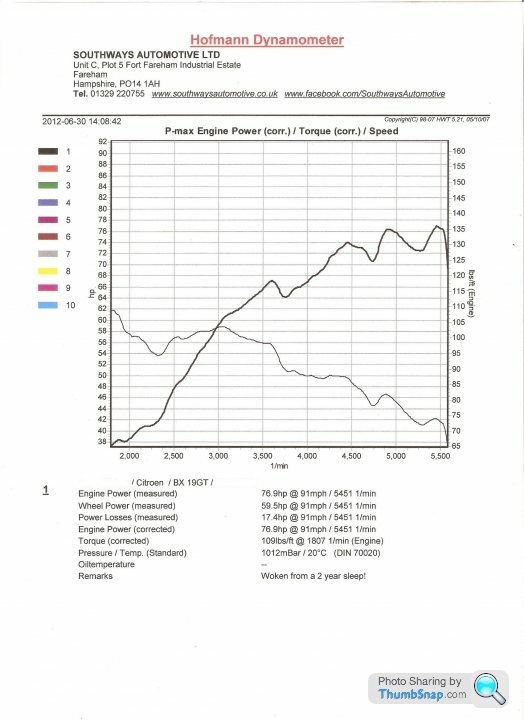
76bhp, give or take. Book figure was 105bhp. Not great!
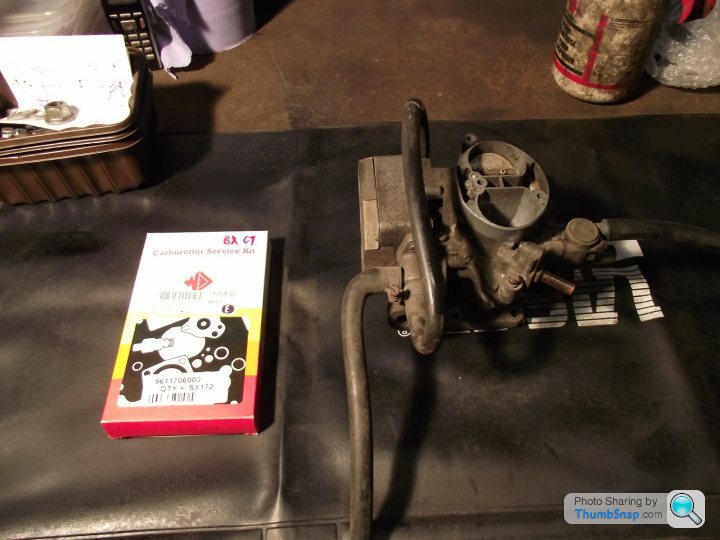
Having found the engine to be in good health mechanically, I deduced the issue must be with the Solex twin-choke carburettor, because, well....all carbs are trouble, aren't they? b d things.
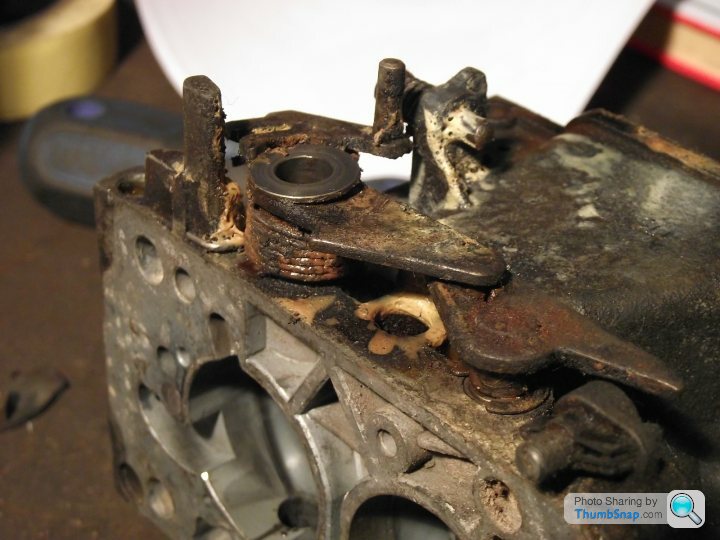
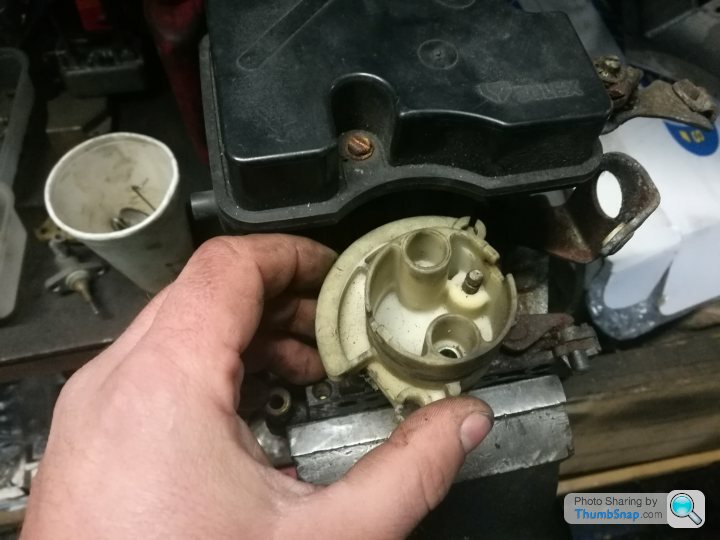
I'm fairly familiar with these carbs, as the AX GTs I know and love use the Z2 variant, only with a manual choke. Time to pull it to bits:
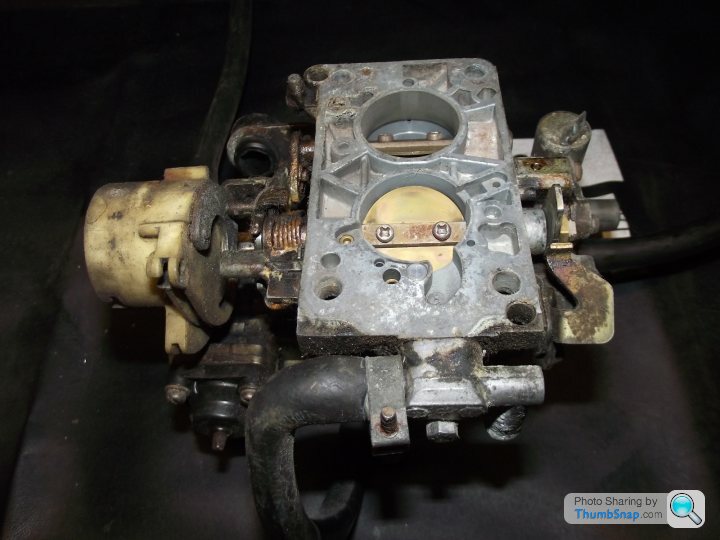
Straight away, I found a problem:
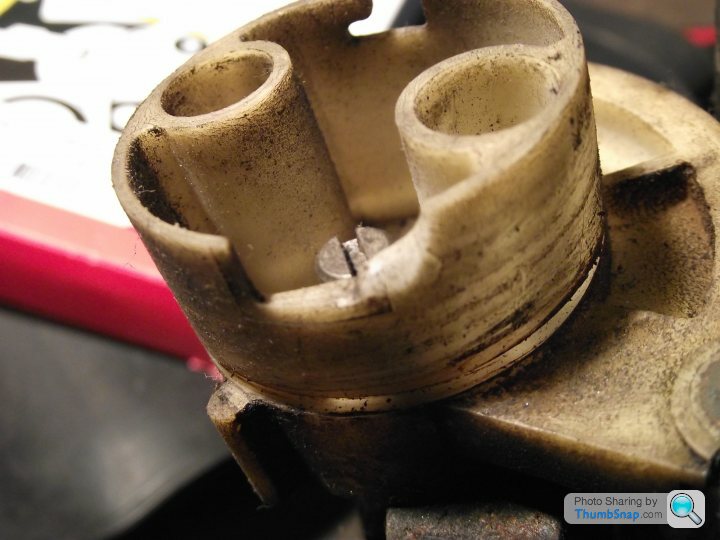
The nylon plastic housing that the cable pulled on was fractured, and that meant that the return spring that was supposed to pull it back to idle, wasn't. I'm not sure if that was the only problem, but it didn't help. It was also a bit of a non-starter, as it turns out, NOBODY bothers dealing in Solex spares, and I couldn't find a replacement. I even considered getting it scanned and 3-D printed, but it was a work up to say the least. I knew I was either going to be getting creative, or fitting a different carb.
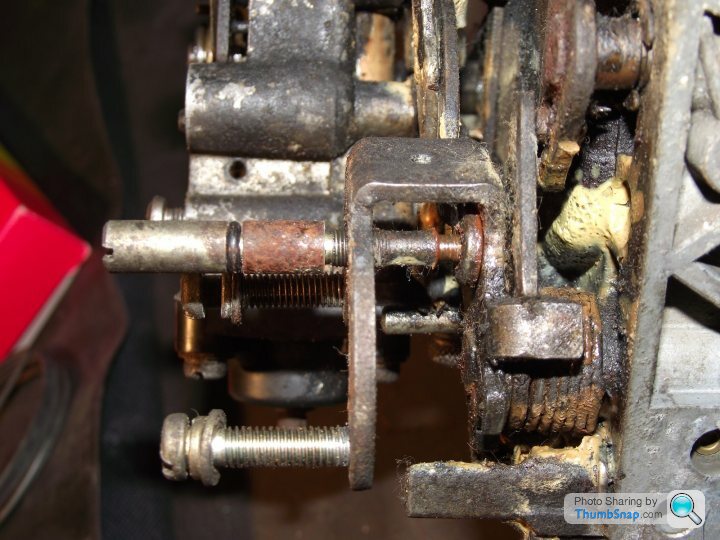
I then stumbled upon another problem. 190k miles of use meant that all the little linkages on the side of the unit had play in them. The carb itself is a clever little chap, as although it's twin-choke, it actually only operates one choke for most of the throttle travel. Only when the throttle is fully depressed does the second butterfly open, giving you a 'kick' in the back, regardless of engine speed. It's not quite the kick in the back the AX GT gives you, as it's carting another 250kg around, and trying to rotate smaller cogs in the gearbox via larger wheels on the road, but it's noticeable.
Now this is great, but imagine the choke was partially closed while you're on cold start. A bootful of throttle administered there would no doubt result in fouled spark plugs, and more clag than a Napier Deltic, along with little to no variation in speed. So, the second butterfly has a bypass linkage, meaning that if the choke is even slightly on, it won't operate the second butterfly. You basically can't have full power until the engine has warmed up, because the choke is waxstat controlled. Neat, huh?
Well, it would be, if the linkage wasn't bent and the second butterfly was staying closed, even at full throttle! So, that'll be the 76bhp then....
Rusty, rattly and bent linkages:
With the hunt for spares proving fruitless, and my irritating arrogance to retain the originality of the car, I had to switch my attentions elsewhere, otherwise I would be achieving nothing....fast.
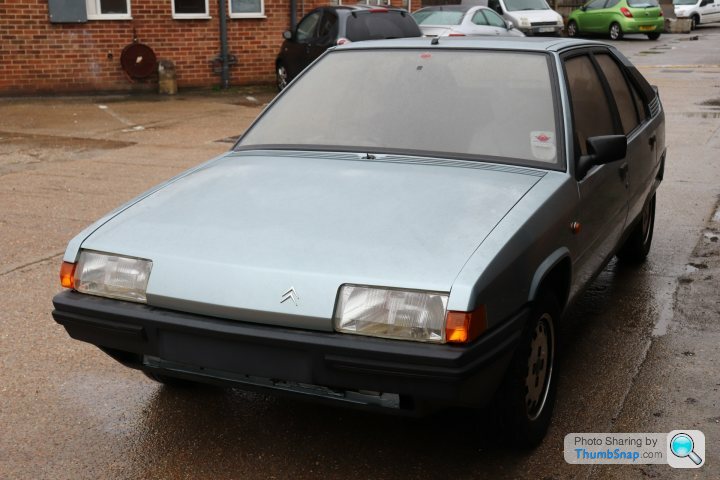
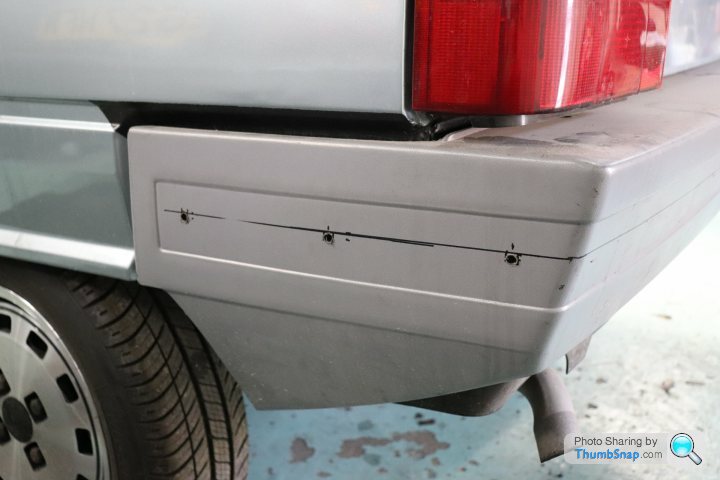
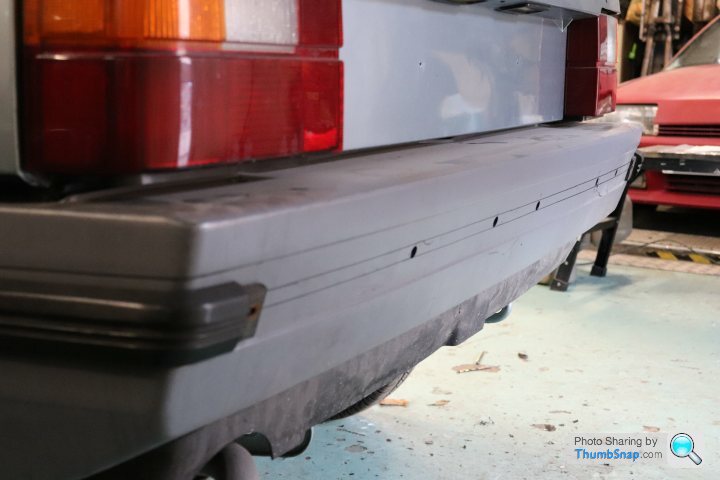
That work transpired to be body-related. The original bumpers on the car were a constant source of both annoyance, and confusion. The front one didn't look right (like the car had been 'chinned'), and the rear one was split under the rear lamp on one side. To compound things, they were different colours, with the front being a dark blue (which I could kinda get behind), and the rear a faded grey, which refused to un-fade.
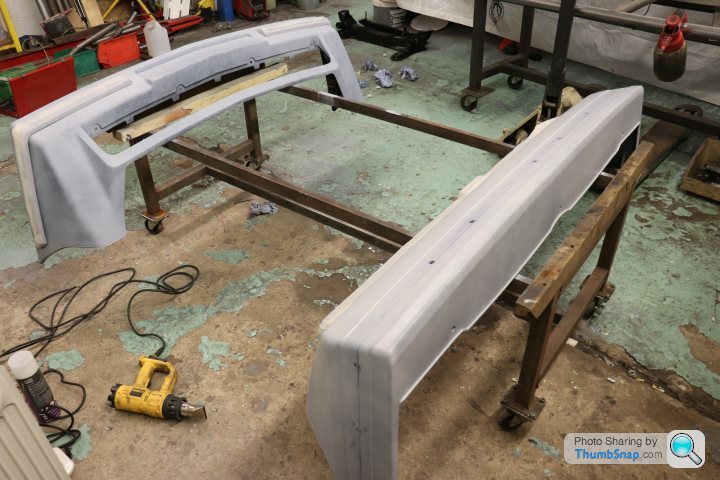
Imagine my delirium when I sourced a brand new/old stock BX mk1 genuine rear bumper on eBay, for 20 pounds!
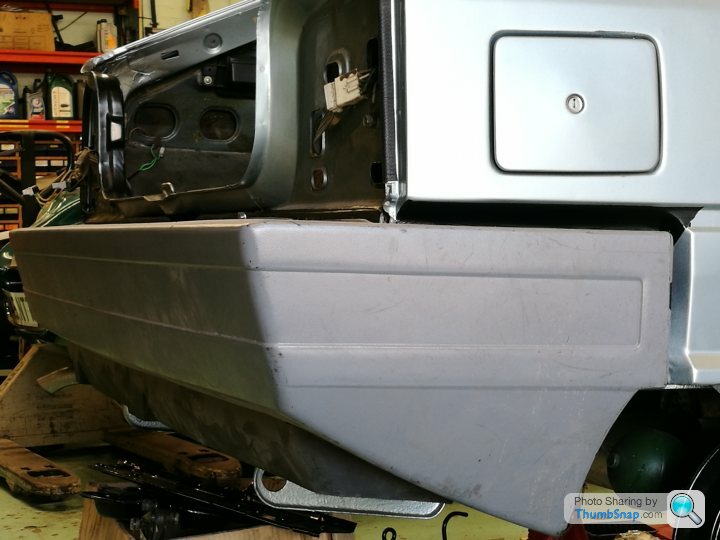
The only issues were that it was without mouldings (the GT was the only mk1 to use them), and it was in primer grey, which was a bummer as the original bumpers were coloured plastic; The replacements, even if from Citroen, came primed, and you had to paint them. I'd seen mixed results with this over the years, and was keen to not have glossy, smooth bumpers. Matt and textured - that's how they're meant to be.
Still, it fitted the car, and I set about attempting to remove the mouldings from the original rear bumper in preparation to switch them over:
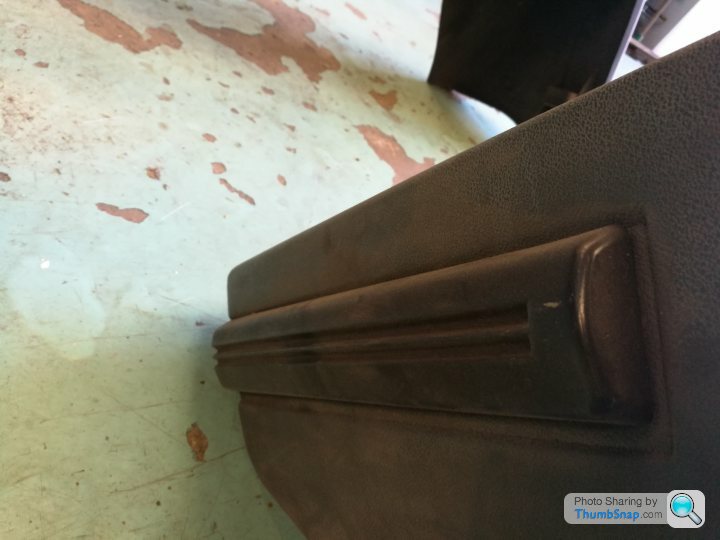
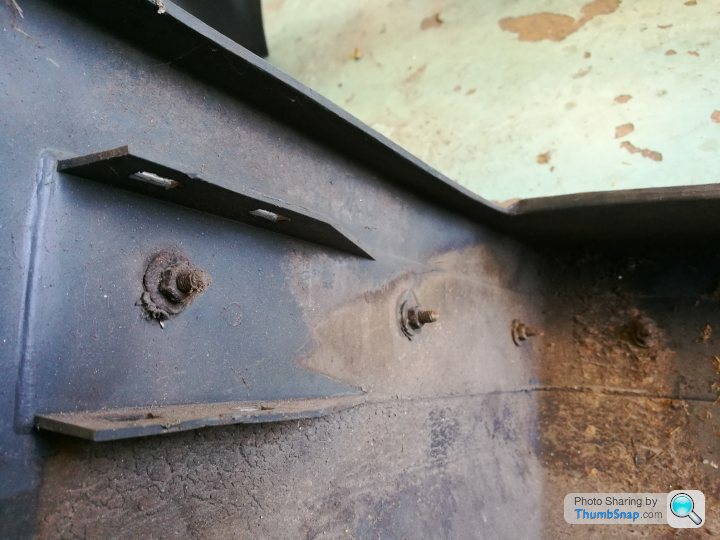
The mouldings in question were affixed by a series of rusty M6 bolts, set inside the moulding. A nut and washer simply held them to the bumper, and amazingly, they were all undone with complete ease!
Not really. Many of them snapped, or broke. Curses.
Because that was becoming a bit stressful (like every other part of this bd car), I moved onto the rear brakes, which, amazingly, had been one of only two MoT advisories on the last ticket issued, as they were slightly pitted.
Some new Bendix discs had been obtained by my Dad (oh yeah, it's his car....I forgot), as well as a set of brand new genuine pads:

Mmmmmmmm......dealer markup.
The rear brake pads on Citroens of a hydropneutically-suspended disposition are tiny, as are the discs. Likewise, the calipers, as there is no handbrake mechanism, as the handbrake operates the front wheels. The calipers are twin-pot (tiny, tiny pots) and have to be split in half to change the discs (unless you want to fart around trying to remove the entire thing without kinking the brake pipe).
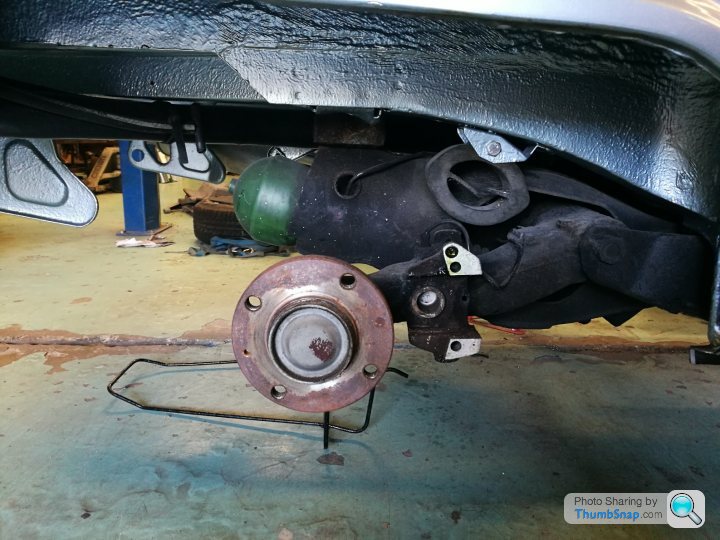
See? Told you it had tiny discs! Wait, that's the hub...
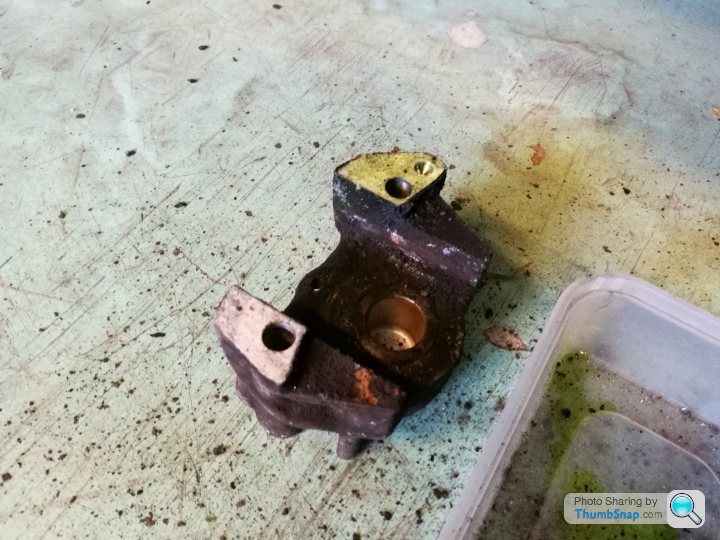
The other half of the caliper:
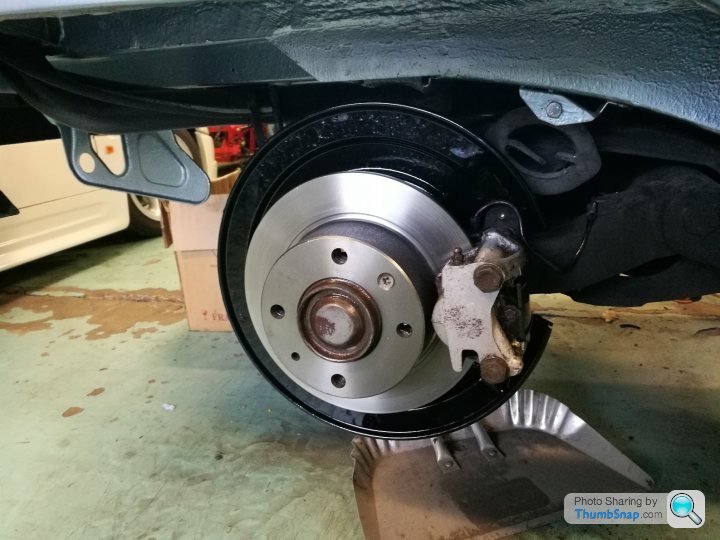
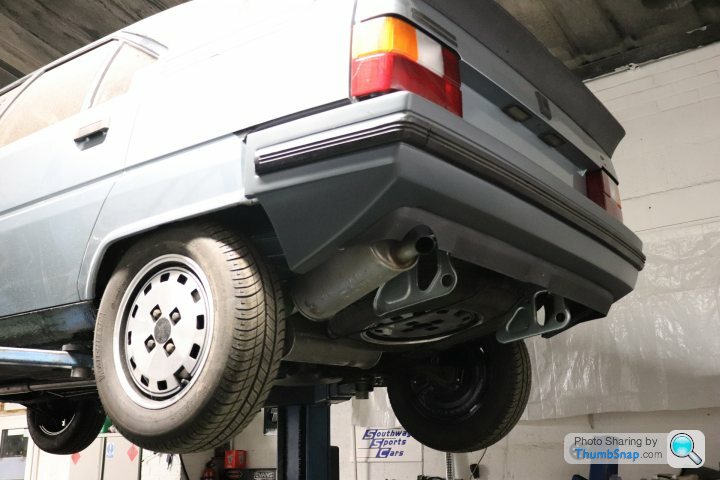
I wanted to get these sorted, partly because having brakes would be desirable, and partly because these (and some of the pipes supplying them) were among the final jobs to sort out before I could commission the hydraulics (the engine still had no carb, but that's by the by...)
Eventual success! New discs and pads fitted, along with the disc back plates which I had blasted and painted:
The brakes on a hydro-Citroen are a delight to bleed in. While on conventional cars, you have a nightmare trying to pump, hold, release, pump, hold, release, all the while trying to hear your mate shout "Up.....Down.....Up", only to find you have air trapped in the circuit, and a pedal limper than Aston Villa's efforts to survive relegation in 2016. You could use a bleeder, of course, but where's the fun in that?
On a Citroen, life is good (provided the bleed nipples are OK). You start engine, open nipple, hold foot on brake until green blood spews out of nipple into hose, lock nipple off and you're done. No pumping! Why? Because the brakes are power brakes, not power assisted brakes as they are on your VW Passat. You don't create the force acting on the brakes, you just control how much the system is allow to pinch the discs with. Brilliant!
Or not brilliant, if your engine doesn't run. And mine didn't have a carb, so it didn't run. A brief test with brake-cleaner sprayed into an open-intake manifold proved both that it would fire, and that our fire extinguishers worked.
To this end, I managed to source a Weber carb. Some BXs used these (my red mk1 made of rust does), but most used Solex. People have trouble getting the Solex to work properly, so they convert to Webers claiming that they drive better. They don't; A good Solex is a lovely thing to pedal, but they are a fight to get running sometimes, and they're also tricky to find bits for.
I didn't want to go the Weber route, because originality. However, I also wanted a running engine, and so was offered a Weber carb which I'd throw at the engine from 25ft and see if it fitted. It didn't fit brilliantly, as all the plumbing was wrong, but with the choke wedged shut and the throttle wedged open, I managed to crank the engine over enough for the mechanical pump to fill the float bowls, and we were ready for a starting attempt.
It lived!!
Then it died.
But then it lived again! Great! It was running like total dogst, but it was running. Idle at 2000rpm, smoke, backfiring.....the works. But it mattered not, as all I needed were revs so that I could tighten the pressure-relief screw and let the pump try and bring the system up to 1400psi.
I tightened the screw, and awaiting the hissing and clicking, hopefully followed with a BX attempting to lift itself off the deck.
I got hissing. I got clicking. I got no lifting. I did get movement of a sort, but sadly it was a liquid sort:
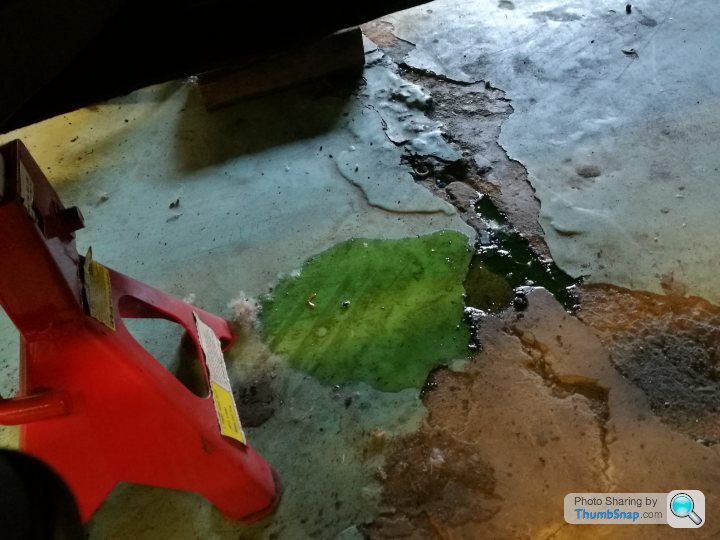
Once I'd gone round and actually tightened some of the new unions that I'd left undone, the BX raised itself into the air! Then it fell again. Then it raised again. Then it dropped again. So I filmed it:
https://youtu.be/1d3Tk1Ll6PQ
Trapped air is never good. Some 'Citrobics' sorted this out, and the BX was happily pumping up and down, suspension as soft as I remember it. Moral of the story here is that if you happen to have a car in bits for 4 years or more, and are rebuilding it over time, don't assume you've completed anything until you've checked it!
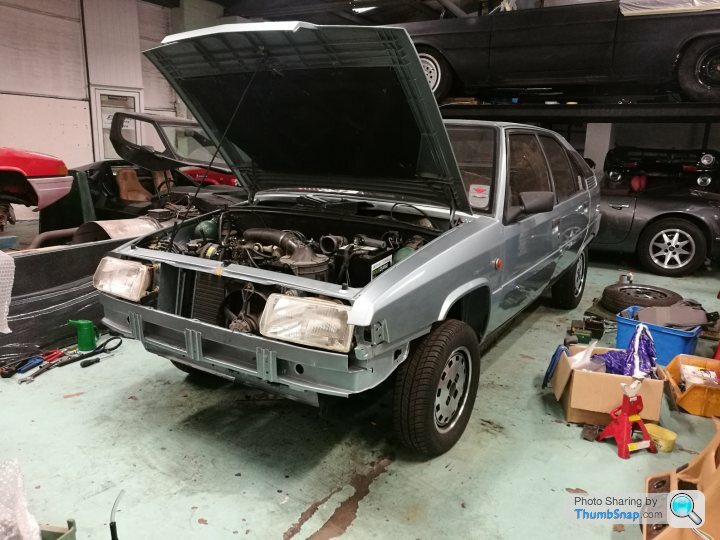
With the car now taking its own weight for the first time in Christ knows, I hastily refitted the passenger side wing in an effort to try and make the BX look more like a car. It's about small mental victories, really!
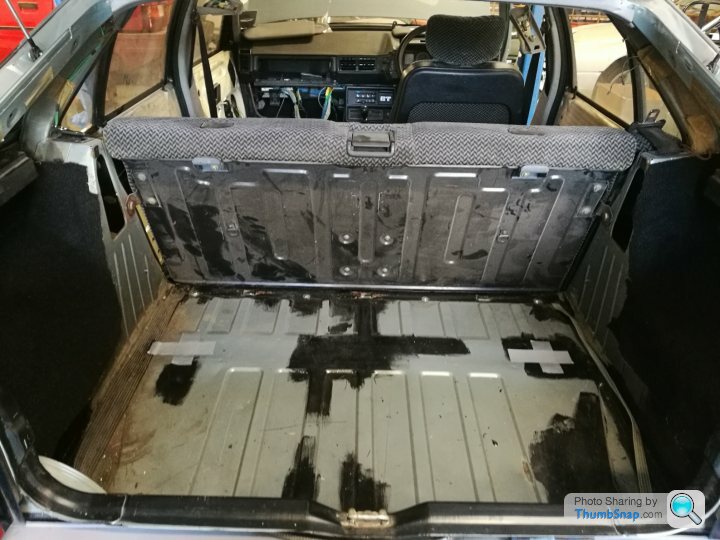
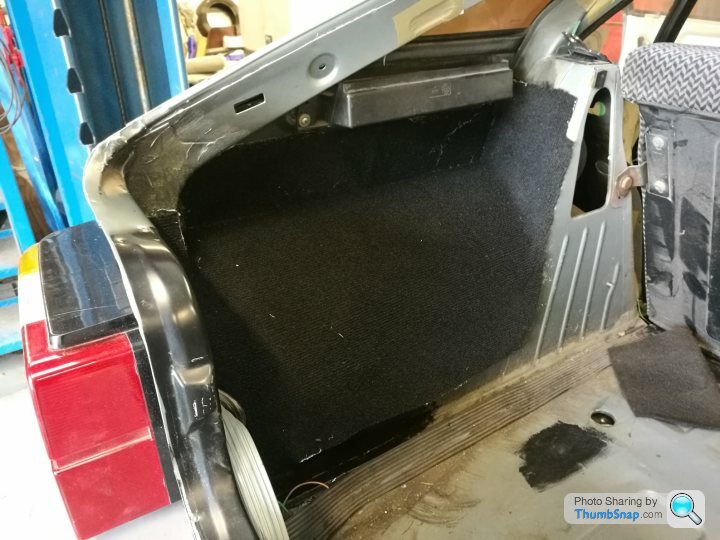
With the car running, I moved to the boot, as I desperately just wanted to 'complete' an area of the car, and the boot seemed achieveable. This was a case of rust treating and painting some scabs on the floor, as well as carpeting the inner wings:
 \
\
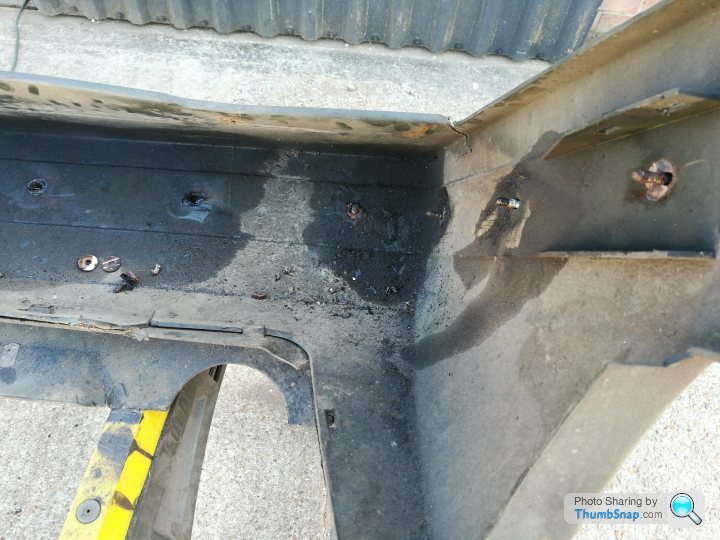
I left the car up on the ramp, knowing that the elephant in the room was still the sills, which had holes that hadn't yet been sorted, along with some questionable MoT-spec welded plating that I wanted to remove. For this I needed the two-post ramp to become available for a decent period of time, and that's one of the reasons this car has been such a stop/start project!
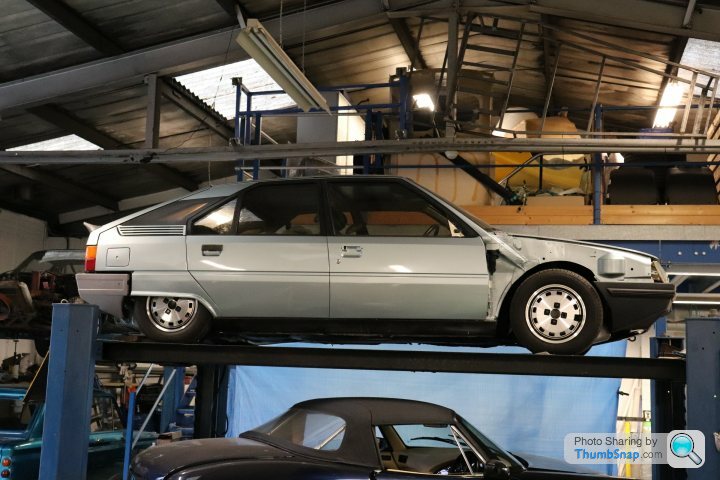
The ramp became free, and I moved the BX over to it, but because I needed to weld the areas that you'd normally lift the car up with, I had to get creative:
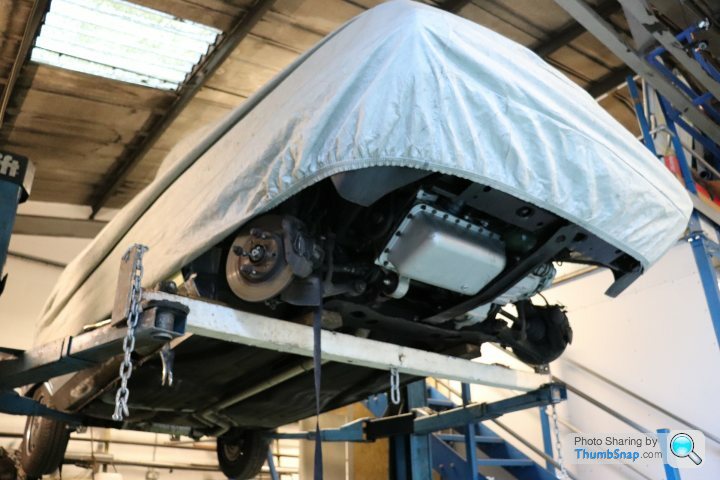
Once it was accessible, It was a case of going hunting for anything less than acceptable, and putting them right (apologies for out-of-focus pics - I had just bought an SLR and had no idea how to drive it. That was auto-focus, believe it or not!):
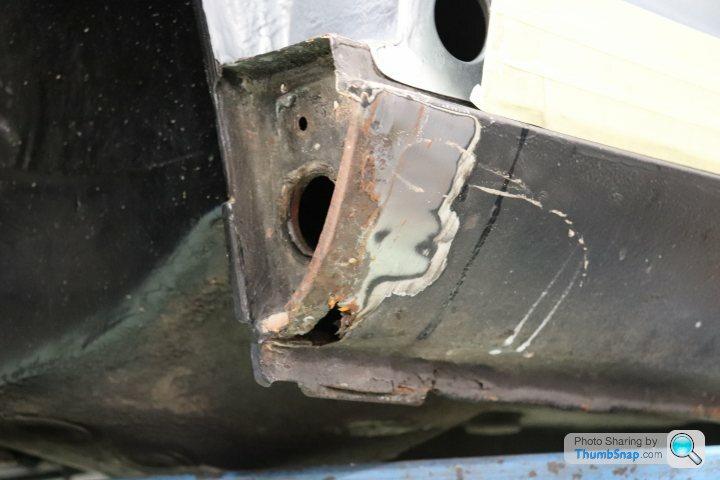
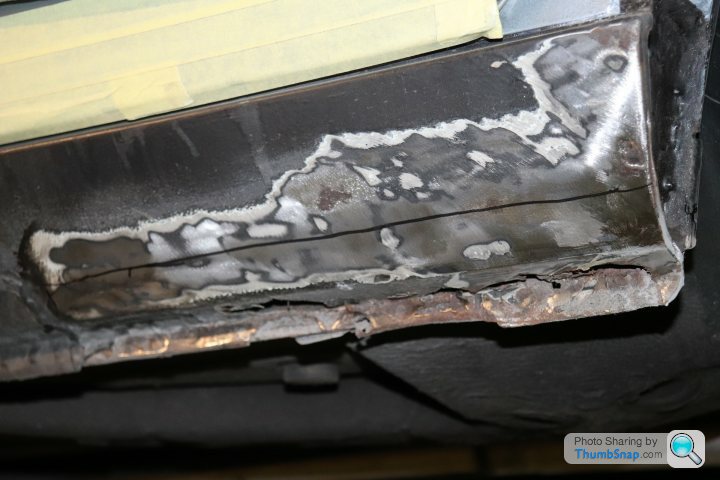
One of the MoT patches:
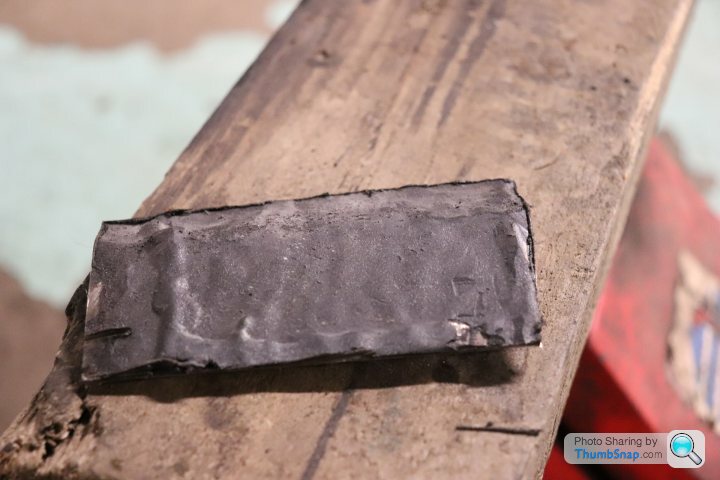
And the underside:
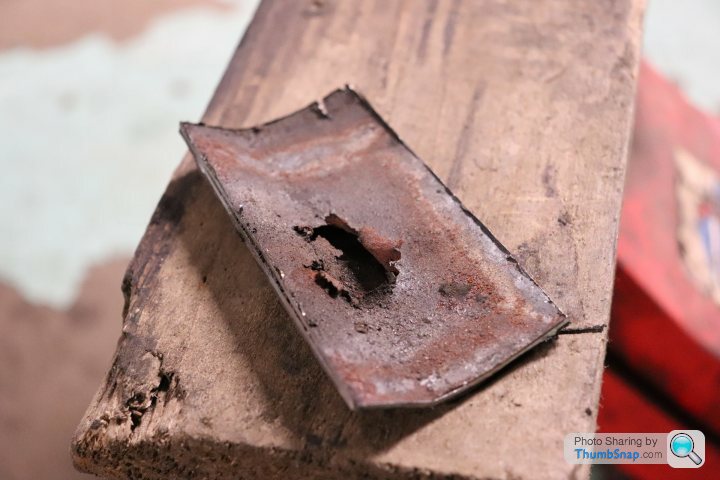
Goes to show that just because a car is welded up for the MoT, doesn't mean it's good!
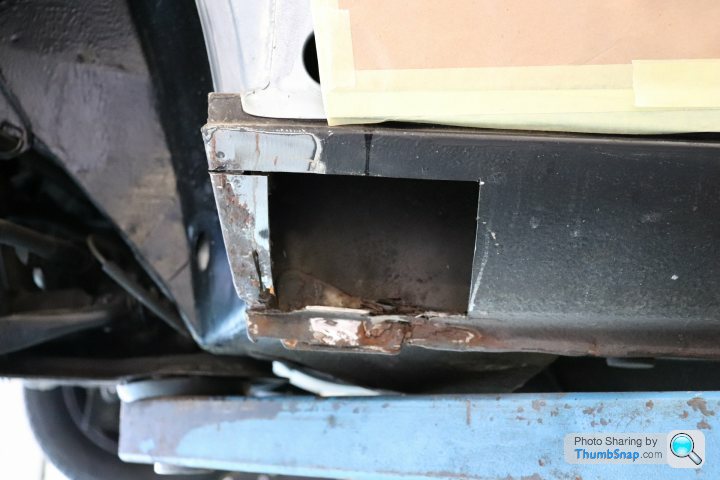
Loads of new tin installed:
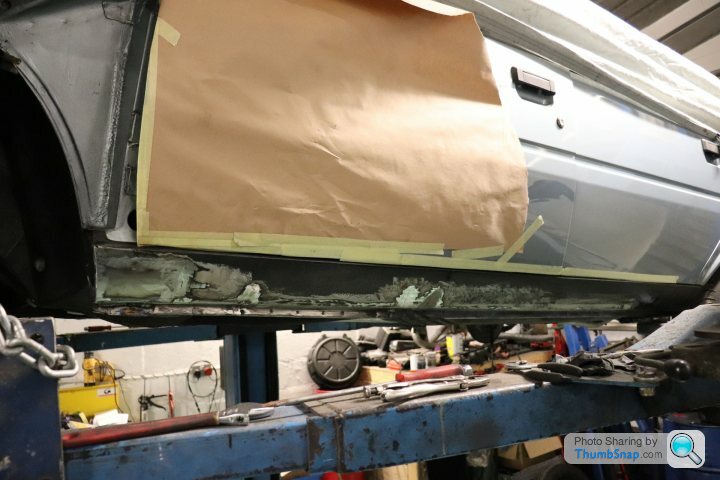
I then painted the sills using 2k epoxy mastic. I did take pictures of this, but they're not on this PC, so you can't see them! The paint used was a gloss black, as opposed to the matt black used originally. This didn't bother me as much as you might think, as although it looked less OE, gloss meant all the st and muck would run off it more easily. And, black is black.
'Course, if you've got a dent in the sill that you never noticed before, as there was no light reflection, and you didn't spot it when you were prepping as it was a strange contour that wasn't apparent with a grinder, and then only came to spot it once you'd applied loads of gloss black paint, meaning the shine made it stand out.....well, that'd be annoying, huh?
Anywhoo, we had black sills. I got all excited and fitted the wings in an attempt to make it look like it was moving on. I think it did!

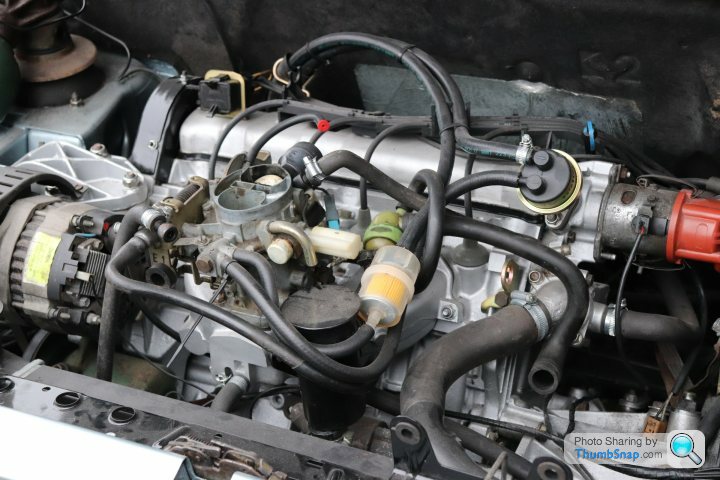
Thanks to the dicky-fitting Weber carb (which, as it turned out to be was actually a 1.6 automatic-spec unit, and no good for the GT), the car now moved under its own steam. Sure, it had no choke, idled at 2000rpm, no throttle cable and no air filter, but it was (just about) possible to move it around with the clutch alone.
Here is said Weber carb:
The interior was still to be sorted too:
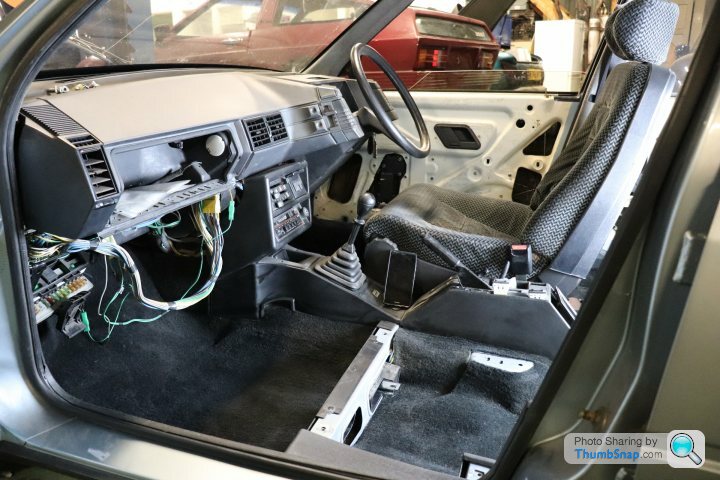
But, we were getting there!
pt2. coming up.....
We're quite a long way behind where the starts, and where we are today, so bear with me. And in an attempt to inject some excitement to this, it's worth pointing out that the thread is now beginning to reach its conclusion. There's a time frame involved, as well as emotions, jeopardy and stress. This process started about six and a half years ago, and just goes to show how time flies when you're enjoying yourself! Or, indeed, pulling your hair out and crying into a bottle because you've found a bracket that you had zinc-plated, but can't remember for the life of you where it goes, as although you're a BX geek, they only used this particular bracket in an 18month production run, and none of your other cars have it. And you didn't take a picture.
What I did take pictures of, is the carb rebuild. During a snowy afternoon just over two years ago, I set up camp in the corner of the workshop and made a start on the Solex Z1 rebuild. It was very dark (because the snow had covered all the windows) and it was about -3c. Ideal. Luckily, the halogen lamps did give off some heat:
You might remember that way back when, at the beginning of all this, the BX wasn't running brilliantly. It drove OK, but it had two problems. Problem number one was a sticking throttle, where if you pumped the throttle pedal a few times before an attempt to start (as you had to do, if you wanted any chance of hearing the engine running) the revs would hang at around 3000rpm, which was less than ideal.
Second issue was a chronic lack of power. The power graph produced at the rolling road looked thus:
76bhp, give or take. Book figure was 105bhp. Not great!
Having found the engine to be in good health mechanically, I deduced the issue must be with the Solex twin-choke carburettor, because, well....all carbs are trouble, aren't they? b
d things.I'm fairly familiar with these carbs, as the AX GTs I know and love use the Z2 variant, only with a manual choke. Time to pull it to bits:
Straight away, I found a problem:
The nylon plastic housing that the cable pulled on was fractured, and that meant that the return spring that was supposed to pull it back to idle, wasn't. I'm not sure if that was the only problem, but it didn't help. It was also a bit of a non-starter, as it turns out, NOBODY bothers dealing in Solex spares, and I couldn't find a replacement. I even considered getting it scanned and 3-D printed, but it was a work up to say the least. I knew I was either going to be getting creative, or fitting a different carb.
I then stumbled upon another problem. 190k miles of use meant that all the little linkages on the side of the unit had play in them. The carb itself is a clever little chap, as although it's twin-choke, it actually only operates one choke for most of the throttle travel. Only when the throttle is fully depressed does the second butterfly open, giving you a 'kick' in the back, regardless of engine speed. It's not quite the kick in the back the AX GT gives you, as it's carting another 250kg around, and trying to rotate smaller cogs in the gearbox via larger wheels on the road, but it's noticeable.
Now this is great, but imagine the choke was partially closed while you're on cold start. A bootful of throttle administered there would no doubt result in fouled spark plugs, and more clag than a Napier Deltic, along with little to no variation in speed. So, the second butterfly has a bypass linkage, meaning that if the choke is even slightly on, it won't operate the second butterfly. You basically can't have full power until the engine has warmed up, because the choke is waxstat controlled. Neat, huh?
Well, it would be, if the linkage wasn't bent and the second butterfly was staying closed, even at full throttle! So, that'll be the 76bhp then....
Rusty, rattly and bent linkages:
With the hunt for spares proving fruitless, and my irritating arrogance to retain the originality of the car, I had to switch my attentions elsewhere, otherwise I would be achieving nothing....fast.
That work transpired to be body-related. The original bumpers on the car were a constant source of both annoyance, and confusion. The front one didn't look right (like the car had been 'chinned'), and the rear one was split under the rear lamp on one side. To compound things, they were different colours, with the front being a dark blue (which I could kinda get behind), and the rear a faded grey, which refused to un-fade.
Imagine my delirium when I sourced a brand new/old stock BX mk1 genuine rear bumper on eBay, for 20 pounds!
The only issues were that it was without mouldings (the GT was the only mk1 to use them), and it was in primer grey, which was a bummer as the original bumpers were coloured plastic; The replacements, even if from Citroen, came primed, and you had to paint them. I'd seen mixed results with this over the years, and was keen to not have glossy, smooth bumpers. Matt and textured - that's how they're meant to be.
Still, it fitted the car, and I set about attempting to remove the mouldings from the original rear bumper in preparation to switch them over:
The mouldings in question were affixed by a series of rusty M6 bolts, set inside the moulding. A nut and washer simply held them to the bumper, and amazingly, they were all undone with complete ease!
Not really. Many of them snapped, or broke. Curses.
Because that was becoming a bit stressful (like every other part of this b
d car), I moved onto the rear brakes, which, amazingly, had been one of only two MoT advisories on the last ticket issued, as they were slightly pitted.Some new Bendix discs had been obtained by my Dad (oh yeah, it's his car....I forgot), as well as a set of brand new genuine pads:
Mmmmmmmm......dealer markup.
The rear brake pads on Citroens of a hydropneutically-suspended disposition are tiny, as are the discs. Likewise, the calipers, as there is no handbrake mechanism, as the handbrake operates the front wheels. The calipers are twin-pot (tiny, tiny pots) and have to be split in half to change the discs (unless you want to fart around trying to remove the entire thing without kinking the brake pipe).
See? Told you it had tiny discs! Wait, that's the hub...
The other half of the caliper:
I wanted to get these sorted, partly because having brakes would be desirable, and partly because these (and some of the pipes supplying them) were among the final jobs to sort out before I could commission the hydraulics (the engine still had no carb, but that's by the by...)
Eventual success! New discs and pads fitted, along with the disc back plates which I had blasted and painted:
The brakes on a hydro-Citroen are a delight to bleed in. While on conventional cars, you have a nightmare trying to pump, hold, release, pump, hold, release, all the while trying to hear your mate shout "Up.....Down.....Up", only to find you have air trapped in the circuit, and a pedal limper than Aston Villa's efforts to survive relegation in 2016. You could use a bleeder, of course, but where's the fun in that?
On a Citroen, life is good (provided the bleed nipples are OK). You start engine, open nipple, hold foot on brake until green blood spews out of nipple into hose, lock nipple off and you're done. No pumping! Why? Because the brakes are power brakes, not power assisted brakes as they are on your VW Passat. You don't create the force acting on the brakes, you just control how much the system is allow to pinch the discs with. Brilliant!
Or not brilliant, if your engine doesn't run. And mine didn't have a carb, so it didn't run. A brief test with brake-cleaner sprayed into an open-intake manifold proved both that it would fire, and that our fire extinguishers worked.
To this end, I managed to source a Weber carb. Some BXs used these (my red mk1 made of rust does), but most used Solex. People have trouble getting the Solex to work properly, so they convert to Webers claiming that they drive better. They don't; A good Solex is a lovely thing to pedal, but they are a fight to get running sometimes, and they're also tricky to find bits for.
I didn't want to go the Weber route, because originality. However, I also wanted a running engine, and so was offered a Weber carb which I'd throw at the engine from 25ft and see if it fitted. It didn't fit brilliantly, as all the plumbing was wrong, but with the choke wedged shut and the throttle wedged open, I managed to crank the engine over enough for the mechanical pump to fill the float bowls, and we were ready for a starting attempt.
It lived!!
Then it died.
But then it lived again! Great! It was running like total dogs
t, but it was running. Idle at 2000rpm, smoke, backfiring.....the works. But it mattered not, as all I needed were revs so that I could tighten the pressure-relief screw and let the pump try and bring the system up to 1400psi.I tightened the screw, and awaiting the hissing and clicking, hopefully followed with a BX attempting to lift itself off the deck.
I got hissing. I got clicking. I got no lifting. I did get movement of a sort, but sadly it was a liquid sort:
Once I'd gone round and actually tightened some of the new unions that I'd left undone, the BX raised itself into the air! Then it fell again. Then it raised again. Then it dropped again. So I filmed it:
https://youtu.be/1d3Tk1Ll6PQ
Trapped air is never good. Some 'Citrobics' sorted this out, and the BX was happily pumping up and down, suspension as soft as I remember it. Moral of the story here is that if you happen to have a car in bits for 4 years or more, and are rebuilding it over time, don't assume you've completed anything until you've checked it!
With the car now taking its own weight for the first time in Christ knows, I hastily refitted the passenger side wing in an effort to try and make the BX look more like a car. It's about small mental victories, really!
With the car running, I moved to the boot, as I desperately just wanted to 'complete' an area of the car, and the boot seemed achieveable. This was a case of rust treating and painting some scabs on the floor, as well as carpeting the inner wings:
\I left the car up on the ramp, knowing that the elephant in the room was still the sills, which had holes that hadn't yet been sorted, along with some questionable MoT-spec welded plating that I wanted to remove. For this I needed the two-post ramp to become available for a decent period of time, and that's one of the reasons this car has been such a stop/start project!
The ramp became free, and I moved the BX over to it, but because I needed to weld the areas that you'd normally lift the car up with, I had to get creative:
Once it was accessible, It was a case of going hunting for anything less than acceptable, and putting them right (apologies for out-of-focus pics - I had just bought an SLR and had no idea how to drive it. That was auto-focus, believe it or not!):
One of the MoT patches:
And the underside:
Goes to show that just because a car is welded up for the MoT, doesn't mean it's good!
Loads of new tin installed:
I then painted the sills using 2k epoxy mastic. I did take pictures of this, but they're not on this PC, so you can't see them! The paint used was a gloss black, as opposed to the matt black used originally. This didn't bother me as much as you might think, as although it looked less OE, gloss meant all the s
t and muck would run off it more easily. And, black is black.'Course, if you've got a dent in the sill that you never noticed before, as there was no light reflection, and you didn't spot it when you were prepping as it was a strange contour that wasn't apparent with a grinder, and then only came to spot it once you'd applied loads of gloss black paint, meaning the shine made it stand out.....well, that'd be annoying, huh?
Anywhoo, we had black sills. I got all excited and fitted the wings in an attempt to make it look like it was moving on. I think it did!
Thanks to the dicky-fitting Weber carb (which, as it turned out to be was actually a 1.6 automatic-spec unit, and no good for the GT), the car now moved under its own steam. Sure, it had no choke, idled at 2000rpm, no throttle cable and no air filter, but it was (just about) possible to move it around with the clutch alone.
Here is said Weber carb:
The interior was still to be sorted too:
But, we were getting there!
pt2. coming up.....
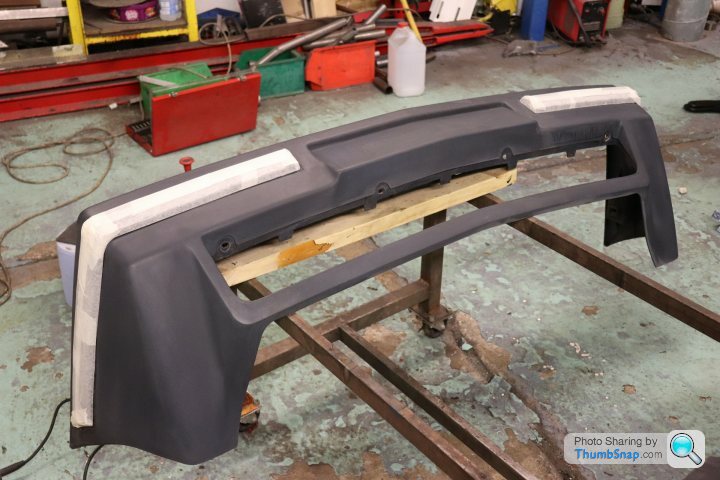
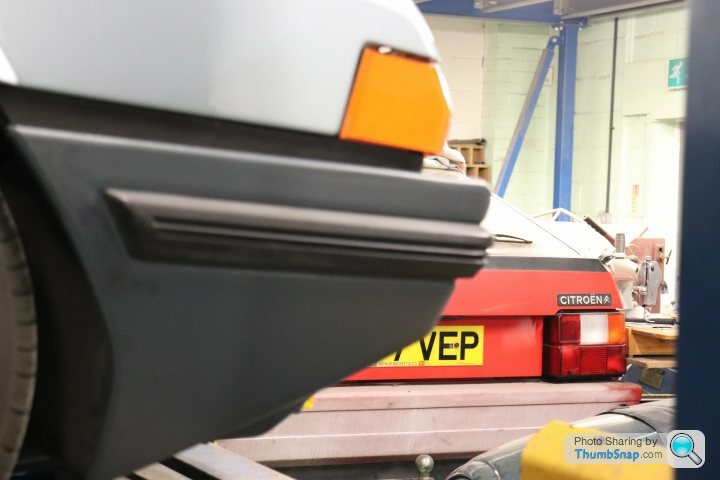
The BX GT was beginning to take shape externally, but the bumpers were still pissing on my chips of contentment. I knew they were a big job for me, as I'm no painter. I had to try and sort the mouldings out, and then attempt to paint a bumper in a paint to make it look like it wasn't painted. Right.
Looking on, forlornly, was the BX outcast. Namely, an R.T.S. BX 16v. I've debated starting yet ANOTHER BX thread on here for that car. 2019 will likely supply more BX-related chod content for you all!

Anyway, the moulding side of things was pretty easy:


The time to bite the bullet approached. I had to paint the bumpers!
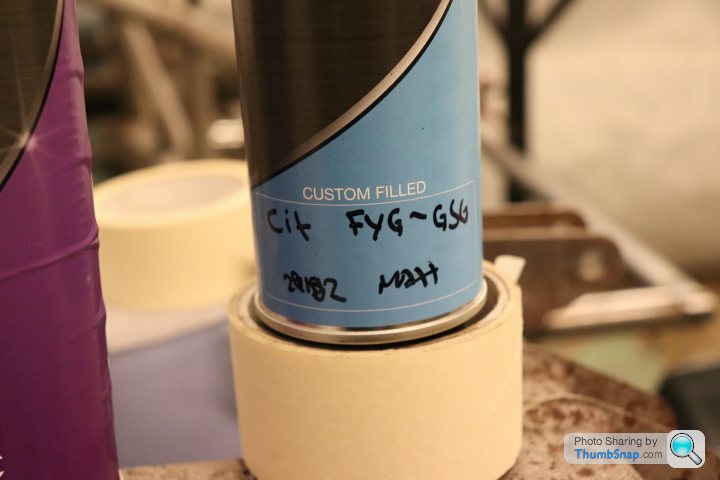
Through some assistance with some BX bods, I was pointed to a colour-code chart. I knew the colour of the GT was 'Romantic Blue', so it gave a code of FYG. It also gave that code for a couple of other body colours, including a metallic grey, so I was a bit skeptical, but with nothing else to go on I decided to head to Express Paints in Portsmouth, and have some mixed up:
Then it was a case of prepping the bumpers, and no sooner had I started, I spotted something:
In all my faffing with the rear bumper moulding, trying anything and everything to get it to line up straight, I noticed the front ones were sitting pissed. Having flipped the bumper over, I noticed there were no fixings that I couldundo snap off to allow me to adjust it. I then noticed that they were glued on.
And then the penny dropped! The wasn't the original front bumper, because it's been in a shunt. That's why the front panel is bent up, giving it that funny nose. It's also why the front bumper is a different colour - it's not meant to be blue at all. I had assumed, wrongly, that the front one was right, as it looked 'right', but every other Romantic Blue BX I'd found looked different. And that's why: They had grey bumpers!
Some primer was applied, and I waited to apply the first coat of paint:
On it went, and straight away I was a relieved man!
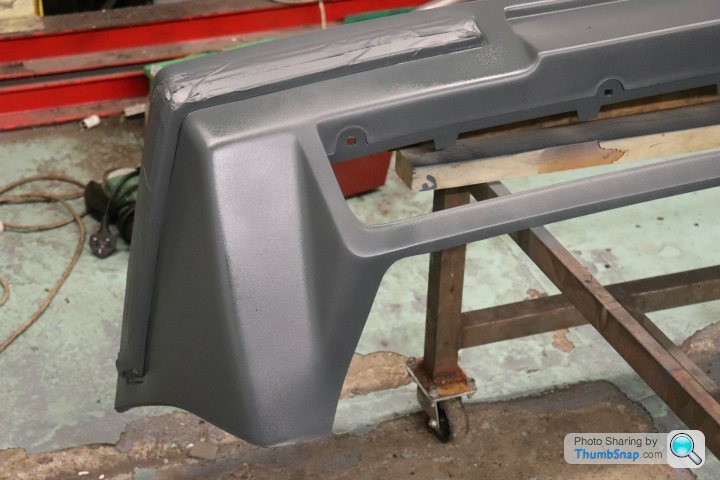
The front bumper in particular was a nightmare. Years and years of bumper gel and silicone gave me nightmares with the paint reacting, but for the cost of three rattle cans, this was a worthwhile job. I think it'll probably flake off, but I've proved the theory now, and I could have a bodyshop do them properly in the future (or my Dad could, anyway!) The important thing is that the paint gives a perfect finish, because it's mixed as a matt coat.
I offered a bumper up, and got genuinely excited. It looked spot on!
All of the original bumper fastenings had rusted and broke, so I had to get creative. I decided to use rivnuts to secure the rear bumper:
Once the mouldings were on, it really started to take shape. This was about the time I got a real rush of motivation to see this thing done before the year is out, and a plan was hatched.
pt.3 later tonight
Looking on, forlornly, was the BX outcast. Namely, an R.T.S. BX 16v. I've debated starting yet ANOTHER BX thread on here for that car. 2019 will likely supply more BX-related chod content for you all!
Anyway, the moulding side of things was pretty easy:
The time to bite the bullet approached. I had to paint the bumpers!
Through some assistance with some BX bods, I was pointed to a colour-code chart. I knew the colour of the GT was 'Romantic Blue', so it gave a code of FYG. It also gave that code for a couple of other body colours, including a metallic grey, so I was a bit skeptical, but with nothing else to go on I decided to head to Express Paints in Portsmouth, and have some mixed up:
Then it was a case of prepping the bumpers, and no sooner had I started, I spotted something:
In all my faffing with the rear bumper moulding, trying anything and everything to get it to line up straight, I noticed the front ones were sitting pissed. Having flipped the bumper over, I noticed there were no fixings that I could
And then the penny dropped! The wasn't the original front bumper, because it's been in a shunt. That's why the front panel is bent up, giving it that funny nose. It's also why the front bumper is a different colour - it's not meant to be blue at all. I had assumed, wrongly, that the front one was right, as it looked 'right', but every other Romantic Blue BX I'd found looked different. And that's why: They had grey bumpers!
Some primer was applied, and I waited to apply the first coat of paint:
On it went, and straight away I was a relieved man!
The front bumper in particular was a nightmare. Years and years of bumper gel and silicone gave me nightmares with the paint reacting, but for the cost of three rattle cans, this was a worthwhile job. I think it'll probably flake off, but I've proved the theory now, and I could have a bodyshop do them properly in the future (or my Dad could, anyway!) The important thing is that the paint gives a perfect finish, because it's mixed as a matt coat.
I offered a bumper up, and got genuinely excited. It looked spot on!
All of the original bumper fastenings had rusted and broke, so I had to get creative. I decided to use rivnuts to secure the rear bumper:
Once the mouldings were on, it really started to take shape. This was about the time I got a real rush of motivation to see this thing done before the year is out, and a plan was hatched.
pt.3 later tonight

Ace threads. Genuinely more excited to read this than a thread about the latest exotic.
My dad had one until I was about 7. I still vividly remember the texture of the foam behind the rear vents. Odd memory but it left an impression.
His next car was a 5 door Ax gt. Love what you're doing to keep these brilliant old a Citroëns on the road
My dad had one until I was about 7. I still vividly remember the texture of the foam behind the rear vents. Odd memory but it left an impression.
His next car was a 5 door Ax gt. Love what you're doing to keep these brilliant old a Citroëns on the road
Nice - It was only today i was discussing my dads 4x4 gti with a work colleague and my desire to take it on now my rallye is finished and his reluctance to sell to me as he uses it most days.
Its only on 37k
This one is lovely, and the job your doing looks great, love the colour/spec and the early dash
Its only on 37k
This one is lovely, and the job your doing looks great, love the colour/spec and the early dash
So, in an attempt to try and bring things up to date, I'm back at home with access to all the pictures. Let's get this story caught up!
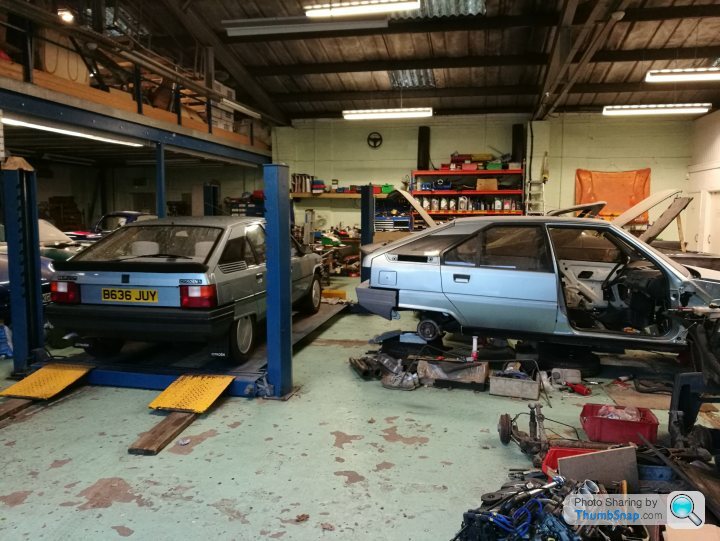
First up, a time where I had 20% of the UK's BX GT population in the workshop!:
One issue that had been lingering over me for some time, had been the Solex carb issue. The Weber I'd been sent was a non-starter, because it wasn't suitable for a 1.9 engine. The Solex I had, wasn't suitable because it was shagged.
Step up a kind man called Derek. He had a Solex carb for spares, and offered to send it to me....for free!
When that carb arrived, I immediately checked the plastic cable....thingy.
It wasn't broken! It was different, but it could work!

The carb Derek sent was pretty seized up, but happily I was able to harvest enough off it to rebuild the existing Z1 into something usable. I modified the throttle cable, started tweaking some bits and fitted it up. It didn't run well, but it ran, and the autochoke waxstat was working. I decided to crack on with other things, and come back to it later.
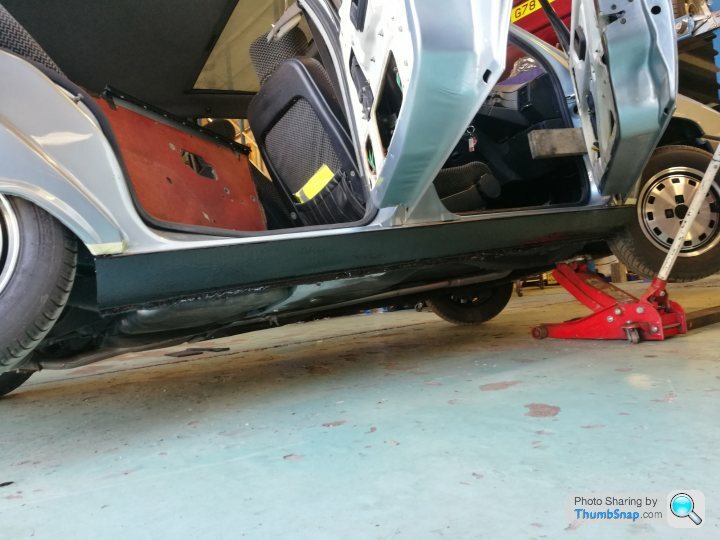
I mentioned earlier that I'd painted the sills, and that you'd just have to take my word for it. Well, now you don't, 'cos here's the proof!
But while I was there, I also attended to the bonnet alignment. Once I'd fitted the wings, I achieved quite a pleasing panel gap down both sides, but it still sat too low relative to the leading edge of the wing. At this point, I realised that the rubber buffers that go in the bonnet for the bump stops on the front panel to rest on, were missing. So, I made some out of rubber sheet, and hey presto!
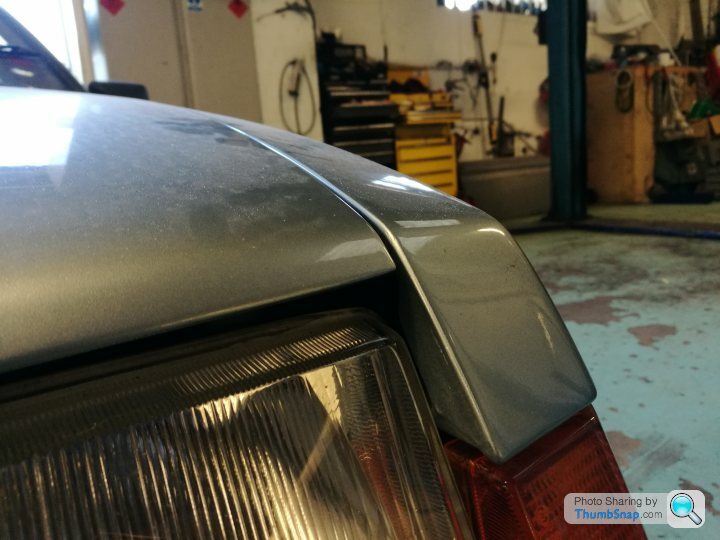
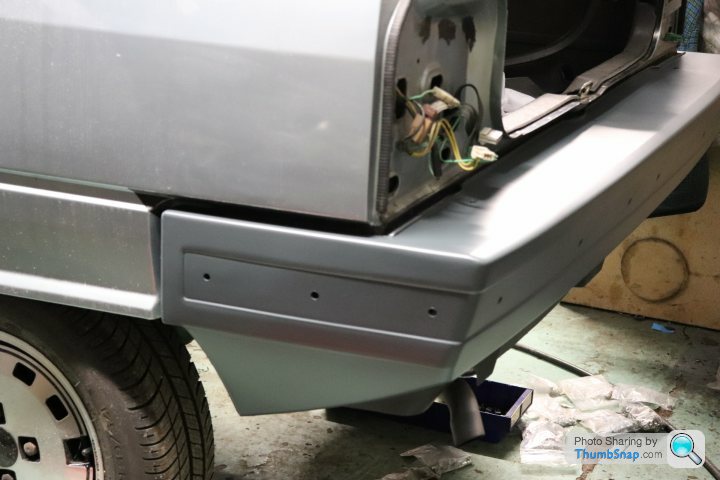
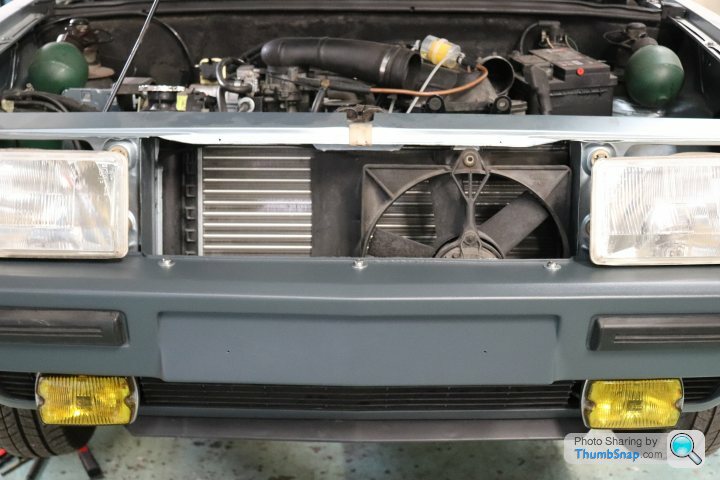
With the bonnet looking sweet, I needed a front bumper to match the rear (for once!) On a BX GT, you pretty much do this in reverse order!
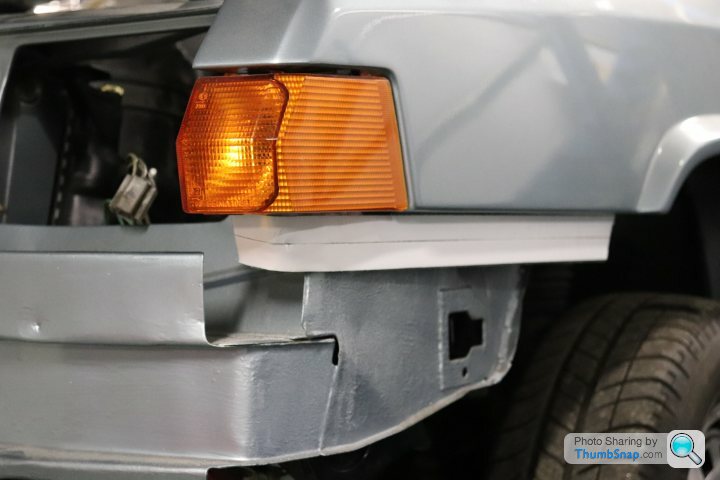
So, first up, the fog lamps:
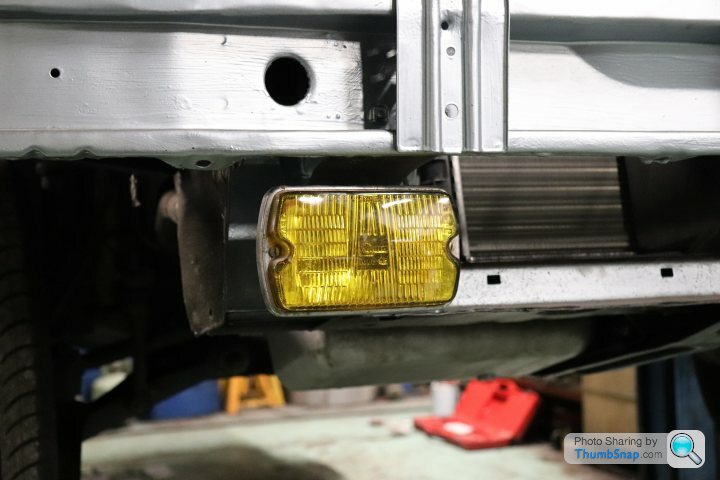

Then you slide the black plastic grille over, which incorporates the splitter, and attach it to the lower panel. I forgot to take pics of this, but what do you want? This is free, isn't it?!
Once the fog lamps and grille are in, the bumper goes over the top (except in this picture, which was taken before I remembered the grille had to go in first. Sue me.:
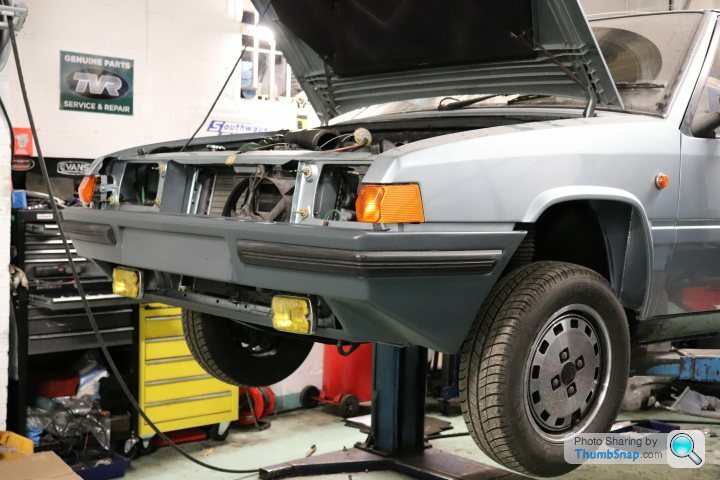
It's secured with many more fixings, though the original types were big button-headed screws. I couldn't use those because I'd switched to M8 rivnuts, so I attempted to use some stainless buttonheads, but they were way too noticeable!
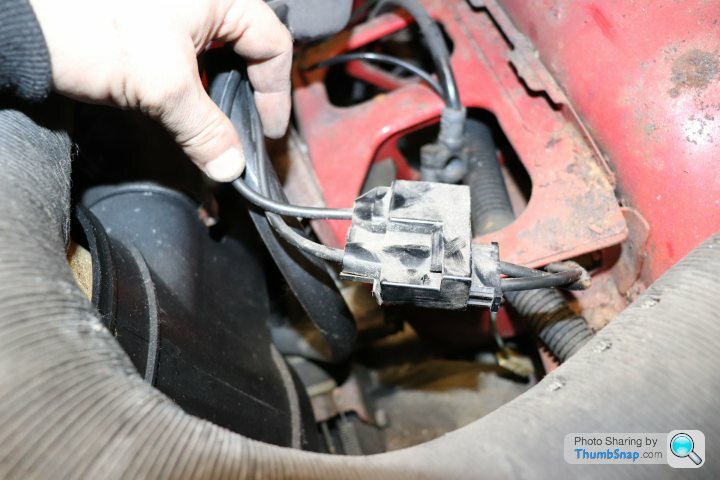
I also discovered why the fog lamps weren't working.
Well, one of the reasons they weren't working!
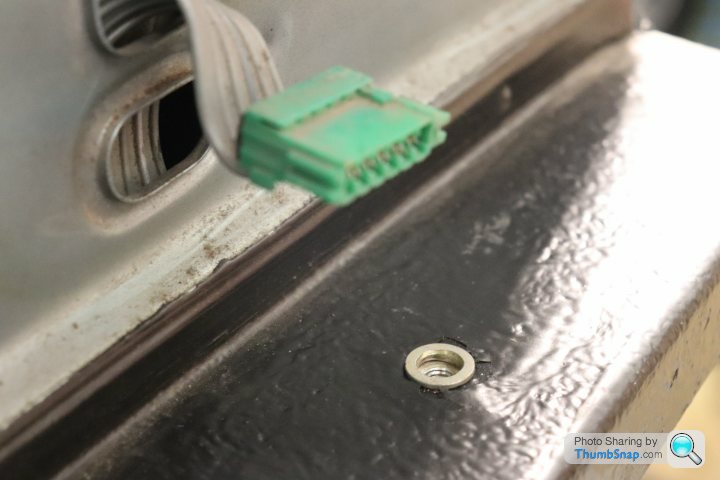
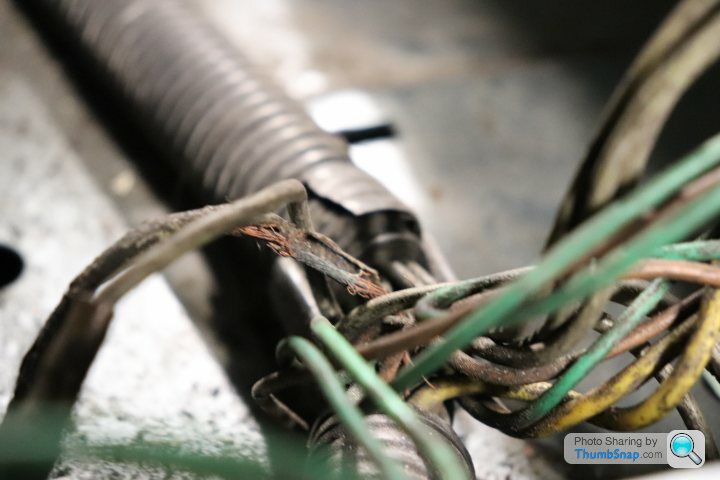
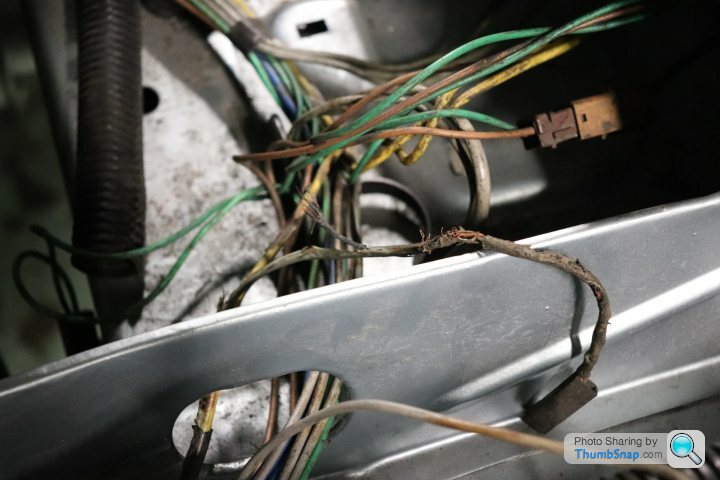
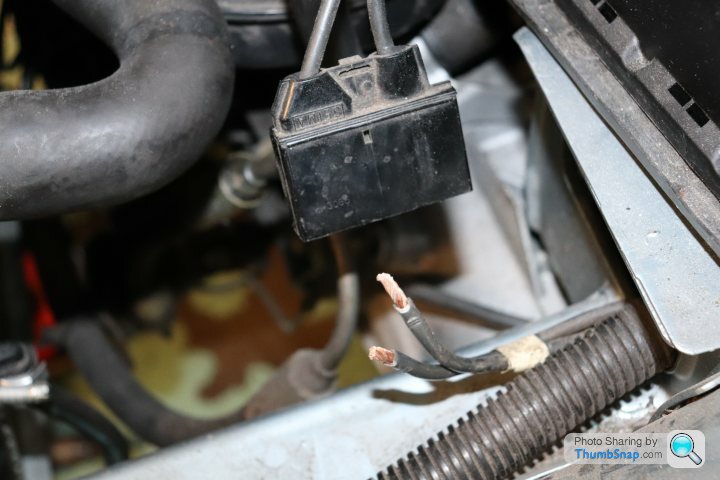
On the subject of wiring woes, I found that one of the multi-pin connectors for the main power supply had corroded and fallen apart (what does this car think it is? Old or something?!)
If only I had another BX to look at and see which wires went where.
Oh, right...
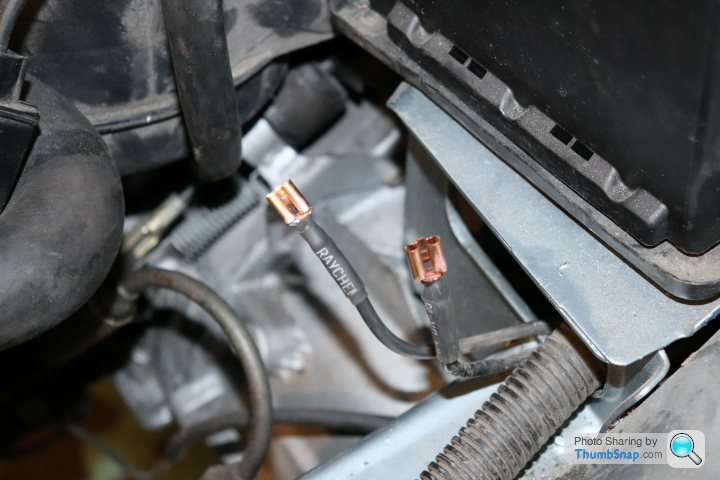
Sadly, I didn't have the terminals to use that would fit the original connector block. That said, I did have some heavy duty spades which were up to the spec, and when fitted in a thoughtful manner, should do the trick fine:
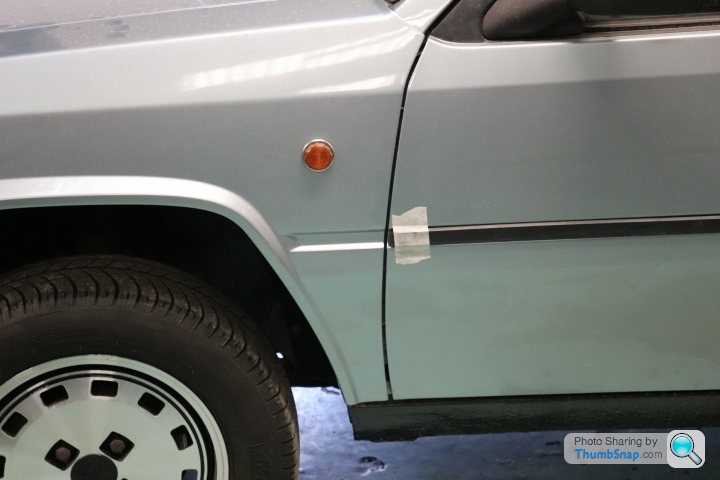
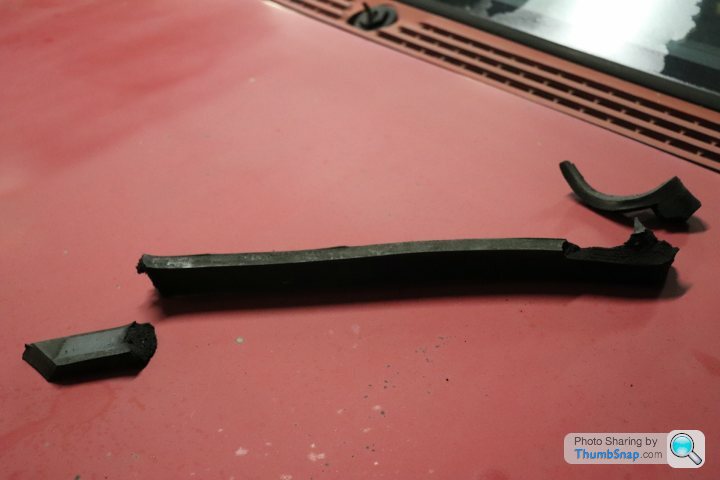
Once that was done, I set about attempting to refit the original door mouldings. Hours of painful scraping away of old glue and trim tape later, and I'd refitted the mouldings all round, except for the front wings.....because they had vanished!
Dick cheese!
If only I had a guide as to how they're meant to be shaped. Something like....another BX.
Oh, wait:
Fantastic. But if only I had a spare moulding.
Oh, wait:
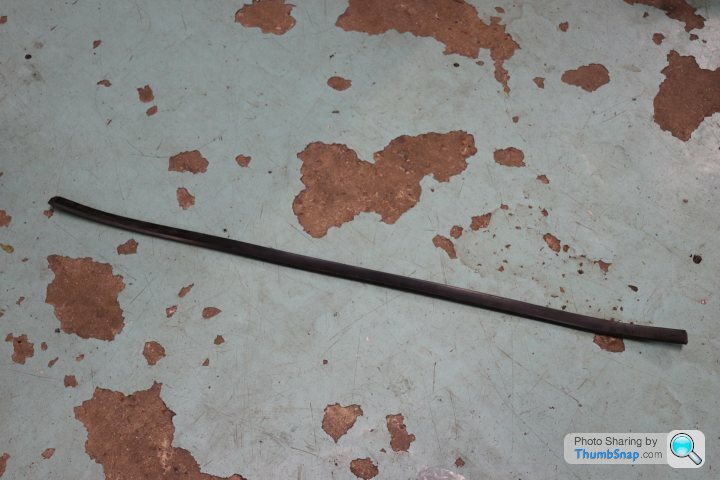
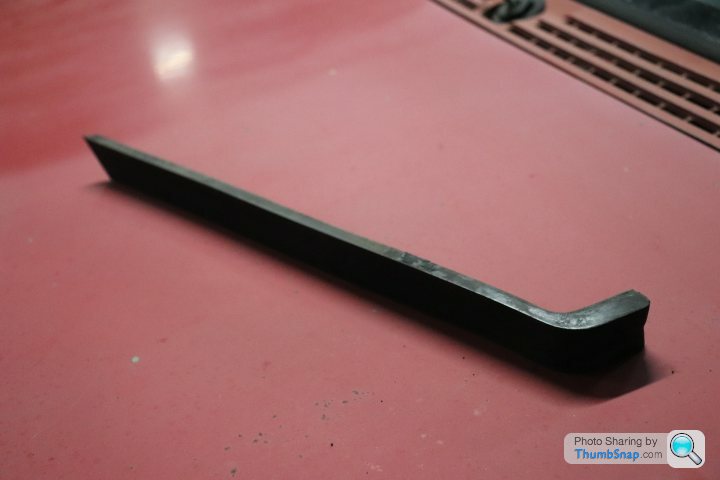
So, using our friendly grinding wheel...
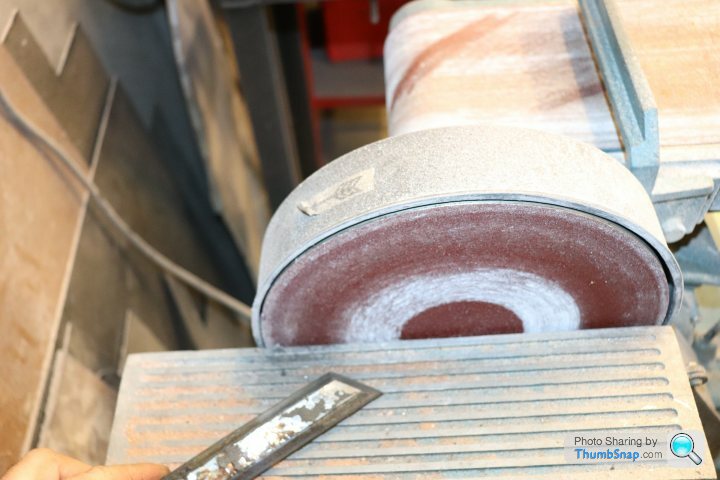
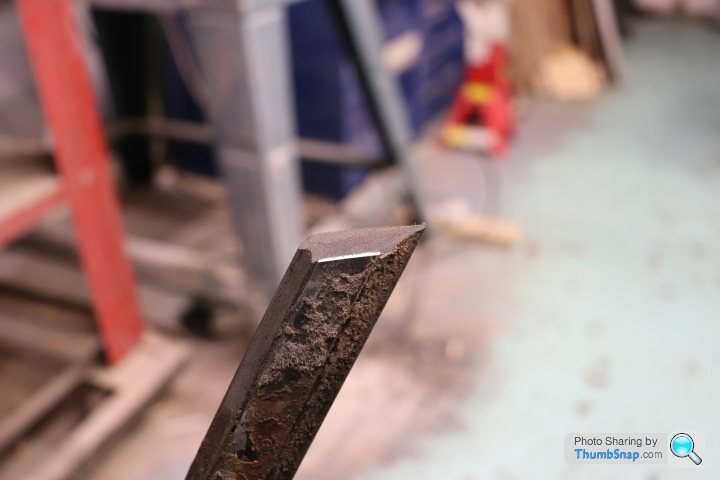
Jobbed!
I then went to the back of the car, to prep and fit the badges....again. They'd been fitted once before, and fallen off once before. This time I elected to fit them with something different, as well as going gung-ho on surface preparation! I even heated the sticky pads up first, as well as the boot area, and the badges themselves!
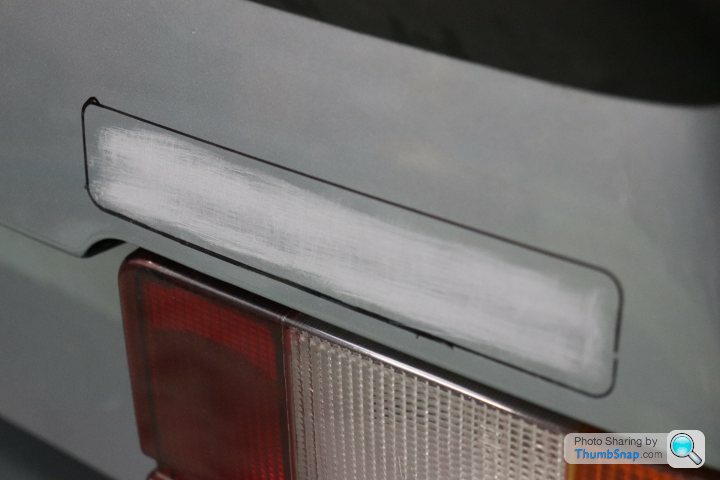
'Course, I used the st trim tape to stick all the mouldings on, so the following Monday they'd all peeled off. Great.
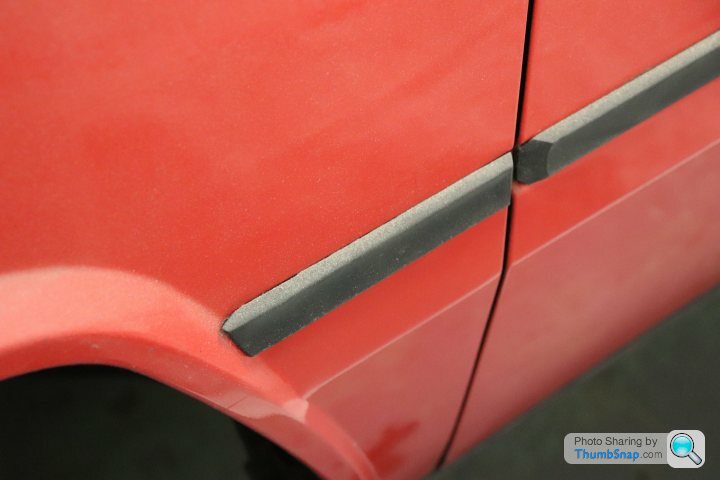
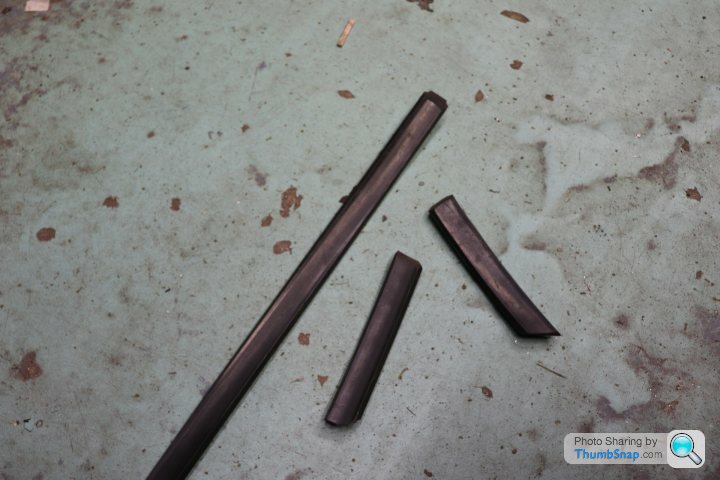
Speaking of mouldings, I had to somehow refit this one to make it look like the one below!
And fit it here:
Got away with it though!
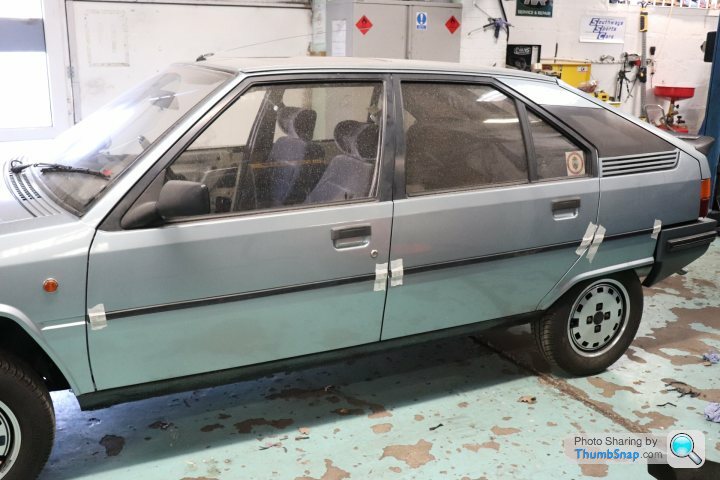
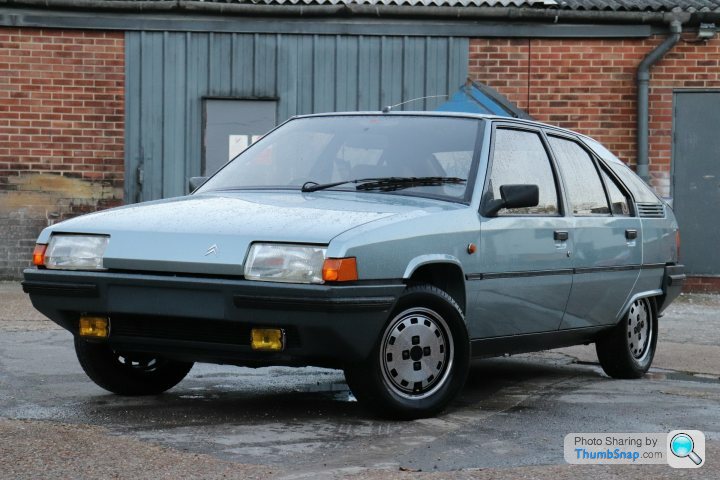
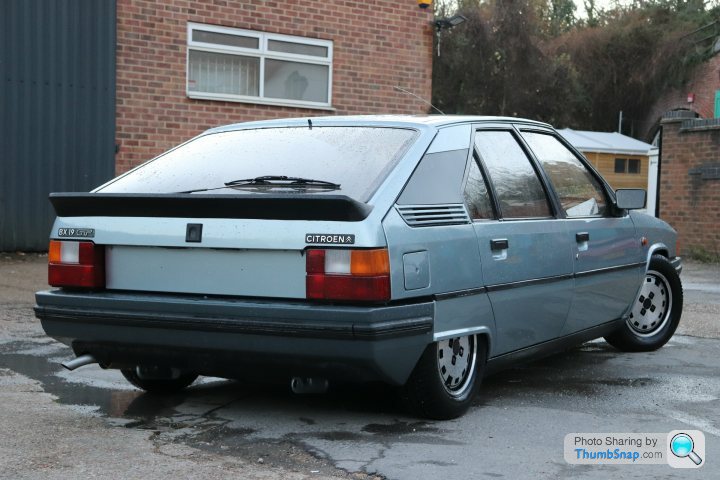
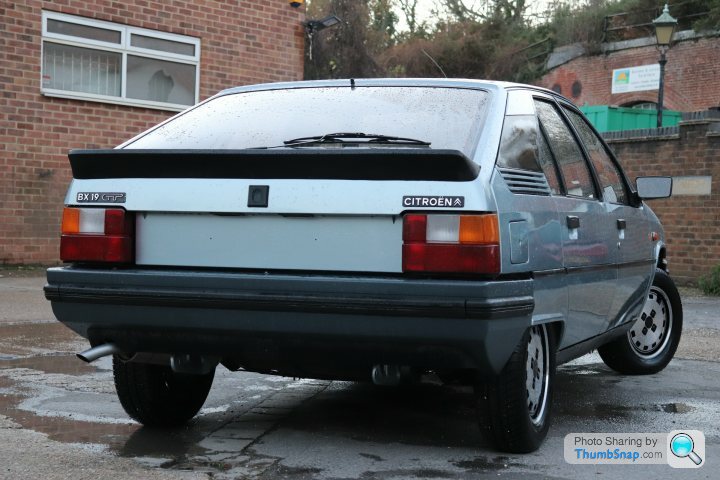
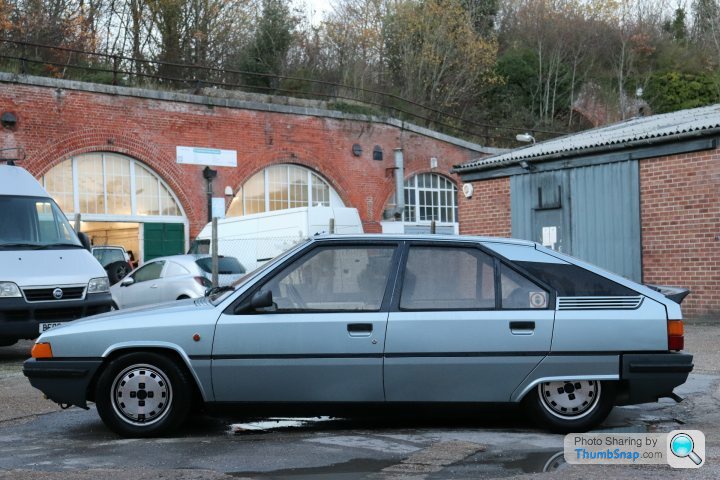
Before the door mouldings let go, I popped it outside for a quick set of snaps, feeling quite proud at this point. It's turned into a handsome BX!:

pt.4 to follow and bring us up to date
First up, a time where I had 20% of the UK's BX GT population in the workshop!:
One issue that had been lingering over me for some time, had been the Solex carb issue. The Weber I'd been sent was a non-starter, because it wasn't suitable for a 1.9 engine. The Solex I had, wasn't suitable because it was shagged.
Step up a kind man called Derek. He had a Solex carb for spares, and offered to send it to me....for free!
When that carb arrived, I immediately checked the plastic cable....thingy.
It wasn't broken! It was different, but it could work!
The carb Derek sent was pretty seized up, but happily I was able to harvest enough off it to rebuild the existing Z1 into something usable. I modified the throttle cable, started tweaking some bits and fitted it up. It didn't run well, but it ran, and the autochoke waxstat was working. I decided to crack on with other things, and come back to it later.
I mentioned earlier that I'd painted the sills, and that you'd just have to take my word for it. Well, now you don't, 'cos here's the proof!
But while I was there, I also attended to the bonnet alignment. Once I'd fitted the wings, I achieved quite a pleasing panel gap down both sides, but it still sat too low relative to the leading edge of the wing. At this point, I realised that the rubber buffers that go in the bonnet for the bump stops on the front panel to rest on, were missing. So, I made some out of rubber sheet, and hey presto!
With the bonnet looking sweet, I needed a front bumper to match the rear (for once!) On a BX GT, you pretty much do this in reverse order!
So, first up, the fog lamps:
Then you slide the black plastic grille over, which incorporates the splitter, and attach it to the lower panel. I forgot to take pics of this, but what do you want? This is free, isn't it?!
Once the fog lamps and grille are in, the bumper goes over the top (except in this picture, which was taken before I remembered the grille had to go in first. Sue me.:
It's secured with many more fixings, though the original types were big button-headed screws. I couldn't use those because I'd switched to M8 rivnuts, so I attempted to use some stainless buttonheads, but they were way too noticeable!
I also discovered why the fog lamps weren't working.
Well, one of the reasons they weren't working!
On the subject of wiring woes, I found that one of the multi-pin connectors for the main power supply had corroded and fallen apart (what does this car think it is? Old or something?!)
If only I had another BX to look at and see which wires went where.
Oh, right...
Sadly, I didn't have the terminals to use that would fit the original connector block. That said, I did have some heavy duty spades which were up to the spec, and when fitted in a thoughtful manner, should do the trick fine:
Once that was done, I set about attempting to refit the original door mouldings. Hours of painful scraping away of old glue and trim tape later, and I'd refitted the mouldings all round, except for the front wings.....because they had vanished!
Dick cheese!
If only I had a guide as to how they're meant to be shaped. Something like....another BX.
Oh, wait:
Fantastic. But if only I had a spare moulding.
Oh, wait:
So, using our friendly grinding wheel...
Jobbed!
I then went to the back of the car, to prep and fit the badges....again. They'd been fitted once before, and fallen off once before. This time I elected to fit them with something different, as well as going gung-ho on surface preparation! I even heated the sticky pads up first, as well as the boot area, and the badges themselves!
'Course, I used the s
t trim tape to stick all the mouldings on, so the following Monday they'd all peeled off. Great.Speaking of mouldings, I had to somehow refit this one to make it look like the one below!
And fit it here:
Got away with it though!
Before the door mouldings let go, I popped it outside for a quick set of snaps, feeling quite proud at this point. It's turned into a handsome BX!:
pt.4 to follow and bring us up to date
Love this thread. Had a BX (1.9TDi) in the early 90's as a company car. Quirky and crap in equal measure but overall loved it and it served well over 100k miles.
Looking at the latest photos you've posted I noticed that the heatshrink on the wiring loom has the name ' Raychem' . My wife worked for Raychem and regularly visited the PSA harness shops in Portugal during the same era.
Looking forward to seeing the end result!
Looking at the latest photos you've posted I noticed that the heatshrink on the wiring loom has the name ' Raychem' . My wife worked for Raychem and regularly visited the PSA harness shops in Portugal during the same era.
Looking forward to seeing the end result!
Gassing Station | Readers' Cars | Top of Page | What's New | My Stuff