Lexus V8 with NOS in a Renault Espace - yeah lets do it !
Discussion


Erwin1978 said:
Loving this post, enjoy and appreciate the determination and creativity. I have one question now though. Why a manifold for a Renault V6? Aren't you keeping with the Lexus V8? Looking forward to more updates!
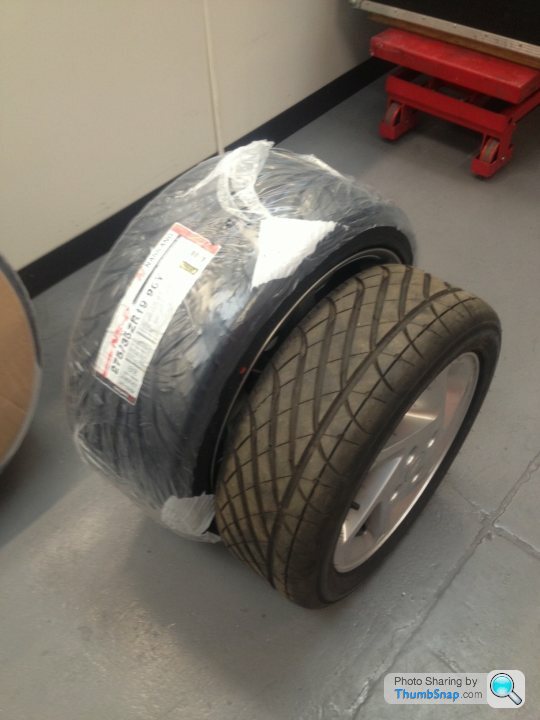
Sorry i should have made it more clear - The V6 manifold and Goodridge hose are for a car at work not my project The wheels i ordered have arrived today , i was told there could be up to 4 weeks wait if they had to be manufactured so went ahead with the order, 5 days later they arrive , a little earlier than i need them because i need to get the new suspension first but at least i have them now.

you cant really see the size of them so i put a 15" ford RS wheel next to them to show scale
you cant really see the size of them so i put a 15" ford RS wheel next to them to show scale
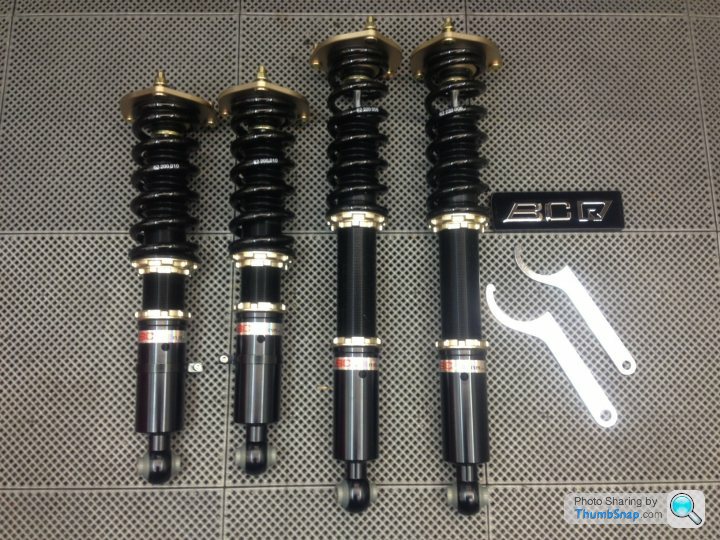
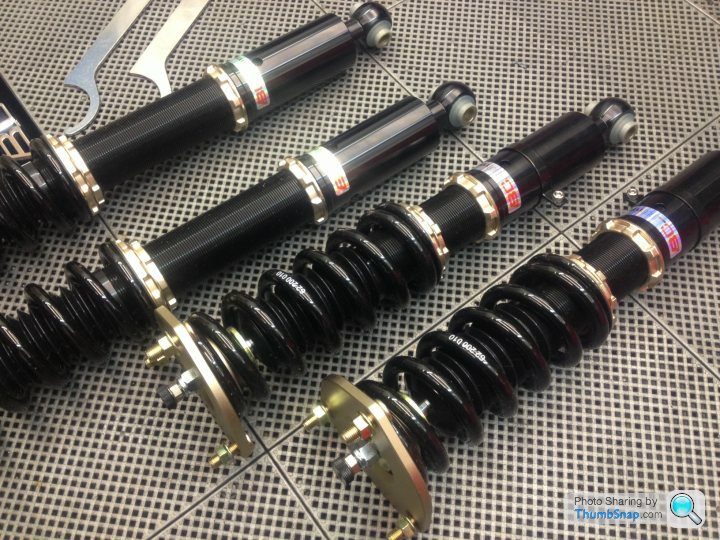
Another shot of the coilovers
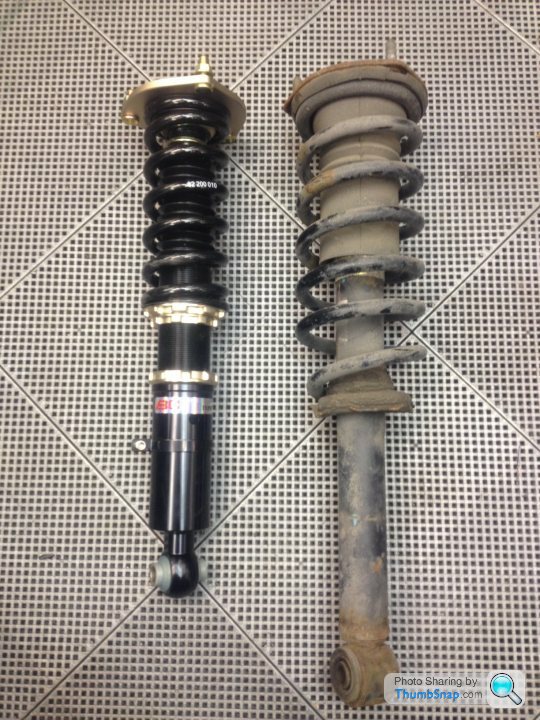
New and old front
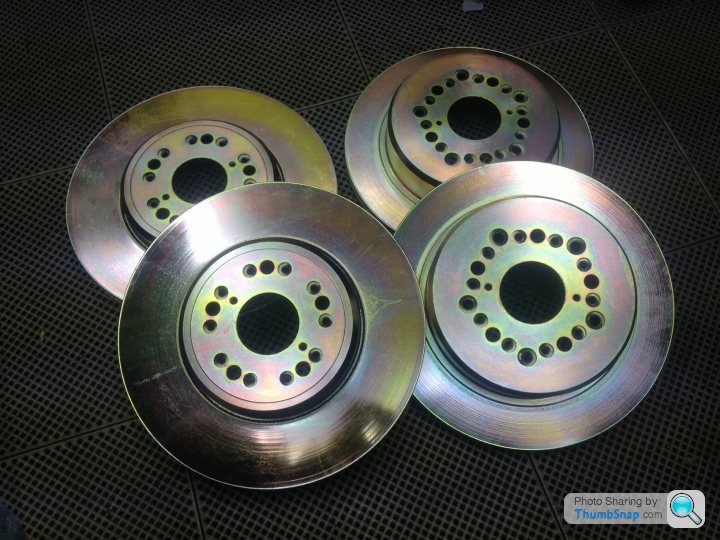
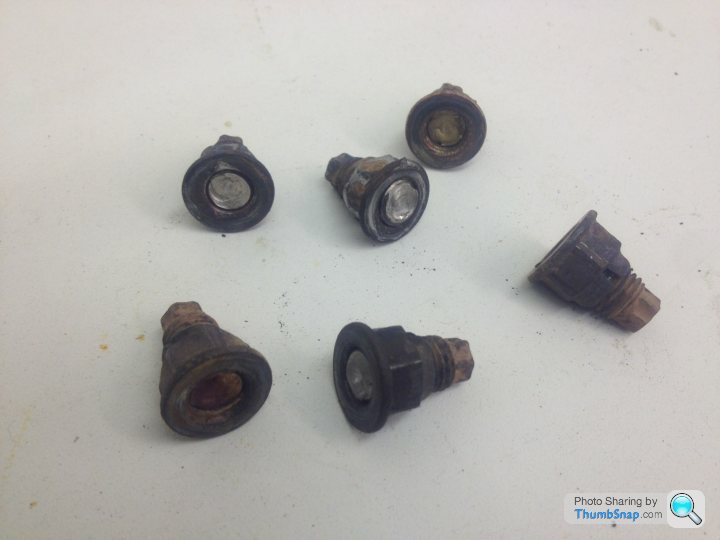
Brake Discs as removed from the car last week

Brake discs returned to me today after a quick 'dipping'
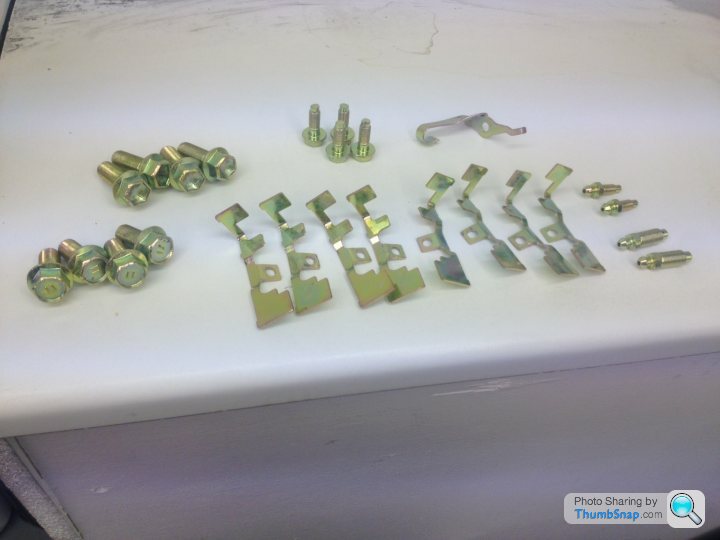
Brake parts after dipping
Top adjuster

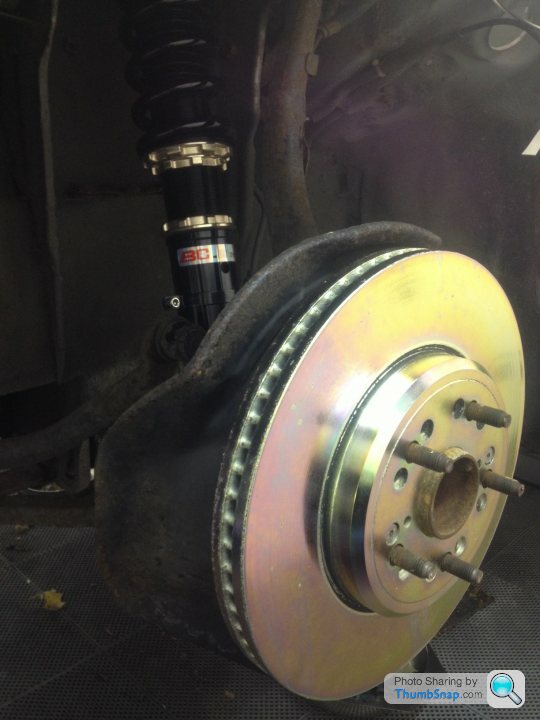
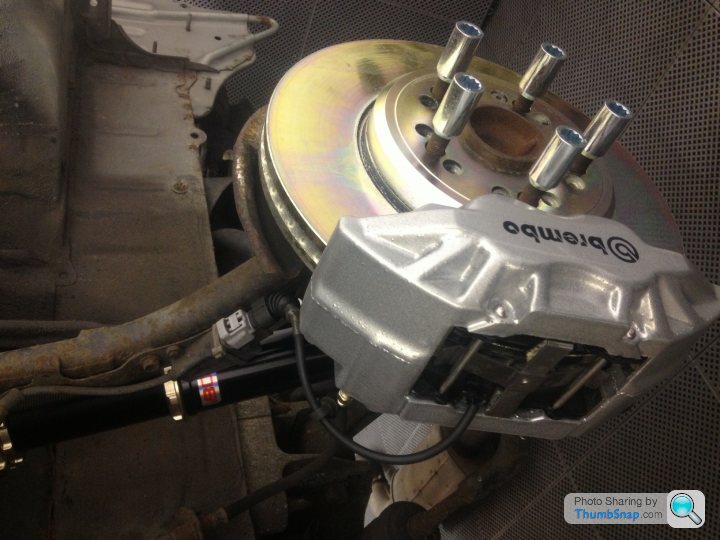
Front corner fitted
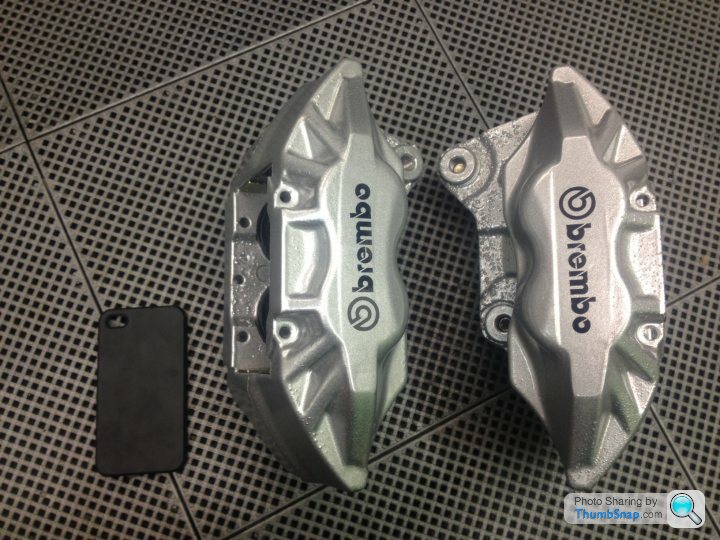
Thats about it for today , got all the discs and coilovers fitted , hope to trial fit the wheels sometime this week to check for clearance , I have all the calipers in pieces and im hoping to get them powder coated this week , pads are on order and need to measure for the braided hoses im going to make up.
Then looking ahead a little , when the car is on 'all fours' again , i have some measuring of both cars to do to determine where to cut on both cars .
Looking forward to the next few weeks - i should be able to make some good progress if work does'nt get in the way too much !
New and old front
Brake Discs as removed from the car last week
Brake discs returned to me today after a quick 'dipping'
Brake parts after dipping
Top adjuster
Front corner fitted
Thats about it for today , got all the discs and coilovers fitted , hope to trial fit the wheels sometime this week to check for clearance , I have all the calipers in pieces and im hoping to get them powder coated this week , pads are on order and need to measure for the braided hoses im going to make up.
Then looking ahead a little , when the car is on 'all fours' again , i have some measuring of both cars to do to determine where to cut on both cars .
Looking forward to the next few weeks - i should be able to make some good progress if work does'nt get in the way too much !
Quick update , been busy with work so progress has been slow , I got all the discs and calipers refitted and started on the new brake lines , replacing the standard flexi's with braided hoses , the front to rear solid brake line was badly corroded so I started on replacing it - that's where the trouble started ! In order to get it off and a new one fitted I had to remove the right hand exhaust shields , which meant I had to remove the front Y piece of exhaust which was badly corroded which meant the cats had to come off too , 6 simple nuts to remove ........
 o
o
Well at least it's off and I can get to the brake line now , unfortunately I just have the small matter of 6 sheared studs to remove from the manifolds , luckily they are quite accessible so I'm not too worried
This is just a pic of the front corner , I've not got the front hoses on yet but otherwise they are finished
oWell at least it's off and I can get to the brake line now , unfortunately I just have the small matter of 6 sheared studs to remove from the manifolds , luckily they are quite accessible so I'm not too worried
This is just a pic of the front corner , I've not got the front hoses on yet but otherwise they are finished
Well those 6 broken studs were troublesome to say the least but they are all out and sorted now , new gaskets are on order and should be delivered soon , the new front to rear brake pipe is fitted as are the front flexi's , at the rear I just require 1 more union to finish all the brake lines and get them bled up .
Whilst I was underneath I noticed how much corrosion was on the steel fuel lines so they are now removed and new ones are half fitted and waiting for the final couple of bits to arrive , so all in all not much to show and actually looks like a few steps backwards , but hopefully move forward again over the next couple of weeks .
Whilst I was underneath I noticed how much corrosion was on the steel fuel lines so they are now removed and new ones are half fitted and waiting for the final couple of bits to arrive , so all in all not much to show and actually looks like a few steps backwards , but hopefully move forward again over the next couple of weeks .
hi everyone, right - where to start ? , the new brake lines are all complete and bled up with thankfully no leaks and no problems, the new fuel lines are complete - pressurised up with no leaks and no problems,and the new exhaust bolts and gaskets are fitted with no leaks and no problems , WOO HOO , i tidied up some of the wiring and had it running yesterday so im basically back to where i was a few months ago except with a lighter wallet and some new shiny bits.
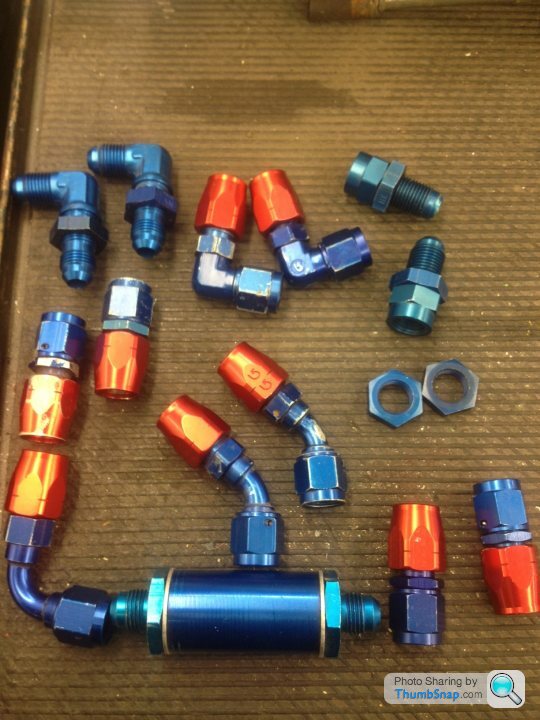
Here are a couple of pics of the fuel system parts

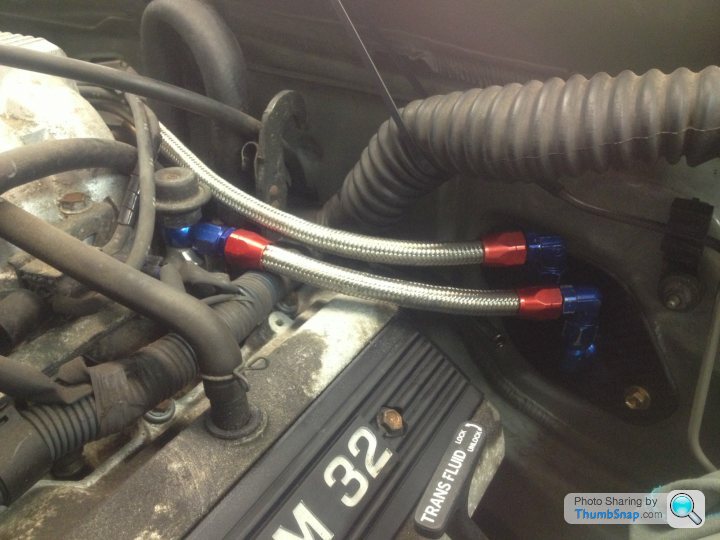
the only problem with fitting new shiny bits is that it shows how dirty and scruffy everything else is - will sort that later !
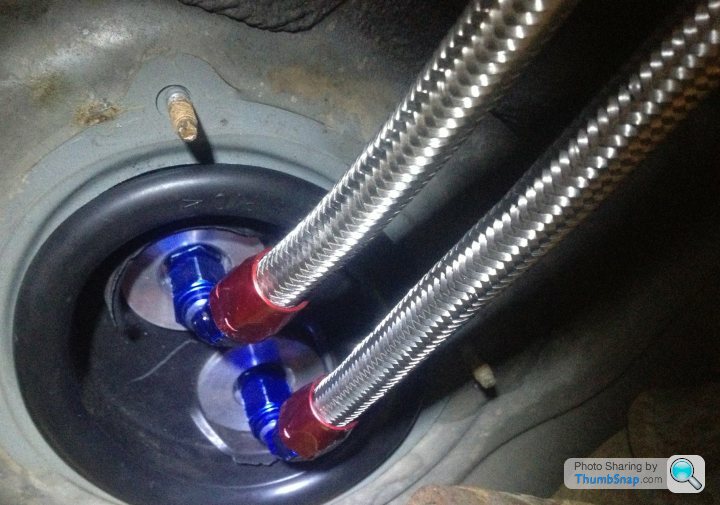
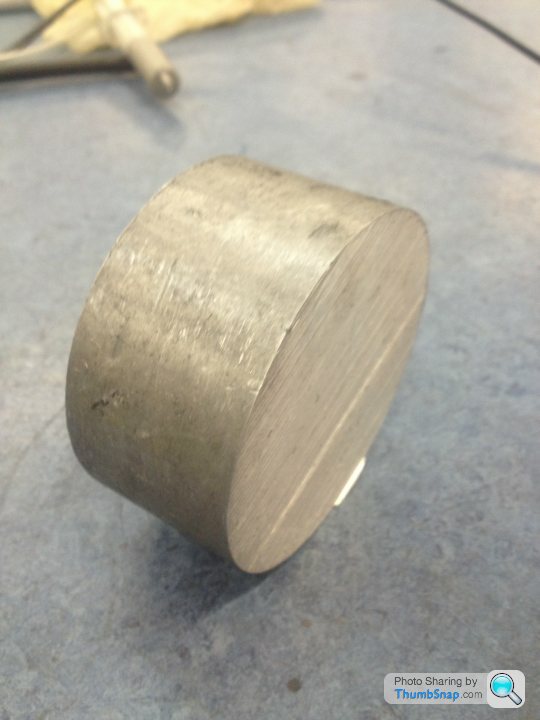
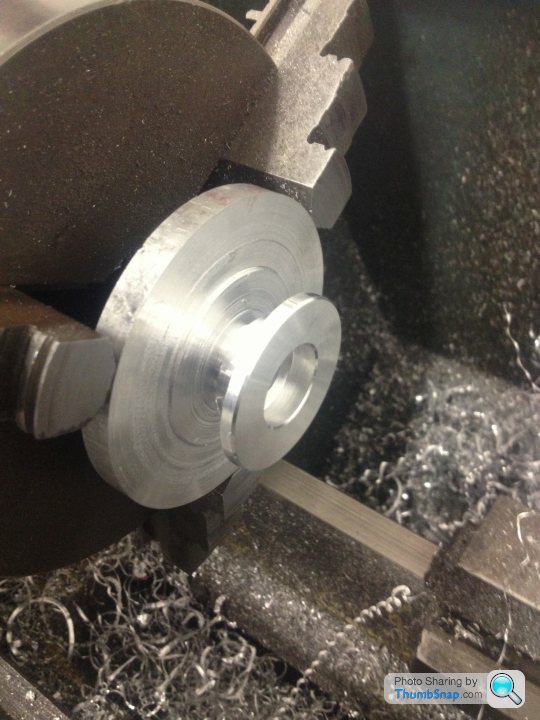
in the last pic you can just about see the aluminium adaptors i had to machine to connect the fittings to the tank , the next pics are of the starting piece and then half finished in the lathe, sorry but i forgot to take a pic of the finished item
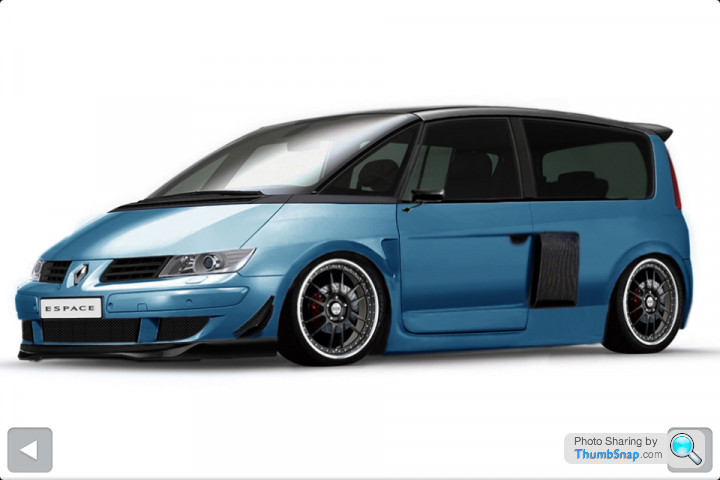
here is a pic i found on the internet , i realise it is the newer model espace but the look and stance is pretty much the look i am aiming for , the 2 door idea i like too but thats almost too much work for the way im doing it (perhaps should have thought more about the spaceframe route- but cost is always the prohibiting factor)
next step is to start welding some bracing into the car before removal of the roof , if the weather ever improves i hope to pull the car out of the garage and take some pics of the momentus moment i cut the roof off
Here are a couple of pics of the fuel system parts
the only problem with fitting new shiny bits is that it shows how dirty and scruffy everything else is - will sort that later !
in the last pic you can just about see the aluminium adaptors i had to machine to connect the fittings to the tank , the next pics are of the starting piece and then half finished in the lathe, sorry but i forgot to take a pic of the finished item
here is a pic i found on the internet , i realise it is the newer model espace but the look and stance is pretty much the look i am aiming for , the 2 door idea i like too but thats almost too much work for the way im doing it (perhaps should have thought more about the spaceframe route- but cost is always the prohibiting factor)
next step is to start welding some bracing into the car before removal of the roof , if the weather ever improves i hope to pull the car out of the garage and take some pics of the momentus moment i cut the roof off
Max_Torque said:
Are you running solid engine mounts? If not, make sure you keep a fire extinguisher handy...........
hi, thanks max_torque but yes i did think someone may notice that , it is a little bit short but it was the only pipe i had left and wanted to get it running, i have some more pipe on order so i can make a longer oneI see from some of your posts you have a very good engineering background so i wondered if you might be able to help with any advice on the next set of pics ?
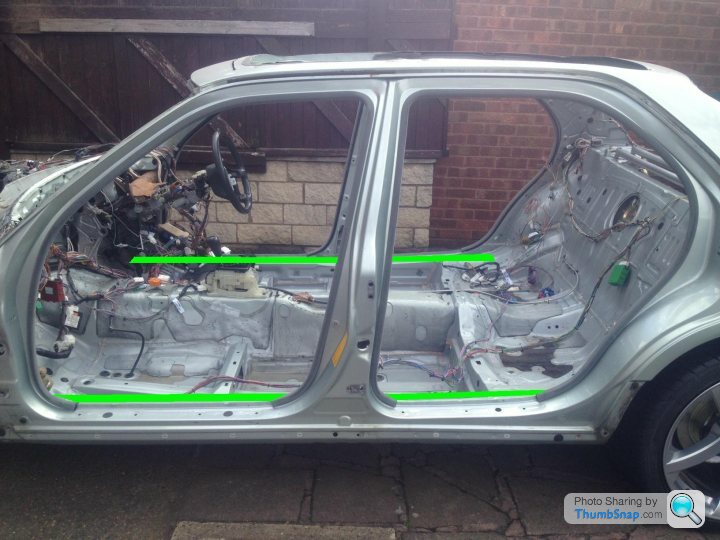
I pulled the car out of the garage yesterday and took a few pics , the next stage i want to do is chop the roof of the lexus and in order to do this i want to put some strengthening bars in before chopping - firstly i intend welding some box along the sills (green)then the front to back bars(red)and then the blue bars , i am wondering if anyone can see any obvious problems or better ways to keep everything straight whilst the roof is off and before the new body is attached
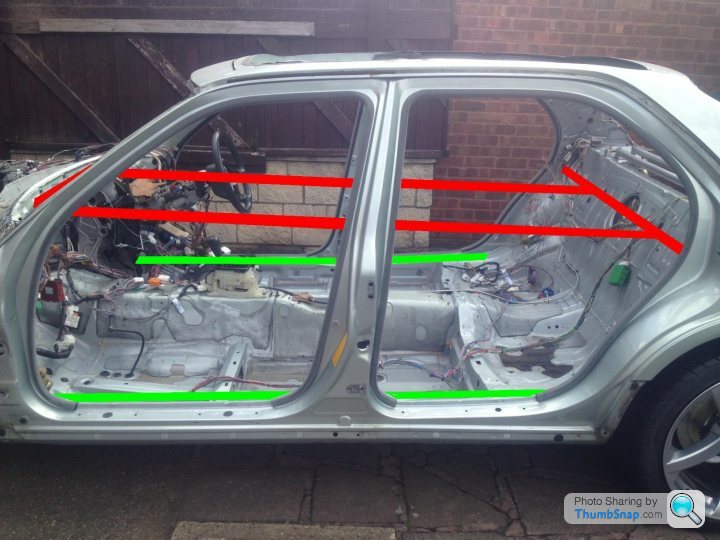
I also gave it a quick weigh too 1094KG !!
it will never be a featherweight !
Thanks for any advice
thanks for the great advice max_torque

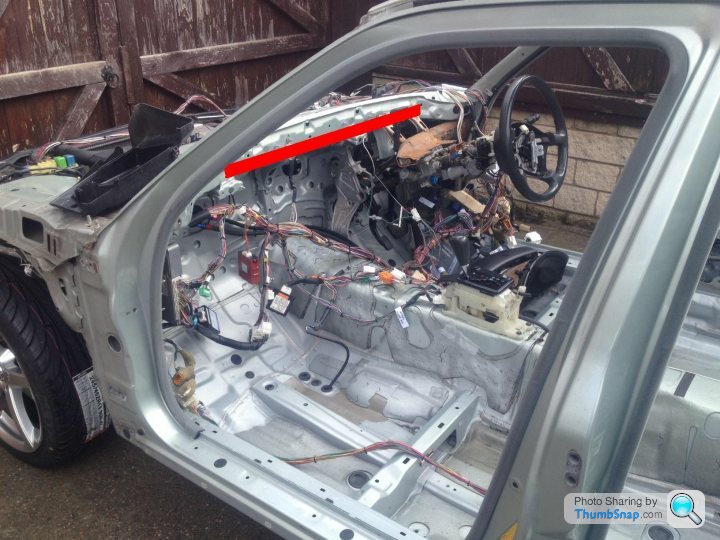
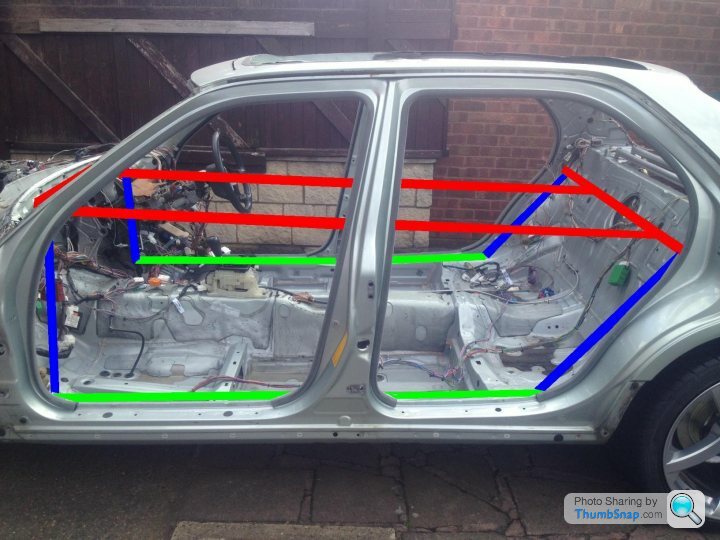
my intended cut lines are shown in purple , the A and C pillars cut at bottom screen height and the B pillar cut at sill height, the rear arch cut following on from the previous cut (width to fit into espace "steel" body .
The main worry strength wise is that i have to cut a good chunk out of the lower A pillar to enable the espace "steel" lower A pillar to fit ,this is partly why i felt the need for the red bars
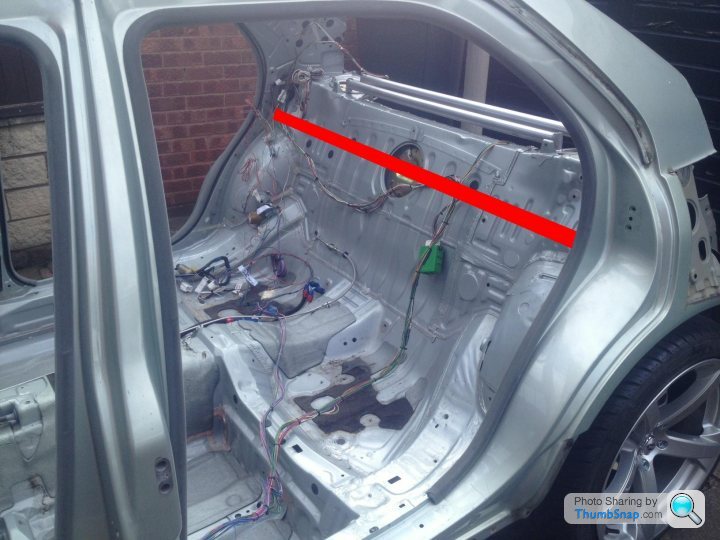
Been doing a little work on the espace shell, the floor has all been cut out and now just requires a little tidying up and some strengthening down the sills, I will then have the required points and measurements to enable me to start cutting the lexus shell to suit , here are a few pics
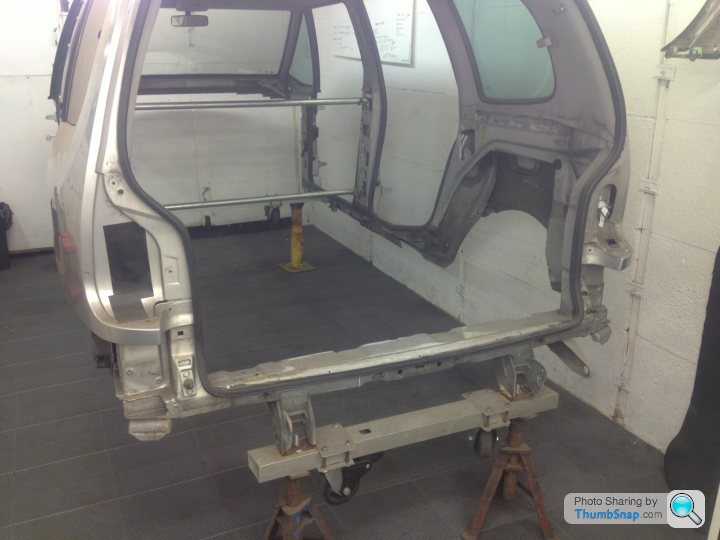
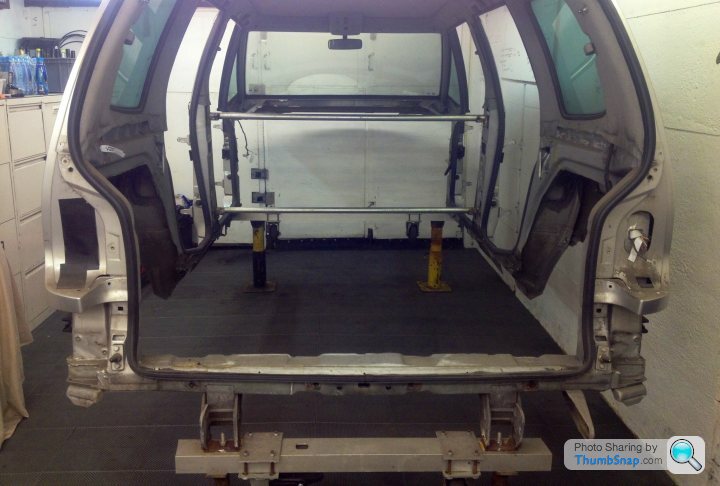
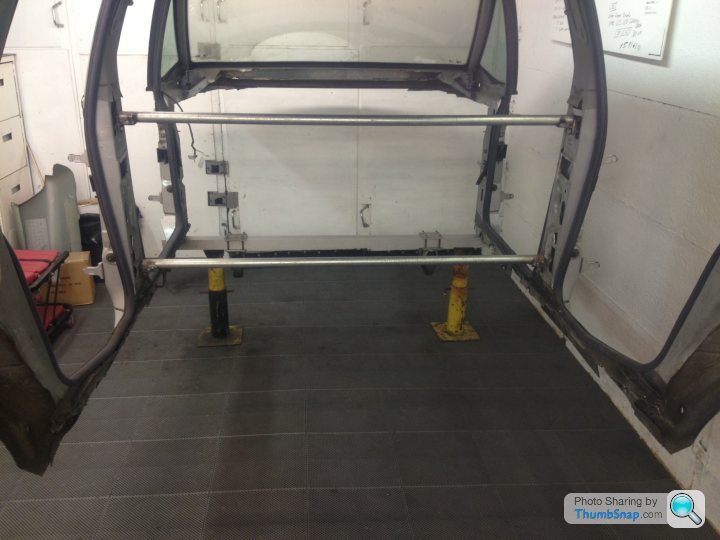
the next few pics show the progression of the 'firewall' area
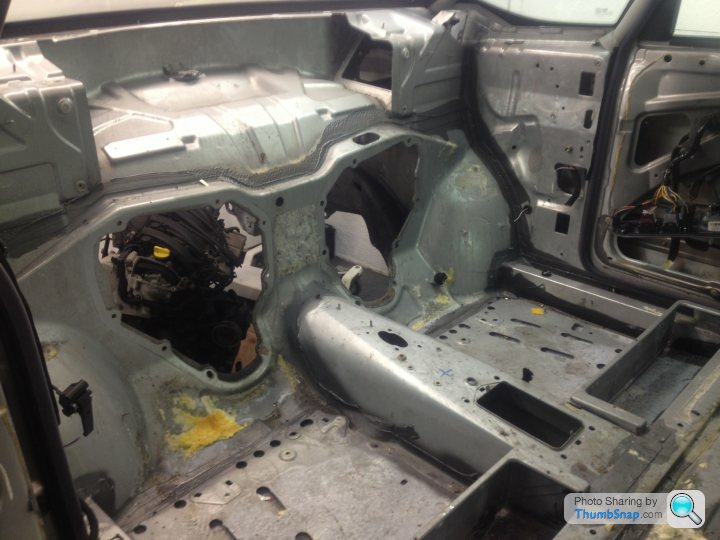
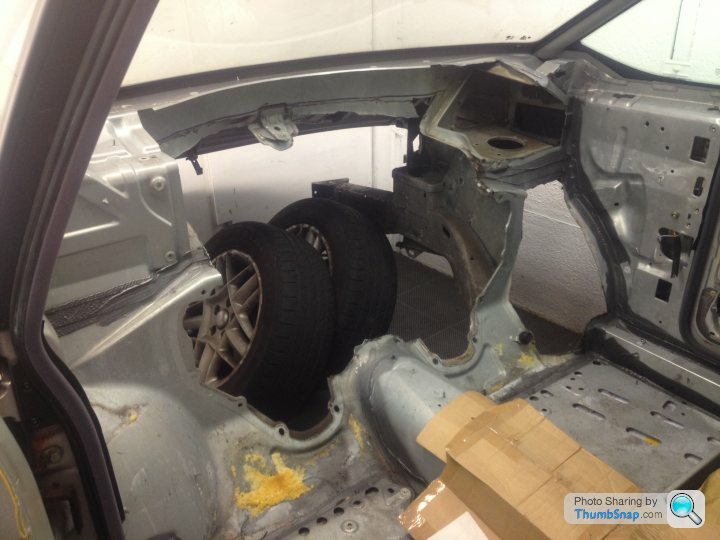
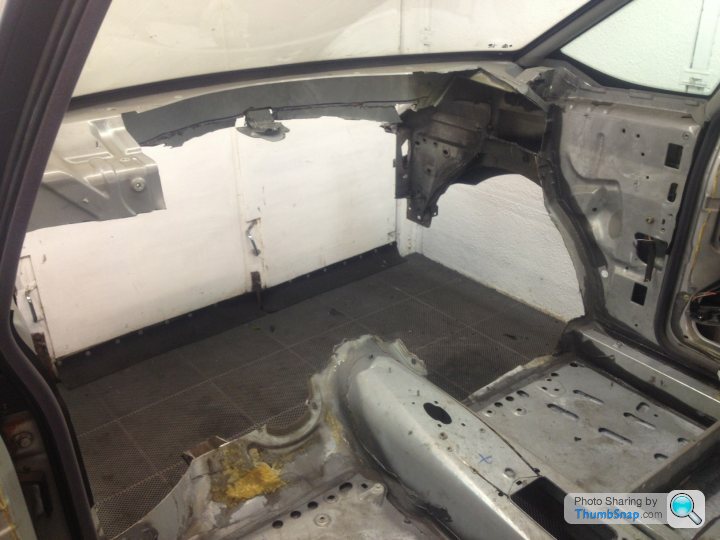
the next few pics show the progression of the 'firewall' area
Papa Hotel said:
I read this thread when it was first made and thought "another clown with a big idea, teasing us, we'll never hear from him again." I'm chuffed to bits I was wrong. 
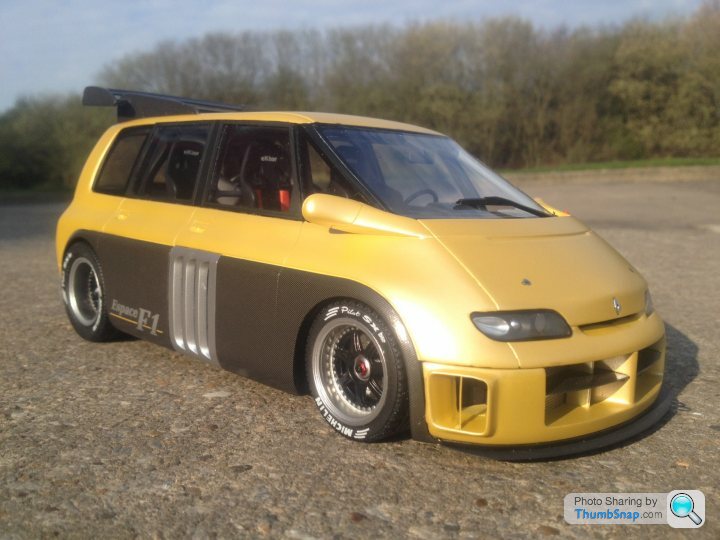
You were prob right when you thought "another clown with a big idea" !I was sat in the garage only the other day thinking 'what HAVE i started here!', but luckily inspiration arrived in the post the next day , an ebay item - 1/18th scale Renault Espace F1
I am hoping to get some work done over the weekend and post some pics next week
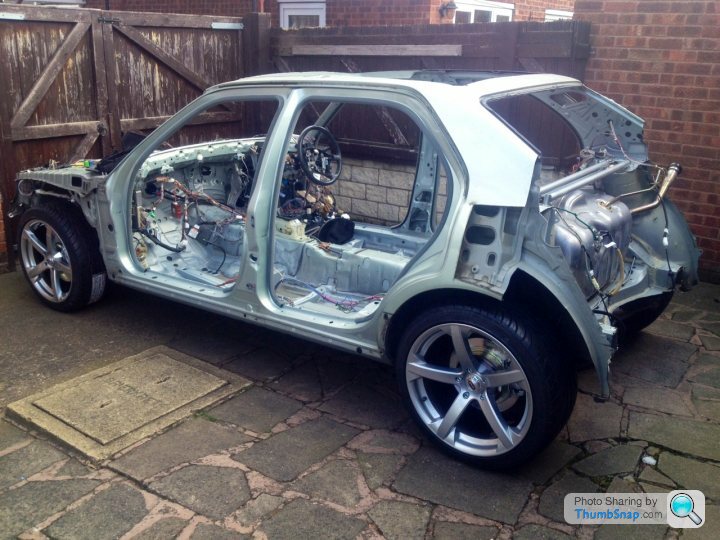
Well - didn't get anywhere near as much done this weekend as i had hoped for , I did manage to 'swap' the cars round so the lexus is back in the garage and the espace is outside , so had to take a quick pic , I slipped a wheel under to get an idea of the ride height ,
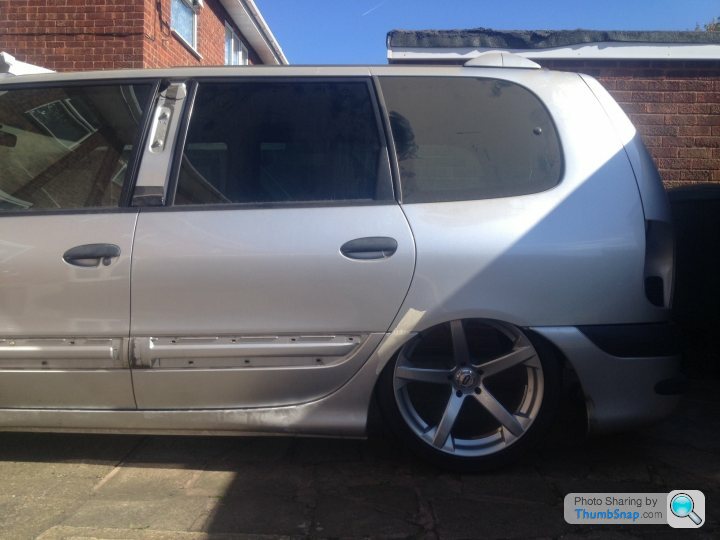
I don't intend for any of the wheel to be 'hidden' under the arch , I'm planning on cutting away until you see the whole wheel and adding arch's , after measuring the width of the lexus this looks like it should work well
I don't intend for any of the wheel to be 'hidden' under the arch , I'm planning on cutting away until you see the whole wheel and adding arch's , after measuring the width of the lexus this looks like it should work well
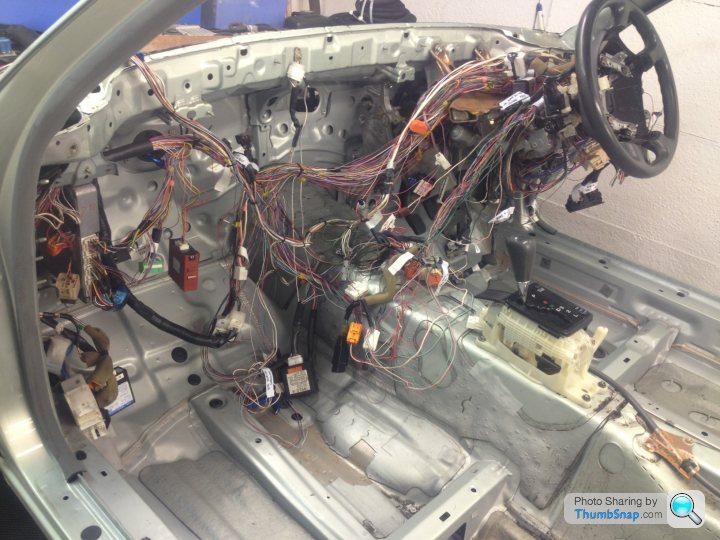
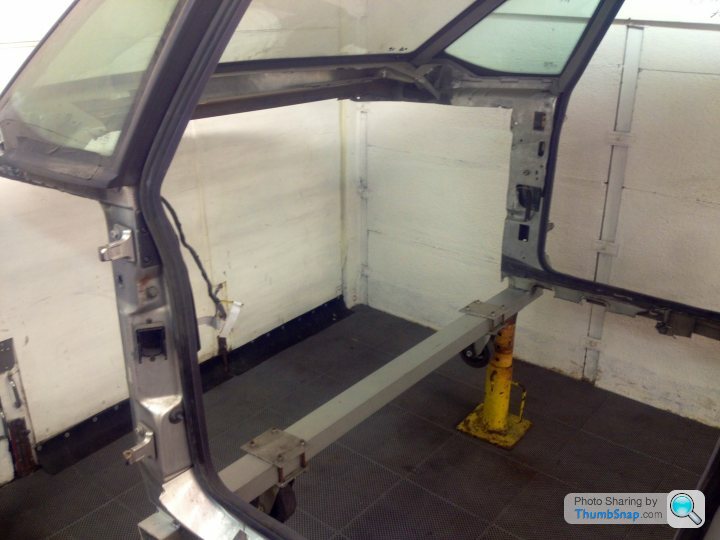
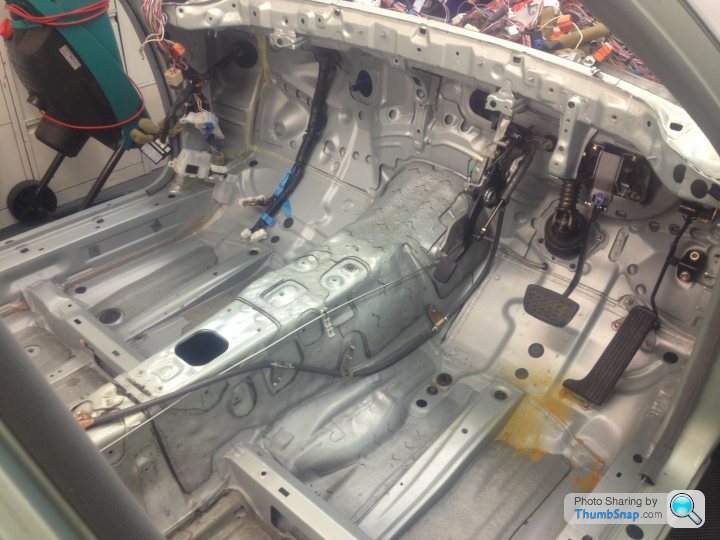
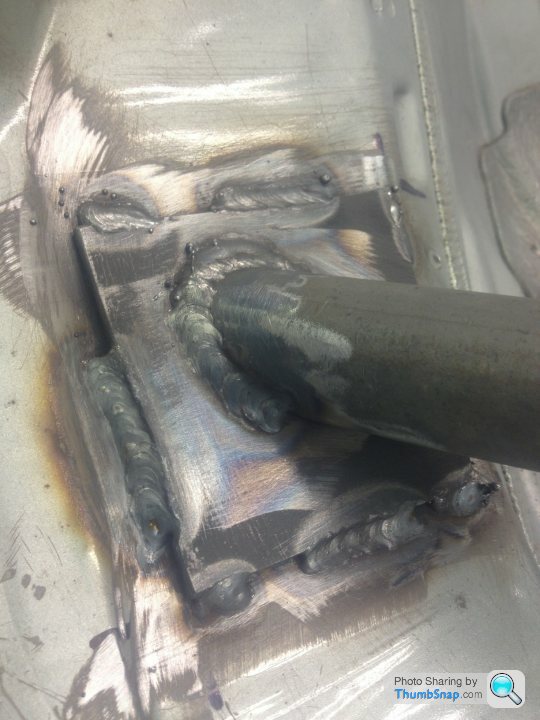
Been very busy with work recently (and kids and house etc etc) so sorry for the lack of any updates but just starting to make some progress again and a momentous occasion tonight - the start of welding the bracing into the Lexus , OK , so its not that momentous but it does feel like progress.
Just a couple of pics of the stripped firewall area

and a pretty boring pic of the first bit of welding
Im hoping to get all the bracing completed over the next week or so and the roof cut off soon after that,work,women and kids permitting
Just a couple of pics of the stripped firewall area
and a pretty boring pic of the first bit of welding
Im hoping to get all the bracing completed over the next week or so and the roof cut off soon after that,work,women and kids permitting
Gassing Station | Readers' Cars | Top of Page | What's New | My Stuff