2010 Suzuki Swift Sport Track Car
Discussion


I have been meaning to post up some info on our Swift which we raced in the Nippon Challenge last year but keep putting it off. Well I have finally found a spare few minutes to put up some details on our project...
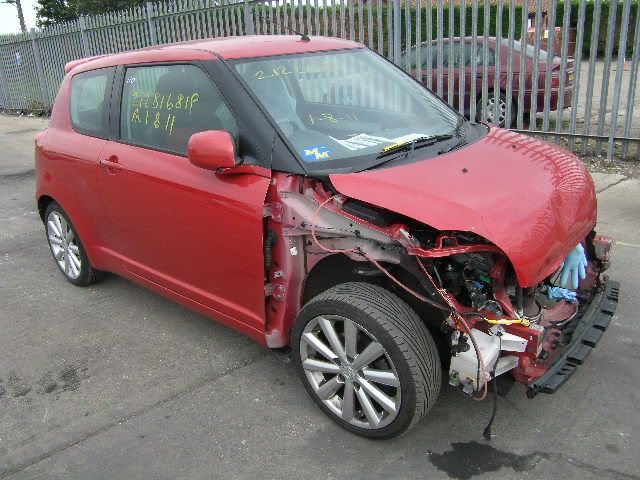
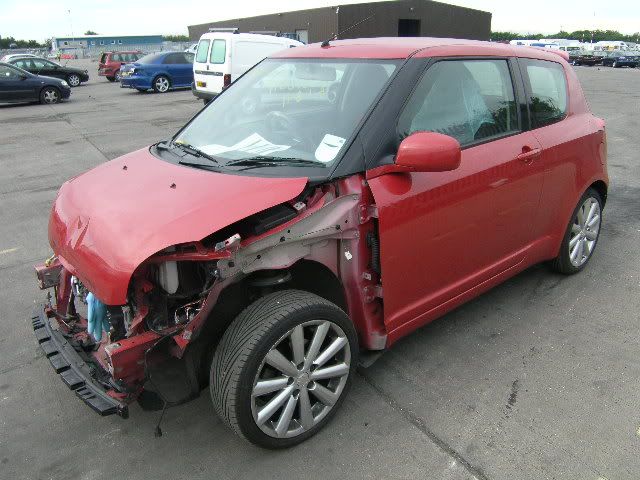
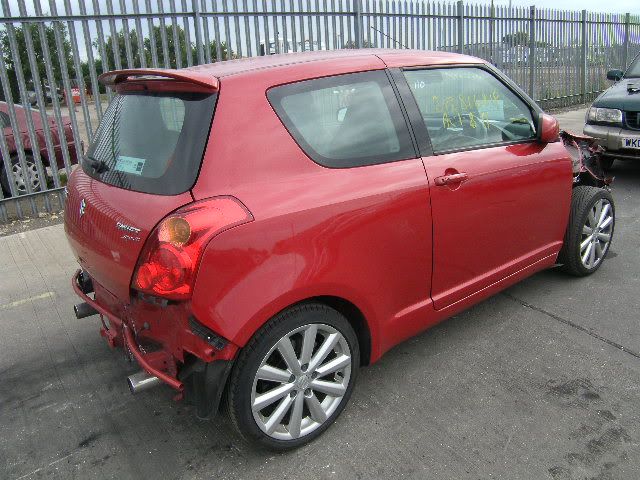
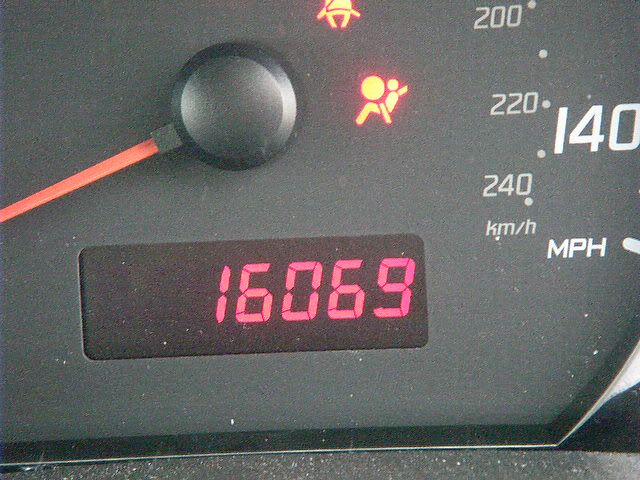
In August 2011 I purchased a 2010 Suzuki Swift Sport with 16k miles on the clock sadly cat D but no chassis damage which meant I got a bargain to build our project... It cost me £2800 for the car as it was and the airbags had not even blown as the sensors were on the lower crash bar and it went under a lorry!
Here she is....
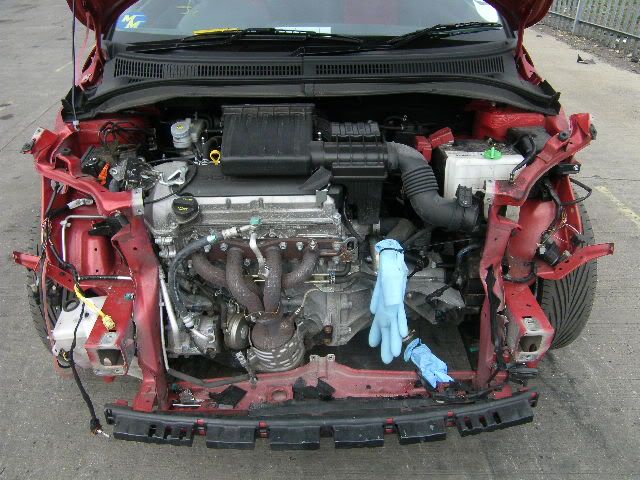
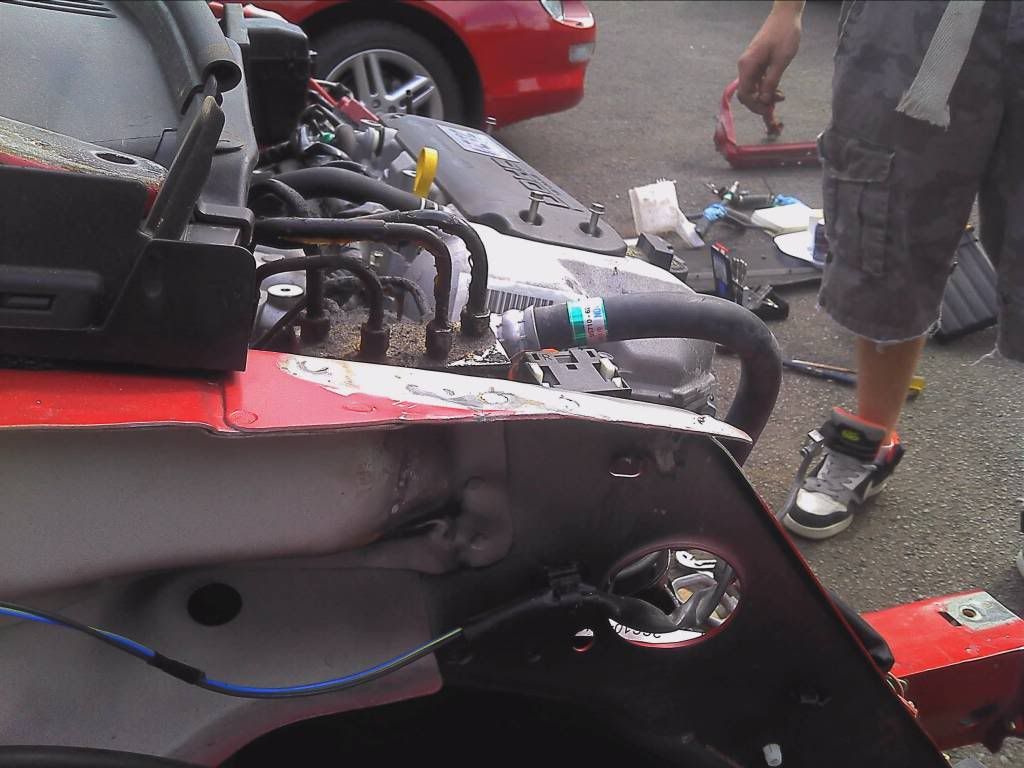
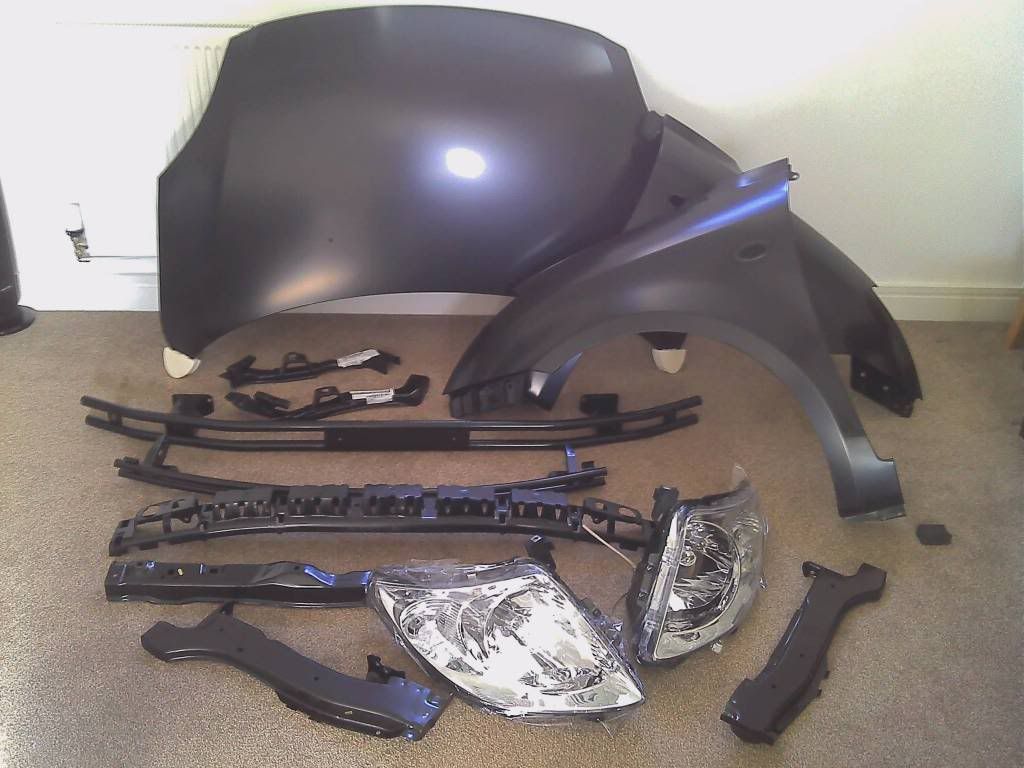
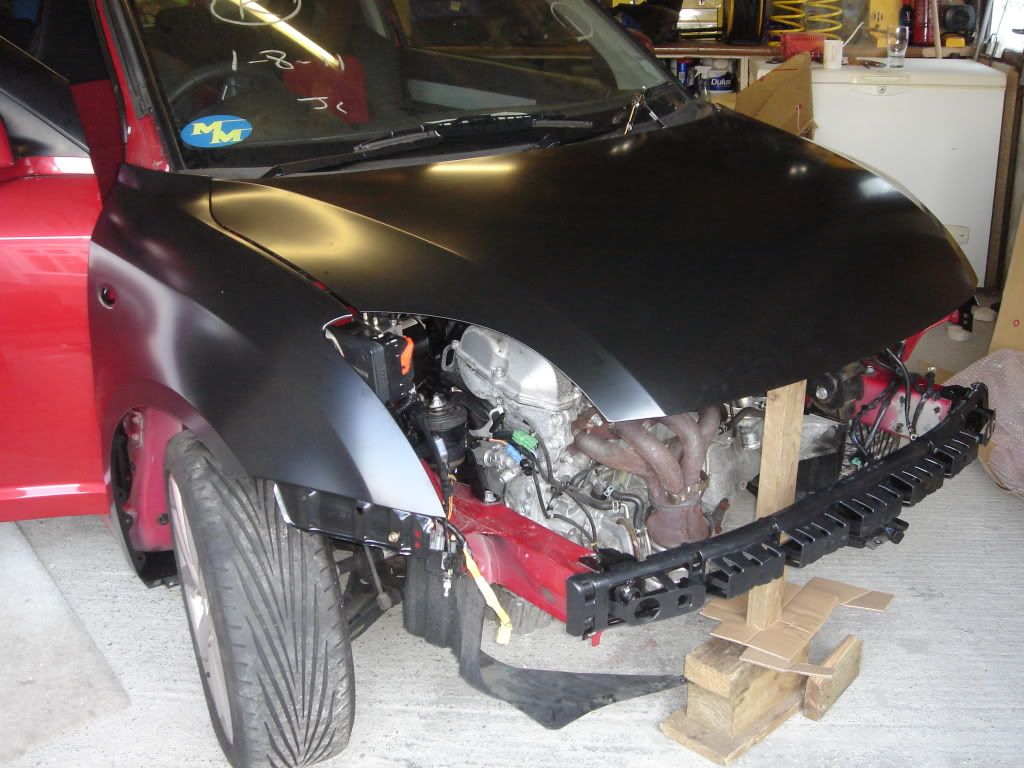
With her home I could start taking off the damaged bits ready for rebuild...
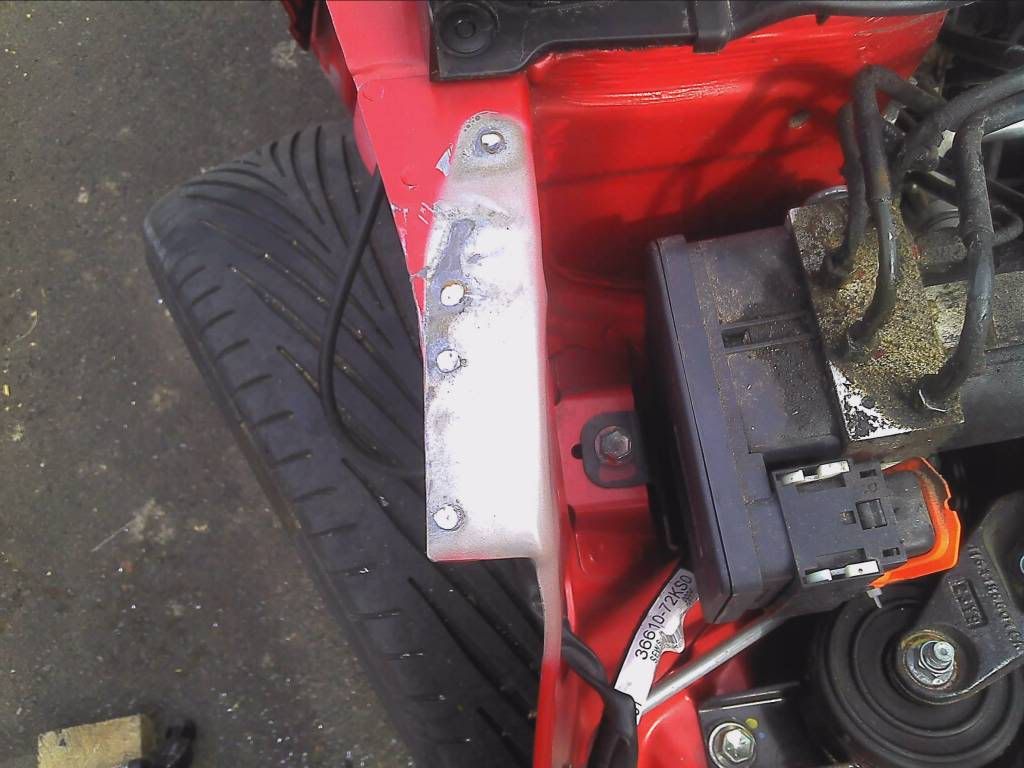
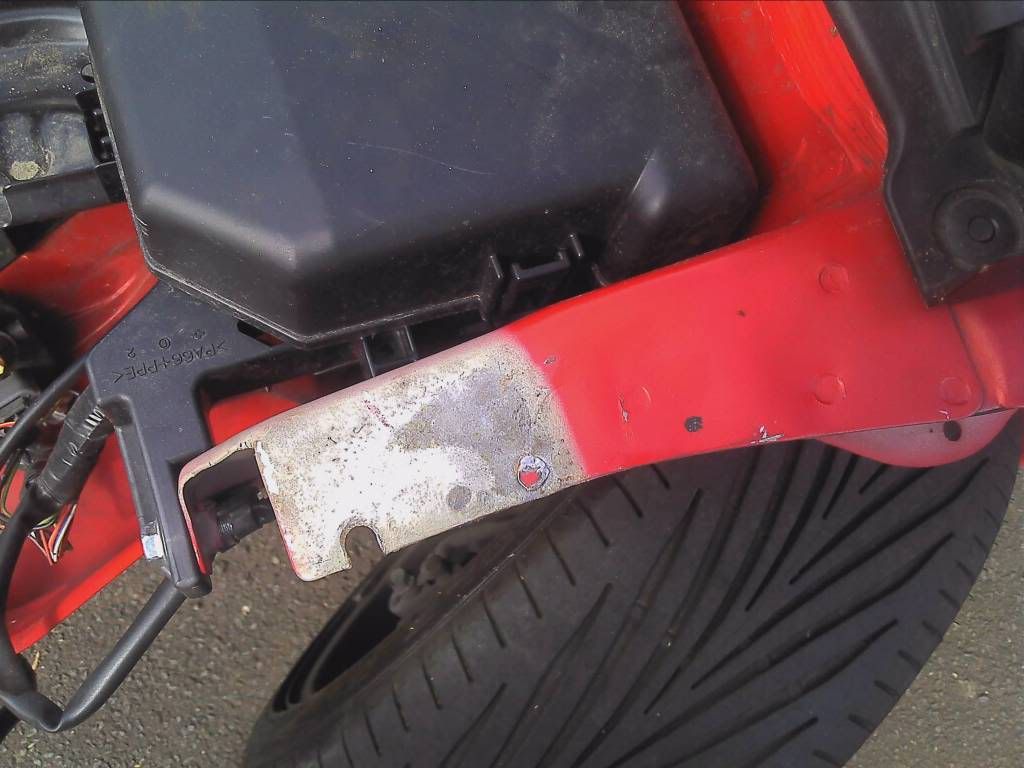
With the damaged bits cut off I had two bits that were bent and needed straightening
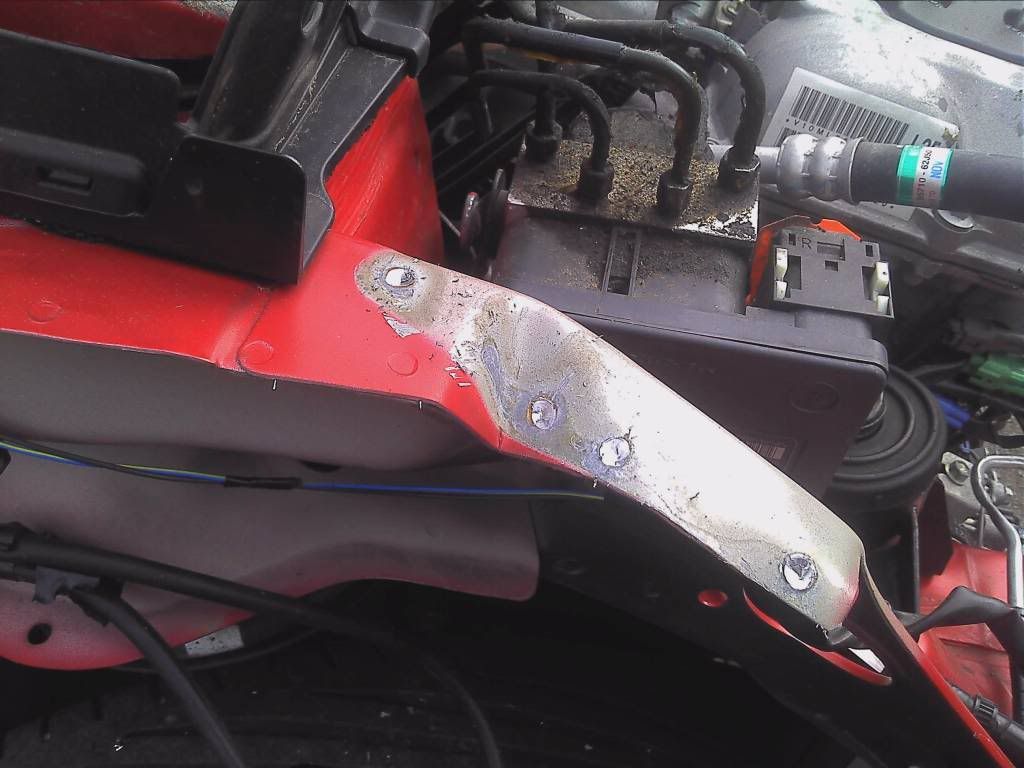
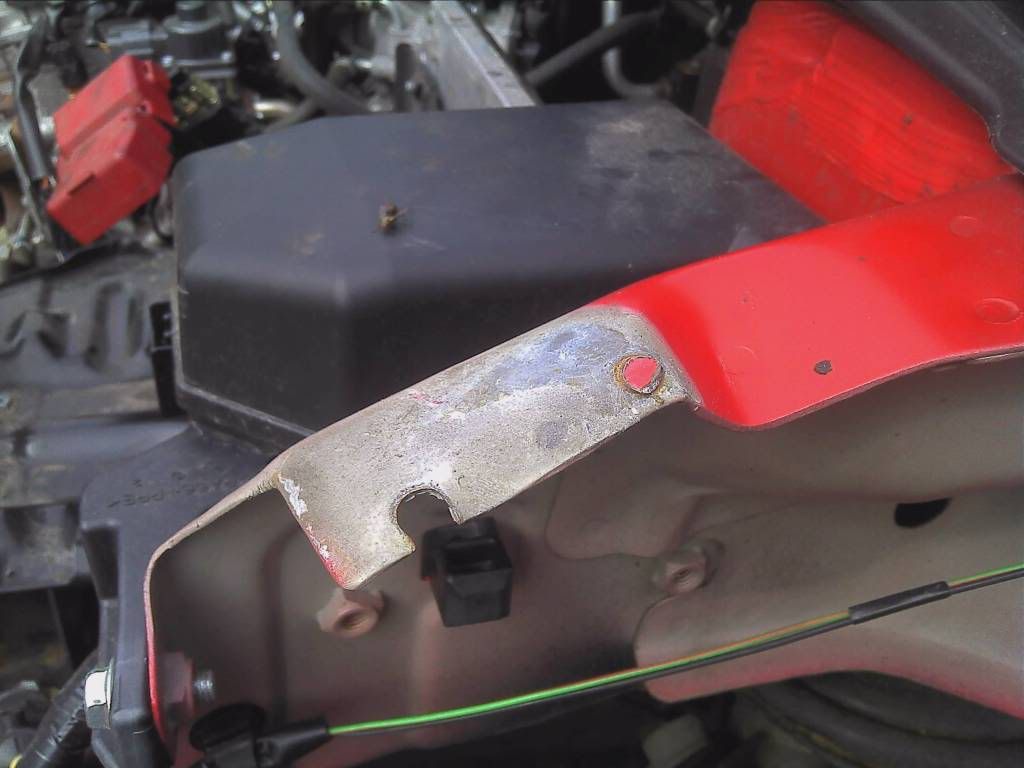
A few minutes with a hammer and she looked like this
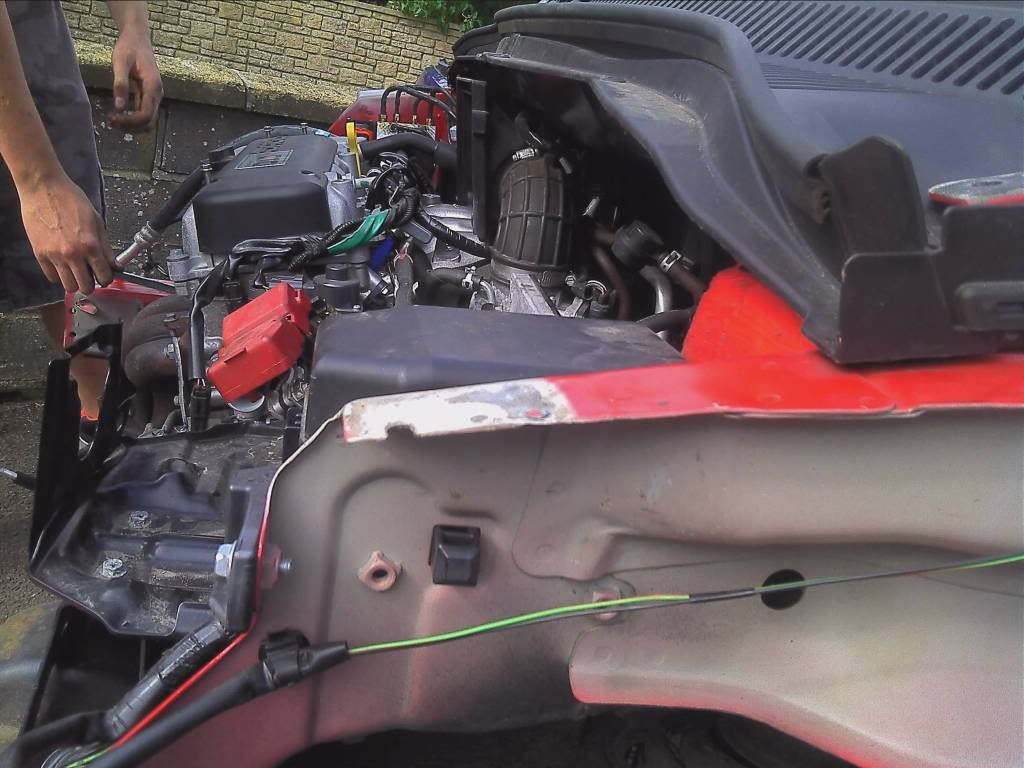
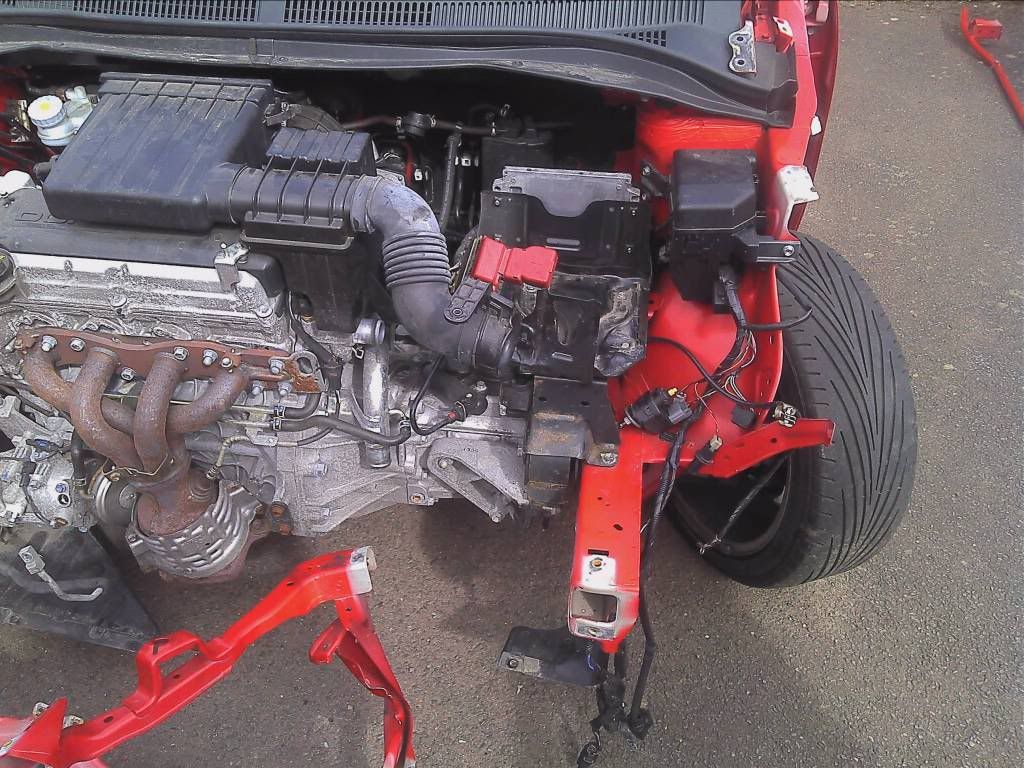
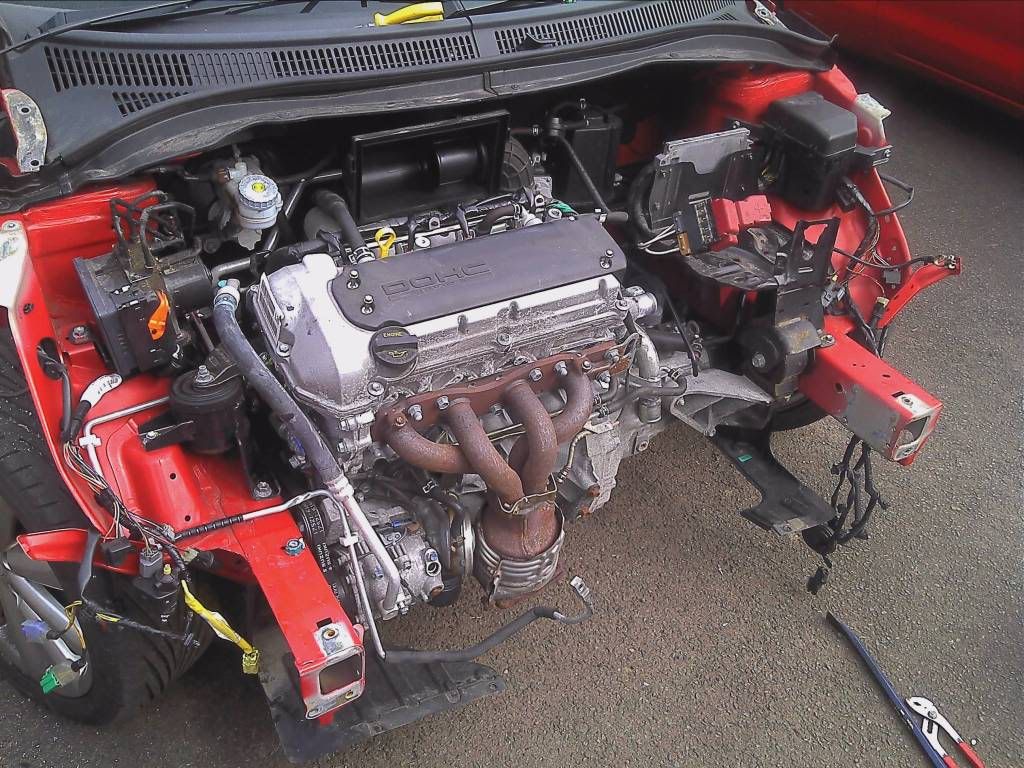
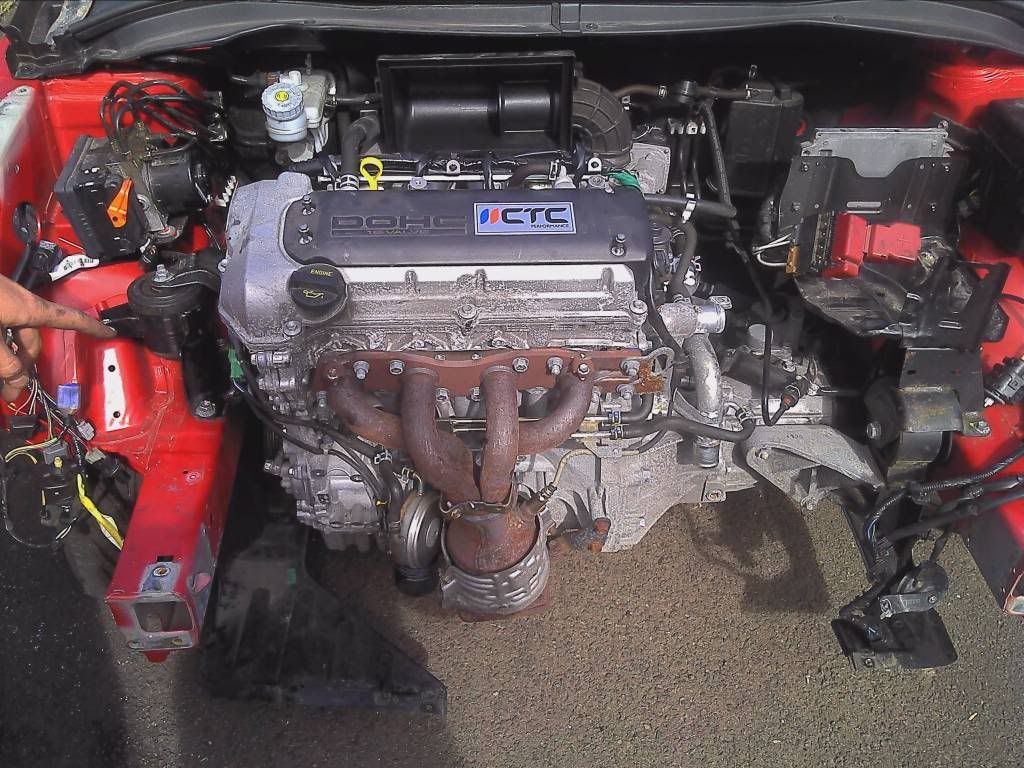
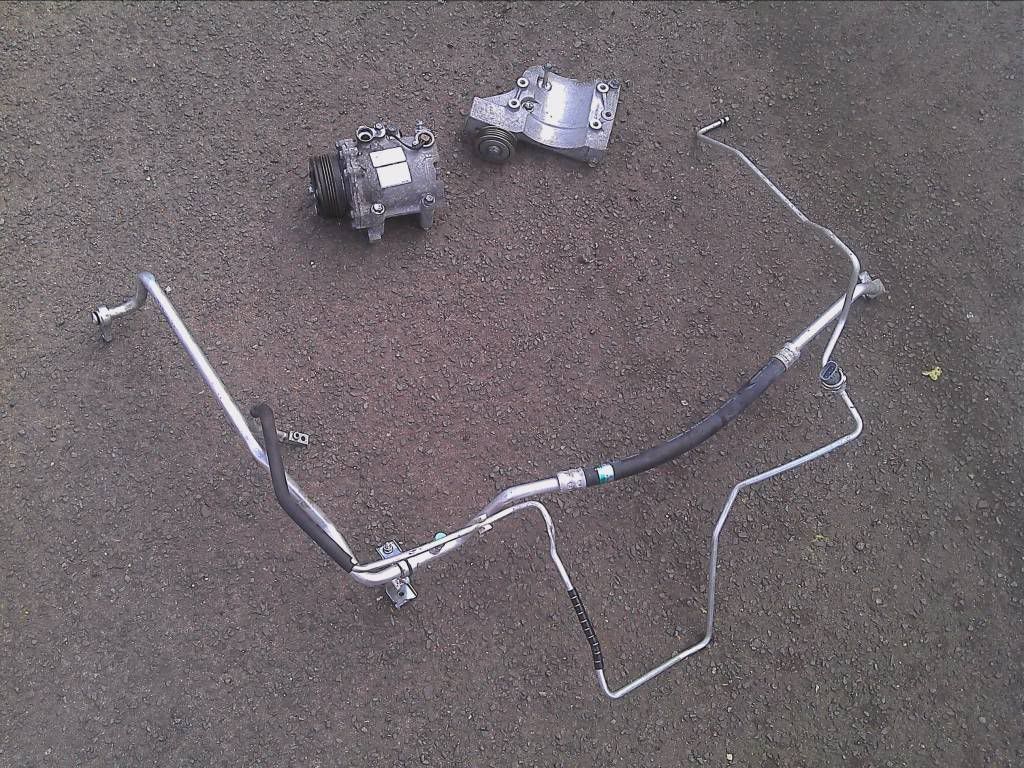
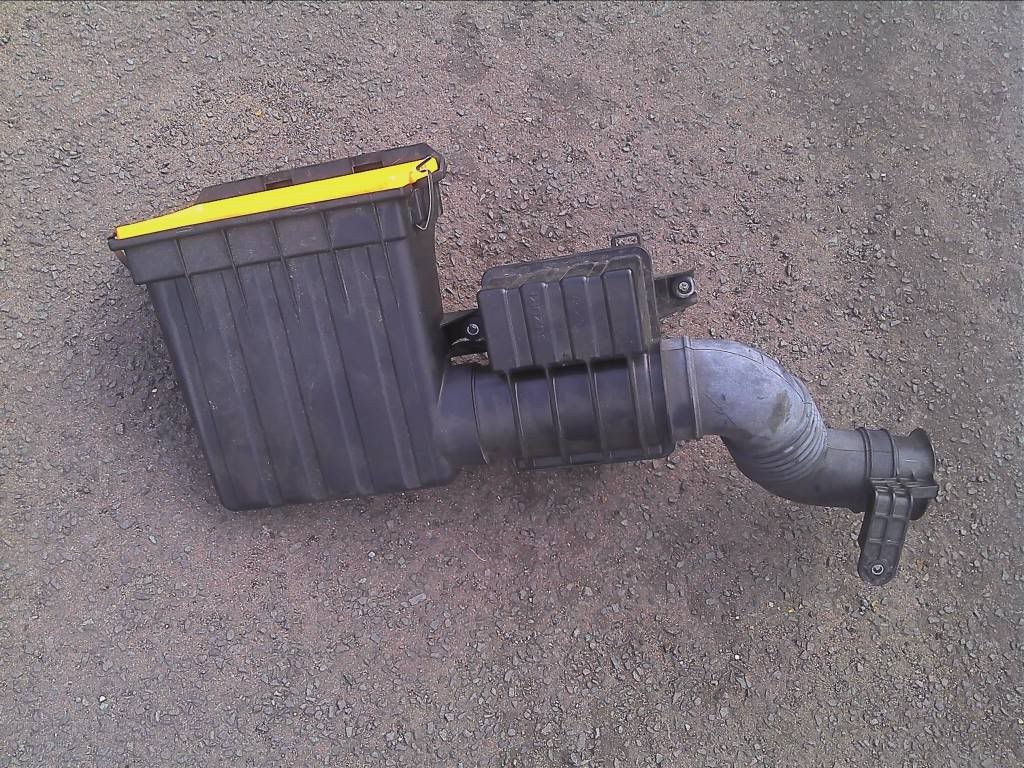
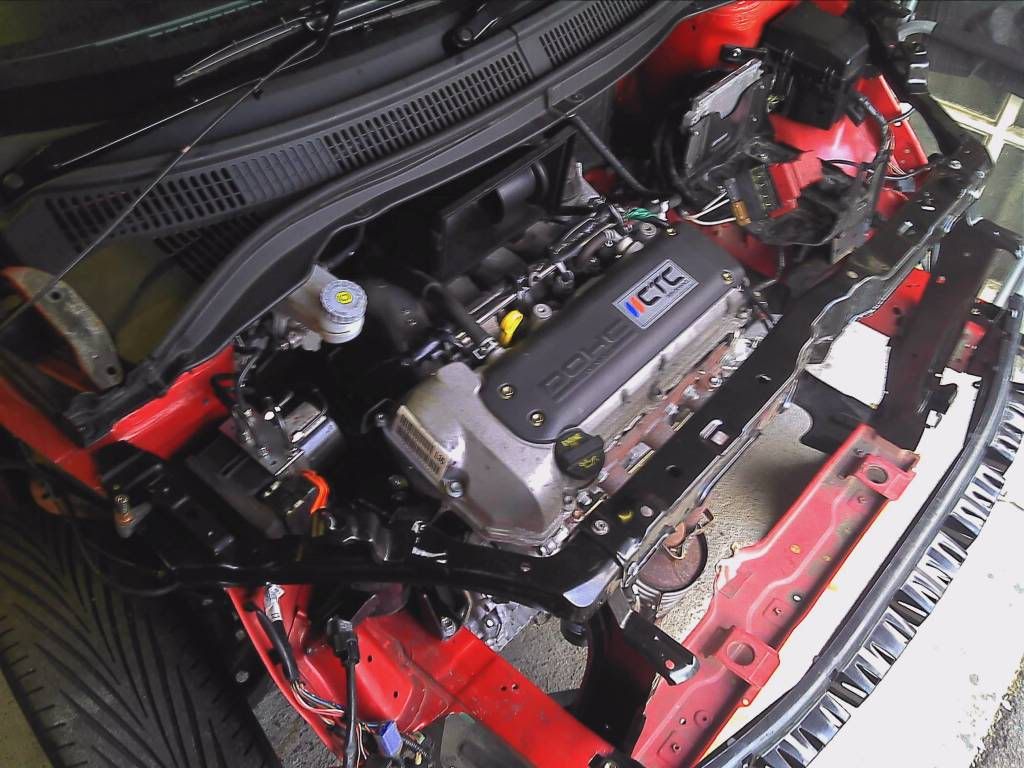
Next up remove the A/C compressor and pipes along with the standard filter box
I then got ordering the parts I needed
Once the parts arrived I could start building up the structure
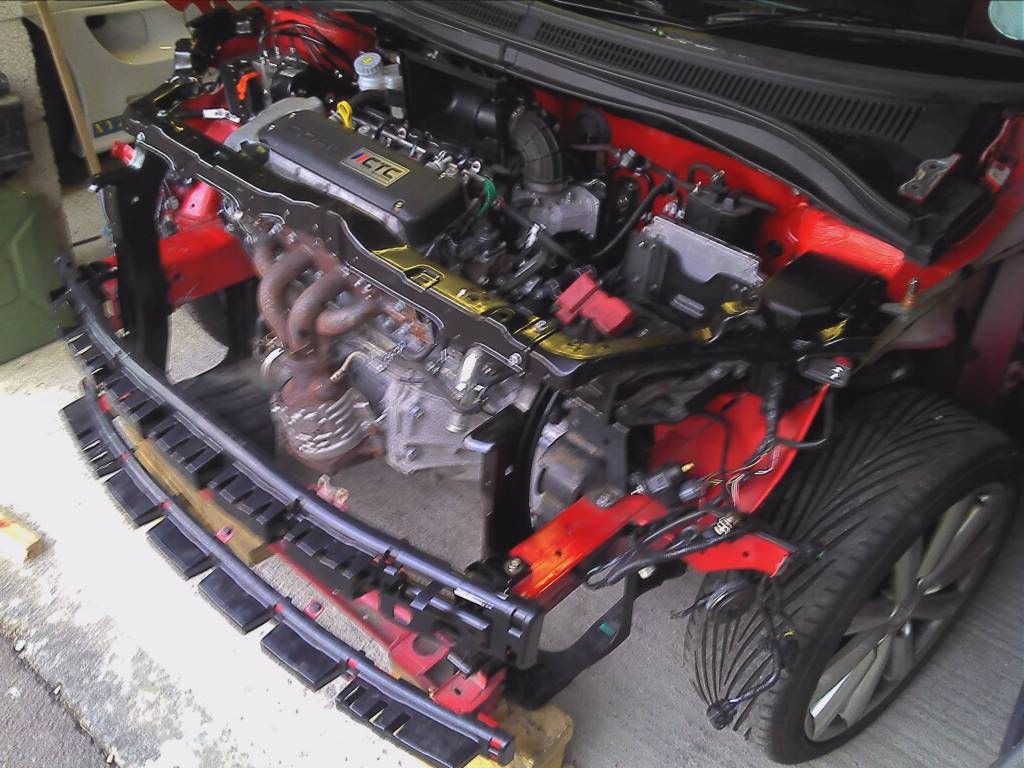
Add the body work
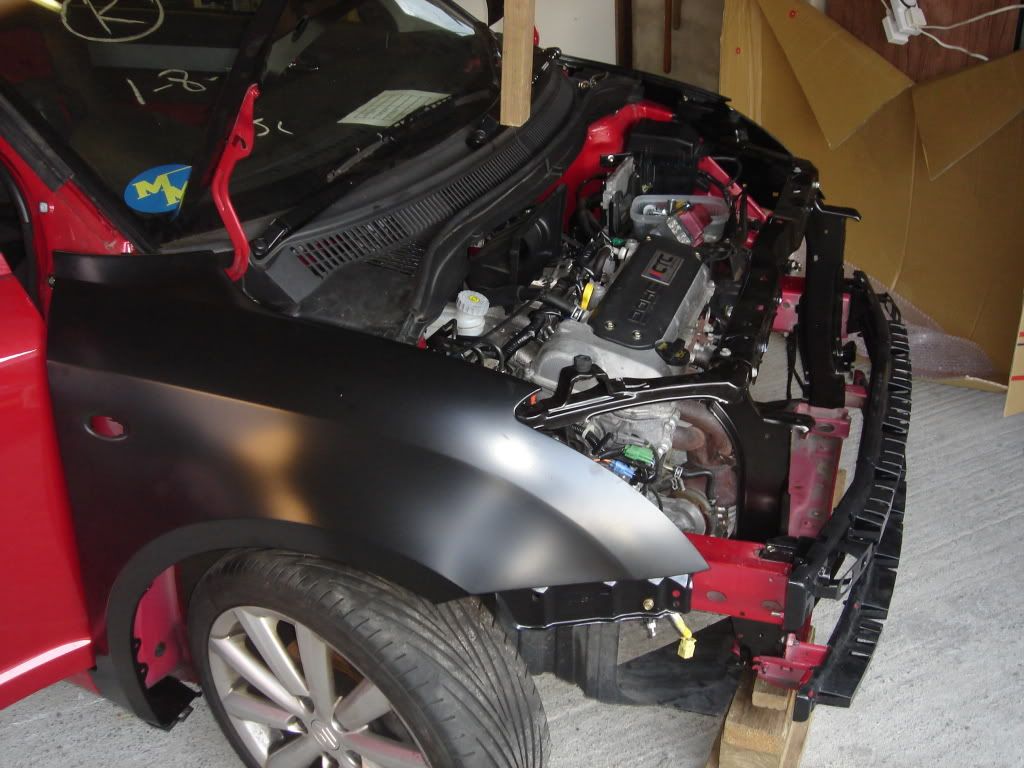
Check the lights fit
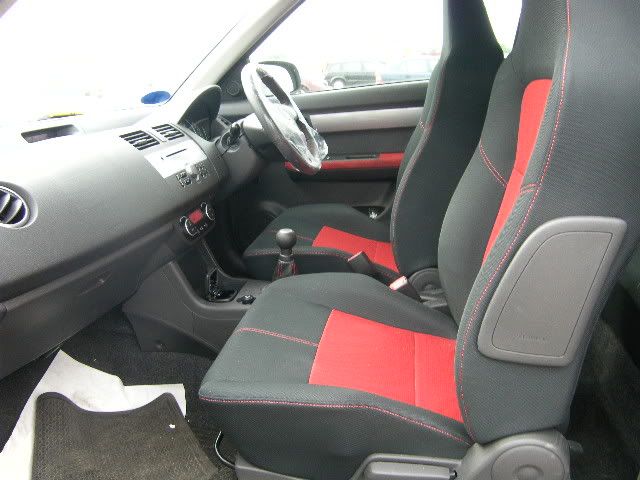
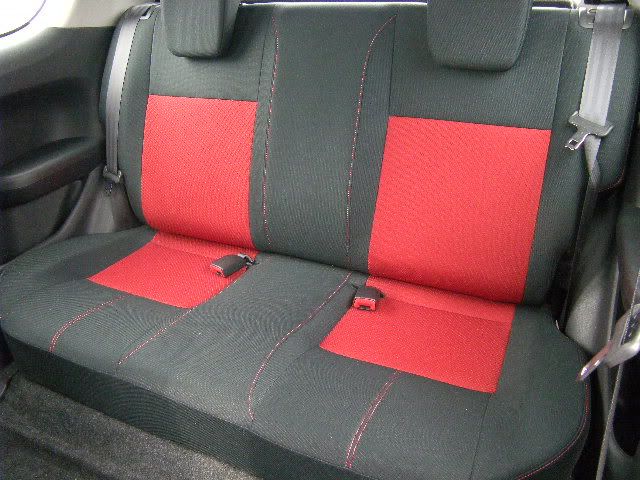
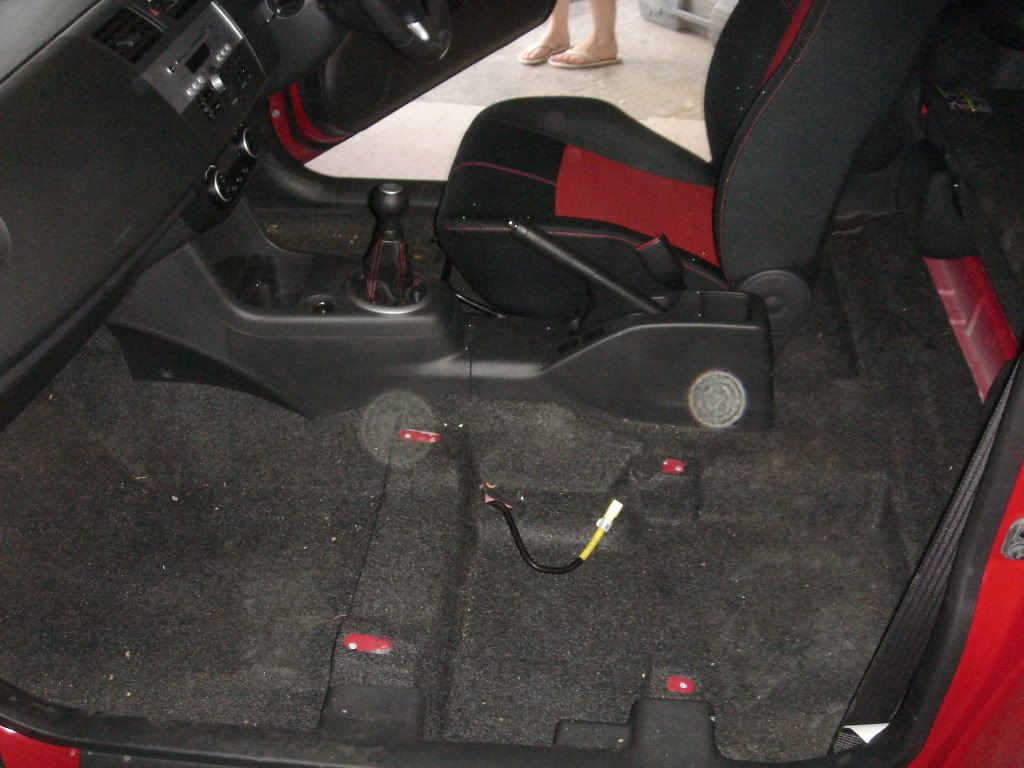
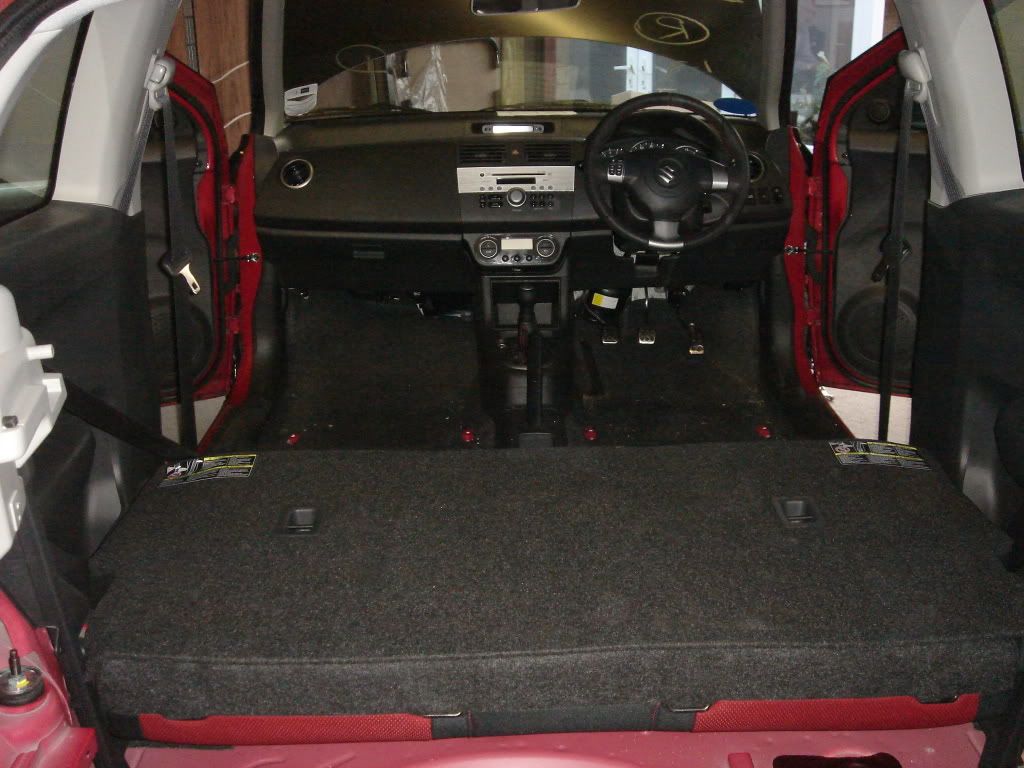
While waiting for some other parts I got cracking with removing the immaculate interior....
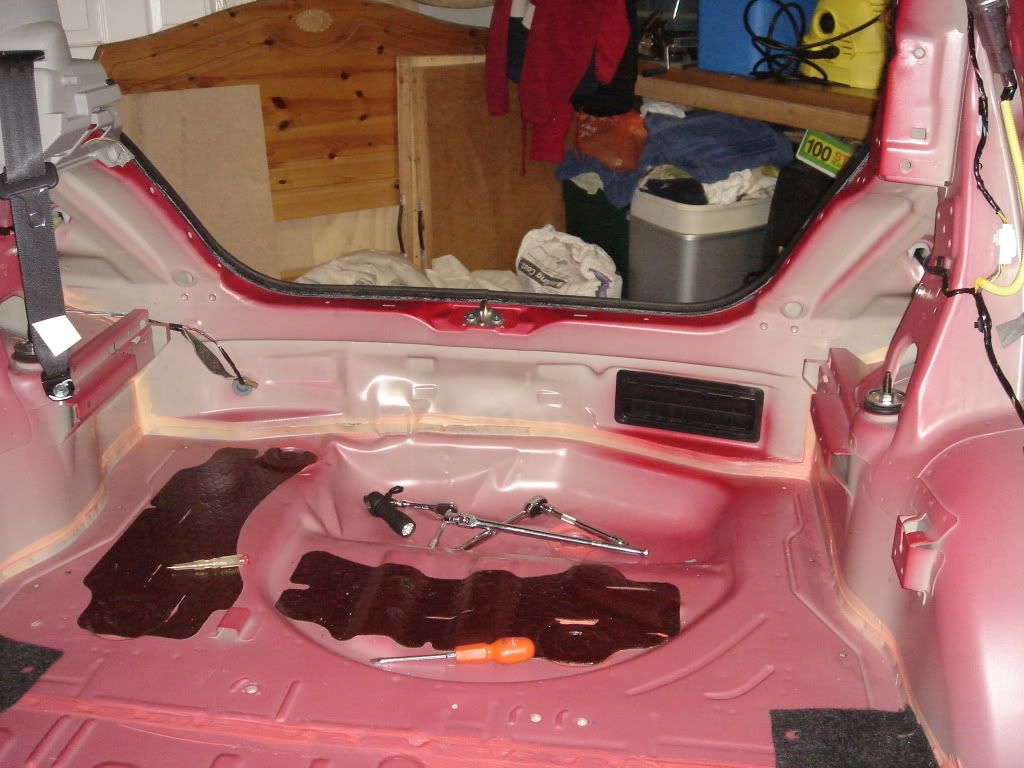
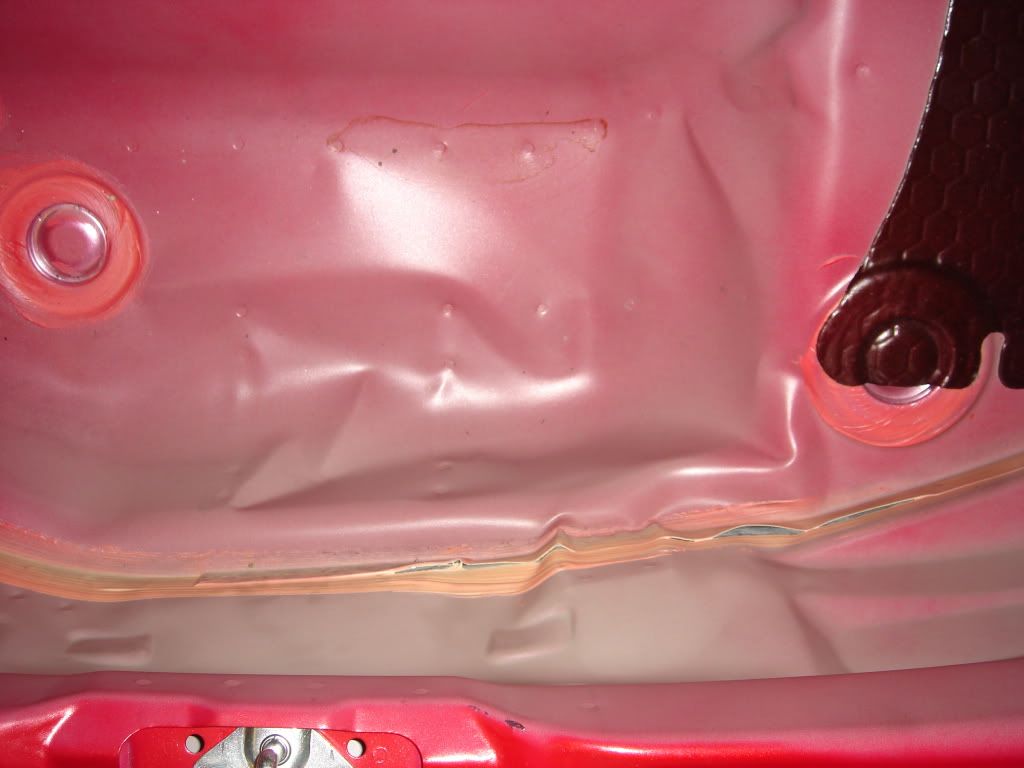
With the boot carpet out of the way there was a little bit of damage to the boot floor but nothing to worry about
More interior out
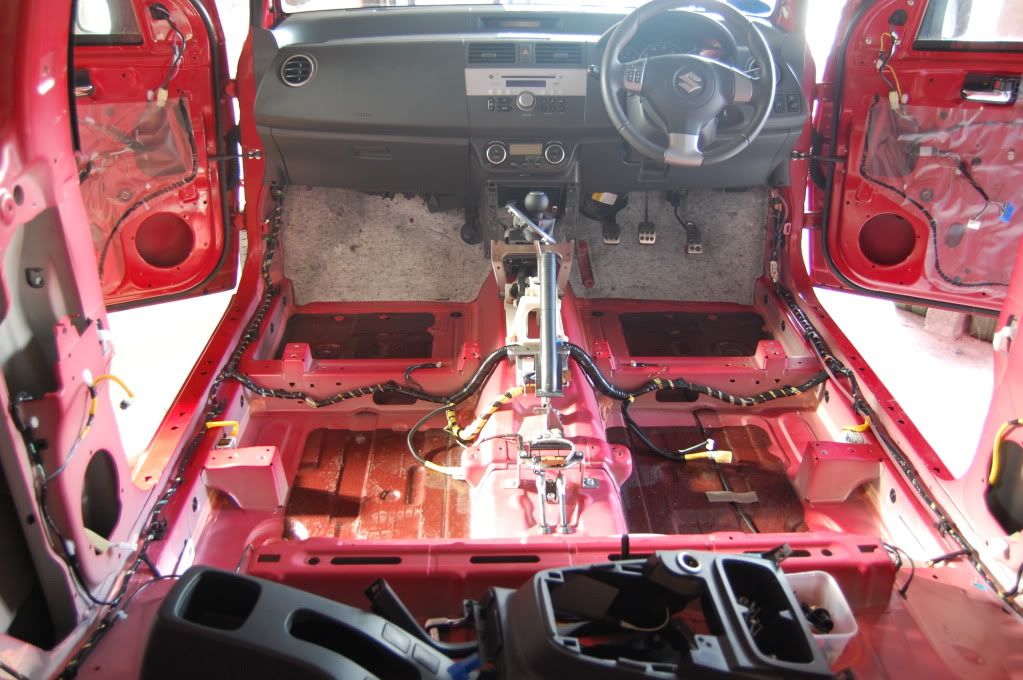

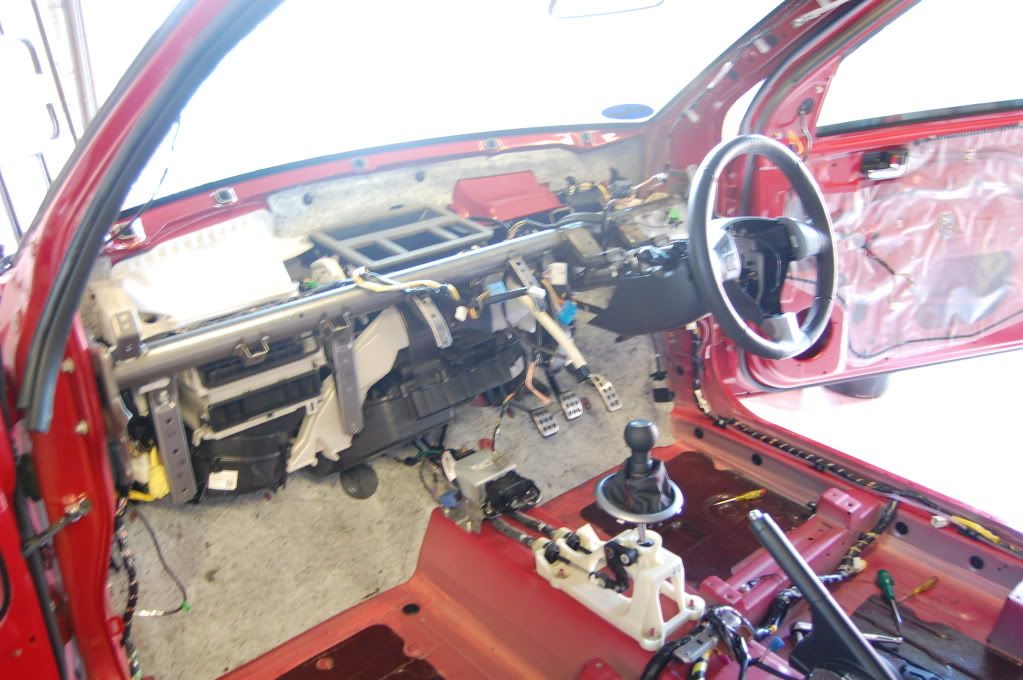
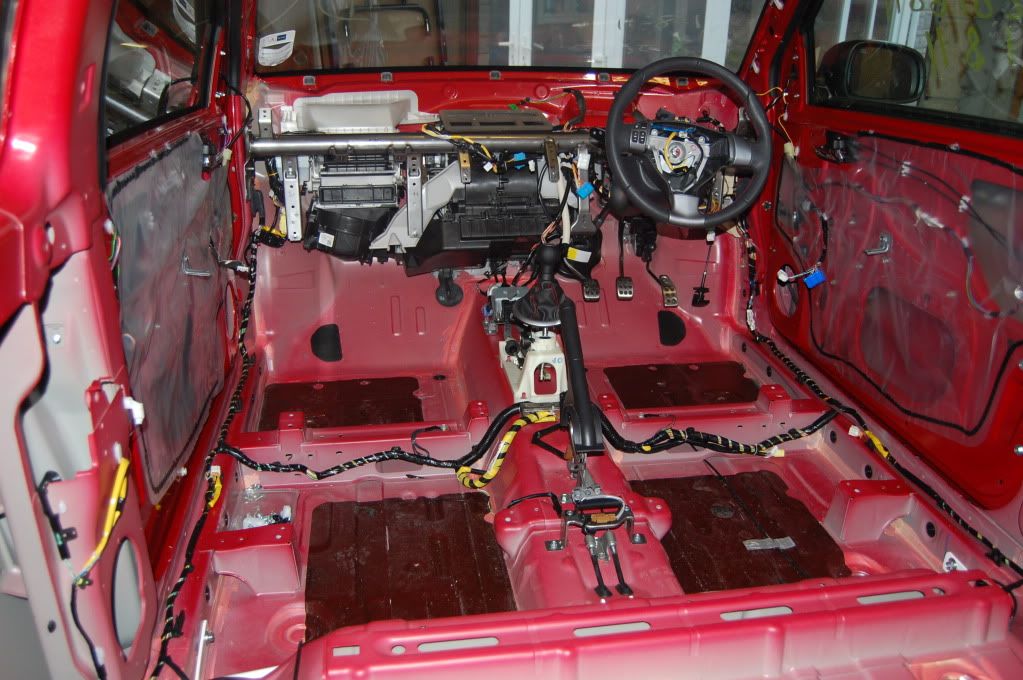
Because I would still be using this as a road car I decided to leave the Heater in place as there is nothing worse than a steamed up car....
In August 2011 I purchased a 2010 Suzuki Swift Sport with 16k miles on the clock sadly cat D but no chassis damage which meant I got a bargain to build our project... It cost me £2800 for the car as it was and the airbags had not even blown as the sensors were on the lower crash bar and it went under a lorry!
Here she is....
With her home I could start taking off the damaged bits ready for rebuild...
With the damaged bits cut off I had two bits that were bent and needed straightening
A few minutes with a hammer and she looked like this
Next up remove the A/C compressor and pipes along with the standard filter box
I then got ordering the parts I needed
Once the parts arrived I could start building up the structure
Add the body work
Check the lights fit
While waiting for some other parts I got cracking with removing the immaculate interior....
With the boot carpet out of the way there was a little bit of damage to the boot floor but nothing to worry about
More interior out
Because I would still be using this as a road car I decided to leave the Heater in place as there is nothing worse than a steamed up car....
Thanks ;-) lots more coming up to today's date and lots to follow as there are lots of custom parts currently being made...
Anyway back to the build...
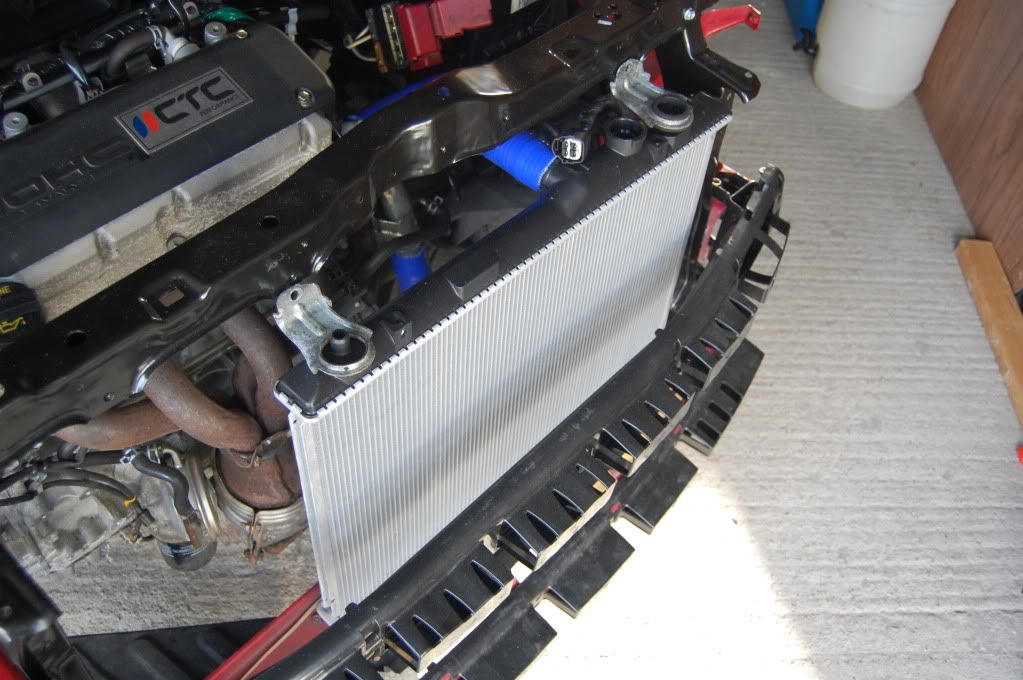
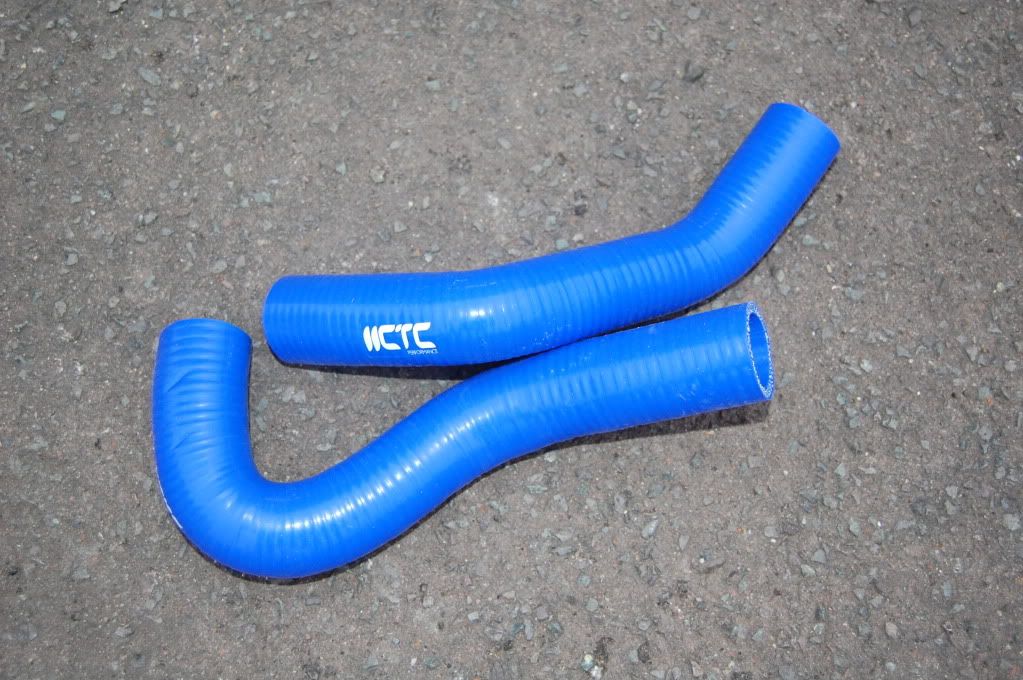
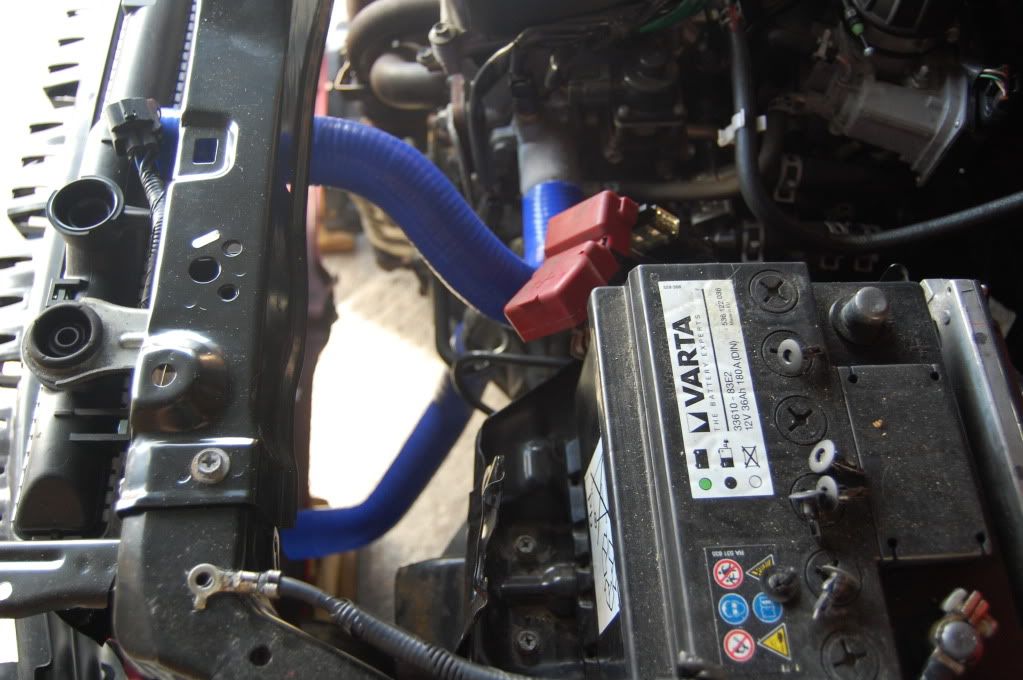
The Radiator and hoses arrived so they were promptly fitted..
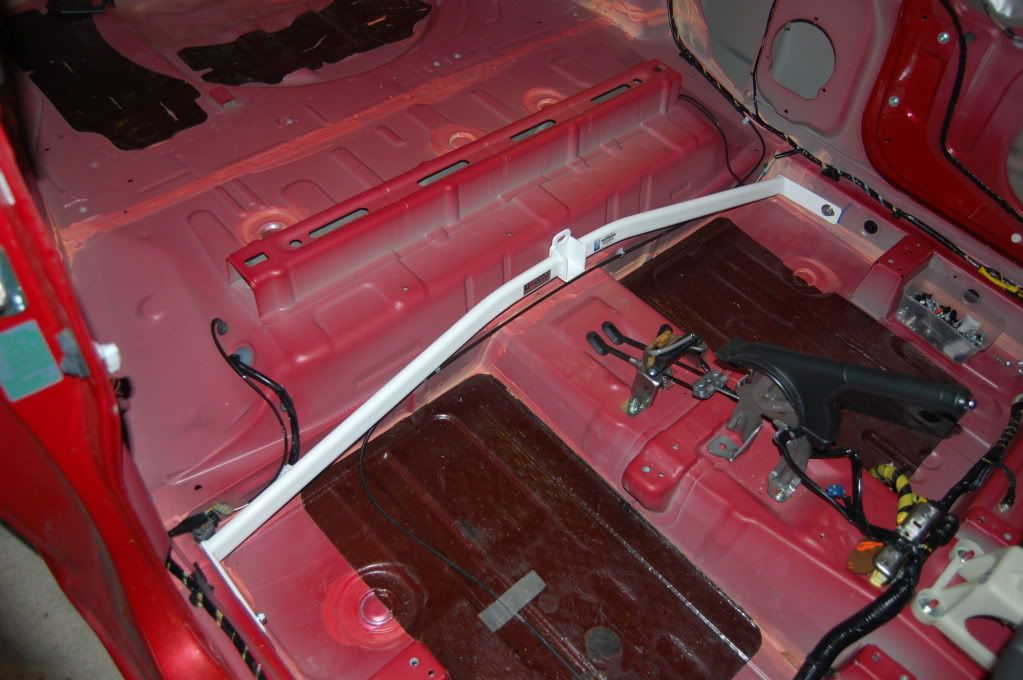
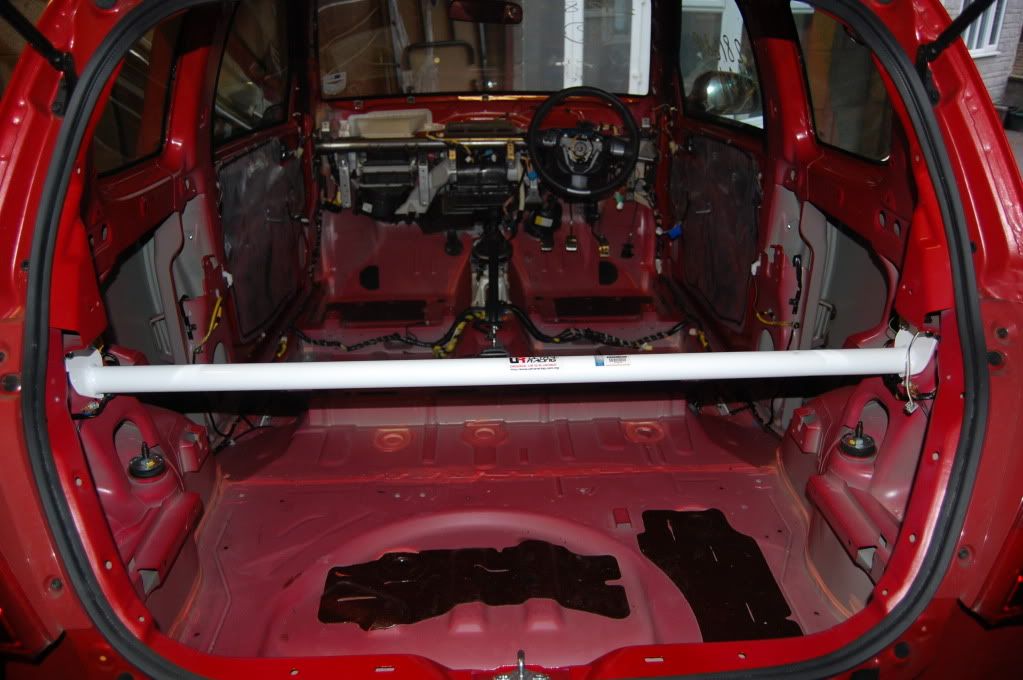
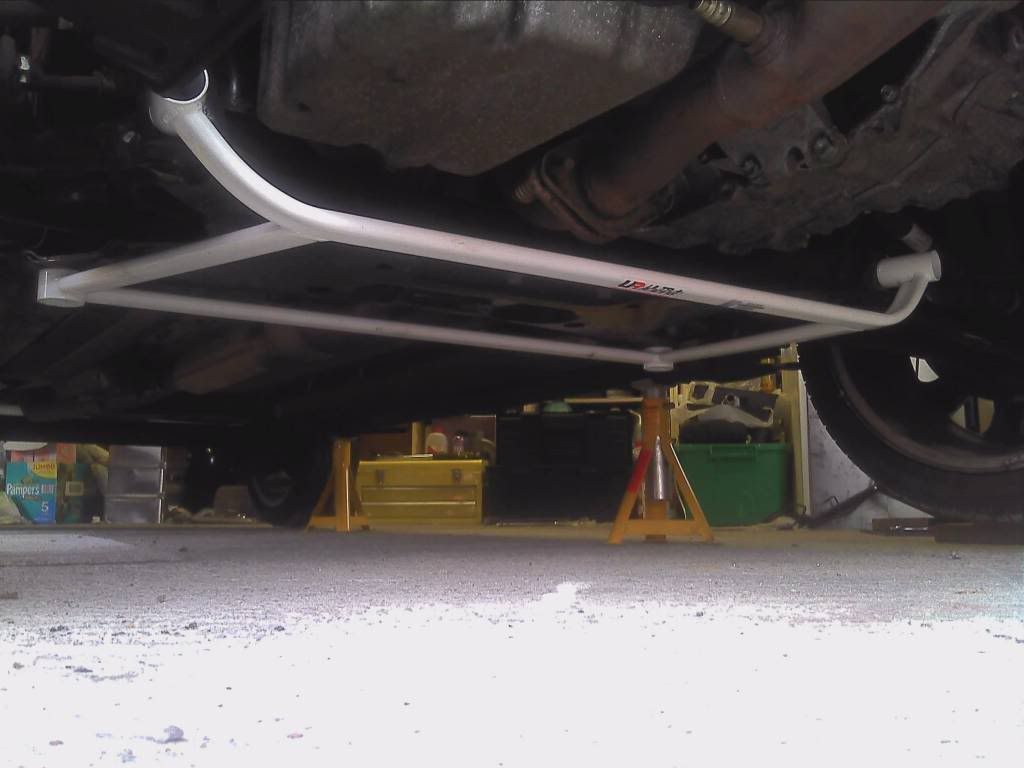
Next up we had lots of Ultra Racing Braces to fit. We started out with the room brace fitted behind the driver and passenger seat inside.
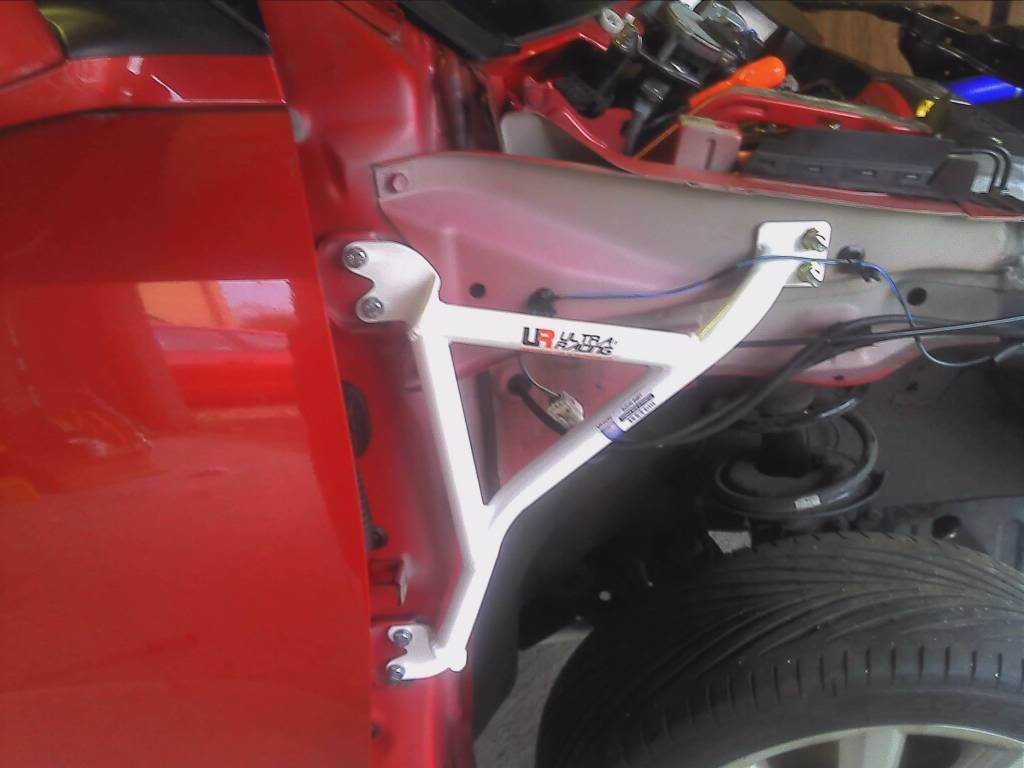
Next up were the inner wing braces. These bolt onto the door hinges however we would recommend longer bolts although the original bolts will fit there is probably not enough thread on the bolts. You then have to drill holes at the front and bolt through. These will reduce movement in the front suspension mounts, just a shame no one will see them...
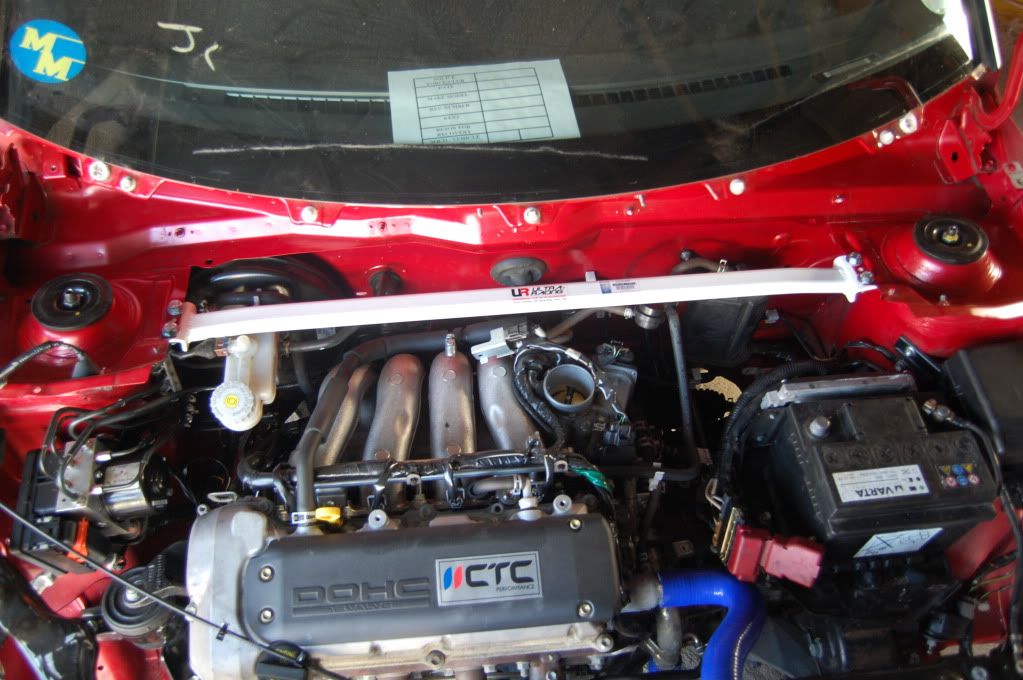
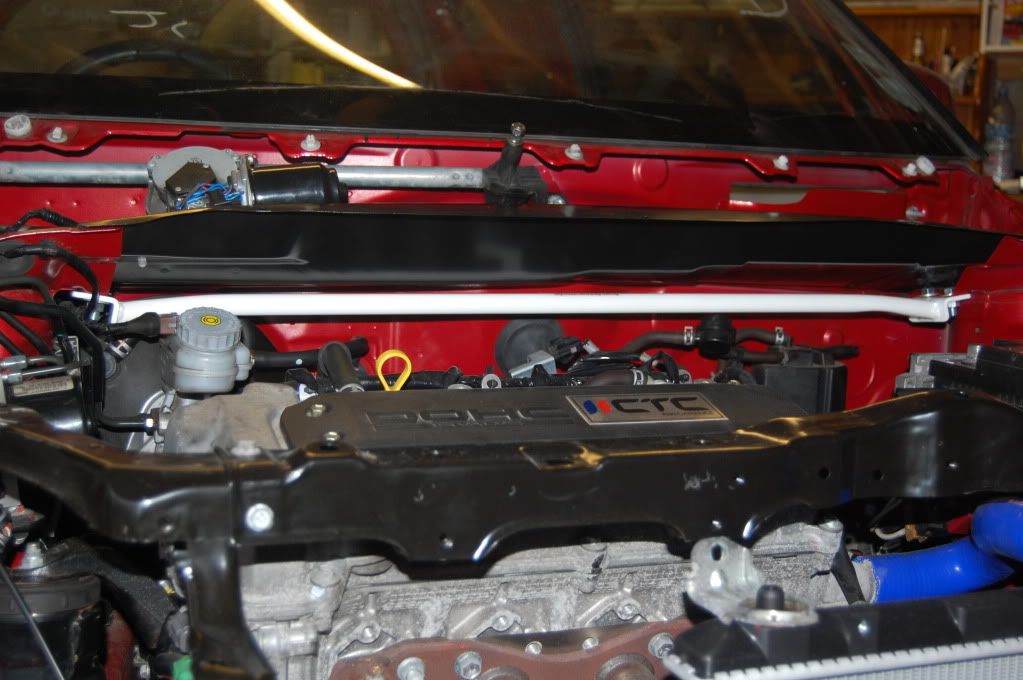
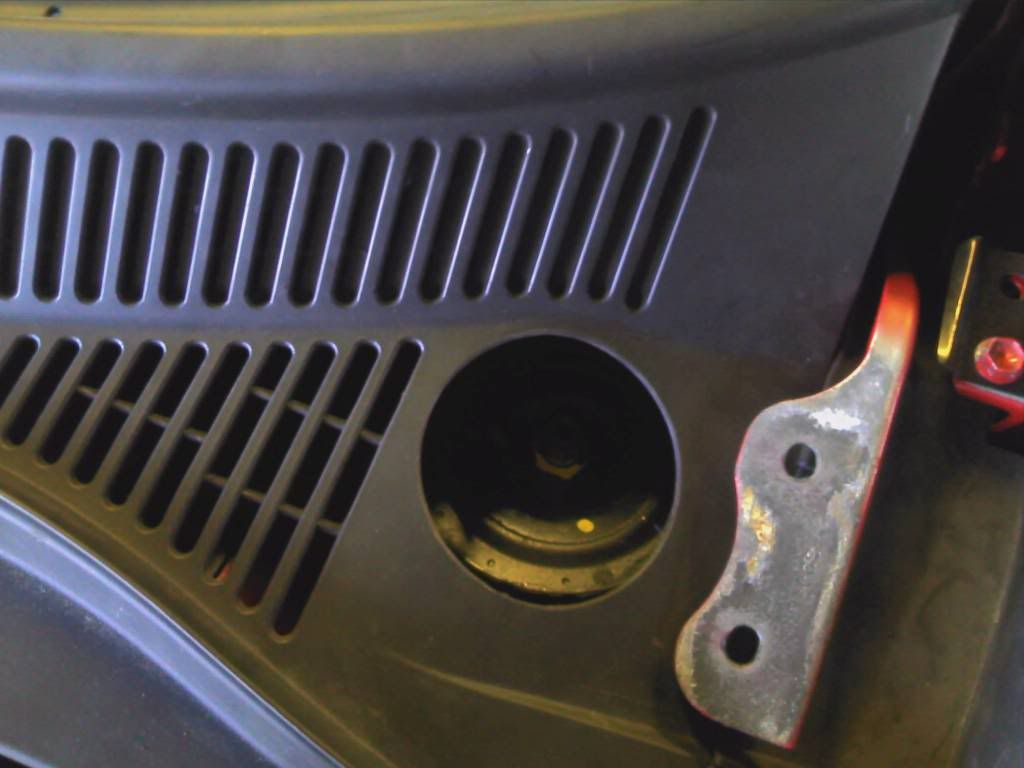
We then fitted the front upper brace. You have to remove the rain tray above and the wipers but this does not take long and only needs 9 bolts removed to gain access. Its a straight fit and there is clearance from the rain tray once re-fitted..
We went for the rear upper brace next. Now unlike other upper braces this fits slightly higher up. Ultra tell me this is because the brace fits onto a box section that welds onto the top mount of the suspension so will have the same effect without restricting boot space as much as the others. Well again it was very straight forward to fit and should stop movement between the rear suspension mounts.

We then fitted the rear under brace and the front lower brace
After using XYZ Coilovers and Brakes on our MR2 Turbo I decided to order the XYZ Race Spec Coilovers for the Swift

With the coilovers on route I cut out space so that you could adjust the dampening and rebound from the top mount

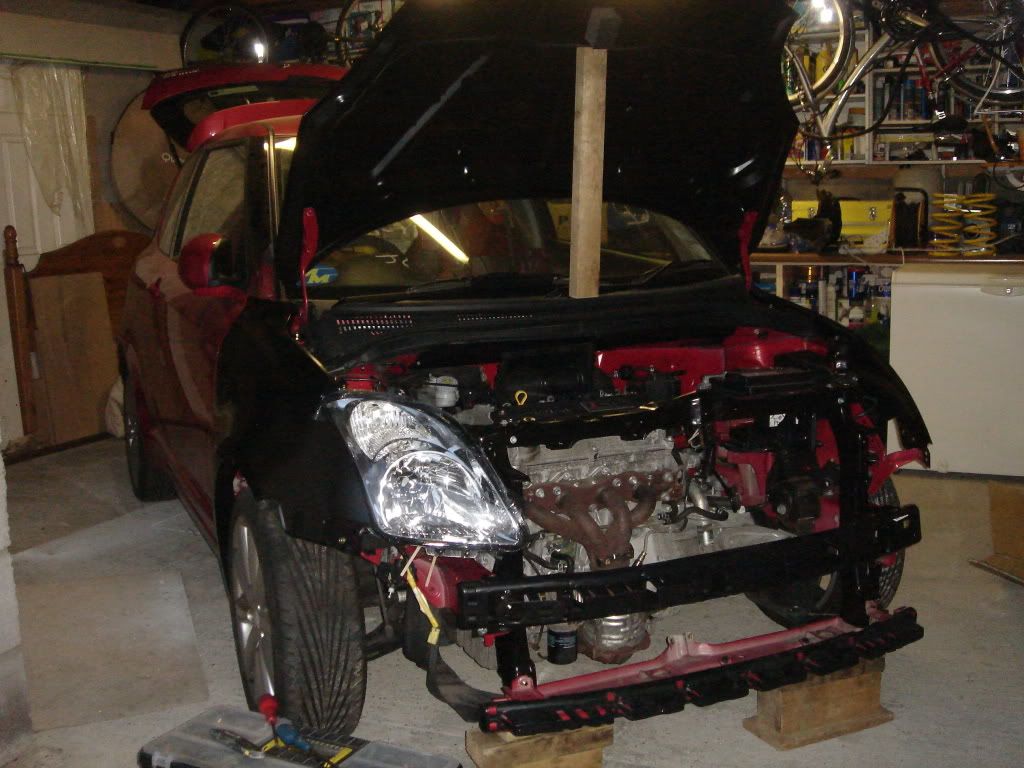
With all the bits done and out of the way I finished off fixing the bonnet in place and the headlights in properly as they were only fitted to test it all went into place correctly...
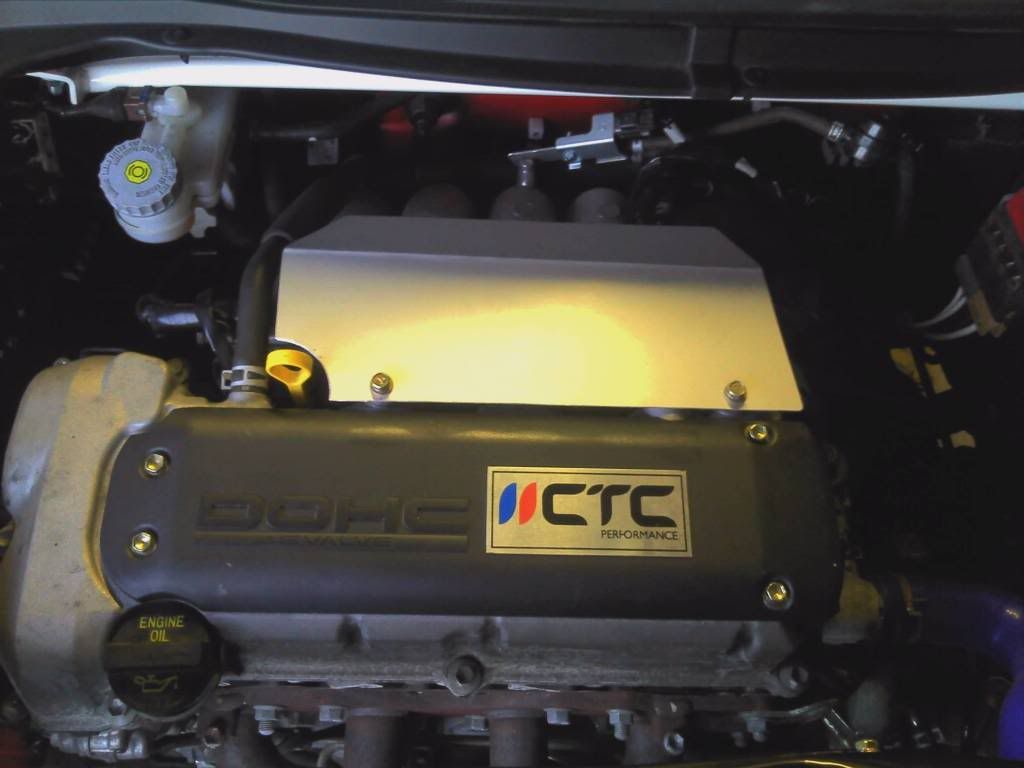
Made my self a nice little inlet manifold heat shield out of ally which later I will get copied in Carbon.
Next up I ordered these in 15" as the car would handle better and cost less for tyres rather than sticking with the standard 17" wheels.

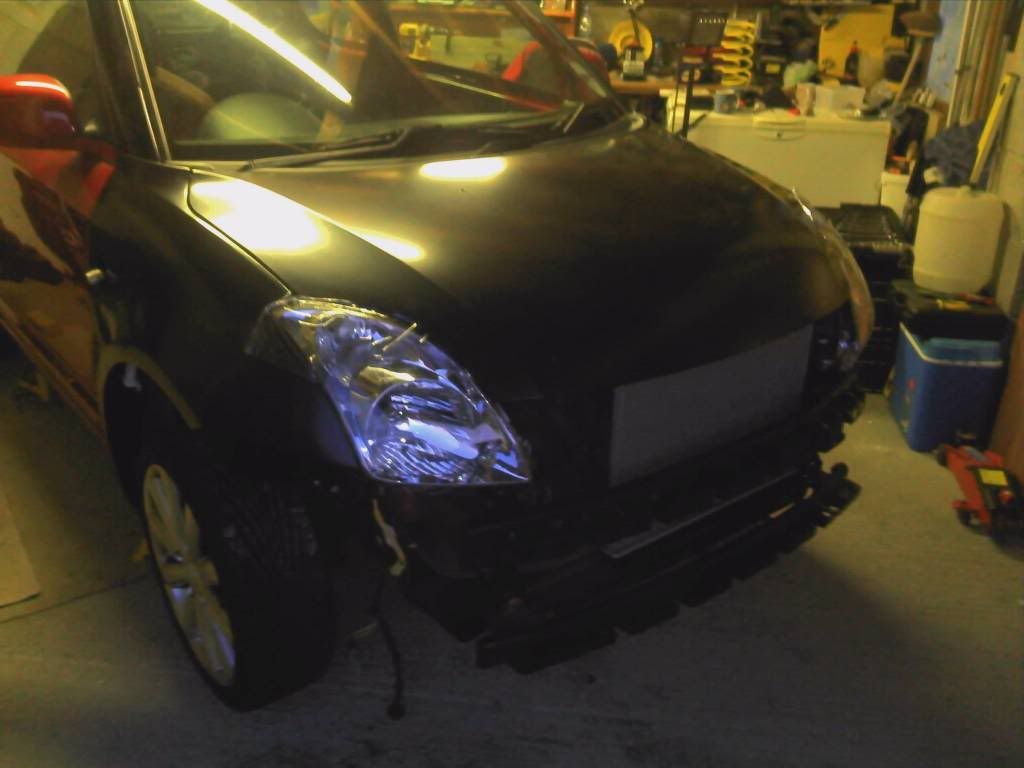
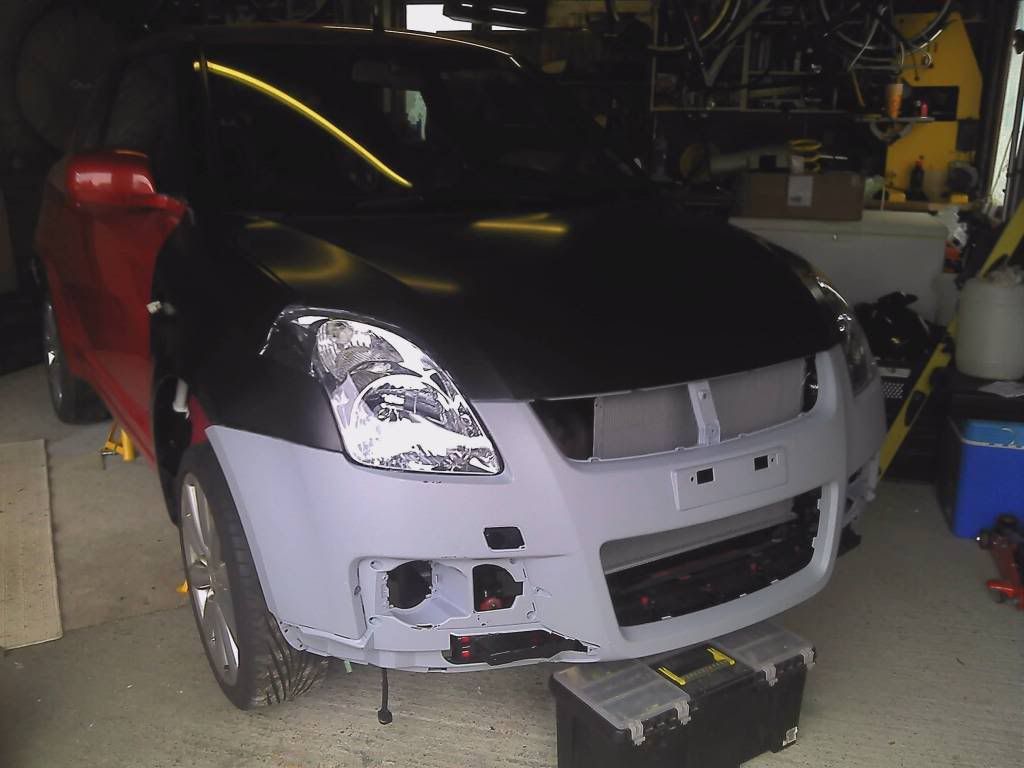
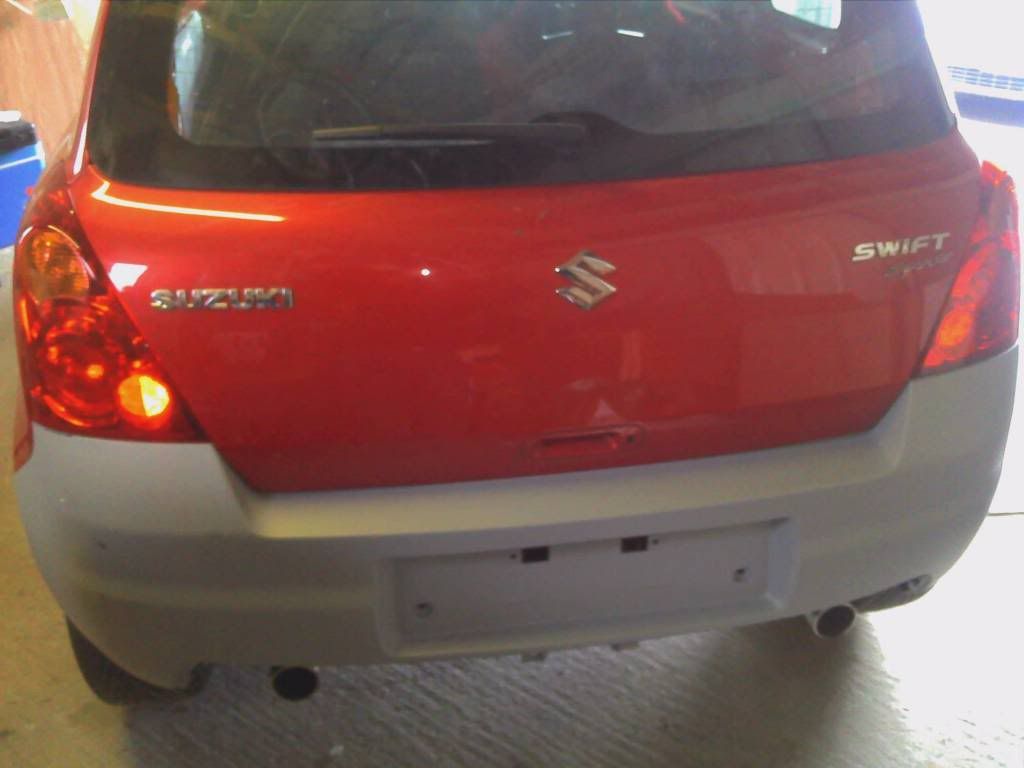
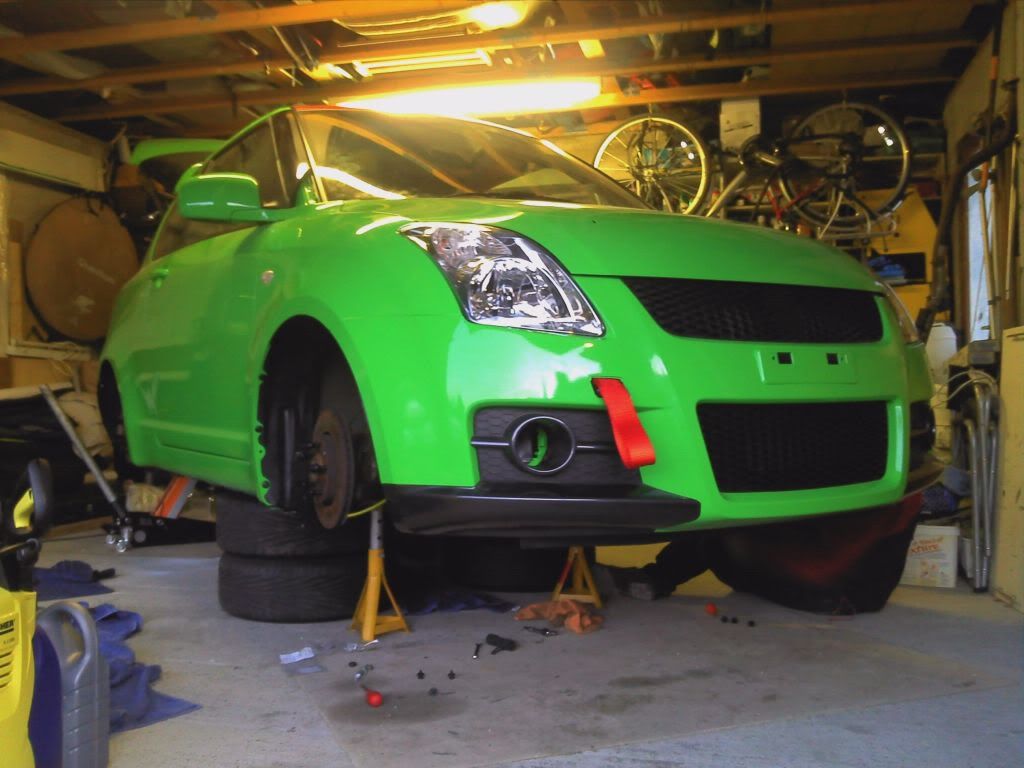
The bumpers turned up so I test fitted them..
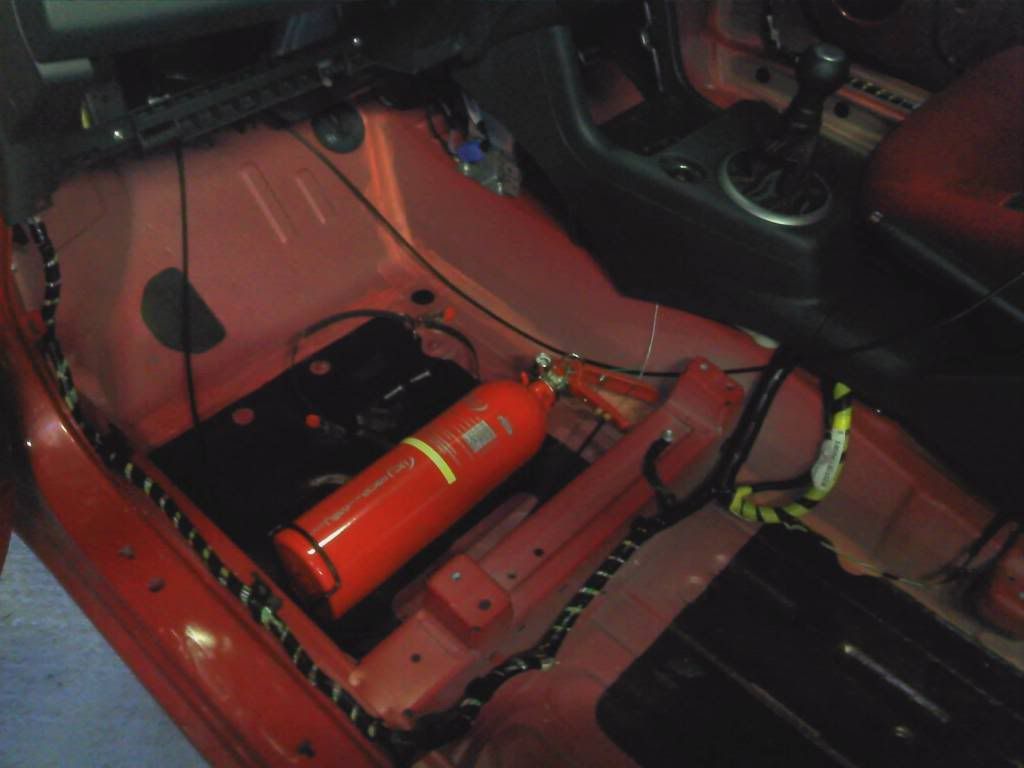
I then started on the cut off and fire extinguisher
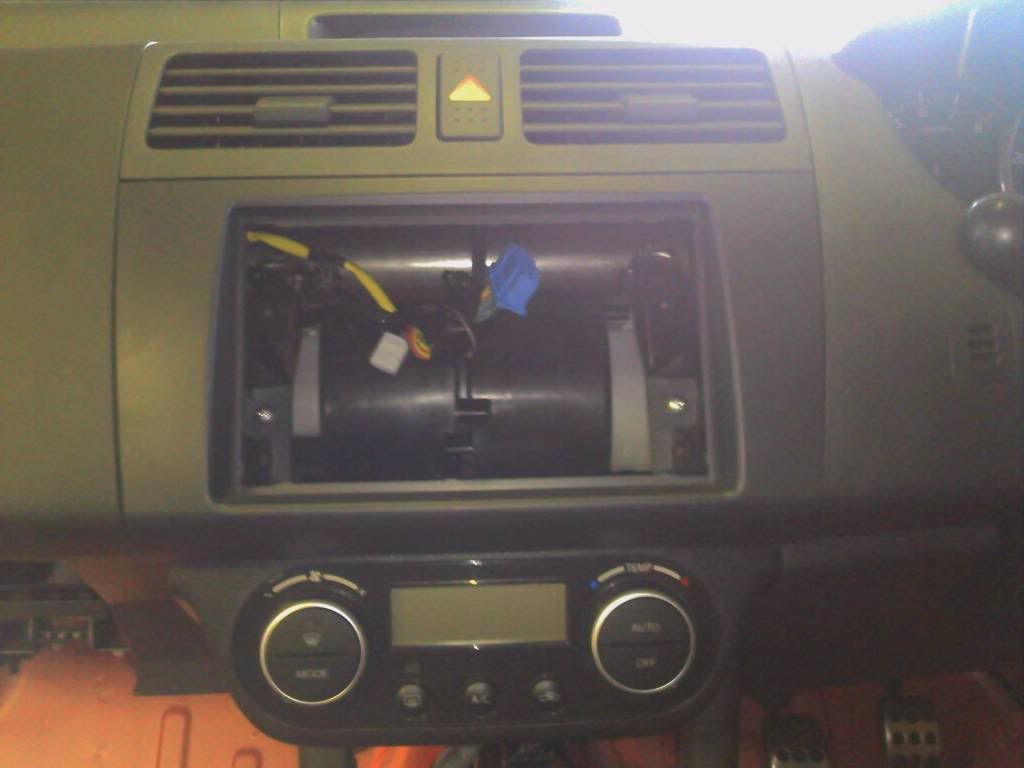
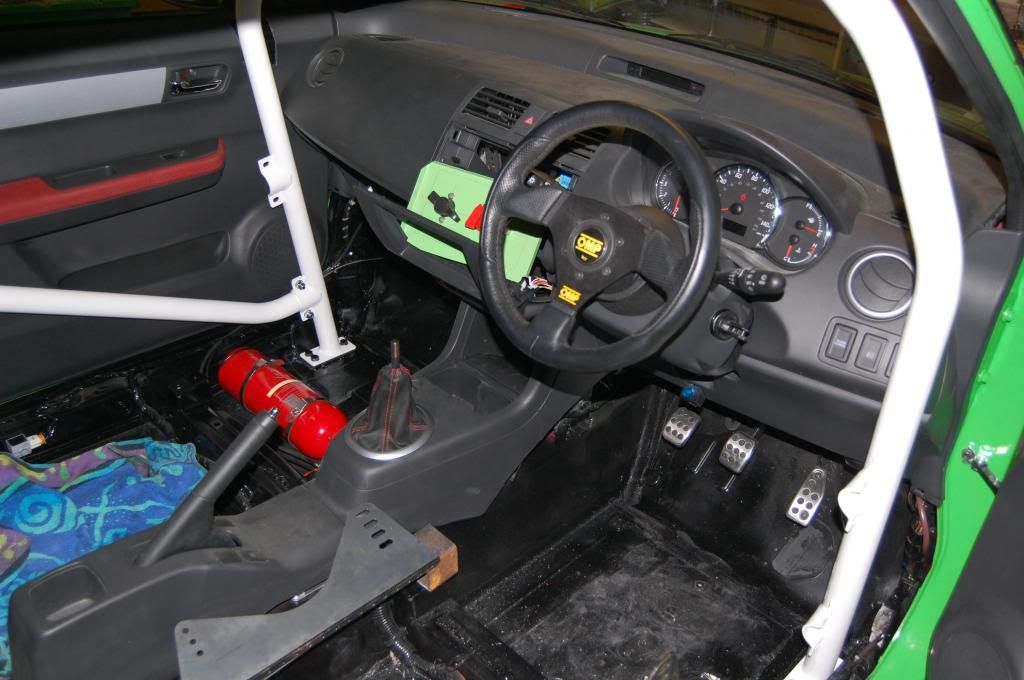
We then fitted a double din fascia and the plan is to bolt in a metal panel to attach all the switches where the stereo used to go
Backwards step but I decided to paint the interior black so had to remove a lot but here it is done... Looks much better than faded pinky red... ish


With this lot done we did a lot of prep work ready to paint her....


With the car painted I could get cracking with wet/dry and G3... Also to show how well the finish is compared to most self paint jobs... took hours to mask but worth the time.. You might notice the roof is still red but the plan was always to wrap the roof it so I saved the paint...


Next my coilovers arrived so we could get them fitted..


As you can see even on the axle stands she would be sitting low!!

We then did the fronts


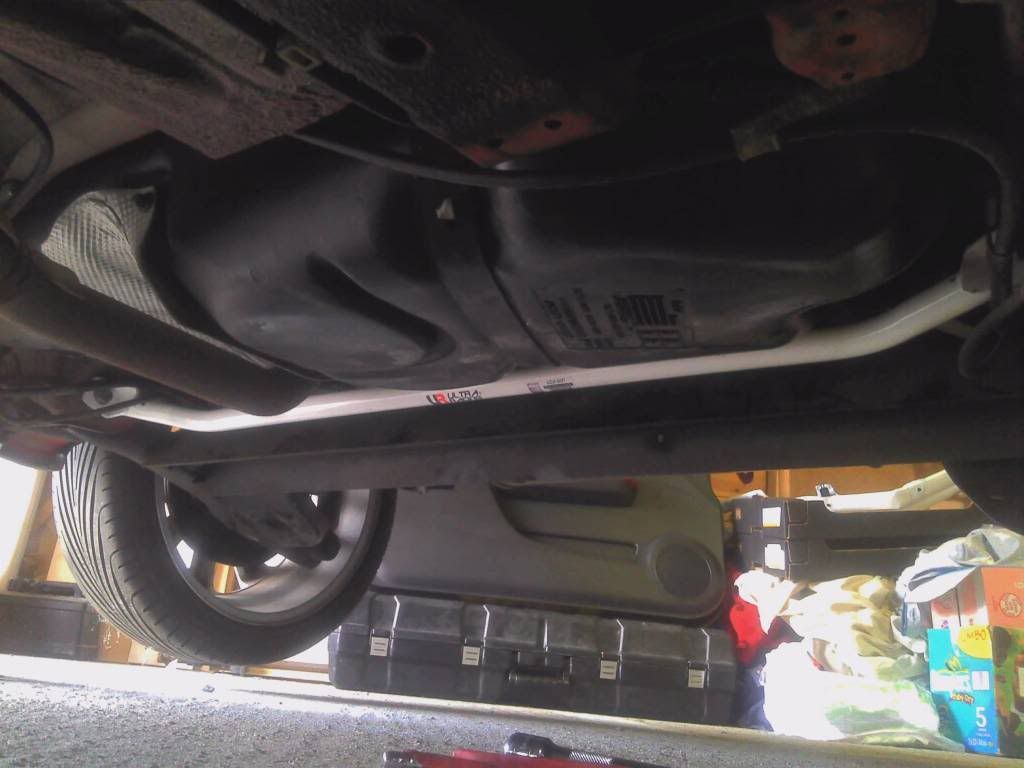
With the suspension on we fitted the Ultra Uprated ARB to the subframe

We then added the CTC Rear Camber Shims to give another -2deg camber and tow out the rear to reduce understeer


The Rota's arrived ;-) Thanks to Ben...

Next up got my graphics planned out..

After discussions with the guys at Rent4Ring I needed to baffle the sump to prevent oil starvation on 4th cylinder..


Added two plated inside and then bolted the top back on and returned the sump... Simple but effective and cheaper than R's or Monster Sport parts...

On to the brakes we fitted Hel braided lines which consists of 6 lines on the swift


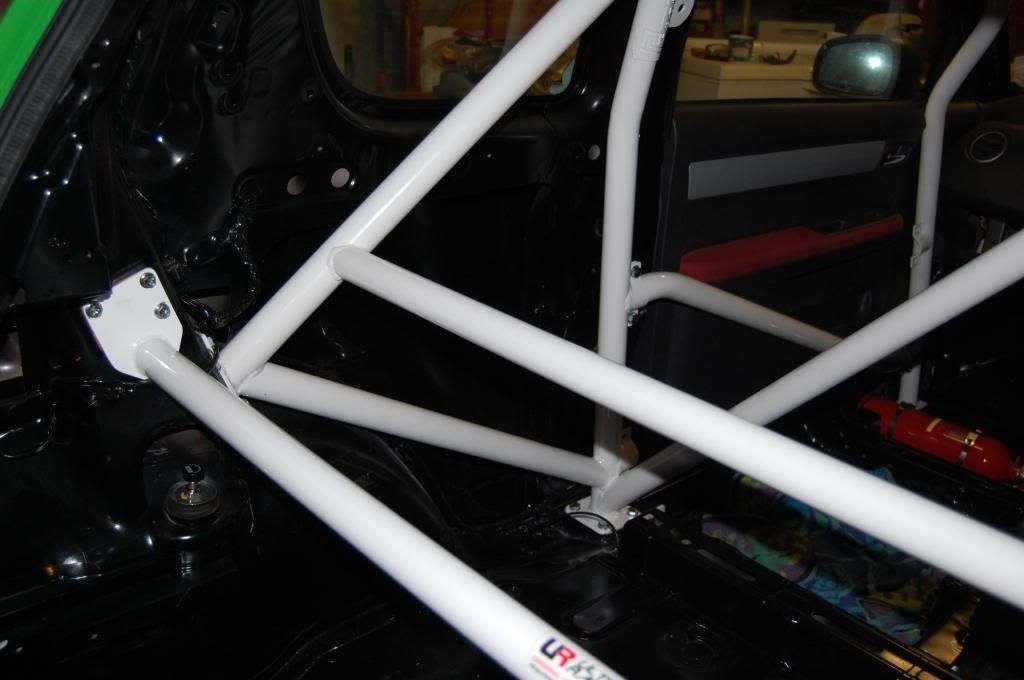
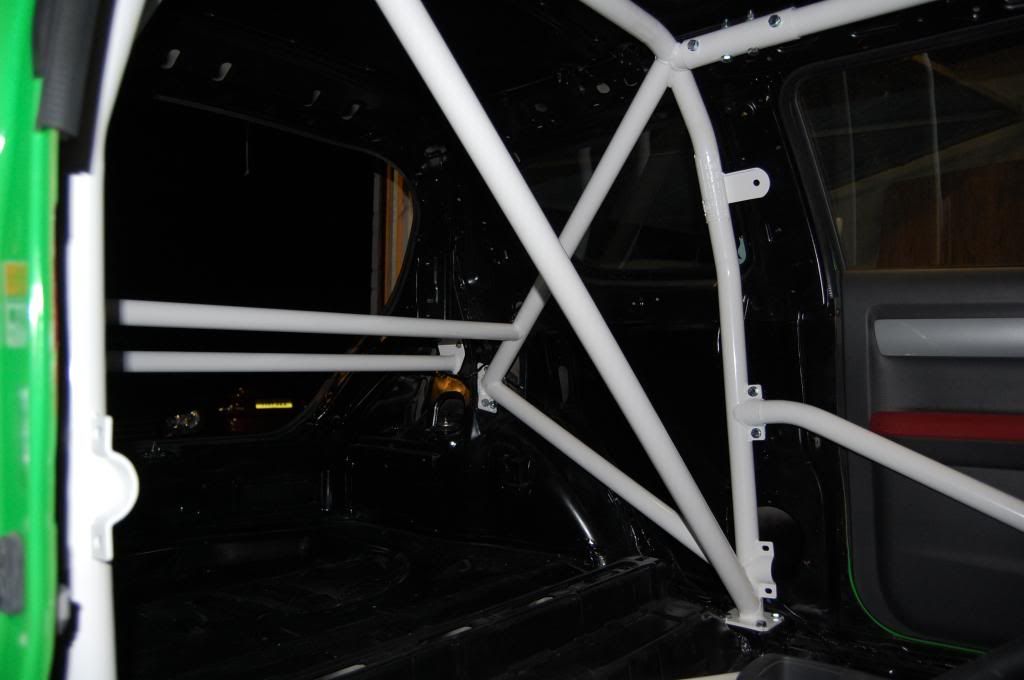
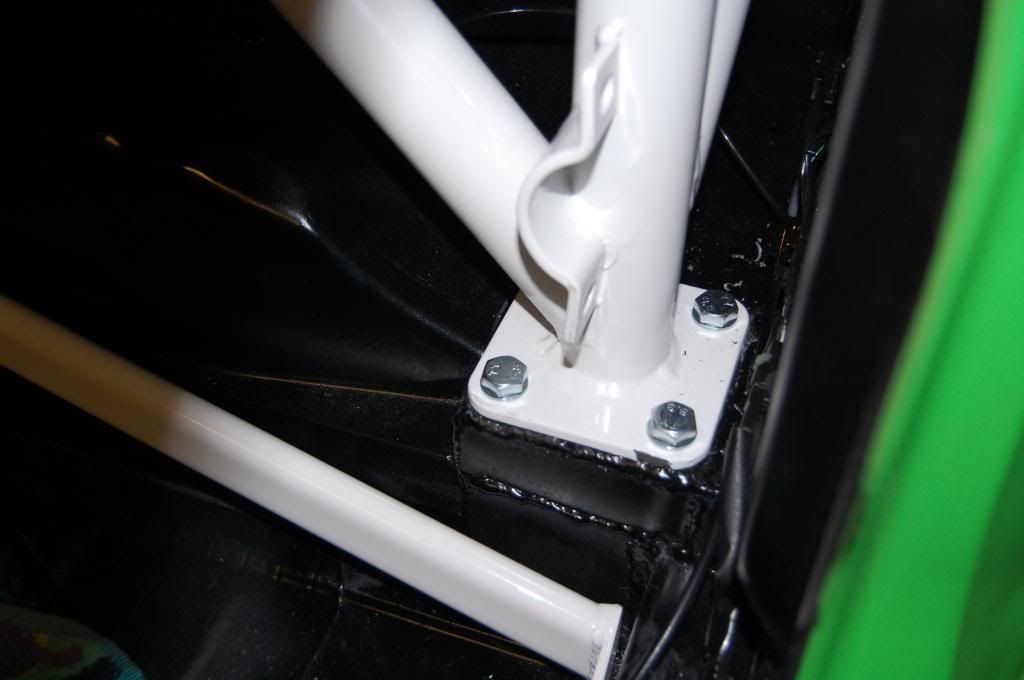
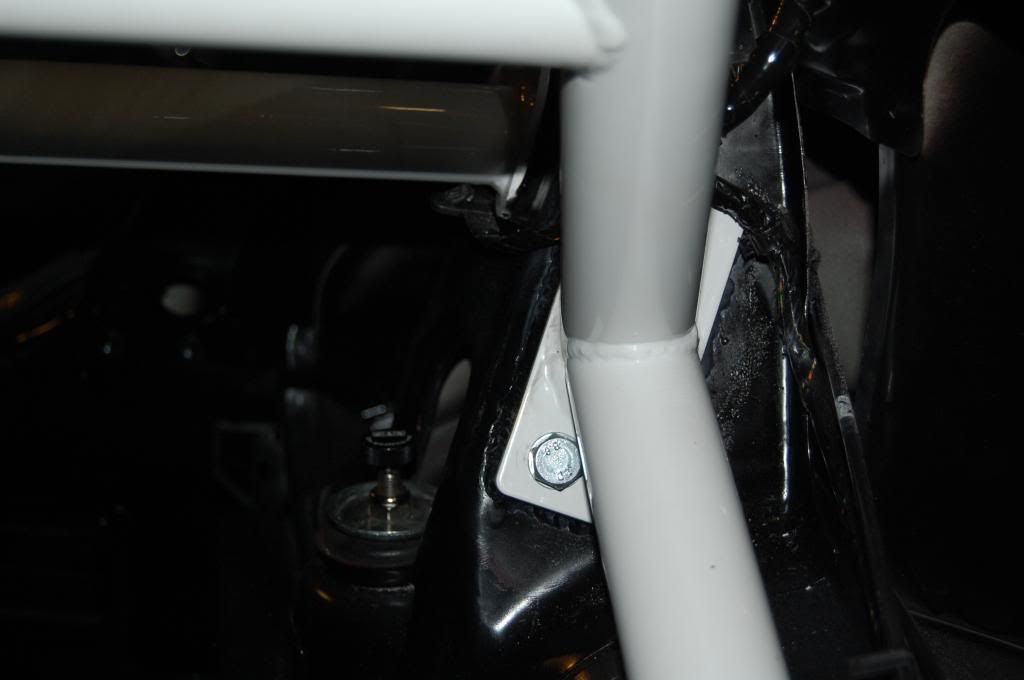
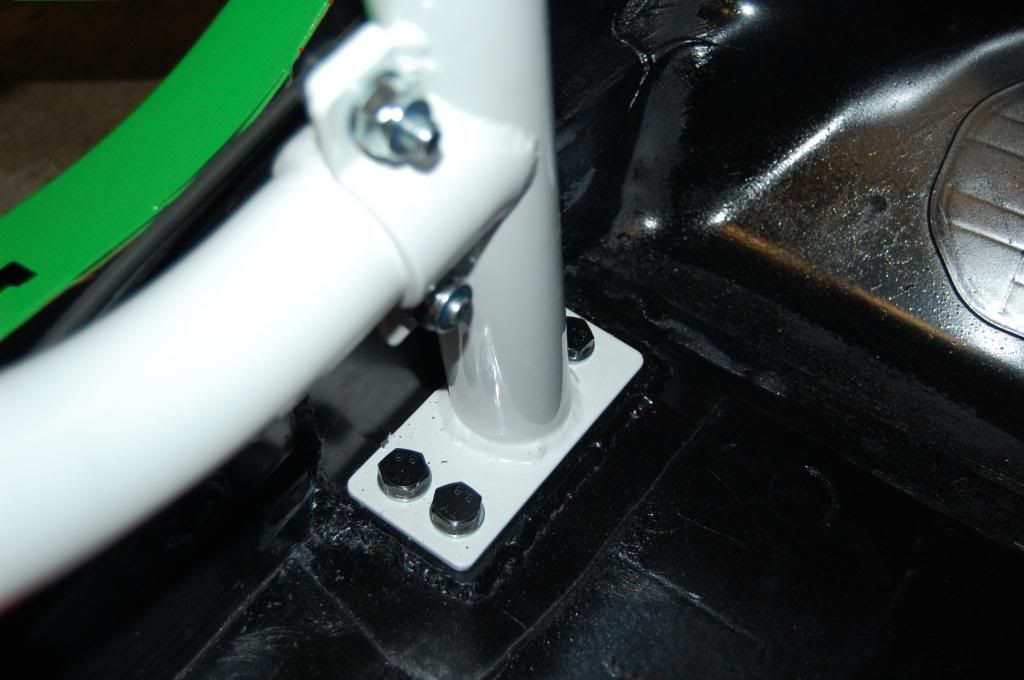
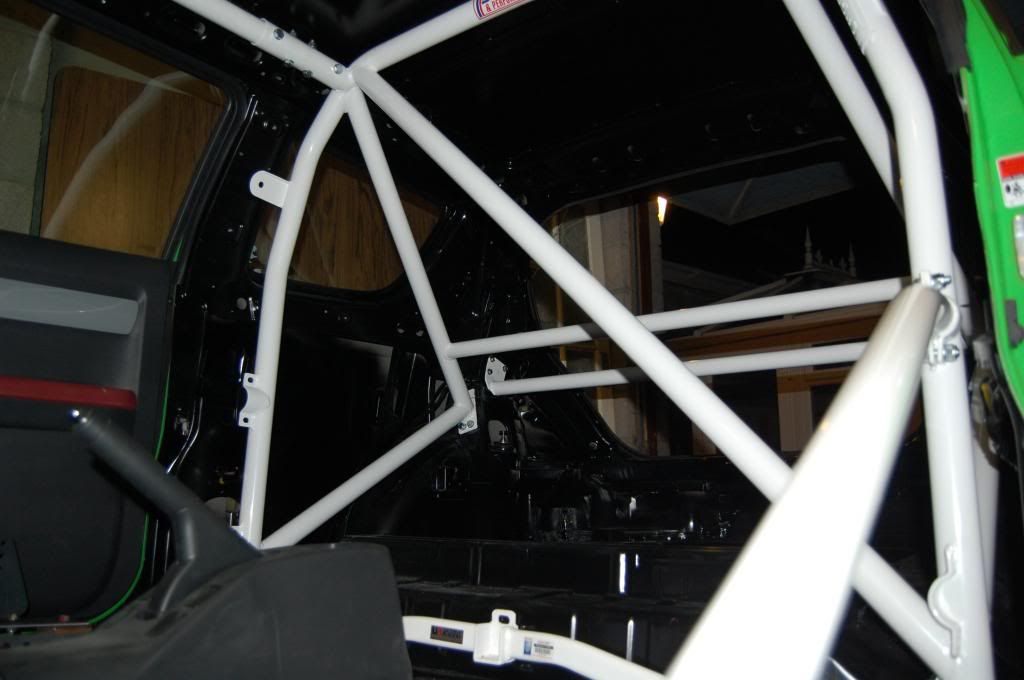
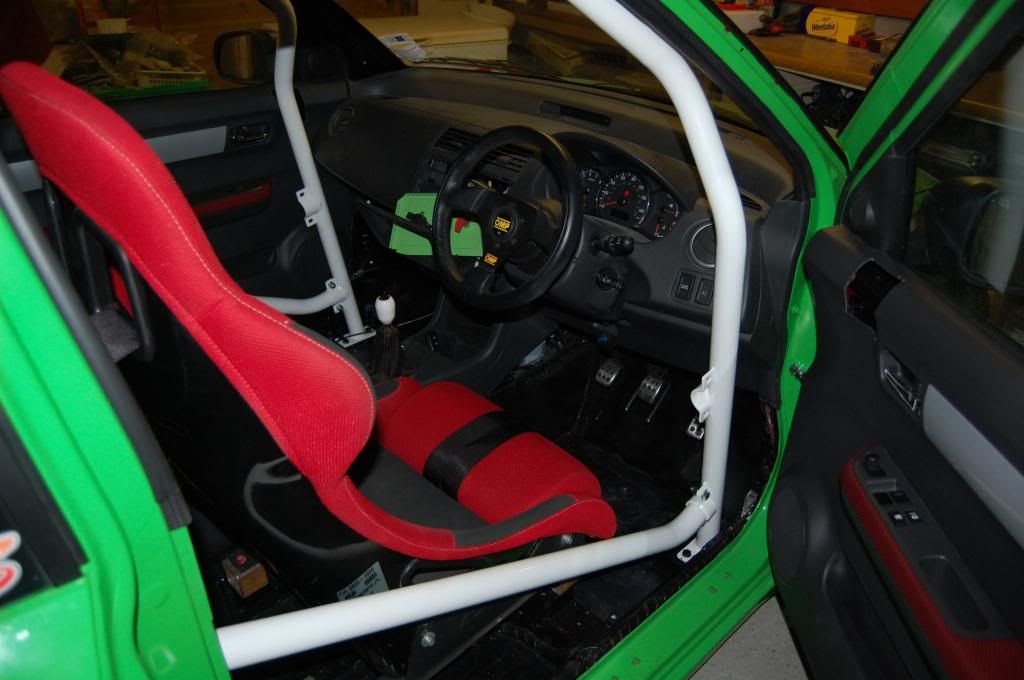
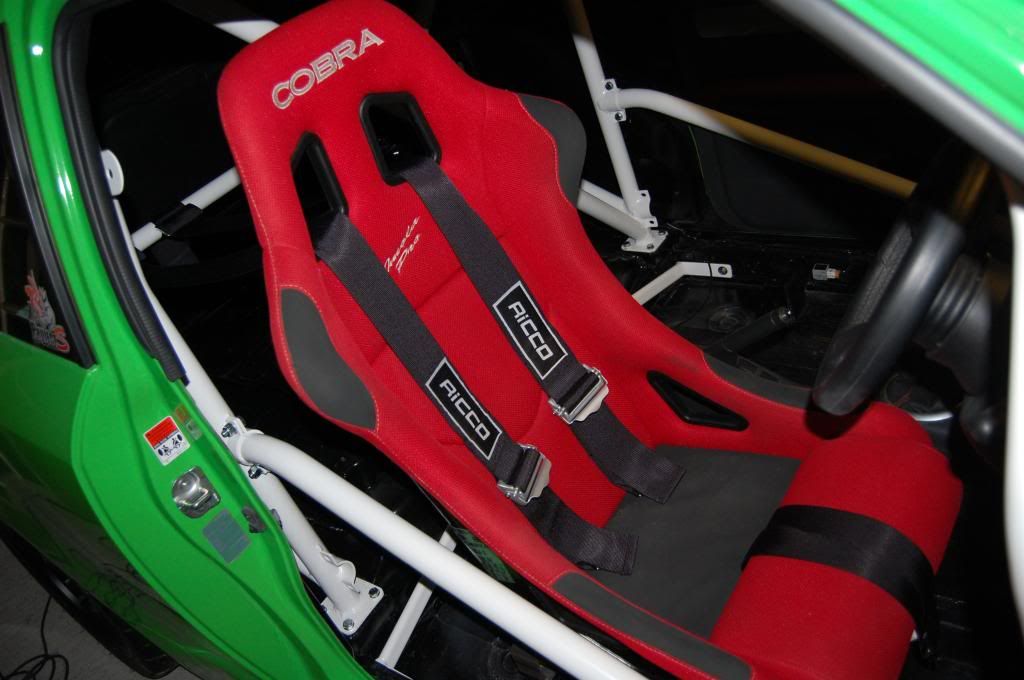
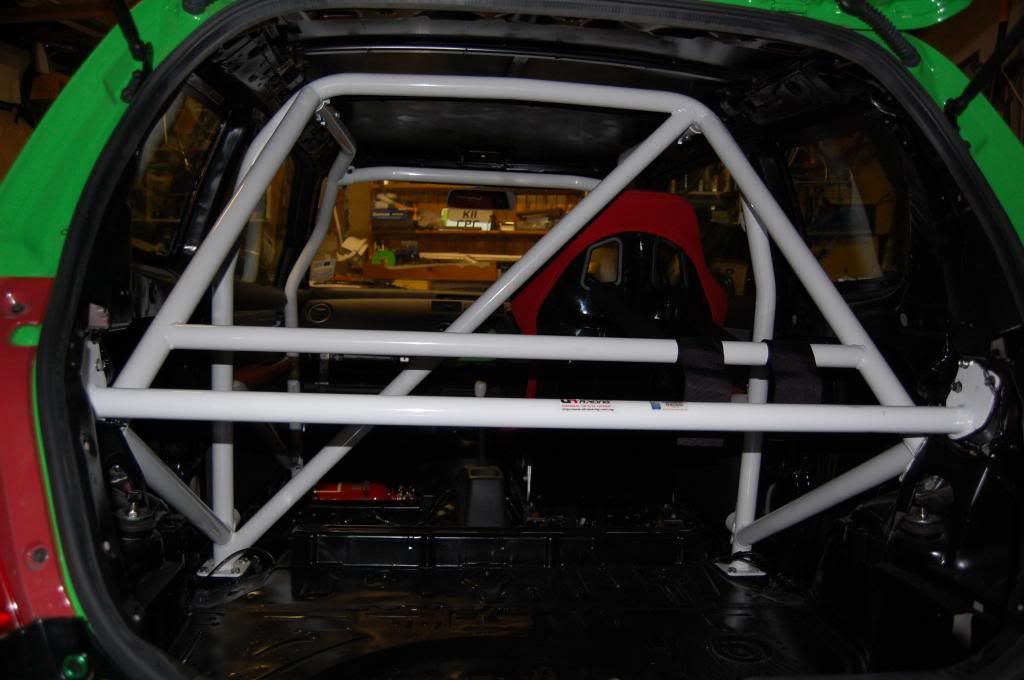
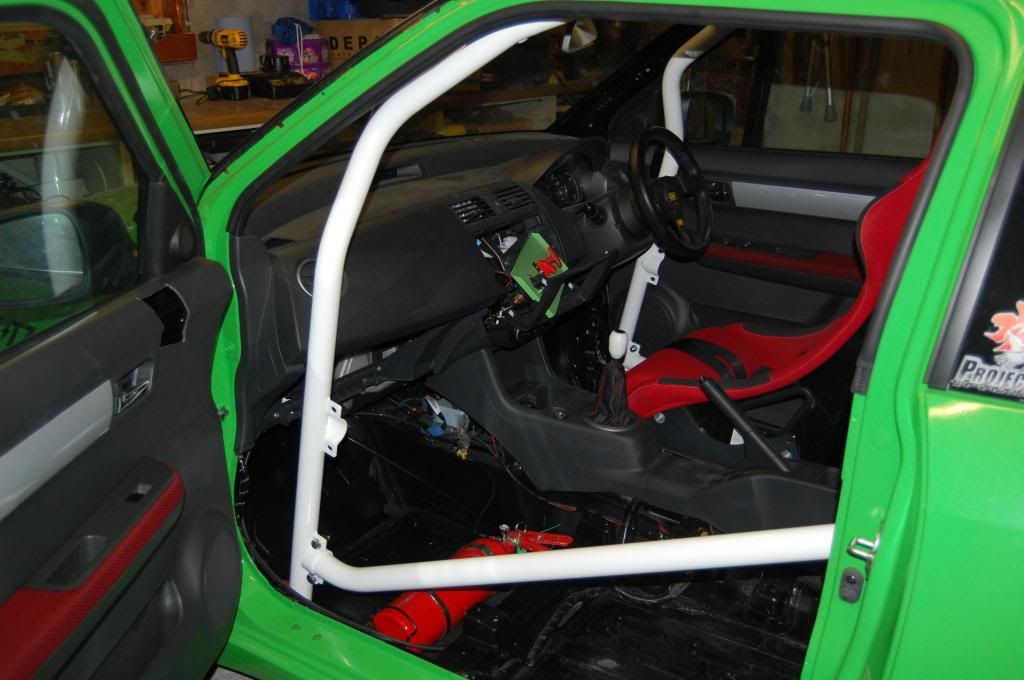
The cage turned up next unpainted for trial fit...


All seemed to go well so it was removed and shipped off for powder coating.
I next fitted some ridgid collars to the front subframe to make sure it does not move.


We then moved onto the rear ARB from Ultra. Although very good it would not fit with coilover height adjusters that sit in the bottom. We modified ours but now have another option from hard race that is much better. We might change at a later date...


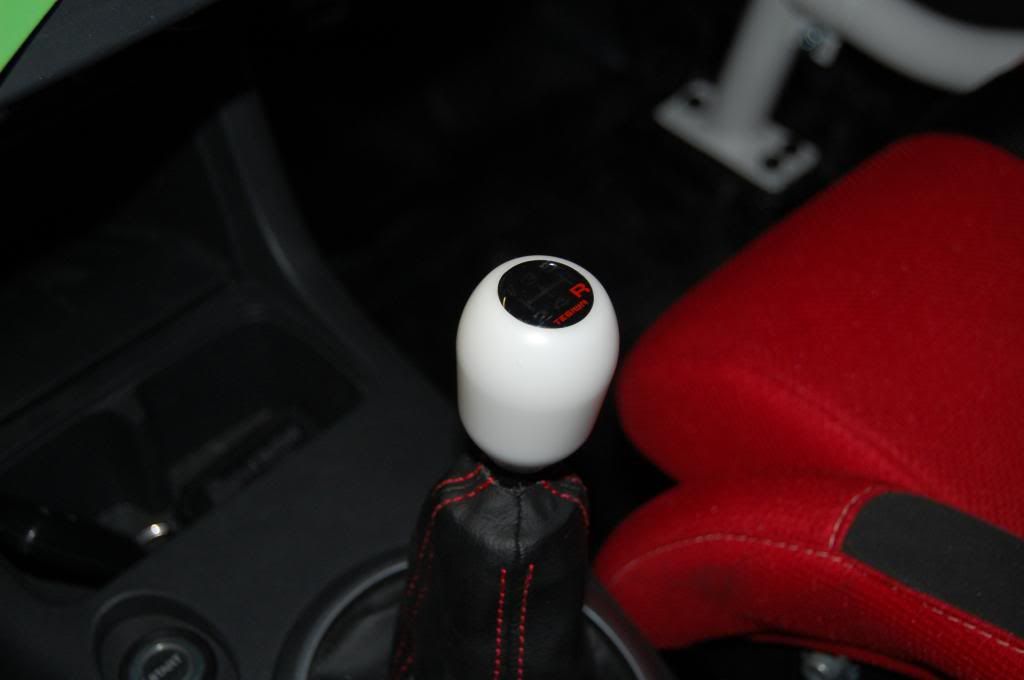
I love small steering wheels so I fitted a OMP wheel ;-)

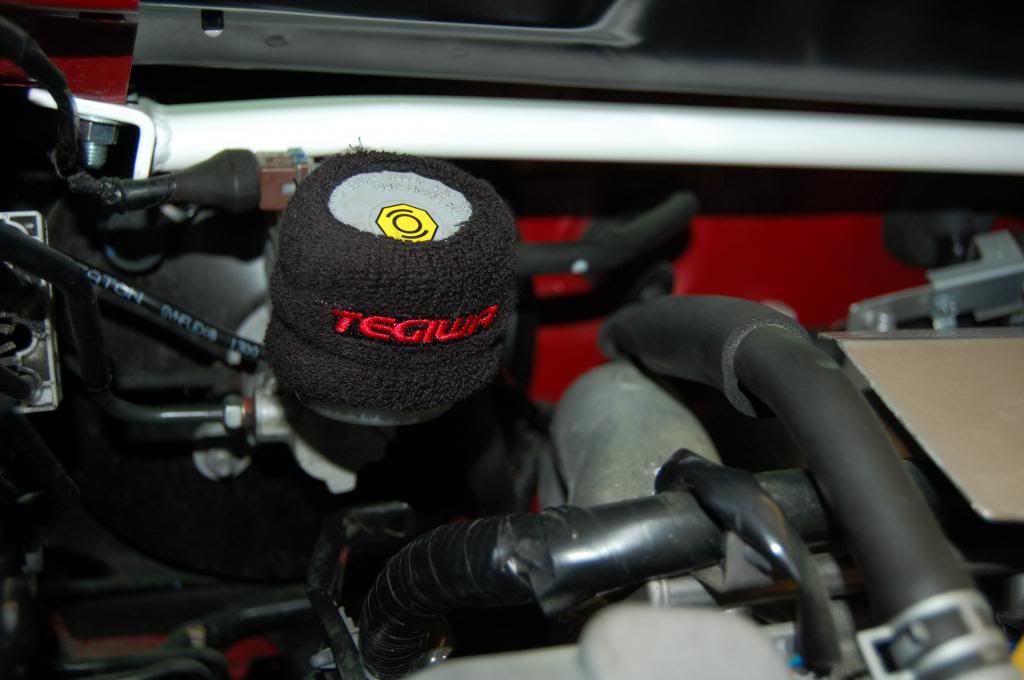
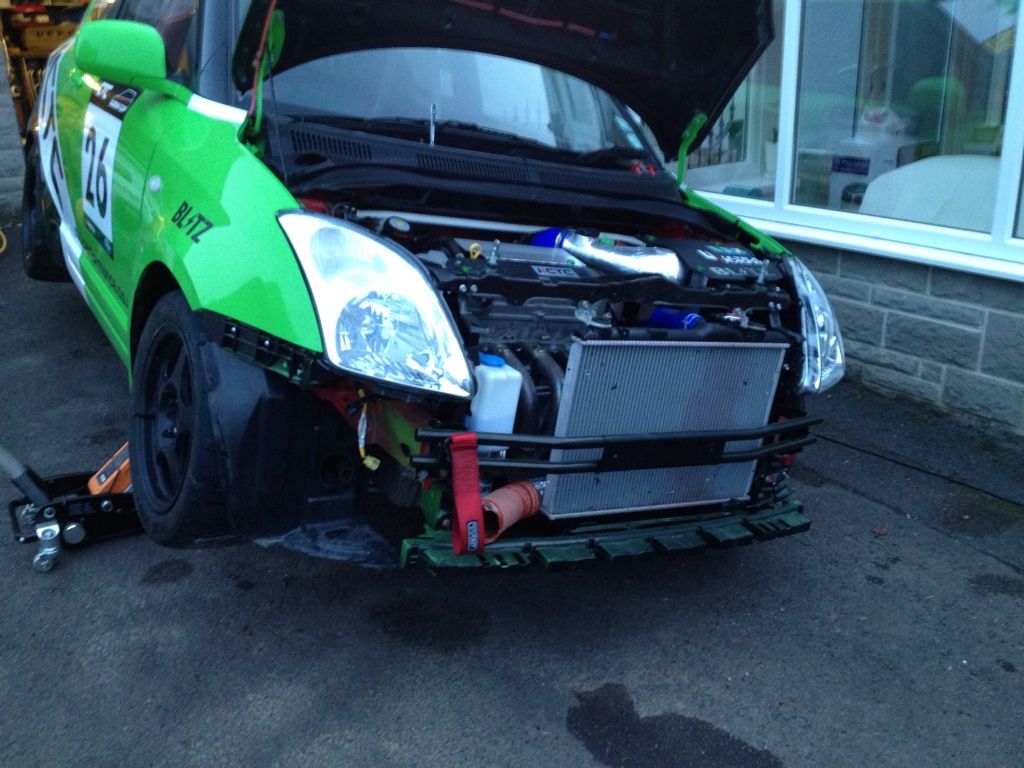
As the swift can suffer very hot under bonnet temps I had an intake kit made which relocates the battery to incorporate a box to house a large blitz filter.


Next up my Titanium Exhaust turned up.. it weighed in at 4.5kg instead of 18.5kg that the stock system weighed! Very happy with it!

http://www.youtube.com/watch?feature=playe...p;v=ssxsrposVGM
With that fitted we could now replace the manifold. We had it made with a 300cell cat which was not as free flowing as I would like however we wanted to keep the engine check light off...


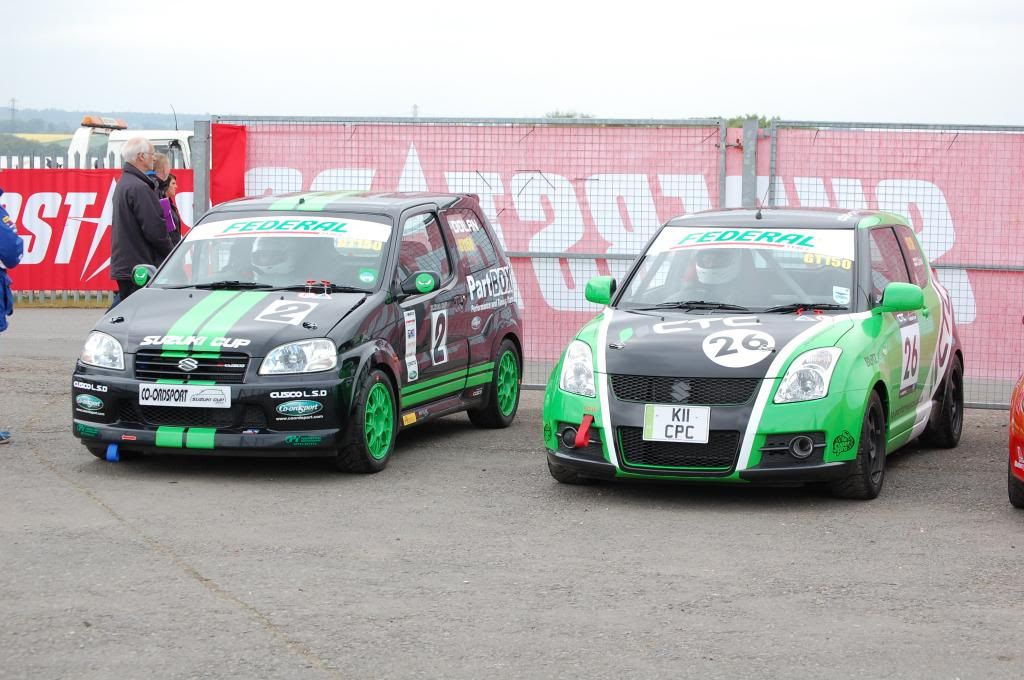
Tyres turned up so we could get her on the Rota's... We had to go for Fedderal FZ201's which were the regulation tyre for the Nippon Challenge

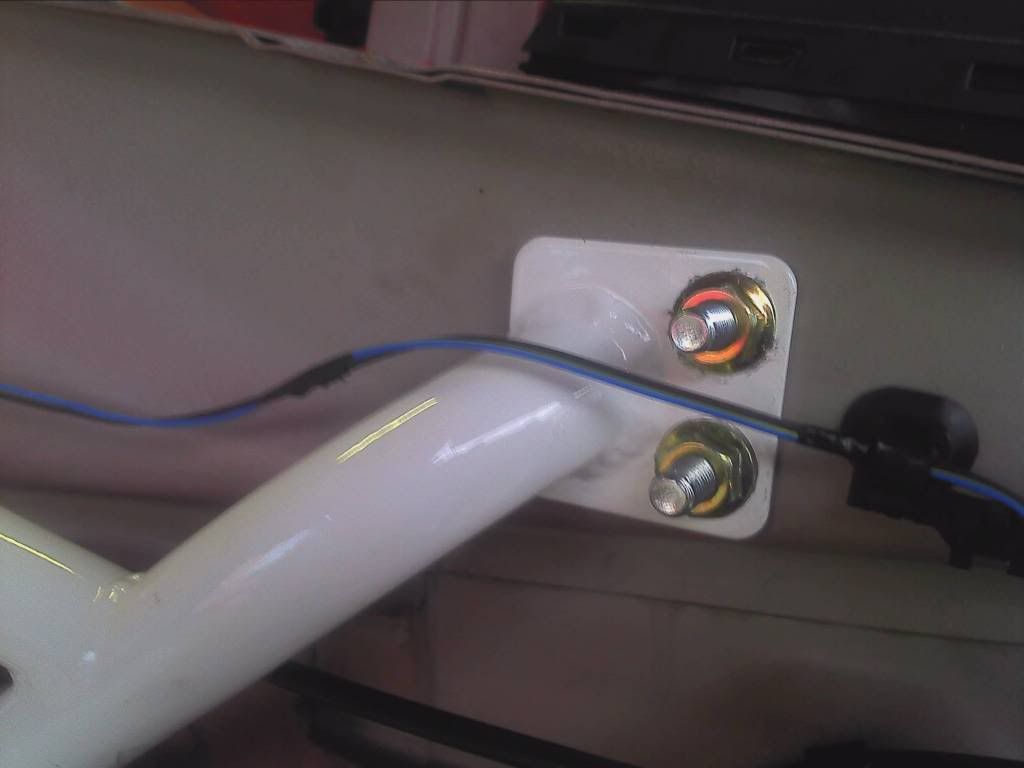
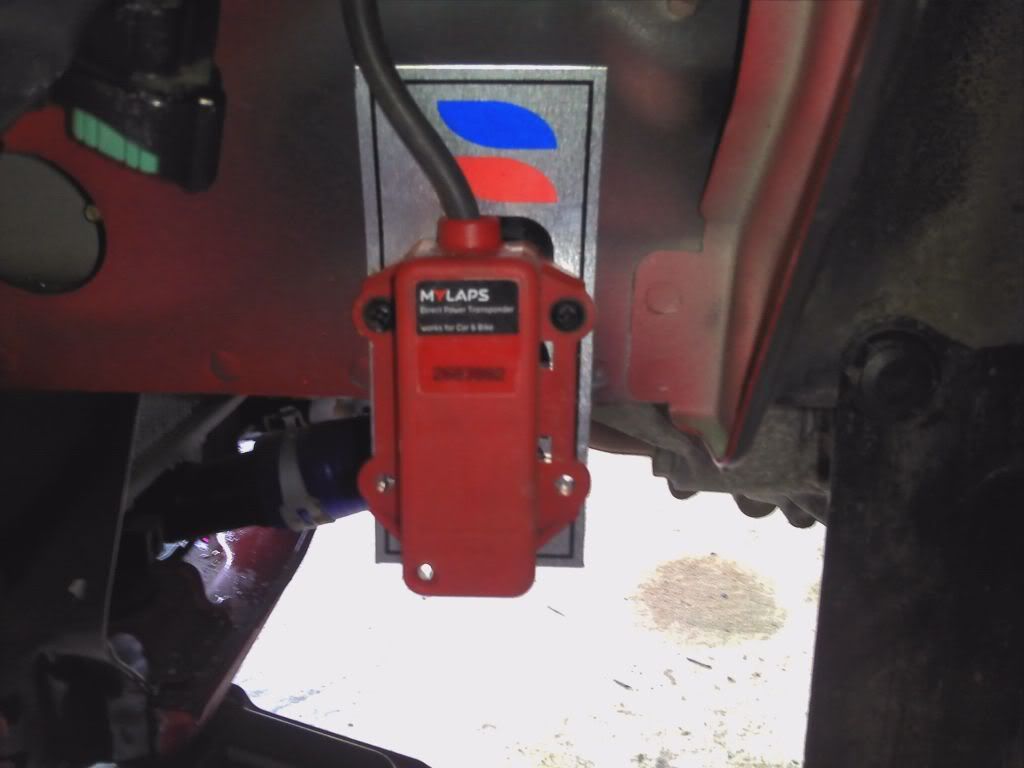
We then fitted the lap timer transponder under the front wing..
Anyway back to the build...
The Radiator and hoses arrived so they were promptly fitted..
Next up we had lots of Ultra Racing Braces to fit. We started out with the room brace fitted behind the driver and passenger seat inside.
Next up were the inner wing braces. These bolt onto the door hinges however we would recommend longer bolts although the original bolts will fit there is probably not enough thread on the bolts. You then have to drill holes at the front and bolt through. These will reduce movement in the front suspension mounts, just a shame no one will see them...
We then fitted the front upper brace. You have to remove the rain tray above and the wipers but this does not take long and only needs 9 bolts removed to gain access. Its a straight fit and there is clearance from the rain tray once re-fitted..
We went for the rear upper brace next. Now unlike other upper braces this fits slightly higher up. Ultra tell me this is because the brace fits onto a box section that welds onto the top mount of the suspension so will have the same effect without restricting boot space as much as the others. Well again it was very straight forward to fit and should stop movement between the rear suspension mounts.
We then fitted the rear under brace and the front lower brace
After using XYZ Coilovers and Brakes on our MR2 Turbo I decided to order the XYZ Race Spec Coilovers for the Swift
With the coilovers on route I cut out space so that you could adjust the dampening and rebound from the top mount
With all the bits done and out of the way I finished off fixing the bonnet in place and the headlights in properly as they were only fitted to test it all went into place correctly...
Made my self a nice little inlet manifold heat shield out of ally which later I will get copied in Carbon.
Next up I ordered these in 15" as the car would handle better and cost less for tyres rather than sticking with the standard 17" wheels.
The bumpers turned up so I test fitted them..
I then started on the cut off and fire extinguisher
We then fitted a double din fascia and the plan is to bolt in a metal panel to attach all the switches where the stereo used to go
Backwards step but I decided to paint the interior black so had to remove a lot but here it is done... Looks much better than faded pinky red... ish
With this lot done we did a lot of prep work ready to paint her....
With the car painted I could get cracking with wet/dry and G3... Also to show how well the finish is compared to most self paint jobs... took hours to mask but worth the time.. You might notice the roof is still red but the plan was always to wrap the roof it so I saved the paint...
Next my coilovers arrived so we could get them fitted..
As you can see even on the axle stands she would be sitting low!!
We then did the fronts
With the suspension on we fitted the Ultra Uprated ARB to the subframe
We then added the CTC Rear Camber Shims to give another -2deg camber and tow out the rear to reduce understeer
The Rota's arrived ;-) Thanks to Ben...
Next up got my graphics planned out..
After discussions with the guys at Rent4Ring I needed to baffle the sump to prevent oil starvation on 4th cylinder..
Added two plated inside and then bolted the top back on and returned the sump... Simple but effective and cheaper than R's or Monster Sport parts...
On to the brakes we fitted Hel braided lines which consists of 6 lines on the swift
The cage turned up next unpainted for trial fit...
All seemed to go well so it was removed and shipped off for powder coating.
I next fitted some ridgid collars to the front subframe to make sure it does not move.
We then moved onto the rear ARB from Ultra. Although very good it would not fit with coilover height adjusters that sit in the bottom. We modified ours but now have another option from hard race that is much better. We might change at a later date...
I love small steering wheels so I fitted a OMP wheel ;-)
As the swift can suffer very hot under bonnet temps I had an intake kit made which relocates the battery to incorporate a box to house a large blitz filter.
Next up my Titanium Exhaust turned up.. it weighed in at 4.5kg instead of 18.5kg that the stock system weighed! Very happy with it!
http://www.youtube.com/watch?feature=playe...p;v=ssxsrposVGM
With that fitted we could now replace the manifold. We had it made with a 300cell cat which was not as free flowing as I would like however we wanted to keep the engine check light off...
Tyres turned up so we could get her on the Rota's... We had to go for Fedderal FZ201's which were the regulation tyre for the Nippon Challenge
We then fitted the lap timer transponder under the front wing..
Edited by CTC P on Monday 4th February 08:09


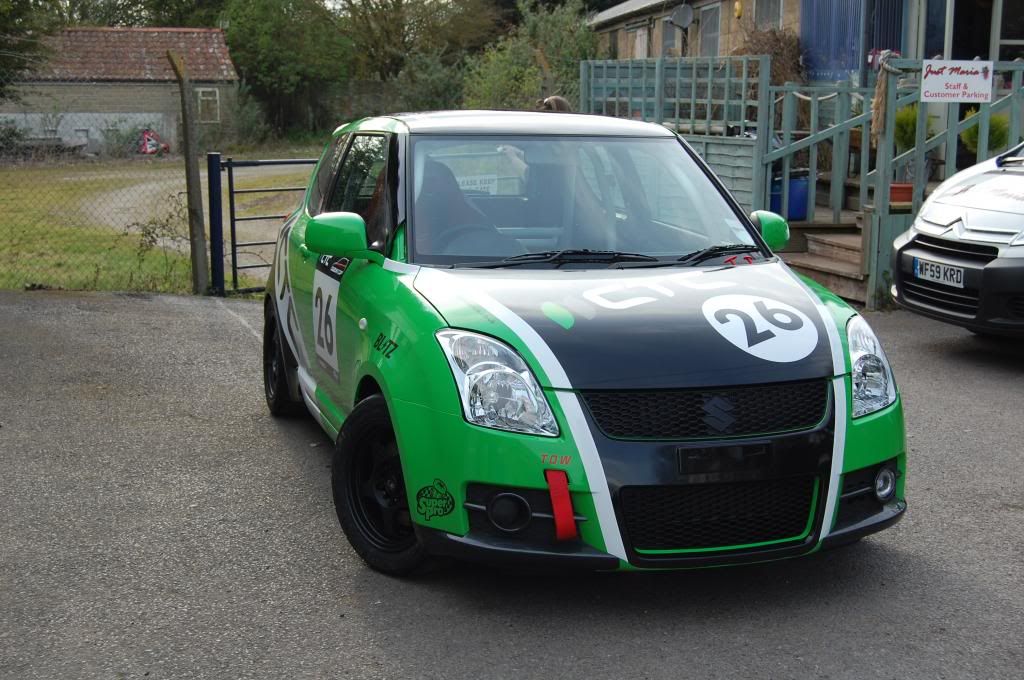
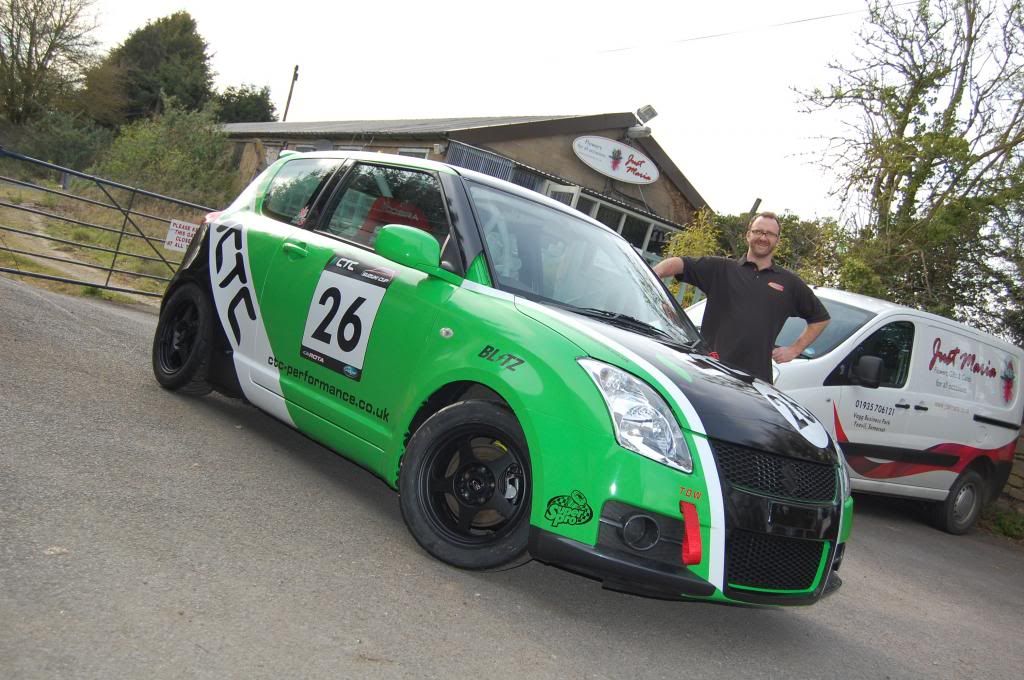
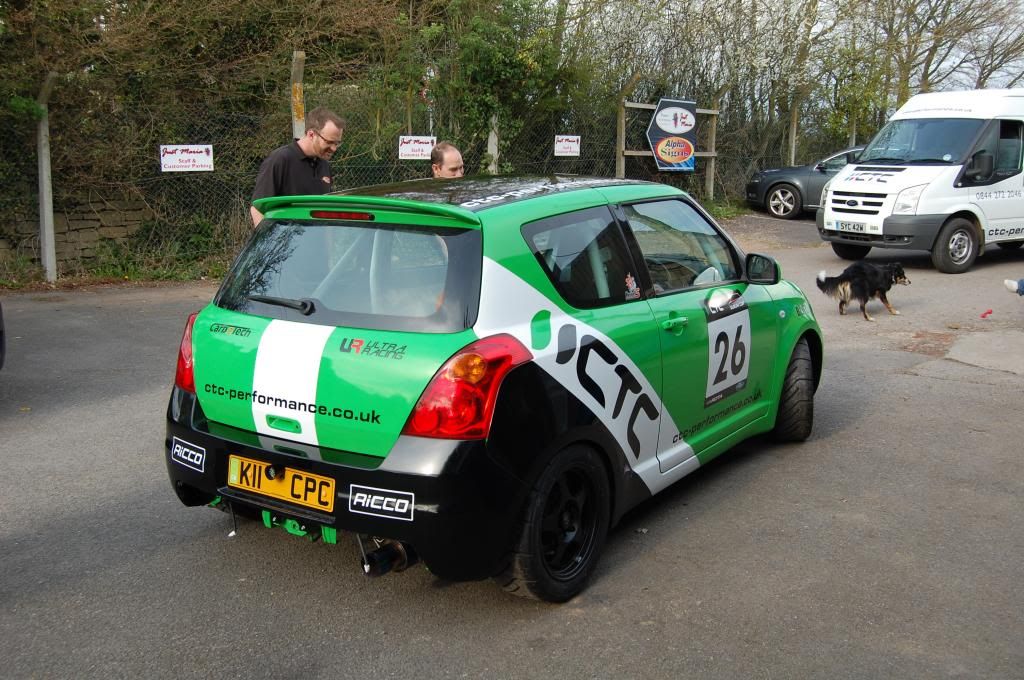
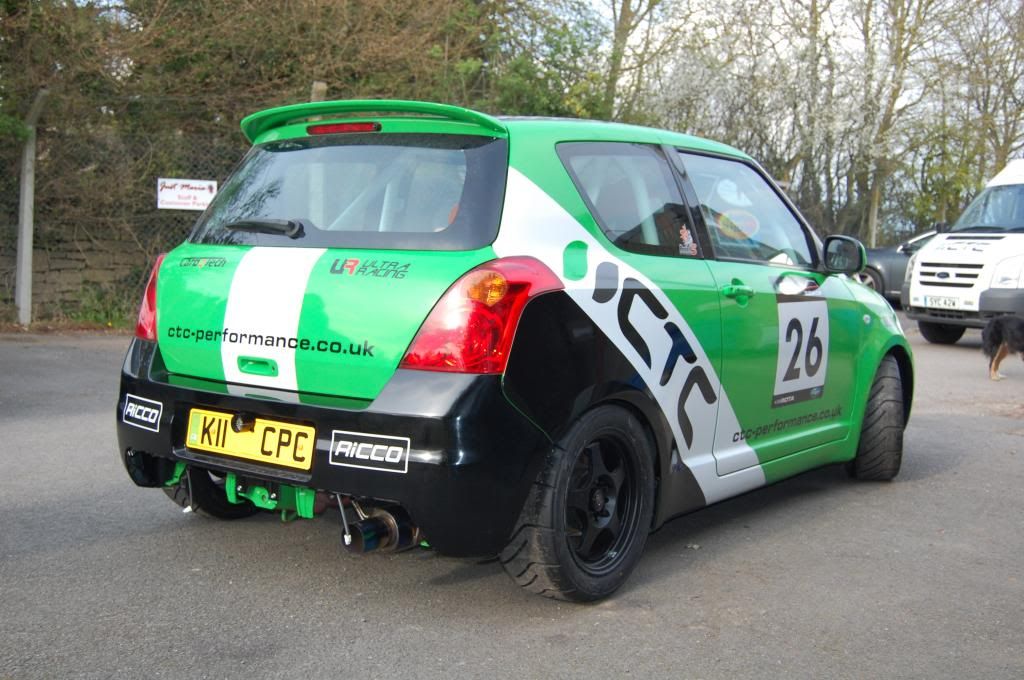
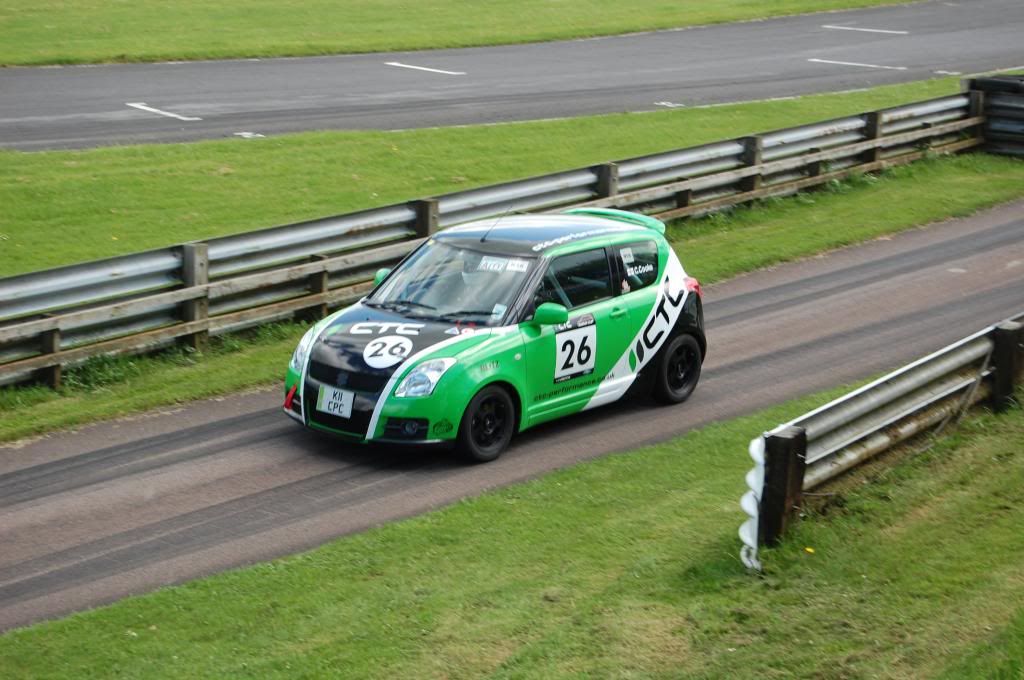
Next we took her off to the Graphics company to be stickered up.. this bit was really exciting as I designed the graphics and so many people said it would not look right... How wrong they were... I was so pleased how it came out!
A proud Olly at Alpha Signs in Yeovil who did the stickers ;-)
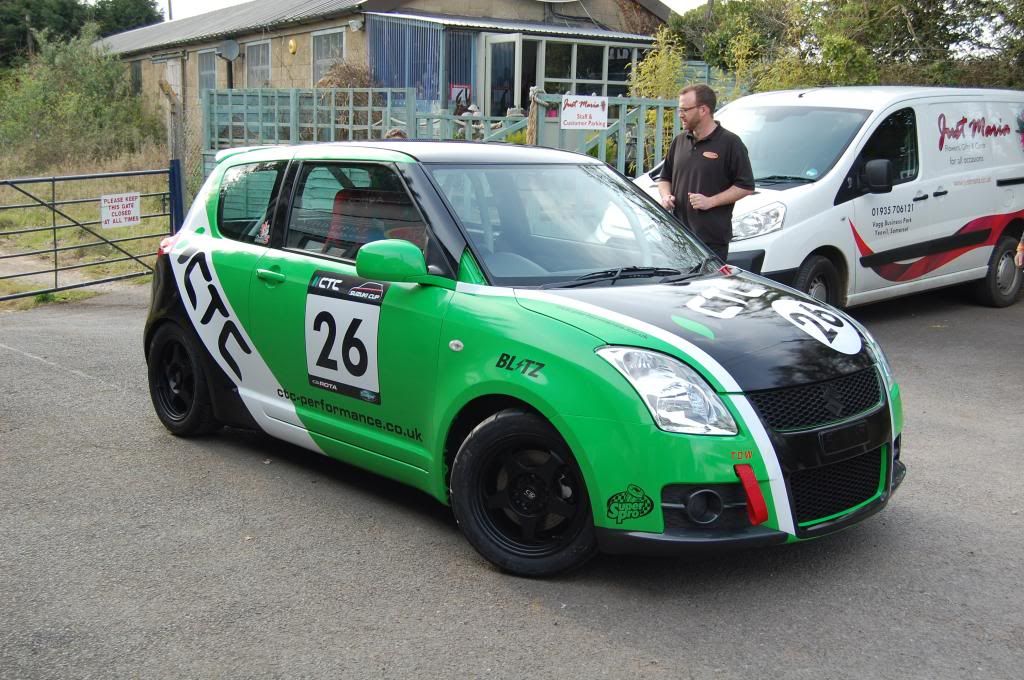
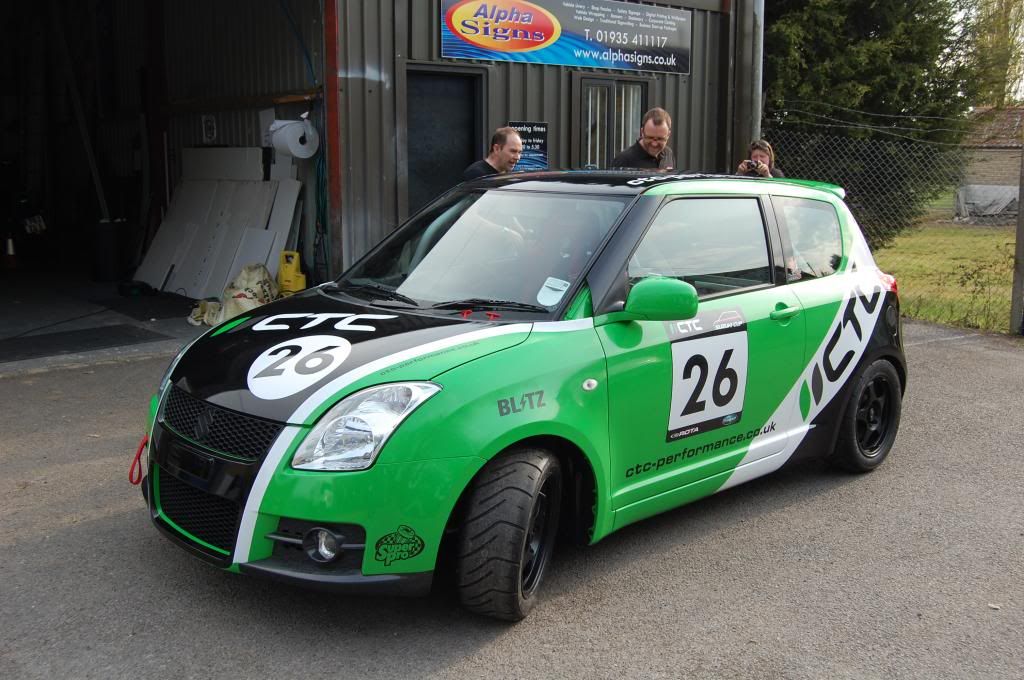
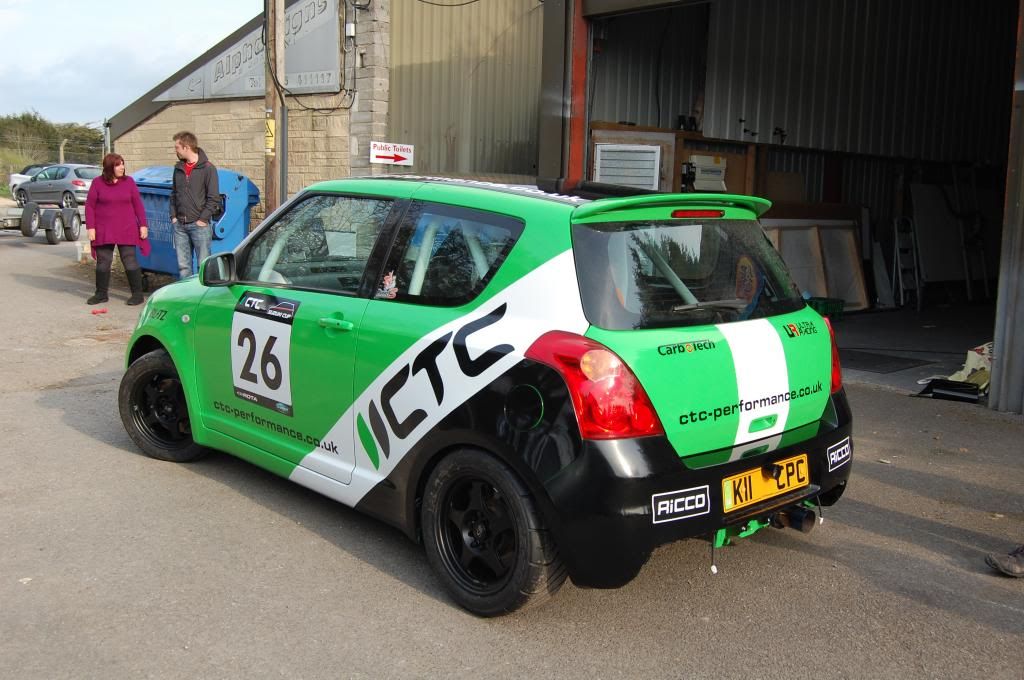
A proud Olly at Alpha Signs in Yeovil who did the stickers ;-)
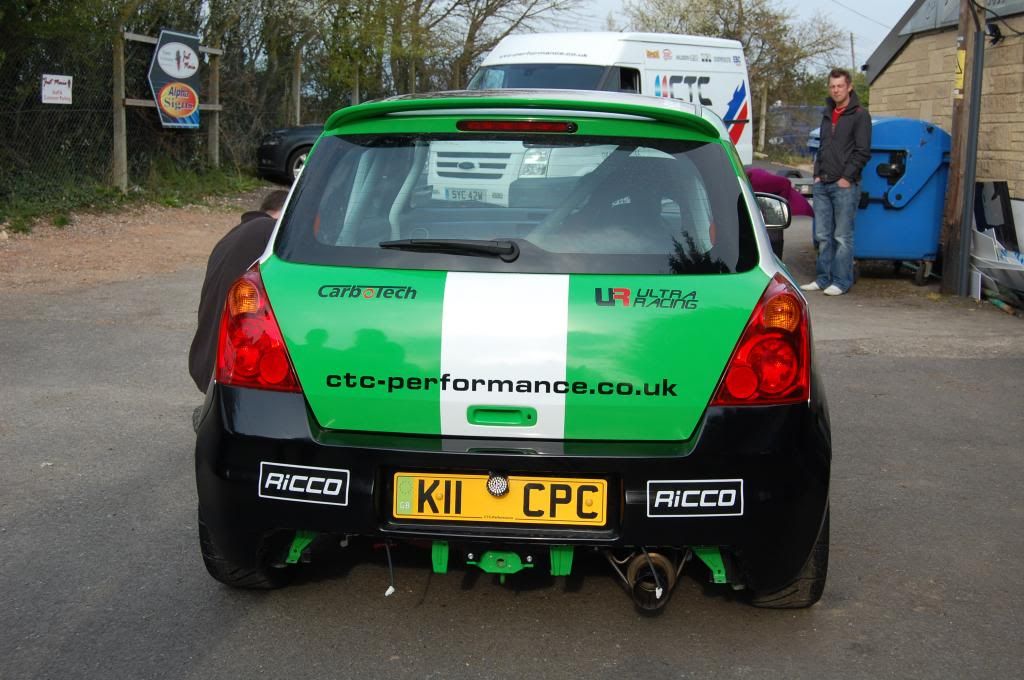
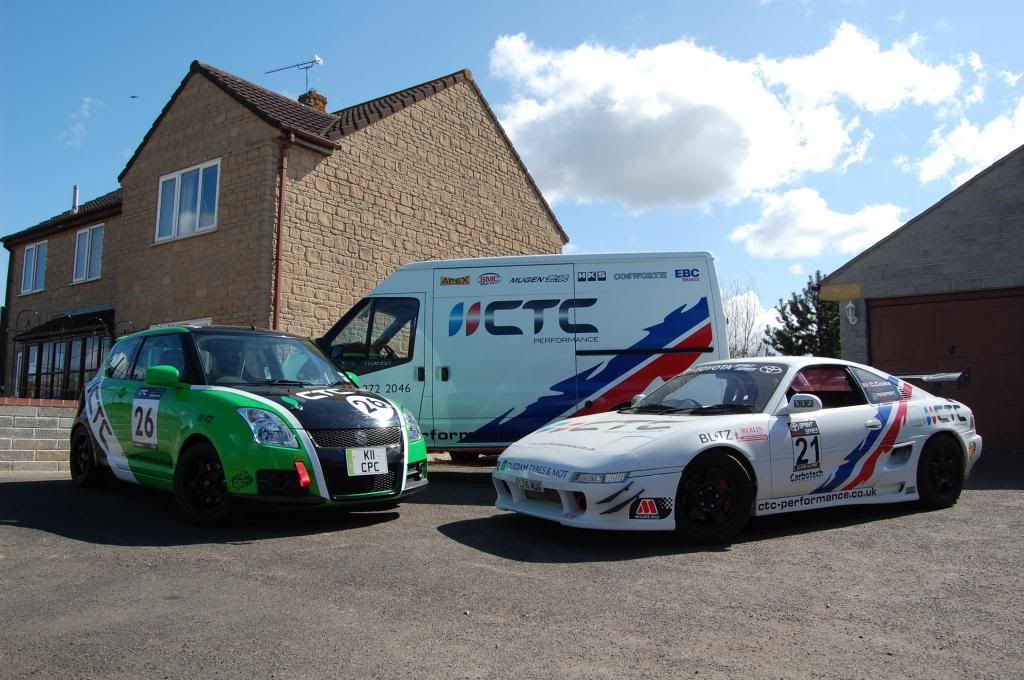
So pleased with her we took some more pictures once I got the car home..... Does make you realise how tall the swift is against the MR2!!
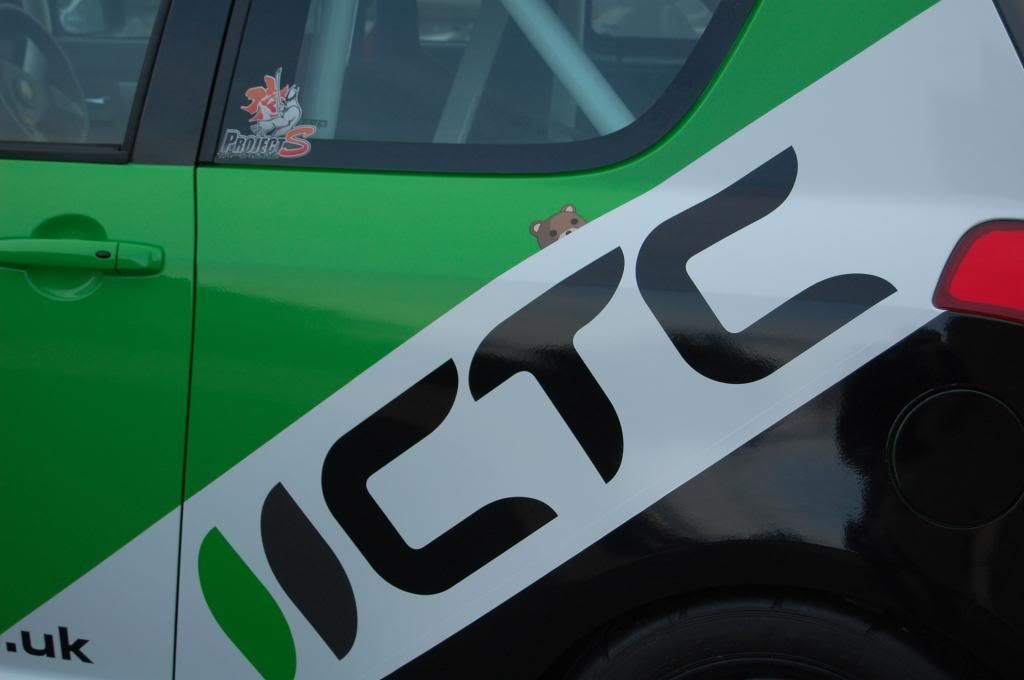
oh and I added some cheeky Peedo Bear Stickers when I got back ;-)

More to follow on the build and our progress in the Nippon in 2012 inc vids of us on track etc....
oh and I added some cheeky Peedo Bear Stickers when I got back ;-)
More to follow on the build and our progress in the Nippon in 2012 inc vids of us on track etc....
We took her on the dyno after wiring up the Emanage and she made 145bhp up from 122bhp so not a bad gain for a filter and exhaust....
We took her for a blast to see what the exhaust sounded like....
http://www.youtube.com/watch?v=ri3zpjGBKOk
http://www.youtube.com/watch?v=N01W69KwWPo
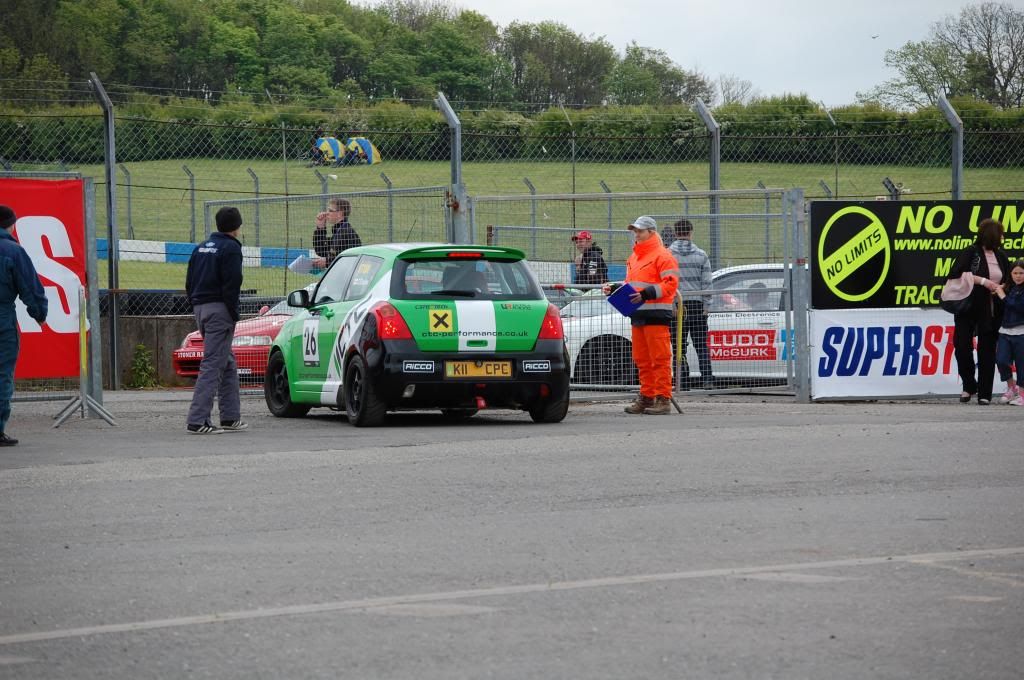
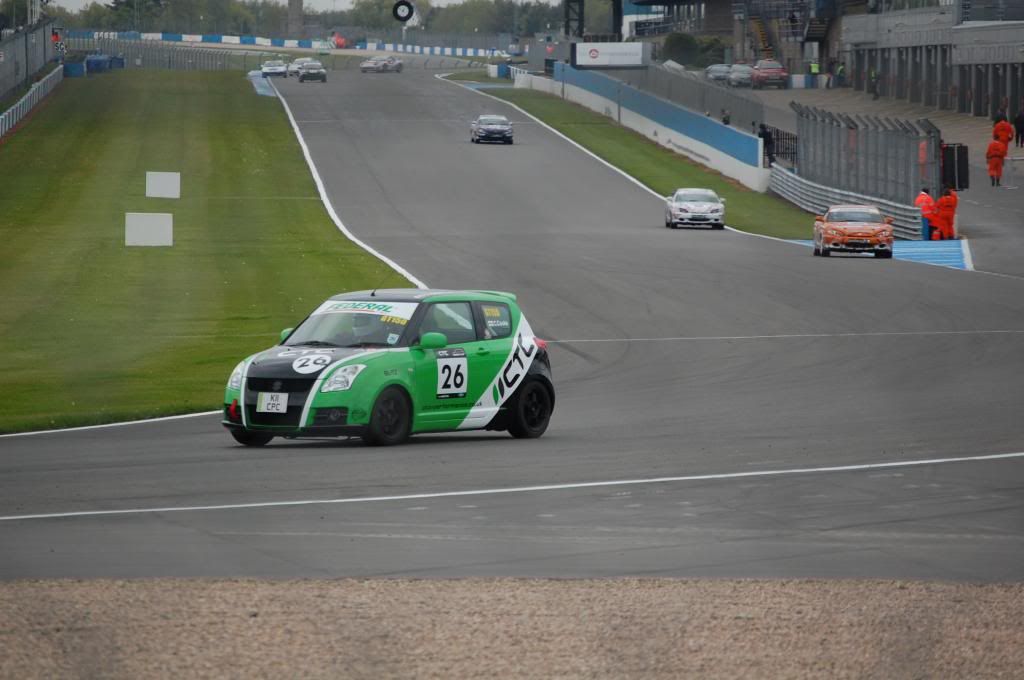
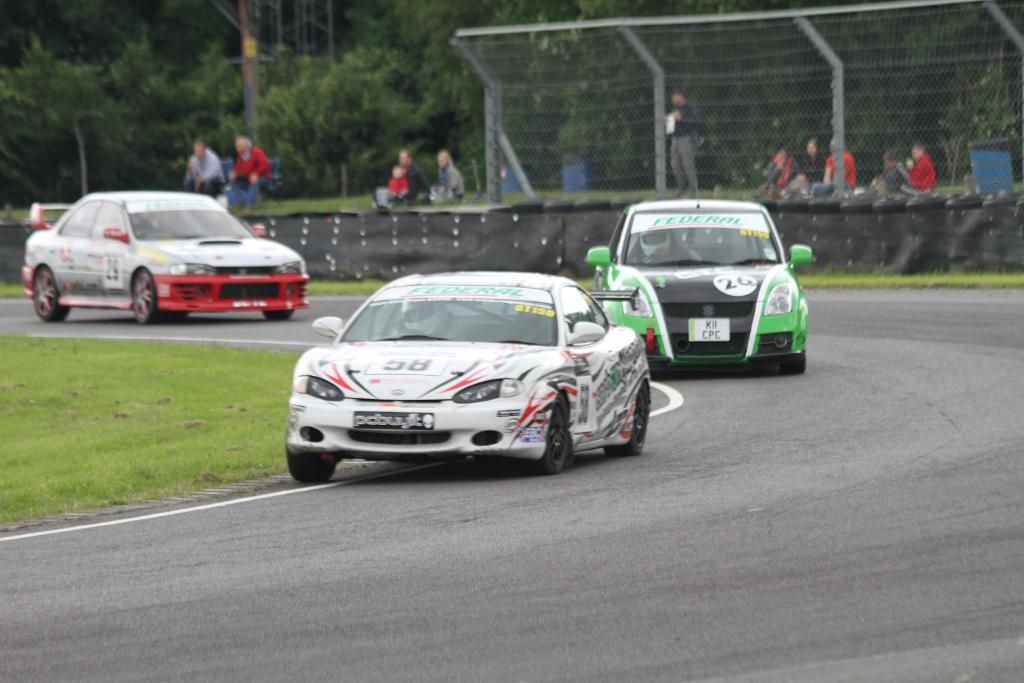
Having only done a few miles we took her on track at japfest... you might recognise the first car on the vid for a split second.. its a face book vid so might not work if not friends with me...
hhttp://static.ak.fbcdn.net/rsrc.php/v1/y2/r/5l8_EVv_jyW.swf?v=222586901177875&ev=0
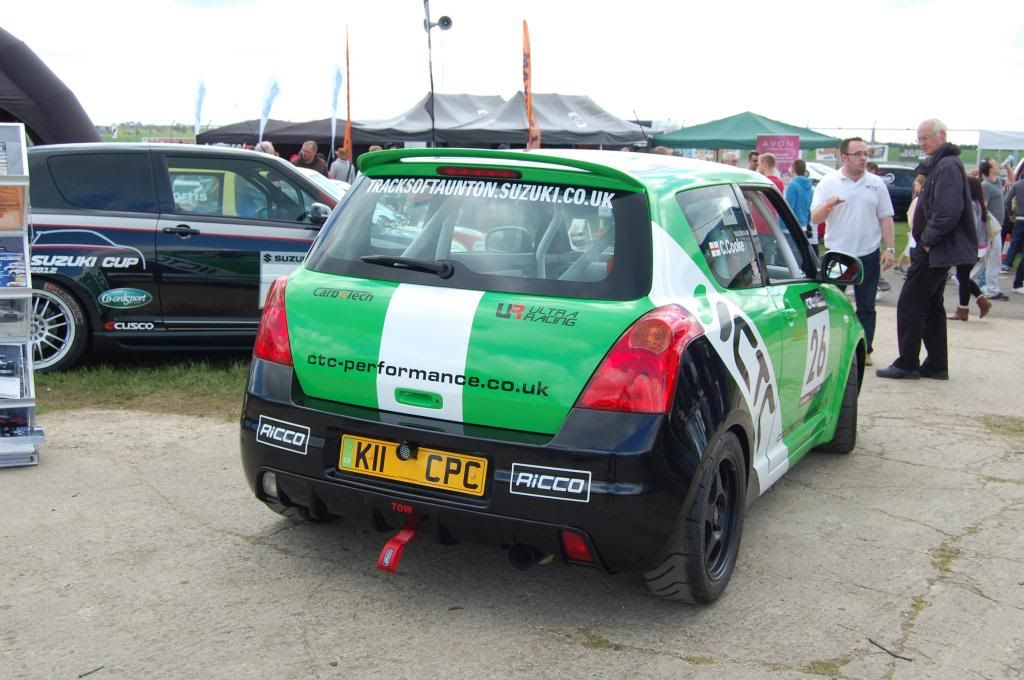
Here are a couple of pics at Japfest

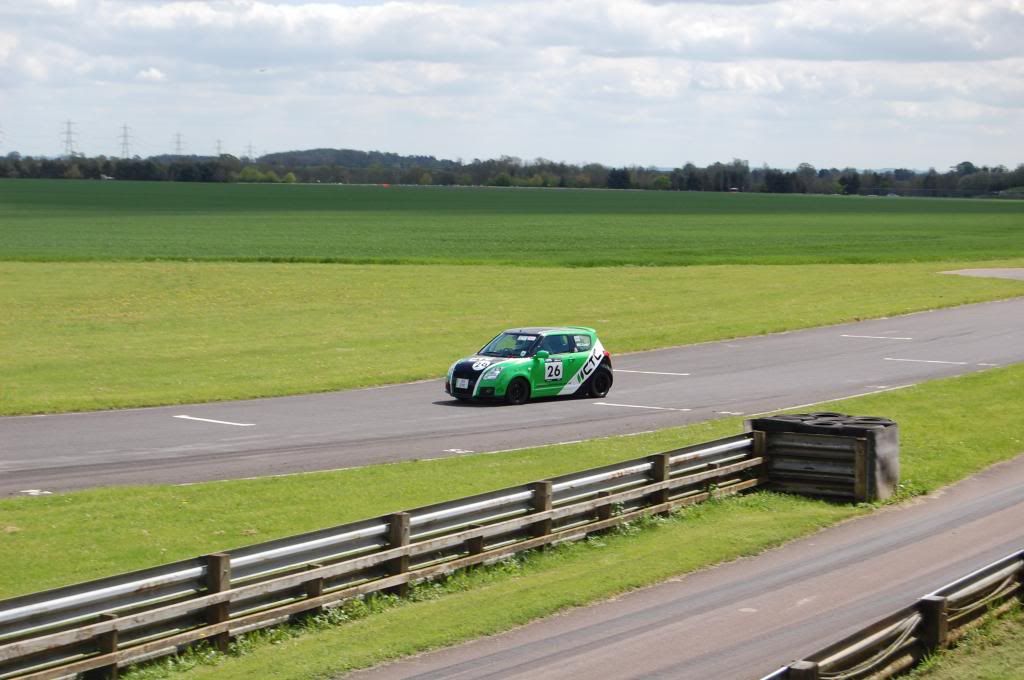
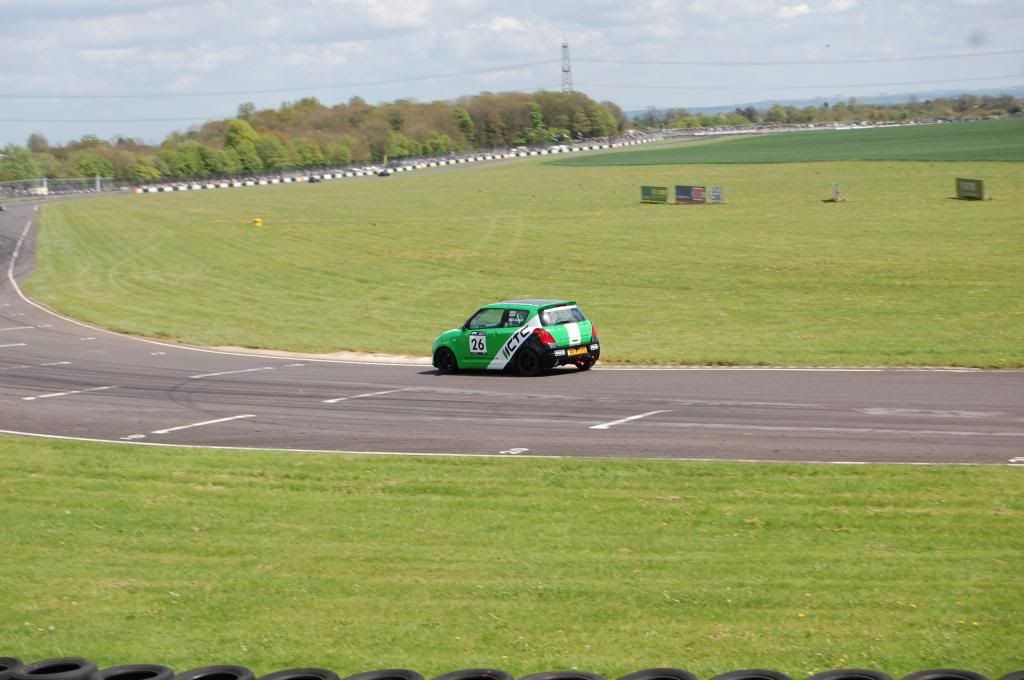
With all of 15 mins on track we entered our first ever race in the Nippon at Donny! Was very very scarry indeed but we pushed her as hard as we could and she did well!


With the first race out of the way we decided to strip out more weight...

We took her for a blast to see what the exhaust sounded like....
http://www.youtube.com/watch?v=ri3zpjGBKOk
http://www.youtube.com/watch?v=N01W69KwWPo
Having only done a few miles we took her on track at japfest... you might recognise the first car on the vid for a split second.. its a face book vid so might not work if not friends with me...
hhttp://static.ak.fbcdn.net/rsrc.php/v1/y2/r/5l8_EVv_jyW.swf?v=222586901177875&ev=0
Here are a couple of pics at Japfest
With all of 15 mins on track we entered our first ever race in the Nippon at Donny! Was very very scarry indeed but we pushed her as hard as we could and she did well!
With the first race out of the way we decided to strip out more weight...
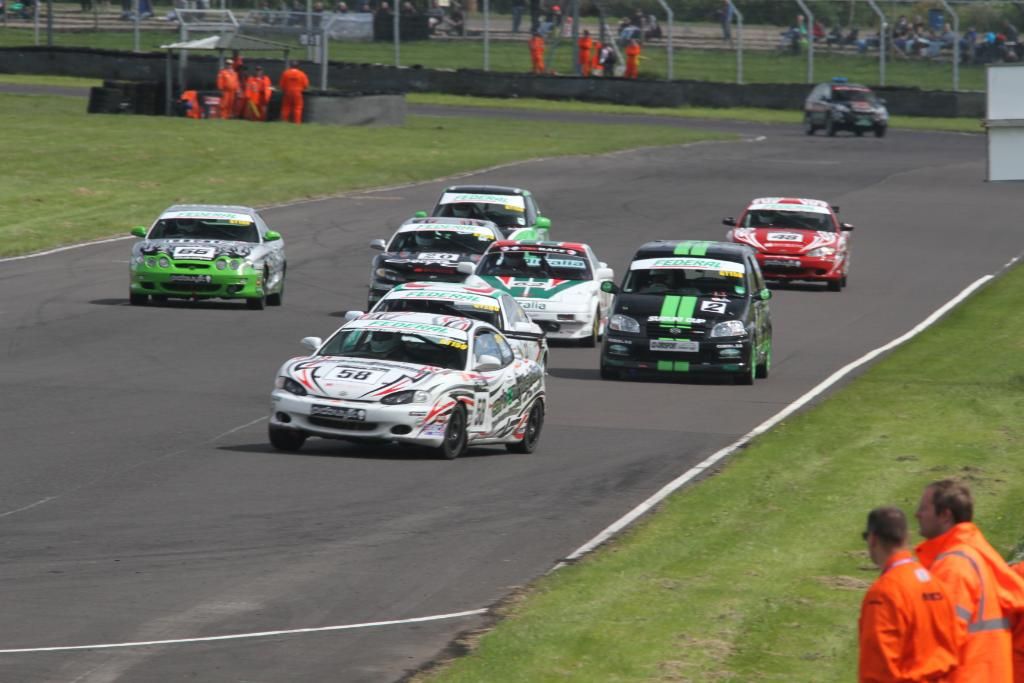
Next up we took the car to Combe and we got our first two trophies!! 3rd in class race 1 and 2nd in class race 2. I did not have a camera however a following Scoobie caught a couple of my laps. She only got passed because I stupidly moved over to let a Teg that span on the first lap who is a front runner past but it lost me momentum through the corner so her 300bhp vs my 145bhp meant she got past but I stayed just behind her until the end of the race with about 0.2 secs a lap in it!!
http://www.youtube.com/watch?v=kvaY21RFOKc
Here are a couple of pics

http://www.youtube.com/watch?v=kvaY21RFOKc
Here are a couple of pics
As we are a little bit too heavy in our class we wanted to reduce the cars weight. I bought some Lexan sheet to make the front windows to start. I will do the rears at a later date. The first thing to do was remove the original glass mark and cut the lexan to shape..

We then removed the window runners, electric motors and cut out any extra metal not needed..


We then fitted the lexan window and bolted in place

Removed the film and added a window slider for the driver.
We then removed the window runners, electric motors and cut out any extra metal not needed..
We then fitted the lexan window and bolted in place
Removed the film and added a window slider for the driver.
Next up was Silverstone..... I qualified on the grid 2nd in Class with a 300bhp 350Z in front of me..... I got destroyed off the line and then trying to make up time I attempted a late brake however the MX5 turned in and it ended in disaster on the first lap!
Here are some pics:
Before the race


During Race

After Race


Oh and a cheeky video this time from in the car capturing the whole thing..... try to watch it all had a bit of fun with the video lol
http://www.youtube.com/watch?v=WKVStb5xGQI
Fear not the car was fixed see next post!
Here are some pics:
Before the race
During Race
After Race
Oh and a cheeky video this time from in the car capturing the whole thing..... try to watch it all had a bit of fun with the video lol
http://www.youtube.com/watch?v=WKVStb5xGQI
Fear not the car was fixed see next post!


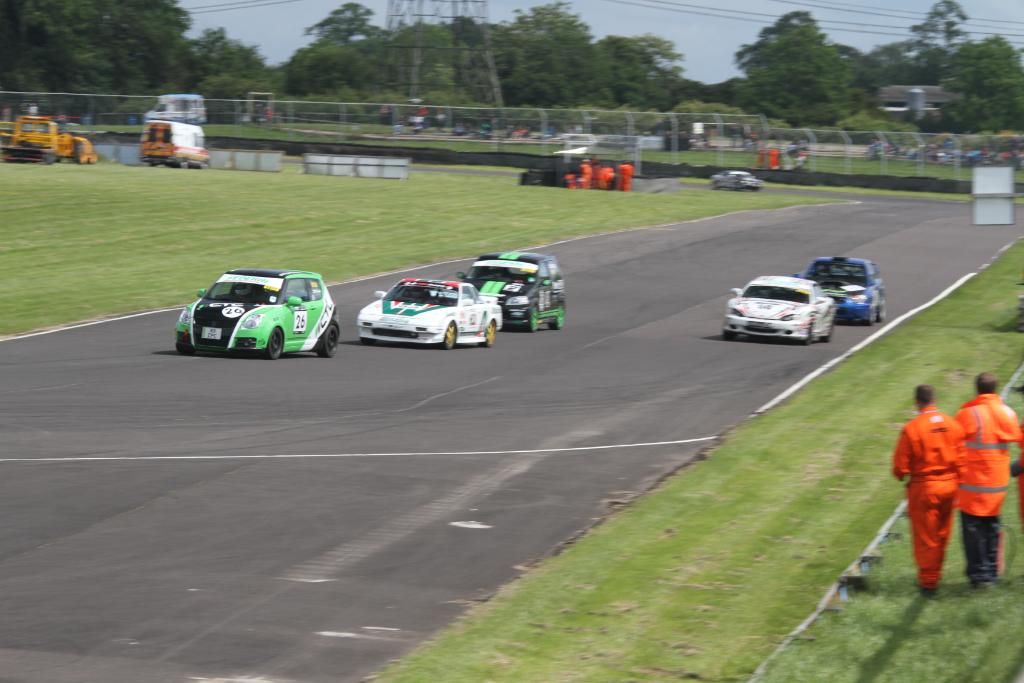
Made it out for Cadwell and after Silverstone I drove like a granny.... I just wanted to have fun seen as I had big plans for my savings and did not want to blow it all rebuilding her again!! Once past the Hyundai I took almost 5 secs a lap out of him hence catching the next one so quick...
Here is a vid from race 2 from our car and below that from the rear of the Hyundai I was following from almost all the race...
http://www.youtube.com/watch?v=sHi-jYmUvoU
http://www.youtube.com/watch?v=RaDjzYJB9Tg
Here are a few pics


Here is a vid from race 2 from our car and below that from the rear of the Hyundai I was following from almost all the race...
http://www.youtube.com/watch?v=sHi-jYmUvoU
http://www.youtube.com/watch?v=RaDjzYJB9Tg
Here are a few pics
OK so for this year its going to be a long road but an epic one non the less......
So first up we stripped down the car, removed the gearbox and the engine...
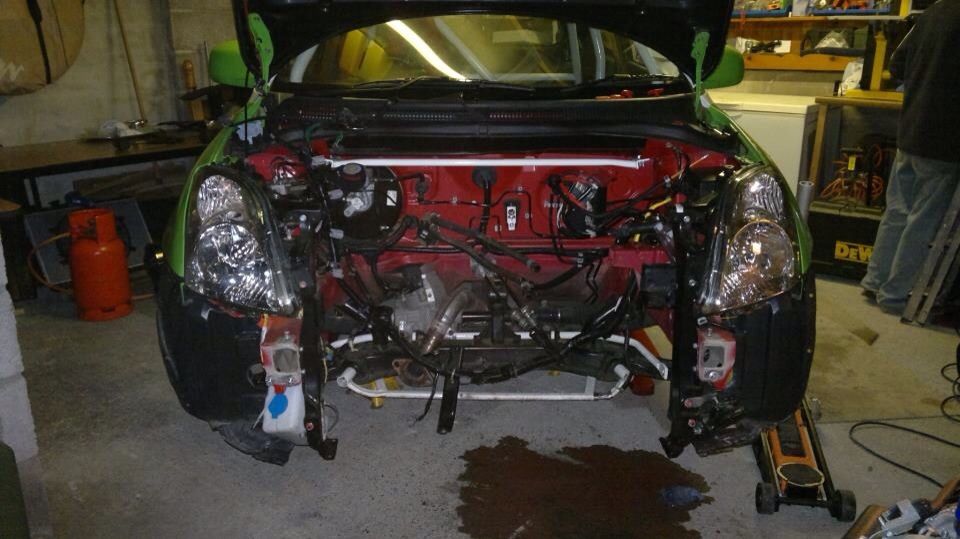
Bumper off..
Front end completely removed as I bolted it all together rather than welding it so I can work on it with ease and repair quickly track side
Gearbox out first.....
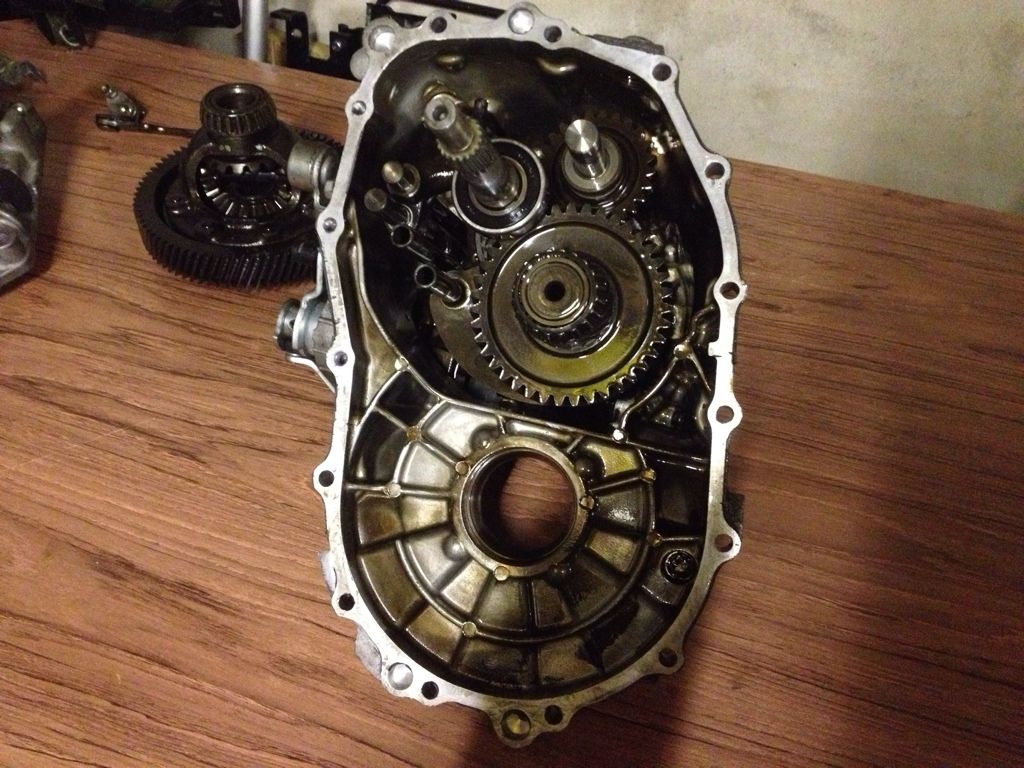
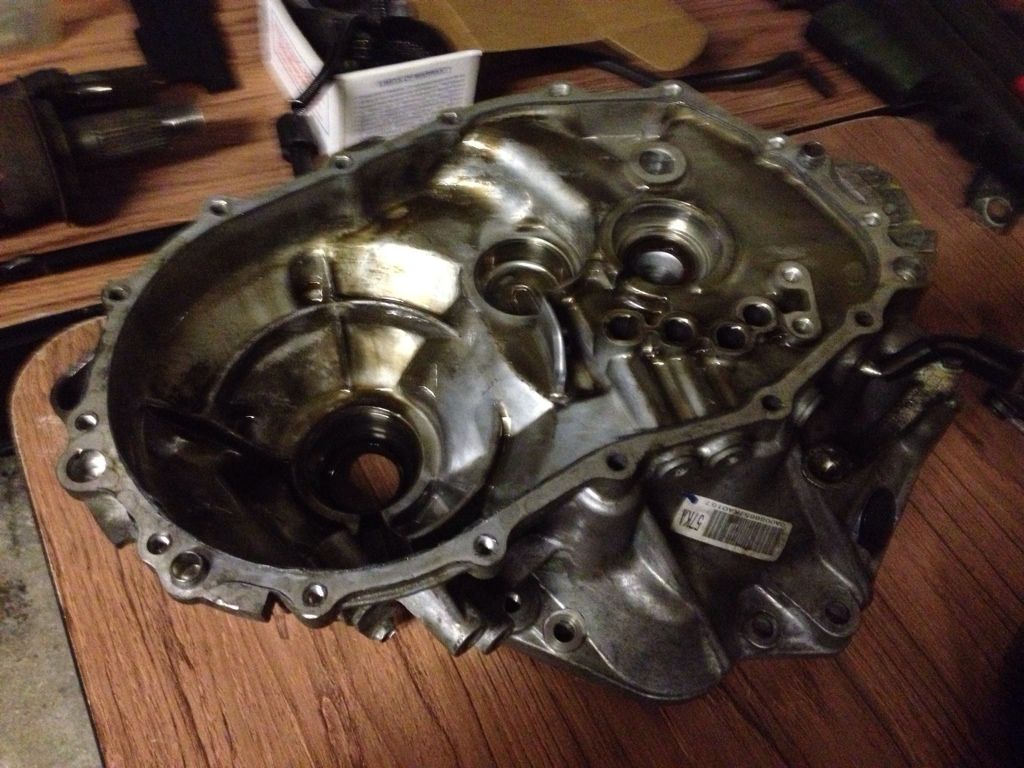
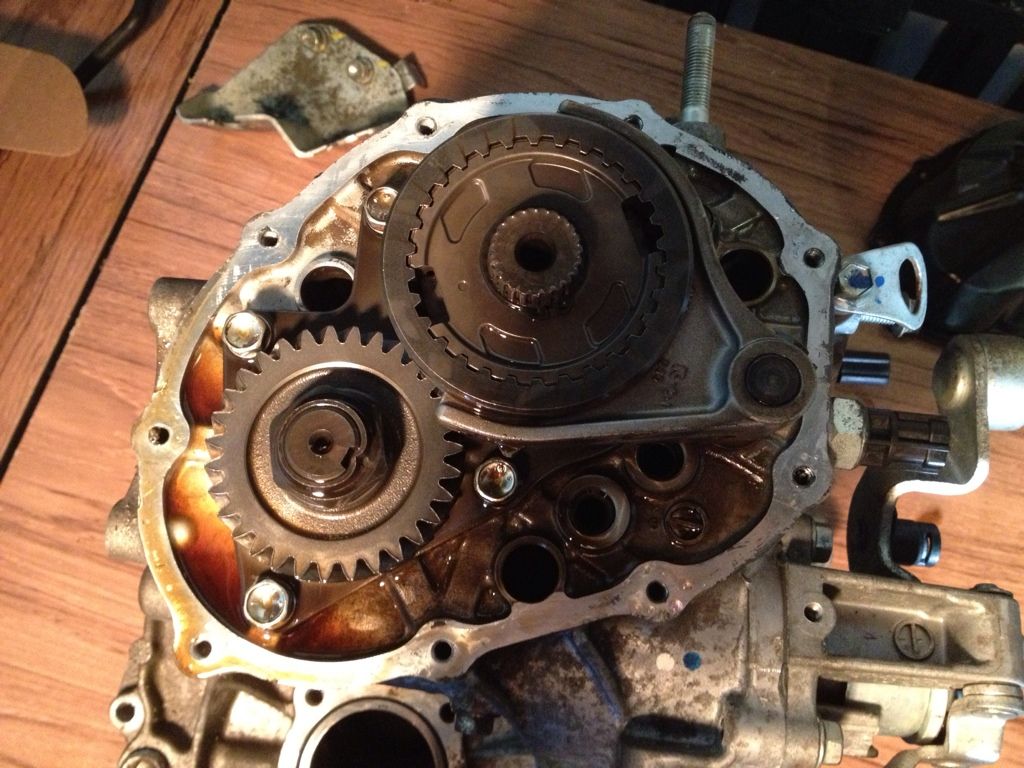
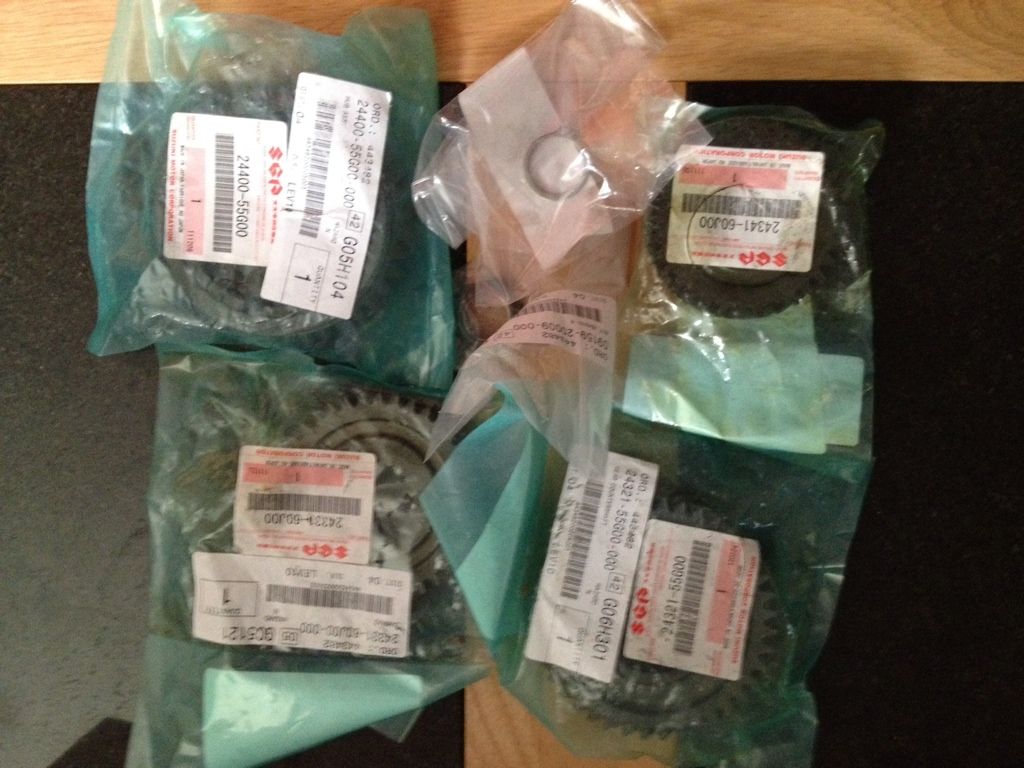
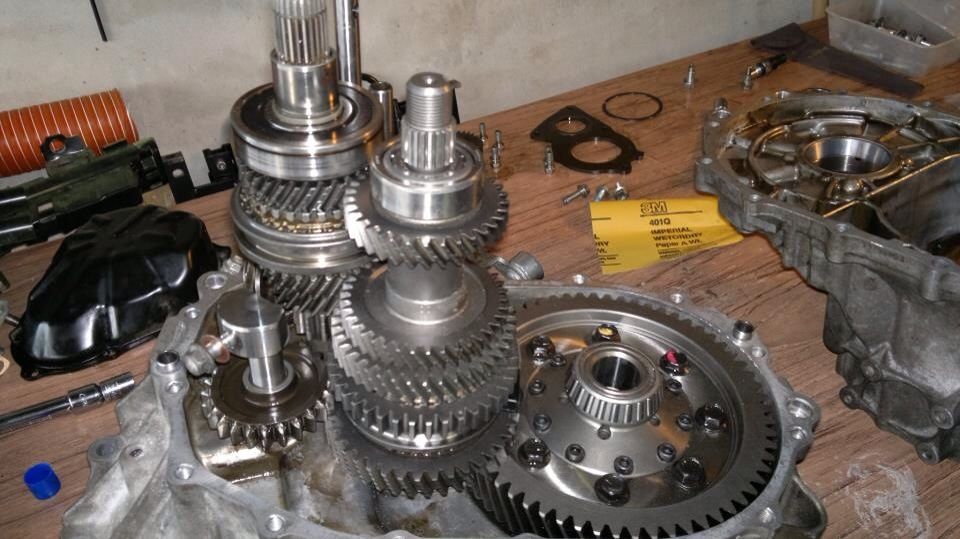
With the box out I started off stripping it down ready to fit Short final drive and LSD..
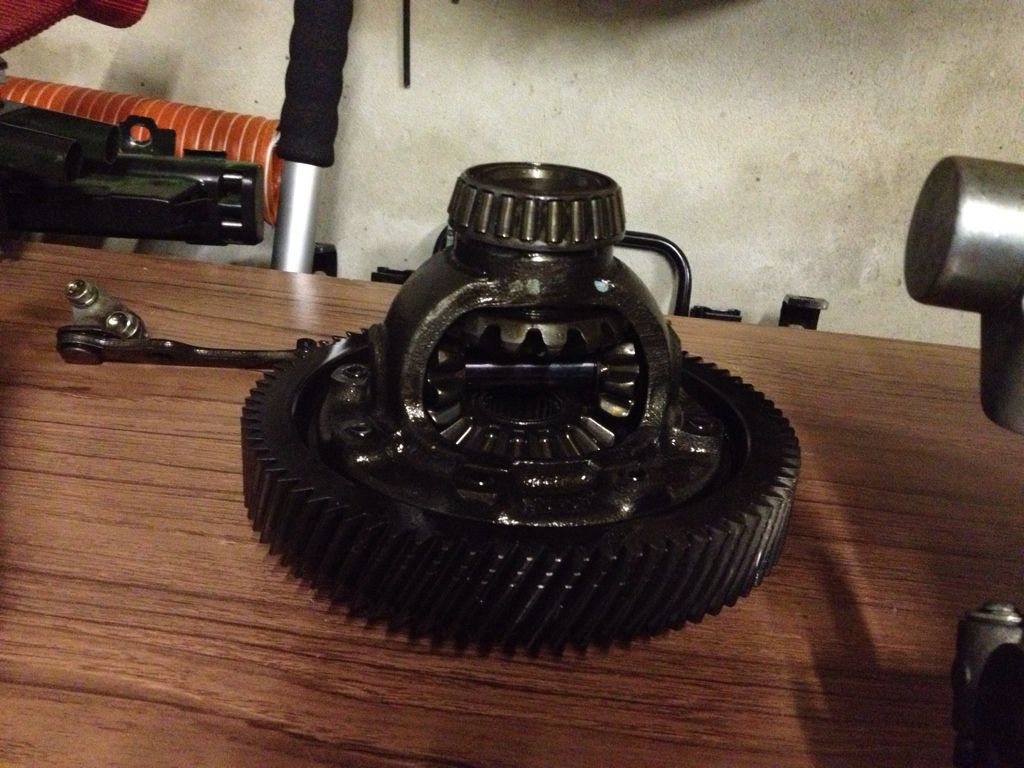
Standard diff soon to be replaced by a real one !
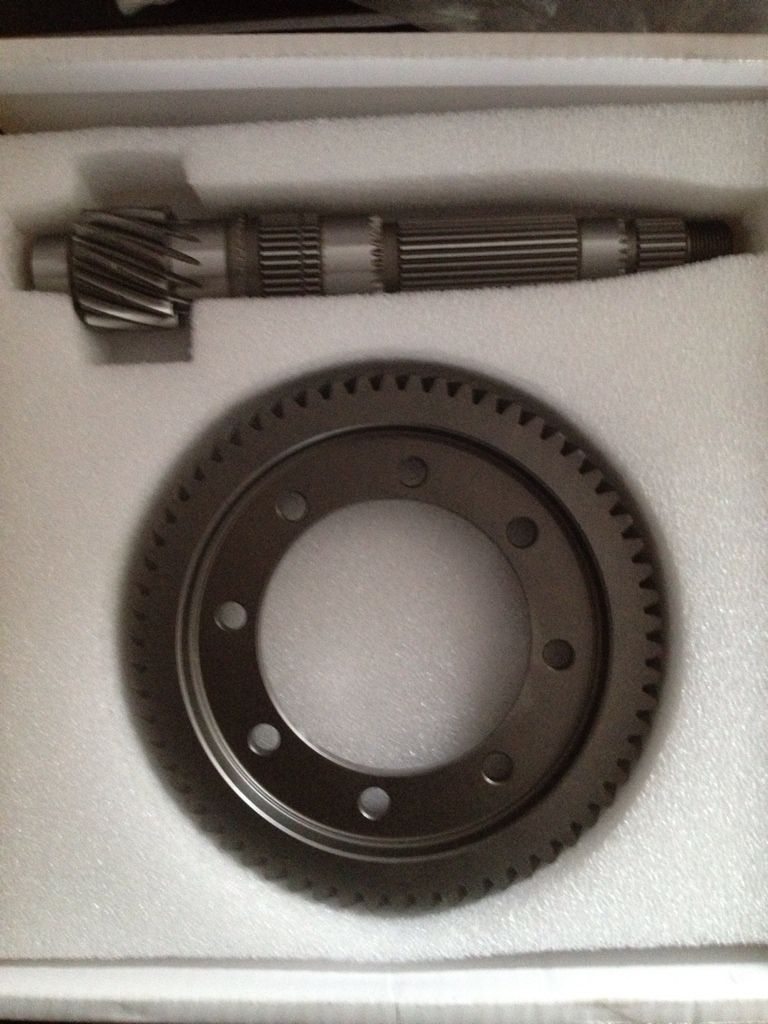
New final drive to be fitted
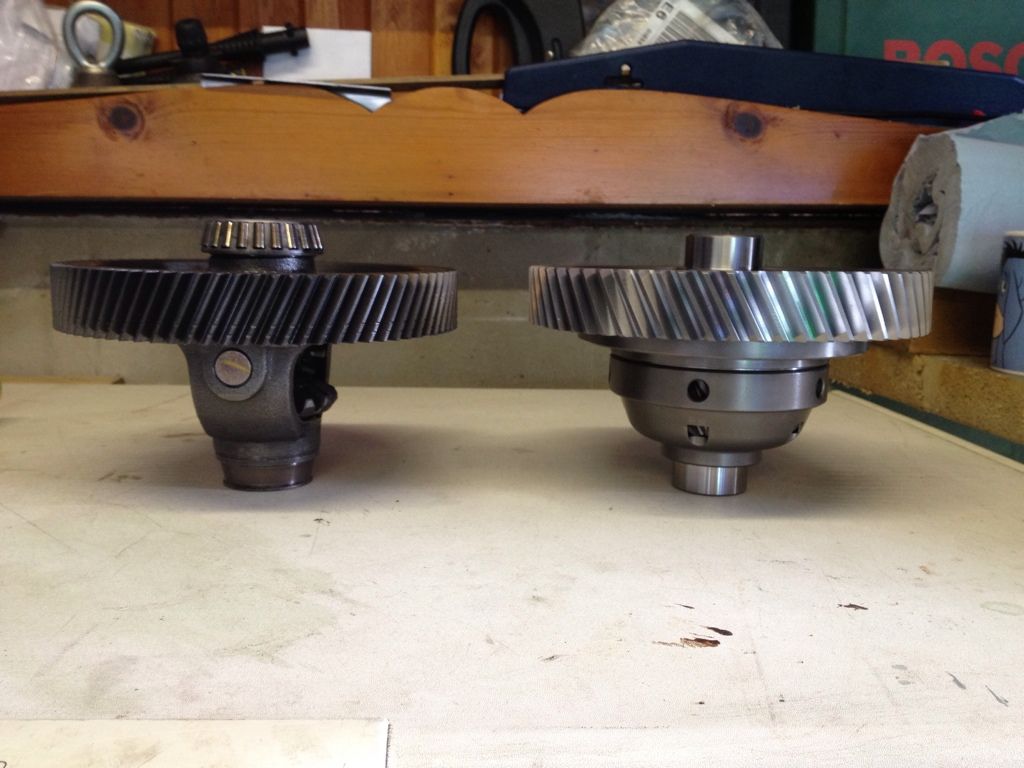
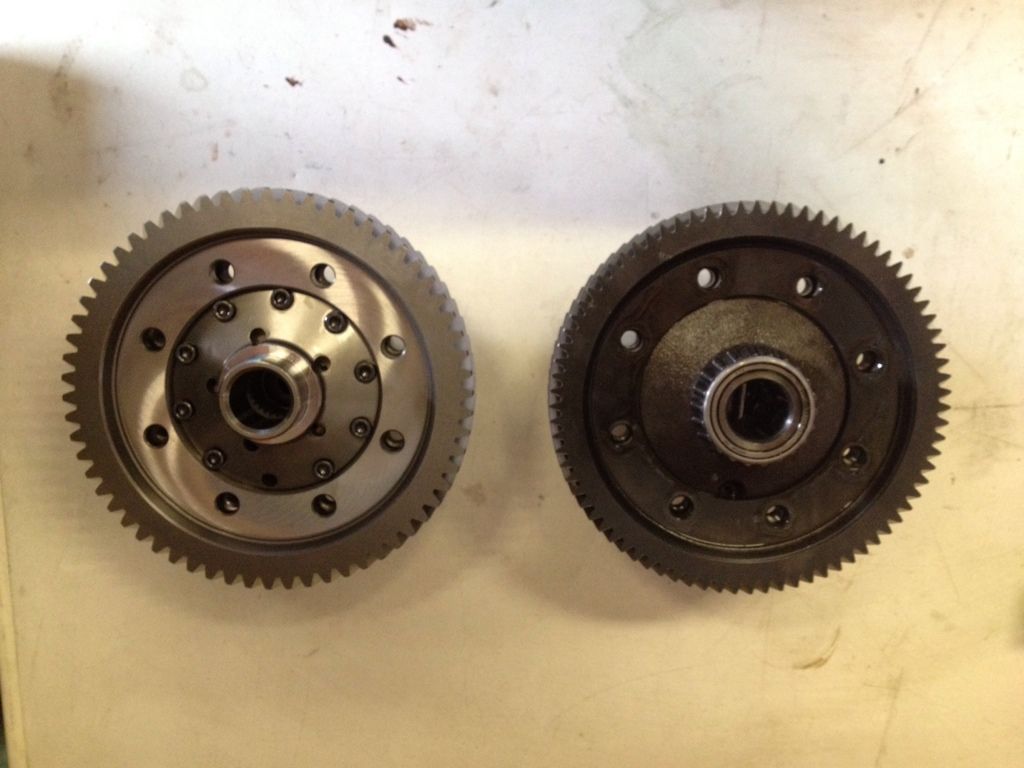
Old Diff and Final Drive VS new LSD and Short final drive
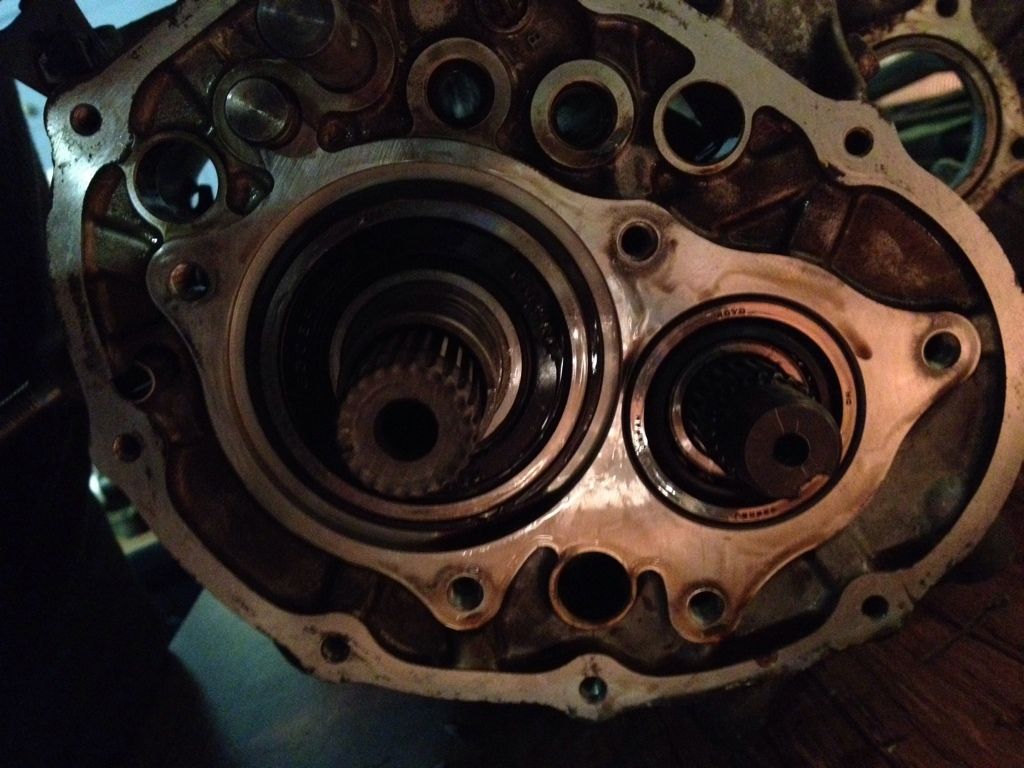
With these bits out of the way I started off by stripping down all the gears as the main shaft with all gears needed replacing to match the new final drive gear...
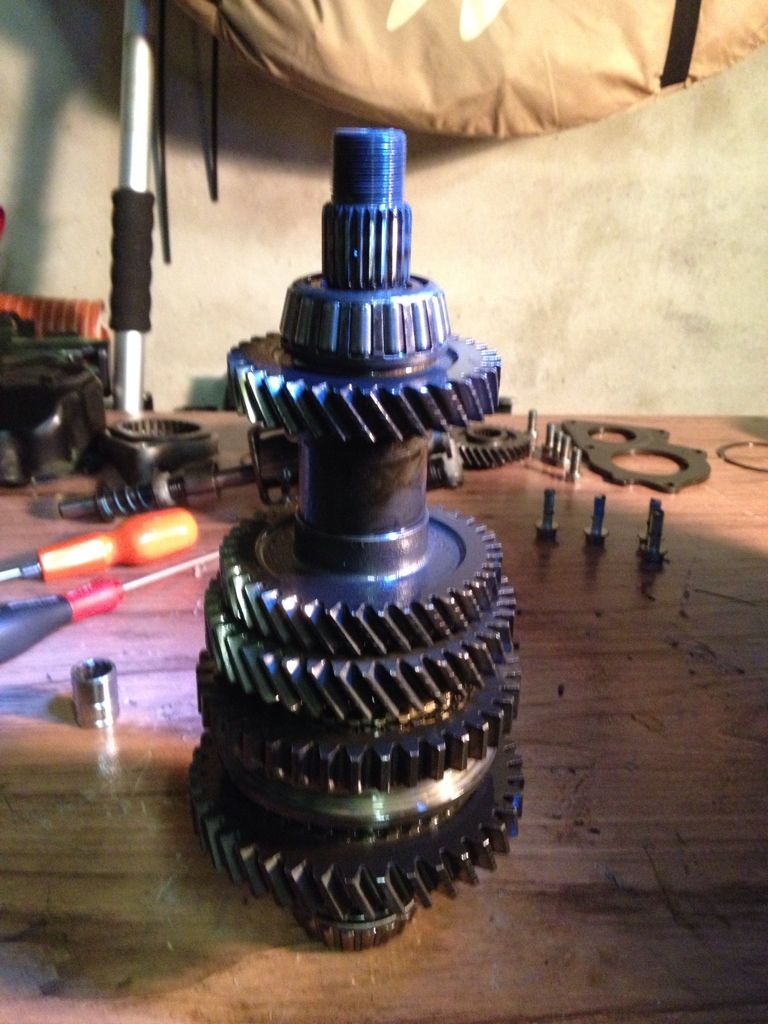
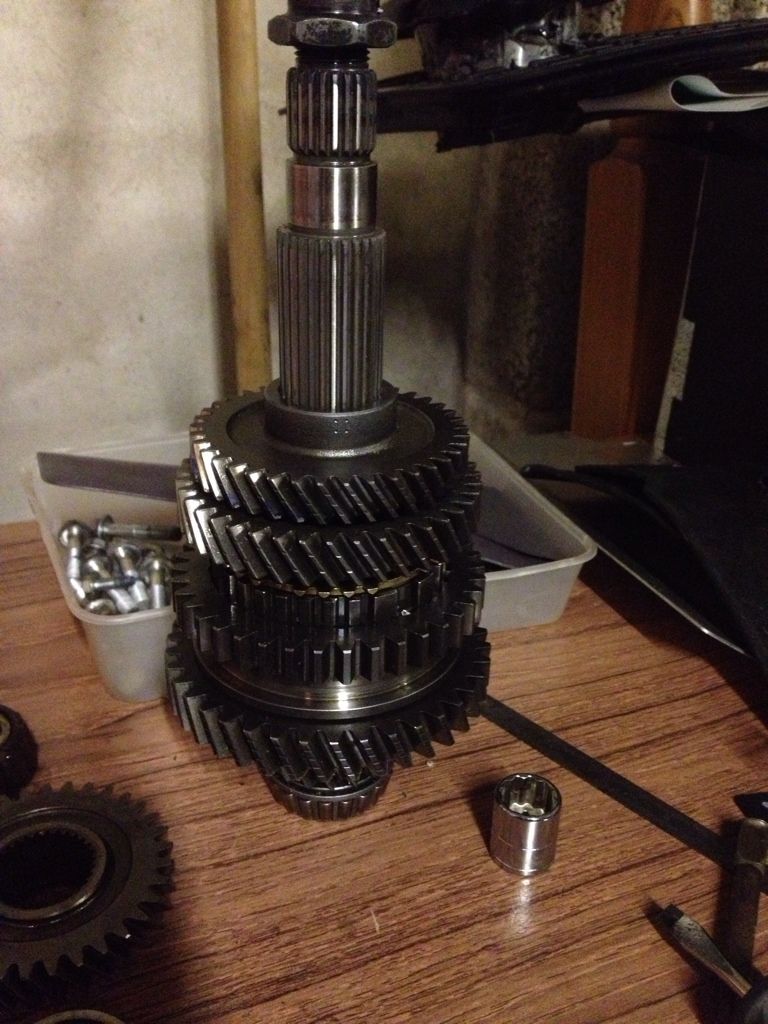
Some worn parts needed replacing
and almost all back together with new parts
With the box back together we ordered in this bad boy...
So first up we stripped down the car, removed the gearbox and the engine...
Bumper off..
Front end completely removed as I bolted it all together rather than welding it so I can work on it with ease and repair quickly track side
Gearbox out first.....
With the box out I started off stripping it down ready to fit Short final drive and LSD..
Standard diff soon to be replaced by a real one !
New final drive to be fitted
Old Diff and Final Drive VS new LSD and Short final drive
With these bits out of the way I started off by stripping down all the gears as the main shaft with all gears needed replacing to match the new final drive gear...
Some worn parts needed replacing
and almost all back together with new parts
With the box back together we ordered in this bad boy...
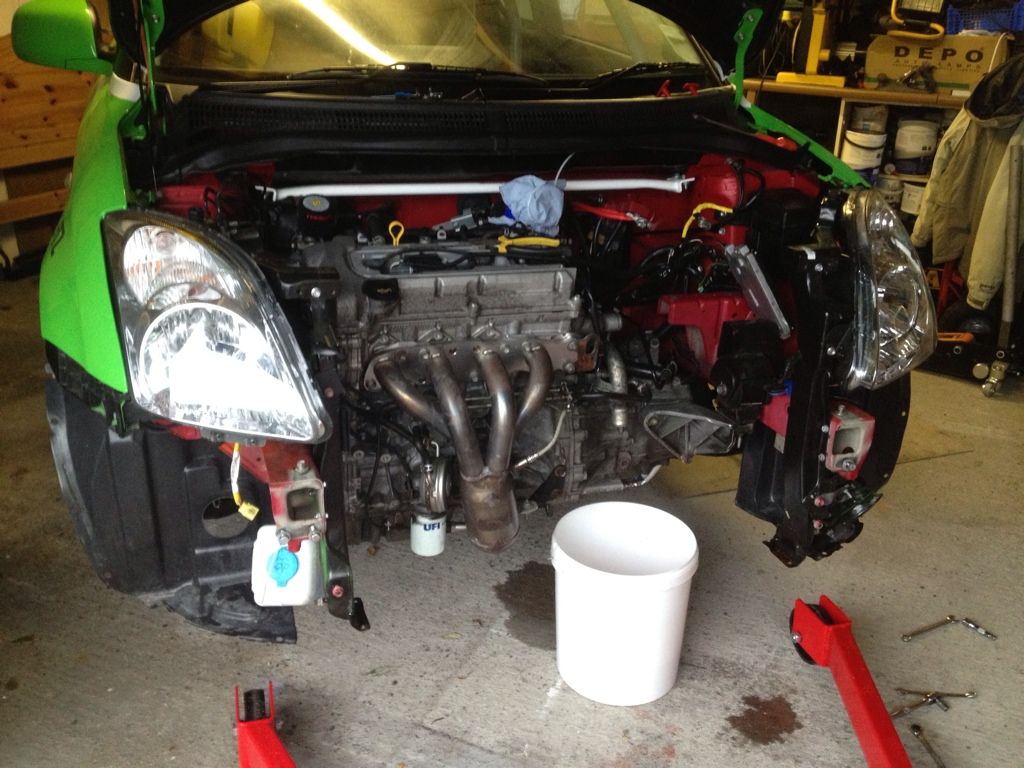
With this done next we removed the engine..
So the strip down began...
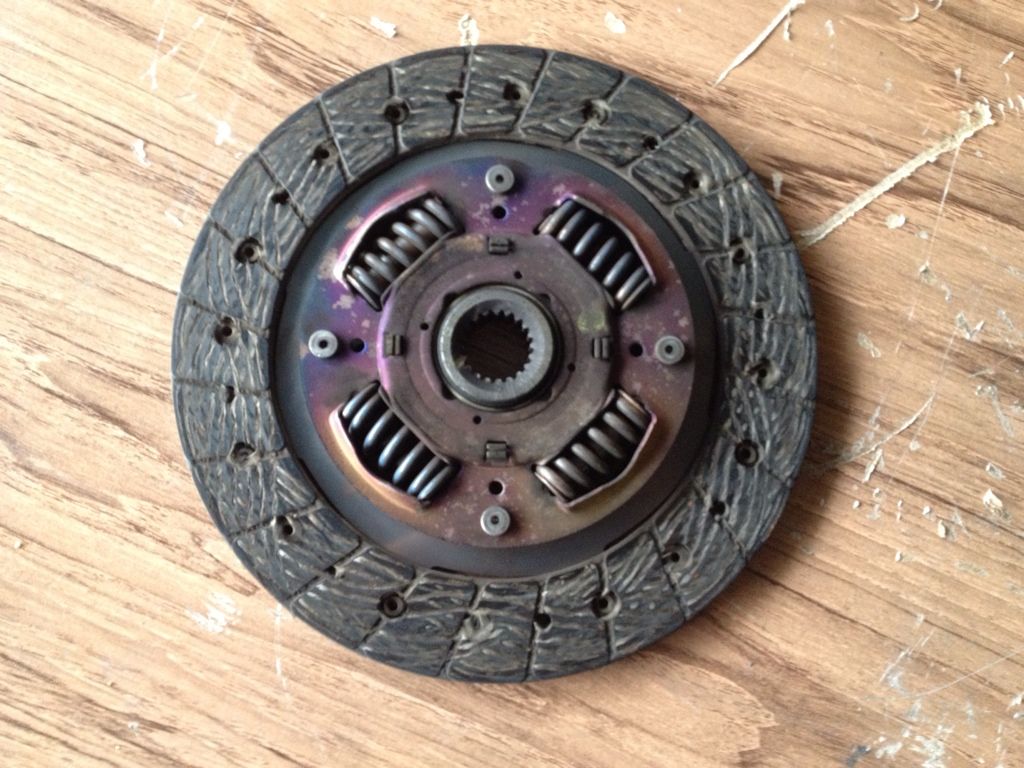
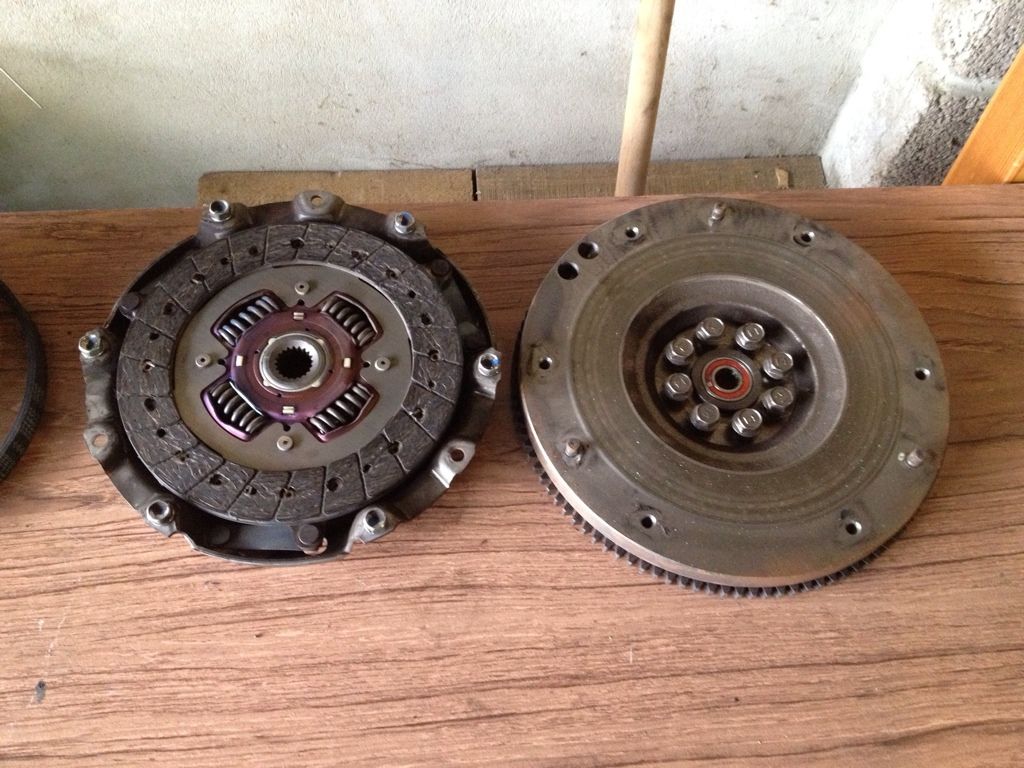
Clutch looks like it has been a bit hot...
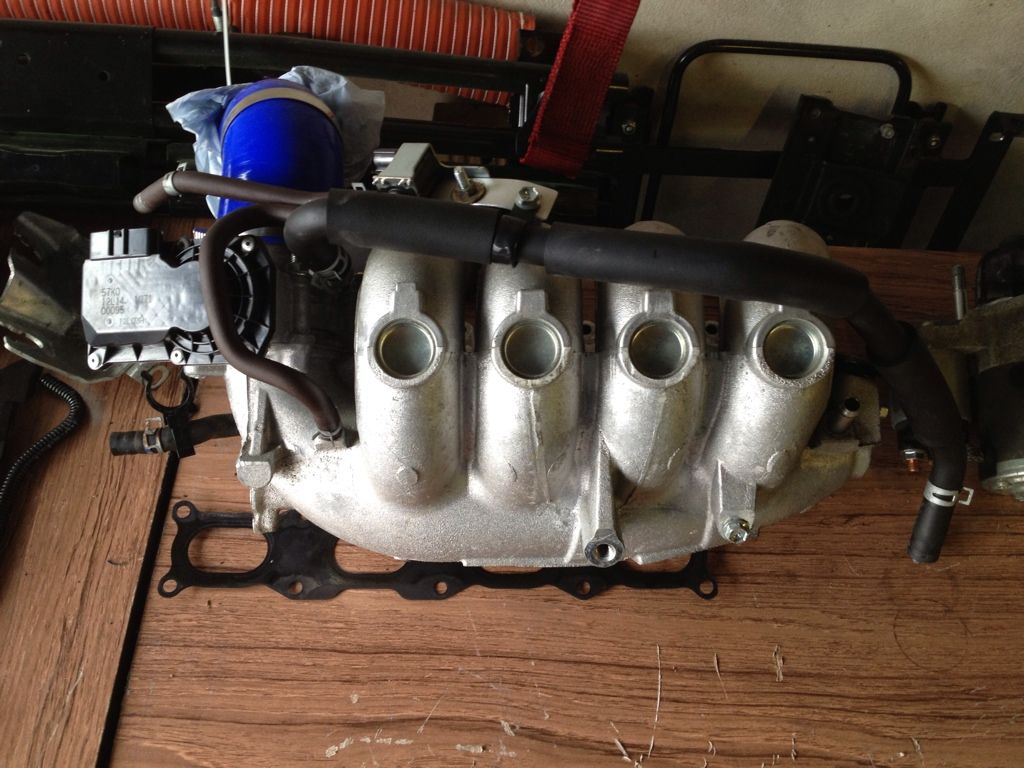
Inlet manifold and throttle body no longer required..
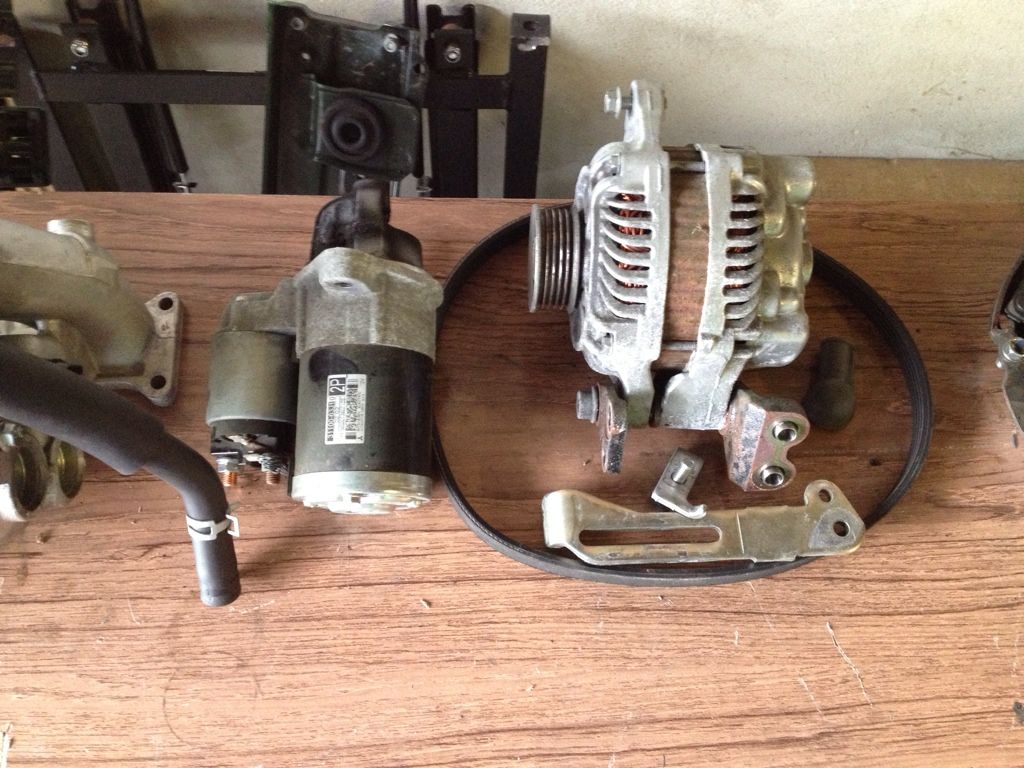
Alternator and starter motor off
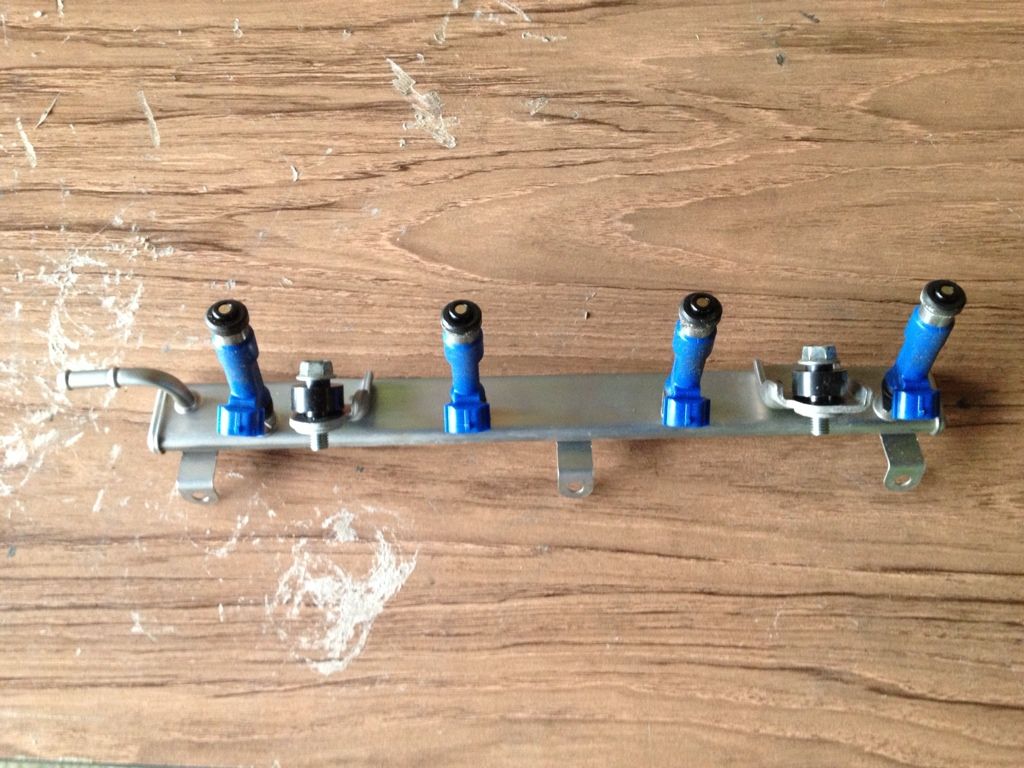
Stock fuel rail and injectors removed and soon to be replaced..
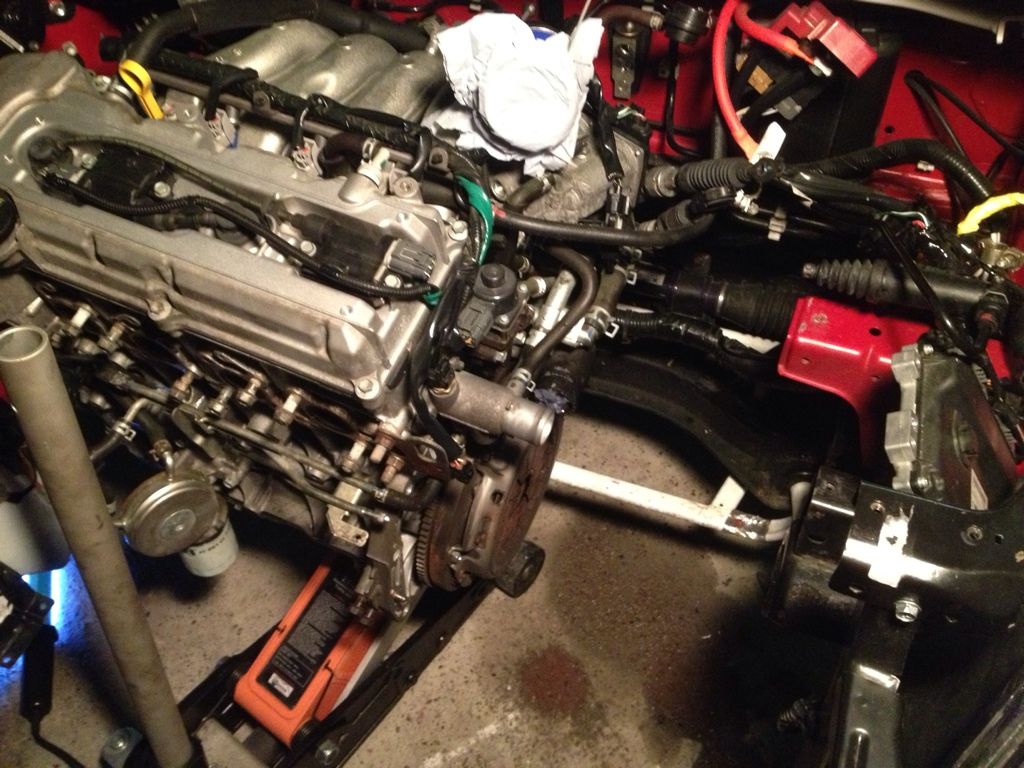
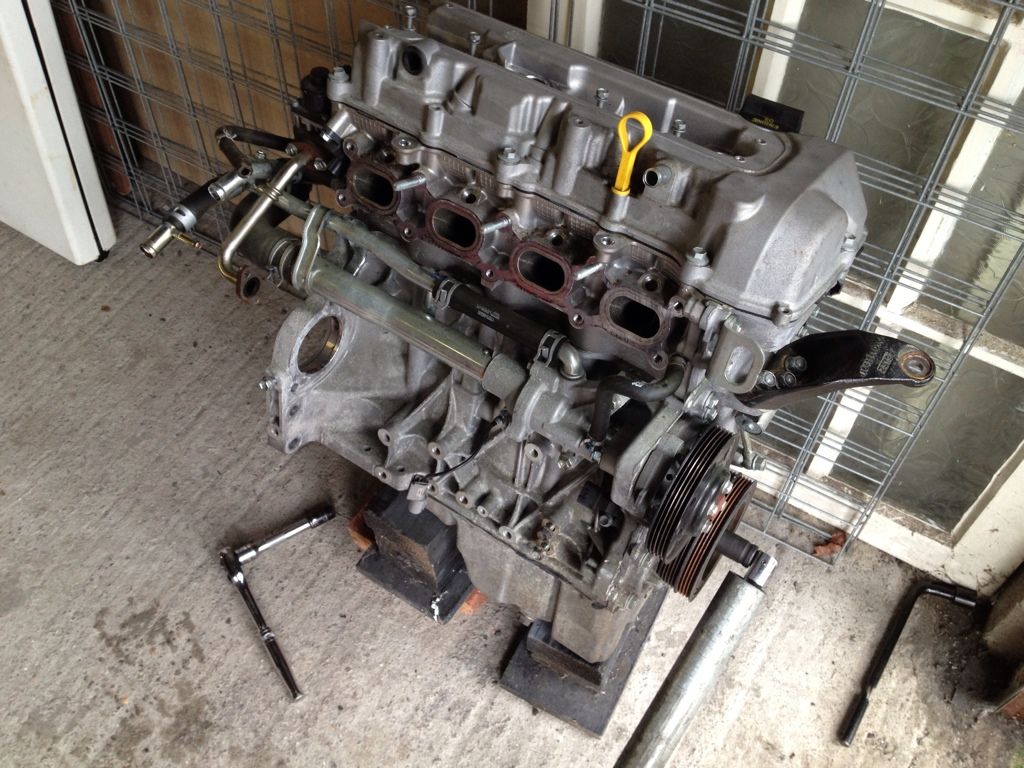
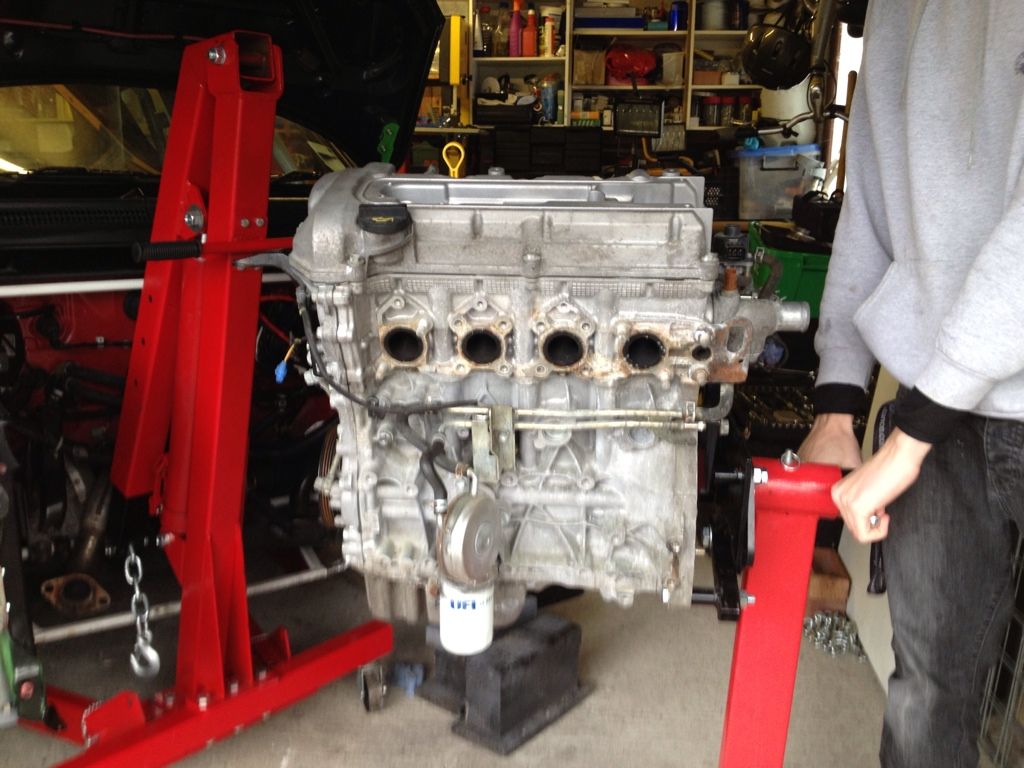
Engine on the stand ready to break it down to component parts...
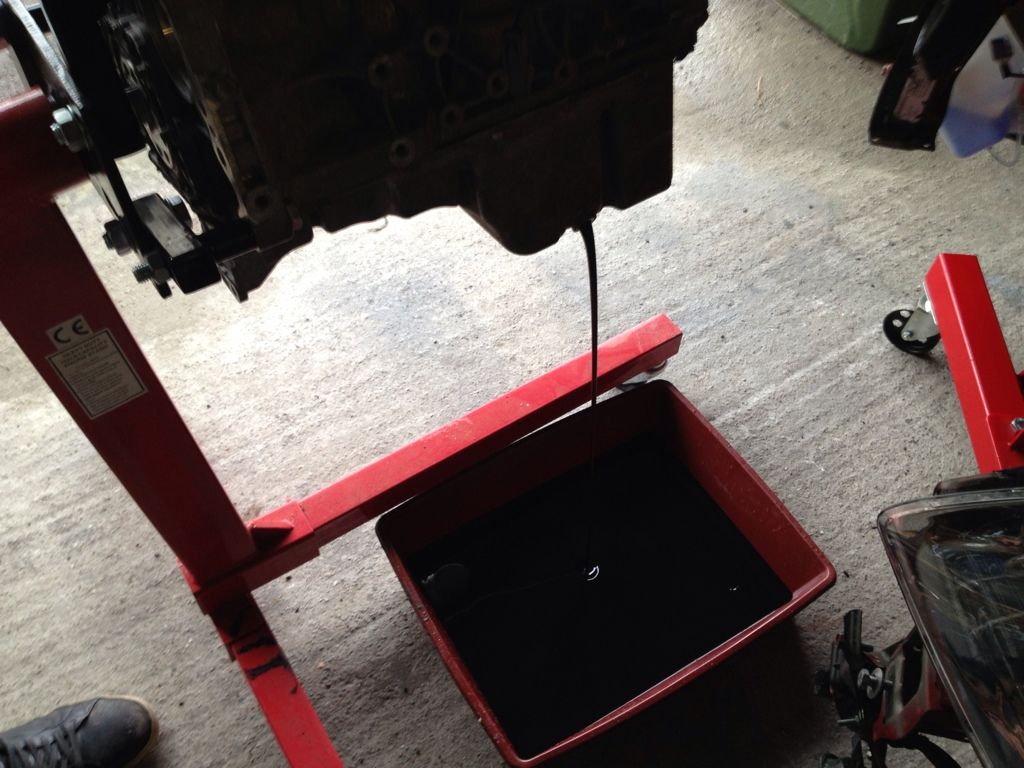
Oil out
Cam cover off
Next up we needed to remove the crank pulley... We used our usual impact gun both electric and compressed air.. nothing would shift it. I got out the trusty Suzuki Workshop manual as I have never had one stuck on like this! It says Special tool required... As I did not want to waste time going to Suzuki for a tool I made one from an old spirit level
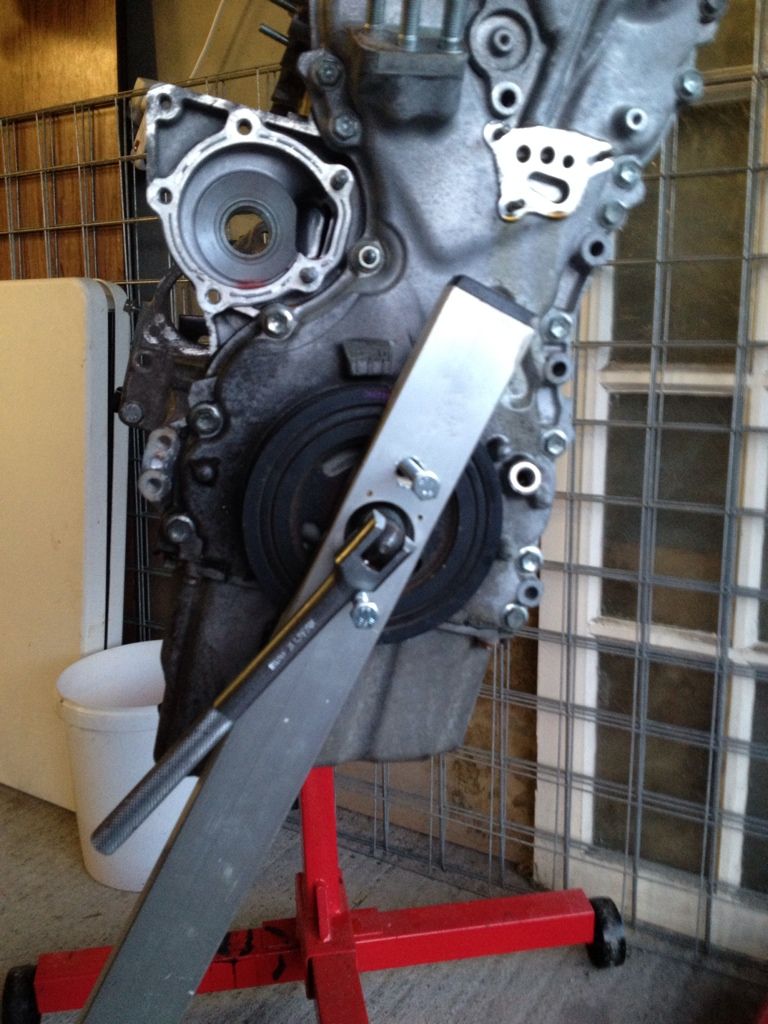
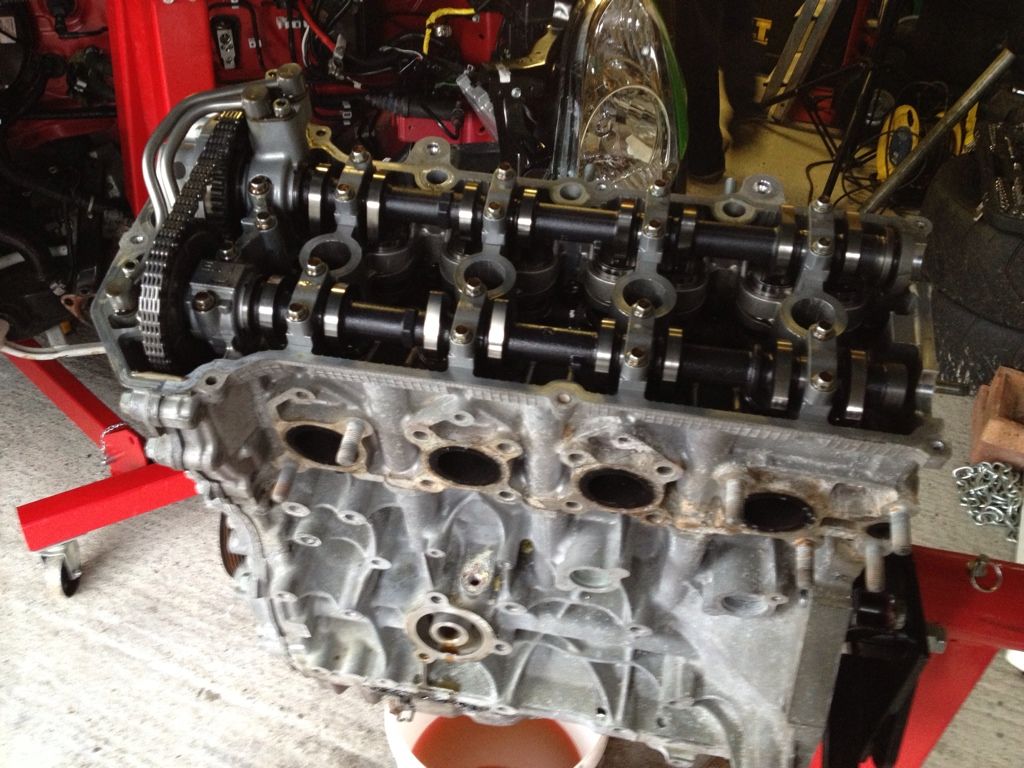
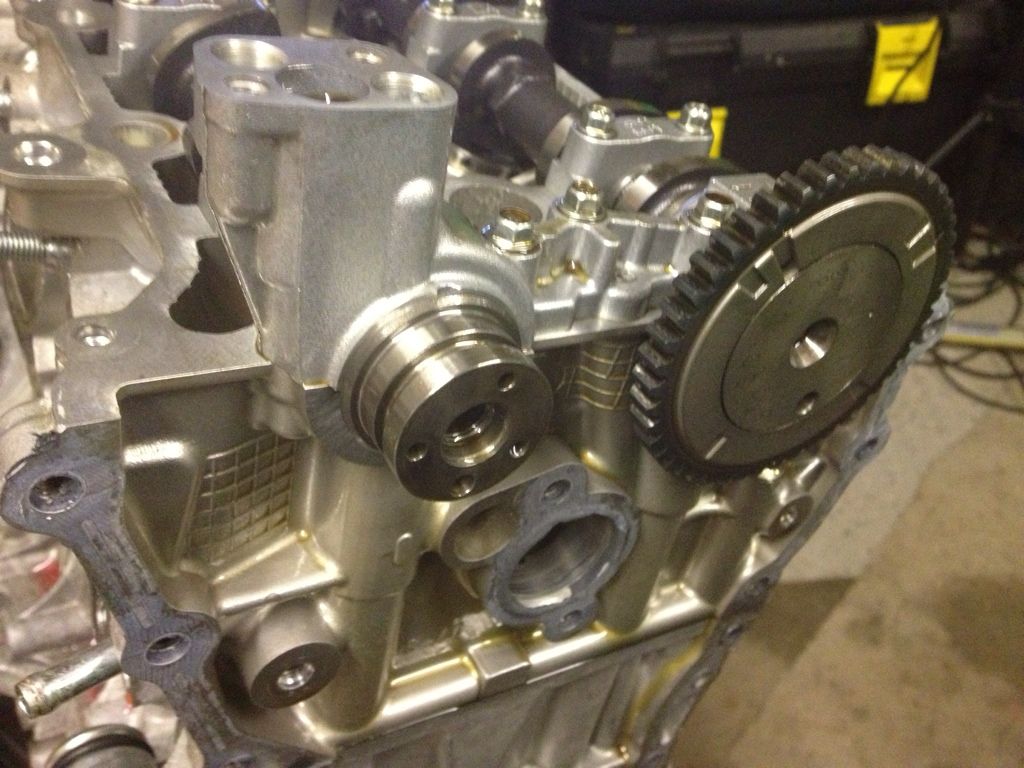
Timing chain cover off next..
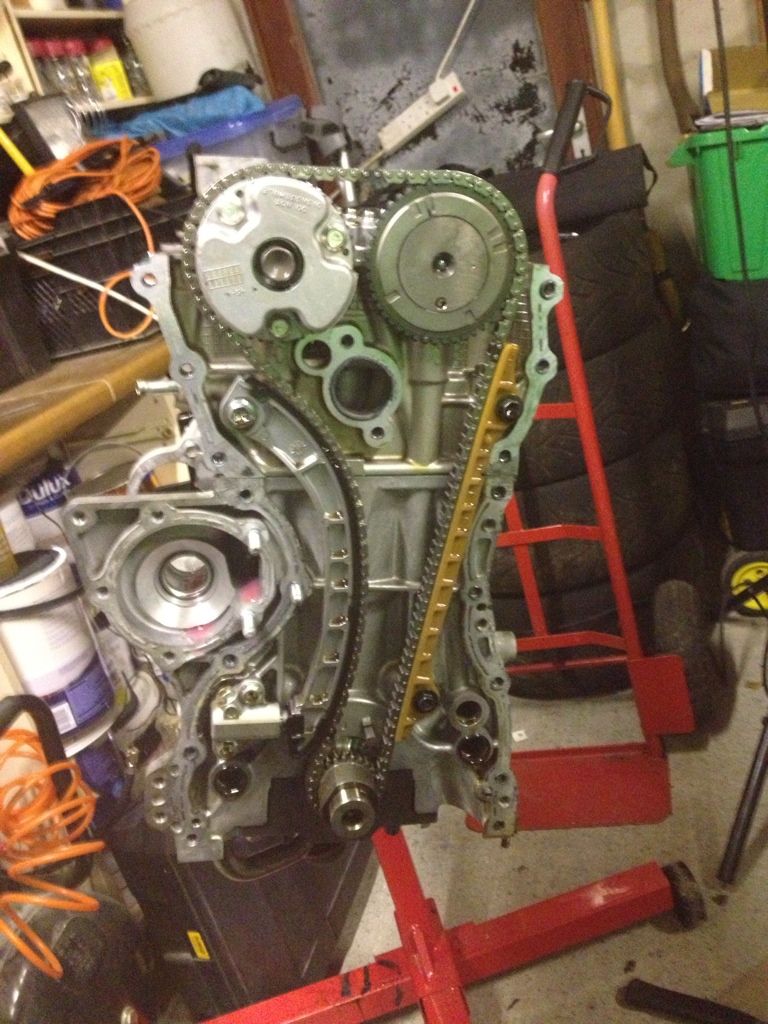
With this gone we could remove the VVT and the Cams...
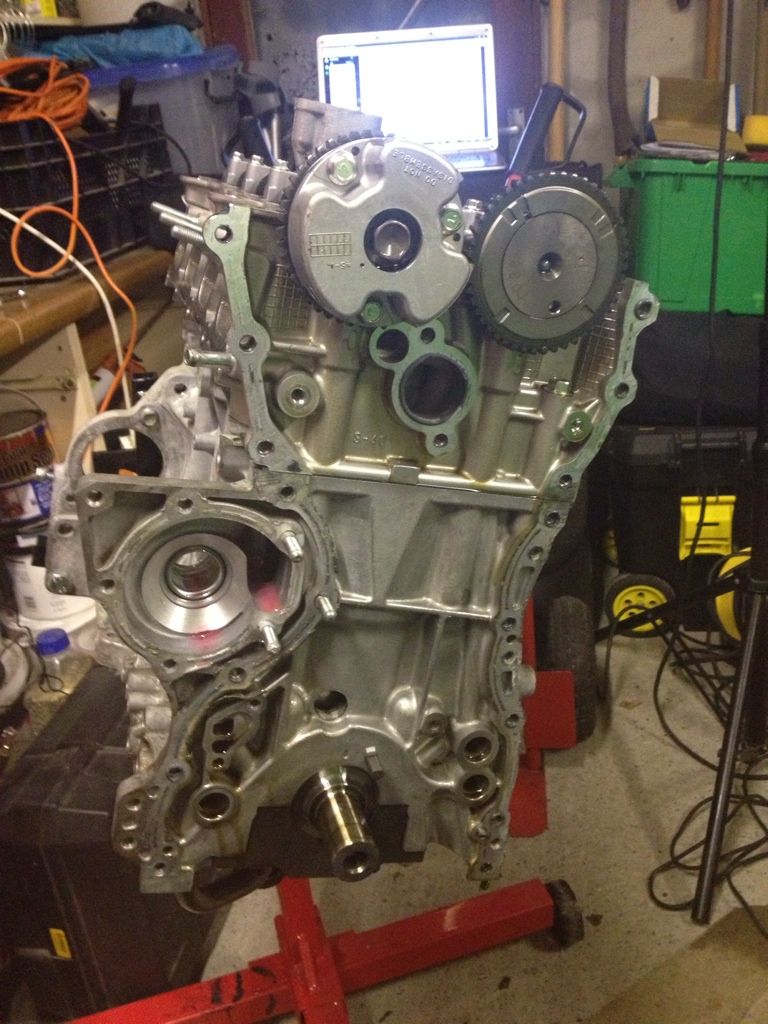
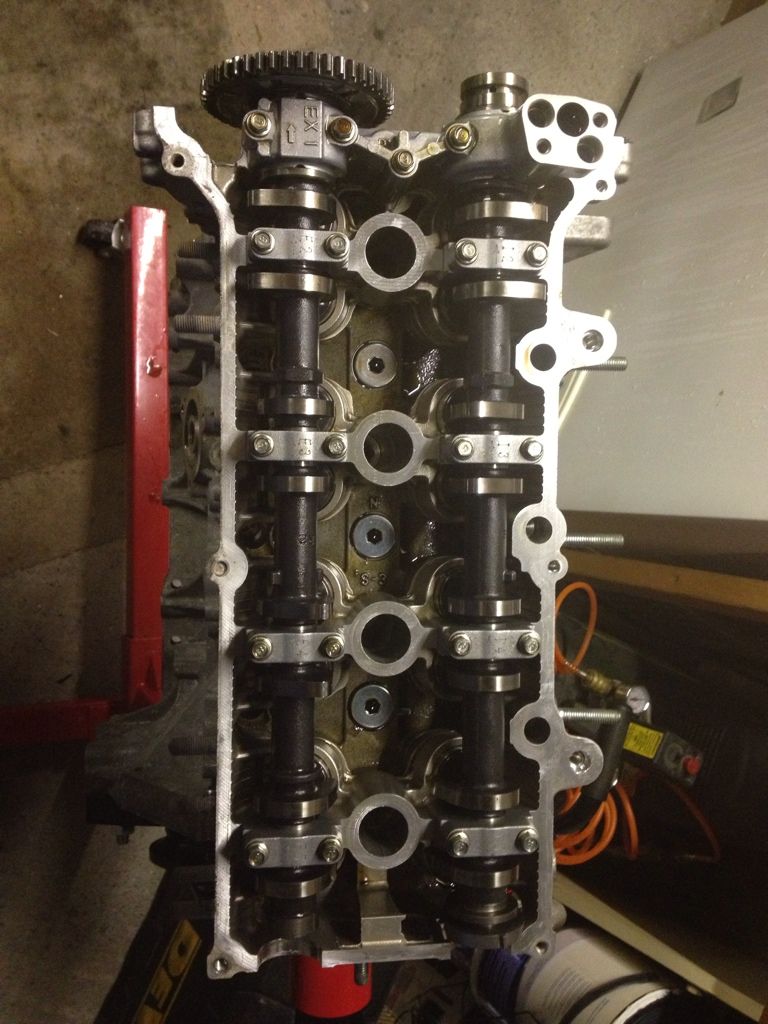
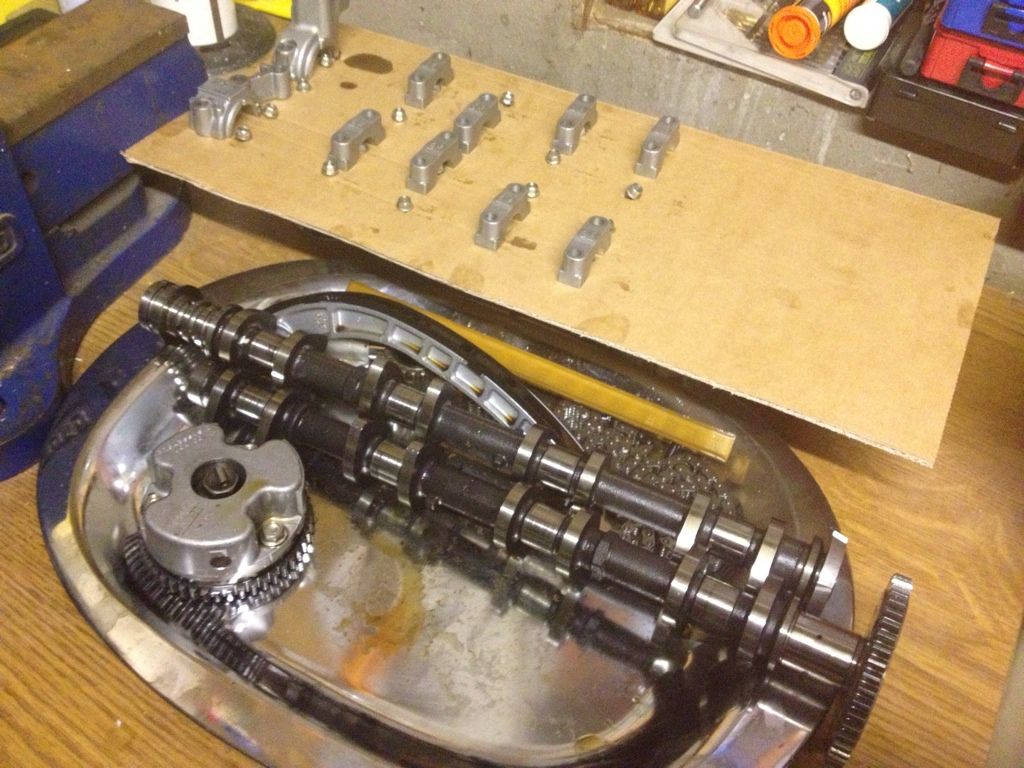
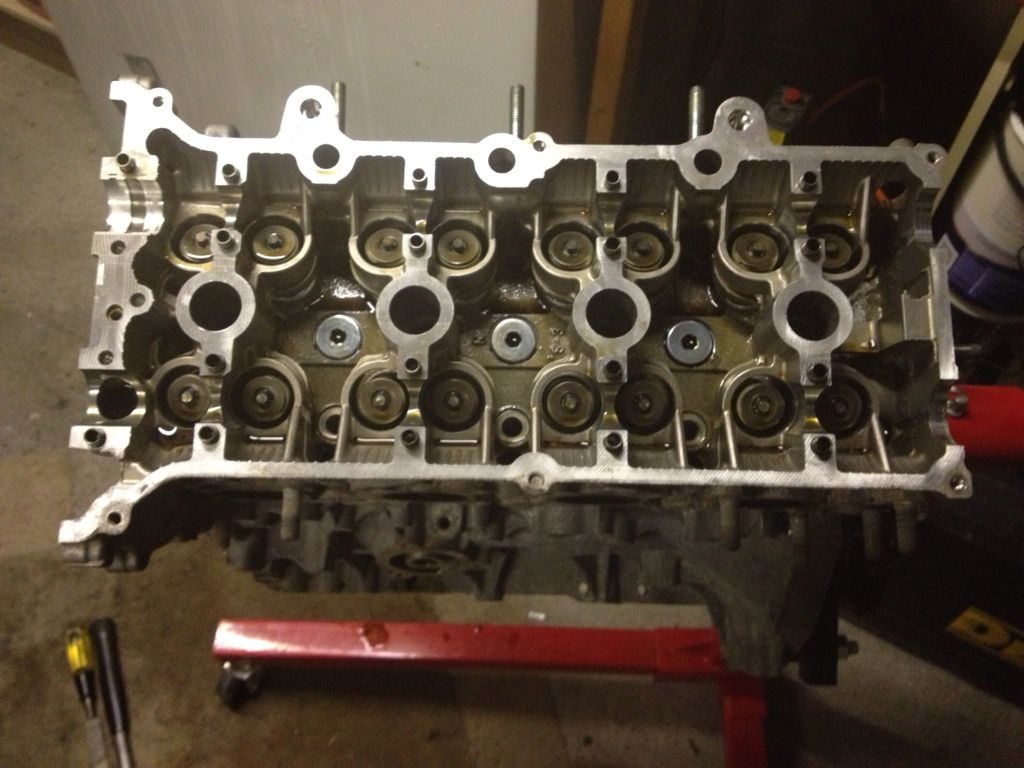
The valves would be staying in for now as I needed them in to show CNC heads and is now with Ferrea to make me some large valves!
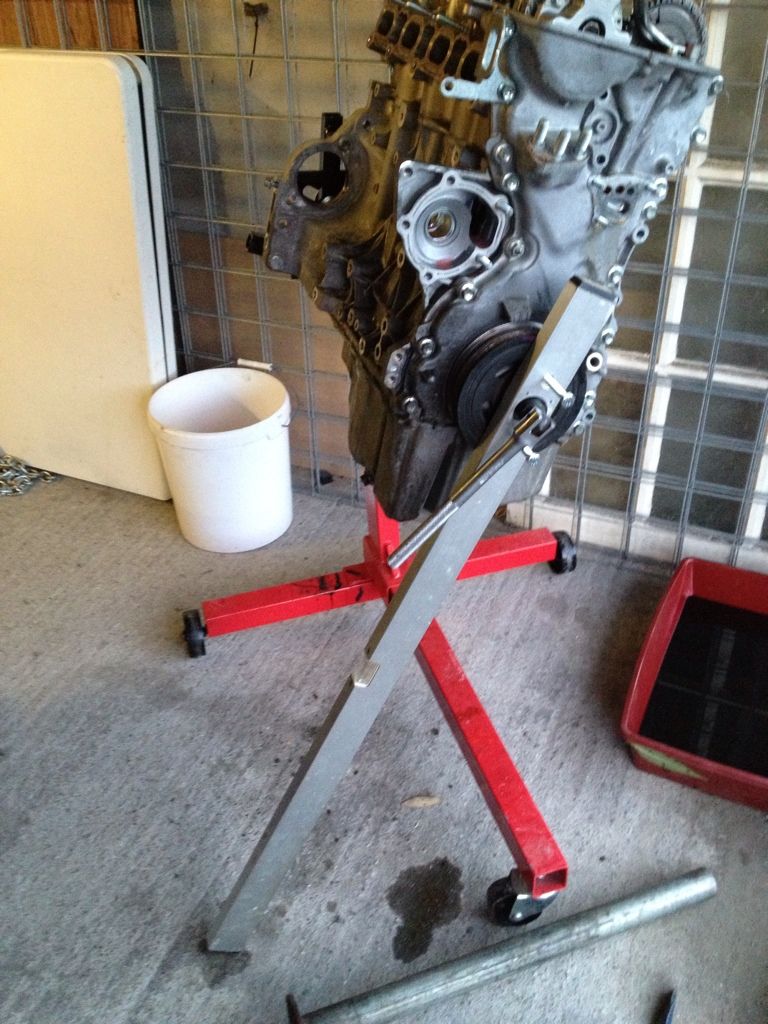
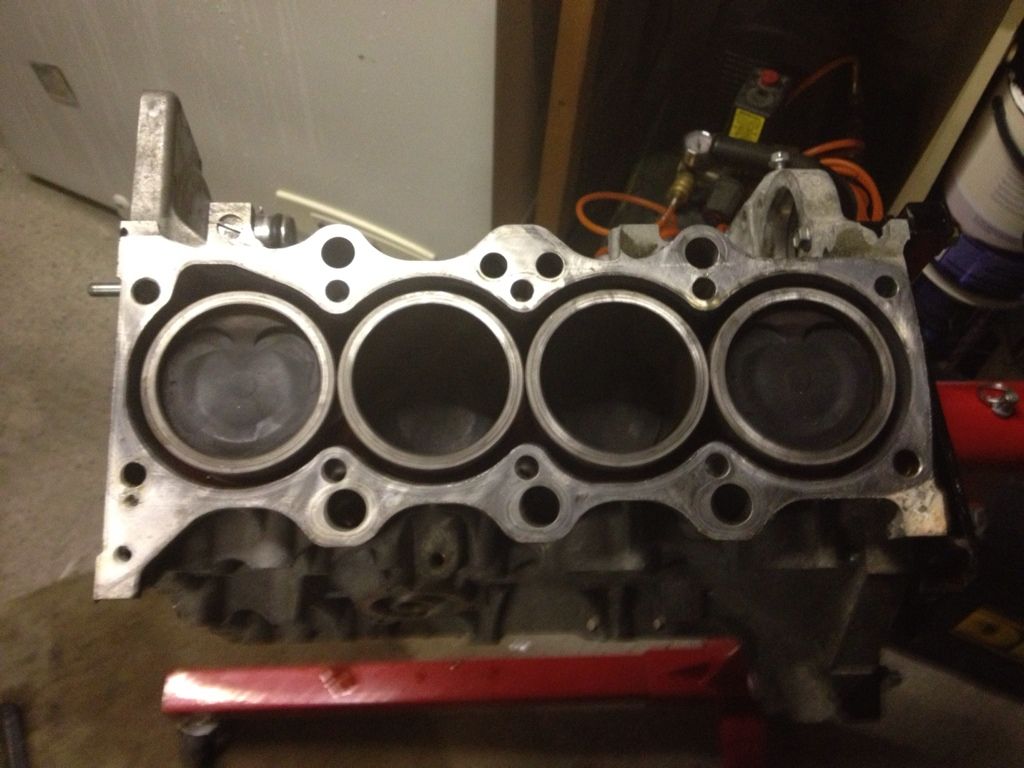
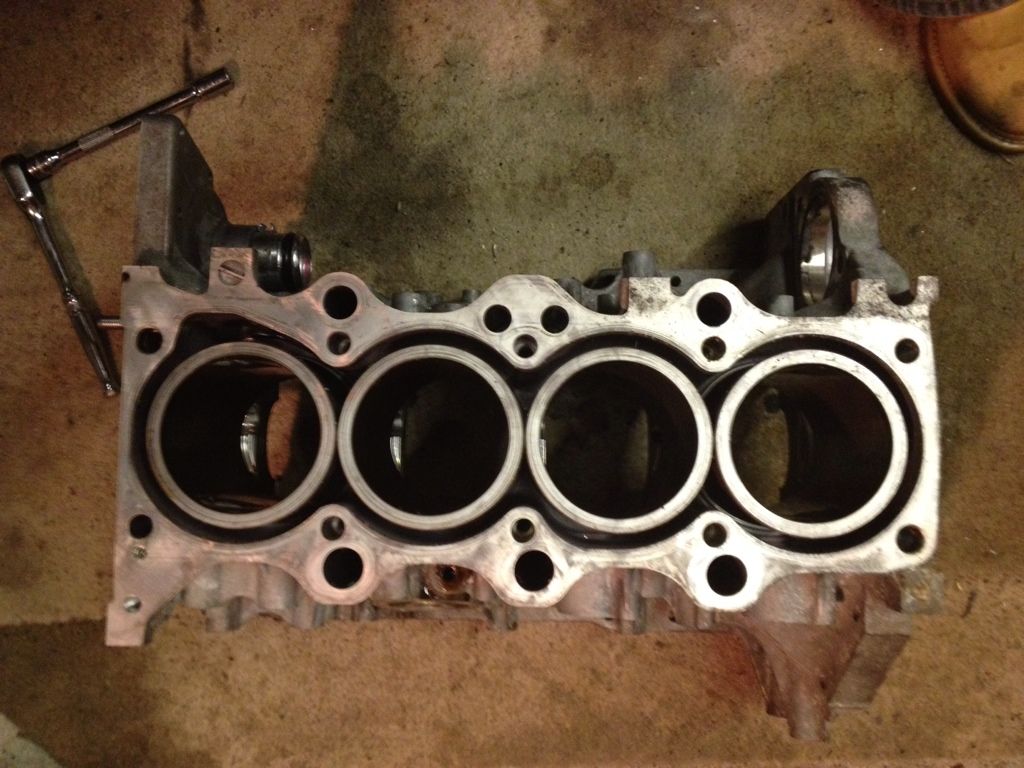
Head off..
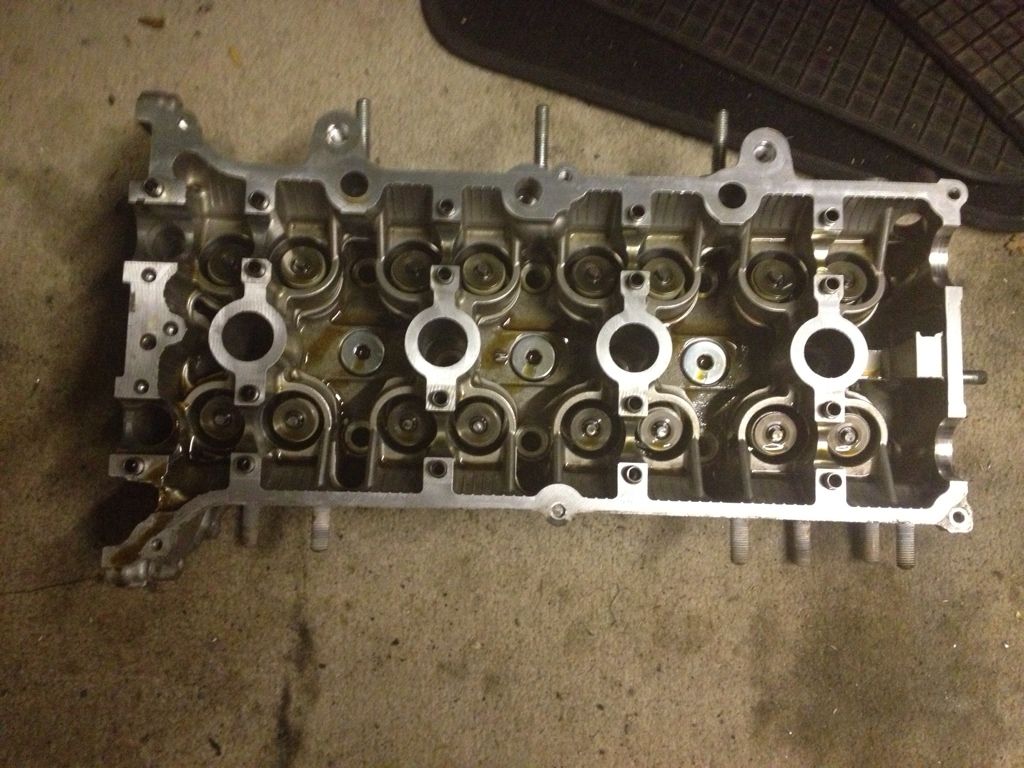
Block left to strip...
Under side
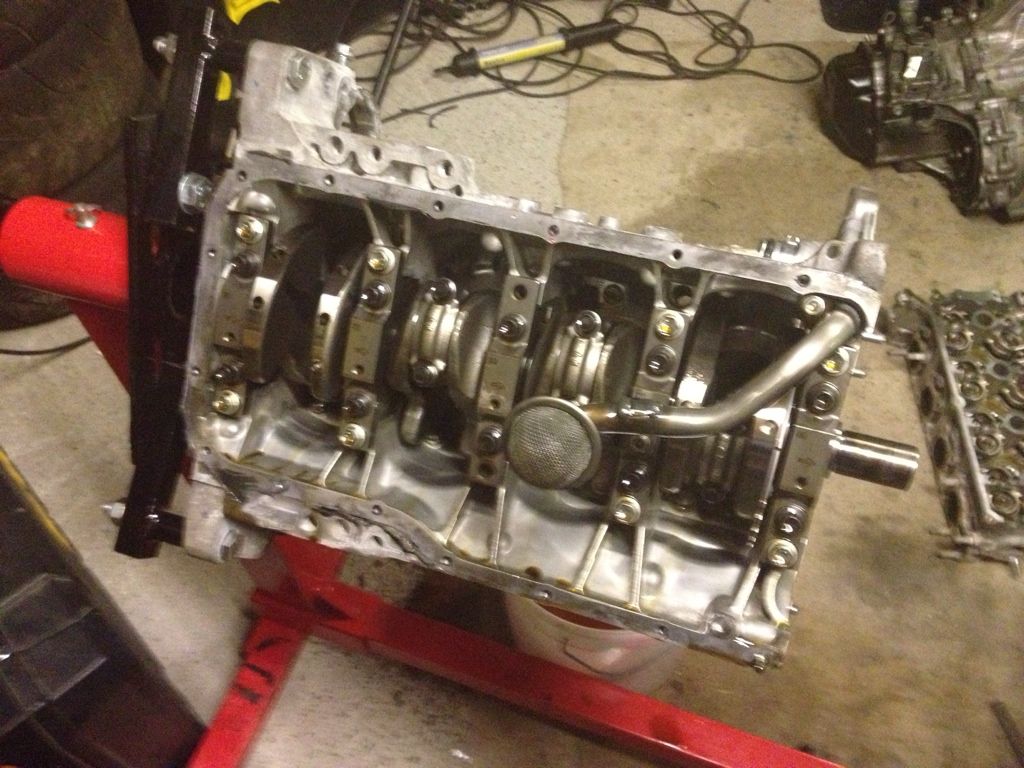
Pistons out and crank removed..
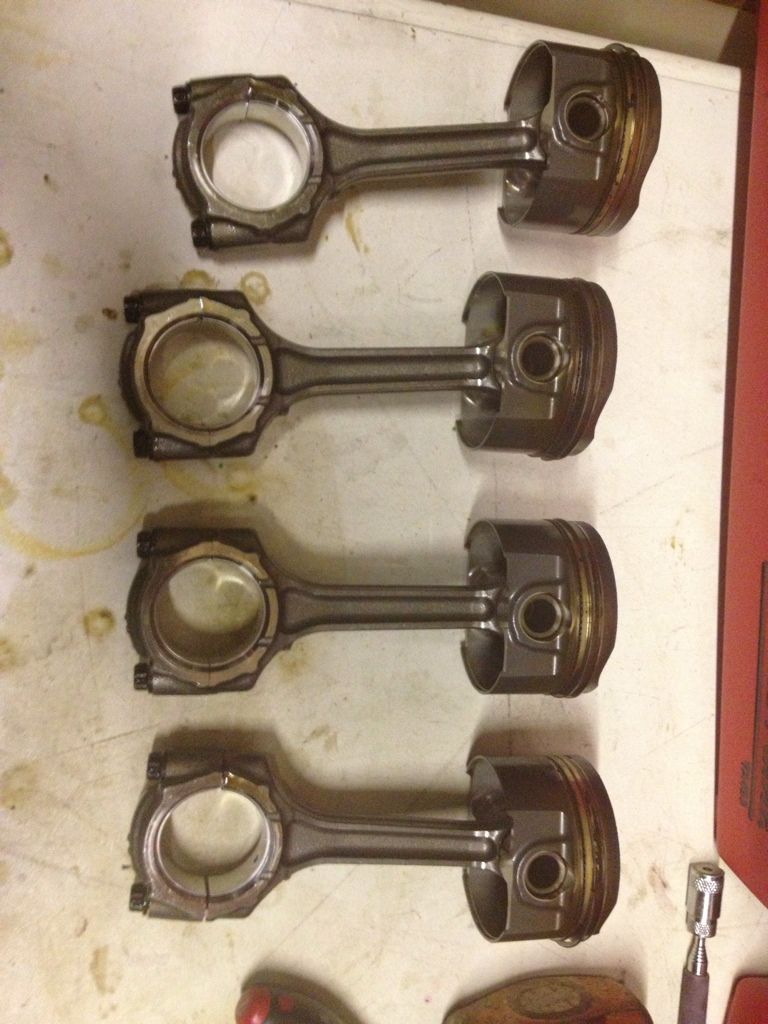
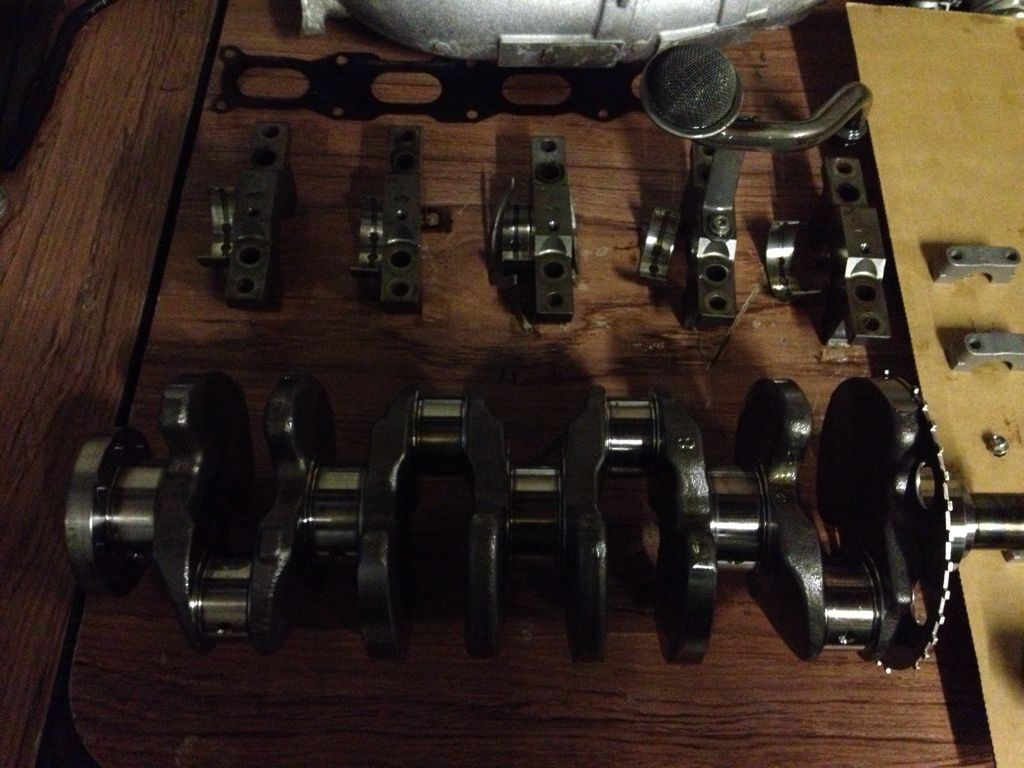
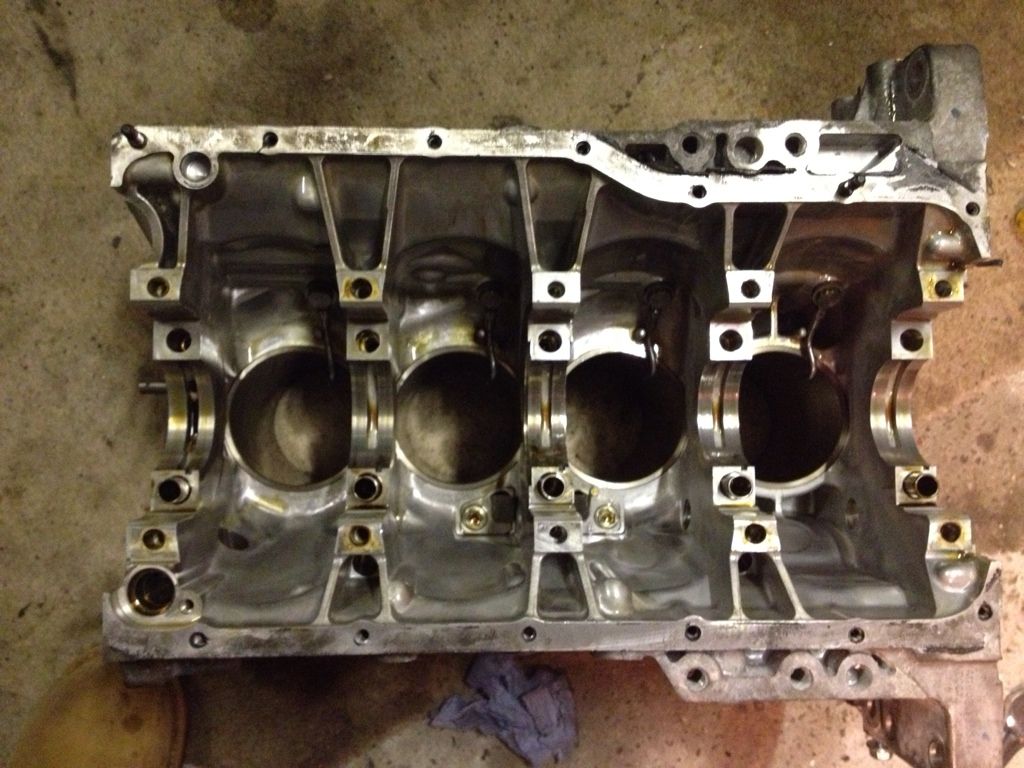
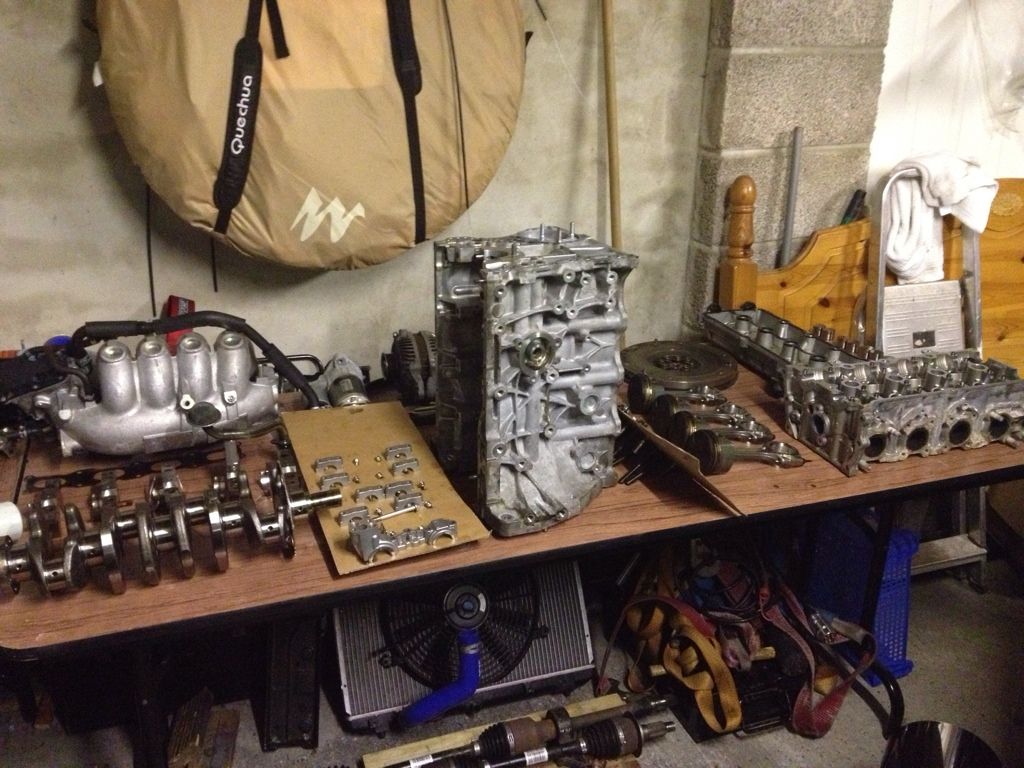
So thats the engine laid out on a table....
With this all done the head was sent to Cat Cams and I needed to draw the pistons, rods and block with sleeves so that LA Sleeve can look to make 86mm pistons, rods and sleeves to close deck the block. This will increase cc from 1587cc to 1929cc increasing compression from 11:1 to 12:1. I wanted to go more but want to run on 99Ron so thats about the max...


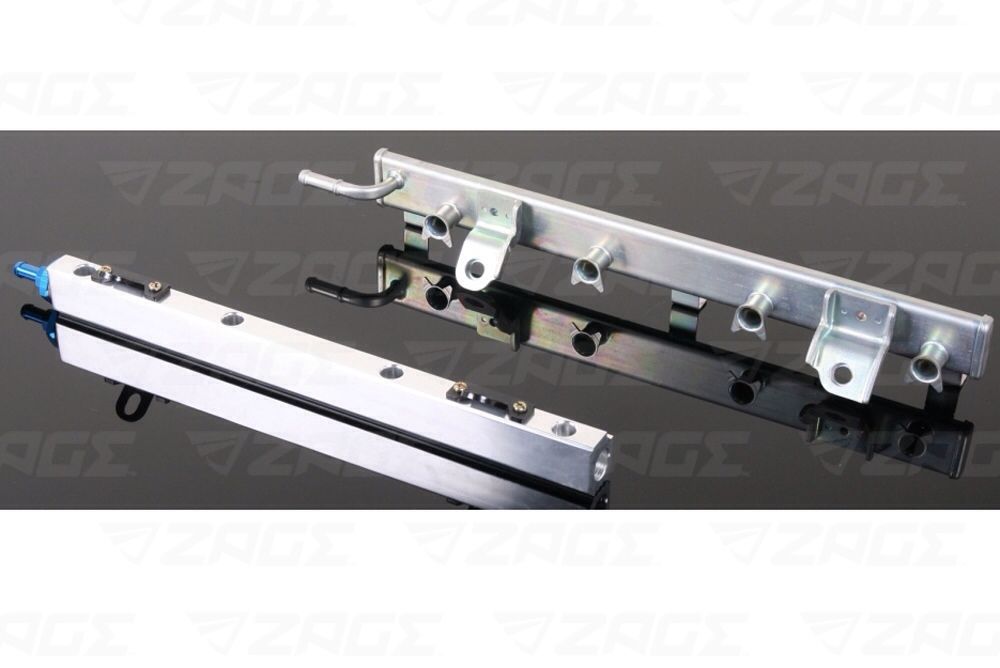
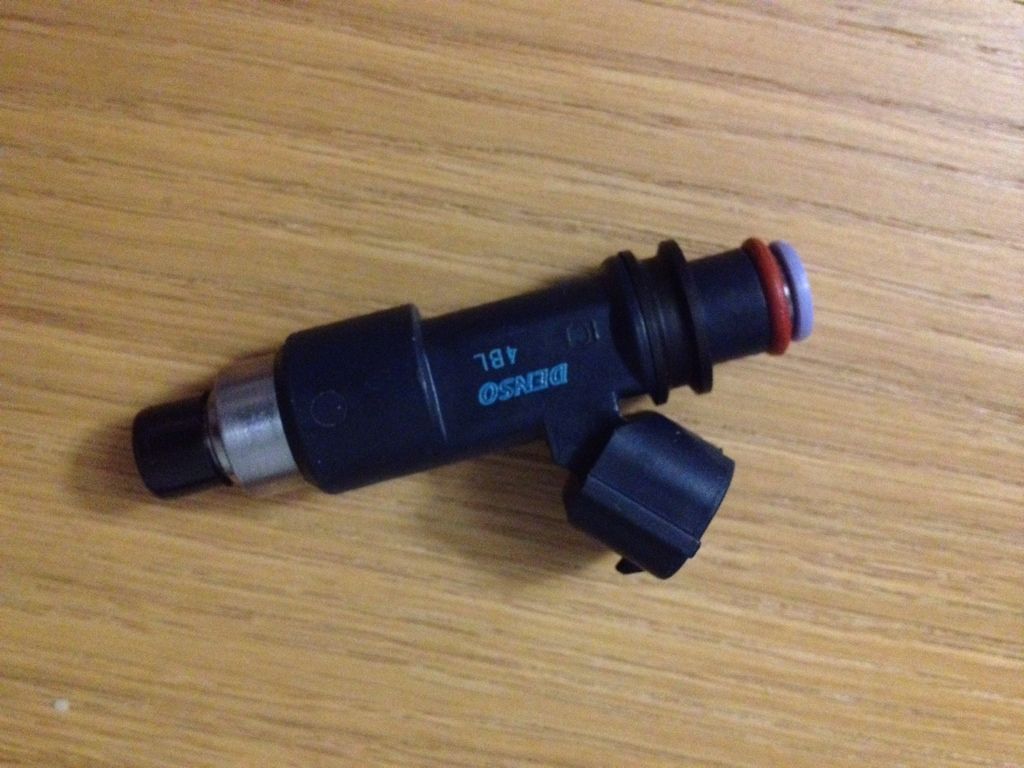
Next up I ordered the fuel rail and 360cc injectors
Old vs new
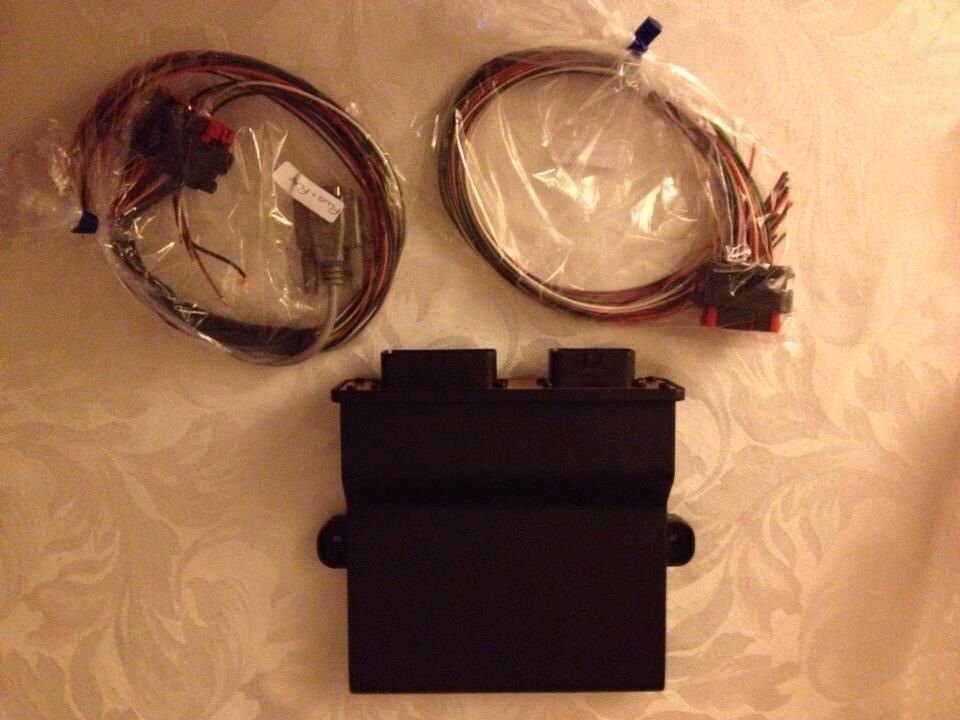
ECU arrived.. this is a motorsport ECU built specifically for the Swift to be CANBUS compatable...
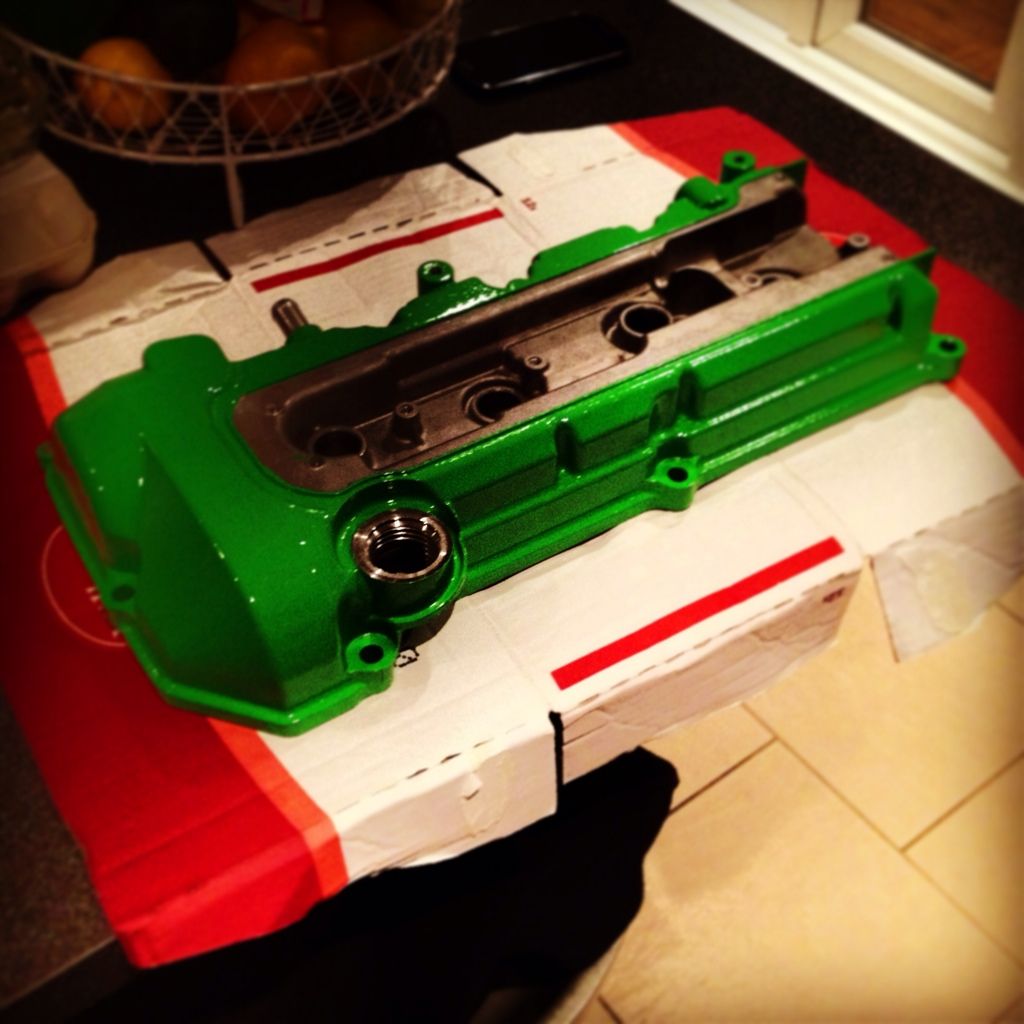
Next I painted the cam cover so the engine bay looks good when its back together. Missed the middle as it will be covered by a carbon plug cover..
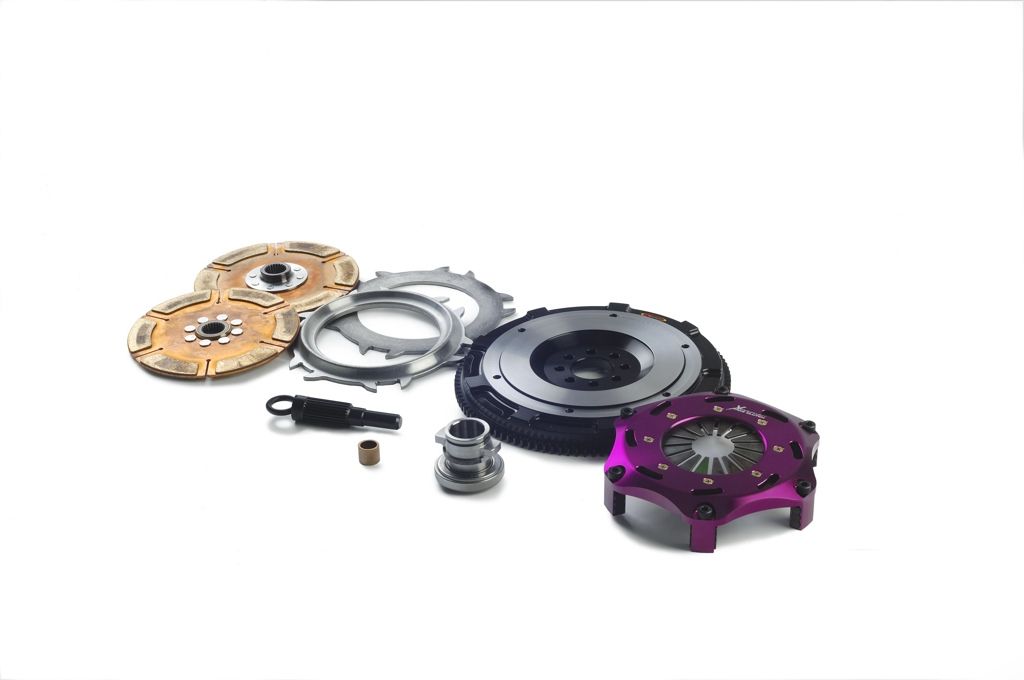
Thats basically as far as I have got... Clutch is on the boat from Australia, Pistons, Rods and Liners should be going into production soon and these bad boys turn up next week...
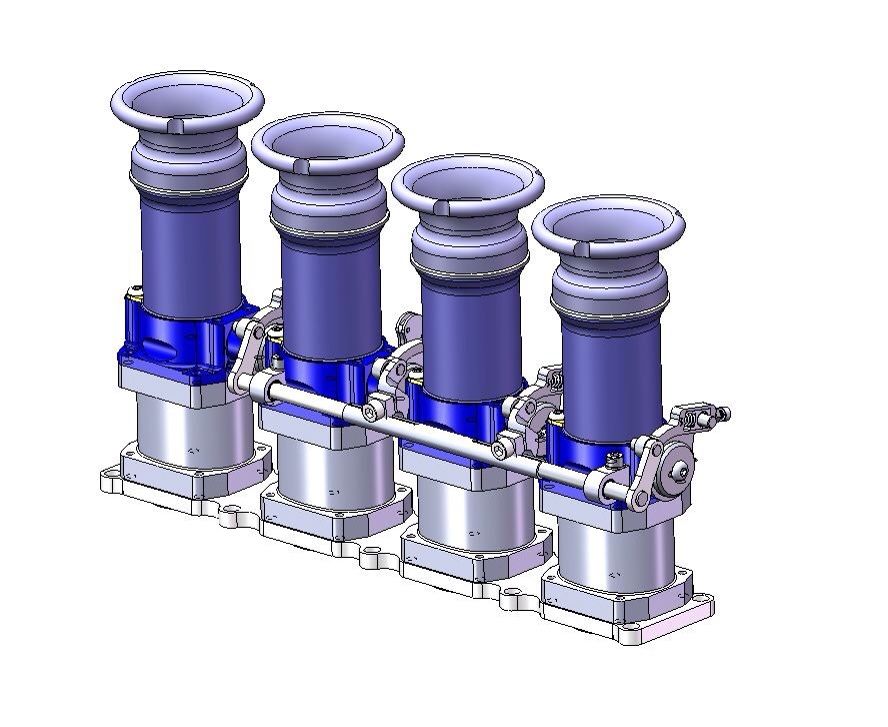
That should sort out the crappy electronic throttle with some instant throttle response.... We are aiming for 250+ BHP N/A which will make it the most powerful N/A Swift in existence as the most at the moment is about 185bhp....
Just want all my parts as I'm getting inpatient!! Its going to be a long wait....
So the strip down began...
Clutch looks like it has been a bit hot...
Inlet manifold and throttle body no longer required..
Alternator and starter motor off
Stock fuel rail and injectors removed and soon to be replaced..
Engine on the stand ready to break it down to component parts...
Oil out
Cam cover off
Next up we needed to remove the crank pulley... We used our usual impact gun both electric and compressed air.. nothing would shift it. I got out the trusty Suzuki Workshop manual as I have never had one stuck on like this! It says Special tool required... As I did not want to waste time going to Suzuki for a tool I made one from an old spirit level
Timing chain cover off next..
With this gone we could remove the VVT and the Cams...
The valves would be staying in for now as I needed them in to show CNC heads and is now with Ferrea to make me some large valves!
Head off..
Block left to strip...
Under side
Pistons out and crank removed..
So thats the engine laid out on a table....
With this all done the head was sent to Cat Cams and I needed to draw the pistons, rods and block with sleeves so that LA Sleeve can look to make 86mm pistons, rods and sleeves to close deck the block. This will increase cc from 1587cc to 1929cc increasing compression from 11:1 to 12:1. I wanted to go more but want to run on 99Ron so thats about the max...
Next up I ordered the fuel rail and 360cc injectors
Old vs new
ECU arrived.. this is a motorsport ECU built specifically for the Swift to be CANBUS compatable...
Next I painted the cam cover so the engine bay looks good when its back together. Missed the middle as it will be covered by a carbon plug cover..
Thats basically as far as I have got... Clutch is on the boat from Australia, Pistons, Rods and Liners should be going into production soon and these bad boys turn up next week...
That should sort out the crappy electronic throttle with some instant throttle response.... We are aiming for 250+ BHP N/A which will make it the most powerful N/A Swift in existence as the most at the moment is about 185bhp....
Just want all my parts as I'm getting inpatient!! Its going to be a long wait....


Gassing Station | Readers' Cars | Top of Page | What's New | My Stuff