E30 M52-swapped Trackday Car
Discussion


Again, it's been a while since my last post, but it doesn't mean I've been sat idle!
With regards to the running problems I encountered after fitting the mounts, after weeks of testing, scratching my head and investing in a BMW OBD2 reader, I eventually got to the bottom of it.
I was getting intermittent errors on both crank and cam sensors, and a replacement used OEM cam sensor made no difference. Intermittent errors are the worst kind. It turned out in the end that in both cases (crank sensor and the replacement cam sensor), the 3 wires where they met the sensor had crumbling insulation just falling off them, allowing them to touch - occasionally. So I put my previous (aftermarket) cam sensor on and a new OEM crank sensor. I noticed the difference between the aftermarket and broken OEM cam sensor was the presence of shielding in the short loom from the connector to the sensor. So I made my own from some aluminium tape and made sure that each line of tap was folded over to touch the previous one without adhesive between the two - to ensure a continuous shield.
I also wasn't getting on with the Condor Speed Shop gearbox mounts. They were not an isolating design, so vibrations were getting transferred straight from the gearbox to the cross-member through the centre bolt. This had just been exacerbating the running issues from the crank/cam sensors. I sold these on and replaced them with stock E30 gearbox mounts. The Condor Speed Shop engine mounts are ace though. Not much in the way of additional noise/vibration, but the engine is mounted rock solid.
So with the car running as it should again, I turned my attention to the disappointing handling I had experienced at Oulton Park. First concern was the front springs being way too soft (about 350-360lb by my estimation), so I swapped these out for some 7", 450lb springs from Faulkners. I also reduced the rear track by 10 mm per side by swapping the 15 mm spacers for 5 mm ones. This in turn allowed me to slot the shorter & stiffer Koni barrel springs back in (in place of the Jamex or Gmax 20mm drop ones I'd put in there), reducing both rake and roll. I could tell right away that these two mods transformed the way the car drove. It rolled less, was less tail happy and even rode better; on the old springs, I had cranked the dampers right up to make up for the reduced spring rate. Ultimately this is a bodge as a damper is in no way a spring and it made the ride crashy. Now, with stiffer springs I could back the dampers off, letting the spring do its job and that just made everything feel more - for want of a better word, 'right'.
So, with a solid driving car and a fresh year's MOT in my hand, it was time to put it to good use - I booked a day at Blyton Park. And yet again, things didn't go to plan.
Not long after booking, my lovely Fiancee reminded me we were attending a wedding in Rochdale the night before. So I decided to drive the car to the wedding with all my gear and get an early night.
So, herein I learnt the following lesson: floor-hinged pedals, manual brakes, hairline sensitive throttle response, bucket seats, harnesses and general lack of heat insulation make for a miserable experience in stop-start traffic in the pouring rain. Particularly a continuous 80 minutes of it. On the plus side, the car ran fine in these conditions, except for a slightly disconcerting grumble/whine that began to develop when coasting in neutral or with the clutch down.
6 o'clock the next morning, I dragged myself out of bed and went on my way. The aforementioned noise became a loud and pervasive transmission noise/grumble as my journey went on. I arrived at Blyton Park worried and with ringing ears.
Nevertheless, signed on and did some very loud sighting laps. I gave the car a good once over and confirmed it probably wasn't a wheel bearing or other safety-critical item, then decided to watch for a while and go home. But watching brought on temptation and I succumbed. I decided to risk a few laps.
Apart from the noise, the car was great. It could do with a bit more power and a cornerweight/geometry setup to get it bang on, but it was a completely different car to the one I drove earlier this year at Oulton. It went where I pointed it with no understeer and at no point did the rear feel unsettled. Furthermore, replacing the front wheel bearings had indeed fixed the high-speed braking issues I'd experienced at Oulton. This is more like what I was expecting after I'd invested so much time and money. I was grinning, but decided it was better to call it a day at 3 hard laps before I broke something proper. I proceeded to limp it home at a steady 50-60mph and shove it in the garage. Once more, I had to take some solace from the fact that despite some mechanical maladies, it hadn't failed to get from A to B and then Back to A again.
So for now, with tax up, I've SORN'd it until I can figure out what's wrong. Hopefully just a failed centre-bearing and hopefully not a diff - but we'll see. Overall though, despite a disappointing day, I've been left feeling much better about the overall state and capability of the thing than I was a few months ago. MUCH better.
Can't wait until my next track outing, where hopfully I'll finally be able to get a full day in without issue.
Hello again Mark, thanks for the compliments! So what's the Llandow track like? it's a fair old drag from Warrington but the trackday prices seem pretty reasonable. Which E30 are you tracking, is that the red M3? Need to drop me a line next time you're headed up Oulton Park way (you're aka Hoobs on E30zone right?). For me, Oulton and Aintree are local, but then Blyton, Anglesey and Donnington are all about the same distance. Going further afield would have me trying to factor a B&B into the cost of a trackday too!
Yeah, every time I get a little disheartened I just think about how far it's come - selling a project makes no sense unless the cash is desperately needed - that would only lead to regret Definitely in this for the long haul.
I wouldn't mind running stiffer springs, but I was a little worried about taking the dampers too far out of their operating range, given the springs they were supplied with (standard 318ti coilover kit). So 450lb seemed like a good compromise. I do mean to get some stiffer rear barrel springs in the near future too - I'm assuming your 280lb rears were on rear coilovers? So that's about 550lb-600lb in-board spring rate? BC do rear barrel springs up to about 10kg rate (about 560lb) for a decent price, they might just be a little short at 6". The currently fitted Koni springs are 7" with approx 400-420lb rate.
Yeah, every time I get a little disheartened I just think about how far it's come - selling a project makes no sense unless the cash is desperately needed - that would only lead to regret
Definitely in this for the long haul. I wouldn't mind running stiffer springs, but I was a little worried about taking the dampers too far out of their operating range, given the springs they were supplied with (standard 318ti coilover kit). So 450lb seemed like a good compromise. I do mean to get some stiffer rear barrel springs in the near future too - I'm assuming your 280lb rears were on rear coilovers? So that's about 550lb-600lb in-board spring rate? BC do rear barrel springs up to about 10kg rate (about 560lb) for a decent price, they might just be a little short at 6". The currently fitted Koni springs are 7" with approx 400-420lb rate.
Prognosis looks bad. Got under the car today and had a proper poke around. Centre bearing was good, as were wheel bearings. But the diff is making a horrible noise when turned by hand. I drained off a little of the oil for inspection and it was nasty, thick and grey. Pretty certain LSD oil shouldn't look like that after 1200 miles. Video and pics to follow...but now I have to consider what I'm going to do in the way of sorting it! A rebuild or pick up one of the few used Torsen diff's floating around - although these have a slightly taller ratio.
So, video: nasty grinding noises coming from diff.
http://youtu.be/sySMYsLh4s0
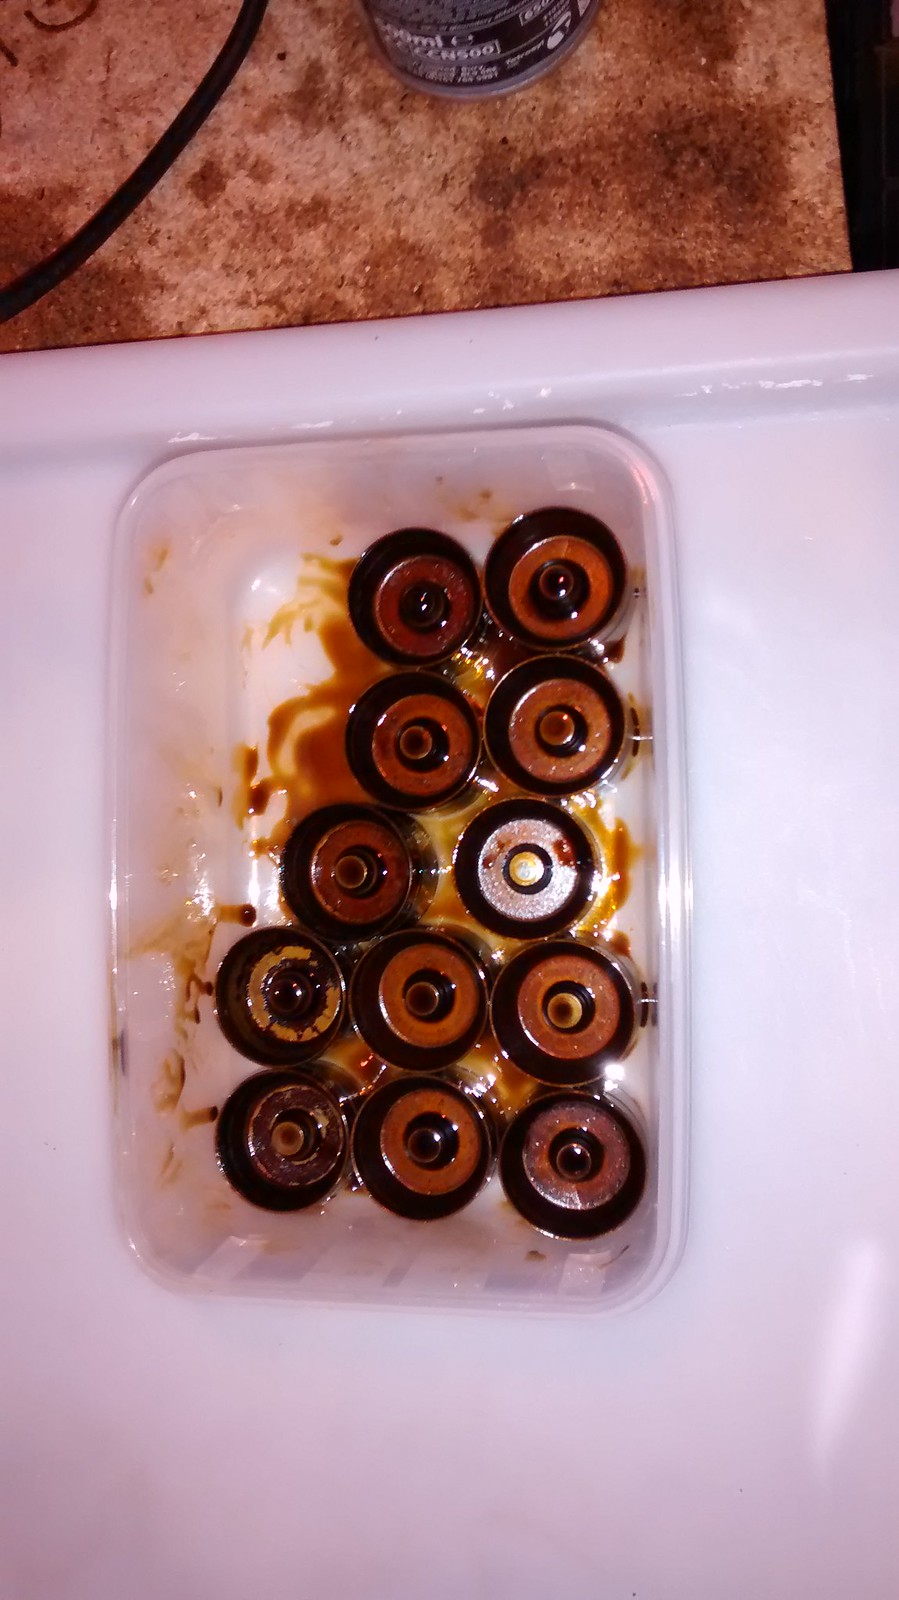
And the autopsy! First up, oil looked like this:
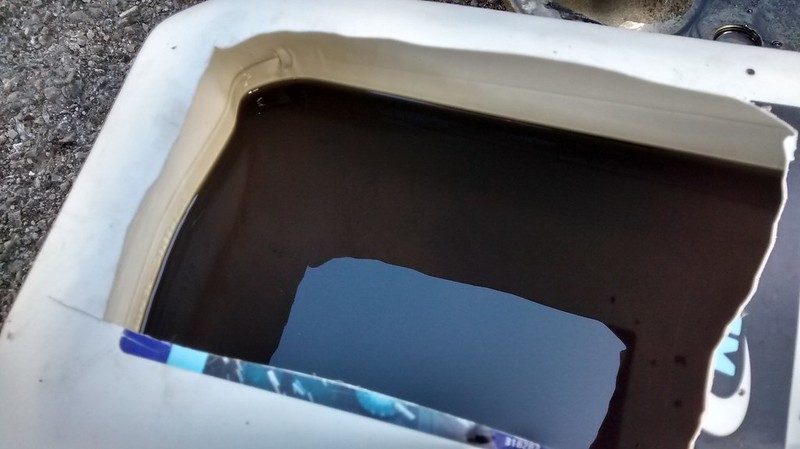
Bearing in mind it‘s only done 1200 miles since I filled the thing, it shouldn‘t be looking like that.
Turning the thing by the input shaft by hand felt all kinds of wrong. Perhaps difficult to see from the video, but it was sticky and notchy.
http://youtu.be/gVrPG-kQiTk
Then there was the swarf collecting on the magnet for the speed sensor:
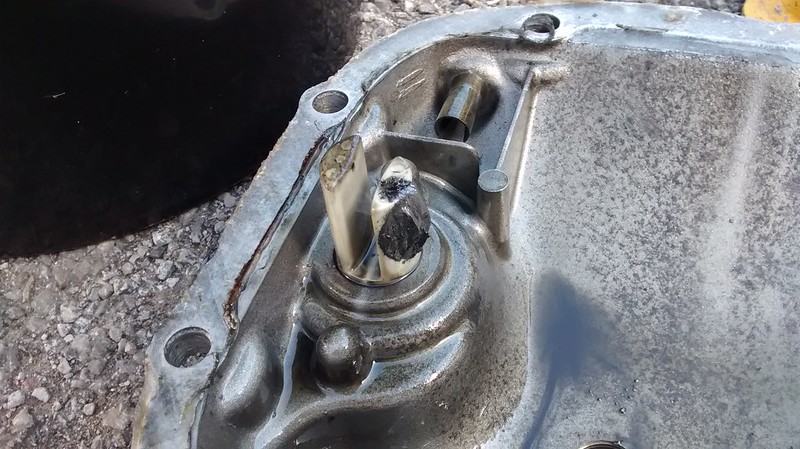
And there we have it - the reason behind the noise that was making my ears bleed at anything over 60 mph...
http://youtu.be/sySMYsLh4s0
And the autopsy! First up, oil looked like this:
Bearing in mind it‘s only done 1200 miles since I filled the thing, it shouldn‘t be looking like that.
Turning the thing by the input shaft by hand felt all kinds of wrong. Perhaps difficult to see from the video, but it was sticky and notchy.
http://youtu.be/gVrPG-kQiTk
Then there was the swarf collecting on the magnet for the speed sensor:
And there we have it - the reason behind the noise that was making my ears bleed at anything over 60 mph...
Yeah I‘ve come across Gripper diffs before - my friend used one in the car he built for Forumula Student iirc. Comparable price to a Quaife torque biasing unit. A bit rich for me at the moment though as I‘m currently looking at buying a new house.
I ended up taking the diff to Neinmeister in Warrington for a rebuild, mainly because I can drop it off, pick it up and speak to people in person if need be - no mucking about with shipping. It seems that the failure is due to pitting in the outer race of all the bearings. I had a look at them the other day - it looks like corrosion to be honest. When I bought the diff, it had been stored for some time drained of oil and with the backplate off, so I wonder if condensation had settled in the bearings causing localised corrosion, which was lifted during use leaving the pitting behind and causing rapid wear. On the other hand, the clutch plates were like brand new; less than 0.1mm wear on one of the plates iirc so didn‘t seem much point in replacing them at this time. So a new set of bearings and seals and it should be good to go - hopefully I will have it back next week.
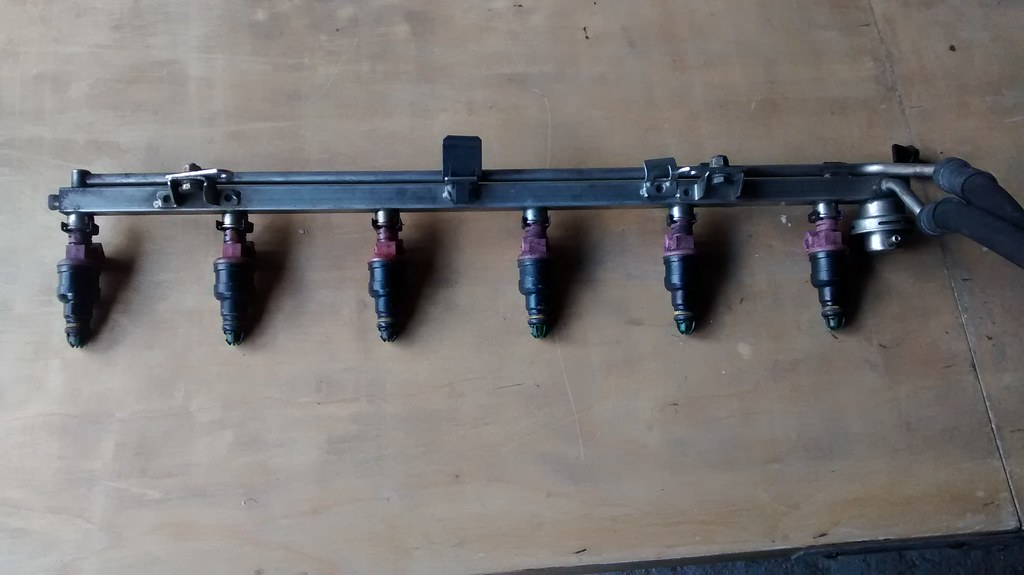
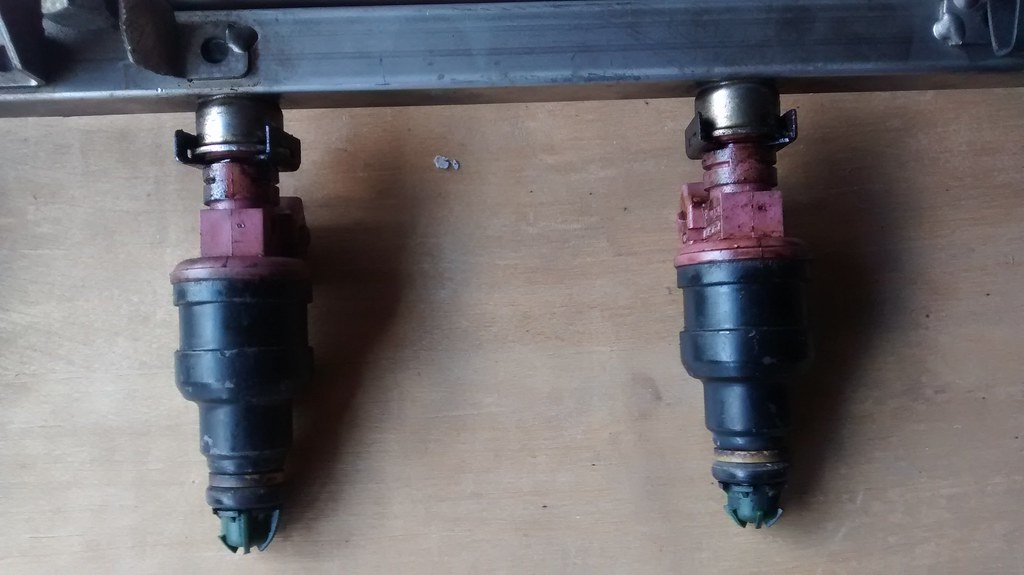
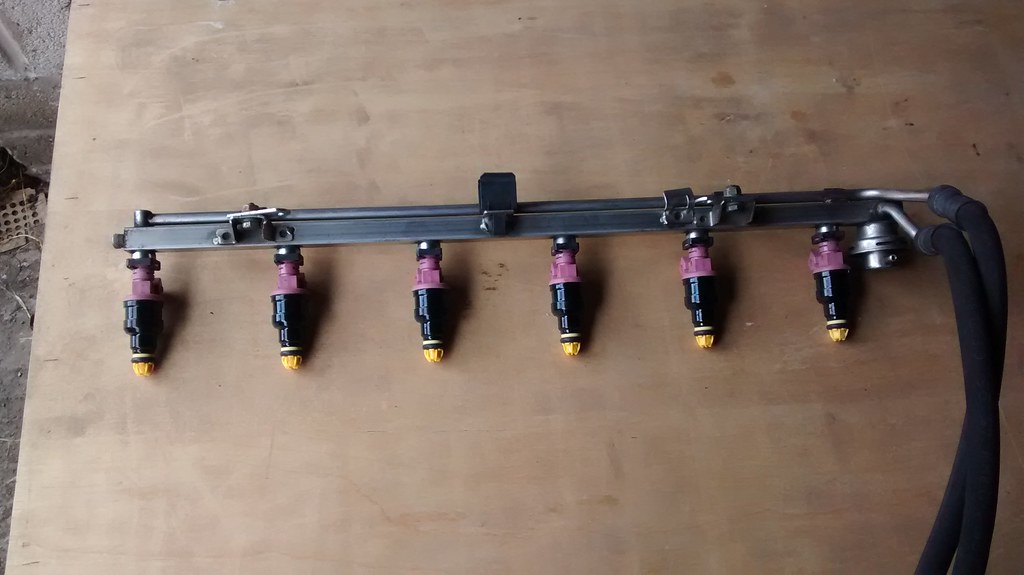
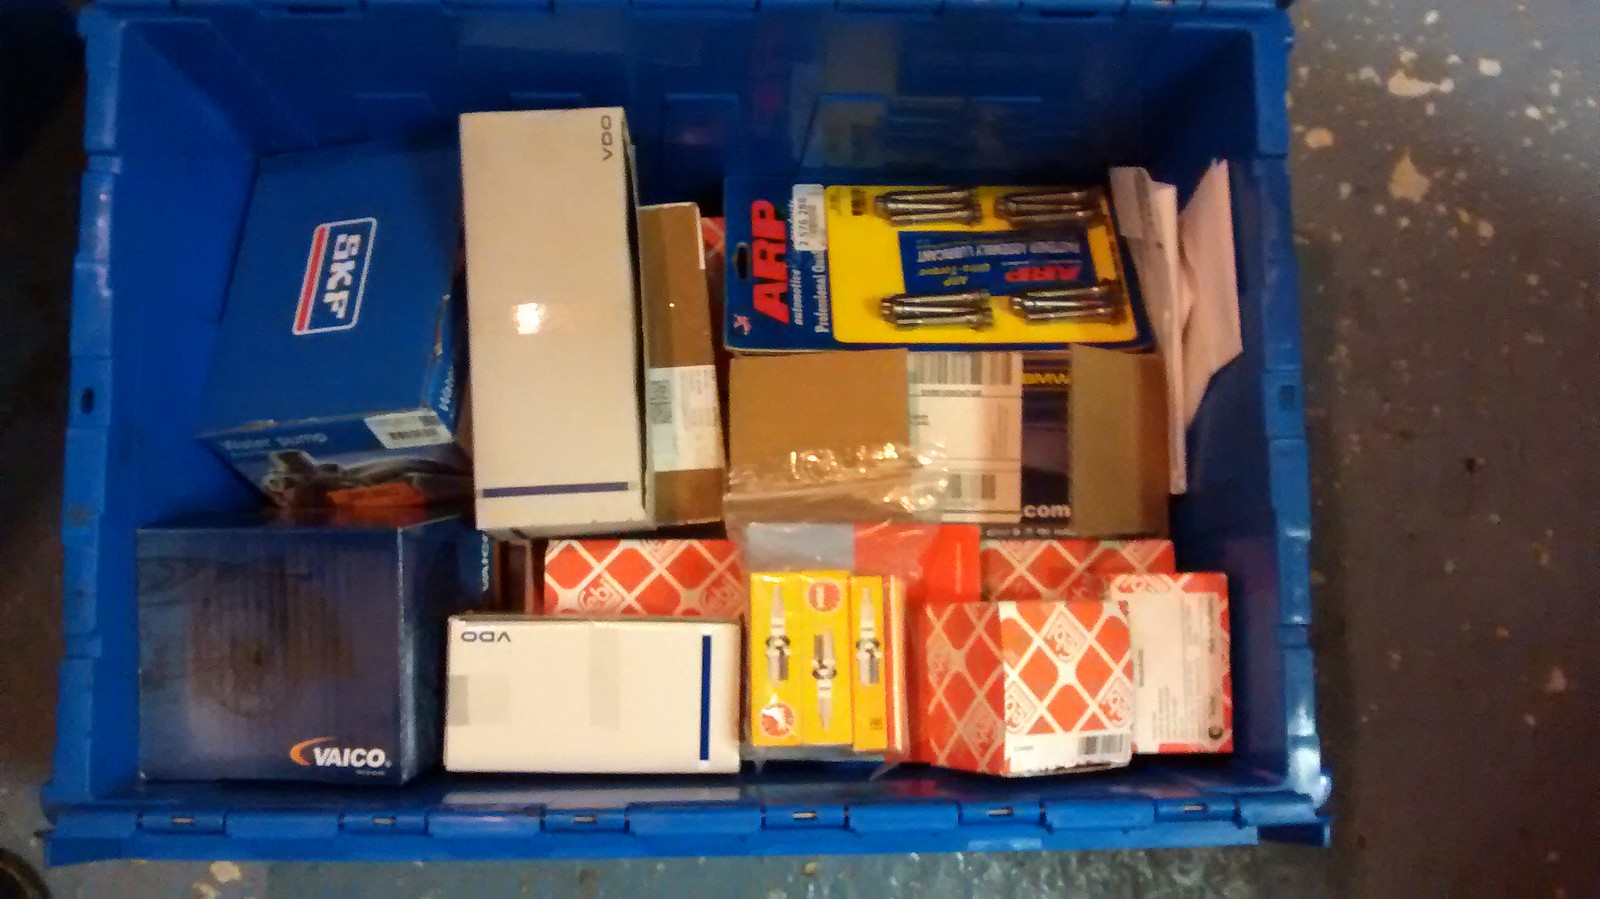
While it‘s out, I‘ve done a couple of other little jobs. First up, I replaced all the injectors with refurbished ones from CP Injection in Merseyside. Two of the old ones were weeping fuel ever so slightly from the o-rings in the rail and given the state of the donor car, it‘s anybody‘s guess as to how often they saw a fuel filter change. So this was really a job that was overdue.
Old injectors in fuel rail:
Complete with leaks:
New injectors in rail, fuel rail cleaned up too:
Havn‘t run the engine with them yet as - well because I was inspecting the centre bearing and drivetrain, I havn‘t put the exhaust back on yet. But I pressurised the system again and there don‘t seem to be any leaks. Hopefully I‘ve managed to find a few more lost bhp! Next goal is the open track session at 3-Sisters on 7th October. If I can get 20 or 30 laps in without further incident, it‘ll be time to book a proper track day again
I ended up taking the diff to Neinmeister in Warrington for a rebuild, mainly because I can drop it off, pick it up and speak to people in person if need be - no mucking about with shipping. It seems that the failure is due to pitting in the outer race of all the bearings. I had a look at them the other day - it looks like corrosion to be honest. When I bought the diff, it had been stored for some time drained of oil and with the backplate off, so I wonder if condensation had settled in the bearings causing localised corrosion, which was lifted during use leaving the pitting behind and causing rapid wear. On the other hand, the clutch plates were like brand new; less than 0.1mm wear on one of the plates iirc so didn‘t seem much point in replacing them at this time. So a new set of bearings and seals and it should be good to go - hopefully I will have it back next week.
While it‘s out, I‘ve done a couple of other little jobs. First up, I replaced all the injectors with refurbished ones from CP Injection in Merseyside. Two of the old ones were weeping fuel ever so slightly from the o-rings in the rail and given the state of the donor car, it‘s anybody‘s guess as to how often they saw a fuel filter change. So this was really a job that was overdue.
Old injectors in fuel rail:
Complete with leaks:
New injectors in rail, fuel rail cleaned up too:
Havn‘t run the engine with them yet as - well because I was inspecting the centre bearing and drivetrain, I havn‘t put the exhaust back on yet. But I pressurised the system again and there don‘t seem to be any leaks. Hopefully I‘ve managed to find a few more lost bhp! Next goal is the open track session at 3-Sisters on 7th October. If I can get 20 or 30 laps in without further incident, it‘ll be time to book a proper track day again
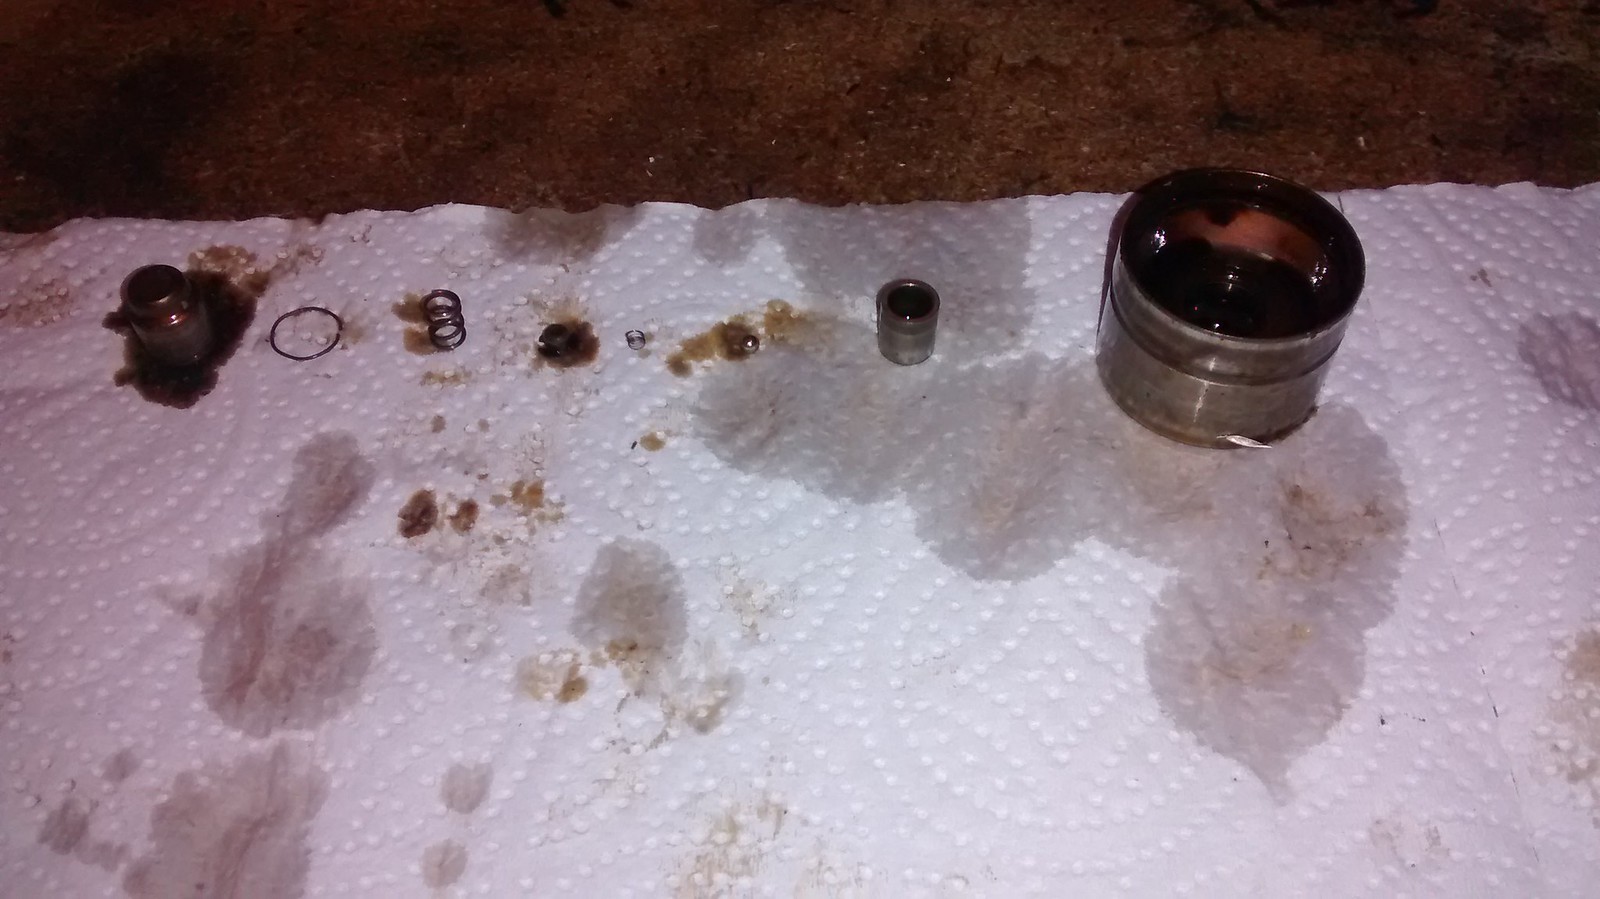
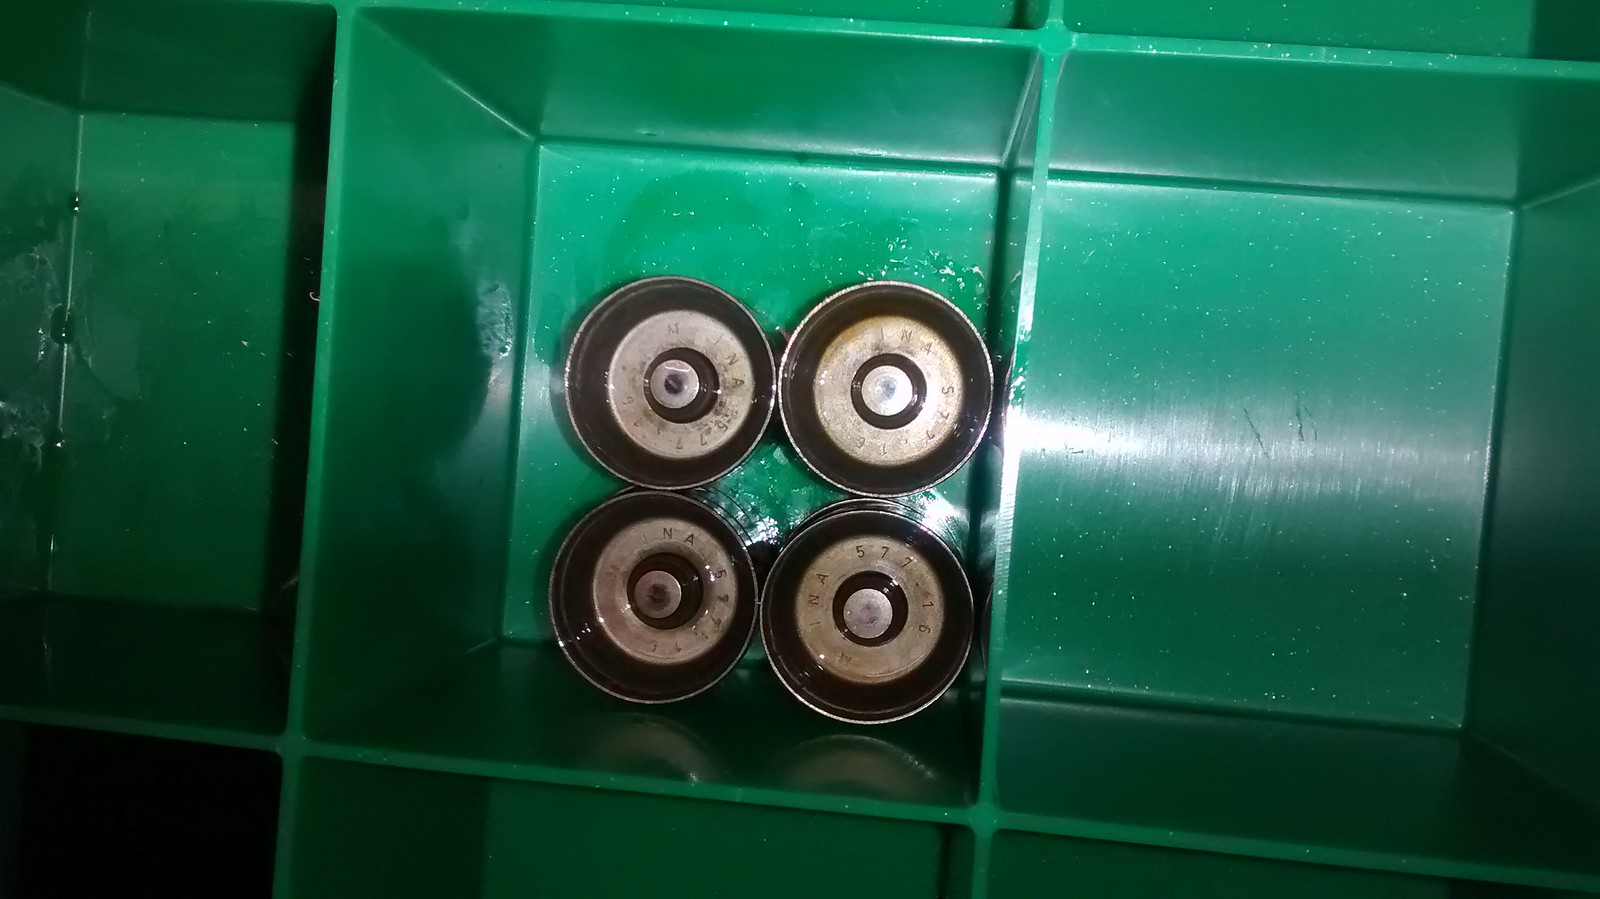
Well, got my diff back from Neinmeister today. Looks good! Feels smooth and tight when turned by hand so hopefully I will get a chance this weekend to put it back on the car. Can't wait to see how it feels...and to see if the tried and tested 'bodyrometer' can tell the difference with the refurbished injectors finished.
In the meantime, here are some photos showing the somewhat decayed state of the old output shaft bearings.
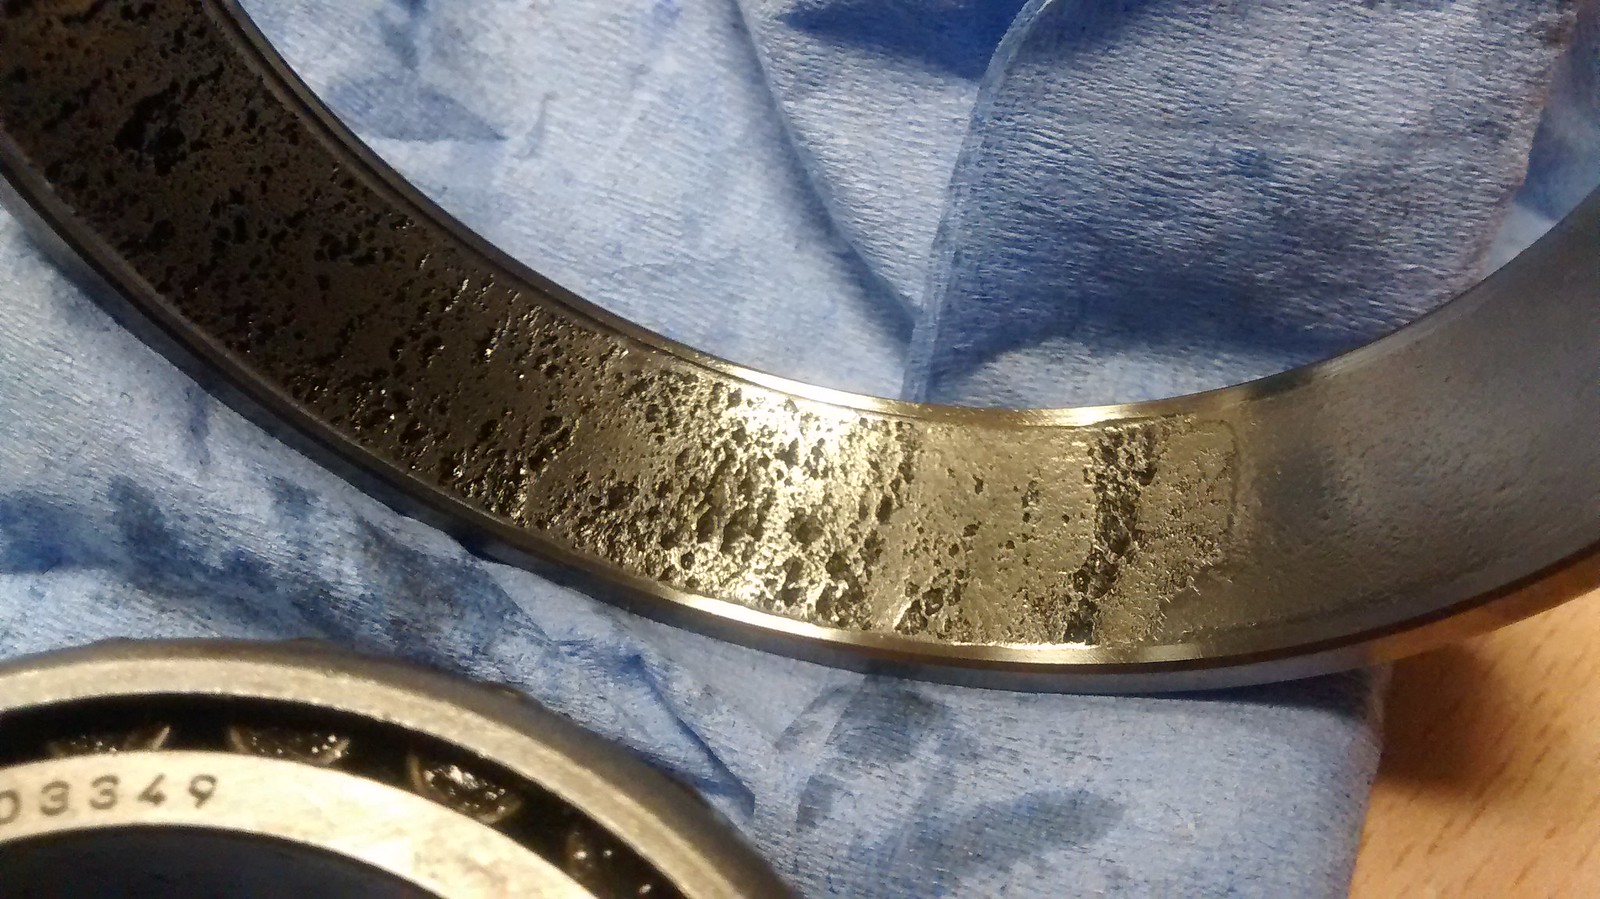
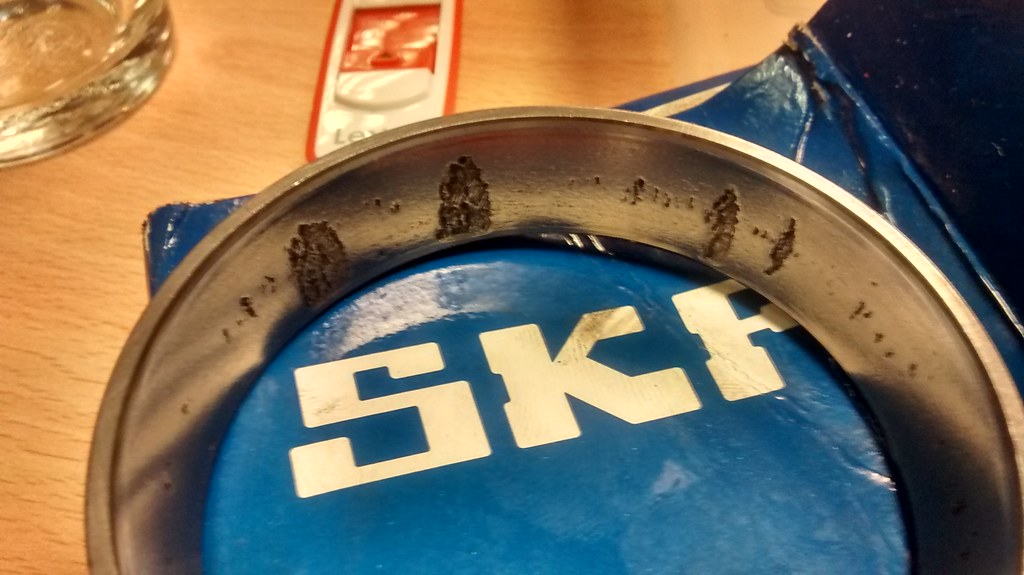
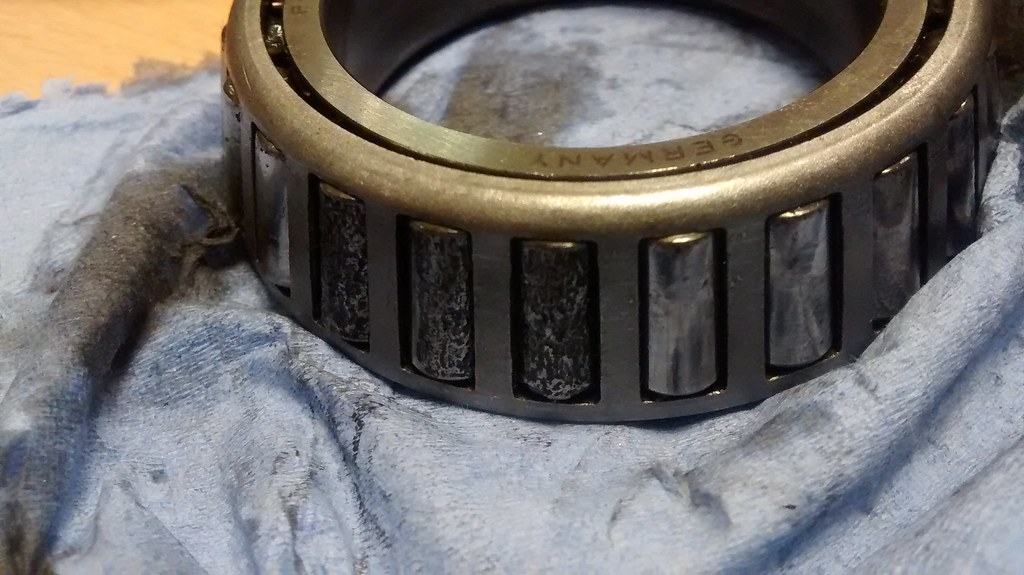
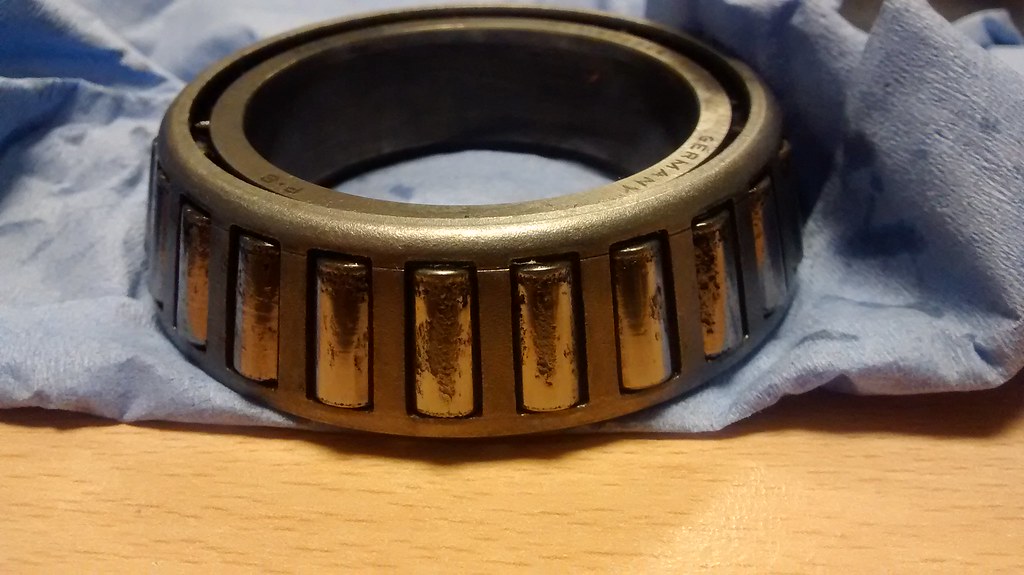
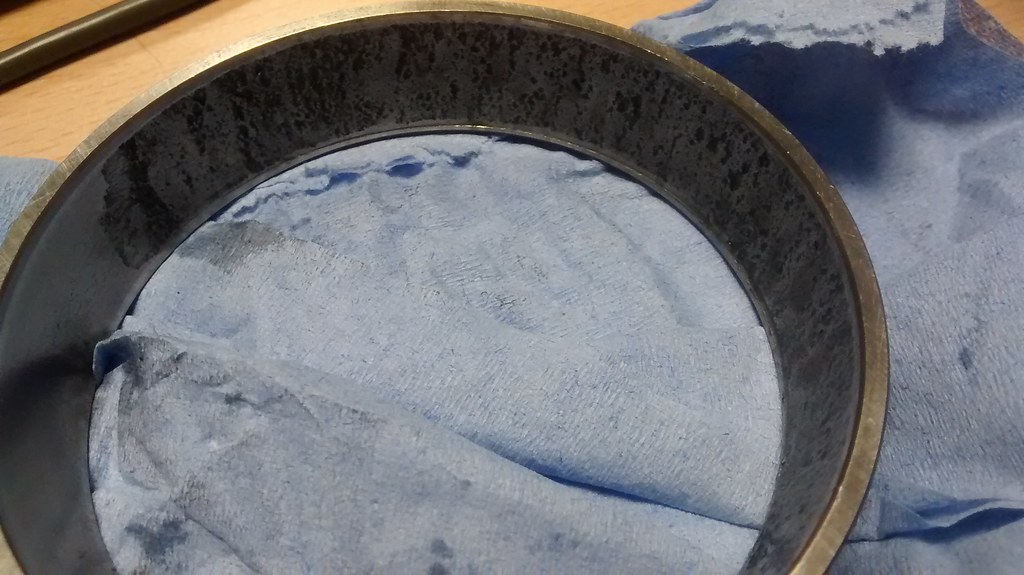
In the meantime, here are some photos showing the somewhat decayed state of the old output shaft bearings.
As it stands, the car is still SORN. But I‘ve been chipping away at various jobs without any real time pressures, which has been great. Cheap jobs too, because as it stands I‘m pretty skint for the moment!
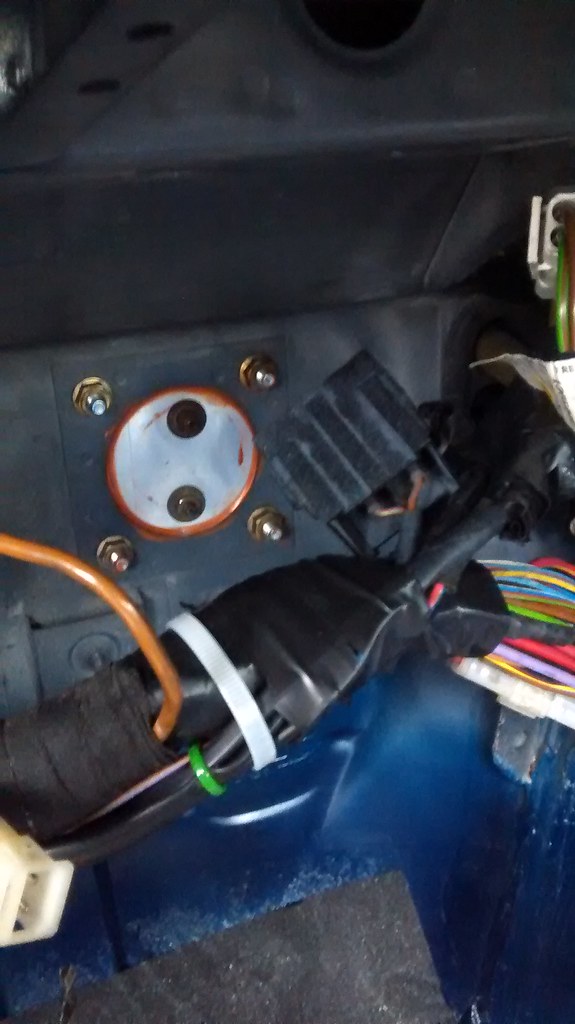
The diff is now all hooked up again and ready to roll. I had 8-litres of 5w-40 Castrol Edge in the garage ready for an oil change, so I got myself a filter and sump plug washer and got on with it. I wasn‘t entirely happy with the spreader plate for my pedal box either - call me anally retentive or whatever, but I knew I‘d feel more comfortable with something a bit meatier preventing the floorpan folding inwards under hard braking. I made something a little bigger than the old one and made it out of 3 mm steel rather than 2 mm, so...old vs. new:
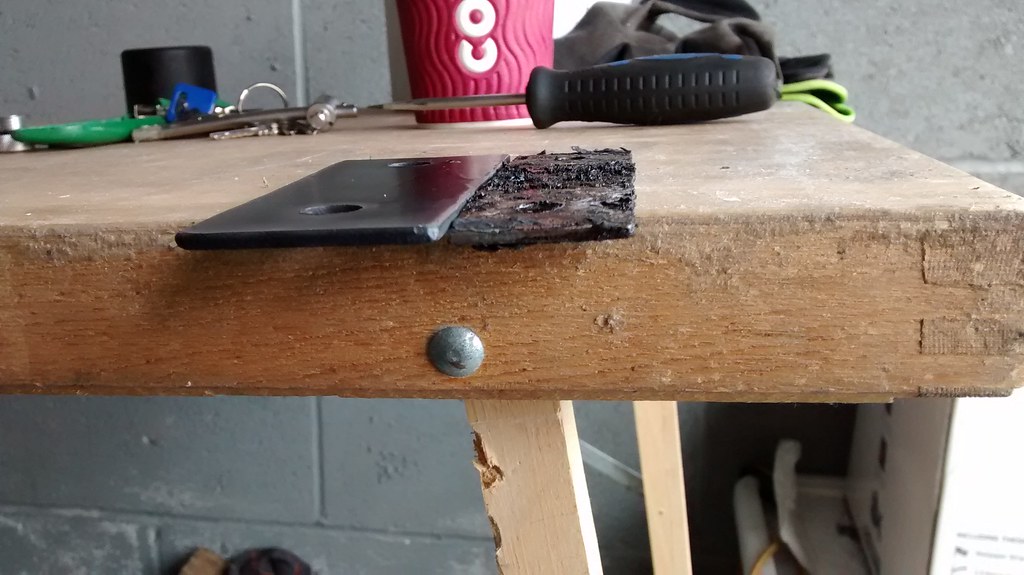
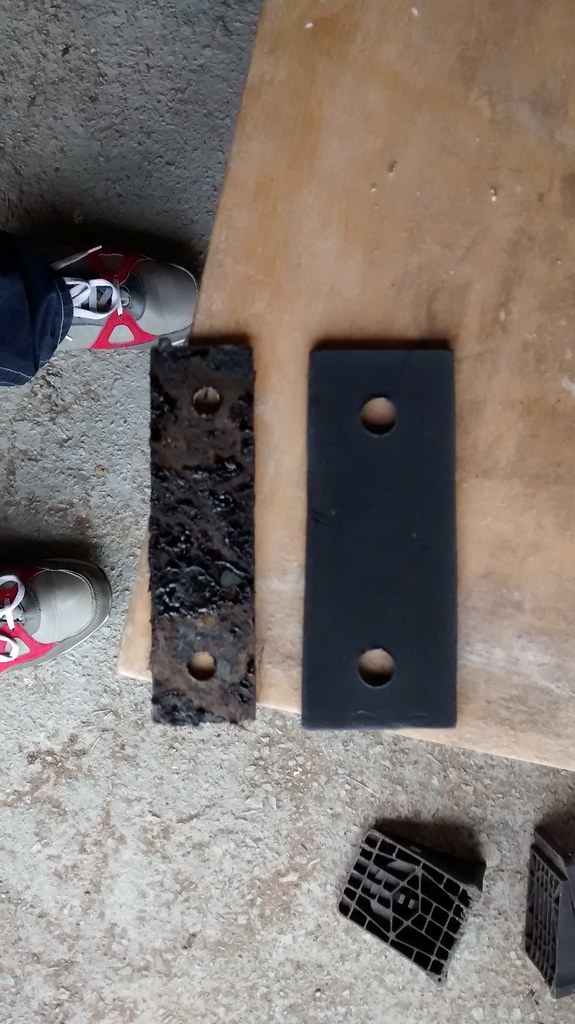
There are actually two spreader plates; this one covers the two bolts on the right side of the chassis rail and one for the one bolt on the left.
The other thing I wanted to sort out was crankcase ventilation. When I installed the M50 manifoled, I binned the PCV valve and routed the crankcase breather straight into the inlet - the most common way of doing the M50 manifold install. However a bit of research suggested this isn‘t the best way of letting the crankcase breath as all the combustion gases, oil and water vapour get pulled into the inlet. Yes, they get burnt but they can also filth up the throttle body, manifold and in the worst case, result in fuel dilution and effectively reduced octane at high engine speeds.
So I needed an oil catch can/seperator and these are expensive. So what follows is a little tutorial on how to knock one up on the cheap. The project started with a budget ebay catch can, like this one:
http://www.ebay.co.uk/itm/OIL-CATCH-TANK-ROUND-9MM...
I fully expected this to be devoid of all filtration and baffles upon opening and I wasn‘t disappointed.
They open easily enough with all the hex screws (carefully!) removed and by sticking a screwdriver or other long tool through the drain plug aperture (so it touches the top) and giving it a sharp tap with a hammer to break the seal.
To turn this into a ‘working‘ catch can, I used the following:

1) Stainless steel scourers (from the local £1 shop).
2) A piece of aluminium mesh (the kind used for bodging body repair) cut to fit the inside of the can. I had some of this lying around the garage.
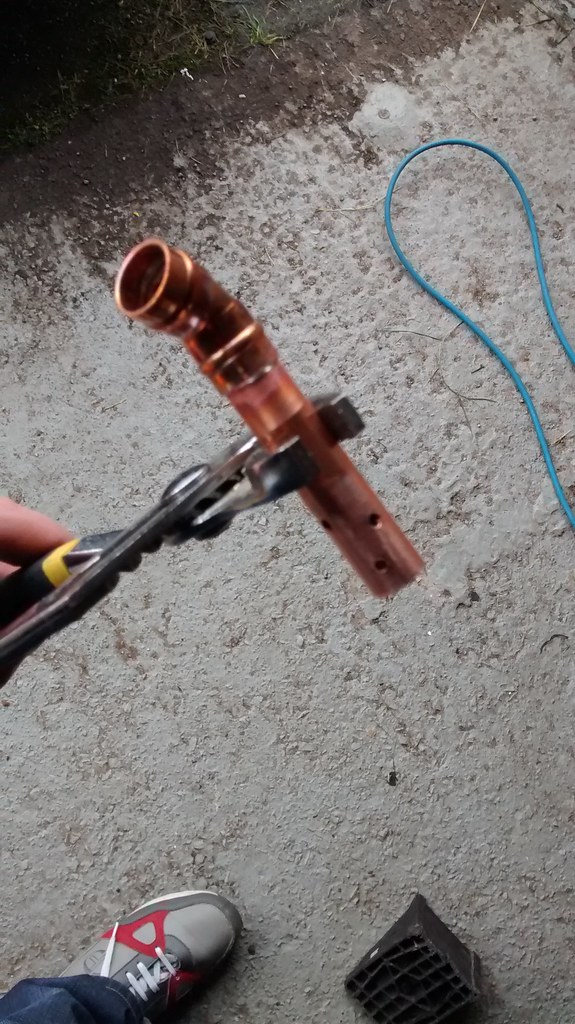
3) Standard 15mm copper pipe - a short length (around 55 mm) and a longer length, cut to hang just above the botom of the level indicator on the can (around 75-80mm). Local plumbing store offcuts will do fine, but most guys will have some knocking about the garage/shed.
4) A 45-degree solder ring elbow (about £2 from B&Q).
I started by drilling some holes in what was to be the bottom of the longer bit of pipe - to be the inlet from the crankcase breather - to make sure I can see how the can is filling before it blocks the inlet.
Then I soldered in the elbow.
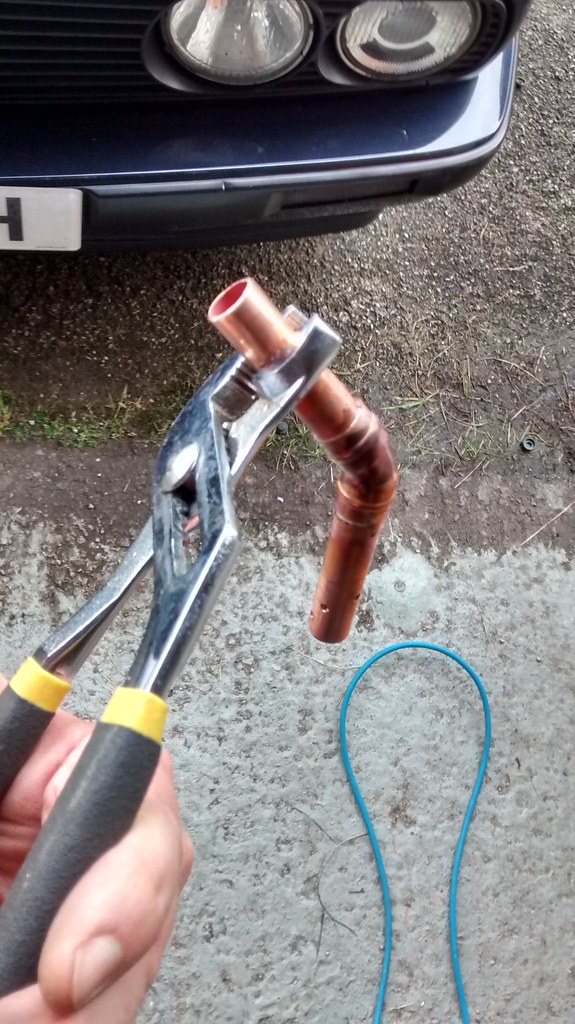
Then you need to find a way of securing this pipe into the top of the can. The cheapest and easiest way of doing this would be just to use some Tiger Seal or similar, but I didn‘t have any lying around. I made a little sleeve out of shrink wrap instead - after failing with flux & solder. It doesn‘t need to be perfect as the can won‘t be subject to high temperatures or pressures, but it should be airtight.
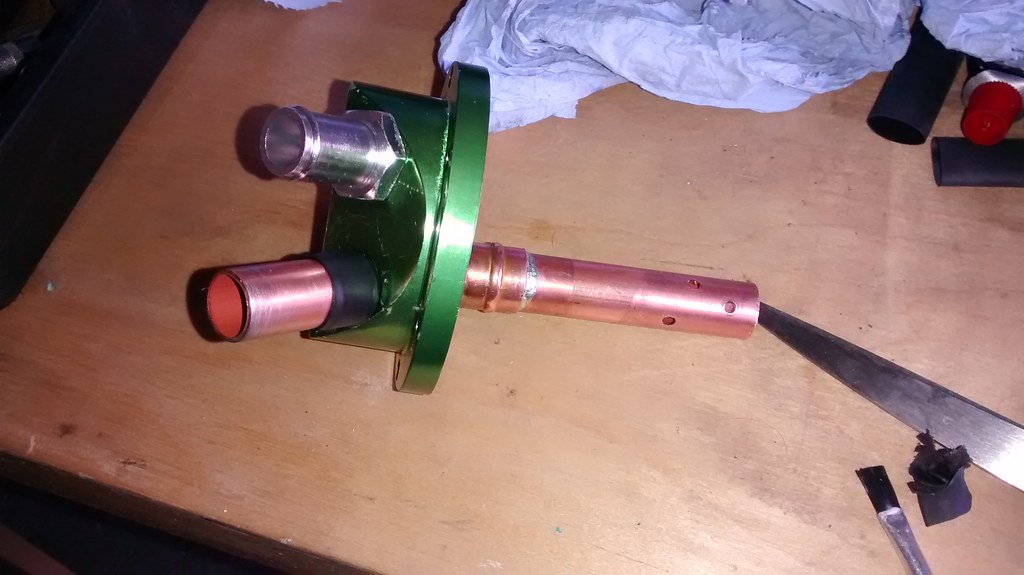
I also found that the factory fittings didn‘t seal air tight, so a bit of instant gasket on the thread and beneath the nut fixed that.
Next step is to pack the can with the scourers. This will provide lots of surface area for the crankcase vapours to condense on.
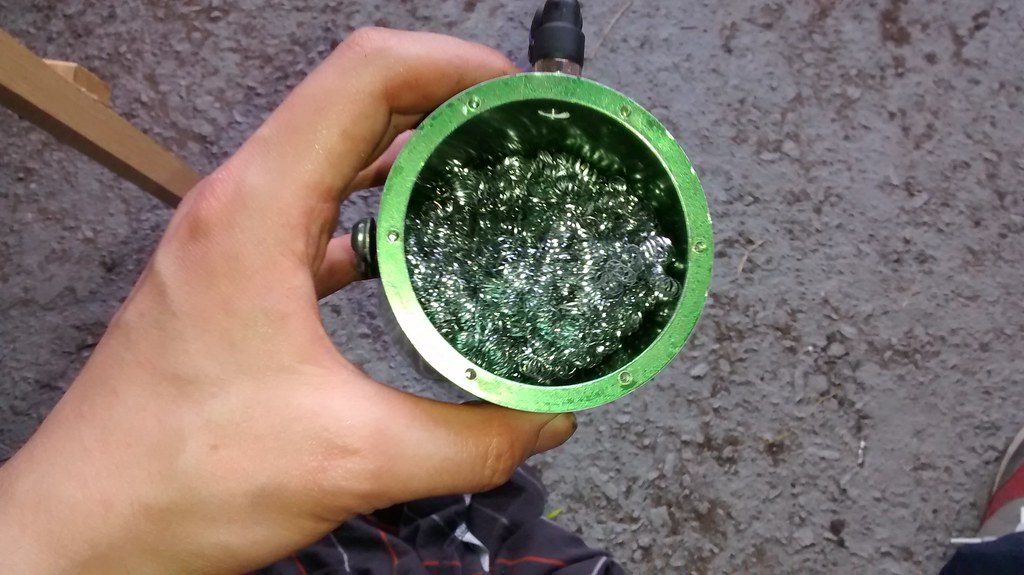
Then the mesh comes in. This acts as a debris filter to stop any of the scouring gubbins (though I checked for loose material beforehand to be sure) being sucked through the outlet and into the intake manifold. It needs a hole punching in it for the inlet pipe to go through.
It may now become apparant that the point of the inlet descending down into the can is to ensure vapour can‘t take a ‘shortcut‘ from the inlet sttraight into the outlet. It is forced to travel through all the filter media.
Now the whole lot can be bolted back together. Clean up the mating surfaces and apply a smear of instant gasket, then screw back together.
At this point, feel free to check for airtight-ness by blowing into the inlet wih the outlet blocked - or vice versa. If the job is good you‘ll end up red faced and with sore cheeks and you‘re good to go! A (hopefully) working catch can/seperator for £20-£25...depending on what supplies are required
There isn‘t really anything left for me to do now tbh. Certainly not anything I can afford! When November comes round, I‘ll tax the car and give it some stick to see how everything feels.
The diff is now all hooked up again and ready to roll. I had 8-litres of 5w-40 Castrol Edge in the garage ready for an oil change, so I got myself a filter and sump plug washer and got on with it. I wasn‘t entirely happy with the spreader plate for my pedal box either - call me anally retentive or whatever, but I knew I‘d feel more comfortable with something a bit meatier preventing the floorpan folding inwards under hard braking. I made something a little bigger than the old one and made it out of 3 mm steel rather than 2 mm, so...old vs. new:
There are actually two spreader plates; this one covers the two bolts on the right side of the chassis rail and one for the one bolt on the left.
The other thing I wanted to sort out was crankcase ventilation. When I installed the M50 manifoled, I binned the PCV valve and routed the crankcase breather straight into the inlet - the most common way of doing the M50 manifold install. However a bit of research suggested this isn‘t the best way of letting the crankcase breath as all the combustion gases, oil and water vapour get pulled into the inlet. Yes, they get burnt but they can also filth up the throttle body, manifold and in the worst case, result in fuel dilution and effectively reduced octane at high engine speeds.
So I needed an oil catch can/seperator and these are expensive. So what follows is a little tutorial on how to knock one up on the cheap. The project started with a budget ebay catch can, like this one:
http://www.ebay.co.uk/itm/OIL-CATCH-TANK-ROUND-9MM...
I fully expected this to be devoid of all filtration and baffles upon opening and I wasn‘t disappointed.
They open easily enough with all the hex screws (carefully!) removed and by sticking a screwdriver or other long tool through the drain plug aperture (so it touches the top) and giving it a sharp tap with a hammer to break the seal.
To turn this into a ‘working‘ catch can, I used the following:
1) Stainless steel scourers (from the local £1 shop).
2) A piece of aluminium mesh (the kind used for bodging body repair) cut to fit the inside of the can. I had some of this lying around the garage.
3) Standard 15mm copper pipe - a short length (around 55 mm) and a longer length, cut to hang just above the botom of the level indicator on the can (around 75-80mm). Local plumbing store offcuts will do fine, but most guys will have some knocking about the garage/shed.
4) A 45-degree solder ring elbow (about £2 from B&Q).
I started by drilling some holes in what was to be the bottom of the longer bit of pipe - to be the inlet from the crankcase breather - to make sure I can see how the can is filling before it blocks the inlet.
Then I soldered in the elbow.
Then you need to find a way of securing this pipe into the top of the can. The cheapest and easiest way of doing this would be just to use some Tiger Seal or similar, but I didn‘t have any lying around. I made a little sleeve out of shrink wrap instead - after failing with flux & solder. It doesn‘t need to be perfect as the can won‘t be subject to high temperatures or pressures, but it should be airtight.
I also found that the factory fittings didn‘t seal air tight, so a bit of instant gasket on the thread and beneath the nut fixed that.
Next step is to pack the can with the scourers. This will provide lots of surface area for the crankcase vapours to condense on.
Then the mesh comes in. This acts as a debris filter to stop any of the scouring gubbins (though I checked for loose material beforehand to be sure) being sucked through the outlet and into the intake manifold. It needs a hole punching in it for the inlet pipe to go through.
It may now become apparant that the point of the inlet descending down into the can is to ensure vapour can‘t take a ‘shortcut‘ from the inlet sttraight into the outlet. It is forced to travel through all the filter media.
Now the whole lot can be bolted back together. Clean up the mating surfaces and apply a smear of instant gasket, then screw back together.
At this point, feel free to check for airtight-ness by blowing into the inlet wih the outlet blocked - or vice versa. If the job is good you‘ll end up red faced and with sore cheeks and you‘re good to go! A (hopefully) working catch can/seperator for £20-£25...depending on what supplies are required
There isn‘t really anything left for me to do now tbh. Certainly not anything I can afford! When November comes round, I‘ll tax the car and give it some stick to see how everything feels.
Edited by motorhole on Sunday 19th October 17:21
This weekend I fitted the catch tank and got round to taking the car for a spin (almost literally...) for the first time since the failure that was the Blyton Park track day.
The most logical place to fit the catch tank was in the space vacated by the original brake master cylinder and servo. The added benefit was this is I could drill through an ally panel I fitted to cover the hole in the bulkhead rather than drill more holes in the shell of the car. Score! I hate drilling holes in a decent shell and try to avoid it wherever possible.
I mounted the catch can using some mounting rubbers that came off the E36 donor car...can't remember what they were for, but they are like mini engine mounts with an M6 thread on each side, so they conveniently screwed straight into the threaded holes in the catch can body - and I bolted the other end through the ally plate.
I was excited about taking the car for a drive, but the roads were pretty damp. I couldn't use full throttle anywhere and the one time I thought it was safe to do so - on a short, quiet, straight stretch of dual carriageway without any other vehicles around - it nearly bit me. As the tacho went past 4500rpm (in 3rd), the rears suddenly lit up and the car decided that it wanted to play with the central reservation. A clenched sphincter and a wiggle of the steering later, all was good but I'm thinking it would be safest to save the *rse dyno test for dry weather!
I'm actually all ready to book another trackday, but as usual, real life gets in the way and cash is being swallowed by buying a new home whilst still trying to flog the current one. Fingers crossed I can get rid of it sooner rather than later and go and burn some fuel for fun!
Well, had another crack at Oulton Park on Tuesday.
Luckily the weather stayed nice and the car drove great - apart from a hot, high-speed braking issue that manifested itself after a lap and a bit. So unfortunately I had to keep my sessions to 1-2 laps, almost like a track day sprint - so it could've been worse.
Basically, by the time I started braking for Lodge on the first lap (last corner), I could feel a slight vibration through the seat, wheel and pedal. This got progressively worse with each braking zone such that by the time I was at Shell Oils hairpin on the 2nd lap, the whole car was vibrating under braking - enough to unnerve my passenger too.
Oddly, at low speed (i.e. coming into the pitlane, slowing down from around 40 mph) it wasn't noticable. And all it needed was for the car to cool down for 15 mins or so and it was fine again for another lap.
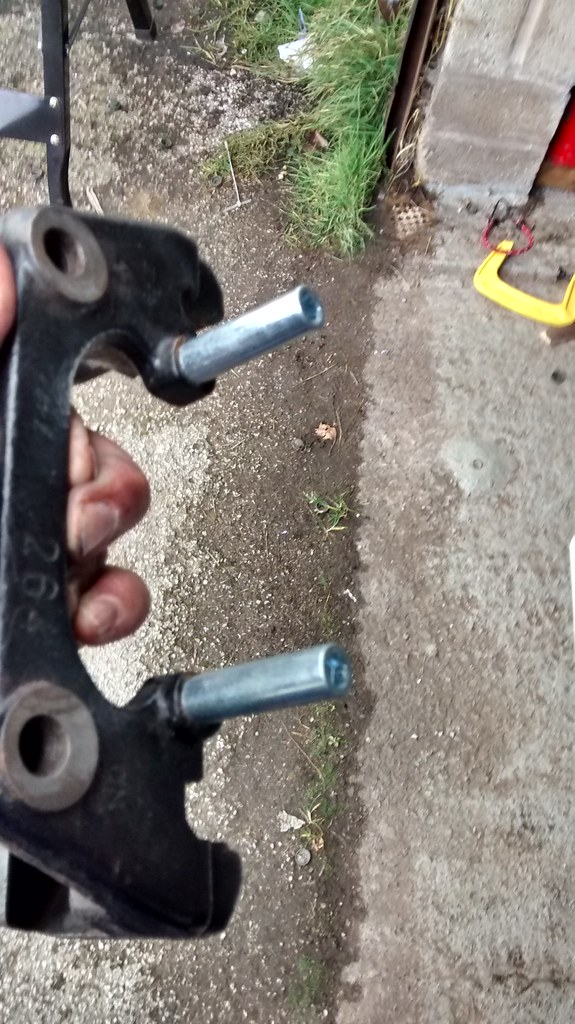
Shame really as the car was great otherwise! Pulled really well and was really strong under braking - when they worked. Also had a lot more grip than I'd be comfortable using on the road (on road tyres still too). I'm booked onto the PPC day at Blyton Park on March 13th now, so I've got until then to get to the bottom of the issue. I'm going to whip the discs off at the weekend and get the runout checked (although my gut tells me these are good tbh) and I'm going to replace the offside caliper with a correct-handed one (I have two nearside calipers fitted right now). Other than that - ideas are welcome
Luckily the weather stayed nice and the car drove great - apart from a hot, high-speed braking issue that manifested itself after a lap and a bit. So unfortunately I had to keep my sessions to 1-2 laps, almost like a track day sprint - so it could've been worse.
Basically, by the time I started braking for Lodge on the first lap (last corner), I could feel a slight vibration through the seat, wheel and pedal. This got progressively worse with each braking zone such that by the time I was at Shell Oils hairpin on the 2nd lap, the whole car was vibrating under braking - enough to unnerve my passenger too.
Oddly, at low speed (i.e. coming into the pitlane, slowing down from around 40 mph) it wasn't noticable. And all it needed was for the car to cool down for 15 mins or so and it was fine again for another lap.
Shame really as the car was great otherwise! Pulled really well and was really strong under braking - when they worked. Also had a lot more grip than I'd be comfortable using on the road (on road tyres still too). I'm booked onto the PPC day at Blyton Park on March 13th now, so I've got until then to get to the bottom of the issue. I'm going to whip the discs off at the weekend and get the runout checked (although my gut tells me these are good tbh) and I'm going to replace the offside caliper with a correct-handed one (I have two nearside calipers fitted right now). Other than that - ideas are welcome
So, there were a few potential causes for the vibration:
1) Brake fluid (Dot 5.1) wasn't the freshest. It was about 18 months old and albeit only having covered around 1000 miles and a half-trackday, it could've been doing with changing.
2) My driver's side brake caliper was actually an upside-down passenger side one. This was a legacy from the build - something I didn't notice until I came to bleed the brakes for the first time. Either way, we got it bled, but perhaps something else was amiss with this minor issue.
3) That old chestnut of 'warped discs' - or uneven pad deposit.
4) Binding calipers.
Anyway over the past few weekends I've set about tearing everything apart and investigating.
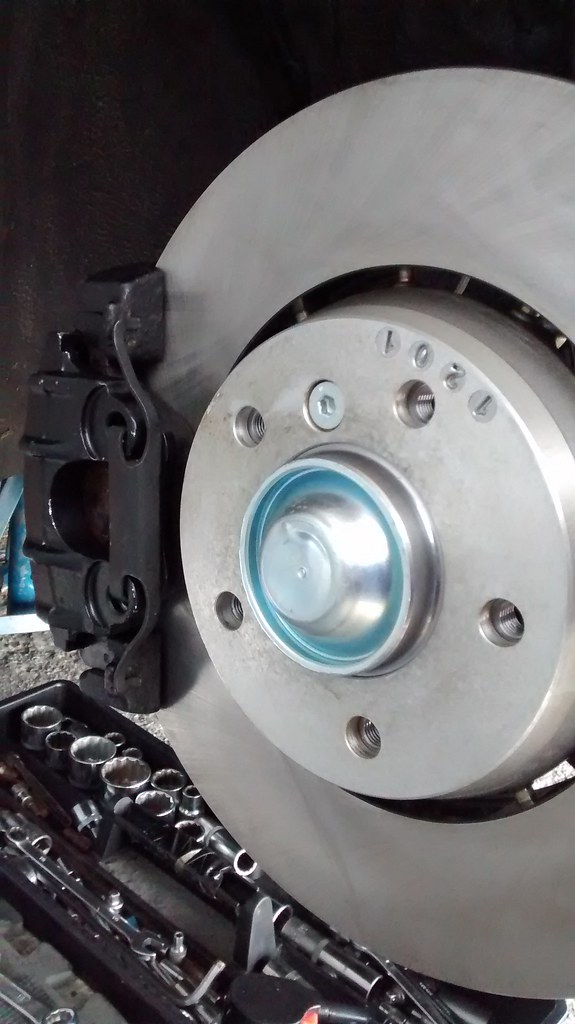
Disc runout was 0.02 mm offside, 0.07 mm nearside. Bit high on the nearside, but I wasn't going to worry about this too much for now. Hub runout was negligible on the nearside, a tiny figure (can't remember what it was!) on the offside.
I replaced the upside-down caliper with a freshly refurbed one from Pagid. I also replaced guide pins and guide pin bushes for good measure - a cheap maintenance task really.
The offside wheel bearing had a noticeable 'sticky' point when turned by hand. Definitely some mechanical contact somewhere that could be felt by hand when rocking it through the sticky point. Odd, as it was a nearly new FAG bearing. I replaced this for good measure and was very careful about torquing up the hub nut.
I bled the brakes. Gunson Eezibleeder - what a great piece of kit. Should've bought one of these ages ago. I had to buy a spare OMP reservoir cap to make my own adapter for it (none of the supplied adapters are anywhere close to the size of the OMP reservoir caps), but it worked a treat.
Then, for good measure, and because I've done about 20 hours overtime in the past 2 months, I treated myself to set of the ATE floating discs from the E36 M3 Evo (using my £15 off CarParts4Less voucher too).
I also purchased a pair of 318ti rear grooved disc brakes (DBA) because they were available at a price I couldn't really turn down. Not required, but a nice to have! Anyway - that didn't go quite to plan...
They say assumption is the mother of all c*ck ups. I can't say that's wrong. You see, my 318ti rear trailing arms were what I'd been looking for for the 5-stud swap. It was what they were advertised as when I bought them. All this time, it's what I ASSUMED I had...until now, when the 318ti disc brakes didn't fit. I checked and double checked part numbers to make sure the discs were right and they were. Then I measured the total depth of the discs that were fitted and it transpires that I have in fact got rear trailing arms, brakes etc from a 2.8 or 3.0 Z3. That means I have nearly 60 mm total distance hub to hub MORE than I thought I had. More track isn't a bad thing to have, but all of a sudden the troubles I had earlier in the build with wheel/arch clearance - when all my calcs suggested I was good - suddenly made sense! Perhaps I should've considered this possibility earlier on. At least all that has now been resolved - so now I have a pair of DBA grooved rear brake discs for an E36 (non-M) up for sale. At $225 Aus each RRP, they don't retail cheap, but I'll let them go for a good price if there are any takers...still boxed and unused and unfitted, only unwrapped
Off to Blyton on 13th March next. Fingers crossed that all will be good.
1) Brake fluid (Dot 5.1) wasn't the freshest. It was about 18 months old and albeit only having covered around 1000 miles and a half-trackday, it could've been doing with changing.
2) My driver's side brake caliper was actually an upside-down passenger side one. This was a legacy from the build - something I didn't notice until I came to bleed the brakes for the first time. Either way, we got it bled, but perhaps something else was amiss with this minor issue.
3) That old chestnut of 'warped discs' - or uneven pad deposit.
4) Binding calipers.
Anyway over the past few weekends I've set about tearing everything apart and investigating.
Disc runout was 0.02 mm offside, 0.07 mm nearside. Bit high on the nearside, but I wasn't going to worry about this too much for now. Hub runout was negligible on the nearside, a tiny figure (can't remember what it was!) on the offside.
I replaced the upside-down caliper with a freshly refurbed one from Pagid. I also replaced guide pins and guide pin bushes for good measure - a cheap maintenance task really.
The offside wheel bearing had a noticeable 'sticky' point when turned by hand. Definitely some mechanical contact somewhere that could be felt by hand when rocking it through the sticky point. Odd, as it was a nearly new FAG bearing. I replaced this for good measure and was very careful about torquing up the hub nut.
I bled the brakes. Gunson Eezibleeder - what a great piece of kit. Should've bought one of these ages ago. I had to buy a spare OMP reservoir cap to make my own adapter for it (none of the supplied adapters are anywhere close to the size of the OMP reservoir caps), but it worked a treat.
Then, for good measure, and because I've done about 20 hours overtime in the past 2 months, I treated myself to set of the ATE floating discs from the E36 M3 Evo (using my £15 off CarParts4Less voucher too).
I also purchased a pair of 318ti rear grooved disc brakes (DBA) because they were available at a price I couldn't really turn down. Not required, but a nice to have! Anyway - that didn't go quite to plan...
They say assumption is the mother of all c*ck ups. I can't say that's wrong. You see, my 318ti rear trailing arms were what I'd been looking for for the 5-stud swap. It was what they were advertised as when I bought them. All this time, it's what I ASSUMED I had...until now, when the 318ti disc brakes didn't fit. I checked and double checked part numbers to make sure the discs were right and they were. Then I measured the total depth of the discs that were fitted and it transpires that I have in fact got rear trailing arms, brakes etc from a 2.8 or 3.0 Z3. That means I have nearly 60 mm total distance hub to hub MORE than I thought I had. More track isn't a bad thing to have, but all of a sudden the troubles I had earlier in the build with wheel/arch clearance - when all my calcs suggested I was good - suddenly made sense! Perhaps I should've considered this possibility earlier on. At least all that has now been resolved - so now I have a pair of DBA grooved rear brake discs for an E36 (non-M) up for sale. At $225 Aus each RRP, they don't retail cheap, but I'll let them go for a good price if there are any takers...still boxed and unused and unfitted, only unwrapped
Off to Blyton on 13th March next. Fingers crossed that all will be good.
So I thought I was going to be thrown another curve ball on the way to Blyton when I noticed a bit of clutch slip in 5th when overtaking on the motorway. Luckily, an adjustment to the clutch pedal fixed it. Basically, the bottom of the pedal was in its rest position before the master cylinder was fully returning. Adjusted it so there was a few mm free-play in the pedal and job done.
...and the car was good! The brakes were great, the diff was working nicely and for the first time I didn‘t need to go home early. I finally had the opportunity to take the car by the scruff of the neck without anything going wrong, so I learnt a lot more about it yesterday than I had from all the time I‘d spent in it beforehand - and that I don‘t need to be as nervous or scared of it as I had been. At no point did it feel snappy or unstable - I could trail brake deep into corners without it trying to swap ends and when it did slide, it was comfortable and progressive. Loads of feedback - and everyone who sat in the passenger seat left commenting on how well it handled too.
It is still a bit soft for real track work, but it‘s tolerable on the road. Something to address in the future if I end up towing it. Also, the temperature slowly rose lap after lap, then backing off a little cooled it down. I never let it get close to 3/4, but it‘s not something I‘ve had an issue with before. Perhaps a bigger rad might be in order in the future. It‘s also a bit ‘ticky‘ when hot too, so perhaps a different oil and an oil cooler might both be worthwhile.
Has anyone here fitted an oil cooler to an M52 before? Can it be done without swapping the filter housing for an S50 one? How easy is the filter housing swap (if at all possible) or is there a way to do it using the standard M52 housing? Any advice would be welcome.
A short video - just showing that the brakes and diff are indeed now work nicely; and short because I still don‘t have internet at the new house so relying on my phone. Will probably get more videos/photos up later.
E30-Blyton-Short: http://youtu.be/Lr-LMs_WOSk
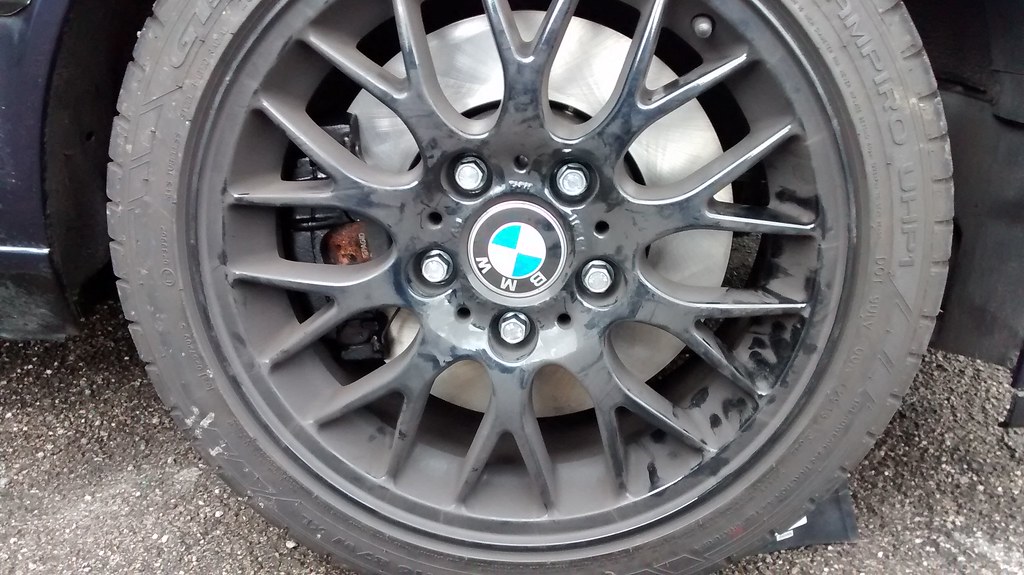
Lots of tyre squeal from the.... err...Champiro UHP1s...
Video!
I didn't record every session, but here's the best one to end up on camera:
https://www.youtube.com/v/BvYA190NSvw
Thought I might be going straight on at the chicane (The Wiggler) once or twice - but the brakes hauled me up perfectly each time. Turns out I just needed more bravery.
And my favourite picture from the day - hint of a slide and inside front wheel almost in the air
So, now it's time for the Fabia daily to get some attention.
It's been loosing a bit of coolant over the past couple of months. No biggie - down to a tiny leak in the radiator. But as it was due a full service and cambelt change in a few weeks anyway, got it booked in. Not a small bill - cambelt, water pump, routine service + radiator and anti-freeze - but fingers crossed it'll do me another few years yet
The local VAG specialist does all the work on the flying banana - because I can't afford to have it off the road for very long, should I manage to screw something up or have to wait for parts. Small price to pay in the long run
Hi Steve. This is what you need to be looking for
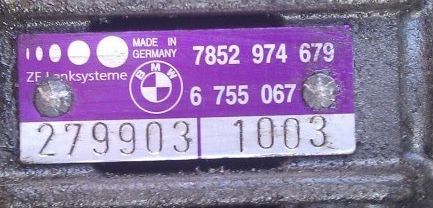
The '067' on the end denotes it as a 3-turn rack. I think most racks are Part no. 32136755068 which is a 3.2 or 3.4 turn rack, I forget.
Weight wise - my thoughts will be invalidated somewhat by the E36 5-stud setup I have up front. This puts the pivot point for the track rod end closer to the stub axle than on an E30 strut, which in turns lessens feedback and increases weight slightly compared with fitting the rack to a regular E30. Still, it feels good to me Certainly turns half a lock of 'oppo' on the E30 rack into a more manageable 'dab of oppo'. Don't find myself wanting more feedback and the weight is nice.
Well impressed by the way that RX8 of your's and Matt's hung on in the corners Al! Flat and properly planted. Struggled to stay put in the slidey leather passenger seat though! Shame you couldn't make it, it was a good day all round, save for Rick's engine failure - even then, he was still smiling.
I'm sure we'll get a chance to catch up soon. Will almost certainly be at Frank's next Blyton day and hope to get another day or two in between.
The '067' on the end denotes it as a 3-turn rack. I think most racks are Part no. 32136755068 which is a 3.2 or 3.4 turn rack, I forget.
Weight wise - my thoughts will be invalidated somewhat by the E36 5-stud setup I have up front. This puts the pivot point for the track rod end closer to the stub axle than on an E30 strut, which in turns lessens feedback and increases weight slightly compared with fitting the rack to a regular E30. Still, it feels good to me
Certainly turns half a lock of 'oppo' on the E30 rack into a more manageable 'dab of oppo'. Don't find myself wanting more feedback and the weight is nice. Well impressed by the way that RX8 of your's and Matt's hung on in the corners Al! Flat and properly planted. Struggled to stay put in the slidey leather passenger seat though! Shame you couldn't make it, it was a good day all round, save for Rick's engine failure - even then, he was still smiling.
I'm sure we'll get a chance to catch up soon. Will almost certainly be at Frank's next Blyton day and hope to get another day or two in between.
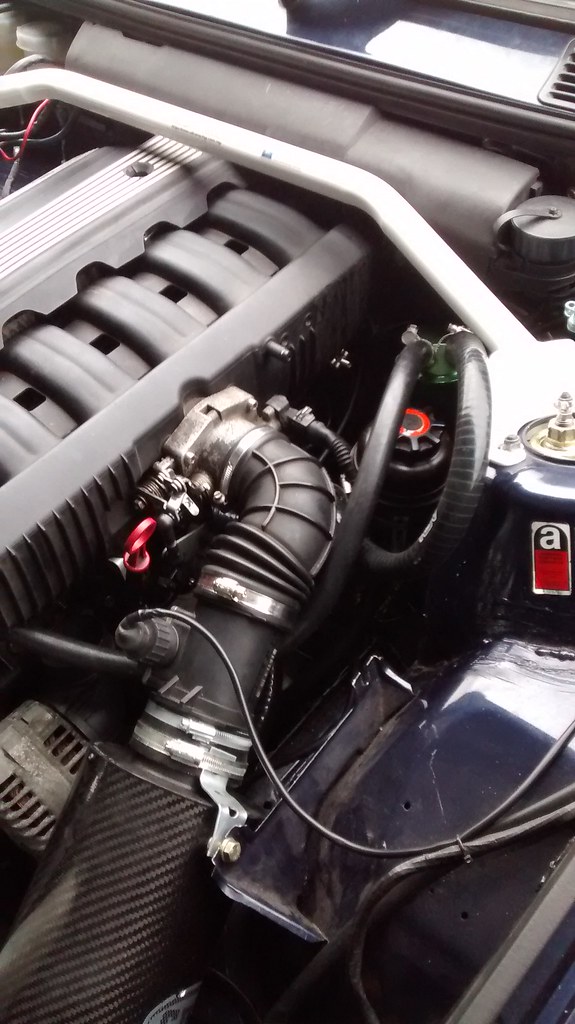
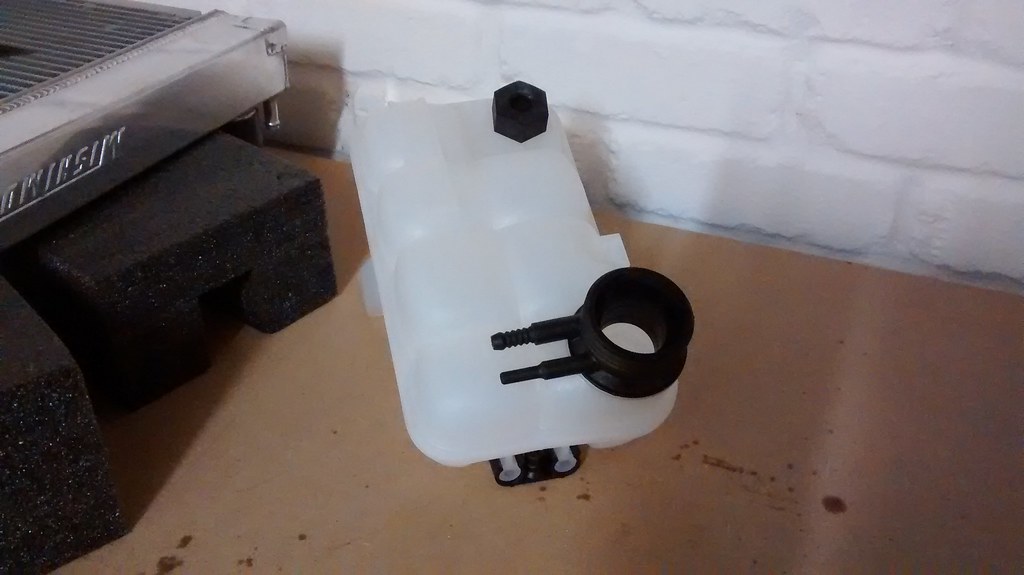
Some updates on work done this summer. Not a lot, all considered! No trackdays and a 2nd house tying up funds. But now that's gone, I've been cracking on. First up was fitting the Mishimoto S50 rad I treated myself to on my birthday...
...starting with a spanking expansion bottle from BMW. Prices are starting to take the pee a bit though, this was best part of £80 with the level sensor blanking cap and the mounting bracket!
The fan fitting using some little ally brackets I knocked up. It's so much nicer having a garage and proper work bench at home now, it means the various bits and pieces I can throw together are much tidier.
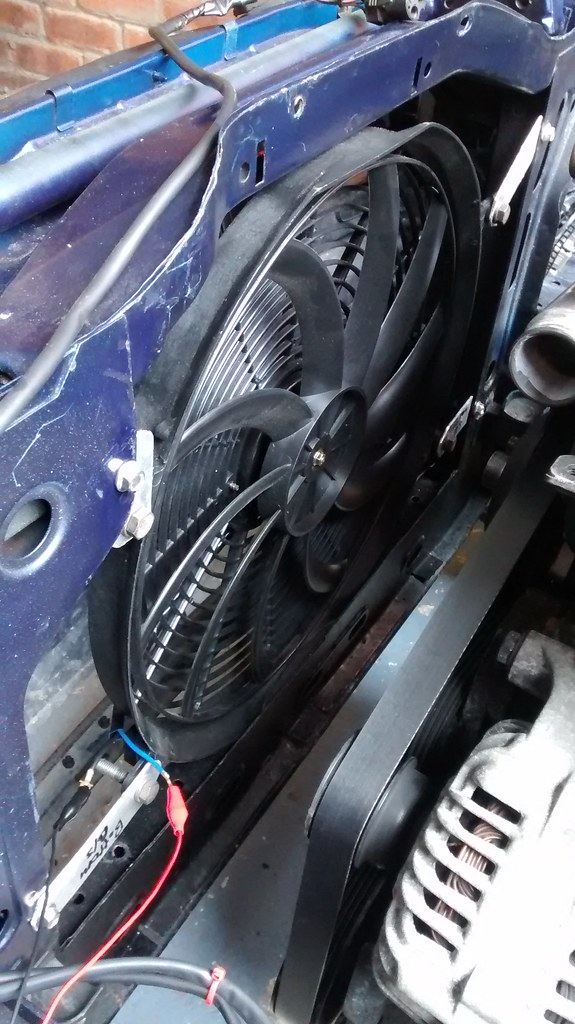
Ignore the croc clips, they were just test wires to make sure I knew which way to wire it up to get it spinning the correct way!
All assembled and running - the return hose routing isn't ideal, but it'll pass for the trackday on the 9th Oct, I can sort it out properly later. Really need to get rid of the factory M40 airbox bracket too, it's really getting in the way! I've been avoiding doing that because I know it will mean paint
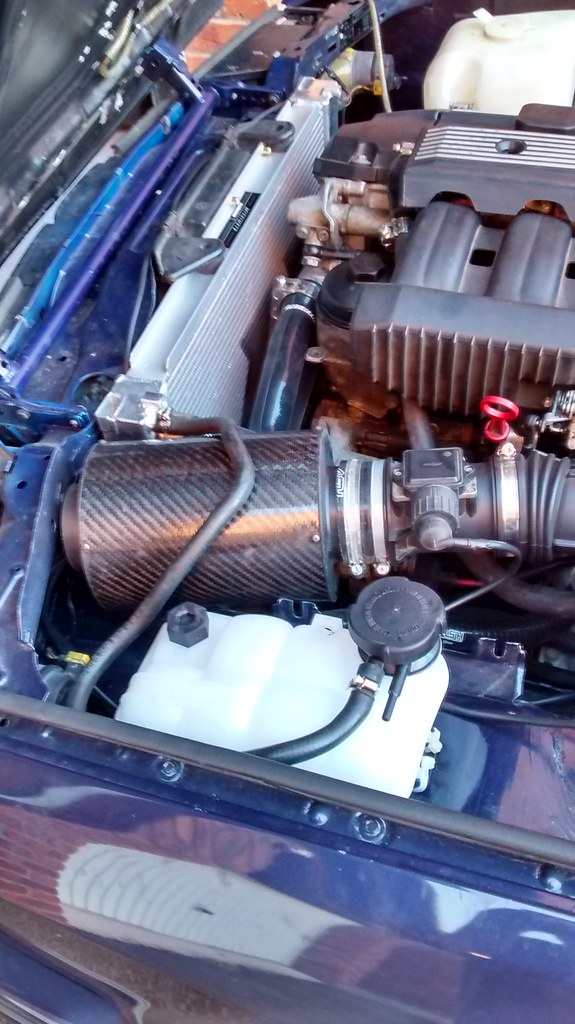
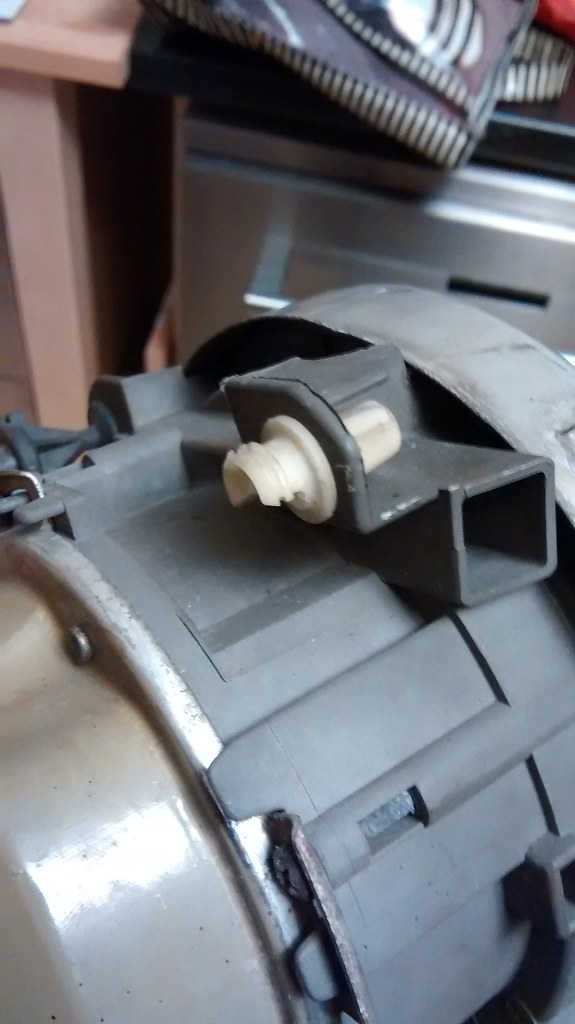
I also fixed these cracked headlight adjust bushes! Been giving me minor MOT issues for the past two years, was about time I fixed it properly. Flew through this time, with no advisories
Then this week, I got this delivered! A running, albeit roughly, M54B30 engine complete with all ancillaries for, well...rather less than the £300-£400 people are asking on Ebay for an M54B30 set of crank, rods and pistons. Hopefully I'll be able to recoup almost all of the engine purchase price by selling on the ancillaries, intake manifold, exhaust manifold, head, block, sump etc on Ebay.
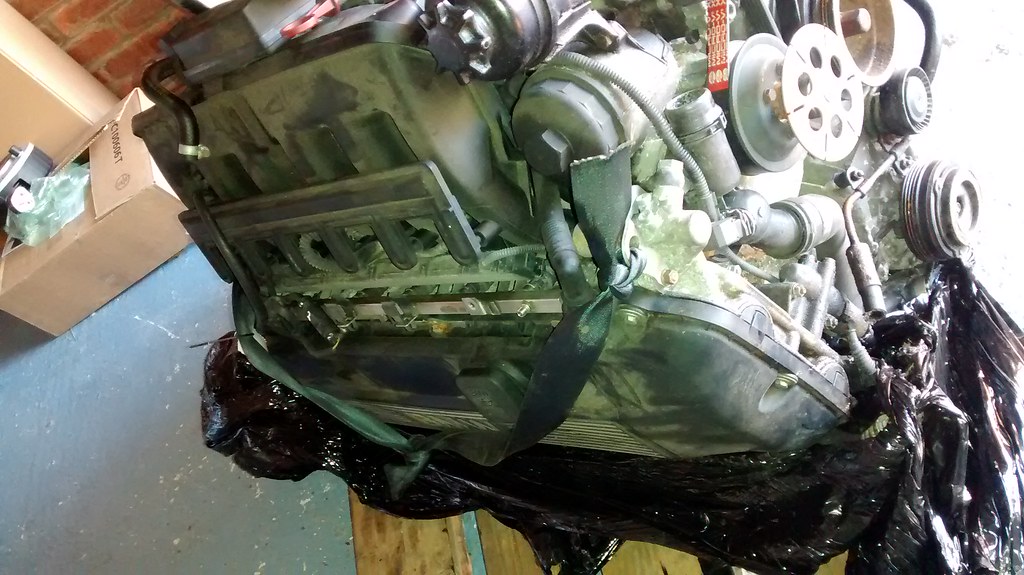
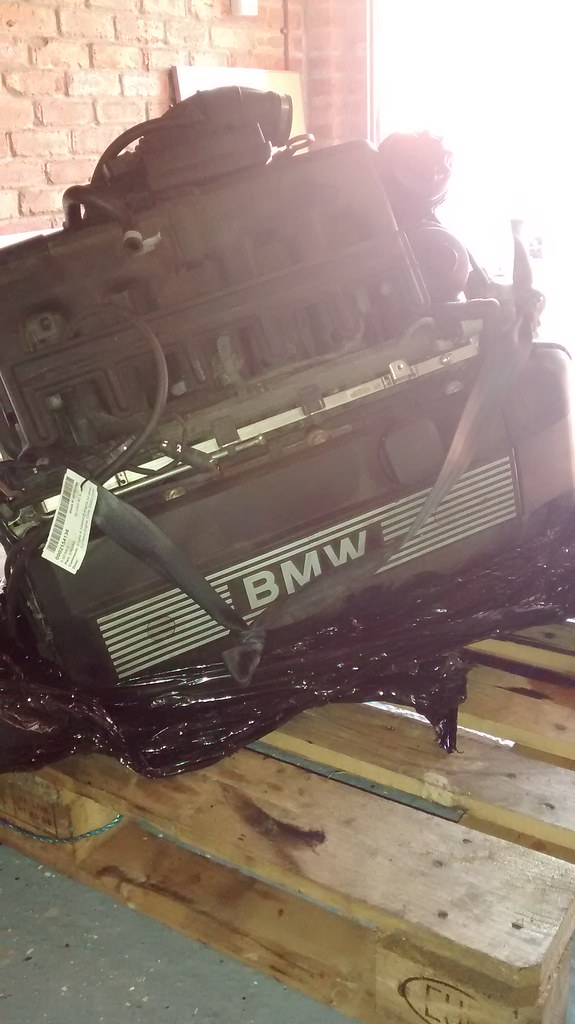
So the plan is, take my time and put together an M52B30. Next stage of the learning process I guess...build an engine. How hard can it be? :?
...starting with a spanking expansion bottle from BMW. Prices are starting to take the pee a bit though, this was best part of £80 with the level sensor blanking cap and the mounting bracket!
The fan fitting using some little ally brackets I knocked up. It's so much nicer having a garage and proper work bench at home now, it means the various bits and pieces I can throw together are much tidier.
Ignore the croc clips, they were just test wires to make sure I knew which way to wire it up to get it spinning the correct way!
All assembled and running - the return hose routing isn't ideal, but it'll pass for the trackday on the 9th Oct, I can sort it out properly later. Really need to get rid of the factory M40 airbox bracket too, it's really getting in the way! I've been avoiding doing that because I know it will mean paint
I also fixed these cracked headlight adjust bushes! Been giving me minor MOT issues for the past two years, was about time I fixed it properly. Flew through this time, with no advisories
Then this week, I got this delivered! A running, albeit roughly, M54B30 engine complete with all ancillaries for, well...rather less than the £300-£400 people are asking on Ebay for an M54B30 set of crank, rods and pistons. Hopefully I'll be able to recoup almost all of the engine purchase price by selling on the ancillaries, intake manifold, exhaust manifold, head, block, sump etc on Ebay.
So the plan is, take my time and put together an M52B30. Next stage of the learning process I guess...build an engine. How hard can it be? :?
Sf_Manta said:
I can foresee a road trip coming up, I do have an engine stand somewhere that's not being used at this moment in time Motorhole
Given the car's no slouch even now, this will put it into M3 territory? It's certainly going to be a handful!
Would suggest you go for a underdrive pulley set on it too.
Well if all goes well at Blyton on Friday, I may sign myself up for the BMW Car Club Trackday at Oulton Park on 6th November. If that happens, you're welcome to tag along.Given the car's no slouch even now, this will put it into M3 territory? It's certainly going to be a handful!
Would suggest you go for a underdrive pulley set on it too.
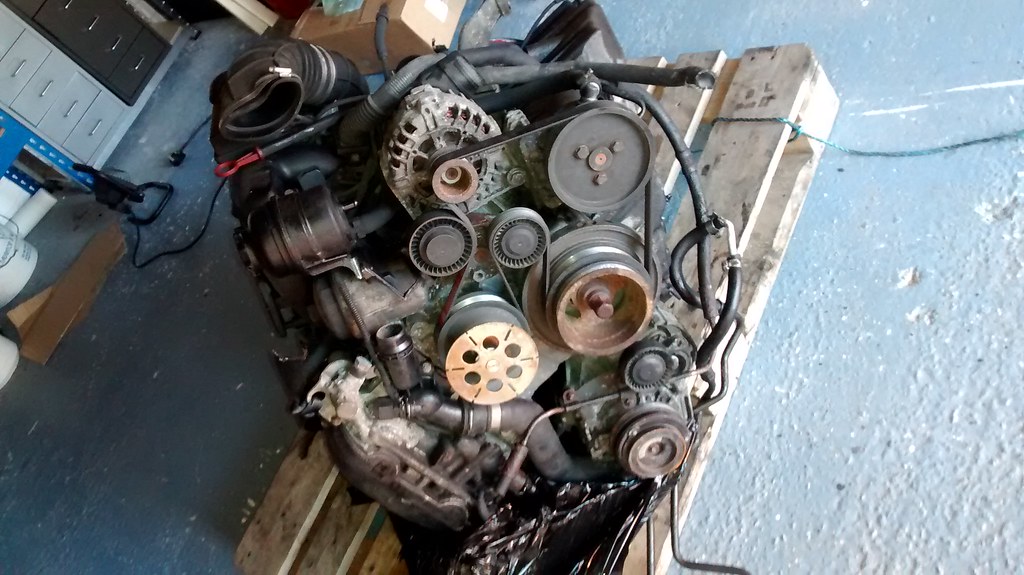
Have already stripped the loom and most of the ancillaries off the M54B30 now, can't take it much further until I get a stand. Was going to go out and buy one, they arn't too expensive
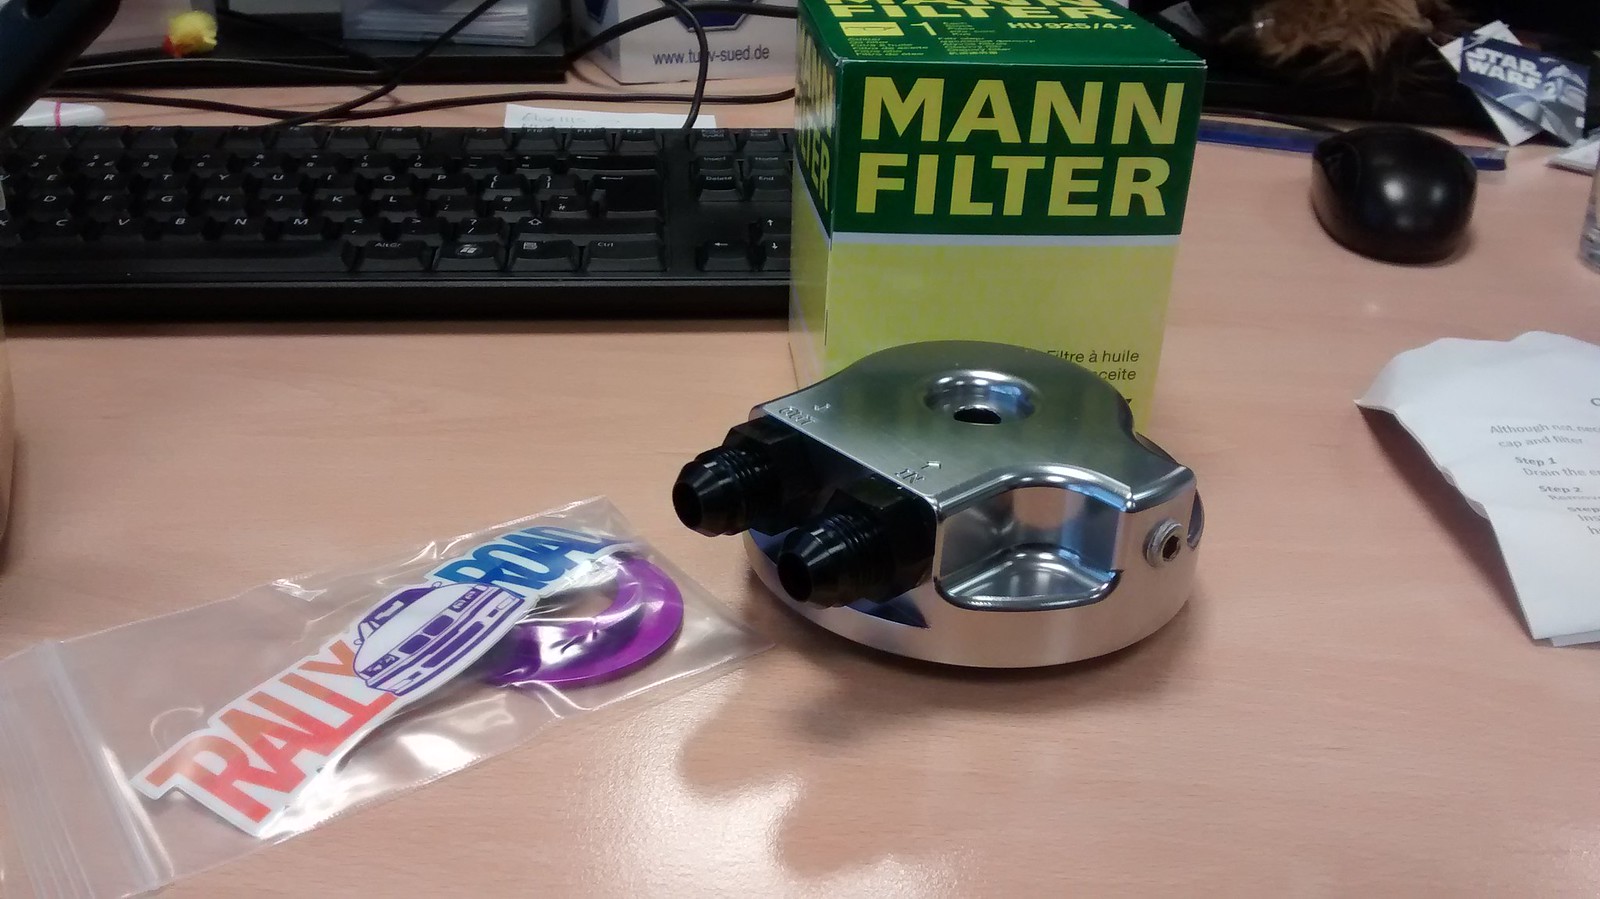
Besides, there's no rush for this. I just want to get the lump cleared out the garage and get all the bits I want from it packaged and boxed up. I also have an M50 filter housing knocking about for fitting a sandwich plate for an oil cooler too. An under drive pulley set - well I really only need one for the PAS pump, as alternator aside, that's the only other thing being run off the aux belt. But not a bad idea
Well, all went well at Blyton. Drove over the night before without issue, good night's sleep in (complete fluke this!) the honeymoon suite at the Beckett Arms and then to the track!
Took Mrs Motorhole with me this time, so she got her first experience in the passenger seat. Her cousin and her partner turned up later in the morning too so with them, and the beautiful weather, none of the non-petrolheads got bored whilst I lapped to my heart's content. I did 8 sessions in all...I think...and the car proved reliable once more, then got me home too without any issues.
Still gets a bit warm when given the beans, but I have a few ideas to improve that in the meantime - I'm planning an oil cooler for the M54B30 - the lack thereof now perhaps being one of the issues. But it never stopped me having a great day!
I've started stripping the M54B30 and have already sold a couple of bits. Looks like the intake boots/vacuum hoses have seen better days and the water pump bearings are a bit rattly. Plugs are all sooted up too. But provided rich and rough is the extent of the issues, hopefully the crank/conrods/pistons will be good. Picked up a Clarke engine stand locally for £34 too, so once I've cracked the crank bolt, up it'll go and the real work will commence.
Regarding chassis developments - I'm looking to get a set of custom tubular wishbones made up. Non-adjustable and that will take OEM ball-joints. These will be shaped to my own spec to address some of the caster/camber issues inherent with the E36 M3 5-stud conversion whilst reducing unsprung weight. Why go to so much bother? Well, I like the performance of the brakes (strong and consistent) - and the affordable associated OEM consumables. I like the availability of E36 parts compared to E30. The bigger wheel bearings are more durable. And the expense of a pair of custom arms - though not insignificant - is still going to be rather less than a big brake kit and different wheels!
Next will be a set of coilovers more suited to track work than the Koni stuff I currently have. I'll also make sure to get the 'M' spec stuff with the roll bar pickups on the strut for better roll resistance. I think GAZ seem to fit the bill for me with regards to budget and ability to customise. Besides, I doubt my driving ability would do justice to the money spent on Ohlins, Nitrons or AST! And by that time, hopefully the M54B30 will be in and running...
Havn't updated this for a while, but progress has been slow yet omnipresent.
Car hasn't been out since October, for no other reason than I've been a bit busy. Though this week I'm going to change the brake fluid and see what I can do with rad airflow before my next track day on 18th March.
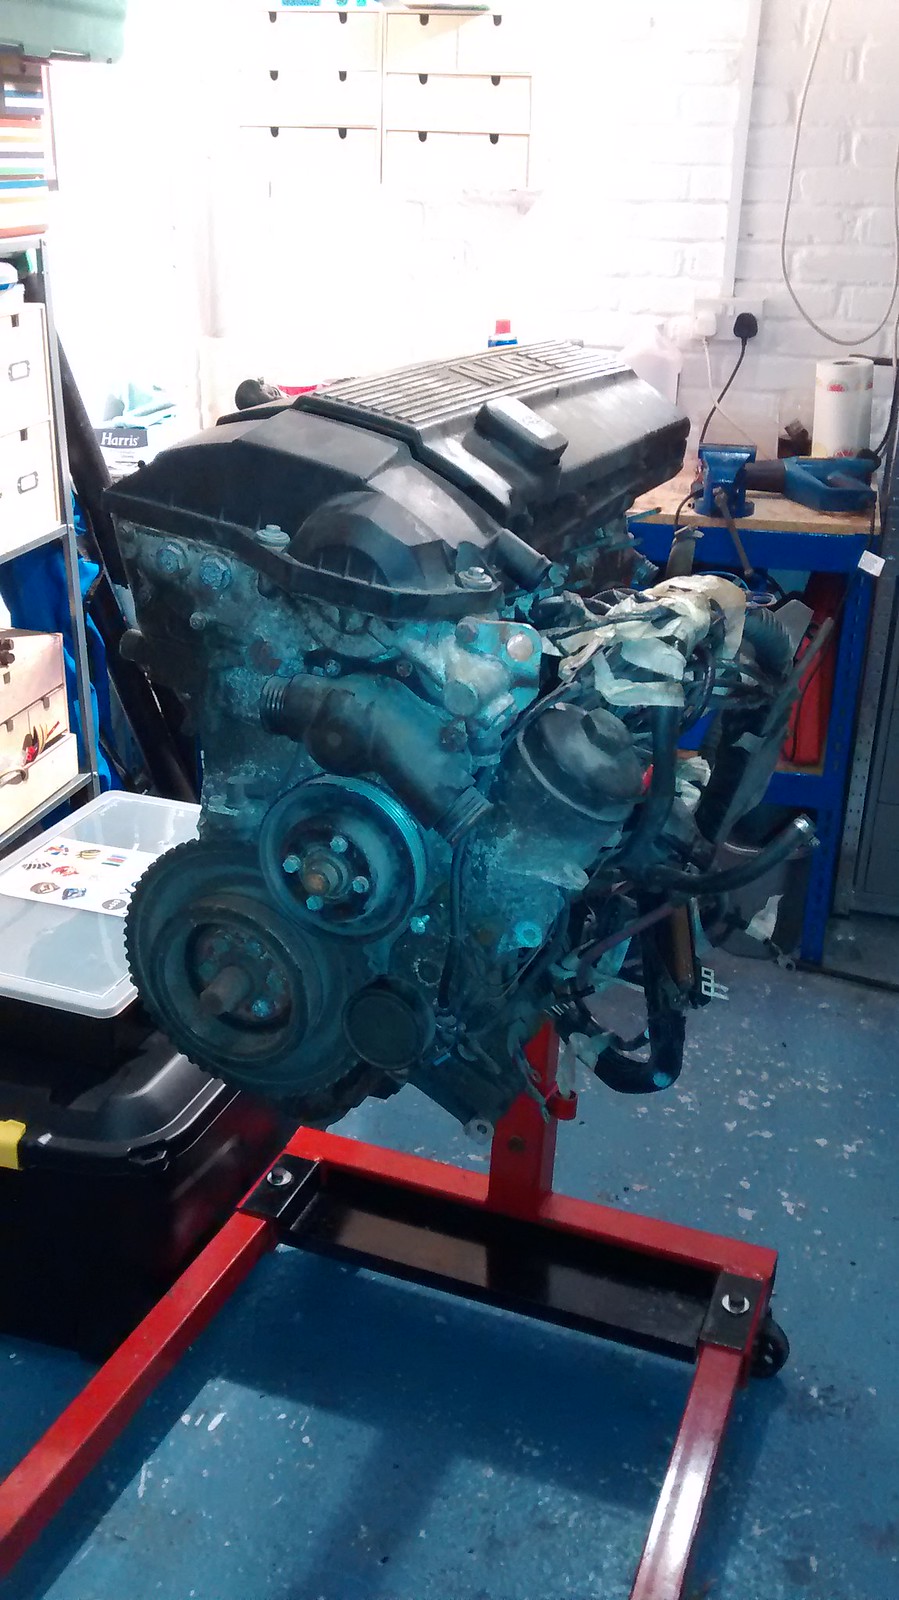
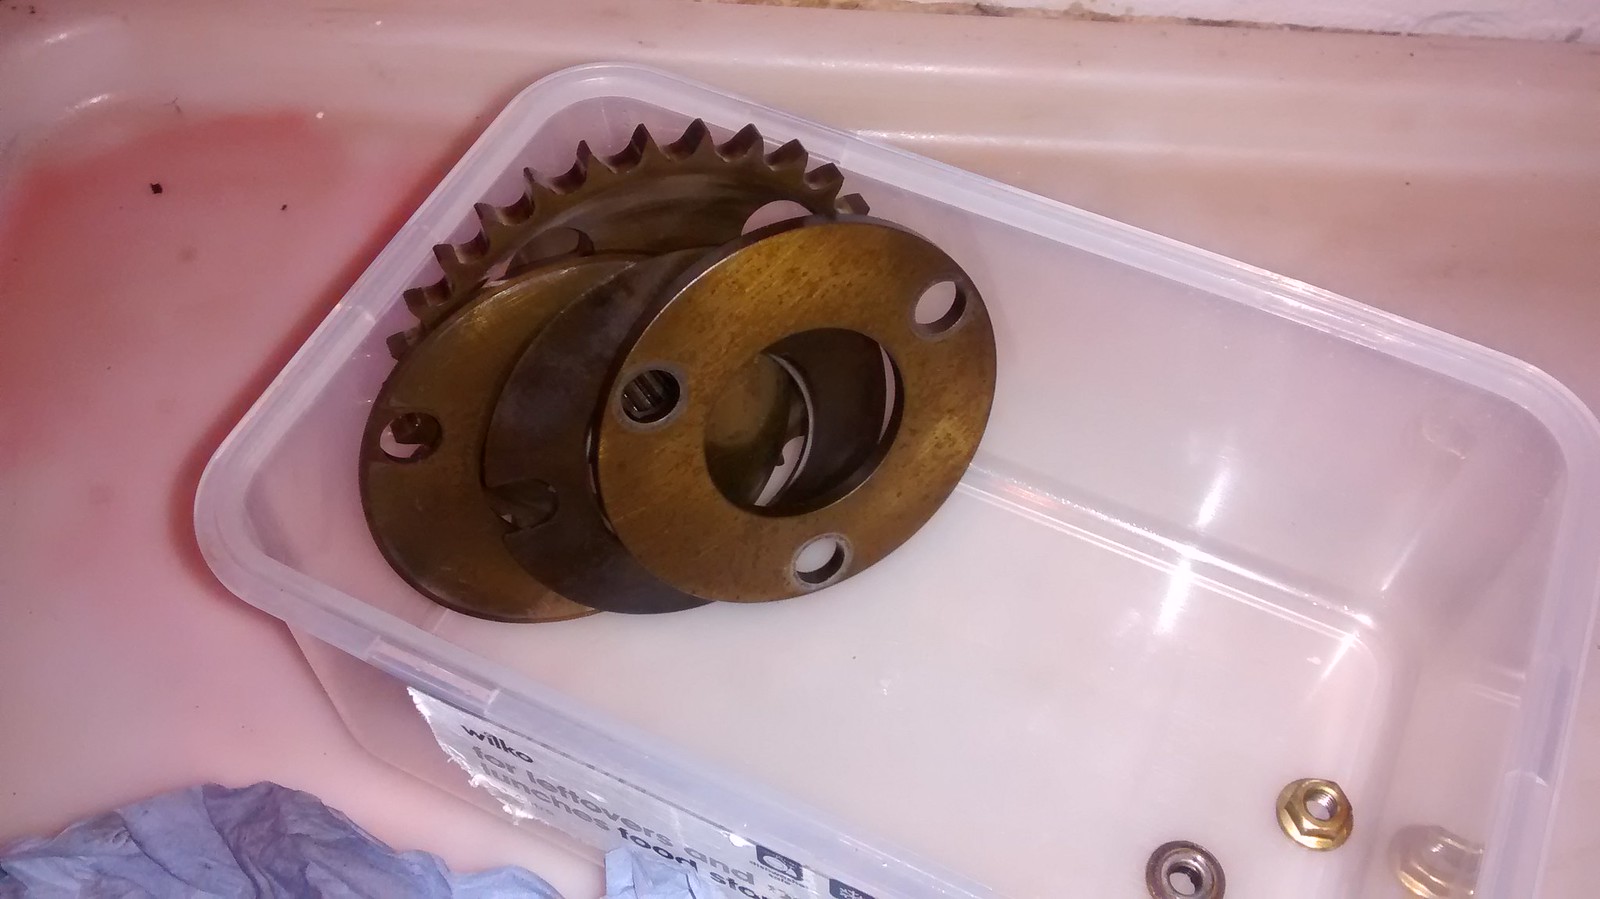
The M52B30 build - well I have some photos of this, though it's more of an M52 stripdown at the moment! I've sold off most of the M54 engine now, so at it stands, the crank, rods, pistons and intake cam have cost me about £30. Still got the block, head and a few other bits - sensors etc - for sale so I will do better than break even eventually.
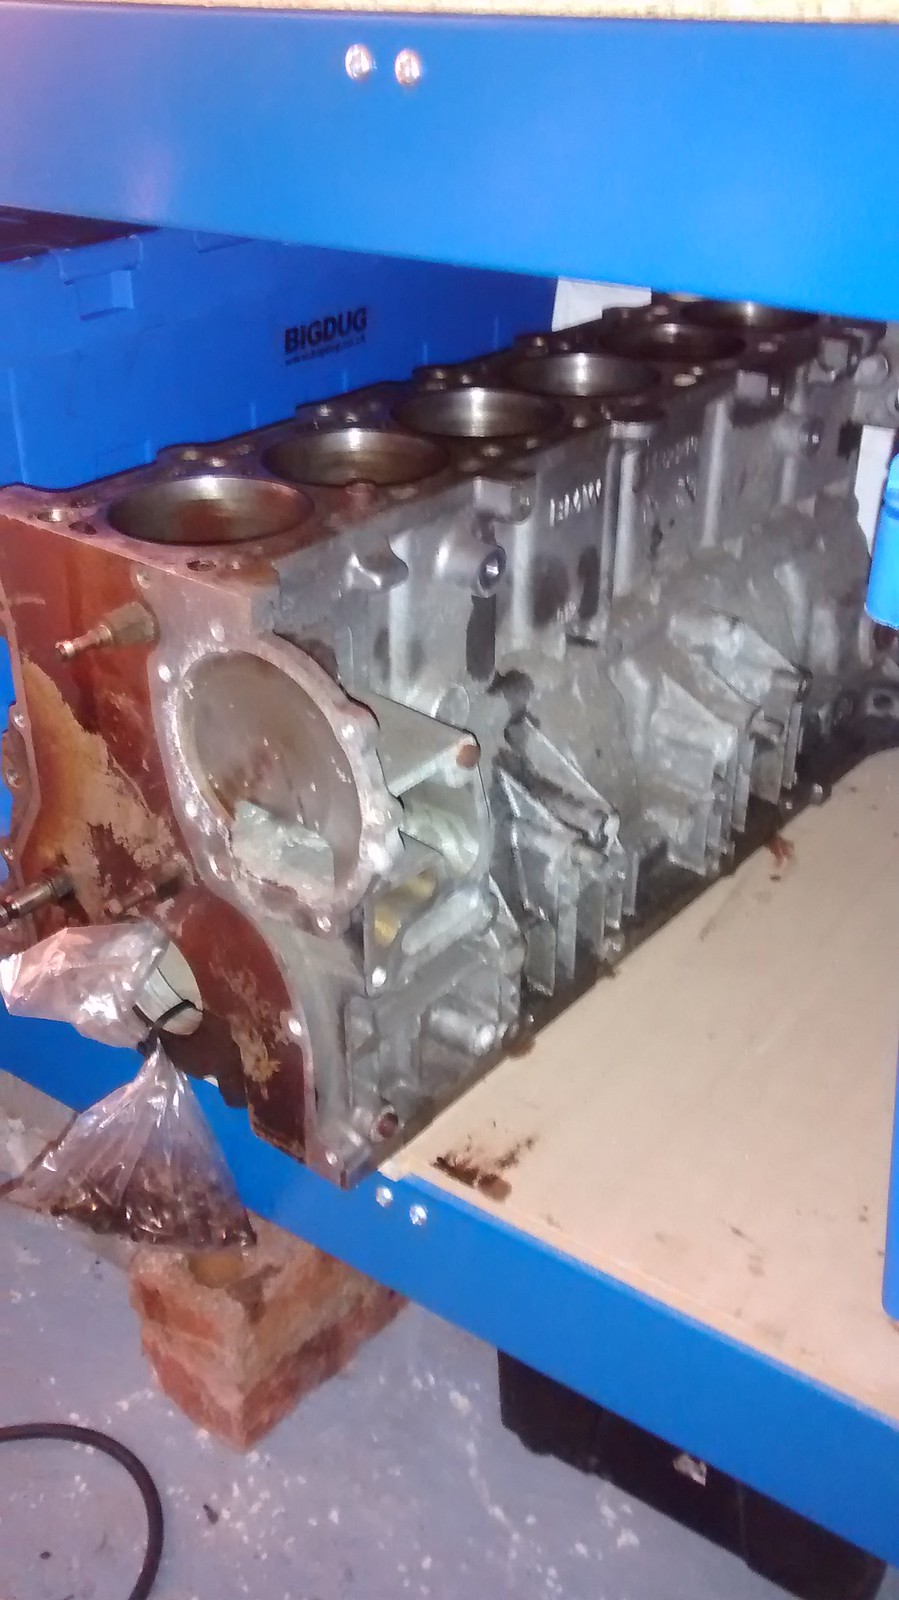
Then for £200, I bought an M52B25 nikasil lined block and a separate steel-lined block to build it all into.
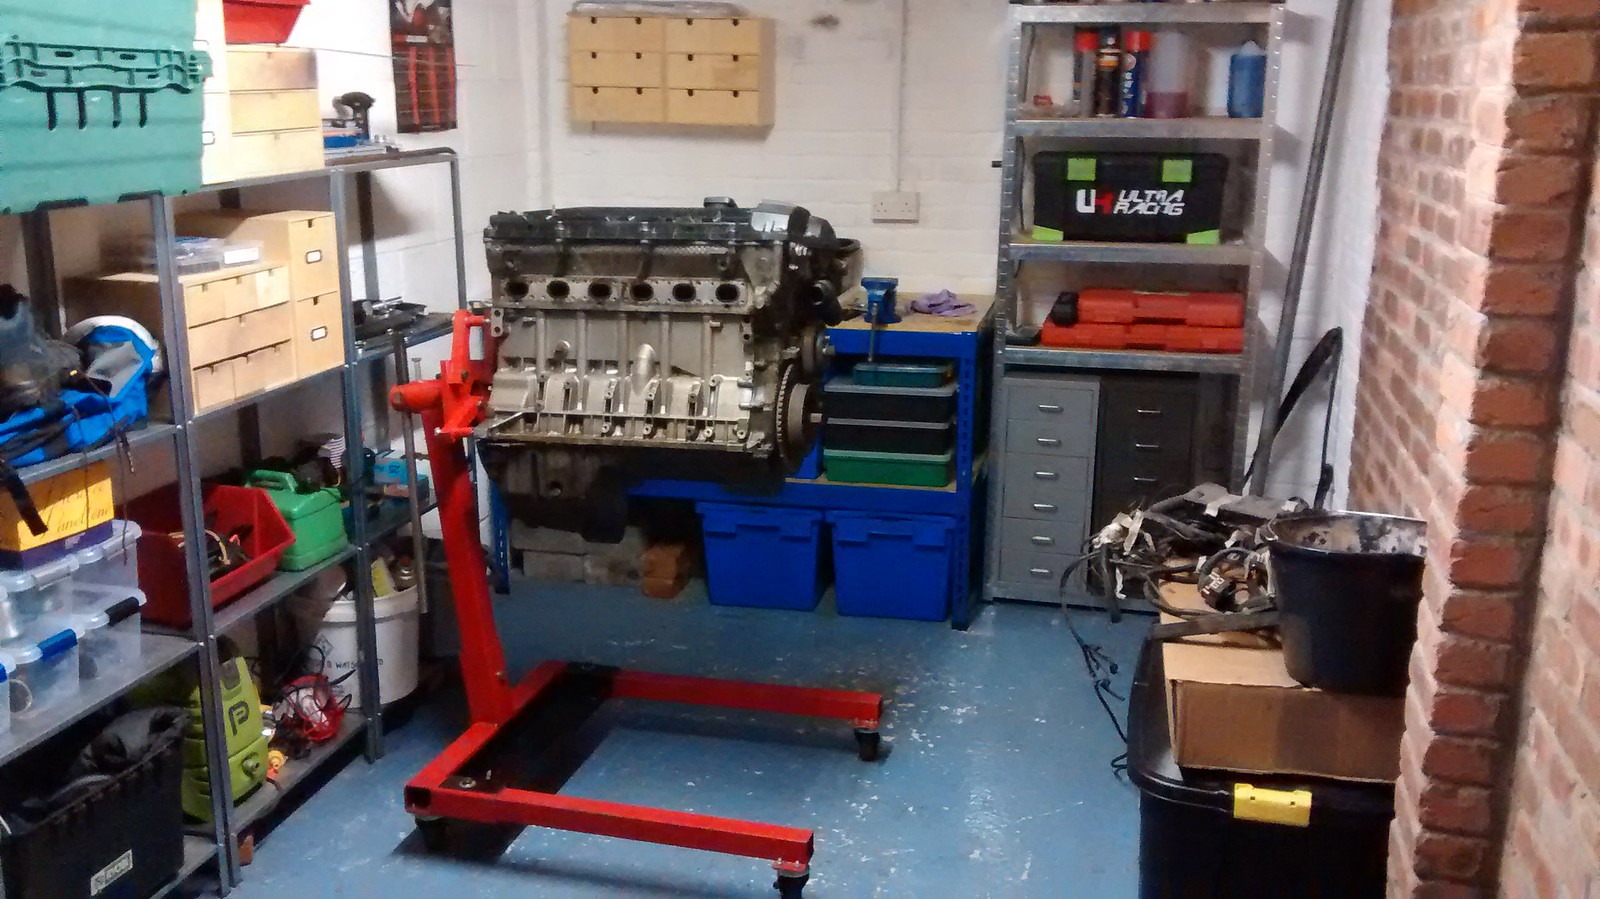
M52 engine on the stand
M52 steel-lined block under the bench
I then set about removing the loom and attached parts then collecting bits and tidying/cleaning the garage for preparation.
Including this little bad boy so I can fit an oil cooler! I currently have a 16-row cooler and thermostat on the way.
And pretty much since then, I've been dismantling, cleaning and stowing! I figured that if I have all the bits ready to go, the build itself should be fairly hassle free and the 'clean' engine will be open for the minimum amount of time. A 4-day weekend should be enough time for a first time to put an engine together right!? :roll:
One question if anyone can help though - basically am I best using assembly grease on cam/crank journals or just using whatever mineral oil I'll be using to break the engine in with? Speaking of which - any recommendations on that front?
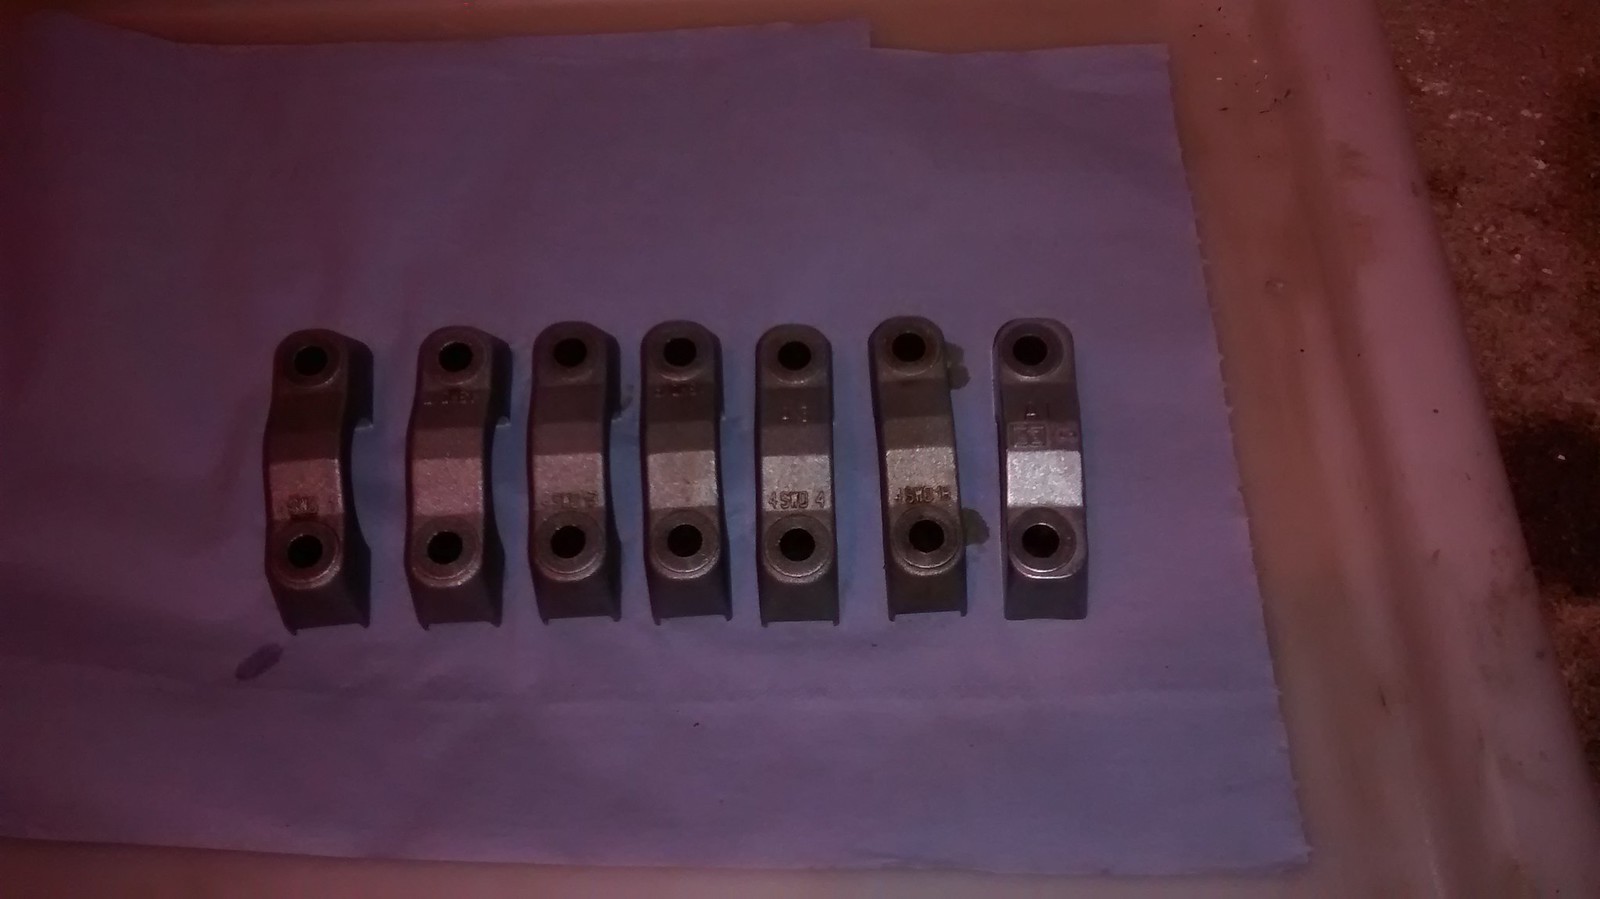
So far the M52 cylinder head is pretty much dismantled with everything cleaned up save for the exhaust lifters ( ). All the intake lifters (taken from the M54 to match the cam) have been serviced and cleaned so I'm not looking forward to doing another 12! After that, it should get easier. I also need to drop the block and cylinder head (when it's off) to the machine shop to get everything checked for flatness, squareness, to get the bores honed and to get the M54 cam turned down to fit. Hopefully it'll soon be all ready to put together!
Car hasn't been out since October, for no other reason than I've been a bit busy. Though this week I'm going to change the brake fluid and see what I can do with rad airflow before my next track day on 18th March.
The M52B30 build - well I have some photos of this, though it's more of an M52 stripdown at the moment! I've sold off most of the M54 engine now, so at it stands, the crank, rods, pistons and intake cam have cost me about £30. Still got the block, head and a few other bits - sensors etc - for sale so I will do better than break even eventually.
Then for £200, I bought an M52B25 nikasil lined block and a separate steel-lined block to build it all into.
M52 engine on the stand
M52 steel-lined block under the bench
I then set about removing the loom and attached parts then collecting bits and tidying/cleaning the garage for preparation.
Including this little bad boy so I can fit an oil cooler! I currently have a 16-row cooler and thermostat on the way.
And pretty much since then, I've been dismantling, cleaning and stowing! I figured that if I have all the bits ready to go, the build itself should be fairly hassle free and the 'clean' engine will be open for the minimum amount of time. A 4-day weekend should be enough time for a first time to put an engine together right!? :roll:
One question if anyone can help though - basically am I best using assembly grease on cam/crank journals or just using whatever mineral oil I'll be using to break the engine in with? Speaking of which - any recommendations on that front?
So far the M52 cylinder head is pretty much dismantled with everything cleaned up save for the exhaust lifters (
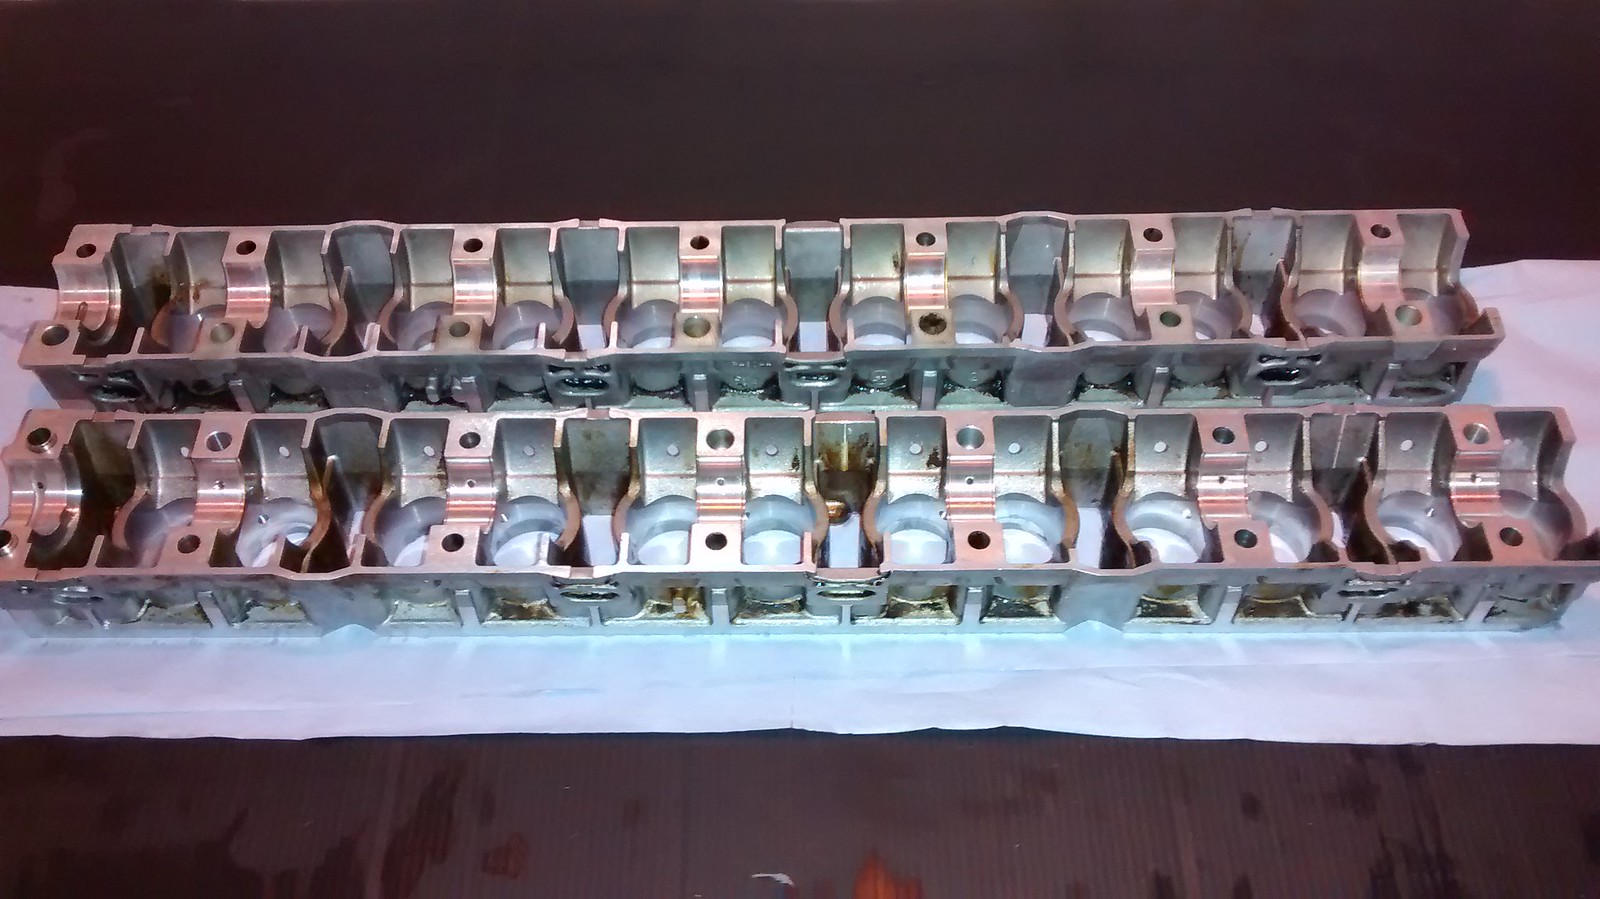
). All the intake lifters (taken from the M54 to match the cam) have been serviced and cleaned so I'm not looking forward to doing another 12! After that, it should get easier. I also need to drop the block and cylinder head (when it's off) to the machine shop to get everything checked for flatness, squareness, to get the bores honed and to get the M54 cam turned down to fit. Hopefully it'll soon be all ready to put together!So yesterday I got on with cleaning up the cylinder head. Lots of labour and now I have a stiff right arm from...er...all the reciprocating hand actions. Still...although it's not perfect, I'm fairly happy with the results.
It started looking something like this.
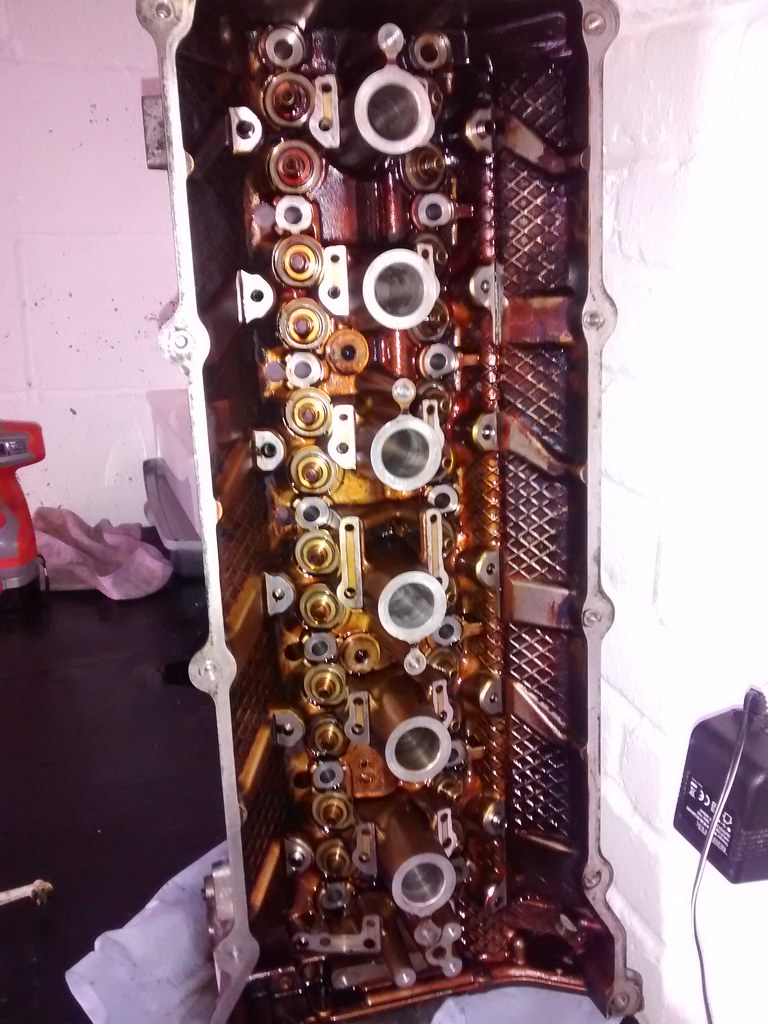
Started with a good soaking in Gunk natural green then a thorough going over with a pressure washer. Then I went to work on the various gasket surfaces, ports etc.
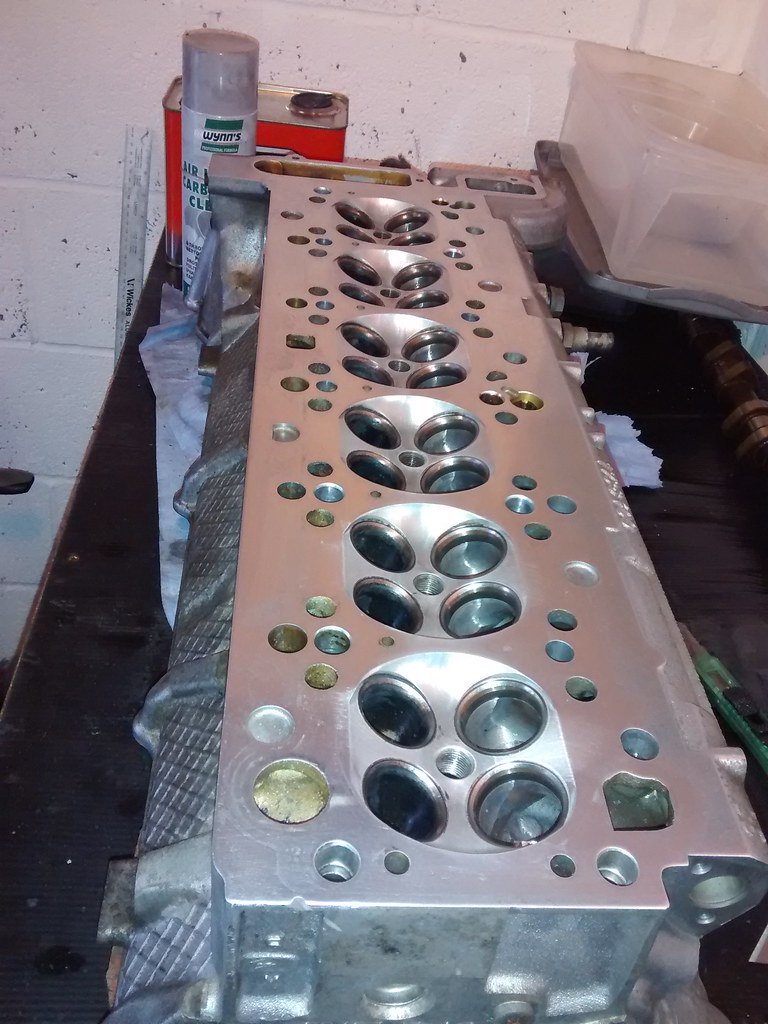
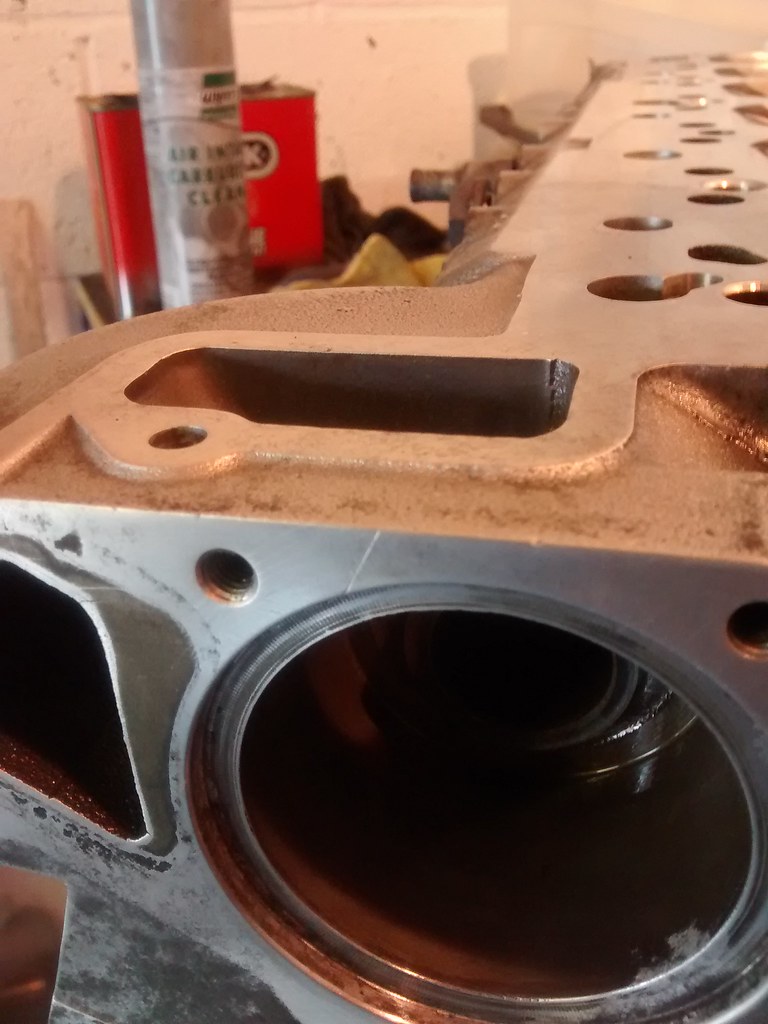
Head gasket surface - began (very, very carefully!) with a sharp Stanley knife blade. Then lots and lots of work with an ultra-fine sanding sponge and wd40 - same in the chambers, taking care to avoid the valve seats. Using a straight edge and feeler gauges, the head comes out nice and flat.
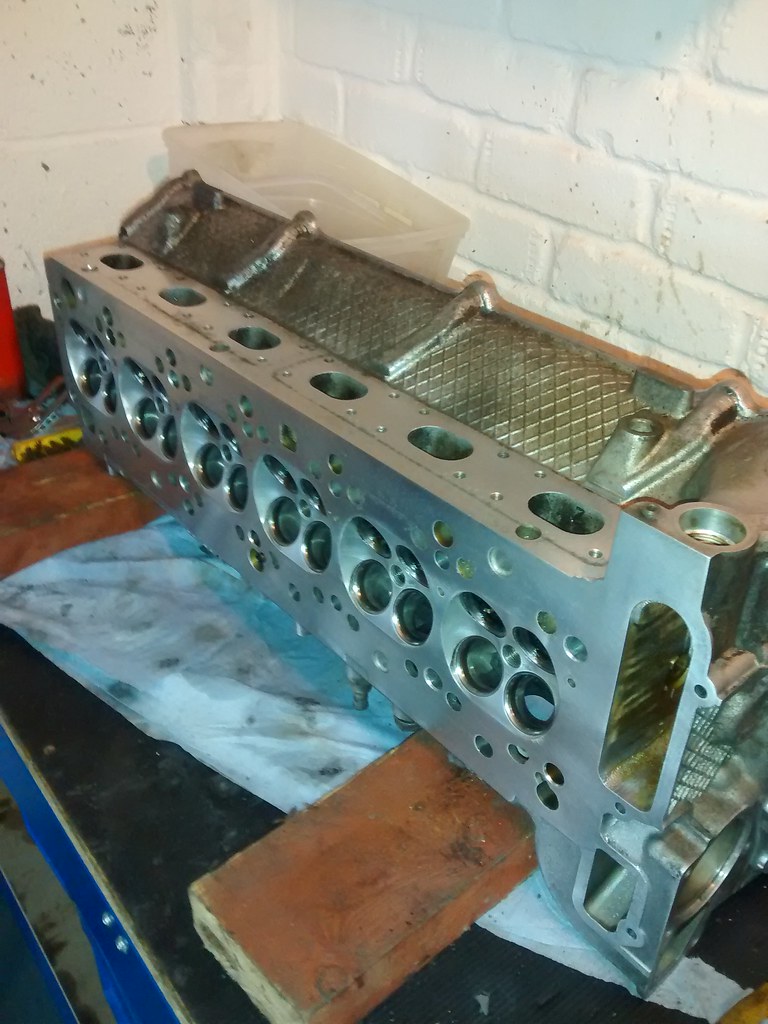
Other gasket surfaces got the same sponge and wd40 treatment. Then to make sure I got all the residual crap out of the head, it got another good soaking in Gunk green and another blast with the pressure washer, taking care to clear out all the galleries and ports. Let it drain, some heat gun action then some oil on parts liable to corrode, job done!
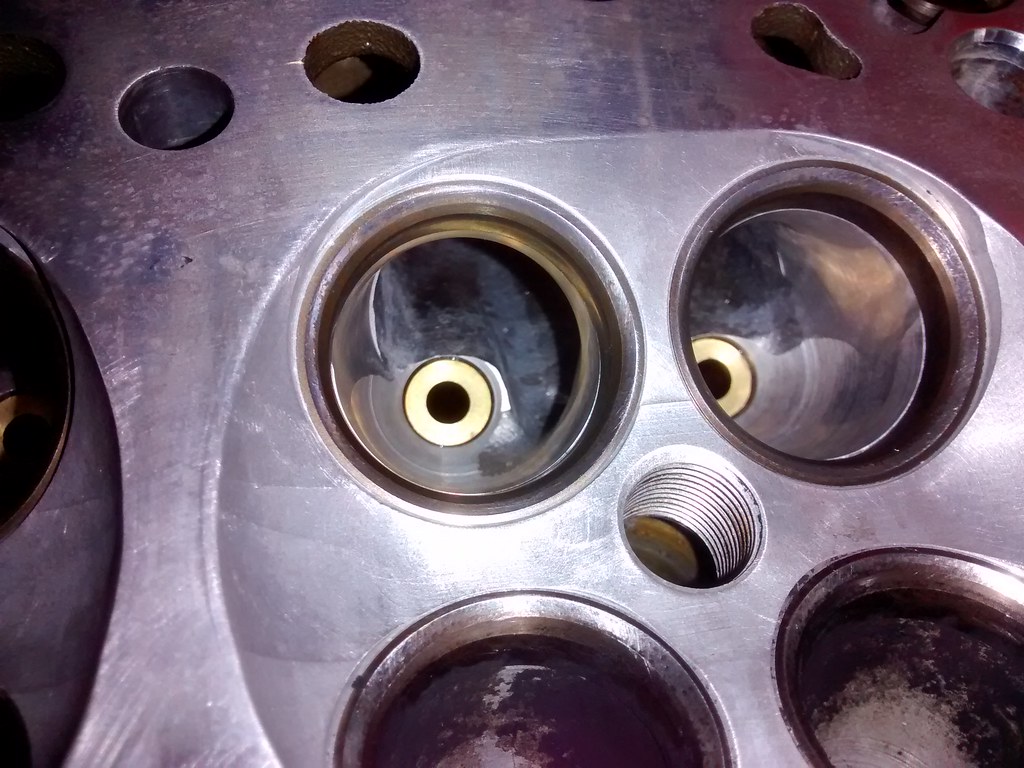
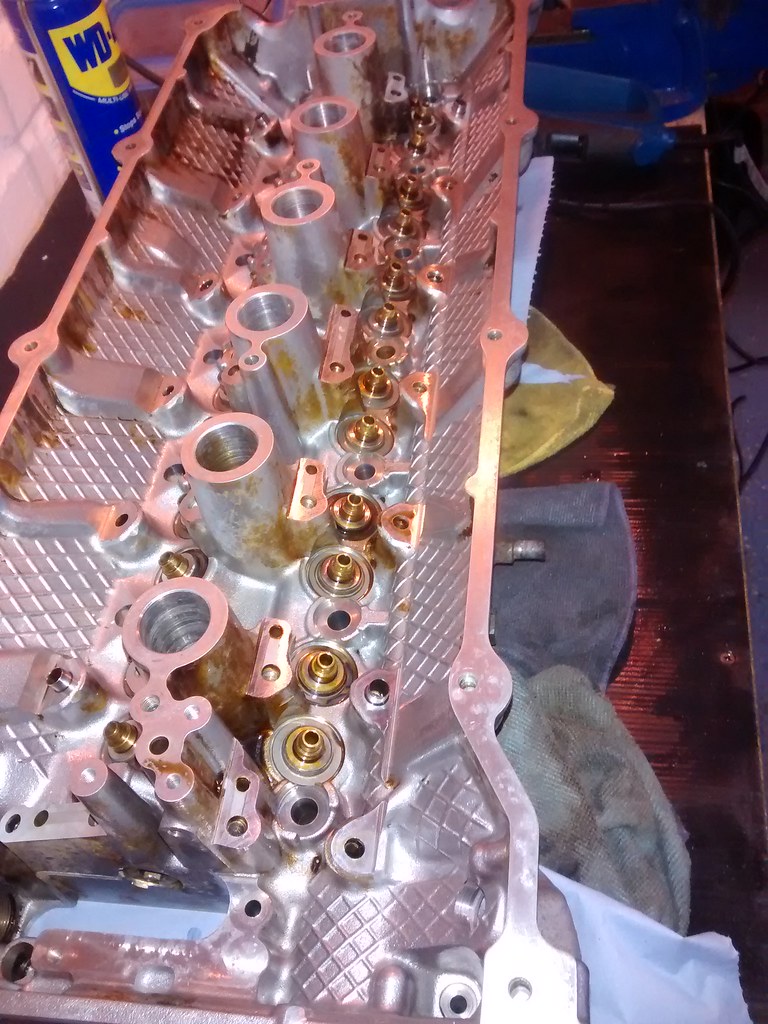
One slight issue - there appears to be a scratch on the gasket surface for the thermostat housing. It's just about deep enough to catch a nail in - is this likely to cause an issue as is? If so, what's the best course of action?
Today, it's back to the car for trackday prep as I'm at Blyton on Friday. After that I need to think about getting all the pistons cleaned up so I can drop them off with the block and M54 intake cam at the machine shop and while all that's being done, I'll get on with putting stem seals, valve, springs etc back into the head
It started looking something like this.
Started with a good soaking in Gunk natural green then a thorough going over with a pressure washer. Then I went to work on the various gasket surfaces, ports etc.
Head gasket surface - began (very, very carefully!) with a sharp Stanley knife blade. Then lots and lots of work with an ultra-fine sanding sponge and wd40 - same in the chambers, taking care to avoid the valve seats. Using a straight edge and feeler gauges, the head comes out nice and flat.
Other gasket surfaces got the same sponge and wd40 treatment. Then to make sure I got all the residual crap out of the head, it got another good soaking in Gunk green and another blast with the pressure washer, taking care to clear out all the galleries and ports. Let it drain, some heat gun action then some oil on parts liable to corrode, job done!
One slight issue - there appears to be a scratch on the gasket surface for the thermostat housing. It's just about deep enough to catch a nail in - is this likely to cause an issue as is? If so, what's the best course of action?
Today, it's back to the car for trackday prep as I'm at Blyton on Friday. After that I need to think about getting all the pistons cleaned up so I can drop them off with the block and M54 intake cam at the machine shop and while all that's being done, I'll get on with putting stem seals, valve, springs etc back into the head
Gassing Station | Readers' Cars | Top of Page | What's New | My Stuff