Ferrari F430 Spider
Discussion


Court_S said:
Wow.
I’ve spent the last few weeks working my way through the M3 then Golf thread. Both were brilliant, but this really is another level.
It’s nice to see a Ferrari being used and improved upon especially because both seem to be frowned upon.
Deja vu? I’ve spent the last few weeks working my way through the M3 then Golf thread. Both were brilliant, but this really is another level.
It’s nice to see a Ferrari being used and improved upon especially because both seem to be frowned upon.
As someone said on the previous page, check out Mark’s Fiesta, that’ll blow your mind.
leglessAlex said:
Woza said:
Very interesting thread. I'm sure it has been asked before and apologies but with the amount of time and effort and cost spent to date would a 16M have been cheaper to buy?
I believe a 16M is still significantly more expensive than the total cost of this so far. It's a privilege in the first instance to own such a car, but in addition being able to undertake this project myself has been one of the best car experiences I've had to date, so much so it's something I'll look back on fondly for the rest of my life. The enjoyment and sense of pride in what I've done are not insignificant; I have a car tailored exactly to personal taste with all faults ironed out and many improvements, all of which all equate to a next-level driving and ownership experience.
There's still more to come including an engine build.
There's still more to come including an engine build.
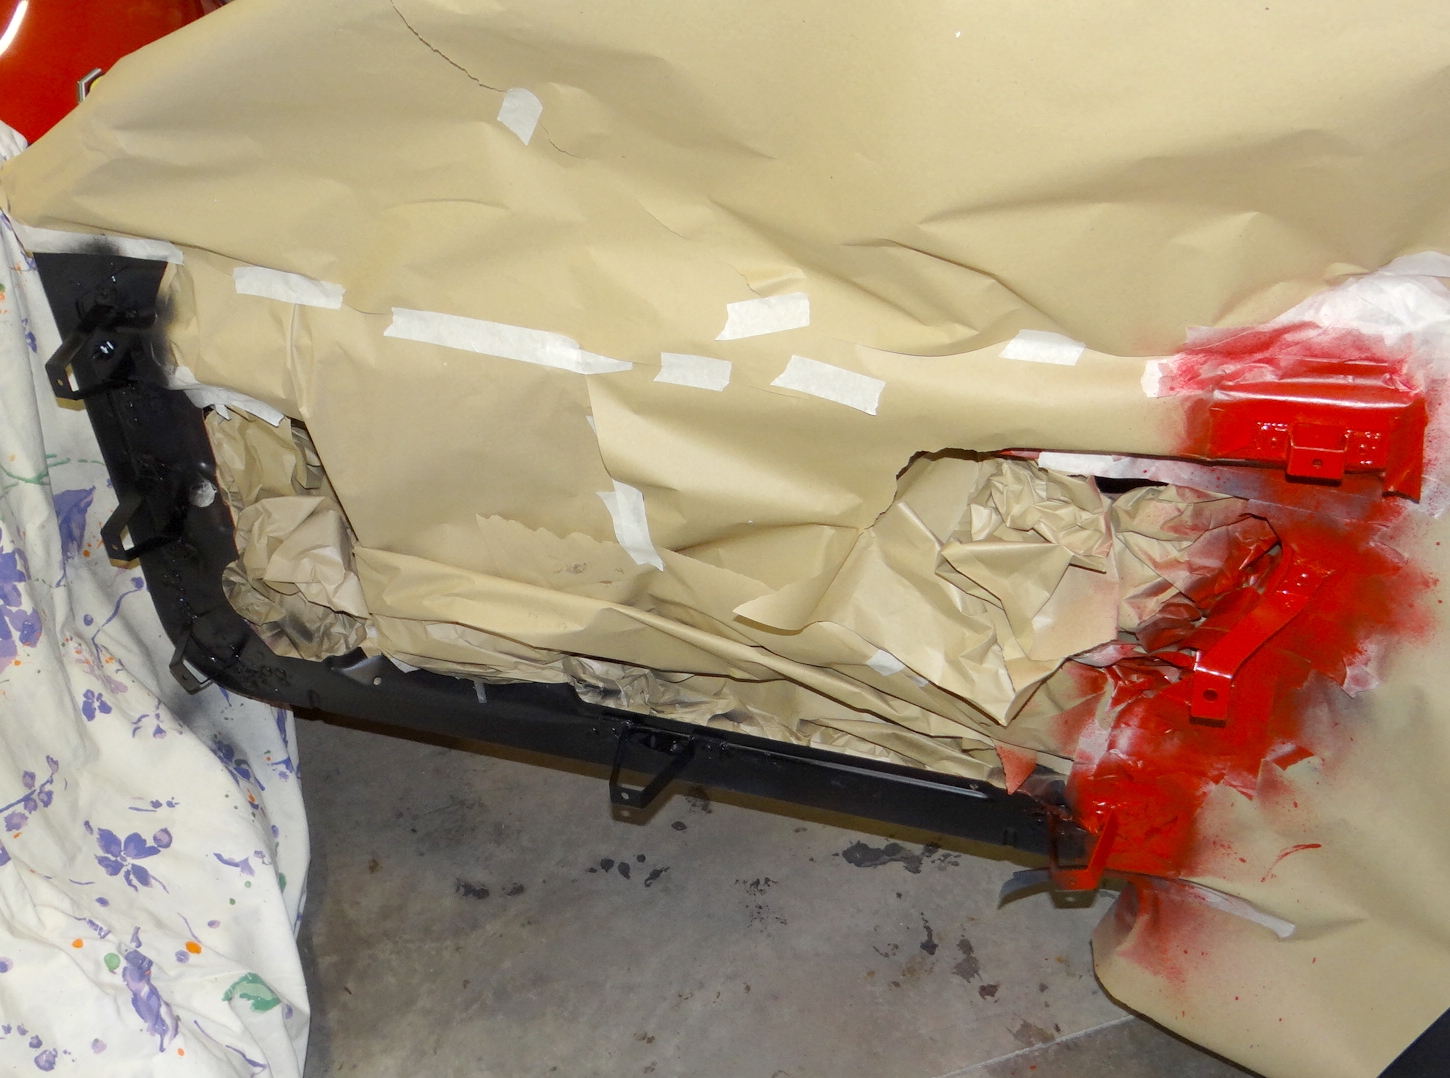
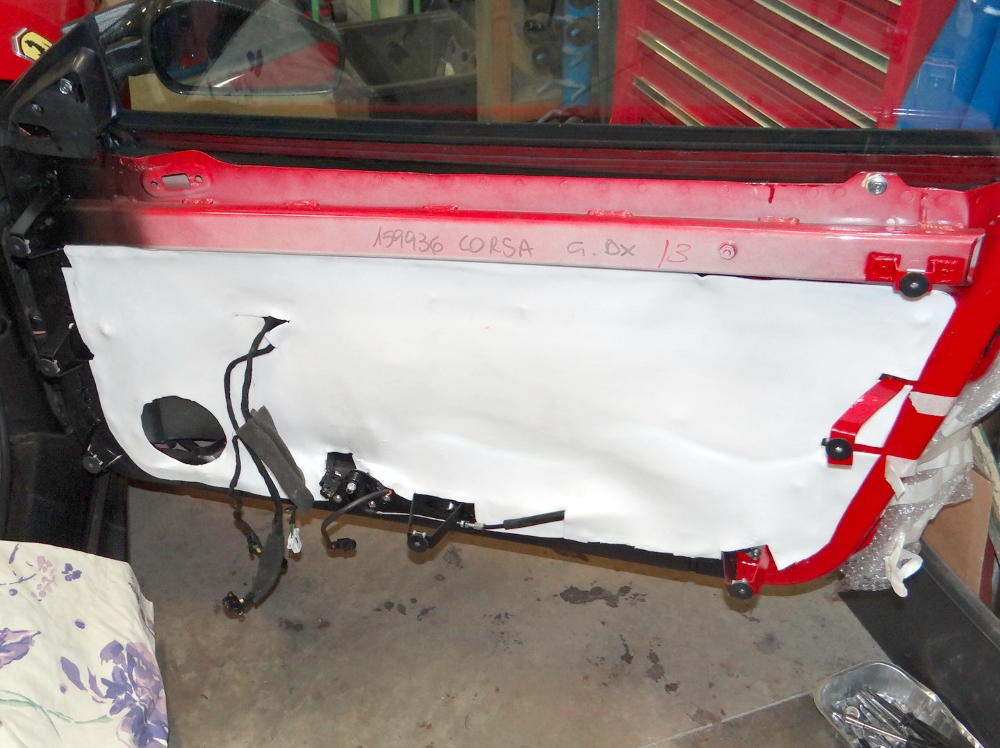
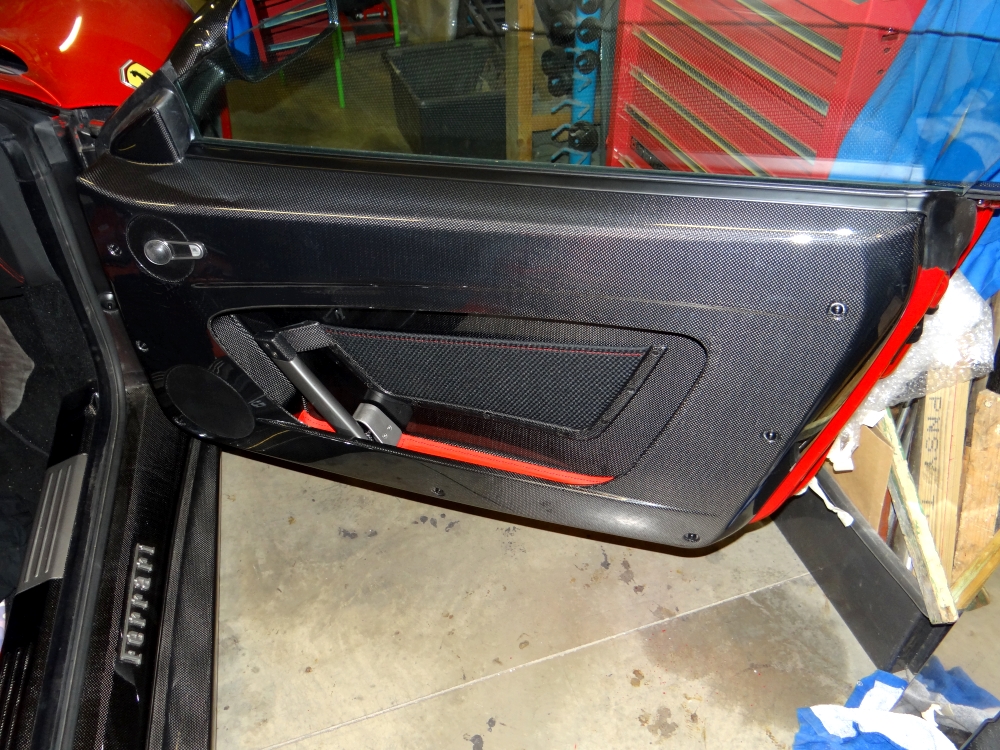
The door card brackets are complete. The factory doors are painted in body colour then the lower and leading edges are painted in stain black, so I've matched the brackets to whatever paint was underneath them.
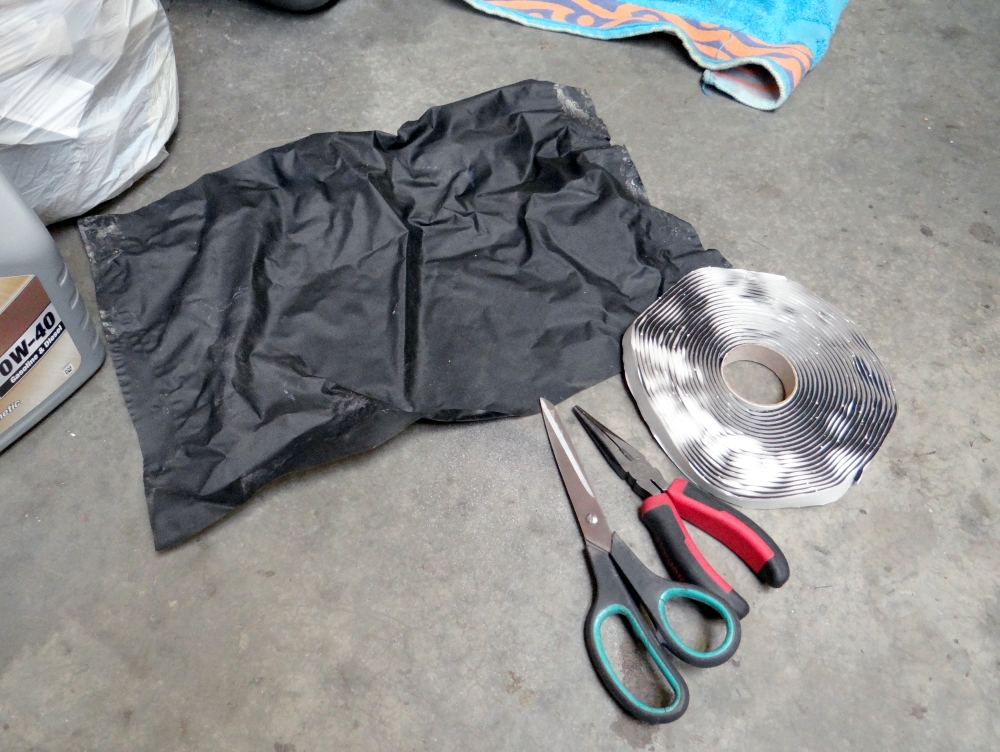
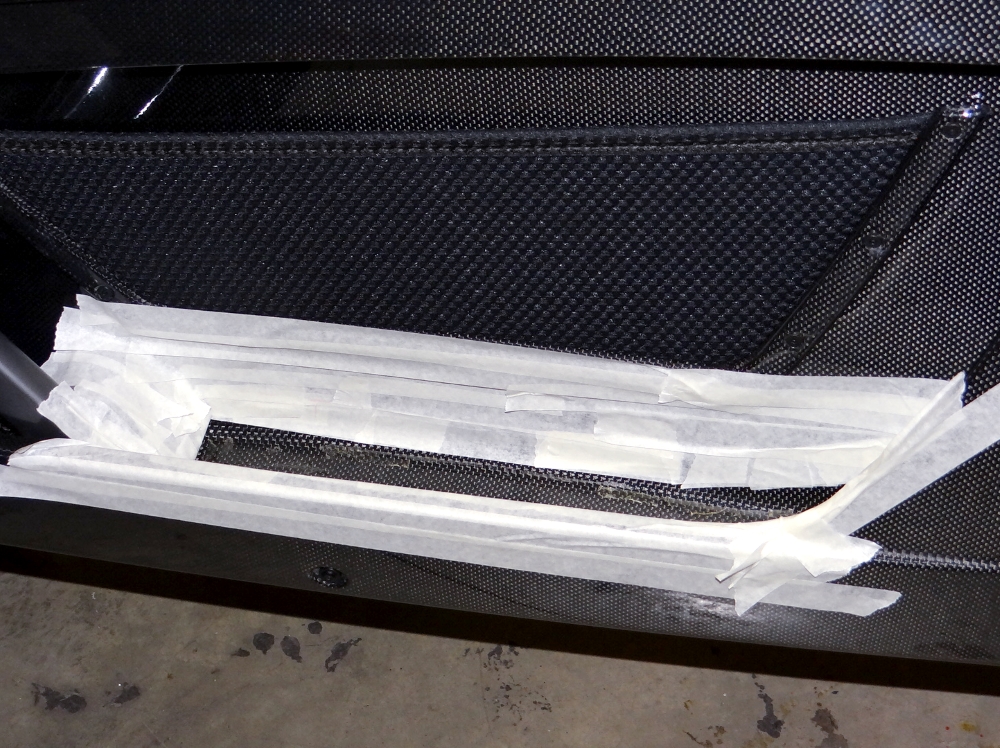
My Dad made templates for the moisture barrier and cut them from closed cell Polyethylene foam. This worked out at around £10 for both sides.

My Dad made templates for the moisture barrier and cut them from closed cell Polyethylene foam. This worked out at around £10 for both sides.
Edited by mwstewart on Wednesday 13th February 16:09
16M Door Cards - Complete
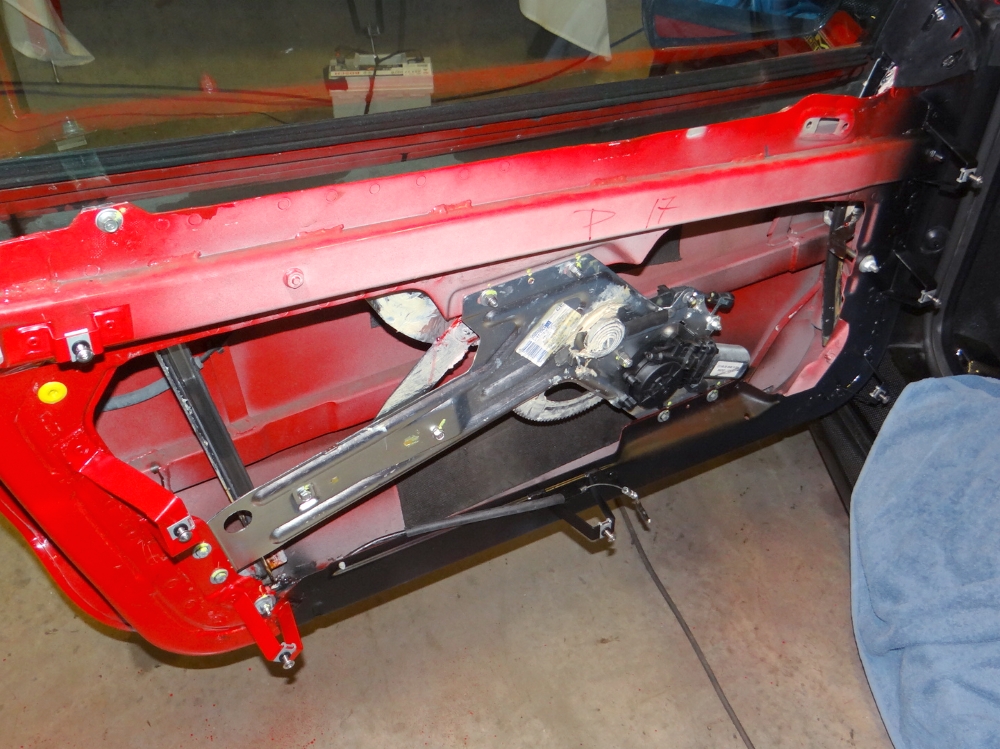
Inside each door a plastic sheet is used to keep water away from the window motor and mechanism, and on my car the adhesive had failed and the sheets were flapping around inside, which isn't good given some of the window mechanism is exposed. To remedy this I removed the sheets from both sides, de-greased them, and then refitted with better adhesive.
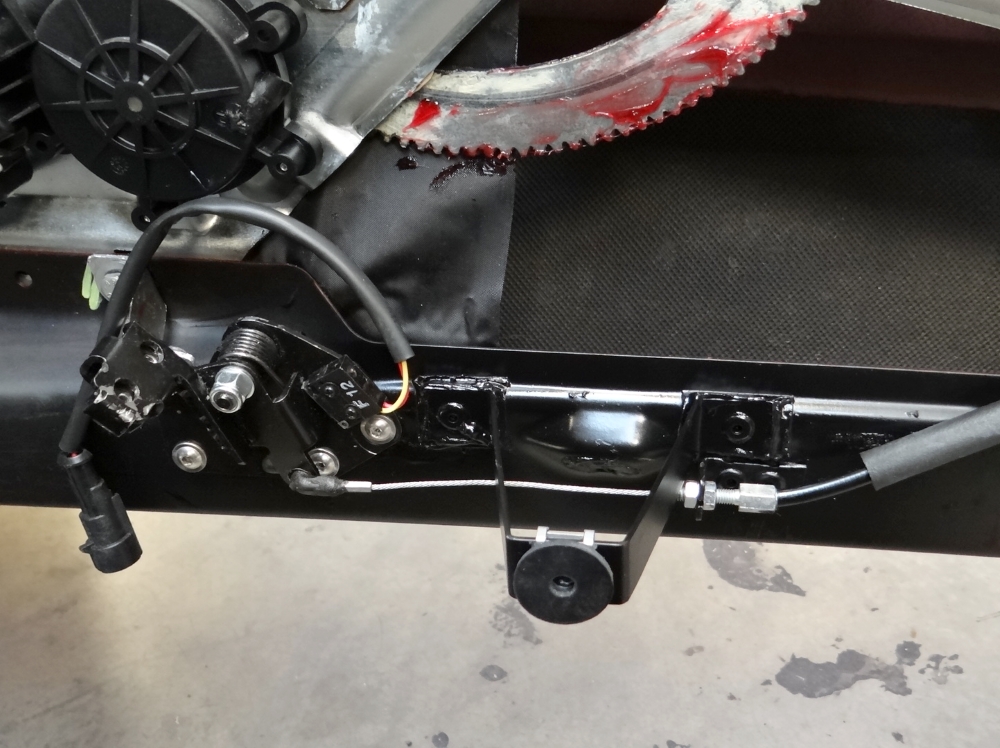
The Scuderia uses the 360 CS inner door mechanisms which are mounted to the door itself rather than the door card. They re-use the cable mounting bracket from the back of the F430 door cards so I had to swap those across and rivet them to the door. I have also fitted Neoprene washers to the door card mounting points to cut down on vibrations.
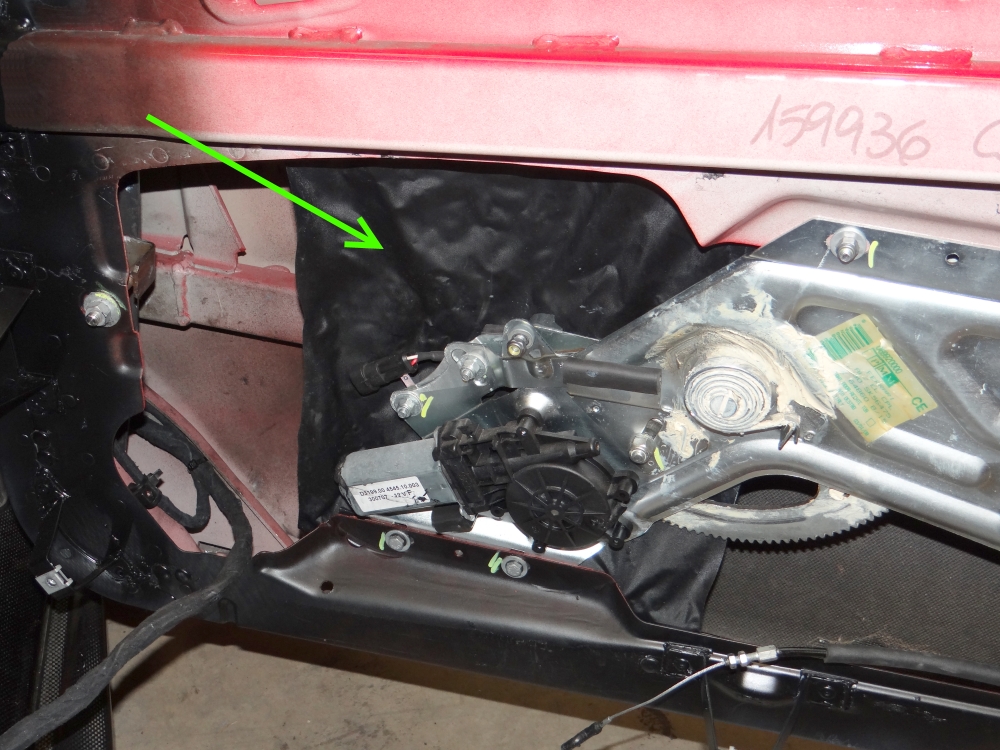
Home-made moisture barriers fitted.
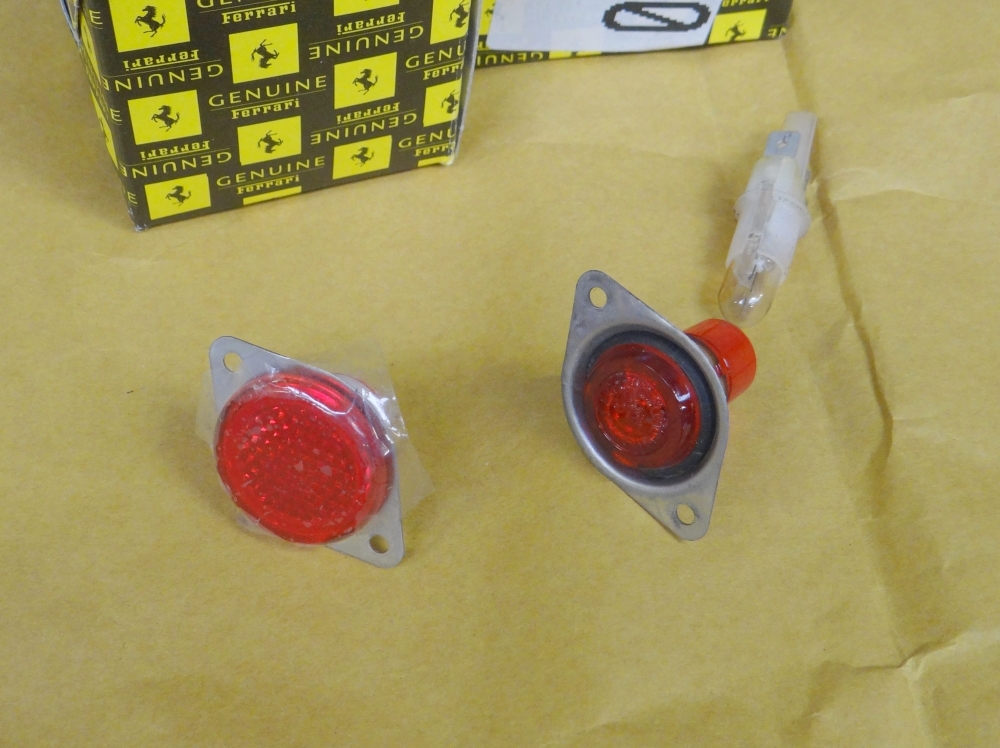
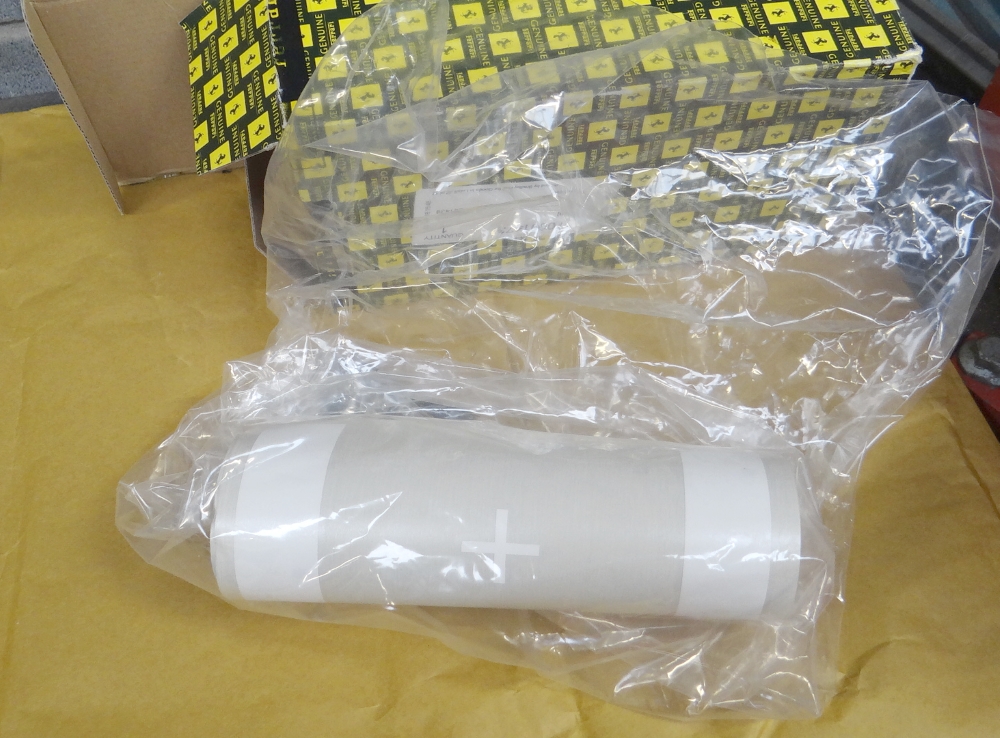
I've fitted the 16M reflectors (left) in place of the original marker lights (right). The reason for this was explained in a previous post.
The inner window scraper trims on my car were finished with some kind of trim paint over the base rubber which over time had started to lift (top). My Dad sanded these for me and painted them with black vinyl and rubber paint. The result was much better than I imagined possible - they are as-new (bottom).
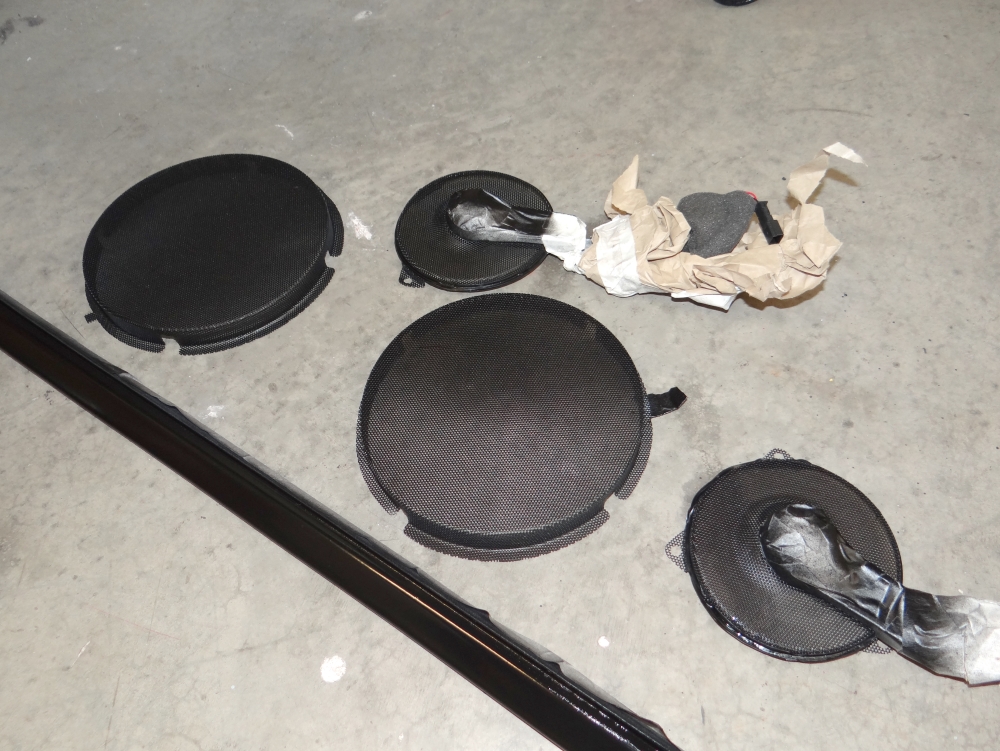
I sprayed an additional layer of black paint on the 16M speaker grilles to freshen them up; the original black paint doesn't have a primer coat underneath so isn't particularly resilient.
All Scuderia door cars had dark grey Alcantara pads lining the bottom of the storage areas which don't tie-in with anything in my interior, so I commissioned a set in the same red Nappa leather as my steering wheel etc. Also, the stitching on the storage nets was always just black so at the same time I had those re-done in red stitching to match that in my interior.
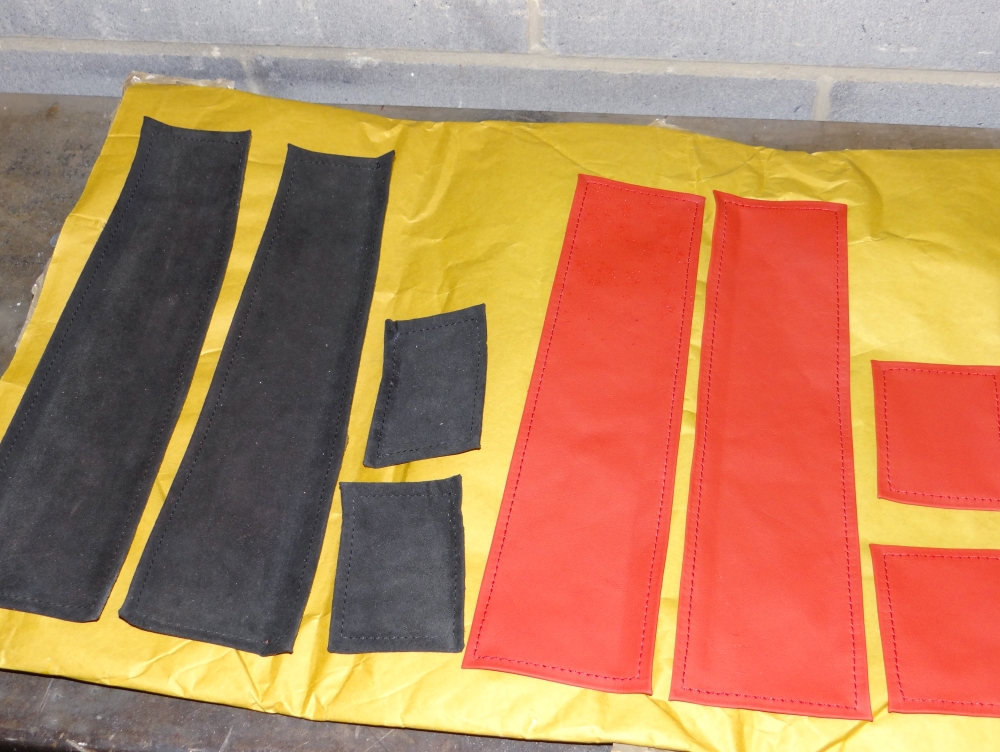
I used spray carpet adhesive to fit the new leather pads.
Door cards complete!
16M Amplifier
The 16M uses a JBL amplifier which is used in quite a few cars including the Toyota Prius and Ferrari California, but having read reviews of its performance I decided I didn't want to fit it. What likely doesn't help is that, for whatever reason, the line-out (connector 'C' on the ISO connections) wasn't used and instead the JBL is fed speaker-level inputs - this is never the way to go to make the most of a head unit and amplifier pairing.
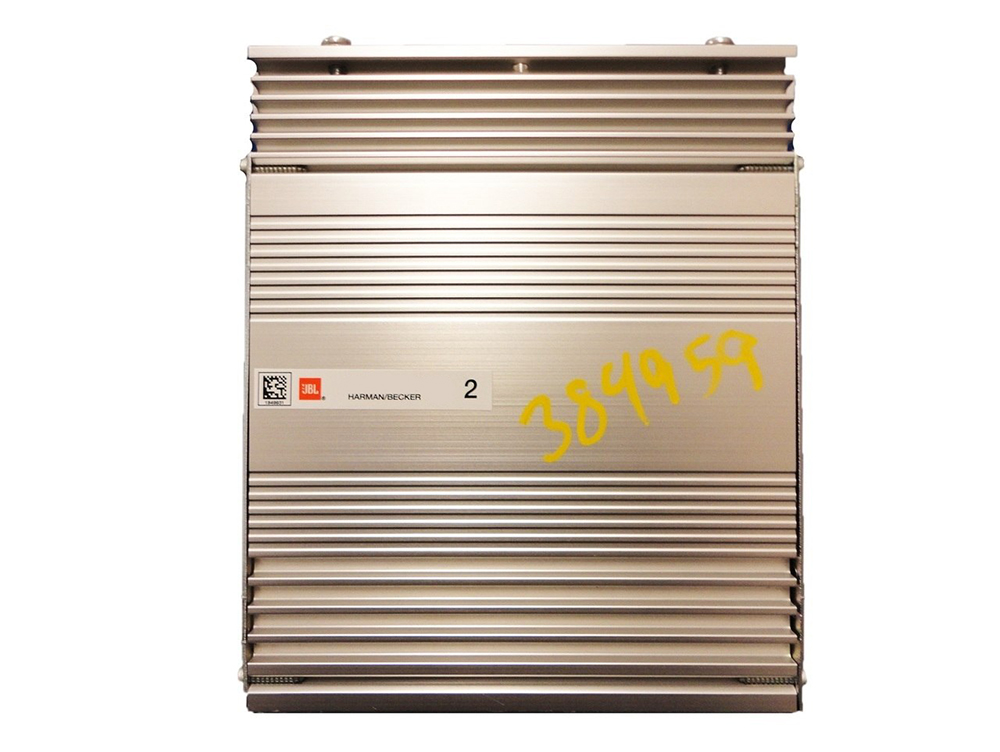
Given the above I decided to make two changes: 1) find an amplifier tested with a better level of performance that is no heavier than the original, and 2) to improve SQ use line level outputs from the Becker head unit to amplifier. I settled on the Apline MRV-F300 amp which is a Class D therefore lighter and cooler running than an equivalent (heavier) Class A or A/B.

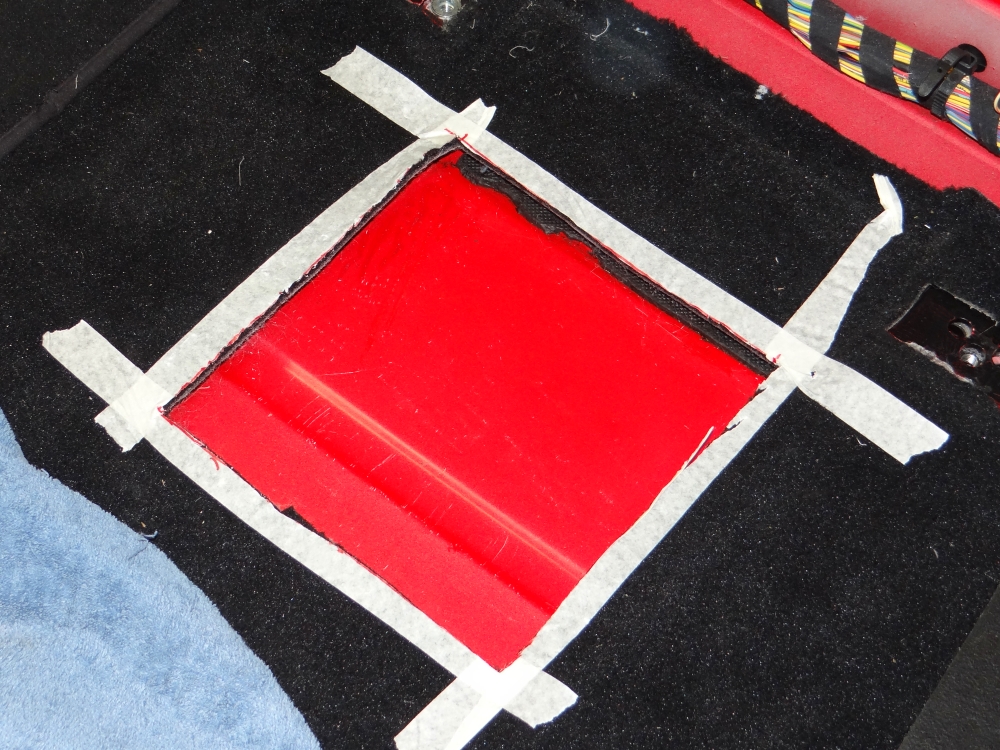
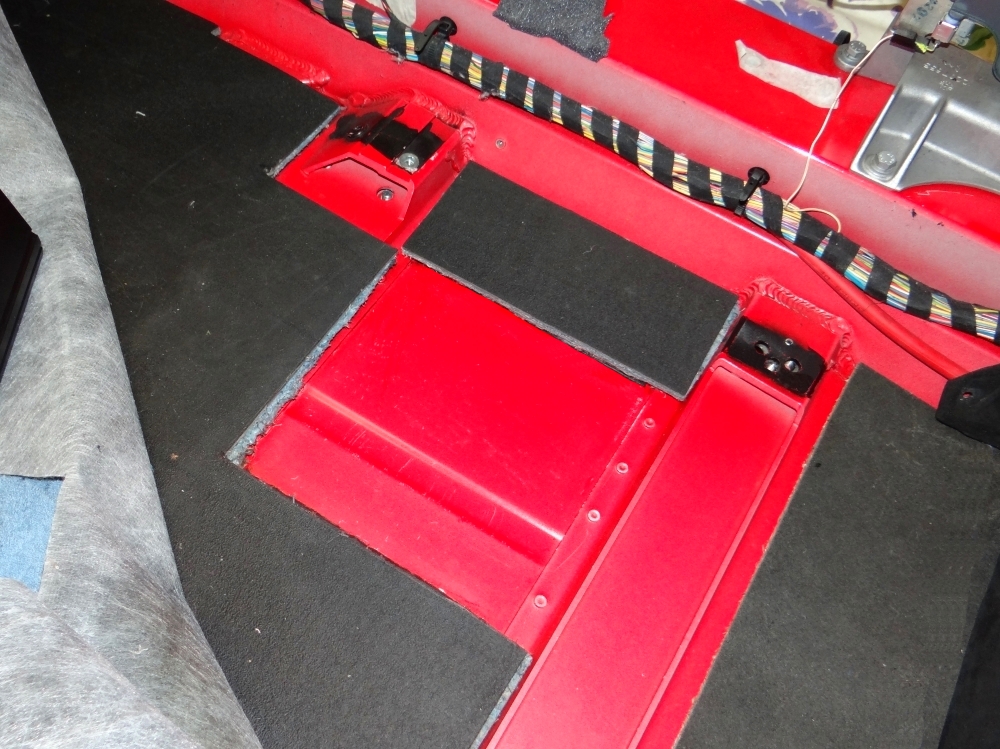
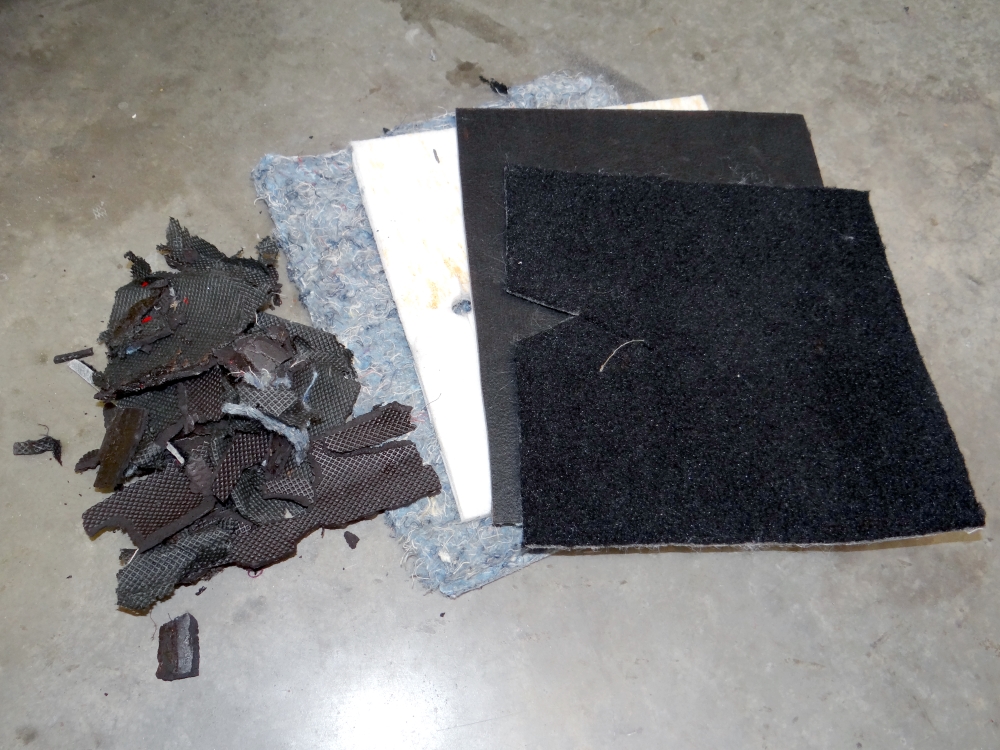
For (relative!) comfort I've opted to retain the sound deadening and vibration material in my car, so in order to mount the amplifier in the factory location I cut a neat square under the passenger seat to allow the amplifier to sit low enough to provide clearance for the left seat. The vibration damping material is bitumen based and stuck to the floor pan; it can be removed with a heat gun and plastic scraper. I removed the adhesive residue with petrol. The sound deadening material lays loosely over the top and was simply cut as required then lifted out.

The 175mm x 210mm area of vibration damping & sound attenuation material came in at 0.665kg, which must put the full complement at around 8kg. The removed part offset the amplifier to mean the total weight added was only just over 1kg - for me that is an acceptable compromise given the benefit. Out of interest at some point in the future I may conduct some tests with a sound level meter with the removable sound deadening material fitted then removed.
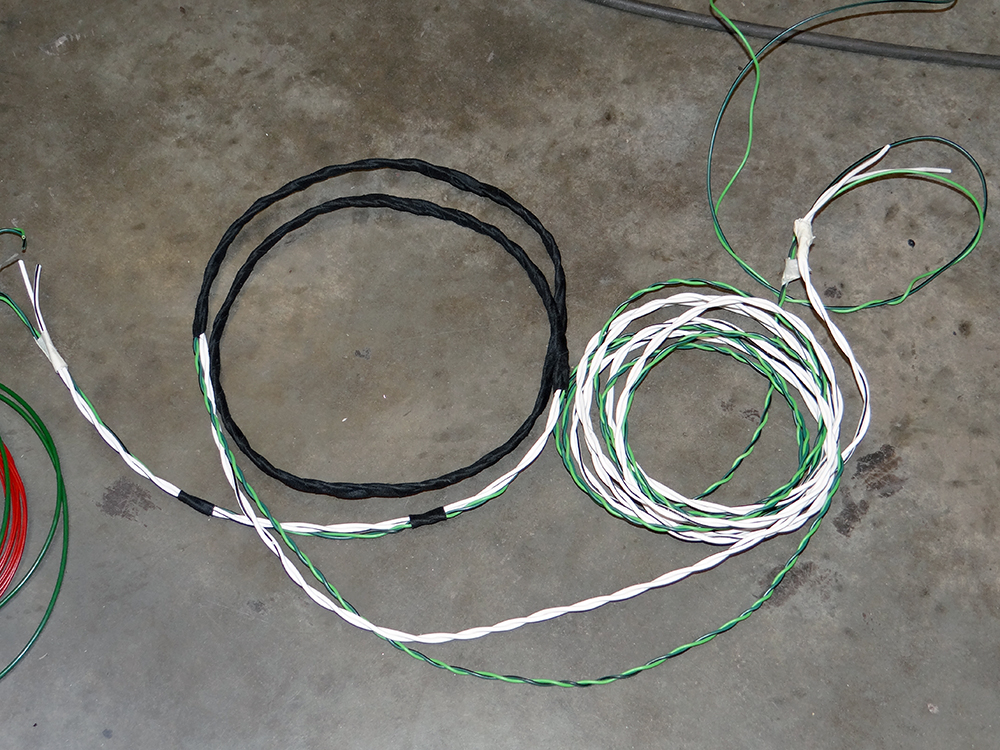
In terms of wiring the neat thing about adding an amplifier is that all cars are pre-wired with a junction point connector to support an one; it's a GT series connector that has speaker wires, power wires, and remote turn-on, so all I had to do was add the additional speaker wires to the door loom multi-plug and add make use of the junction point connector using OEM pins. I've used factory colours throughout and made twisted pairs for reduced interference. The only change I made was to step up the woofer speaker wires by 0.5mm for better SQ.
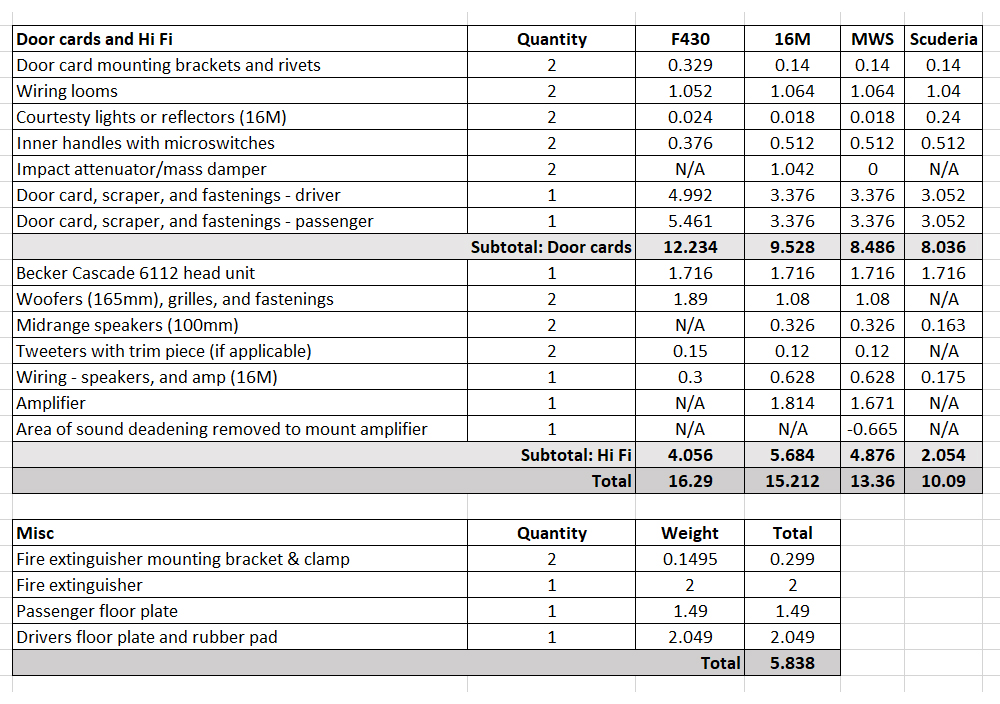
F430, Scuderia, and 16M Door Panel and HiFi Weight Analysis
Door card and stero system weight anlayis
Misc
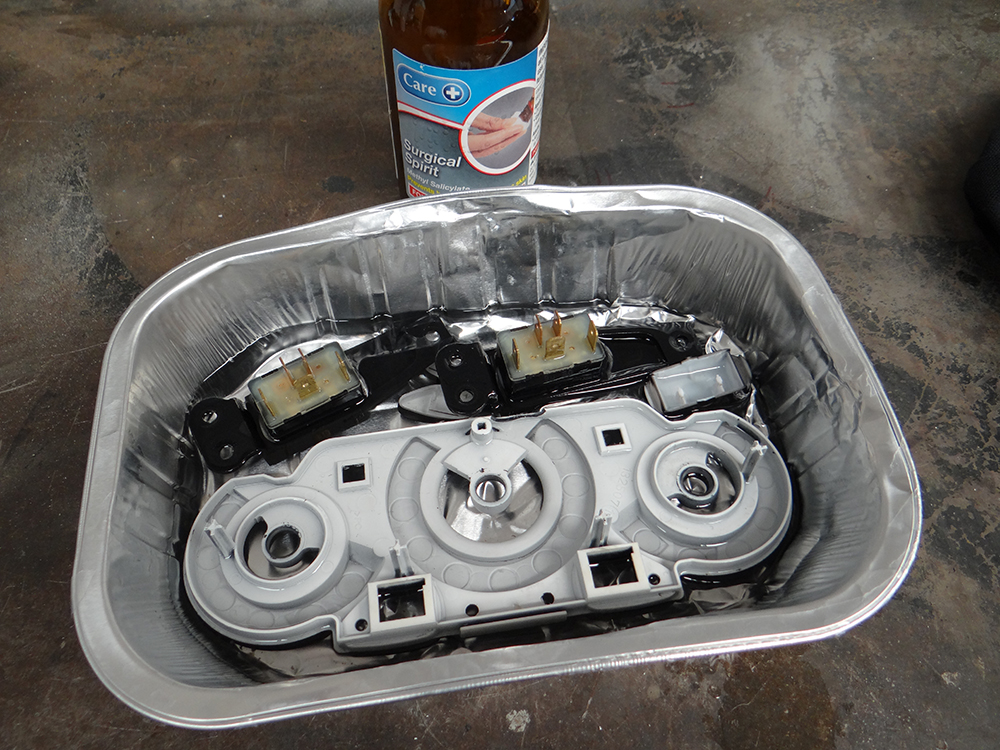
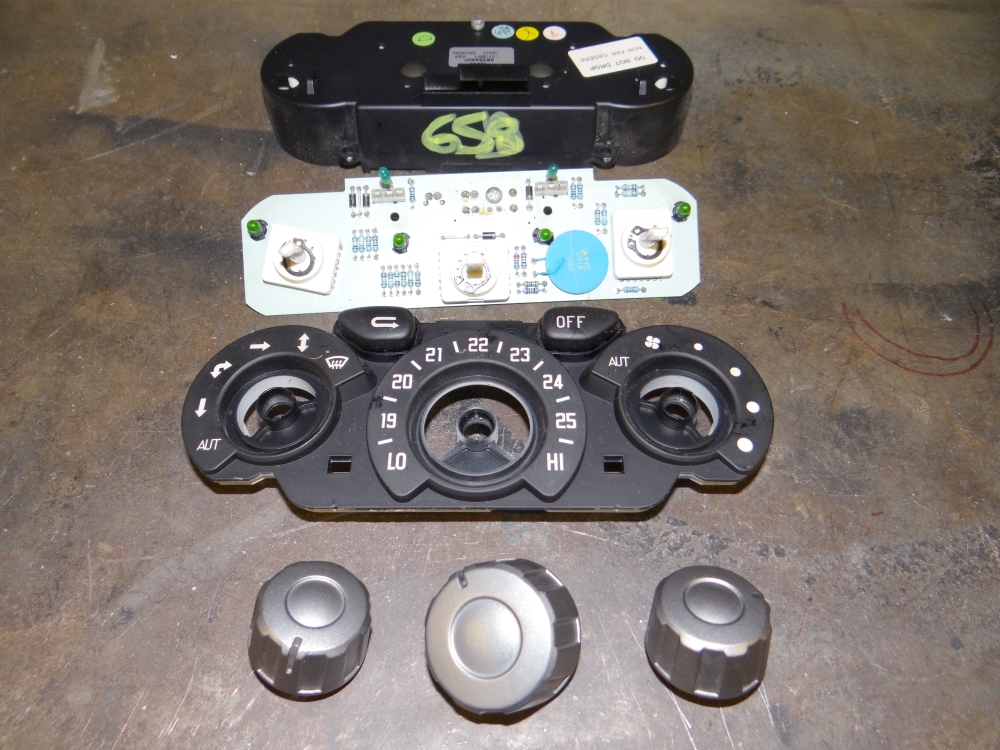
The electric window switches in my car had suffered the usual sticky problem, so given at the same time I had the HVAC control unit in pieces to paint the knobs black (Scuderia has matt black knobs - F430 has satin metallic grey) it made sense to de-sticky everything at the same time. I found that the HVAC temperature display was very resiliant but I had to use extreme care with the window switches because the paint was very fragile.
I used Tamiya paint for the black knobs and their 'Flatt Matt' lacquer to seal the de-stickied parts. It turned out looking OEM but without the risk of further sticky issues.

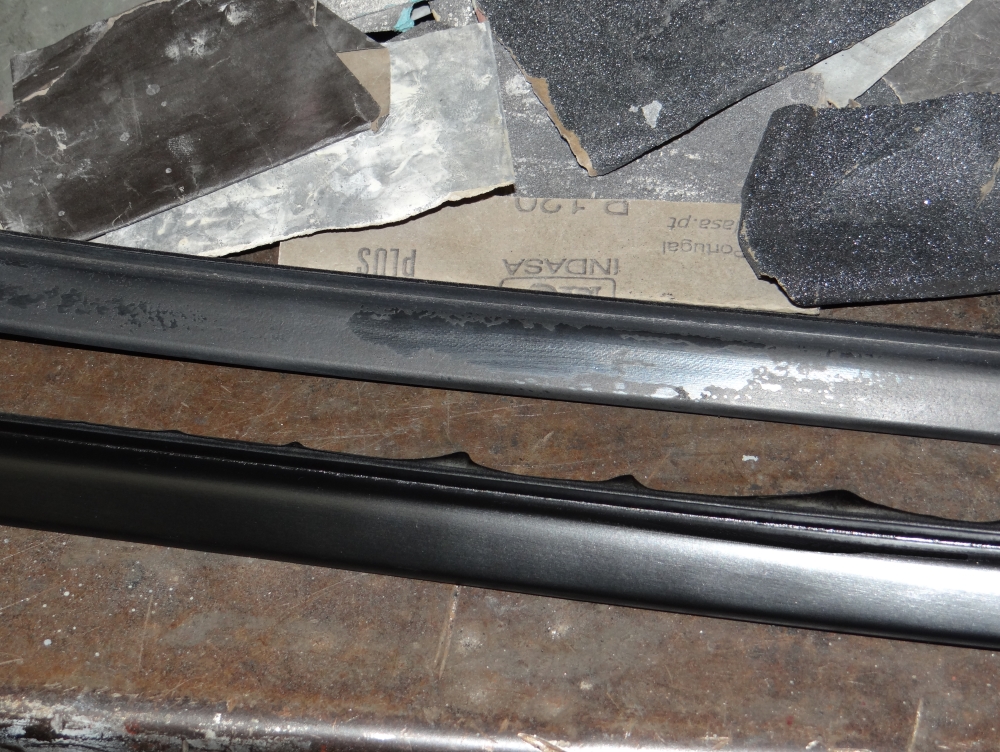
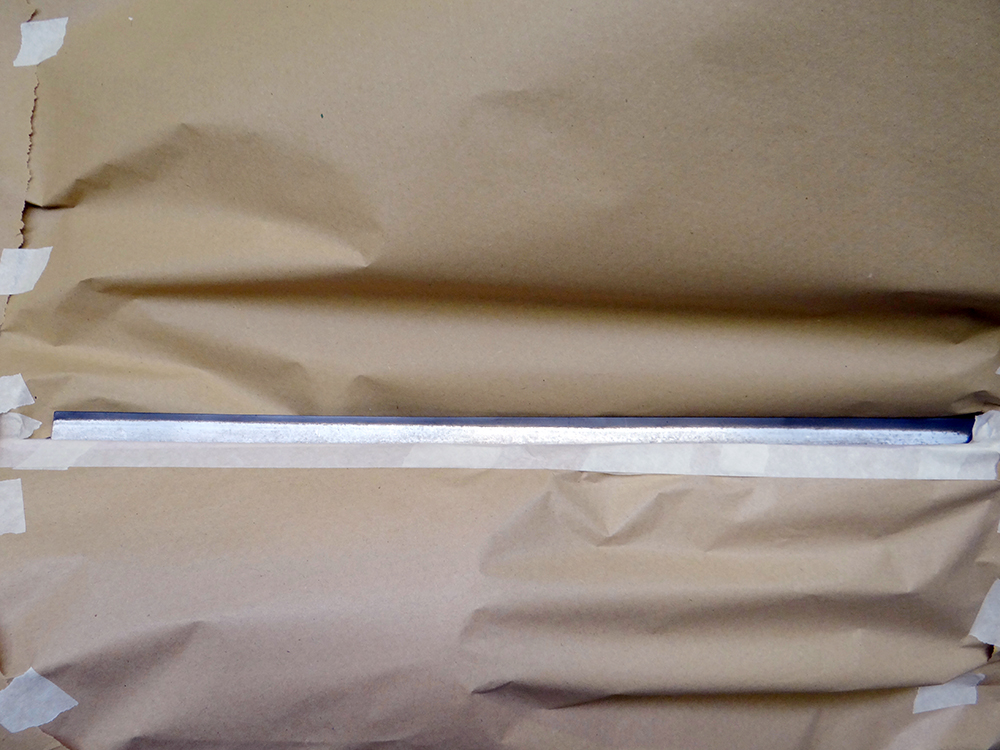
Another titivation job: a strip of aluminium lines either side of the Spider hood tray and on my car the original satin black paint had weathered due to a lack of primer underneath. To restore them the trims were rubbed down, etch primed, and then re-finished in satin black.
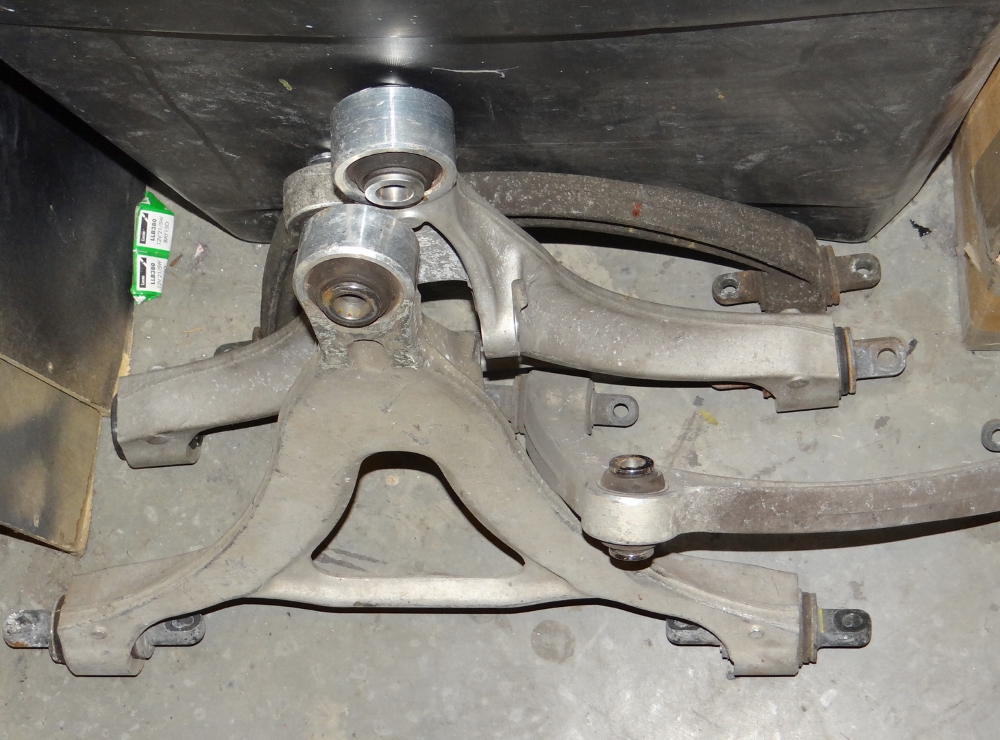
I'm going to refresh the suspension flamblocs and bearings at some point soon so rather than work on my arms I'm piecing together a spare set that can be sent for vapour blasting and build-up off the the car. Fitting them becomes a simple swap-over
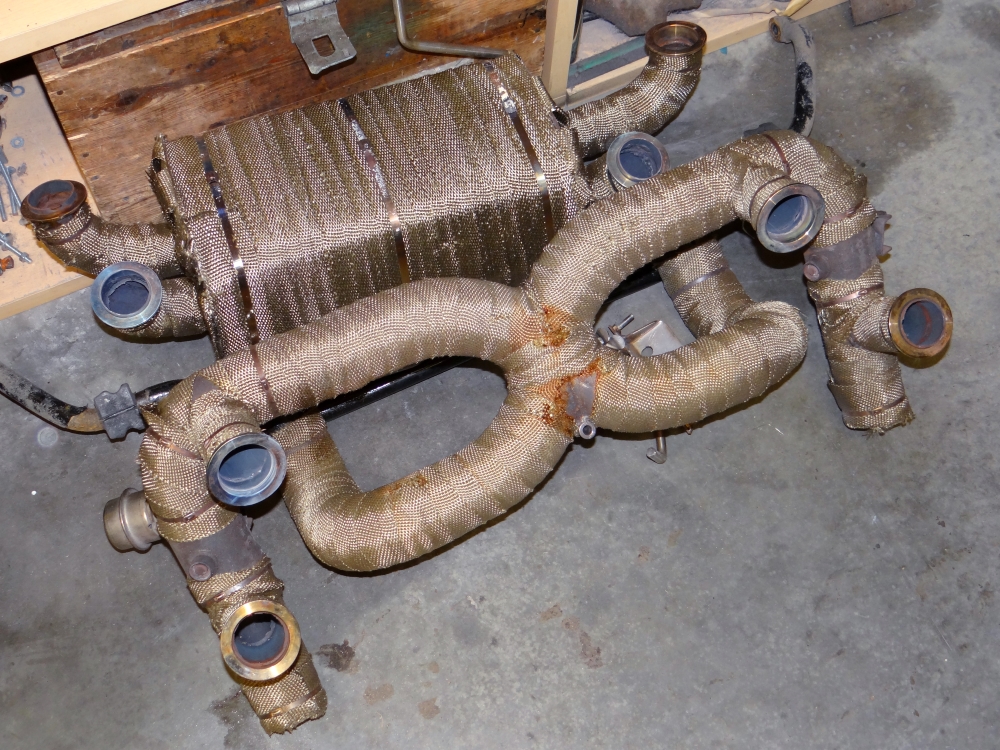
My X-Pipe exhaust has gone because I'm ready for a change.
I also picked up the OEM paint template/jig for the 16M stripe. The stripe on my car is currently a decal which does let down the car, so I'm going to have it painted on.
Weight saving
Unsprung weight saved: 24.97 kg
Sprung weight saved: 96.19 kg
Total weight saved: 121.17 kg
Inside each door a plastic sheet is used to keep water away from the window motor and mechanism, and on my car the adhesive had failed and the sheets were flapping around inside, which isn't good given some of the window mechanism is exposed. To remedy this I removed the sheets from both sides, de-greased them, and then refitted with better adhesive.
The Scuderia uses the 360 CS inner door mechanisms which are mounted to the door itself rather than the door card. They re-use the cable mounting bracket from the back of the F430 door cards so I had to swap those across and rivet them to the door. I have also fitted Neoprene washers to the door card mounting points to cut down on vibrations.
Home-made moisture barriers fitted.
I've fitted the 16M reflectors (left) in place of the original marker lights (right). The reason for this was explained in a previous post.
The inner window scraper trims on my car were finished with some kind of trim paint over the base rubber which over time had started to lift (top). My Dad sanded these for me and painted them with black vinyl and rubber paint. The result was much better than I imagined possible - they are as-new (bottom).
I sprayed an additional layer of black paint on the 16M speaker grilles to freshen them up; the original black paint doesn't have a primer coat underneath so isn't particularly resilient.
All Scuderia door cars had dark grey Alcantara pads lining the bottom of the storage areas which don't tie-in with anything in my interior, so I commissioned a set in the same red Nappa leather as my steering wheel etc. Also, the stitching on the storage nets was always just black so at the same time I had those re-done in red stitching to match that in my interior.
I used spray carpet adhesive to fit the new leather pads.
Door cards complete!
16M Amplifier
The 16M uses a JBL amplifier which is used in quite a few cars including the Toyota Prius and Ferrari California, but having read reviews of its performance I decided I didn't want to fit it. What likely doesn't help is that, for whatever reason, the line-out (connector 'C' on the ISO connections) wasn't used and instead the JBL is fed speaker-level inputs - this is never the way to go to make the most of a head unit and amplifier pairing.
Given the above I decided to make two changes: 1) find an amplifier tested with a better level of performance that is no heavier than the original, and 2) to improve SQ use line level outputs from the Becker head unit to amplifier. I settled on the Apline MRV-F300 amp which is a Class D therefore lighter and cooler running than an equivalent (heavier) Class A or A/B.
For (relative!) comfort I've opted to retain the sound deadening and vibration material in my car, so in order to mount the amplifier in the factory location I cut a neat square under the passenger seat to allow the amplifier to sit low enough to provide clearance for the left seat. The vibration damping material is bitumen based and stuck to the floor pan; it can be removed with a heat gun and plastic scraper. I removed the adhesive residue with petrol. The sound deadening material lays loosely over the top and was simply cut as required then lifted out.
The 175mm x 210mm area of vibration damping & sound attenuation material came in at 0.665kg, which must put the full complement at around 8kg. The removed part offset the amplifier to mean the total weight added was only just over 1kg - for me that is an acceptable compromise given the benefit. Out of interest at some point in the future I may conduct some tests with a sound level meter with the removable sound deadening material fitted then removed.
In terms of wiring the neat thing about adding an amplifier is that all cars are pre-wired with a junction point connector to support an one; it's a GT series connector that has speaker wires, power wires, and remote turn-on, so all I had to do was add the additional speaker wires to the door loom multi-plug and add make use of the junction point connector using OEM pins. I've used factory colours throughout and made twisted pairs for reduced interference. The only change I made was to step up the woofer speaker wires by 0.5mm for better SQ.
F430, Scuderia, and 16M Door Panel and HiFi Weight Analysis
Door card and stero system weight anlayis
Misc
The electric window switches in my car had suffered the usual sticky problem, so given at the same time I had the HVAC control unit in pieces to paint the knobs black (Scuderia has matt black knobs - F430 has satin metallic grey) it made sense to de-sticky everything at the same time. I found that the HVAC temperature display was very resiliant but I had to use extreme care with the window switches because the paint was very fragile.
I used Tamiya paint for the black knobs and their 'Flatt Matt' lacquer to seal the de-stickied parts. It turned out looking OEM but without the risk of further sticky issues.
Another titivation job: a strip of aluminium lines either side of the Spider hood tray and on my car the original satin black paint had weathered due to a lack of primer underneath. To restore them the trims were rubbed down, etch primed, and then re-finished in satin black.
I'm going to refresh the suspension flamblocs and bearings at some point soon so rather than work on my arms I'm piecing together a spare set that can be sent for vapour blasting and build-up off the the car. Fitting them becomes a simple swap-over
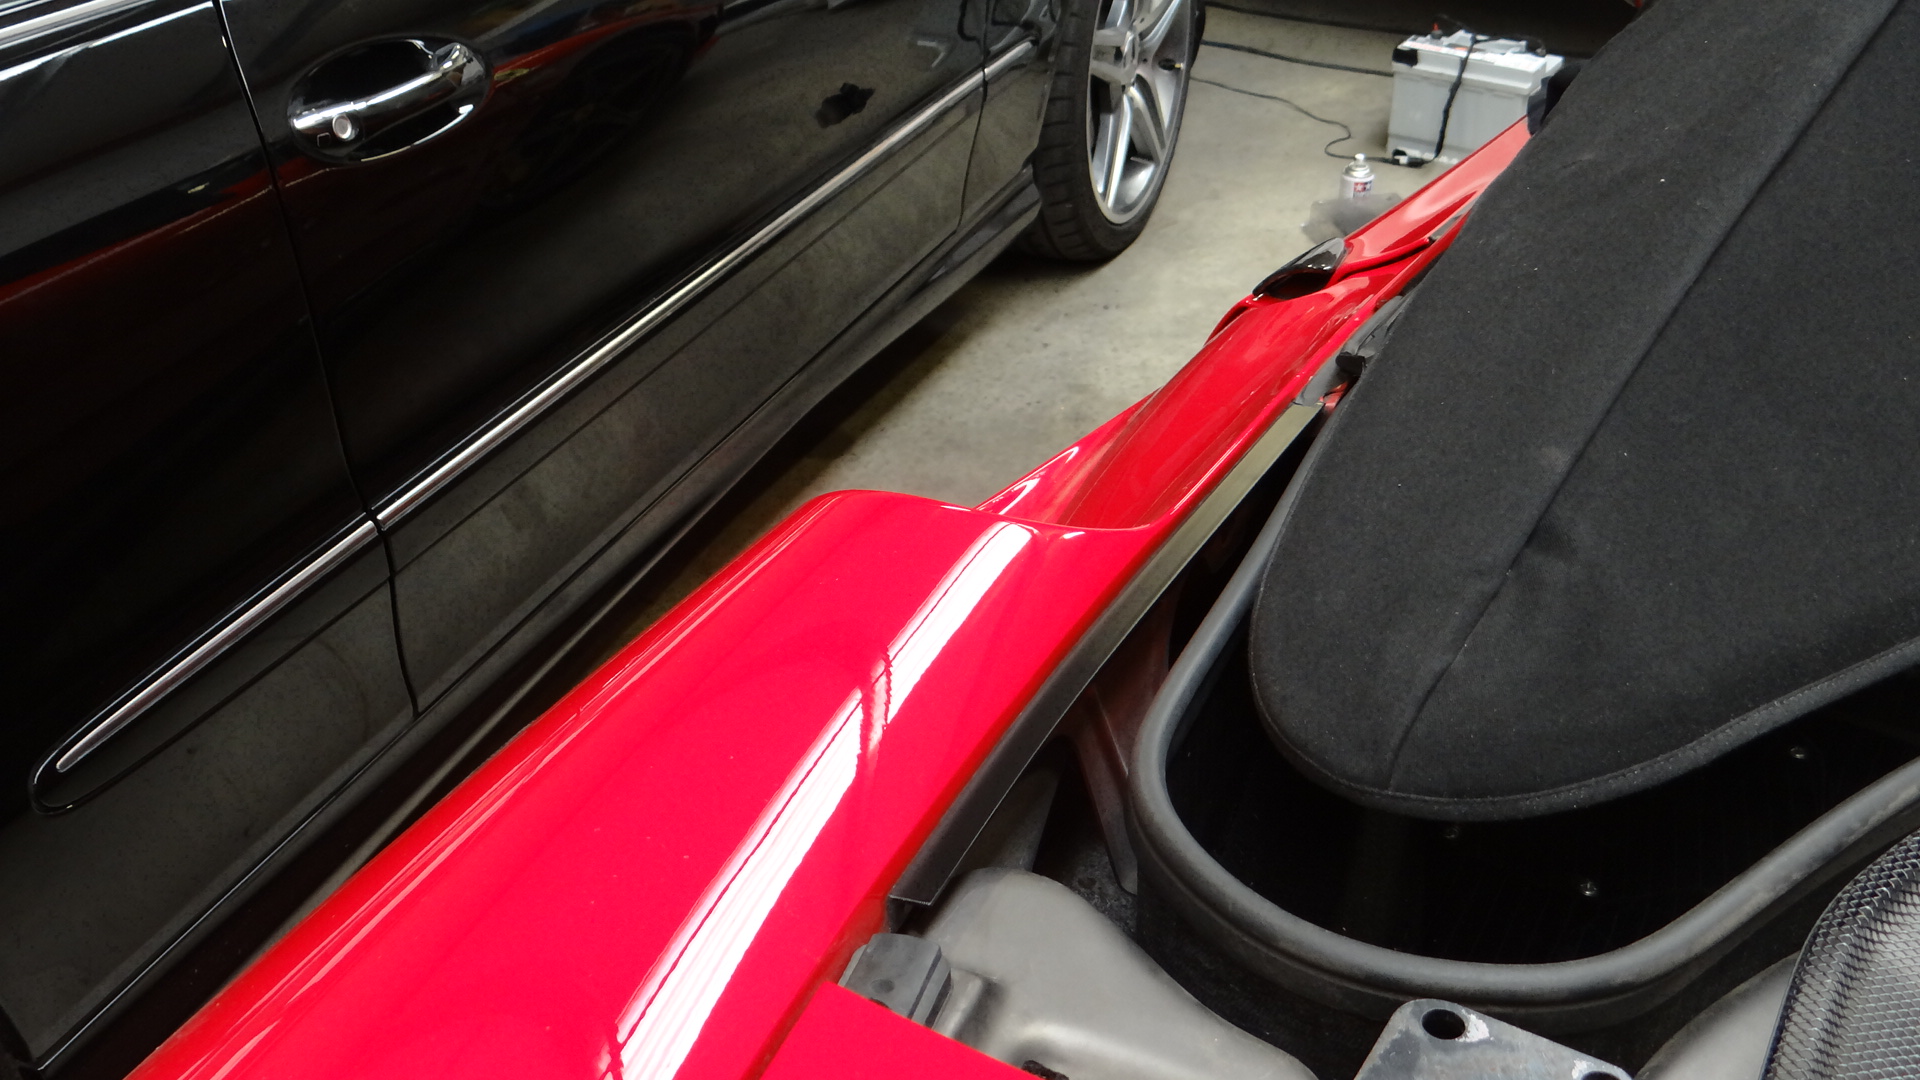
My X-Pipe exhaust has gone because I'm ready for a change.
I also picked up the OEM paint template/jig for the 16M stripe. The stripe on my car is currently a decal which does let down the car, so I'm going to have it painted on.
Weight saving
| Original Part | Fitted Quantity | Original Part (kg) | Replacement Part (kg) | Sprung Saving (kg) | Unsprung Saving (kg) | Replacement Part |
|---|---|---|---|---|---|---|
| Pedals - brake | 1 | 0.987 | 0.627 | 0.36 | - | 16M/Scuderia |
| Pedals - brake and clutch height adjuster bracket | 1 | 0.086 | 0 | 0.086 | - | Removed - unused |
| Brakes - ABS/ESP - acceleration sensor | 1 | 0.091 | 0 | 0.091 | - | Removed - function provided by CAN yaw |
| Pedals - Pedals - accelerator assembly | 1 | 0.883 | 0.869 | 0.014 | - | 16M/Scuderia |
| Door hinges | 4 | 0.705 | 0.5005 | 0.818 | - | Machined to reduce weight |
| Dashboard plaque 'F430 Spider' - carbon version | 1 | 0.025 | 0.086 | -0.061 | - | '16M Scuderia Spider - Limited 499' |
| Interior - centre console, complete (carbon driving zone) | 1 | 2.253 | 1.341 | 0.912 | - | 16M (carbon) |
| Windscreen washer tank, pumps, and minimum fluid | 1 | 5.257 | 2.899 | 2.358 | - | 360 non-headlamp wash version adapted |
| Headlamps - standard | 2 | 0.3505 | 0.137 | 0.427 | - | 16M (carbon) |
| Wing mirrors | 1 | 2.11 | 1.431 | 0.679 | - | 16M/Scuderia (carbon) |
| Spider hood tray | 1 | 8.45 | 1.555 | 6.895 | - | Bespoke carbon version |
| F1 paddles | 1 | 0.154 | 0.103 | 0.051 | - | Steering wheel mounted |
| Steering wheel - leather with aluminium trim | 1 | 1.78 | 1.85 | -0.07 | - | 16M/Scuderia (carbon) - leather & alcantara |
| Interior - rear bulkhead (carpet) | 1 | 2.86 | 2.703 | 0.157 | - | Retrimmed in Alcantara |
| Interior - rear bulkhead document nets (untrimmed) | 2 | 0.119 | 0.257 | -0.276 | - | Retrimmed in Alcantara |
| Interior - rear shelf, centre (carpet) | 1 | 0.402 | 0.465 | -0.063 | - | Retrimmed in Alcantara |
| Pedals - drivers footrest 'dead pedal' | 1 | 0.181 | 0.162 | 0.019 | - | Hill Engineering (drilled aluminium) |
| Interior - tunnel trim (carpet) | 1 | 1.177 | 1.041 | 0.136 | - | Retrimmed in Alcantara |
| Interior - drivers footwell trim (carpet) | 1 | 0.305 | 0.316 | -0.011 | - | Retrimmed in Alcantara |
| Interior - rear shelf, LH (carpet) | 1 | 0.822 | 1.039 | -0.217 | - | Retrimmed in Alcantara |
| Interior - rear shelf, RH (carpet) | 1 | 0.98 | 0.91 | 0.07 | - | Retrimmed in Alcantara |
| Interior - passenger footwell trim (carpet) | 1 | 0.229 | 0.371 | -0.142 | - | Retrimmed in Alcantara |
| Bumper - front mounting washers (steel) | 4 | 0.019 | 0.012 | 0.028 | - | Bespoke aluminium spacers |
| Battery change #2 - Optima 'Red Top' 34R | 1 | 18.75 | 16.72 | 2.03 | - | Bosch S5 007 |
| Pedals - passenger footrest | 1 | 0.347 | 0.136 | 0.211 | - | 16M/Scuderia (machined flat and drilled) |
| Doors - door card mounting brackets and rivets | 2 | 0.1645 | 0.14 | 0.049 | - | 16M specific brackets |
| Doors - wiring loom | 2 | 0.526 | 0.532 | -0.012 | - | 16M door loom |
| Doors - inner handle with microswitches | 2 | 0.188 | 0.256 | -0.136 | - | 16M/Scuderia inner handle mechanism |
| Doors - door card, scraper, and fastenings - driver | 1 | 4.992 | 3.376 | 1.616 | - | 16M door card, scraper, and fastenings |
| Doors - door card, scraper, and fastenings - passenger | 1 | 5.461 | 3.376 | 2.085 | - | 16M door card, scraper, and fastenings |
| Hi Fi - woofer, grille, and fastenings | 2 | 0.945 | 0.54 | 0.81 | - | 16M midbass with fastenings |
| Hi Fi - tweeter and trim piece | 2 | 0.075 | 0.06 | 0.03 | - | 16M tweeter & midrange with fastenings |
| Hi Fi - midrange and fastenings | 2 | 0 | 0.163 | -0.326 | - | 16M midrange with fastenings |
| Hi Fi - amplifier | 1 | 0 | 1.671 | -1.671 | - | 16M amplifier |
| Hi Fi - wiring for amplifier and additional speakers | 1 | 0 | 0.628 | -0.628 | - | 16M Hi Fi wiring |
| Undertray, rear | 1 | 9.1 | 5.249 | 3.851 | - | 16M/Scuderia (carbon composite) |
| Capristo exhaust valve controller | 1 | 0 | 0.245 | -0.245 | - | Capristo |
| Door courtesy lights | 2 | 0.012 | 0.009 | 0.006 | - | 16M reflectors |
| Area of sound deadening removed to mount amplifier | 1 | 0.665 | 0 | 0.665 | - | Removed |
Unsprung weight saved: 24.97 kg
Sprung weight saved: 96.19 kg
Total weight saved: 121.17 kg
I've said this before, and I'm sure there's some PHer laughing at me for brown nosing or whatever, but I don't care.
This build is ex-f king-ceptional. It's got to be the best car build thread on PH, and the attention to detail is just off the charts. Have you got any European trips planned this year?
This build is ex-f
king-ceptional. It's got to be the best car build thread on PH, and the attention to detail is just off the charts. Have you got any European trips planned this year?
leglessAlex said:
I've said this before, and I'm sure there's some PHer laughing at me for brown nosing or whatever, but I don't care.
This build is ex-fking-ceptional. It's got to be the best car build thread on PH, and the attention to detail is just off the charts. Have you got any European trips planned this year?
Agreed.This build is ex-f
king-ceptional. It's got to be the best car build thread on PH, and the attention to detail is just off the charts. Have you got any European trips planned this year?Thanks all. The car will be one of our wedding cars this year and we're also using it to drive to Italy.
For the exhaust change I'm thinking about the Capristo valved exhaust https://www.youtube.com/watch?v=qu95SSMYbOw

It has specific cats with a straighter exit to the silencer, and the pipes are also 70mm vs the 65mm original.
The X-Pipe has been good in terms of experiencing a higher pitched sound, but I've found it ran hotter, sapped a bit of power, and I actually miss the fullter, and louder - if less musical - 'natural' exhaust note.
For the exhaust change I'm thinking about the Capristo valved exhaust https://www.youtube.com/watch?v=qu95SSMYbOw
It has specific cats with a straighter exit to the silencer, and the pipes are also 70mm vs the 65mm original.
The X-Pipe has been good in terms of experiencing a higher pitched sound, but I've found it ran hotter, sapped a bit of power, and I actually miss the fullter, and louder - if less musical - 'natural' exhaust note.
mwstewart said:
The 175mm x 210mm area of vibration damping & sound attenuation material came in at 0.665kg, which must put the full complement at around 8kg. The removed part offset the amplifier to mean the total weight added was only just over 1kg - for me that is an acceptable compromise given the benefit. Out of interest at some point in the future I may conduct some tests with a sound level meter with the removable sound deadening material fitted then removed.
You might find that cutting that 'hole' in the material has a bigger impact on sound than you expect. A bit like opening the window when driving - it only needs to be open a small amount to let the majority of the noise in. The sound waves can effectively bypass the insulation now there's an opening. A sound level meter might give you an indication of the change but it may be difficult to pick it out of an overall sound level reading (using a calibrated sound level meter).The regions that will be affected will be localised in the frequency spectrum (depending on the spec of the material) and could easily be buried by other factors. Repeatability is very difficult without a controlled environment too. Obviously the amplifier sitting in its place will help; if it were me I would have sought a compressible closed-cell foam alternative to sit underneath the amplifier. Having said that, without knowing how noisy the car is in the first place it's difficult to know if it'll make the slightest difference at all.Gassing Station | Readers' Cars | Top of Page | What's New | My Stuff