Volkswagen Corrado G60
Discussion


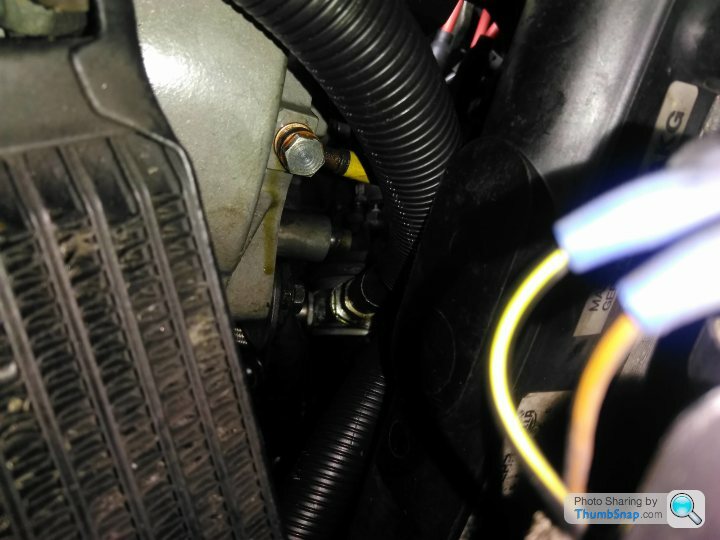
Just a thought having looked at the install of the those braided lines.
Are they in contact with each other ?
if so, you'd be best putting some sleeving. or some kind of sleeve around both pipes to stop them chaffing, as the stainless braiding is incredibly abrasive.
https://www.practicalmachinist.com/vb/general/ot-b...
Or alternatively find the automotive equivalent of these :
https://www.hellermanntyton.co.uk/products/cable-t...
@eddiecatflap thanks! Nice to see two Corrado threads on the same page of Readers Cars...
A little bit of an update, having got the space out back under the car port free, I managed to get the G60 in it, but its TIGHT getting through the gates forwards, when you're under the time pressure of not burning more oil than you have to...
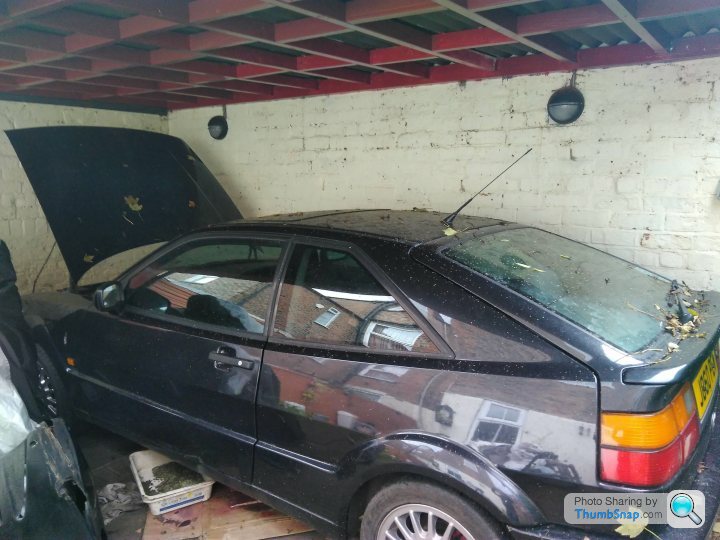
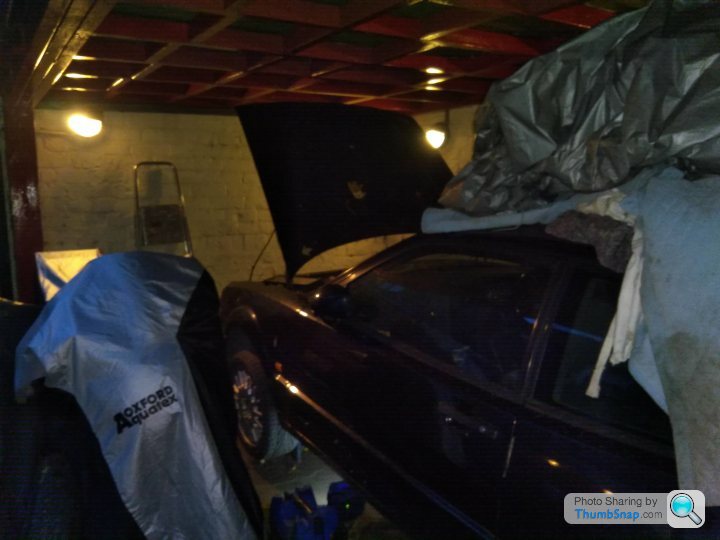
That did them mean that I could get some work done on it despite the weather, although there's not a lot of room.
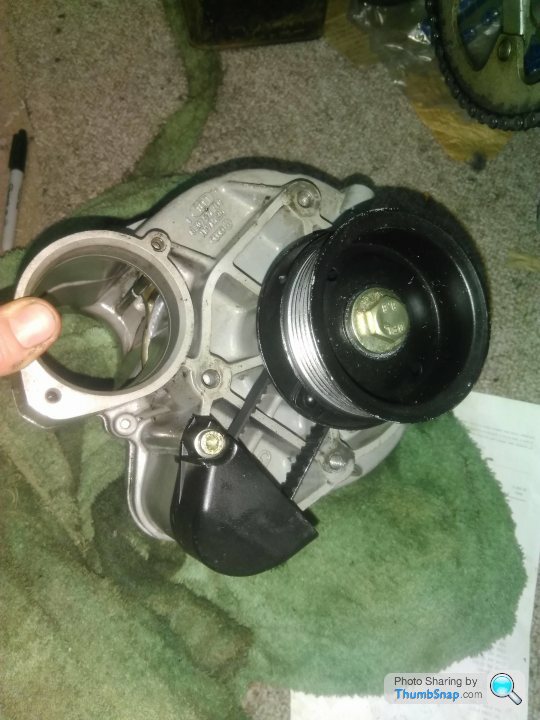
Still, got the oil line return line off...and it's perfectly fine, which means the charger is at fault. Easier the second time round the take it all apart again.
The charger and all of the ancillary pipework is full of oil. I've cleaned as much of it as possible as I go, but I've not dismantled the intercooler yet. I'm dreading what I'll find to be honest.
Still, it's out and I'll get it boxed up tomorrow to send back to JMR.
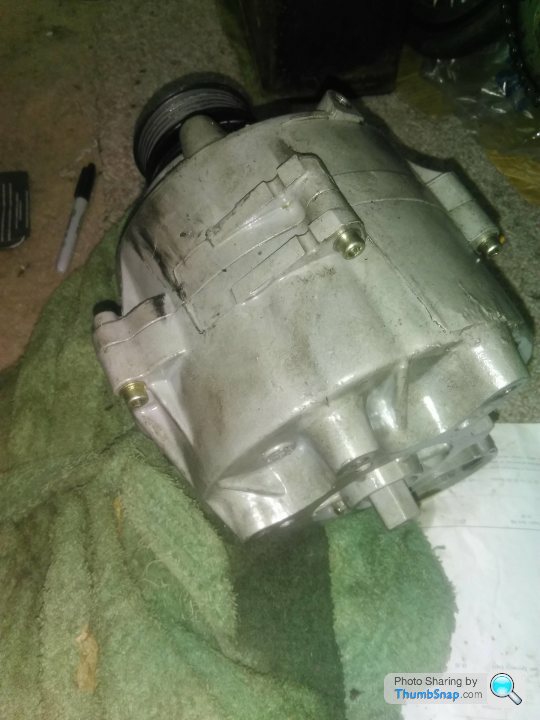
I spotted a slight weep from the coolant bypass due to an overtight hose clip that had knackered itself, so replaced that while the access was easy. I've also put the oil return line back in having learned from last time!
Let's see what the analysis of the charger brings, but hopefully be back up and running soon.
Whether I keep it after this or not, I'm not sure. Just a bit of a low point I suspect, but it's tried my patience recently and there are other things I perhaps want to be doing with my time.
A little bit of an update, having got the space out back under the car port free, I managed to get the G60 in it, but its TIGHT getting through the gates forwards, when you're under the time pressure of not burning more oil than you have to...
That did them mean that I could get some work done on it despite the weather, although there's not a lot of room.
Still, got the oil line return line off...and it's perfectly fine, which means the charger is at fault. Easier the second time round the take it all apart again.
The charger and all of the ancillary pipework is full of oil. I've cleaned as much of it as possible as I go, but I've not dismantled the intercooler yet. I'm dreading what I'll find to be honest.
Still, it's out and I'll get it boxed up tomorrow to send back to JMR.
I spotted a slight weep from the coolant bypass due to an overtight hose clip that had knackered itself, so replaced that while the access was easy. I've also put the oil return line back in having learned from last time!
Let's see what the analysis of the charger brings, but hopefully be back up and running soon.
Whether I keep it after this or not, I'm not sure. Just a bit of a low point I suspect, but it's tried my patience recently and there are other things I perhaps want to be doing with my time.
Dam, the Supercharger filling with oil is NOT the update I was expecting. Hope this turns out to be just a small inconvenience and not a total disaster.
I dare say I am dead keen to see how this pans out because I'm getting dam close to getting my Corrado G60 back on the road and am still unsure about getting the charger rebuilt/upgraded & who to rebuild it.
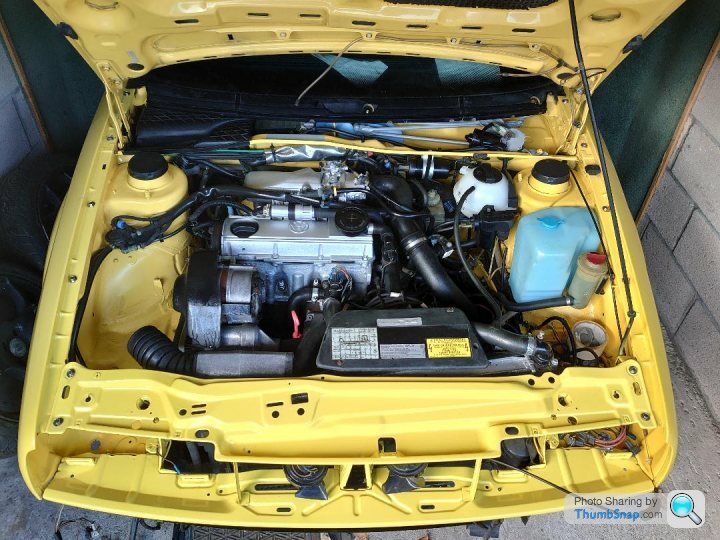
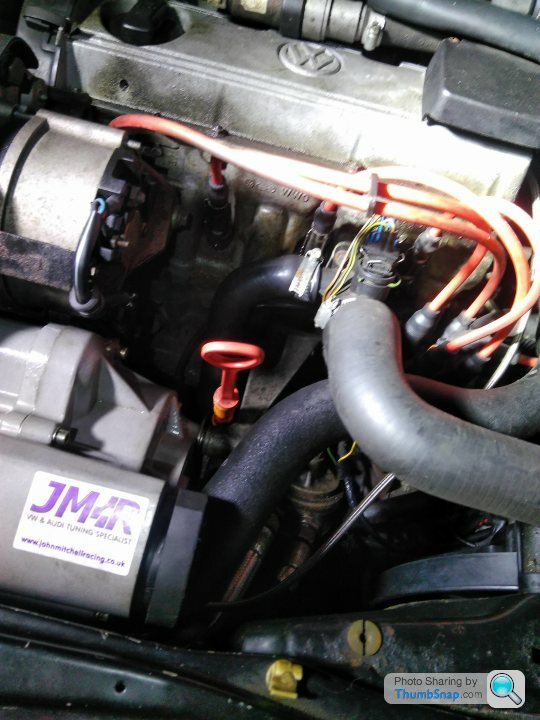
I need to relocate my G60 to a new garage so today I've been preparing it for a move, this is the first time the engine bay has seen light in over a year hence it's a bit dusty but I took a snap to give me some motivation to crack on and a reminder of how many new nuts/bolts/washers I still need and how impressive it is that you can fit the entire front end assembly in the boot - practical coupe!!
I dare say I am dead keen to see how this pans out because I'm getting dam close to getting my Corrado G60 back on the road and am still unsure about getting the charger rebuilt/upgraded & who to rebuild it.
I need to relocate my G60 to a new garage so today I've been preparing it for a move, this is the first time the engine bay has seen light in over a year hence it's a bit dusty but I took a snap to give me some motivation to crack on and a reminder of how many new nuts/bolts/washers I still need and how impressive it is that you can fit the entire front end assembly in the boot - practical coupe!!
aka_kerrly said:
Dam, the Supercharger filling with oil is NOT the update I was expecting. Hope this turns out to be just a small inconvenience and not a total disaster.
I dare say I am dead keen to see how this pans out because I'm getting dam close to getting my Corrado G60 back on the road and am still unsure about getting the charger rebuilt/upgraded & who to rebuild it.
I need to relocate my G60 to a new garage so today I've been preparing it for a move, this is the first time the engine bay has seen light in over a year hence it's a bit dusty but I took a snap to give me some motivation to crack on and a reminder of how many new nuts/bolts/washers I still need and how impressive it is that you can fit the entire front end assembly in the boot - practical coupe!!
That is one clean Sirocco engine bay, top marksI dare say I am dead keen to see how this pans out because I'm getting dam close to getting my Corrado G60 back on the road and am still unsure about getting the charger rebuilt/upgraded & who to rebuild it.
I need to relocate my G60 to a new garage so today I've been preparing it for a move, this is the first time the engine bay has seen light in over a year hence it's a bit dusty but I took a snap to give me some motivation to crack on and a reminder of how many new nuts/bolts/washers I still need and how impressive it is that you can fit the entire front end assembly in the boot - practical coupe!!
Oh bugger. Interetsed to hear the JMR verdict on the charger but can't be fun having to take it back out and put it back in again. I really hate having to do things again in scenario's like this.
If it is an consoliation my white corrado came back from the painters after 7 months and the windscreen cracked on the drive home and leaked on the corner and I poked a hole through the floor (the mount for the rear most fuel line bracket had rusted).
Windscreen was refitted for free without damage to the paint but am waiting to get the floor sorted. I haven't used the car all year and have purchased a leather inteior for it. It will be mostly retired for the winter by the time I get it back.
Sometimes our patience is tested with our old cars.
Garemberg said:
aka_kerrly said:
That is one clean Sirocco engine bay, top marksIt's a 1989 Corrado, I can see why you might think it is a Scirocco bay, the lack of headlights & grill make it less identifiable as a Corrado but there are are few other quirks which make it different to the UK Corrado. The brake servo & master cylinder are located on the right hand side of the engine bay the same as the mk1 Golf based Scirocco & the ECU is on the left hand side not the right as per UK cars due to the windscreen wiper motor being on the opposite side to.
This is because my car is left hand drive as it's originally an American market vehicle.
aka_kerrly said:
??
It's a 1989 Corrado, I can see why you might think it is a Scirocco bay, the lack of headlights & grill make it less identifiable as a Corrado but there are are few other quirks which make it different to the UK Corrado. The brake servo & master cylinder are located on the right hand side of the engine bay the same as the mk1 Golf based Scirocco & the ECU is on the left hand side not the right as per UK cars due to the windscreen wiper motor being on the opposite side to.
This is because my car is left hand drive as it's originally an American market vehicle.
Just pulling your leg mate, I have a 94 VR6 and people are always calling it a Scirocco, following this thread with interest.It's a 1989 Corrado, I can see why you might think it is a Scirocco bay, the lack of headlights & grill make it less identifiable as a Corrado but there are are few other quirks which make it different to the UK Corrado. The brake servo & master cylinder are located on the right hand side of the engine bay the same as the mk1 Golf based Scirocco & the ECU is on the left hand side not the right as per UK cars due to the windscreen wiper motor being on the opposite side to.
This is because my car is left hand drive as it's originally an American market vehicle.
@ aka_kerrly that’s a tidy engine bay, certainly puts mine to shame! Always wanted a nugget yellow G60 (or 16v come to that), but black is also fine!
@ _Mja_ sorry to hear about your woes, good luck with getting the floor sorted (but at least they managed to sort the windscreen without too much trouble)
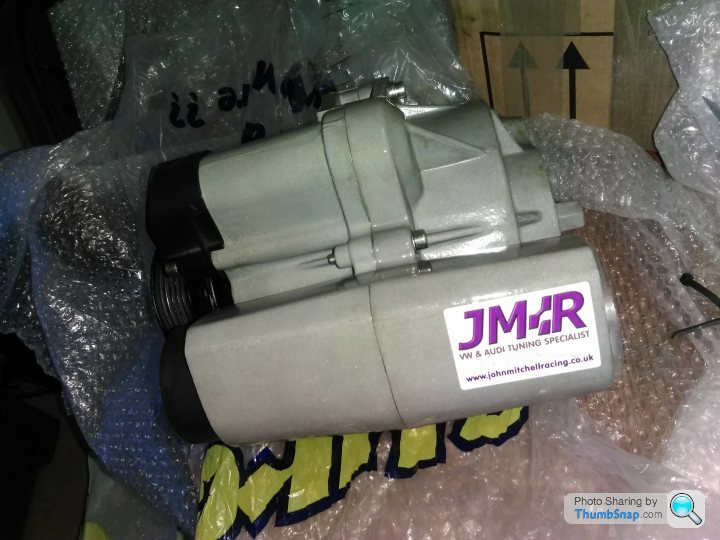
The charger has gone to JMR, so I’ll see what they say next week. I have some of the week off, so I might do some other jobs on it while I’m waiting (or I might get distracted with other stuff...which is more likely)
@ _Mja_ sorry to hear about your woes, good luck with getting the floor sorted (but at least they managed to sort the windscreen without too much trouble)
The charger has gone to JMR, so I’ll see what they say next week. I have some of the week off, so I might do some other jobs on it while I’m waiting (or I might get distracted with other stuff...which is more likely)
Just a quick charger update - JMR have confirmed that the oil seal on the output side of the charger had become displaced, allowing oil past and hence the smokescreen.
John seemed to think that this was an early indication of possible wear to the magnesium housing, and where the old seal had settled nicely in, the new one didn’t take.
They are all interference fit seals (or should be), however, if this is no longer adequate to restrain it against the oil pressure, it now needs to be glued into place. John has source a 2 pack glue that will work on both the seal and the casing (I hope!) and the charger will be back with me next week.
It’s then a matter of bolting it back together and running it for an hour at idle with the outlet disconnected so I can see easily if seal fails again.
A predicted, I didn’t do anything more on th Corrado with my week off (but I am halfway through refurbishing a set of Kawasaki forks for a bike that’s been off the road since February, so that’s progress...)
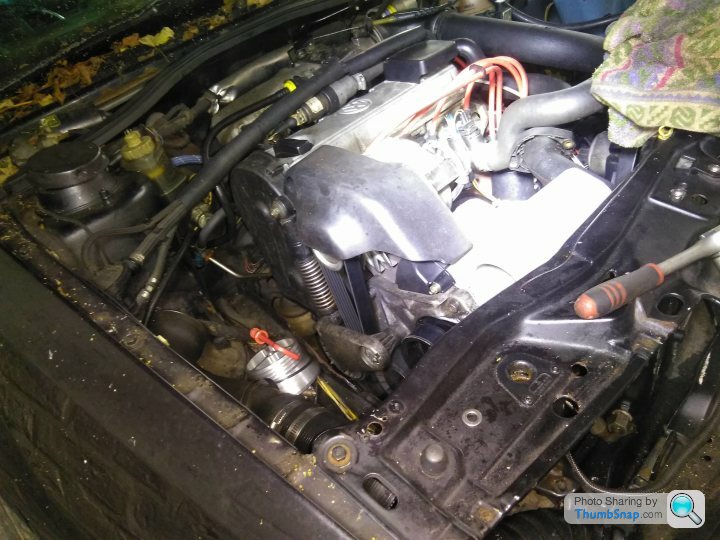
The package has arrived.... Time to get some supercharger re-instalation underway.
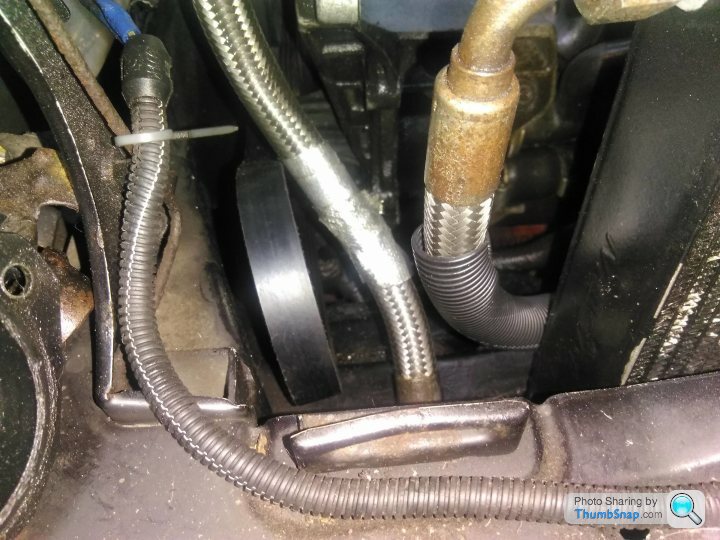
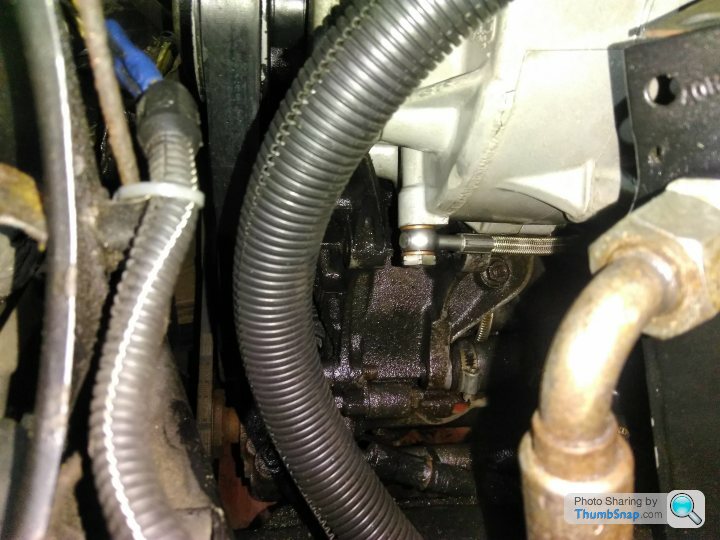
Following @Slippydiff's excellent advice, I covered up the braided oil lines on the way....
... before getting the bolts on the airbox side in :

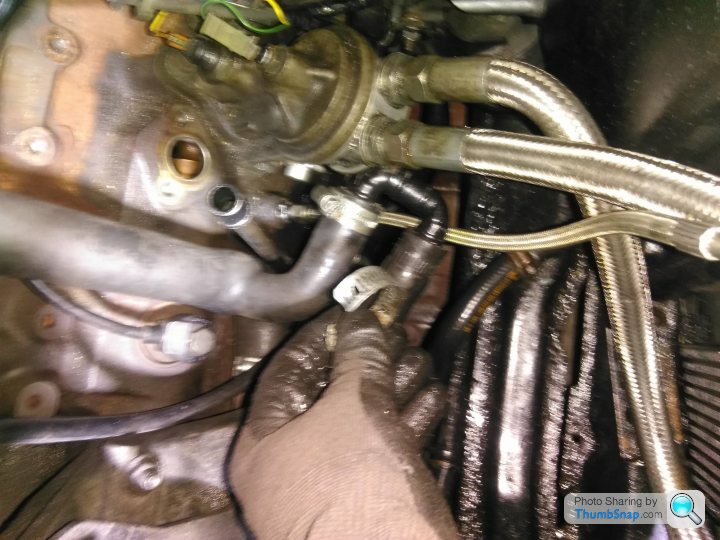
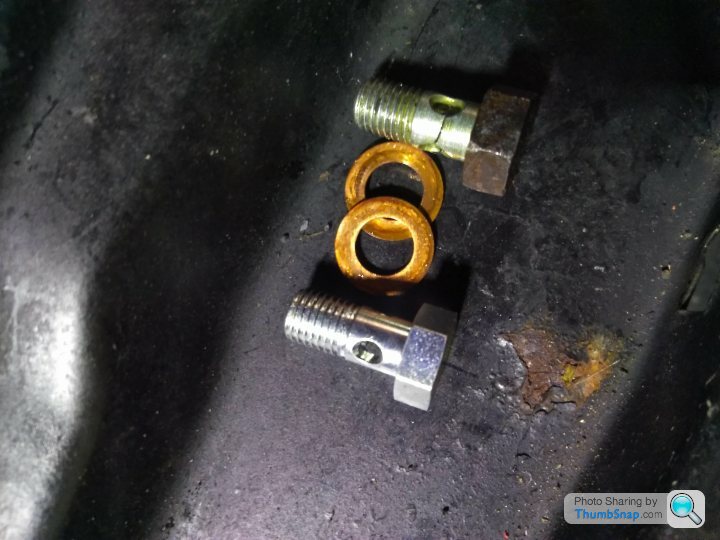
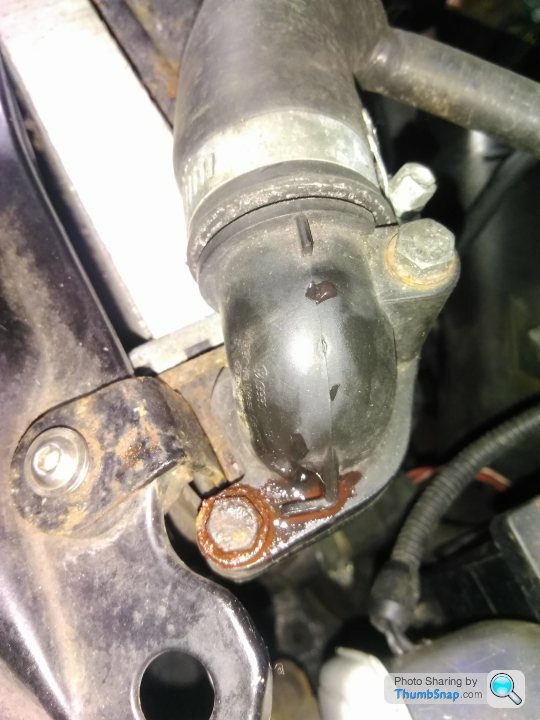
Next up the oil lines.... Oh dear. That's not good.
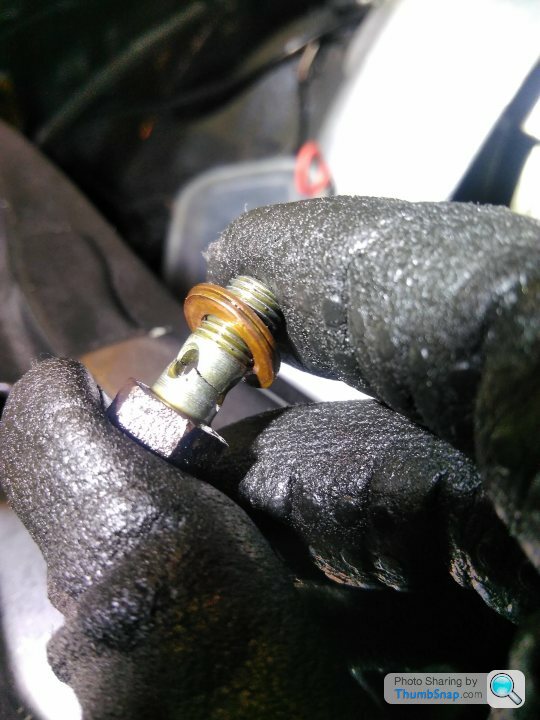
Lucky escape there, I must have over-tightened it last time. New banjo bolt (M8 x 1.0mm x 17mm shank) on order, but that will certainly mean that its not going to be done this weekend.
Still, it gives me time to drain the intercooler of oil, and so some other bits and pieces... Might even get the Kawasaki back on the road!
Following @Slippydiff's excellent advice, I covered up the braided oil lines on the way....
... before getting the bolts on the airbox side in :
Next up the oil lines.... Oh dear. That's not good.
Lucky escape there, I must have over-tightened it last time. New banjo bolt (M8 x 1.0mm x 17mm shank) on order, but that will certainly mean that its not going to be done this weekend.
Still, it gives me time to drain the intercooler of oil, and so some other bits and pieces... Might even get the Kawasaki back on the road!
A small Corrado update from antics over the weekend, some of them are even positive....
The nearside headlight had a snapped locating tab - caused by me putting it in a stupid place and it falling off that place and breaking the tab. I watched an excellent video on Delboy's Garage and picked up a soldering iron and tried my hand at plastic welding. Not too bad for a first attempt:
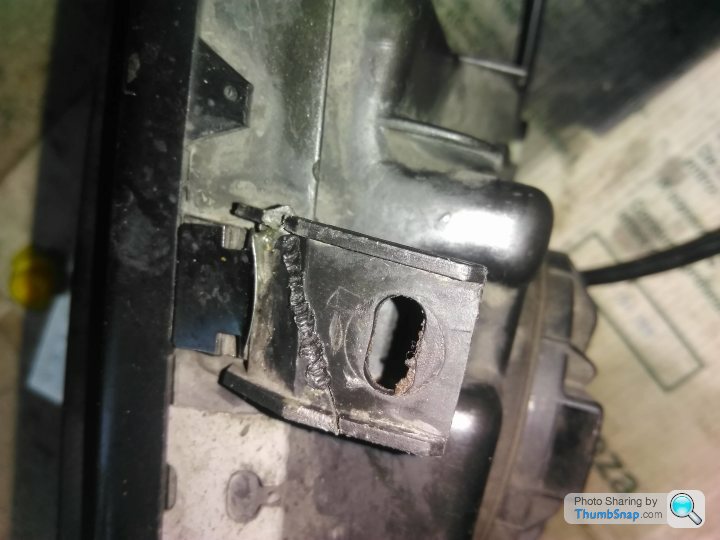
I had to make it messier though by adding a steel stitch for strength. Its now substantially stronger than it was though (and unlike my previous araldite attempts, this appears to hold)
Why was I doing this instead of the charger? Well, it needed doing to make the car roadworthy and also I was waiting for the banjo bolt. Also, I had a fear that the charger would fail again if I'm honest.
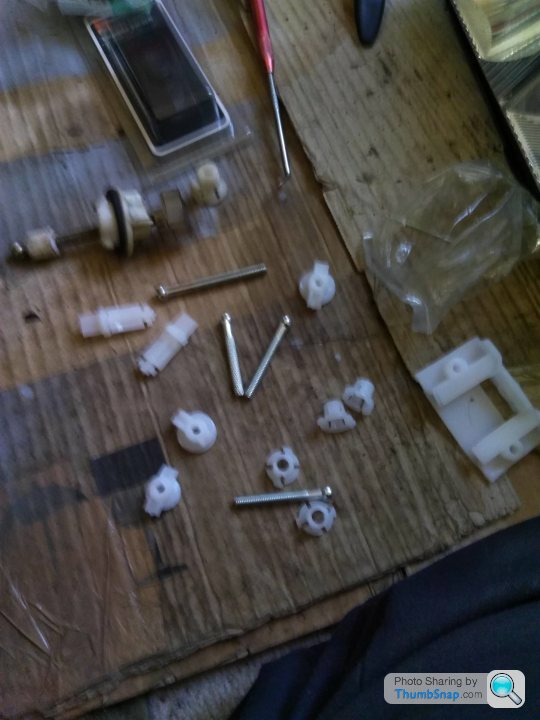
Having picked it up to put it back in...it rattled. A broken plastic sort of rattle. Not good. Upon further inspection, the headlight adjuster was broken.
To get at the headlight adjuster, you have to take the lense out, which luckily is nice and easy on cars that still have glass headlights.
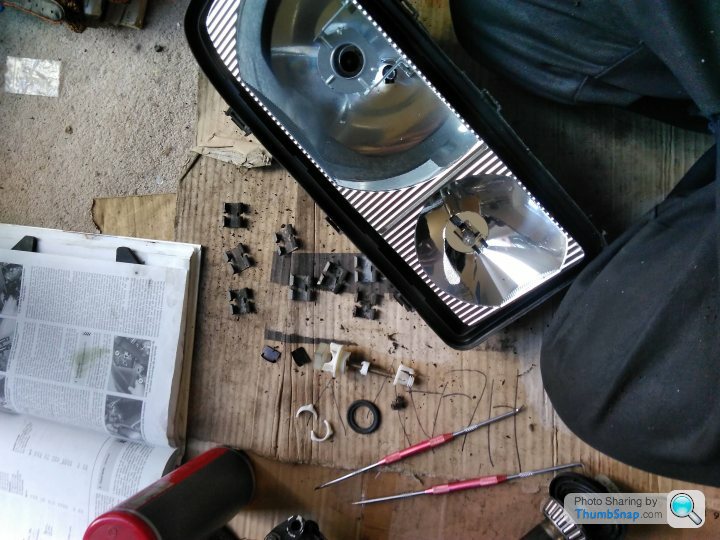
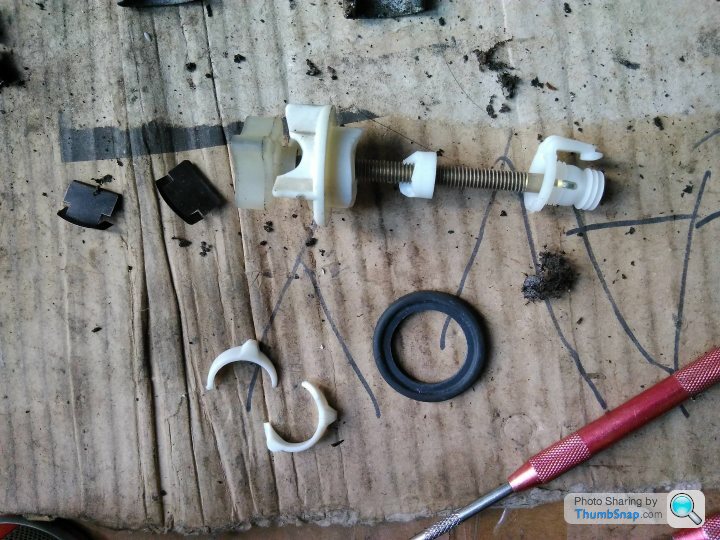
I glued the broken bits back together, I'll be honest, it didn't work. Then I remembered that I had spare headlights in the loft from when I replaced the glass a while back. The upshot? I pulled out a headlight and tried to remove the adjuster. The 30 year old plastic broke.
I pulled out the second headlight being super careful. That adjuster broke as well. Fragile....
Very annoying, I now have three dismantled headlights with broken adjusters on the garage. I have a part on order which I'm hoping will replace one of the knackered ones.
That being the case, I thought I best get on with the bloody charger until the part arrives.
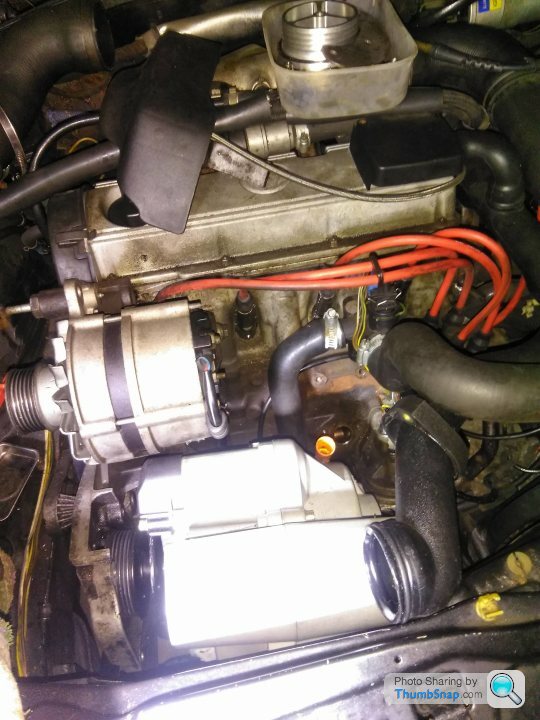
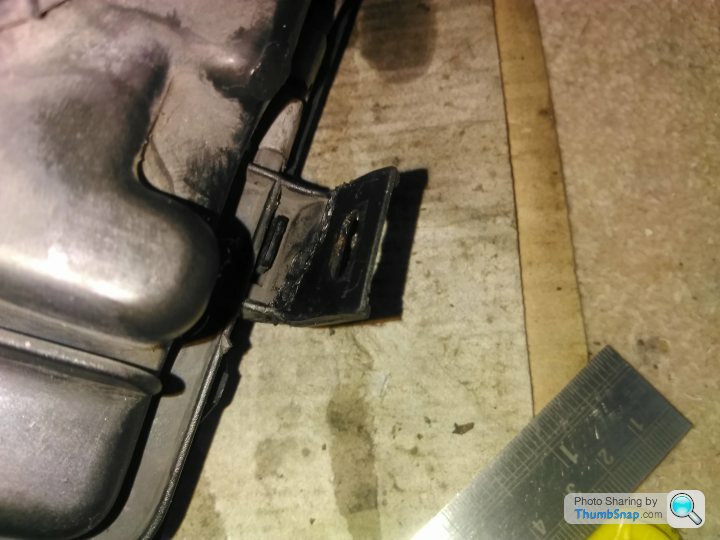
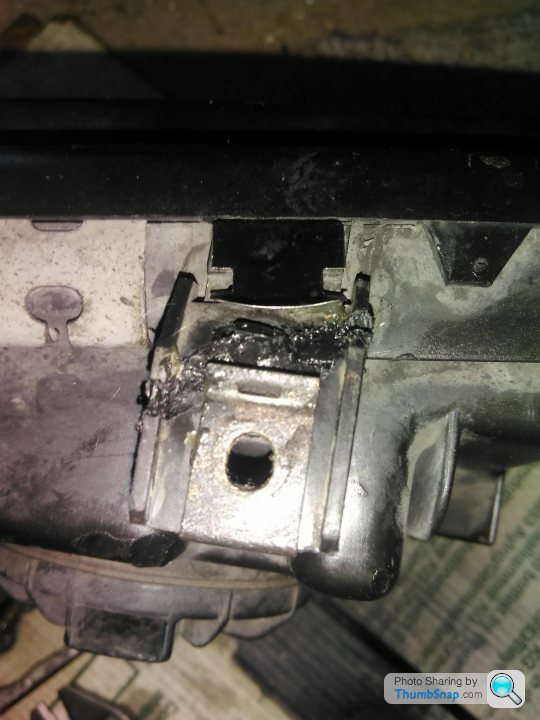
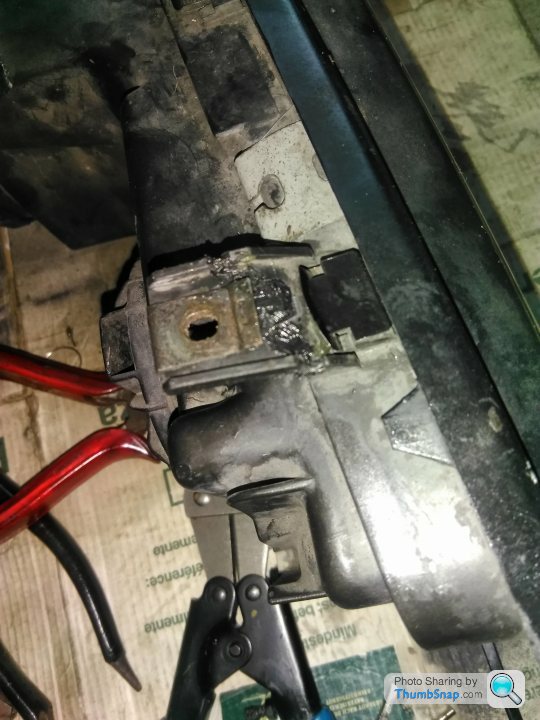
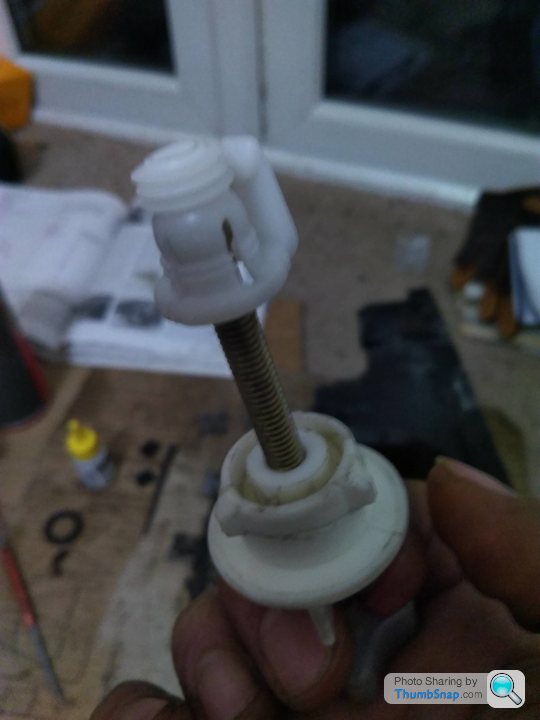
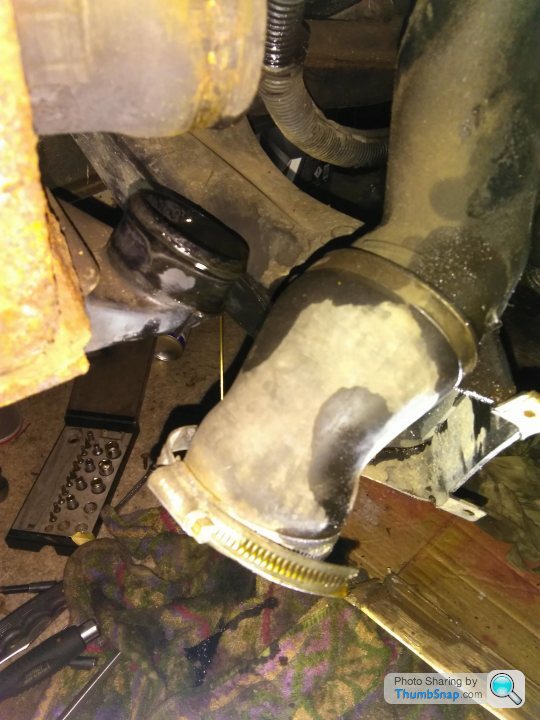
New bolt vs. old, a 12mm head vs. a 14mm head, but no other major differences.
Got the charger back in (much easier learning from my last installation mistakes).
Checked the oil feed and return lines had oil in them after some cranking with the coil HT lead removed.
John at JMR advised running the car with the charger output disconnected for at least half and hour to see if the oil seal had taken this time. I'll be honest, the engine wasn't entirely happy about that, there were some knocks and bangs, but eventually it idled for 30 minutes.
Good output of air, but there is still some oil. I'm not sure if this is normal levels or not. Less than there was though.
It cut out after half an hour without input from me. I'm not sure why, but that's obviously not ideal. I'll try again tomorrow and see what happens. Still, it's positive overall, I think.
What was less than ideal? Having run it up temperature, there's a coolant leak from the plastic elbow on top of the radiator.
FFS. I'm running out of patience with this car. I've got that part on order now too, I'm determined to get it back on the road despite its best attempts to thwart me.
Still got to clean out the intercooler and change the plugs (but at least I got the Kawasaki forks rebuilt).
The nearside headlight had a snapped locating tab - caused by me putting it in a stupid place and it falling off that place and breaking the tab. I watched an excellent video on Delboy's Garage and picked up a soldering iron and tried my hand at plastic welding. Not too bad for a first attempt:
I had to make it messier though by adding a steel stitch for strength. Its now substantially stronger than it was though (and unlike my previous araldite attempts, this appears to hold)
Why was I doing this instead of the charger? Well, it needed doing to make the car roadworthy and also I was waiting for the banjo bolt. Also, I had a fear that the charger would fail again if I'm honest.
Having picked it up to put it back in...it rattled. A broken plastic sort of rattle. Not good. Upon further inspection, the headlight adjuster was broken.
To get at the headlight adjuster, you have to take the lense out, which luckily is nice and easy on cars that still have glass headlights.
I glued the broken bits back together, I'll be honest, it didn't work. Then I remembered that I had spare headlights in the loft from when I replaced the glass a while back. The upshot? I pulled out a headlight and tried to remove the adjuster. The 30 year old plastic broke.
I pulled out the second headlight being super careful. That adjuster broke as well. Fragile....
Very annoying, I now have three dismantled headlights with broken adjusters on the garage. I have a part on order which I'm hoping will replace one of the knackered ones.
That being the case, I thought I best get on with the bloody charger until the part arrives.
New bolt vs. old, a 12mm head vs. a 14mm head, but no other major differences.
Got the charger back in (much easier learning from my last installation mistakes).
Checked the oil feed and return lines had oil in them after some cranking with the coil HT lead removed.
John at JMR advised running the car with the charger output disconnected for at least half and hour to see if the oil seal had taken this time. I'll be honest, the engine wasn't entirely happy about that, there were some knocks and bangs, but eventually it idled for 30 minutes.
Good output of air, but there is still some oil. I'm not sure if this is normal levels or not. Less than there was though.
It cut out after half an hour without input from me. I'm not sure why, but that's obviously not ideal. I'll try again tomorrow and see what happens. Still, it's positive overall, I think.
What was less than ideal? Having run it up temperature, there's a coolant leak from the plastic elbow on top of the radiator.
FFS. I'm running out of patience with this car. I've got that part on order now too, I'm determined to get it back on the road despite its best attempts to thwart me.
Still got to clean out the intercooler and change the plugs (but at least I got the Kawasaki forks rebuilt).
Day off today, so having done some other jobs (including some AX stuff), I managed to spend a few hours on the Corrado.
Had a chat with John at JMR, the oil that can be seen coming out is unlikely to be a result of the new glued in seal failing, so I can start putting it back together. I did another half hour run of it just to test, with similar results. Fingers crossed....
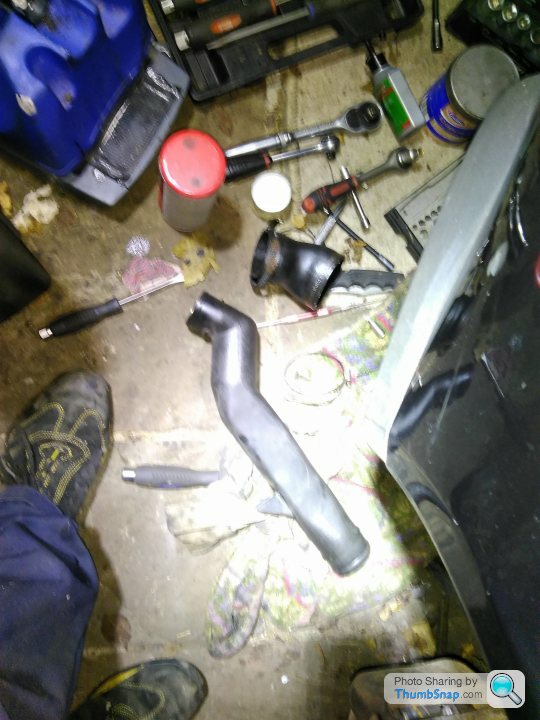
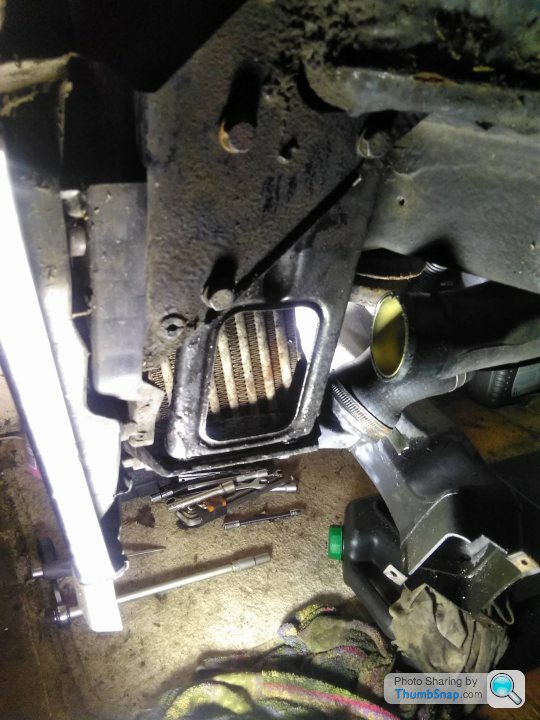
So, that means getting the rest of the oil out of the downstream end of the charger. There was a lot in the intercooler as I suspected there would be.
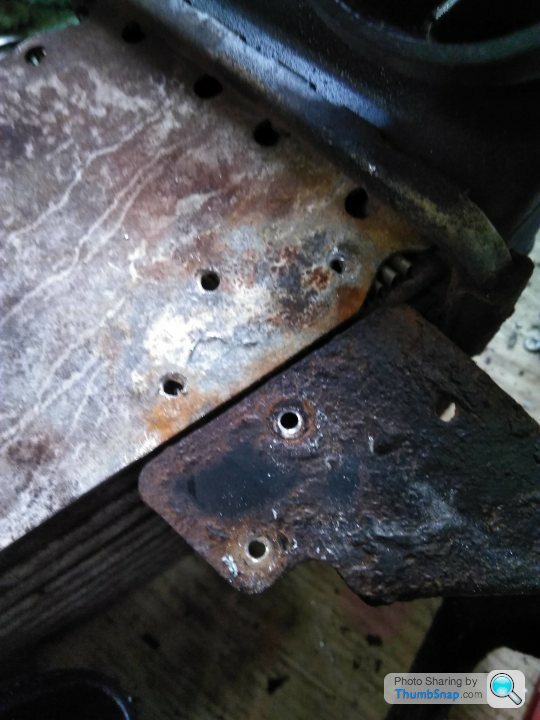
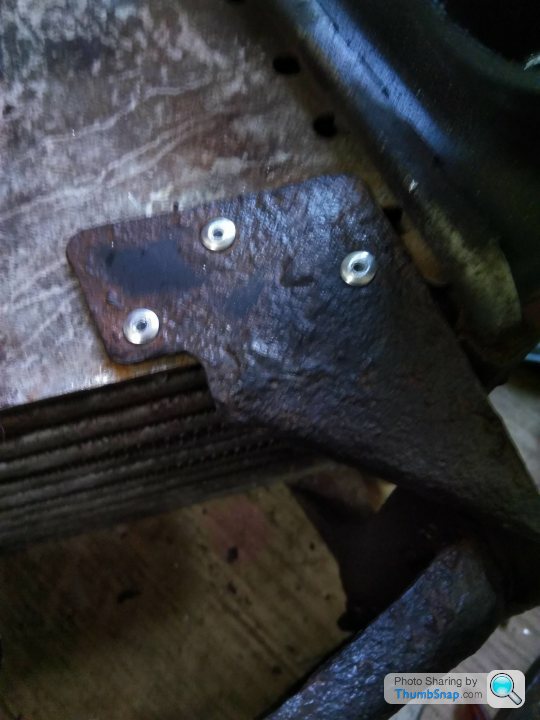
Manged to get the intercooler out by removing the wheel arch liner and undoing the 3 13mm bolts, the very very corroded 10mm ones that would also do the job are going nowhere without a drill I think...
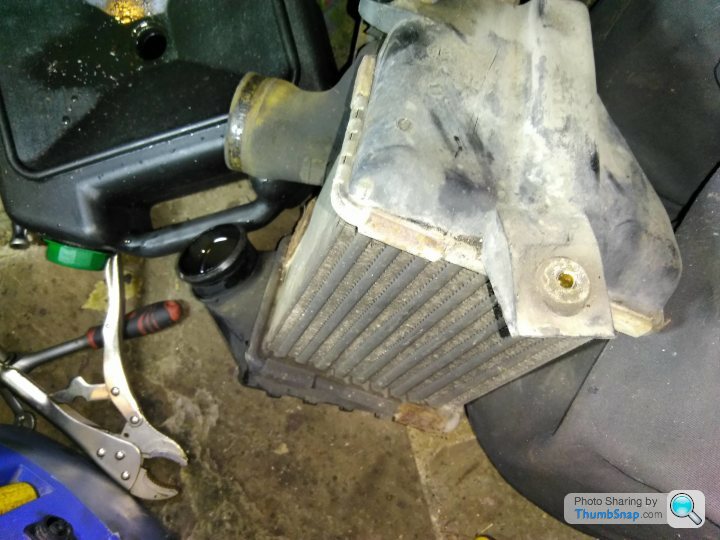
The intercooler bracket is pretty scabby, and three of the rivets holding it on to the cooler have corroded away leaving it flapping. I can't put it back like that, so some anti rust treatment and more rivets will be needed (provided I can get those 10mm bolts out).
I'm pretty sure that it's the same part that was used in the Mk2 Golf GTD at the time (and the Passat with the same 1.6 TD engine, all 80 horses of it), although they're not exactly common either. I'll try and clean this one up though.
I have also found a US supplier of aluminium headlight adjusters (again following a chat with John - nice to know that yes, they all behave like that and shatter). The aluminium ones aren't cheap (5 times the price is the plastic kit I have on order), but worth knowing they're out there!
Had a chat with John at JMR, the oil that can be seen coming out is unlikely to be a result of the new glued in seal failing, so I can start putting it back together. I did another half hour run of it just to test, with similar results. Fingers crossed....
So, that means getting the rest of the oil out of the downstream end of the charger. There was a lot in the intercooler as I suspected there would be.
Manged to get the intercooler out by removing the wheel arch liner and undoing the 3 13mm bolts, the very very corroded 10mm ones that would also do the job are going nowhere without a drill I think...
The intercooler bracket is pretty scabby, and three of the rivets holding it on to the cooler have corroded away leaving it flapping. I can't put it back like that, so some anti rust treatment and more rivets will be needed (provided I can get those 10mm bolts out).
I'm pretty sure that it's the same part that was used in the Mk2 Golf GTD at the time (and the Passat with the same 1.6 TD engine, all 80 horses of it), although they're not exactly common either. I'll try and clean this one up though.
I have also found a US supplier of aluminium headlight adjusters (again following a chat with John - nice to know that yes, they all behave like that and shatter). The aluminium ones aren't cheap (5 times the price is the plastic kit I have on order), but worth knowing they're out there!
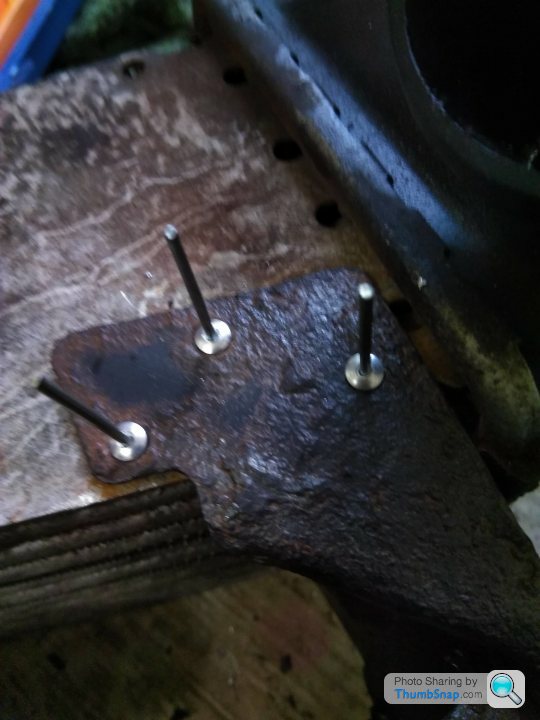
I'm afraid I gave up on fighting with the 10mm bolts. They weren't coming out in one piece, and removing them wasn't necessary for the job I was doing and would just add more work to a car I need to get back on the road (upcoming building work...its sat in the car port when the builders will need to be in 3 weeks time).
Very unfortunate that the £10 headlight adjustment kit didn't work out then. The supplied bolts were too short and the wrong diameter and thread pitch. Oh and the plastics weren't compatible with the reflector...or the headlight casing. Apart from that - perfect.
Still,if I can get the engine sorted, I can bung one of the spare headlights back in and move it under a 'daytime' MOT until the aluminium adjusters turn up from the USA. That was $113 that I really didn't want to spend, but I'm sure they'll be shiny....
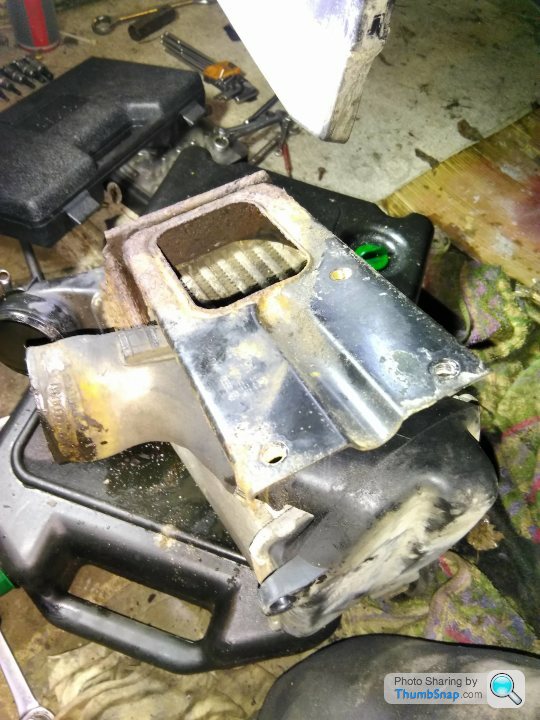
All of that being said, I managed to make some intercooler progress. Here was the old broken arrangement once I'd drilled out the old rivets. Very, very carefully to avoid damaging the air pathways. Unfortunately some damage to the cooling fins was unavoidable.
Still, some new rivets later, and it was secure again.
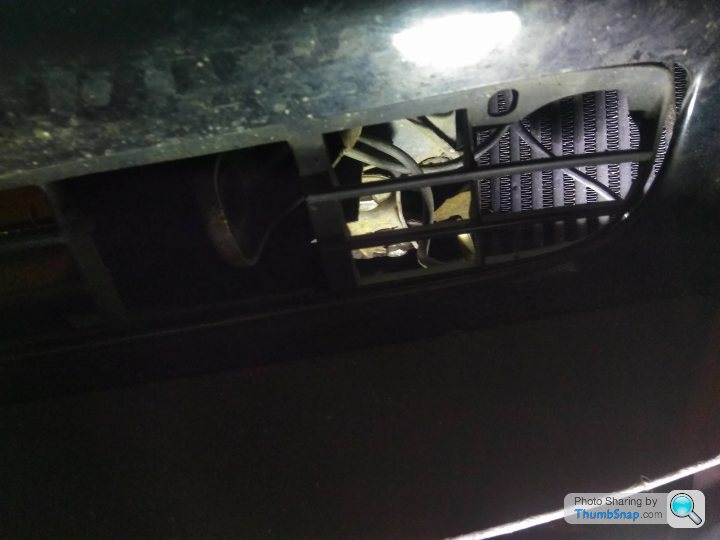
Manged to get it installed tonight, and some of the pipework connected. It's a little better than it was. Also nice to see that clearly someone in VW thought about the air flow more than people give them credit for. The intercooler is nicely positioned to pick up air flow from the nearside vent under the fog light. It might not get the full cooling effect of a front mounted intercooler, but much better than the Passat or Golf design from memory.
Very unfortunate that the £10 headlight adjustment kit didn't work out then. The supplied bolts were too short and the wrong diameter and thread pitch. Oh and the plastics weren't compatible with the reflector...or the headlight casing. Apart from that - perfect.
Still,if I can get the engine sorted, I can bung one of the spare headlights back in and move it under a 'daytime' MOT until the aluminium adjusters turn up from the USA. That was $113 that I really didn't want to spend, but I'm sure they'll be shiny....
All of that being said, I managed to make some intercooler progress. Here was the old broken arrangement once I'd drilled out the old rivets. Very, very carefully to avoid damaging the air pathways. Unfortunately some damage to the cooling fins was unavoidable.
Still, some new rivets later, and it was secure again.
Manged to get it installed tonight, and some of the pipework connected. It's a little better than it was. Also nice to see that clearly someone in VW thought about the air flow more than people give them credit for. The intercooler is nicely positioned to pick up air flow from the nearside vent under the fog light. It might not get the full cooling effect of a front mounted intercooler, but much better than the Passat or Golf design from memory.
mercedeslimos said:
A buddy of mine got those aluminium adjusters this week, they look good and won't break again like the plastic ones.
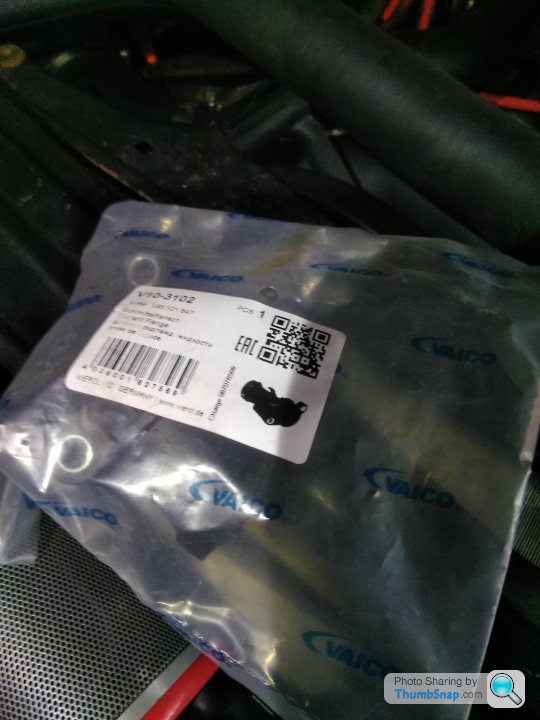
That's good to hear, thanks. I'm just waiting for mine to arrive, but have progressed with putting the rest of it back together. Replaced the coolant elbow (which was surprisingly simple and didn't result in too much coolant loss :
Ran it up to temperature and in the process found a leak - one of the hoses near the inlet manifold:

This is part of the carbon canister emission contol. As such it's probably not doing a great deal for emissions given its age, but I don't want to remove it all right no, so settled for fixing the vacuum leak...
Hope to get a shakedown run today.
Shakedown run achieved, no clouds of oil smoke and nothing fell off....
Tightened up the supercharger bracing bolt which was loose, plugged in the OS headlight which I'd forgotten to do, and replaced the sidelight bulb.
I'm still running it as a daytime car for now until the headlight adjusters can be fitted. They've arrived in the country though as I've had a notification of a Customs charge. Splendid.
Gassing Station | Readers' Cars | Top of Page | What's New | My Stuff