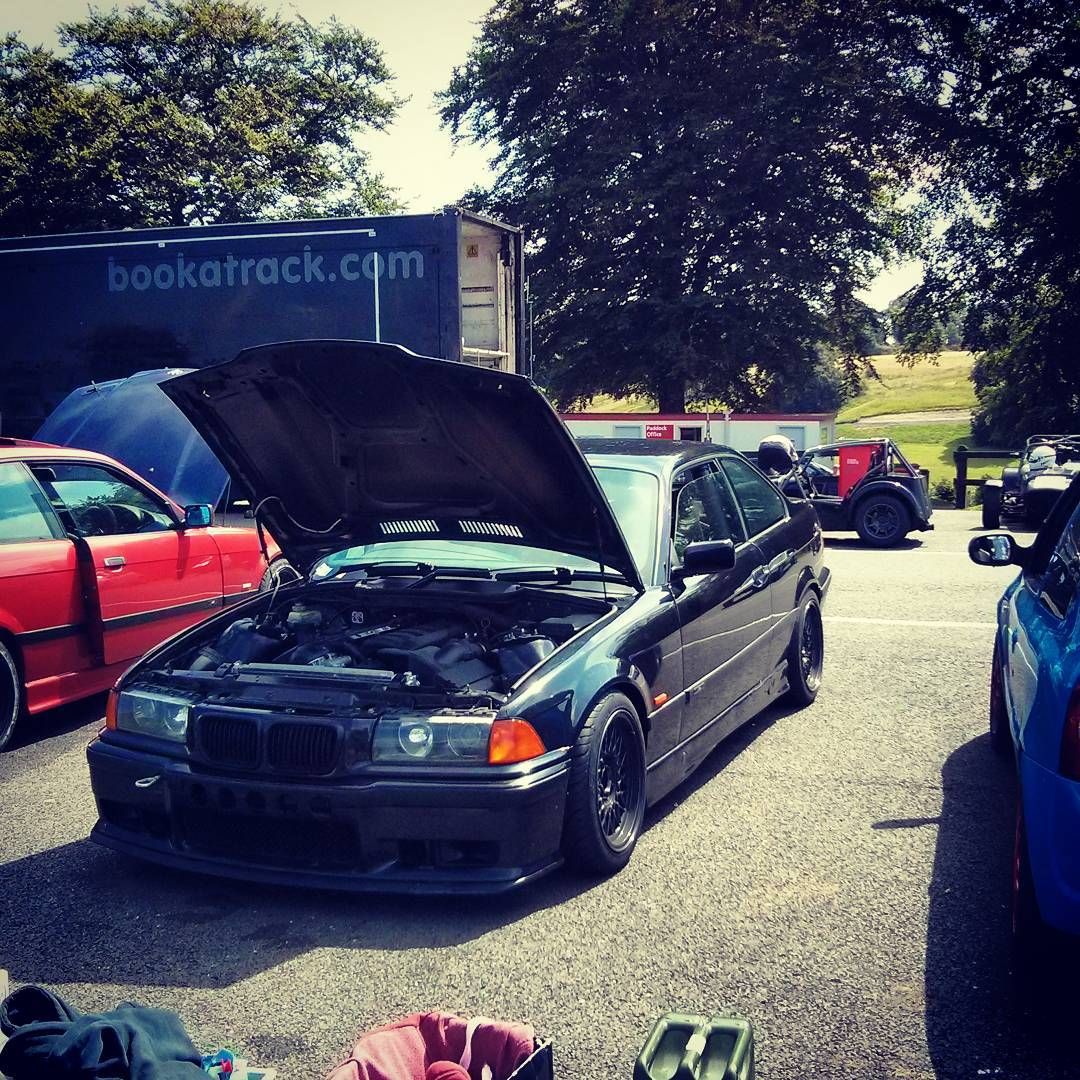
E36 Track Car - Replacement Engine Build(s)
Discussion


Great thread buddy. This is what I wanna do, but complete newbie but wanna get into the mechanical side of things. I've got a m50b25 non vanos in my 34 and plan to do this conversion. I've managed to acquire the m54b30 crank, pistons and rods for good price. My problem is my 34 is my daily so don't want it off the road. Do I plan on sourcing another engine for cheap when and if it arises. My question to you is do I go with the m50 with or without vanos? Wanna keep it as low budget as possible but at the same time will be using this as a way of learning how to strip an engine and rebuild but with the m54b30 internals. Depending on which engine I go for what do you recommend on cams, would like hotter cams say from s50 U.S spec but difficult to source and shrick cams expensive. Cheers
Humour said:
Awesome build Foxy, despite coming up unlucky with the first engine build.
I particularly like the exhaust build, but presumably the car now is fully track focused and will not be MOT able, so will need to be trailered to and from the track?
I managed to follow the telemetry build up to the point of writing the translation script, I can see there is definitely value in having telemetry for the health of the engine as well as checking on your driving during and post event. Thumbs up
Out of curiosity, what specific oil type and grade did you use on the M50B28 engine for the first track session after running the engine in and what was the condition of the old big end shells that were replaced on the first and second engine builds? I saw the new shells going in but would like to know what the old shells looked like.
Humour
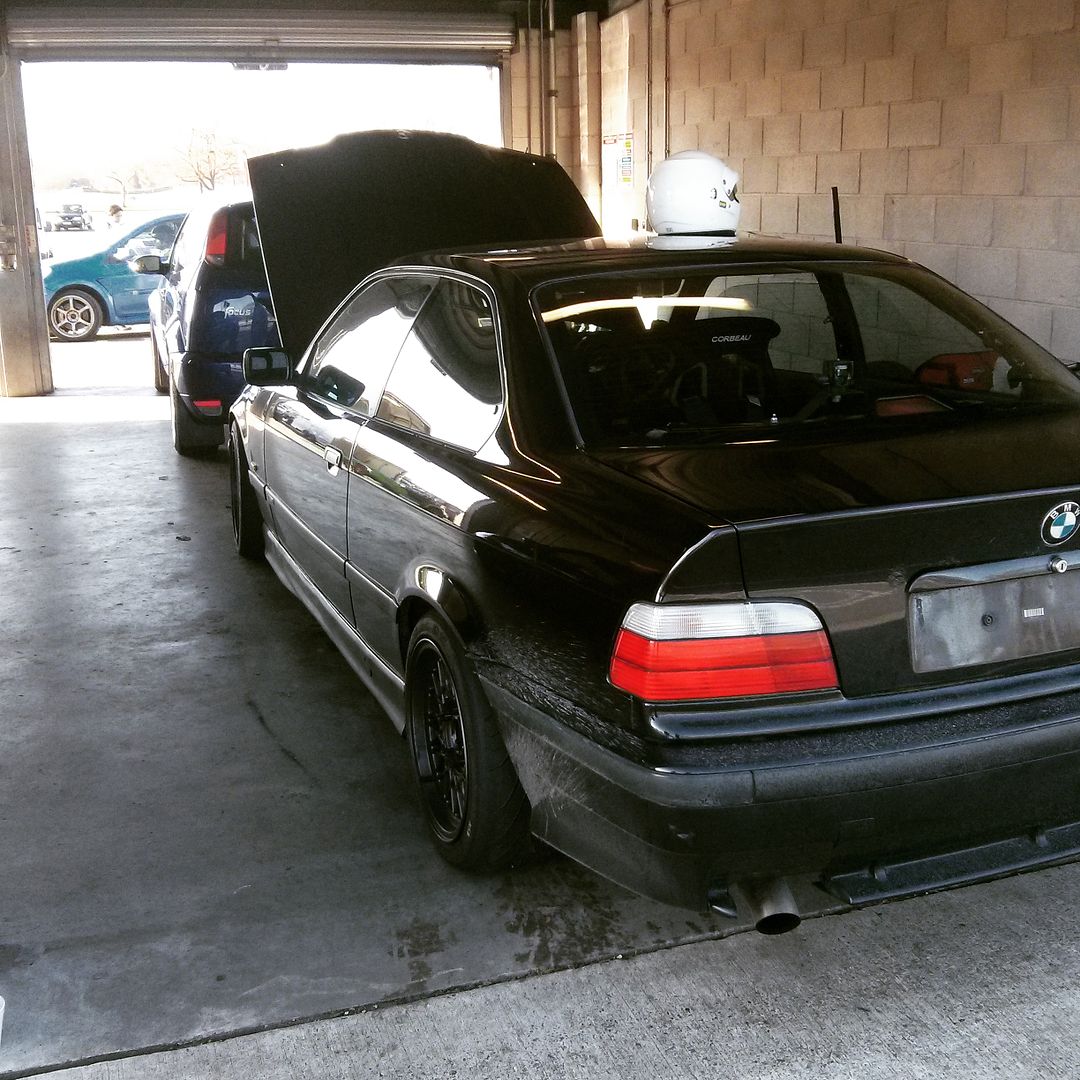
Yeah, its literally just for track. When I first got the car it was standard, and I did use it as a daily for a while, until I got bored going to the petrol station too often!I particularly like the exhaust build, but presumably the car now is fully track focused and will not be MOT able, so will need to be trailered to and from the track?
I managed to follow the telemetry build up to the point of writing the translation script, I can see there is definitely value in having telemetry for the health of the engine as well as checking on your driving during and post event. Thumbs up
Out of curiosity, what specific oil type and grade did you use on the M50B28 engine for the first track session after running the engine in and what was the condition of the old big end shells that were replaced on the first and second engine builds? I saw the new shells going in but would like to know what the old shells looked like.
Humour
I'm glad I got somewhere near with the data logging as its something I wanted to review, especially with an undocumented engine so to speak. Took a bit of time but the main thing was a lot was gained from it in the end.
The shells were 'as new', every one looked the same as it went in, not even any shiny bits in specific areas like I've seen with new bearings before. I've still got them in a box somewhere. It had 5w30 in it
E34ashy said:
Great thread buddy. This is what I wanna do, but complete newbie but wanna get into the mechanical side of things. I've got a m50b25 non vanos in my 34 and plan to do this conversion. I've managed to acquire the m54b30 crank, pistons and rods for good price. My problem is my 34 is my daily so don't want it off the road. Do I plan on sourcing another engine for cheap when and if it arises. My question to you is do I go with the m50 with or without vanos? Wanna keep it as low budget as possible but at the same time will be using this as a way of learning how to strip an engine and rebuild but with the m54b30 internals. Depending on which engine I go for what do you recommend on cams, would like hotter cams say from s50 U.S spec but difficult to source and shrick cams expensive. Cheers
If it was me, id be building a 3.0 non VANOS - simply due to your car is already a non VANOS and it will just work, as I'm assuming your ECU and wiring do not have any VANOS functionality  I do think the VANOS gives some added benefit to power delivery, but if you are low budget and want to keep things simple go for non VANOS.
The US S50 cams are hard to find, and even then a lot are not actually the proper item - you need to measure the lobes to be 100% sure. Also, the inlet cam is VANOS, so I'm not even sure it would work in a non VANOS head. You could get aftermarket non VANOS cams, like shrick, but then like you say its a lot of money. For that money it would be easier to fit a VANOS loom and use a VANOS capable ECU in your car and go that route with an M54 inlet cam, or S50 cam setup.
Good write up, I enjoyed that  I'd have looked very hard to find the cause of piston failure though, just for future knowledge/reference.
On a new engine build put some really cheap mineral in and run it for about 15 mins of mixed driving before dropping it and replacing it and the filter. You'll find that 75% of whatever is going to come out (fine metal particles, dirt etc) will have done so by then so you won't have them swimming around the engine for the rest of your running in period.
Good luck with it!
I'd have looked very hard to find the cause of piston failure though, just for future knowledge/reference.On a new engine build put some really cheap mineral in and run it for about 15 mins of mixed driving before dropping it and replacing it and the filter. You'll find that 75% of whatever is going to come out (fine metal particles, dirt etc) will have done so by then so you won't have them swimming around the engine for the rest of your running in period.
Good luck with it!
Really interesting read there. Do you have any further plans for the engine? Are things like the solid lifters and individual throttle bodies from the S50/S54 engines compatible, for instance?
There was another thread on here with a dedicated track-built E36 saloon, a white one with Warsteiner decals, widened arches and a replica M3 GT2 adjustable rear spoiler fitted if you need any inspiration. That ended up with an Alpina engine then ceased being updated.
There was another thread on here with a dedicated track-built E36 saloon, a white one with Warsteiner decals, widened arches and a replica M3 GT2 adjustable rear spoiler fitted if you need any inspiration. That ended up with an Alpina engine then ceased being updated.
Evoluzione said:
Good write up, I enjoyed that I'd have looked very hard to find the cause of piston failure though, just for future knowledge/reference.
On a new engine build put some really cheap mineral in and run it for about 15 mins of mixed driving before dropping it and replacing it and the filter. You'll find that 75% of whatever is going to come out (fine metal particles, dirt etc) will have done so by then so you won't have them swimming around the engine for the rest of your running in period.
Good luck with it!
The only semi-conclusion we came to was the machine shop in question may not have bolted the front lower timing case to the engine and skimmed it at the same time as the block - as the head gasket goes round that area too. If they didn't, its quite possible the head was 'sat up' on that end ever so slightly, which has caused issues resulting in the piston failure. Cant really say though, as the machine shop would not admit to something like that - I used a different shop for the engine after that. I'd have looked very hard to find the cause of piston failure though, just for future knowledge/reference.On a new engine build put some really cheap mineral in and run it for about 15 mins of mixed driving before dropping it and replacing it and the filter. You'll find that 75% of whatever is going to come out (fine metal particles, dirt etc) will have done so by then so you won't have them swimming around the engine for the rest of your running in period.
Good luck with it!
Sammo123 said:
Unlucky with the first engine but looks like it's all heading in the right direction!
Can I pick your brains on the clutch setup quickly? What parts do I need to get hold of to go to solid flywheel? M20 flywheel obviously. What clutch kit do I need to buy?
You want the M20 Flywheel - the back will need a few mm machining off it as it catches on the M50/M52 block where there is a tiny bit of excess casting (you could remove the part of the casting instead), it makes sense when you offer it up. You also need an M20 325i clutch kit, I used Sachs. If you are using a 328/M3 ZF transmission, use the release bearing that comes with the clutch. Keep the ZF clutch fork/arm and slave cylinder. If you use the Getrag box, you will need a different (taller) release bearing I think, but I've not checked.Can I pick your brains on the clutch setup quickly? What parts do I need to get hold of to go to solid flywheel? M20 flywheel obviously. What clutch kit do I need to buy?
ManOpener said:
Really interesting read there. Do you have any further plans for the engine? Are things like the solid lifters and individual throttle bodies from the S50/S54 engines compatible, for instance?
There was another thread on here with a dedicated track-built E36 saloon, a white one with Warsteiner decals, widened arches and a replica M3 GT2 adjustable rear spoiler fitted if you need any inspiration. That ended up with an Alpina engine then ceased being updated.
I think I have seen that thread, it was a good build. I have no other plans for the engine, just to use it now - things like bodies will fit, but the S50 heads are slightly different and there are differences with management between the two engines etc, would be easier to put it on aftermarket. As long as it stays reliable-ish, it will just be getting used this year There was another thread on here with a dedicated track-built E36 saloon, a white one with Warsteiner decals, widened arches and a replica M3 GT2 adjustable rear spoiler fitted if you need any inspiration. That ended up with an Alpina engine then ceased being updated.
f0xy said:
Yeah, its literally just for track. When I first got the car it was standard, and I did use it as a daily for a while, until I got bored going to the petrol station too often!
I'm glad I got somewhere near with the data logging as its something I wanted to review, especially with an undocumented engine so to speak. Took a bit of time but the main thing was a lot was gained from it in the end.
The shells were 'as new', every one looked the same as it went in, not even any shiny bits in specific areas like I've seen with new bearings before. I've still got them in a box somewhere. It had 5w30 in it
Yeah I hear you on the first point I'm glad I got somewhere near with the data logging as its something I wanted to review, especially with an undocumented engine so to speak. Took a bit of time but the main thing was a lot was gained from it in the end.
The shells were 'as new', every one looked the same as it went in, not even any shiny bits in specific areas like I've seen with new bearings before. I've still got them in a box somewhere. It had 5w30 in it
 that's why I'm driving a little Grande Punto 1.3Mjet diesel as the daily hack, 50 quid fuel for the month is just the ticket, so the saved pennies can go on the 328 track car instead
Definitely effort paying off on the telemetry, so credit where credit is due.
Taking your word for it, that is exceptional in my opinion, on a 188K engine that had spent most of its life running on s
 tty LL04 BMW long life oil (18K oil service intervals), so to find shells as good as new is astounding! Makes me feel less concerned about our engine health, other than understanding and managing the oil temps.
When we got our car it was clattering quite a bit at the top end, heard another 328 engine running by chance and it became obvious that the injector pulses sequence and their loudness on our car was not right. Did a bit of searching and reading, (no INPA or codes read) and diagnosed the Cam position sensor, got a new one from BMW and presto it immediately sounded like the other car. Not a bad guess on my part
 When we serviced it we put in Castrol 10W60 oil in it, the engine then sounded quieter yet again (it's a 125K engine if the tacho is to be believed), even during and after our first full day shakedown on the Bedford GT circuit. I know allot has been said about oil grades on various forums for the M5X engines, but for track work I strongly believe that oil fit for purpose is a must. The 5W30 grade would suffice for the road, but imo for track I don't think it will resist degradation as long or as well as 10W60, especially when temps get above 100C.
 Our engine was a total unknown to us and admittedly, we now have a cam cover seal leak after the shakedown, but I suspect it has nothing to do with the oil being too thin and has allot to do with a 10+ years old gasket turning into plastic. We will find out soon enough.
Given the amount of trouble you have gone to thus far in your builds, my advice is to use the best oil you can for track use. You might find it will last more than 2 track days too.

Enjoy. Hopefully see you on track at some point this year.
Humour
Edited by Humour on Friday 16th January 21:16
Humour said:
Yeah I hear you on the first point that's why I'm driving a little Grande Punto 1.3Mjet diesel as the daily hack, 50 quid fuel for the month is just the ticket, so the saved pennies can go on the 328 track car instead
Definitely effort paying off on the telemetry, so credit where credit is due.
Taking your word for it, that is exceptional in my opinion, on a 188K engine that had spent most of its life running on stty LL04 BMW long life oil (18K oil service intervals), so to find shells as good as new is astounding! Makes me feel less concerned about our engine health, other than understanding and managing the oil temps.
When we got our car it was clattering quite a bit at the top end, heard another 328 engine running by chance and it became obvious that the injector pulses sequence and their loudness on our car was not right. Did a bit of searching and reading, (no INPA or codes read) and diagnosed the Cam position sensor, got a new one from BMW and presto it immediately sounded like the other car. Not a bad guess on my part When we serviced it we put in Castrol 10W60 oil in it, the engine then sounded quieter yet again (it's a 125K engine if the tacho is to be believed), even during and after our first full day shakedown on the Bedford GT circuit. I know allot has been said about oil grades on various forums for the M5X engines, but for track work I strongly believe that oil fit for purpose is a must. The 5W30 grade would suffice for the road, but imo for track I don't think it will resist degradation as long or as well as 10W60, especially when temps get above 100C.
Our engine was a total unknown to us and admittedly, we now have a cam cover seal leak after the shakedown, but I suspect it has nothing to do with the oil being too thin and has allot to do with a 10+ years old gasket turning into plastic. We will find out soon enough.
Given the amount of trouble you have gone to thus far in your builds, my advice is to use the best oil you can for track use. You might find it will last more than 2 track days too.
Enjoy. Hopefully see you on track at some point this year.
Humour
I've had the same camshaft sensor issue in the past, where all the injectors end up batch firing. Easy enough to see now with a data log too! that's why I'm driving a little Grande Punto 1.3Mjet diesel as the daily hack, 50 quid fuel for the month is just the ticket, so the saved pennies can go on the 328 track car instead Definitely effort paying off on the telemetry, so credit where credit is due.
Taking your word for it, that is exceptional in my opinion, on a 188K engine that had spent most of its life running on s
tty LL04 BMW long life oil (18K oil service intervals), so to find shells as good as new is astounding! Makes me feel less concerned about our engine health, other than understanding and managing the oil temps.When we got our car it was clattering quite a bit at the top end, heard another 328 engine running by chance and it became obvious that the injector pulses sequence and their loudness on our car was not right. Did a bit of searching and reading, (no INPA or codes read) and diagnosed the Cam position sensor, got a new one from BMW and presto it immediately sounded like the other car. Not a bad guess on my part
When we serviced it we put in Castrol 10W60 oil in it, the engine then sounded quieter yet again (it's a 125K engine if the tacho is to be believed), even during and after our first full day shakedown on the Bedford GT circuit. I know allot has been said about oil grades on various forums for the M5X engines, but for track work I strongly believe that oil fit for purpose is a must. The 5W30 grade would suffice for the road, but imo for track I don't think it will resist degradation as long or as well as 10W60, especially when temps get above 100C. Our engine was a total unknown to us and admittedly, we now have a cam cover seal leak after the shakedown, but I suspect it has nothing to do with the oil being too thin and has allot to do with a 10+ years old gasket turning into plastic. We will find out soon enough.
Given the amount of trouble you have gone to thus far in your builds, my advice is to use the best oil you can for track use. You might find it will last more than 2 track days too.
Enjoy. Hopefully see you on track at some point this year.
Humour
Edited by Humour on Friday 16th January 21:16
Not got any pics of the shells yet but I will this weekend if I remember. Taking it to Oulton Park on Tuesday... hopefully get to open the engine up properly!
Look forward to hearing the report on how the first track event of the year goes. It should be good though as your package is now pretty strong all round.
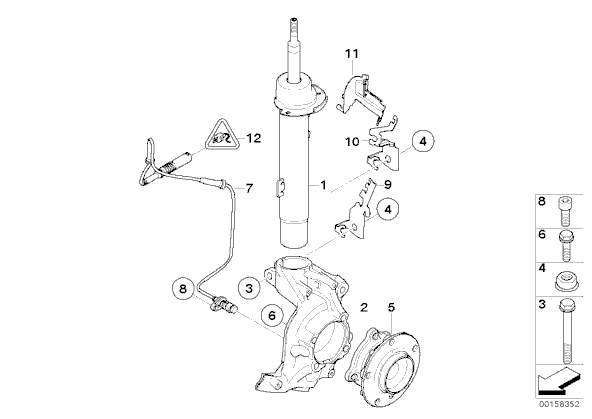
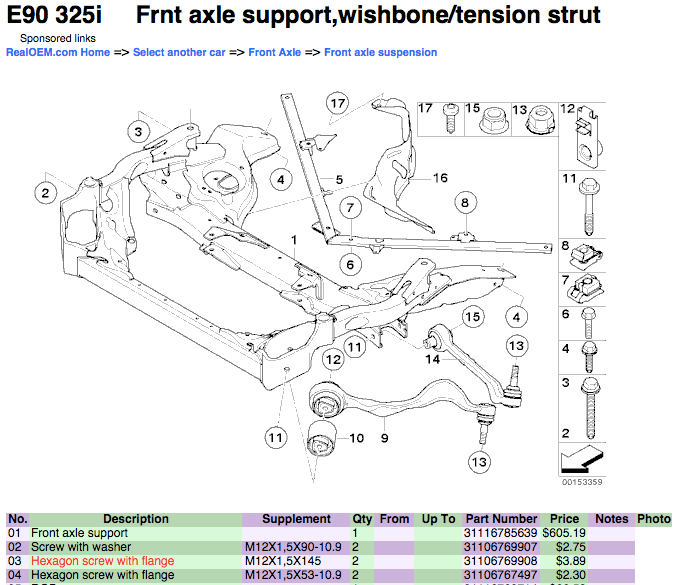
F0xy, we are soon to embark on the rear end rebuild on ours and I'm planning to have the M3 chassis reinforcement plates welded in. Doing so will make it difficult to reuse the studs. I would appreciate it if you can confirm which specific E90 suspension bolt you used to replace the studs. Is it BMW 33326760346 part number, No.3 in the diagram below?
Humour
It should be good though as your package is now pretty strong all round.F0xy, we are soon to embark on the rear end rebuild on ours and I'm planning to have the M3 chassis reinforcement plates welded in. Doing so will make it difficult to reuse the studs. I would appreciate it if you can confirm which specific E90 suspension bolt you used to replace the studs. Is it BMW 33326760346 part number, No.3 in the diagram below?
Humour
Edited by Humour on Saturday 31st January 15:06
Humour said:
Look forward to hearing the report on how the first track event of the year goes. It should be good though as your package is now pretty strong all round.
F0xy, we are soon to embark on the rear end rebuild on ours and I'm planning to have the M3 chassis reinforcement plates welded in. Doing so will make it difficult to reuse the studs. I would appreciate it if you can confirm which specific E90 suspension bolt you used to replace the studs. Is it BMW 33326760346 part number, No.3 in the diagram below?
Humour
Well - thats if I make it there. I've had issues with the passenger rear bearing/hub flange again, and had to strip it apart today, but no one has a new flange in stock. Hoping I can source one on Monday. It should be good though as your package is now pretty strong all round.F0xy, we are soon to embark on the rear end rebuild on ours and I'm planning to have the M3 chassis reinforcement plates welded in. Doing so will make it difficult to reuse the studs. I would appreciate it if you can confirm which specific E90 suspension bolt you used to replace the studs. Is it BMW 33326760346 part number, No.3 in the diagram below?
Humour
Edited by Humour on Saturday 31st January 15:06
The bolt you need is number 3 on this diagram:

Humour said:
Thanks for the info, much appreciated. There are only 2 studs used on the E36 subframe, correct?
Bad news on the rear hub. What about contacting a breaker? They usually would have something like that.
Humour
Yeah, just the front two. One of my originals snapped clean off when removing it, flush with the chassis. That was an interesting task to say the least...Bad news on the rear hub. What about contacting a breaker? They usually would have something like that.
Humour
Not much open on a Sunday, and generally most want to sell you the whole arm. I've got spare arms, but either with shafts stuck in the stub/flange or knackered wheel bolt threads. Thankfully I think I have sorted one for Monday, so it will need fitting after work, joys. The new bearing is already in, just need the other bit now and it should be good to go.
I had booked a few days around Christmas when OpenTrack had their offer on, Oulton Park being the first one on the Tuesday just gone. The weekend before I decided to give the car a quick check over - only to realise the N/S rear bearing had lots of play again (exactly the same as March 2014 when I had to replace the bearing and hub). After stripping it apart, it turned out once again the hub was damaged, with wear to the inner half of the bearing face causing a very loose fit..
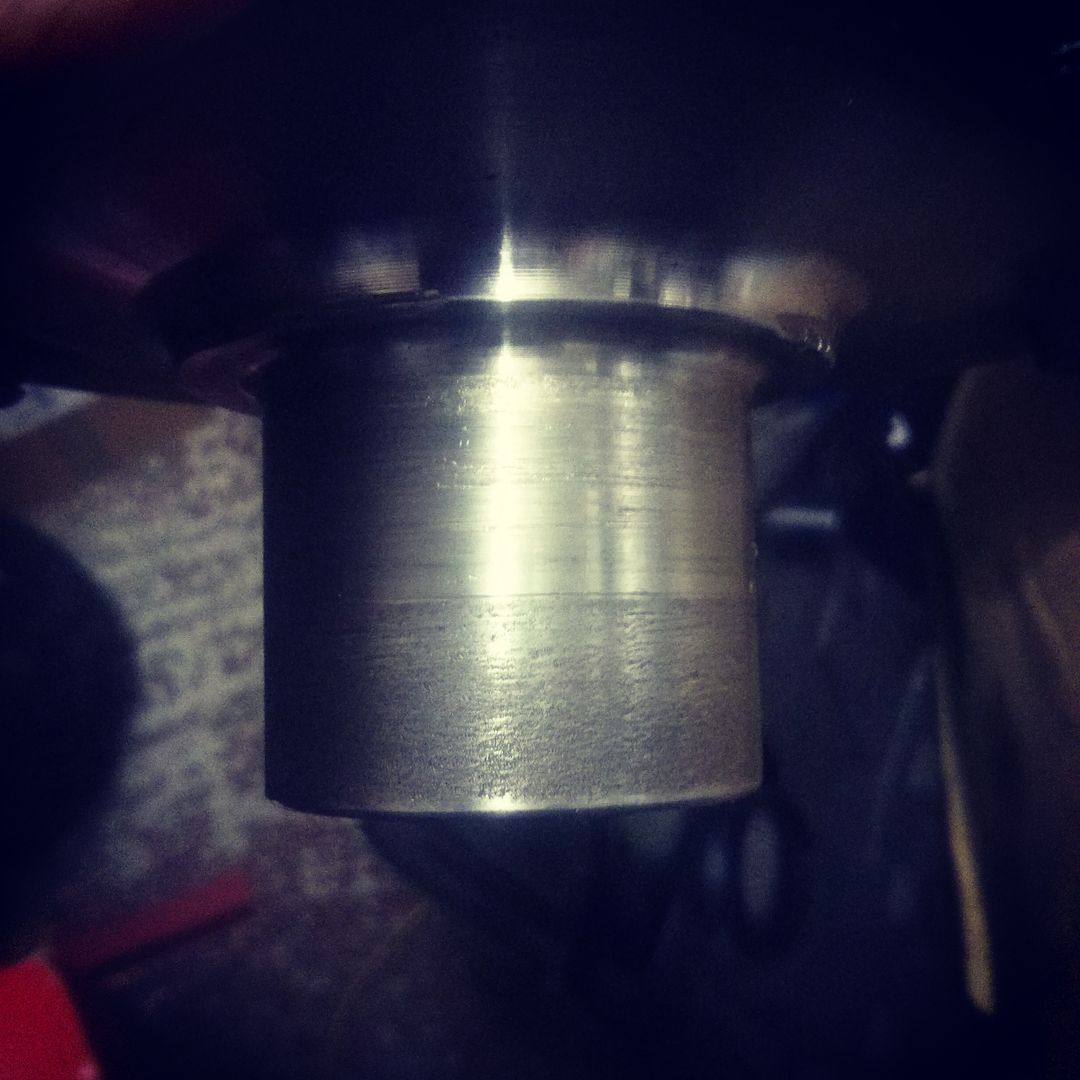
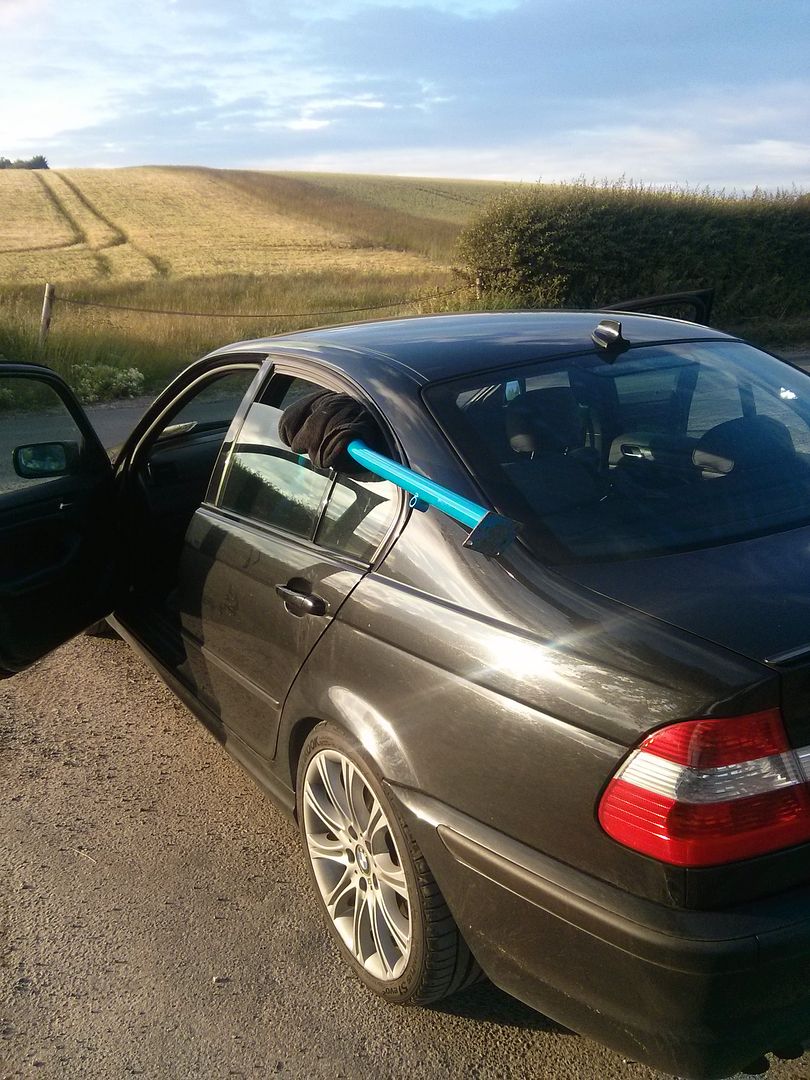
This was replaced in March 2014 as above, along with a new bearing, and torqued to the required 250NM. Its done two three track days and that's about it, quite odd. Managed to source a rear bearing on Saturday, but could not get a replacement hub until Monday. When leaving the house on Monday morning for work, I noticed the rear window of the E36 was broken/shattered, which was great timing. Luckily managed to get a local firm to source one the same day, and £165 later all was well. After collecting the hub, I fitted it in the evening and swapped the studs over. Built the rear end back up and it was about ready for Tuesday.
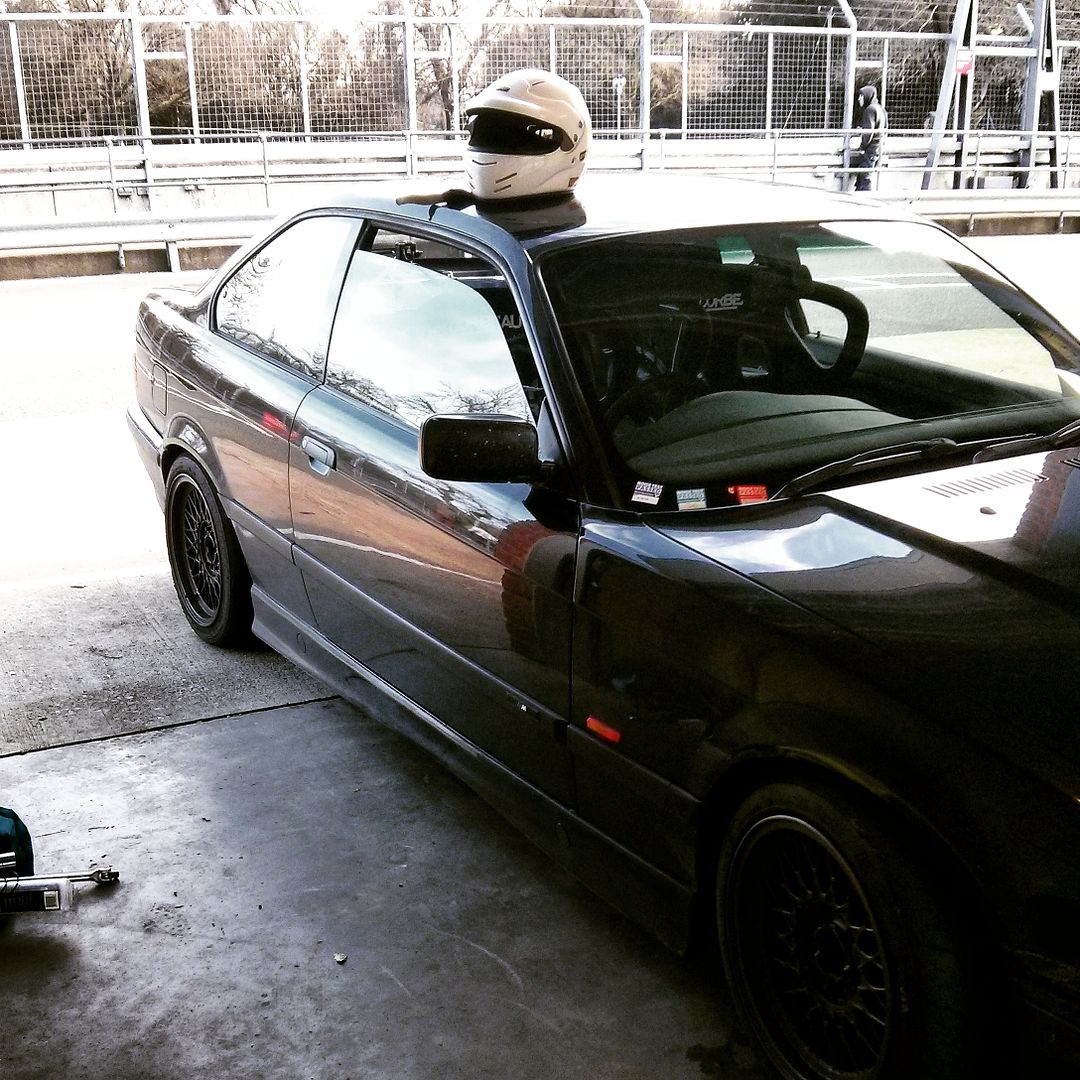
The day was very quiet, only 40ish cars booked on and perfect weather conditions - which meant I could finally see what the new engine was like.
In summary, its great - its a completely different experience to a 328, so much more torque and the power delivery is something completely different again. After a quick skim over the data logs the coolant never went over 85/86C, and oil temp never went over 104.5C - most of the time it just sat under 100C. I ran the RSR's all day, which were 5 track days old, and they still have some life left in them - exceptional wear rate and performance for £240/set, when compared to nearly £600/set for R888, which to be honest is a joke.
The only disappointment was yet more issues with Ferodo pads - I have moved from CL RC5+ to the Ferodo DS3000, which was a tough decision after having issues with them on my Clio, but they were the only pad available quickly at the time. For the first 2-3 sessions they were great, really good feel and brilliant stopping power, but throughout the day I started getting more and more vibration through the wheel under braking, until the end of the day when it was at its worst. I had the exact same issue on the Mk1 with DS3000s, and after a bit of a read it seems to be quite a common issue. Either way that needs resolving - considering the discs were new, as were the freshly rebuilt calipers.
Few of the more interesting bits of the day..

https://www.youtube.com/watch?v=E4LOM_FEsPU
..and a small external clip

https://www.youtube.com/watch?v=FNXplrOraZs
This was replaced in March 2014 as above, along with a new bearing, and torqued to the required 250NM. Its done two three track days and that's about it, quite odd. Managed to source a rear bearing on Saturday, but could not get a replacement hub until Monday. When leaving the house on Monday morning for work, I noticed the rear window of the E36 was broken/shattered, which was great timing. Luckily managed to get a local firm to source one the same day, and £165 later all was well. After collecting the hub, I fitted it in the evening and swapped the studs over. Built the rear end back up and it was about ready for Tuesday.
The day was very quiet, only 40ish cars booked on and perfect weather conditions - which meant I could finally see what the new engine was like.
In summary, its great - its a completely different experience to a 328, so much more torque and the power delivery is something completely different again. After a quick skim over the data logs the coolant never went over 85/86C, and oil temp never went over 104.5C - most of the time it just sat under 100C. I ran the RSR's all day, which were 5 track days old, and they still have some life left in them - exceptional wear rate and performance for £240/set, when compared to nearly £600/set for R888, which to be honest is a joke.
The only disappointment was yet more issues with Ferodo pads - I have moved from CL RC5+ to the Ferodo DS3000, which was a tough decision after having issues with them on my Clio, but they were the only pad available quickly at the time. For the first 2-3 sessions they were great, really good feel and brilliant stopping power, but throughout the day I started getting more and more vibration through the wheel under braking, until the end of the day when it was at its worst. I had the exact same issue on the Mk1 with DS3000s, and after a bit of a read it seems to be quite a common issue. Either way that needs resolving - considering the discs were new, as were the freshly rebuilt calipers.
Few of the more interesting bits of the day..
https://www.youtube.com/watch?v=E4LOM_FEsPU
..and a small external clip
https://www.youtube.com/watch?v=FNXplrOraZs
Hi foxy,
looks like you had a great day on track. From what I can gather from the video, the package seems consistent enough to give confidence in chucking it about and getting the rear end out on the power with predictable results. Win win for the year ahead it looks like.
The engine sounds great, especially over 6Krpm++ its now effectively a 3.0 M3 without the special head and tb's. I would hazard a guess that with 250cc EV6 injectors and a remap the engine is capable of hitting 3 litre M3 HP numbers, unless the fuelling is a limiting factor.
The temps you reported are on the money for track work in my opinion, but the ambient is pretty low at present, so it will be interesting to see how the numbers compare during a summer day out on track.
I wish I had the budget and knowhow to build your exhaust system and the M54B30 RA into our M52 block. We may get there at the end of our car's development cycle, maybe, we will see.
Looking forward to more vids.
Humour
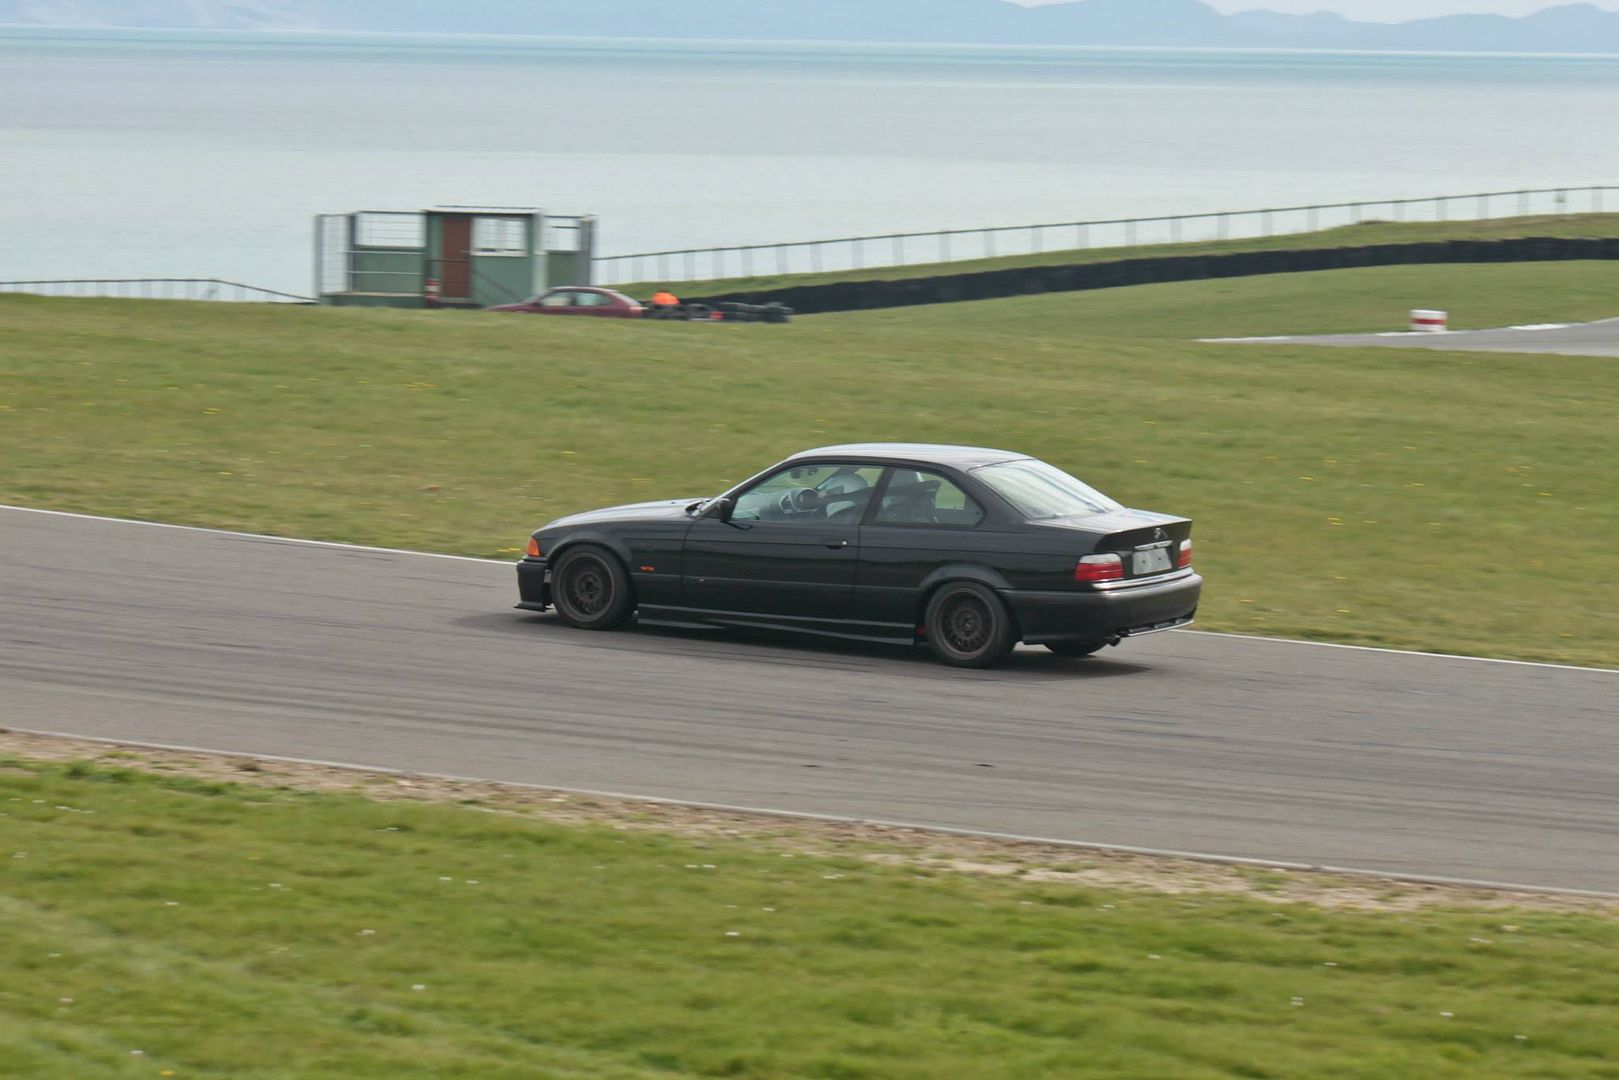
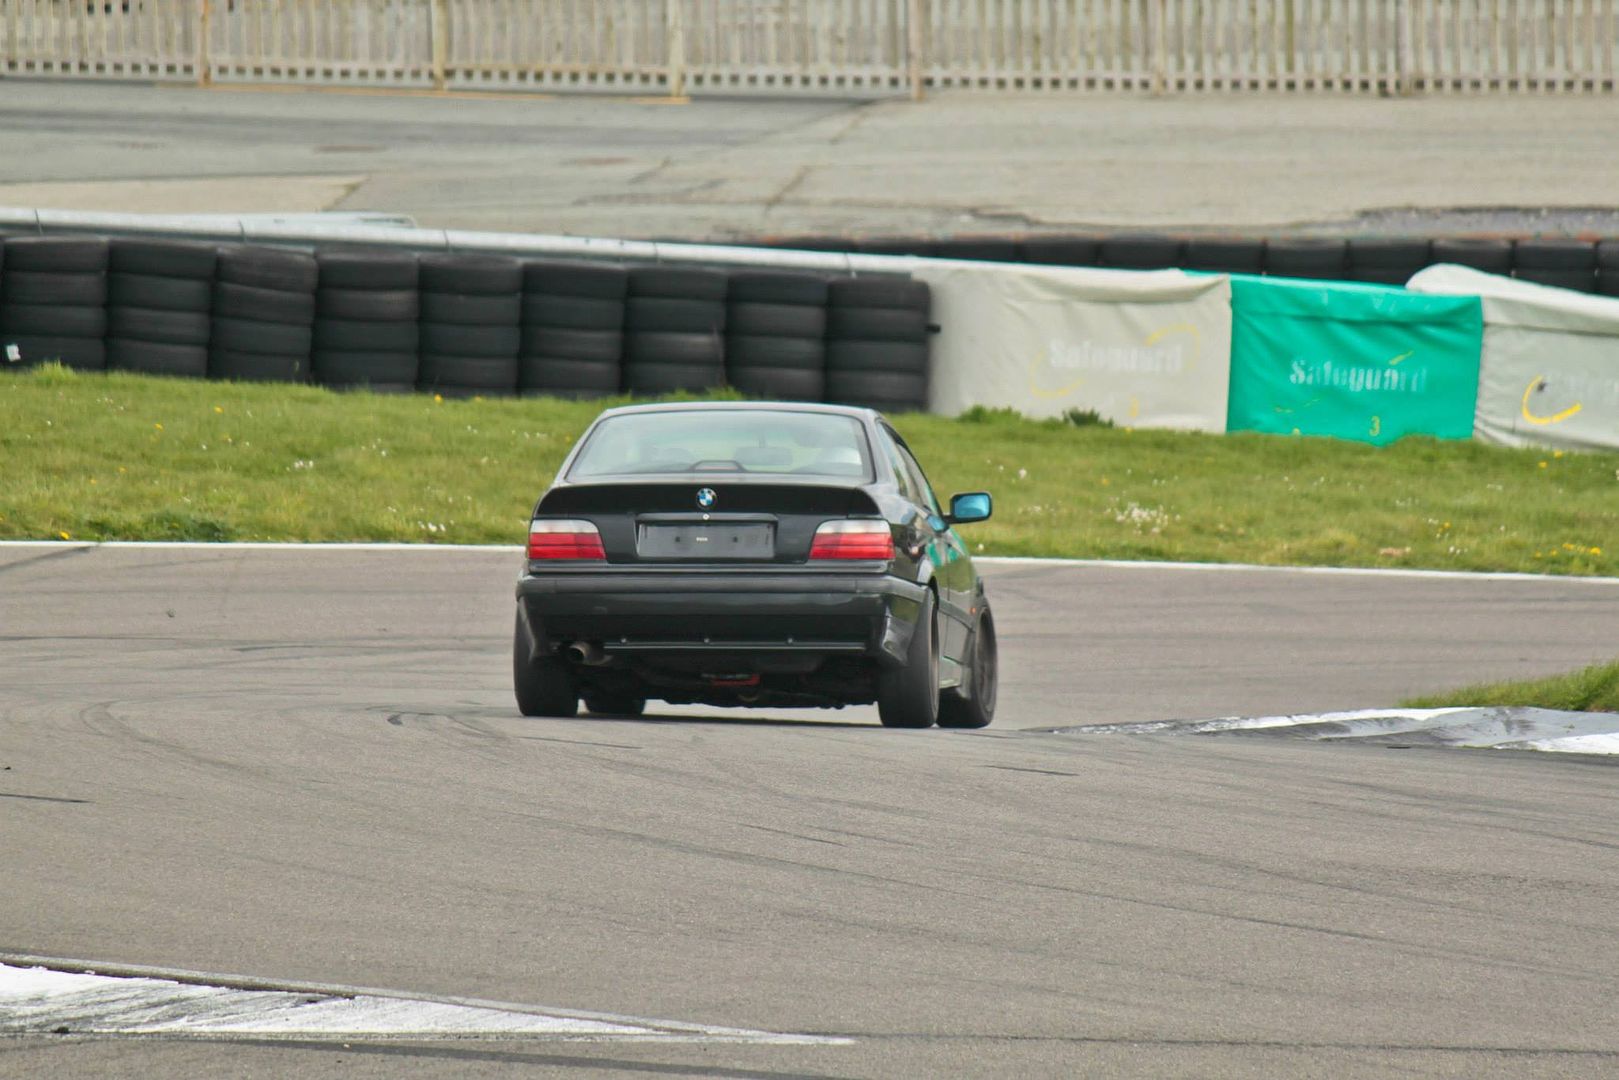
So in the past three months I've changed a few bits and had it out at Anglesey..
The weather was perfect, clear sun all day - although had a few issues with the car. First being gearbox started to breathe oil out of the top breather cap, which seemed to get less throughout the day - it has never done this before so I'm not sure what it is yet. Upon arriving back, when moving in reverse there were some very odd noises coming from the box, so I'm assuming its related also. Unfortunately you can't get to the breather with the engine/box in the car. The N/S driveshaft has gone noisy under load, but its not really an issue as I have a couple of spares. Apart from that everything else went well.

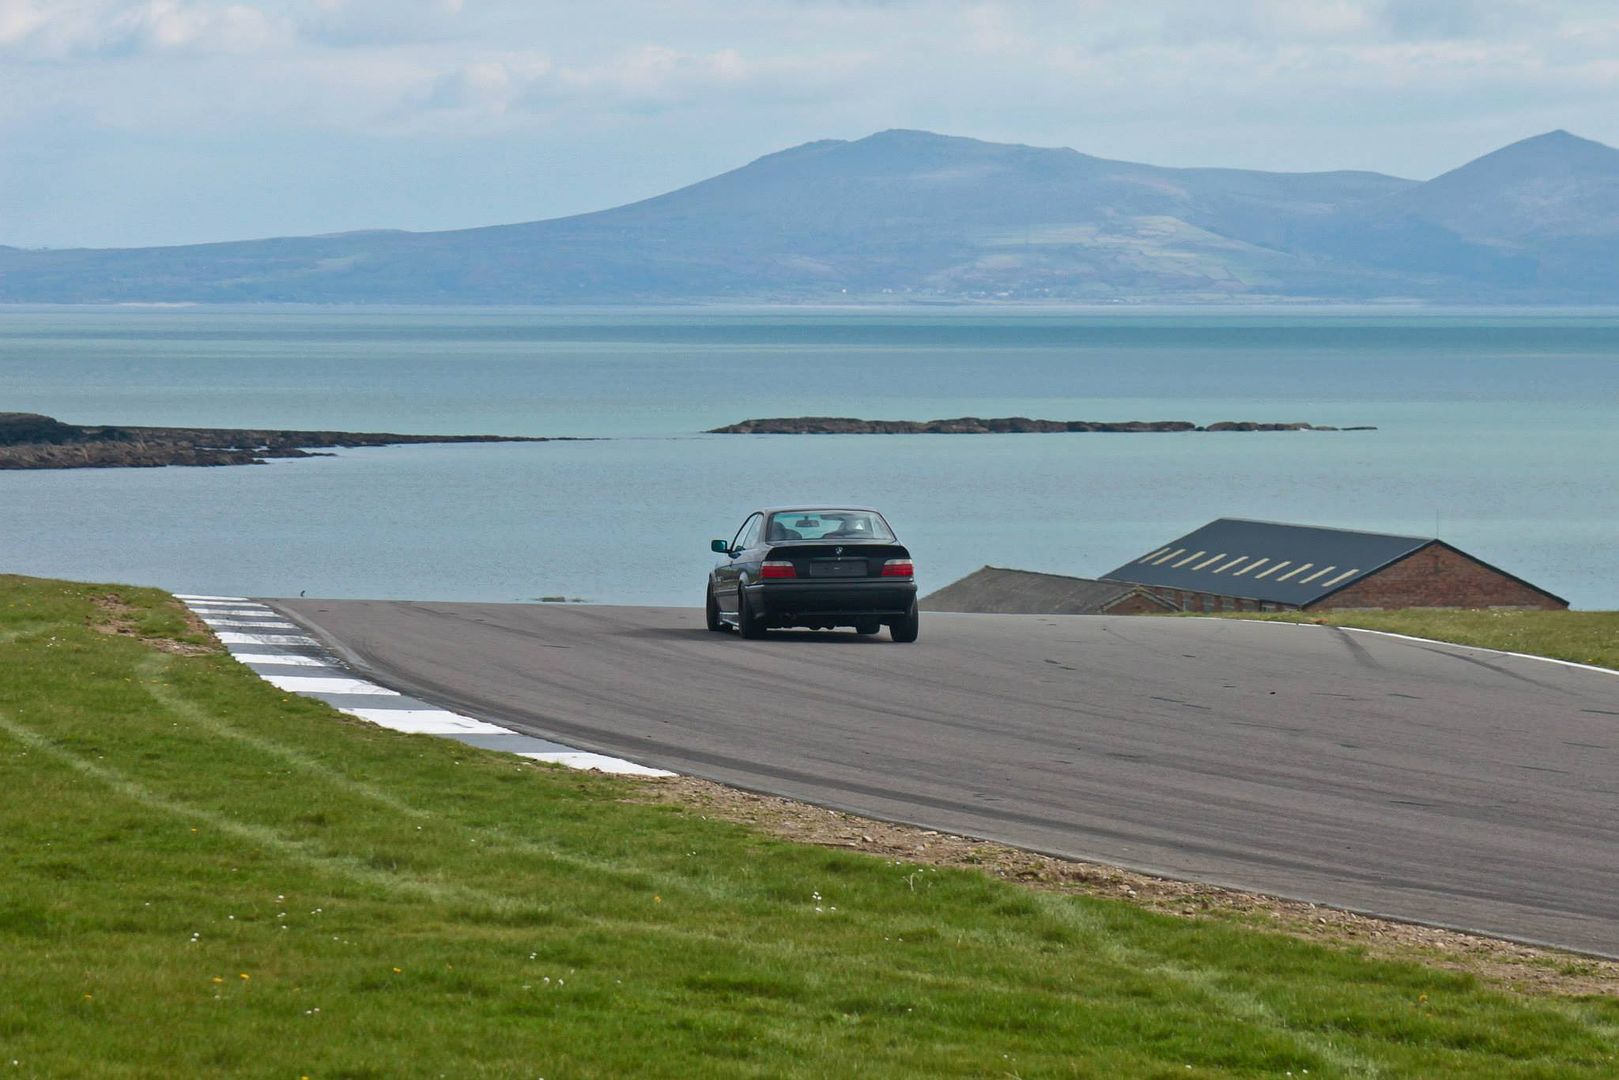
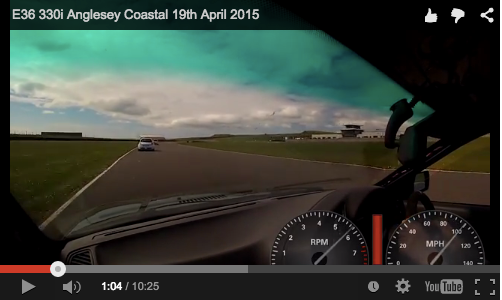
https://www.youtube.com/watch?v=_wahNq4d2tQ
Since then I have been moving the car on to standalone management, as I wasn't really happy with how the stock ECU was handling it and we could never get the map 'just right' with the drawn out process of reading, modifying, flashing, testing and so on.
I've ditched the MAF and standard lambda sensors, the standalone now runs MAP along with a feed from the wide band already on the car. Im still running the 328/M3 injectors and E46 coil packs. I could have used the standard sensors, but decided to replace the crank/water temp/air temp sensors with aftermarket items being cheap enough.
After some long nights and careful planning I had the loom done and all tested working fine. I got the car running so it was then time to hand it over to someone who knew how to properly map it. On the standard ECU with modified map, it made just under 250hp/250lbft - I wasn't expecting any more power, just wanted safe AFRs that would be consistent.
Some hours later we had a decent set of figures, but as you can see there was a slight dip at approximately 4500rpm in both torque and power. In standard from the VANOS engages at 1100rpm or so, then dis-engages at 4500rpm - so it had to be somewhat related.
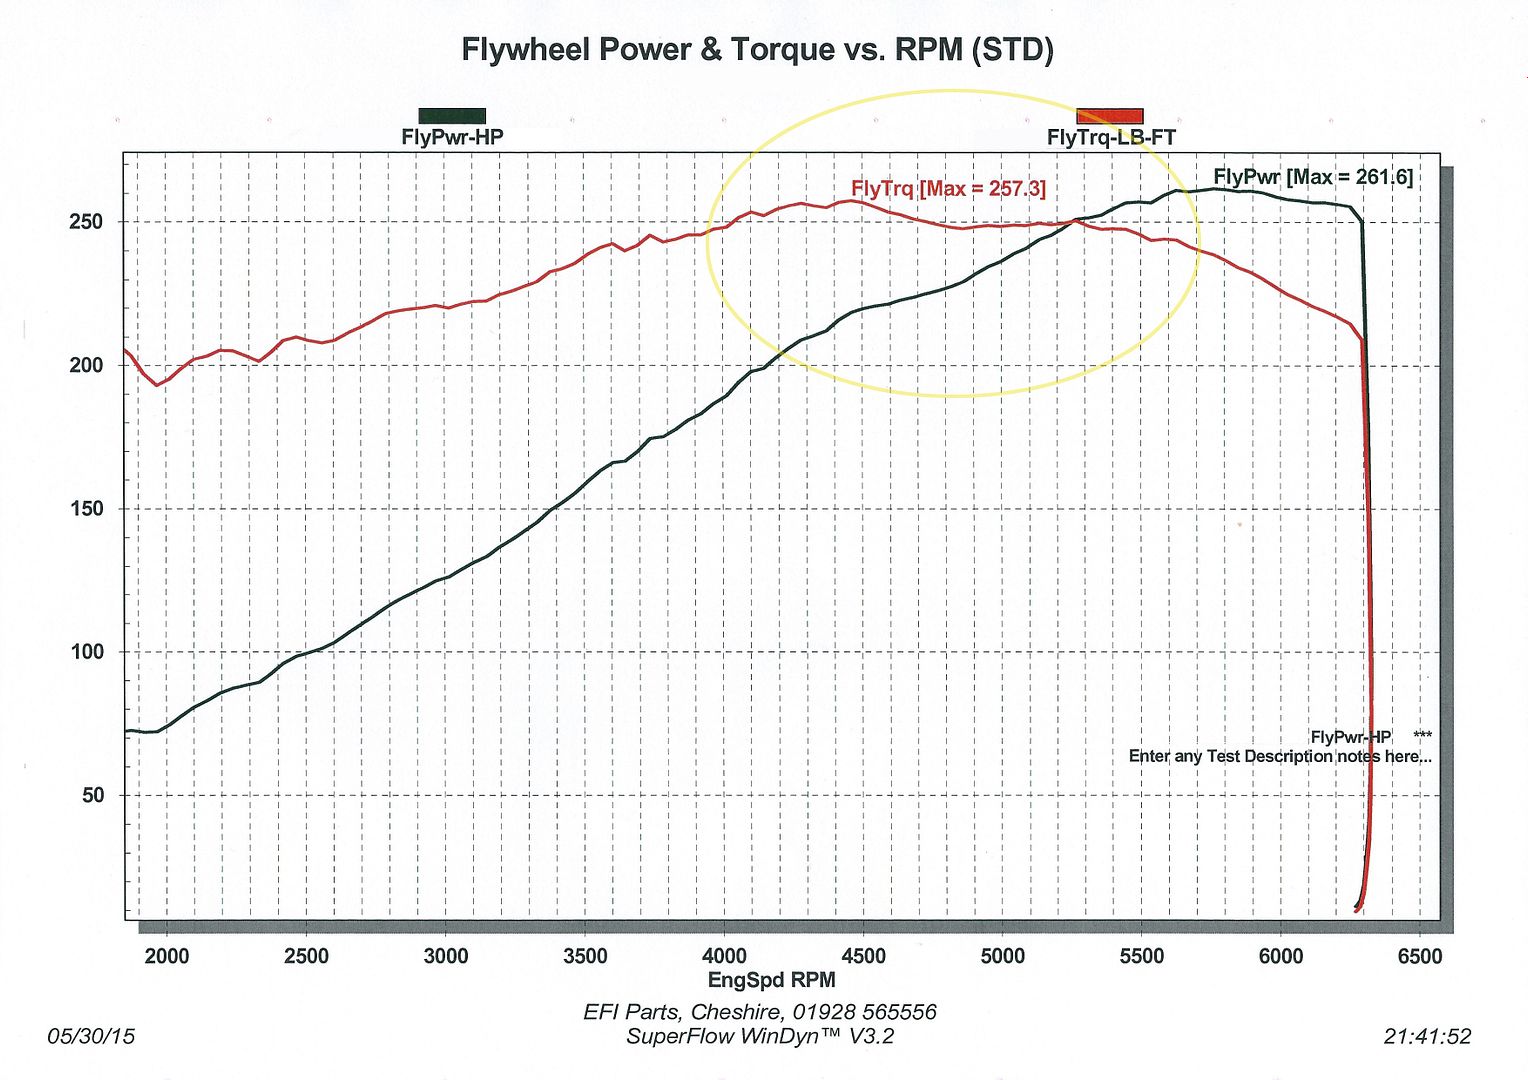
The VANOS was then held on for another 500rpm and after a bit more tuning the dip had completely gone..
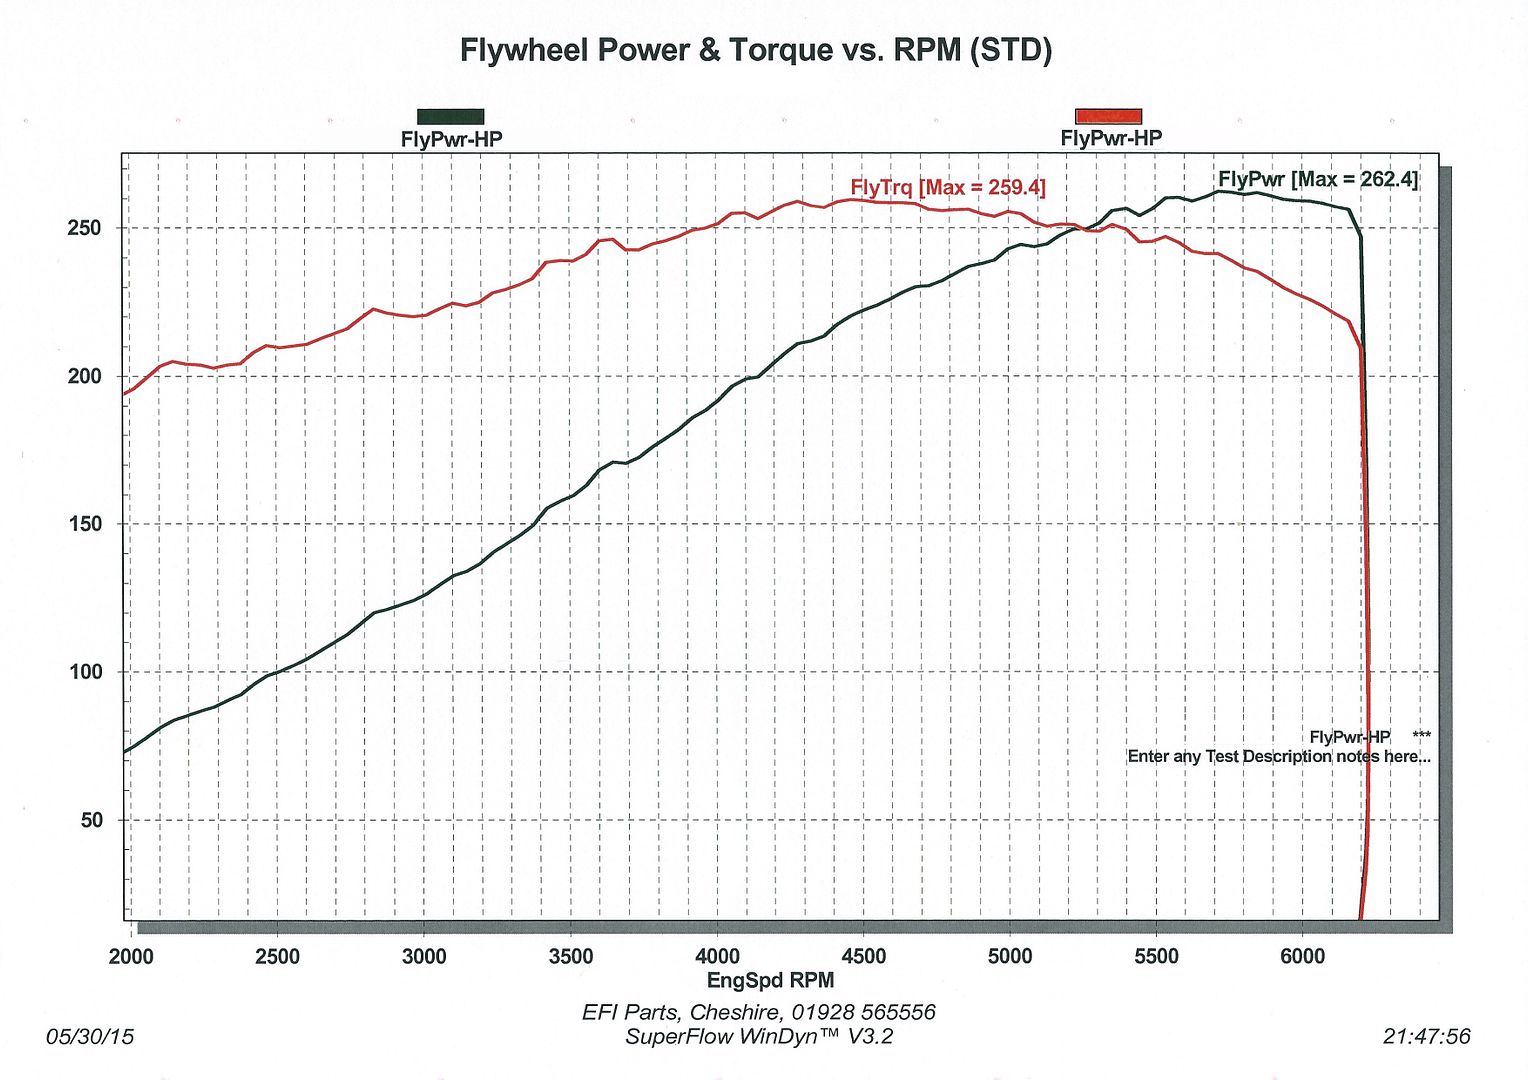
First impressions are night and day different to the standard management, the throttle response is so much better from everywhere in the rpm range, and the power feels much smoother. Now just to get it back out there...
The weather was perfect, clear sun all day - although had a few issues with the car. First being gearbox started to breathe oil out of the top breather cap, which seemed to get less throughout the day - it has never done this before so I'm not sure what it is yet. Upon arriving back, when moving in reverse there were some very odd noises coming from the box, so I'm assuming its related also. Unfortunately you can't get to the breather with the engine/box in the car. The N/S driveshaft has gone noisy under load, but its not really an issue as I have a couple of spares. Apart from that everything else went well.
https://www.youtube.com/watch?v=_wahNq4d2tQ
Since then I have been moving the car on to standalone management, as I wasn't really happy with how the stock ECU was handling it and we could never get the map 'just right' with the drawn out process of reading, modifying, flashing, testing and so on.
I've ditched the MAF and standard lambda sensors, the standalone now runs MAP along with a feed from the wide band already on the car. Im still running the 328/M3 injectors and E46 coil packs. I could have used the standard sensors, but decided to replace the crank/water temp/air temp sensors with aftermarket items being cheap enough.
After some long nights and careful planning I had the loom done and all tested working fine. I got the car running so it was then time to hand it over to someone who knew how to properly map it. On the standard ECU with modified map, it made just under 250hp/250lbft - I wasn't expecting any more power, just wanted safe AFRs that would be consistent.
Some hours later we had a decent set of figures, but as you can see there was a slight dip at approximately 4500rpm in both torque and power. In standard from the VANOS engages at 1100rpm or so, then dis-engages at 4500rpm - so it had to be somewhat related.
The VANOS was then held on for another 500rpm and after a bit more tuning the dip had completely gone..
First impressions are night and day different to the standard management, the throttle response is so much better from everywhere in the rpm range, and the power feels much smoother. Now just to get it back out there...
The engine/management setup is still going well and with a few tweaks the cold start and warm idle are now great too. I've not had much time recently with work and being at Le Mans again, but with Cadwell booked I thought it might be time to get some bits sorted...
First was another pair of 595 RSR's to replace some worn out ones from Anglesey earlier in the year - at the same time I've had both sets of wheels powder coated again as they were looking a bit tatty from never being cleaned and thrown about in the garage.
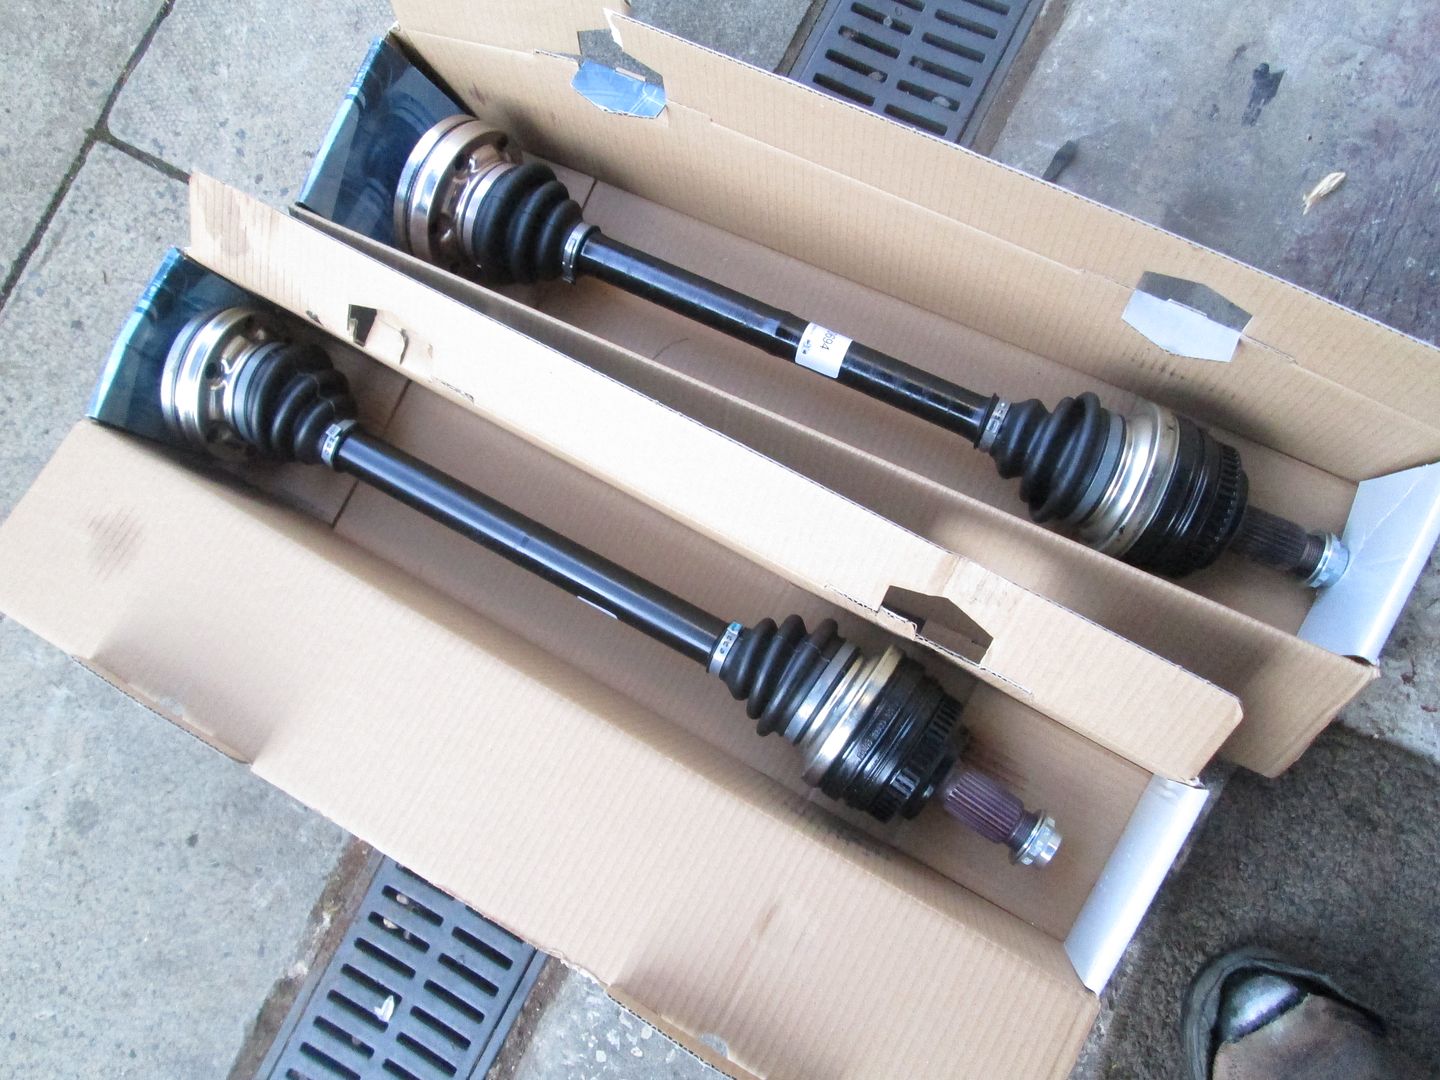
I started to strip my driveshafts down to re-build with Redline CV2 + new boots, but the outer CVs were past their best, so I replaced both shafts with some decent quality items..
With the amount of repair work this shell has had to its sills (inner and outer) I did not want to commit to a weld-in cage as mentioned previously in this thread. I had been keeping an eye out for a second hand bolt-in type, either Safety Devices or Wiechers Sport. I spotted one for sale so went to pick it up...
It was an interesting 400 mile round trip to say the least.... Wiechers Sport 6 point, with single door bars and harness bar. With the door bars being bolt-in, I wanted to modify them into a double, but obviously keep them in such a way so they can be removed. Started by picking up some OMP fittings, 40mm CDS and various other bits - then spent a few evenings cutting and profiling to get them just right.
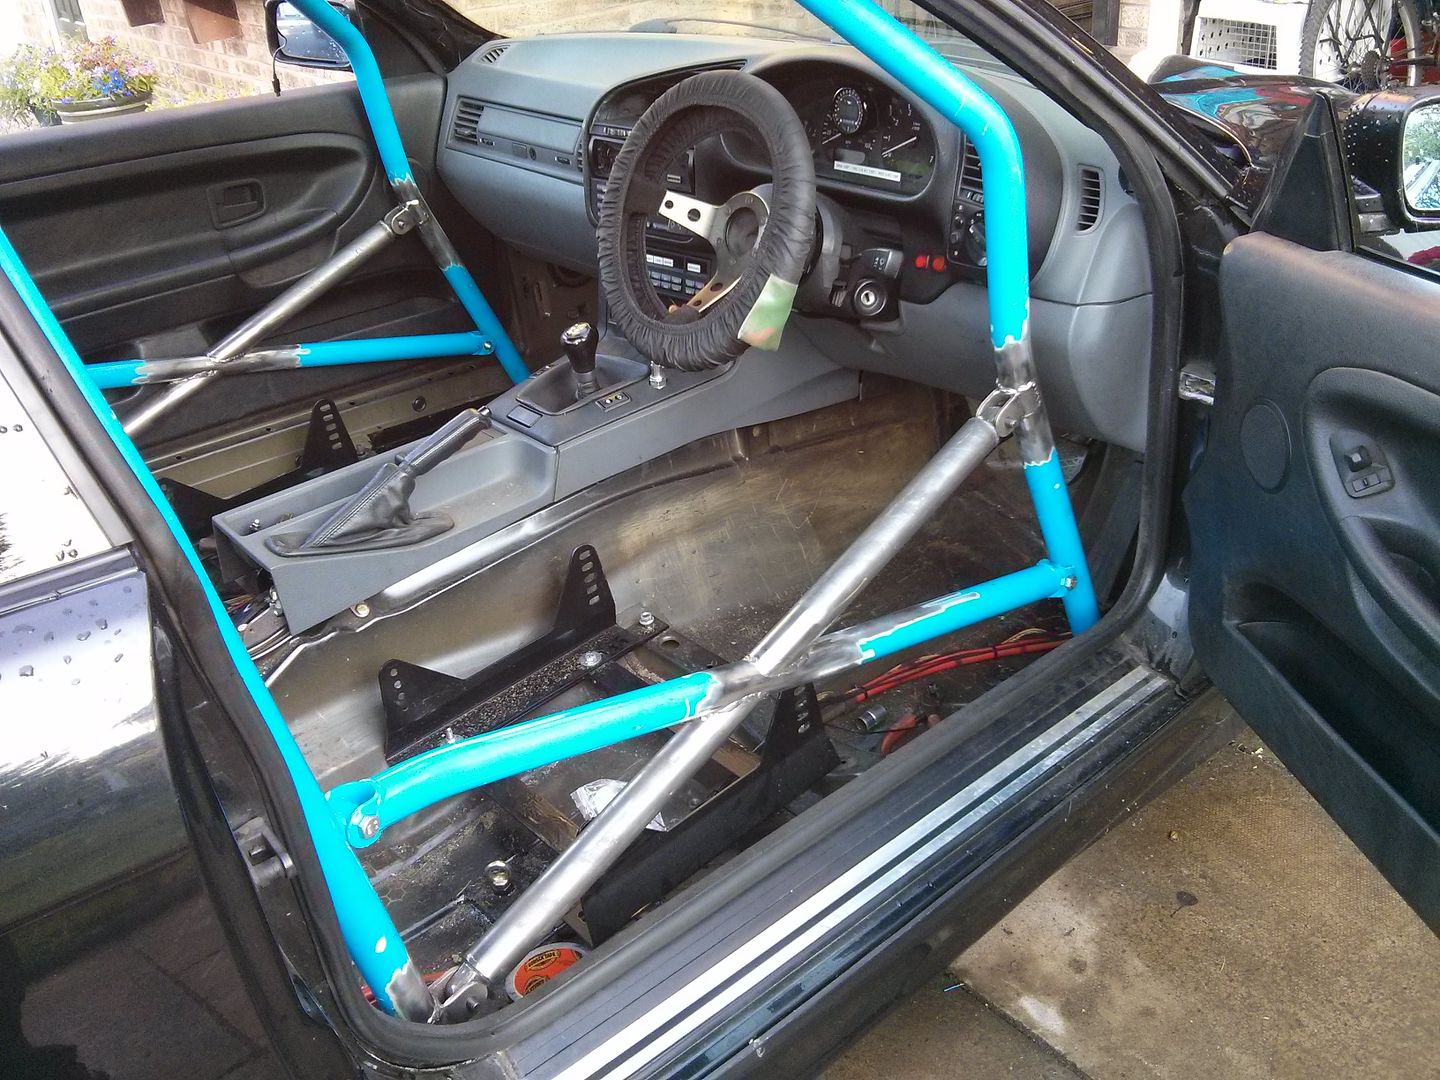
The whole cage was then removed and dropped off to be powder coated in a slightly more subtle colour. Whilst that's been away I have welded some oversized 3mm plate to either side of the chassis on all 6 locations, then seam sealed and painted, ready for it to be bolted in. A couple of days later it was back, so the only thing left to do was get it in the car..
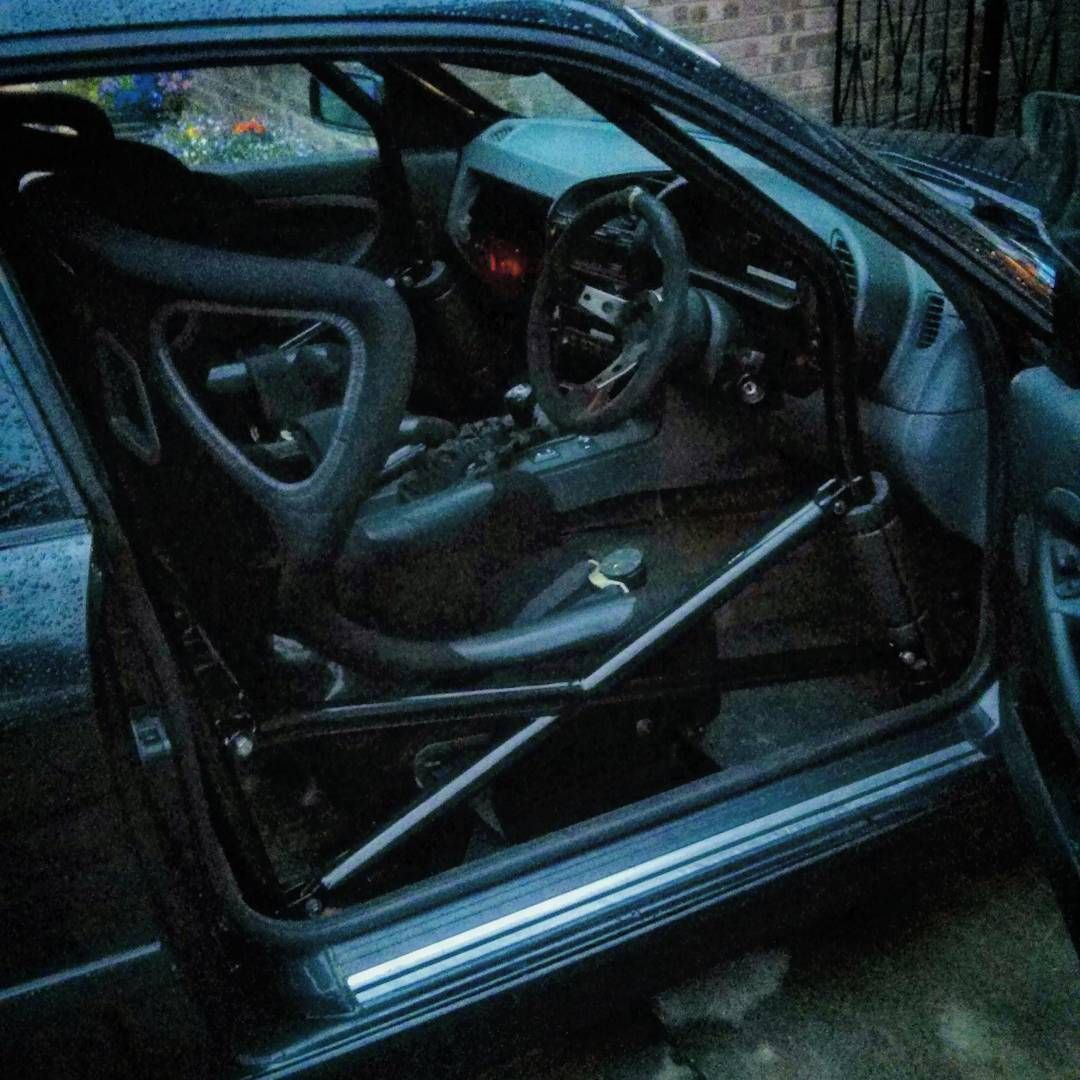
After finishing a few odd jobs, it was ready for Cadwell.
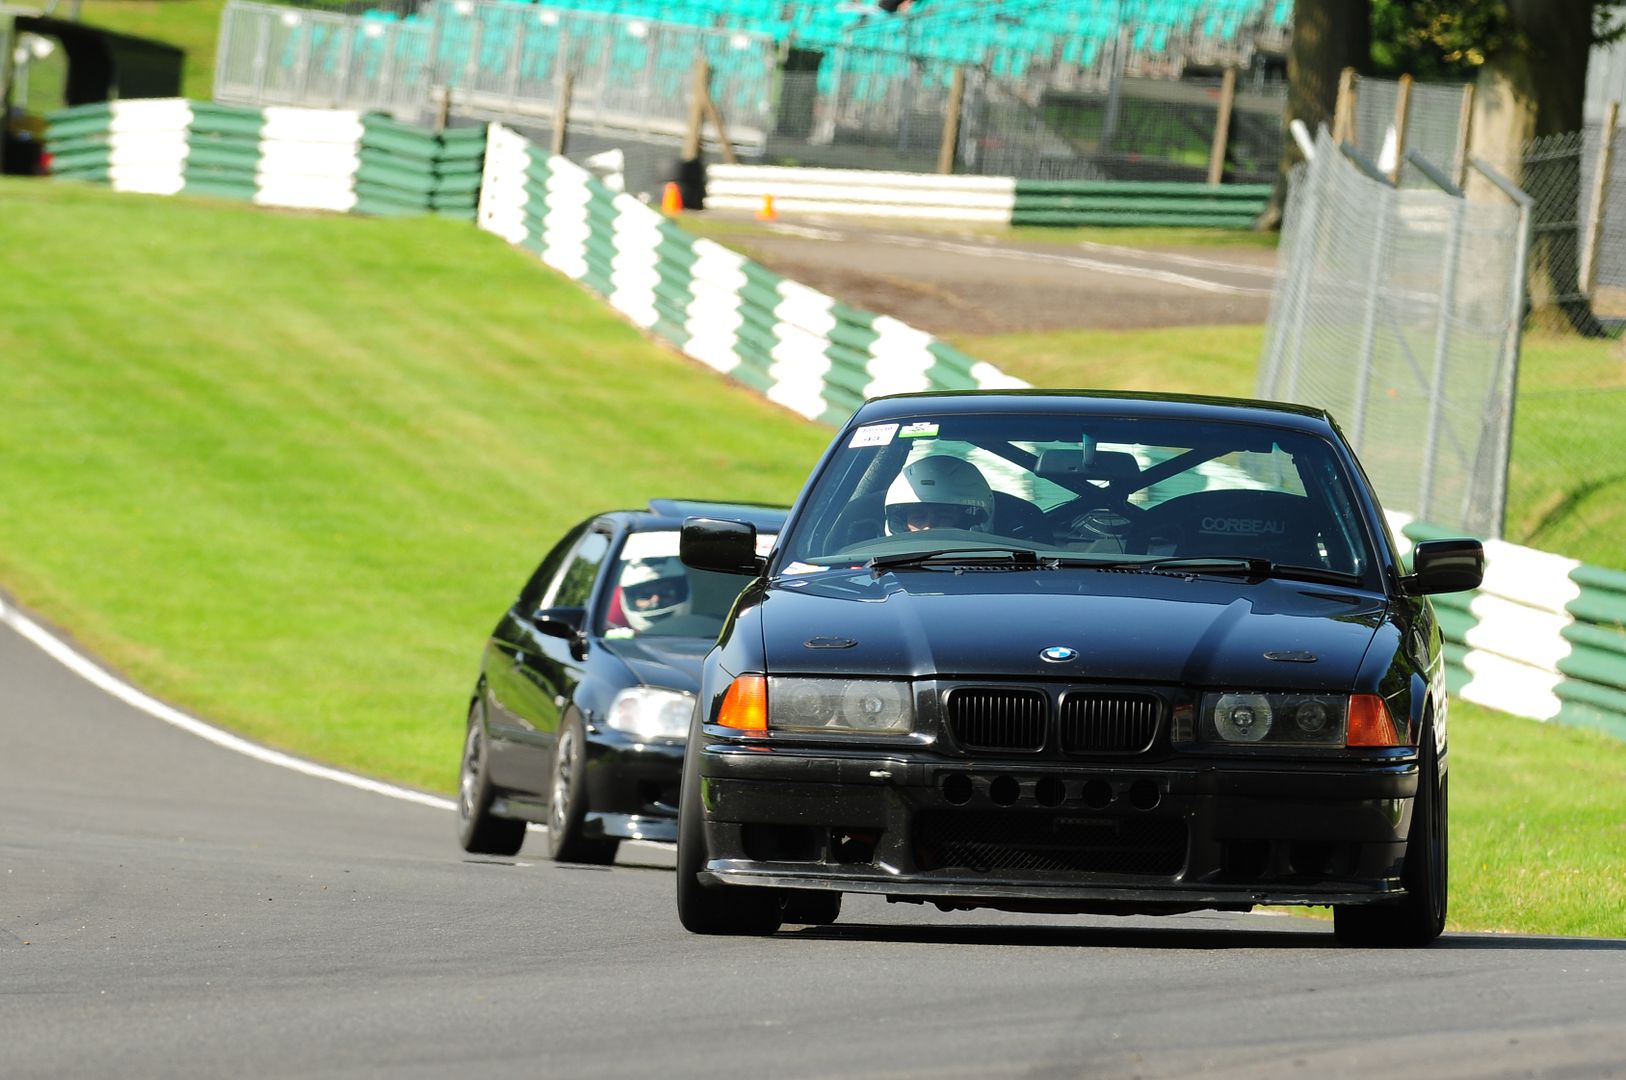
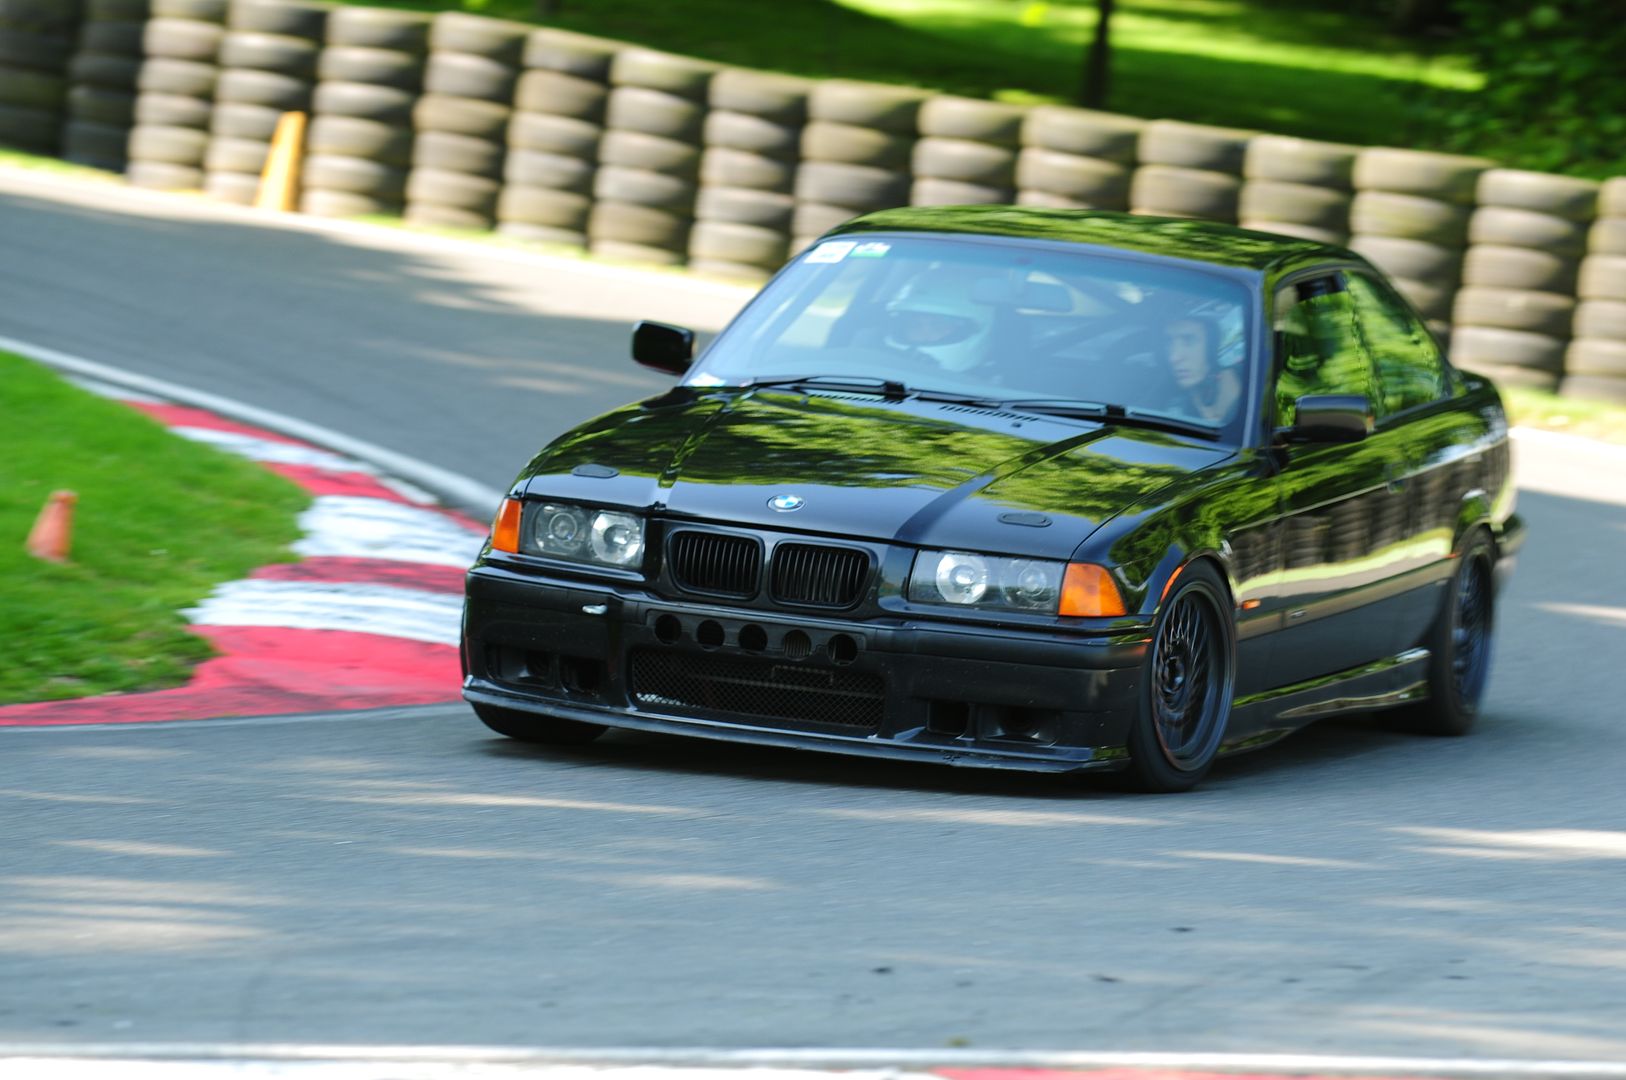
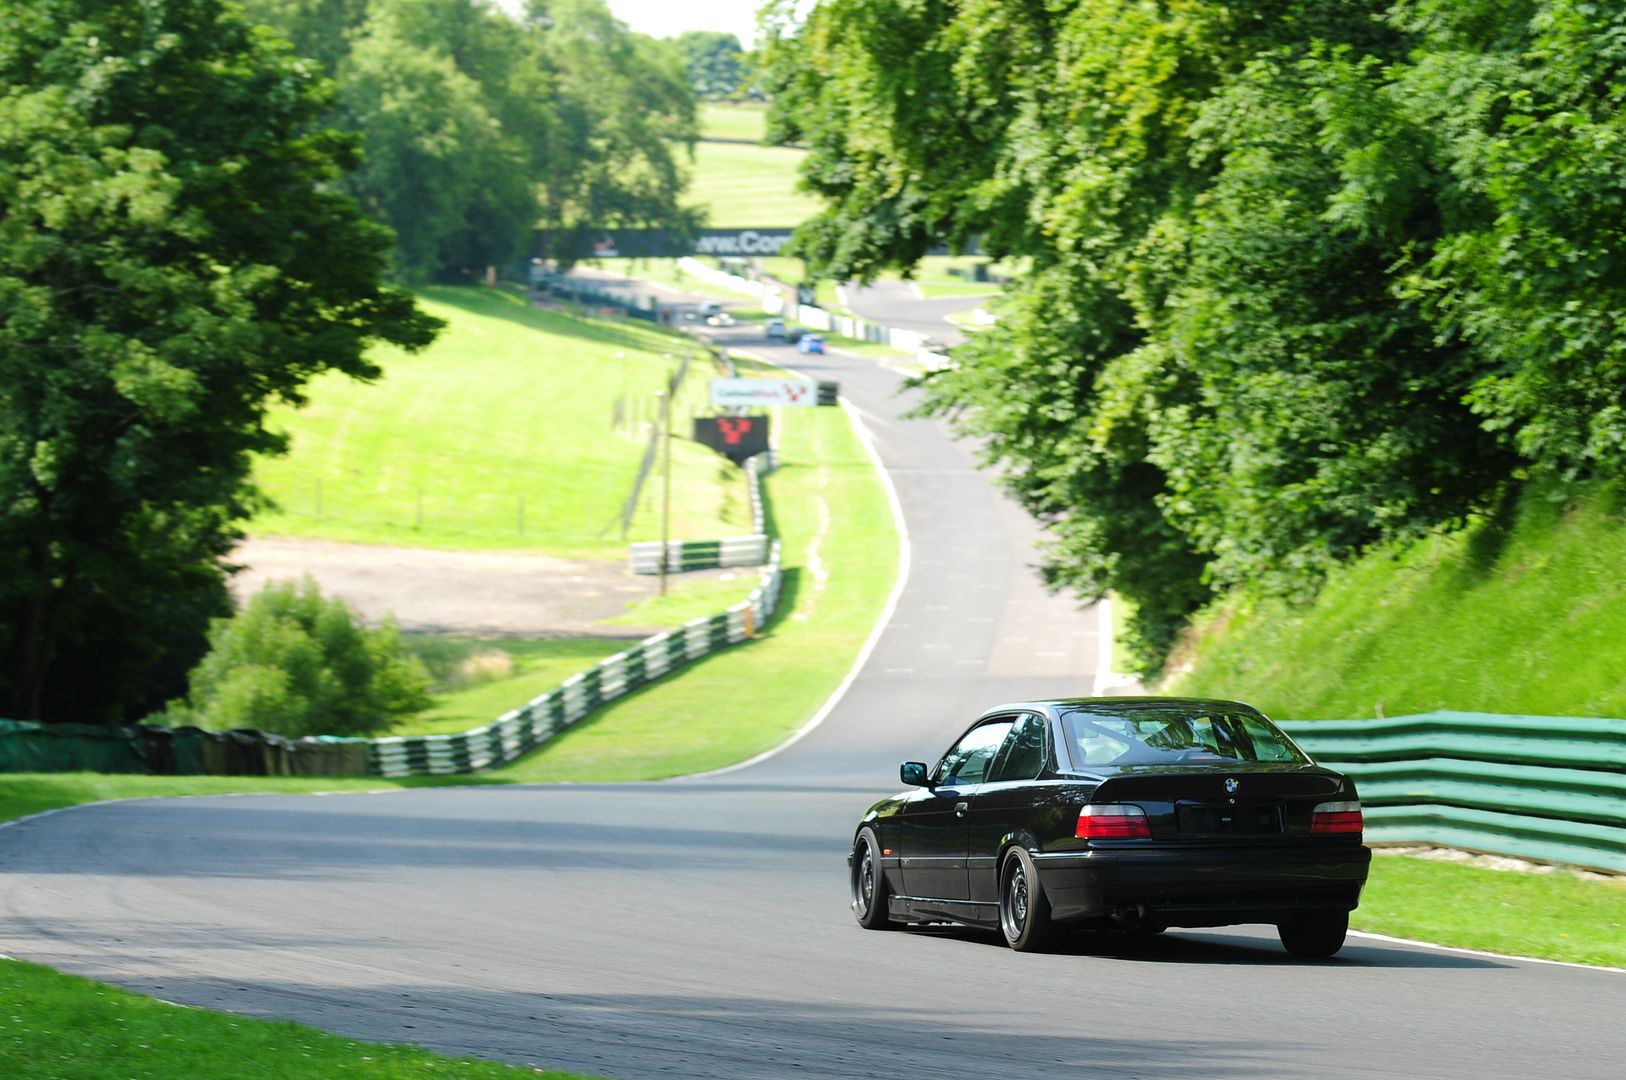
The car was brilliant all day without any issues - the LSD is starting to make a bit of noise when its really hot which is something that's going to get attention but everything else was spot on. Engine wise - the standalone has transformed the engine, especially mid-range just where it was needed.
https://www.youtube.com/watch?v=oM0VsrBA2I4
https://www.youtube.com/watch?v=4JqyW6__Mis
As mentioned above, LSD rebuild is the next job. The breakaway torque is well down at 30lb/ft, and the pinion bearing is getting quite noisy - its history and mileage are unknown, so I wanted to strip it down and see. The past few weeks have consisted of collecting parts. My current final drive ratio is from a standard E36 M3 - 3.15:1. Luckily with BMWs, a lot of that era (E28, E30, E32, E34, E36) used the same dimension hardware (ring gear and pinion) inside the differential, which makes a lot of ratios available to 'build' your own.
With my S5D320Z 5 Speed Gearbox, 6500rpm limiter and 205/45/16 wheels, the road speeds are currently:
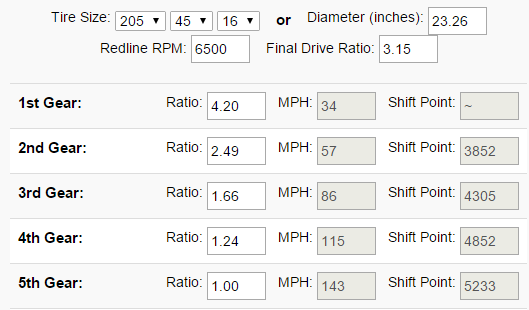
I am changing to a 3.46 ratio, using the same gearbox, limiter and wheels, which is generally regarded as a better ratio when you don't need top speed. Road speed comparison:

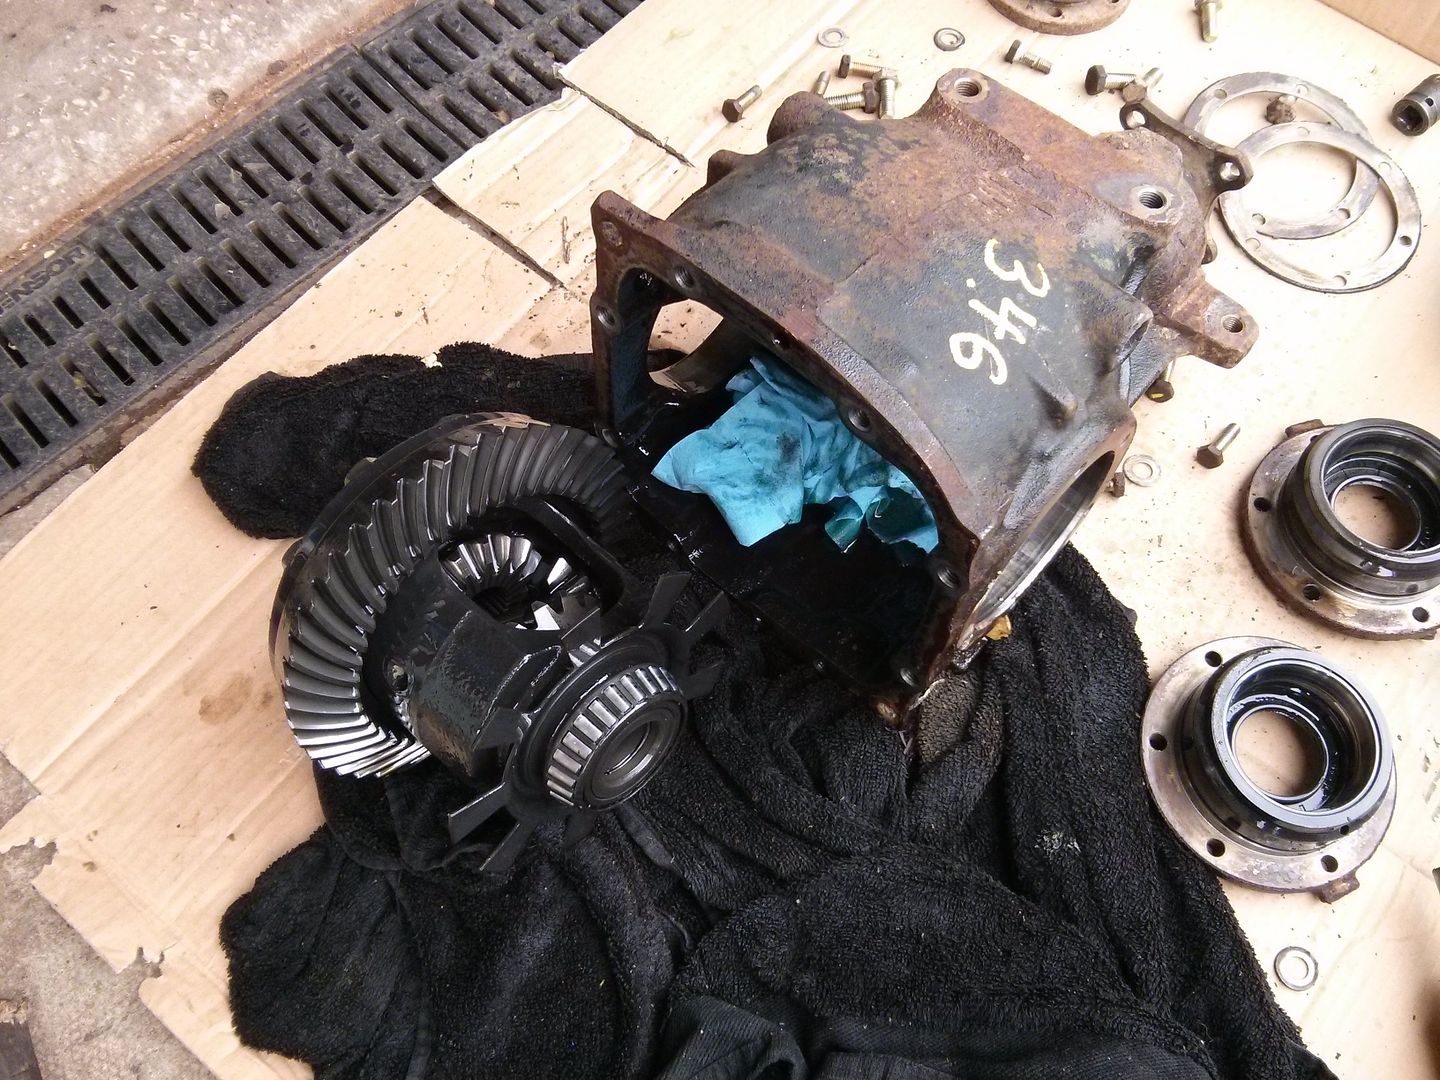
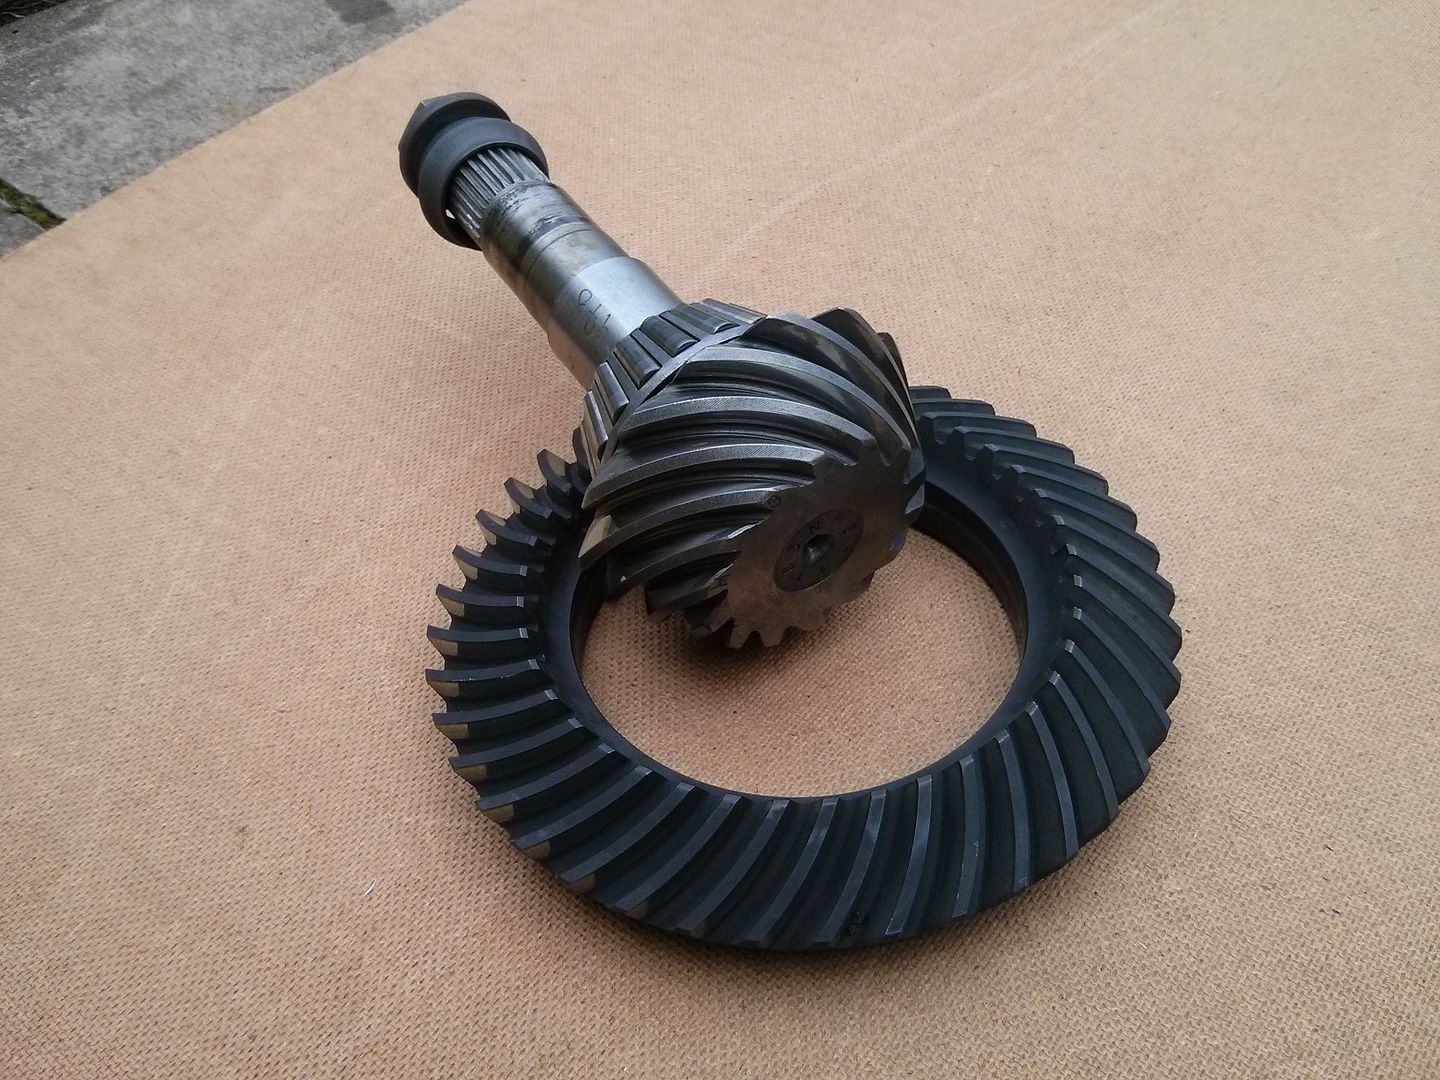
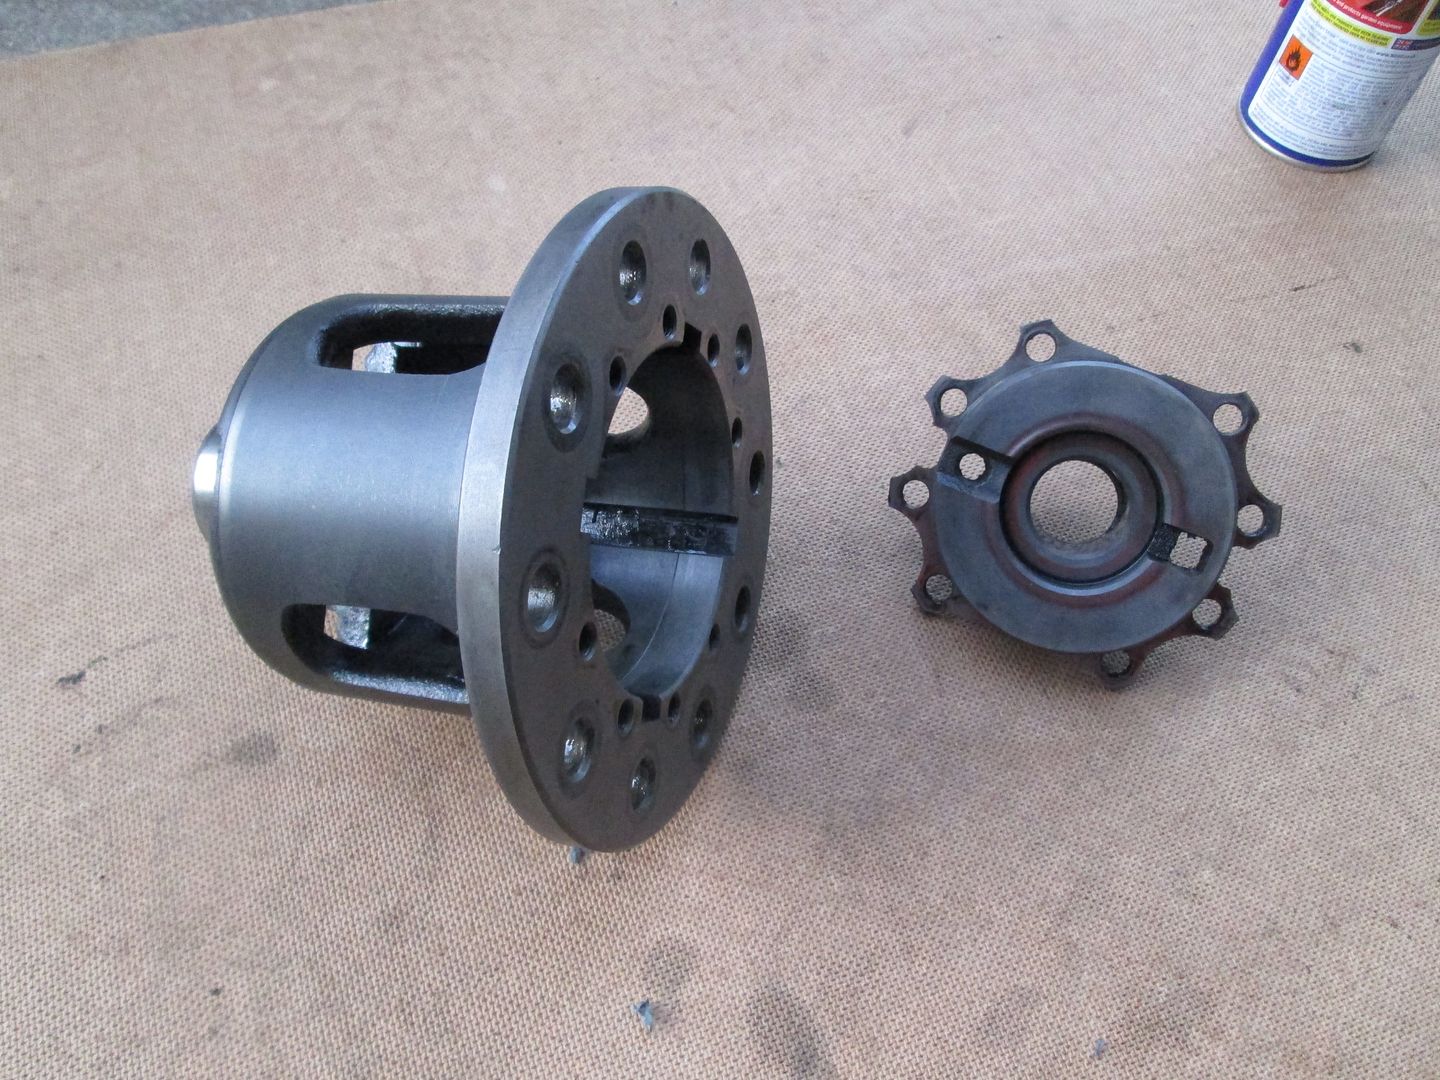
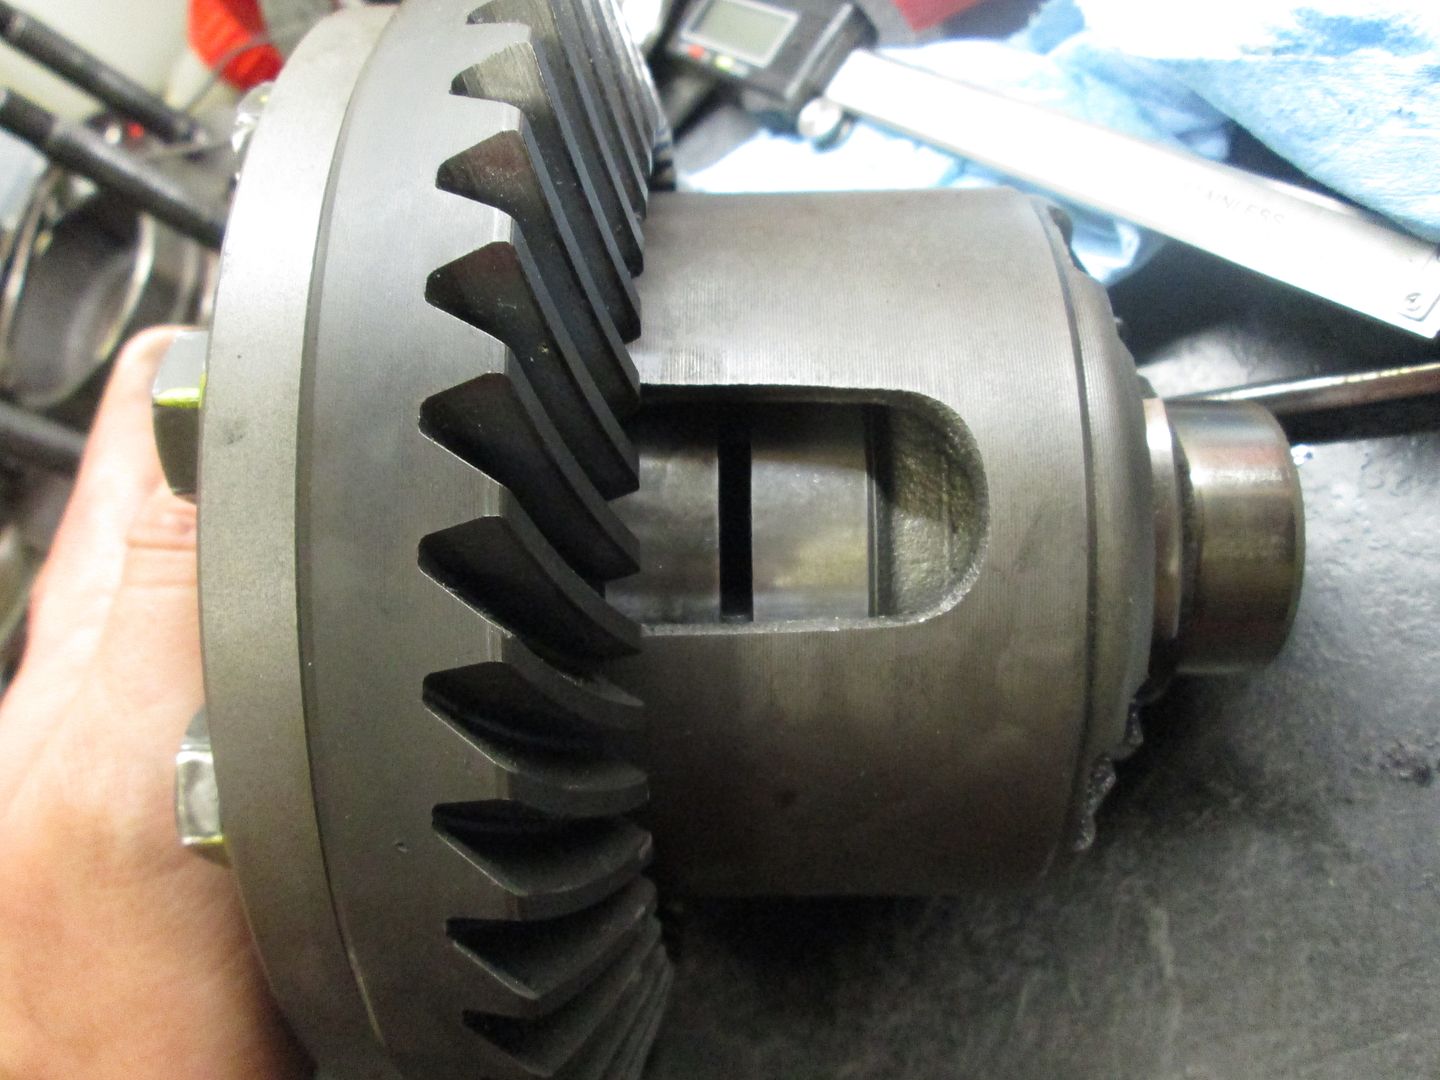
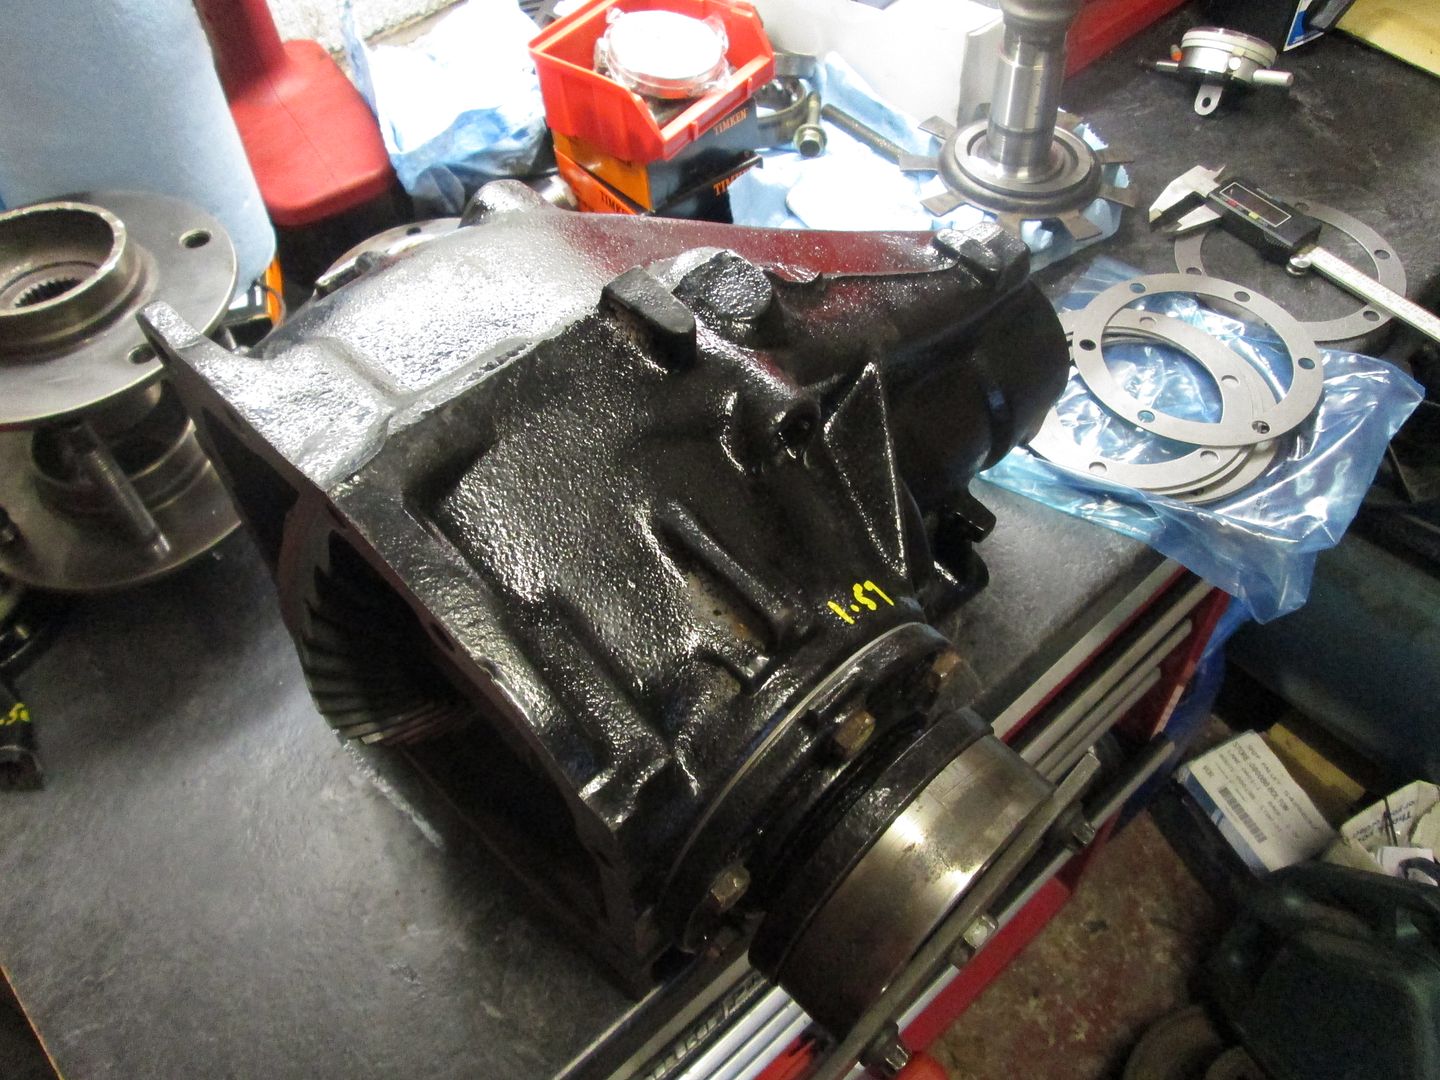
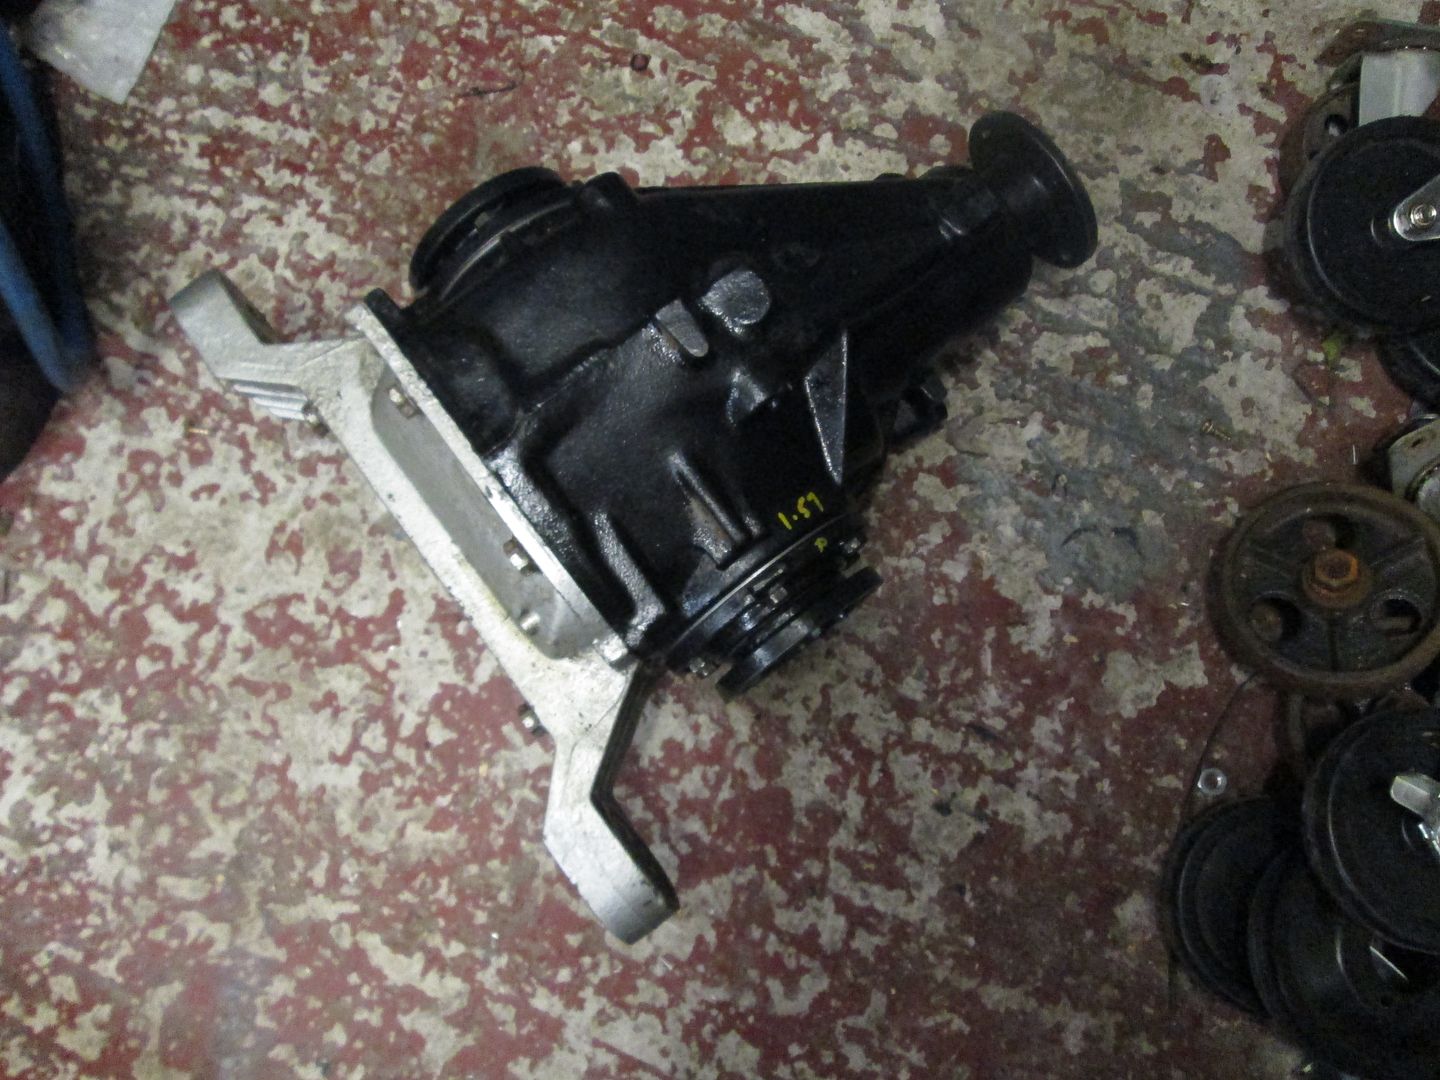
I picked up an open differential from an E34, and stripped it apart for the 3.46 ring gear and pinion..
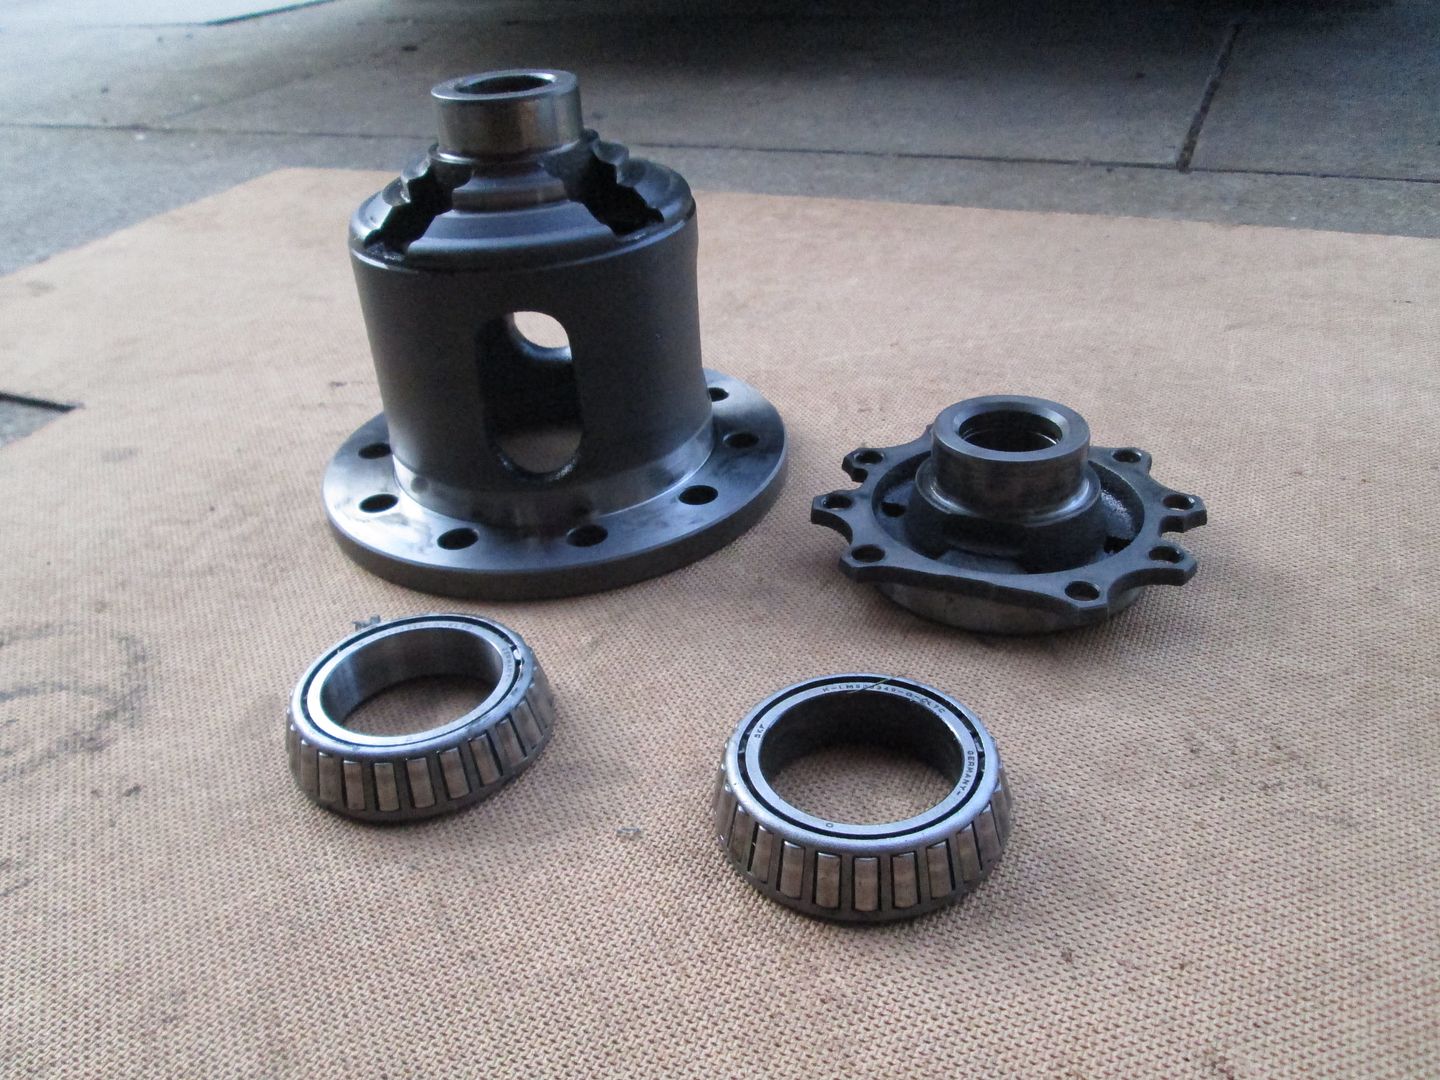
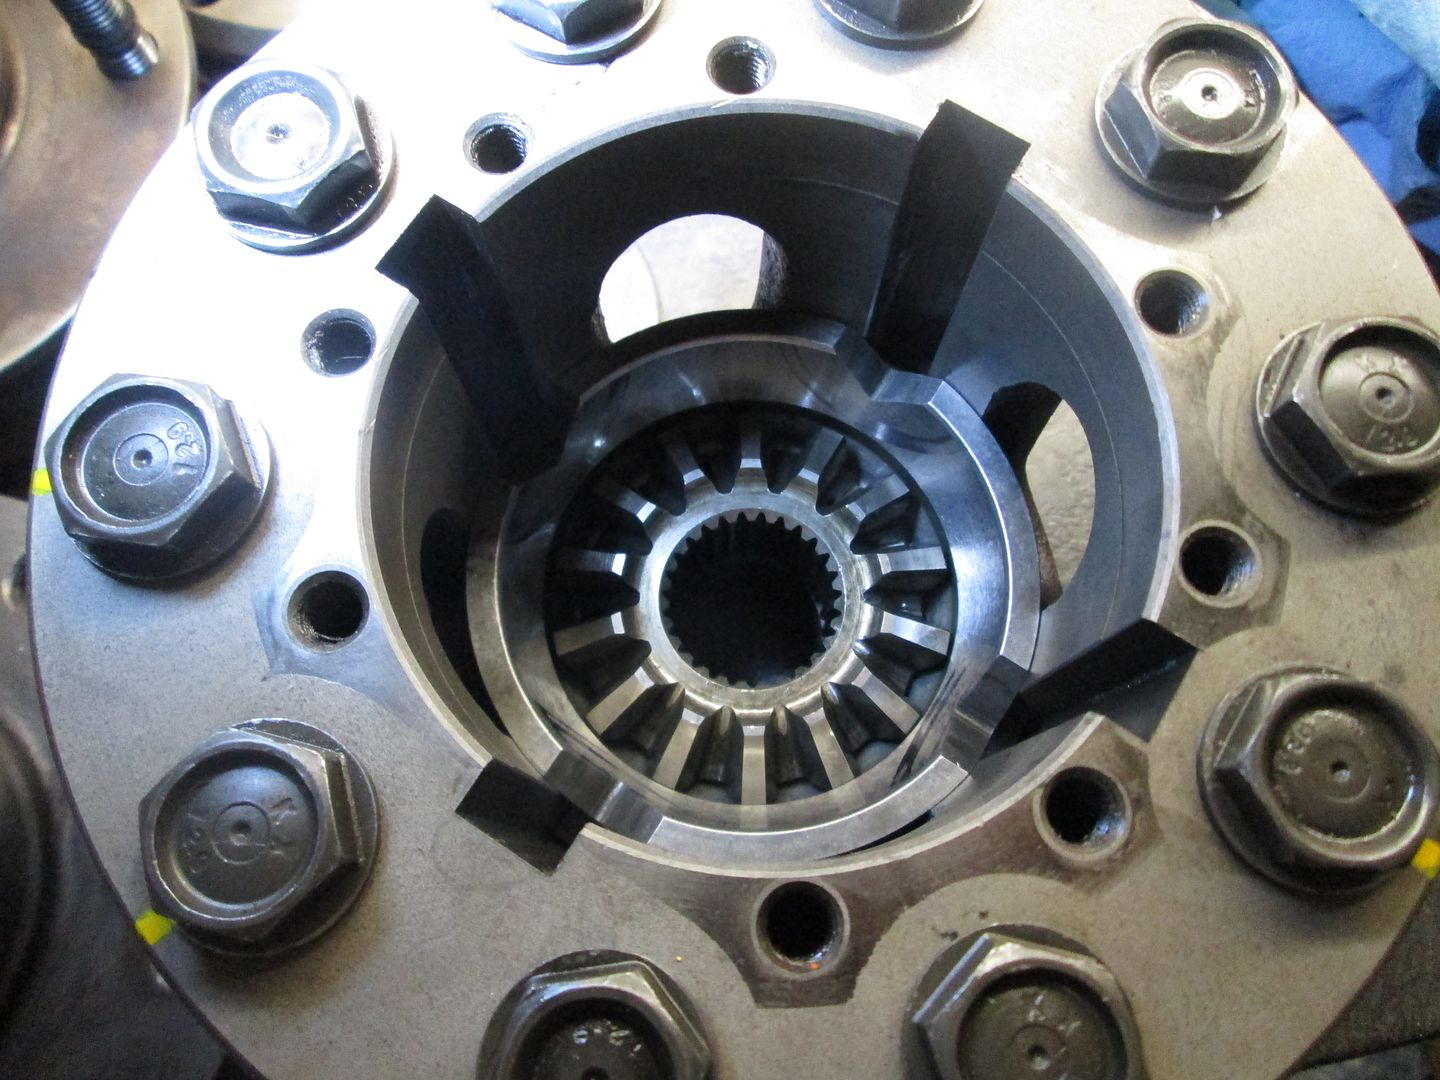
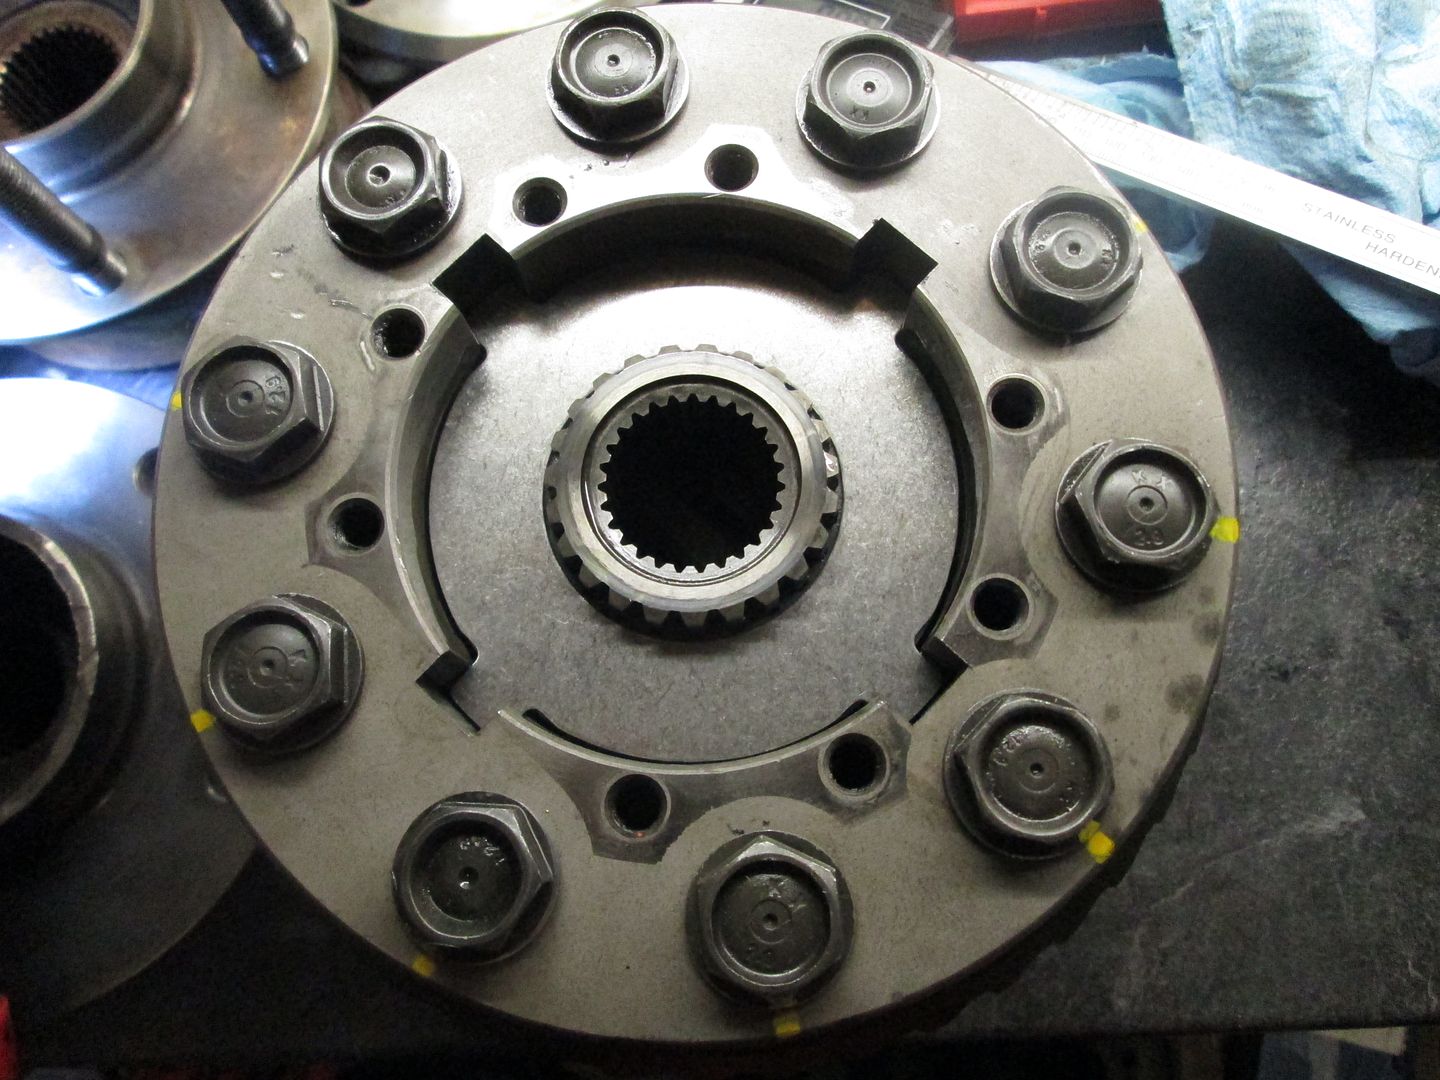
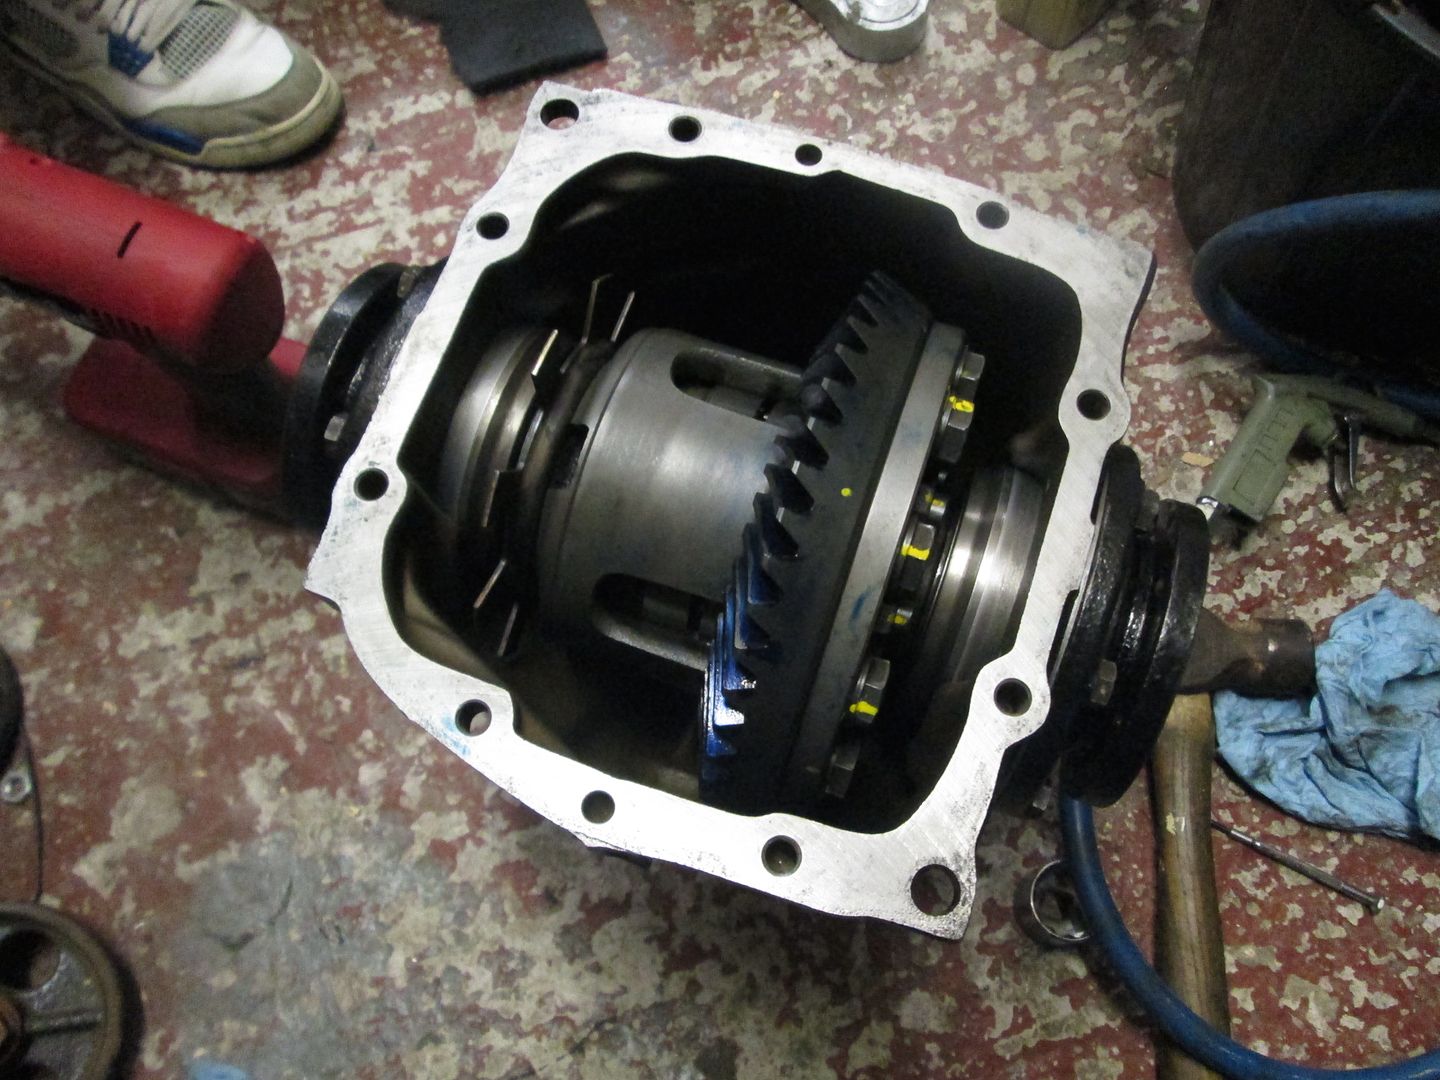
I've since stripped a couple of my spare differentials apart and had the casings sand blasted, so the new unit will start from a clean case. I stripped down the LSD unit..
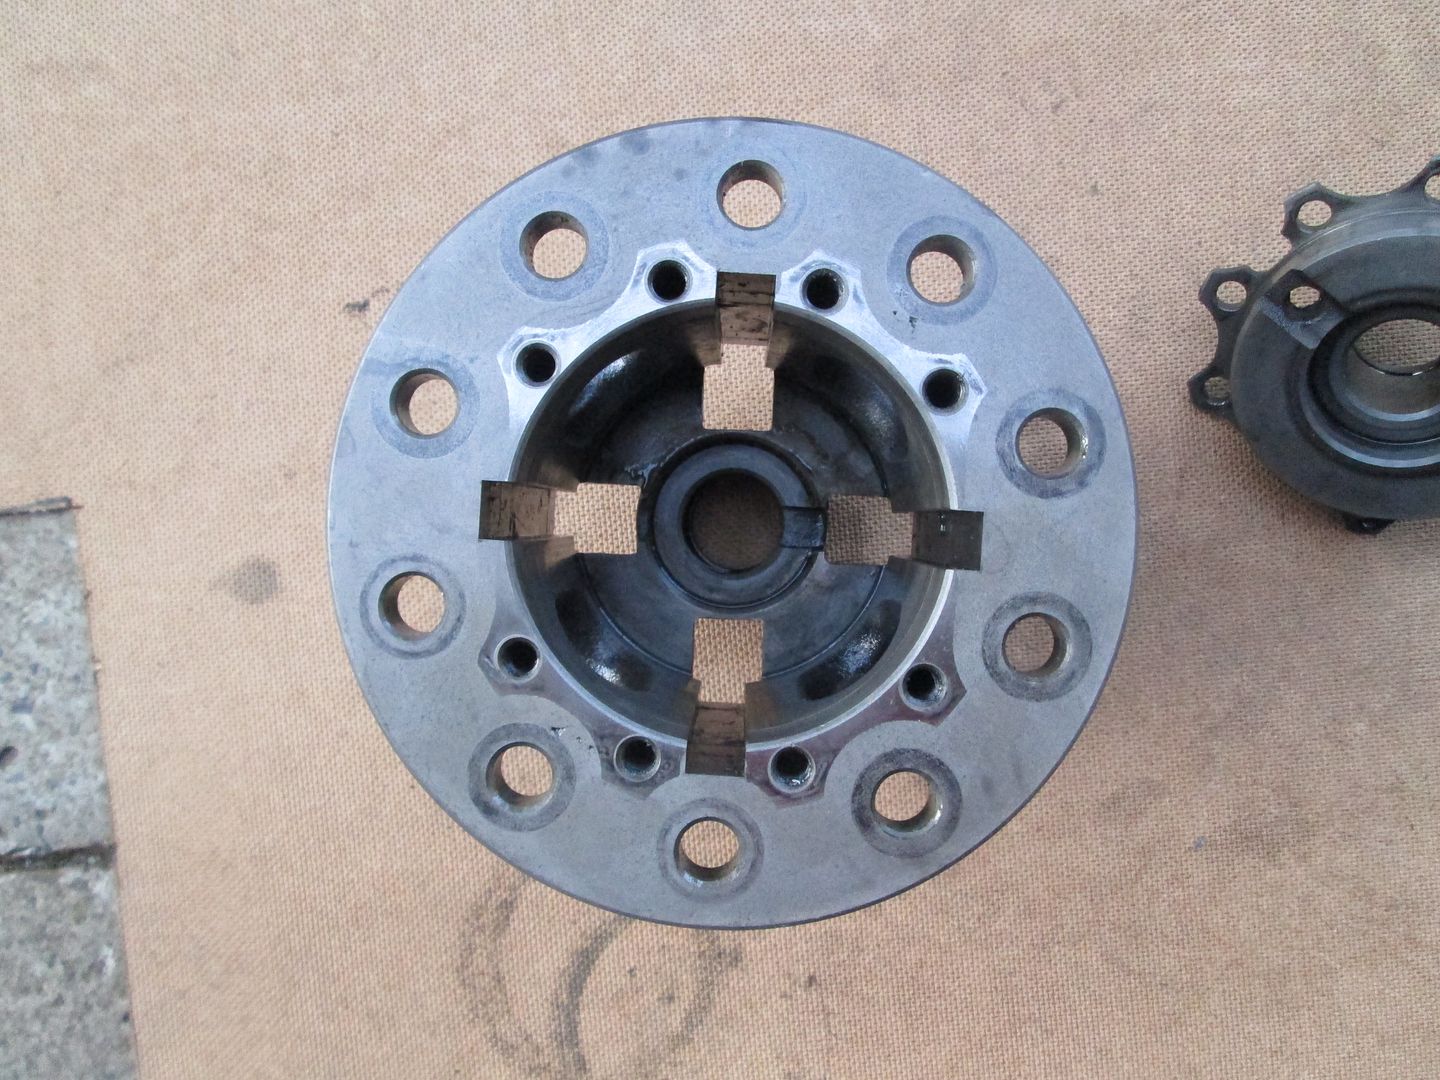
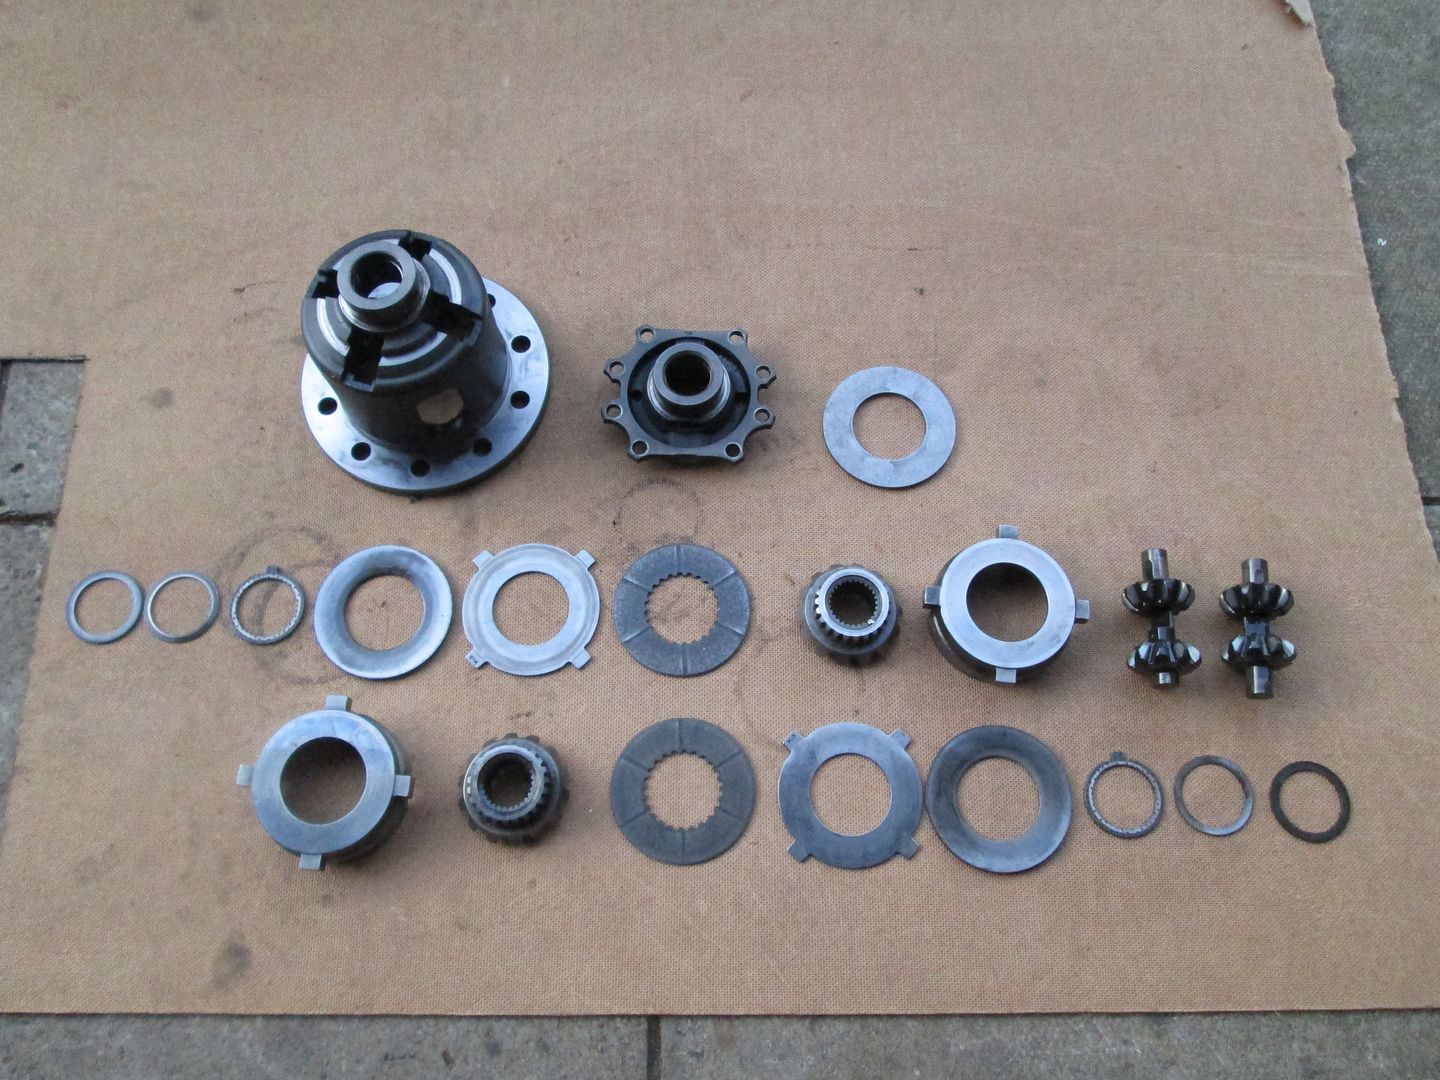
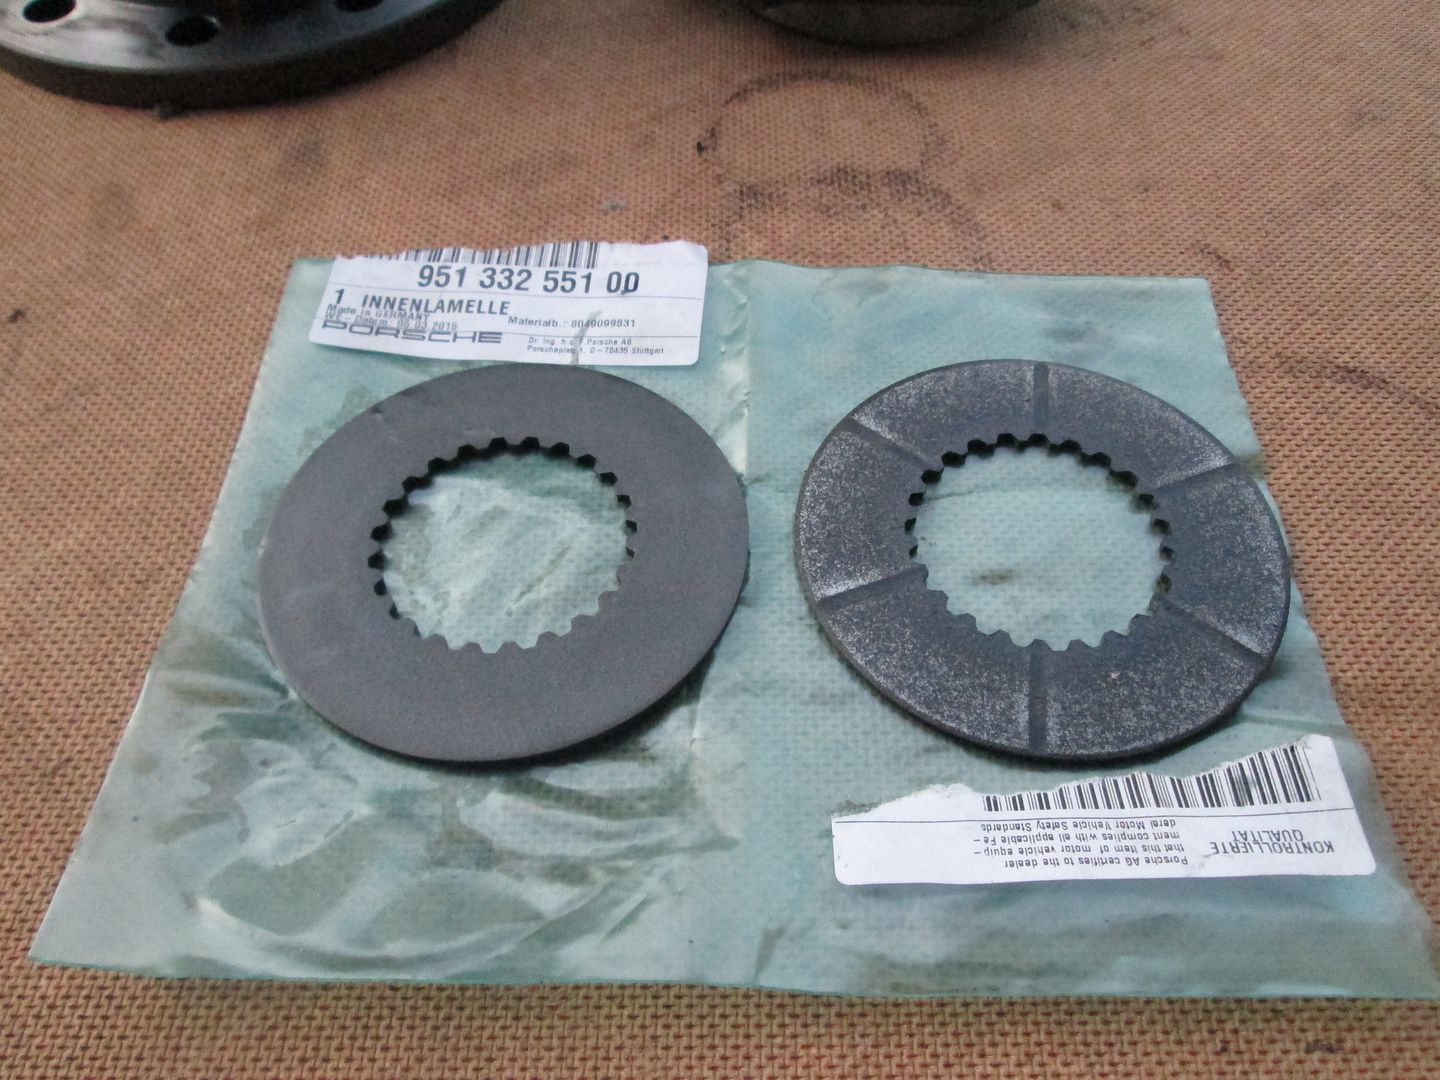
The friction discs are well worn (1.93mm down from ±2.0mm when new), the contact plates have also seen a small amount of wear, although they are being replaced anyway..
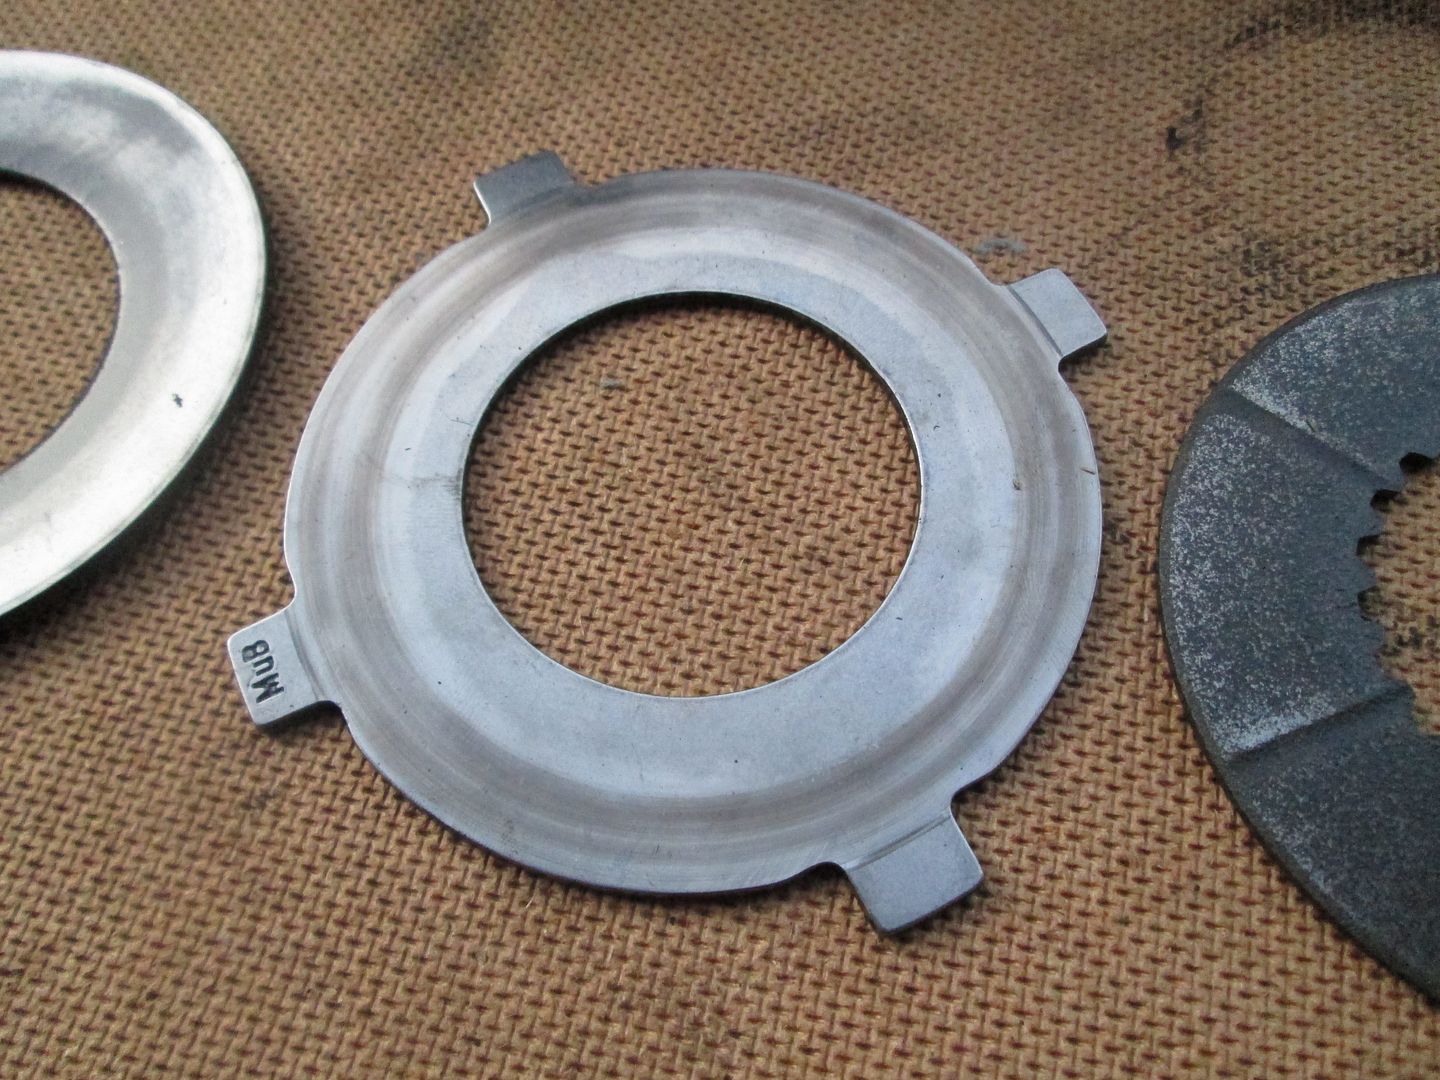
With the ±2.0mm BMW discs no longer available, most suggest running a Porsche 2.5mm clutch disc. To keep the stack height the same, the extra thickness has to be lost on the 'dog ear' plates. My unit had 2.1mm plates fitted, so I have dropped to 1.6mm - also available from Porsche. Clutch disc comparison..
Once the last few parts arrive I will get on with building and setting up the unit, hopefully soon...
First was another pair of 595 RSR's to replace some worn out ones from Anglesey earlier in the year - at the same time I've had both sets of wheels powder coated again as they were looking a bit tatty from never being cleaned and thrown about in the garage.
I started to strip my driveshafts down to re-build with Redline CV2 + new boots, but the outer CVs were past their best, so I replaced both shafts with some decent quality items..
With the amount of repair work this shell has had to its sills (inner and outer) I did not want to commit to a weld-in cage as mentioned previously in this thread. I had been keeping an eye out for a second hand bolt-in type, either Safety Devices or Wiechers Sport. I spotted one for sale so went to pick it up...
It was an interesting 400 mile round trip to say the least.... Wiechers Sport 6 point, with single door bars and harness bar. With the door bars being bolt-in, I wanted to modify them into a double, but obviously keep them in such a way so they can be removed. Started by picking up some OMP fittings, 40mm CDS and various other bits - then spent a few evenings cutting and profiling to get them just right.
The whole cage was then removed and dropped off to be powder coated in a slightly more subtle colour. Whilst that's been away I have welded some oversized 3mm plate to either side of the chassis on all 6 locations, then seam sealed and painted, ready for it to be bolted in. A couple of days later it was back, so the only thing left to do was get it in the car..
After finishing a few odd jobs, it was ready for Cadwell.
The car was brilliant all day without any issues - the LSD is starting to make a bit of noise when its really hot which is something that's going to get attention but everything else was spot on. Engine wise - the standalone has transformed the engine, especially mid-range just where it was needed.
https://www.youtube.com/watch?v=oM0VsrBA2I4
https://www.youtube.com/watch?v=4JqyW6__Mis
As mentioned above, LSD rebuild is the next job. The breakaway torque is well down at 30lb/ft, and the pinion bearing is getting quite noisy - its history and mileage are unknown, so I wanted to strip it down and see. The past few weeks have consisted of collecting parts. My current final drive ratio is from a standard E36 M3 - 3.15:1. Luckily with BMWs, a lot of that era (E28, E30, E32, E34, E36) used the same dimension hardware (ring gear and pinion) inside the differential, which makes a lot of ratios available to 'build' your own.
With my S5D320Z 5 Speed Gearbox, 6500rpm limiter and 205/45/16 wheels, the road speeds are currently:
I am changing to a 3.46 ratio, using the same gearbox, limiter and wheels, which is generally regarded as a better ratio when you don't need top speed. Road speed comparison:
I picked up an open differential from an E34, and stripped it apart for the 3.46 ring gear and pinion..
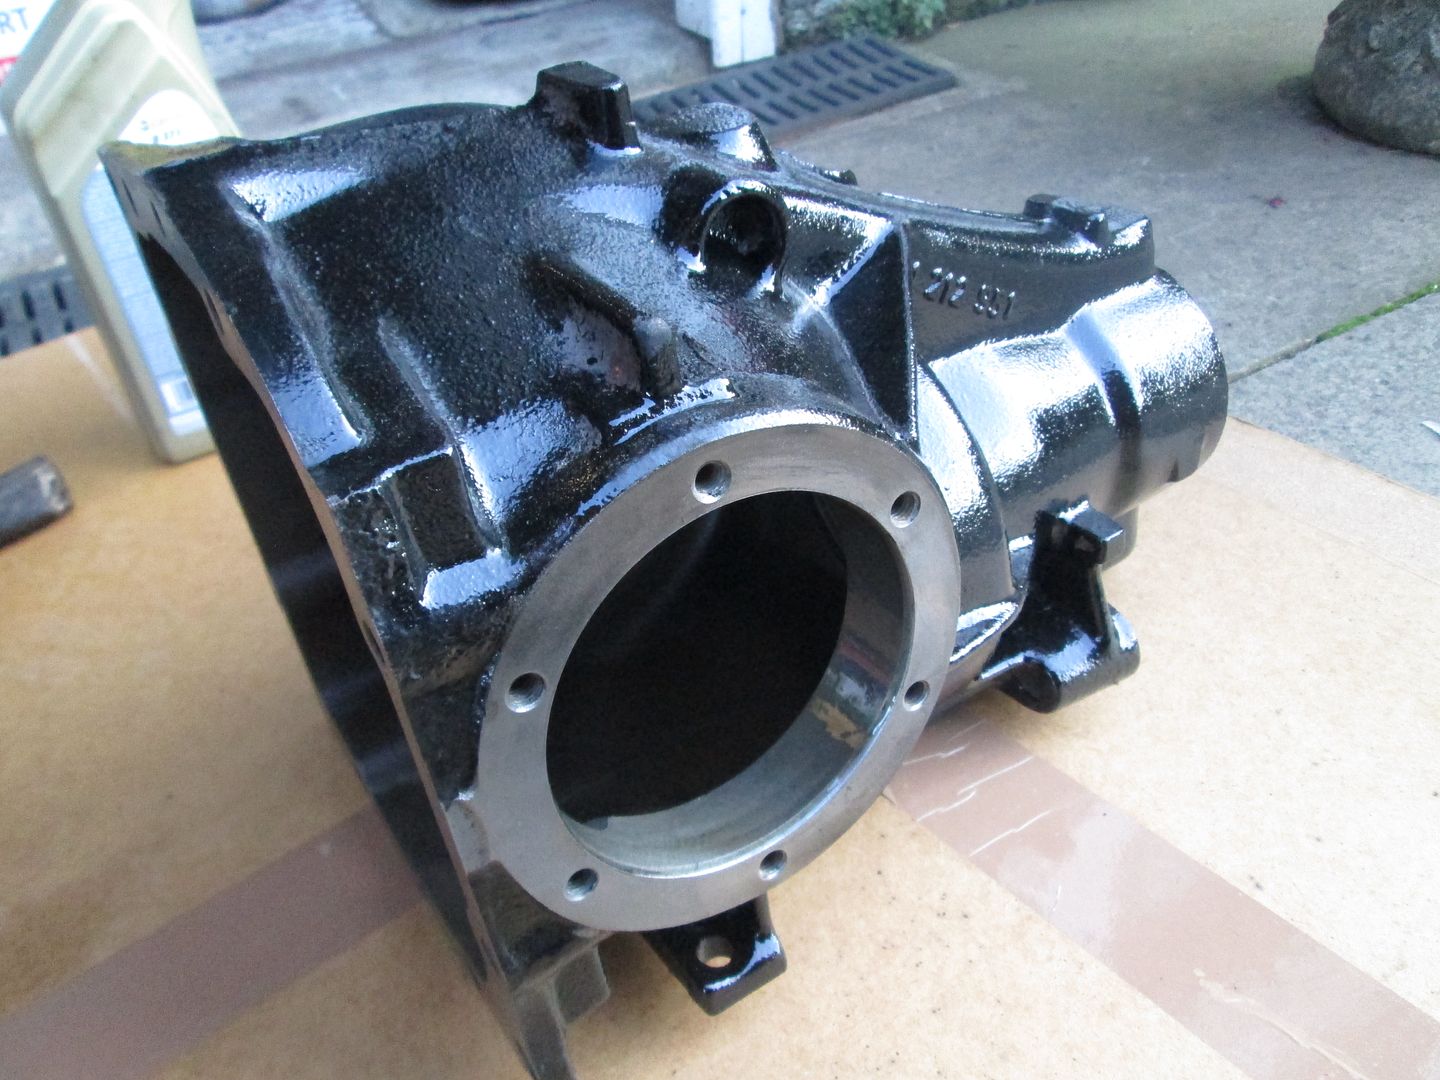
I've since stripped a couple of my spare differentials apart and had the casings sand blasted, so the new unit will start from a clean case. I stripped down the LSD unit..
The friction discs are well worn (1.93mm down from ±2.0mm when new), the contact plates have also seen a small amount of wear, although they are being replaced anyway..
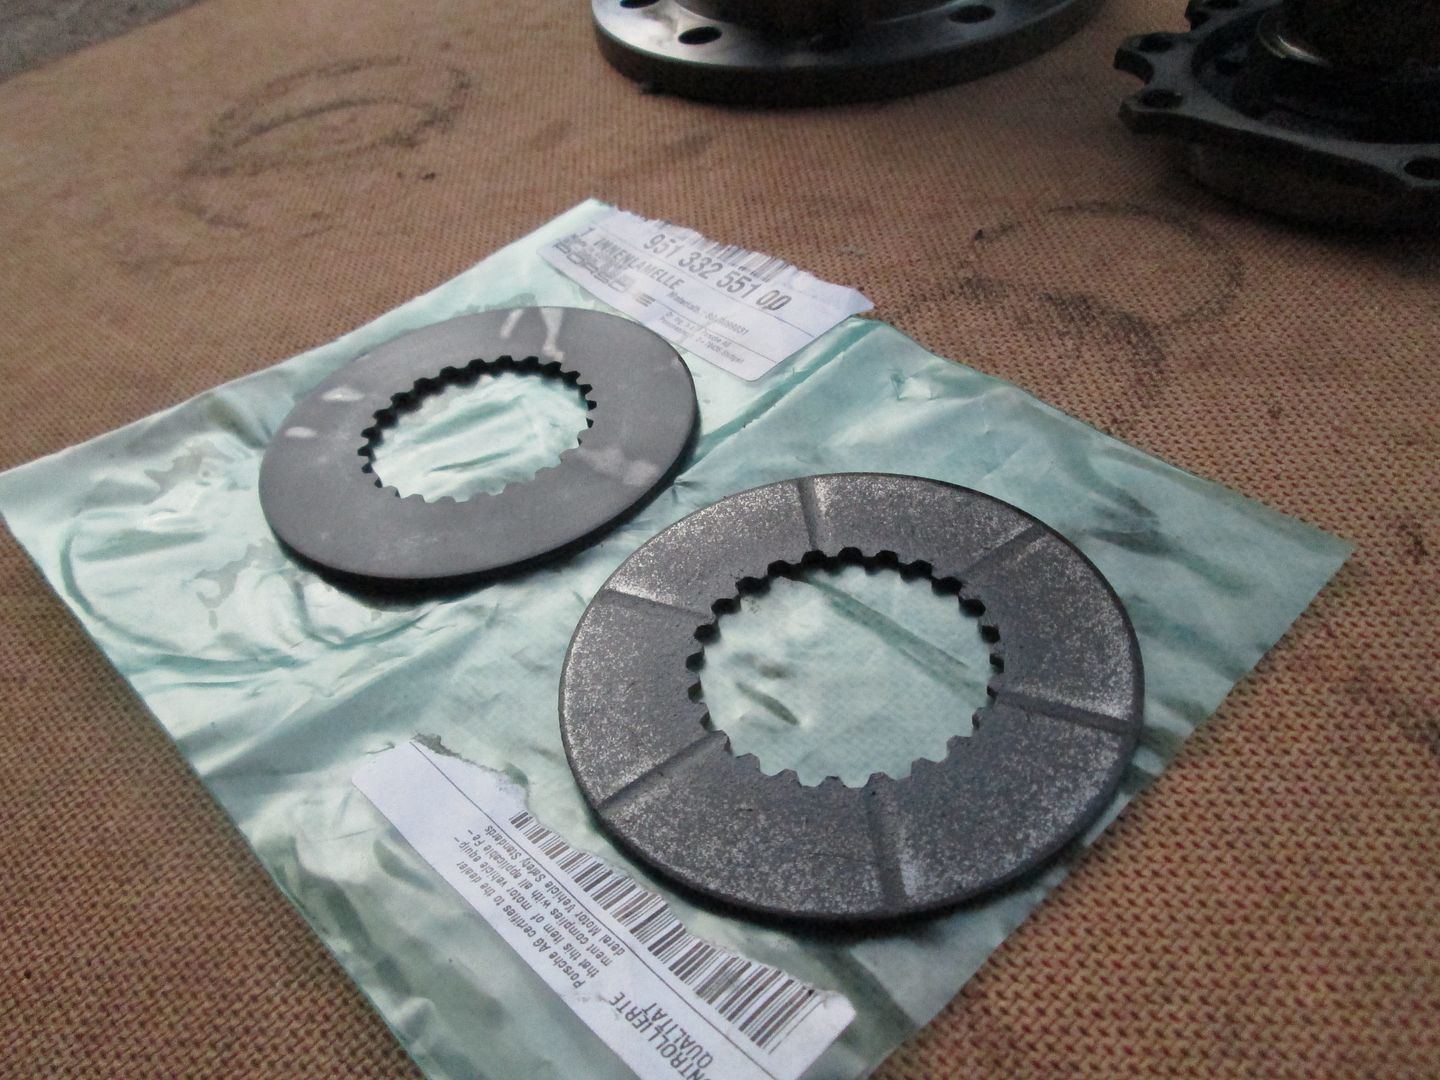
With the ±2.0mm BMW discs no longer available, most suggest running a Porsche 2.5mm clutch disc. To keep the stack height the same, the extra thickness has to be lost on the 'dog ear' plates. My unit had 2.1mm plates fitted, so I have dropped to 1.6mm - also available from Porsche. Clutch disc comparison..
Once the last few parts arrive I will get on with building and setting up the unit, hopefully soon...
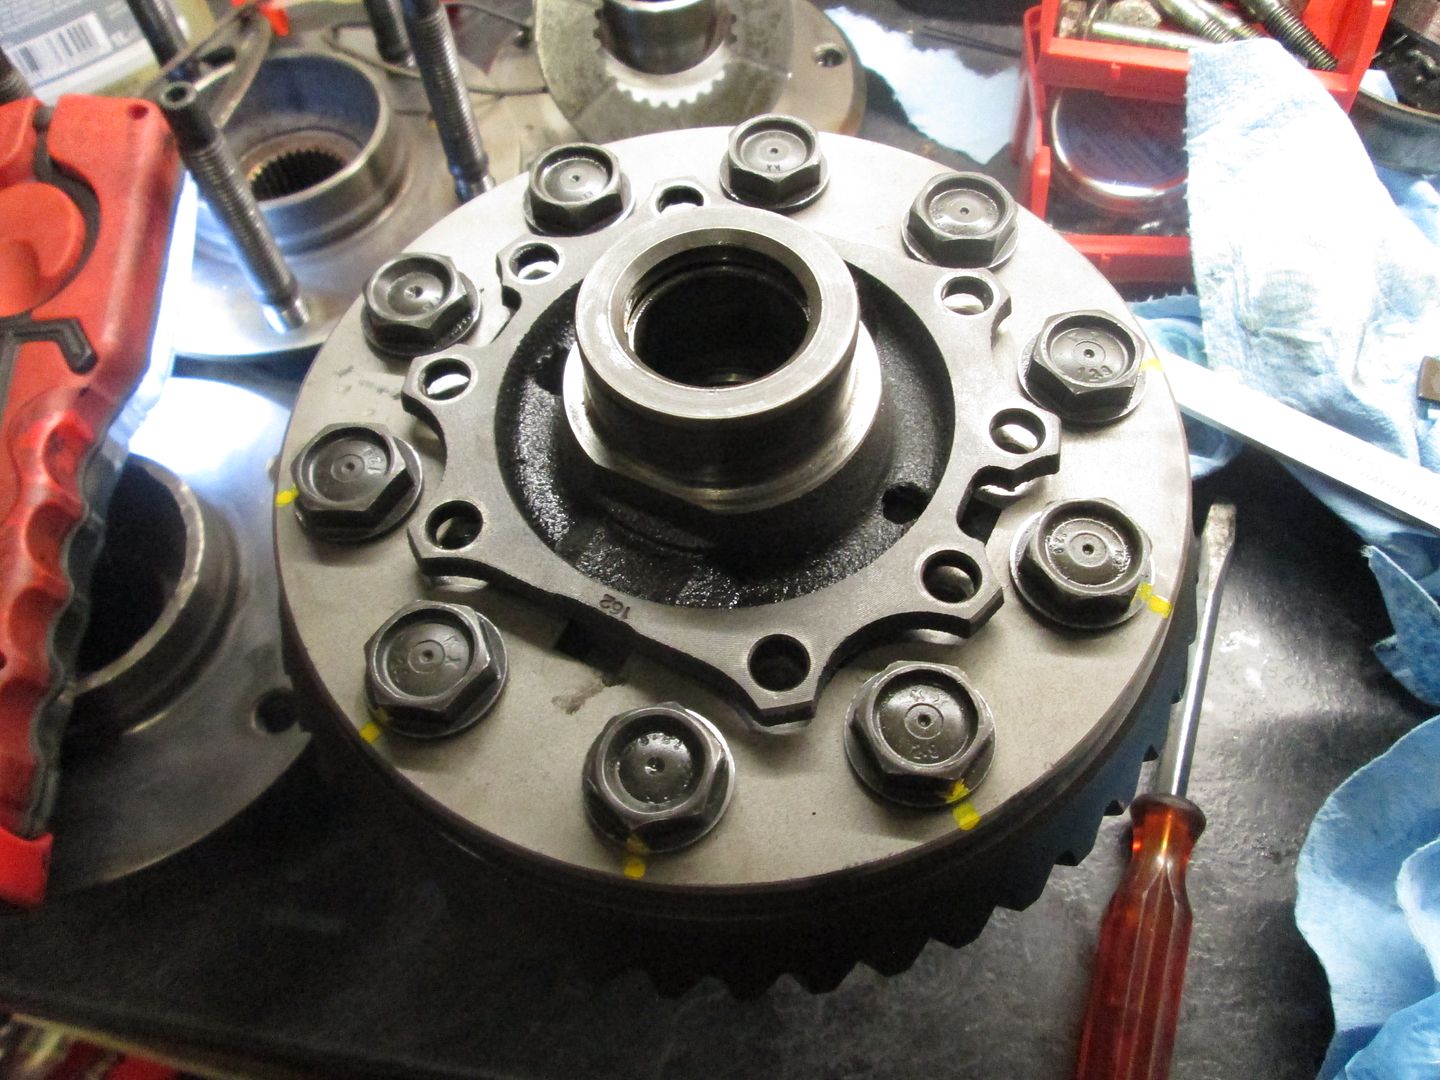
After getting the final internal LSD bits I got on with putting them together. First on was the 3.46 ring gear, with Loctite 271 on the bolts and torqued to 110lb/ft.
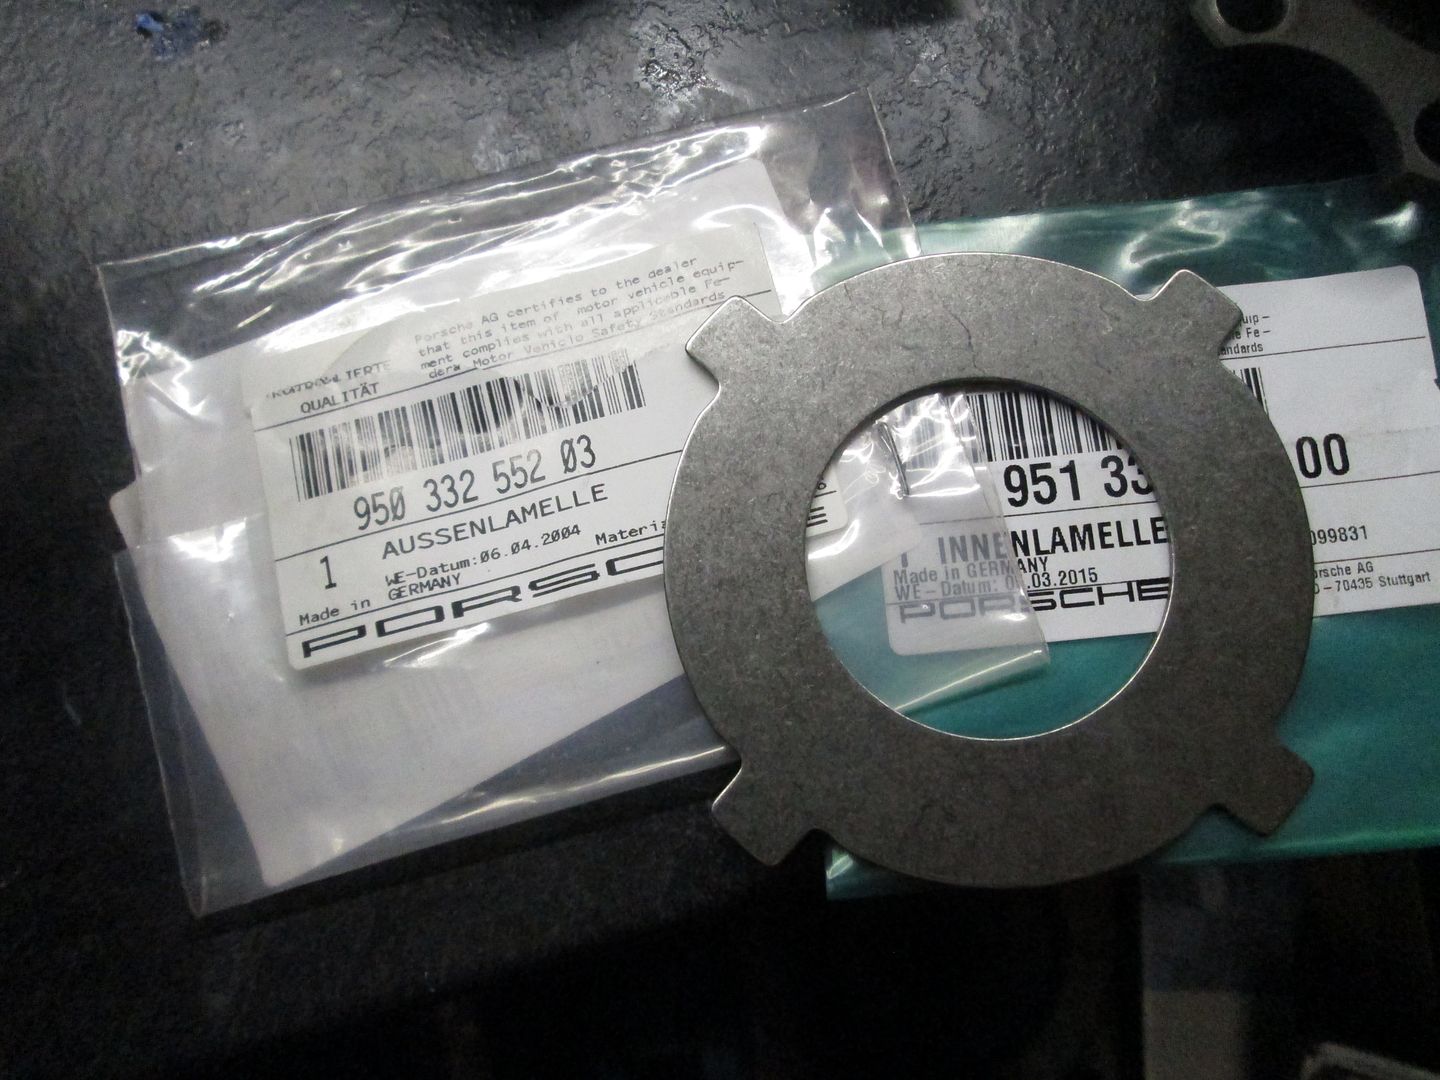
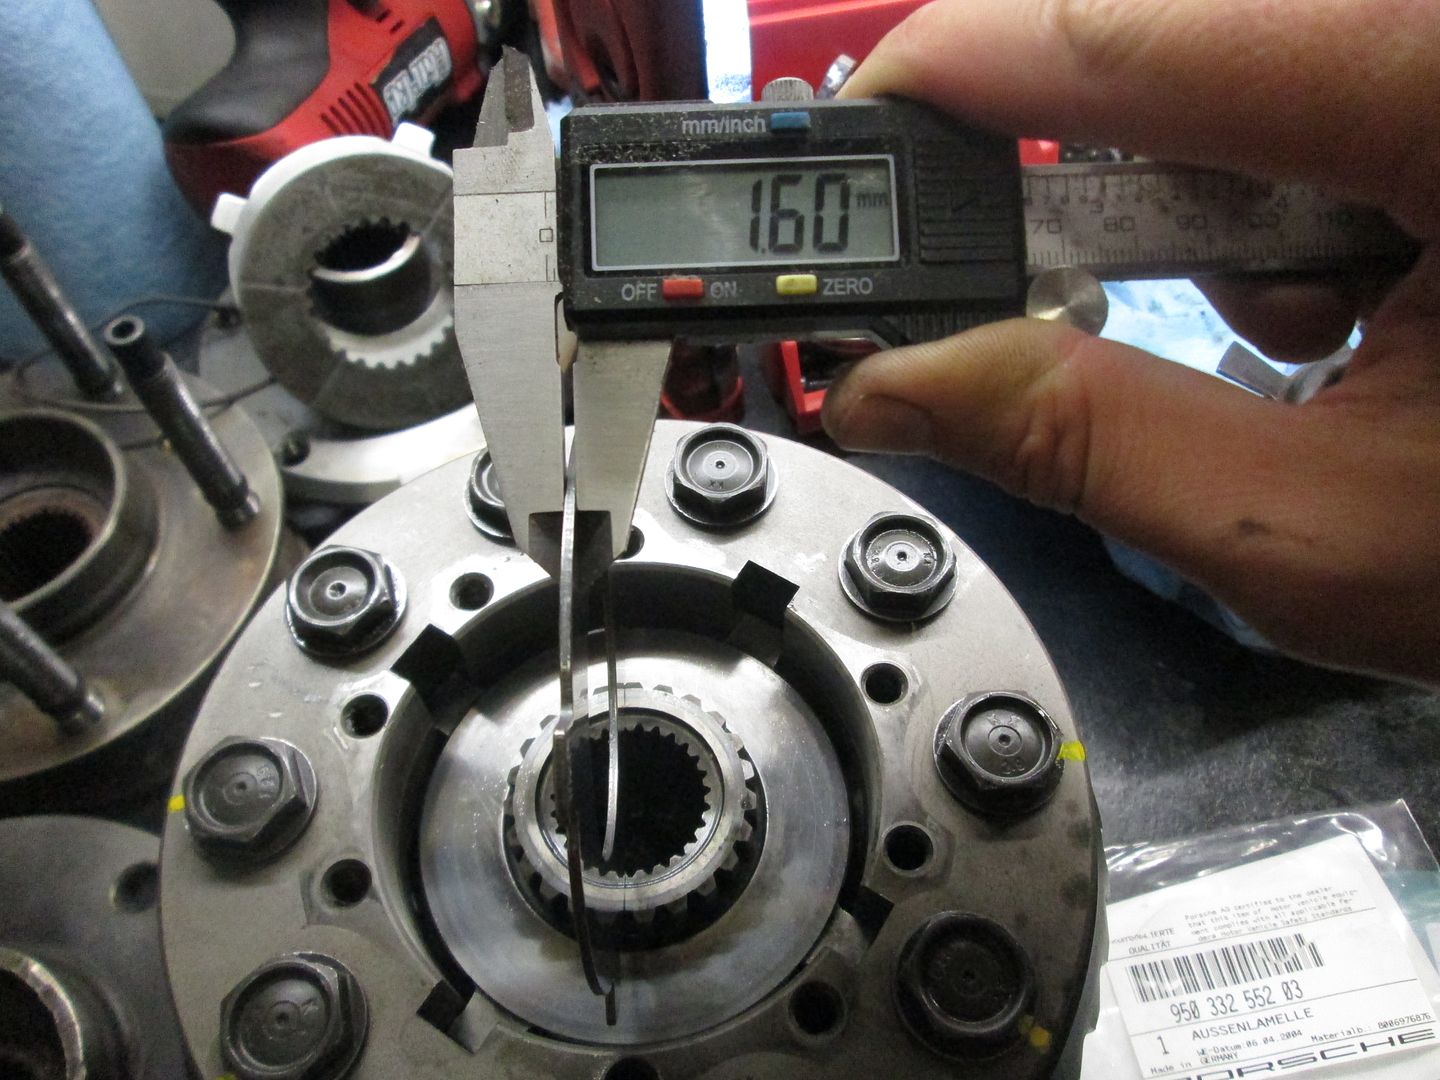
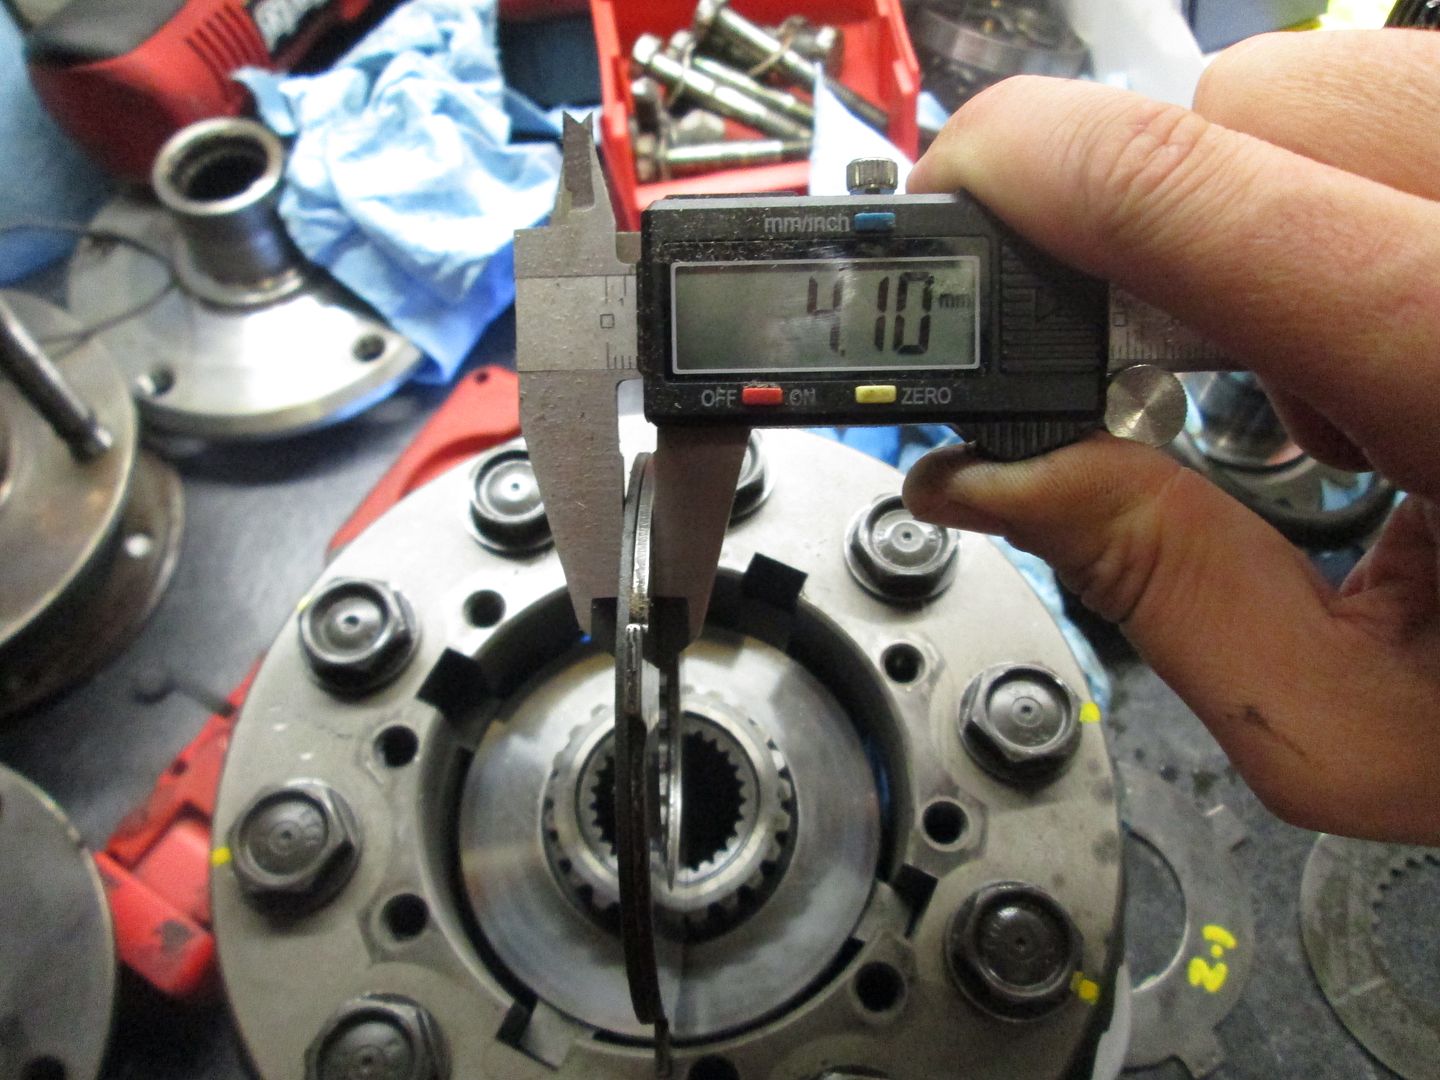
The standard 'clutch stack' is made up from a 2.1mm spacer plate, and the 2.0mm friction disk, giving a total of 4.10mm. There are two pairs of these inside. I'm using the Porsche friction discs, which are 2.5mm (2.0mm not available any more), I needed to use a thinner spacer plate to keep the same stack thickness. Back to Porsche and a couple of days later I had some 1.6mm items..
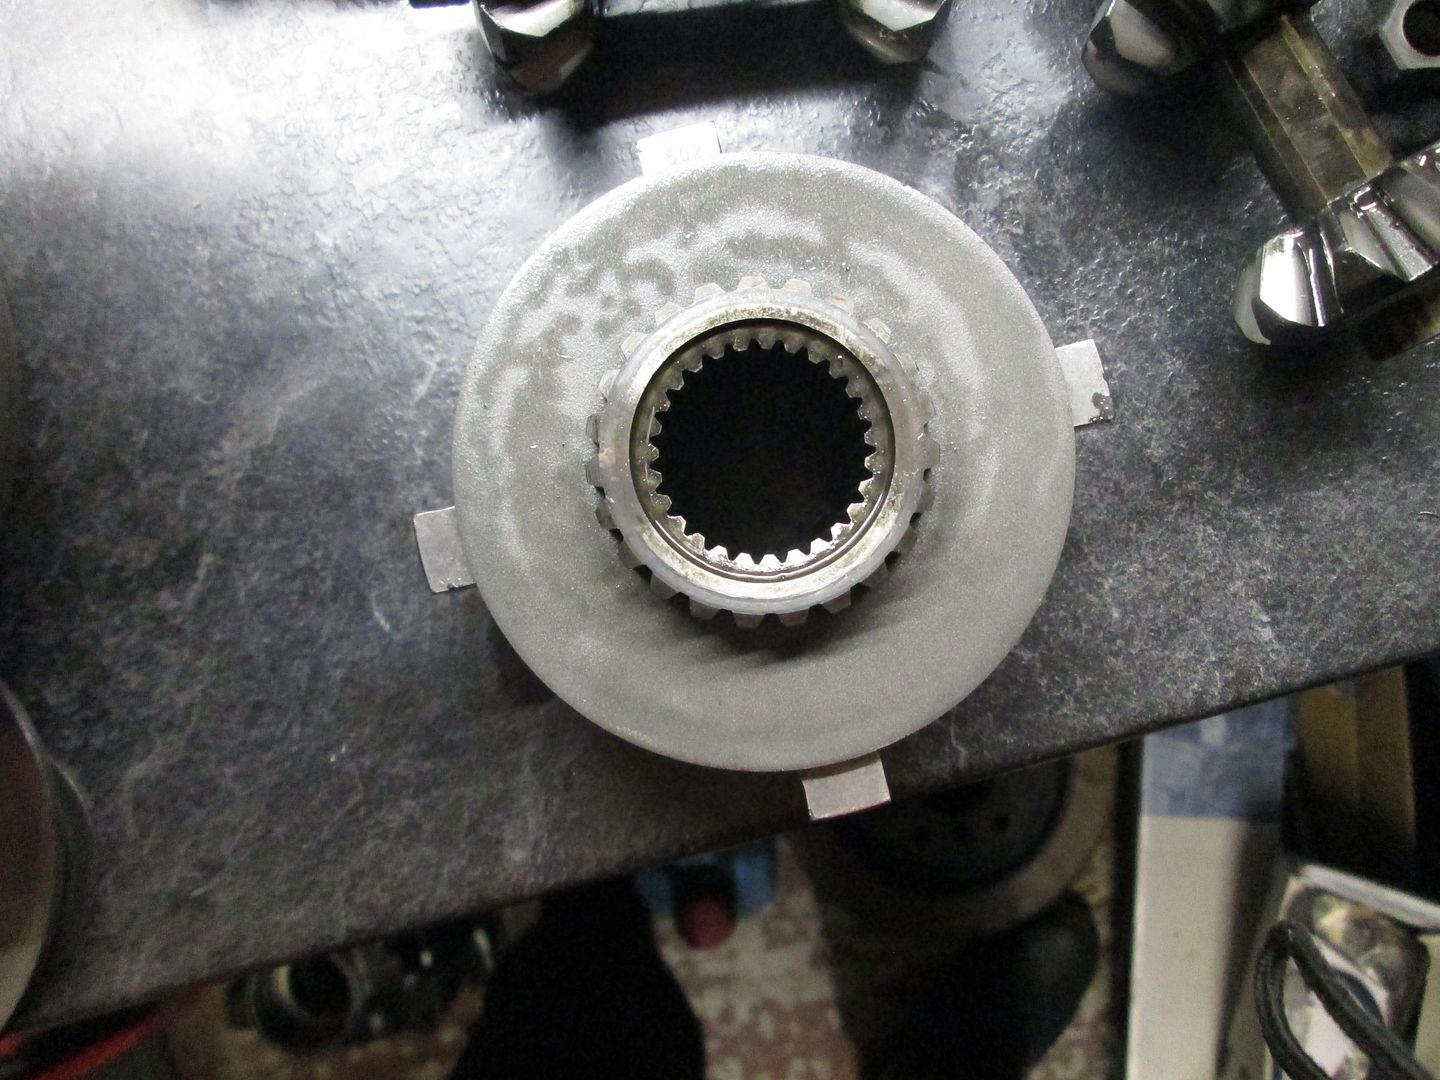
Then combined with the 2.5mm friction disc, it keeps the same original thickness..
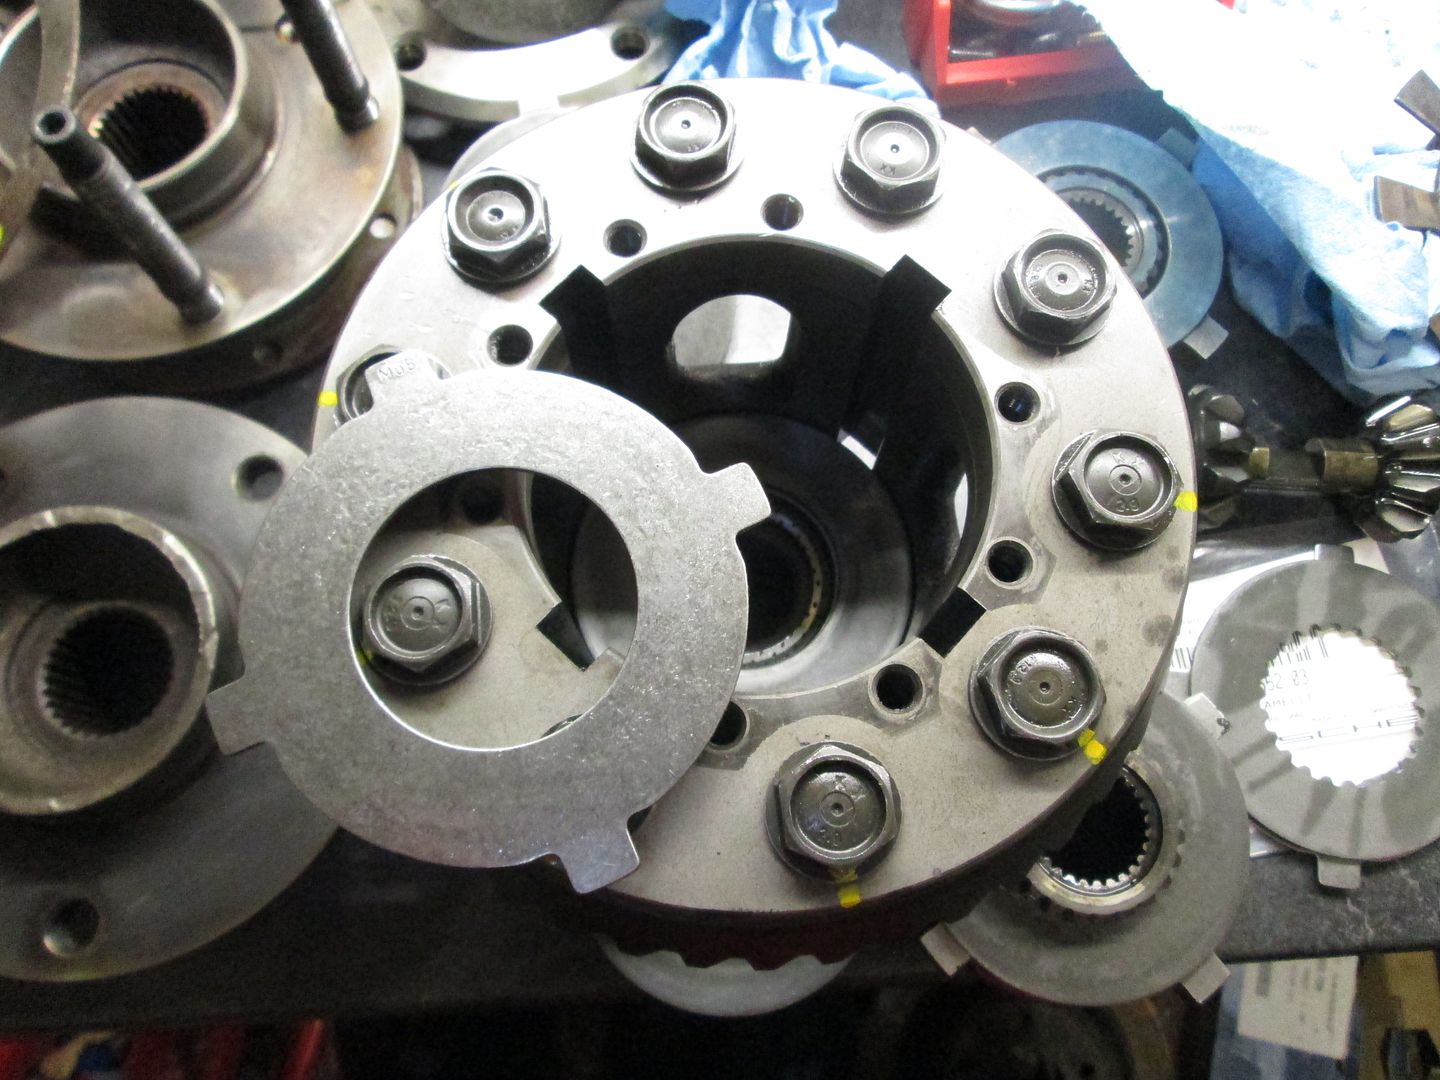
The housing was cleaned out then parts fitted in order. First is a 4mm thick spacer plate which sits in the bottom (many people remove this and fit another set of spacer+friction disk for some 'theoretical additional lock', but its not proven as the stack height is still the same). Inside this there is a washer, sprung belleville washer, and a small solid friction disc..
Next is a large belleville washer, then the new 1.6mm spacer..
The first friction disc was then given a bit of LSD oil, pushed onto the gear and onto the housing, then dropped in the right way..
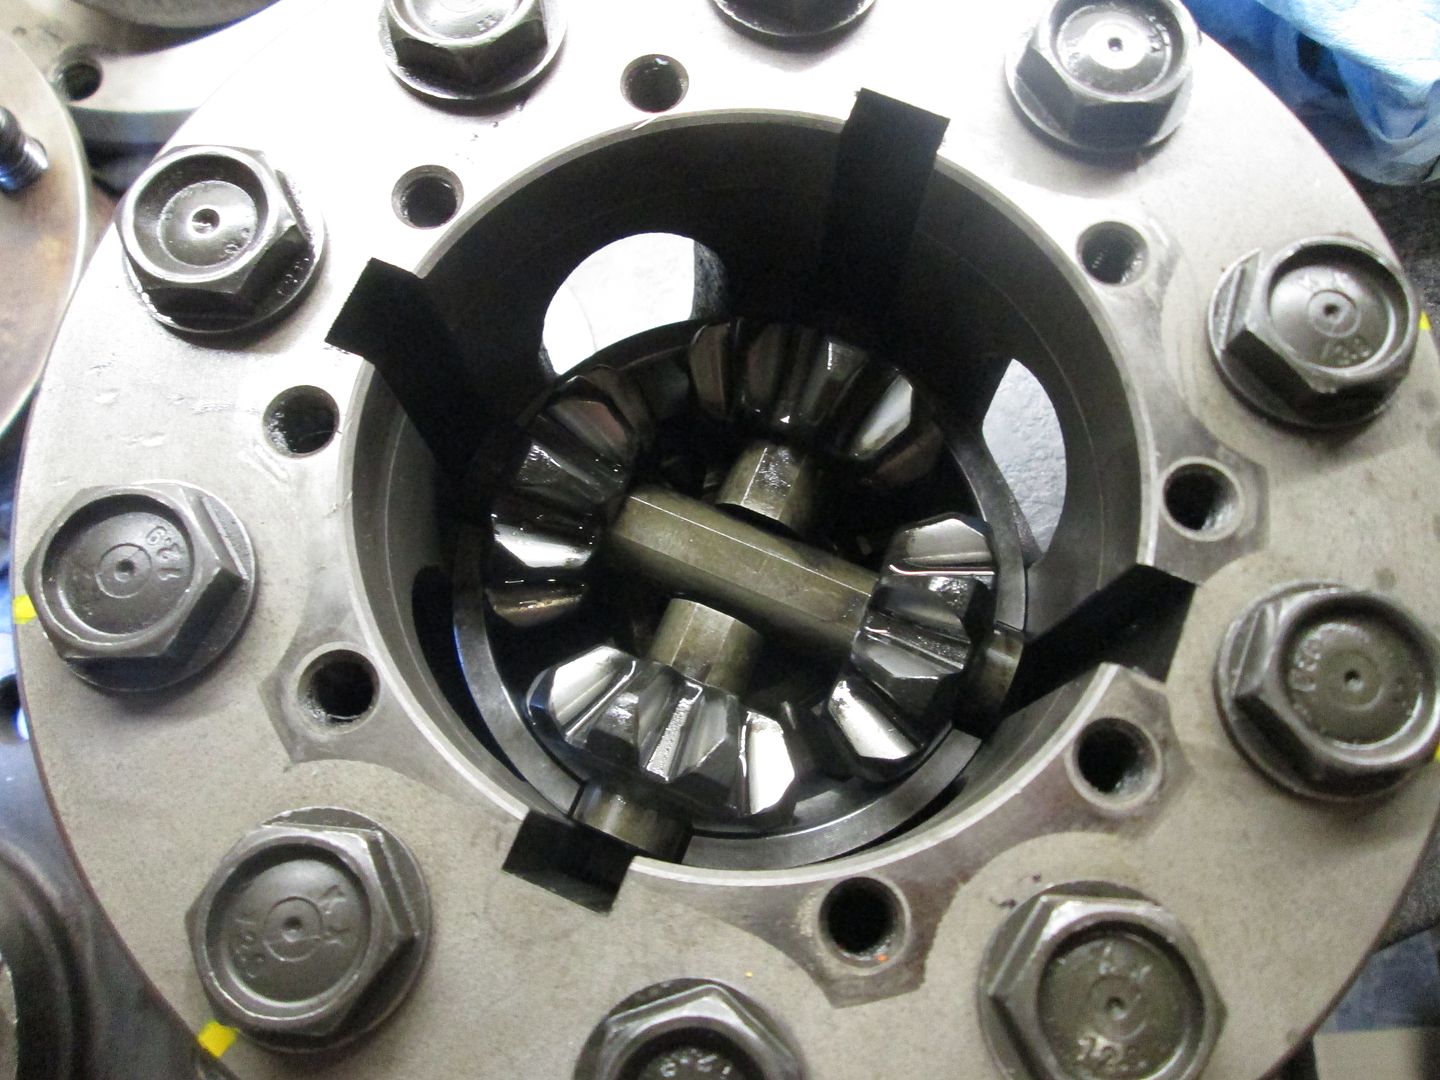
Spider gears and then the upper gear..
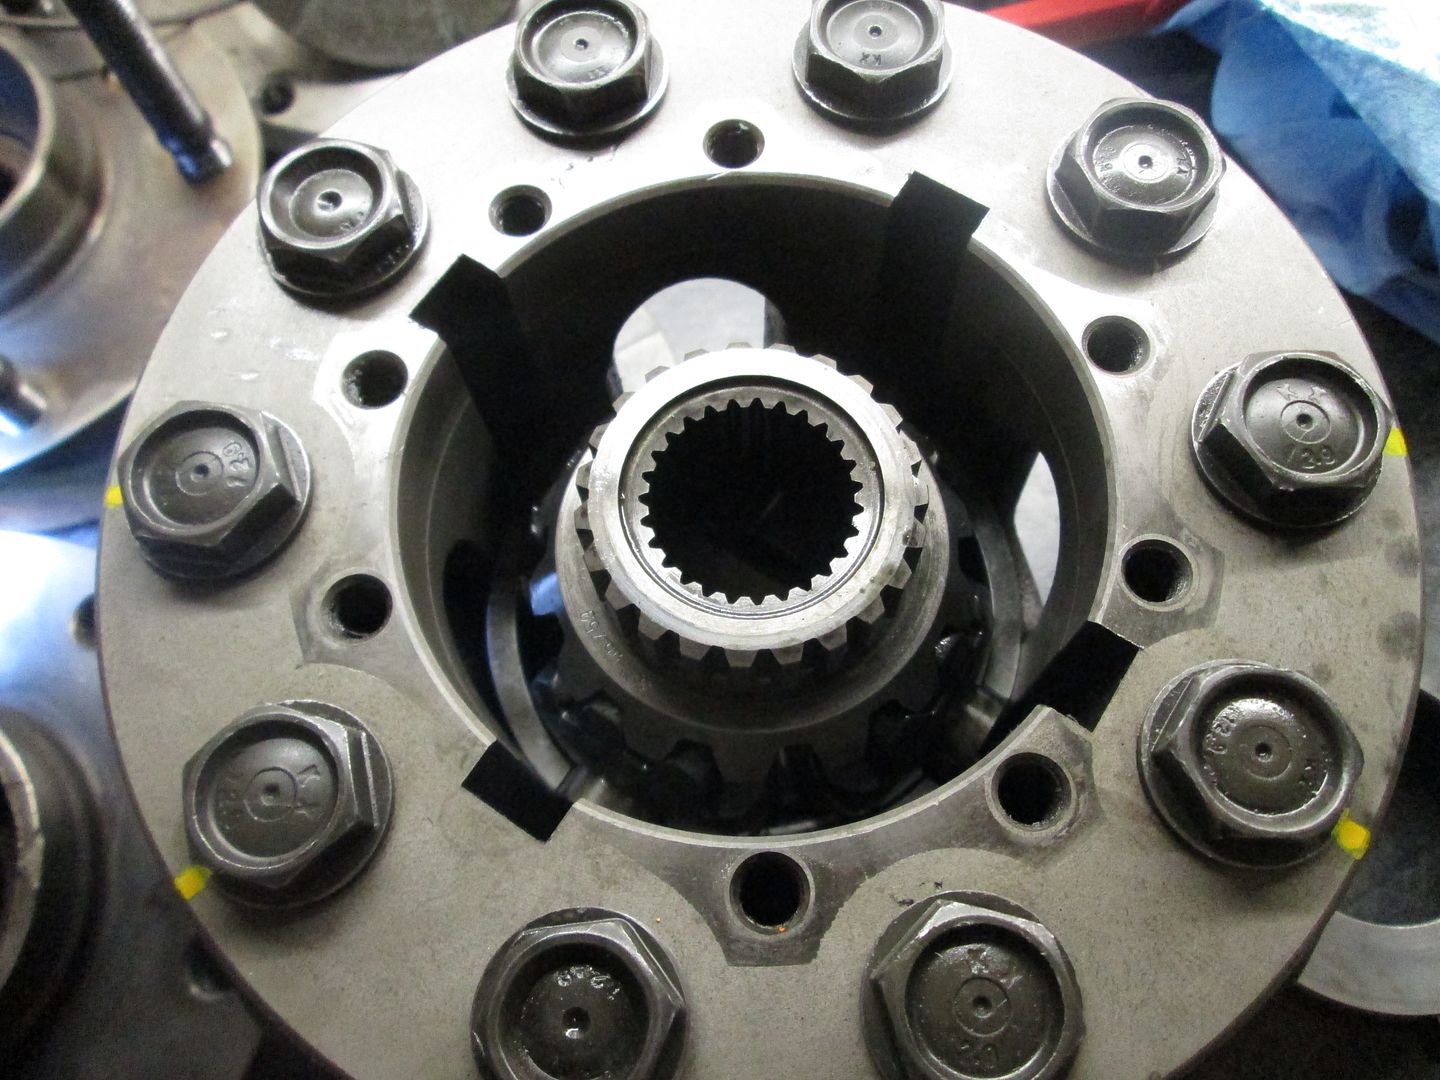
The other housing, second friction disc and last 1.6mm spacer on top..
Outer belleville washer..
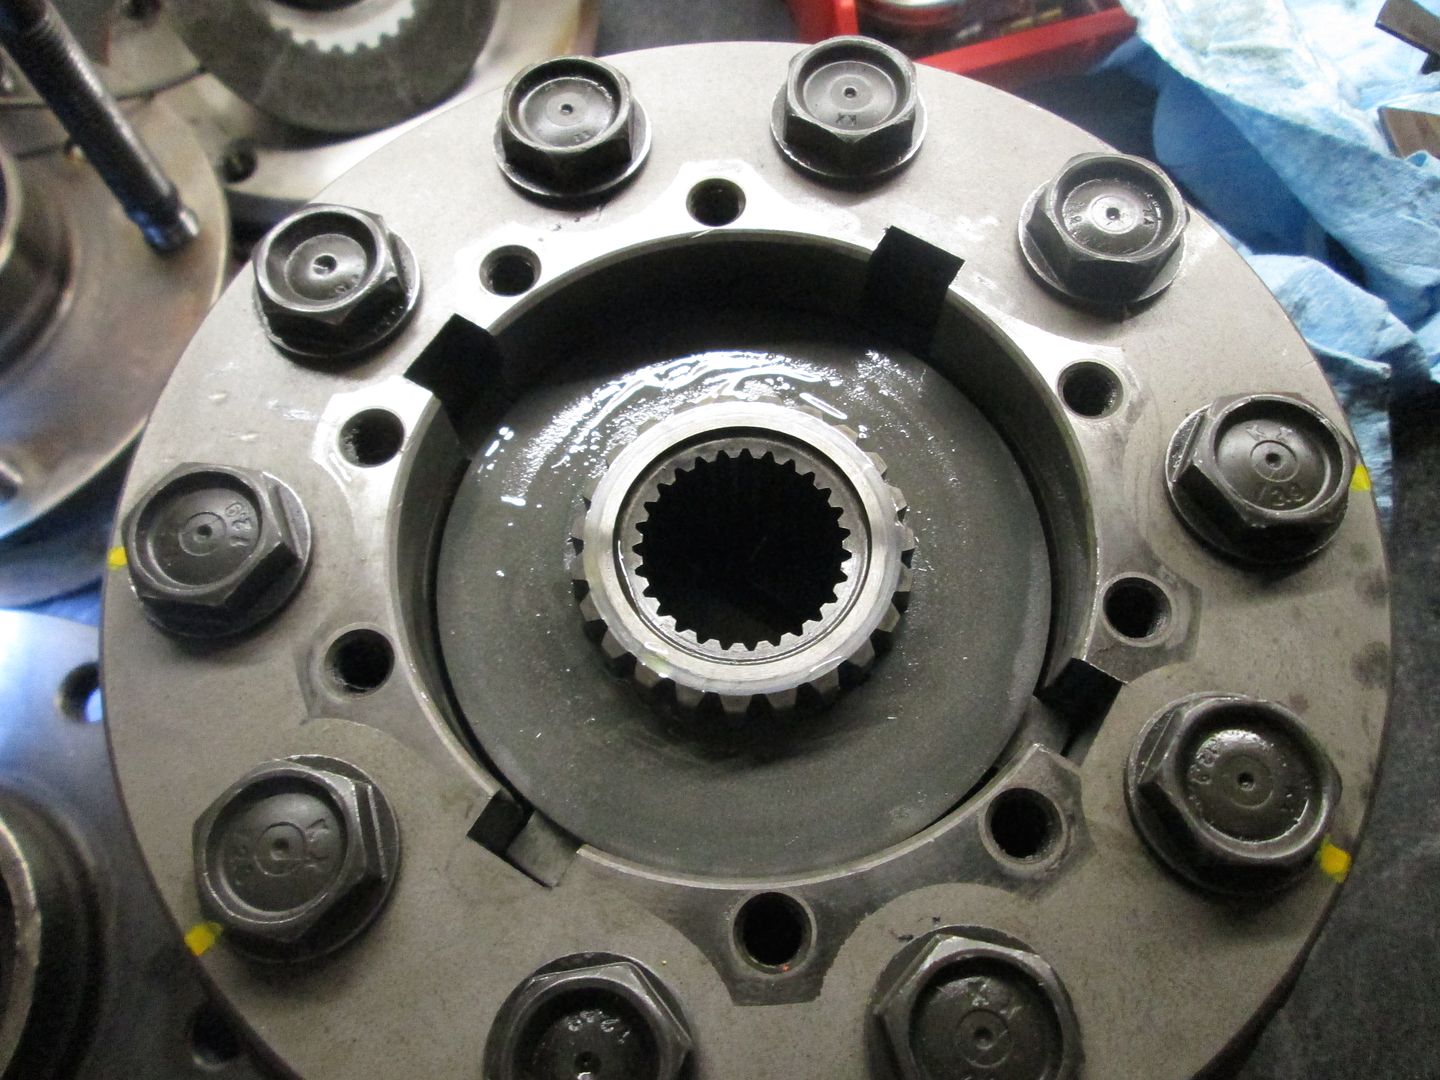
Then the top housing was stacked with the three smaller elements (spacer, belleville washer and small solid friction disc)..
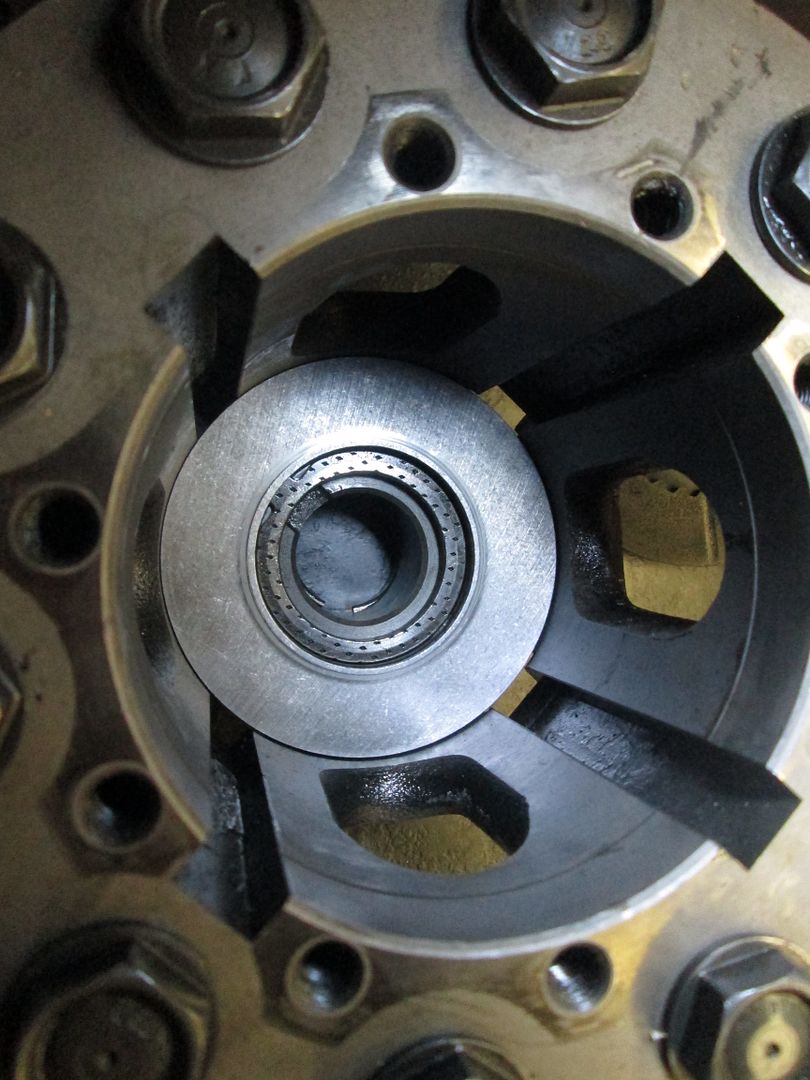
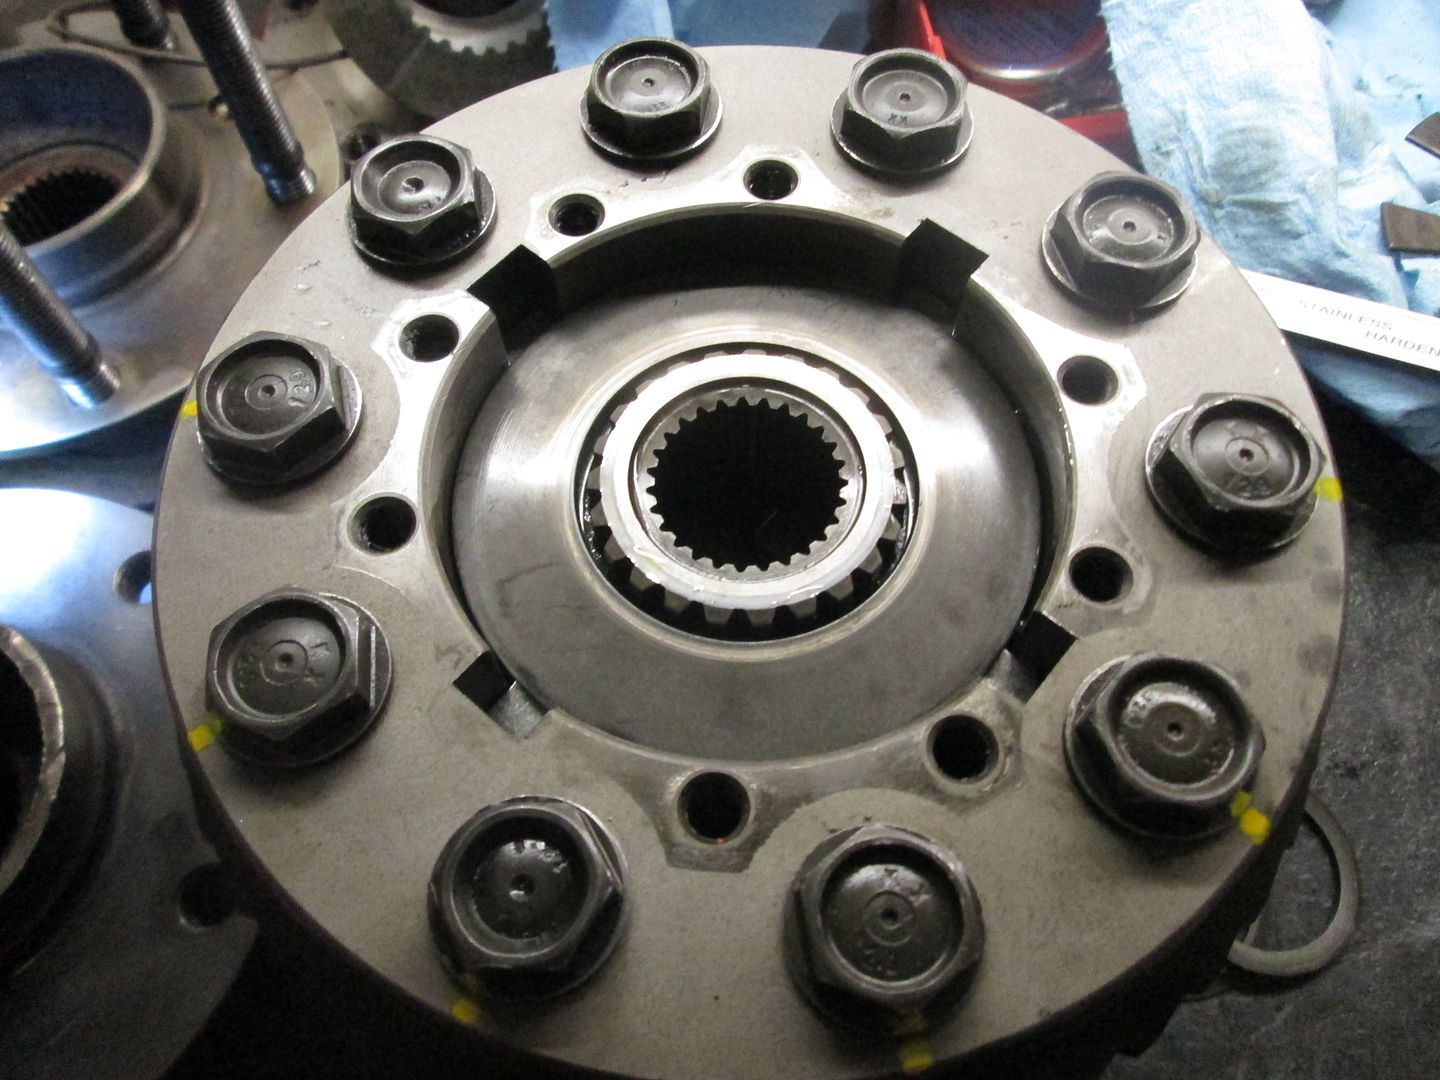
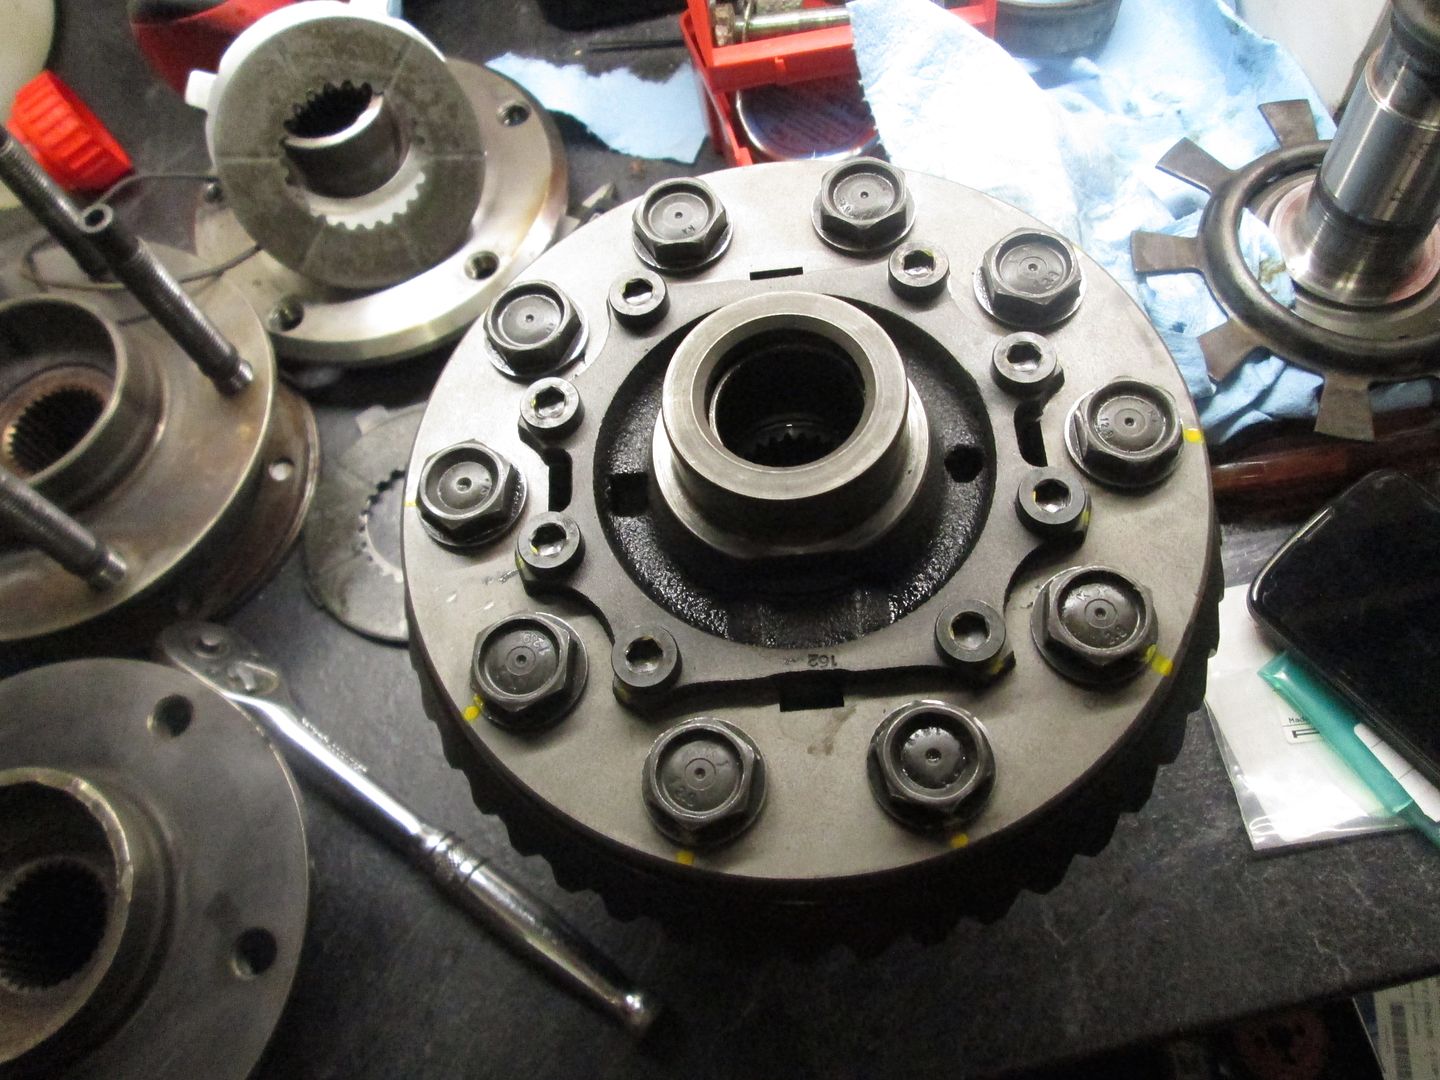
This was then flipped over and slotted into the housing - here it is pushed down until the plates contact, to give you an idea of how much static tension the internals are under. If you had more plates, thicker spacer discs or taller belleville washers this would sit even taller, meaning the unit has more static 'lock'..
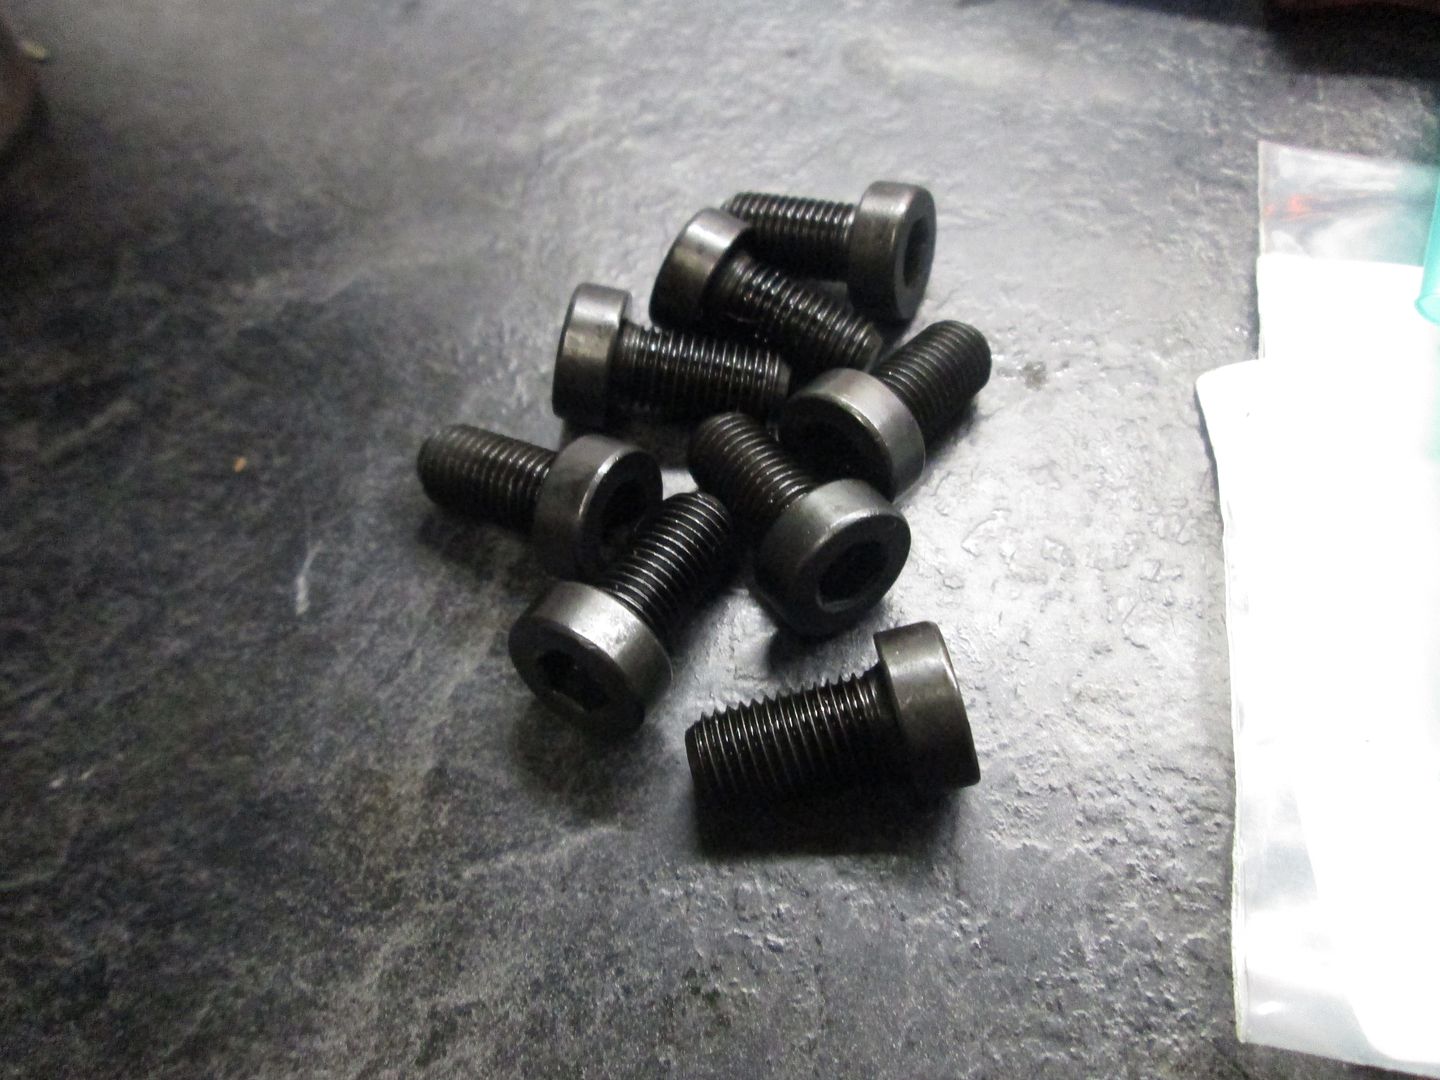
8x new bolts from BMW - Loctite added then torqued to 25lb/ft..
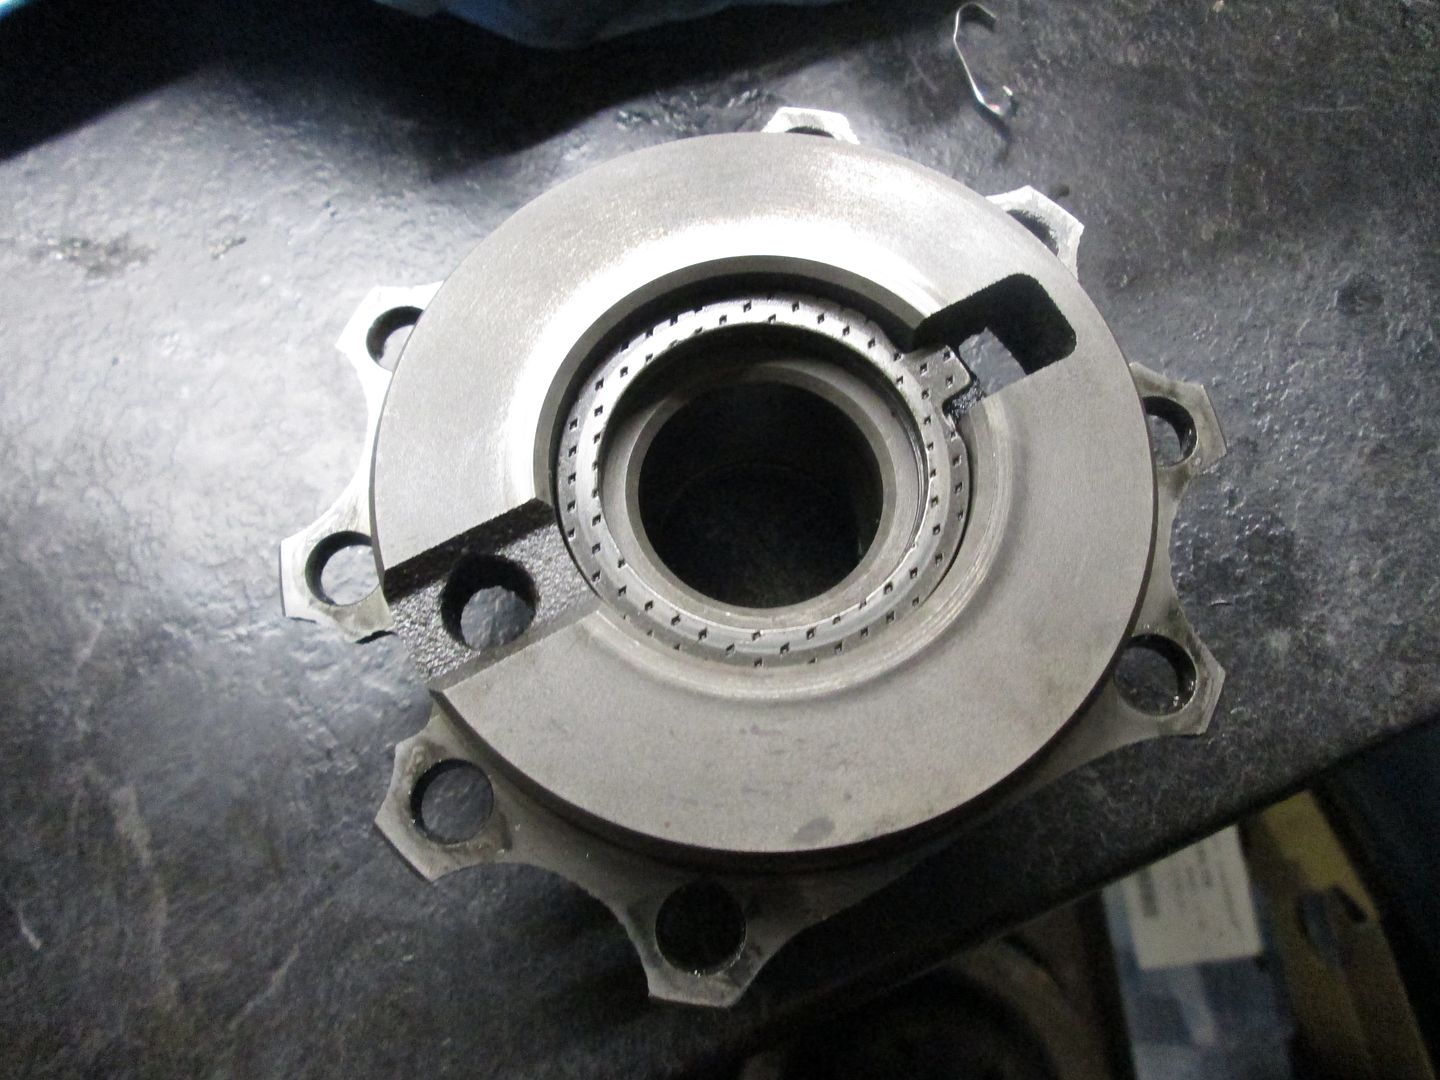
...and thats the LSD unit ready for new bearings and the next steps in the rebuild..
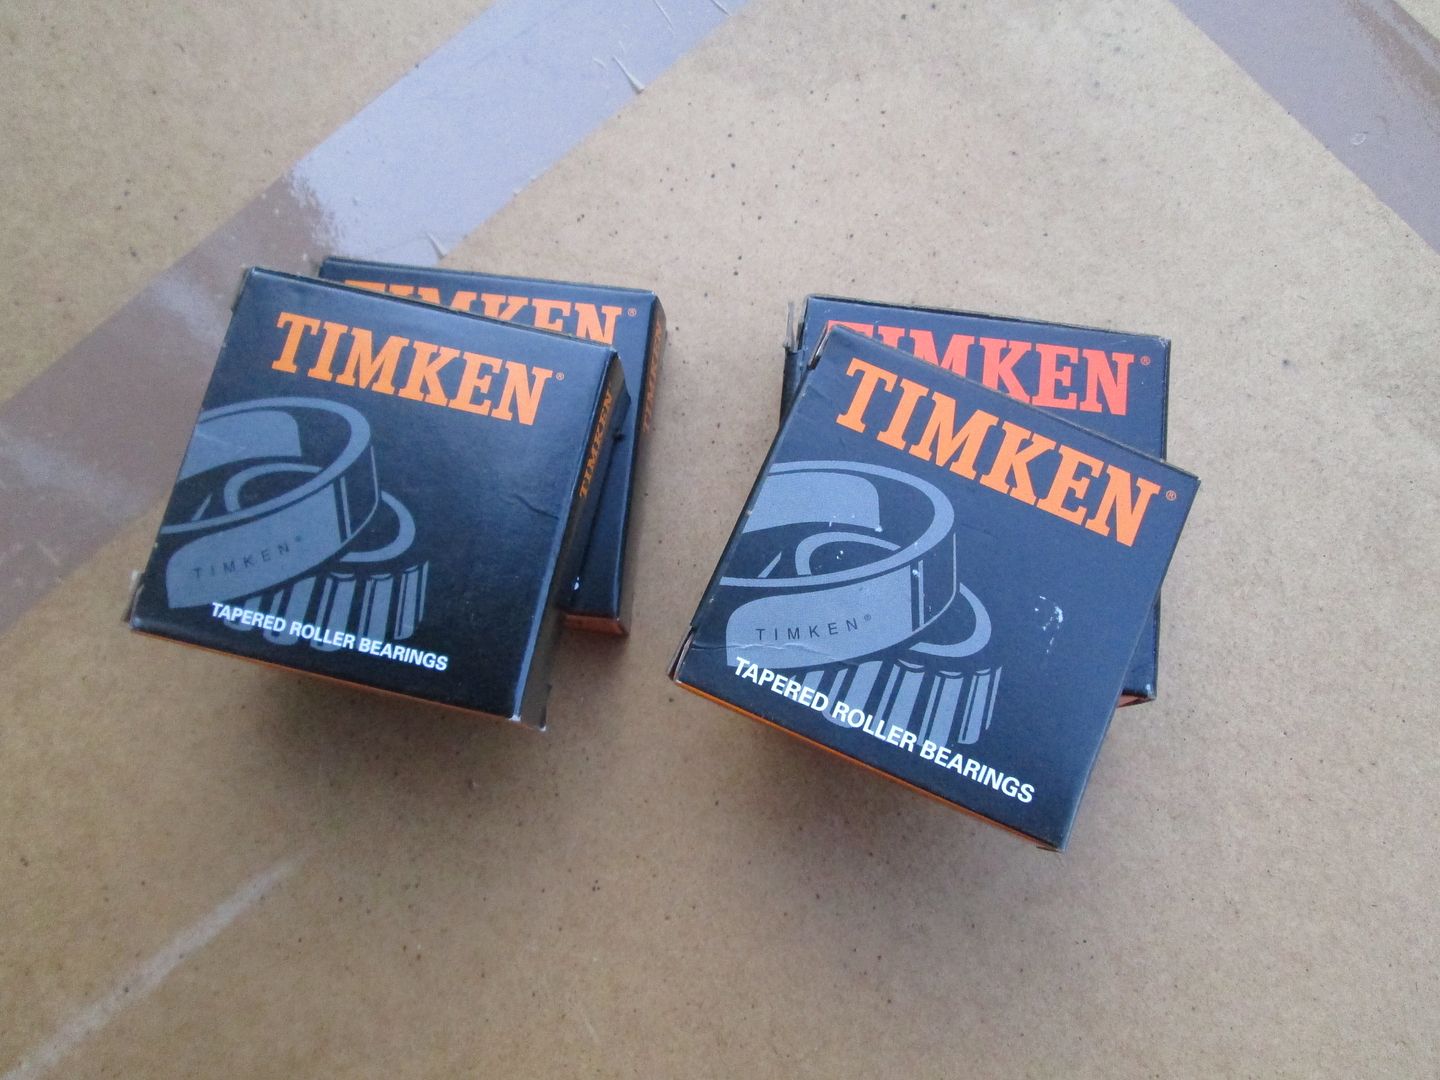
I got a set of bearings, went for a decent brand that most seem to go with...
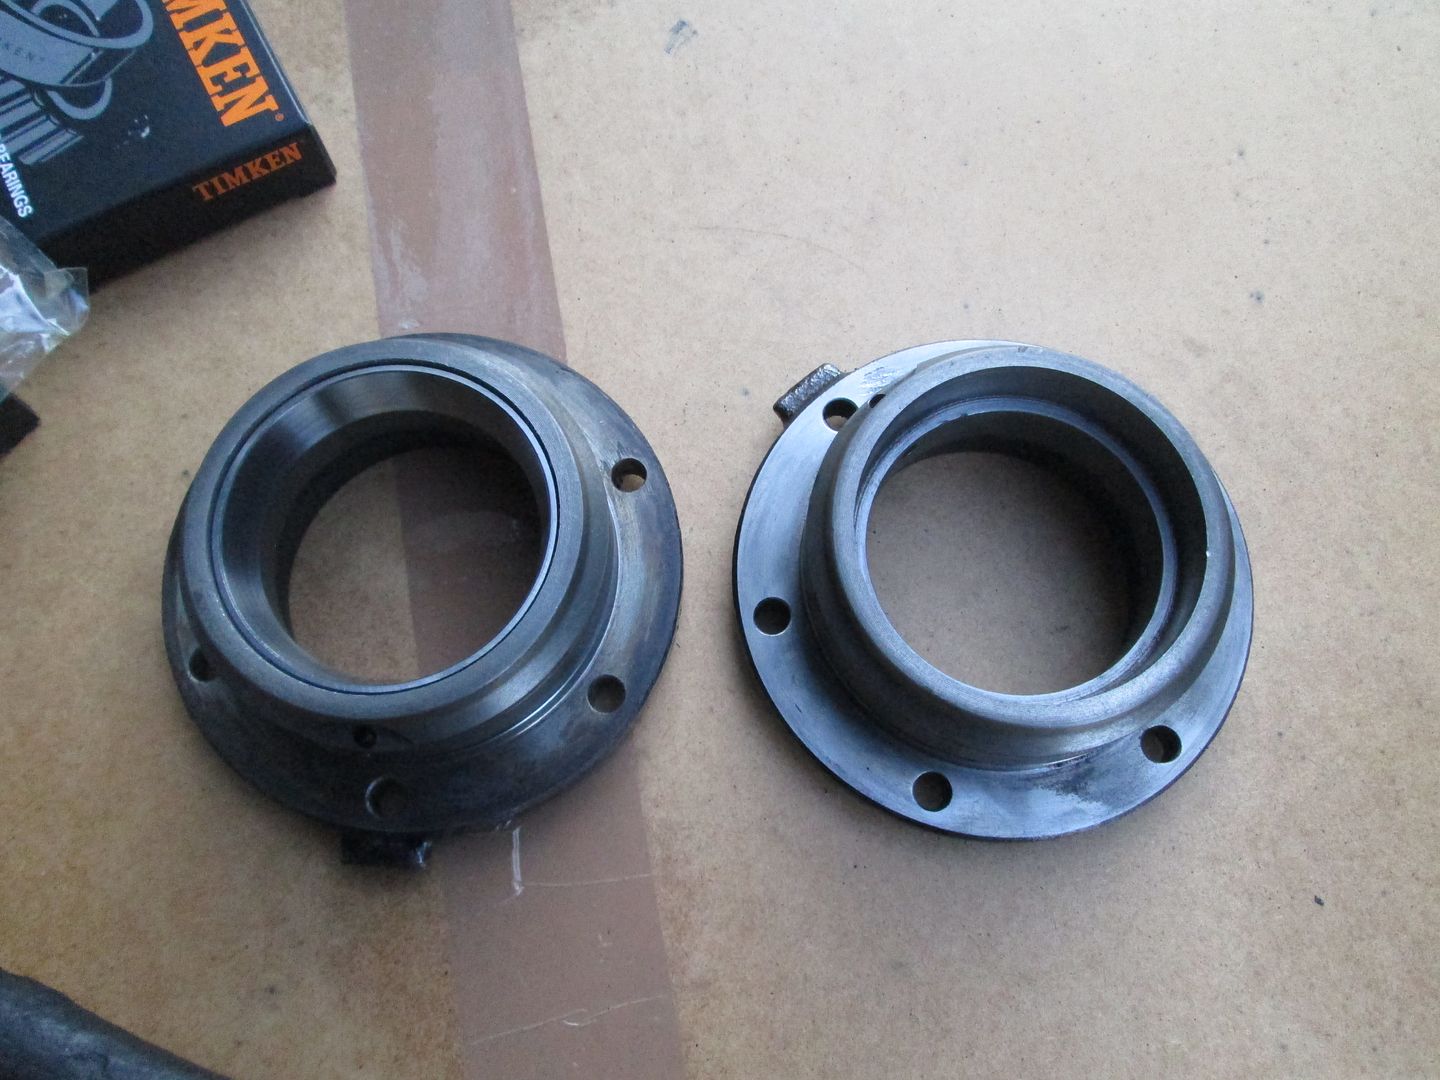
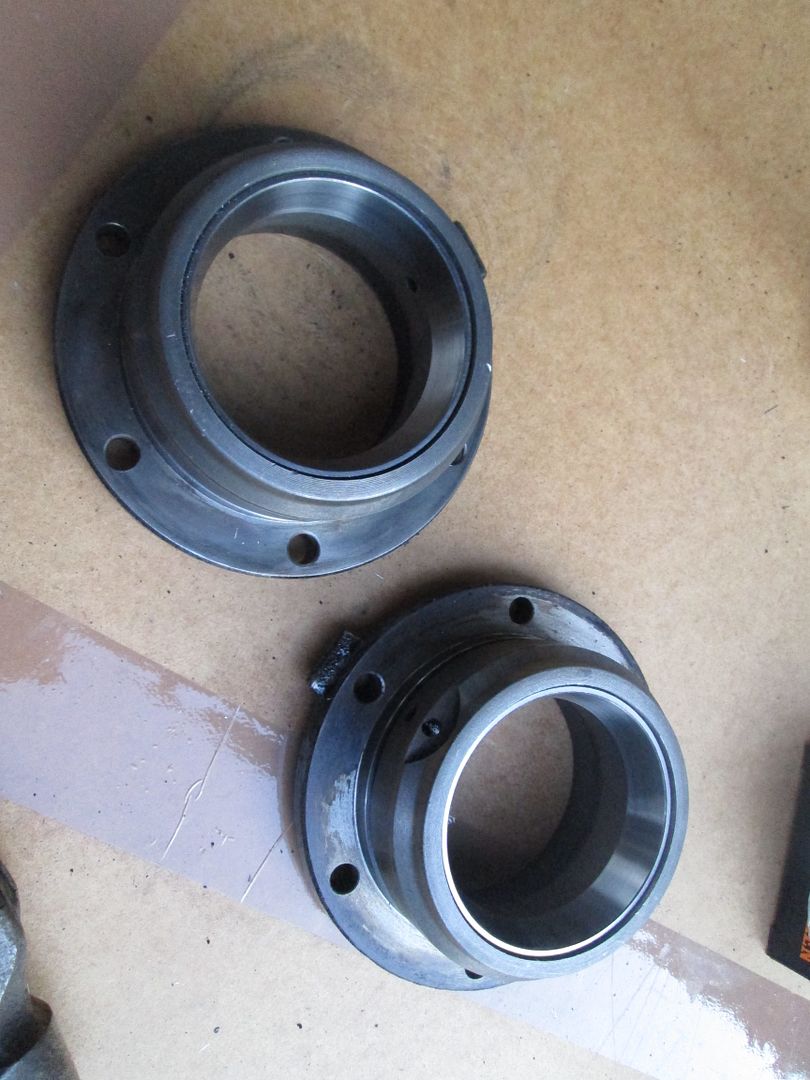
Cleaned the outer housings and drove the outer races into place..
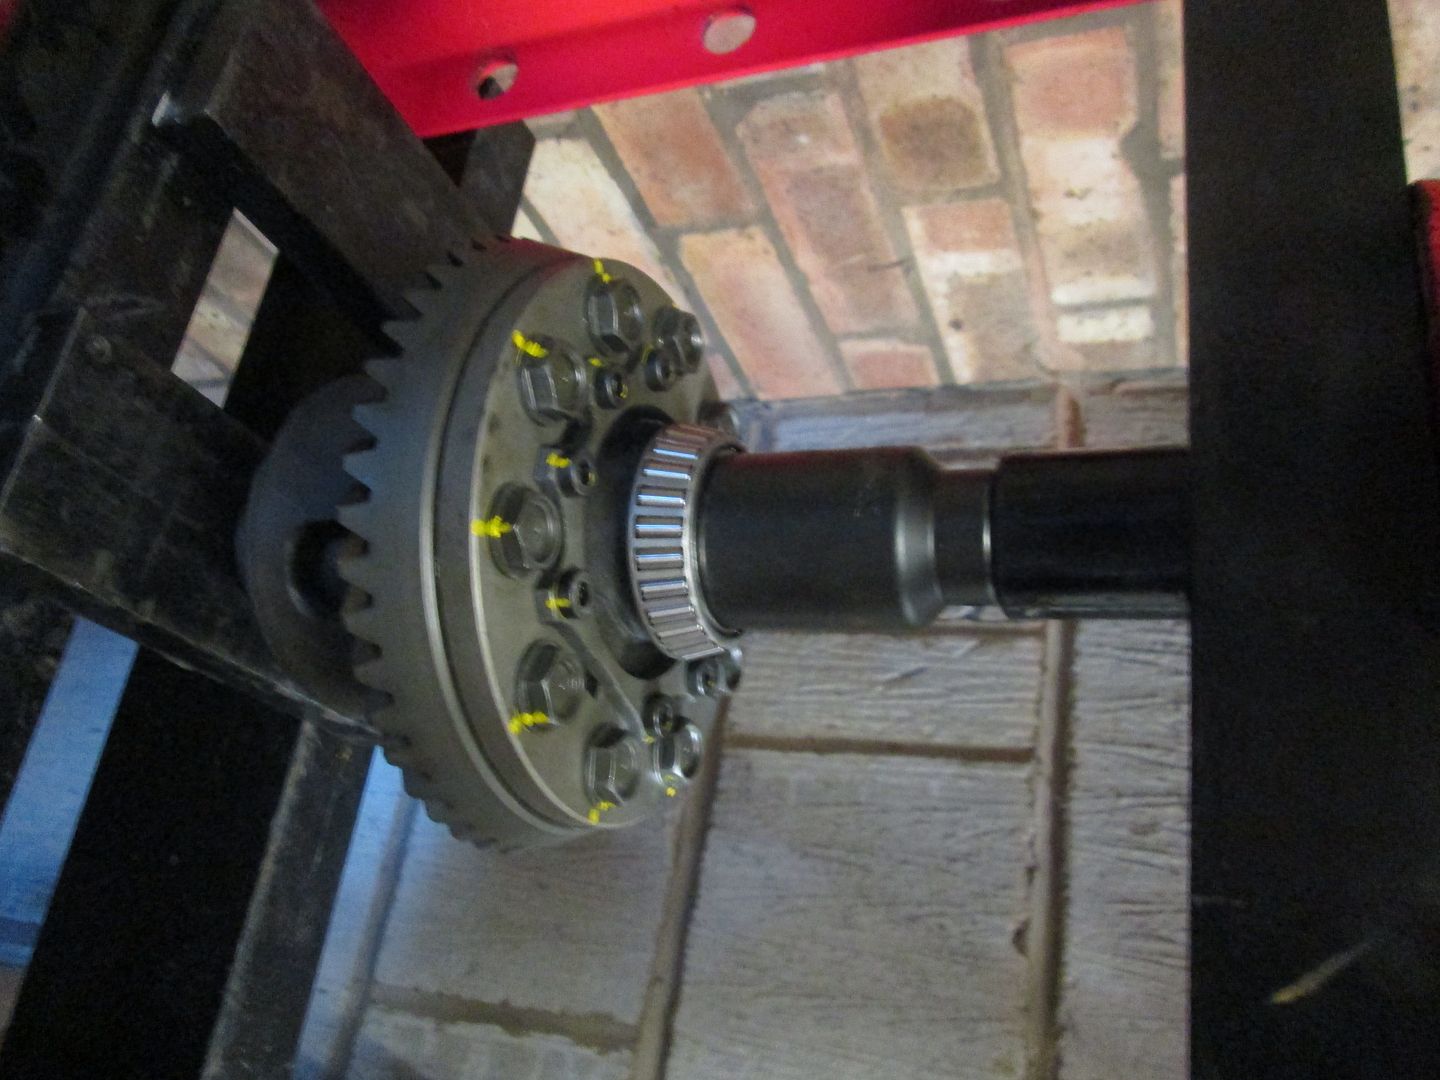
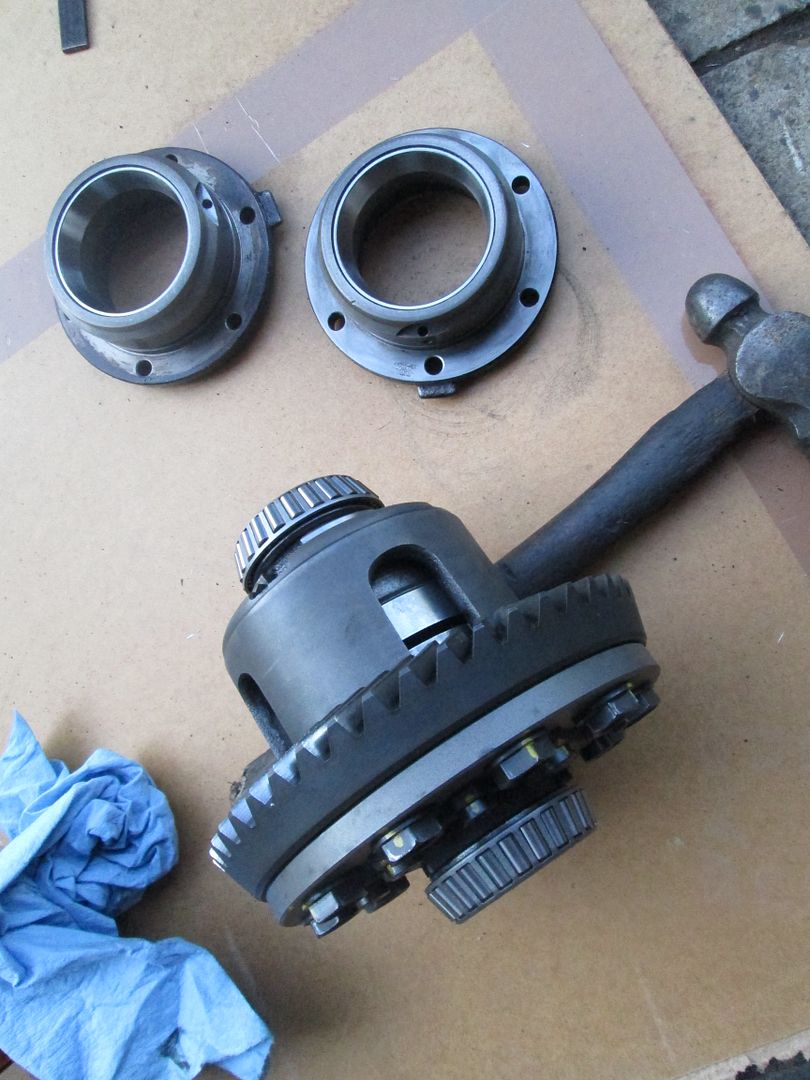
Pressed the other half of the bearings onto the LSD unit..
Next was to clean up one of the cases and mating faces..
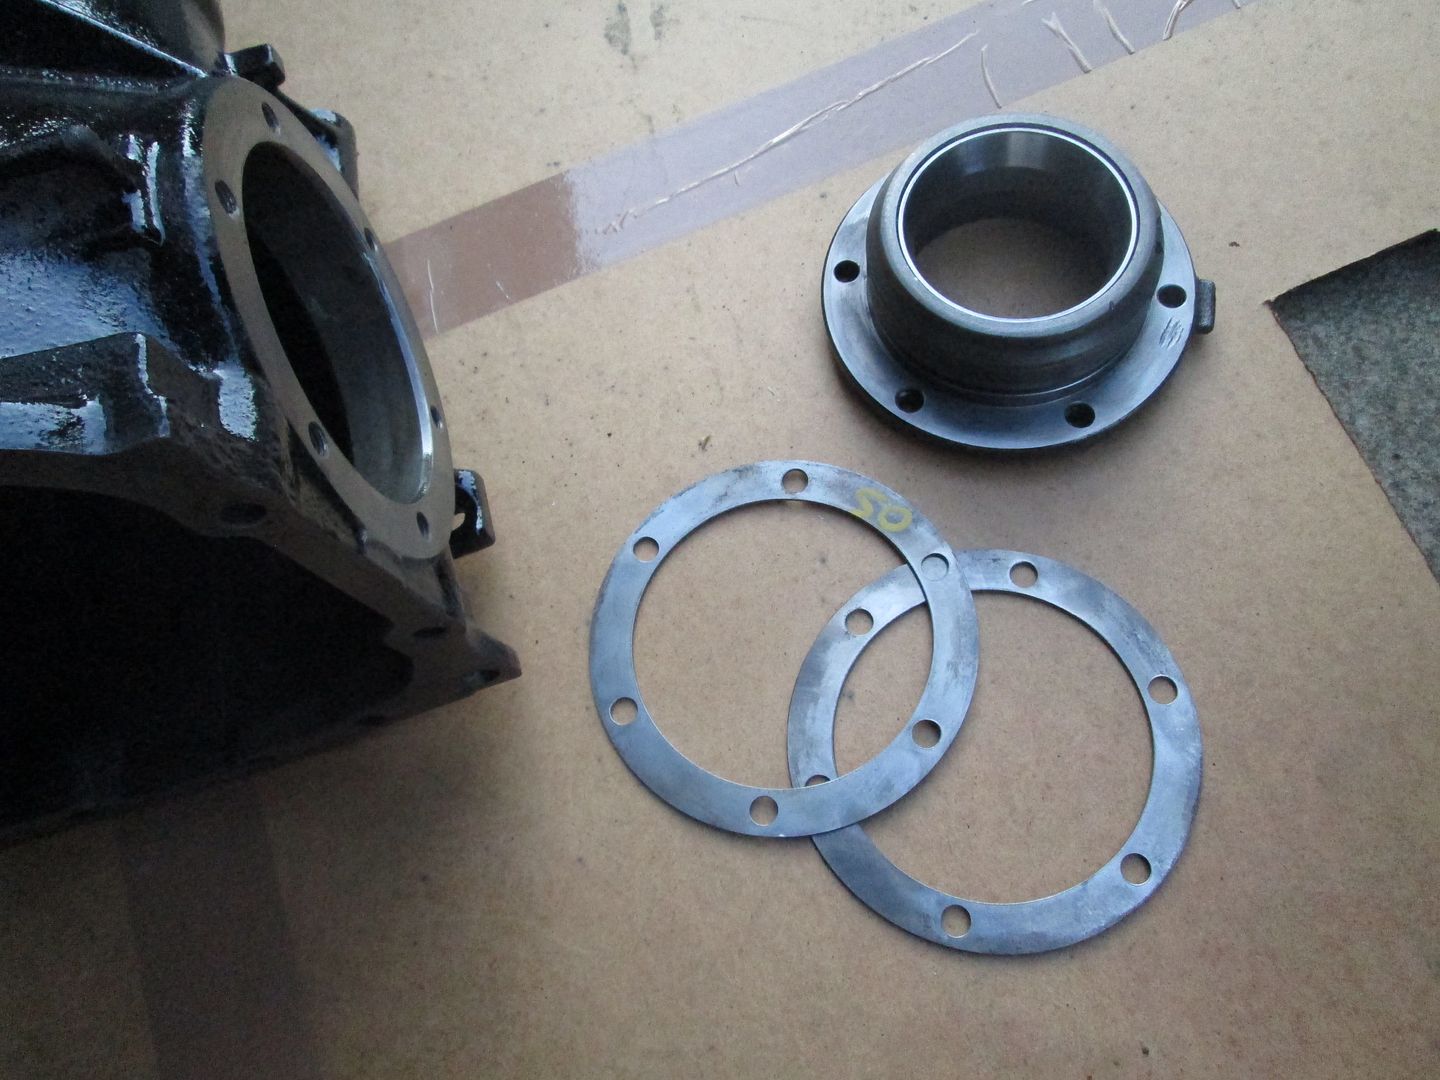
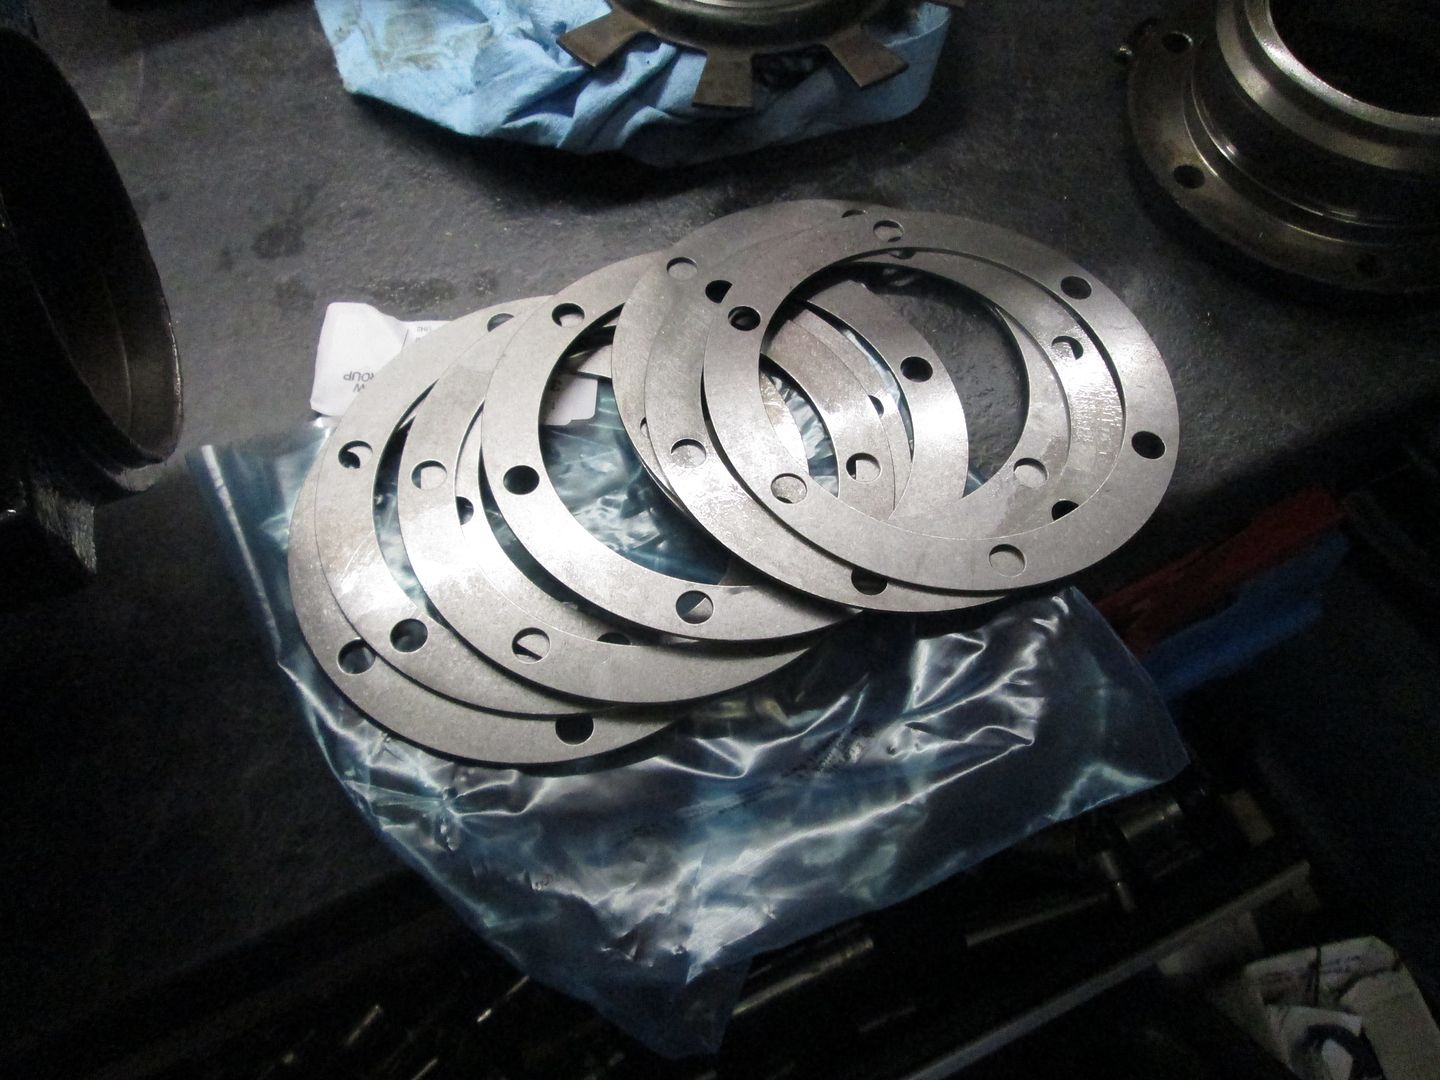
The first step is to set up the correct spacing on the LSD unit/carrier bearings, so the bearing runs with a specified amount of drag. This is achieved by using spacers that vary in thickness. I had to order a larger range from BMW, as its all trial and error to get the correct thickness on both sides and keep the drag tolerance within spec
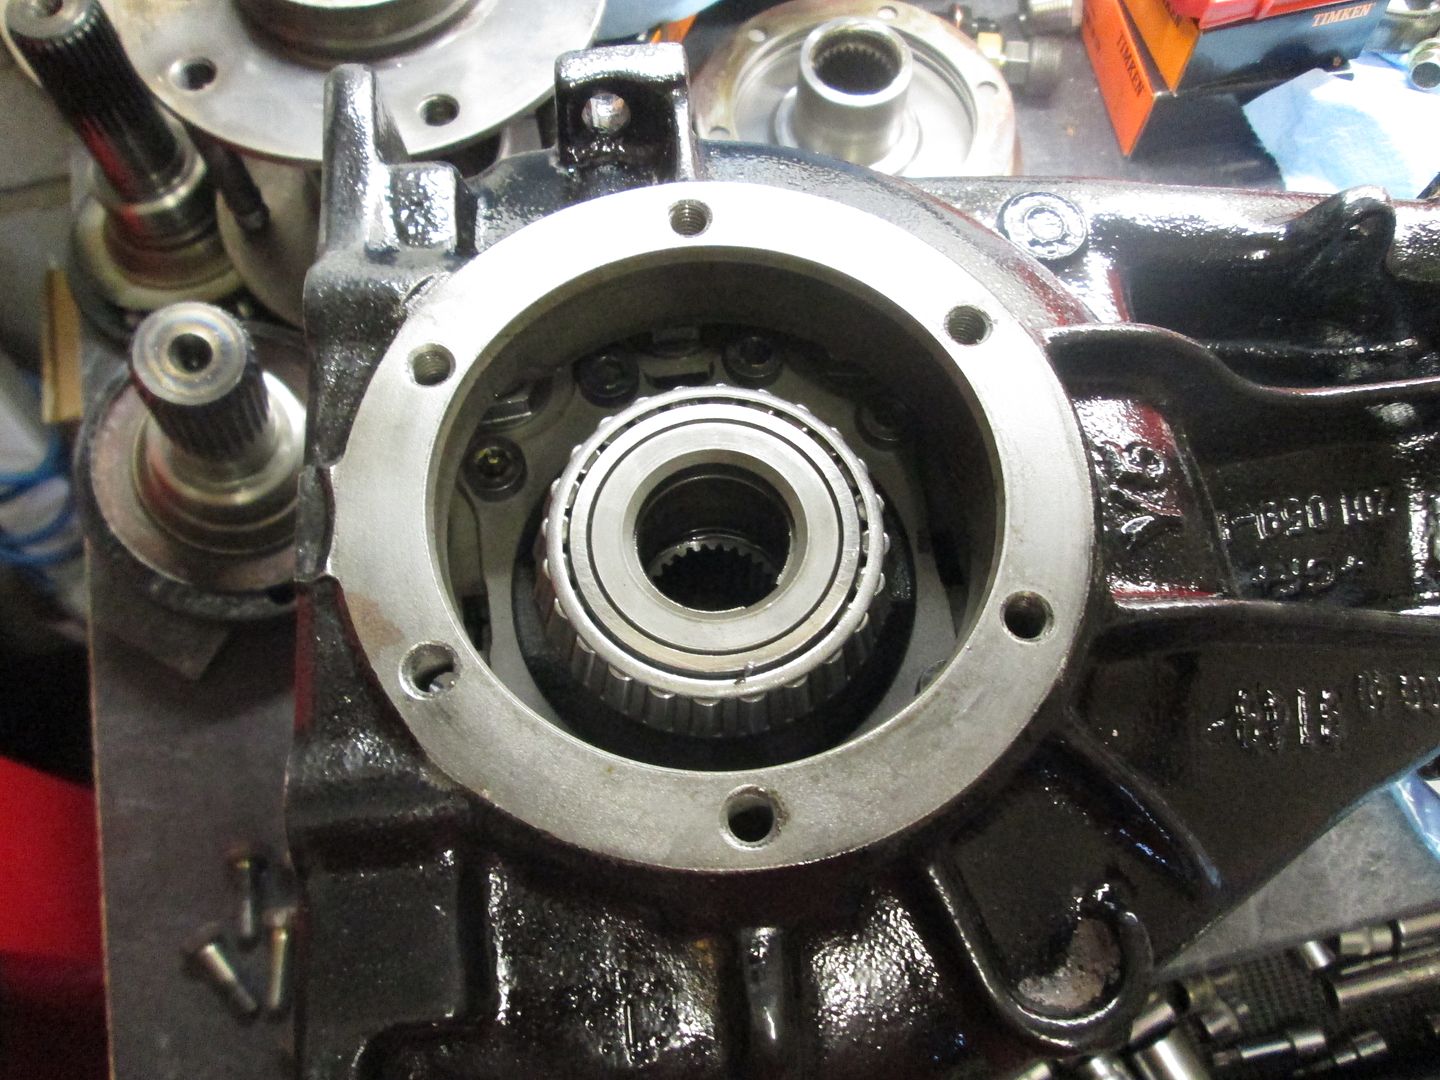
Dropped the LSD unit into the case, then started out with two shims..
To measure the drag tolerance on the bearings, a torque wrench is used. Although, it has to be one that drops down to very small values - the specification is in in/lb. The range you have to stick within is 11in/lb to 23in/lb. To use the torque wrench, you need to be able to continually spin the carrier on its bearings using the output flange, so I knocked up a small plate with a bolt..
Then used the inch/pound torque wrench to measure the drag..
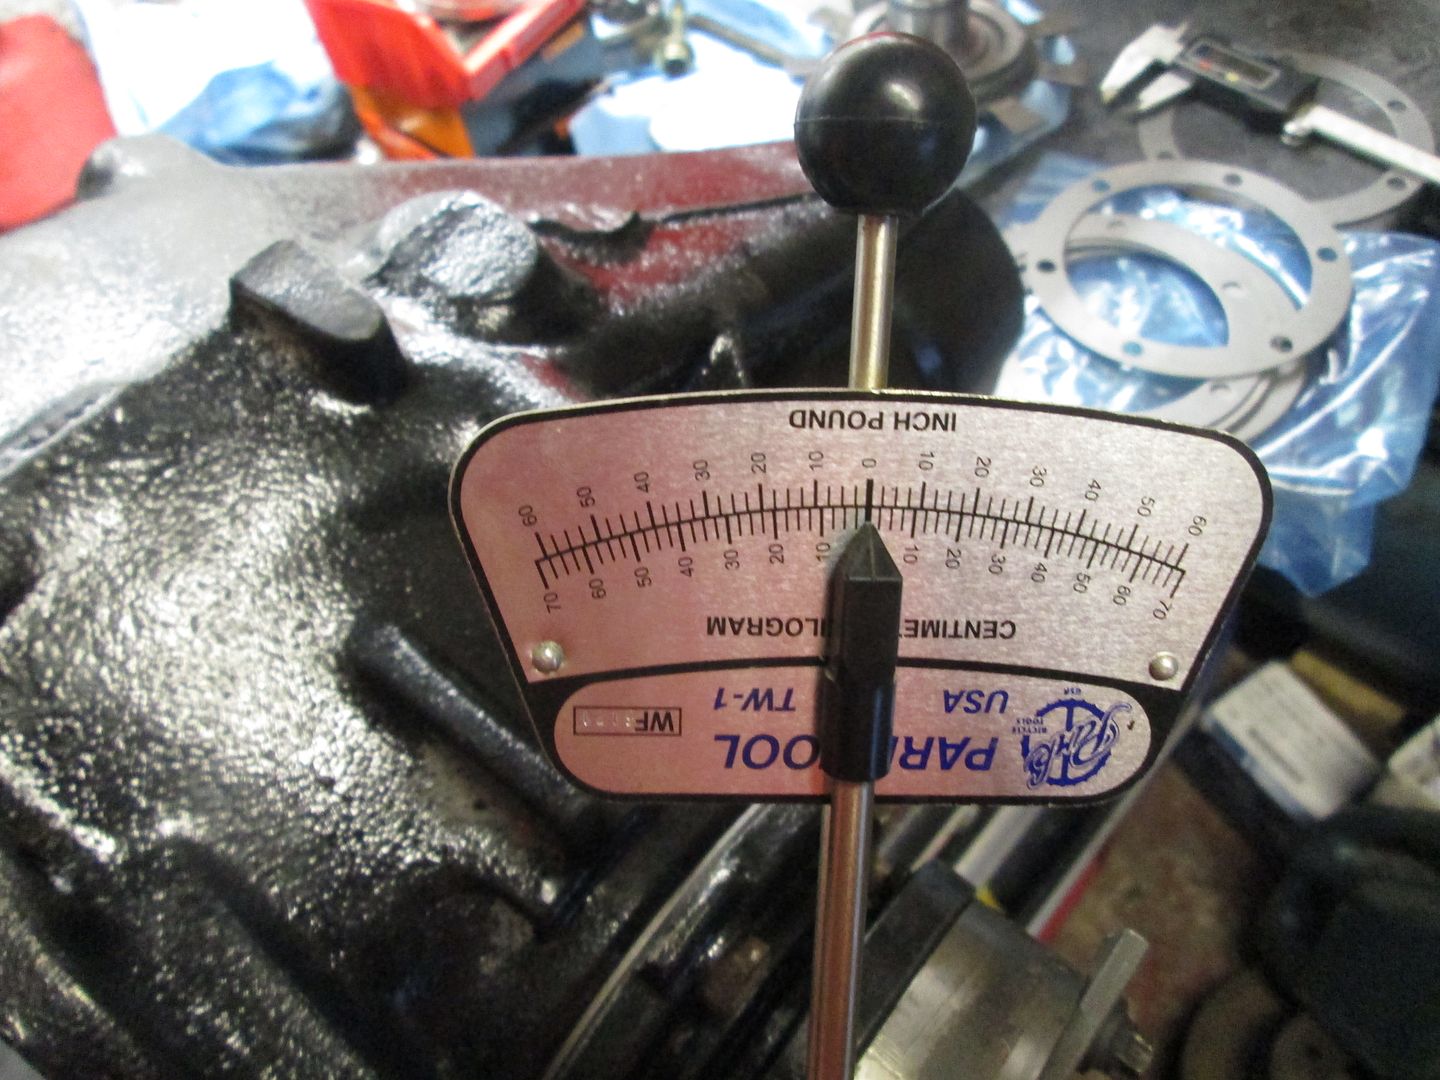
After trying a few different sized shims on both sides I ended up with 18in/lb, which was good enough for me. My total shim thickness was 3.11mm.
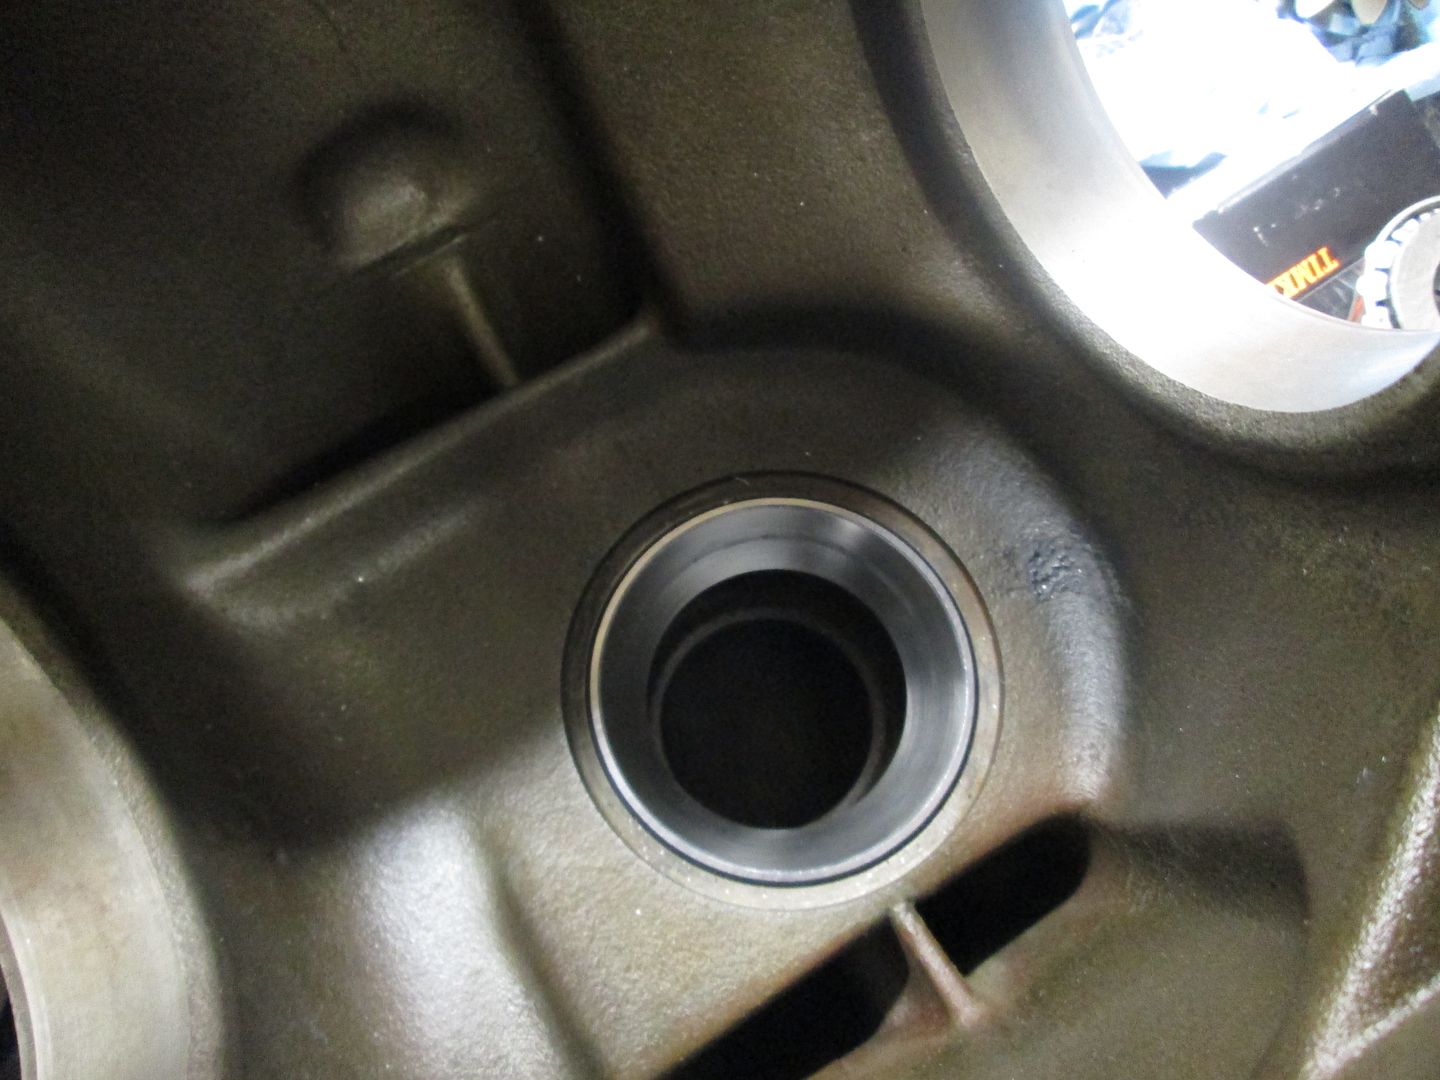
Next was to drive the races for the pinion into the case - the inner race also has a shim under it which can be changed, but I stuck with the one that was fitted to the case the pinion came from..

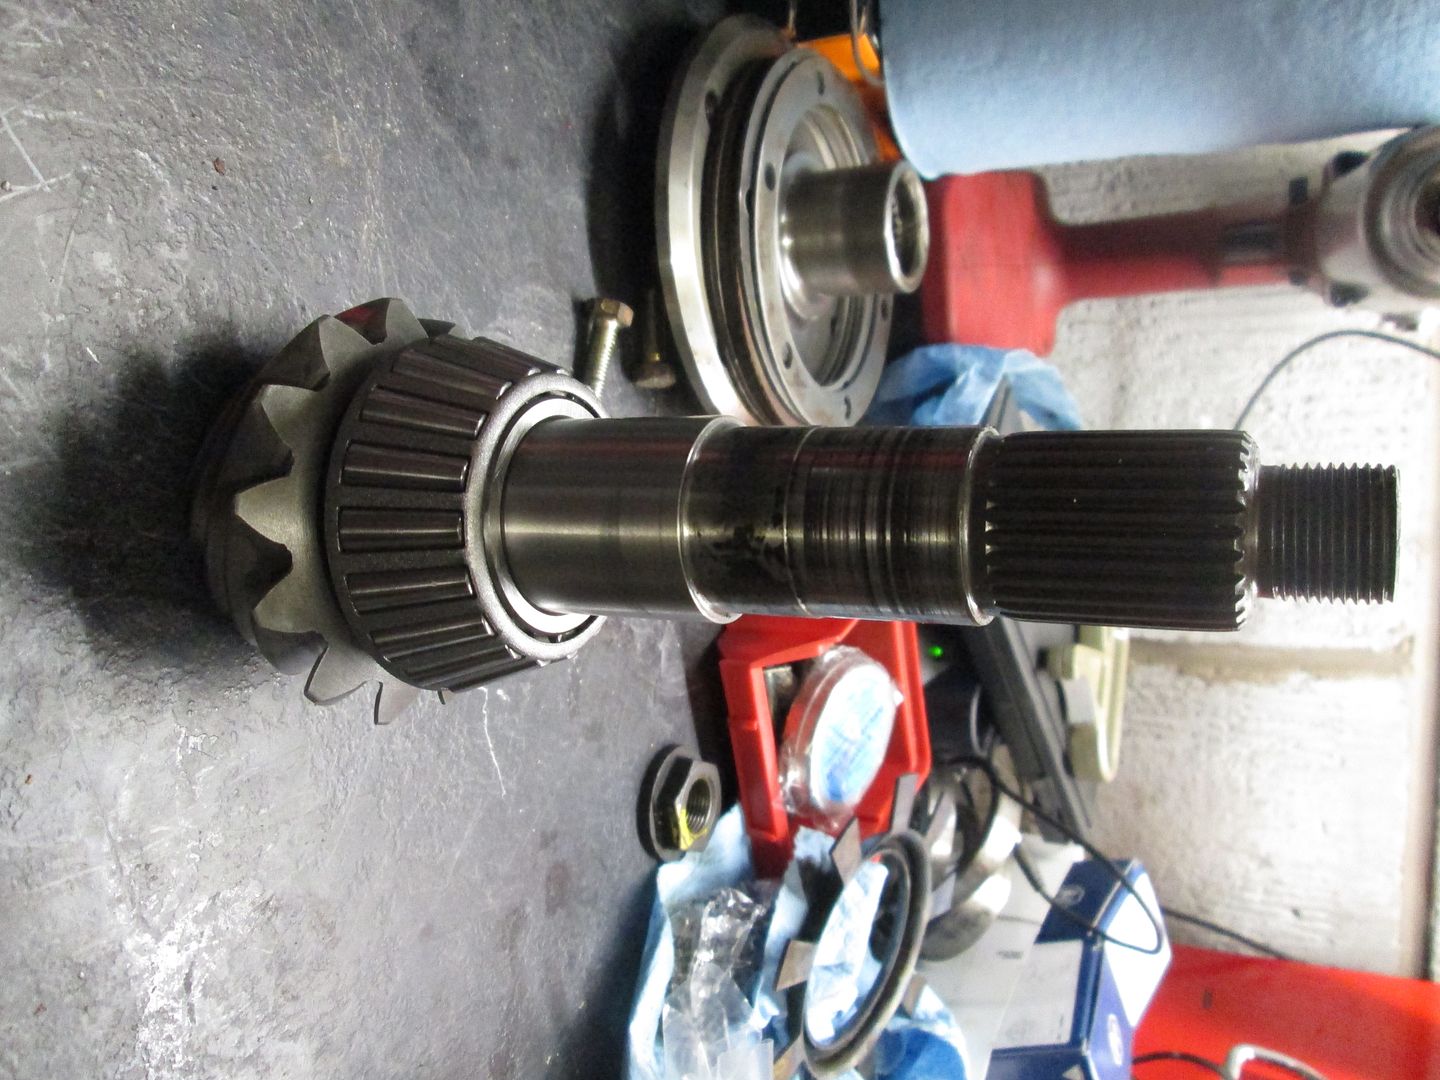
Pressed the new inner bearing onto the pinion itself..
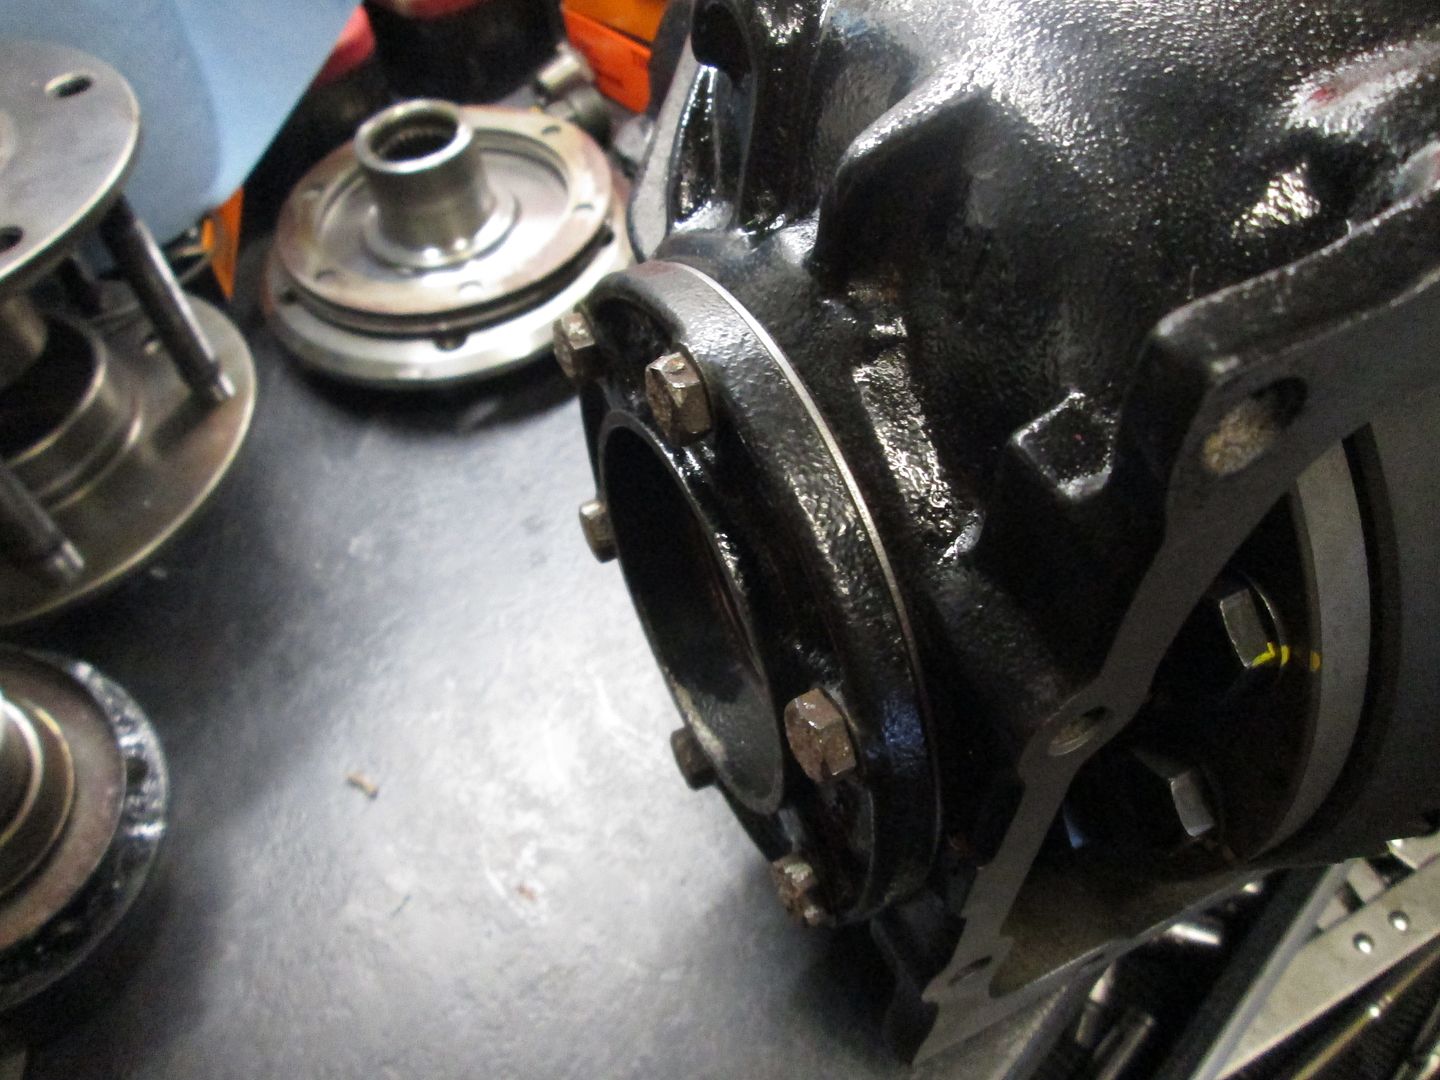
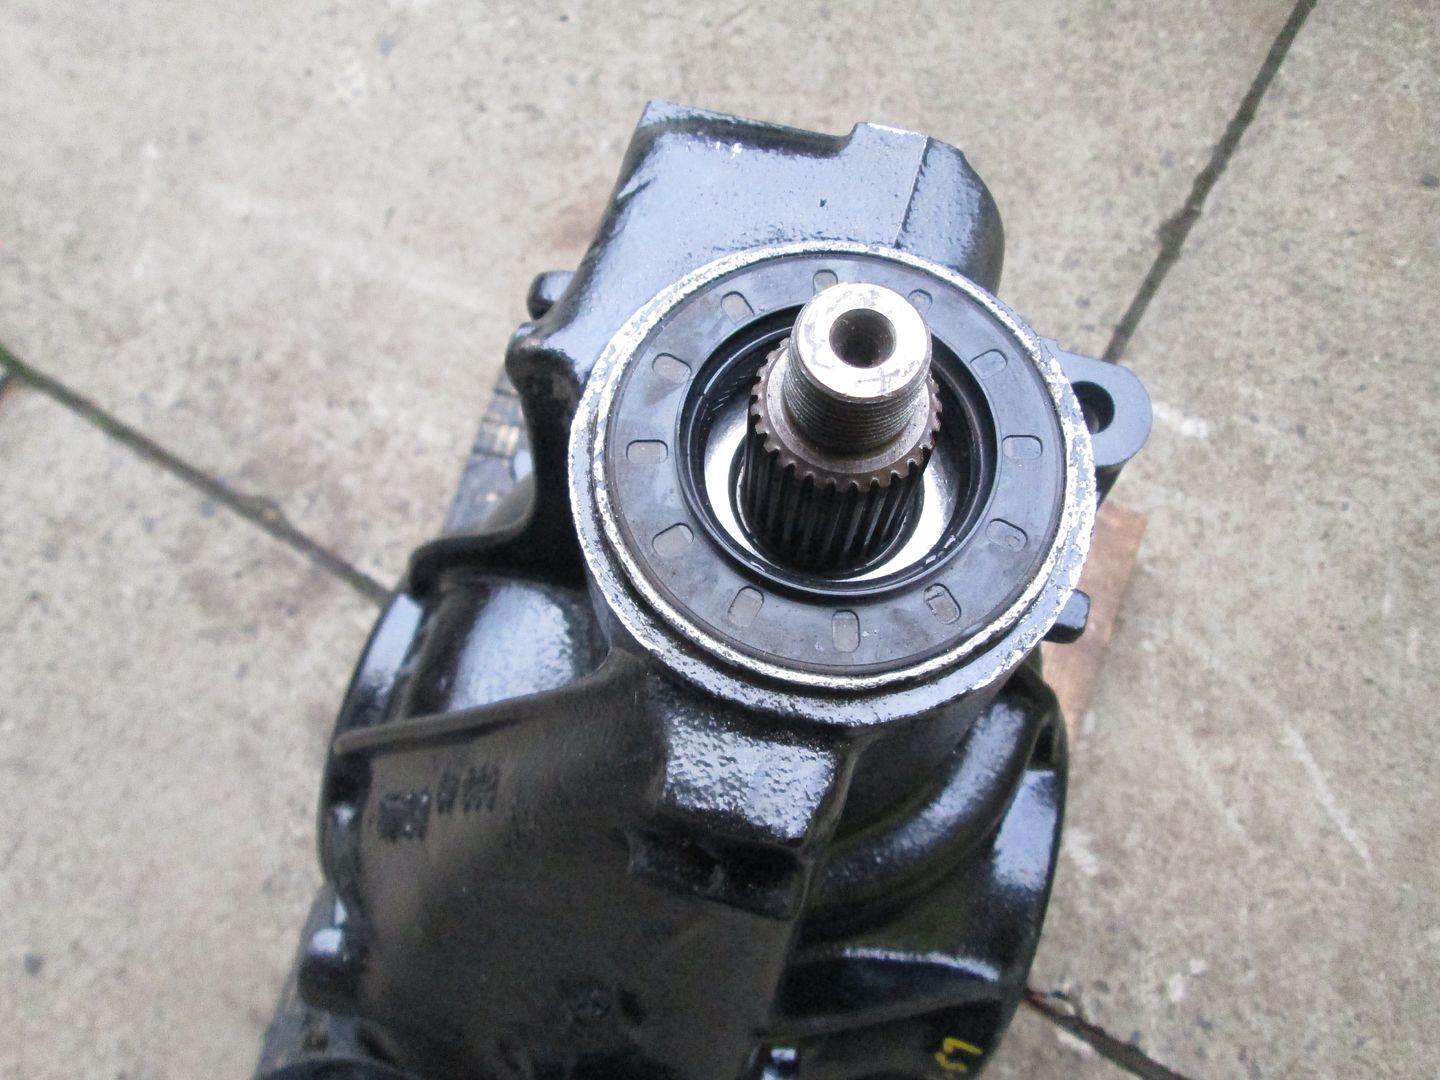
The BMW diffs use a crush washer design, meaning you torque down the front flange and then gradually keep tightening until you get the correct preload, which is also measured in in/lb. New crush washer and input flange seal..

Outer race pressed into place, crush washer between them both, outer seal fitted then the flange went into the case..
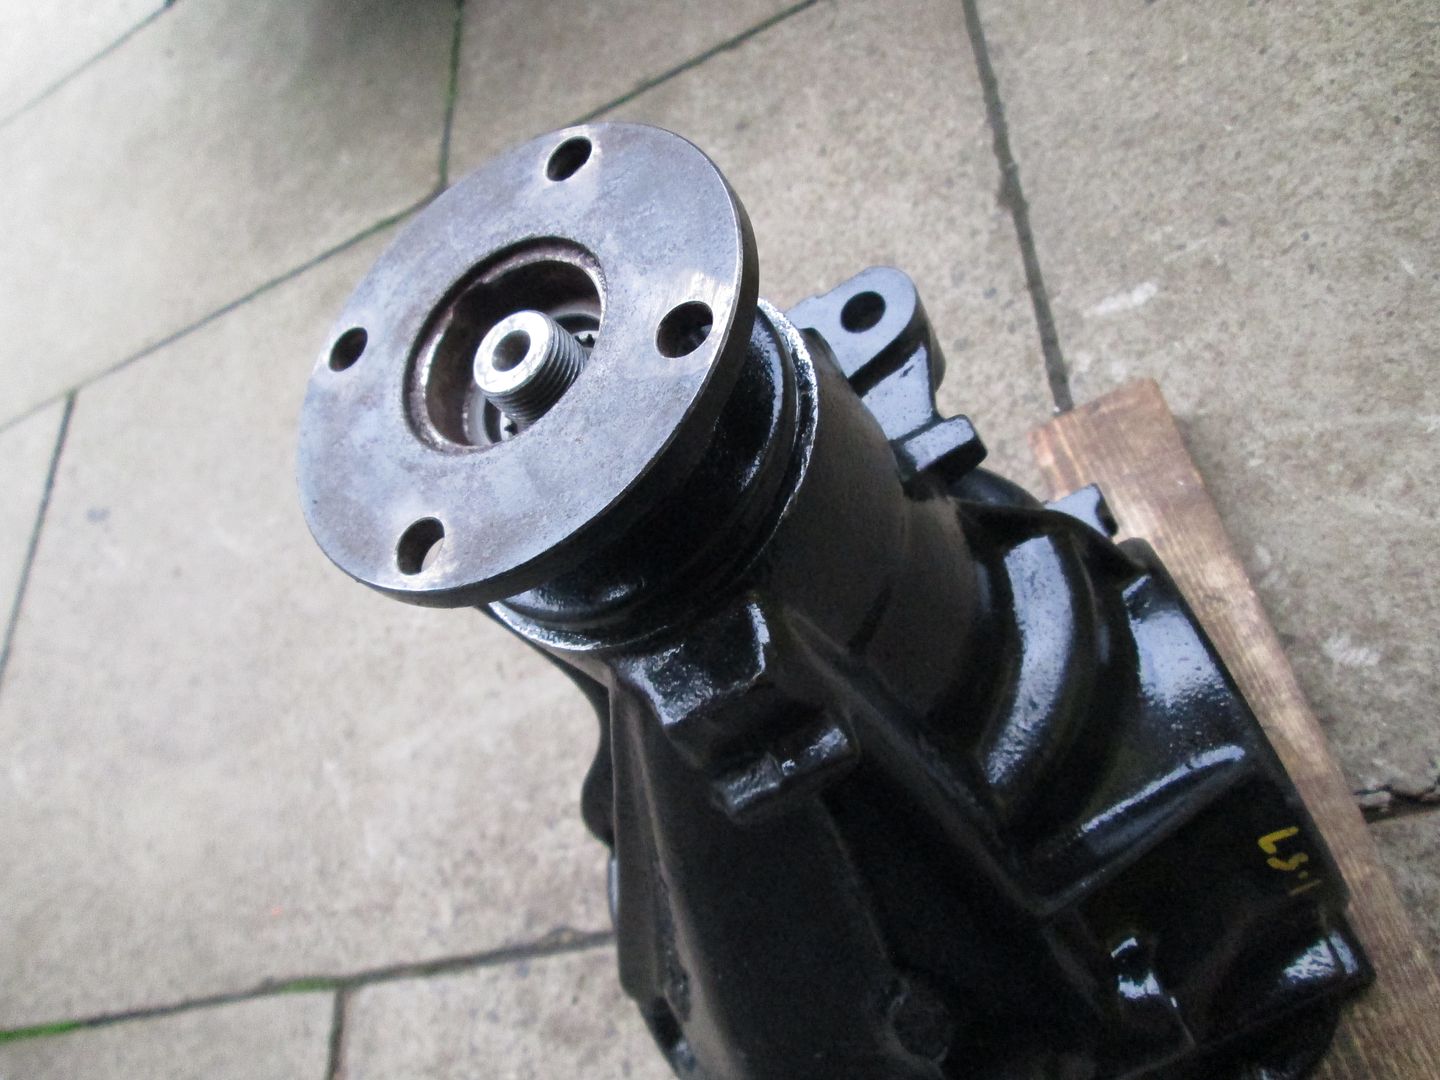
This was then set up with 20in/lb of rolling drag, which falls between the recommended 11-23in/lb tolerance.
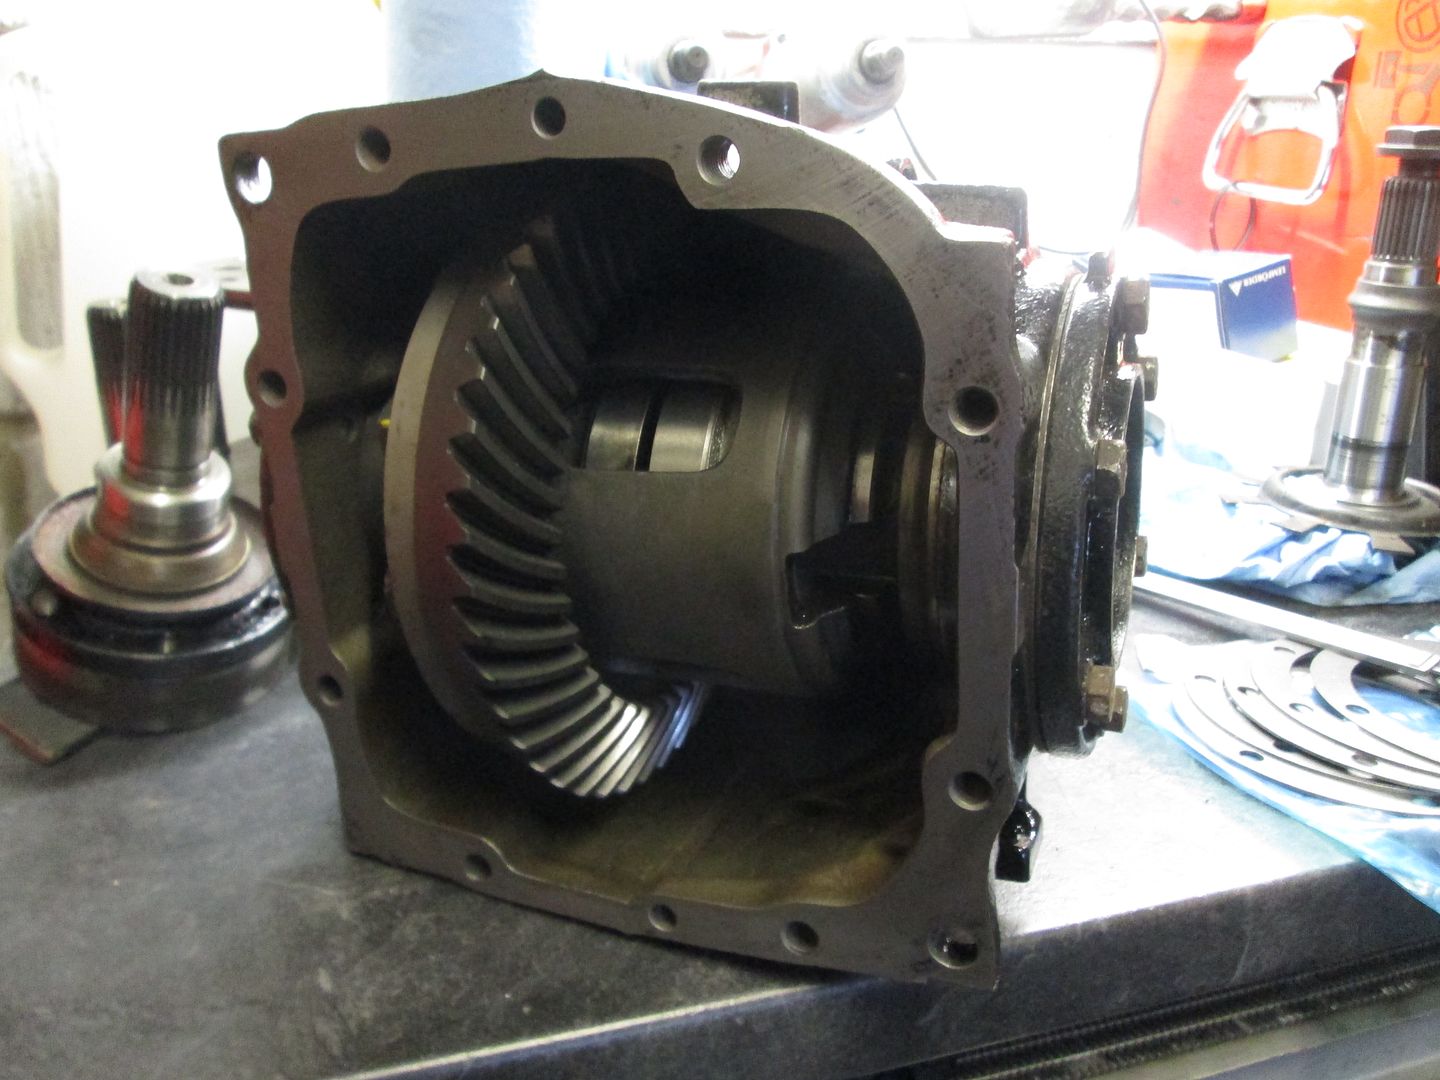
With the pinion installed, the LSD carrier could be put back into the case, and backlash checked. Using a dial gauge, the initial reading was 0.01mm, which is too tight for the setup. The BMW tolerance states anywhere between 0.06mm and 0.14mm is acceptable. To gain the additional backlash, the LSD unit has to be moved away from the pinion gear - this is achieved by swapping the side casing shims (as per the above setup). Although, you have to keep the total thickness of both shims used to the same as the original setup, to maintain the correct preload/drag value. In my case, this was 3.10mm. After a few different pairs of shim combinations, I got the backlash to 0.07mm, within tolerance.
The last step was to check the gear pattern between the pinion and crown wheel, on both the drive and coast faces. I used some engineering blue to mark up the gears then spin the diff over numerous times in both directions - the contact patches then show up clean. The coast face of the gear had a clean central contact patch, in the middle of the face.
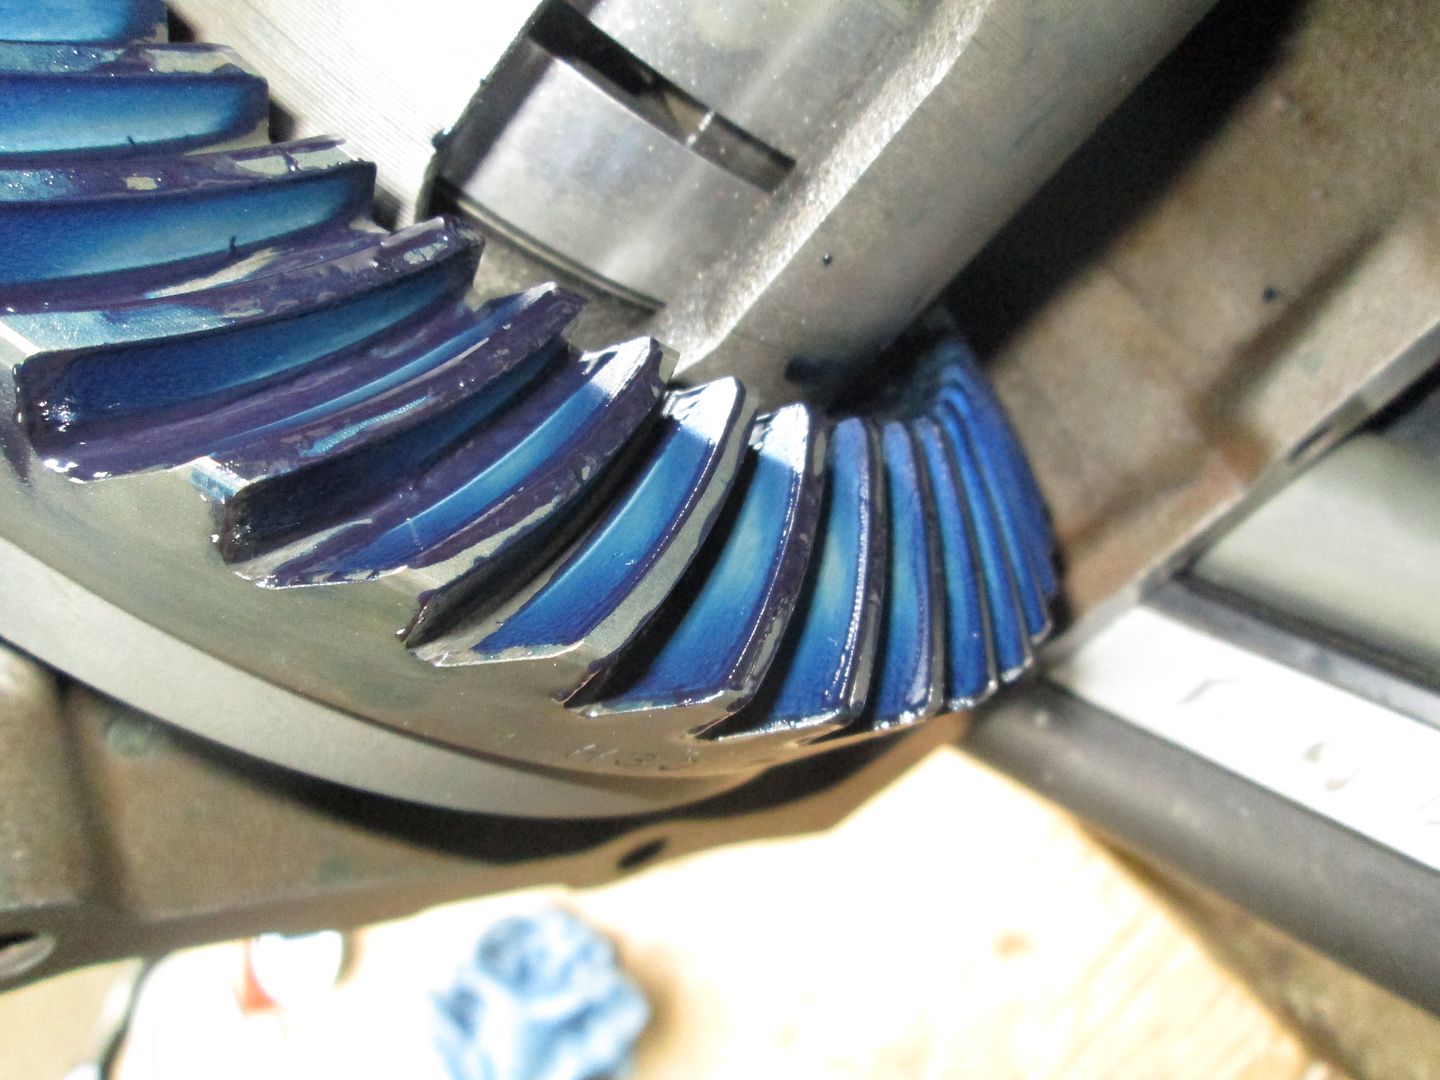
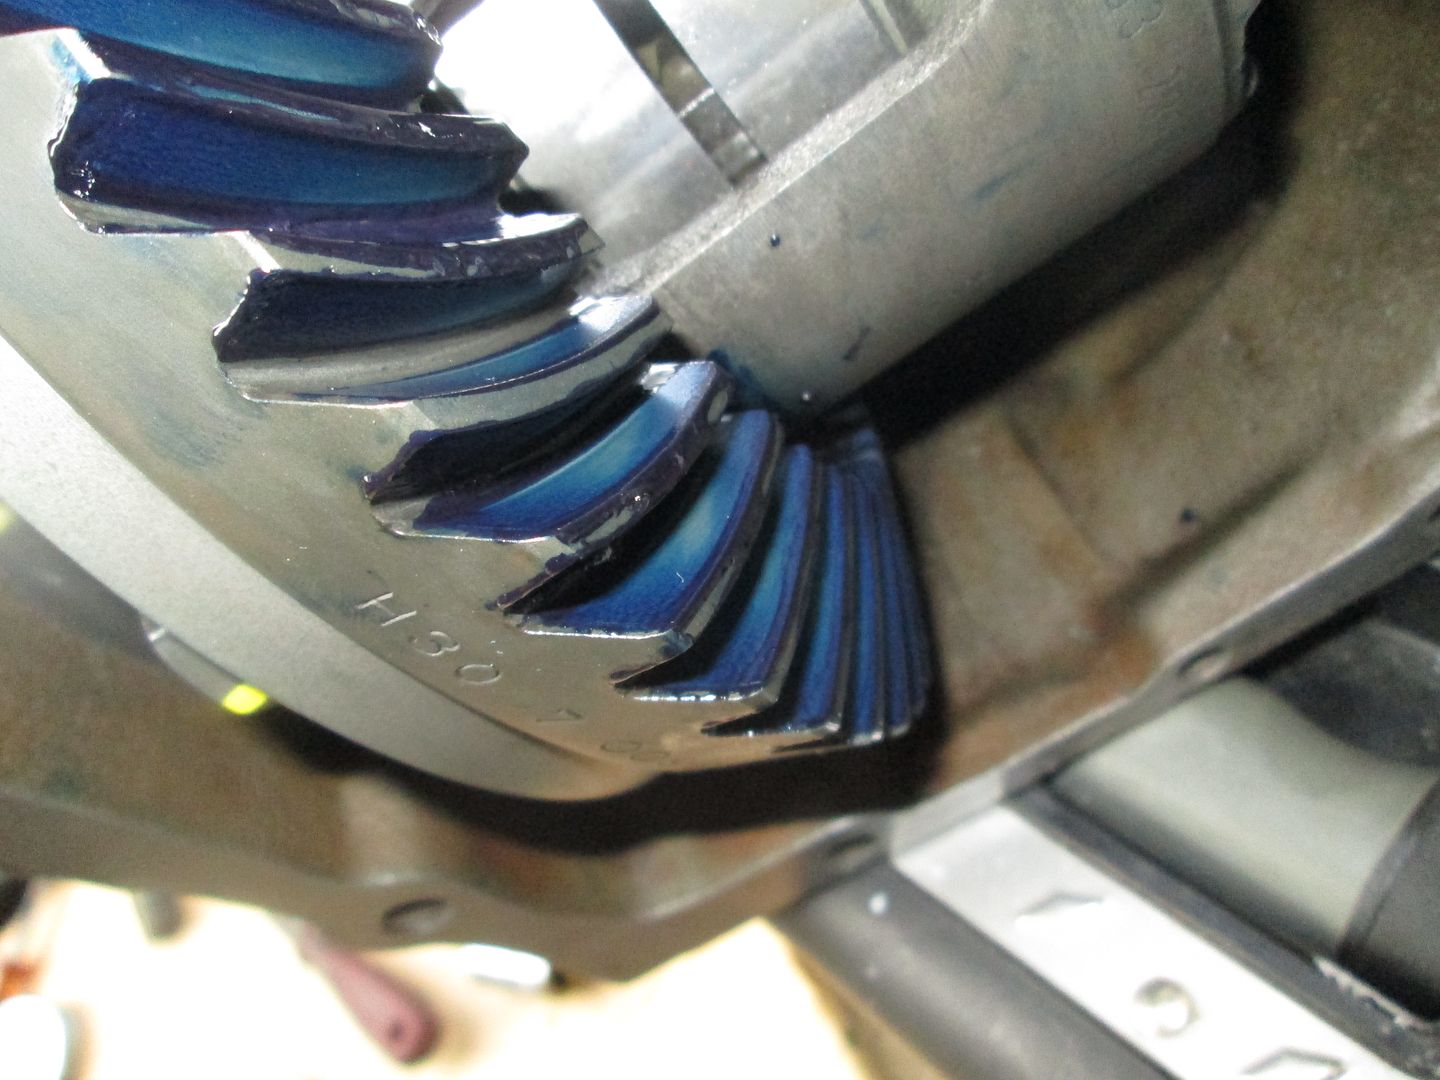
The drive side had a good sized contact patch in the middle, offset to the inside of the gear but not hanging over the edge, which is good.

If one, or both contact patches were incorrect, I would have had to swap the side shims out again and try to get better pattern - although, you have to then re-check the backlash is within tolerance. If you can't get a good pattern within the backlash range, you need to change the shim under the pinion bearing, to move the pinion gear further in or out.
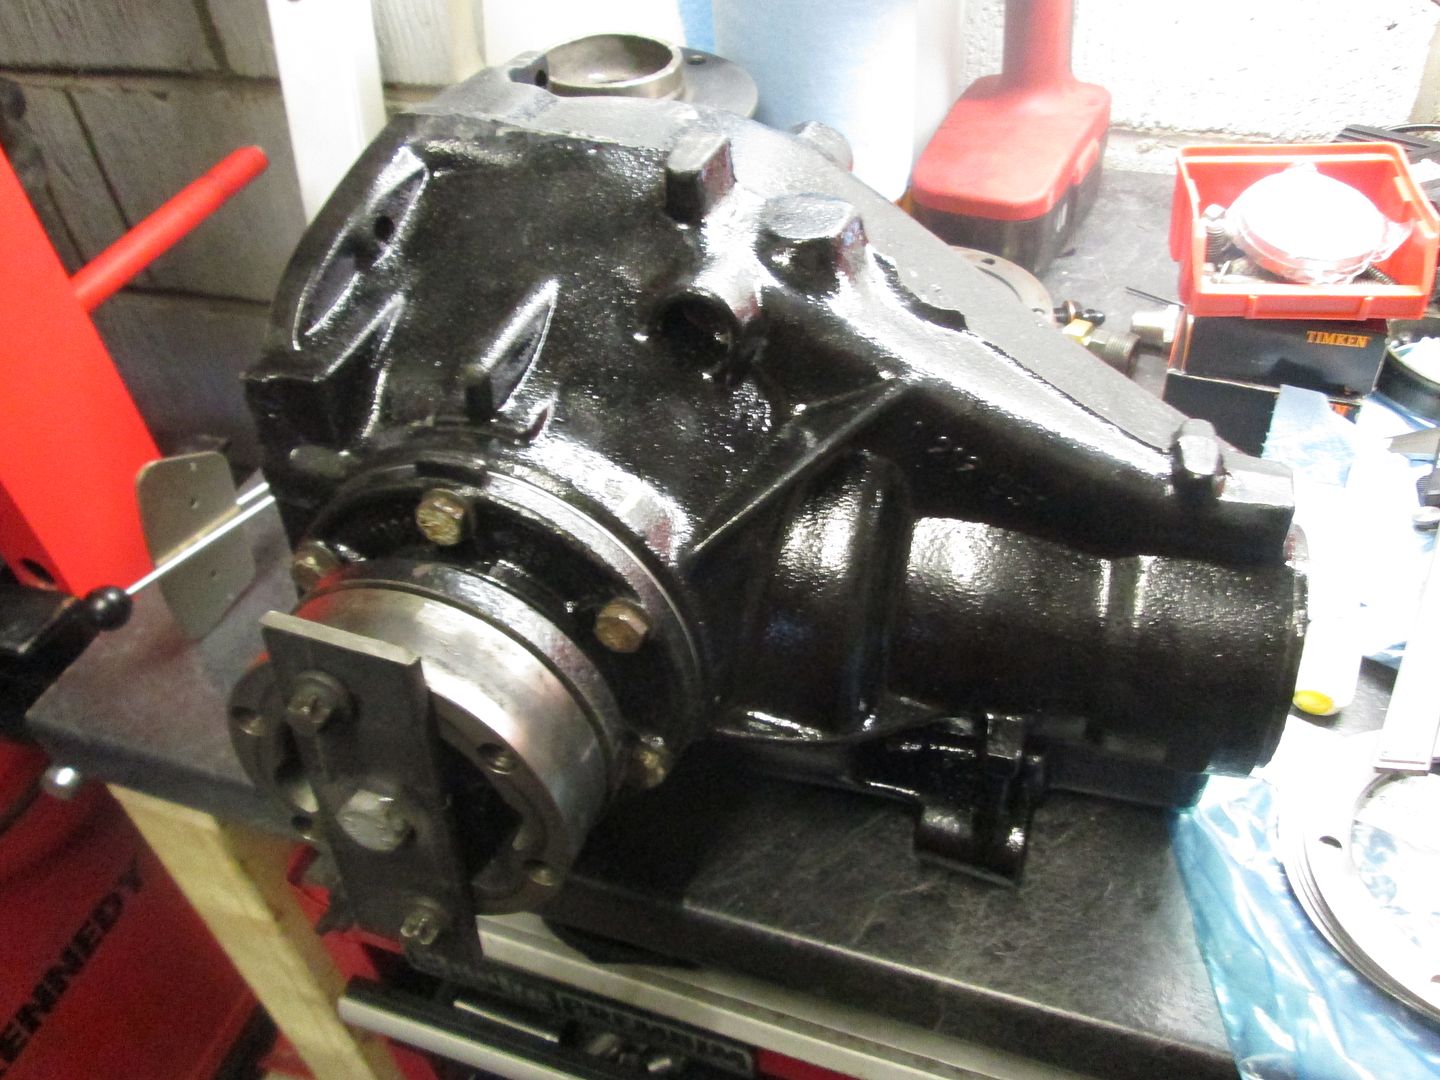
The final bits were to drive in the new output shaft seals..
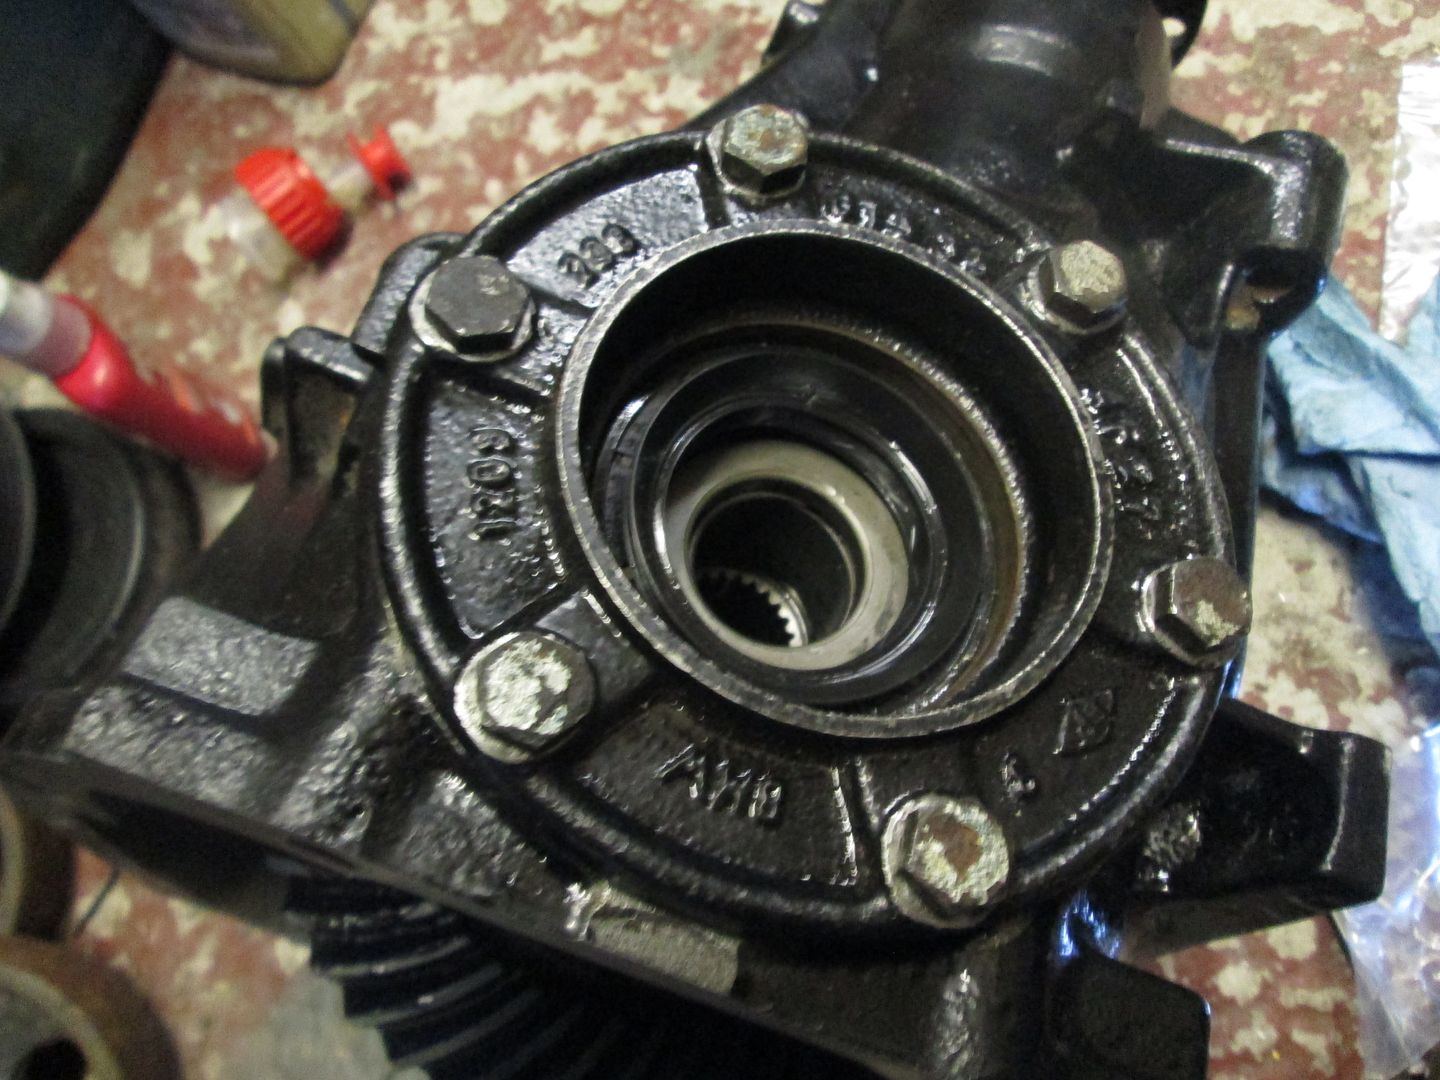
Install the locking tab on the pinion nut so it can't move..
Then fit and torque the back cover with some new sealant..
Thats about it, one 3.46 ratio LSD with new clutches ready to go back on the car.
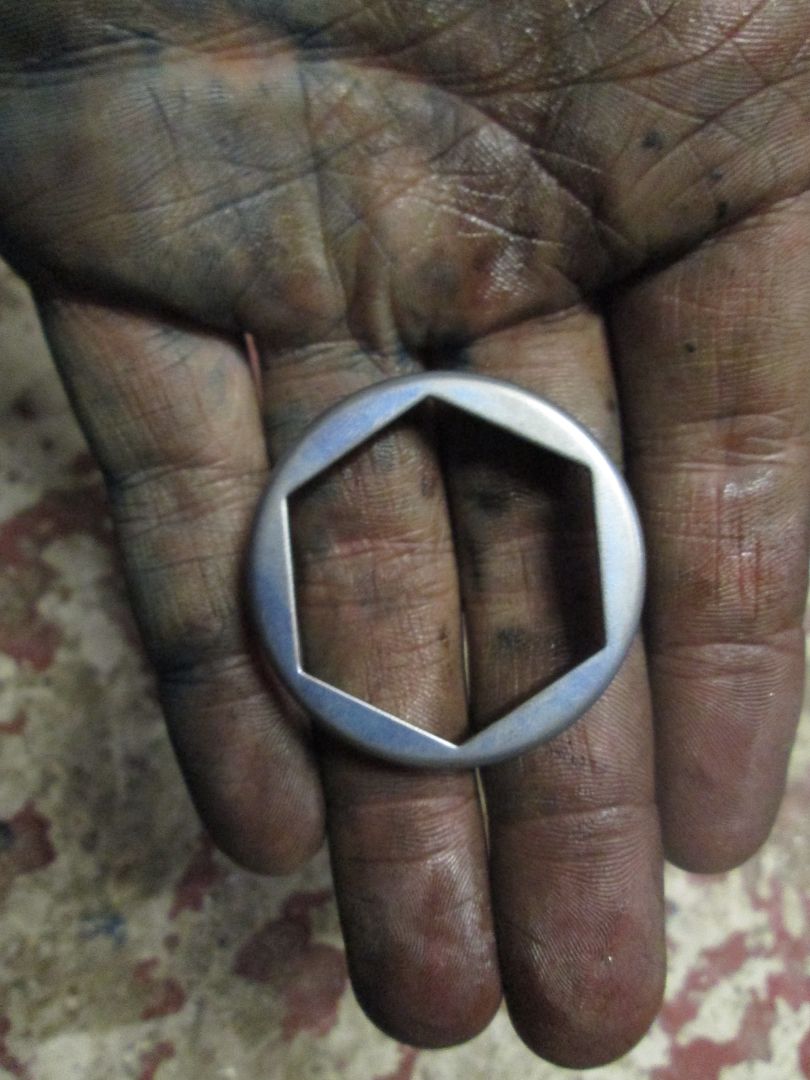
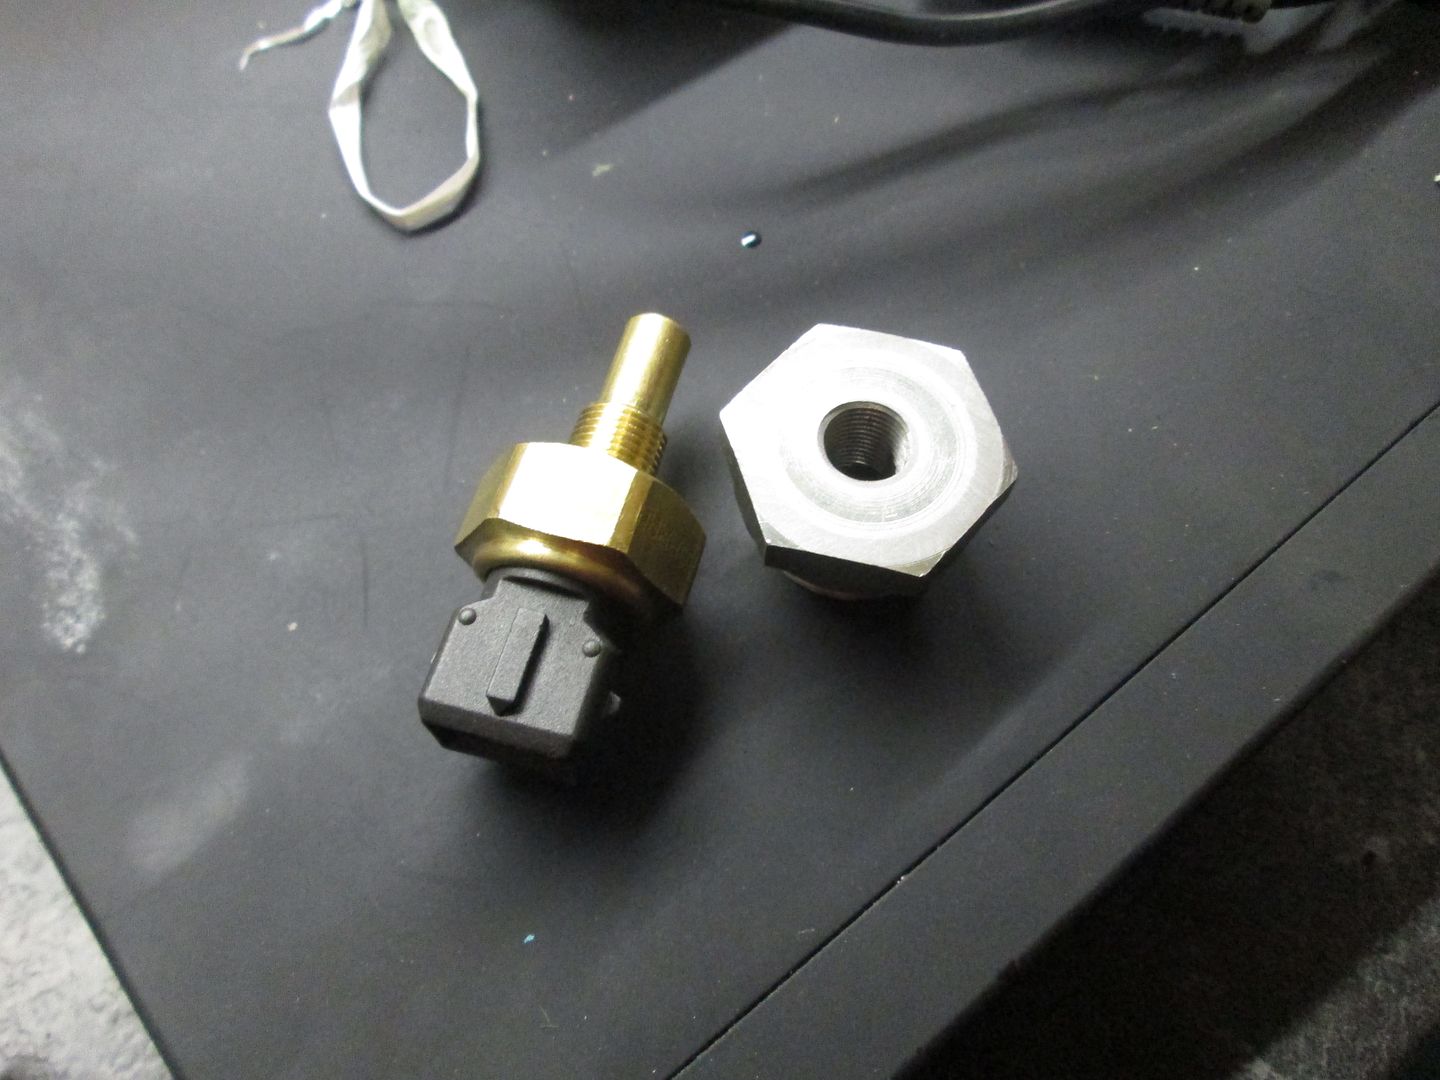
On another note, I wanted to see what sort of temperature changes these units see with certain oils - to do this I needed a sensor in there. The fill/drain plugs on the back cover are M22x1.5. I managed to get hold of an plug in the correct thread, then had it drilled through and tapped to 1/8NPT. I'm going to use it in the fill plug hole once the new oil has gone in. Paired with a temperature sensor (same as used with the aftermarket ECU) I can easily read the temperature off whenever required.
Filled the diff with some Castrol 75-140w EP LSD Oil, and put it back onto the car. Initial thoughts are the ratios are far better, the drop in RPM matched with the change in ratio is right in the middle of the power band. The LSD operation is much more defined and traction is improved, both under acceleration and braking. No unusual noises, whines or leaks as of yet but it needs some more miles.
The standard 'clutch stack' is made up from a 2.1mm spacer plate, and the 2.0mm friction disk, giving a total of 4.10mm. There are two pairs of these inside. I'm using the Porsche friction discs, which are 2.5mm (2.0mm not available any more), I needed to use a thinner spacer plate to keep the same stack thickness. Back to Porsche and a couple of days later I had some 1.6mm items..
Then combined with the 2.5mm friction disc, it keeps the same original thickness..
The housing was cleaned out then parts fitted in order. First is a 4mm thick spacer plate which sits in the bottom (many people remove this and fit another set of spacer+friction disk for some 'theoretical additional lock', but its not proven as the stack height is still the same). Inside this there is a washer, sprung belleville washer, and a small solid friction disc..
Next is a large belleville washer, then the new 1.6mm spacer..
The first friction disc was then given a bit of LSD oil, pushed onto the gear and onto the housing, then dropped in the right way..
Spider gears and then the upper gear..
The other housing, second friction disc and last 1.6mm spacer on top..
Outer belleville washer..
Then the top housing was stacked with the three smaller elements (spacer, belleville washer and small solid friction disc)..
This was then flipped over and slotted into the housing - here it is pushed down until the plates contact, to give you an idea of how much static tension the internals are under. If you had more plates, thicker spacer discs or taller belleville washers this would sit even taller, meaning the unit has more static 'lock'..
8x new bolts from BMW - Loctite added then torqued to 25lb/ft..
...and thats the LSD unit ready for new bearings and the next steps in the rebuild..
I got a set of bearings, went for a decent brand that most seem to go with...
Cleaned the outer housings and drove the outer races into place..
Pressed the other half of the bearings onto the LSD unit..
Next was to clean up one of the cases and mating faces..
The first step is to set up the correct spacing on the LSD unit/carrier bearings, so the bearing runs with a specified amount of drag. This is achieved by using spacers that vary in thickness. I had to order a larger range from BMW, as its all trial and error to get the correct thickness on both sides and keep the drag tolerance within spec
Dropped the LSD unit into the case, then started out with two shims..
To measure the drag tolerance on the bearings, a torque wrench is used. Although, it has to be one that drops down to very small values - the specification is in in/lb. The range you have to stick within is 11in/lb to 23in/lb. To use the torque wrench, you need to be able to continually spin the carrier on its bearings using the output flange, so I knocked up a small plate with a bolt..
Then used the inch/pound torque wrench to measure the drag..
After trying a few different sized shims on both sides I ended up with 18in/lb, which was good enough for me. My total shim thickness was 3.11mm.
Next was to drive the races for the pinion into the case - the inner race also has a shim under it which can be changed, but I stuck with the one that was fitted to the case the pinion came from..
Pressed the new inner bearing onto the pinion itself..
The BMW diffs use a crush washer design, meaning you torque down the front flange and then gradually keep tightening until you get the correct preload, which is also measured in in/lb. New crush washer and input flange seal..
Outer race pressed into place, crush washer between them both, outer seal fitted then the flange went into the case..
This was then set up with 20in/lb of rolling drag, which falls between the recommended 11-23in/lb tolerance.
With the pinion installed, the LSD carrier could be put back into the case, and backlash checked. Using a dial gauge, the initial reading was 0.01mm, which is too tight for the setup. The BMW tolerance states anywhere between 0.06mm and 0.14mm is acceptable. To gain the additional backlash, the LSD unit has to be moved away from the pinion gear - this is achieved by swapping the side casing shims (as per the above setup). Although, you have to keep the total thickness of both shims used to the same as the original setup, to maintain the correct preload/drag value. In my case, this was 3.10mm. After a few different pairs of shim combinations, I got the backlash to 0.07mm, within tolerance.
The last step was to check the gear pattern between the pinion and crown wheel, on both the drive and coast faces. I used some engineering blue to mark up the gears then spin the diff over numerous times in both directions - the contact patches then show up clean. The coast face of the gear had a clean central contact patch, in the middle of the face.
The drive side had a good sized contact patch in the middle, offset to the inside of the gear but not hanging over the edge, which is good.
If one, or both contact patches were incorrect, I would have had to swap the side shims out again and try to get better pattern - although, you have to then re-check the backlash is within tolerance. If you can't get a good pattern within the backlash range, you need to change the shim under the pinion bearing, to move the pinion gear further in or out.
The final bits were to drive in the new output shaft seals..
Install the locking tab on the pinion nut so it can't move..
Then fit and torque the back cover with some new sealant..
Thats about it, one 3.46 ratio LSD with new clutches ready to go back on the car.
On another note, I wanted to see what sort of temperature changes these units see with certain oils - to do this I needed a sensor in there. The fill/drain plugs on the back cover are M22x1.5. I managed to get hold of an plug in the correct thread, then had it drilled through and tapped to 1/8NPT. I'm going to use it in the fill plug hole once the new oil has gone in. Paired with a temperature sensor (same as used with the aftermarket ECU) I can easily read the temperature off whenever required.
Filled the diff with some Castrol 75-140w EP LSD Oil, and put it back onto the car. Initial thoughts are the ratios are far better, the drop in RPM matched with the change in ratio is right in the middle of the power band. The LSD operation is much more defined and traction is improved, both under acceleration and braking. No unusual noises, whines or leaks as of yet but it needs some more miles.

Gassing Station | Readers' Cars | Top of Page | What's New | My Stuff