Discussion


It's probably best to ignore what I say when it comes to next steps as I usually go about doing things randomly
Wheels and handling:
The wheels have come back unbent (I had another with slight lip damage I thought I would get done at the same time:
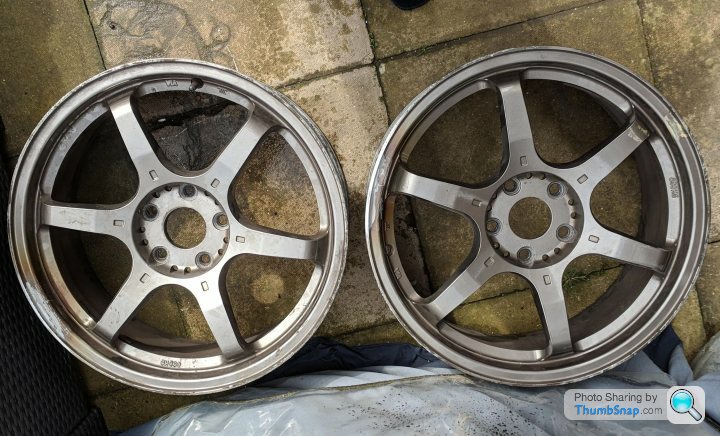
They have now been sent off to be painted!
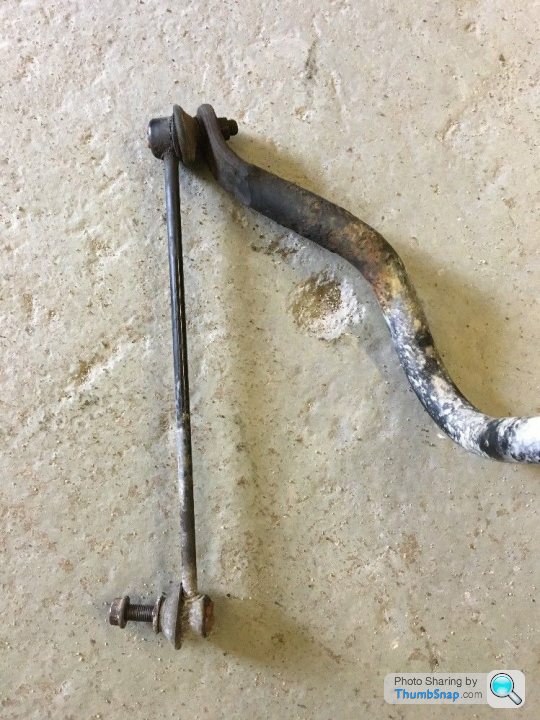
During the colder wet weather I've noticed the suspension go a bit creaky and knocky and with it being sporadic I guessed it may be bush related. As the money was there to be spent I thought it would be a good opportunity to upgrade both the front and rear anti roll cars with upated 27mm Whiteline items alond with some adjustable drop links. Here's an example of what the originals look like:

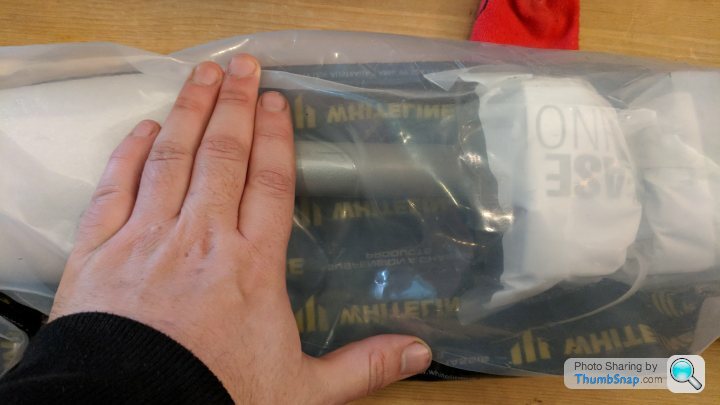
The uprated ones are nice and chunky!
 |
|
Annoyingly the knocking has stopped a bit so these will be fitted at a later date - the full kit worked out cheaper then just getting front and rear drop links and an anti roll bar. They're also 2 point adjustable so it should make the car more fun on cornering..
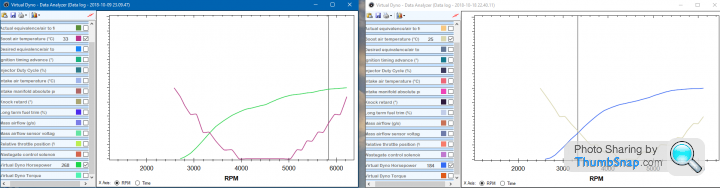
Mapping:
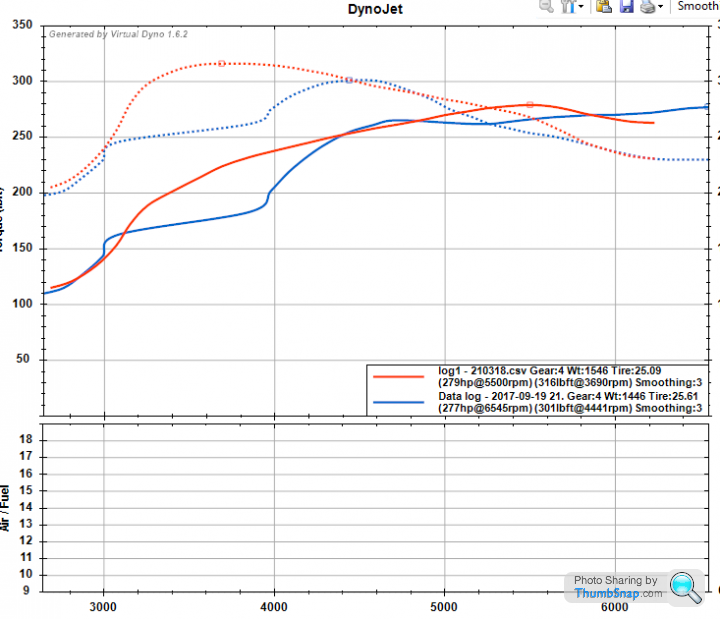
A new log and map revision has been done. As you can see from the above - the power band looks neater. Since this log I've now disabled SWAS (Steering Wheel Angle Sensor) on Versatune. What Swas does is chuck extra fuel into the engine when turning, which reduces the power output. Disabling this therefore cuts this down so the engine can put out more power when cornering. I've given it a little test and it does seem to make a difference.
Visual:
The final bits of the interior hydrodipping has now been done:
Astray re-assembled:

Gulzar will be proud!!
Please note I've finished this part off yet - I thought it would be fun to give the car an "easter egg" and add something a little bit different, which can be hidden away when needed
A bit of special double sided tape to put the handbrake gator back:
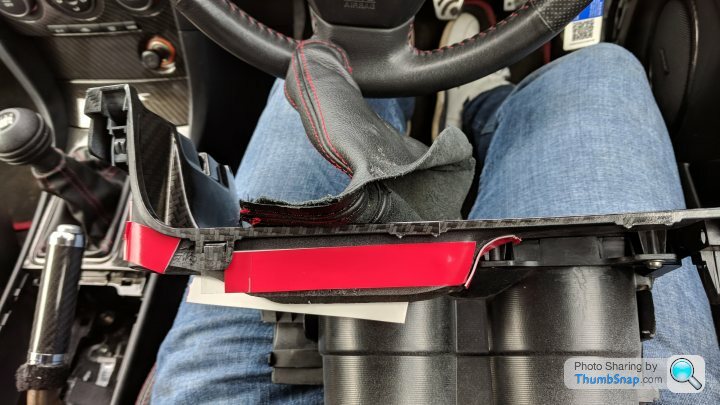
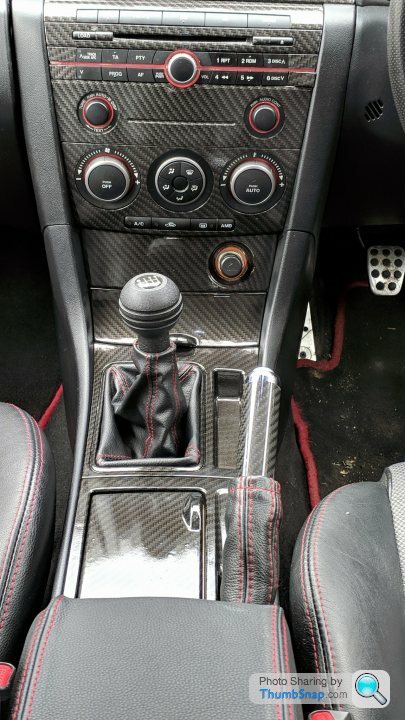
Here it is all back together:
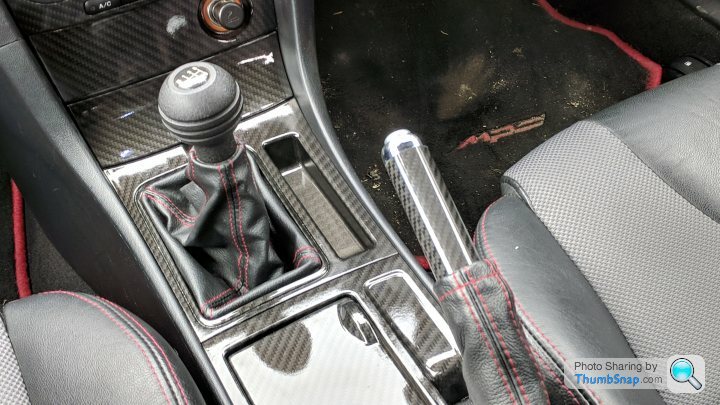
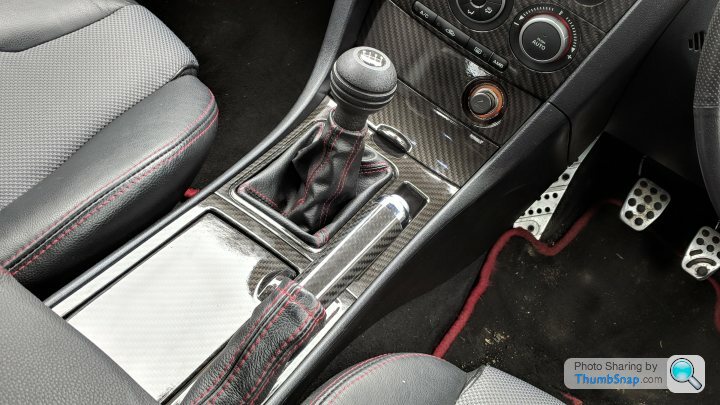
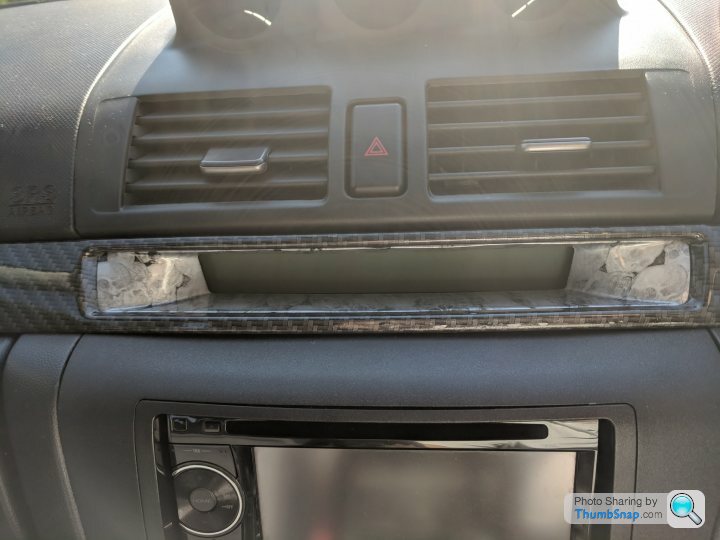
A further back shot does show a rather lot of carbon fibre so I'm going to try and tone it down a little with some plastic parts from a plain Mazda 3 Stereo.
Currently it looks like:
The plastic I have in mind:
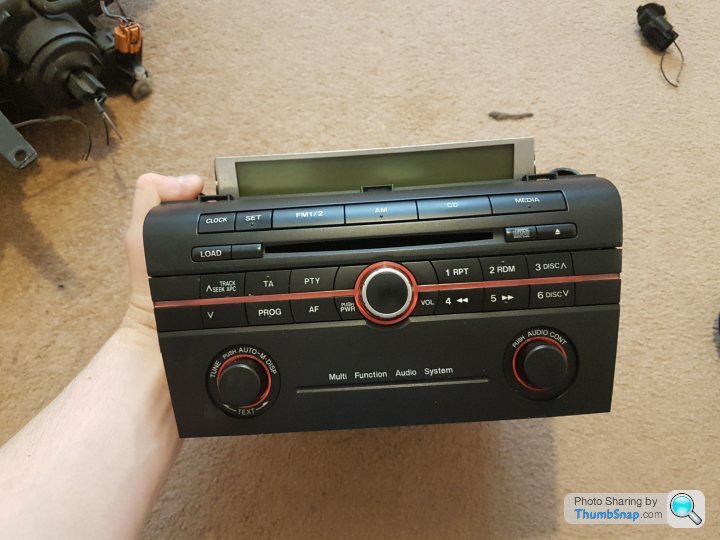
I just want it less shiny on the top but will have to wait and see what it will come out like. If this fails then I will end up getting an Eonon unit. When sitting inside the cabin it doesn't look so bad close up. The botton carbon fibre effect is slightly darker to give it some contrast. I might look at doing the info display surround the same shade to give that a bit more contrast too.
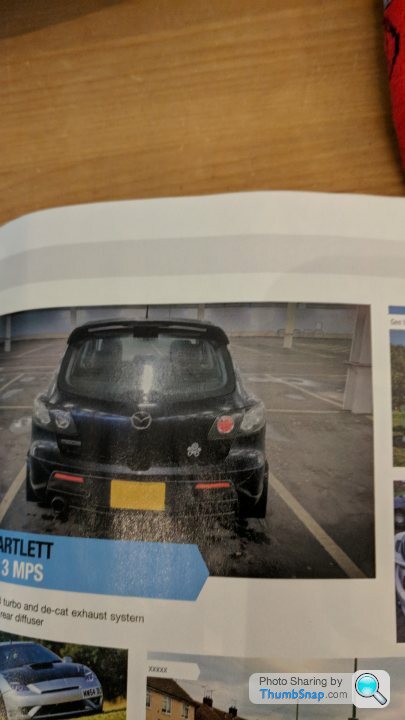
On a side note the car did make it into the back of Aprils issue of Banzai magazine complete with PH sticker
 |
|
Wheels and handling:
The wheels have come back unbent (I had another with slight lip damage I thought I would get done at the same time:
They have now been sent off to be painted!
During the colder wet weather I've noticed the suspension go a bit creaky and knocky and with it being sporadic I guessed it may be bush related. As the money was there to be spent I thought it would be a good opportunity to upgrade both the front and rear anti roll cars with upated 27mm Whiteline items alond with some adjustable drop links. Here's an example of what the originals look like:
The uprated ones are nice and chunky!
|Annoyingly the knocking has stopped a bit so these will be fitted at a later date - the full kit worked out cheaper then just getting front and rear drop links and an anti roll bar. They're also 2 point adjustable so it should make the car more fun on cornering..
Mapping:
A new log and map revision has been done. As you can see from the above - the power band looks neater. Since this log I've now disabled SWAS (Steering Wheel Angle Sensor) on Versatune. What Swas does is chuck extra fuel into the engine when turning, which reduces the power output. Disabling this therefore cuts this down so the engine can put out more power when cornering. I've given it a little test and it does seem to make a difference.
Visual:
The final bits of the interior hydrodipping has now been done:
Astray re-assembled:
Gulzar will be proud!!
Please note I've finished this part off yet - I thought it would be fun to give the car an "easter egg" and add something a little bit different, which can be hidden away when needed
A bit of special double sided tape to put the handbrake gator back:
Here it is all back together:
A further back shot does show a rather lot of carbon fibre so I'm going to try and tone it down a little with some plastic parts from a plain Mazda 3 Stereo.
Currently it looks like:
The plastic I have in mind:
I just want it less shiny on the top but will have to wait and see what it will come out like. If this fails then I will end up getting an Eonon unit. When sitting inside the cabin it doesn't look so bad close up. The botton carbon fibre effect is slightly darker to give it some contrast. I might look at doing the info display surround the same shade to give that a bit more contrast too.
On a side note the car did make it into the back of Aprils issue of Banzai magazine complete with PH sticker
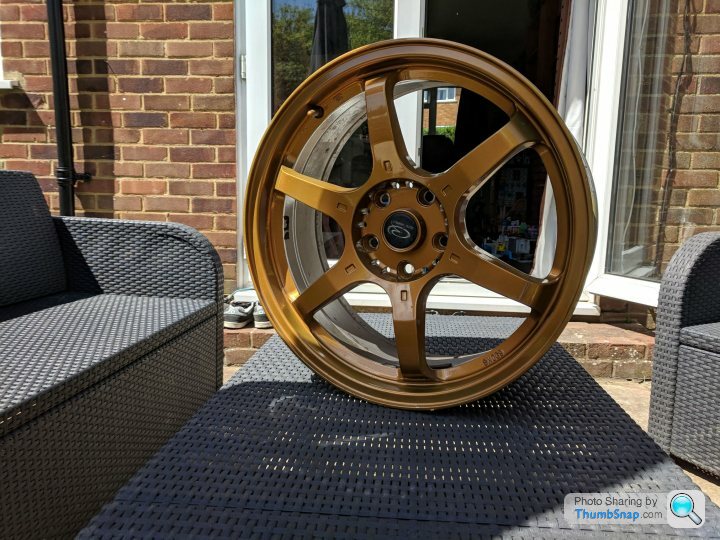
| Wheels:
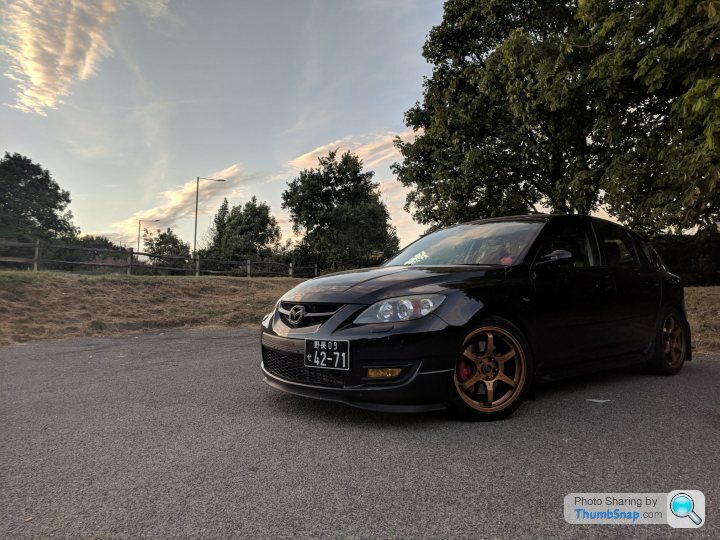
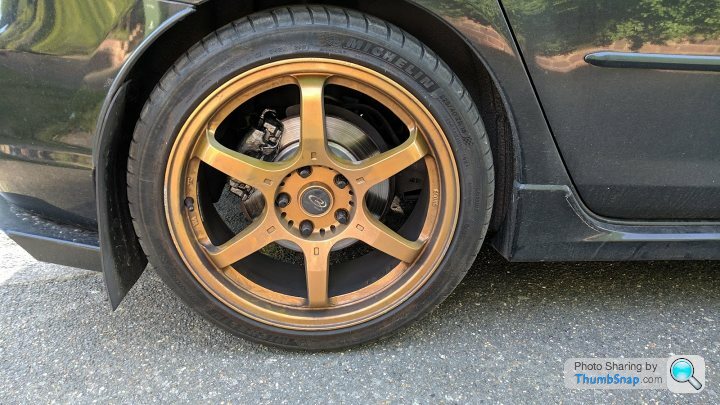
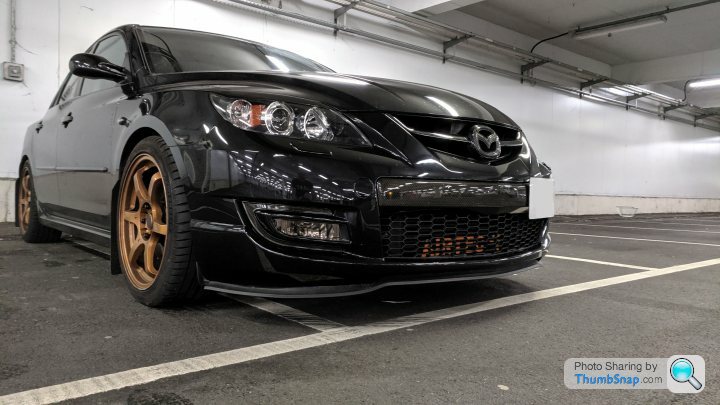
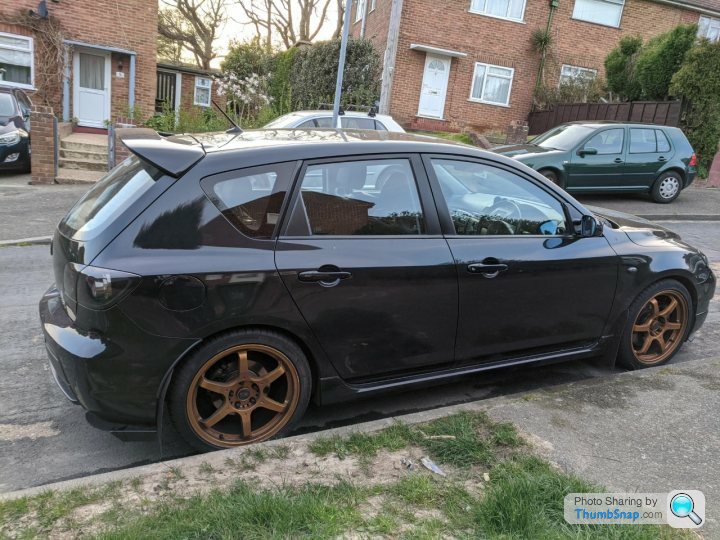
I got the wheels back - I think the colour is a mix of gold and Toyota GT86 orange from the top of my head:
Here's a pic of them on the car - they're a little kerbed now
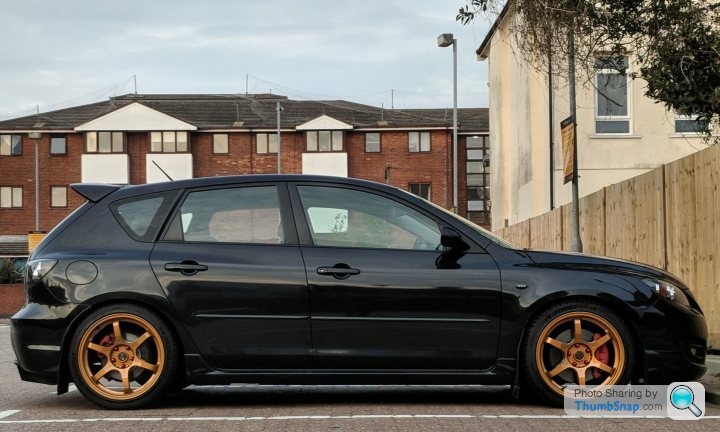
I may get some winter tyres on my old wheels and get these re-done over the winter/next spring.
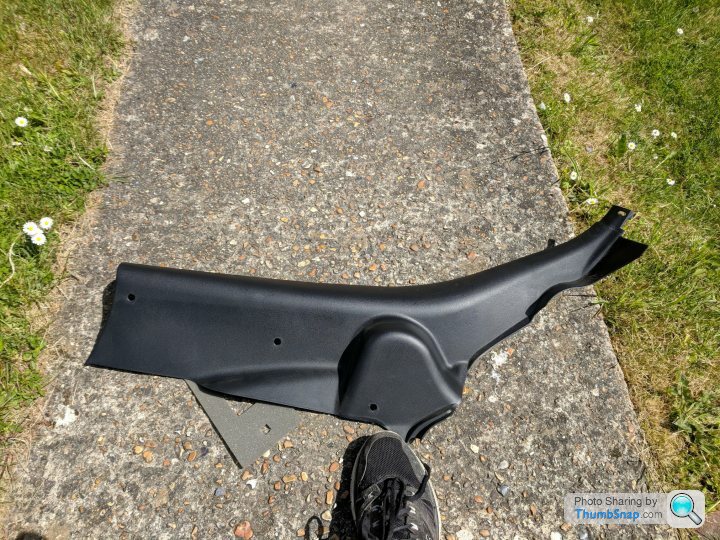
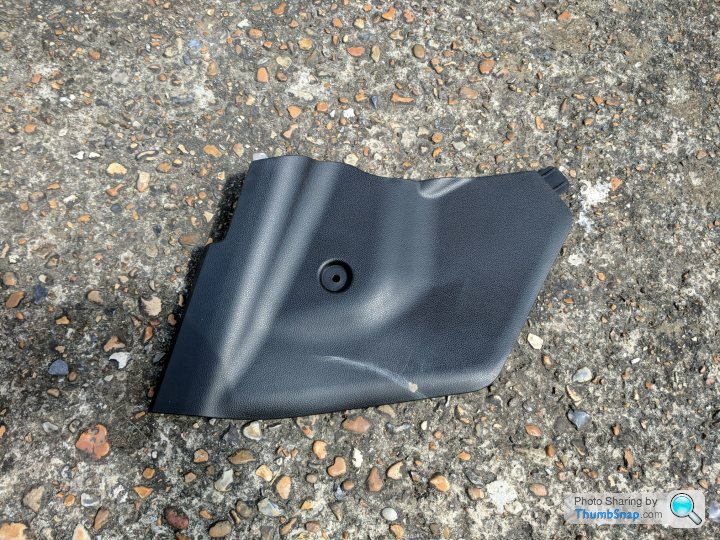
Interior:
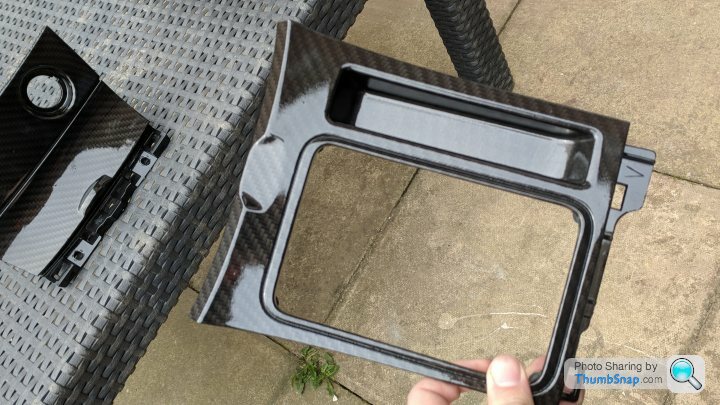
I took some interior plastics off ready for more spraying. The standard plastics appears to attract mud and scratches. It's nice and easy to clean when sprayed. The plastics are easy to get off apart from the ones near the rear seats:[
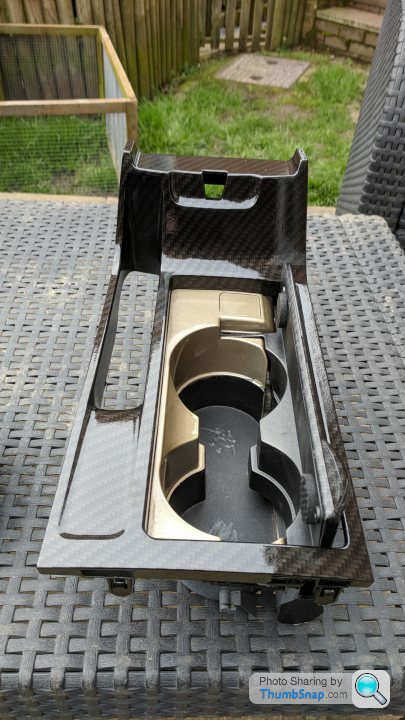
I wanted to have like an easter egg/bit of fun in the interior and the shark in the Corsa story kind of inspired me. Instead of doing anything to the glove box I thought it would be good fun to customise the cup holders. I got the guy who does the dipping to paint it any colour of his choice and it came back gold! I finished it off with a bit of sticker bombing (well an attempt at it at least haha). Results below:
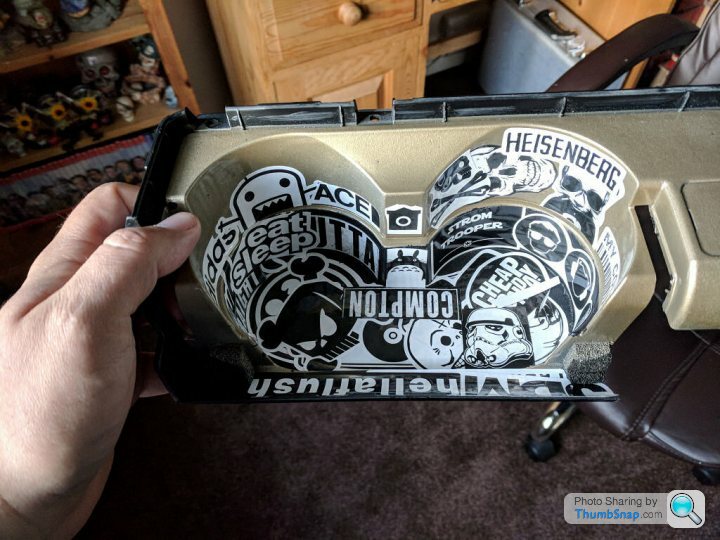
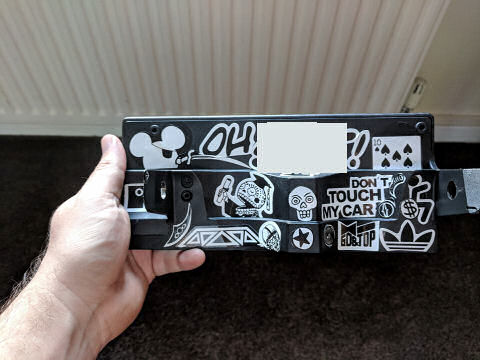
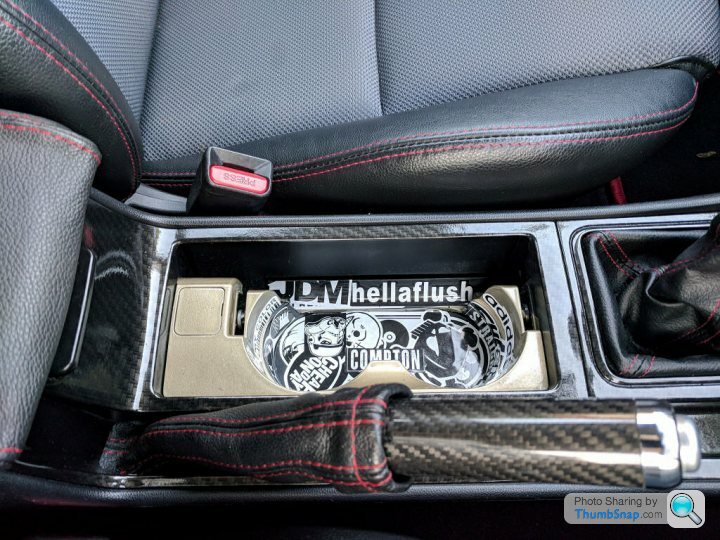 |
|
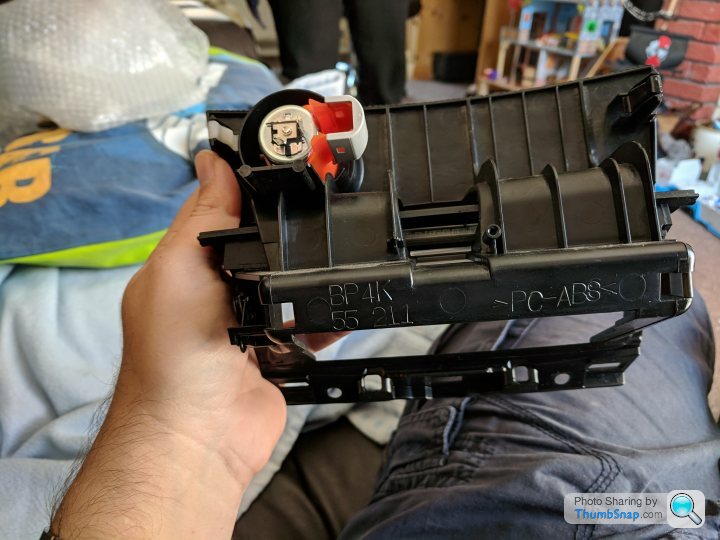
The lid will go back on - I just had to get some parts re-done as there was some issues with the laquar. The good thing with this is that the part can be easily swapped over with a plain oem one if anyone or me decided to change it..
An unexpected upgrade was the audio. Someone had one of the stereo's I was after for sale at a good price. It included all the wiring and steering wheel controls so I just couldn't say no really. There's only a few stereo's out there that's compatible with the Bose speakers the MPS comes with and this is one of them:
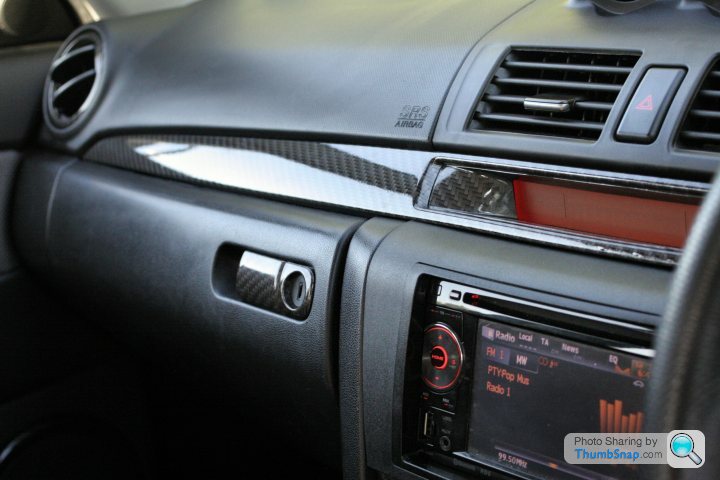
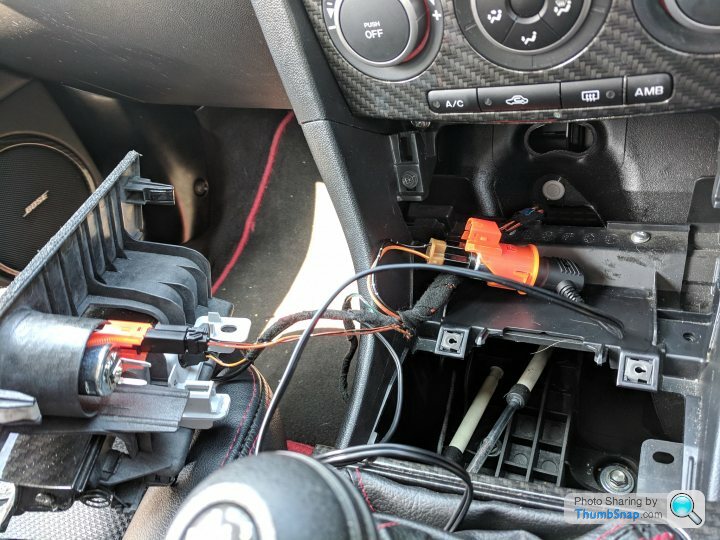
Fitting was an absolute pain as you have to make a the double din cage from the Mazda stereo custom so it fits the info bar on top. The downside is that you lose a lot of the info display such as mpg and the time but the stereo as the time on the screen You also have to cut the legs of the front of the cage so the facia sits in properly and faff about with the wiring at the back of the stereo to get the stereo sitting in as it should. After several hours we finally got there!! Unforunately I no longer have the pics showing the work.
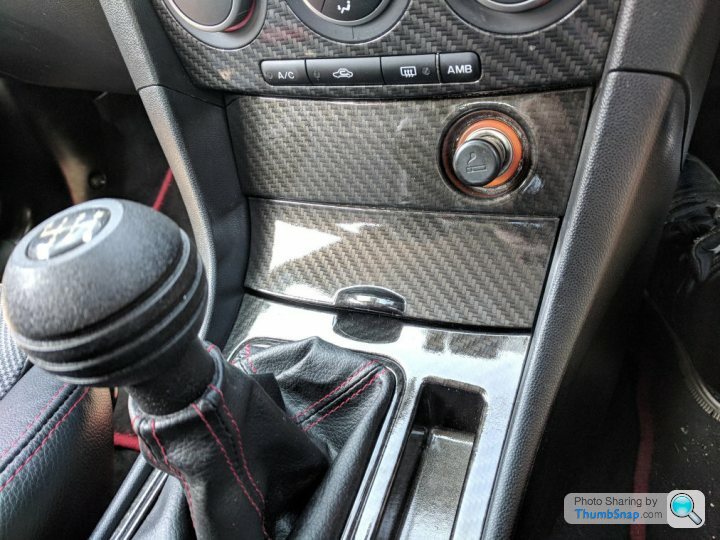
The result is amazing - there is so much more power going through to the speakers and the sound quality is good to. There's also additional extra's over the stock stereo such as touch screen, a rear camera add on if you wanted one, dvd player, usb and bluetooth. You can also change the display colours to match the cars interior colours.
Exterior:
I took the lightbrows off as the lights could do with another refurb - this time I'm going to take them to a professional restoration company to get them done as one side is getting bad. I bought another lightbrow kit from Ebay as I wasn't keen on the old ones touching the wings. A test fit is below:
I think the left side was put in better as the right side looks a little wonky. These won't be fitted properly for another few moths at least.
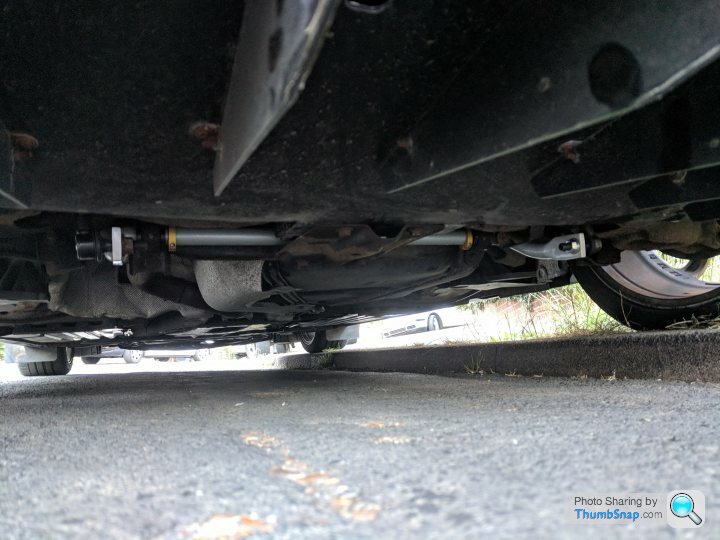
I had another go at the front splittler. This time around I bought some ramps to use so I can get underneath the car and screw it in. Hopefully it will stay on for a but longer then before..


It was sad to see various marks on the bottom of the bumper where it's casught stuff before (black seems to show any mark!). The splitter was cheap at under £10 as it's just a rubber strip. I just didnt fancy spending hundreds on getting one then it ends up breaking within a week..
Another unexpected surprise was the rear canards. I've been thinking about getting some to compliment the rear diffuser but none were in the right style and they were quite expensive. By luck i stumbled across a post from the guy that did the diffusers doing a group buy on the canards. The end result:
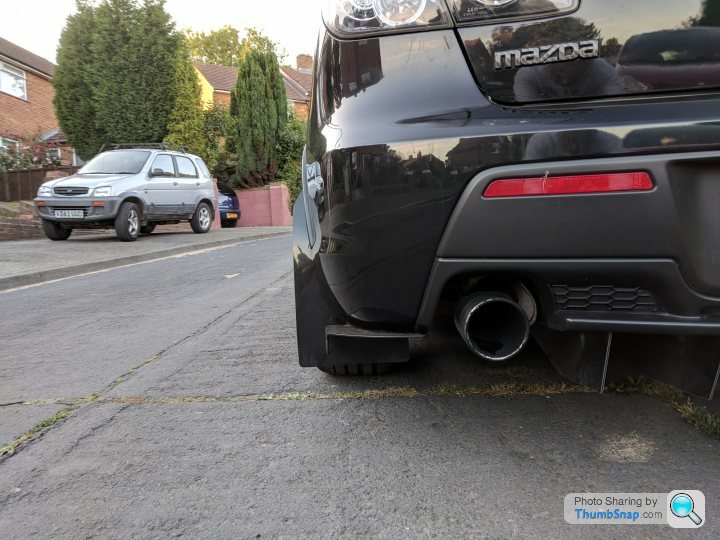
They're just for visual purposes really as it just gives the finishing touch for the rear diffuser. I'm a but unsure of the rear flaps now as they are in the way - rear mud flaps or rear canards? It just looks a little off with them both there but the rear mud flaps do have a purpose and also make the car look a little wider from the rear.
I got the wheels back - I think the colour is a mix of gold and Toyota GT86 orange from the top of my head:
Here's a pic of them on the car - they're a little kerbed now
I may get some winter tyres on my old wheels and get these re-done over the winter/next spring.
Interior:
I took some interior plastics off ready for more spraying. The standard plastics appears to attract mud and scratches. It's nice and easy to clean when sprayed. The plastics are easy to get off apart from the ones near the rear seats:[
I wanted to have like an easter egg/bit of fun in the interior and the shark in the Corsa story kind of inspired me. Instead of doing anything to the glove box I thought it would be good fun to customise the cup holders. I got the guy who does the dipping to paint it any colour of his choice and it came back gold! I finished it off with a bit of sticker bombing (well an attempt at it at least haha). Results below:
|The lid will go back on - I just had to get some parts re-done as there was some issues with the laquar. The good thing with this is that the part can be easily swapped over with a plain oem one if anyone or me decided to change it..
An unexpected upgrade was the audio. Someone had one of the stereo's I was after for sale at a good price. It included all the wiring and steering wheel controls so I just couldn't say no really. There's only a few stereo's out there that's compatible with the Bose speakers the MPS comes with and this is one of them:
Fitting was an absolute pain as you have to make a the double din cage from the Mazda stereo custom so it fits the info bar on top. The downside is that you lose a lot of the info display such as mpg and the time but the stereo as the time on the screen
You also have to cut the legs of the front of the cage so the facia sits in properly and faff about with the wiring at the back of the stereo to get the stereo sitting in as it should. After several hours we finally got there!! Unforunately I no longer have the pics showing the work.The result is amazing - there is so much more power going through to the speakers and the sound quality is good to. There's also additional extra's over the stock stereo such as touch screen, a rear camera add on if you wanted one, dvd player, usb and bluetooth. You can also change the display colours to match the cars interior colours.
Exterior:
I took the lightbrows off as the lights could do with another refurb - this time I'm going to take them to a professional restoration company to get them done as one side is getting bad. I bought another lightbrow kit from Ebay as I wasn't keen on the old ones touching the wings. A test fit is below:
I think the left side was put in better as the right side looks a little wonky. These won't be fitted properly for another few moths at least.
I had another go at the front splittler. This time around I bought some ramps to use so I can get underneath the car and screw it in. Hopefully it will stay on for a but longer then before..
It was sad to see various marks on the bottom of the bumper where it's casught stuff before (black seems to show any mark!). The splitter was cheap at under £10 as it's just a rubber strip. I just didnt fancy spending hundreds on getting one then it ends up breaking within a week..
Another unexpected surprise was the rear canards. I've been thinking about getting some to compliment the rear diffuser but none were in the right style and they were quite expensive. By luck i stumbled across a post from the guy that did the diffusers doing a group buy on the canards. The end result:
They're just for visual purposes really as it just gives the finishing touch for the rear diffuser. I'm a but unsure of the rear flaps now as they are in the way - rear mud flaps or rear canards? It just looks a little off with them both there but the rear mud flaps do have a purpose and also make the car look a little wider from the rear.
It feels like it's been ages since I've done an update!!
Whiteline ARB's and drop links fitted:
They give a massive improvement in handling and I can actually do some decent cornering now. The rear is not on the stiffest setting but I may change that in the future to get a little more understeer. The steering feels really tight and there's no more knocking from the bushes/drop links.
More interior..
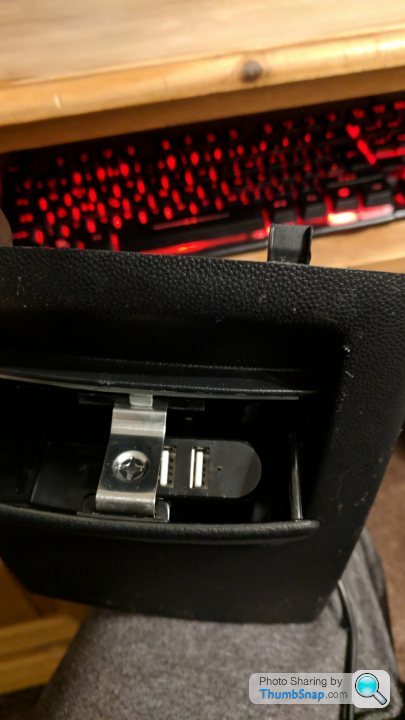
After a long trip in the car it was getting annoying having to plug in stuff to the lighter socket and have excess cables everywhere:
[
 |
|

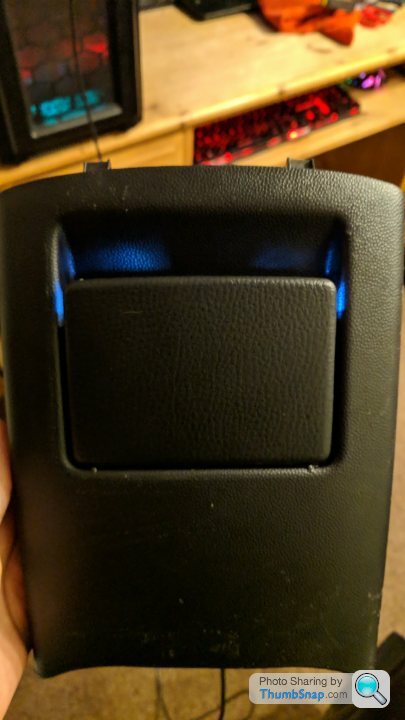
The lid does shut
I might look for a smaller USB adapter in the future so it fits in a little better - that one was just laying around.
I had some more plastics sprayed back to neaten it up and go over some scratches:
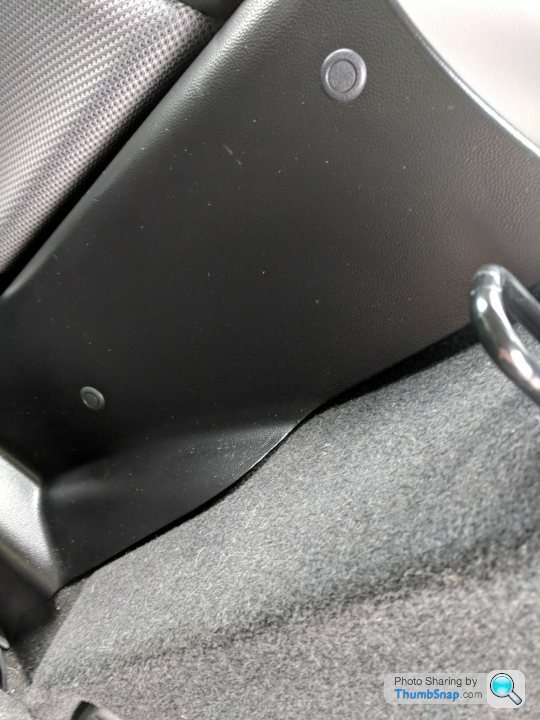
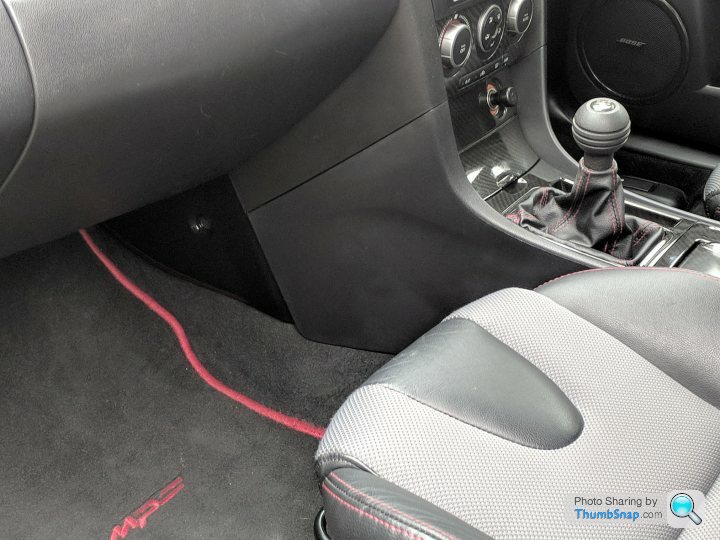
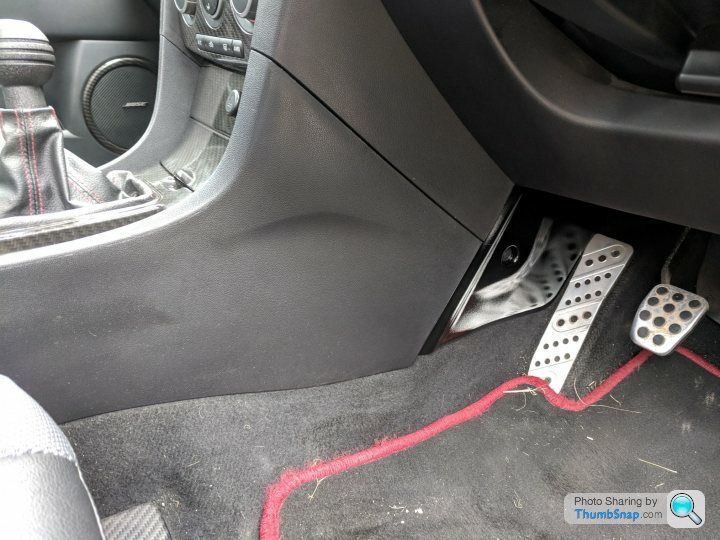
I chose the black plastic in the footwell as I thought it will make the centre console stand out a little bit more rather then it being a sea of grey plastic.. The one by the pedals isn't too bad it just looks really shiny in the pic. I've currently got the plastics that go over the front seatbelts in for spraying. Once these are done I'll look at doing something with the kick/sill plates. I'm tempted to get them done either in a dark carbon fibre dip or just get them sprayed black to match the other plastics.
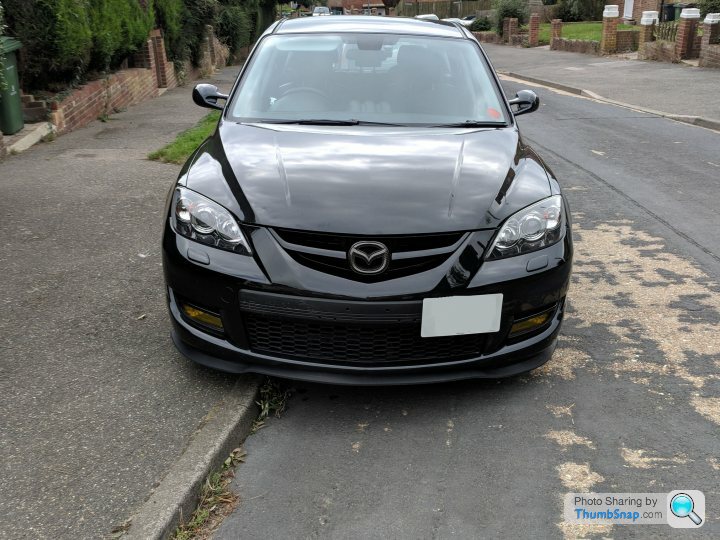
Exterior..
I got the headlights machine polished as the front passenger one was going yellow and nasty again - now they look like new
 |
|
Someone posted up another link for clear rear foglights on Ebay. I wanted to give it another go before I look at getting them tinted so I plucked up the courage and got one and lukily it doesn't rub!! This one is made by Depo and has a better fitmant then the other one I had (I think the other one was a Stanley). It doesn't make much sense though as all my other lights are Stanley. Anyway clear rear fog take 2!!
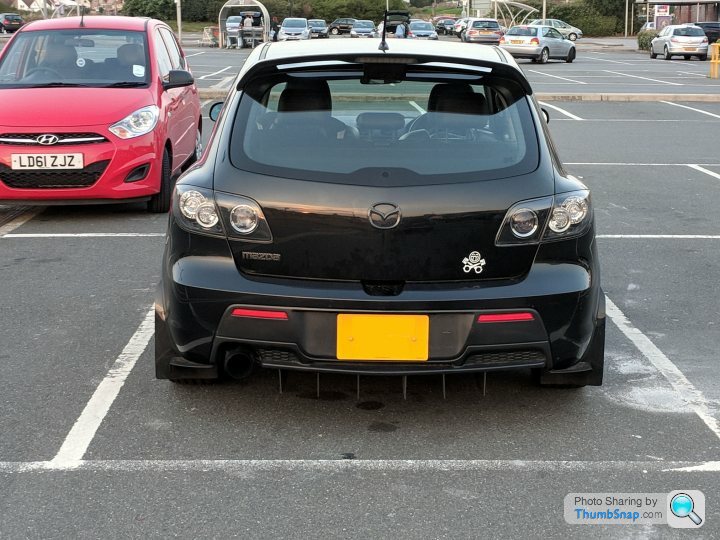
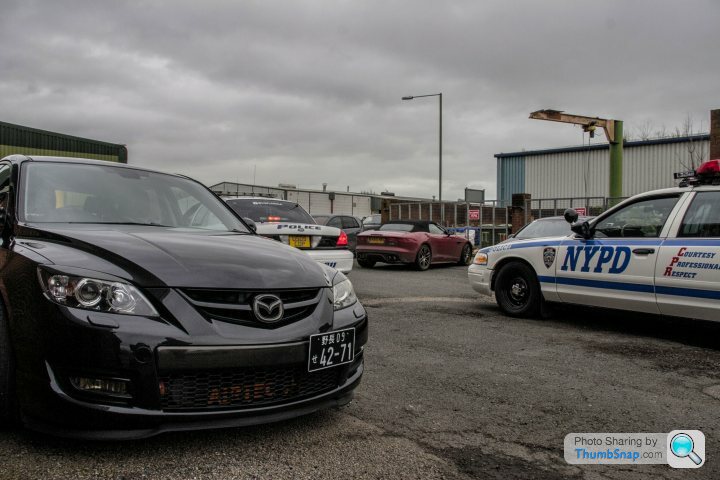
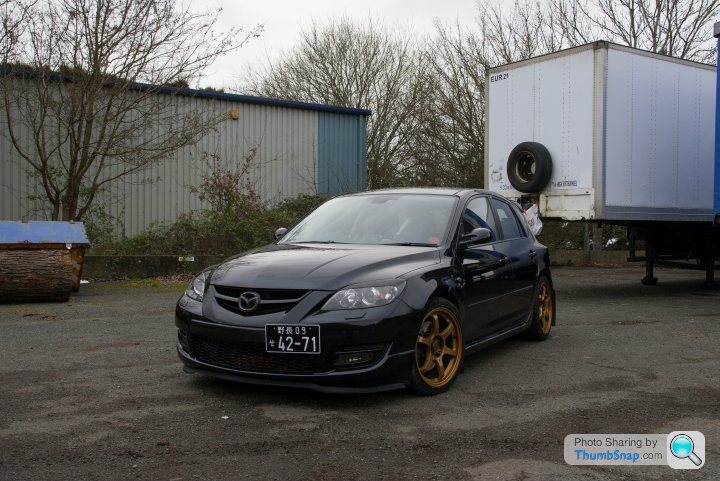
Lastly I got some Jap plates to stick over the normal ones. I tend to use them for car shows or for when I decide to take some proper photo's of it. It looks having black plates on a black car I just need to sort out that bumper plastic at some point:
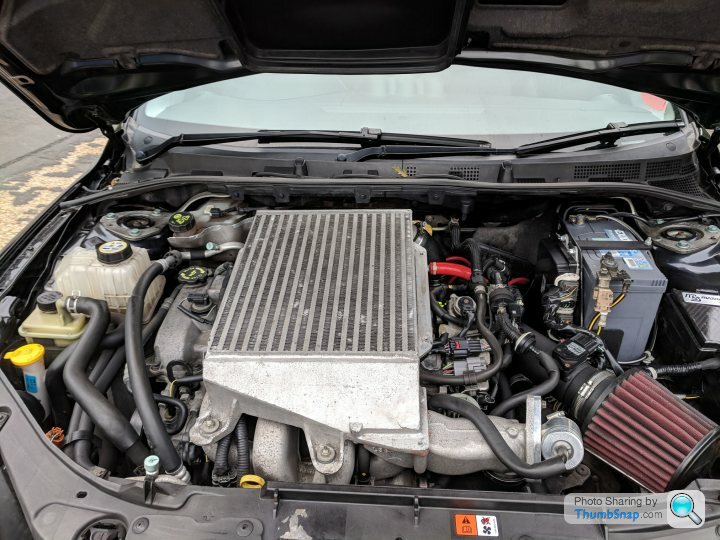
Intercooler..
The long hot summer hasn't helped the standard intercooler, which probably isn't helped by having the bigger turbo stuck to it. Someone was selling a 2nd hand one cheap so I thought I would buy it up altohugh in the long term I will probably end up getting a front mount one. I thought it would be good to do a few tests with it. It currently doesn't have a shroud so it will lose some performance but I'm currently in the process of getting one made up.
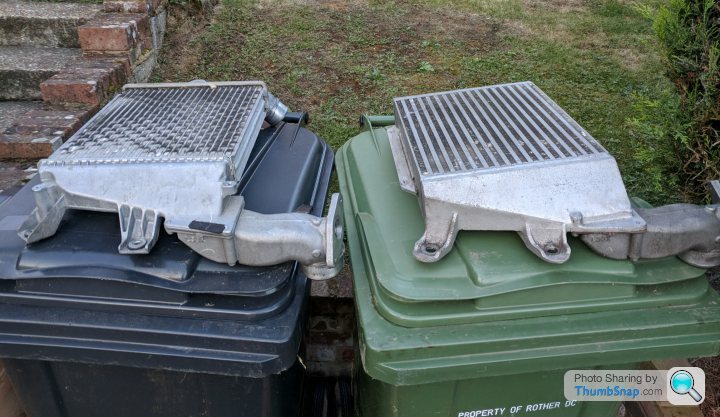
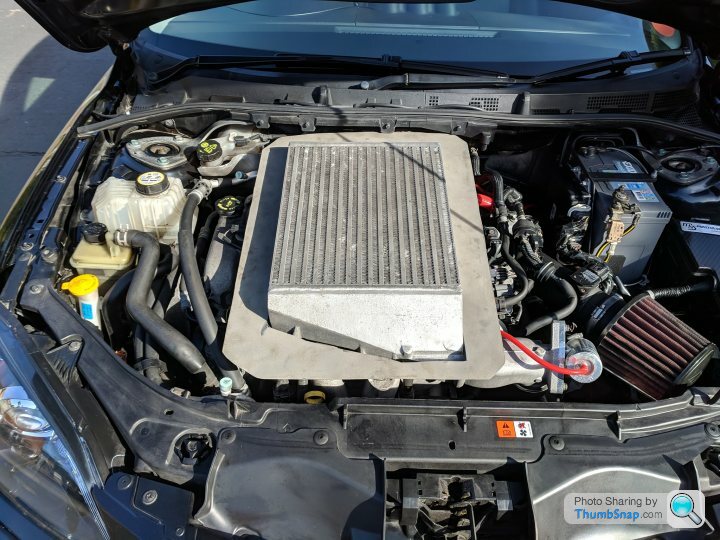
Here's the 2 coolers side by side - the new one has the thicker 3" core:
Swapping them over was fairly easy but I did manage to cut one of the silicone pipes too short so I had to rever back to the original hose for now:

Fitted:
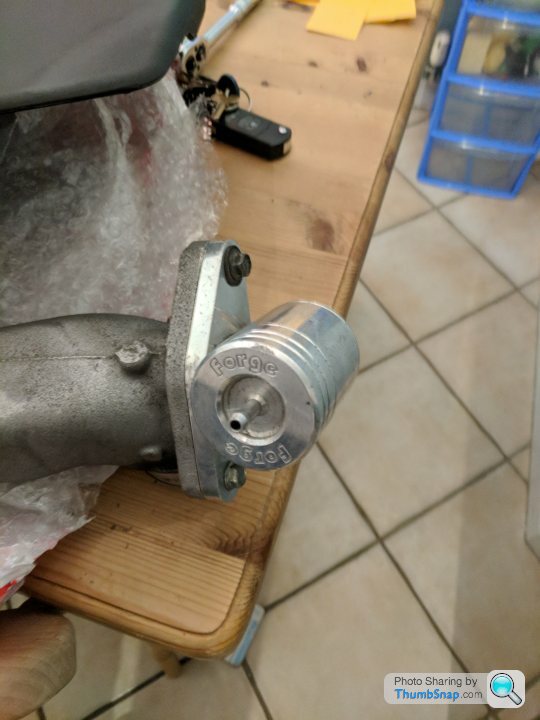
Fitting wasn't all that easy though.. Despite trying to be careful I manage to snap a bolt that goes from the Forge v2 to the intercooler - no problem I thought I'll drill it out and re-do it. Then it snapped again!! Luckily you can change the pipe that runs from the intercooler core to the Forge V2 over:
Coincidently the bolts that hold down the old intercooler shroud are a perfect fit
I did a virtual dyno log to compare the 2. I had to adjust the setting as previously I had the CF on 1.09, which was the incorrect setting. The 1.01 CF should be more accurate, altohugh the actual figures shouldn't be taken for granted:
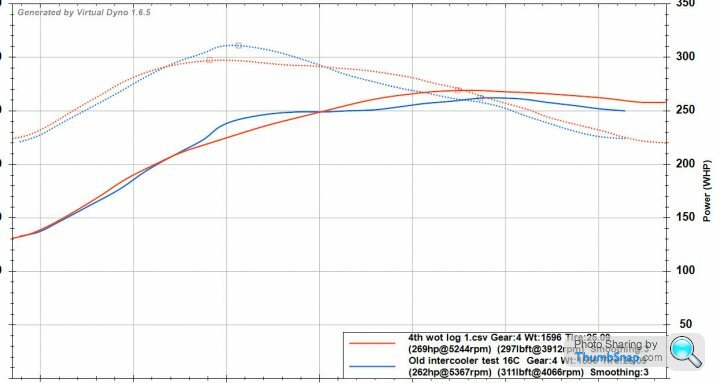
With no additional mapping and on the same surface and temp the new cooler gave me an extra 7hp but I lost 14lbs torque but despite this and having no shroud, which will impact the performance the new intercooler held up better at higher revs. After this run I did another run straight away and lost 5hp probably due to heatsoak. These are at the wheel figures so at the fly it should be about 298hp.
I've now got a new map, which I'm yet to log as I want to sort out a few small niggles not mapping related. Once these have been sorted I will do some new logs
Whiteline ARB's and drop links fitted:
They give a massive improvement in handling and I can actually do some decent cornering now. The rear is not on the stiffest setting but I may change that in the future to get a little more understeer. The steering feels really tight and there's no more knocking from the bushes/drop links.
More interior..
After a long trip in the car it was getting annoying having to plug in stuff to the lighter socket and have excess cables everywhere:
[
|The lid does shut
I might look for a smaller USB adapter in the future so it fits in a little better - that one was just laying around.
I had some more plastics sprayed back to neaten it up and go over some scratches:
I chose the black plastic in the footwell as I thought it will make the centre console stand out a little bit more rather then it being a sea of grey plastic.. The one by the pedals isn't too bad it just looks really shiny in the pic. I've currently got the plastics that go over the front seatbelts in for spraying. Once these are done I'll look at doing something with the kick/sill plates. I'm tempted to get them done either in a dark carbon fibre dip or just get them sprayed black to match the other plastics.
Exterior..
I got the headlights machine polished as the front passenger one was going yellow and nasty again - now they look like new
|Someone posted up another link for clear rear foglights on Ebay. I wanted to give it another go before I look at getting them tinted so I plucked up the courage and got one and lukily it doesn't rub!! This one is made by Depo and has a better fitmant then the other one I had (I think the other one was a Stanley). It doesn't make much sense though as all my other lights are Stanley. Anyway clear rear fog take 2!!
Lastly I got some Jap plates to stick over the normal ones. I tend to use them for car shows or for when I decide to take some proper photo's of it. It looks having black plates on a black car I just need to sort out that bumper plastic at some point:
Intercooler..
The long hot summer hasn't helped the standard intercooler, which probably isn't helped by having the bigger turbo stuck to it. Someone was selling a 2nd hand one cheap so I thought I would buy it up altohugh in the long term I will probably end up getting a front mount one. I thought it would be good to do a few tests with it. It currently doesn't have a shroud so it will lose some performance but I'm currently in the process of getting one made up.
Here's the 2 coolers side by side - the new one has the thicker 3" core:
Swapping them over was fairly easy but I did manage to cut one of the silicone pipes too short so I had to rever back to the original hose for now:
Fitted:
Fitting wasn't all that easy though.. Despite trying to be careful I manage to snap a bolt that goes from the Forge v2 to the intercooler - no problem I thought I'll drill it out and re-do it. Then it snapped again!! Luckily you can change the pipe that runs from the intercooler core to the Forge V2 over:
Coincidently the bolts that hold down the old intercooler shroud are a perfect fit
I did a virtual dyno log to compare the 2. I had to adjust the setting as previously I had the CF on 1.09, which was the incorrect setting. The 1.01 CF should be more accurate, altohugh the actual figures shouldn't be taken for granted:
With no additional mapping and on the same surface and temp the new cooler gave me an extra 7hp but I lost 14lbs torque but despite this and having no shroud, which will impact the performance the new intercooler held up better at higher revs. After this run I did another run straight away and lost 5hp probably due to heatsoak. These are at the wheel figures so at the fly it should be about 298hp.
I've now got a new map, which I'm yet to log as I want to sort out a few small niggles not mapping related. Once these have been sorted I will do some new logs
With help from a friend we started making a home made shroud. I'll save showing you the carboard version..
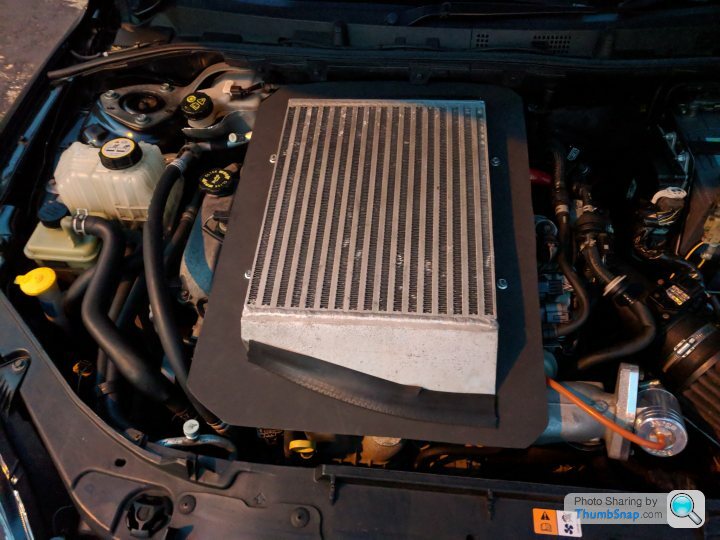
A bit of high temp spray and some rubber strips later and its all as sealed as it can be for a home made job:
In addition to this my coloured bypass hose finally arrived from the usa
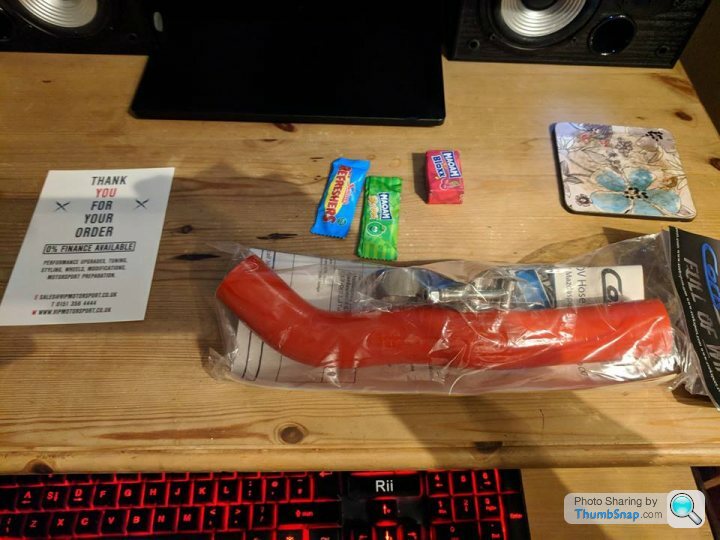
All fitted:

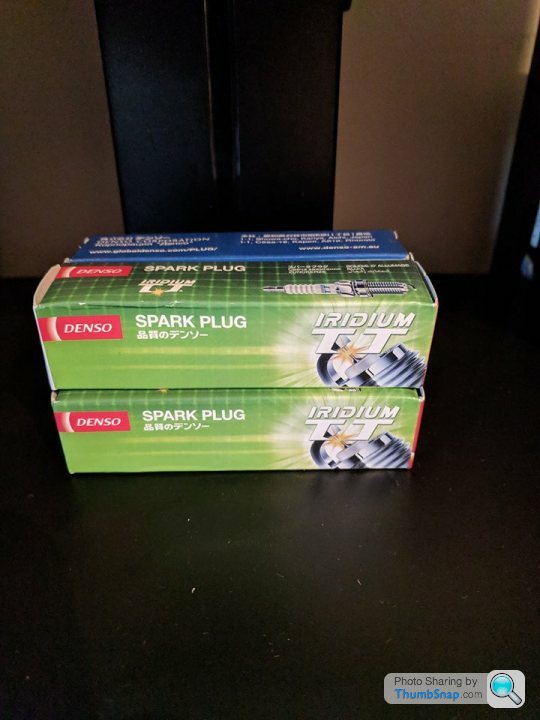
As you can see from the top right there is a slight bend in the shroud but i don't think it will make a huge difference correcting it - some new 10mm nuts made the Forge V2 look a little better. The car had a little mis-fire and hesitation under load, which turned out to be the spark plugs. Some new plugs were ordered and we changed the gapping from the standard 0.8mm to 0.7mm to suit (along with some tuning to match):
I did a few comparison logs to check the stats..
Before:
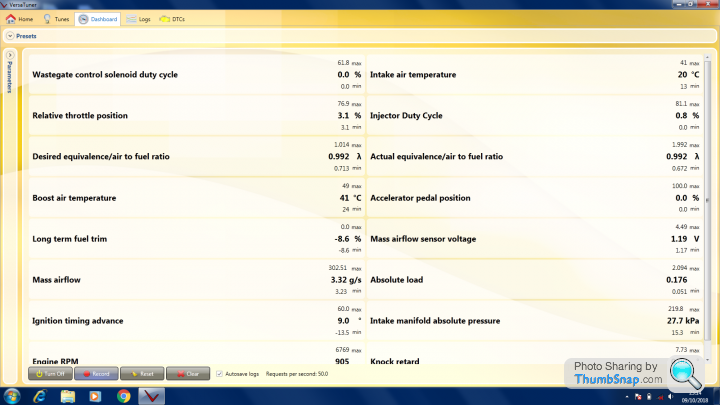
After:
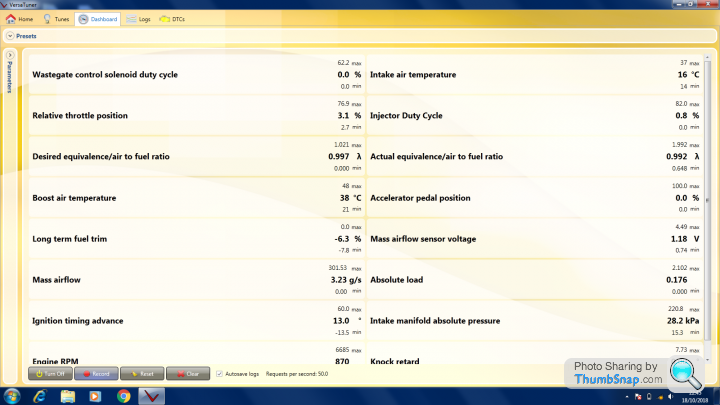
The above was done at the same location with the same outside temps
Here's a chart of the boost air temps compared to the power. As you can see from the after shot the temps rise and fall more gradually with the shroud on:
So what about the power?

I've noticed Virtual Dyno can sometimes give funny figures but the above is a good comparison. The blue is the after figure and the shroud has given me an extra 5whp with torque to match. Again I did the runs at the same location with the same outdoor temps to keep the readings as accurate as possible. Extra weight was added on the 2nd run to make up for more fuel.
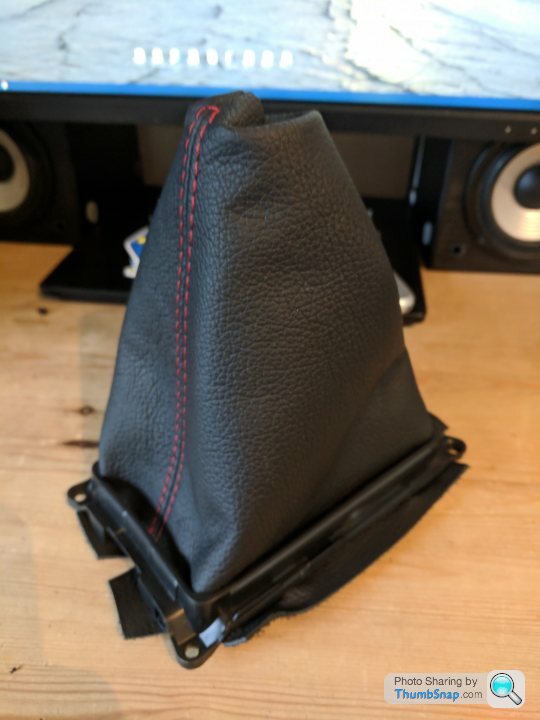
With the interior I bought a new gear gaitor as the colour on the original does not match the new leather put in:
I got a bit bored with all the hydrodipping being carbon fibre so made some changes.
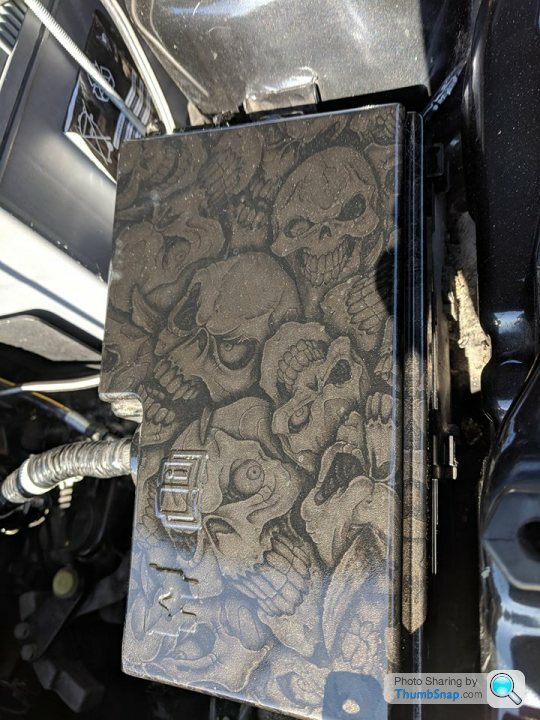
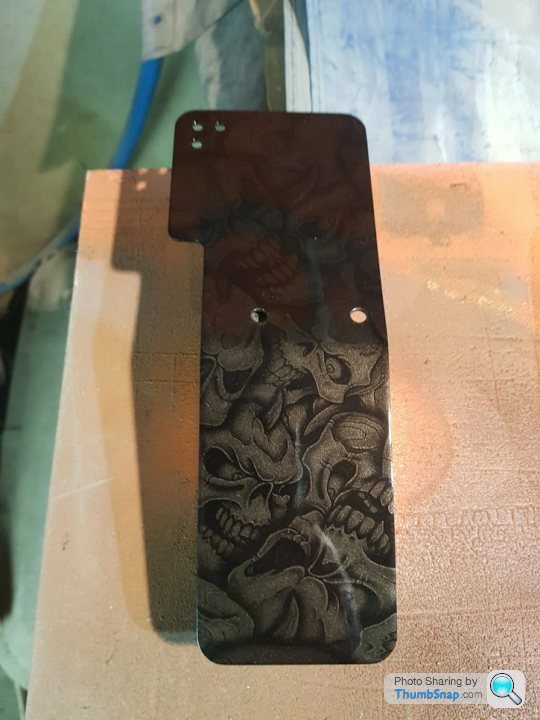
Fuse box cover:
Info display surround:
I decided to get the sill plates dipped in carbon fibre. Here's the rears done:
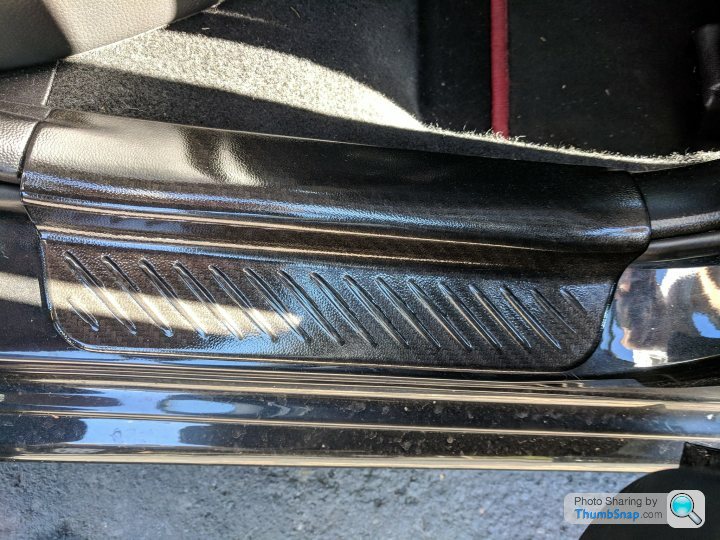
The fronts are being done this month.
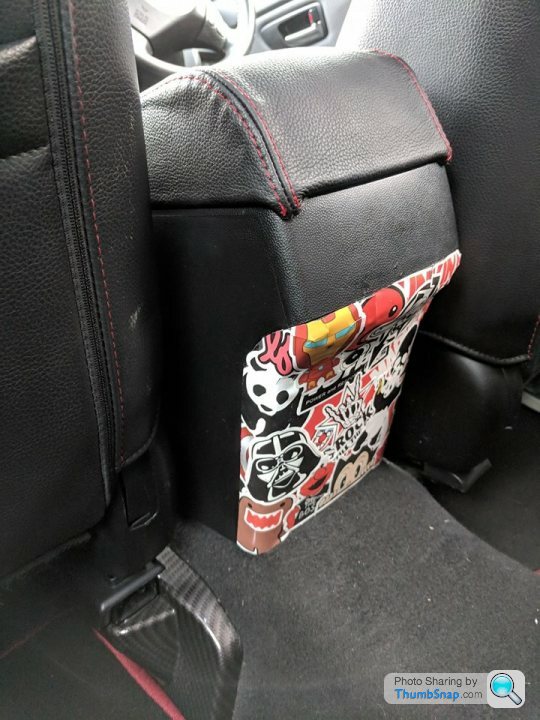
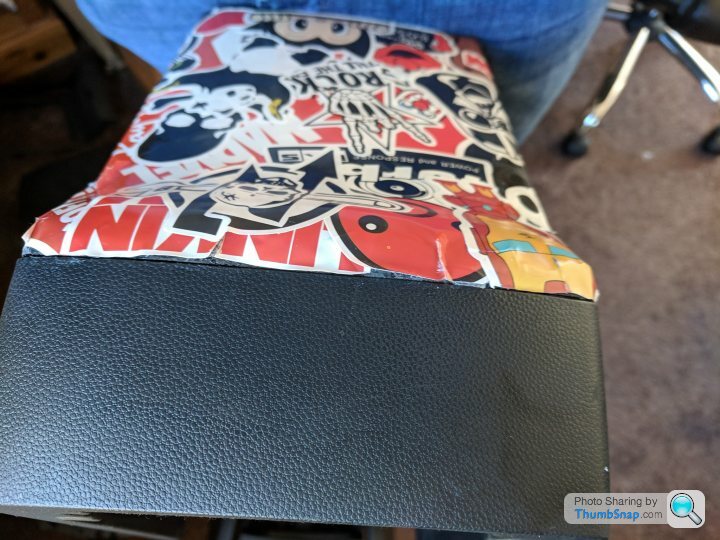
i decided to tackle the dodgy rear panel by the seats. At first I sticker bombed it as the plastidip kept fading after a while but the sticker bombing didn't turn out that great as it kept coming away at the top and it looked a little shi...
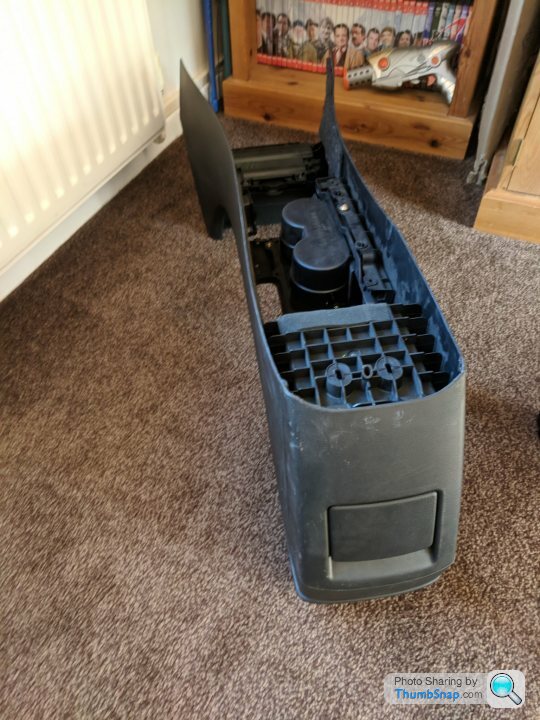
To get around this you have to buy a whole mid console for the one mid panel but they're cheapish to get on ebay if you look around. Interstingly I got one from an older model and it contained some extra sound deadeding, which I swapped over to the new one. The rear panel interestingly contained an ashtray:
Like a lot of interior parts I get 2nd hand off ebay, they usually end up arrinv with more marks on them as liked so I got to work nicking all the spare screws and swapping the parts over:
I'll try and leave this one as it is
A bit of high temp spray and some rubber strips later and its all as sealed as it can be for a home made job:
In addition to this my coloured bypass hose finally arrived from the usa
All fitted:
As you can see from the top right there is a slight bend in the shroud but i don't think it will make a huge difference correcting it - some new 10mm nuts made the Forge V2 look a little better. The car had a little mis-fire and hesitation under load, which turned out to be the spark plugs. Some new plugs were ordered and we changed the gapping from the standard 0.8mm to 0.7mm to suit (along with some tuning to match):
I did a few comparison logs to check the stats..
Before:
After:
The above was done at the same location with the same outside temps
Here's a chart of the boost air temps compared to the power. As you can see from the after shot the temps rise and fall more gradually with the shroud on:
So what about the power?
I've noticed Virtual Dyno can sometimes give funny figures but the above is a good comparison. The blue is the after figure and the shroud has given me an extra 5whp with torque to match. Again I did the runs at the same location with the same outdoor temps to keep the readings as accurate as possible. Extra weight was added on the 2nd run to make up for more fuel.
With the interior I bought a new gear gaitor as the colour on the original does not match the new leather put in:
I got a bit bored with all the hydrodipping being carbon fibre so made some changes.
Fuse box cover:
Info display surround:
I decided to get the sill plates dipped in carbon fibre. Here's the rears done:
The fronts are being done this month.
i decided to tackle the dodgy rear panel by the seats. At first I sticker bombed it as the plastidip kept fading after a while but the sticker bombing didn't turn out that great as it kept coming away at the top and it looked a little shi...
To get around this you have to buy a whole mid console for the one mid panel but they're cheapish to get on ebay if you look around. Interstingly I got one from an older model and it contained some extra sound deadeding, which I swapped over to the new one. The rear panel interestingly contained an ashtray:
Like a lot of interior parts I get 2nd hand off ebay, they usually end up arrinv with more marks on them as liked so I got to work nicking all the spare screws and swapping the parts over:
I'll try and leave this one as it is
It was great reading this thread and the car looks fab overall.
It's all personal views but I think the sticker bomb stuff is a wrong move though - it's a bit 2016 VW 'Scene' and is at odds with all the other cool stuff you have done. Cheapens the overall look for me.
I think overall the car looks awesome and thanks for sharing
It's all personal views but I think the sticker bomb stuff is a wrong move though - it's a bit 2016 VW 'Scene' and is at odds with all the other cool stuff you have done. Cheapens the overall look for me.
I think overall the car looks awesome and thanks for sharing
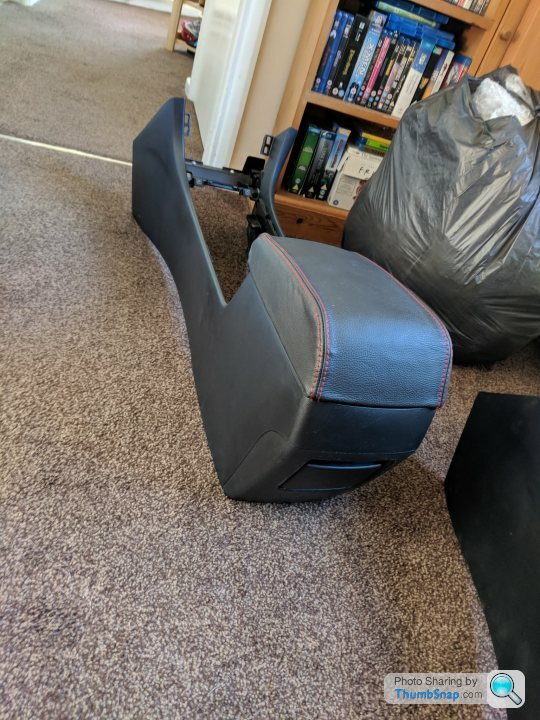
It's been a while but I've manged to stockpile a few parts. First off I added a small usb hub to the rear ashtray. This is just for longer trips so rear seat passengers (mainly my son) can charge their tablet etc on the move. It can be easily taken out and swapped over if the car is sold etc. It's a bit of a cheap and tacky mod but does the job.
I got the boot trim hydrodipped - it looks so much better now..
img]https://thumbsnap.com/sc/9swfO6Jy.jpg[/img]
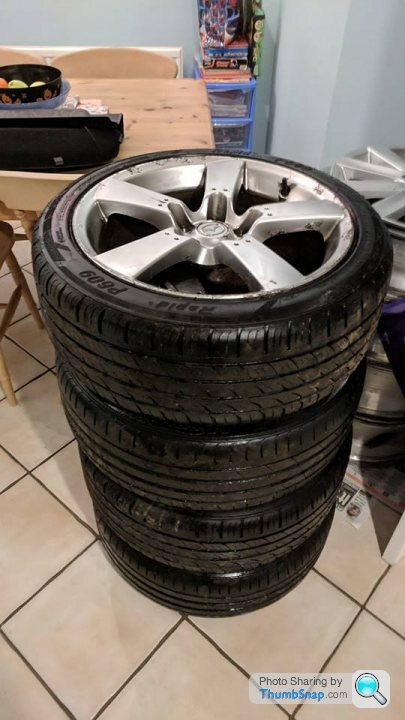
I finally managed to sell my mk1 wheels and got a set of 4 RX8 wheels with tyres for £50. These are to be used as a spare set/winter wheels as i plan to get the Rota's refurbed in the future.
I was thinking of changing the wheel colour so it's more of a matt gold and so far i have the black spline nuts ready to go on and some metallic gun metal caliper paint to go with it but I need a nice dry weekend to give the calipers a paint. Here's a quick mock up of the colour scheme:
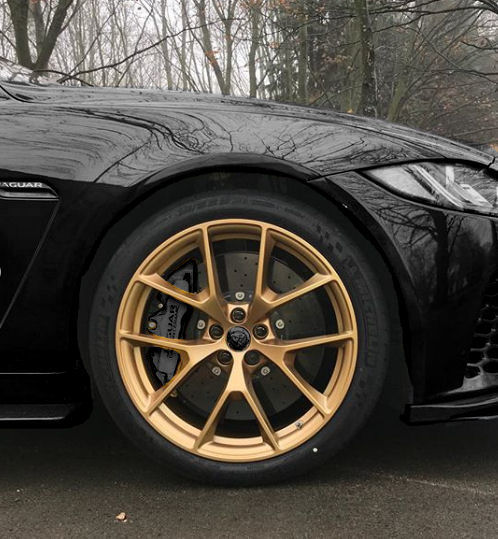
i thought it would make a change to having the typical red calipers.
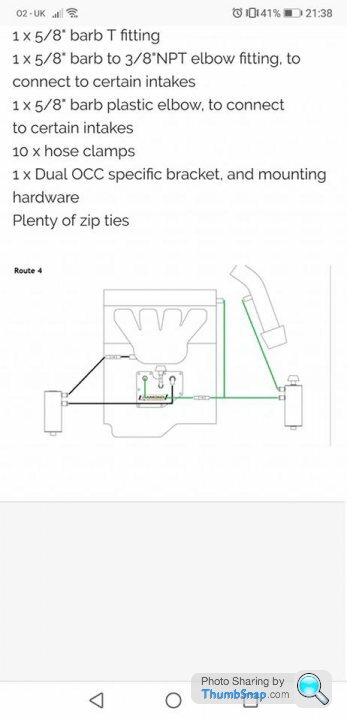
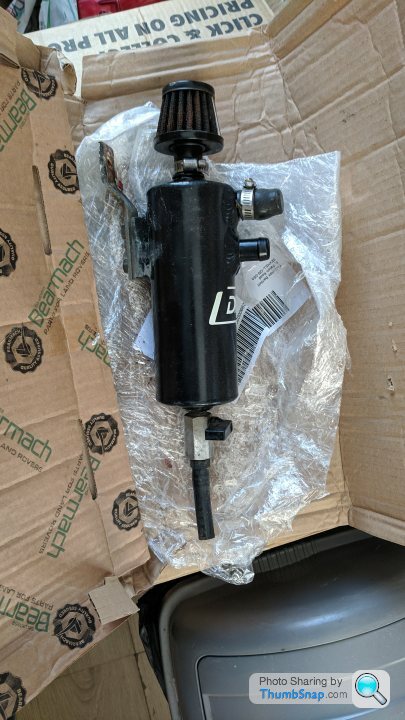
Over the winter months I started working on the oil catch can set up given that the PCV system on the MPS isn't great; especially running at higher power. Before I get the downpipe fitted I want to get a dual catch can set up:
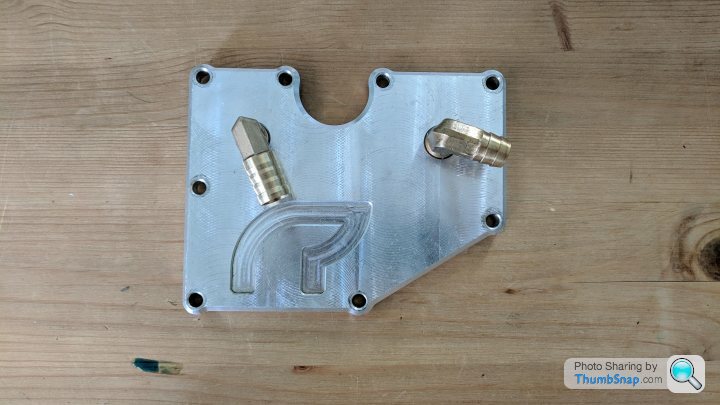
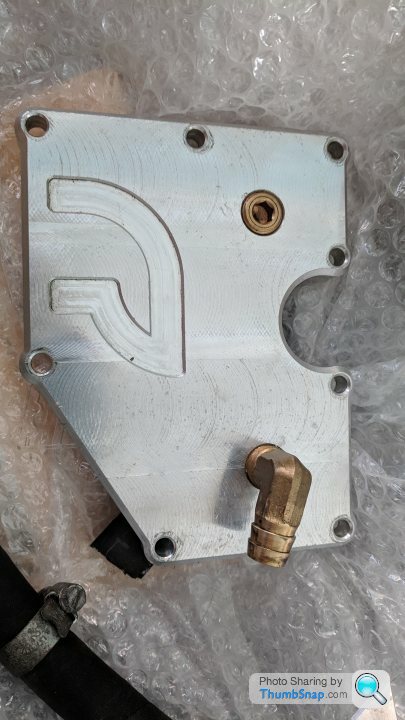
Luckily someone was selling a PCV plate with a catch can but it only had a single output:
A bit of hunting on ebay found the right parts to change it to a dual setup:
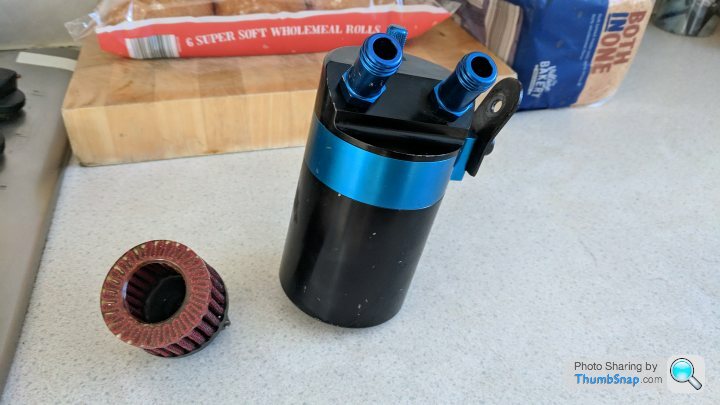
The can that come with the set wasn't really suitable for VTA so I sold this and currently need the following:
- Damond VTA catch can with check valve
- 2 Check valves
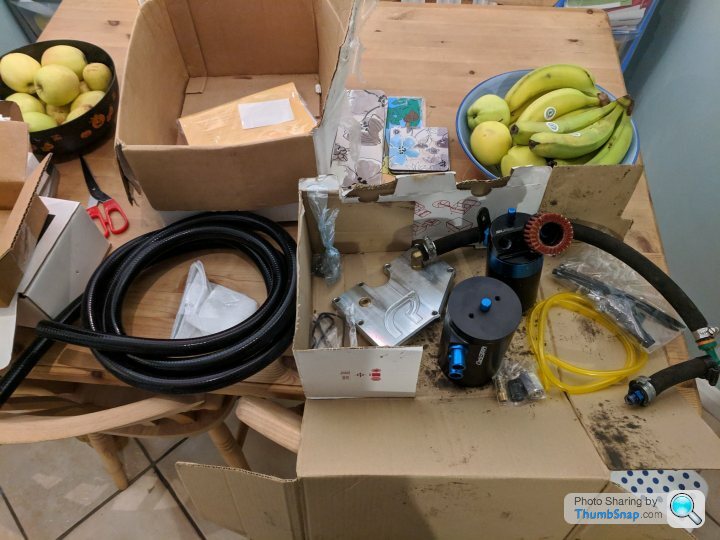
Here's some of the other parts - the kitchen is a great place to mess about with car parts
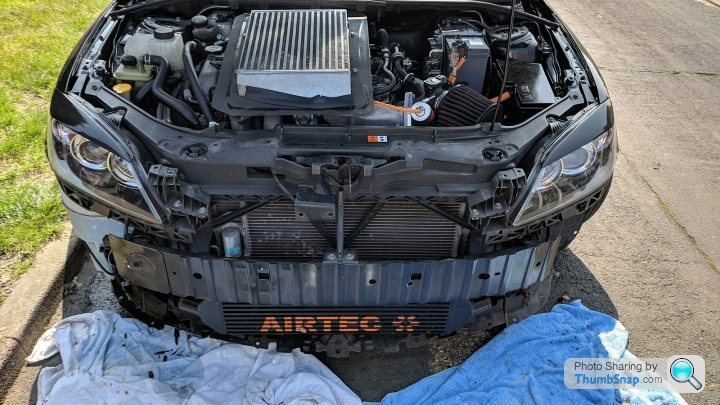
Before i get the catch cans fitted I need to get this fitted:
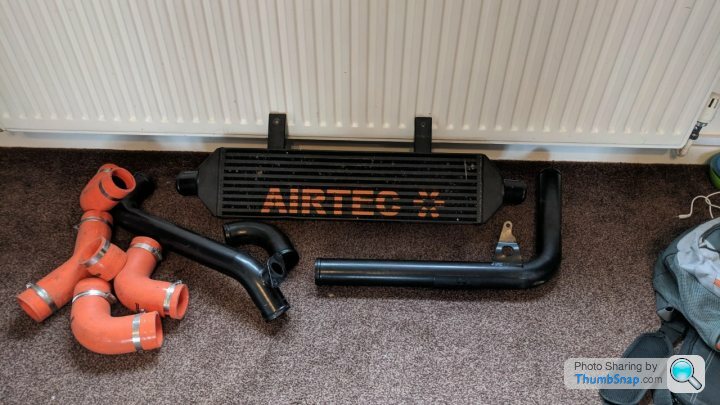
I didn't think I would come across one so soon and this one come up for sale really cheap (£250). If anyone wants to know - the Stage 1 and Stage 3 Airtec coolers for the mps have the same core size. The only difference with a stage 3 kit is a modified crash bar they also supply. Apperently it's a pain to fit it to the crash bar..
The top pipe that goes across the engine is currently being hydrodipped so I'm going to get the core installed 1st then do he rest done at a later date. I'm also going to change the colour scheme in the engine bay from red and black to orange and black so some different coloured vacuum hoses have been ordered. I'll get some more pictures up when it's done as currently there's a bit of a red and orange mush going on.
Lastly MOT time - passed again with no advisories. I kept the EGR off and the plates on and it still went through which is great. For some reason the emissions was slightly lower with the EGR removed - not sure how what works but I'm not complaining
I got the boot trim hydrodipped - it looks so much better now..
img]https://thumbsnap.com/sc/9swfO6Jy.jpg[/img]
I finally managed to sell my mk1 wheels and got a set of 4 RX8 wheels with tyres for £50. These are to be used as a spare set/winter wheels as i plan to get the Rota's refurbed in the future.
I was thinking of changing the wheel colour so it's more of a matt gold and so far i have the black spline nuts ready to go on and some metallic gun metal caliper paint to go with it but I need a nice dry weekend to give the calipers a paint. Here's a quick mock up of the colour scheme:
i thought it would make a change to having the typical red calipers.
Over the winter months I started working on the oil catch can set up given that the PCV system on the MPS isn't great; especially running at higher power. Before I get the downpipe fitted I want to get a dual catch can set up:
Luckily someone was selling a PCV plate with a catch can but it only had a single output:
A bit of hunting on ebay found the right parts to change it to a dual setup:
The can that come with the set wasn't really suitable for VTA so I sold this and currently need the following:
- Damond VTA catch can with check valve
- 2 Check valves
Here's some of the other parts - the kitchen is a great place to mess about with car parts
Before i get the catch cans fitted I need to get this fitted:
I didn't think I would come across one so soon and this one come up for sale really cheap (£250). If anyone wants to know - the Stage 1 and Stage 3 Airtec coolers for the mps have the same core size. The only difference with a stage 3 kit is a modified crash bar they also supply. Apperently it's a pain to fit it to the crash bar..
The top pipe that goes across the engine is currently being hydrodipped so I'm going to get the core installed 1st then do he rest done at a later date. I'm also going to change the colour scheme in the engine bay from red and black to orange and black so some different coloured vacuum hoses have been ordered. I'll get some more pictures up when it's done as currently there's a bit of a red and orange mush going on.
Lastly MOT time - passed again with no advisories. I kept the EGR off and the plates on and it still went through which is great. For some reason the emissions was slightly lower with the EGR removed - not sure how what works but I'm not complaining
Edited by maxdb on Friday 15th March 22:30
OCC update - finally come across one of these! I'm going to order a new filter direct from Damond in the near future with a couple of check valves and a new Mazda PCV valve. As soon as these arrive I should be able to commence fitting:
Fitting the intercooler was fun - I had the core mounted 1st as these are a pain to fit. Enjoy a picture of an MPS with 2 intercoolers!!
 ]
]
Fitting was interesting as came across a few issues
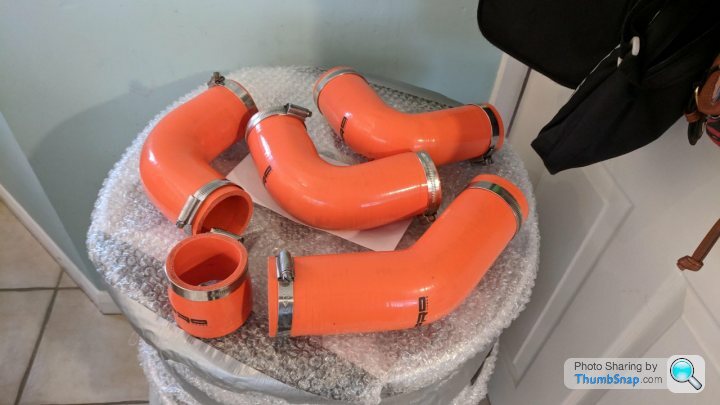
Given all the old vacuum hoses were red it was time to change them ove
All fitted
Removed the heat shield as it was falling off anyway
Changed the bov hose back to oem for now to colour code the engine bay a bit
The engine bay looks a bit messy with all the wiring etc exposed so I bought some covers to tidy it up a little
Hydrodipped to match the fuse box cover - the top intercooler pipe also got gone (picture during fitting)
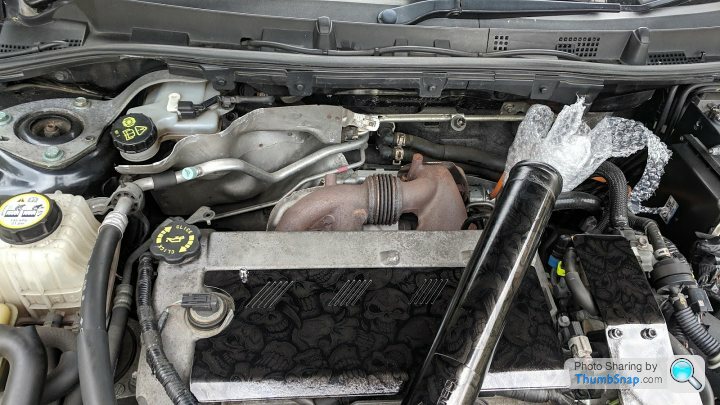
All fitted
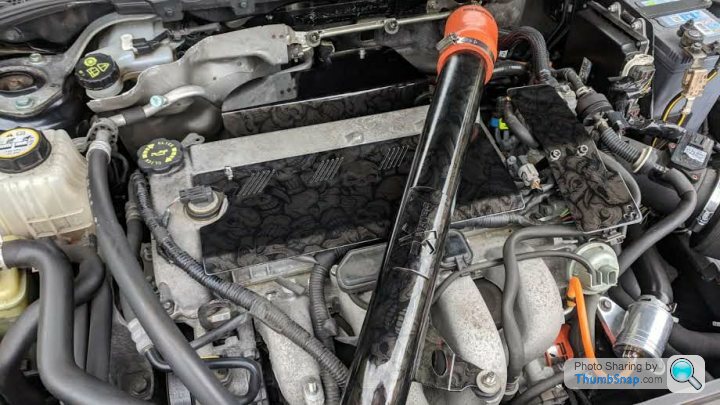
However there was a problem with the heatshield - we thought it may be able to withstand the temps from the exhaust manifold and downpipe but after less an hour of testing this happened:
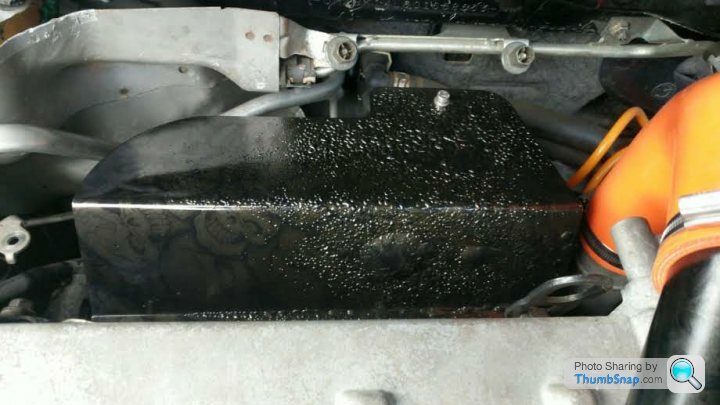
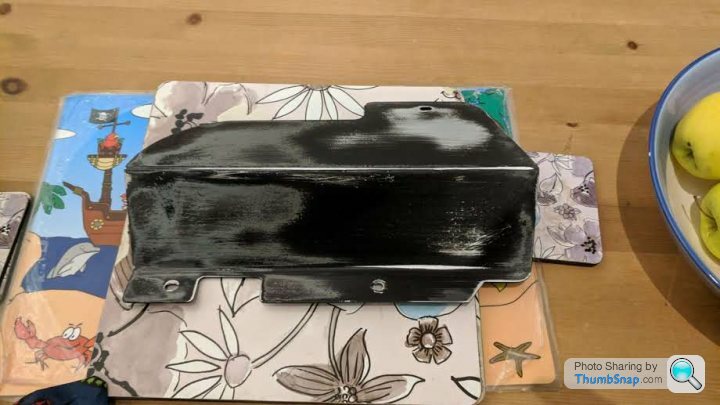
I'm currently in the process of sanding it back and respraying it with some black high temp spray:
I bought an inlet manifold to do some work on but another one has come up so this one will be back up for sale. The new one coming has had the flaps taken out (VCTS delete ) of it to free up some power along with being polished and ported. Hopefully that will be fitted at the same time I get the catch cans fitted.
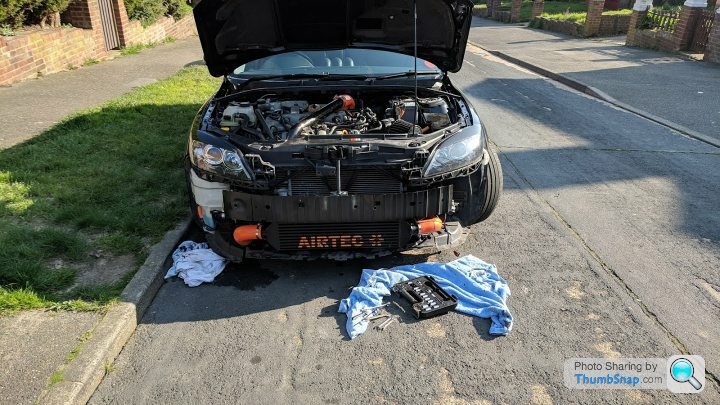
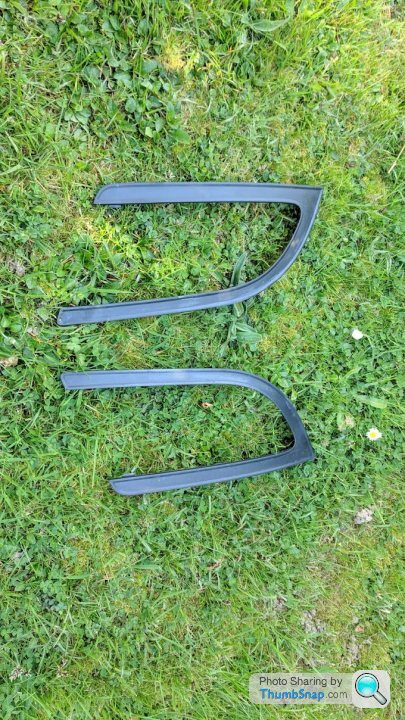
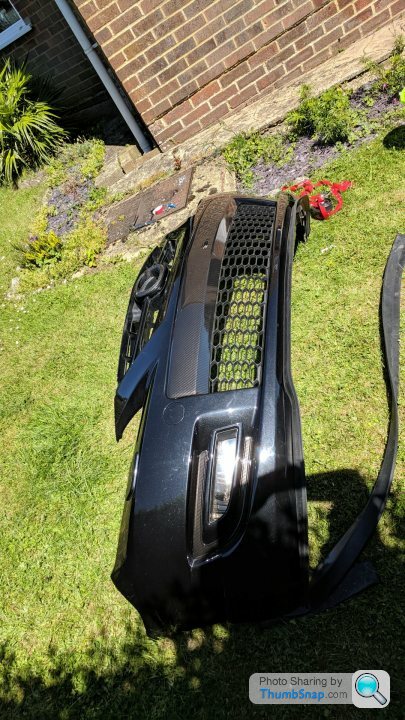
Foglight surrounds:
I really don't like the standard plastic surrounds so they will be hydrodipped in a black carbon fibre to match the lightbrows and some other outside bits to get done. Unfortunately they don't come off easy and it's a bumper off job:
Quick note for anyone who wants to take the bumper off - the washer bottle connection will need plugging up otherwise it will leak everywhere and you will loose lots of fluid
The screws from behind:
Free al last!!
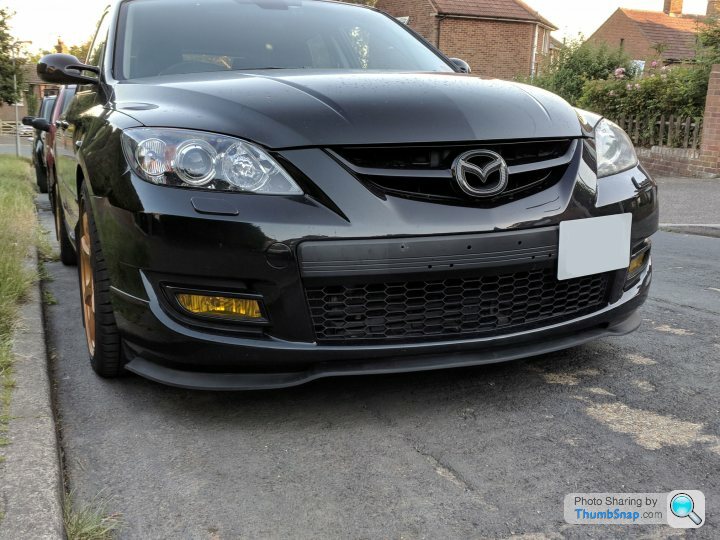
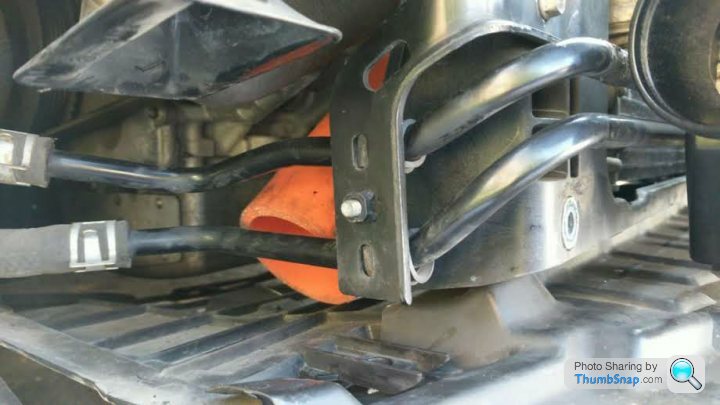
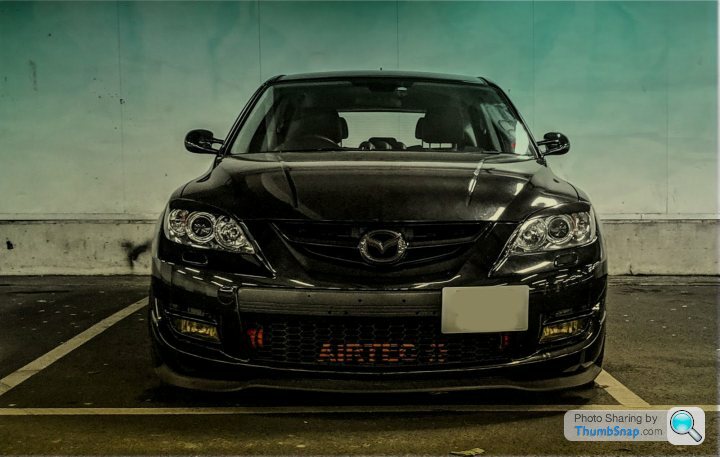
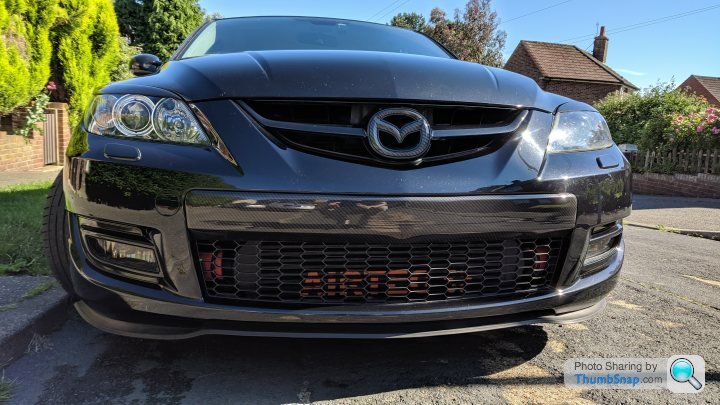
Here's a fancy picture with the front end back together - I might move away from the yellow fogs as not sure if it goes well with the orange on the intercooler.
The calipers have also been repainted. I had a lot of issues repainting as the red was done in Hammerite. I ended up having to sand them back and re-do them with Hammerite. I mixed black with a hint of silver to make a gunmetal kind of colour:
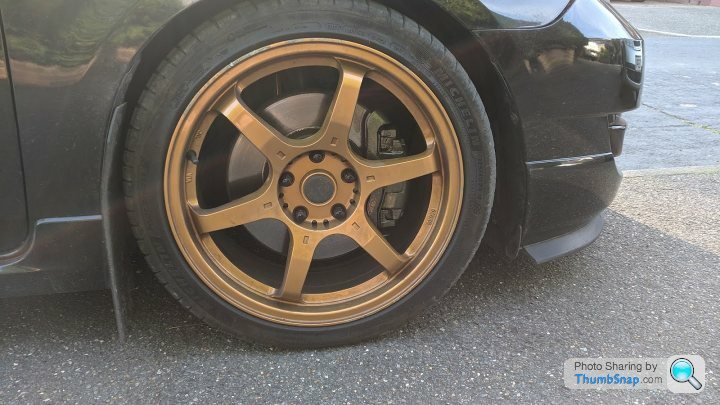
The rears come out a lot worse so moving forward I'm going to pick up a spare set of rear calipers and get them powdercoated gunmetal. The wheels will also be re-done in the future.
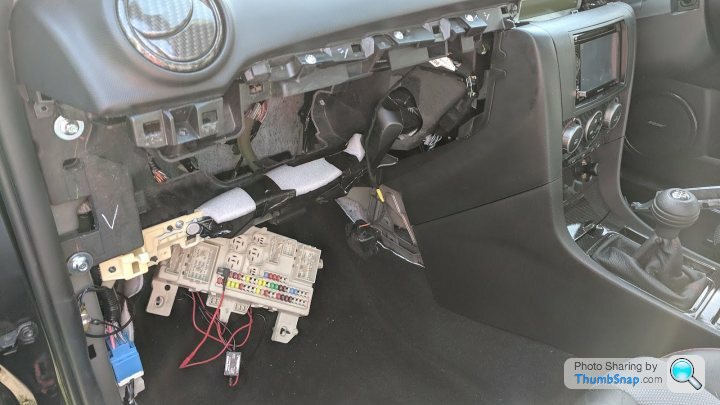
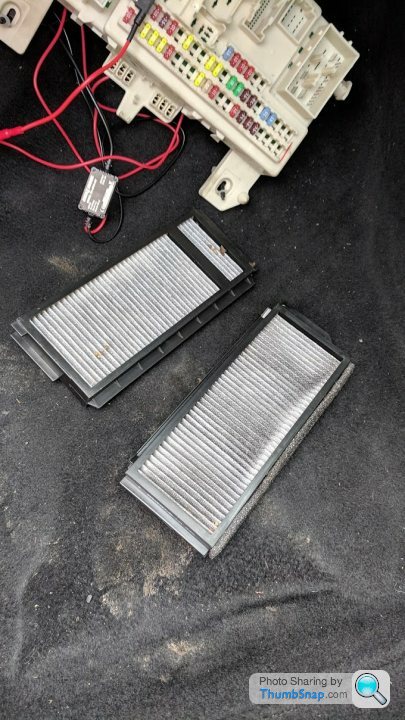
Interiorwise no mods have been done but the cabin filter got changed. What a job that was!!
Fitting the intercooler was fun - I had the core mounted 1st as these are a pain to fit. Enjoy a picture of an MPS with 2 intercoolers!!
]Fitting was interesting as came across a few issues
Given all the old vacuum hoses were red it was time to change them ove
All fitted
Removed the heat shield as it was falling off anyway
Changed the bov hose back to oem for now to colour code the engine bay a bit
The engine bay looks a bit messy with all the wiring etc exposed so I bought some covers to tidy it up a little
Hydrodipped to match the fuse box cover - the top intercooler pipe also got gone (picture during fitting)
All fitted
However there was a problem with the heatshield - we thought it may be able to withstand the temps from the exhaust manifold and downpipe but after less an hour of testing this happened:
I'm currently in the process of sanding it back and respraying it with some black high temp spray:
I bought an inlet manifold to do some work on but another one has come up so this one will be back up for sale. The new one coming has had the flaps taken out (VCTS delete ) of it to free up some power along with being polished and ported. Hopefully that will be fitted at the same time I get the catch cans fitted.
Foglight surrounds:
I really don't like the standard plastic surrounds so they will be hydrodipped in a black carbon fibre to match the lightbrows and some other outside bits to get done. Unfortunately they don't come off easy and it's a bumper off job:
Quick note for anyone who wants to take the bumper off - the washer bottle connection will need plugging up otherwise it will leak everywhere and you will loose lots of fluid
The screws from behind:
Free al last!!
Here's a fancy picture with the front end back together - I might move away from the yellow fogs as not sure if it goes well with the orange on the intercooler.
The calipers have also been repainted. I had a lot of issues repainting as the red was done in Hammerite. I ended up having to sand them back and re-do them with Hammerite. I mixed black with a hint of silver to make a gunmetal kind of colour:
The rears come out a lot worse so moving forward I'm going to pick up a spare set of rear calipers and get them powdercoated gunmetal. The wheels will also be re-done in the future.
Interiorwise no mods have been done but the cabin filter got changed. What a job that was!!
^^ Thanks
June has been a busy month as i'm trying to get lots of the bigger parts hydrodipped before my friend who does it moves away.
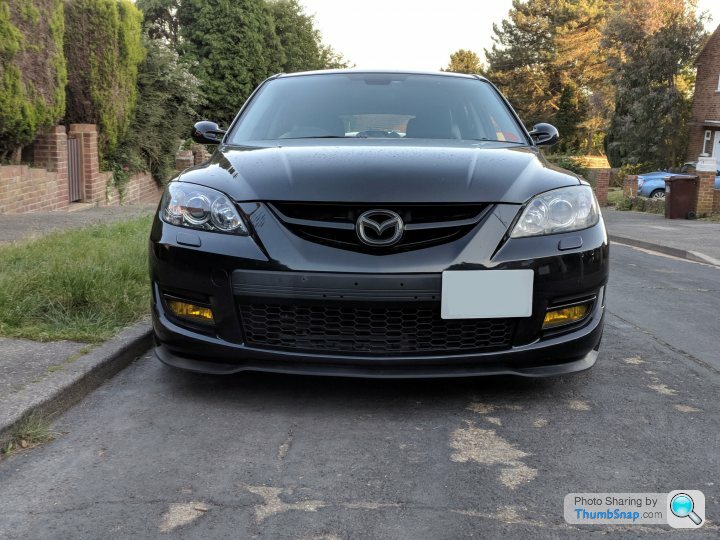
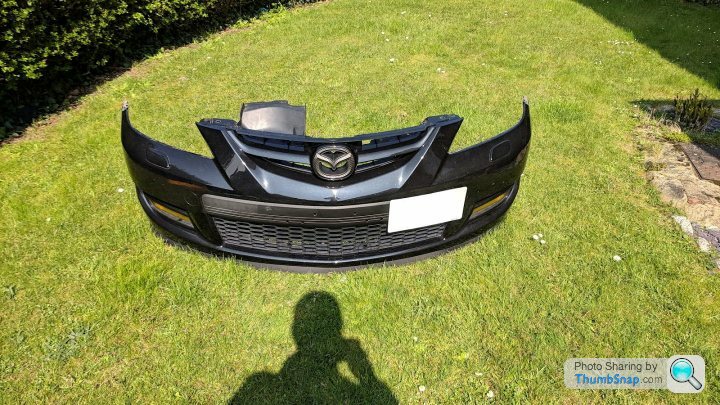
The front bumper plastic and foglight surrounds came back and they look much better then the originals!
Bumper off for re-fit
I spent a good amount of time doing this part as I also changed the fog light tints from yellow to a medium smoke tint along with changing the rubber splitter to a new one with added screws.
Back on the car
Side shot with the number plate back on
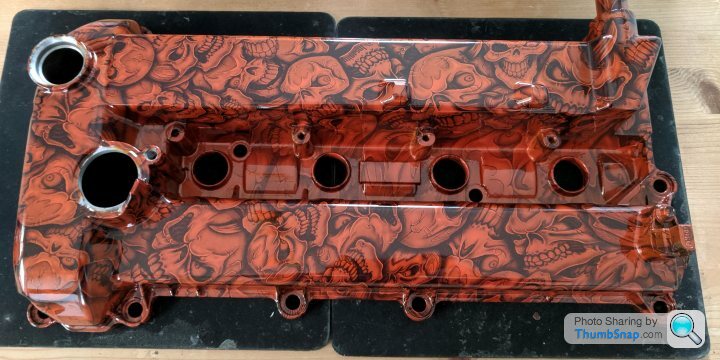
The engine cover has also been done and now it awaits fitting I chose orange so it goes with the hoses
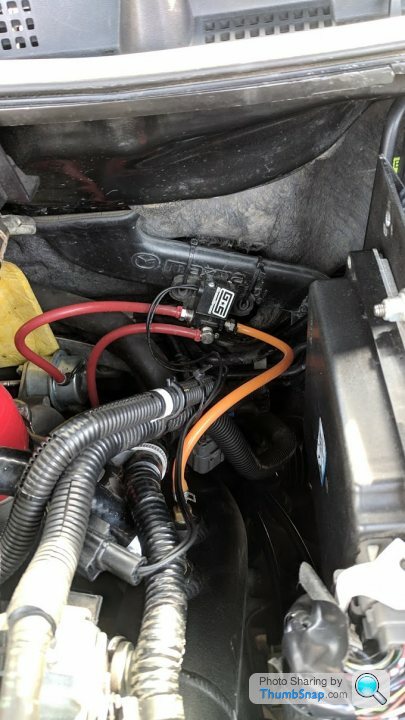
In addition to this I also carried out a throttle body coolent bypass mod. This mod is suitable for vehicles in warmer climates so south east England should be ok It can also be a free mod and the reason for doing it is to help reduce intake temps. As we have a little heat wave coming up I thought it would be worthy of doing.
I tied doing it the barbed way but didn't like it
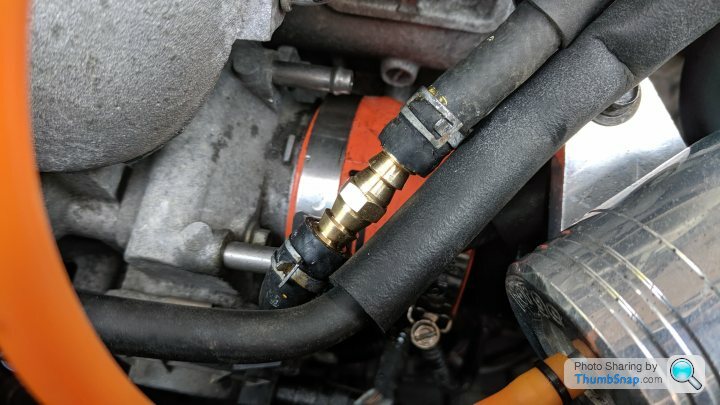
The barb was on the large side for the piping and it just looked a bit rubbish. To do the mod you remove the coolent lines that go into the throttle body and join them together creating the bypass.

The alternative way is to take the line nearest to you (bottom of the picture), remove the other line completely and feed the bottom line into the plug where the top line used to go. The engine needs to be cold otherwise you will loose loads of coolent. I lost a little bit when cold but hopefully not too much.
Once done you can cut down the top line you have removed and join the 2 exposed outputs together on the throttle body to stop dirt and rubbish getting into it
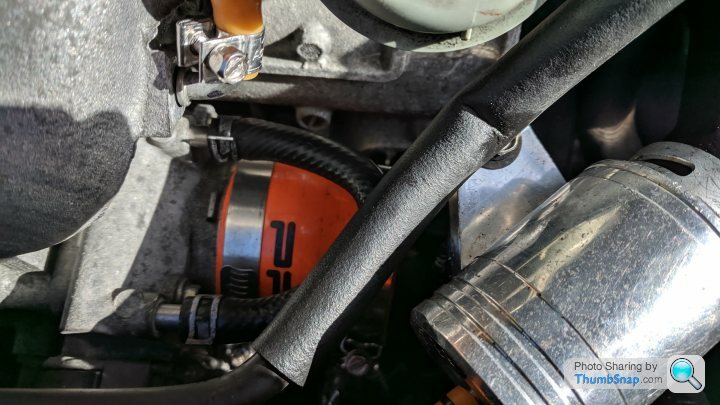
There you go free mod done! It's not been driven yet but I've had the engine idling with a few revs and there's no leaks showing. I plan to do some more ecu logging soon so will compare the temps.
June has been a busy month as i'm trying to get lots of the bigger parts hydrodipped before my friend who does it moves away.
The front bumper plastic and foglight surrounds came back and they look much better then the originals!
Bumper off for re-fit
I spent a good amount of time doing this part as I also changed the fog light tints from yellow to a medium smoke tint along with changing the rubber splitter to a new one with added screws.
Back on the car
Side shot with the number plate back on
The engine cover has also been done and now it awaits fitting
I chose orange so it goes with the hosesIn addition to this I also carried out a throttle body coolent bypass mod. This mod is suitable for vehicles in warmer climates so south east England should be ok
It can also be a free mod and the reason for doing it is to help reduce intake temps. As we have a little heat wave coming up I thought it would be worthy of doing.I tied doing it the barbed way but didn't like it
The barb was on the large side for the piping and it just looked a bit rubbish. To do the mod you remove the coolent lines that go into the throttle body and join them together creating the bypass.
The alternative way is to take the line nearest to you (bottom of the picture), remove the other line completely and feed the bottom line into the plug where the top line used to go. The engine needs to be cold otherwise you will loose loads of coolent. I lost a little bit when cold but hopefully not too much.
Once done you can cut down the top line you have removed and join the 2 exposed outputs together on the throttle body to stop dirt and rubbish getting into it
There you go free mod done! It's not been driven yet but I've had the engine idling with a few revs and there's no leaks showing. I plan to do some more ecu logging soon so will compare the temps.
It's been a long time but here's another update!
I finally caved in and bought the Corksport 51r battery box along with a rocker cover gasket so the new hydrodipped cover can go on.
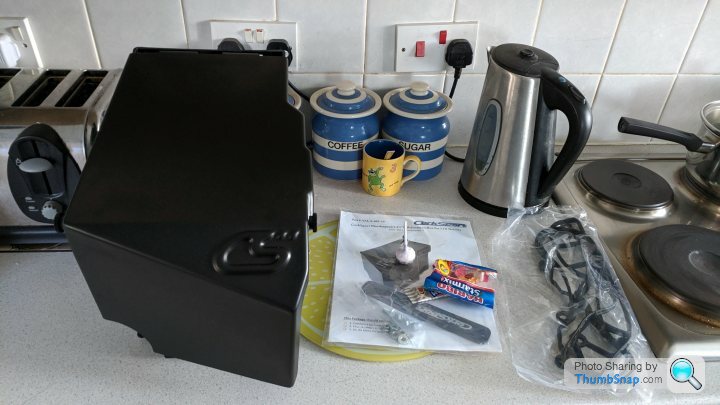
It's quite big for a 51r box but it looks much neater than the old one. It will be on for a few months before it goes off for hydrodipping

Old box

New box

Inside the new box - it was fiddly getting the ECU wired to fit in ok.

Lots of clearance for the intake which will give me enough clearance for an 3.5" intake

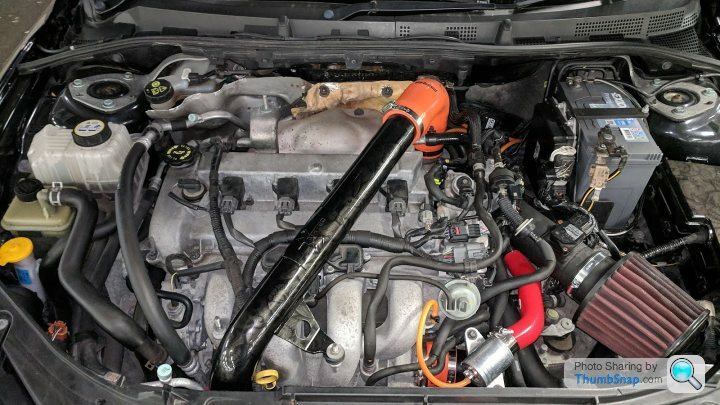
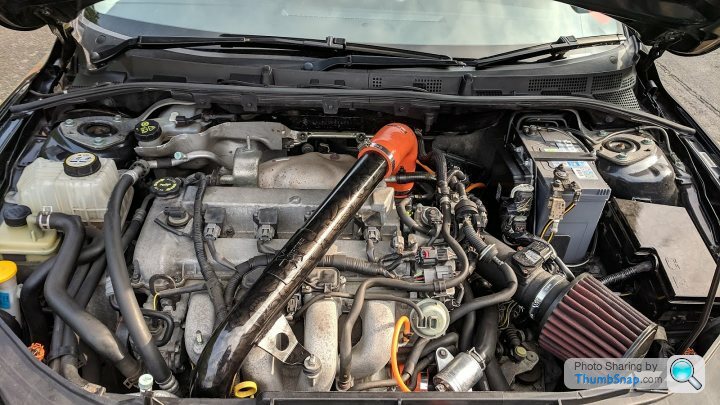
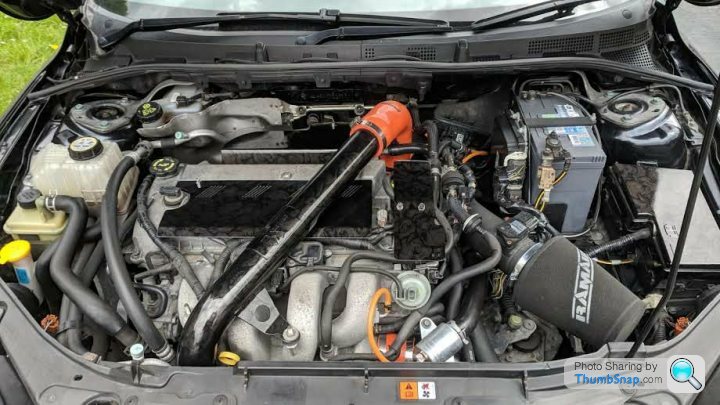
Engine bay as it now stands.
I finally caved in and bought the Corksport 51r battery box along with a rocker cover gasket so the new hydrodipped cover can go on.
It's quite big for a 51r box but it looks much neater than the old one. It will be on for a few months before it goes off for hydrodipping
Old box
New box
Inside the new box - it was fiddly getting the ECU wired to fit in ok.
Lots of clearance for the intake which will give me enough clearance for an 3.5" intake
Engine bay as it now stands.
Jester86 said:
I do like the look of CS battery box.
The only thing that concerns me is the riveted ECU bracket to the OEM battery box. Was it much of an issue to remove?
The improvement in aesthetics alone is worth it!
It wasn't too bad to remove just fiddly getting to the parts at the bottom. It's worth it once done if you're going to be upgrading the intake, turbo or fuel pump internals as it just makes life easier.The only thing that concerns me is the riveted ECU bracket to the OEM battery box. Was it much of an issue to remove?
The improvement in aesthetics alone is worth it!
Can't believe it's now been 5 years!!
I'm still awaiting a big bill at some point but in the meantime here's another MOT with no advisories.

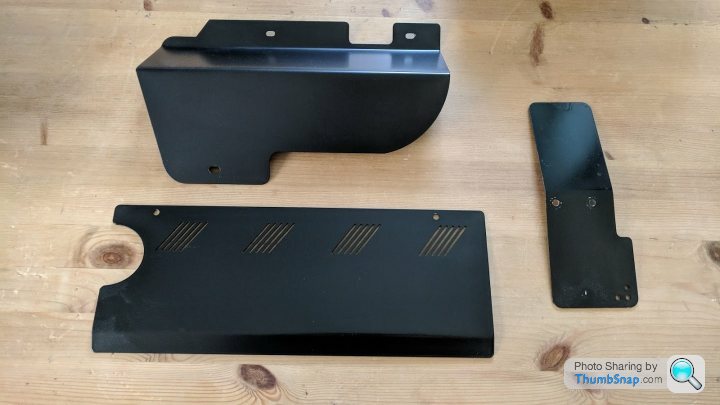
Engine bay:
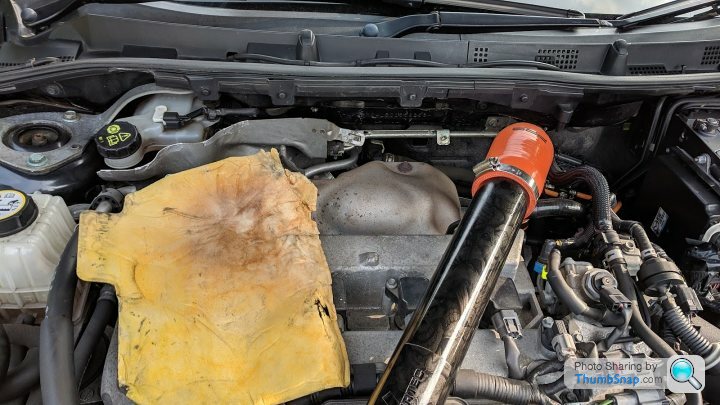
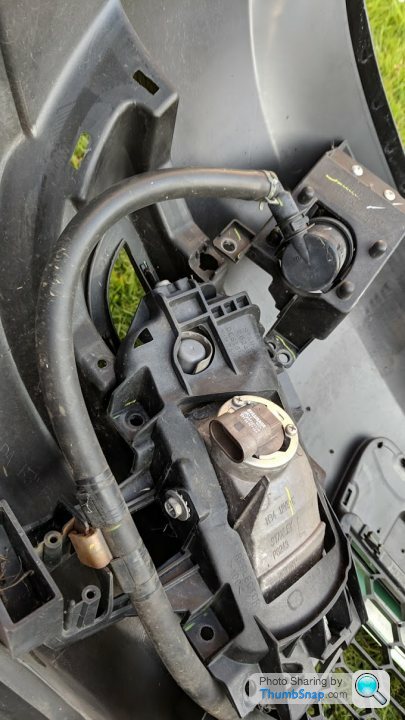
Whilst the scoops behind the grill serve a purpose, especially if you have a top mount cooler - they can also be annoying as they also scoop up a lot of dust and dirt which in turn gets all over the stuff in the engine that's been hydrodipped.
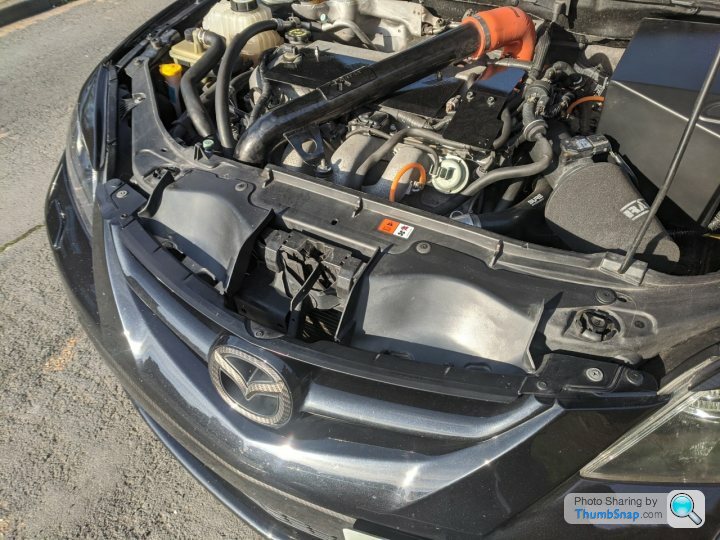
With the vents removed
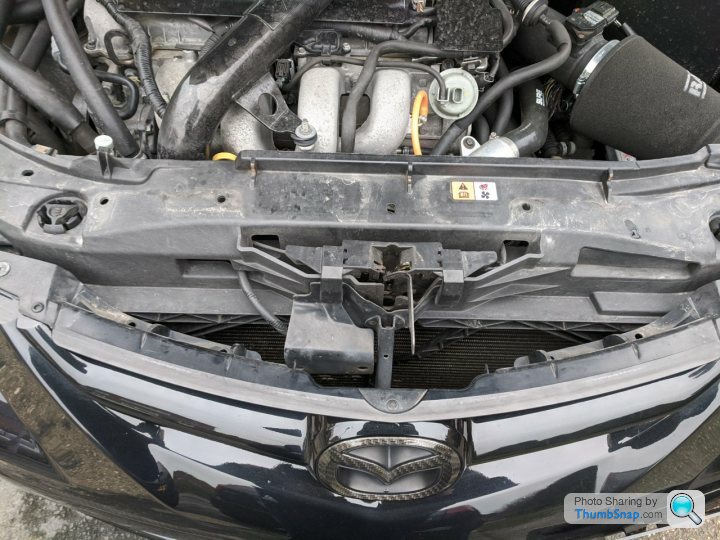
Secret air intake hole - this is used on lower spec models but not the MPS
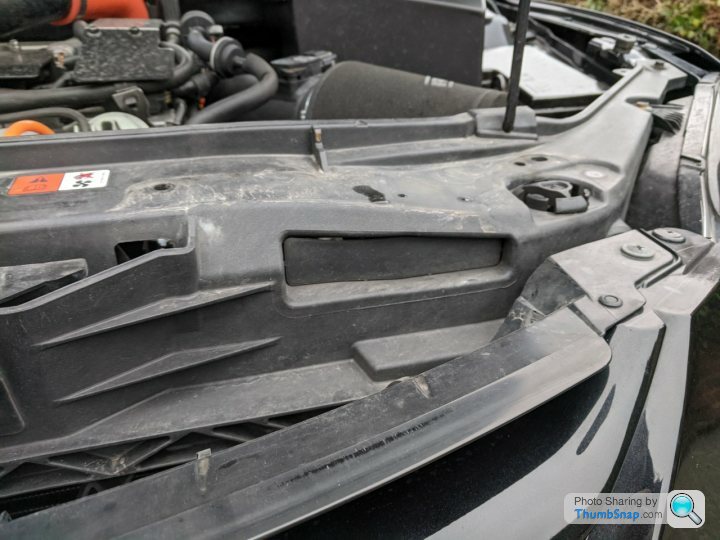
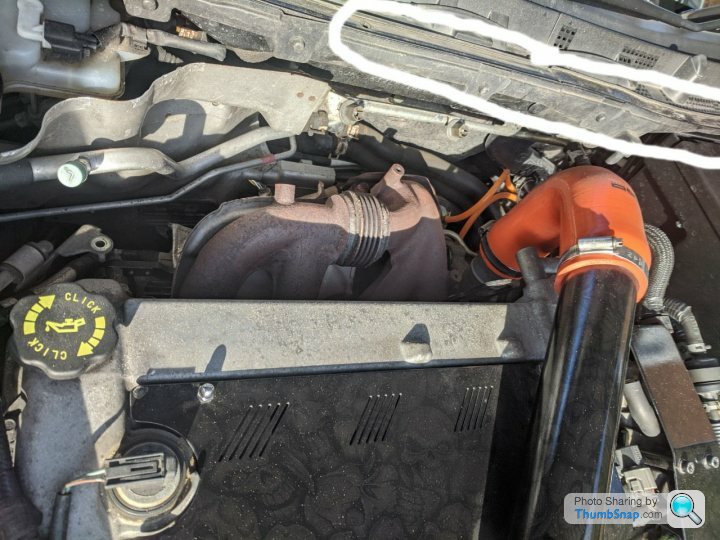
Opened up

JBR Air Dam fitted
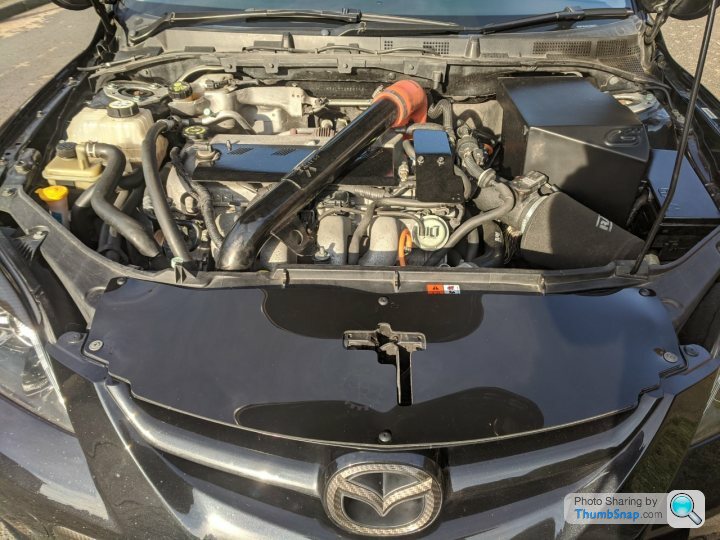
Weatherstrip removed to allow some extra ventilation from the top of the bonnet (circled)
The JBR air damn does allow some air to enter the engine bay but what it's also meant to do is push more air down towards the radiator and intercooler and with the original scoops removed, air can enter through the hole into the intake. With the weatherstrip removed it allows some hot air to escape from the back of the bonnet and is effective when sitting in traffic etc.
Vents:
Whats next is more ventilation. The car has an appointment in April to get some vents fitted just to give it a bit more of a meaner look at the front. I also want the vents to be functional as I get a lot of heat build up at the top of the bonnet where the manifold and turbo sit. Whilst removing the weatherstrip has helped some vents should help it further.
It was hard to pick some suitable vents as a lot will look a bit ott plus the bigger ones have to be imported. Her'es some I come across doing research:
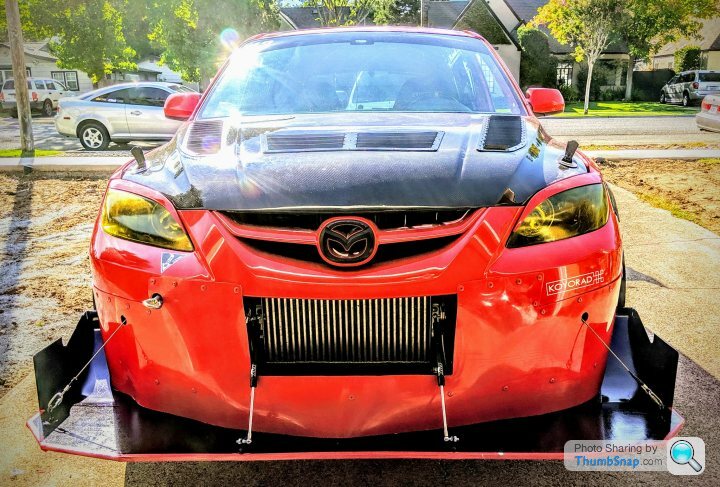
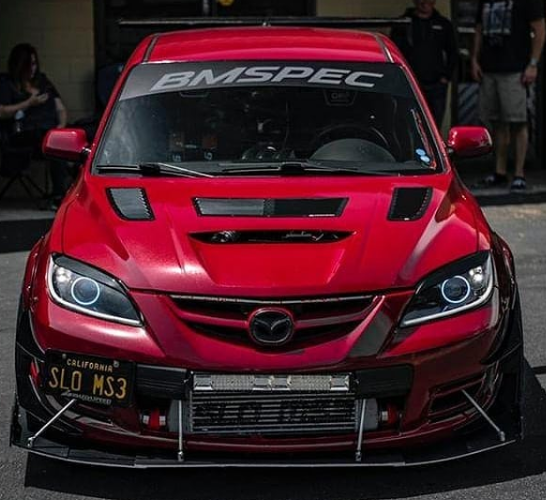
I've settled with some of the below styled vents but not the Ebay rip off ones
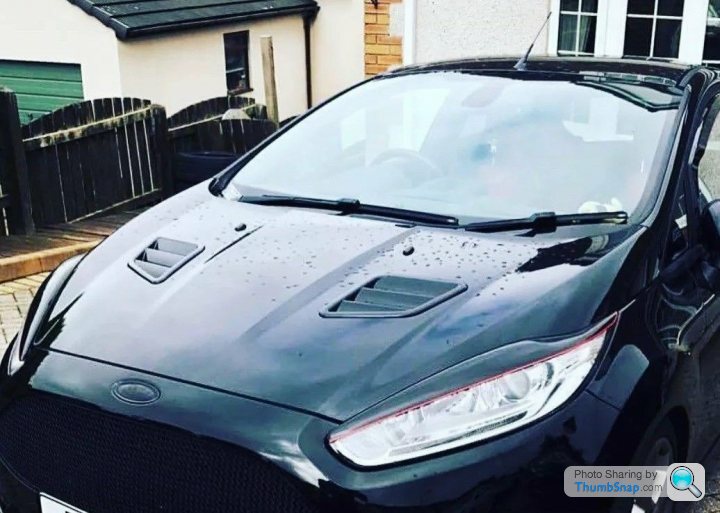
Hopefully the above will blend in ok with the rest of the car :/
I'm still awaiting a big bill at some point but in the meantime here's another MOT with no advisories.
Engine bay:
Whilst the scoops behind the grill serve a purpose, especially if you have a top mount cooler - they can also be annoying as they also scoop up a lot of dust and dirt which in turn gets all over the stuff in the engine that's been hydrodipped.
With the vents removed
Secret air intake hole - this is used on lower spec models but not the MPS
Opened up
JBR Air Dam fitted
Weatherstrip removed to allow some extra ventilation from the top of the bonnet (circled)
The JBR air damn does allow some air to enter the engine bay but what it's also meant to do is push more air down towards the radiator and intercooler and with the original scoops removed, air can enter through the hole into the intake. With the weatherstrip removed it allows some hot air to escape from the back of the bonnet and is effective when sitting in traffic etc.
Vents:
Whats next is more ventilation. The car has an appointment in April to get some vents fitted just to give it a bit more of a meaner look at the front. I also want the vents to be functional as I get a lot of heat build up at the top of the bonnet where the manifold and turbo sit. Whilst removing the weatherstrip has helped some vents should help it further.
It was hard to pick some suitable vents as a lot will look a bit ott plus the bigger ones have to be imported. Her'es some I come across doing research:
I've settled with some of the below styled vents but not the Ebay rip off ones
Hopefully the above will blend in ok with the rest of the car :/
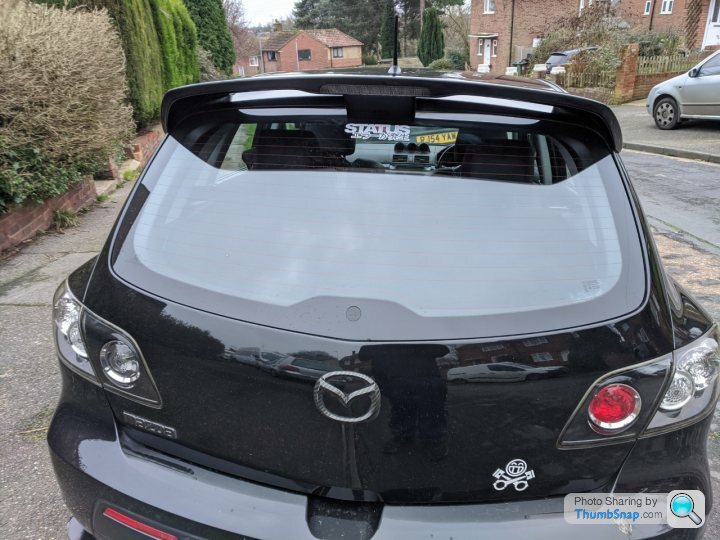
Rear spoiler:
With the rear diffuser and carnards the rear spoiler seems a bit left out.
I've been looking out for spoiler extensions but there isn't much choice out there. Luckily I spotted someone breaking an MPS who had a new BM spec extension unused and it it's box! I was quite lucky with this as from what I understand BM Spec no longer make the extensions and there's not many out there.
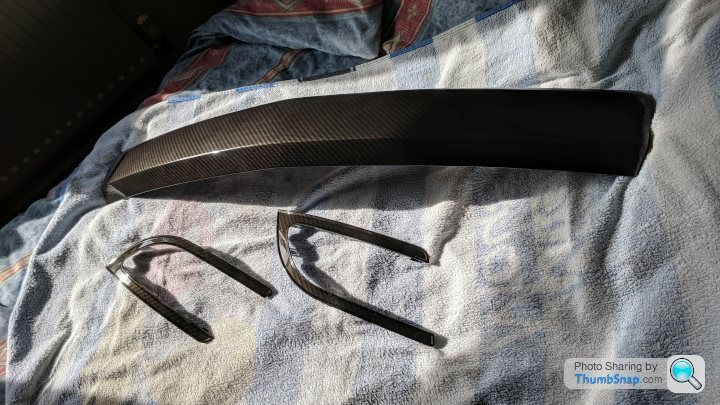
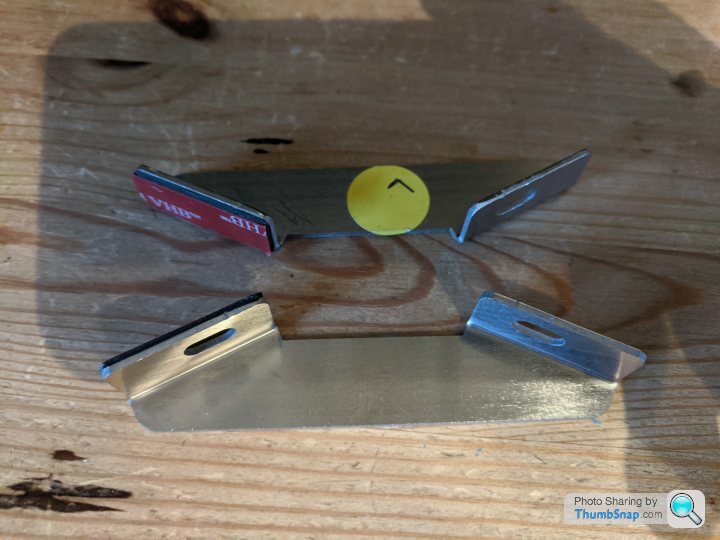
Here it is out the box:

The brackets
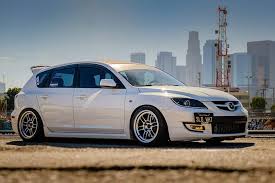
Here's an example pic of one fitted:
The main material is a black plastic so hopefully I'll be able to get it hydrodipped black carbon fibre along with the brackets pictured above.
I'm also looking into getting the rear lights tinted
With the rear diffuser and carnards the rear spoiler seems a bit left out.
I've been looking out for spoiler extensions but there isn't much choice out there. Luckily I spotted someone breaking an MPS who had a new BM spec extension unused and it it's box! I was quite lucky with this as from what I understand BM Spec no longer make the extensions and there's not many out there.
Here it is out the box:
The brackets
Here's an example pic of one fitted:
The main material is a black plastic so hopefully I'll be able to get it hydrodipped black carbon fibre along with the brackets pictured above.
I'm also looking into getting the rear lights tinted
I'm going to get banished for the next mods!
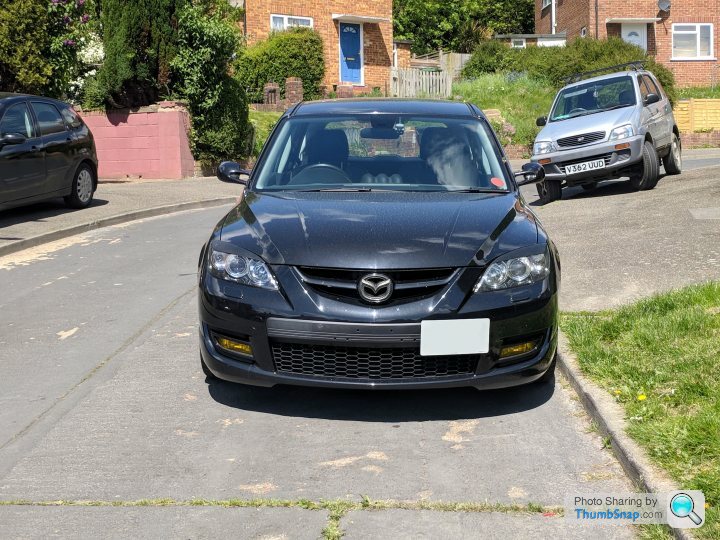
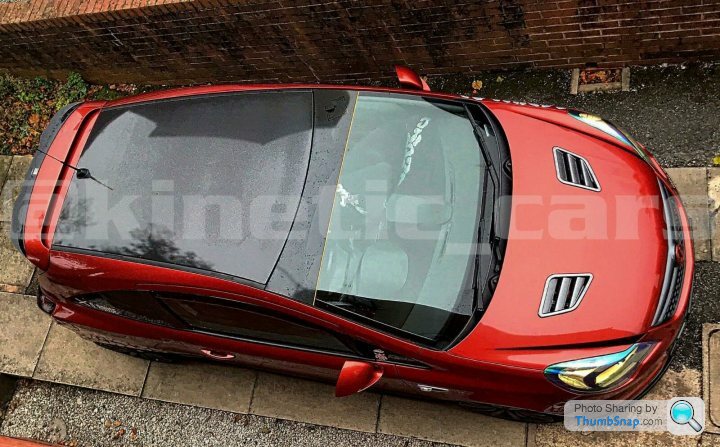
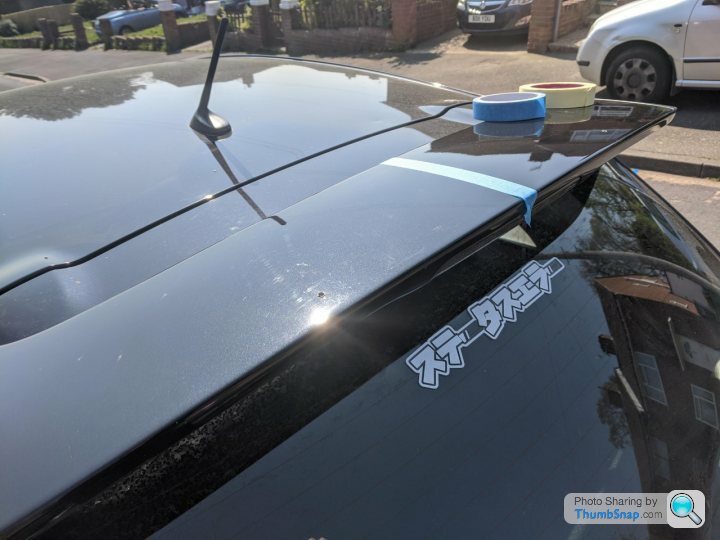
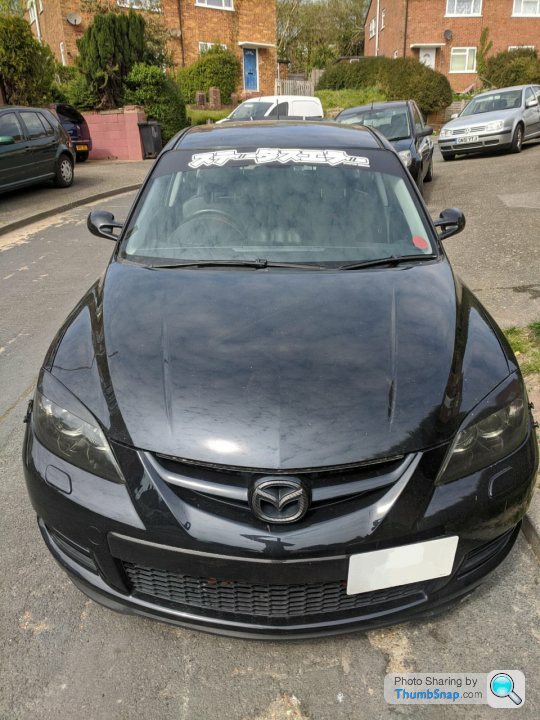
I wanted to get a sunstrip as I've always felt the windscreen looked a bit tall and a sunstrip would hopefully bring it down a bit if that makes any sense. I contacted a local company who could fit it and also tint the lights and reflectors. I quickly got booked in and the work carried out was of good quality so here are the results.
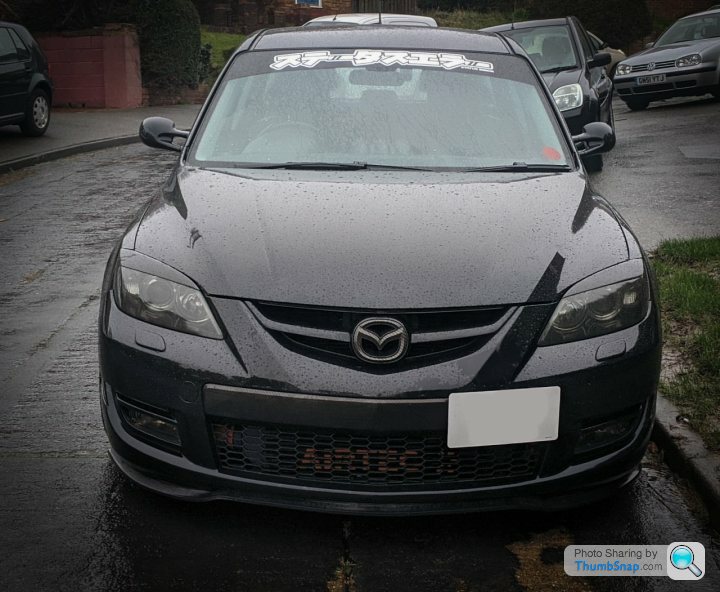
It's just a light tint all round to take the glare of the chrome and I think it works well.
I wanted to get a sunstrip as I've always felt the windscreen looked a bit tall and a sunstrip would hopefully bring it down a bit if that makes any sense. I contacted a local company who could fit it and also tint the lights and reflectors. I quickly got booked in and the work carried out was of good quality so here are the results.
It's just a light tint all round to take the glare of the chrome and I think it works well.
Next up is a free mod prior to giving the car a good clean as it's gathering dust at the moment.
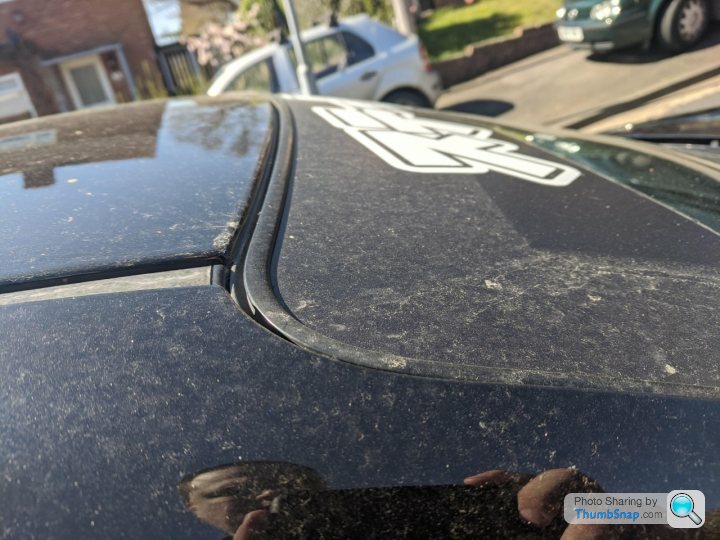
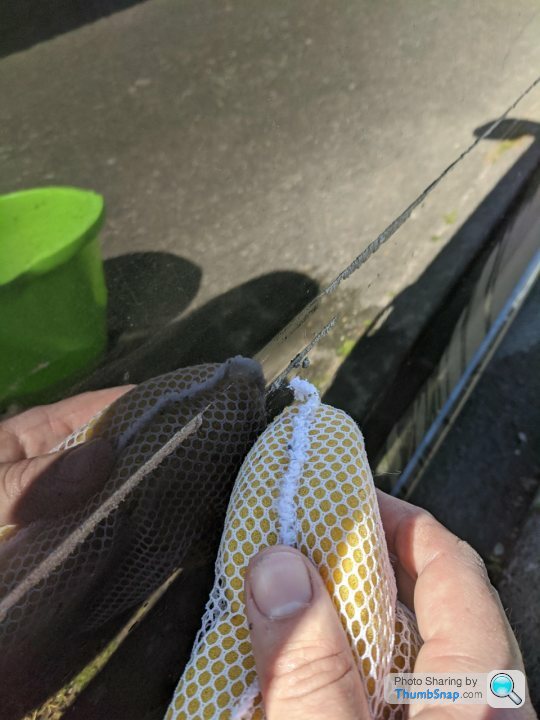
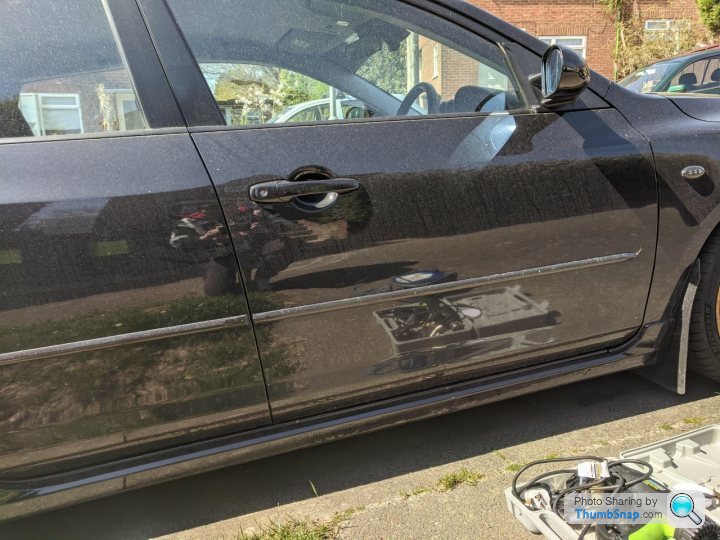
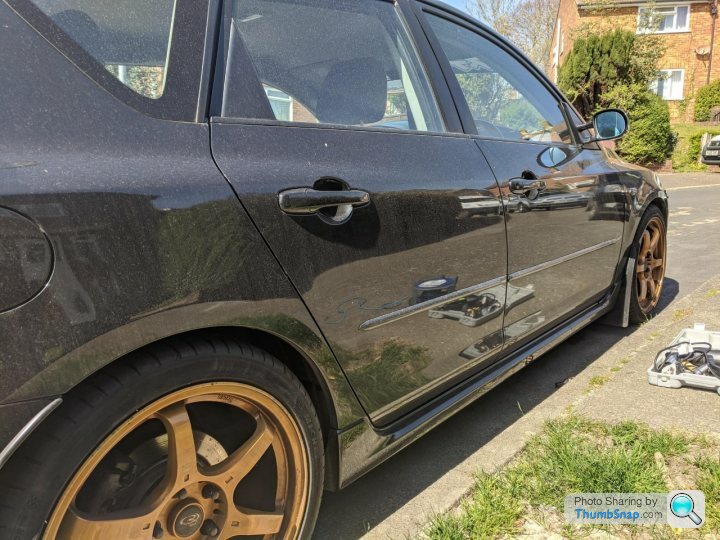
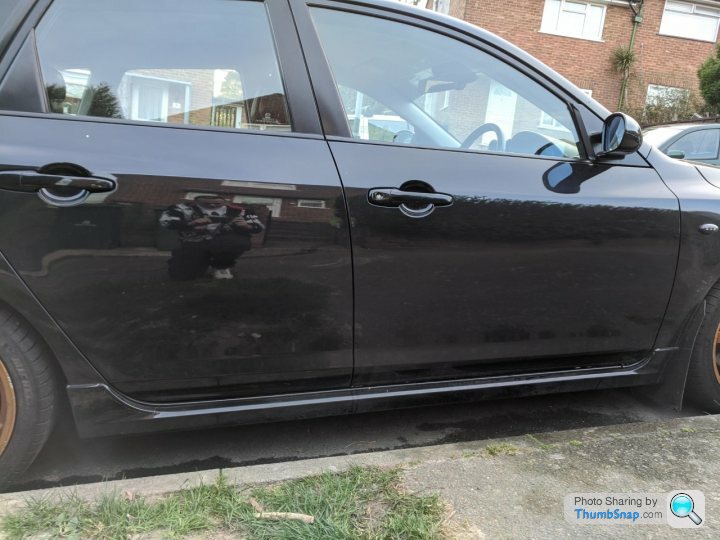
One thing I wanted to do is remove the door strips to clean up the look. Armed with a heat gun, some warm water, sponge and a cloth I eventually got it all done. The drivers side was a lot worse than the passenger side to do and there was lots of adhesive left behind. I did start using a toffee wheel but it looked like it was going to damage the paint so I ended up heating up the adhesive and slowly rubbed it off.
Ready for the bin
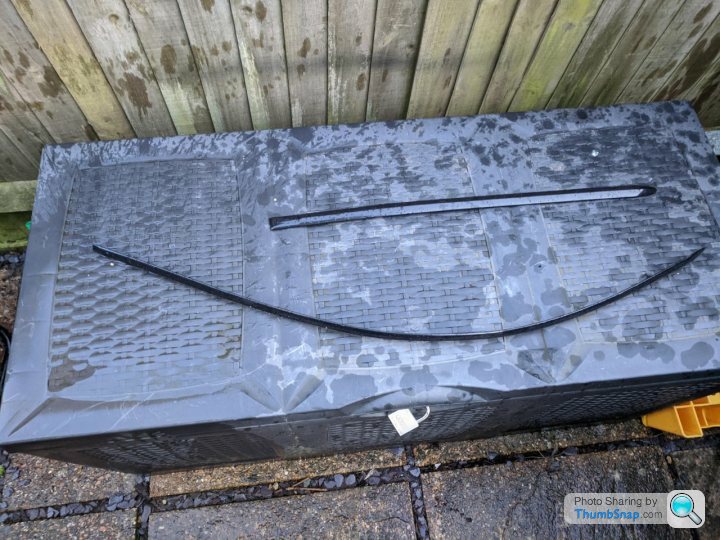
Some before and after comparisons
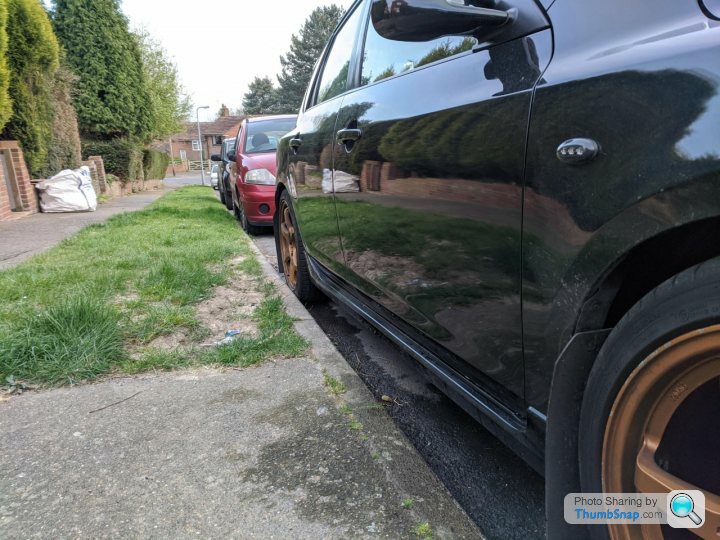
One thing I wanted to do is remove the door strips to clean up the look. Armed with a heat gun, some warm water, sponge and a cloth I eventually got it all done. The drivers side was a lot worse than the passenger side to do and there was lots of adhesive left behind. I did start using a toffee wheel but it looked like it was going to damage the paint so I ended up heating up the adhesive and slowly rubbed it off.
Ready for the bin
Some before and after comparisons
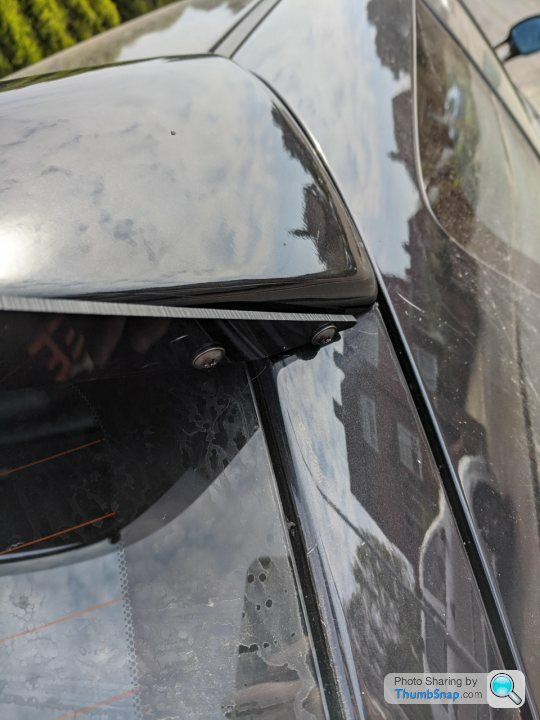
Spoiler extension:
If I got this hydrodipped I would have to fit in within a week of dipping before the lacquer sets so given all the car parts I have laying about at the moment and given the free time over Easter I thought it would be a good time to fit it.
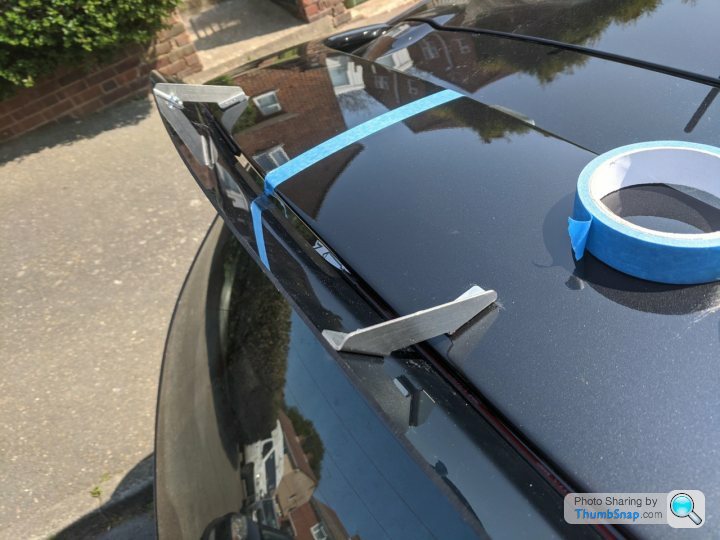
So after some test fitting and taping it was time to try and fit it!
Some tape to help centre it
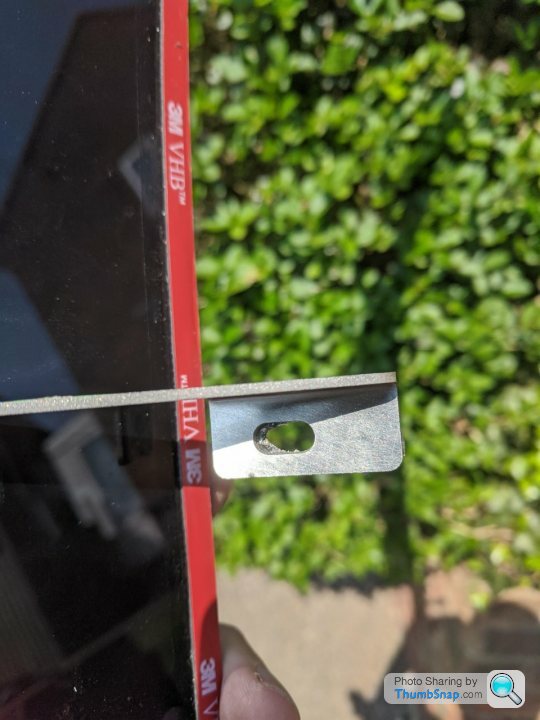
Better not screw this bit up as the aero spoilers are harder to come by..
Bit more lining up
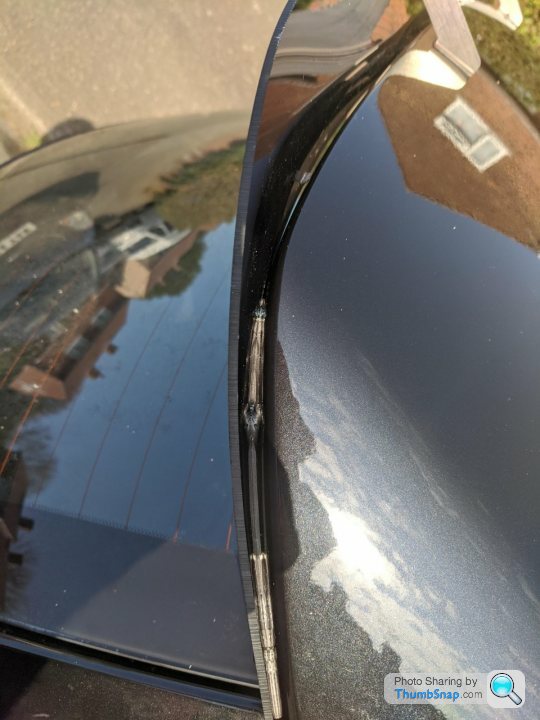
The 3m tape that it had backed on to it didn't like the heat and moving around much so it decided to melt and make a mess. I ended up refitting it without the 3m tape as it will end up coming off one day hopefully to get hydrodipped. I need to drive and test it but have been unable to do so given the current lockdown.
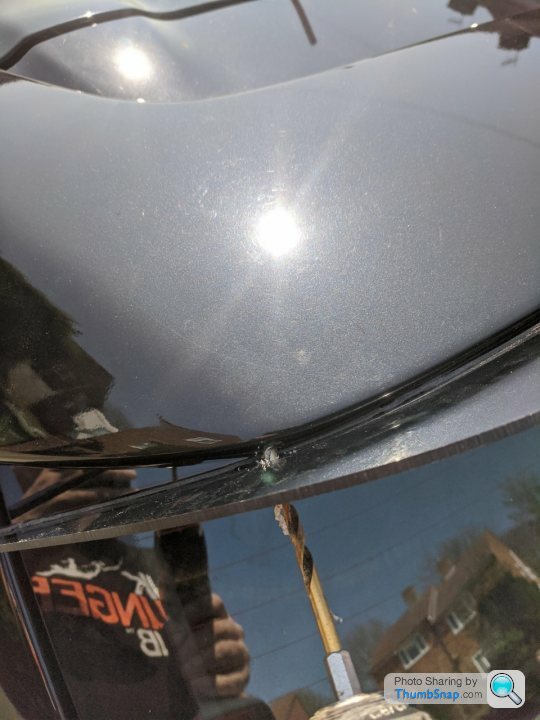
I believe that the US spoilers these spoiler extensions are designed for are a slightly different shape so some extra holes had to be drilled, otherwise it popped out at the sides. I did initially try and use some adhesive but it was clear that it wasn't going to stick or hold.
Close call in this one :/
I know.. I know.. they don't make these anymore so I'm going to leave it as it is..
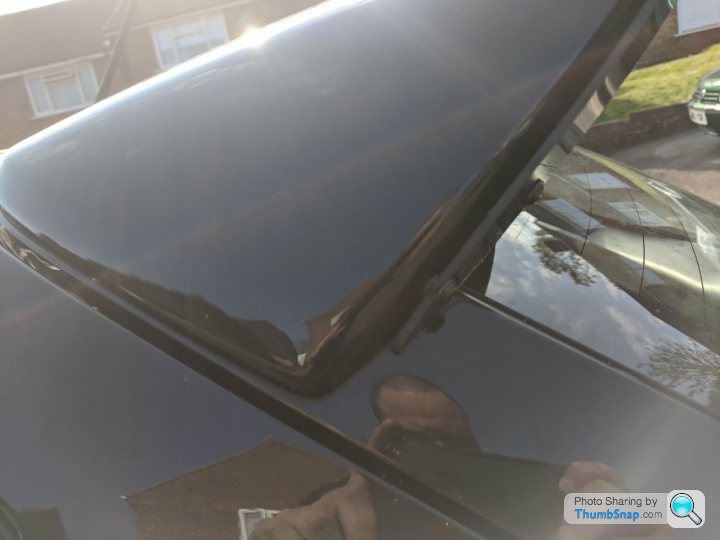
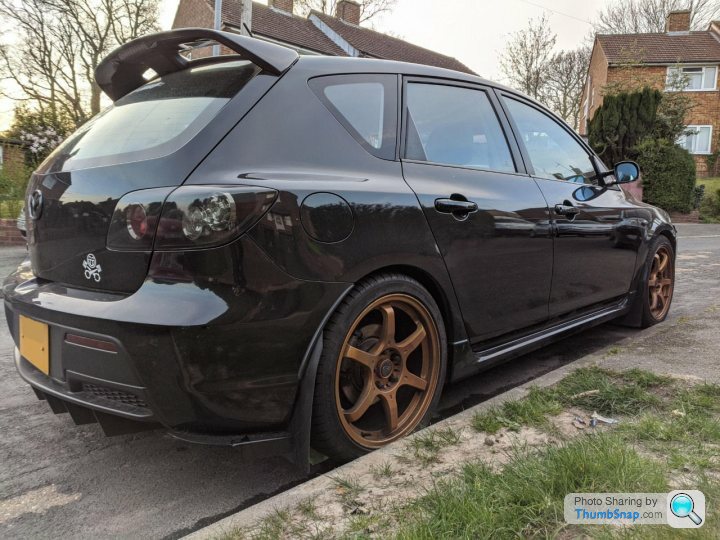
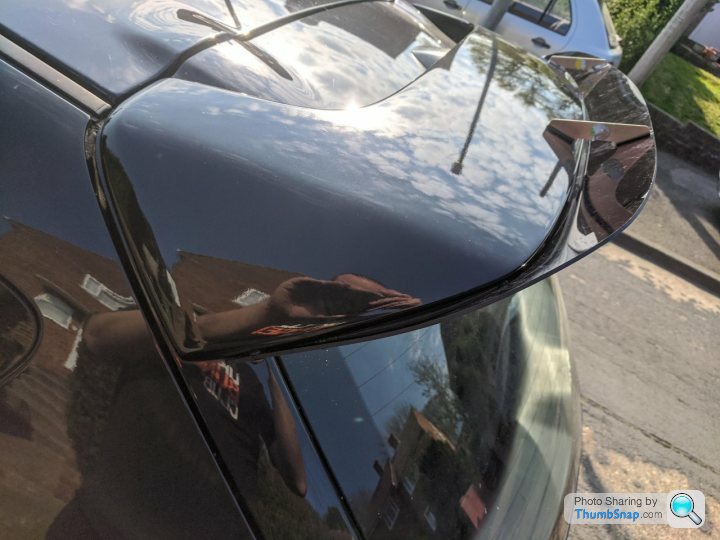
All fitted and sightly cleaned up:
It doesn't massively poke out when viewing from the front, which is good.
Side view
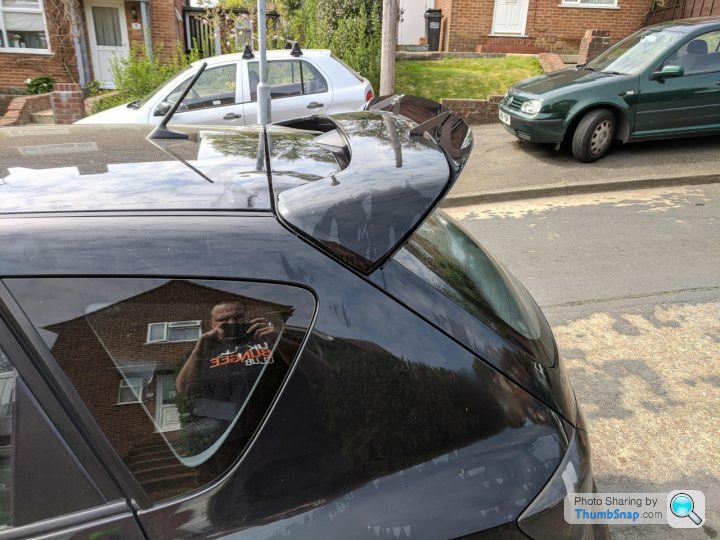
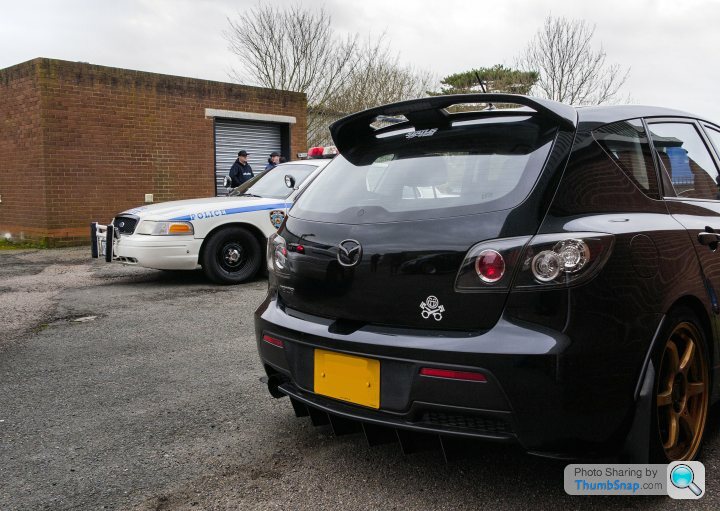
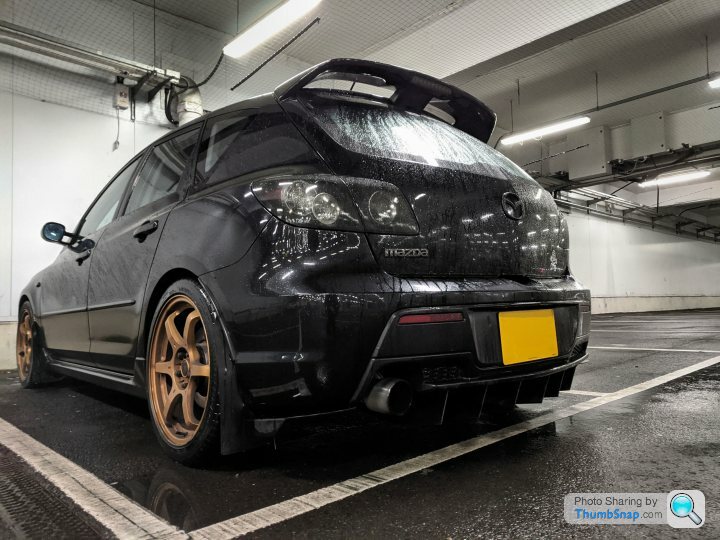
View from the back

Old rear view
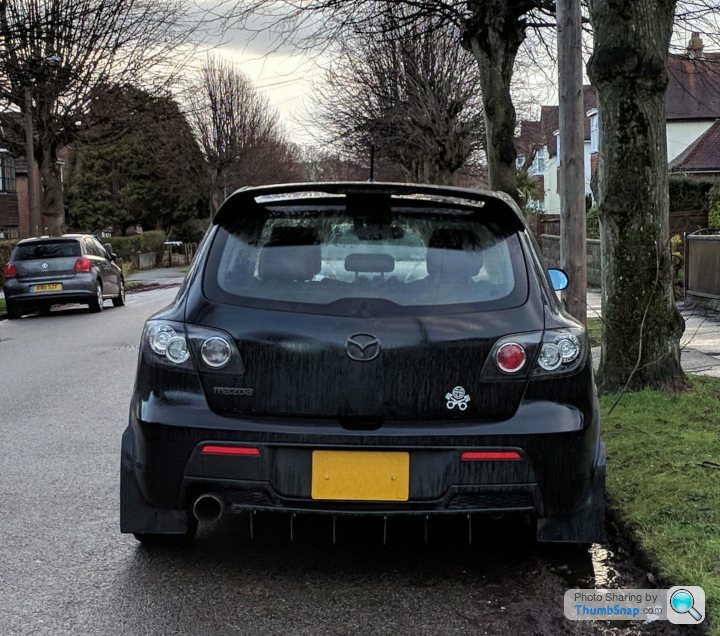
Success!!
If I got this hydrodipped I would have to fit in within a week of dipping before the lacquer sets so given all the car parts I have laying about at the moment and given the free time over Easter I thought it would be a good time to fit it.
So after some test fitting and taping it was time to try and fit it!
Some tape to help centre it
Better not screw this bit up as the aero spoilers are harder to come by..
Bit more lining up
The 3m tape that it had backed on to it didn't like the heat and moving around much so it decided to melt and make a mess. I ended up refitting it without the 3m tape as it will end up coming off one day hopefully to get hydrodipped. I need to drive and test it but have been unable to do so given the current lockdown.
I believe that the US spoilers these spoiler extensions are designed for are a slightly different shape so some extra holes had to be drilled, otherwise it popped out at the sides. I did initially try and use some adhesive but it was clear that it wasn't going to stick or hold.
Close call in this one :/
I know.. I know.. they don't make these anymore so I'm going to leave it as it is..
All fitted and sightly cleaned up:
It doesn't massively poke out when viewing from the front, which is good.
Side view
View from the back
Old rear view
Success!!
Gassing Station | Readers' Cars | Top of Page | What's New | My Stuff