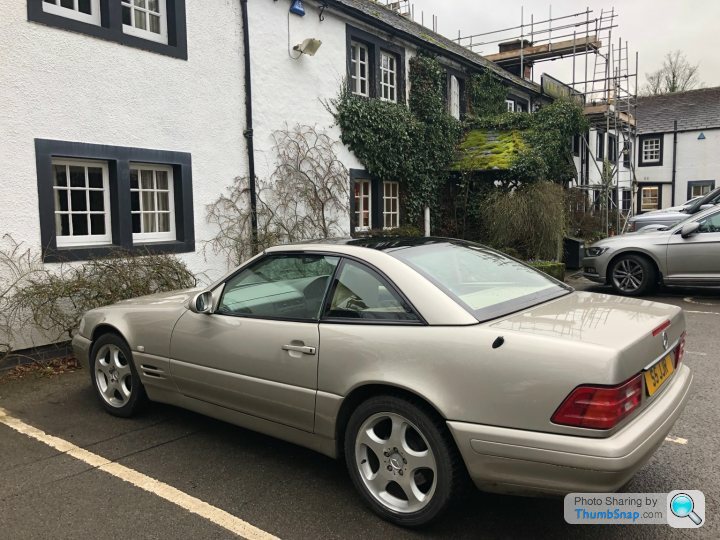
Mercedes 129 titivation
Discussion


The 211 is growing on me...
I used the car to travel to Workington for work earlier this week. Workington not being known for its hospitality, we (my pupil and I) holed up at the Pheasant at Bassenthwaite and I whole-heartedly recommend it to you. We did the journey there on Sunday evening in about 1hr 45mins, not bad for 90miles cross-country and in the dark. The journey back was rather more fun, taking in the Hartside Pass on the Penrith-Alston-Haydon Bridge road.
Today I noticed a hideous graunching noise from the off side front: sounds like a bad ball joint. That will be a damning verdict on the TRW control arms if so: less than 10,000miles... I am not sure what else it could be, it was too loud and horrible-sounding to be an ARB bush (could be a bracket, I suppose).
Some nitty ball-joint failure investigation here
https://youtu.be/jpeMvUU8WM4
I know, Lemforder v TRW and early style v welded, but still perhaps relevant for ball joint internal design issues.
https://youtu.be/jpeMvUU8WM4
I know, Lemforder v TRW and early style v welded, but still perhaps relevant for ball joint internal design issues.
r129sl said:
The suspension seems to have stopped making noises.
Well that's a coincidence. I took my W220 down to my man last week for an MOT and a few other bits, and the day before I did so, this loud creaking noise suddenly started, front nearside.The man said 'it's a ball joint, but there's no play in any of the front suspension, so bring it back next week and I'll have a poke around as I haven't got time to look at it now', so I've been driving around with what sounds like a barn door in a gale screeching as the suspension moves, which is all the time obvs.
Took it out this morning, it's stopped. Bloody cars.
An update: I’ve spent the afternoon working on and cussing at the car. I have changed the front shocks, shock top mounts, bump stops and dust covers. I also tracked down the suspension noise to a duff steering stop.
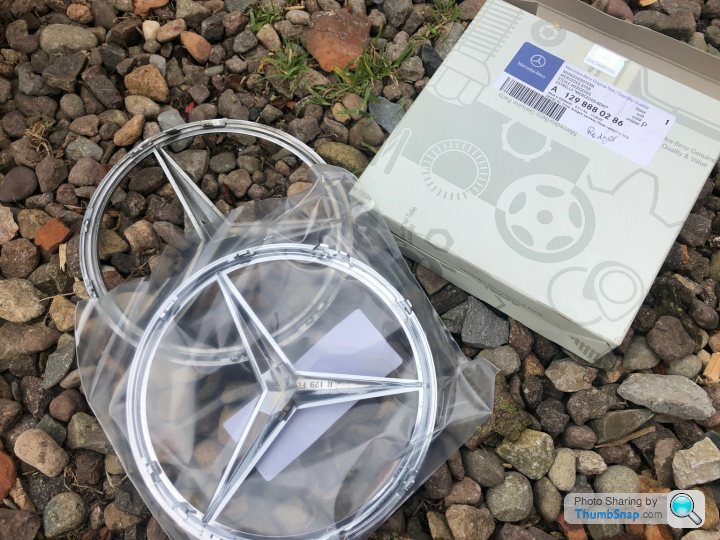
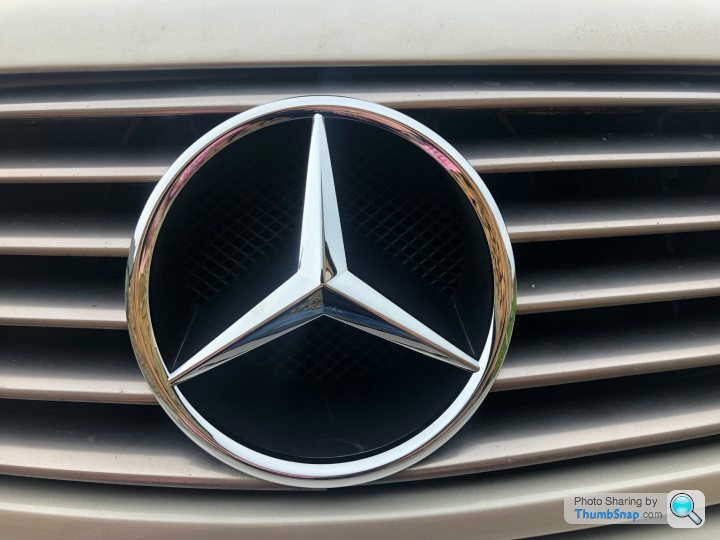
Lovely new parts:
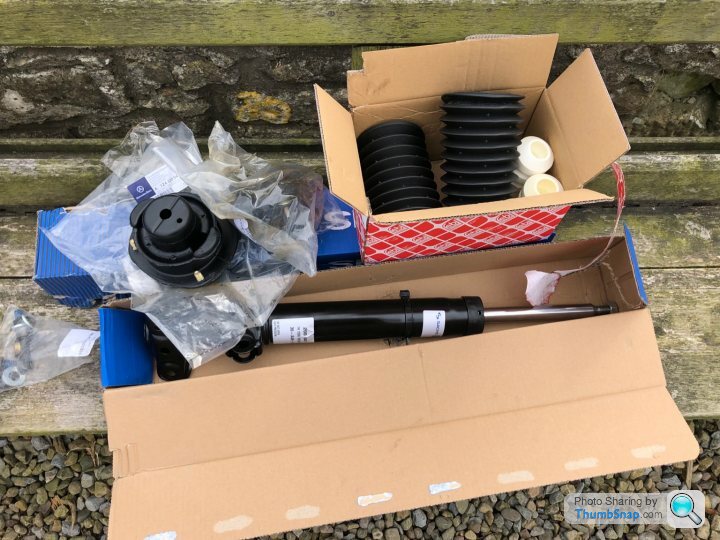
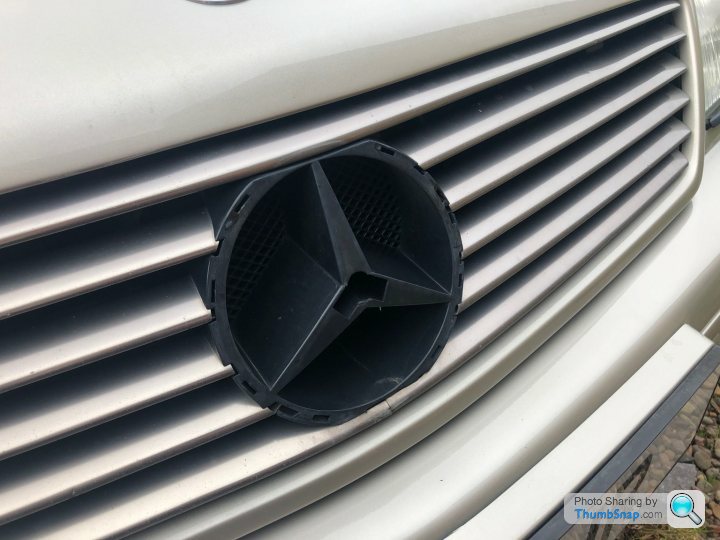
New steering stop. The rubber cap had come away from the old one. The 129 part is NLA, but the 124/201 part is identical. It is also £3 as against £22, good old Merc parts pricing.
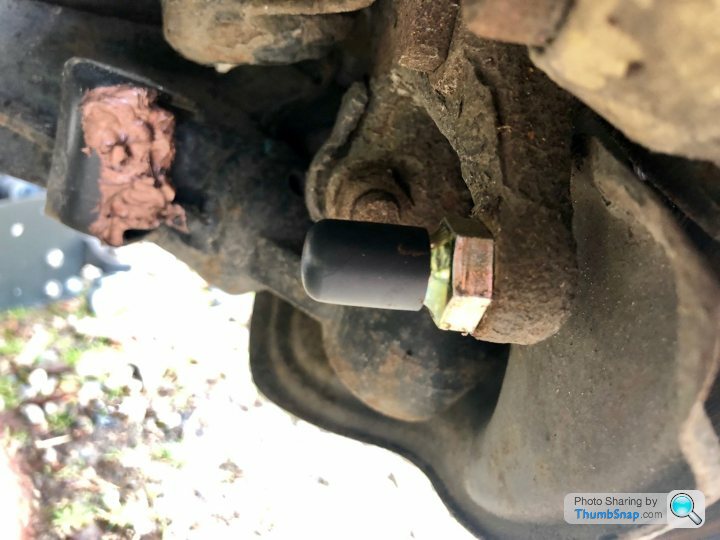
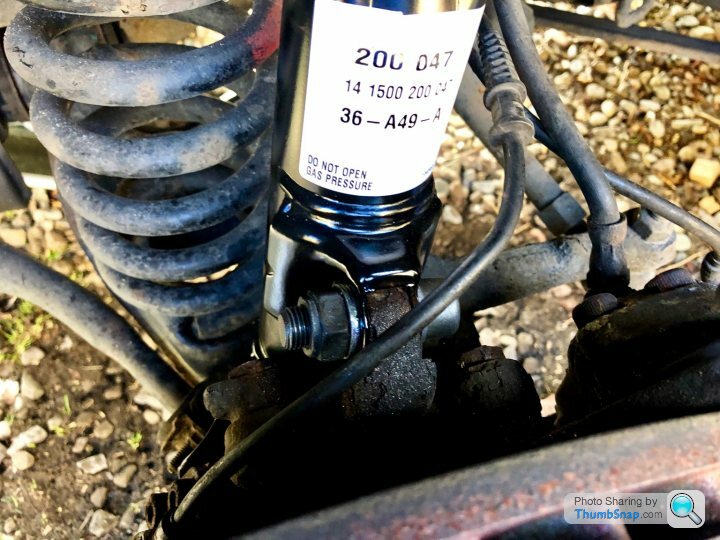
For shocks I fitted Sachs 200 047 and for top mounts I used genuine Merc parts. Dust covers and bump stops were Febi. All in about £320. This should be such an easy job but whoever fitted these up last year had a duff torque wrench. Nothing would break the near side lower mount bolt so I had to hacksaw it off. What a pig of a job. I managed to crush my hand when the air wrench drove the counterhold spanner I had in the other hand into a tight place. Thankfully my 8 year old was on hand to sort it out.
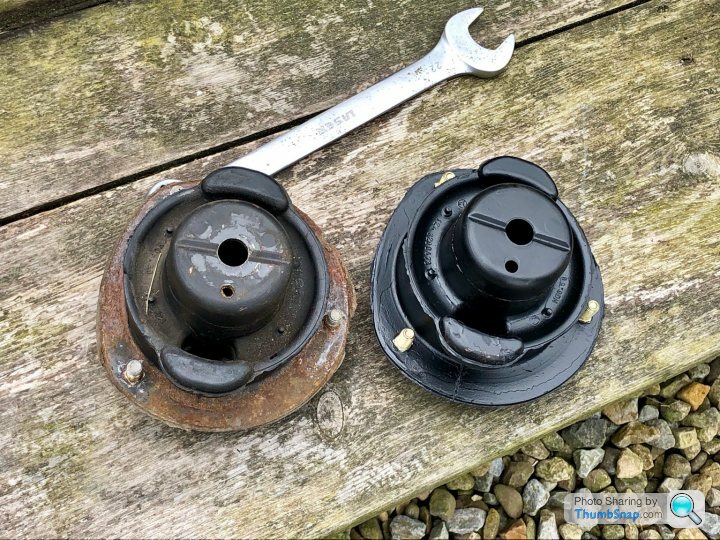
New and old top mounts:
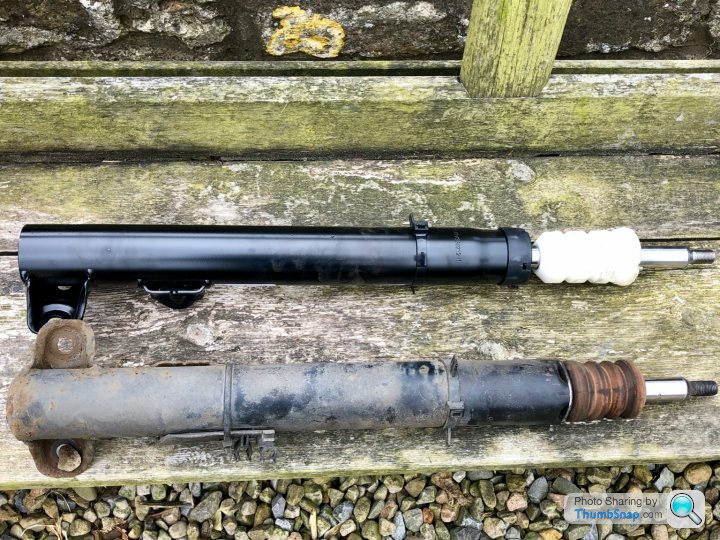
New and old shocks:
Cut up bolt:
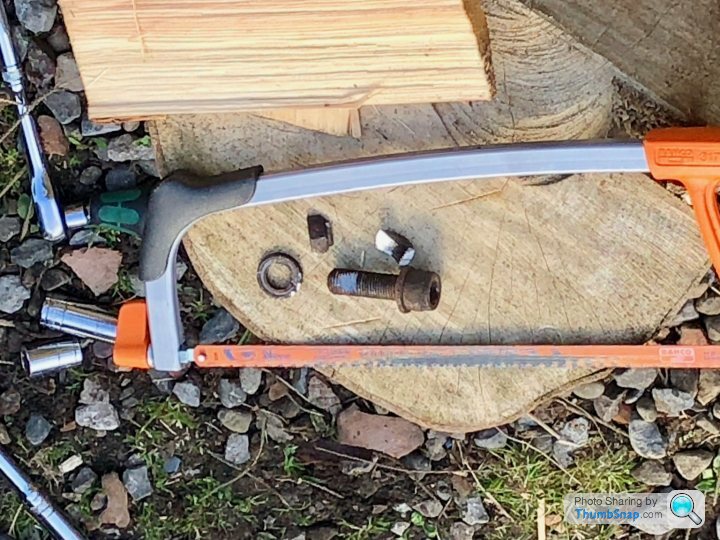
Its replacement affixing the new near side shock to the stub axle. Access to one side of this hex bolt is very tight and you will need a very stubby 12mm hex bit. I improvised and used a spanner on a bit.You could take the calliper off to aid access.
Happily there is a discernible improvement in ride and handling. It’s 75k miles since these were done; everything but these parts was changed last spring (I have no idea why we didn’t do these). I’m going to concentrate on this car this year. Next job is to get the rusty old tail pipe trims I’ve been hoarding shot blasted and powder coated, a little thing but finding the time to take them in is tricky. Maybe a new hood from KHM. And new leather on the driver’s seat. Aspirations...
Lovely new parts:
New steering stop. The rubber cap had come away from the old one. The 129 part is NLA, but the 124/201 part is identical. It is also £3 as against £22, good old Merc parts pricing.
For shocks I fitted Sachs 200 047 and for top mounts I used genuine Merc parts. Dust covers and bump stops were Febi. All in about £320. This should be such an easy job but whoever fitted these up last year had a duff torque wrench. Nothing would break the near side lower mount bolt so I had to hacksaw it off. What a pig of a job. I managed to crush my hand when the air wrench drove the counterhold spanner I had in the other hand into a tight place. Thankfully my 8 year old was on hand to sort it out.
New and old top mounts:
New and old shocks:
Cut up bolt:
Its replacement affixing the new near side shock to the stub axle. Access to one side of this hex bolt is very tight and you will need a very stubby 12mm hex bit. I improvised and used a spanner on a bit.You could take the calliper off to aid access.
Happily there is a discernible improvement in ride and handling. It’s 75k miles since these were done; everything but these parts was changed last spring (I have no idea why we didn’t do these). I’m going to concentrate on this car this year. Next job is to get the rusty old tail pipe trims I’ve been hoarding shot blasted and powder coated, a little thing but finding the time to take them in is tricky. Maybe a new hood from KHM. And new leather on the driver’s seat. Aspirations...
Edited by r129sl on Saturday 27th April 20:26

Zonergem said:
Is there any special method for getting the shocks torqued up correctly with weight on the wheels? Seems quite hard without a lift.
It is only the top mount that you have to worry about in this regard and you can simply torque it upon the car is back on its wheels. However, the whole operation is carried out with a jack under the control arm keeping the spring/shock under tension.Edited by r129sl on Saturday 27th April 20:26
Well there has been lack of action here. The front suspension was a bit clunky so I had all four ARB bushes replaced. That tightened things up nicely.
However a new from-end rattle developed.On rough roads it was rattling away like a bag of spanners, but not at all under braking. Baister diagnosed rattling pads on the off side front calliper. I decided to have a go at replacing the pads myself. All did not go to plan. Does it ever?
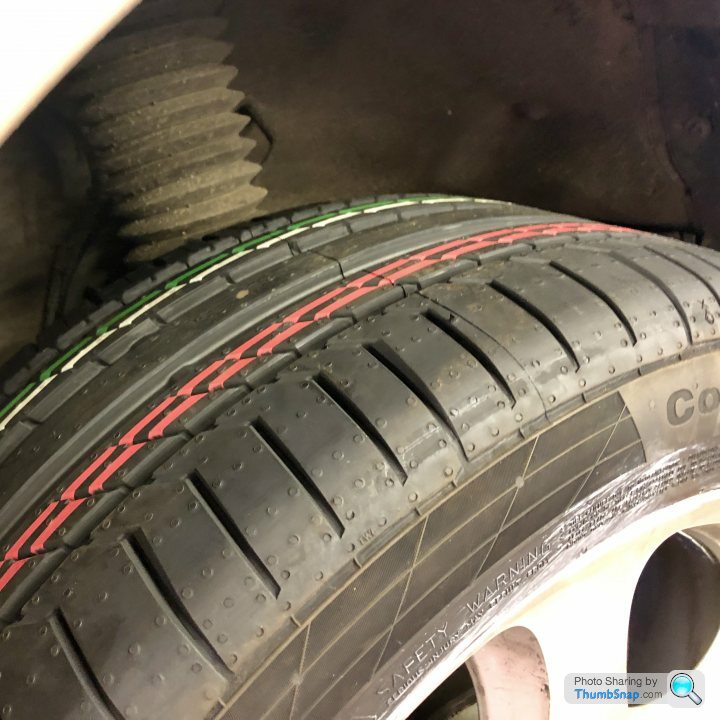
I ordered nice new Brembo pads and Pagid hardware from Euro Car Parks for £50. Brembo make the brake system on the car so I am hopeful their pads should be up to snuff.

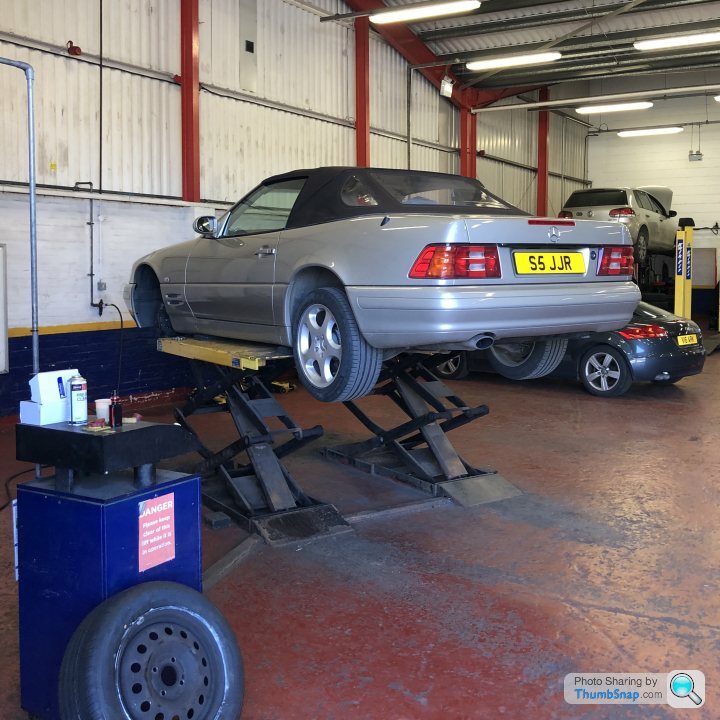
Boy one gave me some help. He got the car top on stands and whipped the wheels off for me.

Side one all done. It is quite easy, although a bit of force is required. Drive the pins out from the face-side with a suitable strong parallel punch (see below for what happens when you use a cheap and nasty conical punch). Some pressure on the retaining springs eases the removal of the pins. Unfasten the wear sensor. Pull the pads out with a screwdriver. Push the pistons back carefully. Copper-slip the new pads and insert in reverse order.

Side two ready to be done...

Unfortunately I drove a conical ended punch a little too far into the calliper and the bloody thing snapped. I cannot get the snapped bit out of the hole. I have tried bashing from the other side with a variety of implements including the old pins and various screwdrivers. And I have tried drilling from the front. No luck. My local man is going to pop round tomorrow and take the calliper off to do it on the bench. Any ideas in the meantime?


However a new from-end rattle developed.On rough roads it was rattling away like a bag of spanners, but not at all under braking. Baister diagnosed rattling pads on the off side front calliper. I decided to have a go at replacing the pads myself. All did not go to plan. Does it ever?
I ordered nice new Brembo pads and Pagid hardware from Euro Car Parks for £50. Brembo make the brake system on the car so I am hopeful their pads should be up to snuff.
Boy one gave me some help. He got the car top on stands and whipped the wheels off for me.
Side one all done. It is quite easy, although a bit of force is required. Drive the pins out from the face-side with a suitable strong parallel punch (see below for what happens when you use a cheap and nasty conical punch). Some pressure on the retaining springs eases the removal of the pins. Unfasten the wear sensor. Pull the pads out with a screwdriver. Push the pistons back carefully. Copper-slip the new pads and insert in reverse order.
Side two ready to be done...
Unfortunately I drove a conical ended punch a little too far into the calliper and the bloody thing snapped. I cannot get the snapped bit out of the hole. I have tried bashing from the other side with a variety of implements including the old pins and various screwdrivers. And I have tried drilling from the front. No luck. My local man is going to pop round tomorrow and take the calliper off to do it on the bench. Any ideas in the meantime?
Fixed it. I squirted a bit of Plus-Gas in the hole (carefully avoiding any friction surfaces), left it a while then brayed it out using a 3mm tough and long allen key from which I first cut off the right angle head. Cleaned up and finished the job in five minutes. Here is the offending snapped-off punch end:

Went for a drive and the car still rattles. I didn't think it was pads rattling in the callipers. Bloody Baister. Had a good mooch around and discovered it was a loose shock top mounting nut. Oops. Dodgy assembly by the home DIY guy way back in April. Car now running well. Just over 280,000miles on the odo.
Went for a drive and the car still rattles. I didn't think it was pads rattling in the callipers. Bloody Baister. Had a good mooch around and discovered it was a loose shock top mounting nut. Oops. Dodgy assembly by the home DIY guy way back in April. Car now running well. Just over 280,000miles on the odo.

Plus-Gas... I had never heard of it. It seems like a very effective lubricant, though Bilt Hamber Ferrosol has a good reputation too.
EDIT: Perhaps you can enter the Tight Nuts Challenge
EDIT: Perhaps you can enter the Tight Nuts Challenge
Edited by bolidemichael on Saturday 31st August 21:43
Gassing Station | Readers' Cars | Top of Page | What's New | My Stuff