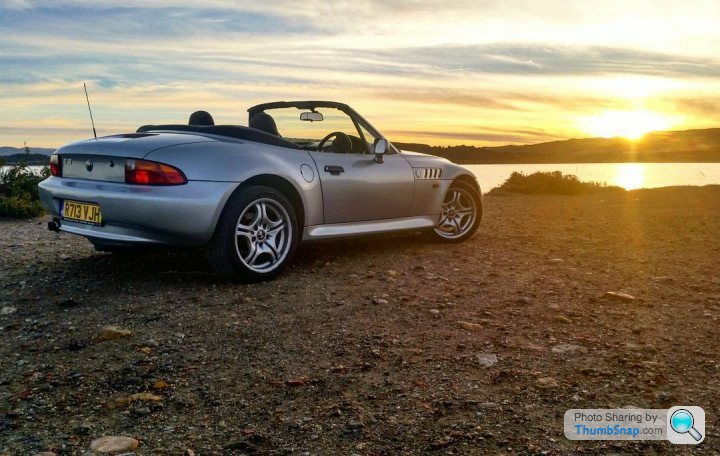
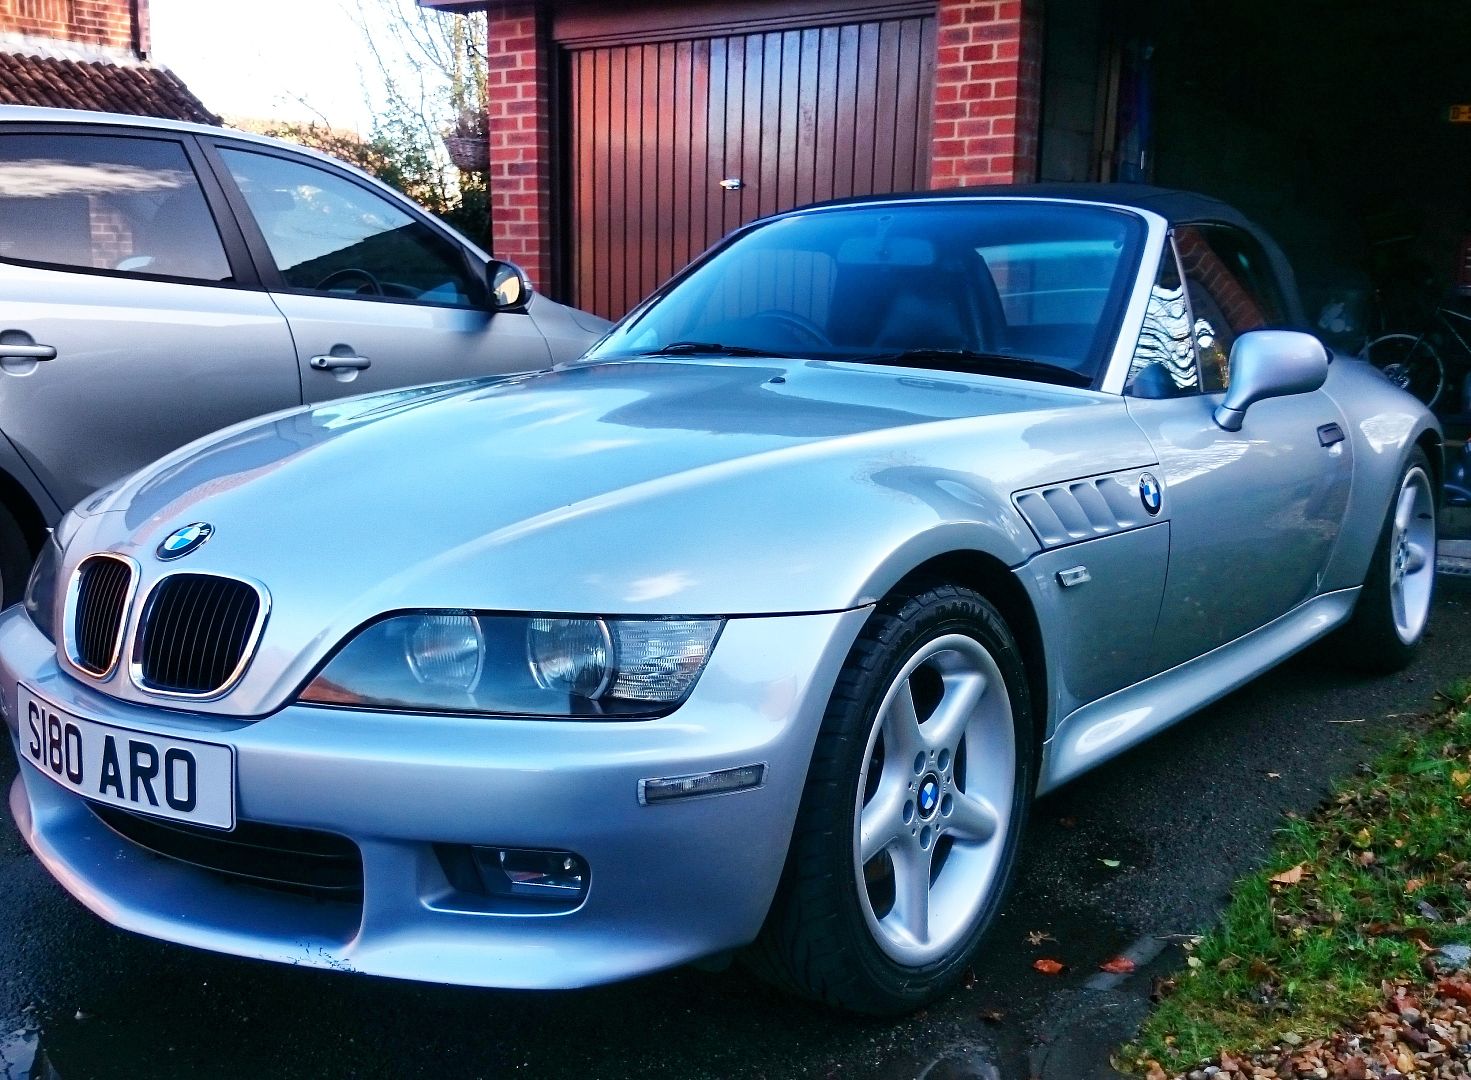
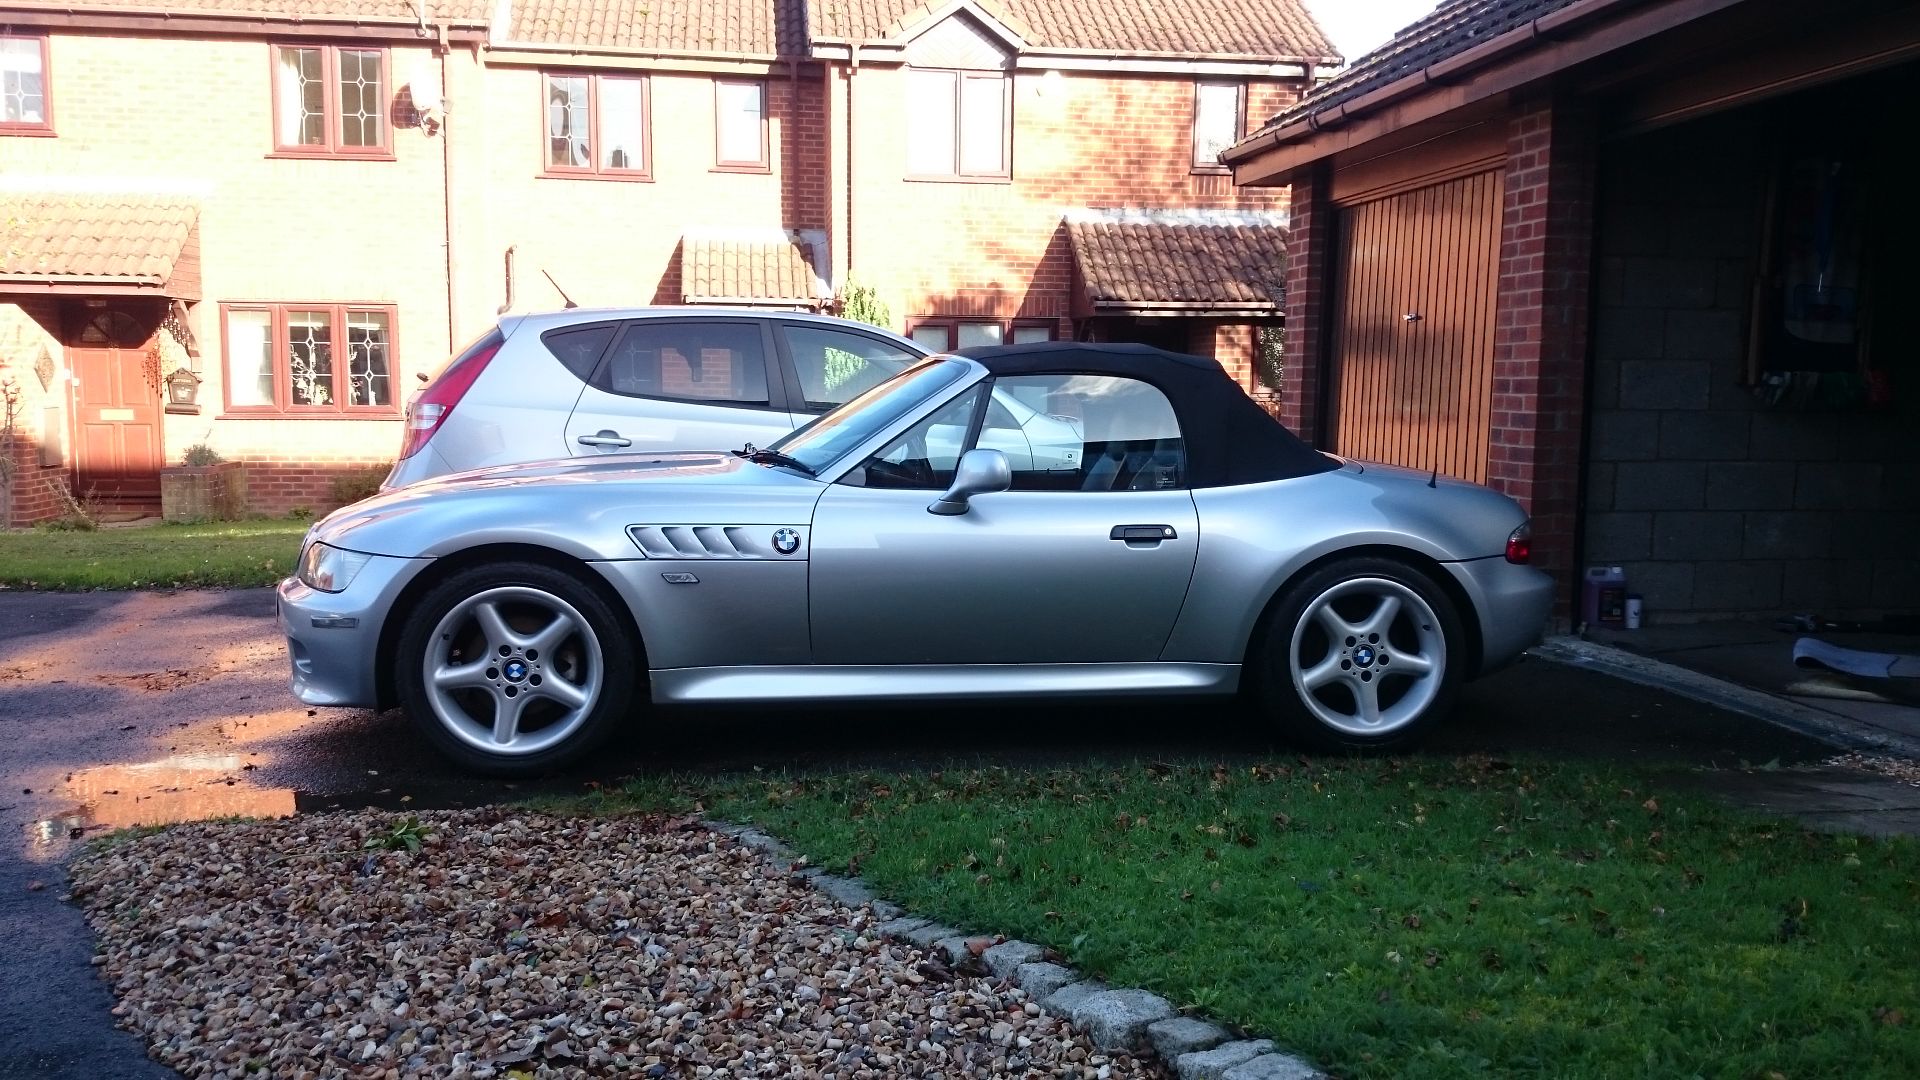
BMW Z3 2.8 - OEM+ long term project
Discussion


Small update this week (MOT next week eeeek)
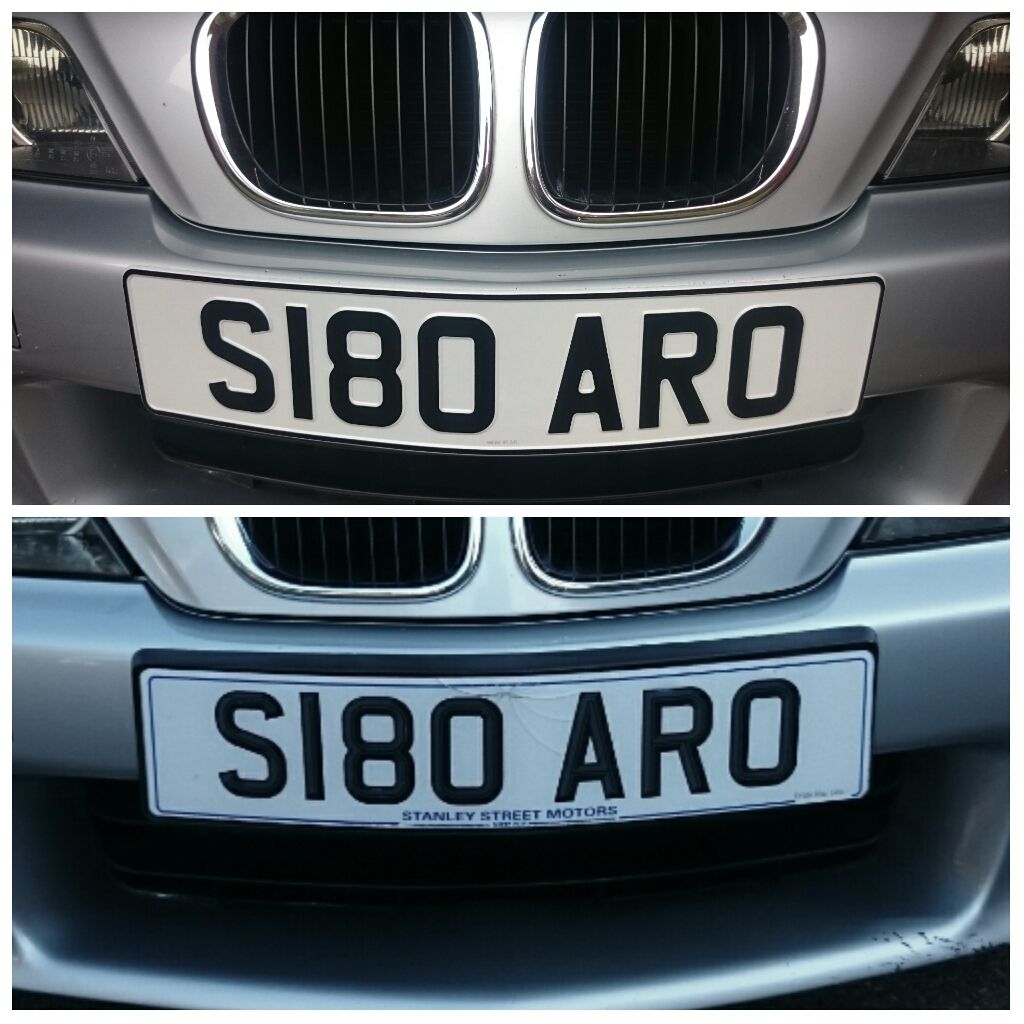
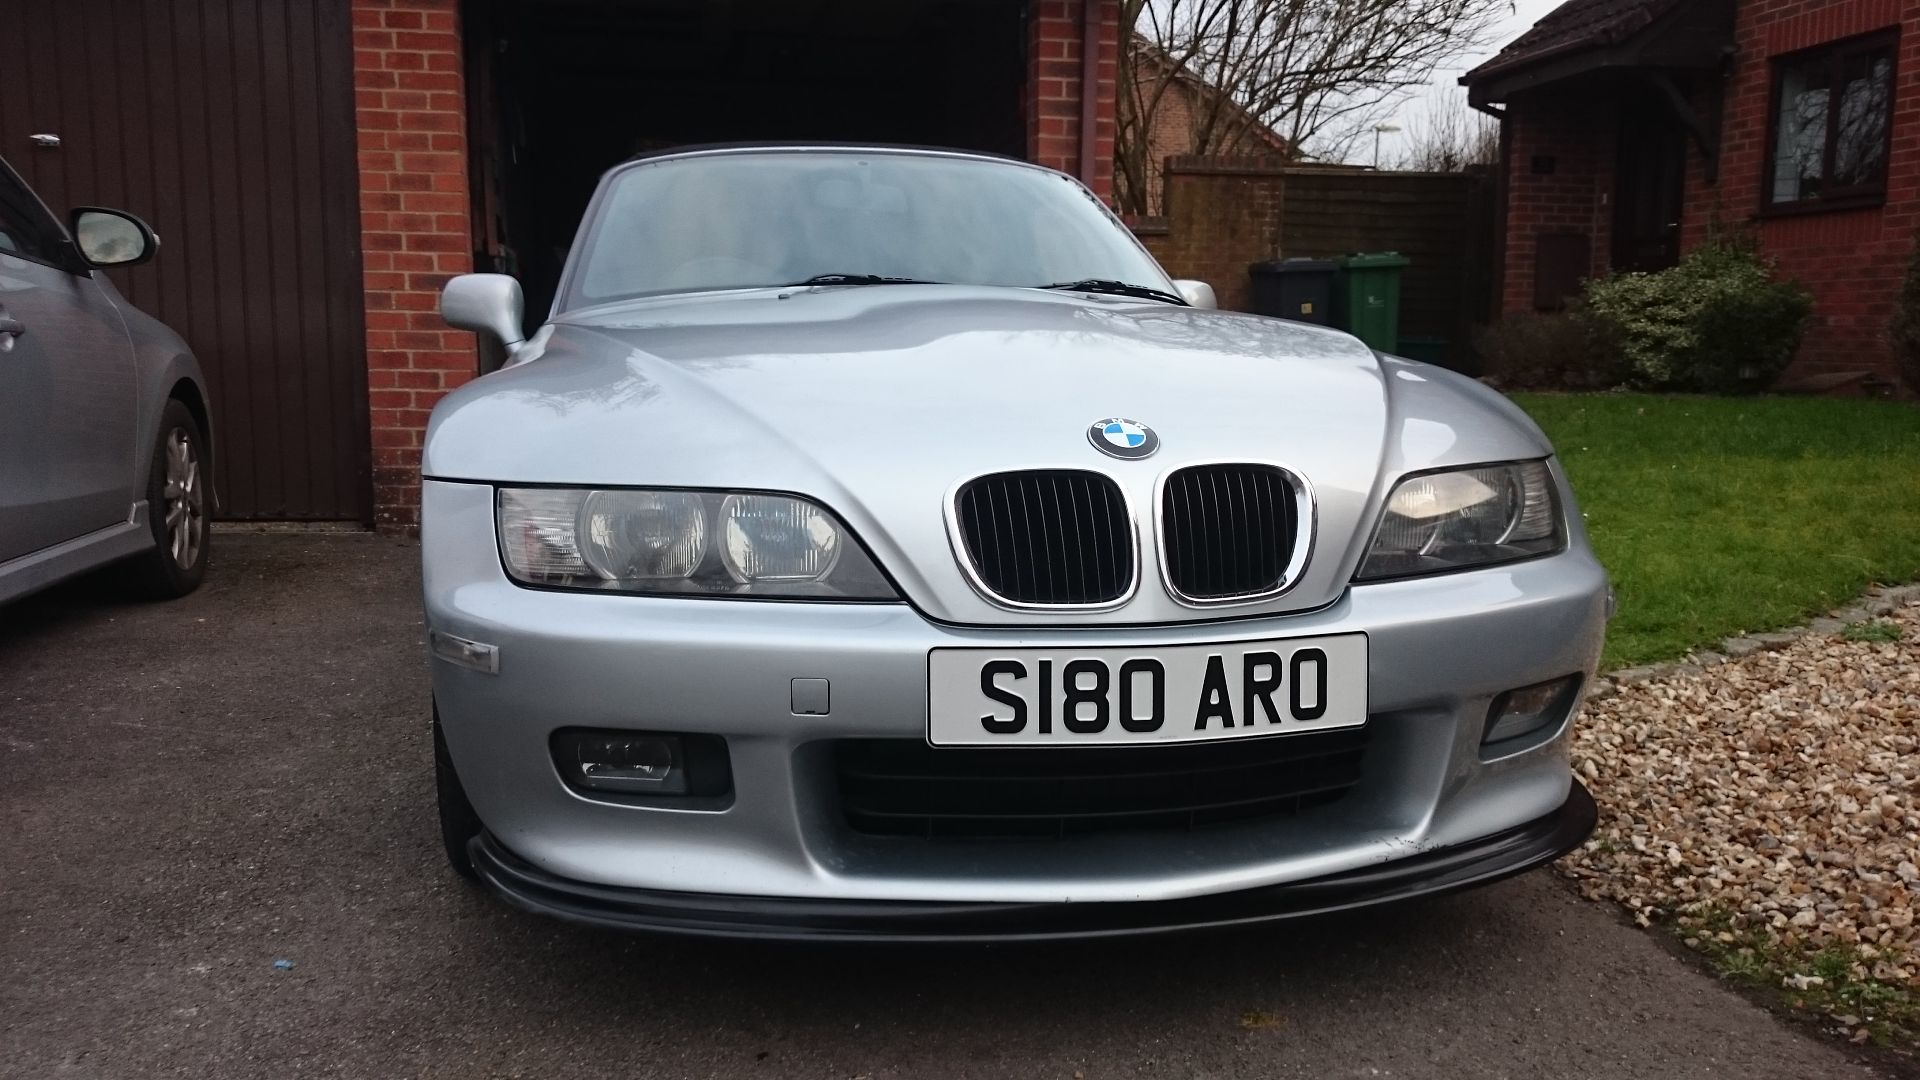
Hated (HATED) the horrible dealer numberplates that came with the car, the front plate was cracked and the back one was straight out of the 90's.
Ordered some pressed metal plates off eBay on Friday night and they were here monday morning!
http://www.ebay.co.uk/itm/251663535494?_trksid=p2057872.m2749.l2649&ssPageName=STRK:MEBIDX:IT
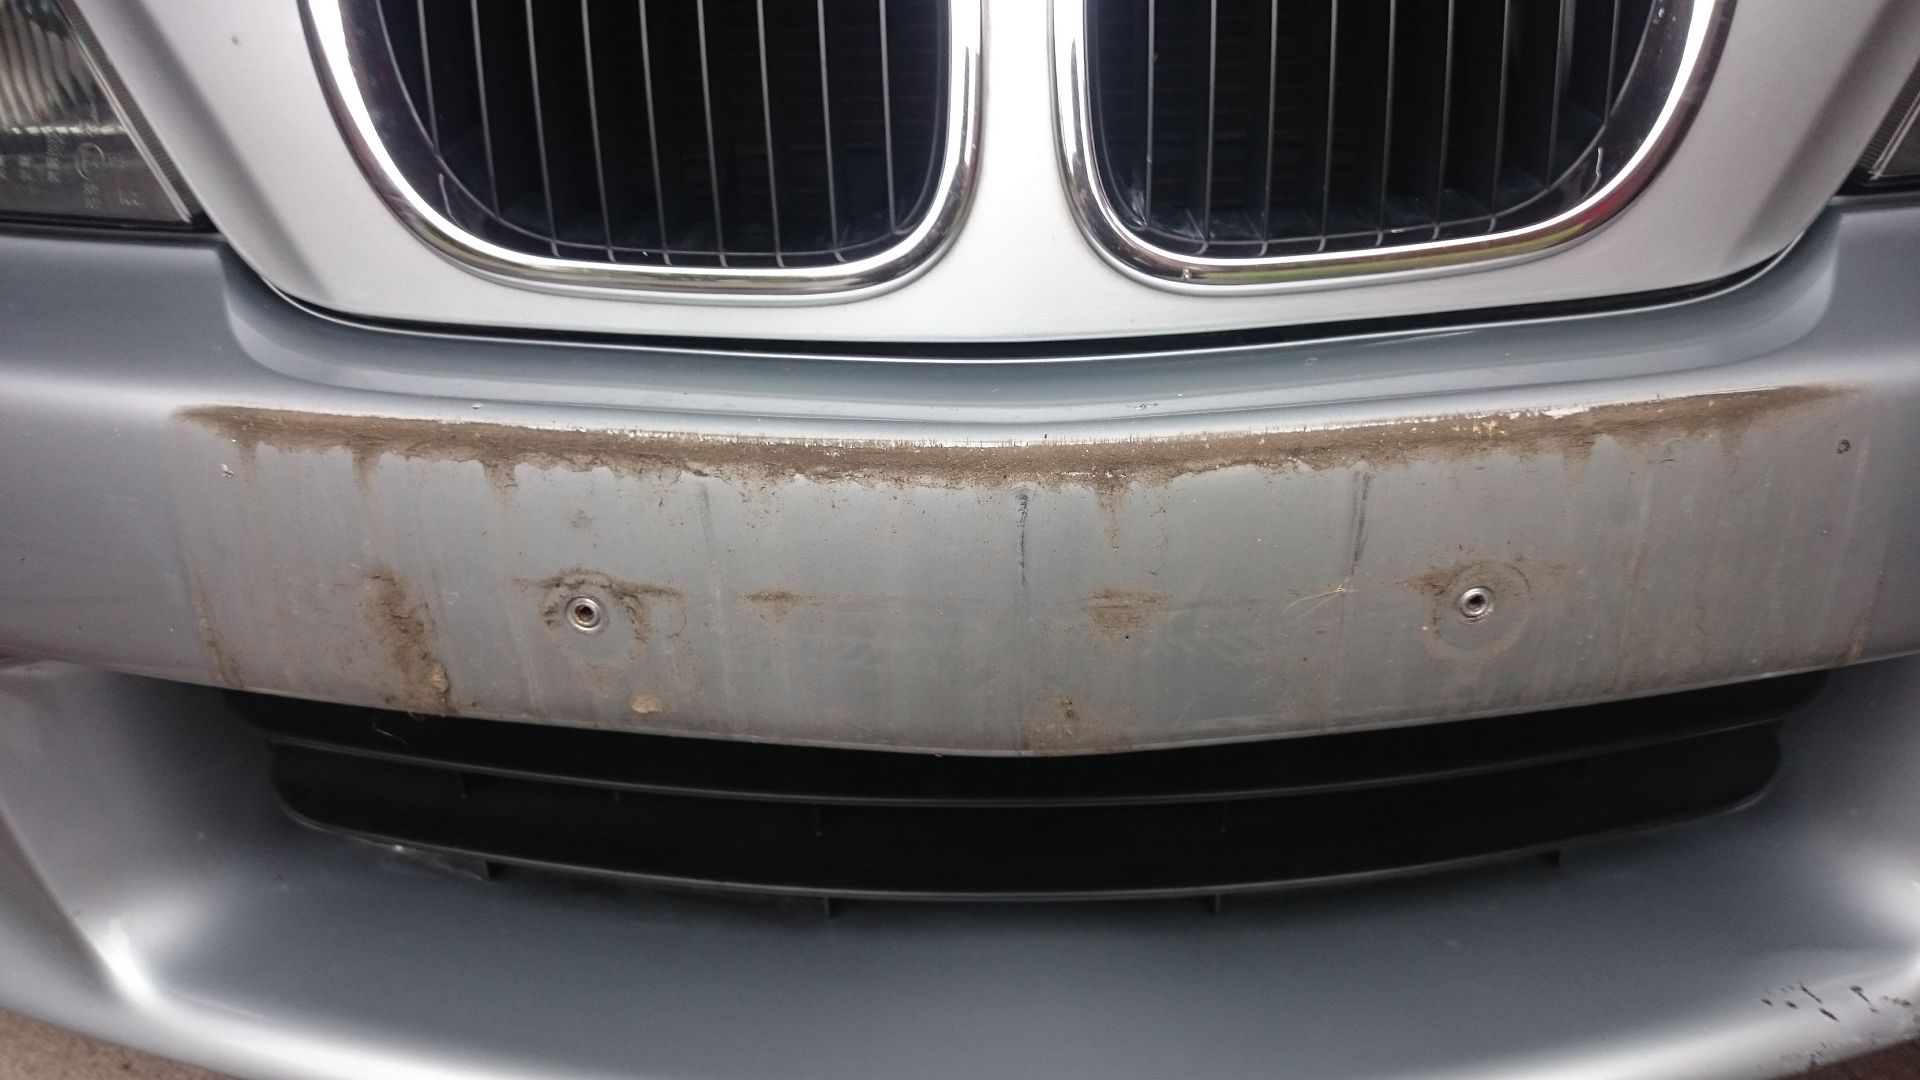
decided to remove the numberplate plinth whilst i was there, grim!
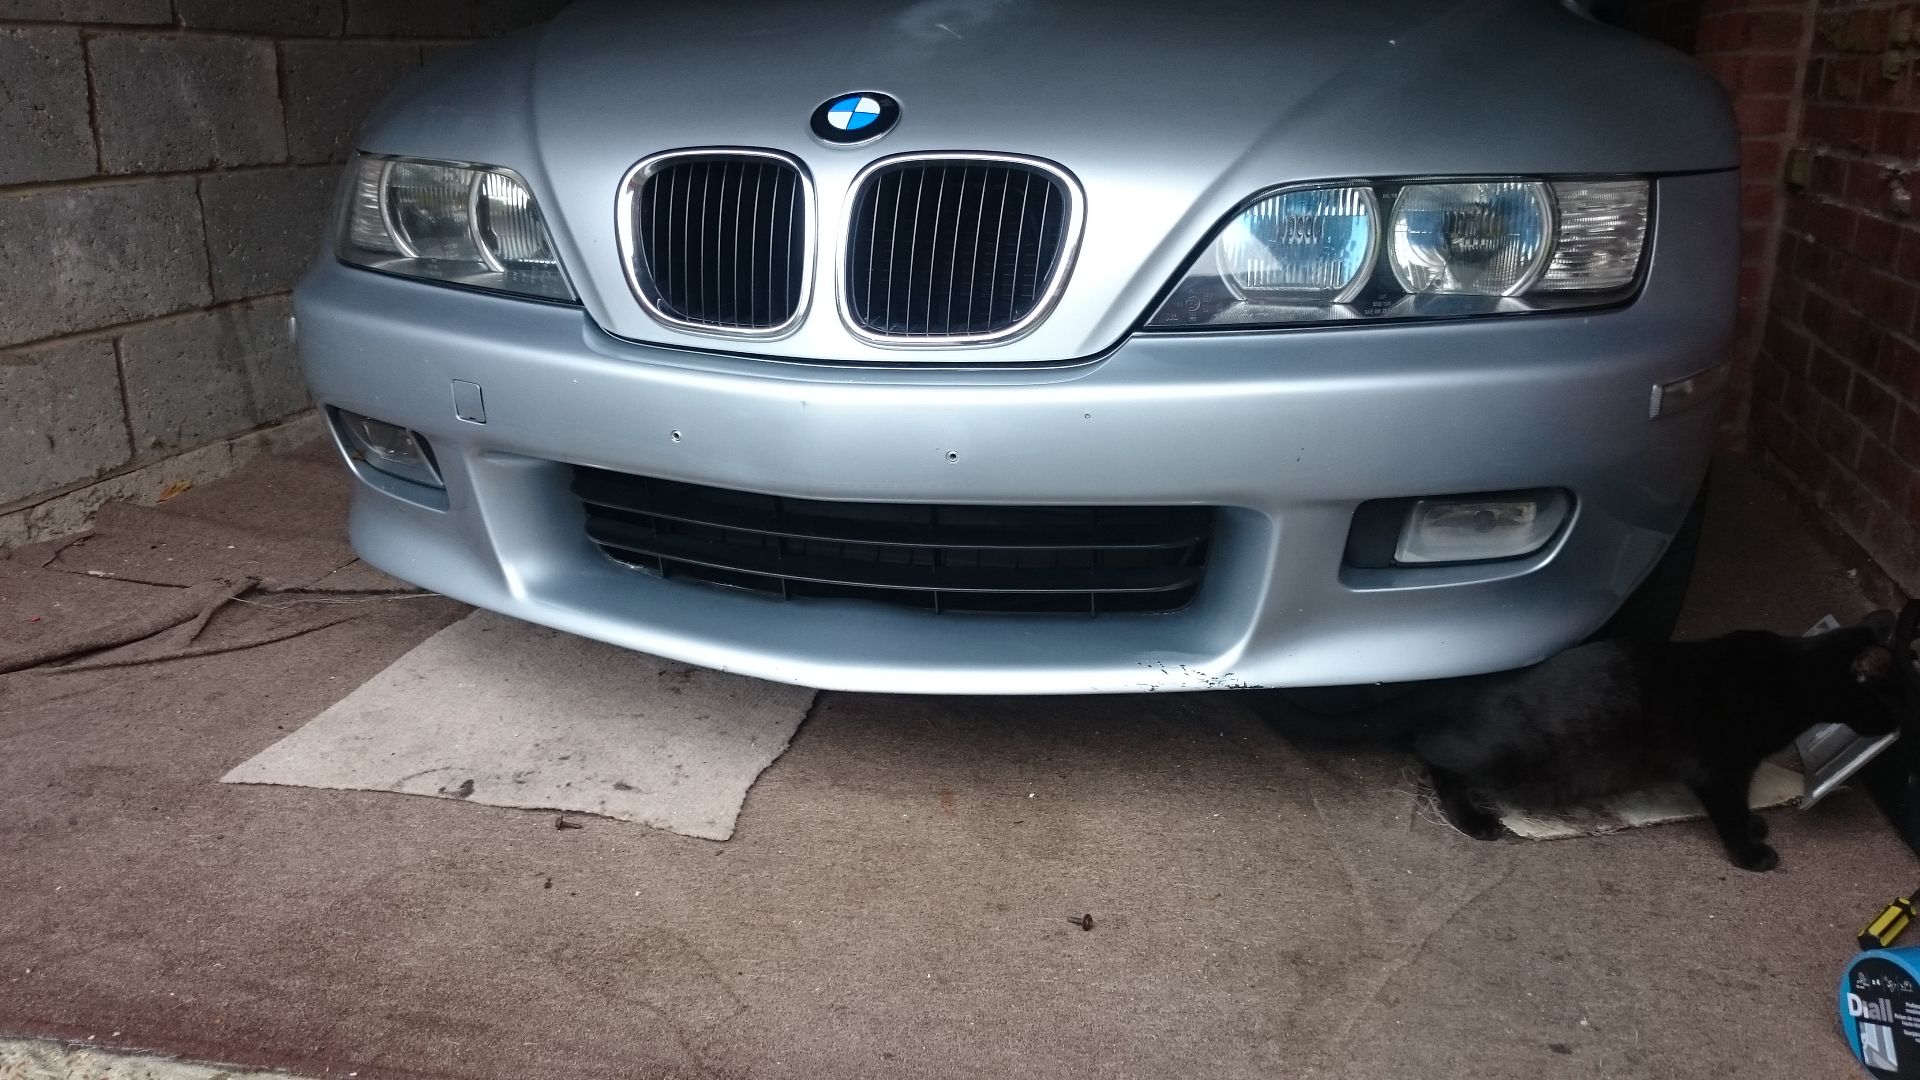
Cars look so much better without front plates
bent the front numberplate slightly over my knee and then stuck it to the car, added some tape to hold the shape for a couple of days.

before and after
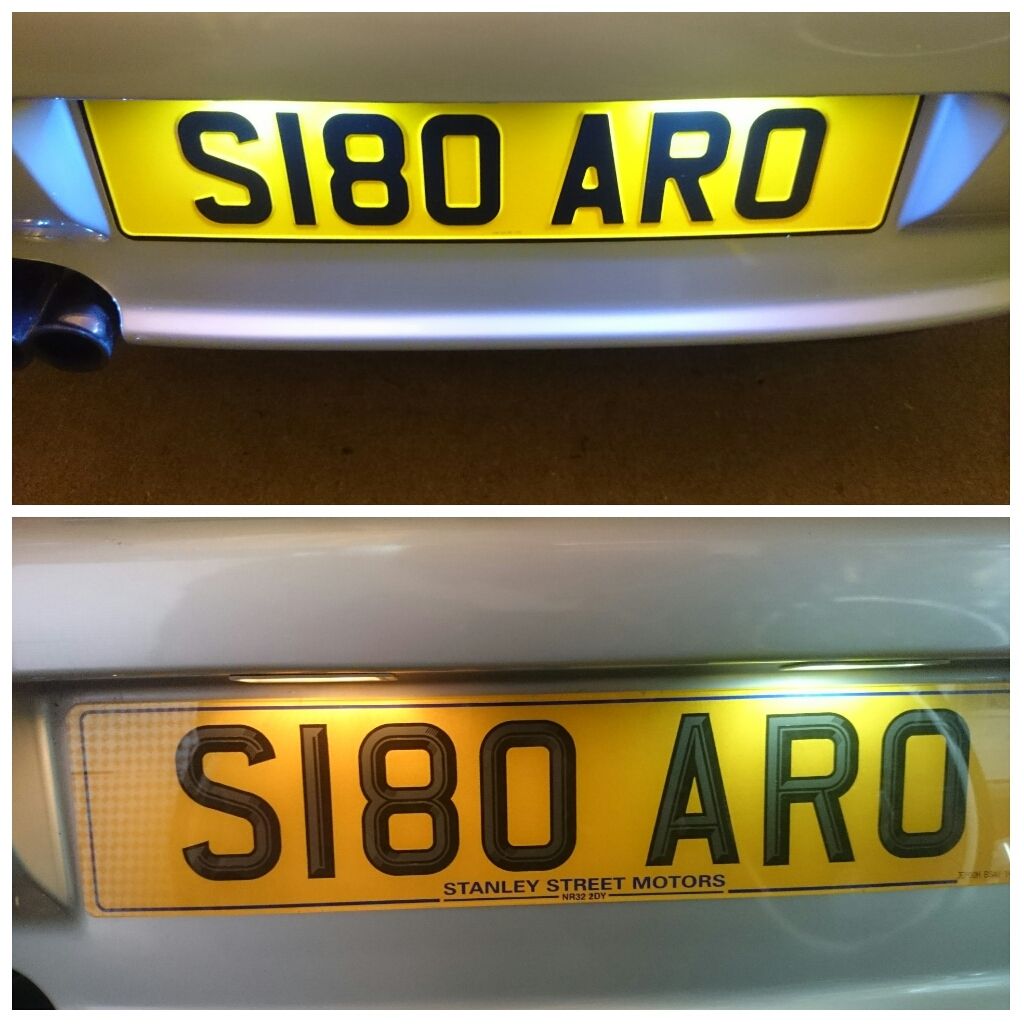
rear plate before and after
Hated (HATED) the horrible dealer numberplates that came with the car, the front plate was cracked and the back one was straight out of the 90's.
Ordered some pressed metal plates off eBay on Friday night and they were here monday morning!
http://www.ebay.co.uk/itm/251663535494?_trksid=p2057872.m2749.l2649&ssPageName=STRK:MEBIDX:IT
decided to remove the numberplate plinth whilst i was there, grim!
Cars look so much better without front plates
bent the front numberplate slightly over my knee and then stuck it to the car, added some tape to hold the shape for a couple of days.
before and after
rear plate before and after
vsonix said:
Really nice Z mate, lot of the same things will be happening to mine, although I'll be keeping the Tango bits but possibly treating the clusters to a light tint. Don't suppose yours came with orange front corner markers did it? Wouldn't mind a set of those, although I do quite like the effect of the amber LED 501s I have between clear plastic.
Mine cane with clear side markers, think only the American cars came with ambers MOT ........
Failed
But only a few things!
Front Shock gone
Front wishbone bushes gone (suspected this)
Advisories were
Rear shocks misting
Front springs corroded
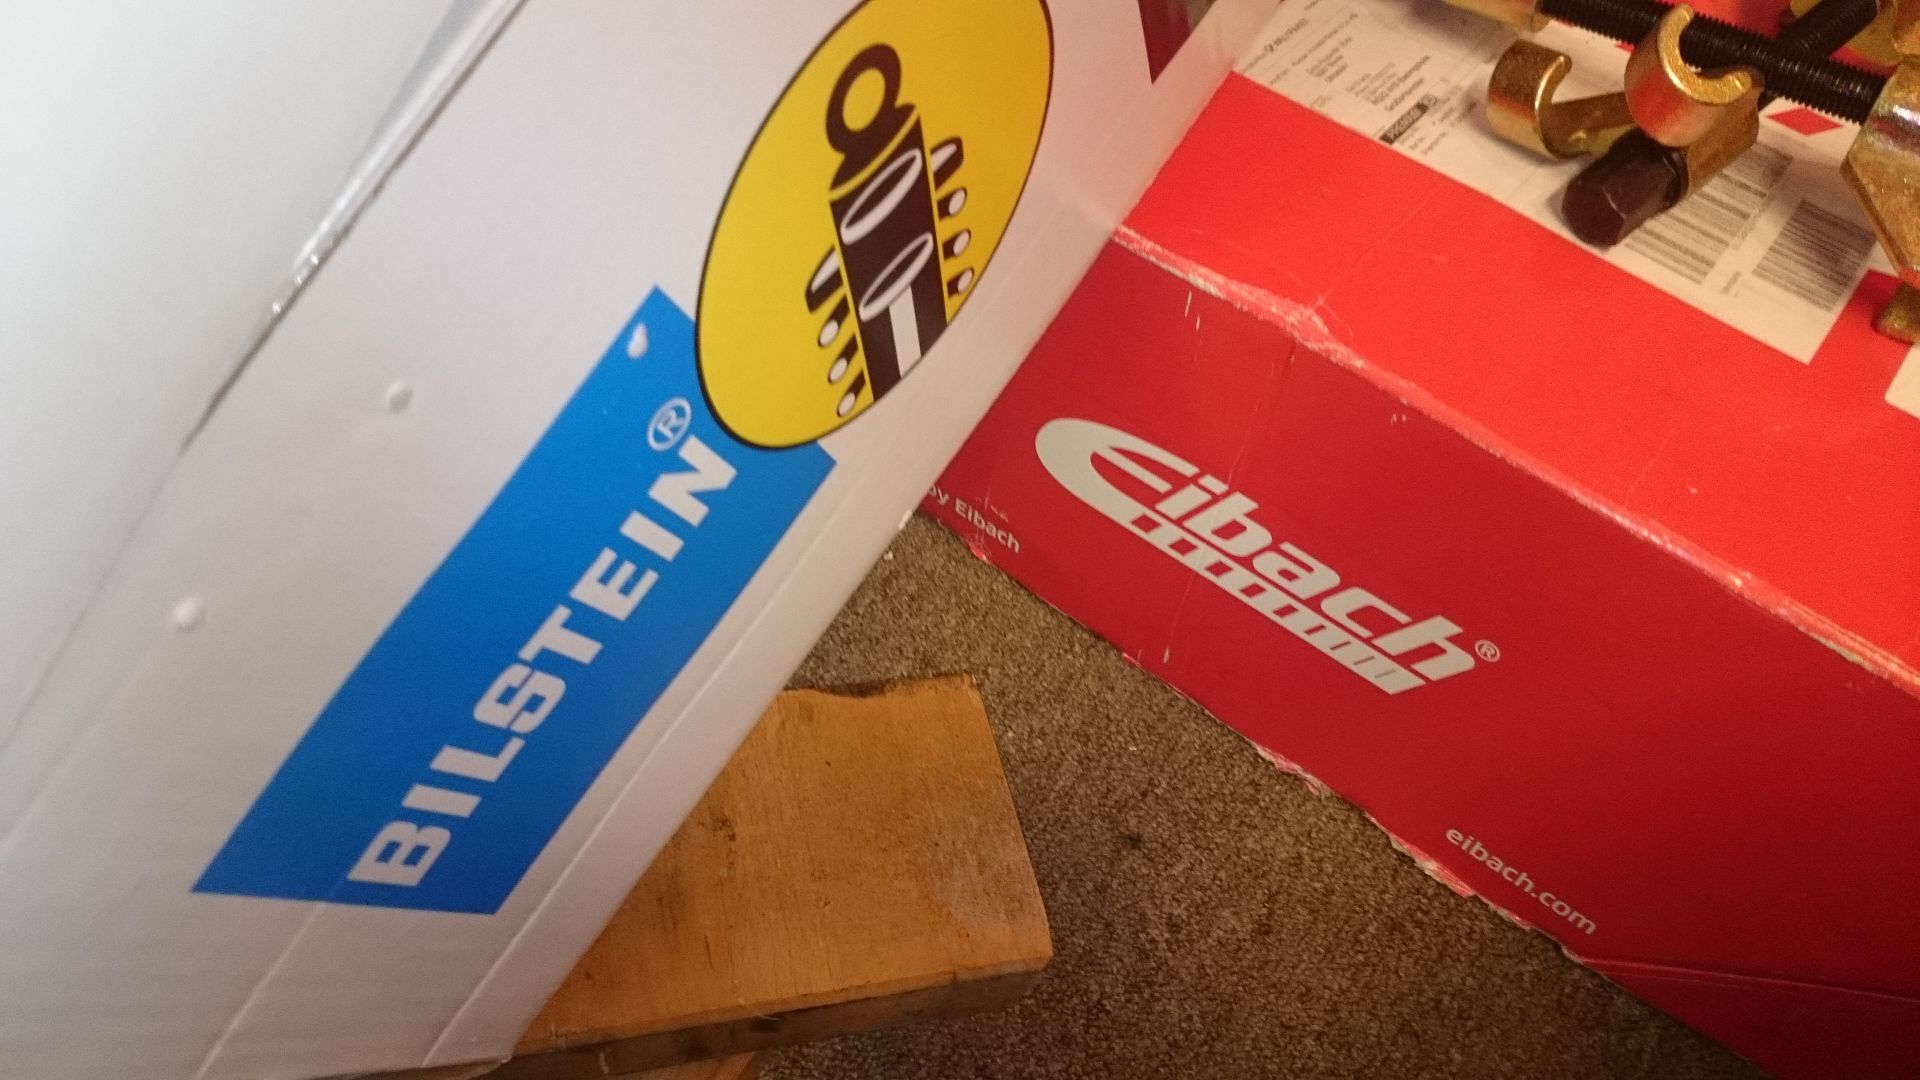
So ... bit of a spend up today.
Bilstein B4s (Front and Rear)
Eibach 30mm lowering springs
Meyle HD Rear Topmounts
Lemforder Front top mounts
Nuts and bolts and gaskets from BMW
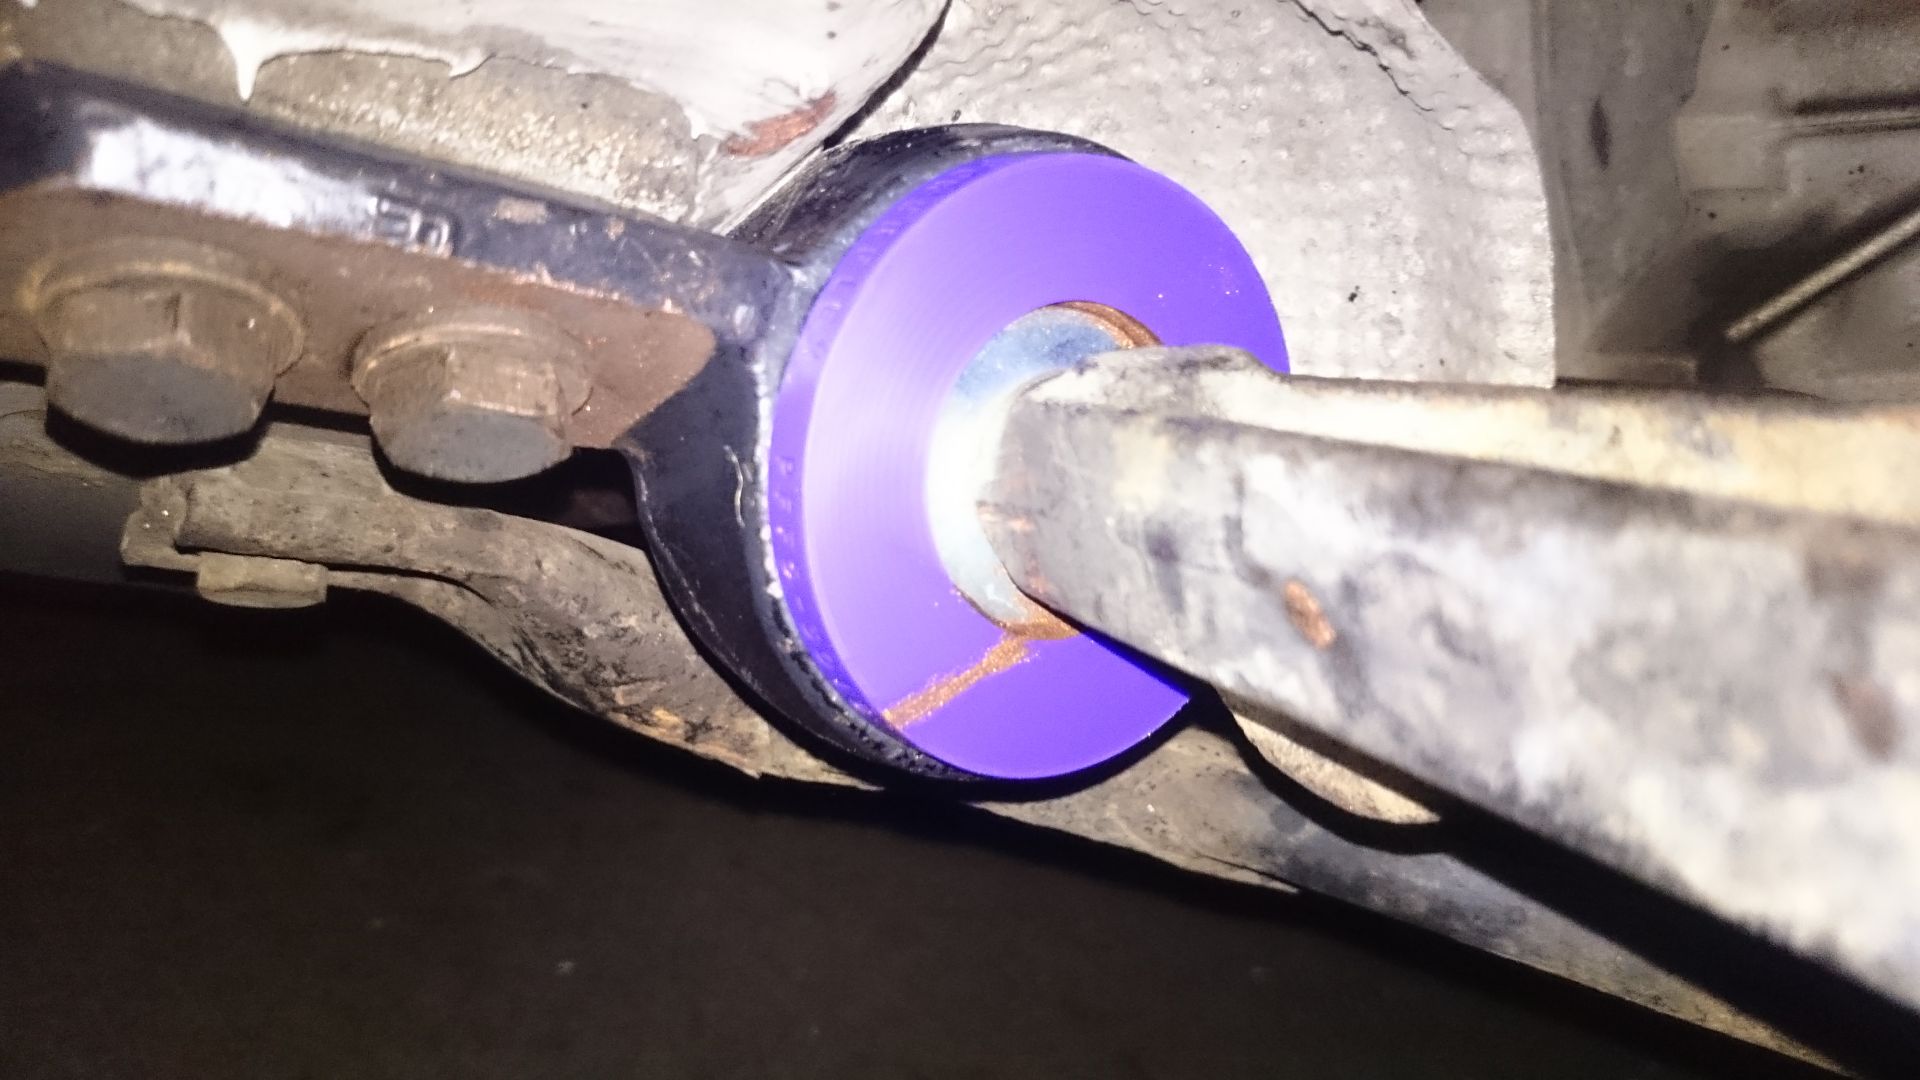
Powerflex wishbone bushes
all to get through a bloody MOT! at least it will do ALL the work needed to get it through
Small update on what feels like the longest process ever.
After the car failed the MOT i decided i was going to do things properly and repalce everything it needed with brand new.
So afer waiting for demon tweeks to deliver some shocks (3 weeks!!!!) i am still waiting on all the hardware from BMW as it appears to be lost in the post!
Have managed to do a couple of bits this weekend.
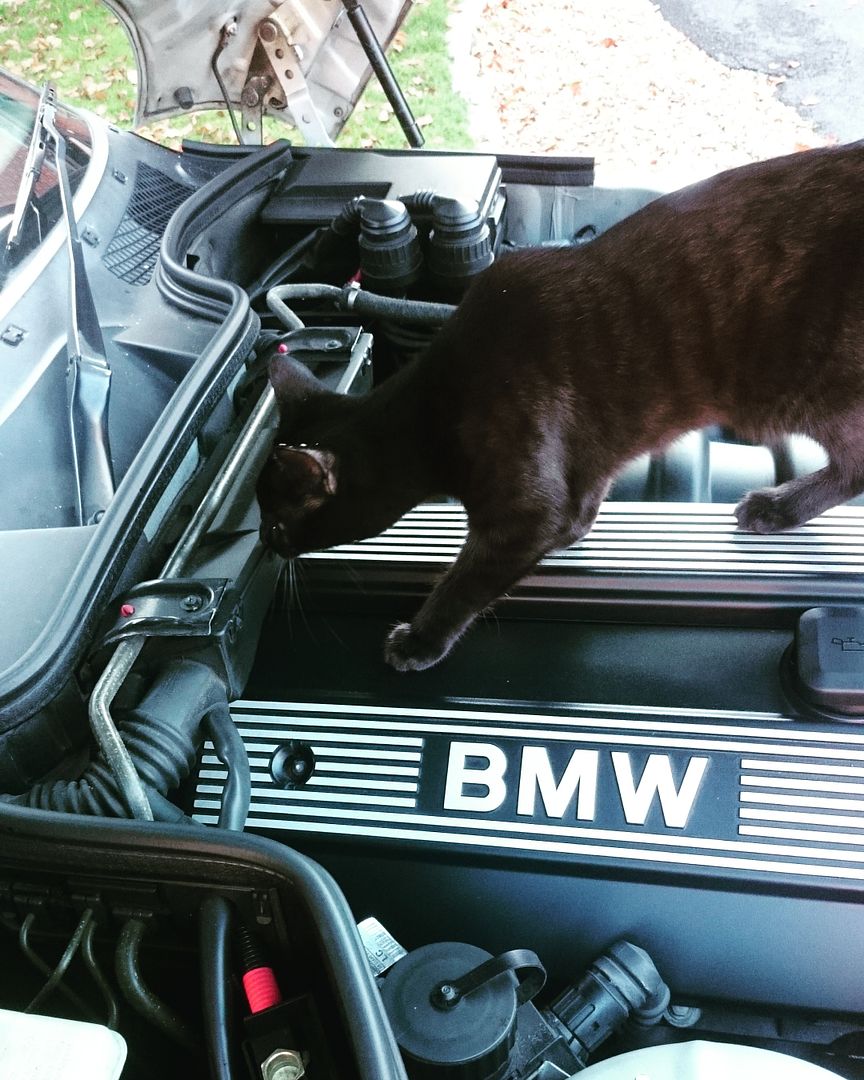
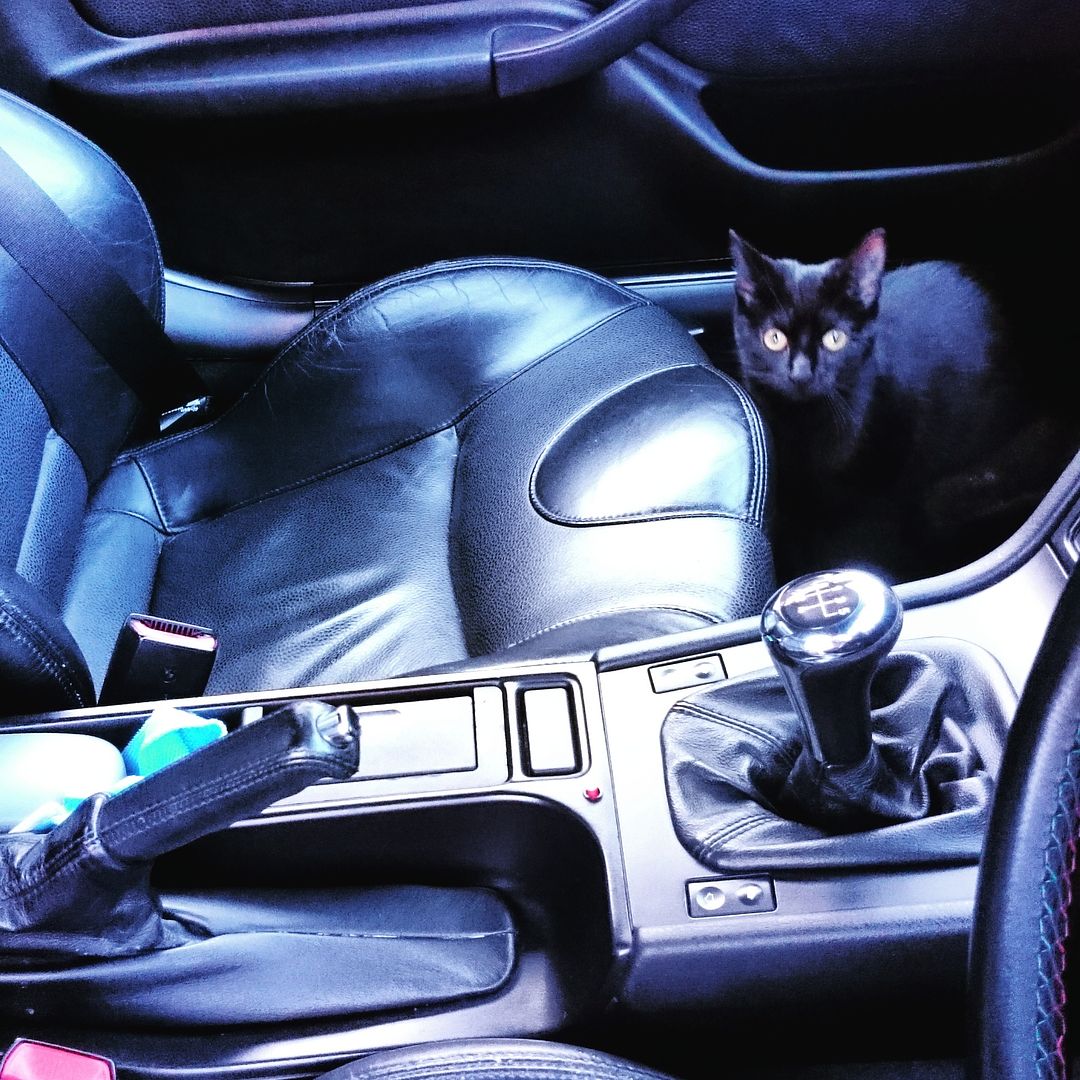
Under supervision from Pickles:
After 3 hours a side of swearing and a sheared bolt (inside the car!!!!!!) i have powerflext polybushed wishbone lollipops.
hopefully this weekend i'll be able to swap out the rear shocks and springs and then do the fronts when my hardware turns up.
So, nicely productive night last night.
I've ordered brand new bolts and gaskets etc from BMW and we've had a bit of a mare getting them to me as the postoffice lost the parcel for a week.
mark and the guys at Soper Parts Lincoln have been amazing and offered super levels of service. Royal mail cocked up, but the parts arrived at last and i was able to build up the front shocks in preparation for slotting them in on the weekend.
One thing to note when using Lemforder top mounts si that the recess for the top nut is tiny .... this wouldnt be a problem with standard 21mm top nut but the bilsteins use a 22mm nut!!!!! which means a impact socket / lambda socket doesnt fit.
i had to use a really old 22mm socket i had (which was thinner walled than modern stuff) and some mole grips to tighten down the topmount. not ideal, but it worked.
best of the best
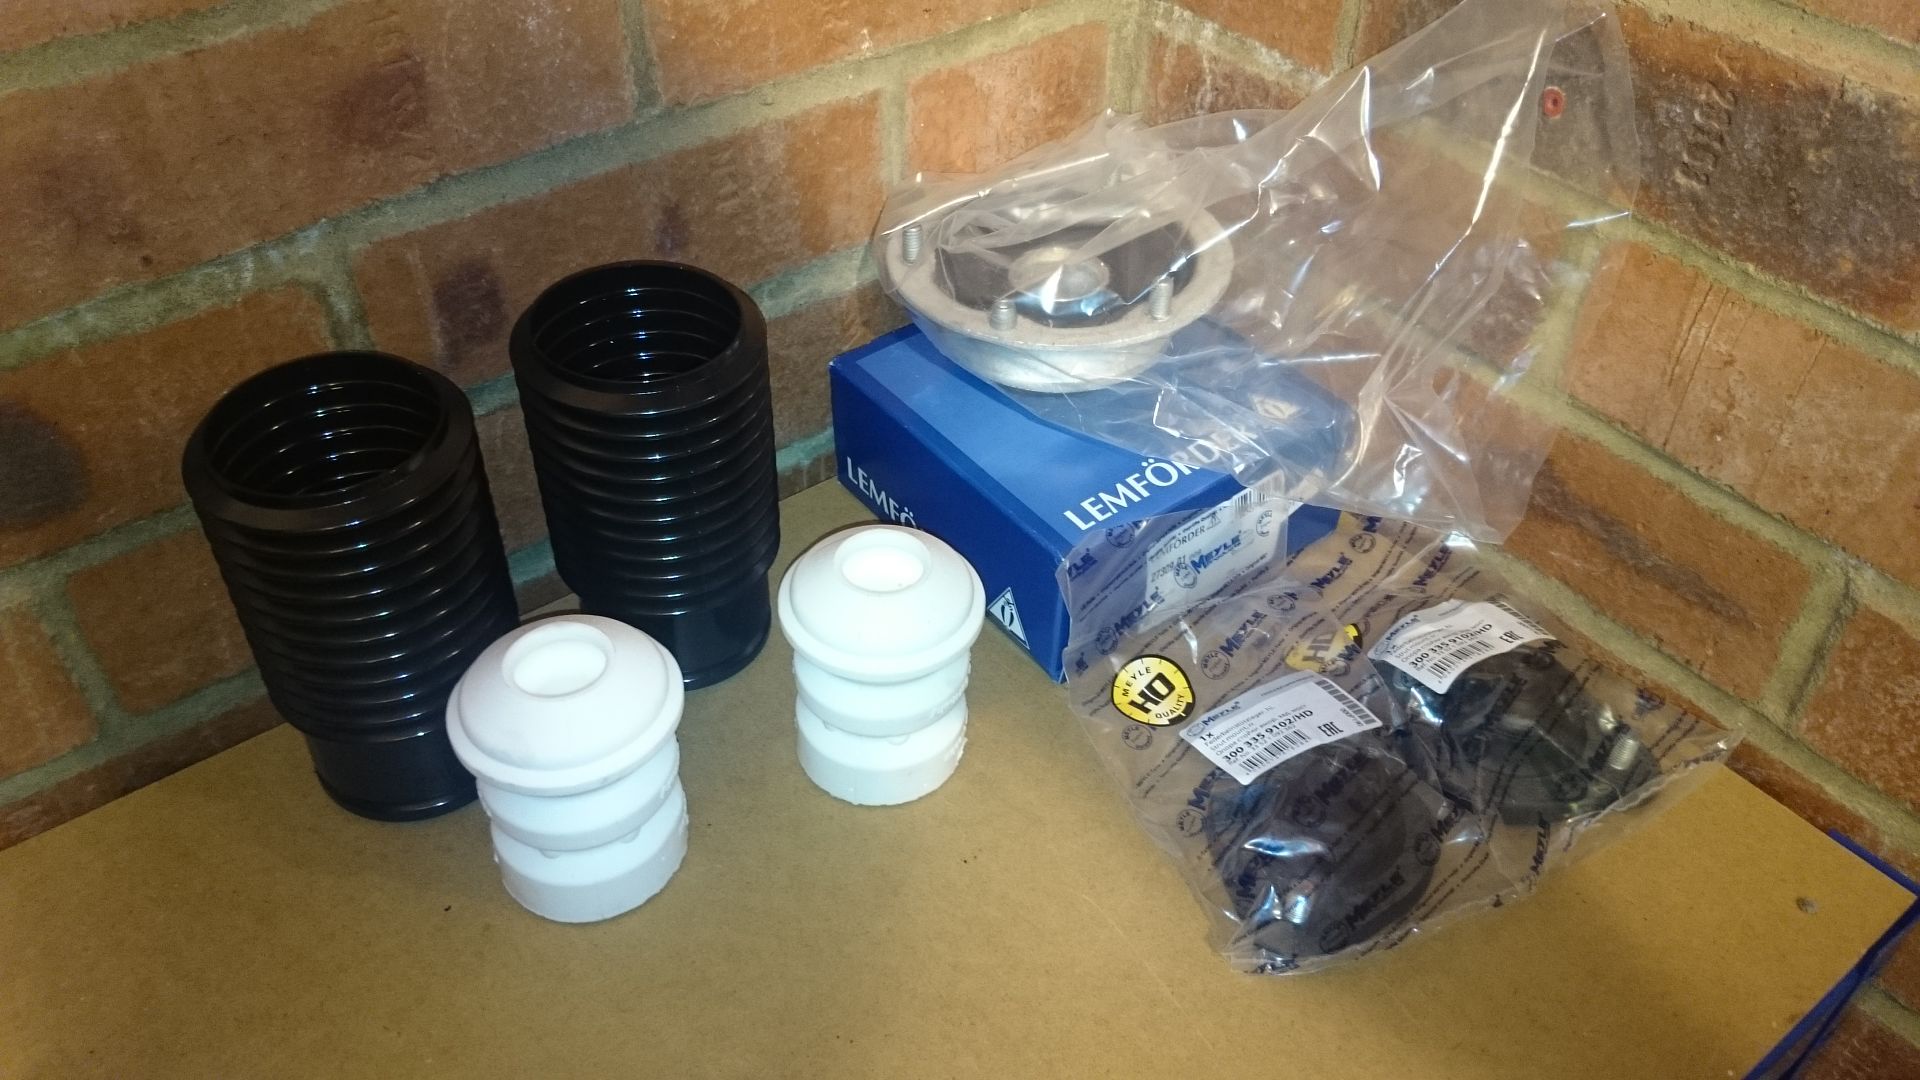
few of the spares, all brand new and proper brands, FEBI, Lemforder, MeyleHD etc
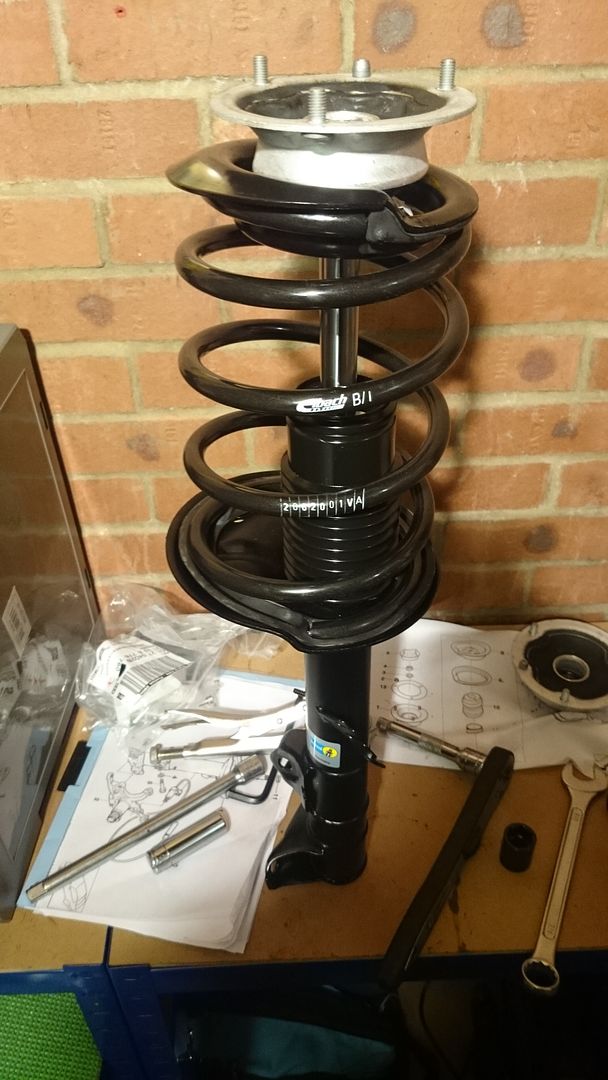
All built up with brand new BMW hardware.
One thing i love about this set up is that it looks so stock.
hopefully get them on this weekend along with the rears.
Failed
But only a few things!
Front Shock gone
Front wishbone bushes gone (suspected this)
Advisories were
Rear shocks misting
Front springs corroded
So ... bit of a spend up today.
Bilstein B4s (Front and Rear)
Eibach 30mm lowering springs
Meyle HD Rear Topmounts
Lemforder Front top mounts
Nuts and bolts and gaskets from BMW
Powerflex wishbone bushes
all to get through a bloody MOT! at least it will do ALL the work needed to get it through
Small update on what feels like the longest process ever.
After the car failed the MOT i decided i was going to do things properly and repalce everything it needed with brand new.
So afer waiting for demon tweeks to deliver some shocks (3 weeks!!!!) i am still waiting on all the hardware from BMW as it appears to be lost in the post!
Have managed to do a couple of bits this weekend.
Under supervision from Pickles:
After 3 hours a side of swearing and a sheared bolt (inside the car!!!!!!) i have powerflext polybushed wishbone lollipops.
hopefully this weekend i'll be able to swap out the rear shocks and springs and then do the fronts when my hardware turns up.
So, nicely productive night last night.
I've ordered brand new bolts and gaskets etc from BMW and we've had a bit of a mare getting them to me as the postoffice lost the parcel for a week.
mark and the guys at Soper Parts Lincoln have been amazing and offered super levels of service. Royal mail cocked up, but the parts arrived at last and i was able to build up the front shocks in preparation for slotting them in on the weekend.
One thing to note when using Lemforder top mounts si that the recess for the top nut is tiny .... this wouldnt be a problem with standard 21mm top nut but the bilsteins use a 22mm nut!!!!! which means a impact socket / lambda socket doesnt fit.
i had to use a really old 22mm socket i had (which was thinner walled than modern stuff) and some mole grips to tighten down the topmount. not ideal, but it worked.
best of the best
few of the spares, all brand new and proper brands, FEBI, Lemforder, MeyleHD etc
All built up with brand new BMW hardware.
One thing i love about this set up is that it looks so stock.
hopefully get them on this weekend along with the rears.
vsonix said:
Don't suppose you have a handy list of the part numbers for all the various gaskets etc you used? I'm about to do the same to my Z. The B4/Eibach combo should be good, I have them on my E36 coupe and it's definitely a nice firm yet comfy setup. I am thinking of going a bit more upmarket on the Z though, either the next level up with the shocks or maybe going for some fully-adjustable coilover setup, and polybusing the whole thing at the same time as I can definitely feel that most of the bushes are nearing if not past the end of their useful lifespan.
I wouldnt bother with coilovers unless you want to spend serious money. B6 / B8s with eibachs would be a great next step.
meyle HD lower arms with polybush rear bushes would be a nice setup on the front
here are the parts you need for the front strut, get the topmounts from GSF / ECP as they are half the price of BMW (lemforder)
Part Number Description Qty Required
1125916 Washer, 15 2
1110196 DUST PROTECTION COLLAR 2
6776760 Washer, 37X2,5MM ZNS3 2
1135580 Upper spring plate 2
1128523 SPRING PAD UPPER, 3MM 2
1090479 SPRING PAD LOWER 2
1094288 WASHER-GASKET 2
1136465 Hex Bolt w/ Washer 4
9905853 Fit bolt, M12X42 2
9905753 Self-locking hex nut, M12-10-ZNS3 2
9903156 Hex Bolt, M12X1,5X70 ZNS 2
ethomas said:
5harp3y said:
All built up with brand new BMW hardware.
One thing i love about this set up is that it looks so stock.
hopefully get them on this weekend along with the rears.
I did exactly this on my E46 a couple of weeks ago, except with Sachs sport dampers in place of B4, and meyle HD bushes all round (fitted new bushes, control arms, and rear shocks about a month earlier). It is a lovely feeling to build up new strut towers with all new bits, and it makes fitting them a doddle. I had the same problem as you with the shock nut, ended up using my normal 12 point socket in my impact wrench to get everything tight. Not the smartest idea but it worked out and saved a lot of faffing about.One thing i love about this set up is that it looks so stock.
hopefully get them on this weekend along with the rears.
The hardest part of fitting the new shock was getting enough clearance so that the old shock would come out nicely. On one side of the car a couple of well positioned kicks were needed before the bugger would pop out. Getting it back in is a lot easier if you put a jack under the steering knuckle and use that to lift the arm. Make sure that the alignment studs in the shock are in the right place, and make sure you don't catch the skin of your thumb between the stud and the clamp when the strut "pops" into place

The difference with mine was incredible. Mismatched springs at the back and mismatched shocks at the front (one had 130k miles on it, one was newer but still pretty shagged), with rattle top mounts, replaced with lovely new things. One of the best value improvements you can do on these cars!
so far i have noticed that i have different shocks / springs and bushes side to side. one shock registered a -7 at the MOT and can easily be compressed by hand! scary stuff
Its finally done! Few hours on saturday and sunday and the suspension is on!
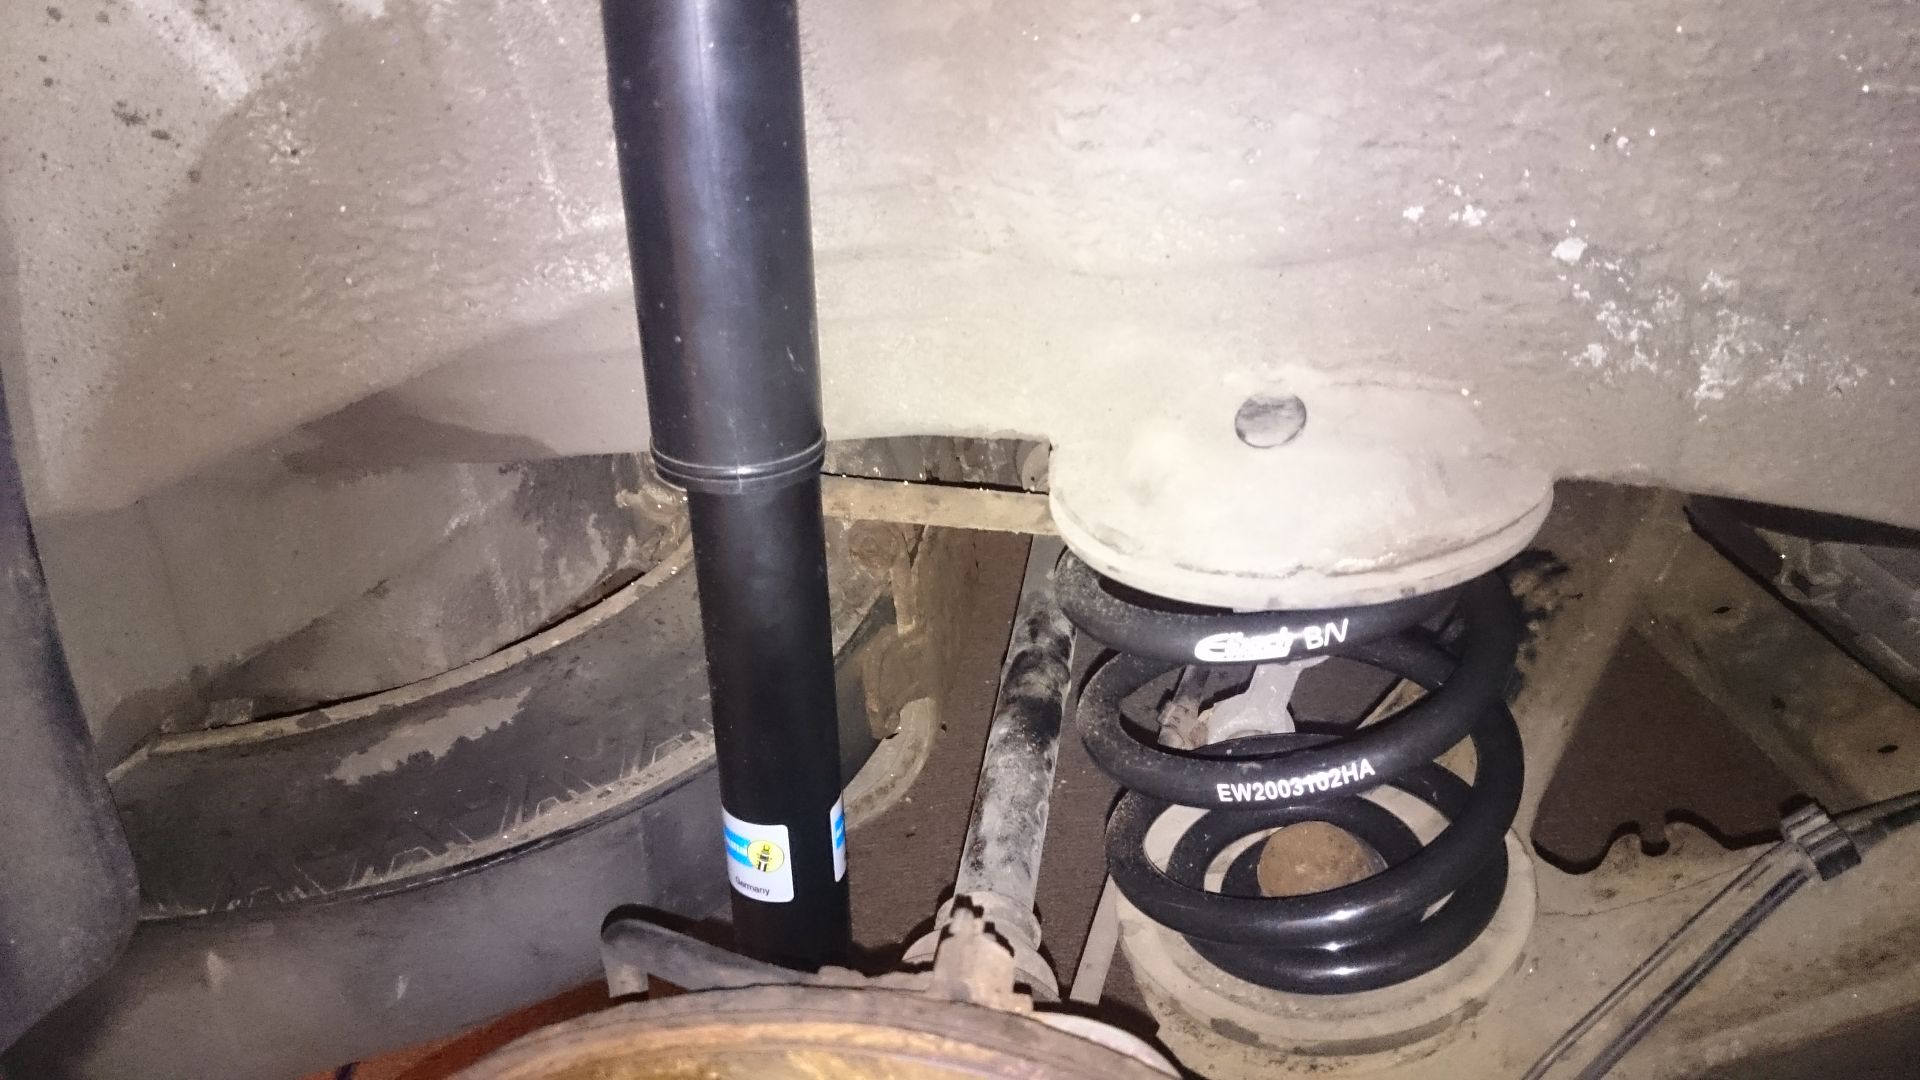
rears in place (handy hint, remove the rear ARB dogbone makes everything a doddle)
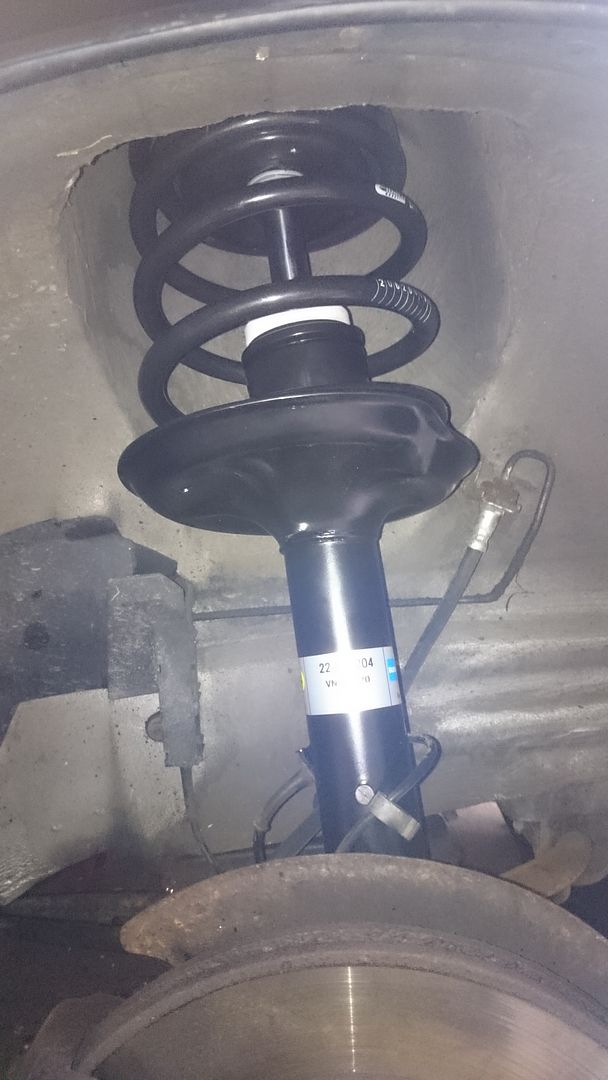
fronts in (those 18mm bolts are flipping tough)
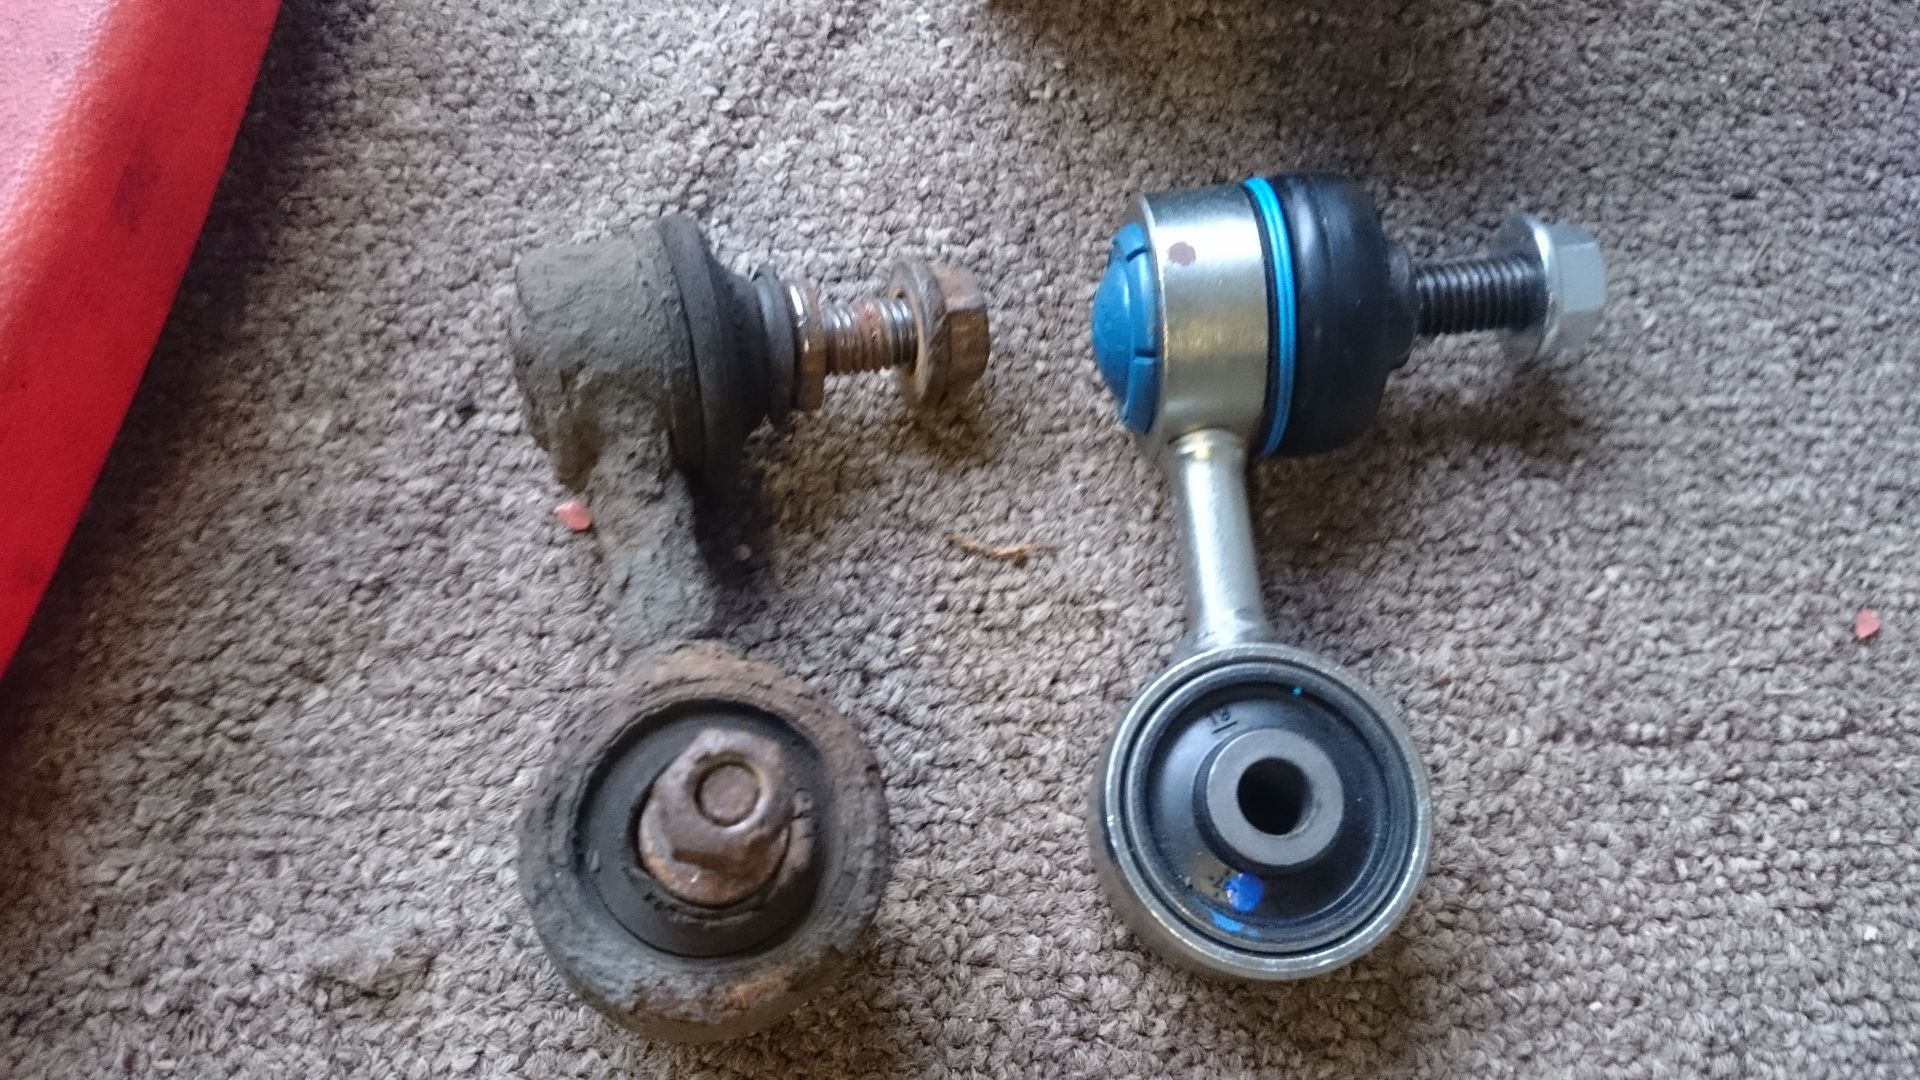
New Meyle HD droplinks
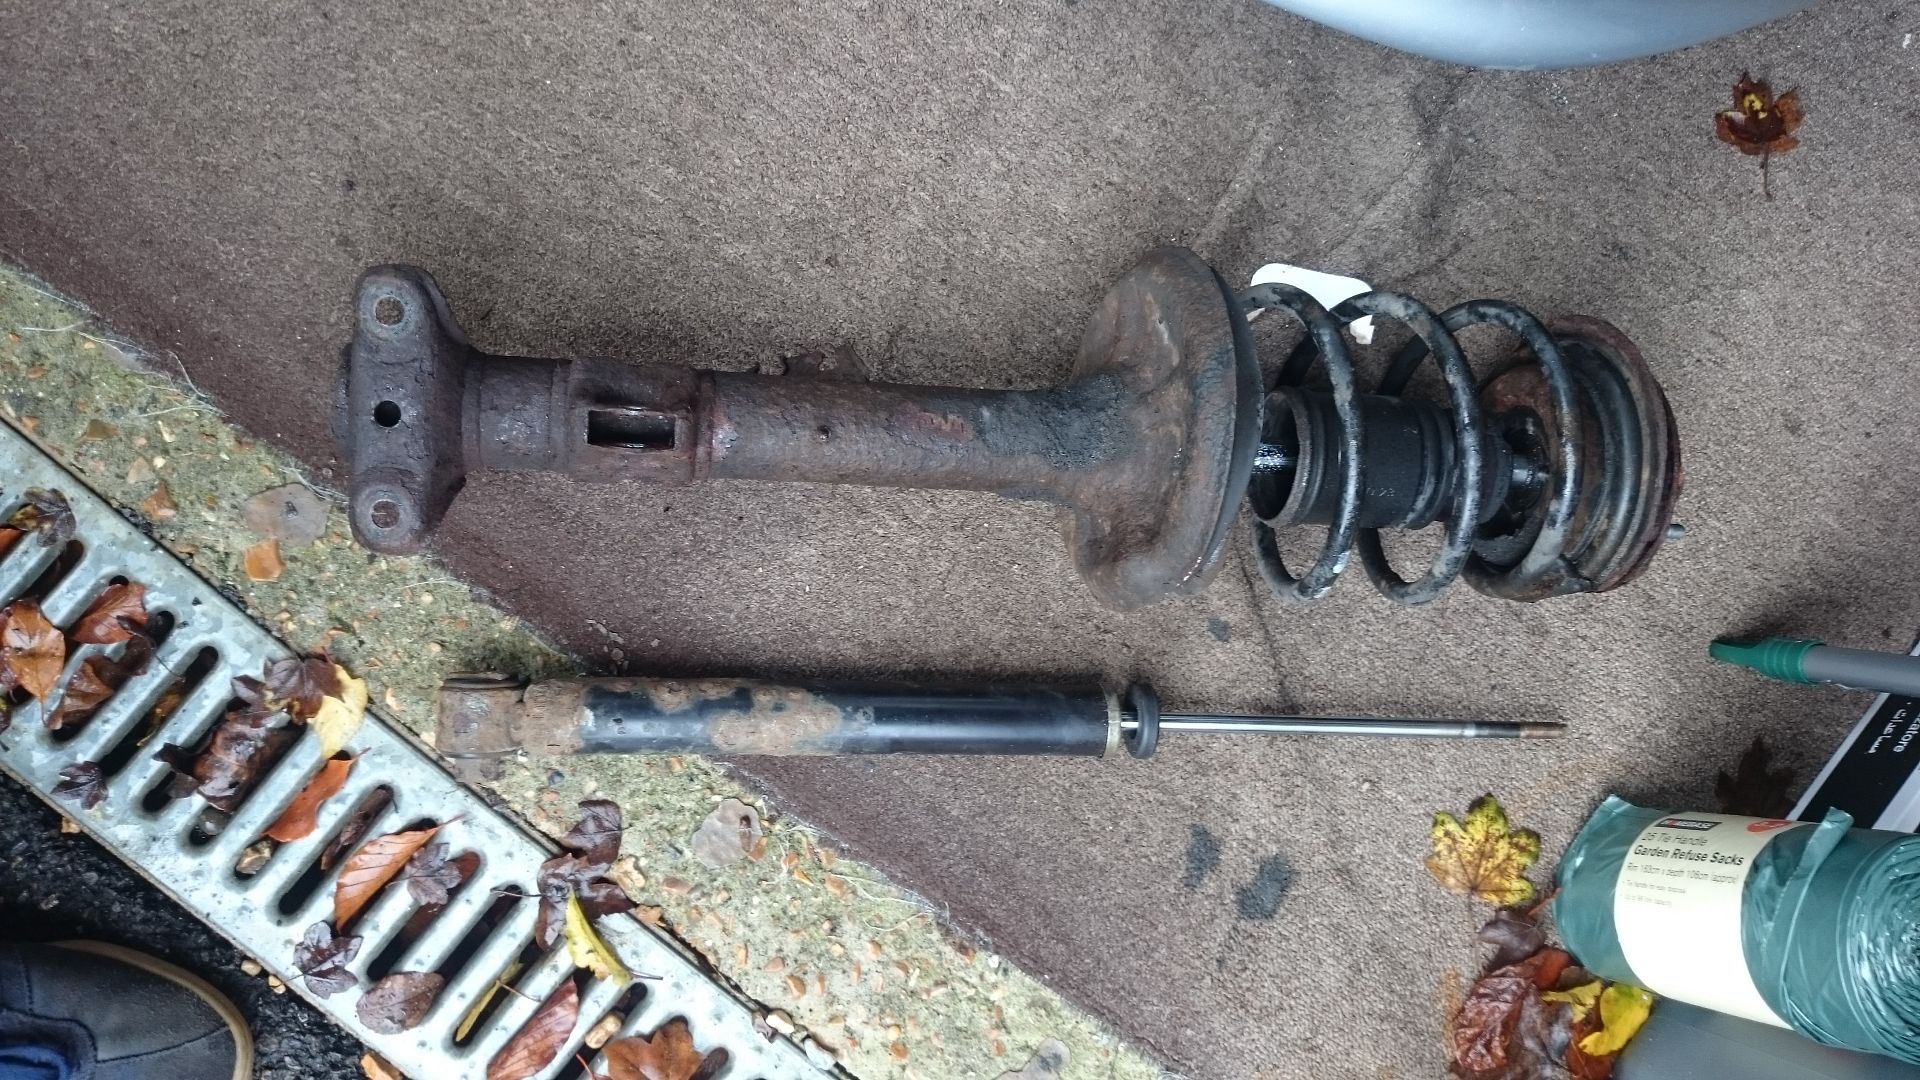
condition of the old stuff (all BMW so might be original bits)
also swapped out a broken foglight

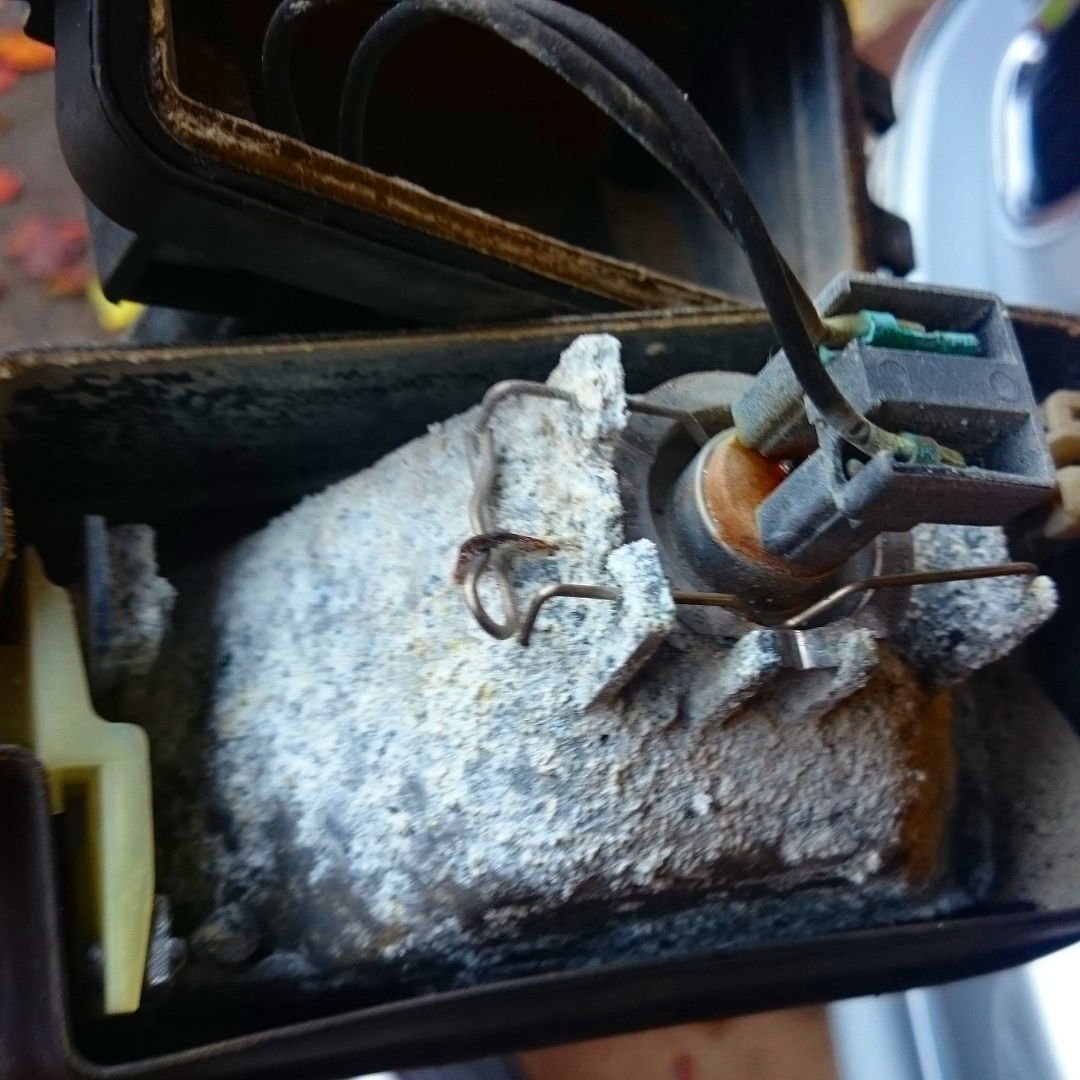
looks like its been under the sea!
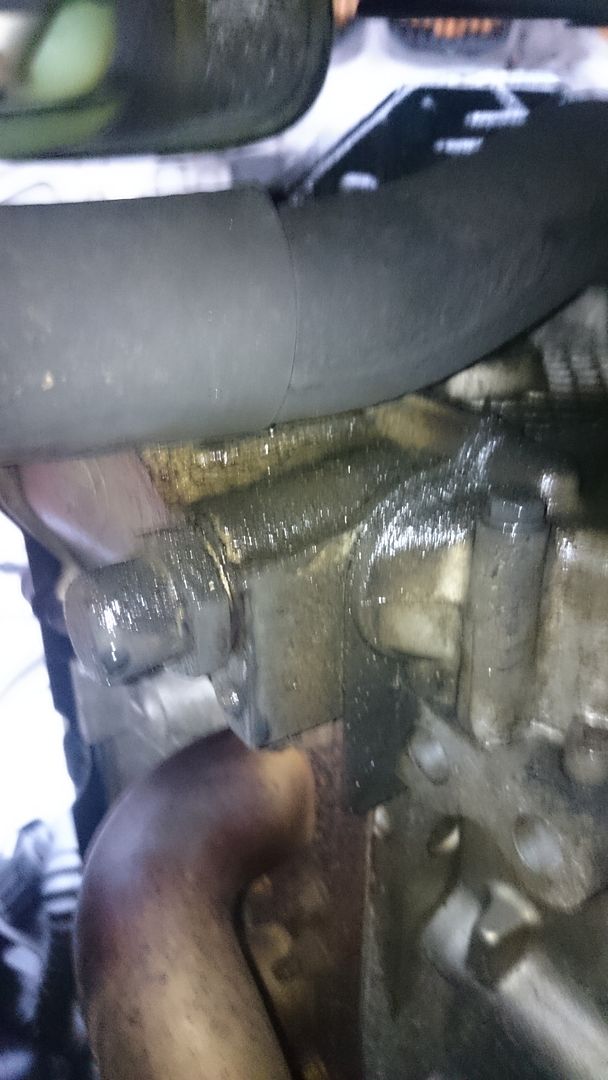
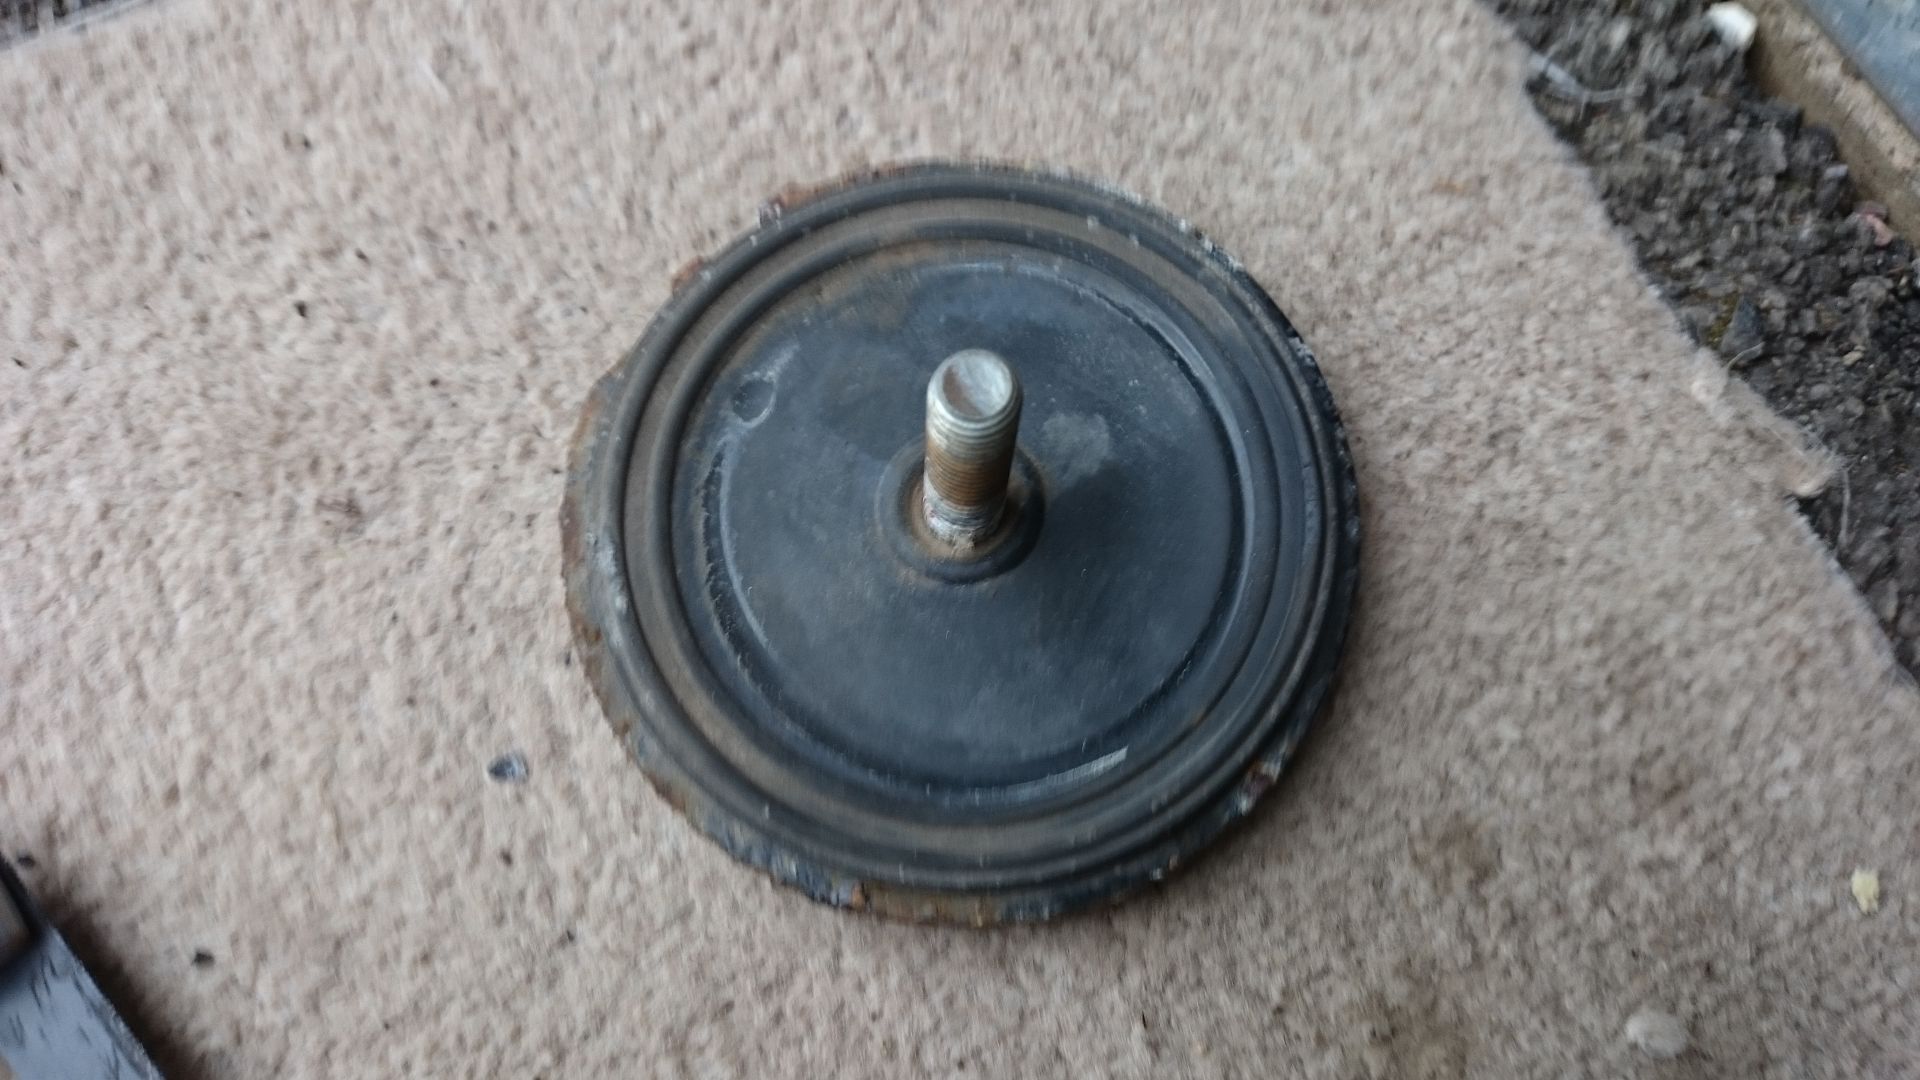
whilst i was under the car i noticed that i had a small opil leak coming from here, does anyone know whats leaking? Vanos unit?
rears in place (handy hint, remove the rear ARB dogbone makes everything a doddle)
fronts in (those 18mm bolts are flipping tough)
New Meyle HD droplinks
condition of the old stuff (all BMW so might be original bits)
also swapped out a broken foglight
looks like its been under the sea!
whilst i was under the car i noticed that i had a small opil leak coming from here, does anyone know whats leaking? Vanos unit?
ethomas said:
Congratulations, how does it drive now? That oil leak could be the oil line to the vanos unit (vanos itself rarely leaks), but on that side it is more likely to be the valve cover gasket I think. Oil filter housing is the other common suspect but that is the other side of the engine.
Only been around the block so far (car has no MOT) feels firm but compliant, hasnt settled fully yet. MOT this week hopefully then some hooning to bed the suspension in!
thanks for the advice. i'll get some of the plastics off this week and have a poke around
Jhonno said:
NiceCupOfTea said:
I've never understood the hate for these.
Supposedly:
Z3 handling - woeful
e30 handling - best thing since sliced bread
Same rear end isn't it?
Near enough the same yes.. Supposedly:
Z3 handling - woeful
e30 handling - best thing since sliced bread
Same rear end isn't it?
So took it down to the garage to have the snapped bolt out, 3 hours later at £140 lighter its finished and MOT'd for another year. Its takena while to get it back on the road due to wanting to do the work myself, however, its back and the weather this weekend was amazing!
took it out for its first proper drive on the new suspension, wow, its like night and day to the old worn out rubbish. Not too harsh and not stupid low so no worries around town.
gave it a clean too!
pickles gave me a hand
took it out for its first proper drive on the new suspension, wow, its like night and day to the old worn out rubbish. Not too harsh and not stupid low so no worries around town.
gave it a clean too!
pickles gave me a hand
Without having much time i decided to jump in a do a few jobs that have been bugging me.
Slow and steady wins the race.
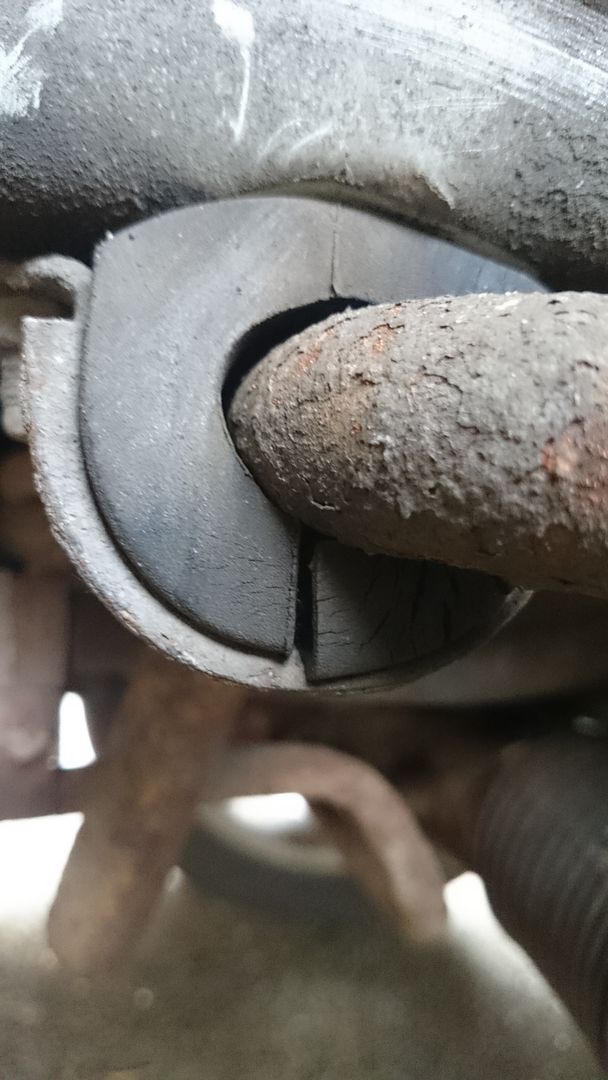
First was to replace the rear exaust rubber as it was saggy as can be. i replaced it with an adjustable driftworks item as it is reinforced. Easiest job in the world, rear wheel off, rubber off, rubber on.
Then i removed the CD changer, i dont use it, it doesnt have a cassette anyway and i dont like looking at it everytime i open the boot.
its in the for sale section should anyone need one. (Cheap)
Next i tackled the aerial grommet which was green and crumbly.
Sopers of Lincoln came up trumps and supplied the rubber (£6) be careful when ordering as different years use differnt rubbers.
Process is:
Unscrew aerial
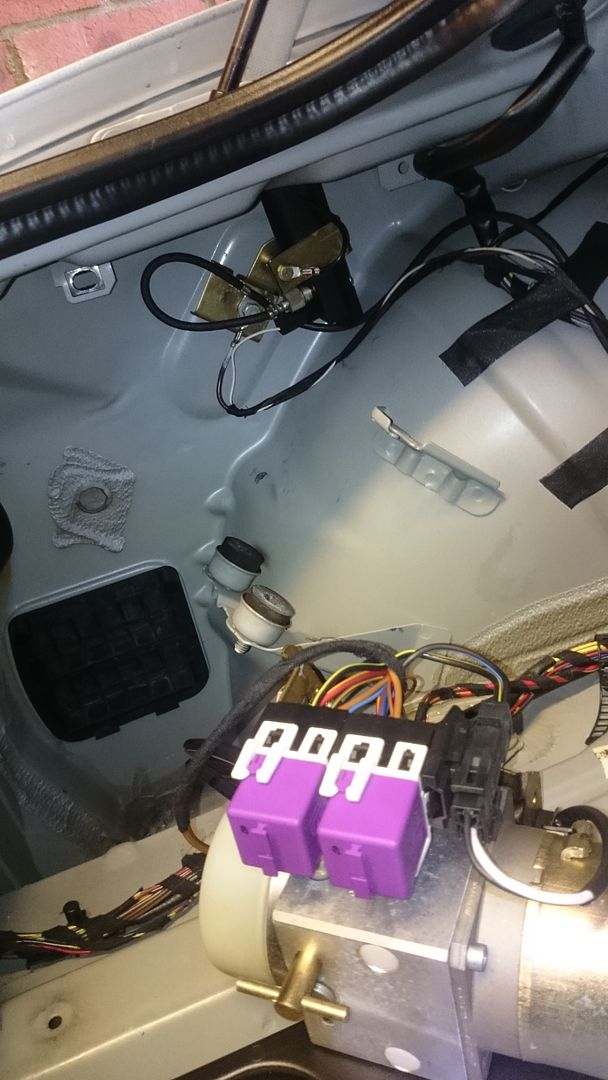
Nearside boot carpet out ( 2 x fasteners)
Unbolt hydraulic pump (makes it sooooo much easier) 2 x 13mm nuts iirc
Move pump out of the way
Unbolt aerial 1 x 10mm nut.
Then you have to wiggle from the bottom and push from the top. TOP TIP use the wheel removal rod to push down from above.
remove the grommet and lose it inbetween the panels as i did to rattle around in the rear wing for eternity.
repeat in reverse to put the new grommet in.
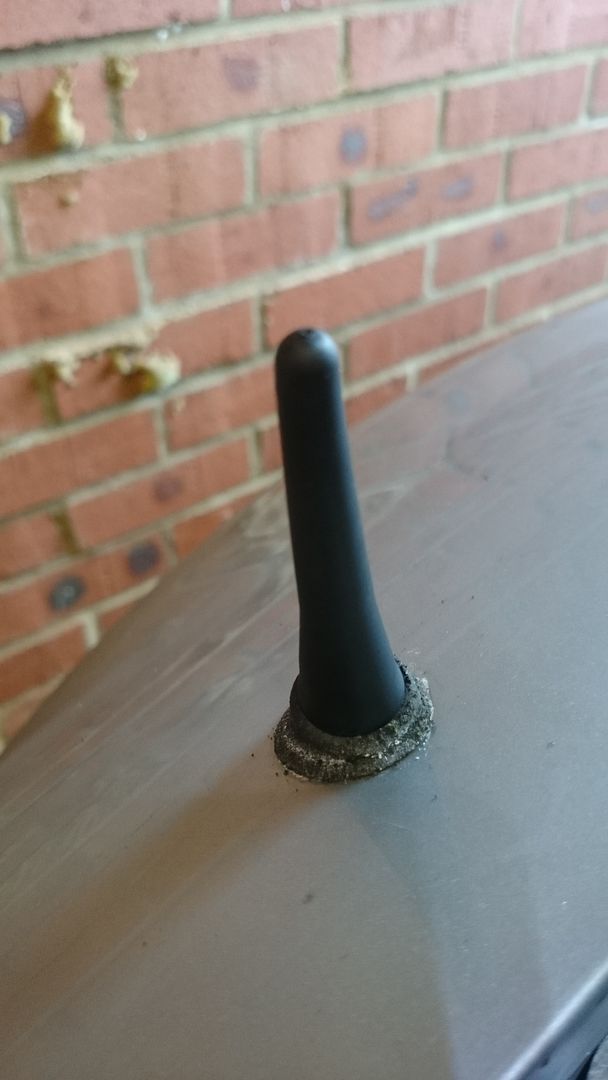
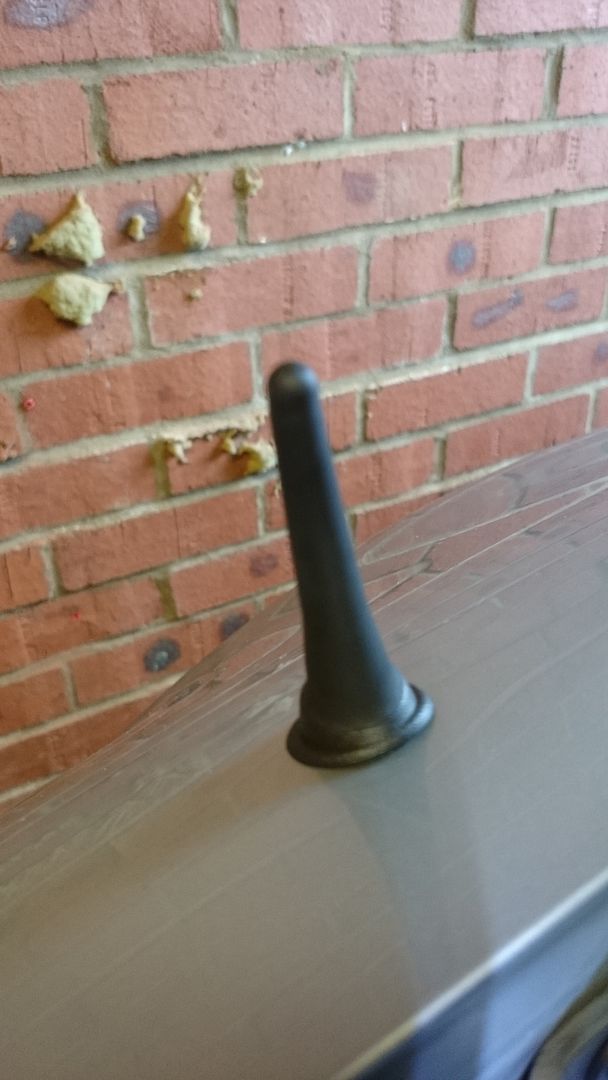
its a citreon stubby aerial FYI
Next job was to tackle this, and to be honest it was one of the things that really put me off the car.
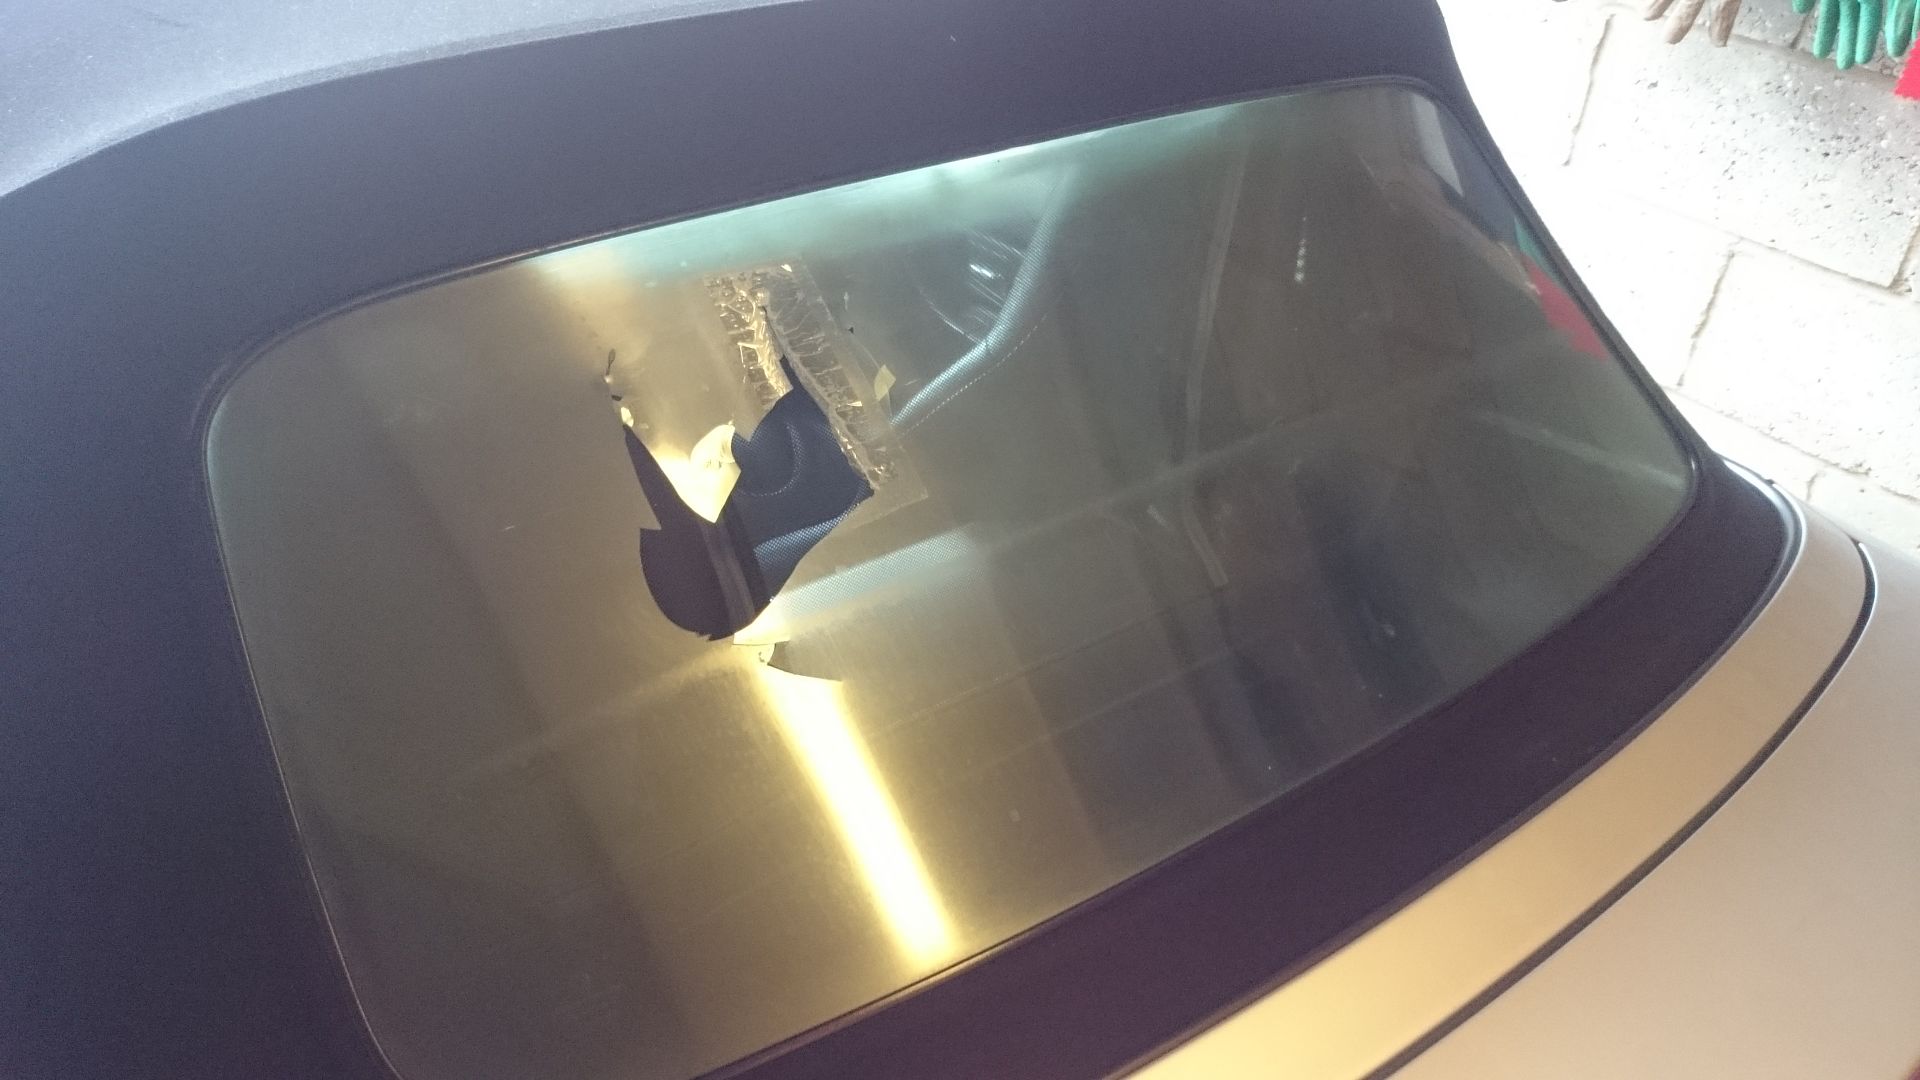
New screen from eBay (£80)

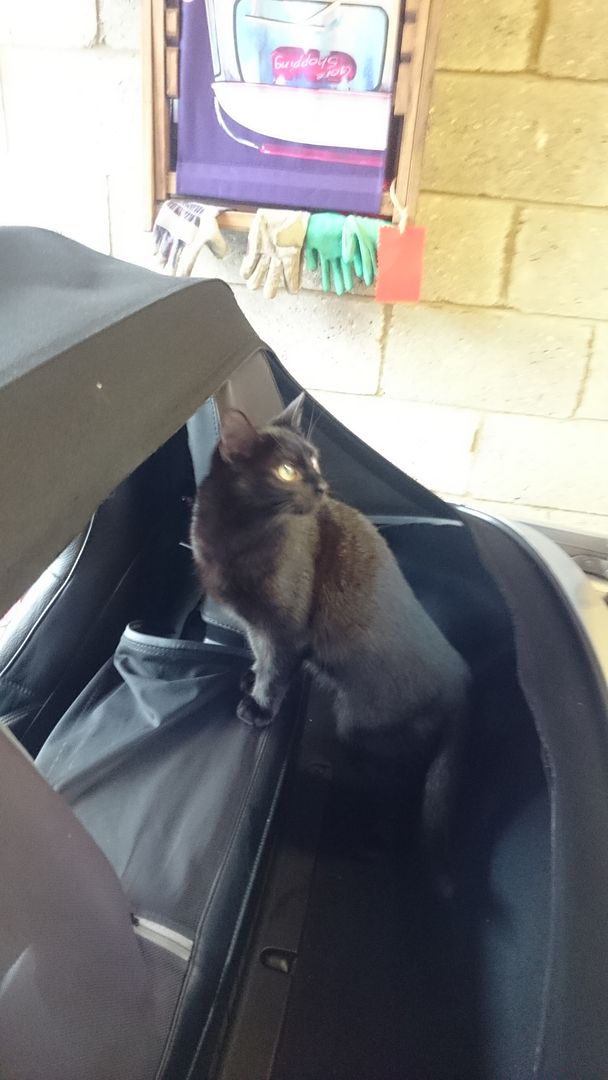
Pickles came to help, but in the end i needed my wife to offer a second pair of hands. it took about an hour. Its a bit of a pain to do but only as you have to try and do it from inside the car with the roll hoops in the way.
et voila
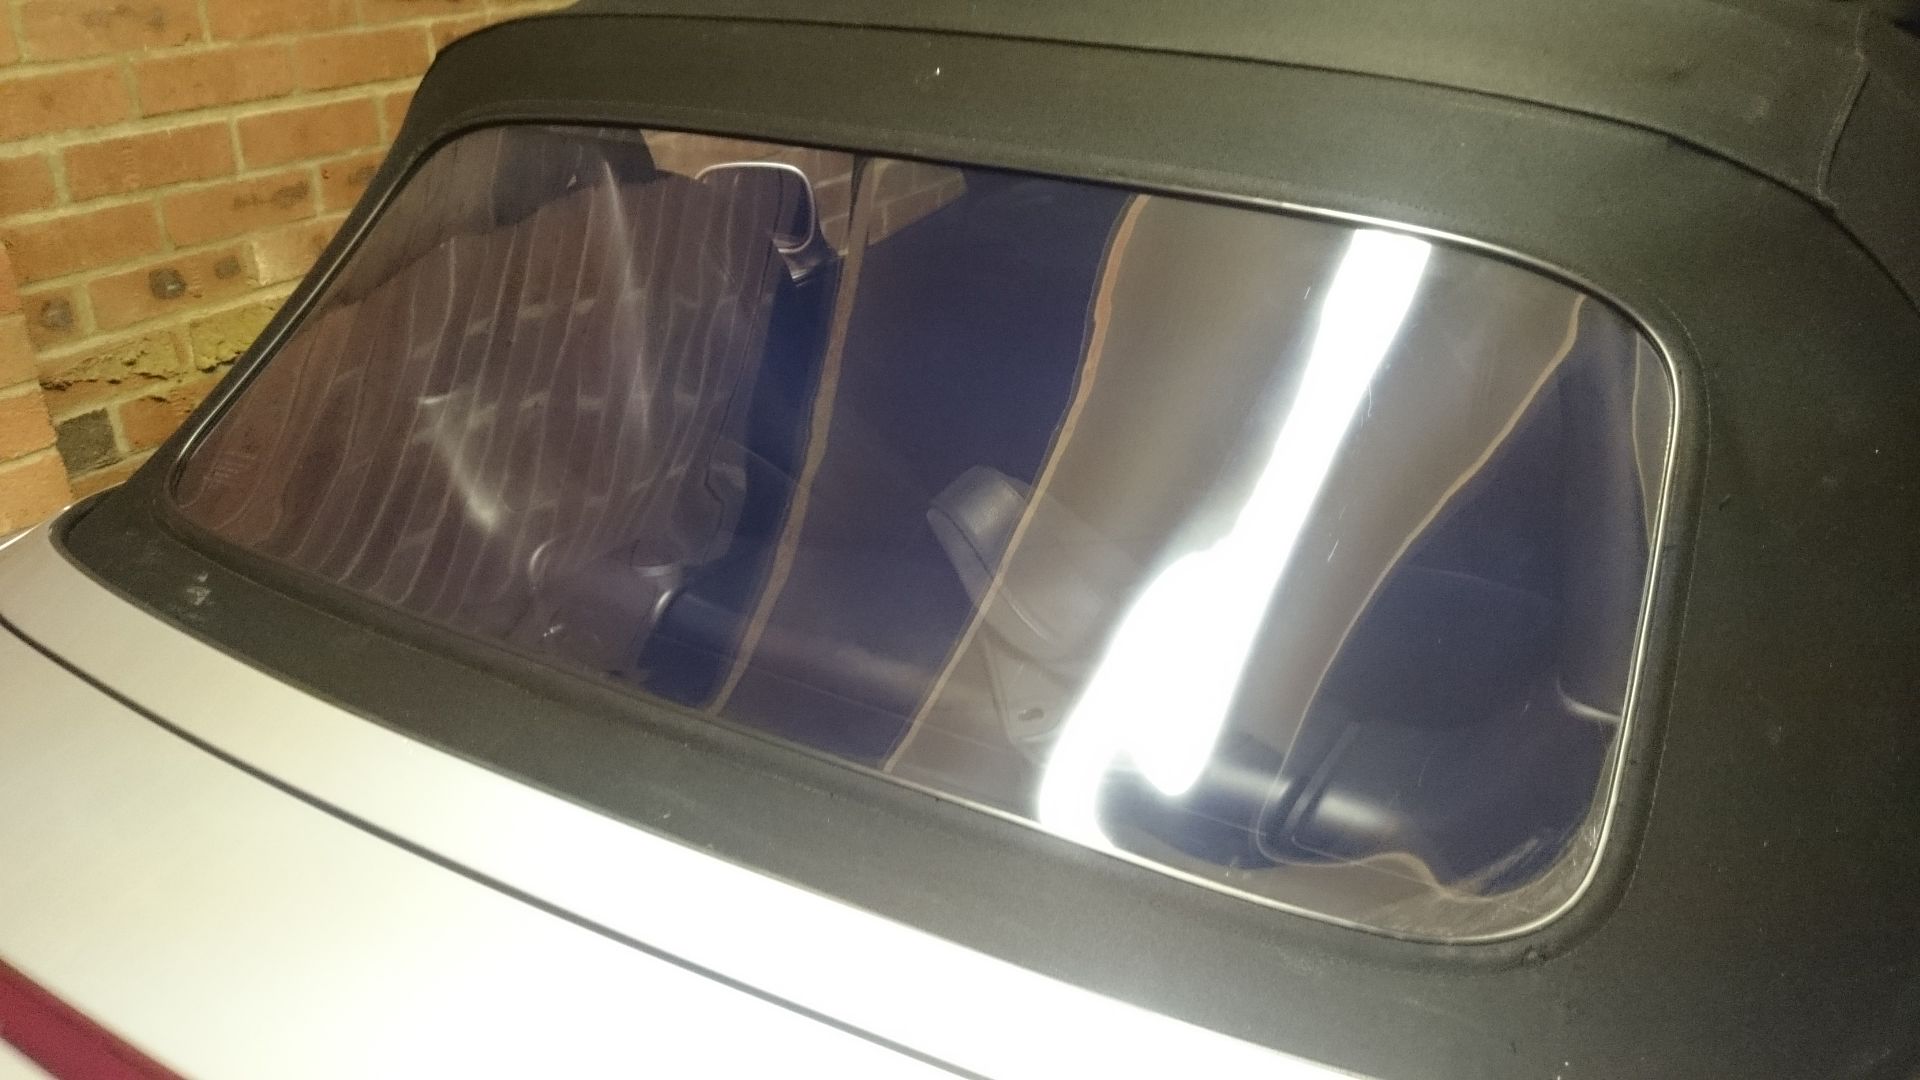
Defo worth doing at home
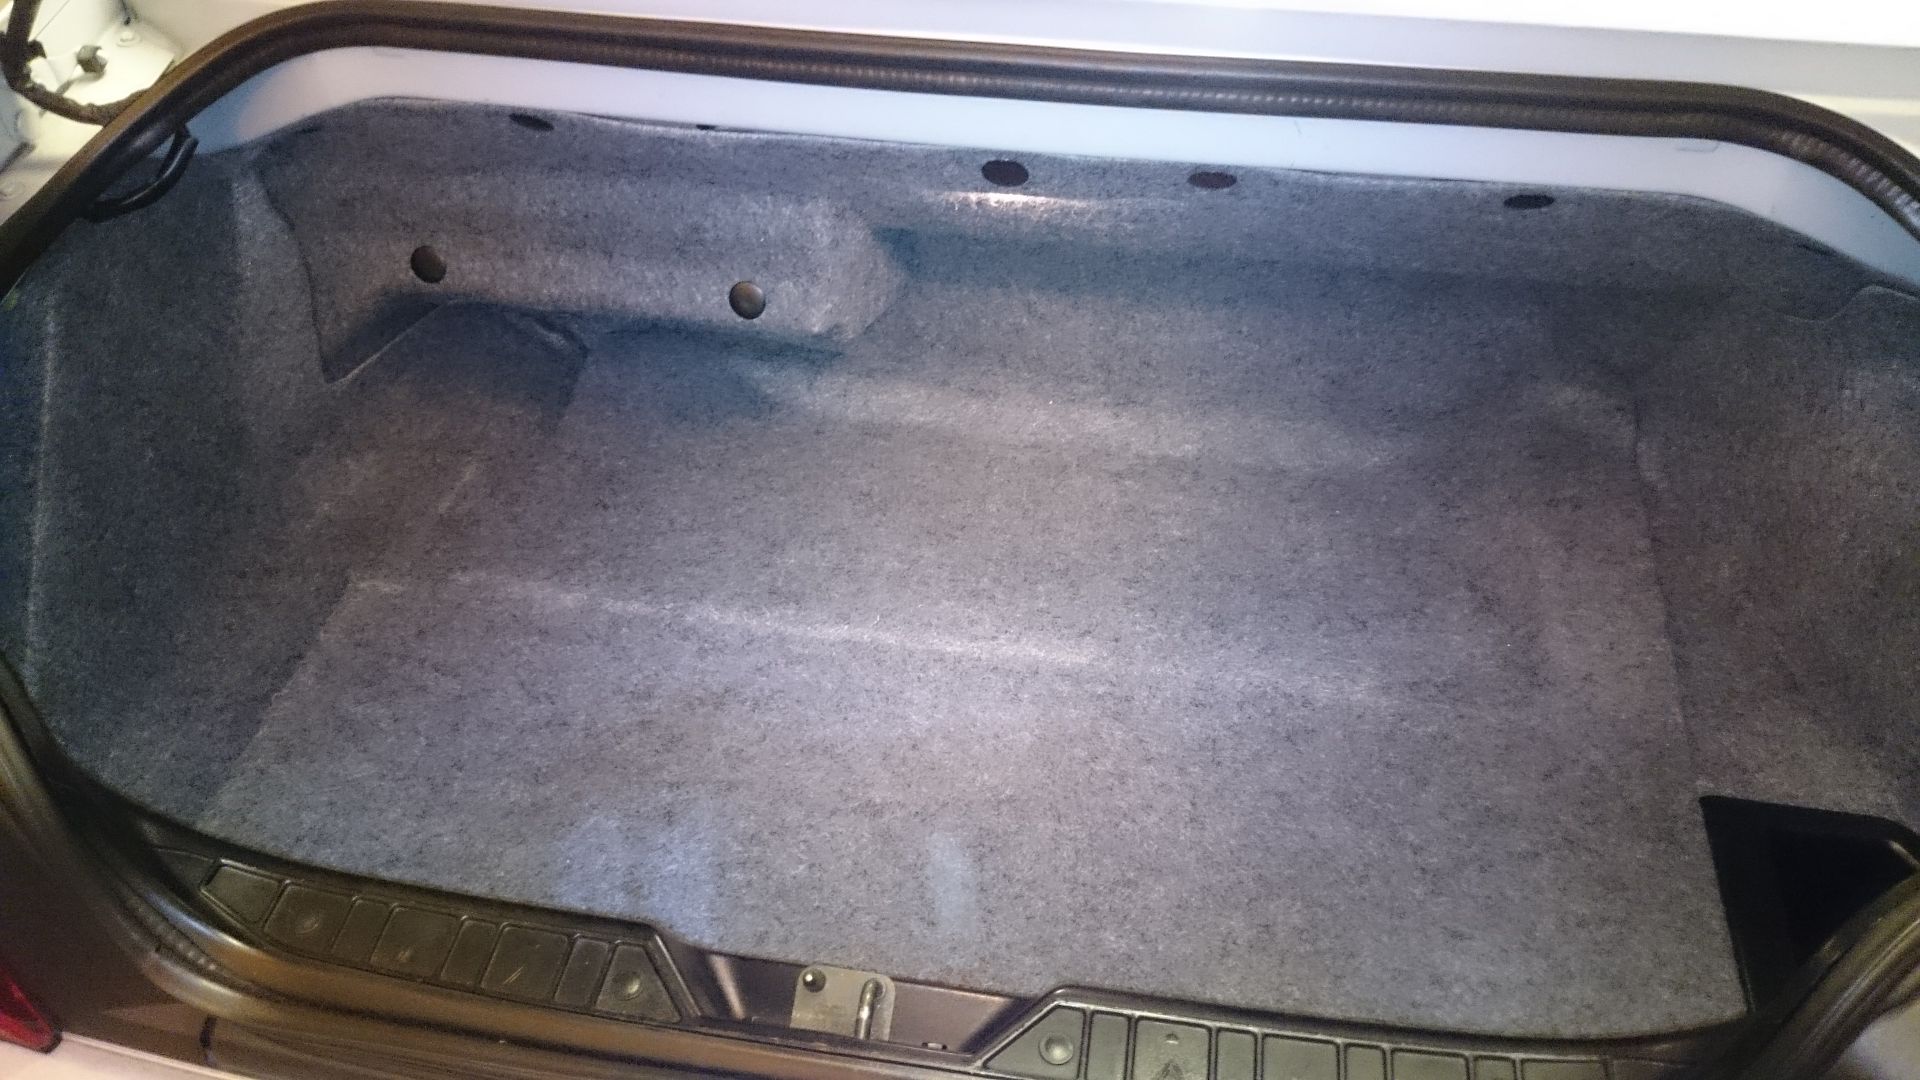
In parrallel to all of this i had removed all the boot carpet (dead easy) and taken it into the bath for a wash. Some bio washing powder and some hot water and it was all brand spankers.
so busy saturday.
Loads more to do but im super up for it.
Slow and steady wins the race.
First was to replace the rear exaust rubber as it was saggy as can be. i replaced it with an adjustable driftworks item as it is reinforced. Easiest job in the world, rear wheel off, rubber off, rubber on.

Then i removed the CD changer, i dont use it, it doesnt have a cassette anyway and i dont like looking at it everytime i open the boot.
its in the for sale section should anyone need one. (Cheap)
Next i tackled the aerial grommet which was green and crumbly.
Sopers of Lincoln came up trumps and supplied the rubber (£6) be careful when ordering as different years use differnt rubbers.
Process is:
Unscrew aerial
Nearside boot carpet out ( 2 x fasteners)
Unbolt hydraulic pump (makes it sooooo much easier) 2 x 13mm nuts iirc
Move pump out of the way
Unbolt aerial 1 x 10mm nut.
Then you have to wiggle from the bottom and push from the top. TOP TIP use the wheel removal rod to push down from above.
remove the grommet and lose it inbetween the panels as i did to rattle around in the rear wing for eternity.
repeat in reverse to put the new grommet in.


its a citreon stubby aerial FYI
Next job was to tackle this, and to be honest it was one of the things that really put me off the car.

New screen from eBay (£80)

Pickles came to help, but in the end i needed my wife to offer a second pair of hands. it took about an hour. Its a bit of a pain to do but only as you have to try and do it from inside the car with the roll hoops in the way.

et voila

Defo worth doing at home
In parrallel to all of this i had removed all the boot carpet (dead easy) and taken it into the bath for a wash. Some bio washing powder and some hot water and it was all brand spankers.

so busy saturday.
Loads more to do but im super up for it.


Busy weekend this weekend but still managed a few hours on the car.
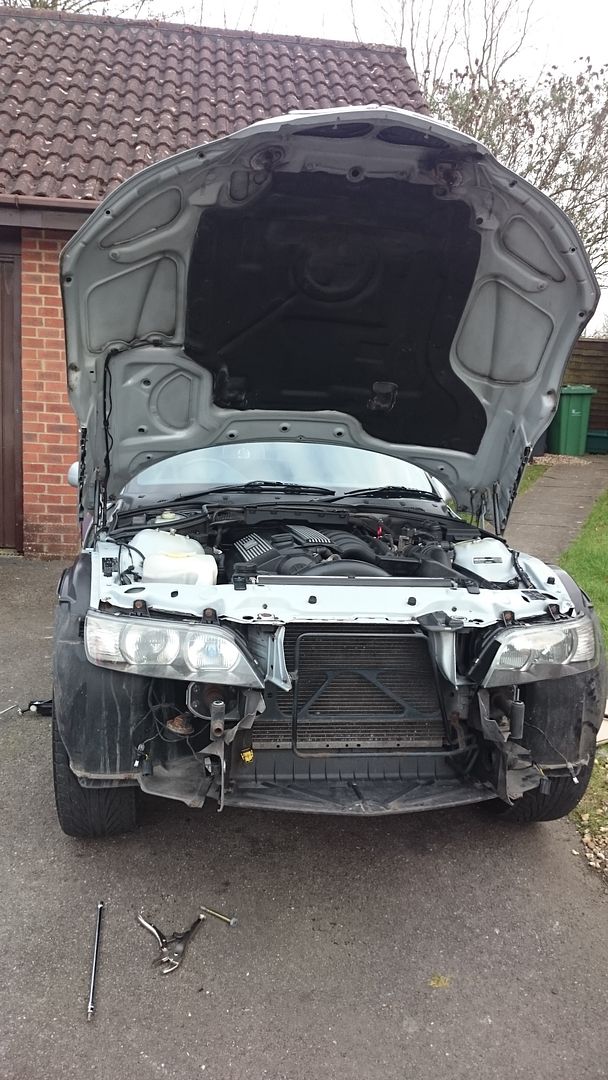
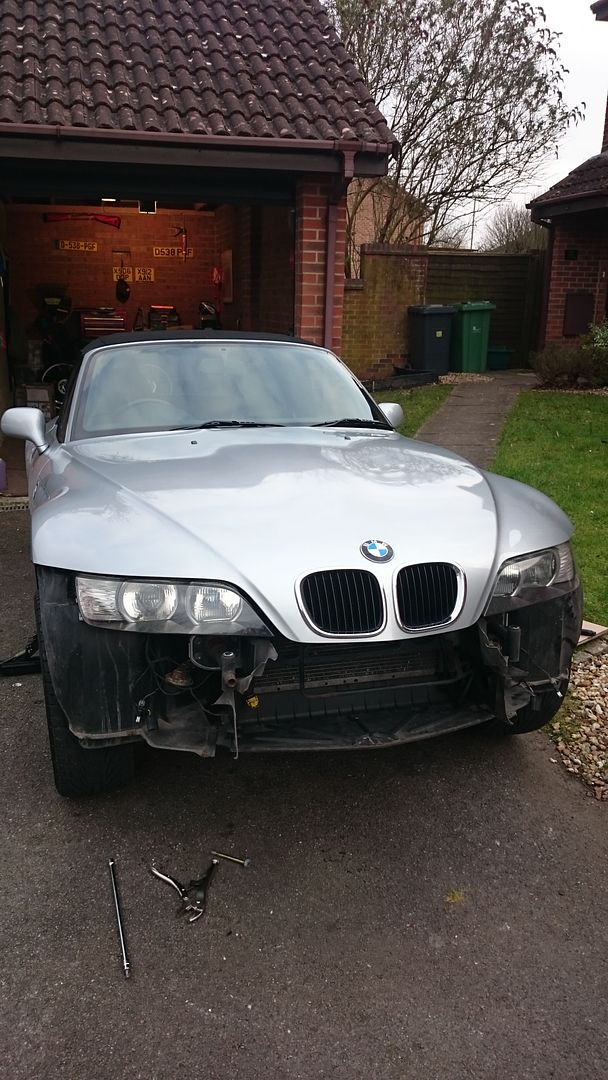
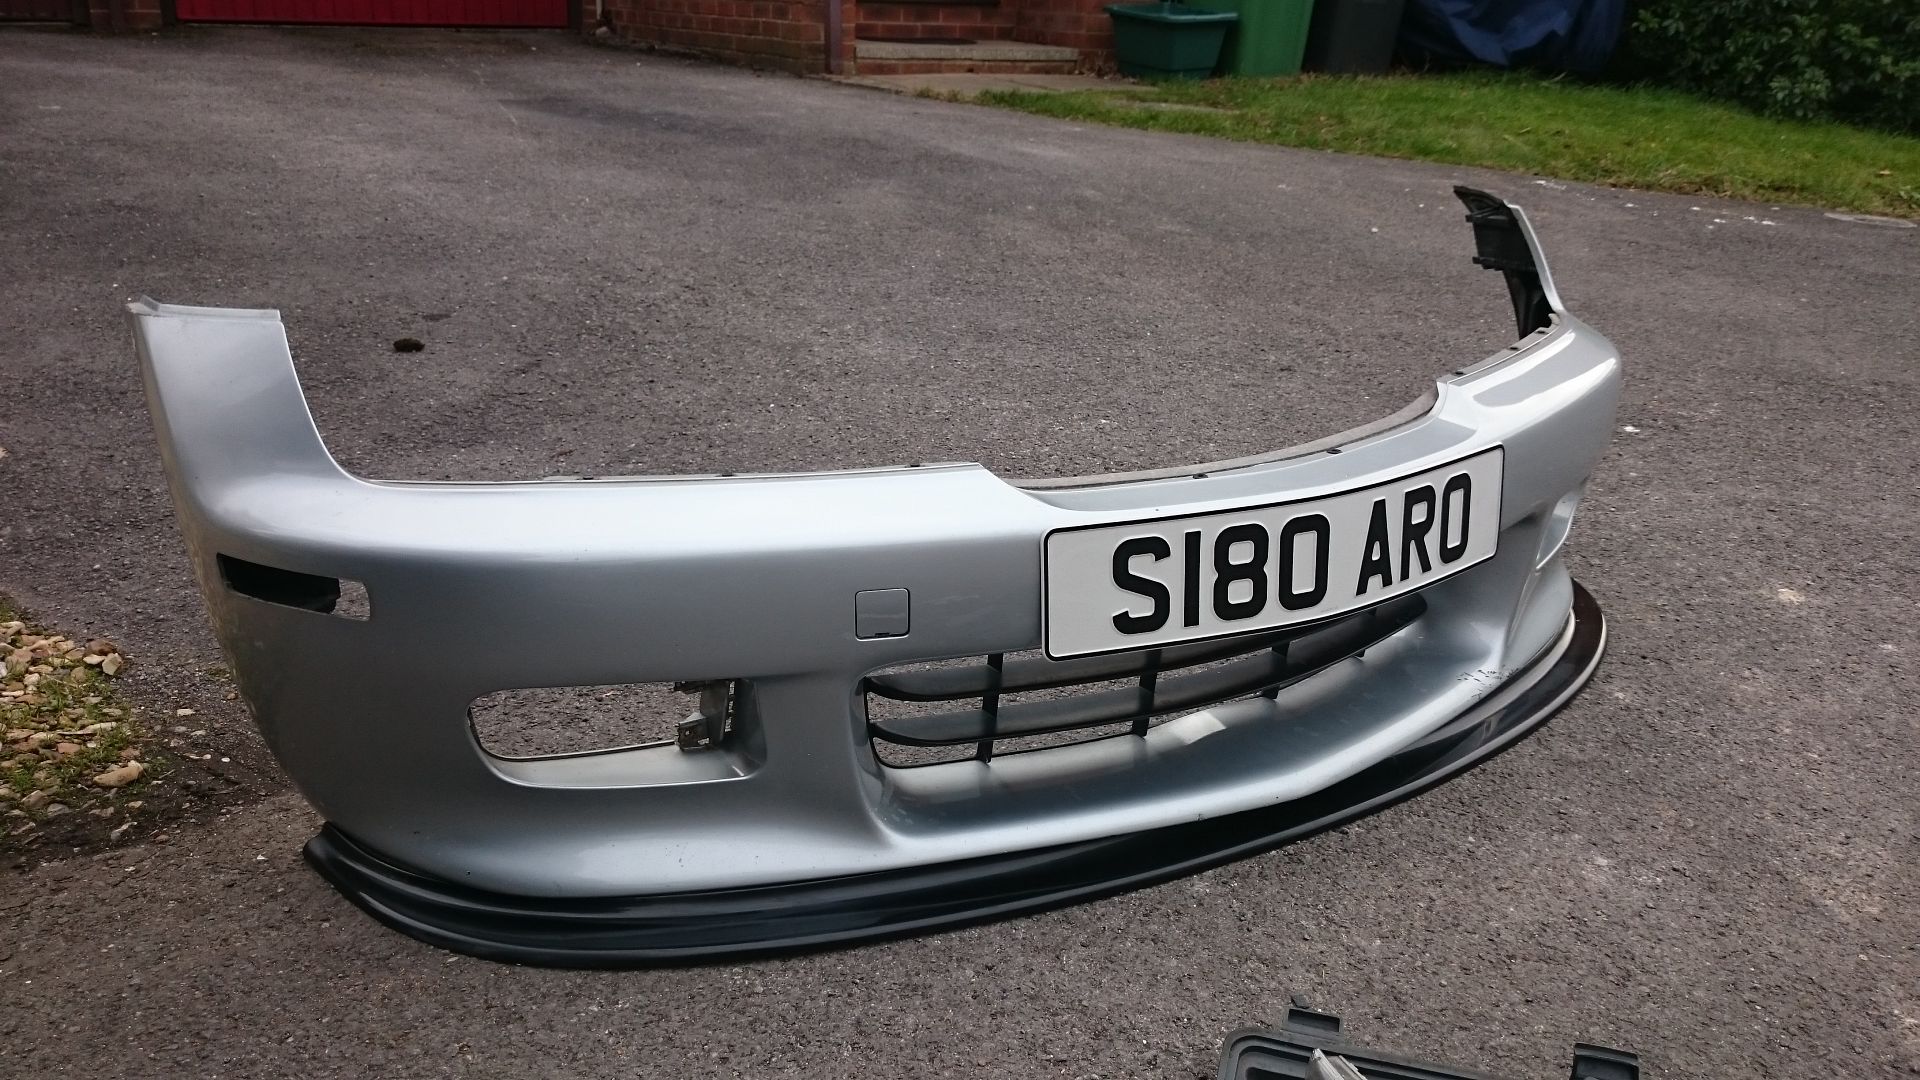
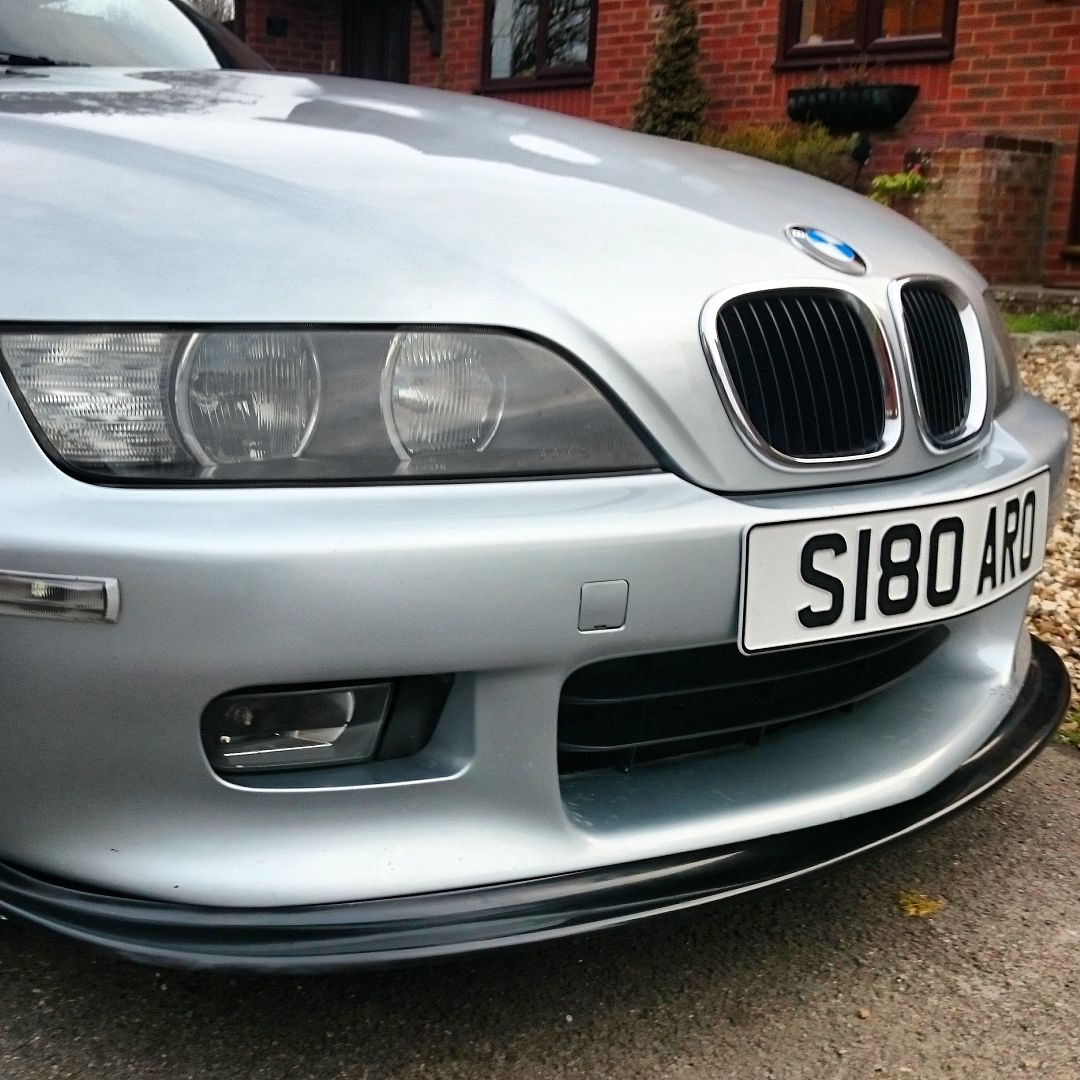
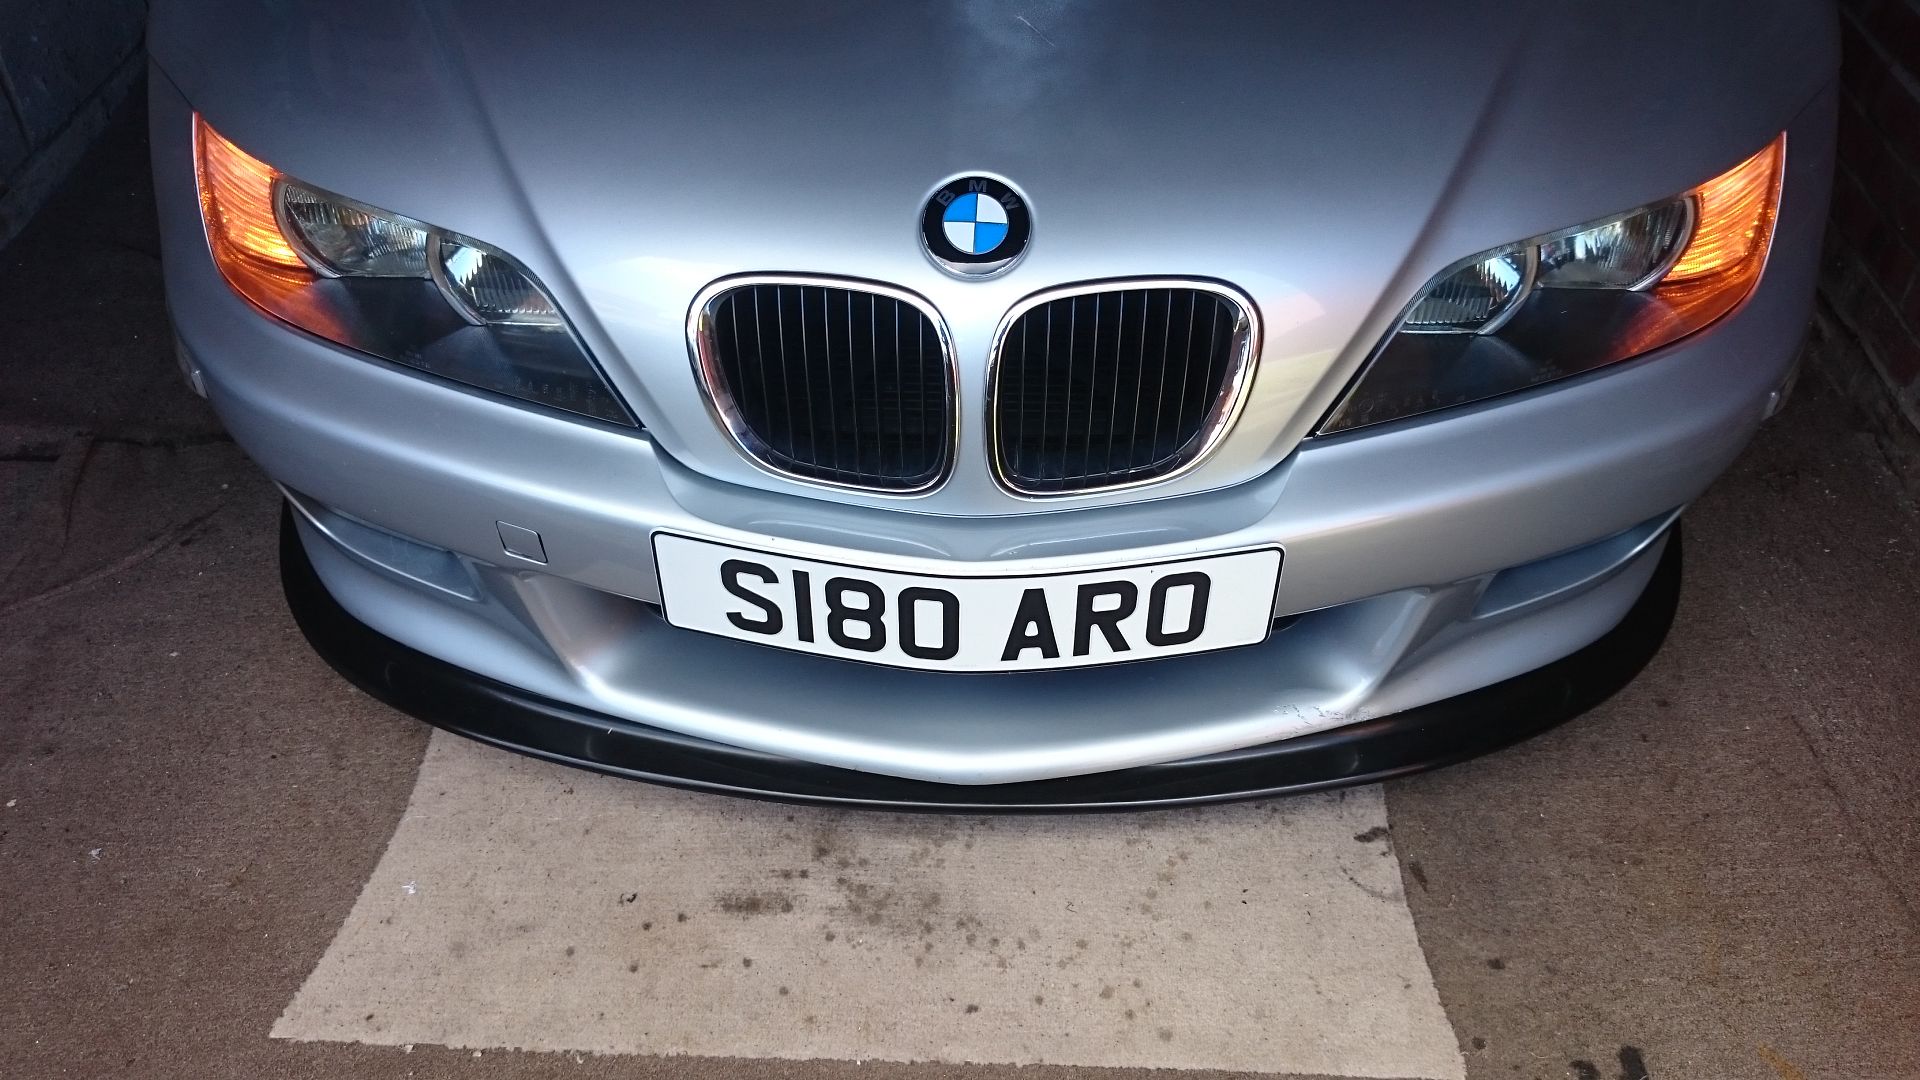
First was to fit my new Splitter from unique Customs.
Really easy to do: 4 x 8mm screws underneath the bumper, 2 x T50 bolts holding the bumper to the shock bars. Yank off!
Flip, measure, measure, measure, screw down with self tappers, take off, use tape, rescrew.
all done.

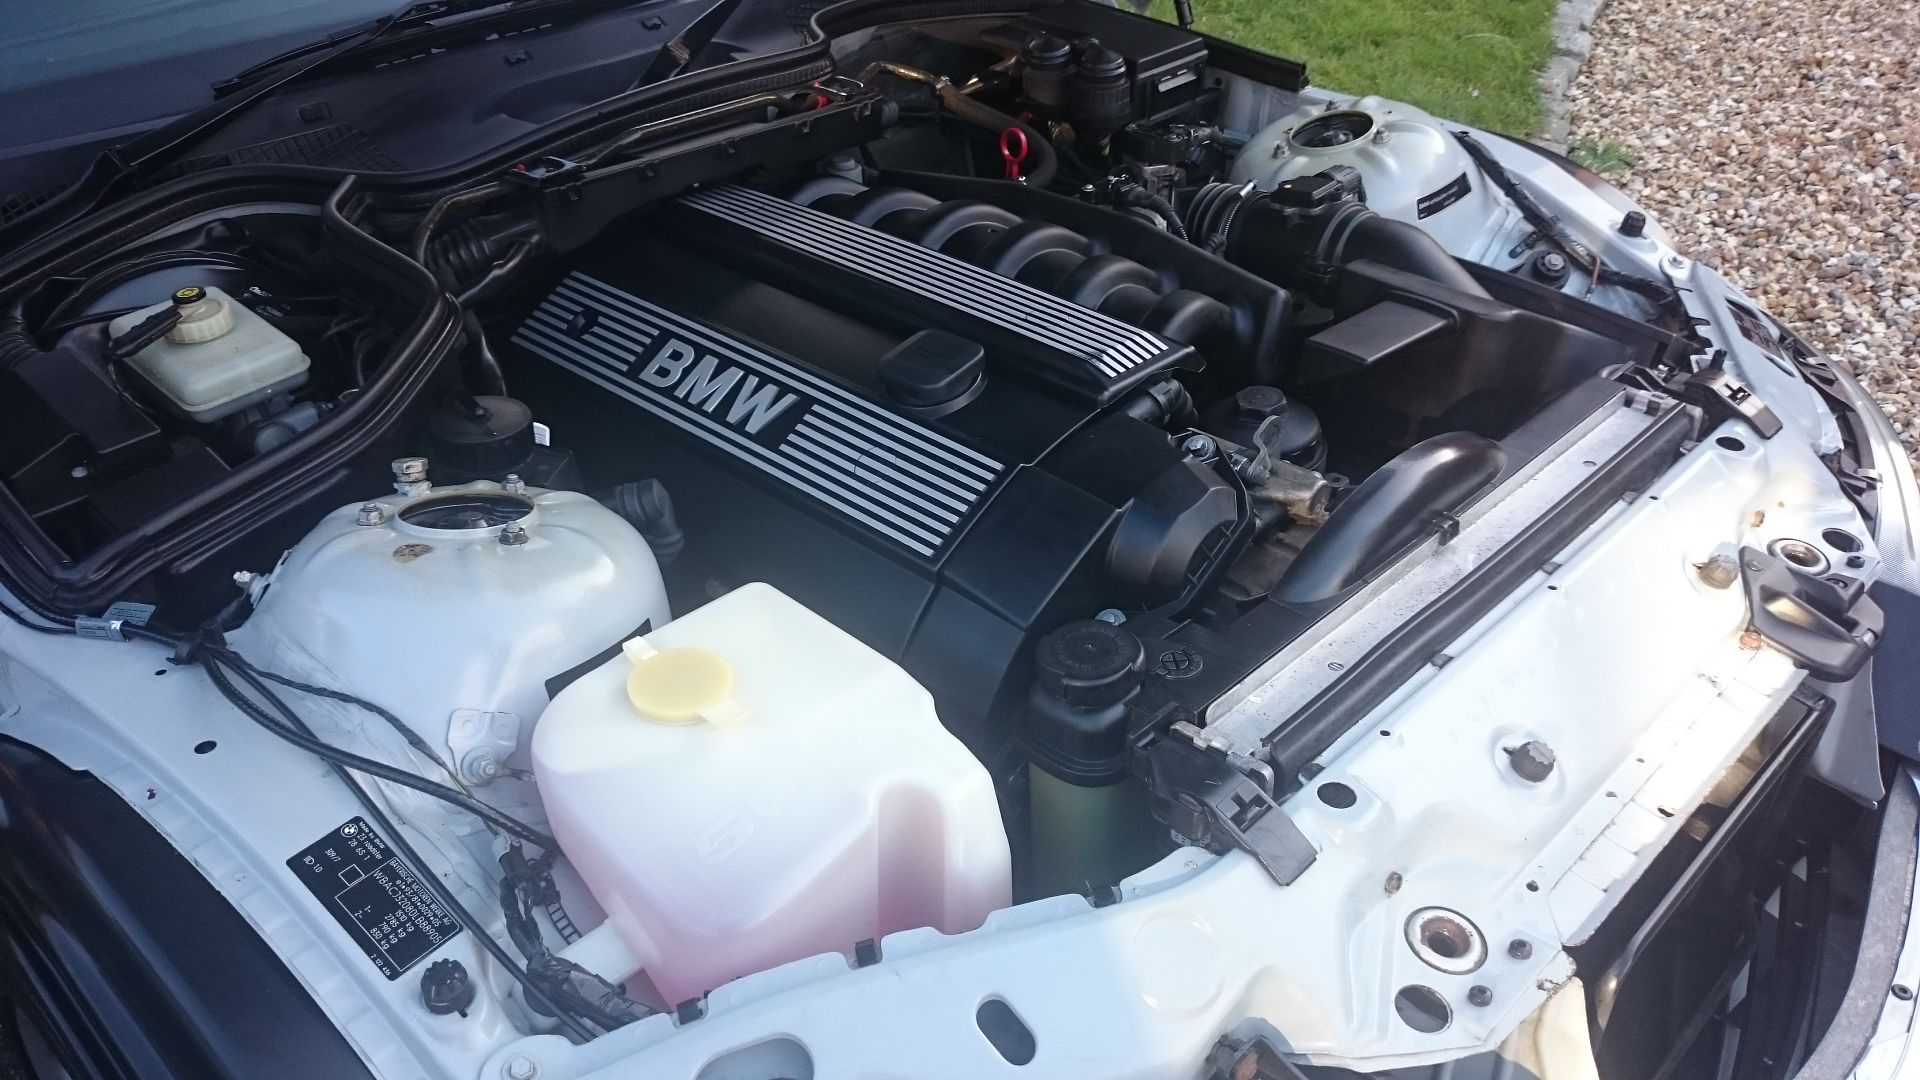
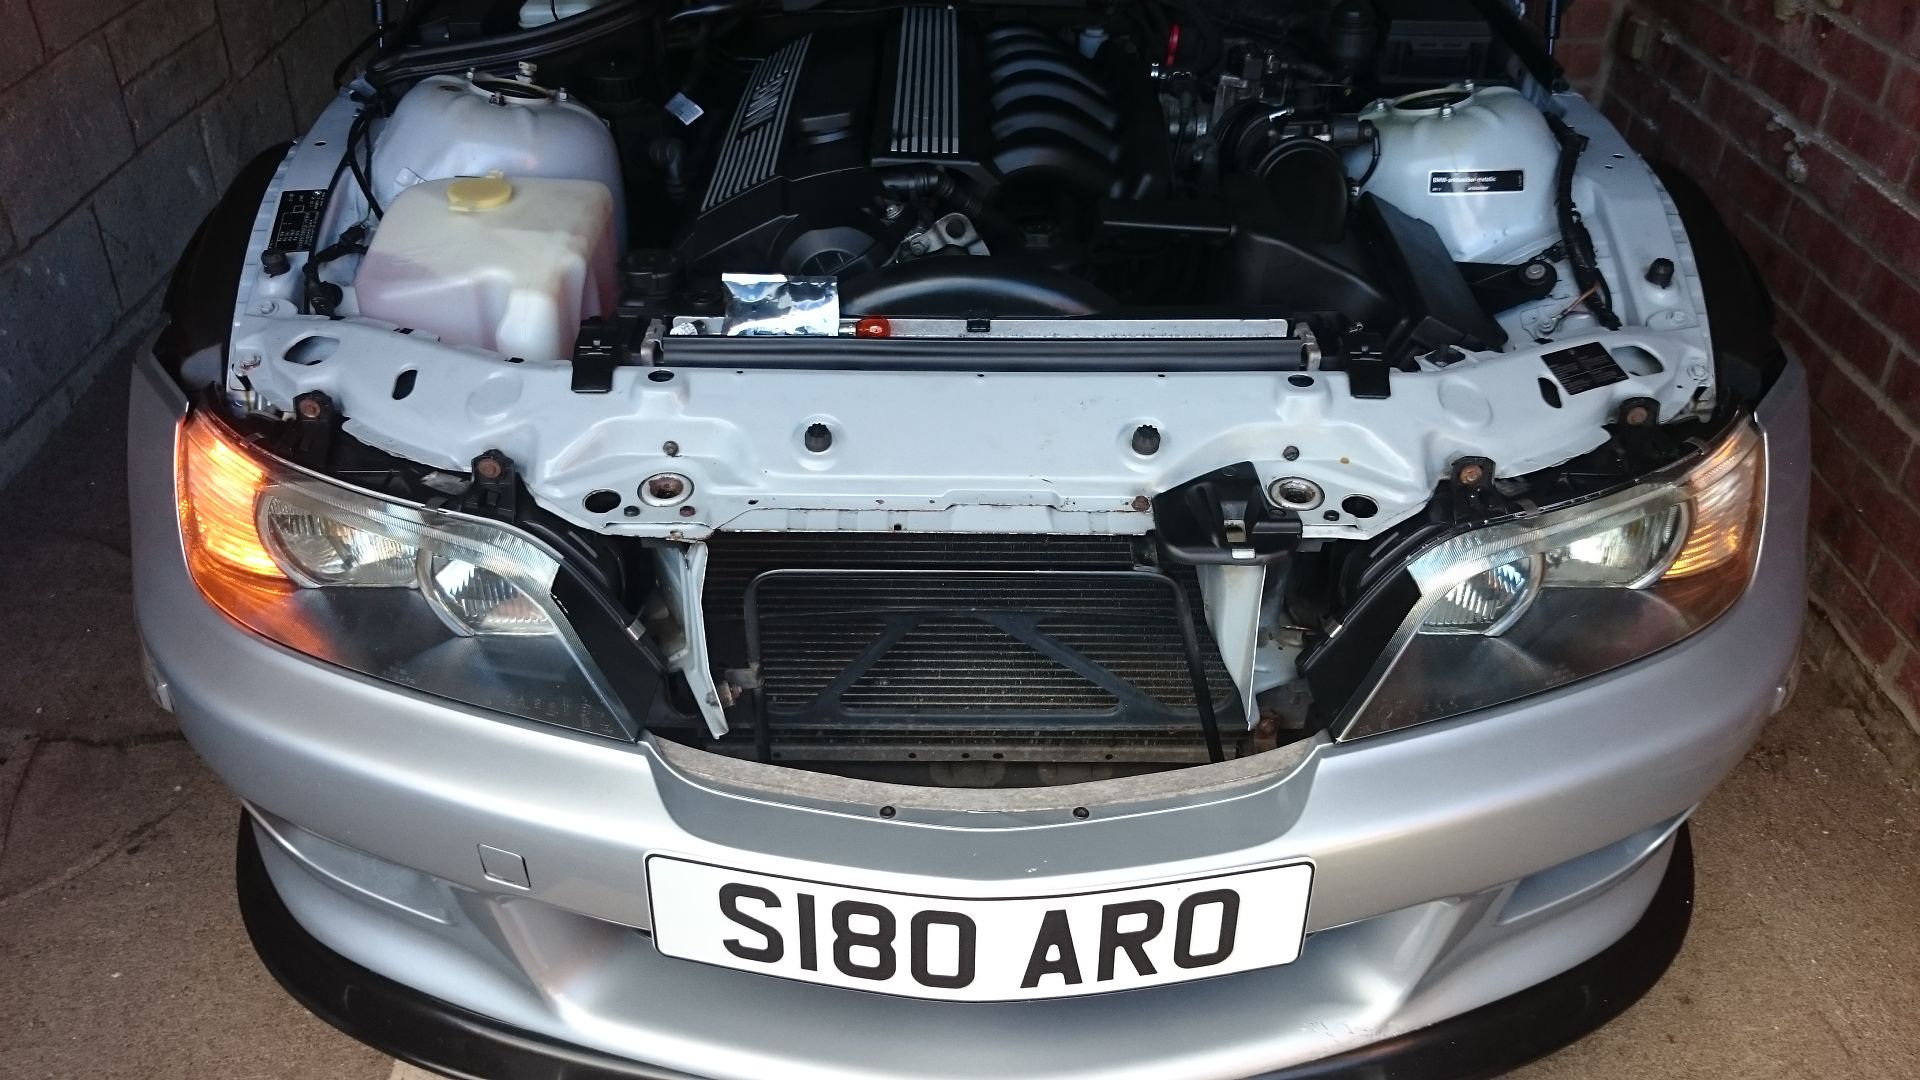
next jobs was to clean the engine bay as its a bit grubby. Took out the airbox and washer bottle to properly clean it using Autoglym engine degreaser.
Washer bottle went in the dishwasher (wife was out), top tip, put a bit of degreaser in it after with some dry rice and shake, gets all the crap out.
refitted and everything was treated with 303 aerospace protectant.
also got my poweflex diff bush and my revshift gearbox mounts to do but it was way to cold to be rolling around under the car
First was to fit my new Splitter from unique Customs.
Really easy to do: 4 x 8mm screws underneath the bumper, 2 x T50 bolts holding the bumper to the shock bars. Yank off!
Flip, measure, measure, measure, screw down with self tappers, take off, use tape, rescrew.
all done.


next jobs was to clean the engine bay as its a bit grubby. Took out the airbox and washer bottle to properly clean it using Autoglym engine degreaser.
Washer bottle went in the dishwasher (wife was out), top tip, put a bit of degreaser in it after with some dry rice and shake, gets all the crap out.
refitted and everything was treated with 303 aerospace protectant.

also got my poweflex diff bush and my revshift gearbox mounts to do but it was way to cold to be rolling around under the car
n3il123 said:
I like them, do you know what size and model/ style they are? i've got a 3.0 which someone has put aftermarket 18 inchers with 40 profile tyres and on the roads around here it tramlines and bumpsteers like a good'un (plus they look a pain in the arse to clean!) so I was wondering about getting a set of standard wheels to see whether that helps.
Style 1817 x 7.5 ET41
17 x 8.5 ET41
all bmw wheels here
http://felgenkatalog.auto-treff.com/
Simple things make all the difference.
£5 for this to finish off the boot.

Busy weekend for me on the zed as the wife was away on a training course.
After a nice drive on saturday morning i cracked on with a job i've been meaning to do for a while.
i had noticed that i had a small oil weep
and it was the cam cover gasket that was playing up.
So a quick order to Sopers Lincoln and we had all the bits.
The process is so easy but takes about 2 hours:
all you need is
10mm socket
8mm socket
flat blade screwdriver
torque wrench it you are being fussy (i am)
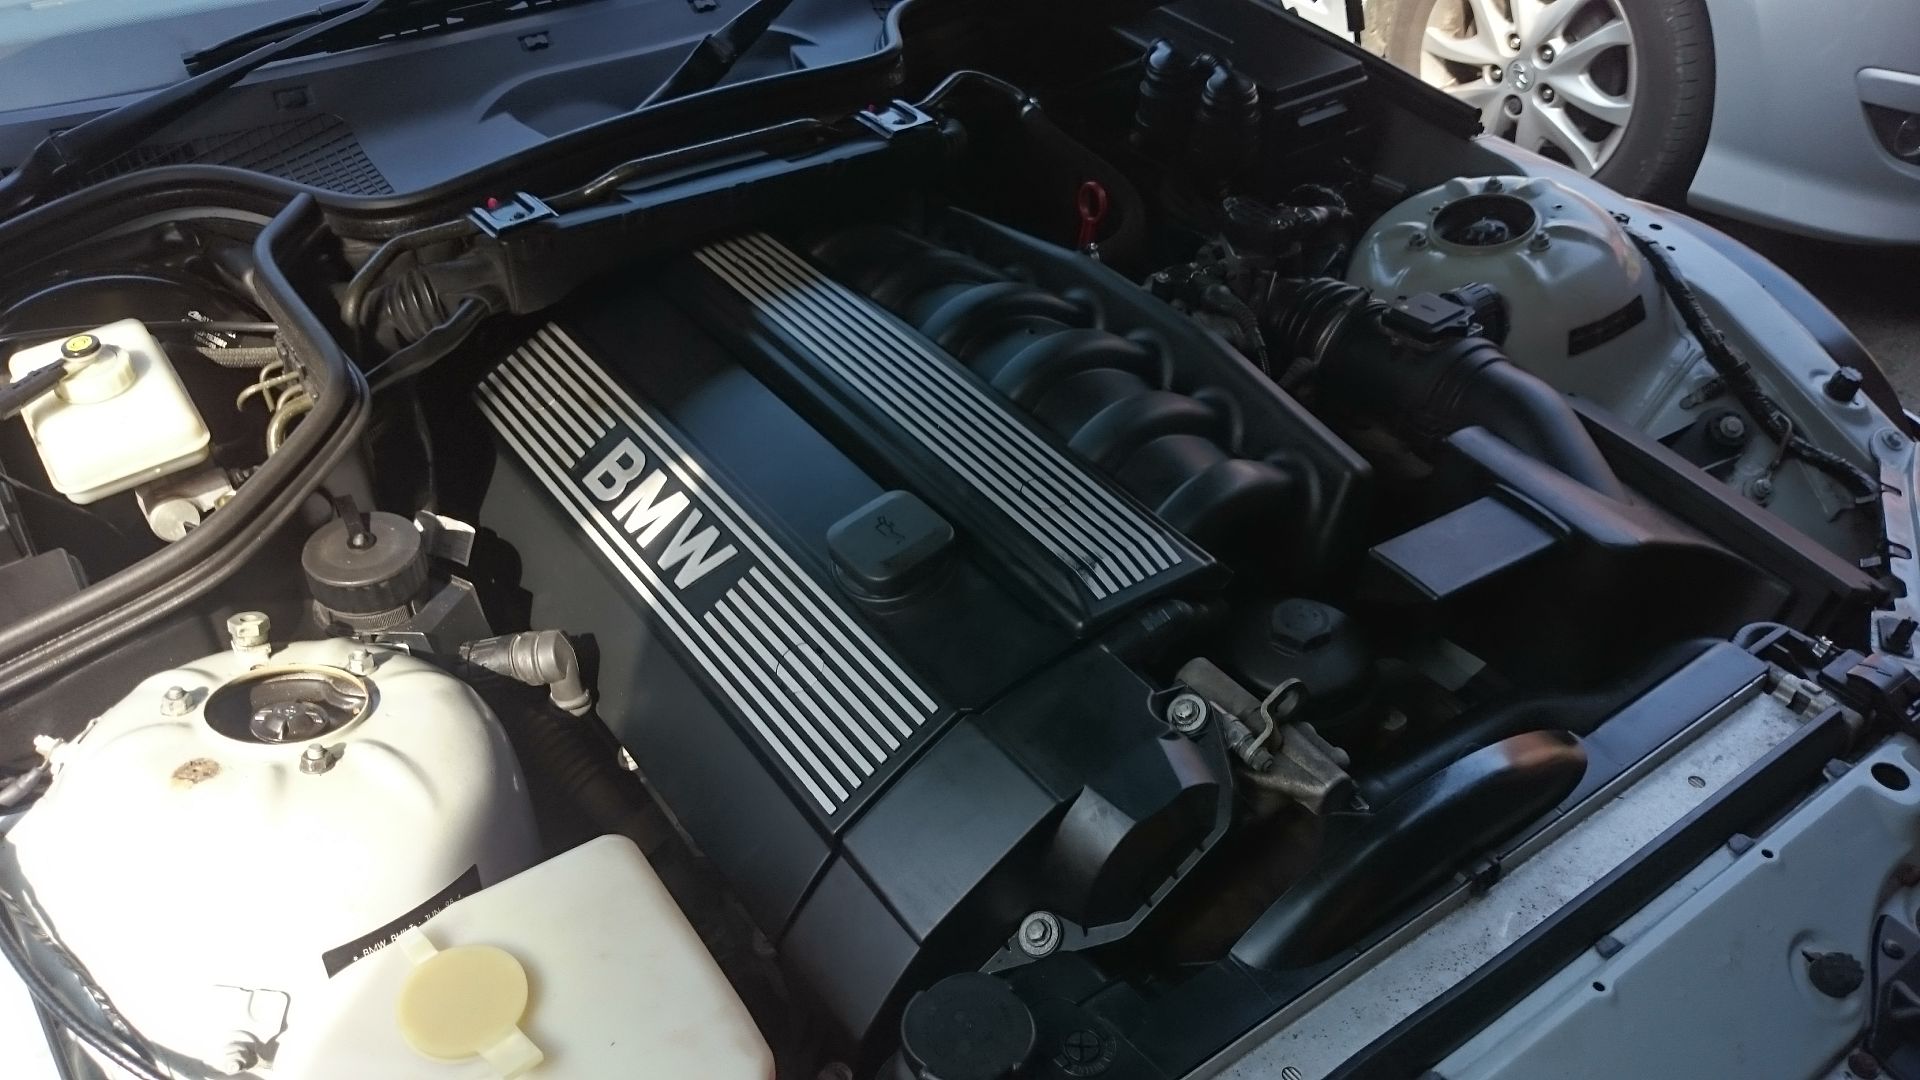
engine cover off, screwdriver to remove the four blanks and then 10mm nut x 2 and 10mm bolt x2
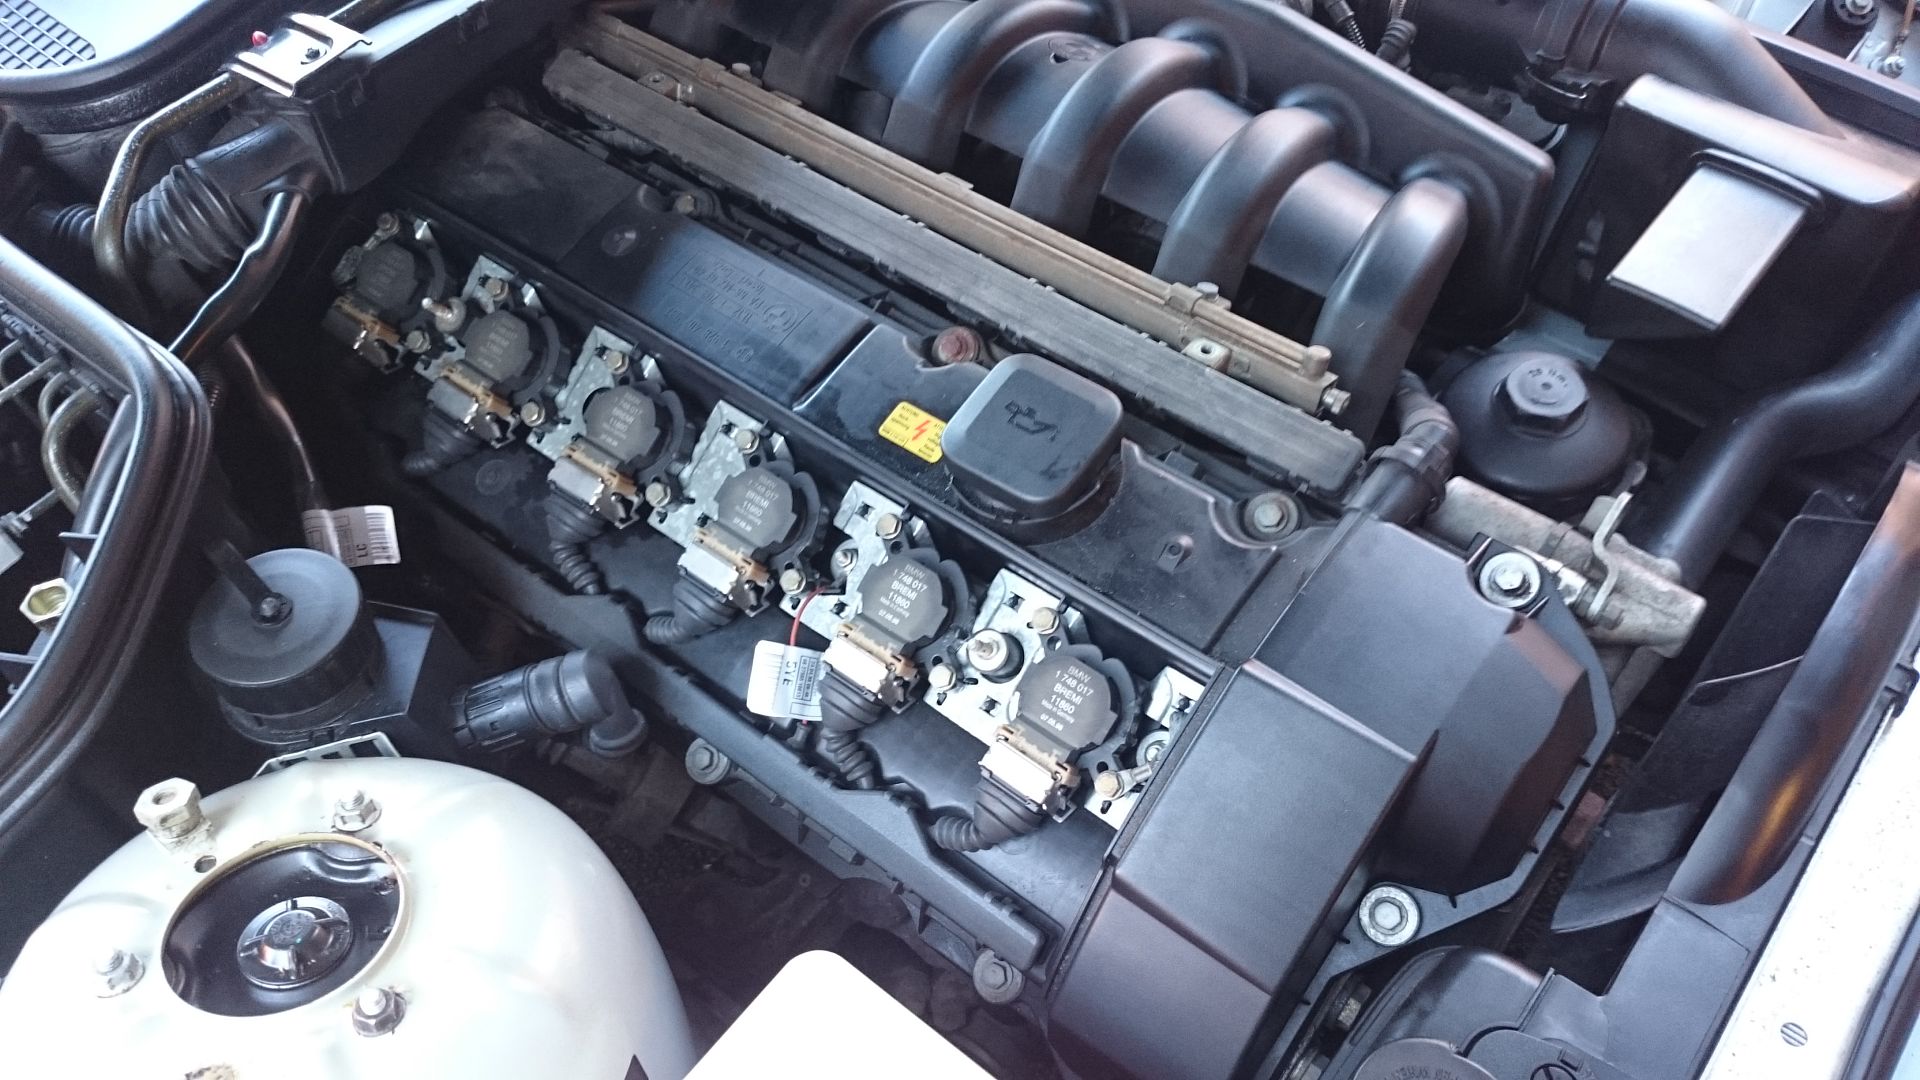
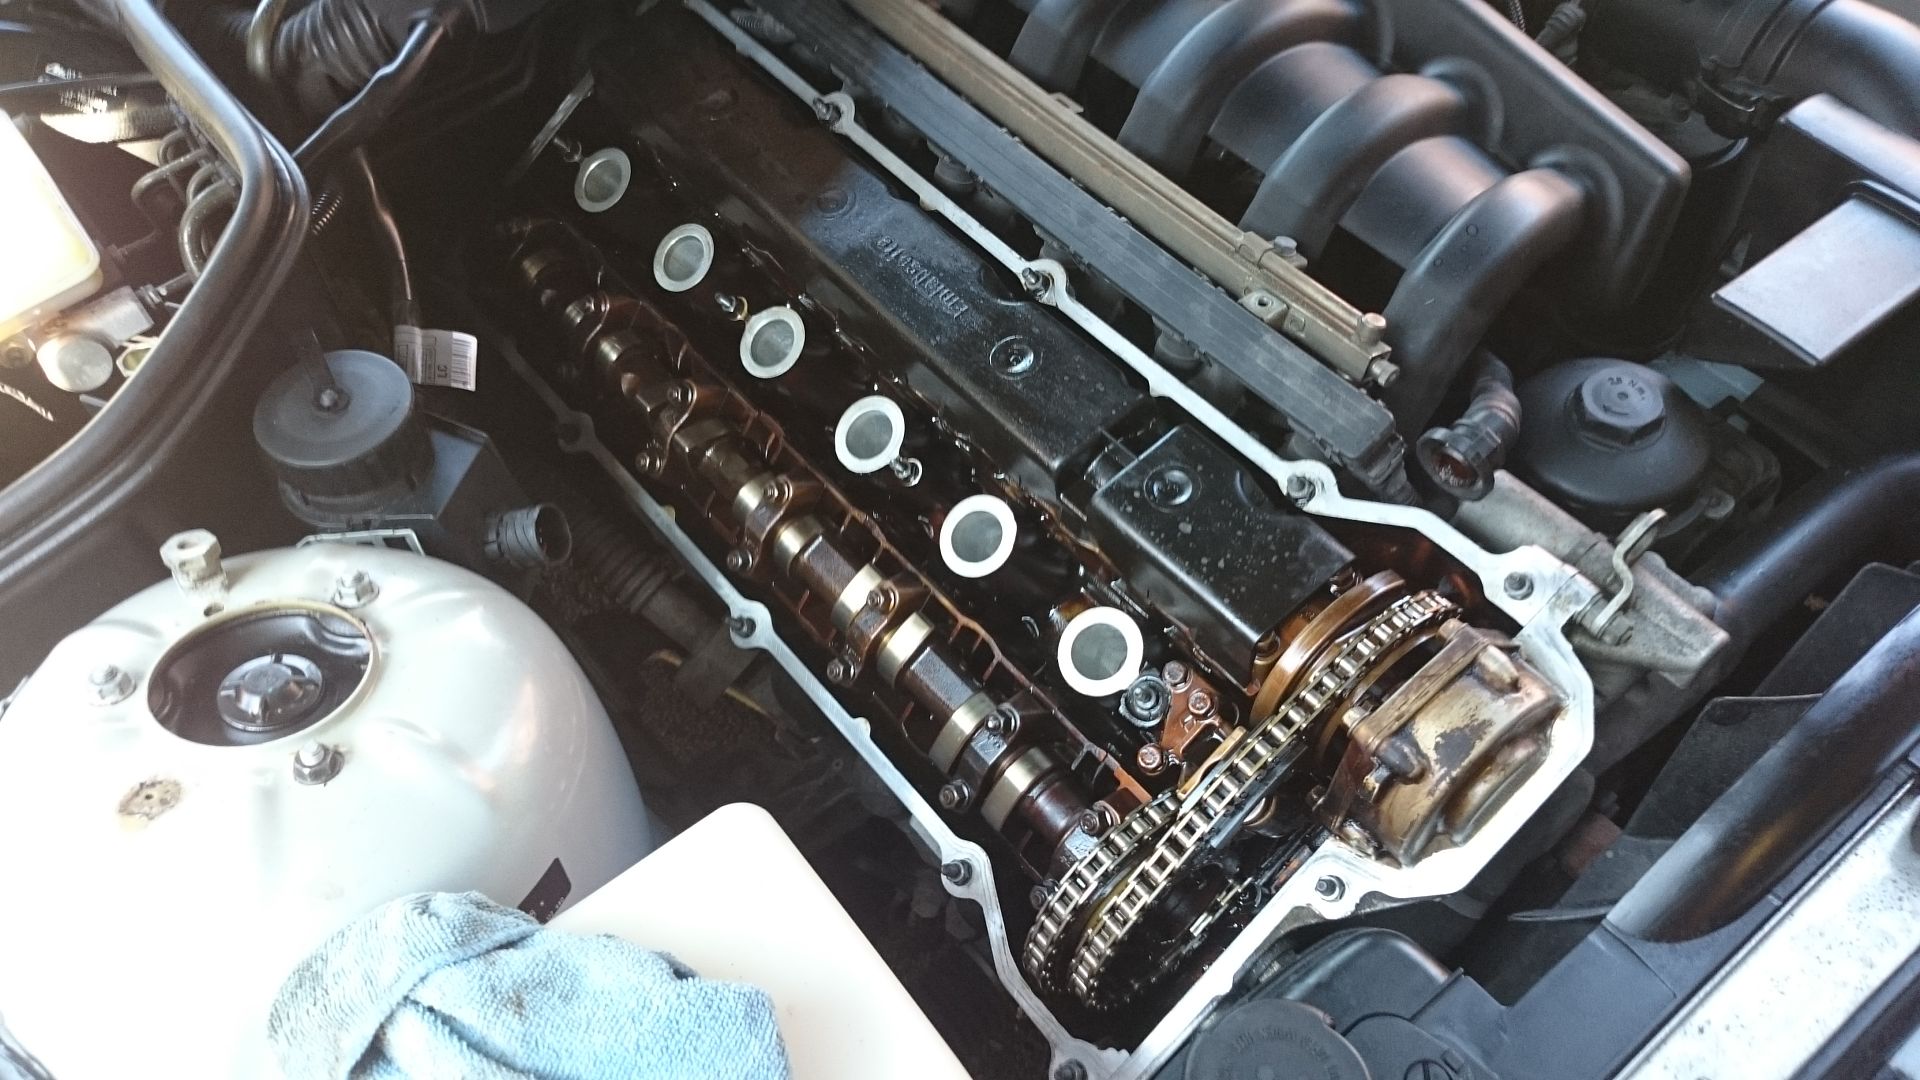
leaves you with access to the coils
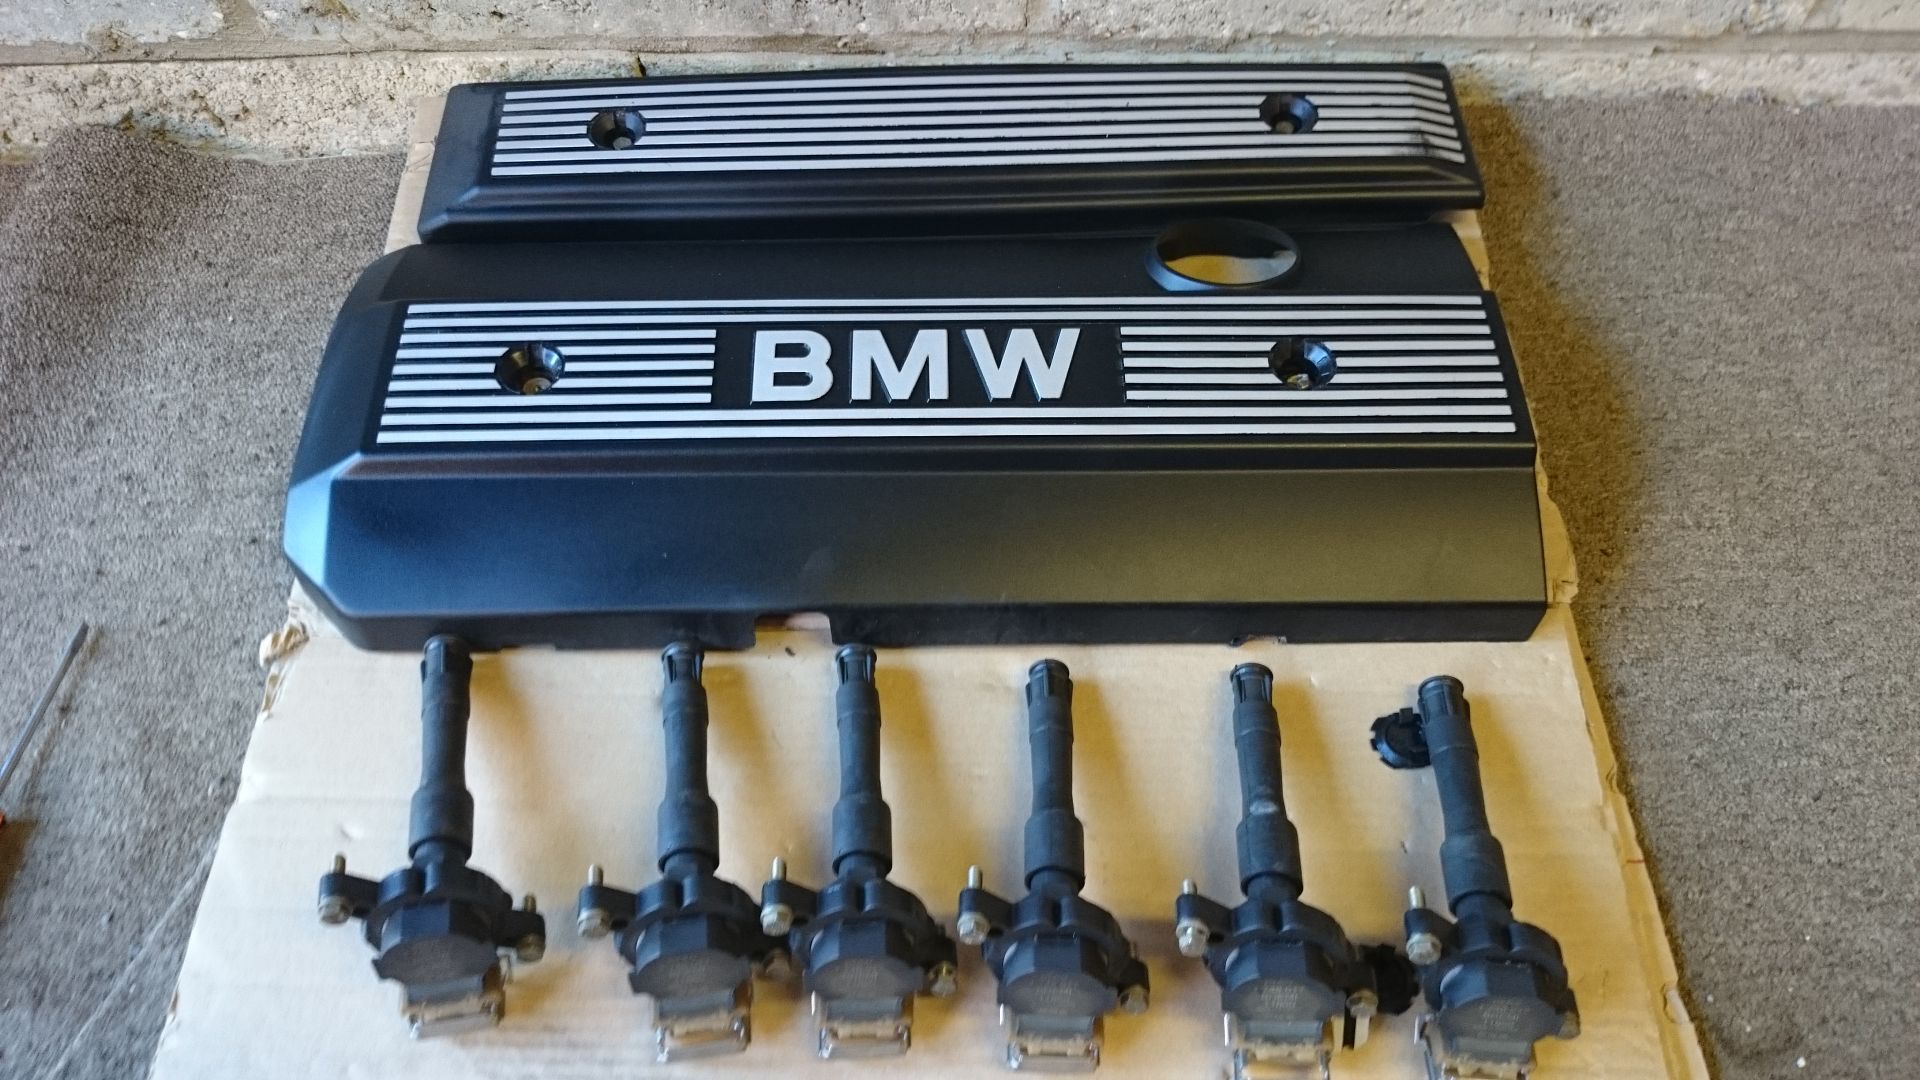
each held on by 2 x 10mm bolts and a clip for the connector, clip slides up and then out, whole wiring assembly can be removed for access very easily (circular connector and some plastic clips)
there are 3 x 8mm earth straps too
notice im lining everything up as it came out, as everything was working before i dont want to swap the coils etc
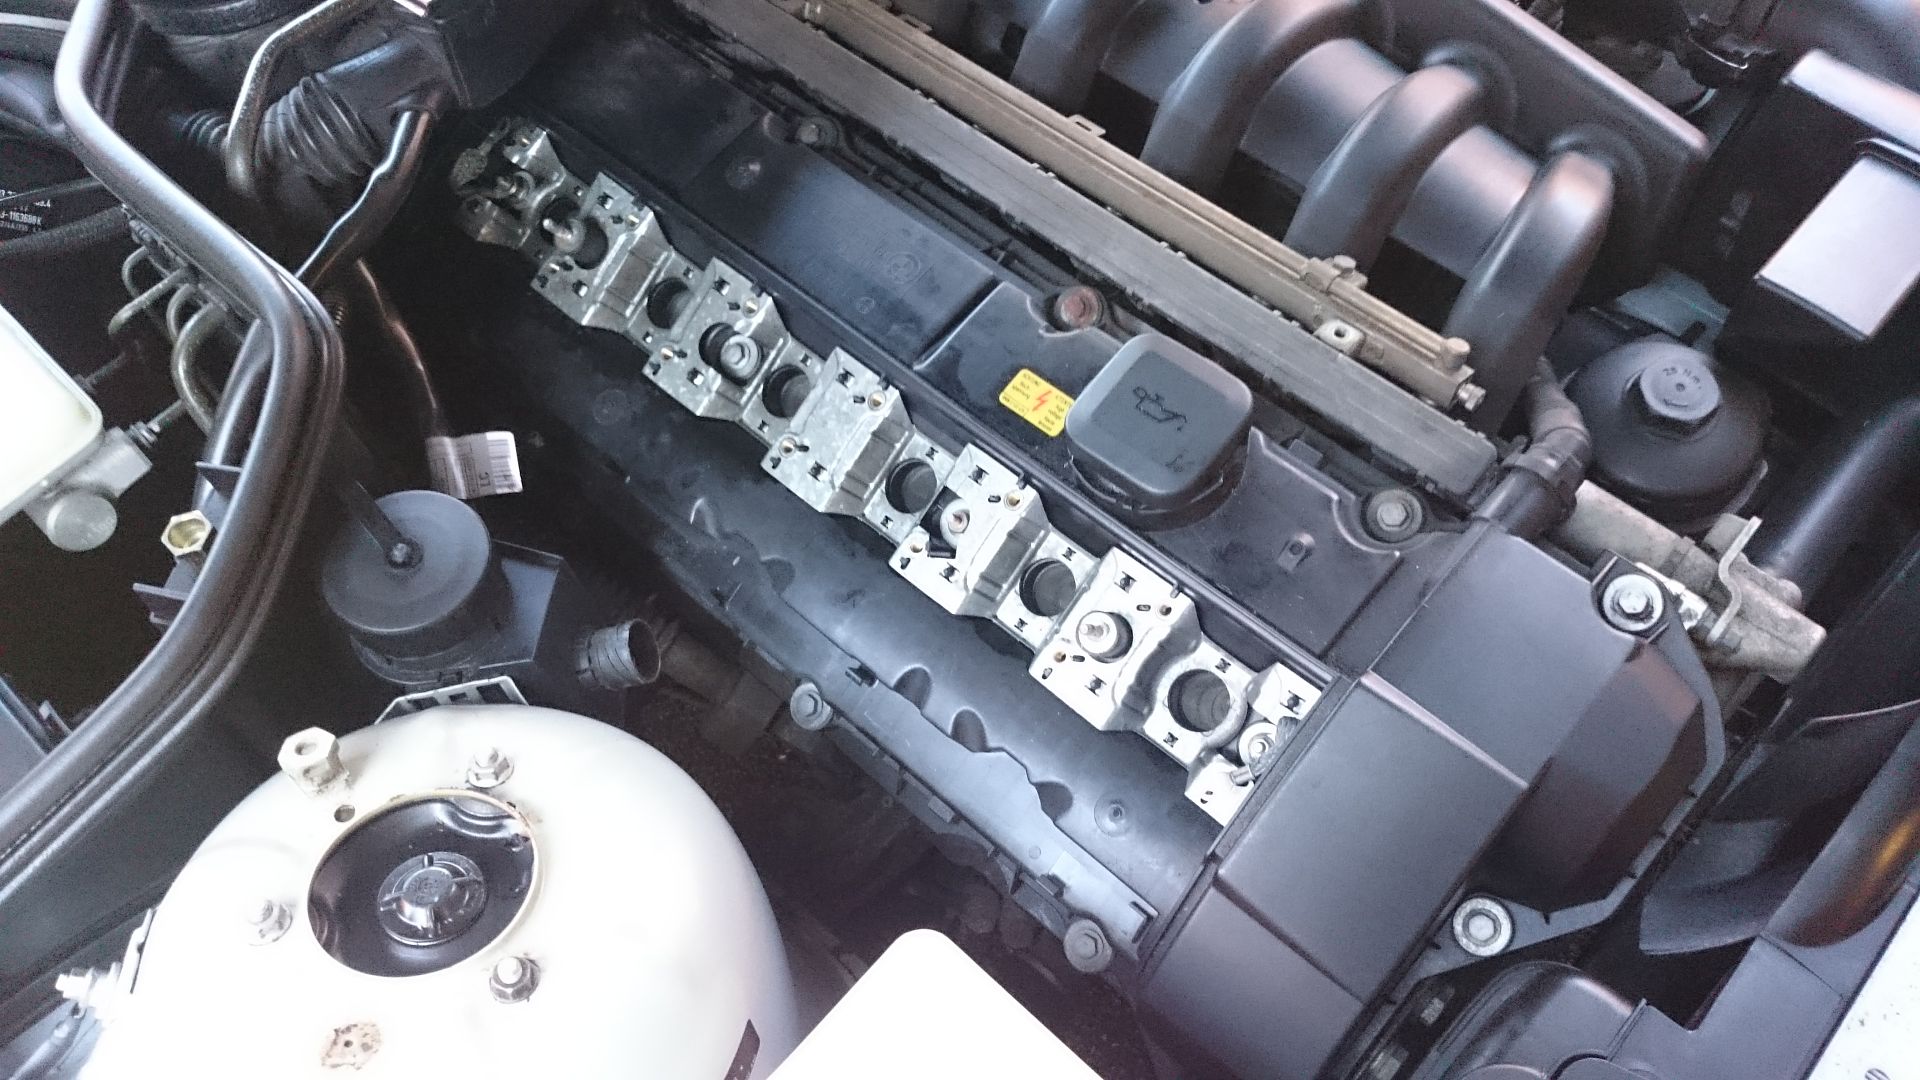
leaves you with this, they you crack on with the 15 x 10mm nuts that hold the cover on. They all have a metal wsher and a rubber bung attached to them. be careful not to drop any. the rears are harder to get at but a little wobbly extension on the socket is all you need.
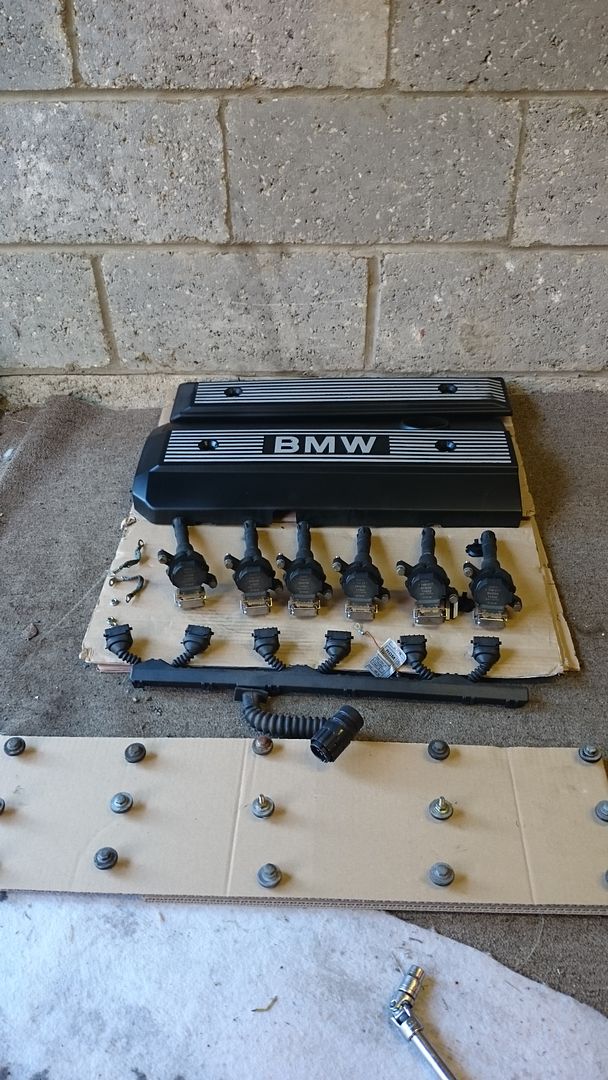
small rubber mallet taps to the cover and some wiggling and it'll come off, it will be tight as the old gaskets would have bonded to the head a little.
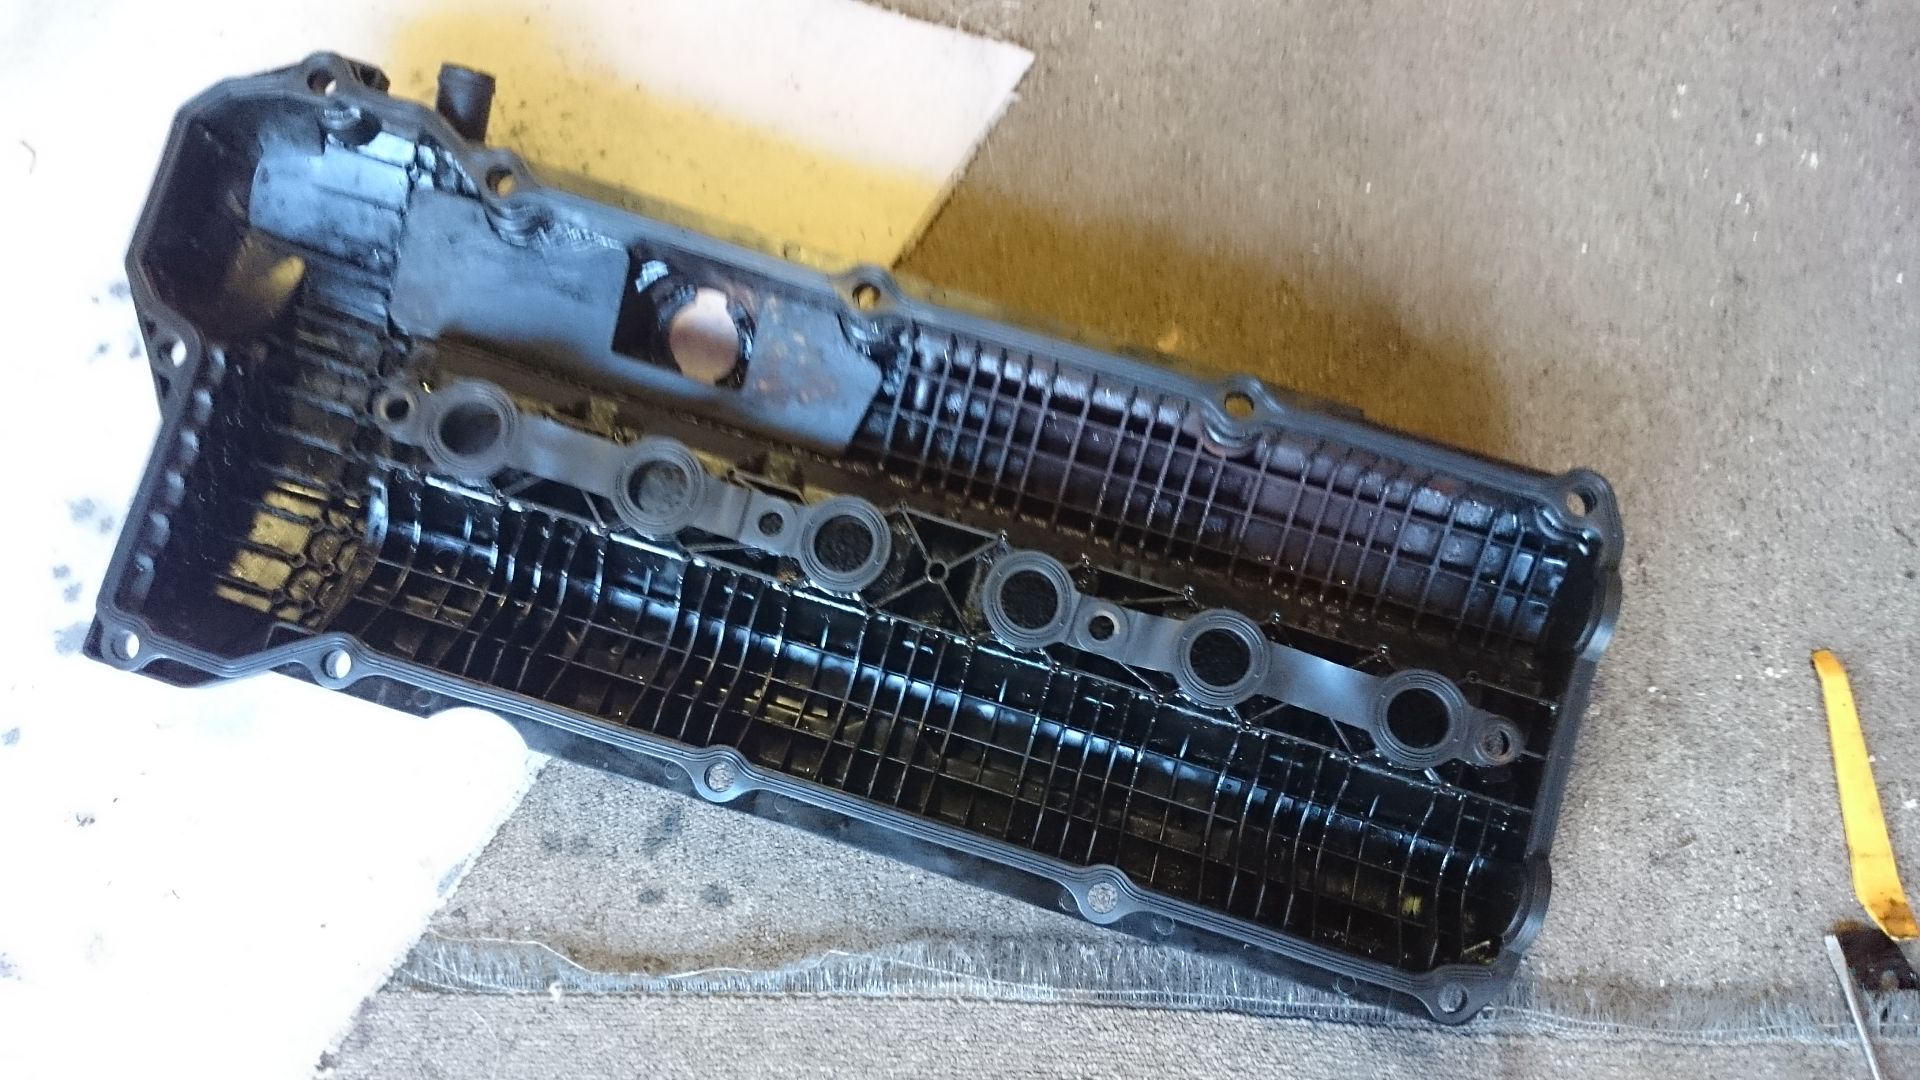
shiny bits.
as per any gasket installation, clean up the mounting surface and scrub an sections that look rough.
BMW advise that you run some sealent at the front in both corners and the half moons at the back.
refit as per above
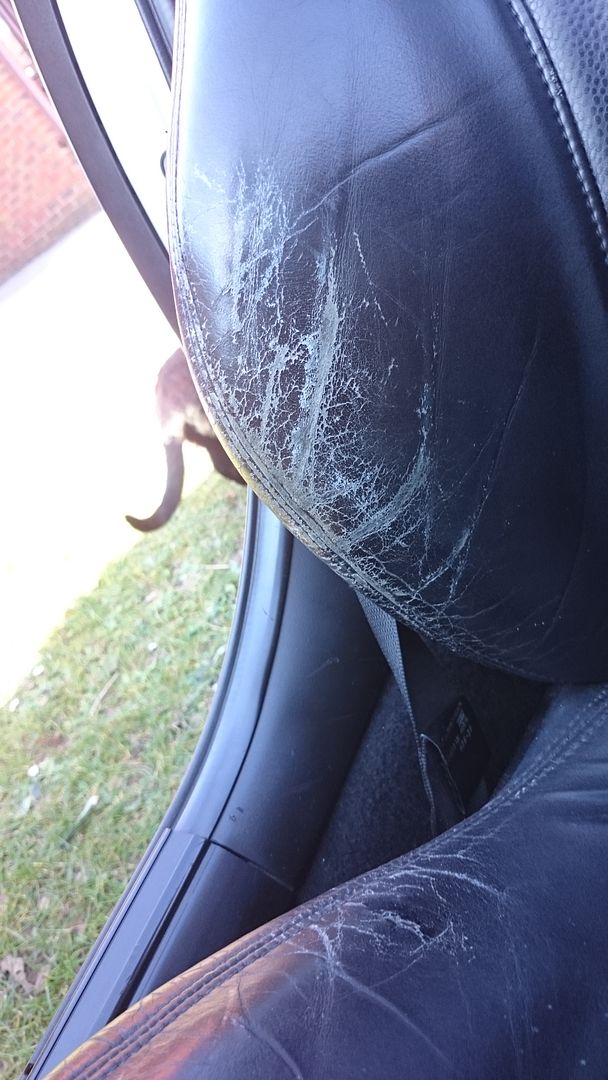
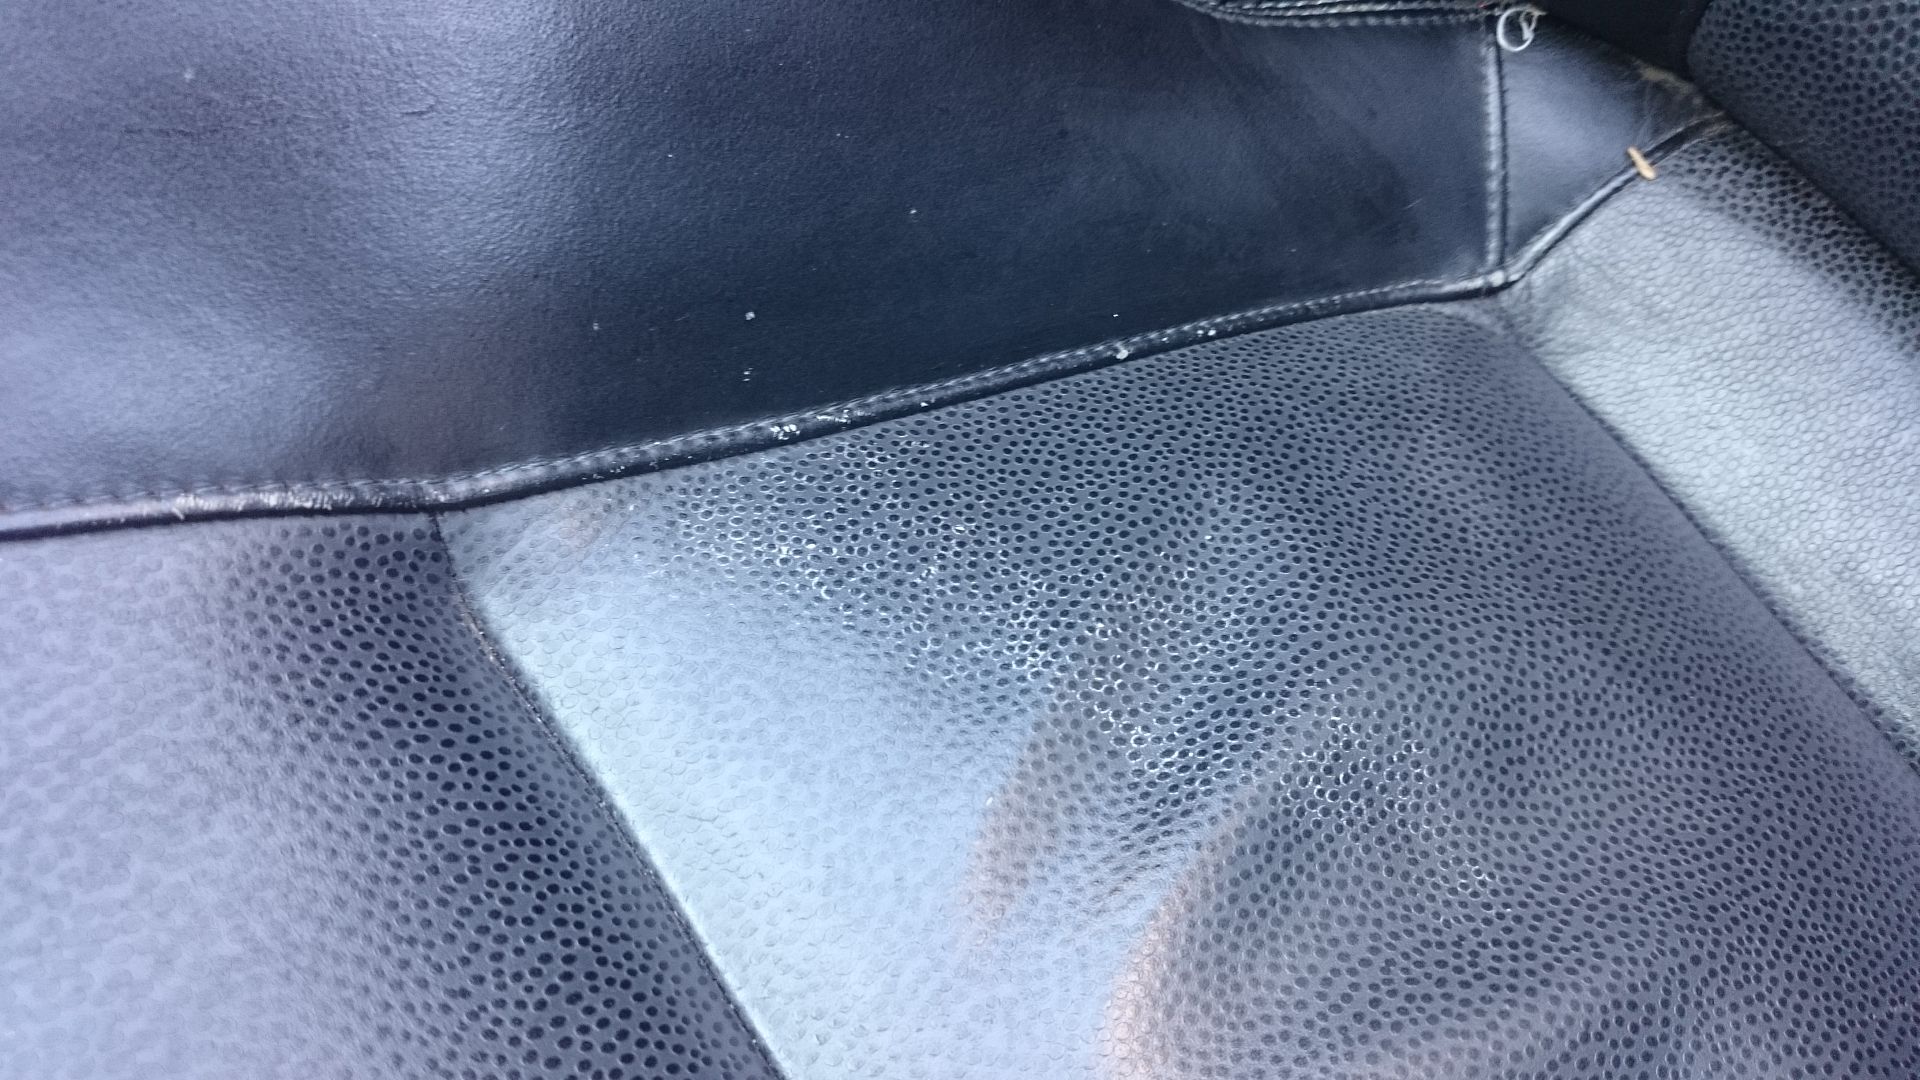
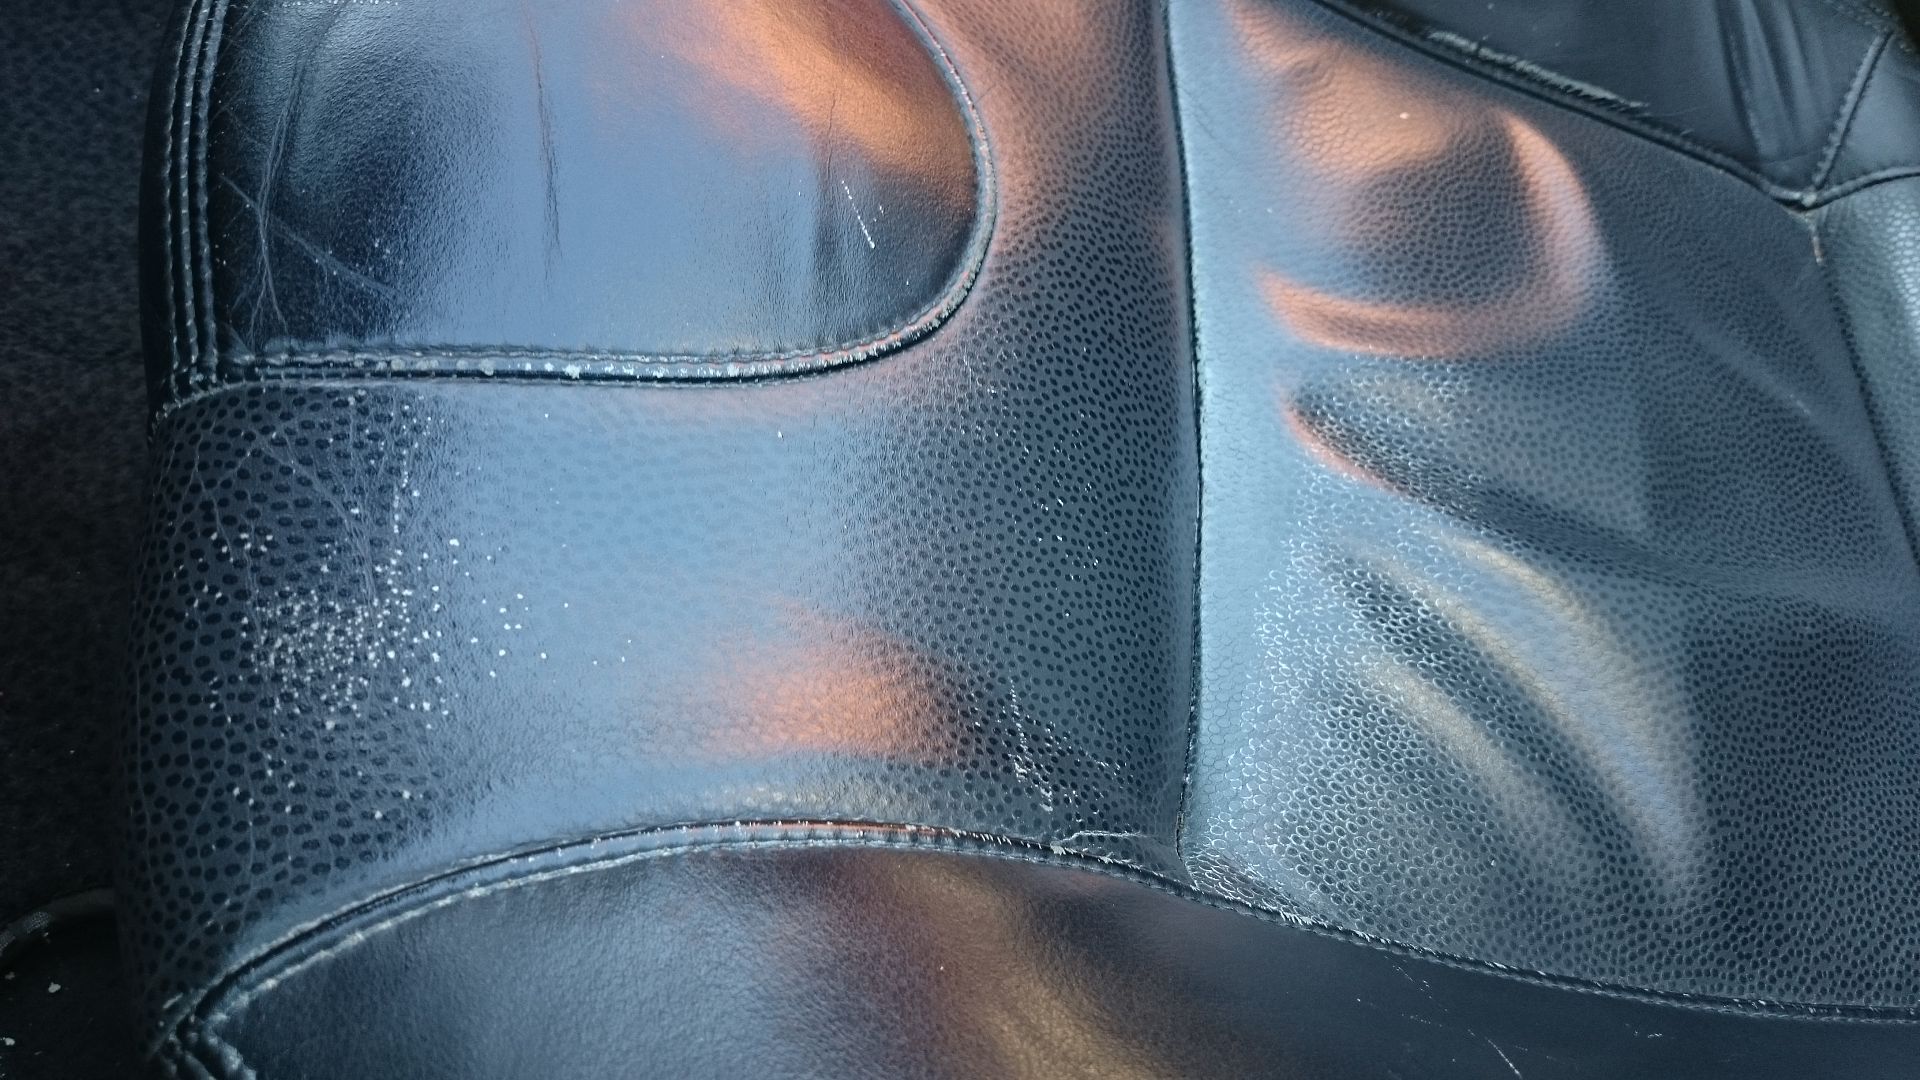
then i went on to dye the leather seats as they were in a poor condition when i bought the car
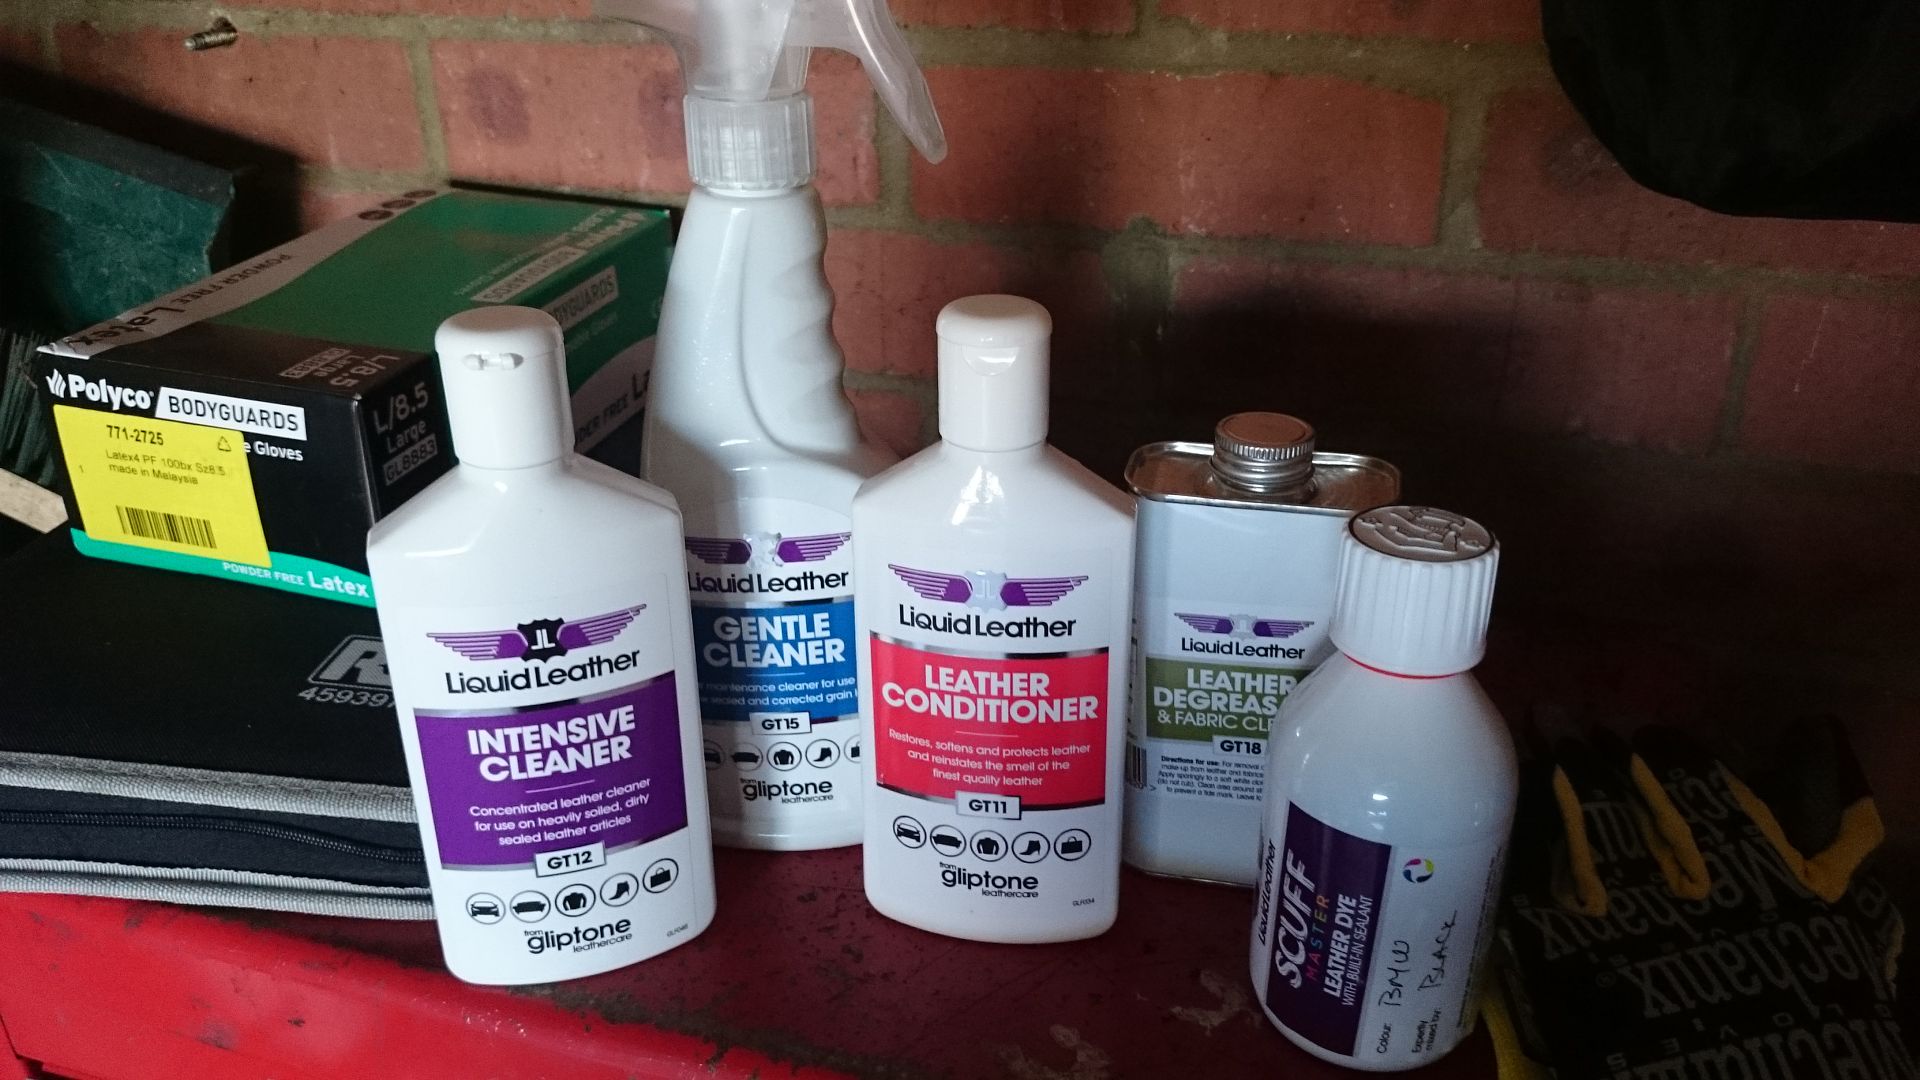
used this kit
process is:
degrease
intensive clean
gentle clean
condition
gentle clean
degrease
dye
dye
dye
dye
dye
some before shots
used a small sponge to cover the leather, let it dry and then go again, did about 5 coats.
after
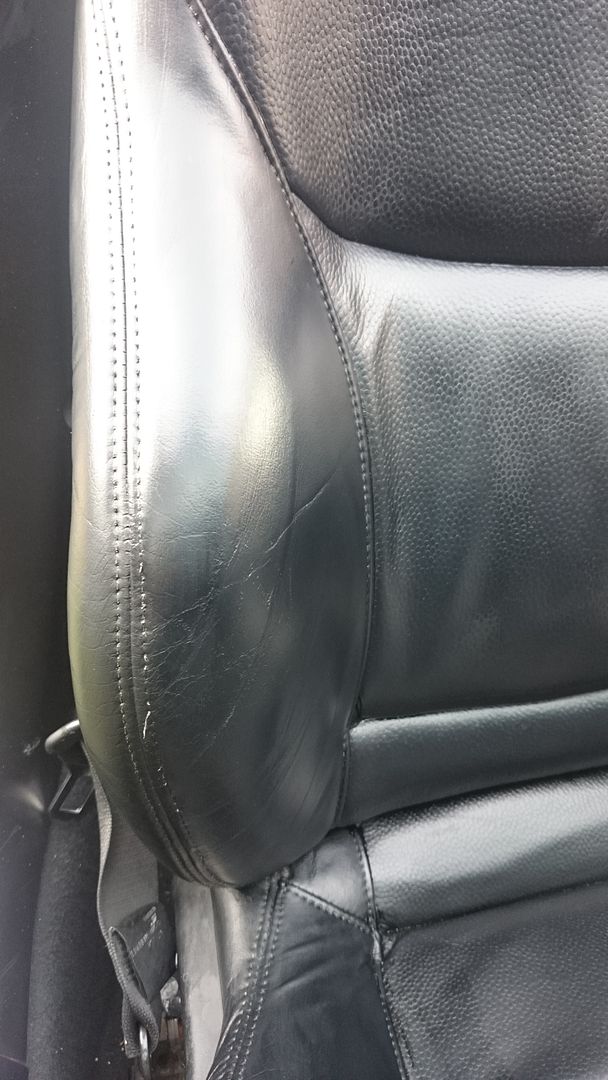

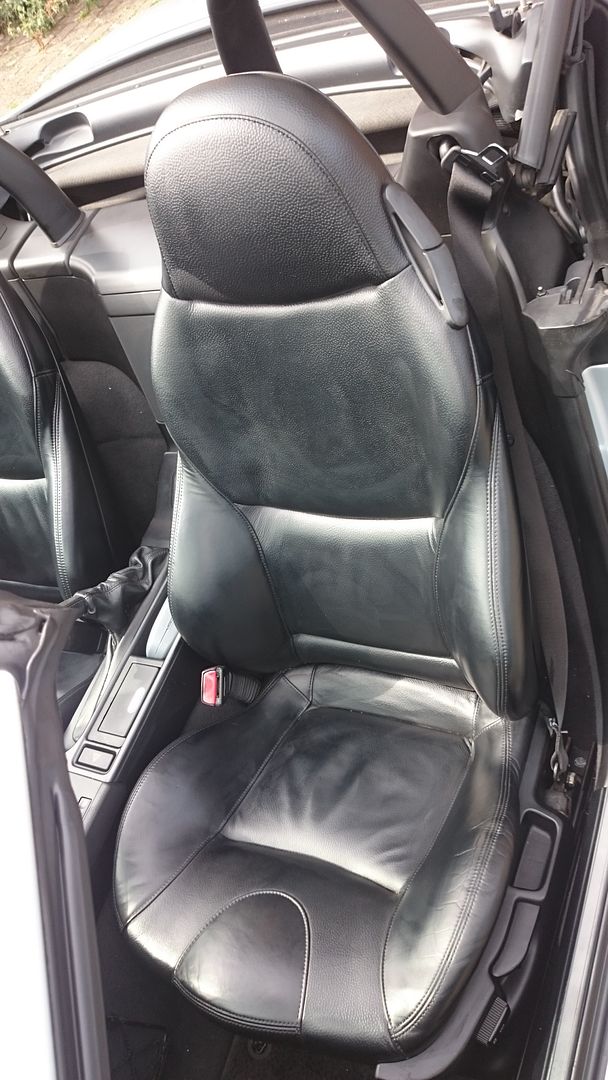
its a little patchy still so i might do another two coats
£5 for this to finish off the boot.


Busy weekend for me on the zed as the wife was away on a training course.
After a nice drive on saturday morning i cracked on with a job i've been meaning to do for a while.
i had noticed that i had a small oil weep

and it was the cam cover gasket that was playing up.
So a quick order to Sopers Lincoln and we had all the bits.
The process is so easy but takes about 2 hours:
all you need is
10mm socket
8mm socket
flat blade screwdriver
torque wrench it you are being fussy (i am)

engine cover off, screwdriver to remove the four blanks and then 10mm nut x 2 and 10mm bolt x2

leaves you with access to the coils

each held on by 2 x 10mm bolts and a clip for the connector, clip slides up and then out, whole wiring assembly can be removed for access very easily (circular connector and some plastic clips)
there are 3 x 8mm earth straps too
notice im lining everything up as it came out, as everything was working before i dont want to swap the coils etc

leaves you with this, they you crack on with the 15 x 10mm nuts that hold the cover on. They all have a metal wsher and a rubber bung attached to them. be careful not to drop any. the rears are harder to get at but a little wobbly extension on the socket is all you need.

small rubber mallet taps to the cover and some wiggling and it'll come off, it will be tight as the old gaskets would have bonded to the head a little.


shiny bits.
as per any gasket installation, clean up the mounting surface and scrub an sections that look rough.
BMW advise that you run some sealent at the front in both corners and the half moons at the back.
refit as per above

then i went on to dye the leather seats as they were in a poor condition when i bought the car

used this kit
process is:
degrease
intensive clean
gentle clean
condition
gentle clean
degrease
dye
dye
dye
dye
dye
some before shots


used a small sponge to cover the leather, let it dry and then go again, did about 5 coats.
after


its a little patchy still so i might do another two coats
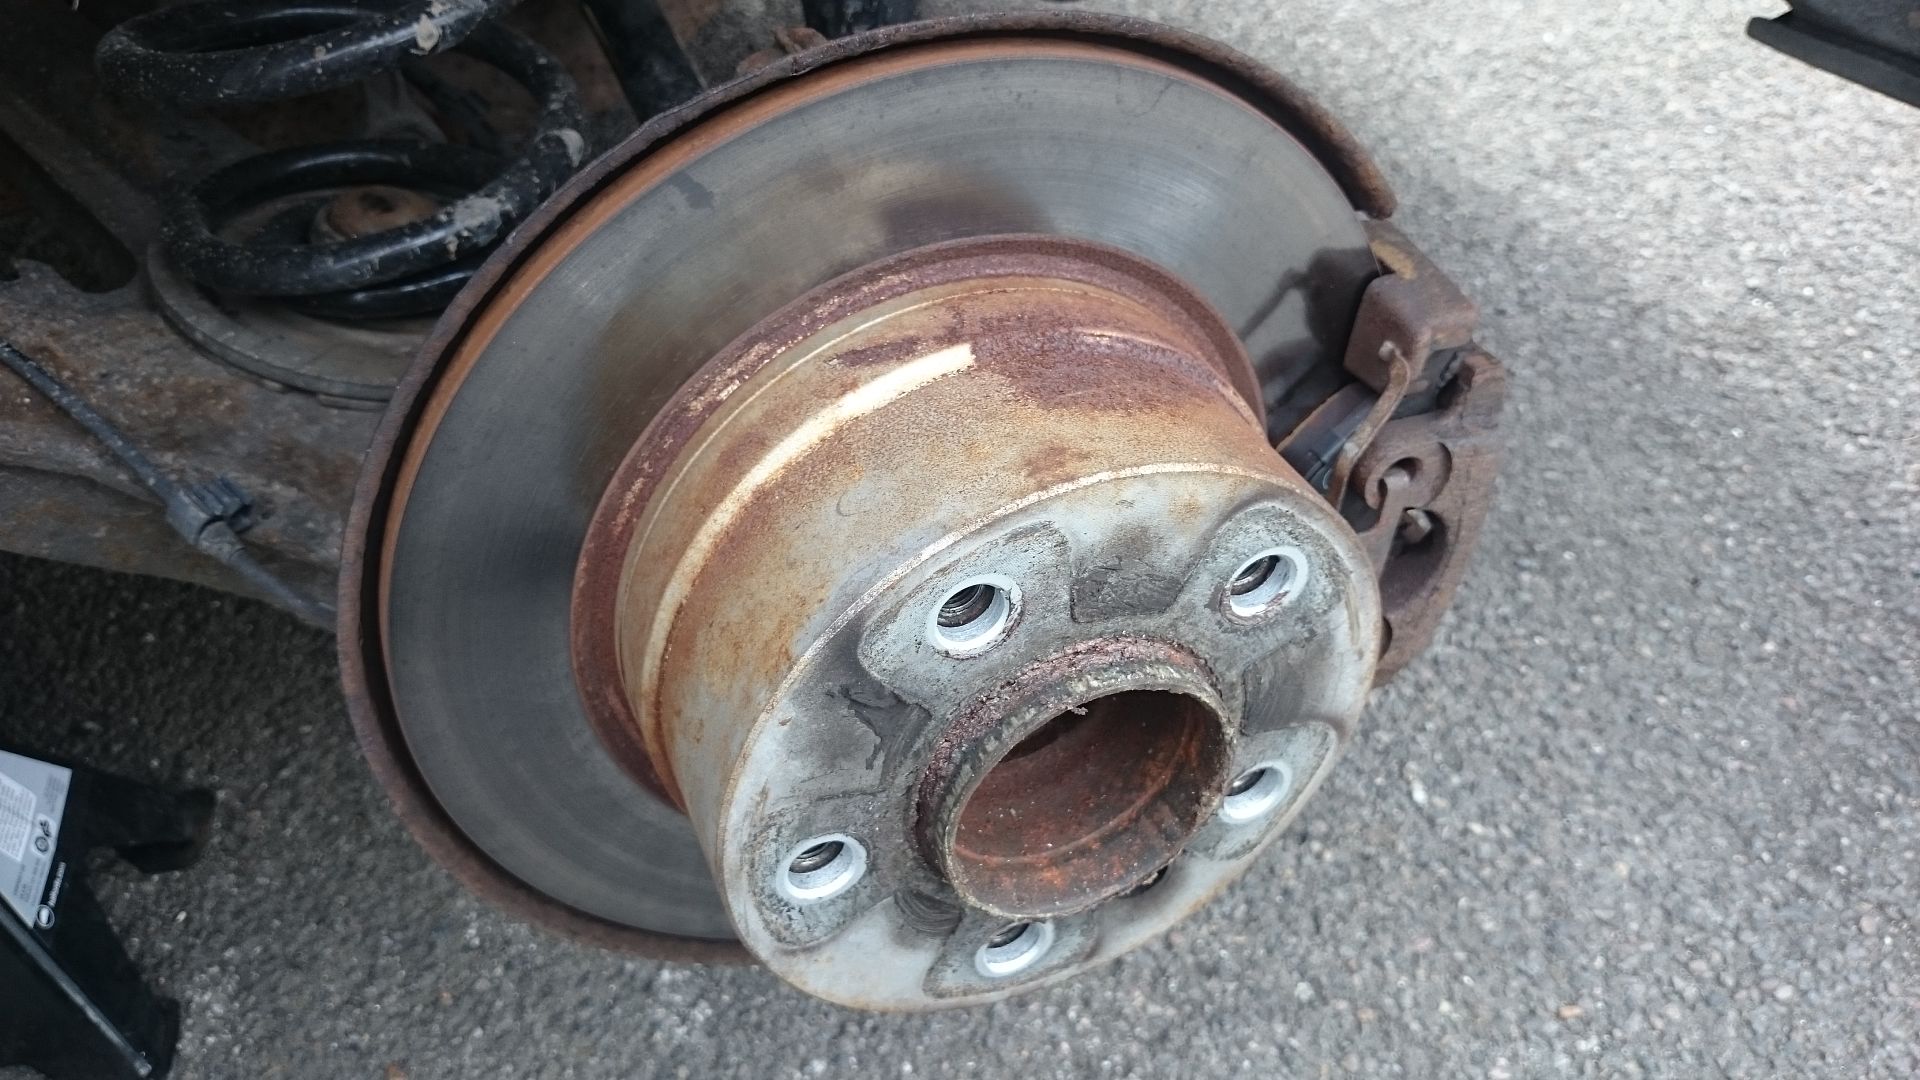
sunday came about and i decided to paint my calipers and discs as they we're disgustingly rusted.
the front discs and pads will need changing at some point this year but will upgrade to either e46 fronts or porsche brembos.
before
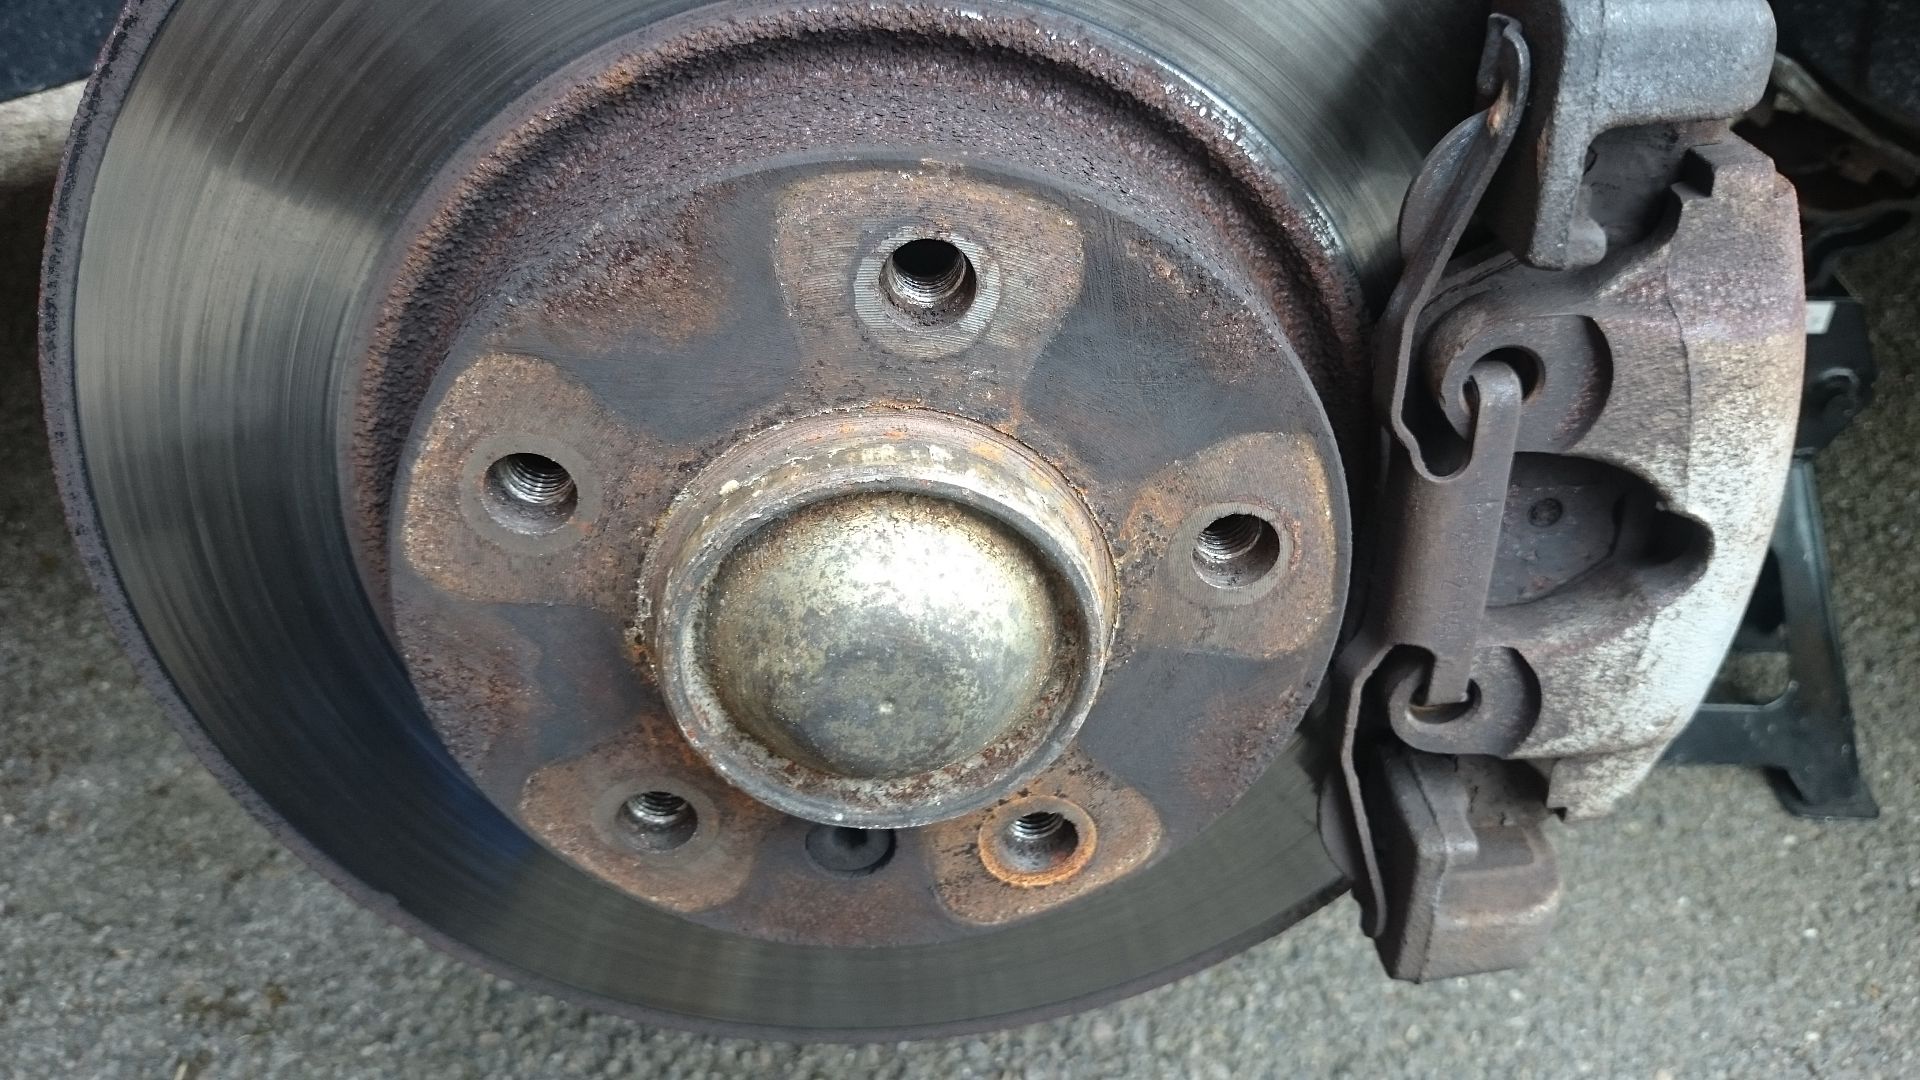
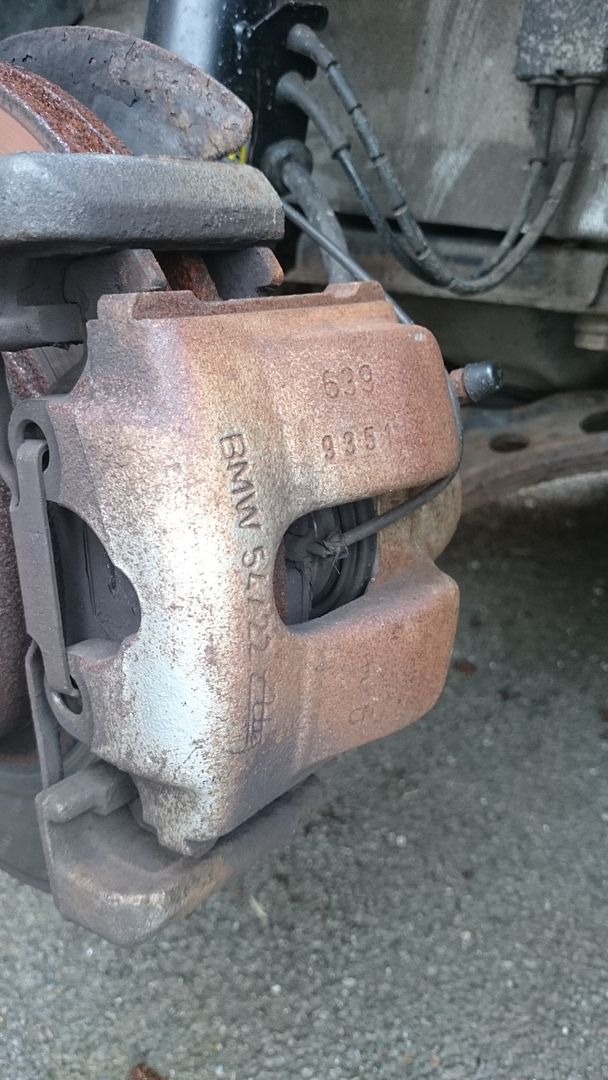
wire bruch on a drill (be careful of the abs wires and brake sensors) i only did the face of everything so it only looks good from the wheel side, which is all im bothered with at the moment.
i used a small brush and halfords 300 degree c engine enamel (matt black)
after
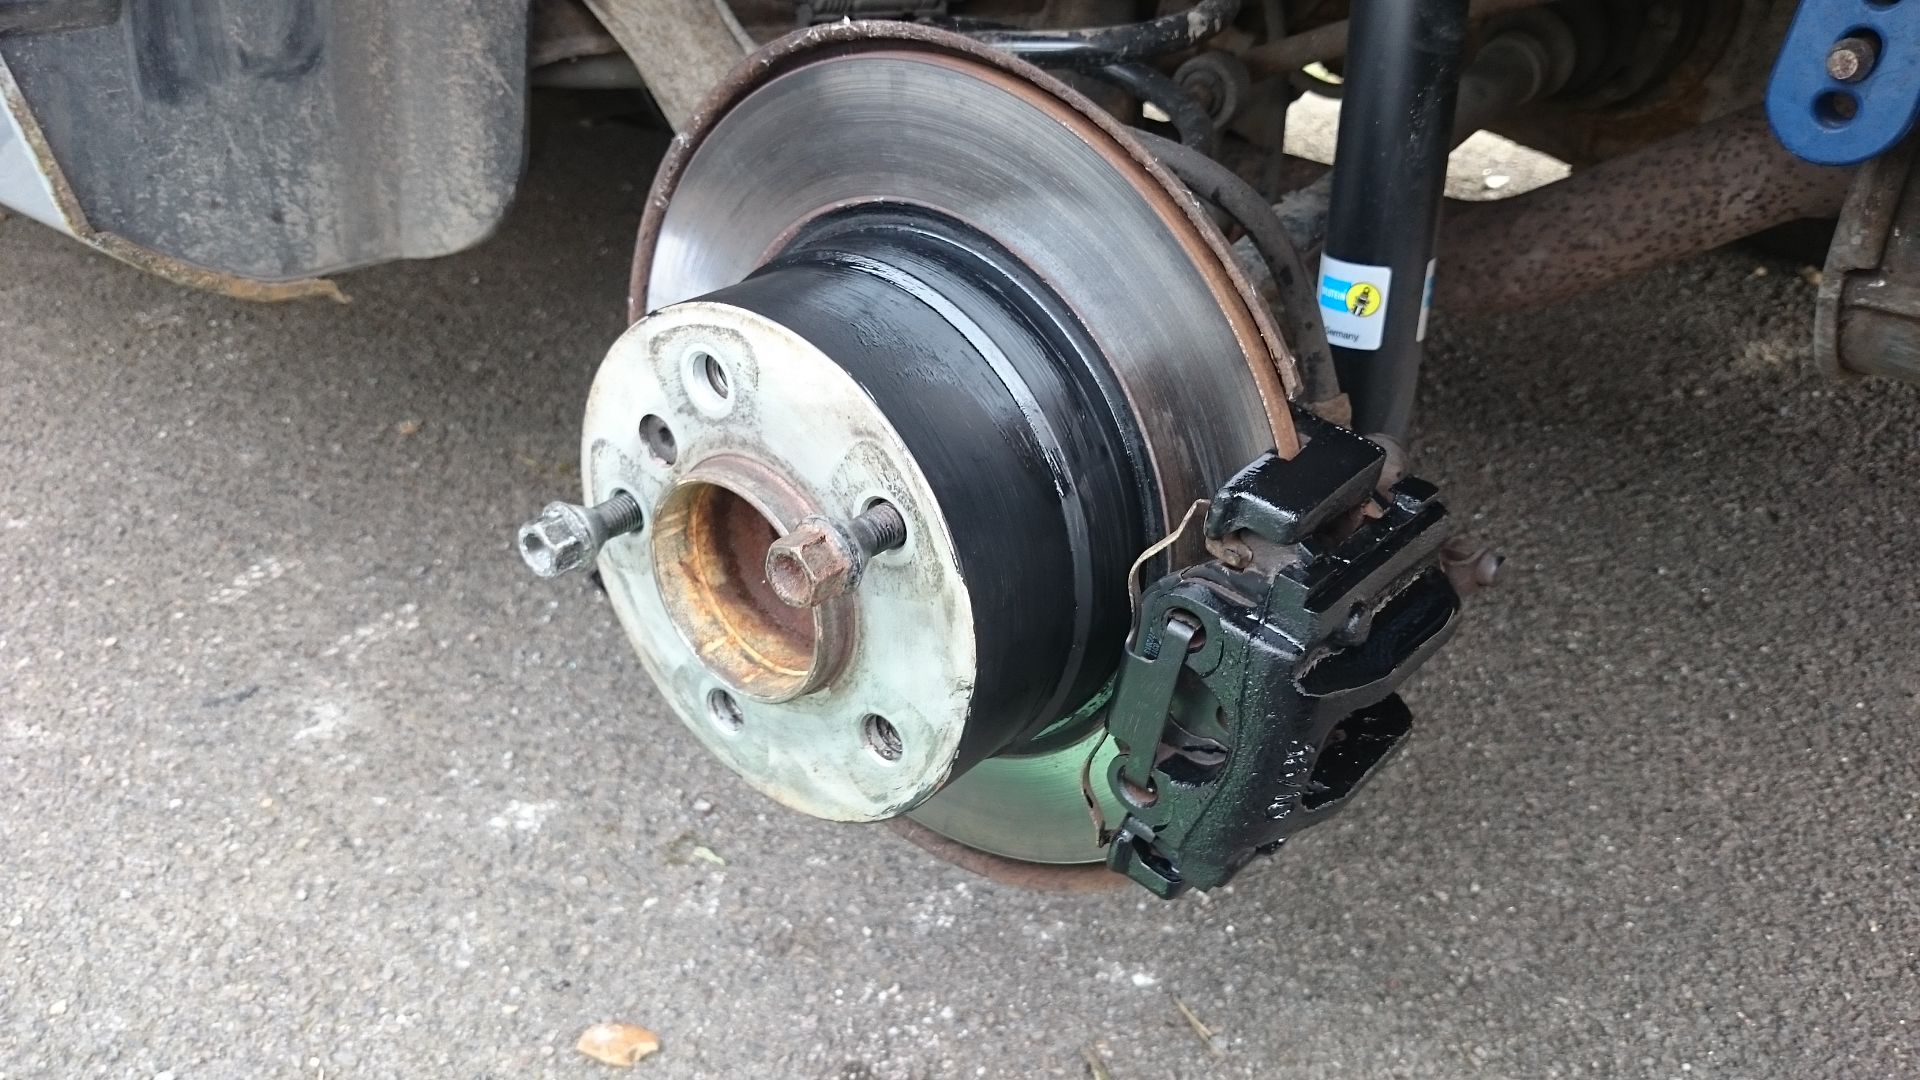
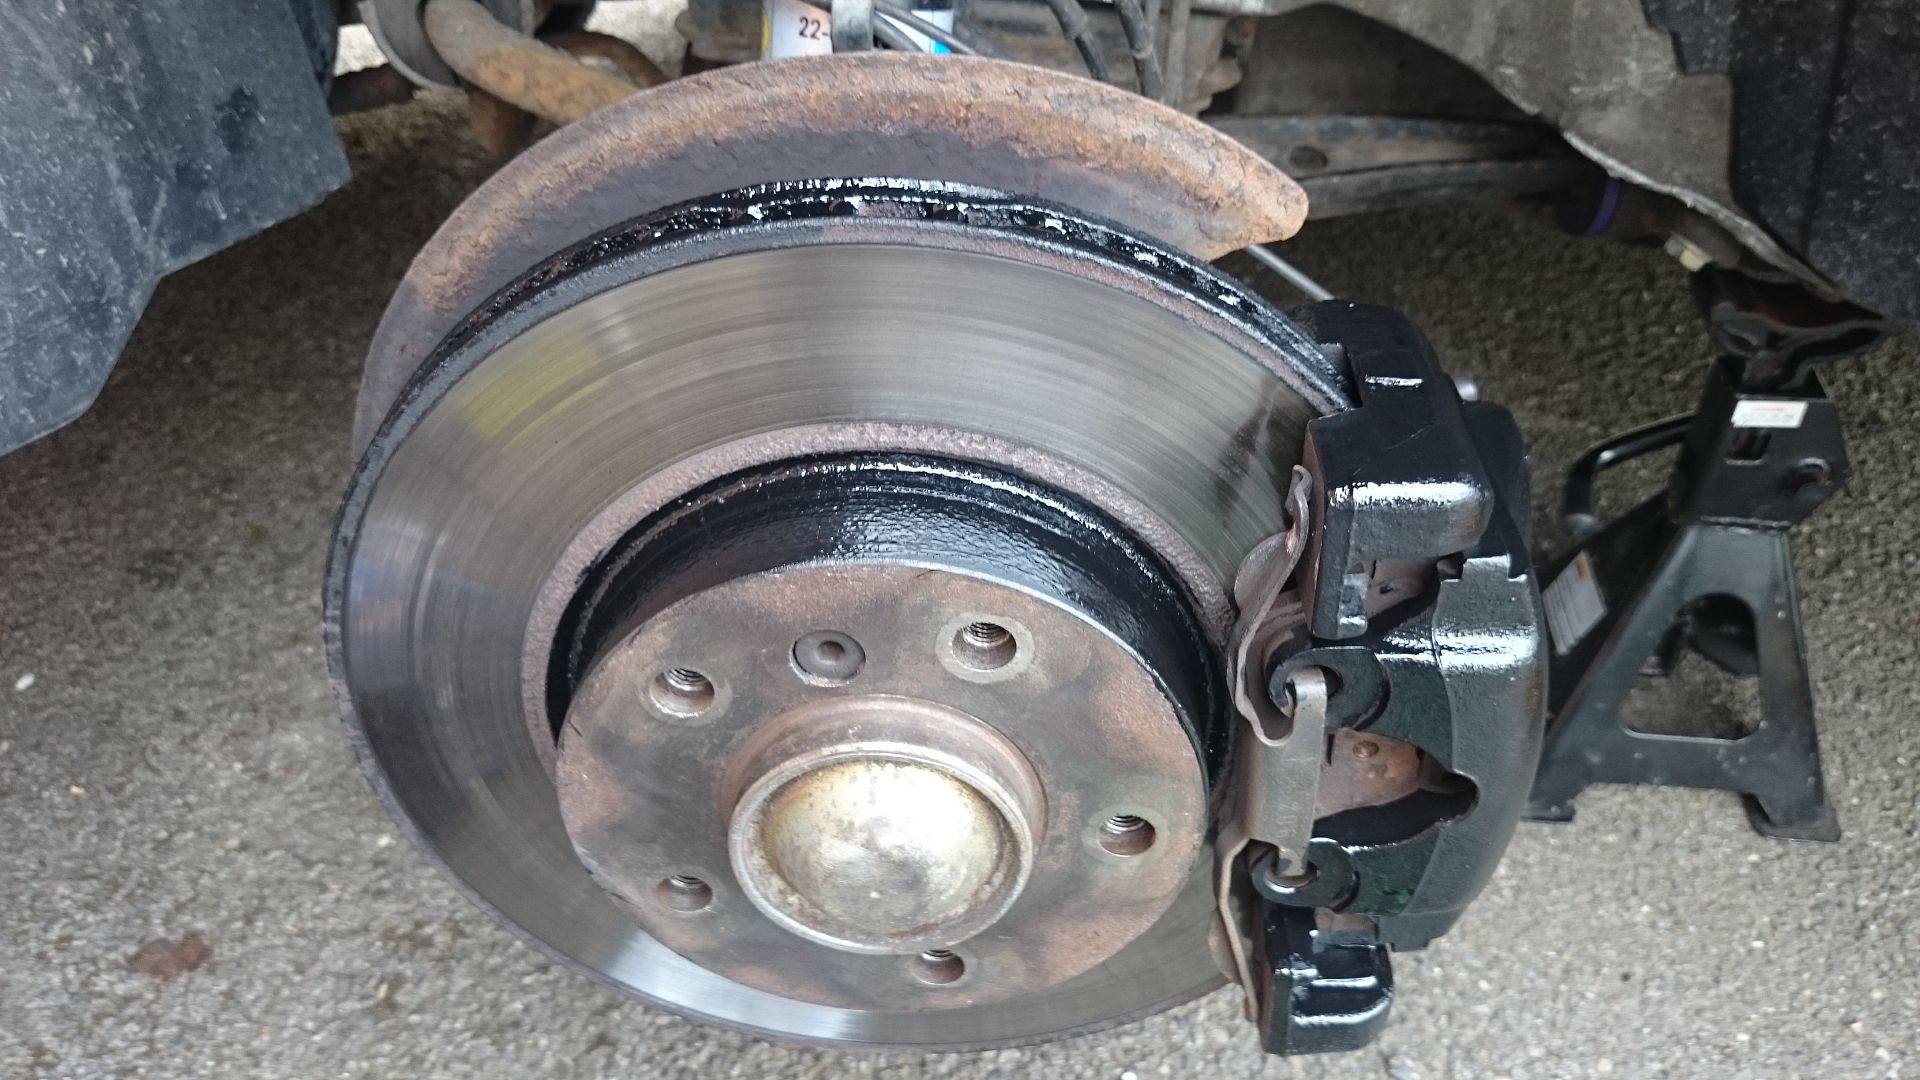
small job but massive change cosmetically, especially as the rear hubs are so big and really visible through the wheels.
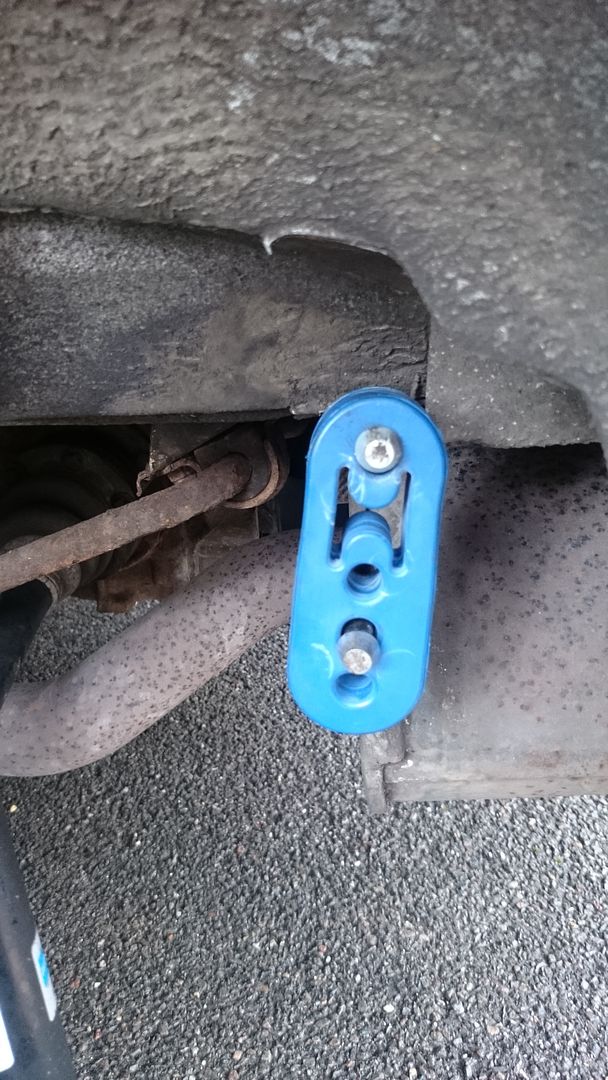
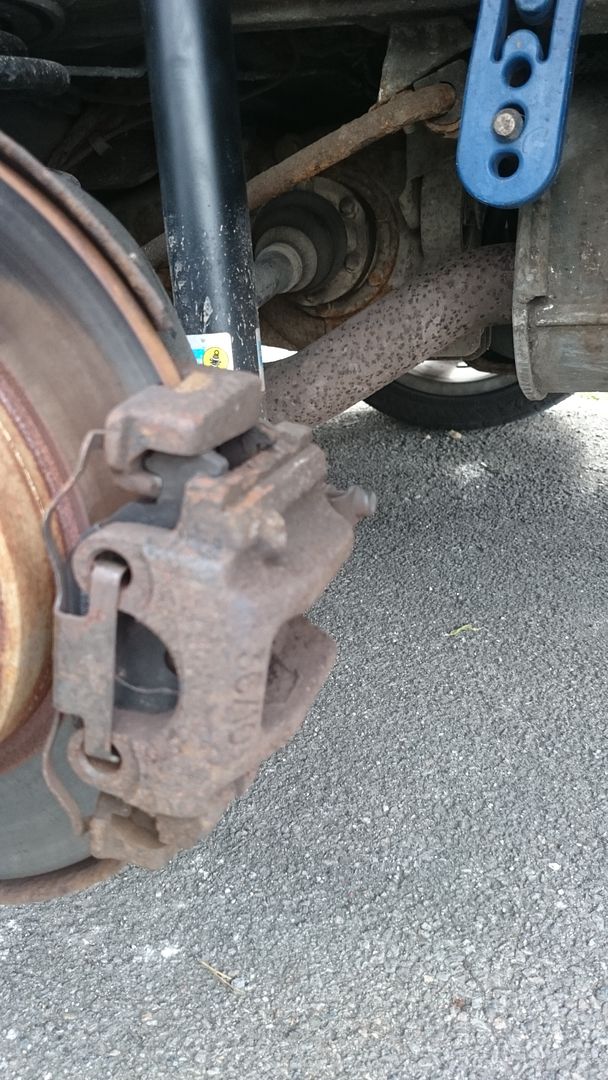
Whilst down there i noticed that:
The rear brake pad sensor is in a teriible state (it actually crumbled in my hands)
The front anti rolls bar bushes are fooked
the rear anti roll bar bracket on the nearside has snapped off!
so a quick phone to sopers this morning and i have, all new front and rear hardware soming for the anti roll bars
the front discs and pads will need changing at some point this year but will upgrade to either e46 fronts or porsche brembos.
before


wire bruch on a drill (be careful of the abs wires and brake sensors) i only did the face of everything so it only looks good from the wheel side, which is all im bothered with at the moment.
i used a small brush and halfords 300 degree c engine enamel (matt black)
after


small job but massive change cosmetically, especially as the rear hubs are so big and really visible through the wheels.
Whilst down there i noticed that:
The rear brake pad sensor is in a teriible state (it actually crumbled in my hands)
The front anti rolls bar bushes are fooked
the rear anti roll bar bracket on the nearside has snapped off!

so a quick phone to sopers this morning and i have, all new front and rear hardware soming for the anti roll bars
Got bored the other night after work and decided to bin off some dead weight from the car.
This might not be to everyone's taste but i personally would rather pay for and be recovered by the AA than drive on the crusted, decreped, awkward skinny piece of junk that is hidden under our cars.
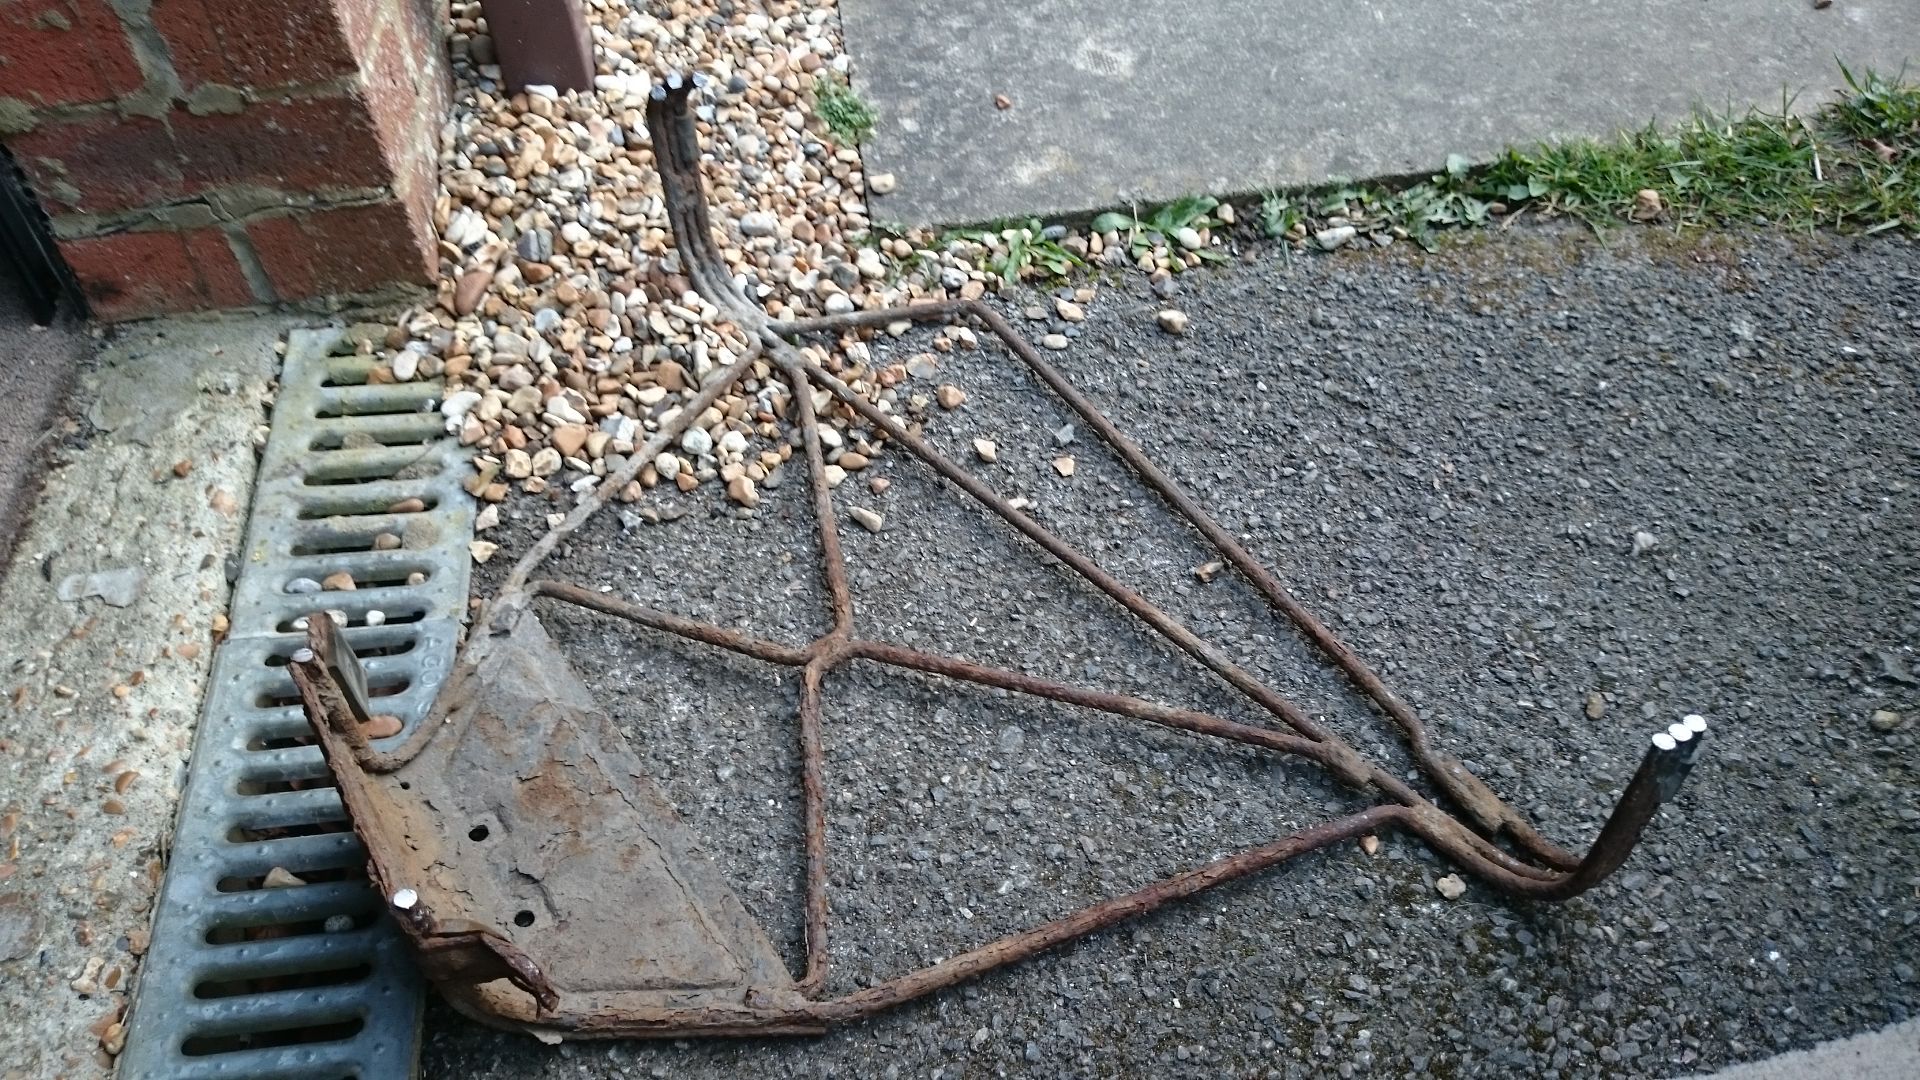
so i removed (permanantly) the spare wheel and carrier.
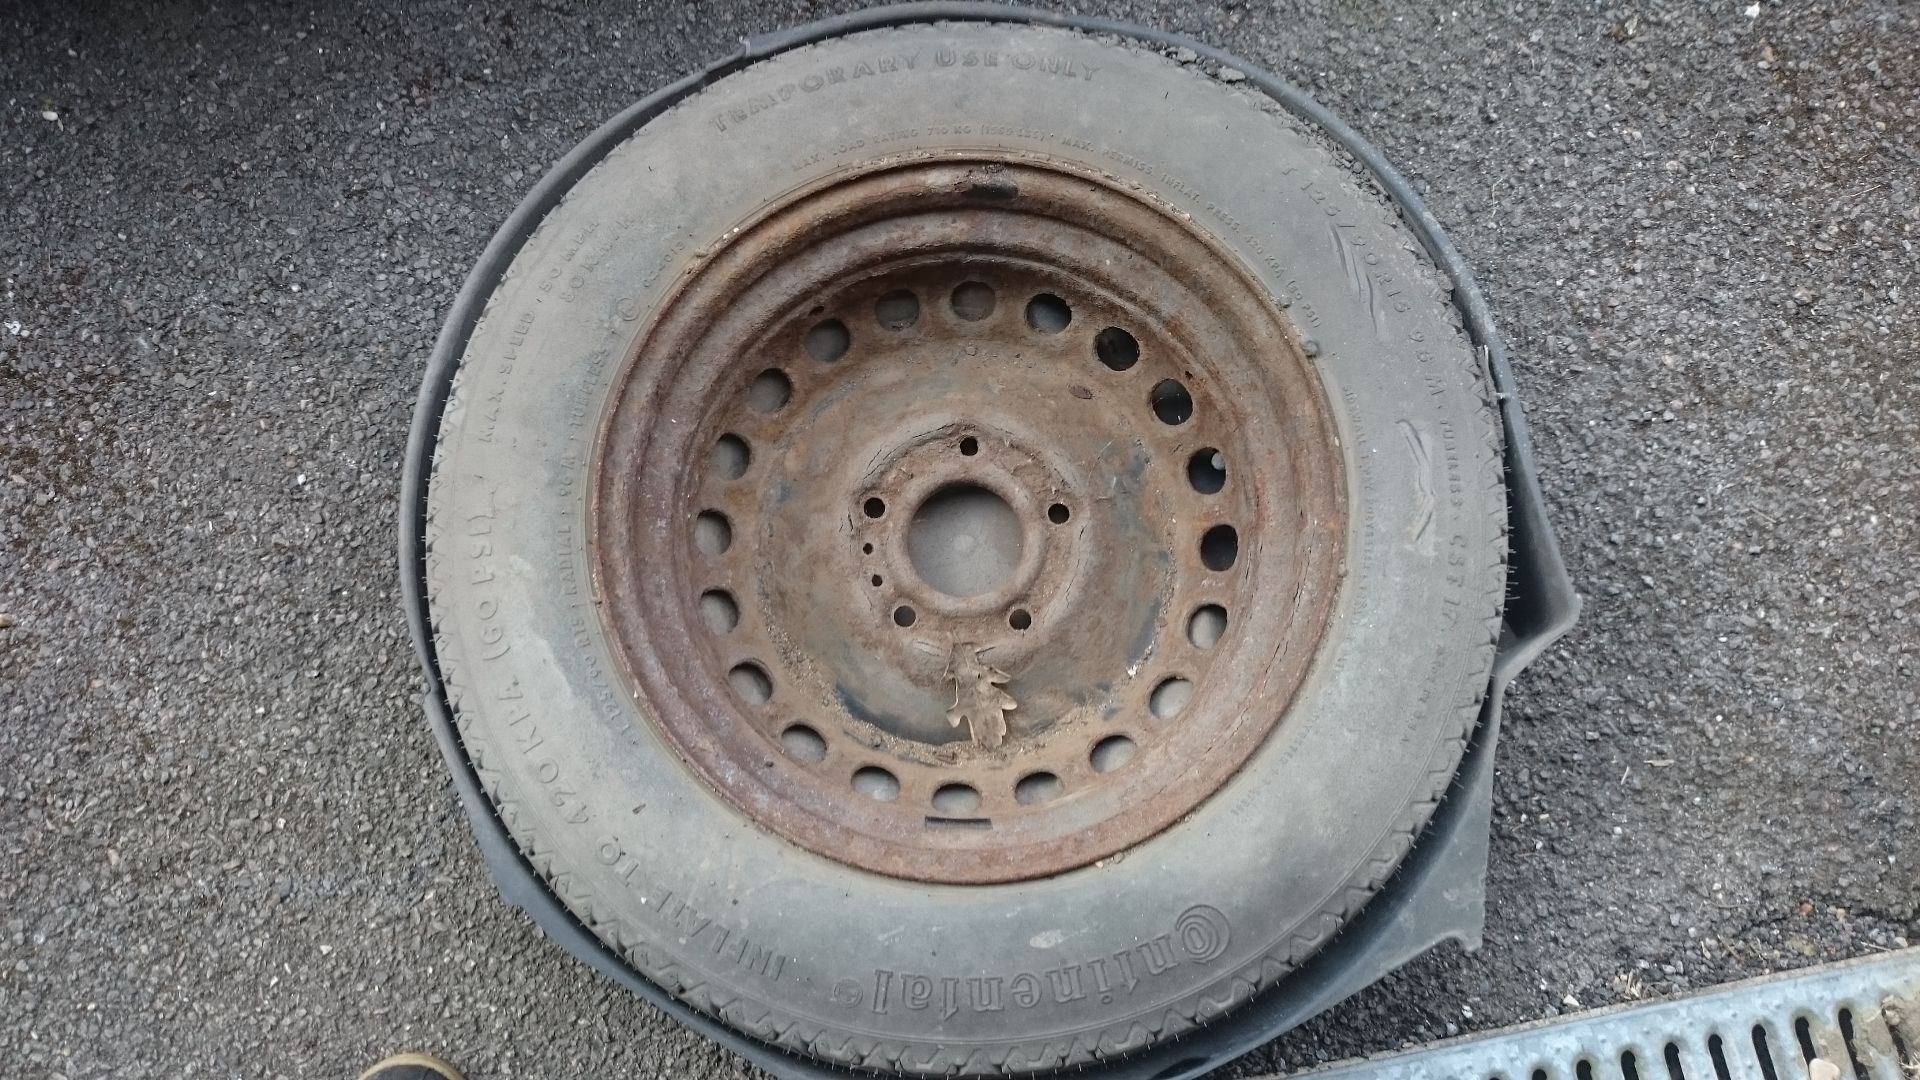
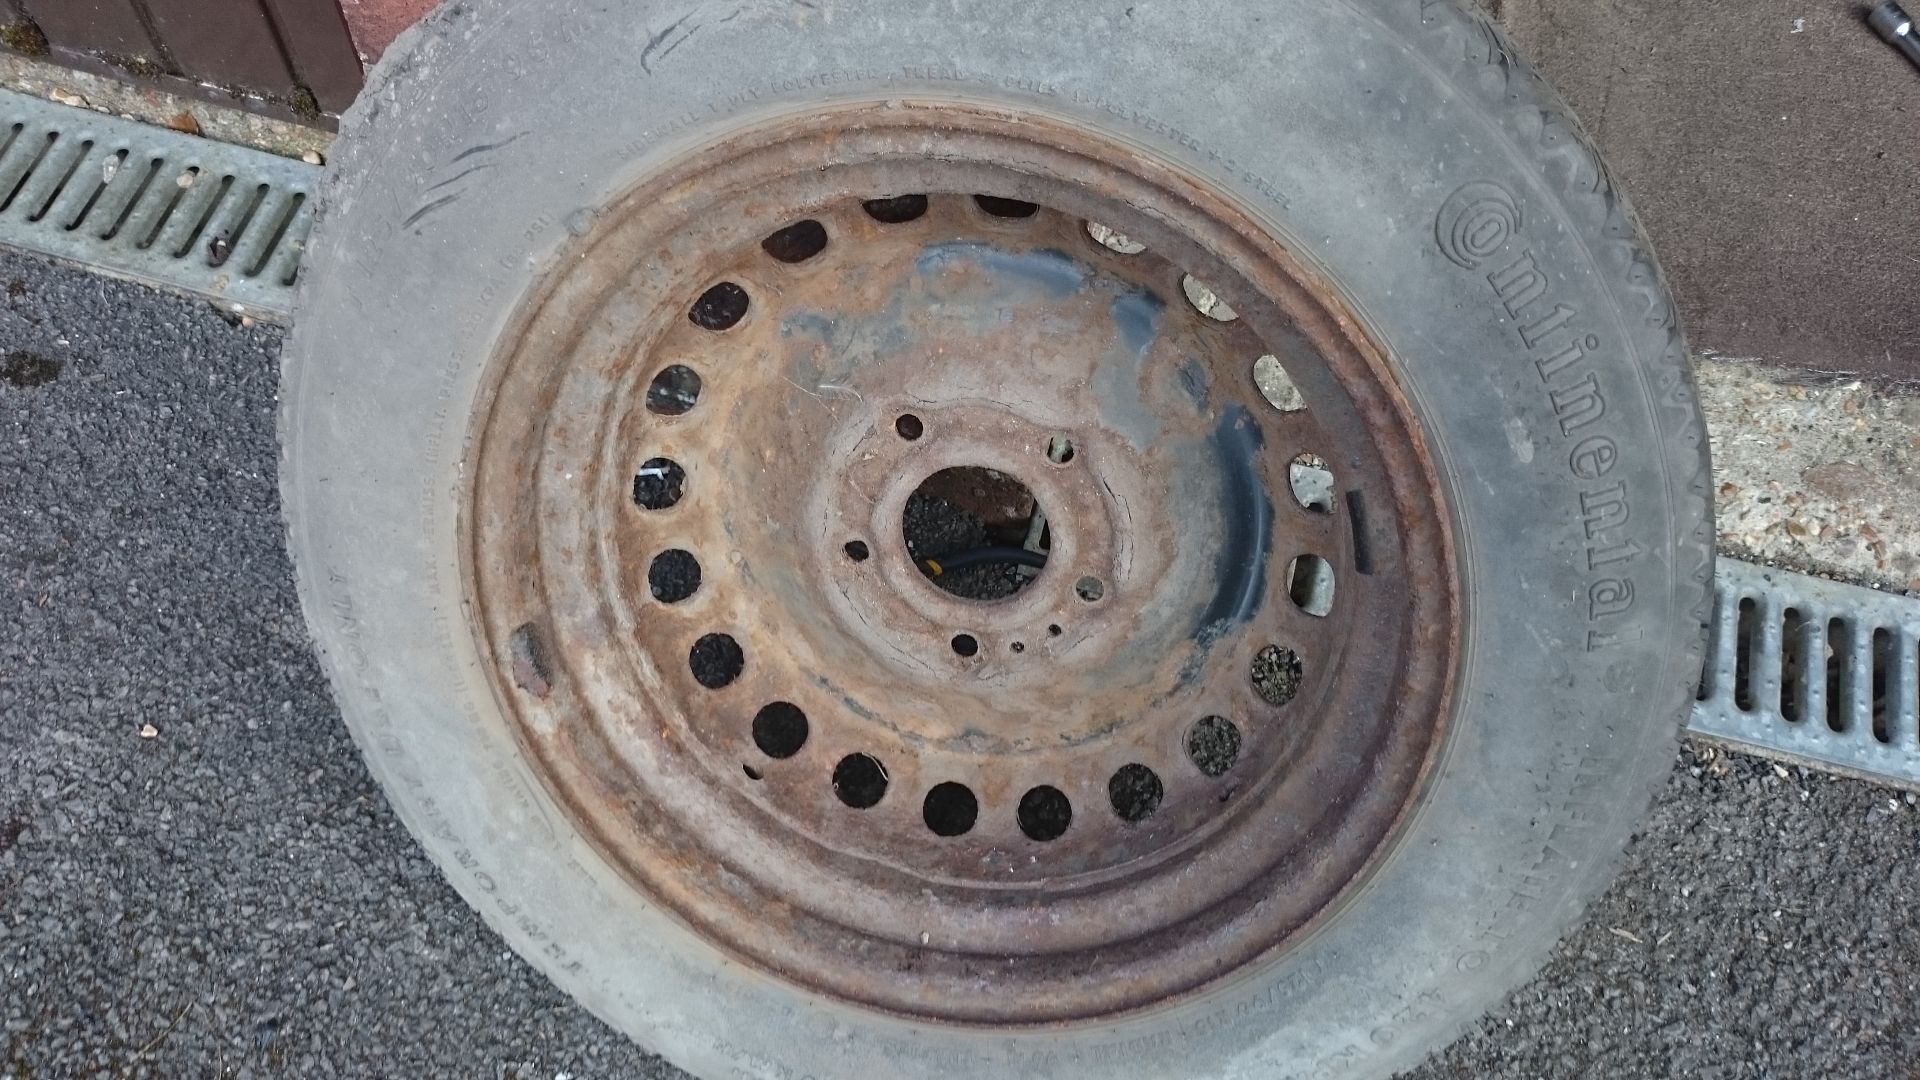
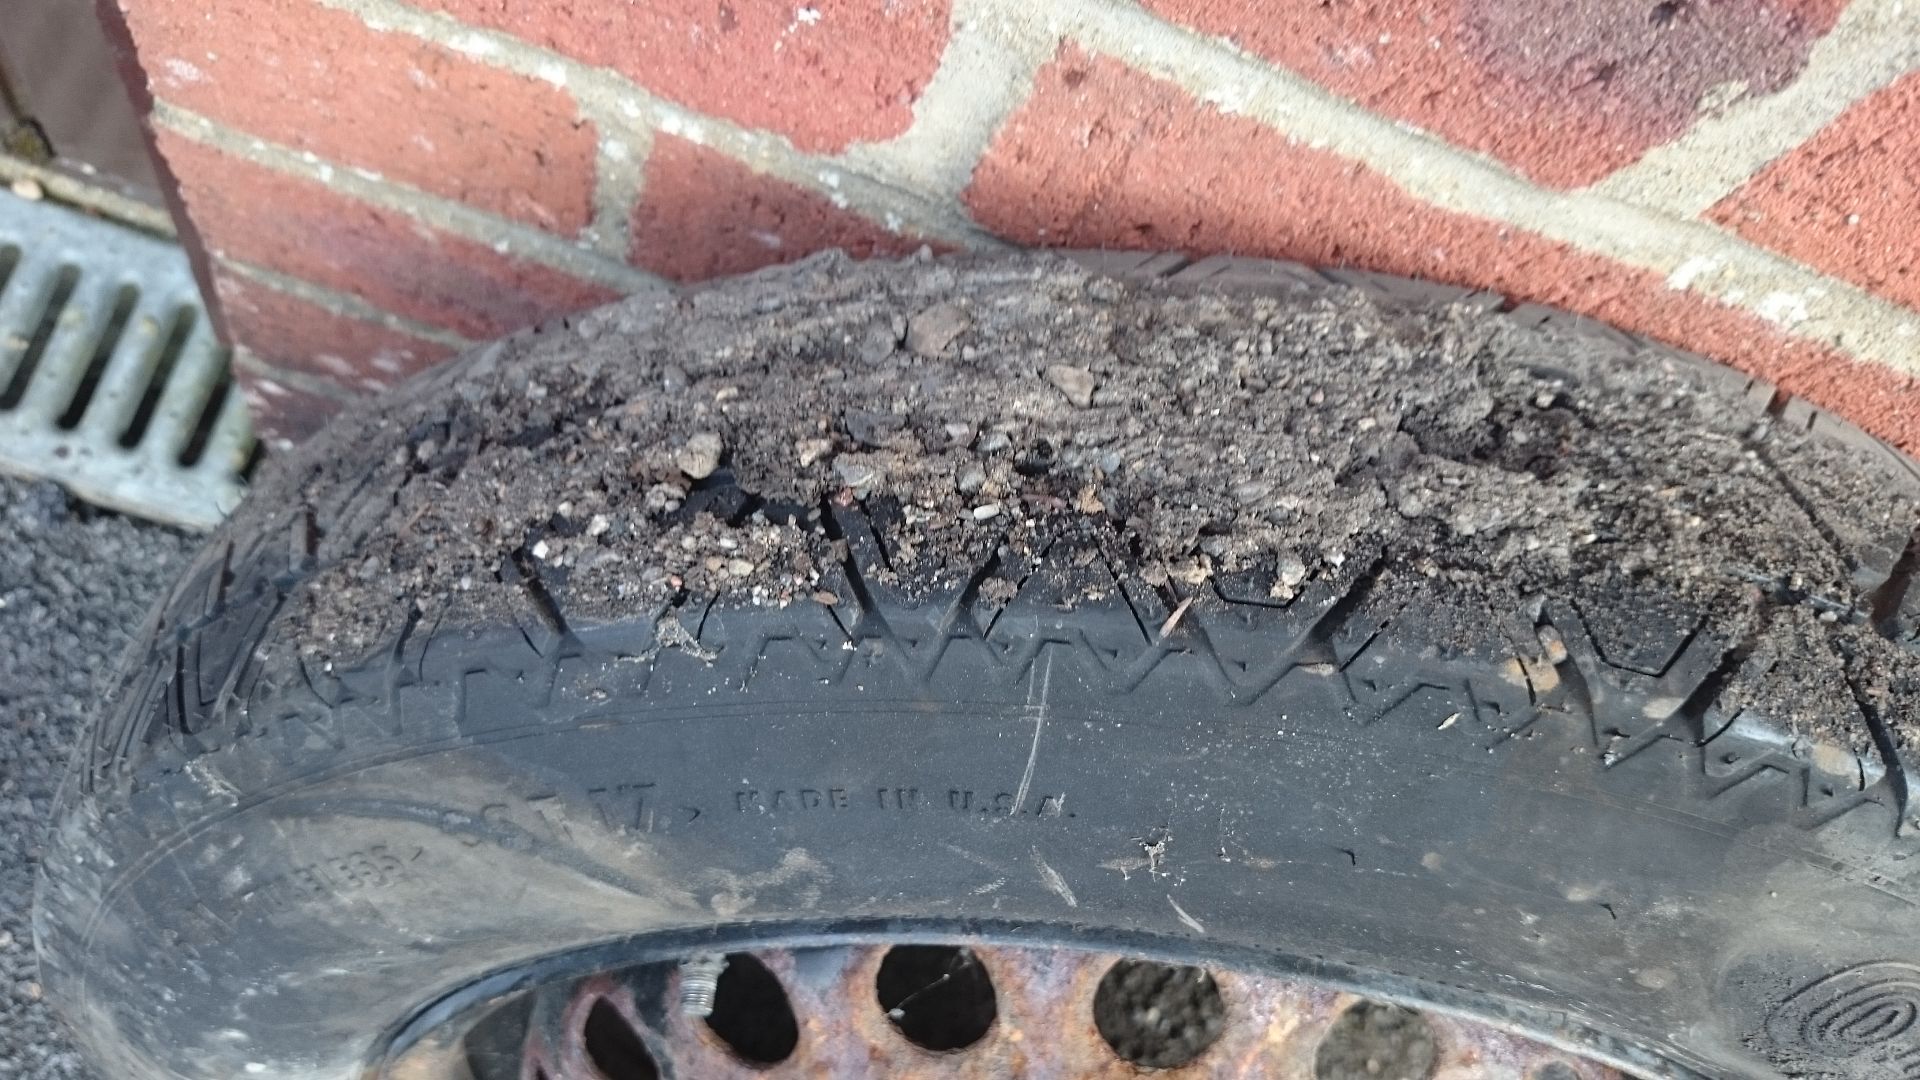
the old top up valve was welded onto the wheel with rust so even if i was at the side of the road it would have never been able to be fitted.
i then went to remove the carrier, it would come off as the bolts were rusted to oblivion
so i hacksawed it off, cut the grommets off and stuck them back on
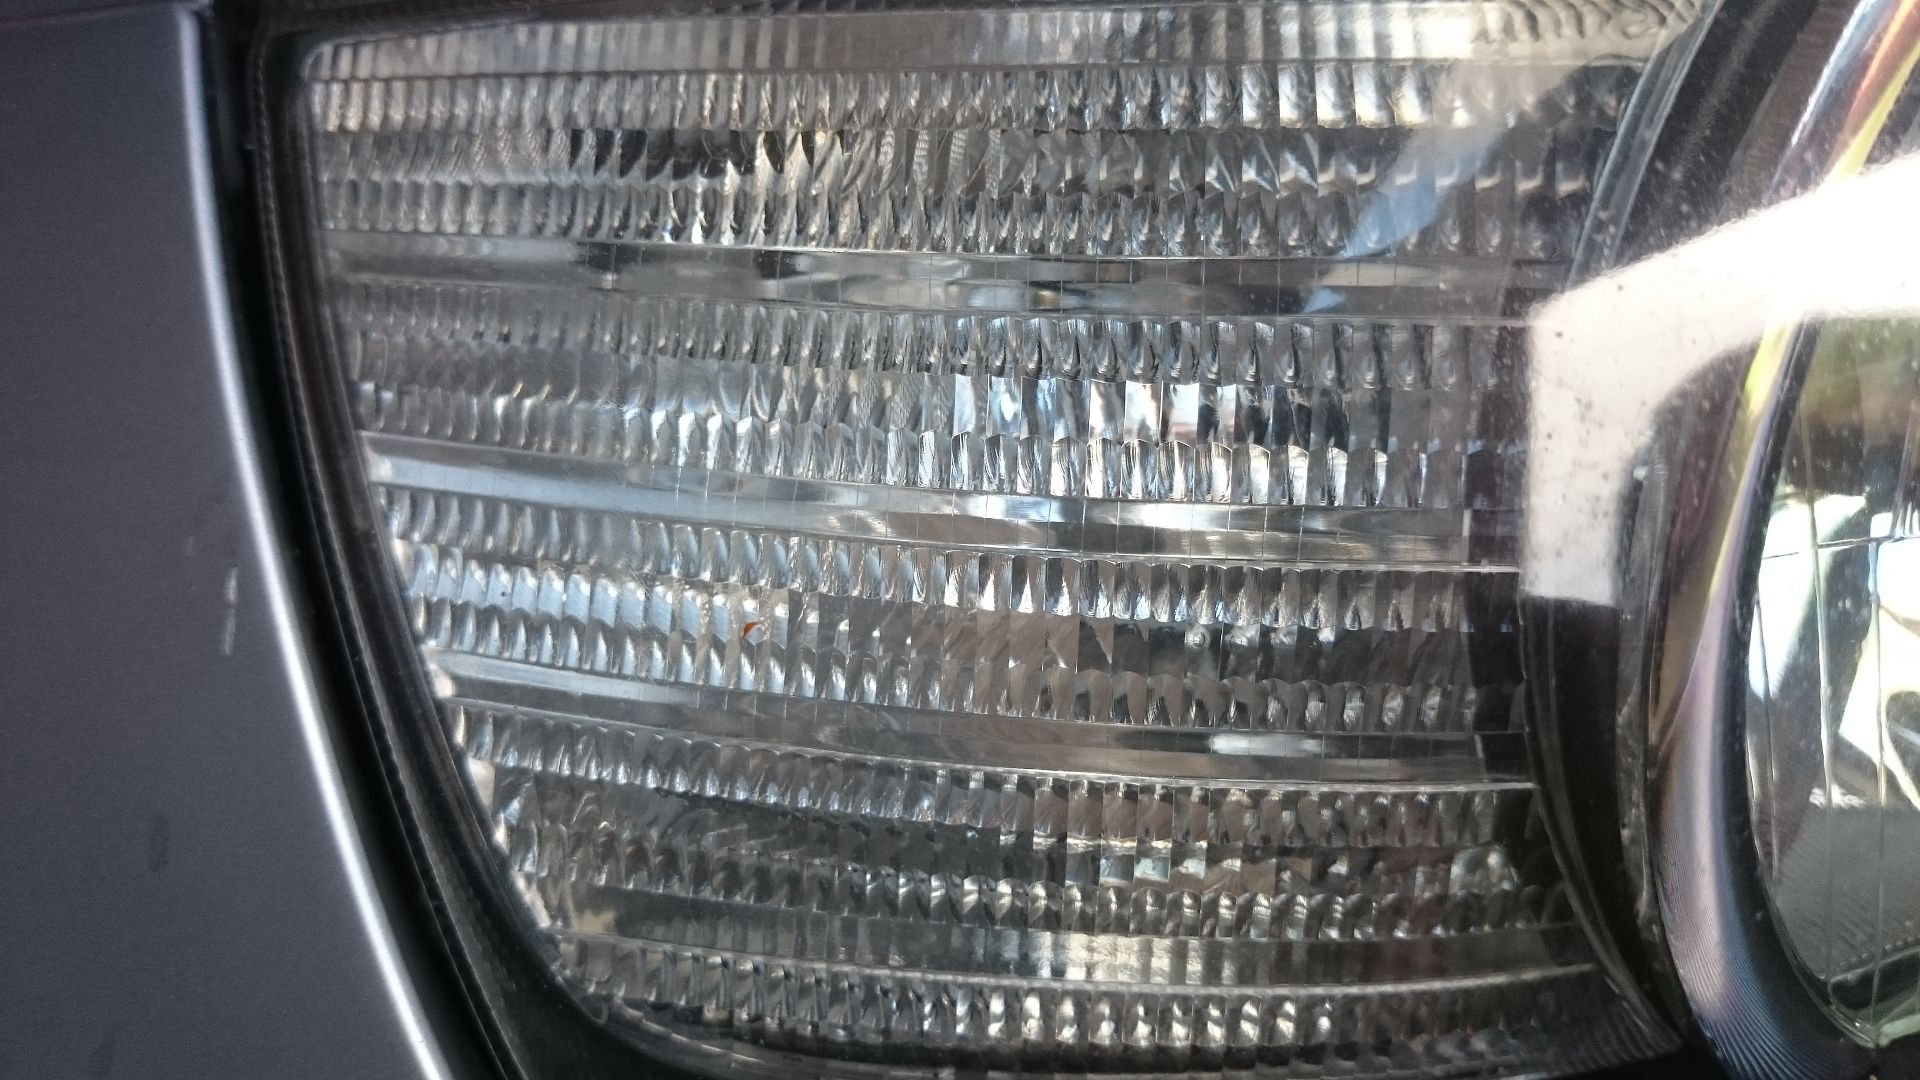
So I've been experimenting with led bulbs with this car as it's something I'm interested in and I wanted to remove all traces of orange from the car.
It would have been very simple to use the chrome coated bulbs but they still reflect orange when you look closely.
Standard cheap led replacements are fine on the rear and the side but due to the design of the reflectors and diffuser in the headlights they don't provide enough light and are not safely visible.
Here is a comparison of a standard halogen bulb (left) and a cheap led unit (right)
As you can see, the halogen is much brighter. In direct sunlight you can barely see the led.
I then swapped in some super 40w led bulbs. They are pricey but I think they look amazing.
Top = new led
Middle = halogen
Bottom = cheap led
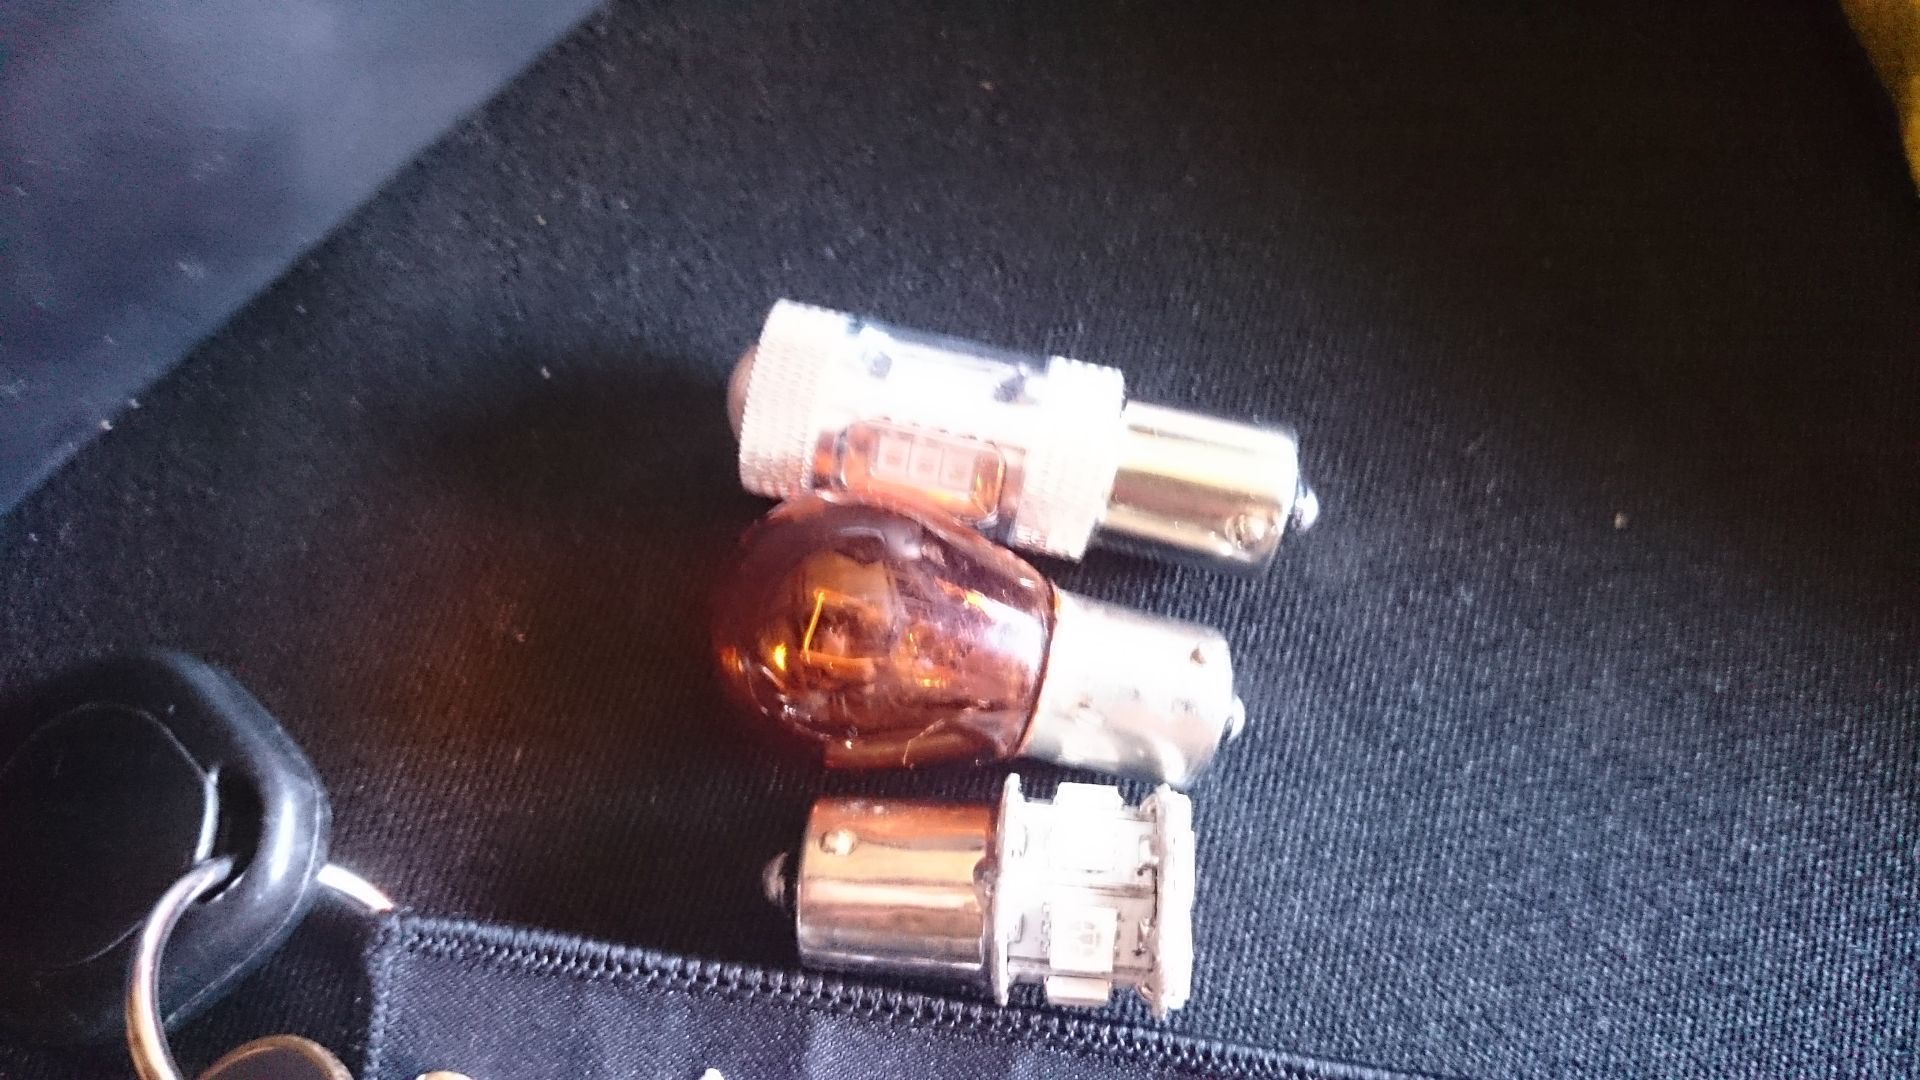
And the result. Much deeper and brighter than the halogen. Less heat, less energy needed and they don't reflect any orange at all
This might not be to everyone's taste but i personally would rather pay for and be recovered by the AA than drive on the crusted, decreped, awkward skinny piece of junk that is hidden under our cars.
so i removed (permanantly) the spare wheel and carrier.


the old top up valve was welded onto the wheel with rust so even if i was at the side of the road it would have never been able to be fitted.
i then went to remove the carrier, it would come off as the bolts were rusted to oblivion
so i hacksawed it off, cut the grommets off and stuck them back on


So I've been experimenting with led bulbs with this car as it's something I'm interested in and I wanted to remove all traces of orange from the car.
It would have been very simple to use the chrome coated bulbs but they still reflect orange when you look closely.
Standard cheap led replacements are fine on the rear and the side but due to the design of the reflectors and diffuser in the headlights they don't provide enough light and are not safely visible.
Here is a comparison of a standard halogen bulb (left) and a cheap led unit (right)

As you can see, the halogen is much brighter. In direct sunlight you can barely see the led.
I then swapped in some super 40w led bulbs. They are pricey but I think they look amazing.
Top = new led
Middle = halogen
Bottom = cheap led
And the result. Much deeper and brighter than the halogen. Less heat, less energy needed and they don't reflect any orange at all
Gassing Station | Readers' Cars | Top of Page | What's New | My Stuff