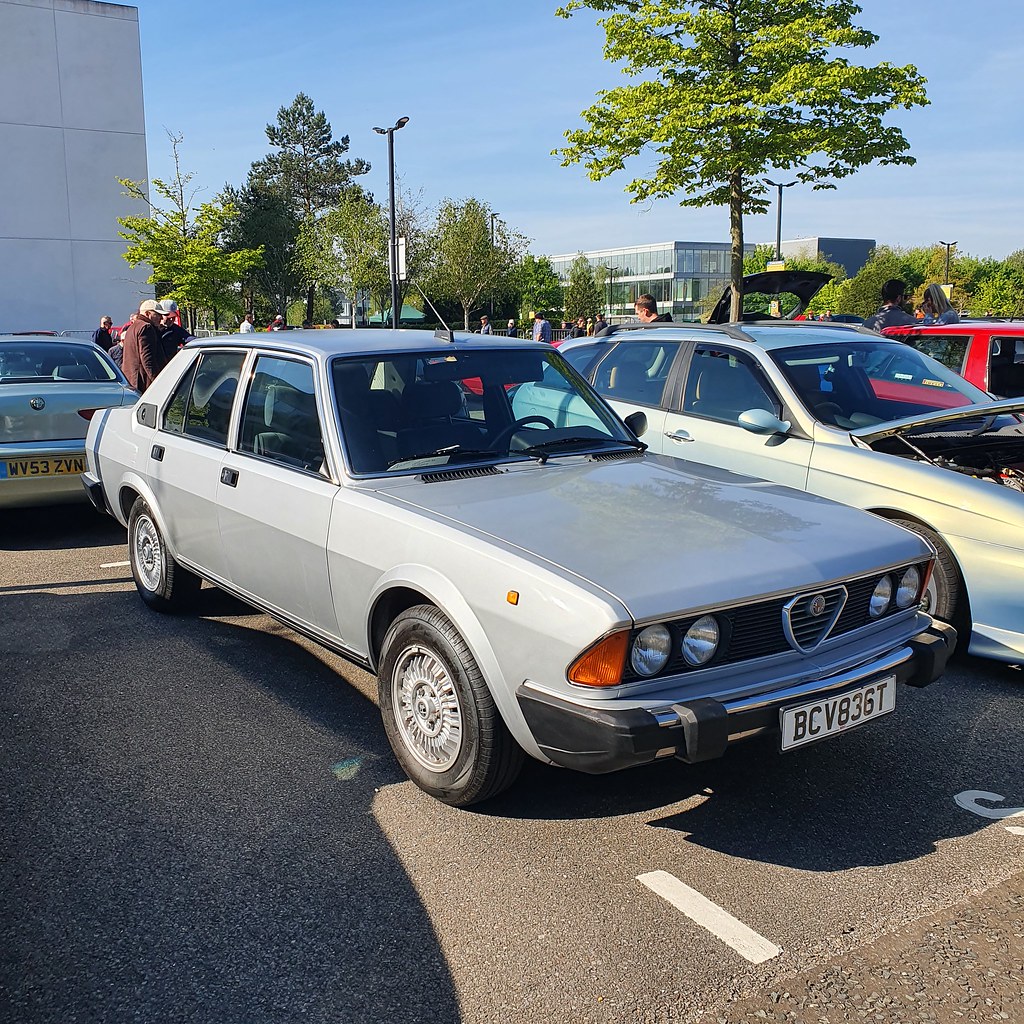
Alfa Romeo 164 Twinspark Super
Discussion


A good start to the day with a fresh MOT for the 164. At my usual place they can be ... gracious... with cars they know but this time a new tester was keen to tick every box.
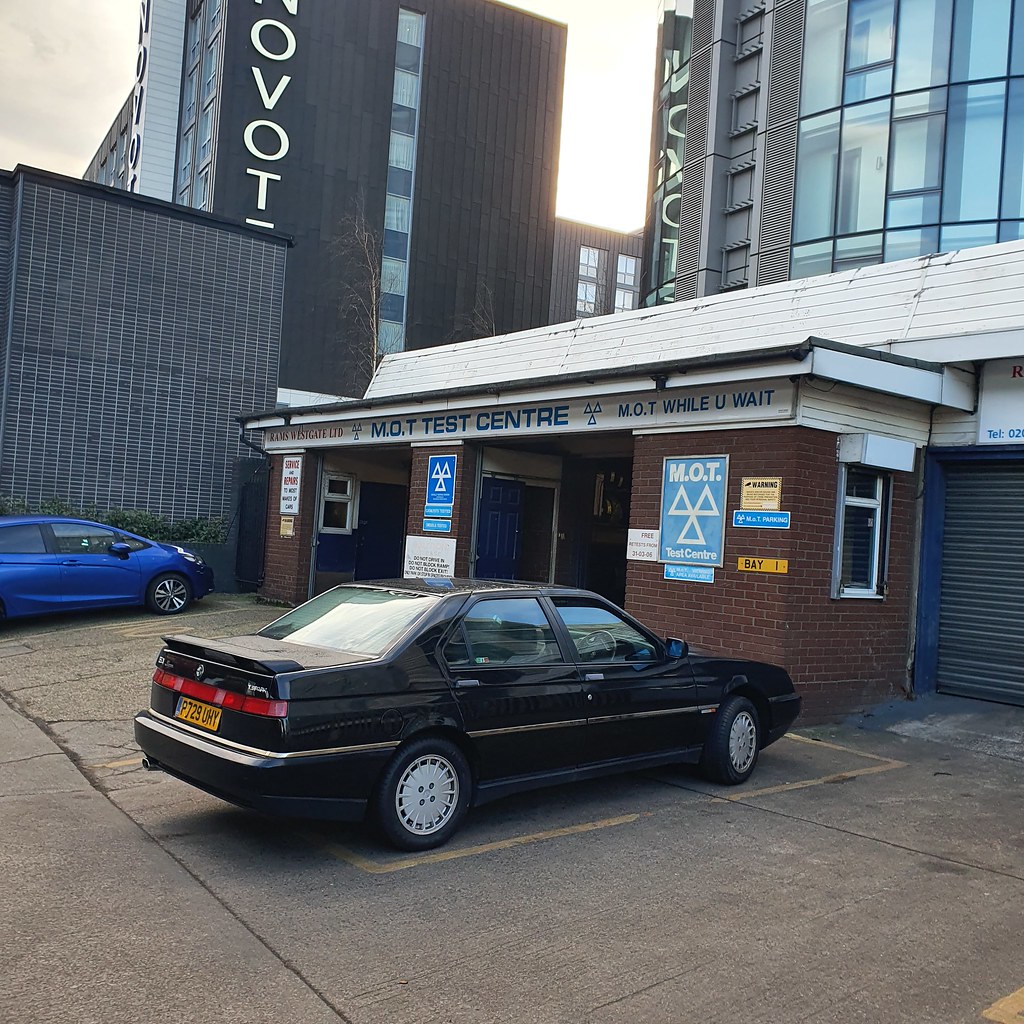
Fortunately a pass after minor fettling and mumbled promises to tackle a few areas that are getting close to breaking point. That distant sound you can hear is my debit card creaking under pressure of current italian stockpiling efforts.
After the test I went to pick up a piece of furniture, skirting the arbitrary ULEZ zone and ending up in tiresome traffic. Despite the chill, the engine temperature crept up past the 75 degrees where the fan usually kicks in. No issues, but upon arrival home it was clear the fan was not operational.
As I has the whole kerfuffle apart recently I had high confidence I could track down the issue:
1) Fuse in the interior panel, 10A - check.
2) Resistance of the actual temperature sensor on the radiator - check.
3) Shorting temperature sensor wires together to kick fan in - fail.

Right, that means a relay, wiring or general power issue.
4) Relay (according to the manual) above N/S headlight - fairly gungy. All contacts filed, and for testing swapped with the identical 2111 yellow 30A item used for the horn.


5) Retry 3) shorting - relay clicking, engagement but still no fan.

6) Check contacts between fan motor and wiring from relay - 12V but... intermittent.
Quick clean of all contacts, check for continuity and then shorting one final time - success!

Restart car, final check that it all works from the radiator sensor... fine. Sorted. Just contacts and connections.
I treated myself to a 'press pack' of the twin spark launch - bliss.


A truly fine typed memorandum with handsome photographs for reprint, including such quotes as:
"(Its) superb blend of performance, handling and economy provides an exciting alternative ti the anonymous ranks of executive saloons."
I think that sums up my interest and the experience with every turn of the key.
Fortunately a pass after minor fettling and mumbled promises to tackle a few areas that are getting close to breaking point. That distant sound you can hear is my debit card creaking under pressure of current italian stockpiling efforts.
After the test I went to pick up a piece of furniture, skirting the arbitrary ULEZ zone and ending up in tiresome traffic. Despite the chill, the engine temperature crept up past the 75 degrees where the fan usually kicks in. No issues, but upon arrival home it was clear the fan was not operational.
As I has the whole kerfuffle apart recently I had high confidence I could track down the issue:
1) Fuse in the interior panel, 10A - check.
2) Resistance of the actual temperature sensor on the radiator - check.
3) Shorting temperature sensor wires together to kick fan in - fail.
Right, that means a relay, wiring or general power issue.
4) Relay (according to the manual) above N/S headlight - fairly gungy. All contacts filed, and for testing swapped with the identical 2111 yellow 30A item used for the horn.
5) Retry 3) shorting - relay clicking, engagement but still no fan.
6) Check contacts between fan motor and wiring from relay - 12V but... intermittent.
Quick clean of all contacts, check for continuity and then shorting one final time - success!
Restart car, final check that it all works from the radiator sensor... fine. Sorted. Just contacts and connections.
I treated myself to a 'press pack' of the twin spark launch - bliss.
A truly fine typed memorandum with handsome photographs for reprint, including such quotes as:
"(Its) superb blend of performance, handling and economy provides an exciting alternative ti the anonymous ranks of executive saloons."
I think that sums up my interest and the experience with every turn of the key.
Cambs_Stuart said:
Always good to see an update. How is the wiring generally holding up? Did Alfas of this era avoid the biodegradable wire coating of other makes?
Yes luckily completed dodged that bullet, only to fall headlong into the Saab, as you will recall!The 164 has not been far since the rebuild and MOT, but I have been plotting away in the background...
A good run down to Somerset to clear the brain on Friday was, as always, an therapautic use of hydrocarbons that the Alfa much appreciated. Good to clear the mind given the abhorrent turn current geopolitical events have taken, and a drive to see my dad to have a good chat (he worked in Kyiv for years and it was an incredibly place to visit as an 18 year old) was required.

It needs a proper deep clean, the paint on the wing mirror and the driver's door is not improving with another winter, but everything is working and its a grin-inducing drive on those A roads and hills of Somerset.
Suspension rebuild has made a significant step - having spoken to a numebr of other owners, and failed to secure the extinct front struts, I pushed the boat out to secure Yellowspeed Racing's custom coilover set. Feedback from those that installed this adjustable setup has been very positive, so I am excited to see how this comes together, and I did manage to secure them for the all-in fee of £730 which is very good compared to all the individual parts required for a standard setup.


As I have NOS wishbones, the next stage is to speak to Phil at Alfacraft and see if we can do the entire front subframe at the same time as all four corners. Then I can obtain all the bushes and powder coating necessary prior to a two day ramp booking in May, following Brooklands Auto Italia.
I have the front a rear subframes, trailing arms, pipes, hoses, engine mounts and, perhaps, some spare bolts, so I should be all set for a monster undercarraige refit this year.
No doubt we will find a few rust spots and holes to treat in the nooks & crannies, but if I expect it, they can't hurt me, right?
Oh I should powder coat that manifold if I am going to a coater too...
Stuart - I belive solid top but lots of adjustment. A lot of the 164 drivers in the forums and owners group have been very surprised at the quality and trabsformation. Mine is on the original fronts so we'll see. Sprinfs are about to go, as are the spring pans at the front!
Steven - PM sent, thank you for the note.
Great to hear a 166 being kept up! I was cobsidering one as ULEZ transport but with the further 2023 expansion planned I may have to rethink my life in general.
No, Phil is not well. He needs a holiday and a good rest - plus a new workshop if the rumours are true.
A jaunt to see a freind in the New Forest and his project - a Fiat 2300 Coupe. I had to take a few photos with the 164 on sinister skulking duties.
Far off photos in the sunset as it is pretty grubby!


Hard day's work removing the mothy interior. Should be a good base.

Obligatory 'half car half garage' shot, to pretend its in Octane or something:

Booked a load of suspension dismantleables into a powder coater for April, hopefuly for the suspension refresh now booked in with Phil for first week of May, right after Auto Italia.
Just nice to be able to drive in daylight and work in a T shirt for once!
Far off photos in the sunset as it is pretty grubby!
Hard day's work removing the mothy interior. Should be a good base.
Obligatory 'half car half garage' shot, to pretend its in Octane or something:
Booked a load of suspension dismantleables into a powder coater for April, hopefuly for the suspension refresh now booked in with Phil for first week of May, right after Auto Italia.
Just nice to be able to drive in daylight and work in a T shirt for once!
Cambs_Stuart said:
That looks like a great project. I always find it's slightly less stressful to work on a friends car.
Yes, and you can always call in some help on your own project down the line! This is a good one though, and he's got great plans for the 2300.e28525e said:
I just read the whole thread from the start. Well done, mate. I am a BMW man, through and through - but I currently own a little 67 step nose 105, which has sparked my interest in other Alfa-ry things. You have a great way of wording things and the little bits of humour really make the thread. Top work.
Thanks, appreciate it and glad to hear its of interest - I do foresee something 105 shaped in my future, though values have gone slightly to boiling point of late.It was Auto Italia yesterday, a highlight of the year for me as Brooklands comes alive to the sounds of fantastic machinery and the sheer volume of awesomeness makes it feel like 5 separate shows.
This year, as always, I left it to the last minute to make the 164 respectible, though I took heart to the fact that while the car has picked up marks in the 8 years of ownership, under the bonnet and in key places it is looking better and better.
Obligatory snow foam shot, as I know you're all itching to see another one of those on PH. Super resin polish applied after a good two bucket scrub, the ultimate 'quick' I have found.

After a dismal week that had me cursing not wearing a jacket on my commute, I skipped downstairs at 7am, giddy as a spring lamb, as the sun started blazing in an agreeable imitiation of an Italian spring. This year some friends joined me for a small convoy, and after a traditional early morning cafe, we left at 8am to secure our prized parking spots.
How often do you see a Lancia Flaminia in your rear view mirror?

As we neared Brooklands, the quality of traffic improved dramatically - gone were lumbering SUVs and the graphite hordes of german solidity, in came the flocks of cars actually designed with care, exhaust notes tuned for intrigue not volume and a rapid increase in road manners and politeness. Imagine if this was the typical traffic jam:

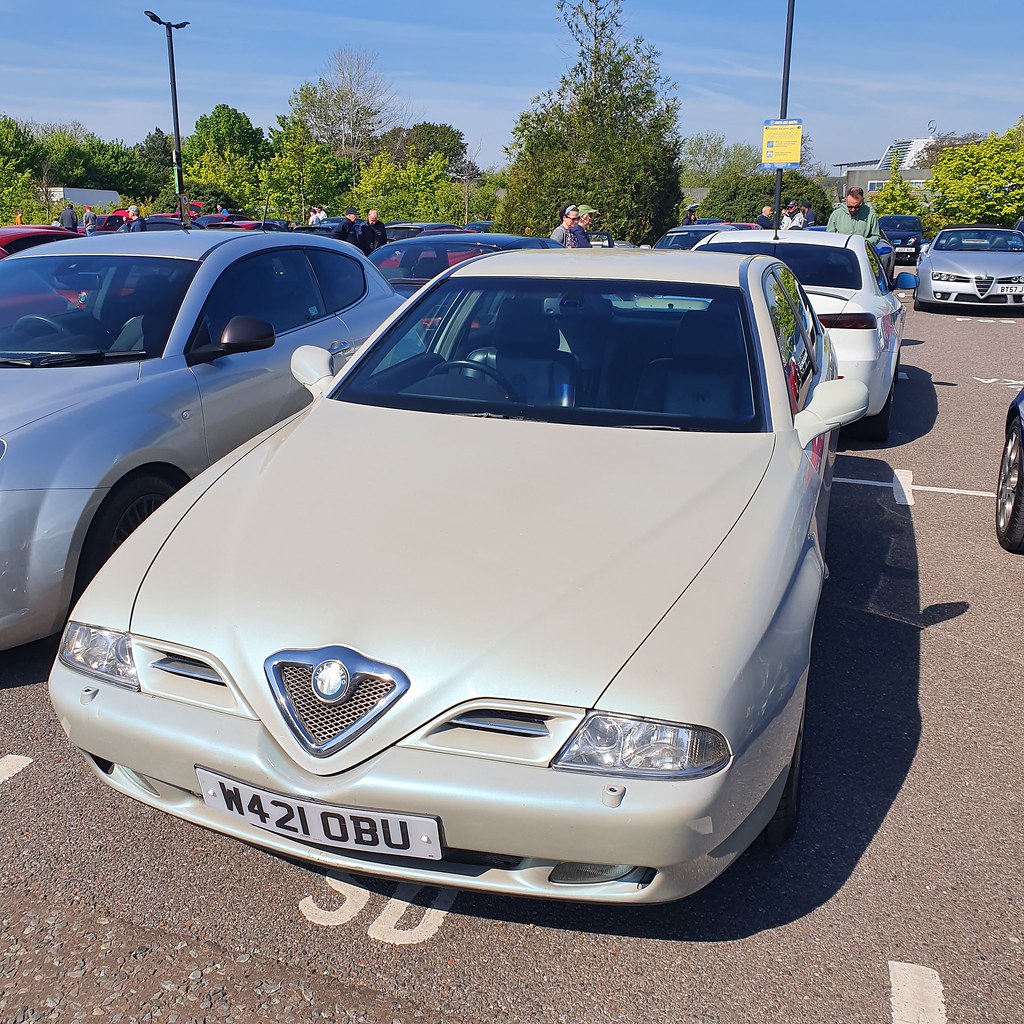
THis year I was the only mk2 164 and only twinspark, I think, though it was exciting to park next to this immaculate V6 in white for a contrast:


What I really love about Auto Italia is the atmosphere. After lockdown and a grey winter, everyone was very keen to catch up, make new friend, excitedly point out tiny interesting car things and generally create a welcoming Brooklands. Maybe it was the weather or the hydrocarbons swirling in the air, but everyone was wearing smiles and genuinely excited to get back to a proper car show.
While I had finished my first Alfa parking duties, my friends in the Lancia had secured pride of place. I'll hand over to the photos now to give you a flavour of the day.


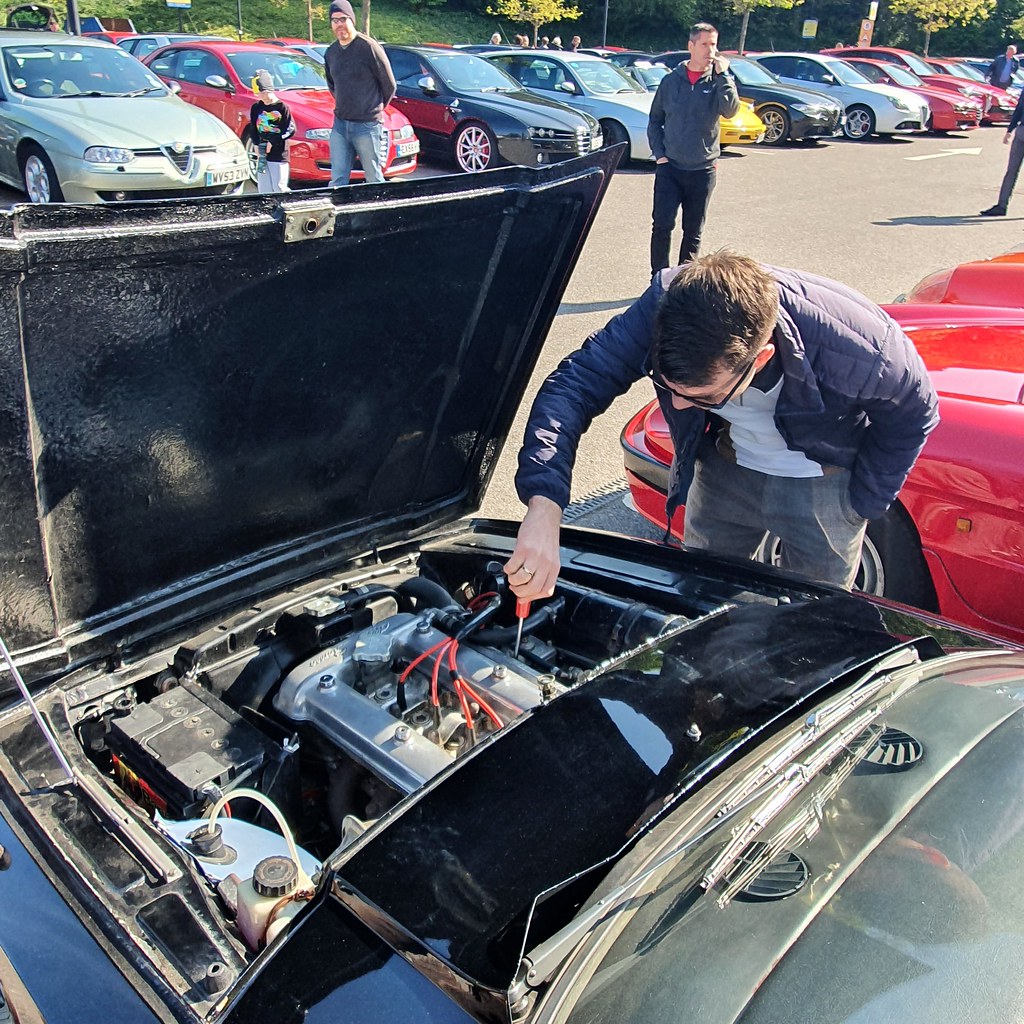
A stuttering Zagato attracted the attention of my friend, and before I could stop him he was out twidling the screws on the carbs.... I am alwasy very careful when volunteering to 'help' on other people's cars, especially a Zagato! But fortunately he knows his stuff and got the idle back to a better shape for the owner.


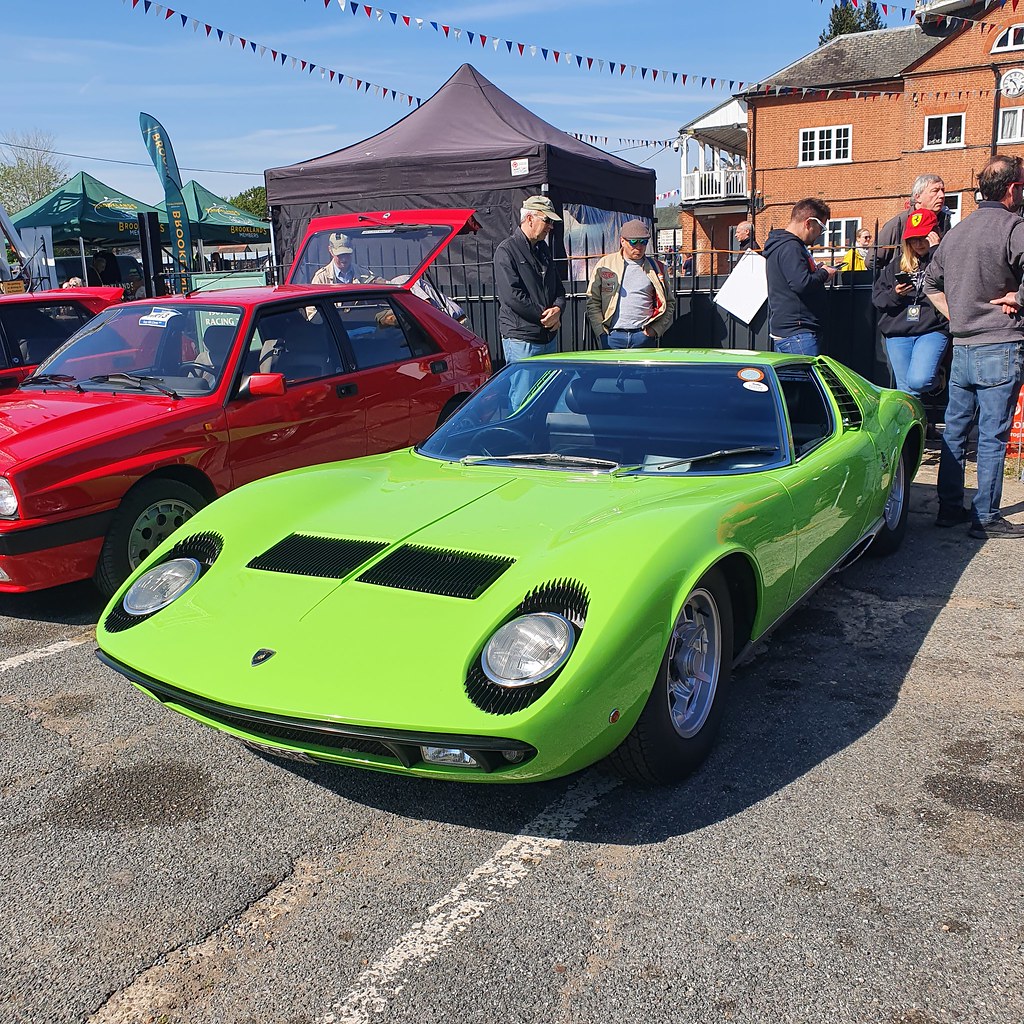
There's a whole load of Ferraris and things but I'm guessing no one is interested in that. Also no one is interested in the Lambourghinis revving their inadequate ECUs to redline in the middle of crowd of people. It just marks them all out as failed carcasses.
This year, as always, I left it to the last minute to make the 164 respectible, though I took heart to the fact that while the car has picked up marks in the 8 years of ownership, under the bonnet and in key places it is looking better and better.
Obligatory snow foam shot, as I know you're all itching to see another one of those on PH. Super resin polish applied after a good two bucket scrub, the ultimate 'quick' I have found.
After a dismal week that had me cursing not wearing a jacket on my commute, I skipped downstairs at 7am, giddy as a spring lamb, as the sun started blazing in an agreeable imitiation of an Italian spring. This year some friends joined me for a small convoy, and after a traditional early morning cafe, we left at 8am to secure our prized parking spots.
How often do you see a Lancia Flaminia in your rear view mirror?
As we neared Brooklands, the quality of traffic improved dramatically - gone were lumbering SUVs and the graphite hordes of german solidity, in came the flocks of cars actually designed with care, exhaust notes tuned for intrigue not volume and a rapid increase in road manners and politeness. Imagine if this was the typical traffic jam:
THis year I was the only mk2 164 and only twinspark, I think, though it was exciting to park next to this immaculate V6 in white for a contrast:
What I really love about Auto Italia is the atmosphere. After lockdown and a grey winter, everyone was very keen to catch up, make new friend, excitedly point out tiny interesting car things and generally create a welcoming Brooklands. Maybe it was the weather or the hydrocarbons swirling in the air, but everyone was wearing smiles and genuinely excited to get back to a proper car show.
While I had finished my first Alfa parking duties, my friends in the Lancia had secured pride of place. I'll hand over to the photos now to give you a flavour of the day.
A stuttering Zagato attracted the attention of my friend, and before I could stop him he was out twidling the screws on the carbs.... I am alwasy very careful when volunteering to 'help' on other people's cars, especially a Zagato! But fortunately he knows his stuff and got the idle back to a better shape for the owner.
There's a whole load of Ferraris and things but I'm guessing no one is interested in that. Also no one is interested in the Lambourghinis revving their inadequate ECUs to redline in the middle of crowd of people. It just marks them all out as failed carcasses.
No I'm not in the market but that is a bargain for the amount of car and the condition it presents in!
Coincidentally I am about to embark on subframe rebuilds and it it a significant undertaking. That colour is correctly sinister for Mediterranean summer cruising, too.
Of all the cars at the show I was most keen on a a pale blue step nose 1600 but I think my window for purchasing is long gone!
Coincidentally I am about to embark on subframe rebuilds and it it a significant undertaking. That colour is correctly sinister for Mediterranean summer cruising, too.
Of all the cars at the show I was most keen on a a pale blue step nose 1600 but I think my window for purchasing is long gone!
Well let's just say this weekend is goign to be a big one...
Preparations underway for the front end after managing to finally secure all engine mounts, bushes and various backups.
The front subframe I picked up a few years back has been prepped to withstand the coming decades... any rust scabs or encroaching corrosion hints dispelled and removed.
I also prepped the NOS wishbones.


Full BiltHamber treatment with 80 rust converter, Electrox primer, a significant dosage of satin black and finally a slathering of S50 and Dynax UB.


The workshop beckons... wish us luck!

Preparations underway for the front end after managing to finally secure all engine mounts, bushes and various backups.
The front subframe I picked up a few years back has been prepped to withstand the coming decades... any rust scabs or encroaching corrosion hints dispelled and removed.
I also prepped the NOS wishbones.
Full BiltHamber treatment with 80 rust converter, Electrox primer, a significant dosage of satin black and finally a slathering of S50 and Dynax UB.
The workshop beckons... wish us luck!
Thanks all - its been a tough two days and the results are.. well.. you'll see.
Significant picture content of inner Alfa organs, though Phil did start getting annoyed with my constant photgraphing of every bolt (I need records for putting it back together!).
Caution is advised.
The Front
Day 1 - The Phil Time Menace
I wanted to tackle the front first as I was keen on the new subframe, and had not yet managed to strip and treat the rear subframe. The rear needs a professional with a full dipping and powder coating capability - one for later.
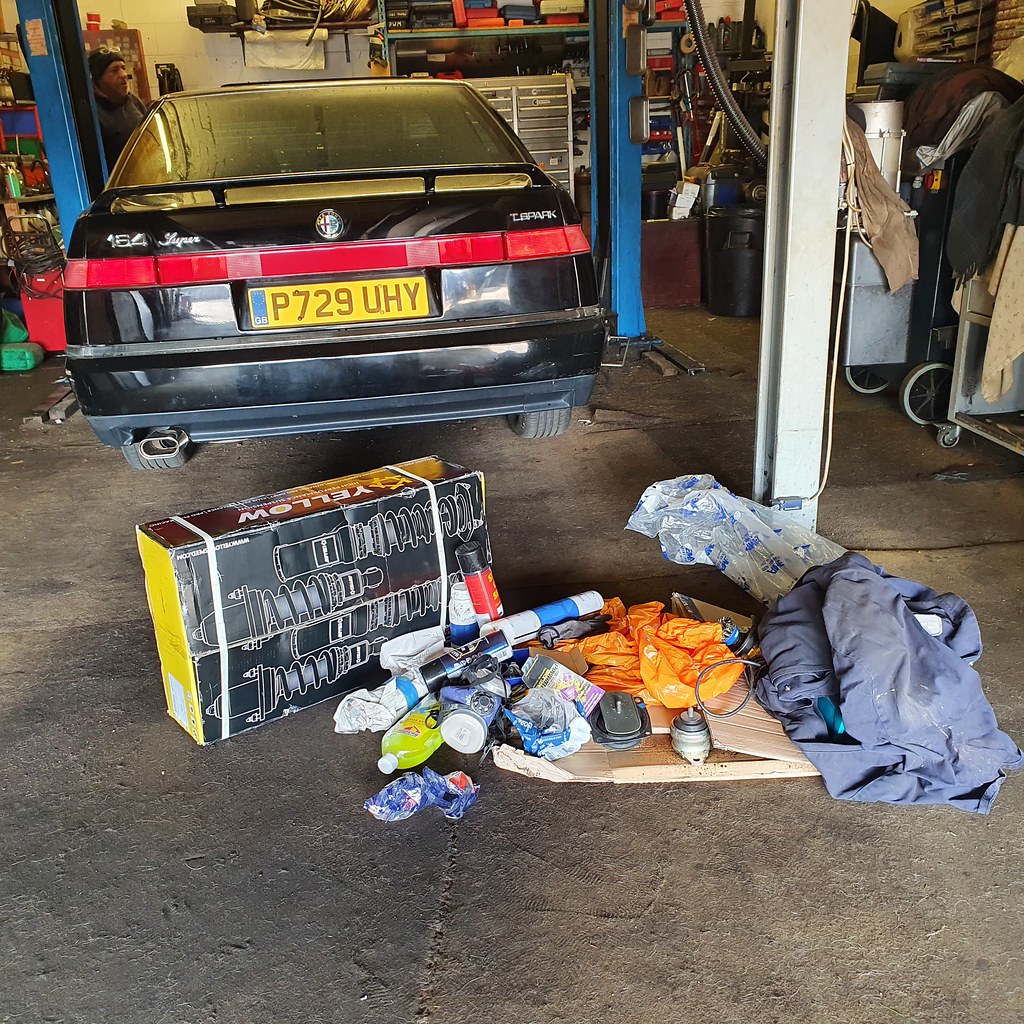
I loaded the car on 'Day 0' - many, many boxes and chemicals, PPE, but it all went in, a testament to the cavernous properties of the 164 boot.

Amazingly, the front subframe, wrapped in plastic from the still-curing waxoil, just went into the rear. Probably about 10mm on clearance!
I measured the 'stock' height at the front (670mm) from floor to top of the wheel arch, and went to bed.
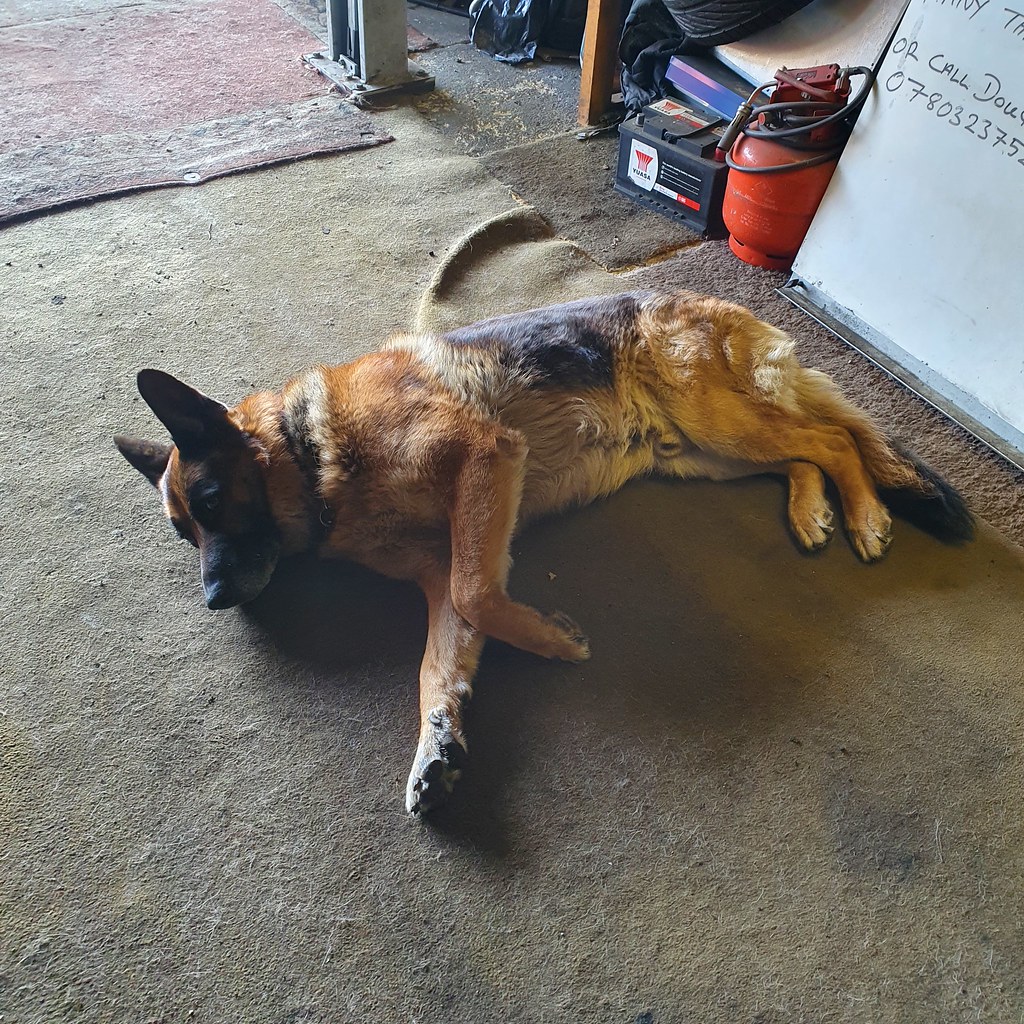
8am on Day 1, the Alfa sprang into life, the sun started shining and I arrived at Phil's to the elated woofling of Senna the German Shephard. I know 50% of you are here for him, so here you go:
Naturally, the first thng Phil said was "Why did you waxoil it before you came? Do it when its on the car!". Oh well... I just wanted to get into all the nooks and crannies from the top... anyway...
First load disgorged before the car goes up.
Engine support on.

Wheels off, state of play inspected.


Wheel arch liners out several bolts later.


Phil's memory suggested struts out first, then start loosening the subframe after taking the front exhaust downpipe off. We got to work in chorus of swearwords, rust and perpetual hunts for the correct spanners and sockets. Pure joy. 13mm top nuts and 17mm main bolts had the original strut towers out quickly. Phil got started on the downpipe, which luckily had only been put on recently for the stainless exhaust.
Inspecting the new coilovers Phil was initially not impressed, grumbling that they 'looked too small' and 'couldnt even be bothered to put the aluminium spacer in'. These run in the gap for the lower hub mounting, and I used a selection of chisels and hammers to reclaim them.


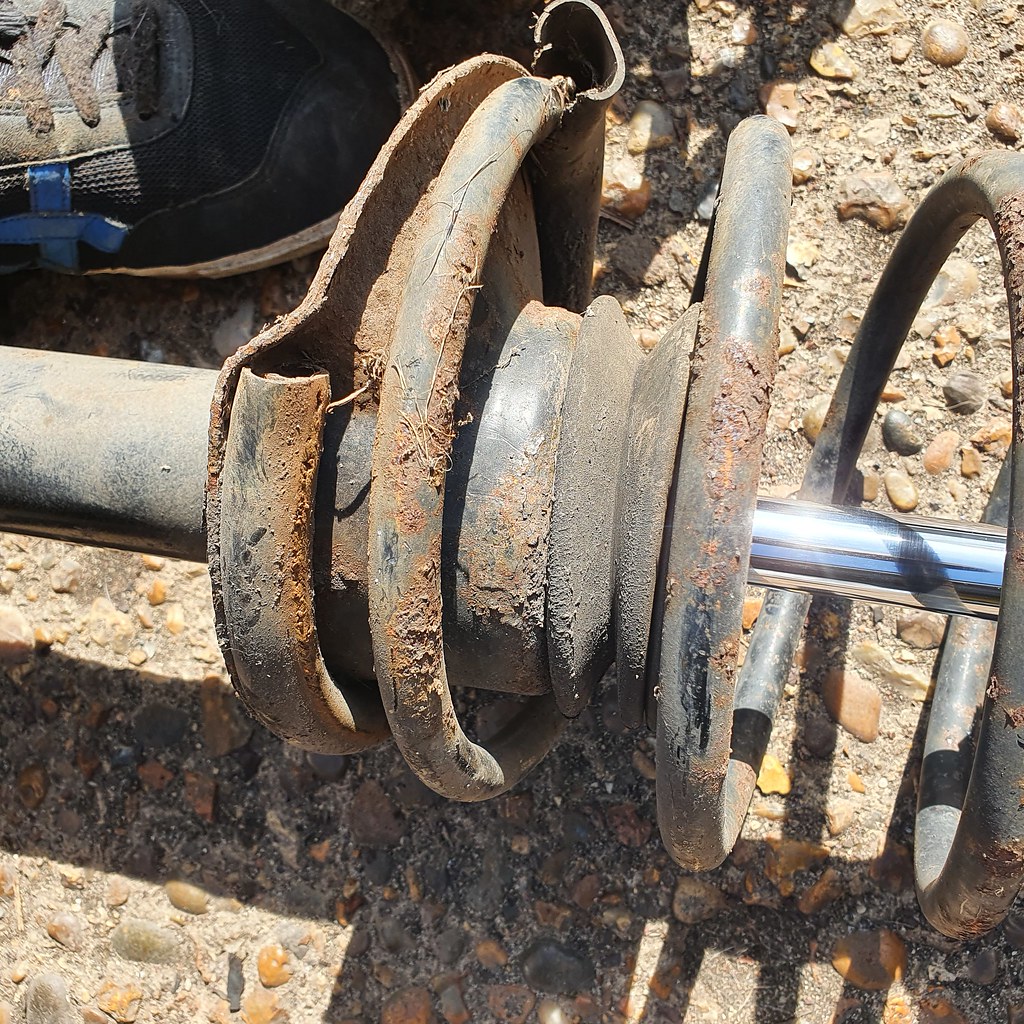
While not actually broken or limp, the original springs and struts are about to start causing issues without proper attention.
Phil sauntered over and grumbled 'that's not doing much good is it'... the exhaust hanger bush I had poured a few months earlier had split through - too firm!

I explained my search for the correct bush, the experiment of pouring bushes and the exciting trip to Redhill for the exhaust. He glared at me, ferreted around in a box for a while and produced... the correct original bush.

Lesson learnt. Always ask Phil.
22mm spanner for the Lambda sensor, and various other bolts - the downpipe came off without issue.
The ABS cradle was not on the new subframe, so we had to save it - Phil suggeted hanging both the pump and the radiator from the upper crossmembers and mounts with cable ties. Done.

Separation of the drop links and some wishbone bolts next.. . a sea of brown ...
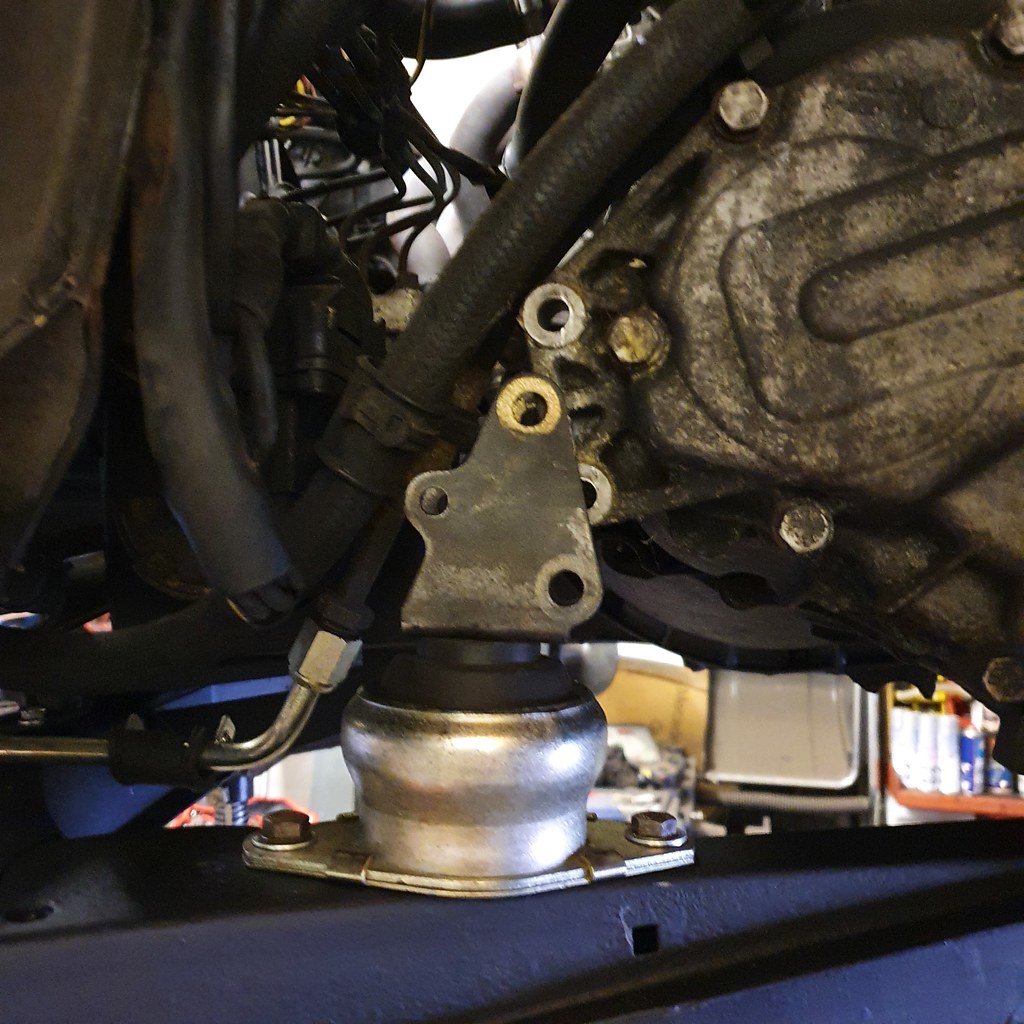
Next up, the gearbox mount, which is on the 'front left', the triangular bracket again needs to be saved while the mount will be changed.

Strut towers looked a bit ropey so, much the Phil's chargrin, I spent 90 minutes cleaning these up and coating them. I also spotted a few items in the wheel arches that needed tidying and treating - I'm not aiming to be here again for a while, so Phil went to poke a customer car, muttering that I was being precious...


Also this front left brake pipe looked to perhaps be weeping slightly. We'll come back to that little bother later.

More scabs identified and marked for the finger sander... on the right...

Purge in progress.

Halfway there...


...and on the left, slightly better.

Let that dry, then on to some sort fo coating. In the meantime, separate the steering rack from the subframe. Very awkward 15 and 13mm bolds, with various hoses and pipe clamps. This was the easiest...

This was the hardest...

Strut tower coating in progress. I went for the Hammerite Stone Chip Black as we are 'rushing' here - its tough, it dries quickly and is easy to direct.


Where were we? Oh yes, the new coilovers. Phil thought it best to get them in to hold the hubs, and I also thought wise to sense check they were roughly the right size before we started delving any more into the innards of the beast.
Following a setup guide on AlfaBB of several owners who had attempted to get stock height, I went for 180mm of thread showing on the main strut. Looked a bit short, but difficult too know how much the spring rates differ and 'settling amount' is.

Well, at least it looks better.

There's one thing Phil is very picky on - bolts being clean. He wire brushed down ever bolts, sometimes the nuts too - or just generously gave me new ones and washers throughout.
A few choice spanners later, they were both in!

Now for the main event - two supports under the frame - constant checking of all loosened hoses, brackets, bolts... lots of big, heavy bolts to come out...

Wishbones unbolted at this stage and swung out of the way... roll bar loosened... gently....

Gently...

Done!

Ah yes. Rust.

All brackets, spaces and supports removed. Some bolts for the wishbones can only be taken out with the engine mount off at the rear. Ouch.


Final project for the day - tidy up the items being reused.

Time was off the essence, so a solid wire wheel, sanding and either rust treatment or straight on with a concoction of underpaints.
There was more stuff, but it was very late. So late Phil took pity on me and lent me his 100HP Panda rather than forcing me onto the bus.

I probably should have just bought one of these.
Day one done!
Significant picture content of inner Alfa organs, though Phil did start getting annoyed with my constant photgraphing of every bolt (I need records for putting it back together!).
Caution is advised.
The Front
Day 1 - The Phil Time Menace
I wanted to tackle the front first as I was keen on the new subframe, and had not yet managed to strip and treat the rear subframe. The rear needs a professional with a full dipping and powder coating capability - one for later.
I loaded the car on 'Day 0' - many, many boxes and chemicals, PPE, but it all went in, a testament to the cavernous properties of the 164 boot.
Amazingly, the front subframe, wrapped in plastic from the still-curing waxoil, just went into the rear. Probably about 10mm on clearance!
I measured the 'stock' height at the front (670mm) from floor to top of the wheel arch, and went to bed.
8am on Day 1, the Alfa sprang into life, the sun started shining and I arrived at Phil's to the elated woofling of Senna the German Shephard. I know 50% of you are here for him, so here you go:
Naturally, the first thng Phil said was "Why did you waxoil it before you came? Do it when its on the car!". Oh well... I just wanted to get into all the nooks and crannies from the top... anyway...
First load disgorged before the car goes up.
Engine support on.
Wheels off, state of play inspected.
Wheel arch liners out several bolts later.
Phil's memory suggested struts out first, then start loosening the subframe after taking the front exhaust downpipe off. We got to work in chorus of swearwords, rust and perpetual hunts for the correct spanners and sockets. Pure joy. 13mm top nuts and 17mm main bolts had the original strut towers out quickly. Phil got started on the downpipe, which luckily had only been put on recently for the stainless exhaust.
Inspecting the new coilovers Phil was initially not impressed, grumbling that they 'looked too small' and 'couldnt even be bothered to put the aluminium spacer in'. These run in the gap for the lower hub mounting, and I used a selection of chisels and hammers to reclaim them.
While not actually broken or limp, the original springs and struts are about to start causing issues without proper attention.
Phil sauntered over and grumbled 'that's not doing much good is it'... the exhaust hanger bush I had poured a few months earlier had split through - too firm!
I explained my search for the correct bush, the experiment of pouring bushes and the exciting trip to Redhill for the exhaust. He glared at me, ferreted around in a box for a while and produced... the correct original bush.
Lesson learnt. Always ask Phil.
22mm spanner for the Lambda sensor, and various other bolts - the downpipe came off without issue.
The ABS cradle was not on the new subframe, so we had to save it - Phil suggeted hanging both the pump and the radiator from the upper crossmembers and mounts with cable ties. Done.
Separation of the drop links and some wishbone bolts next.. . a sea of brown ...
Next up, the gearbox mount, which is on the 'front left', the triangular bracket again needs to be saved while the mount will be changed.
Strut towers looked a bit ropey so, much the Phil's chargrin, I spent 90 minutes cleaning these up and coating them. I also spotted a few items in the wheel arches that needed tidying and treating - I'm not aiming to be here again for a while, so Phil went to poke a customer car, muttering that I was being precious...
Also this front left brake pipe looked to perhaps be weeping slightly. We'll come back to that little bother later.
More scabs identified and marked for the finger sander... on the right...
Purge in progress.
Halfway there...
...and on the left, slightly better.
Let that dry, then on to some sort fo coating. In the meantime, separate the steering rack from the subframe. Very awkward 15 and 13mm bolds, with various hoses and pipe clamps. This was the easiest...
This was the hardest...
Strut tower coating in progress. I went for the Hammerite Stone Chip Black as we are 'rushing' here - its tough, it dries quickly and is easy to direct.
Where were we? Oh yes, the new coilovers. Phil thought it best to get them in to hold the hubs, and I also thought wise to sense check they were roughly the right size before we started delving any more into the innards of the beast.
Following a setup guide on AlfaBB of several owners who had attempted to get stock height, I went for 180mm of thread showing on the main strut. Looked a bit short, but difficult too know how much the spring rates differ and 'settling amount' is.
Well, at least it looks better.
There's one thing Phil is very picky on - bolts being clean. He wire brushed down ever bolts, sometimes the nuts too - or just generously gave me new ones and washers throughout.
A few choice spanners later, they were both in!
Now for the main event - two supports under the frame - constant checking of all loosened hoses, brackets, bolts... lots of big, heavy bolts to come out...
Wishbones unbolted at this stage and swung out of the way... roll bar loosened... gently....
Gently...
Done!
Ah yes. Rust.
All brackets, spaces and supports removed. Some bolts for the wishbones can only be taken out with the engine mount off at the rear. Ouch.
Final project for the day - tidy up the items being reused.
Time was off the essence, so a solid wire wheel, sanding and either rust treatment or straight on with a concoction of underpaints.
There was more stuff, but it was very late. So late Phil took pity on me and lent me his 100HP Panda rather than forcing me onto the bus.
I probably should have just bought one of these.
Day one done!
Edited by Spinakerr on Sunday 8th May 09:10
Edited by Spinakerr on Sunday 8th May 11:43
Day 2 - Attack Of The Frames
After a good soak in Swarfega, some plasters and a good night sleep I leapt into the Panda and sped over to Phil's.
Senna was up, sun was out.

What could possibly go wrong today? We had all the parts, and we knew how everything went together. Easy.
I gleefully unwrapped the new subframe and moved it into position.
Phil looked at it. I looked at it...
... it was not right.
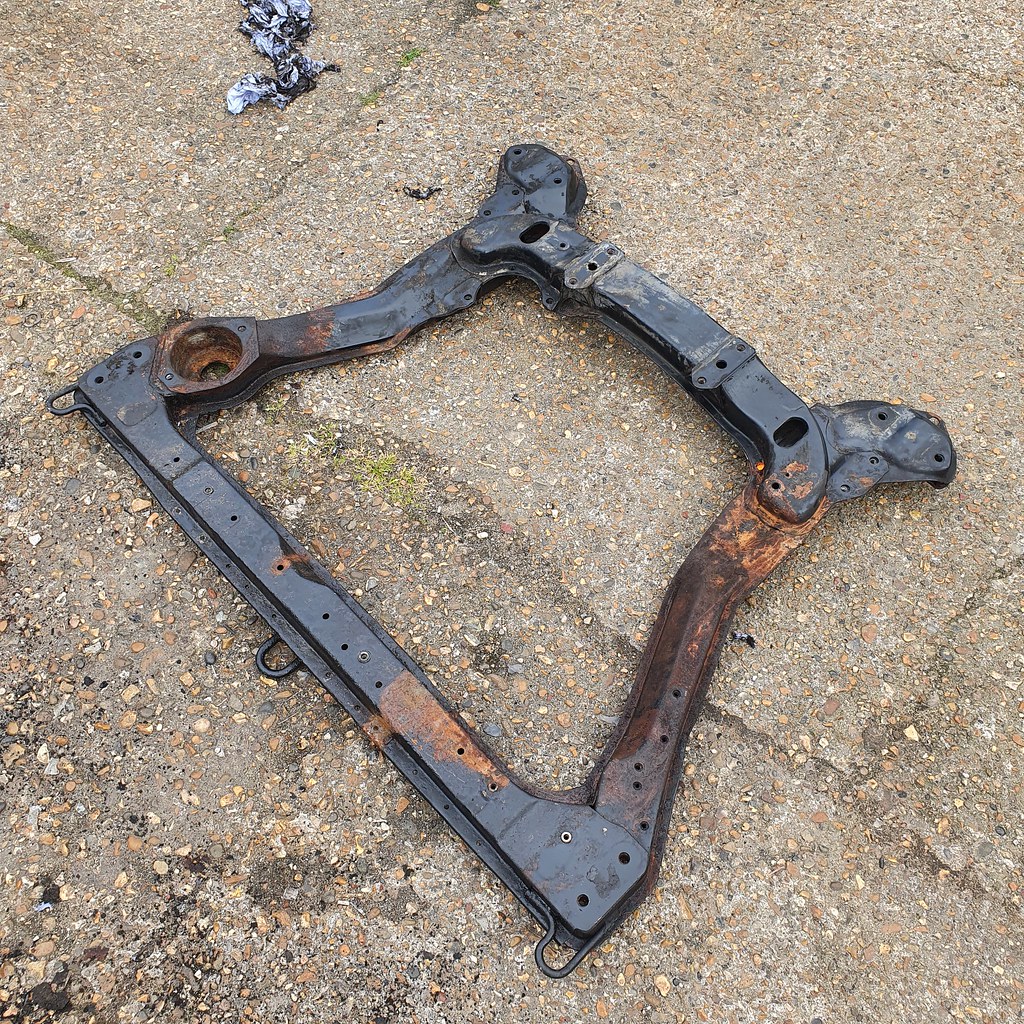
The rear right corner had a different mount for... who knows? An earlier model? The 12V?

The original frame:

Aargh!
Double Aargh!
After storing it for 5 years, spending a significant Sunday prepping and painting... it was the wrong part! For reference, it apears to be an earlier frame, number 60508282. The later frame, mine, appears to be 60563610.

It was early. I was about to make a snap decision, so we instead ordered a breakfast and coffee.
We inspected the old frame. It was not actually rotten anywhere, but I would need to do some seriously speedy prep.
Phil went to work on another car. I entered a trance and got stuck in.
[cue montage music]


This was 2.5 hours I could have done without but... it was done. As with a lot of rusty items that are solid and not actual holes, it actually didn't clean up too badly. I left it to dry and had a little lie down in the shade.
Phil cut the old wishbones and ball joints off because they were 'a pain'.

Not pictured as I was slightly giddy by this time - several coats of stone chip, black paint and a few wax cavity sprays in the subframe.
I started cleaning all the bolts and laying out items for reassembly while Phil worked on his own car.

First mounts back on, along with the radiator support bracket.


The bolts for the wishbones went in before this rear mount!

Now we're getting somewhere - state of play before lunch - all new mounts most definitely in!

Anti roll bar bushes were NOT for a 164 - incorrectly advertised, as always on that auction site.

Old ones had to go back on, but Phil said they looked only a few years old and weren't cracked. We swapped their sides so the stretched portion was least impactful. Indeed, I check the folder and he had swapped them out with the drop links 5 years ago. New wishbones and ball joints affixed.
Newly treated and painted brackets back on. Anti roll bar and ABS cradle back on, plus the top of the gearbox mount.

Back the way it came... sorry for the bad photos but an hour of steering rack, pipe arrangement, careful lining up of items, new washers, now bolts, a swathe of copper grease and it all came together.


Consulting the cardboard to do list, only a few more items like drop links and ball joints to go.

Correct exhaust mount pressed in, downpipe secured.

Mmmmmm matt finish with rubberised coating... lovely. Waxoil cavity to follow - but not today!


Everything just looks so much better here.

A number of checks later... and a few double checks - all secure. All bolts in, all items tight. All bracket back, hoses placed, secured.... done. Are we done? Phil said - 'I'm done with it. Up to you if its done!'. The struts were adjust per the supplied documentation to '12 clicks' from the top... engine hoist off... we were done!
As the wheels touched the ground I measered the ride height - 680mm! As that may settle over time and a few miles, incredibly I may have attained the original height. Phil didn't say a word. So I must have done something right.
By this time I was two hours late for my wife, though as she is understanding she just said to go home, soak and rest up.
That was it. The Front was finally done!
Now, where is that rear subframe....
After a good soak in Swarfega, some plasters and a good night sleep I leapt into the Panda and sped over to Phil's.
Senna was up, sun was out.
What could possibly go wrong today? We had all the parts, and we knew how everything went together. Easy.
I gleefully unwrapped the new subframe and moved it into position.
Phil looked at it. I looked at it...
... it was not right.
The rear right corner had a different mount for... who knows? An earlier model? The 12V?
The original frame:
Aargh!
Double Aargh!
After storing it for 5 years, spending a significant Sunday prepping and painting... it was the wrong part! For reference, it apears to be an earlier frame, number 60508282. The later frame, mine, appears to be 60563610.
It was early. I was about to make a snap decision, so we instead ordered a breakfast and coffee.
We inspected the old frame. It was not actually rotten anywhere, but I would need to do some seriously speedy prep.
Phil went to work on another car. I entered a trance and got stuck in.
[cue montage music]
This was 2.5 hours I could have done without but... it was done. As with a lot of rusty items that are solid and not actual holes, it actually didn't clean up too badly. I left it to dry and had a little lie down in the shade.
Phil cut the old wishbones and ball joints off because they were 'a pain'.
Not pictured as I was slightly giddy by this time - several coats of stone chip, black paint and a few wax cavity sprays in the subframe.
I started cleaning all the bolts and laying out items for reassembly while Phil worked on his own car.
First mounts back on, along with the radiator support bracket.
The bolts for the wishbones went in before this rear mount!
Now we're getting somewhere - state of play before lunch - all new mounts most definitely in!
Anti roll bar bushes were NOT for a 164 - incorrectly advertised, as always on that auction site.
Old ones had to go back on, but Phil said they looked only a few years old and weren't cracked. We swapped their sides so the stretched portion was least impactful. Indeed, I check the folder and he had swapped them out with the drop links 5 years ago. New wishbones and ball joints affixed.
Newly treated and painted brackets back on. Anti roll bar and ABS cradle back on, plus the top of the gearbox mount.
Back the way it came... sorry for the bad photos but an hour of steering rack, pipe arrangement, careful lining up of items, new washers, now bolts, a swathe of copper grease and it all came together.
Consulting the cardboard to do list, only a few more items like drop links and ball joints to go.
Correct exhaust mount pressed in, downpipe secured.
Mmmmmm matt finish with rubberised coating... lovely. Waxoil cavity to follow - but not today!
Everything just looks so much better here.
A number of checks later... and a few double checks - all secure. All bolts in, all items tight. All bracket back, hoses placed, secured.... done. Are we done? Phil said - 'I'm done with it. Up to you if its done!'. The struts were adjust per the supplied documentation to '12 clicks' from the top... engine hoist off... we were done!
As the wheels touched the ground I measered the ride height - 680mm! As that may settle over time and a few miles, incredibly I may have attained the original height. Phil didn't say a word. So I must have done something right.
By this time I was two hours late for my wife, though as she is understanding she just said to go home, soak and rest up.
That was it. The Front was finally done!
Now, where is that rear subframe....
Edited by Spinakerr on Sunday 8th May 11:47
carinaman said:
Hopefully it's not been purloined to help make a set of dentures for a hen!
Great update, though having heard of the difficulties of sourcing that part I'm looking forward to the rear update.
The Panda and being lent it is cool, but trumped by the dog and the biscione tattoo.
Thanks - yes I don't know if anyone has every refurbished and painted two subframes for a 164 int he same week - probably a world first!Great update, though having heard of the difficulties of sourcing that part I'm looking forward to the rear update.
The Panda and being lent it is cool, but trumped by the dog and the biscione tattoo.
Phil and Senna are fanstatic - man and beast in perfect, sweary, car-based harmony. The Panda is really special, just a tad harsh on London roads. WIll send some updates when I see him next as he had a few fixes in the pipeline.
Cambs_Stuart said:
What a rollercoaster of an update. I was on the edge of my seat when i read you had the wrong subframe.
Amazing work all and hats off to alfa craft. There's not many garages that would allow a non employee in to work on the car. They sound like a fantastic outfit.
Thanks as always! Yes technically this was a day 'off' for him, so he is very generous with his time. A one man band with all the knowledge. I wish we could download his brain somehow, I'll have to settle for learning as I go.Amazing work all and hats off to alfa craft. There's not many garages that would allow a non employee in to work on the car. They sound like a fantastic outfit.
Epilogue
I forgot to add - that brake pipe came back to haunt me - ont he way home the classic soft pedal, panic, handbrake, stir the gears, hiccup breath.... significant failure.
I parked the Alfa up, steadied my heart rate following a few near misses, and took a look.
The brake pipe on the N/S front had decided its comfortable, quiet living arrangement had been disturbed too much in the preceeding two days and was making a protest everywhere.
I decided the pull the pipe entirely from its mooring, as the 11mm was not budging, and link it up to a suitable jar.

Bloody cars. Coilovers look good though, right?
I am sending the two front calipers I rescued from Vintage Alfa last year on to Bigg Red this week, they look reasonable and I freed off the old pads and few fitting just to make their job a might easier and ensure I had a doggie bag full of spares.


It looks like a complete brake overhaul will be causing Phil to again ponder his generosity while I tackle that rear subframe.
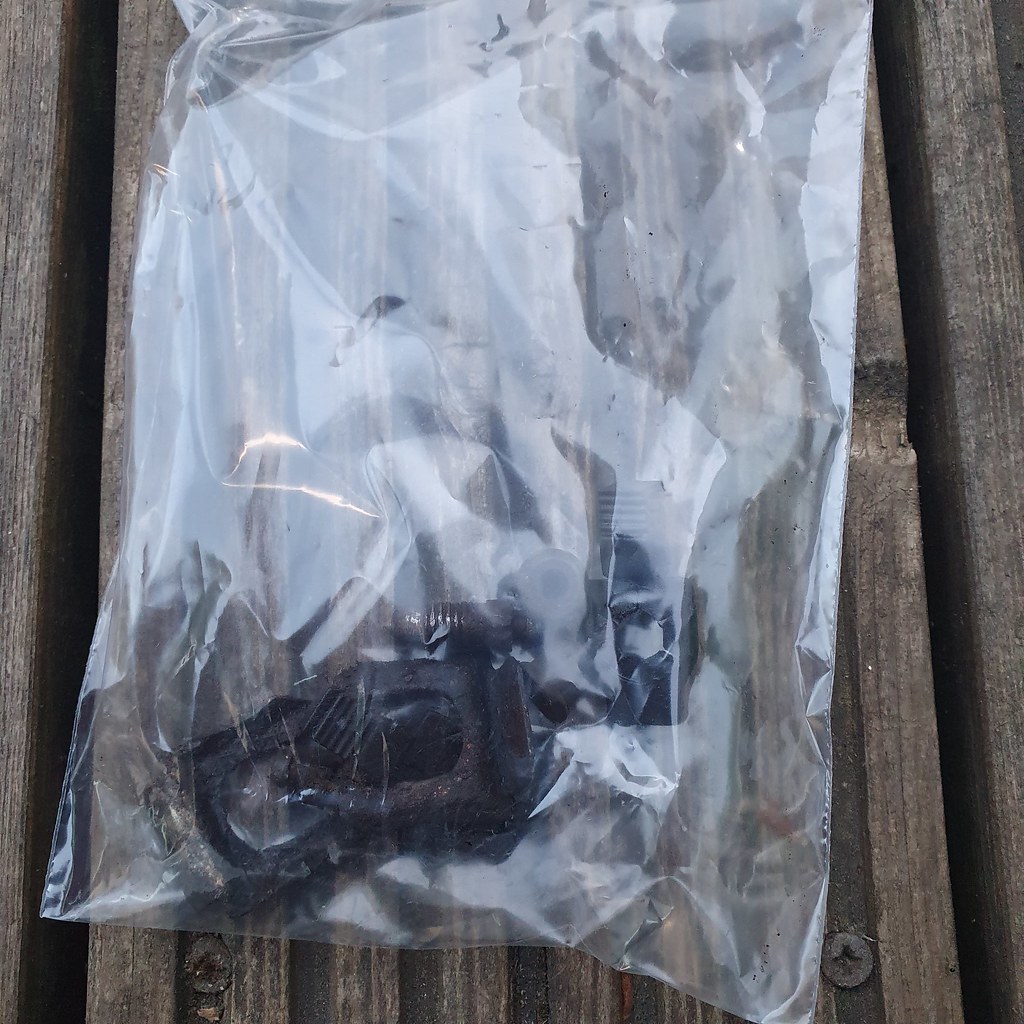
Ah yes, the rear! I'm 97.7% sure the subframe did not change in part number or design through the production run, so this one is off to a skilled person with a chemical bath for proper powder coating. I'm also sending the control arms (?) - the ones without adjustment - as they are very expensive to buy.

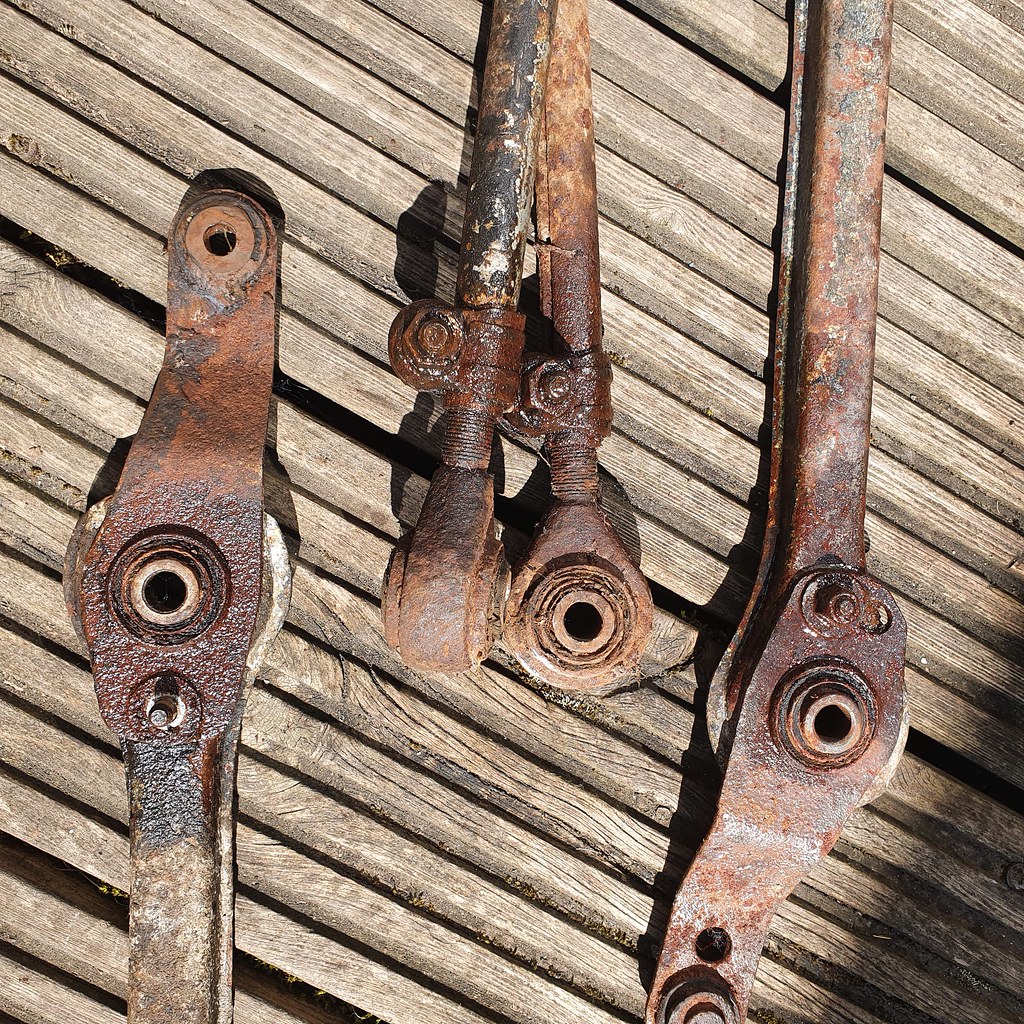
Some items needed persuasion.

The adjustable jobbies are available for circa 60 quid each, so I think its easier to buy them rather than wrestle with the rusty 13mm items, powder coat and then try to fit new bushes.
Next up - hoping Phil returns my call for the dates for the rear...
I forgot to add - that brake pipe came back to haunt me - ont he way home the classic soft pedal, panic, handbrake, stir the gears, hiccup breath.... significant failure.
I parked the Alfa up, steadied my heart rate following a few near misses, and took a look.
The brake pipe on the N/S front had decided its comfortable, quiet living arrangement had been disturbed too much in the preceeding two days and was making a protest everywhere.
I decided the pull the pipe entirely from its mooring, as the 11mm was not budging, and link it up to a suitable jar.
Bloody cars. Coilovers look good though, right?
I am sending the two front calipers I rescued from Vintage Alfa last year on to Bigg Red this week, they look reasonable and I freed off the old pads and few fitting just to make their job a might easier and ensure I had a doggie bag full of spares.
It looks like a complete brake overhaul will be causing Phil to again ponder his generosity while I tackle that rear subframe.
Ah yes, the rear! I'm 97.7% sure the subframe did not change in part number or design through the production run, so this one is off to a skilled person with a chemical bath for proper powder coating. I'm also sending the control arms (?) - the ones without adjustment - as they are very expensive to buy.
Some items needed persuasion.
The adjustable jobbies are available for circa 60 quid each, so I think its easier to buy them rather than wrestle with the rusty 13mm items, powder coat and then try to fit new bushes.
Next up - hoping Phil returns my call for the dates for the rear...
I don't think there's many scenarios where I would be parted from this car.
Even thr ULEZ discussions led to both mt wife and I discussion where it would live or how many times a year we would use it, whereas replacements for the other members of the fleet were examined and shortlisted.
I never thought I would own a car for 9 years, let alone an Alfa, but its part of my mental fabric now - my reference point for sharp and unfussy all purpose driving. It is both the absolute average and utterly unique driving proposition concurrently.
I am more excited than ever to complete the underside rebuild I started a spreadsheet for in 2016, and finally take it on an alpine tour this year.
This is, hopefully, just the beginning.
Midpoint update:
The rear cross member and various rear important bits are being powder coated, the front calipers are back from Bigg Red in sparkling condition and a date with Phil at Alfacraft set for tackling all the remaining jobs to get the 164 back on the road.
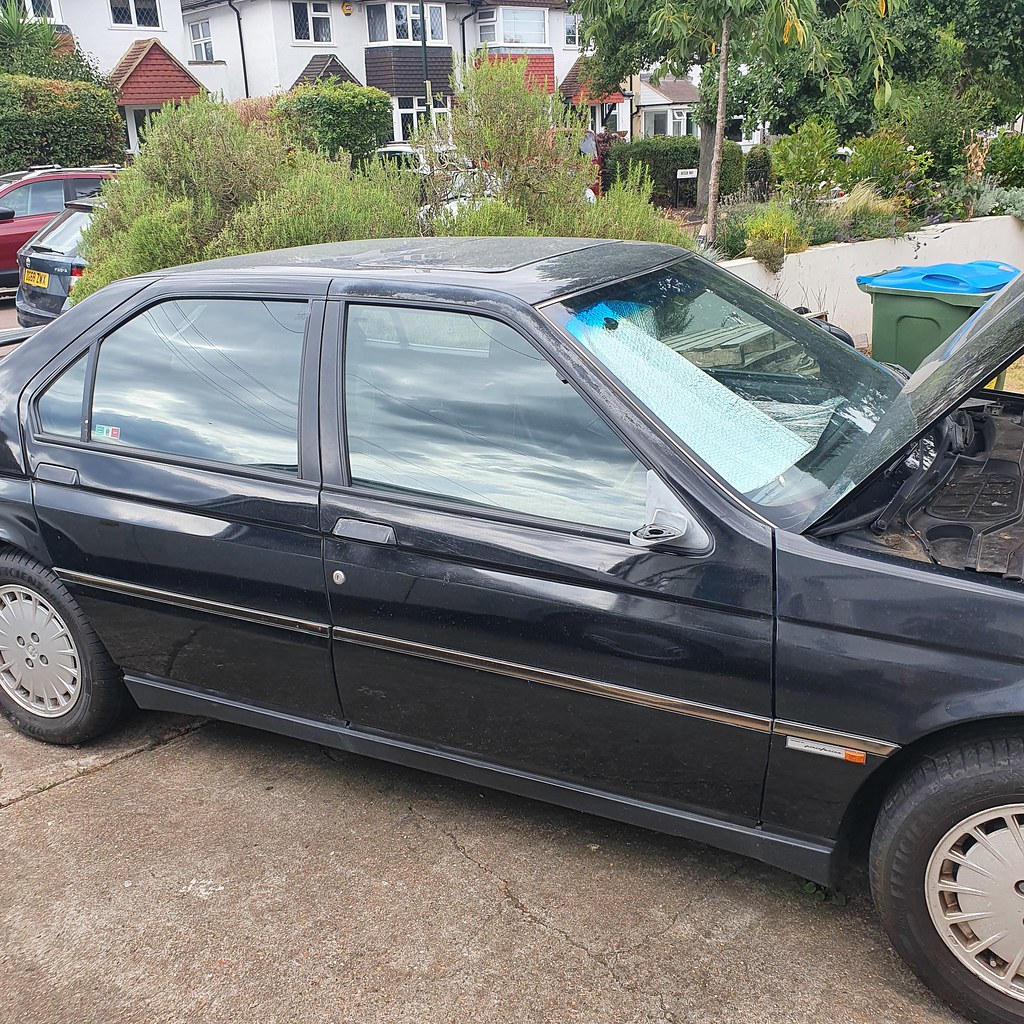
With the battery disconnected and the car unlikely to move until then, I decided to instigate a long overdue item on the 'to do' list - the speakers. These had long since perished, and although the exhaust note has been the most perfect companion to driving since fitting, I was keen to actually have the car ready for long distance Miami Vice - themed 80s night drives to the correct array of tunes.

Front door cards were overdue a general clean and spruce up - goal is to refresh the speaker grilles, remove problematic crumbling foam that gets (as Anakin would put it) everywhere, and renew all speakers themselves.
The front air duct twists off, the window switches pop out with a screwdriver and then there is the usual exciting puzzle of hidden screws, bolts, interior poper fittings, wires and clips that we all love to break when enacting anything door card related.
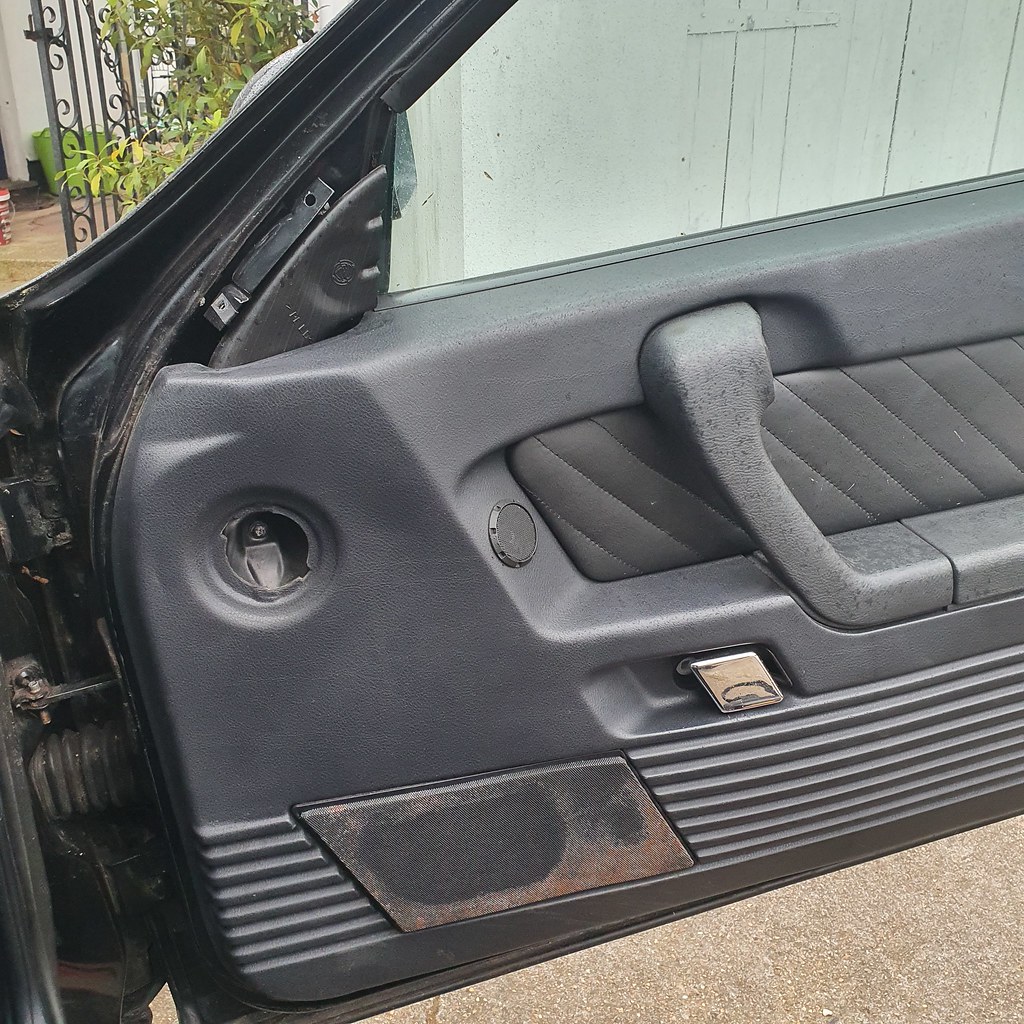

Oh yes the light at the bottom of the door. Very executive.

Tweeters...

A quick wrestle with the door release mechanism and it was off. Original speakers have long since degenerated. This will become a theme.


"I hate foam. Its so course and rough and irritating. And it gets everywhere."

6.5in fronts in the Series 2 164 rather than the 5.25in in the Series 1. Verified.

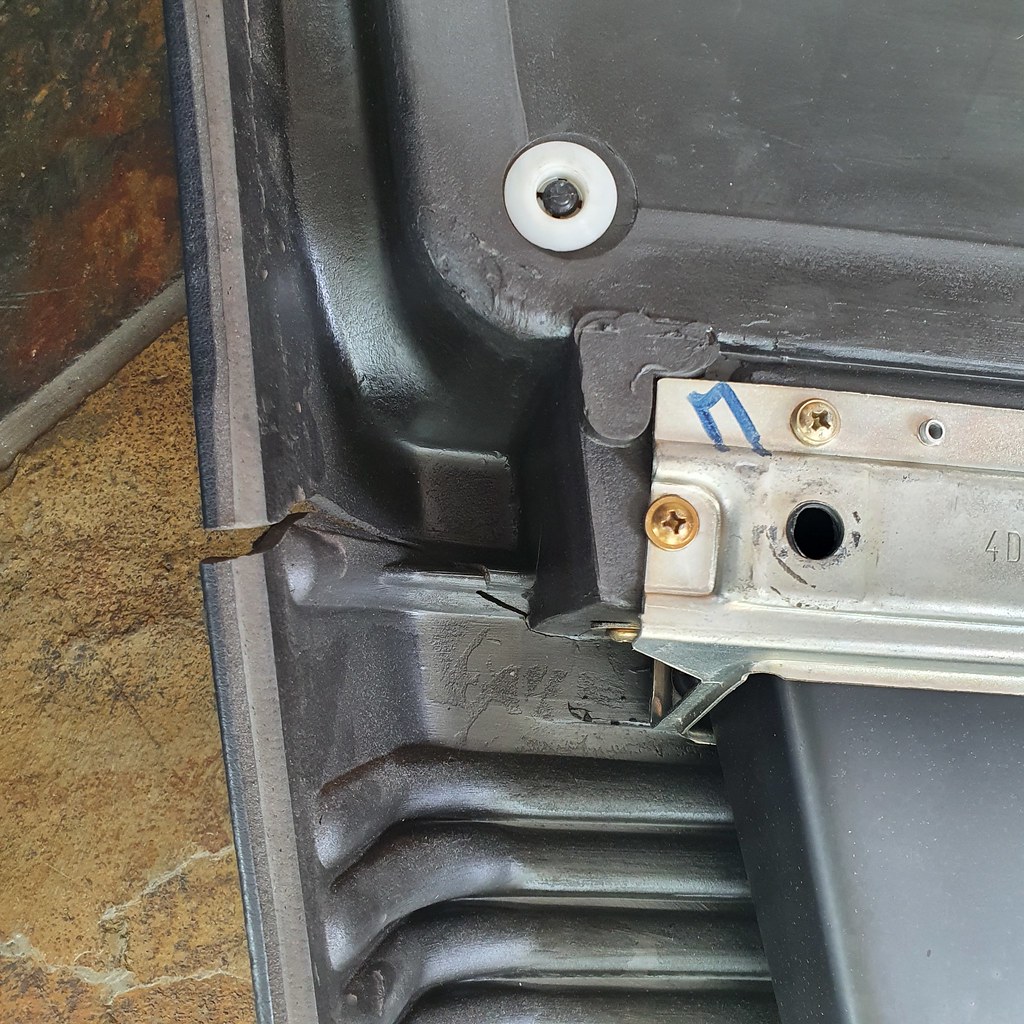
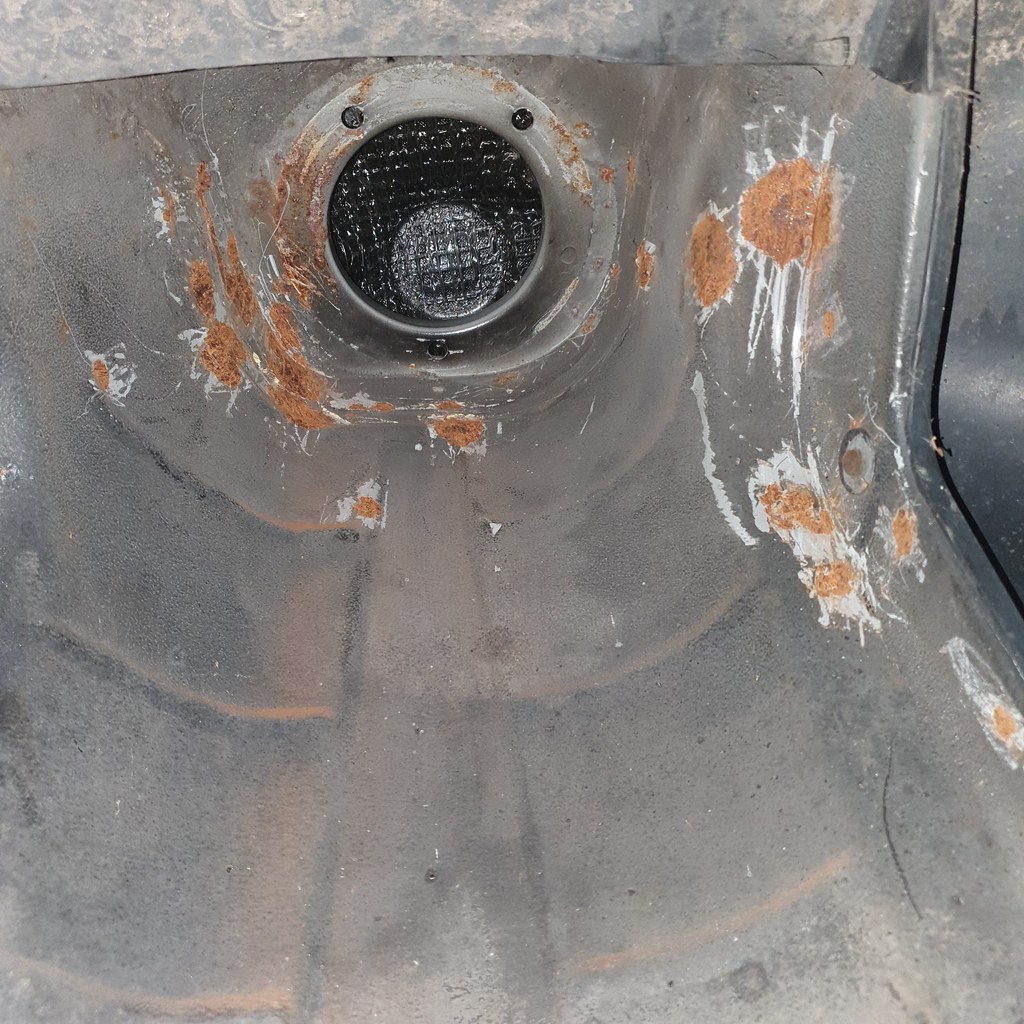
Reason for grille rust - damp foam.

Passenger door in simialr state. Less clips were lost in this process.

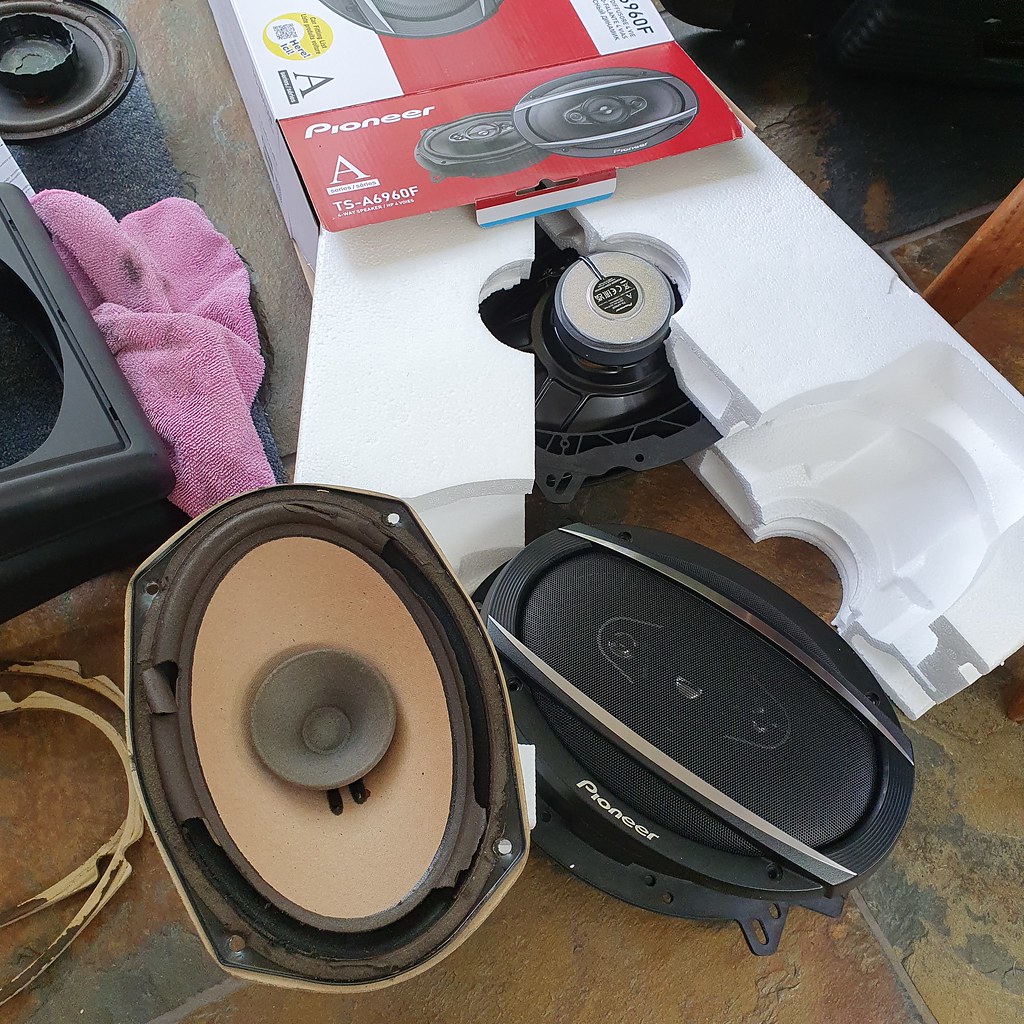
On to the rears - this was much easier as the parcel shelf covers just popped off, and there were 4 7mm bolts for each 6x9 unit.
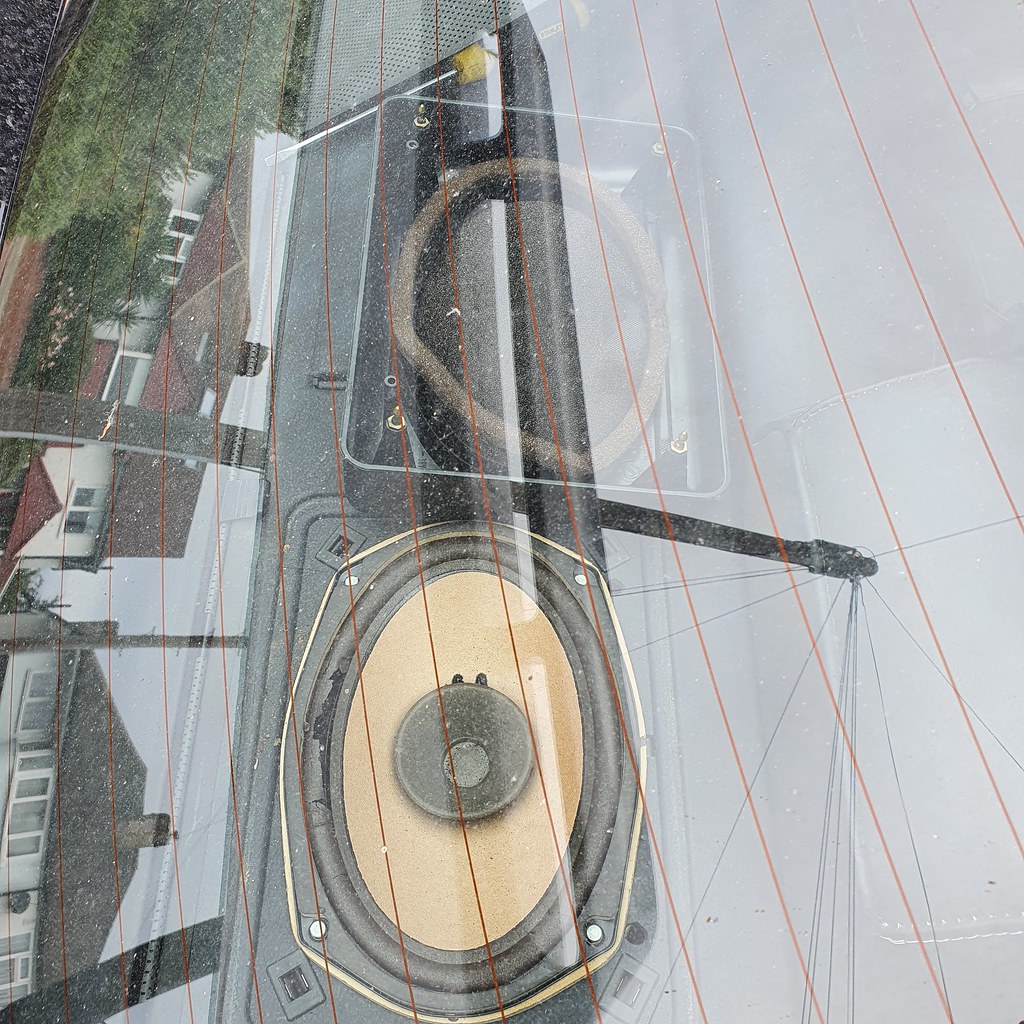
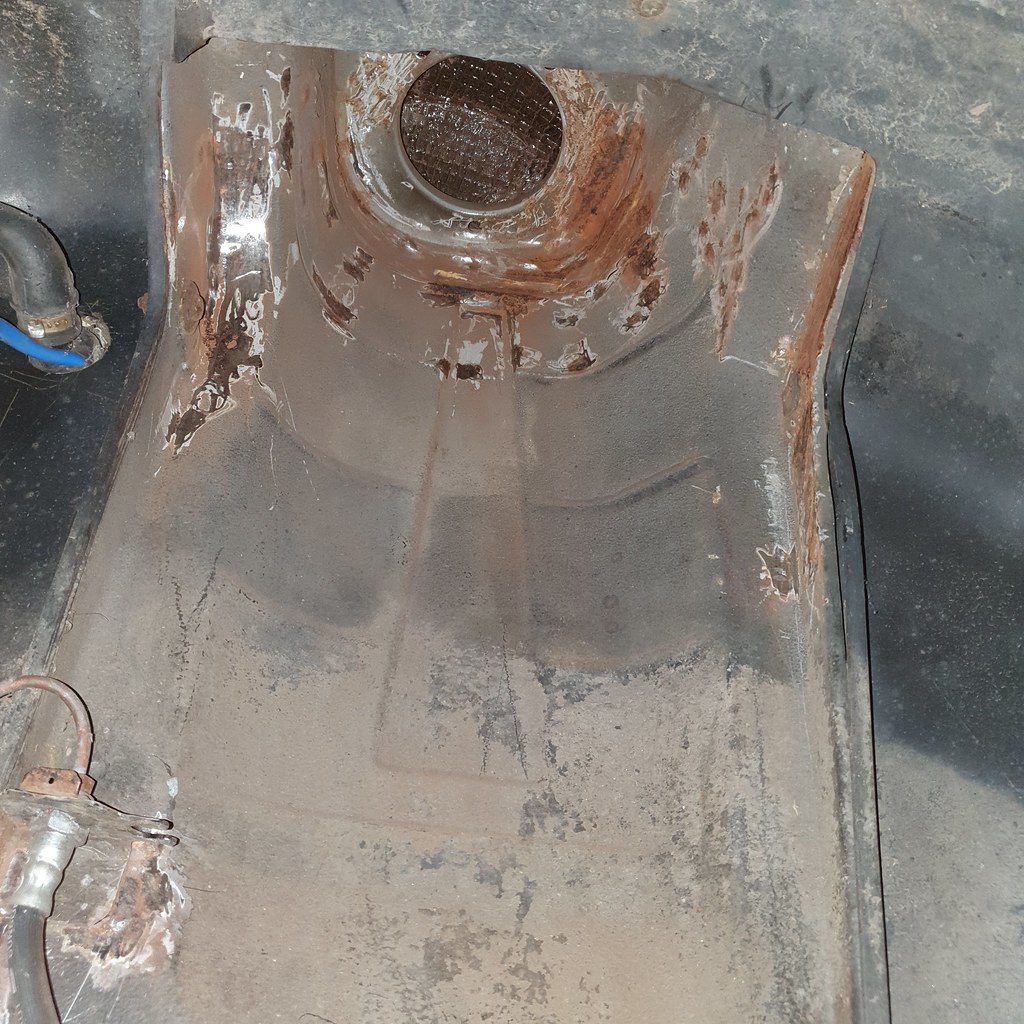
The foam though... my goodness. This was a disster. Imagine a bad toffee pudding from a busy pub, left in the sun for a few years for the wiring to sink in to. There was also some foam sound deadening mat that had likewise trasmorgrified into some Geiger-esque goo. All of this was expunged with wild abandon, and the splash damage to seats and boot hastily removed before it could do any mroe harm. Awful job.


Done. Pioneer units ordered, and I need some 'dark grey' rather than black paint for these grilles.
More to follow.
The rear cross member and various rear important bits are being powder coated, the front calipers are back from Bigg Red in sparkling condition and a date with Phil at Alfacraft set for tackling all the remaining jobs to get the 164 back on the road.
With the battery disconnected and the car unlikely to move until then, I decided to instigate a long overdue item on the 'to do' list - the speakers. These had long since perished, and although the exhaust note has been the most perfect companion to driving since fitting, I was keen to actually have the car ready for long distance Miami Vice - themed 80s night drives to the correct array of tunes.
Front door cards were overdue a general clean and spruce up - goal is to refresh the speaker grilles, remove problematic crumbling foam that gets (as Anakin would put it) everywhere, and renew all speakers themselves.
The front air duct twists off, the window switches pop out with a screwdriver and then there is the usual exciting puzzle of hidden screws, bolts, interior poper fittings, wires and clips that we all love to break when enacting anything door card related.
Oh yes the light at the bottom of the door. Very executive.
Tweeters...
A quick wrestle with the door release mechanism and it was off. Original speakers have long since degenerated. This will become a theme.
"I hate foam. Its so course and rough and irritating. And it gets everywhere."
6.5in fronts in the Series 2 164 rather than the 5.25in in the Series 1. Verified.
Reason for grille rust - damp foam.
Passenger door in simialr state. Less clips were lost in this process.
On to the rears - this was much easier as the parcel shelf covers just popped off, and there were 4 7mm bolts for each 6x9 unit.
The foam though... my goodness. This was a disster. Imagine a bad toffee pudding from a busy pub, left in the sun for a few years for the wiring to sink in to. There was also some foam sound deadening mat that had likewise trasmorgrified into some Geiger-esque goo. All of this was expunged with wild abandon, and the splash damage to seats and boot hastily removed before it could do any mroe harm. Awful job.
Done. Pioneer units ordered, and I need some 'dark grey' rather than black paint for these grilles.
More to follow.
Good point - I do have some sticky mats somewhere and the boot is the primary target for deadening. The cabin of the car is very well lined and I don't want to pull up the carpet at the mo, but will see what can be added in doors and parcel shelf.
The tweeters were a factory option - I had to rellace the driver's side a few years ago. Will see how if sounds one the new units are in...
Speakers have arrived and look correct, plus the grilles are resplendent after some treatment and new paint coats this week.
The tweeters were a factory option - I had to rellace the driver's side a few years ago. Will see how if sounds one the new units are in...
Speakers have arrived and look correct, plus the grilles are resplendent after some treatment and new paint coats this week.
I believe I have solved this mystery - there is a bill in 1999 for 'fitting new passenger door trim'. The passenger side has the 1-way round paper cone, the driver's side the coaxial with central tweeter.
I believe the car came with matching coaxials, as it was the last half of Series 2 production, but when the new trim was fitted they replaced it with a paper cone on that side.
WHen I bought the car the missing tweeters bothered me, so I fitted a pair, not noticing the coaxial mismatch.
Will likely leave the tweeters unplugged given the new Pioneers have all that tweeterage embedded.
THis is goign ratehr too well for a 164 update - the new units from Pioneer are a perfect match, and having dispensed with all their additional brackets and grilles they slot in perfectly with the original cleaned-up gaskets and fittings.

The grilles were gently de-bent and de-kinked, wire brushed, Bilt Hambered and then sprayed with a few coats of relatively tough paint. This makes a significant difference for me!

For the connectors - I toyed with soldering/splicing the supplied terminals onto the original Alfa connectors, but resorted to disassembling the original Alfa connectors from their plugs and gently bending them to be snug fits for the new Pioneer units.


The little 'click' when the tiny spring mounted item caught was very reassuring.
Rears in...


Fronts in...

A quick test with a reconnected battery and a few favourites.. Gosh. Its not hi-fi, but it is a huge improvement! I'm glad I selected Pioneer speakers of ~40W to match the Pioneer bluetooth head unit I fitted a few years ago. Nothing untoward, just straightforward sound!
I tightened everything up and refitted the rear grilles having reattached them to the plastic box covers.

Question for all those with car audio experience - shall I reconnect the standalone door handle tweeters? My initial reaction is to not - there's no additional amp, the fronts are now both coaxial and the tweeters may overlap a little, even if the small stereo amp is up for 6 speakers vs 4.
Any thoguhts?
As for the front - I am in no rush, so have decided to fix a few bits of cracked trim. Clear Gorilla glue is working on the smaller items, but for a large central crack I am going to experiment with one of these 'hot staplers'.

I also want to replace some of the old or missing trim clips - I definitely have a box of 7894 assorted interior trims frm eBay somewhere, but I can't find it at the moment.
I also realised this was the perfect time to repair the folding action on the driver's mirror that has not worked since purchase - the motor whizzes away but likely a cog dislodged or broken. I dimly recall purchasing a spare mirror some time in history, so need to delve into the caves for that one too.
The grilles were gently de-bent and de-kinked, wire brushed, Bilt Hambered and then sprayed with a few coats of relatively tough paint. This makes a significant difference for me!
For the connectors - I toyed with soldering/splicing the supplied terminals onto the original Alfa connectors, but resorted to disassembling the original Alfa connectors from their plugs and gently bending them to be snug fits for the new Pioneer units.
The little 'click' when the tiny spring mounted item caught was very reassuring.
Rears in...
Fronts in...
A quick test with a reconnected battery and a few favourites.. Gosh. Its not hi-fi, but it is a huge improvement! I'm glad I selected Pioneer speakers of ~40W to match the Pioneer bluetooth head unit I fitted a few years ago. Nothing untoward, just straightforward sound!
I tightened everything up and refitted the rear grilles having reattached them to the plastic box covers.
Question for all those with car audio experience - shall I reconnect the standalone door handle tweeters? My initial reaction is to not - there's no additional amp, the fronts are now both coaxial and the tweeters may overlap a little, even if the small stereo amp is up for 6 speakers vs 4.
Any thoguhts?
As for the front - I am in no rush, so have decided to fix a few bits of cracked trim. Clear Gorilla glue is working on the smaller items, but for a large central crack I am going to experiment with one of these 'hot staplers'.
I also want to replace some of the old or missing trim clips - I definitely have a box of 7894 assorted interior trims frm eBay somewhere, but I can't find it at the moment.
I also realised this was the perfect time to repair the folding action on the driver's mirror that has not worked since purchase - the motor whizzes away but likely a cog dislodged or broken. I dimly recall purchasing a spare mirror some time in history, so need to delve into the caves for that one too.
Cambs_Stuart said:
I've always wanted to have a go with a hot stapler. They look great in the adverts.
Exactly - let's see what happens...StescoG66 said:
Disconnect the additional tweeters otherwise the impedance to the head unit will be wrong and could cause damage.
Thank you - will do.The Rear
Day 0 - Prep Work
Ok, 164 fanciers, get ready for The Big One - a full week of work ending with The Festival Of The Unexceptional on the 30th July.
For full manufactured TV peril voiceover - is it possible to rebuild the rear end, dial in the new coilovers, replace the brake calipers, repair the splurting rusting brake lines, complete rust remedial work, refit some interior, complete a full valet, fit new tyres and alloys in time for a road trip to Grimsthorpe?
Well, probably.
Current situation - we left the poor 164 with brake fluid oozing from the front calipers after the rebuild of the Front. A near-death fretful 20mph limp was not how I imagined the first drive on front coiovers would go, but such is Alfa life. The car has languished outside, and is now 2.7% spiders and cobwebs by weight.

Front door cards, interior trim and wing mirrors are in various states of segregated progress around the house.
1. A donor subframe sourced in The Haul (see Eyes passim) has been collected from powder coaters along with a bevy of rear suspension components.

2. Front caliper donors were sourced some years ago and have returned from Bigg Redd, along with new pads.
3. New bushes await all circular apertures.
4. New belts for the trusty finger sander ready to deal with rust as it crops up.
With two days booked at Alfacraft, the weather thankfully less akin to an outtake from the film Sunshine and a full week off work, I am very excited to tidy, repair and renew as much as possible.
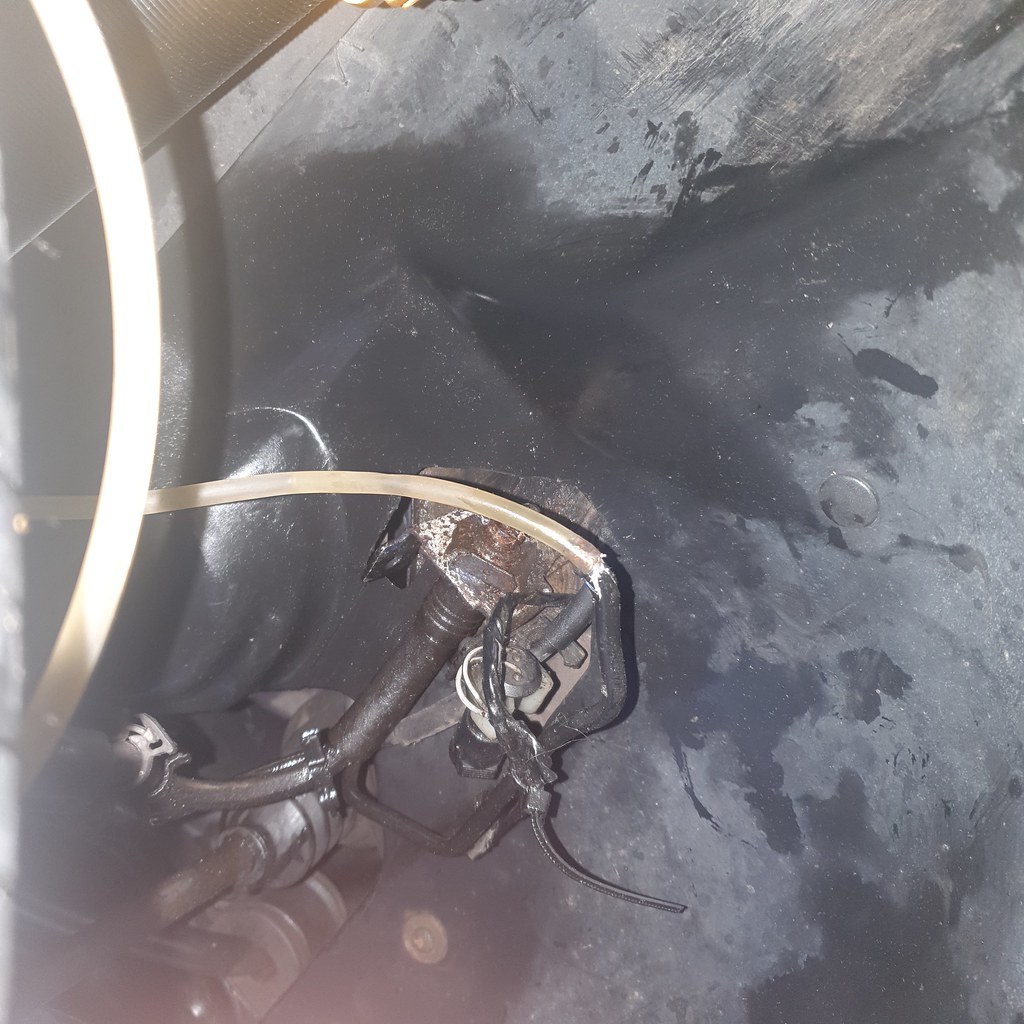
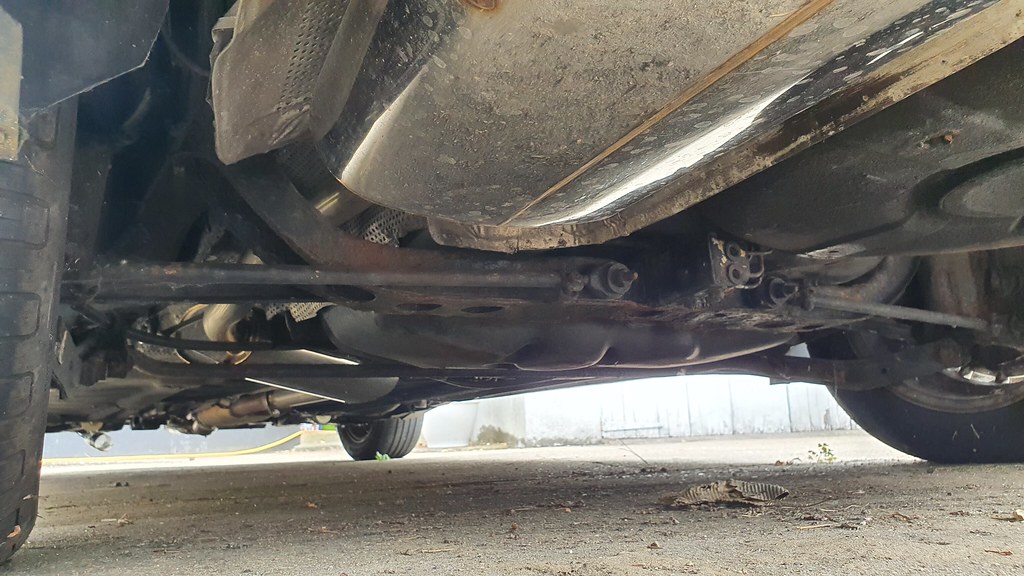
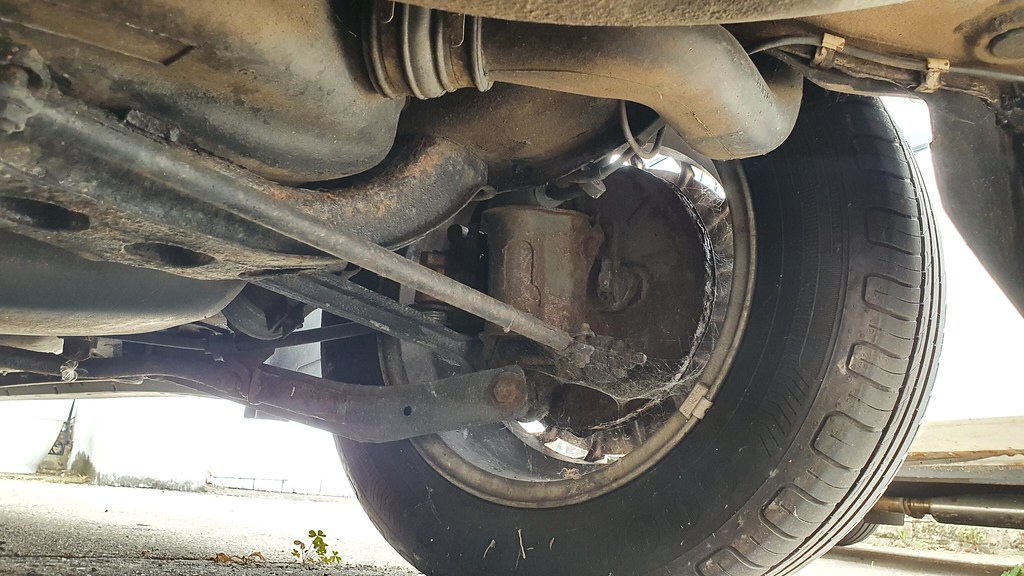
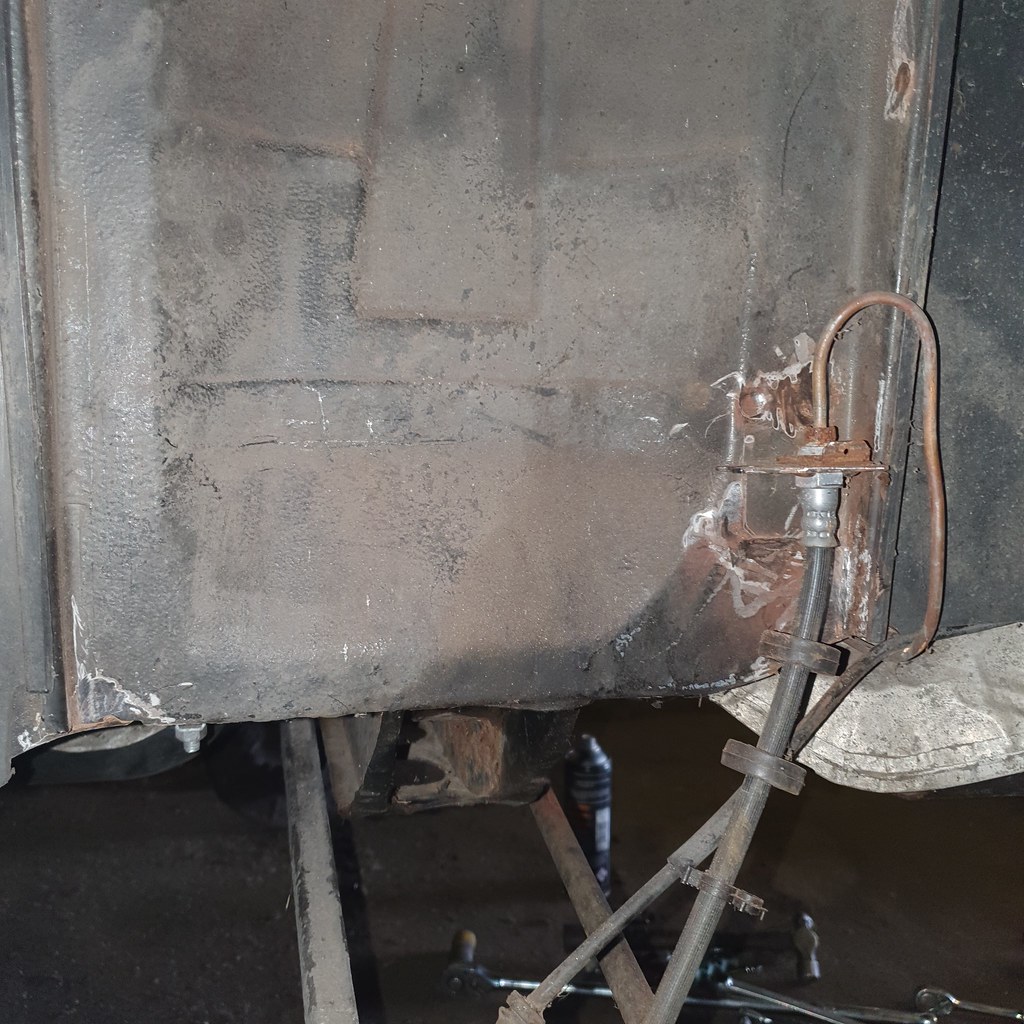
First challenge - how to limp the car back for all this work? I decided to crimp the front left as best I could, and encapsulate the offending end in a rubber hose, running it to a 'catch can' under the car, as I want to avoid Dot 4 getting anywhere near all the shiny new front components.


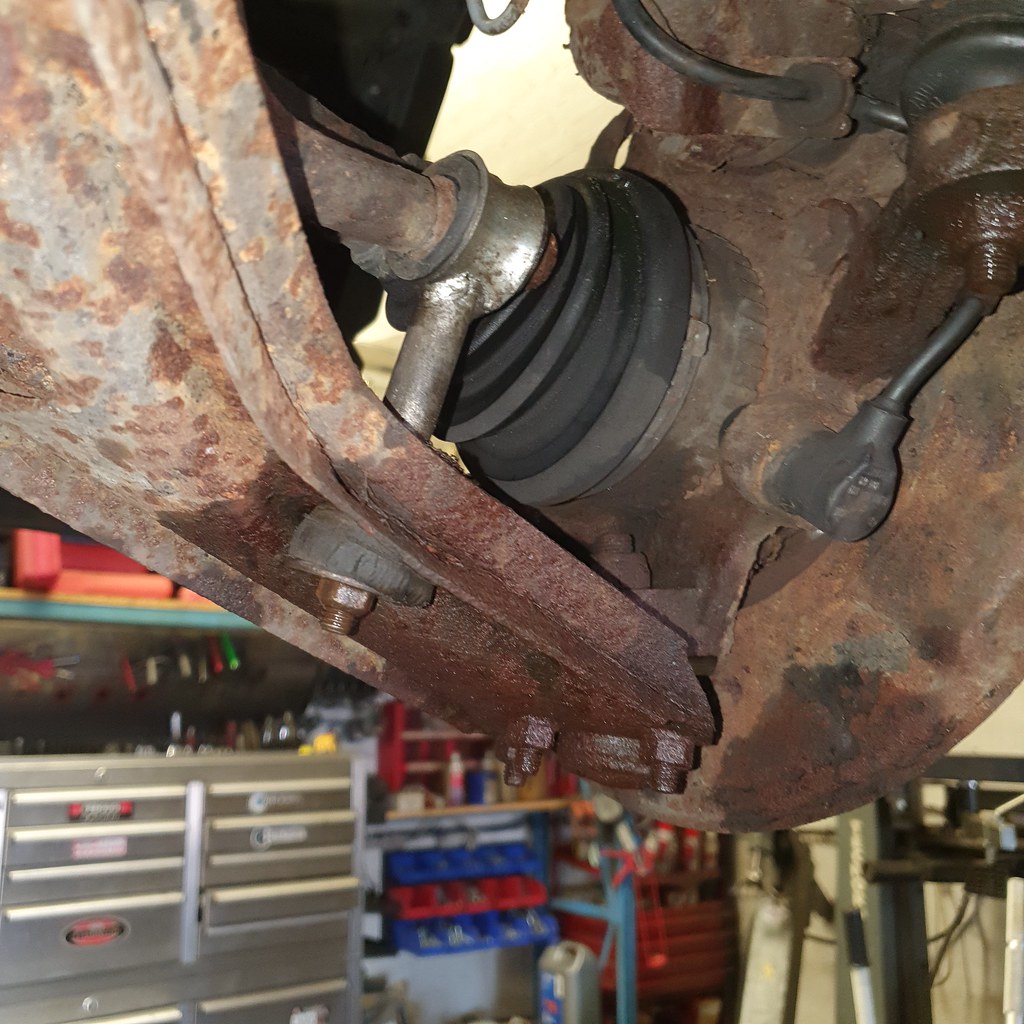
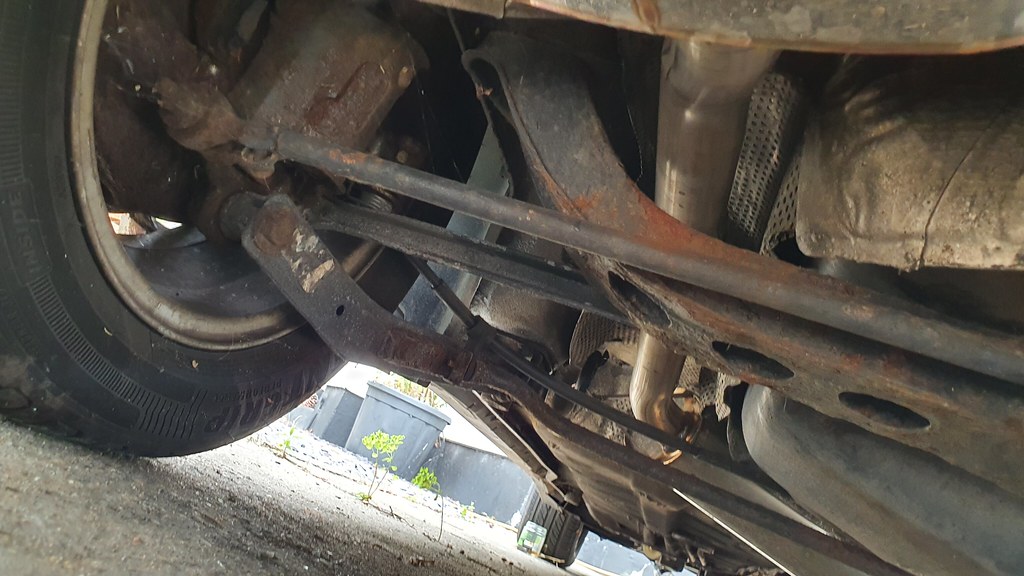
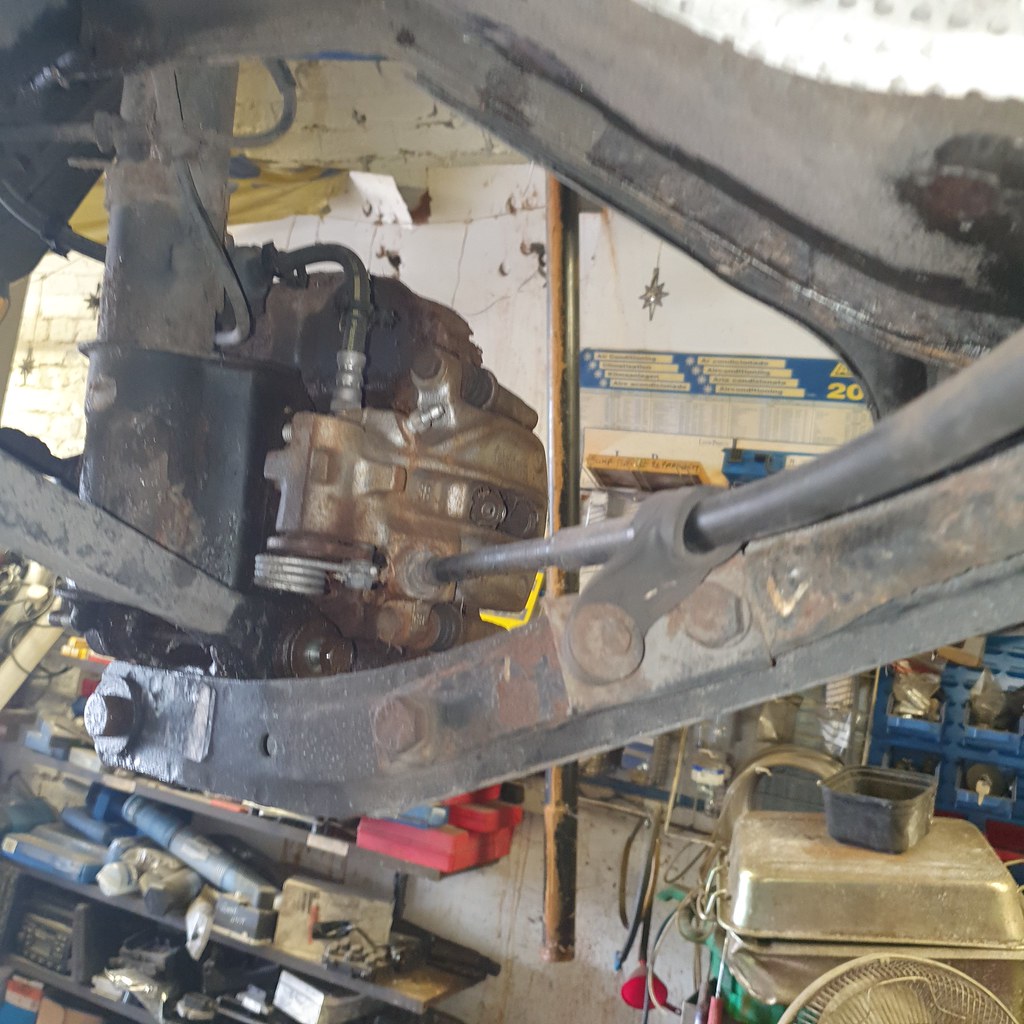
I hope you are all admiring the engine mount, wishbone, strut and subframe in that picture with barely concealed admiration.
Next up - prep the rear rustiness as much as possible with PlusGas. Note the amount of spiderthread. That is currently structural.

Finally - given my abortive attempts at wing mirror painting (a story for another time...) I just bolted on a blue metallic NOS item that I had purchased about 8 years ago.

Ok. All set.
Edited by Spinakerr on Saturday 23 July 22:18
The Rear
Day 1 - A New Hope
I giddily prepped morning coffee, dog treats and donned overalls for the first day at the workshop, bounded downstairs and joined the hilariously trudging traffic to Alfacraft. Fortunately the sheer volume of grumpy morning cars meant I rarely left first gear and the handbrake was seldom used; only a few heart stopping moments as fools swerved across lanes, desperate to make up a car length or two at 8am. My jerry-rigged catch can prevented any unwanted DOT4 circulation.
The dusty, cobwebbed Alfa limped onto the lift and would not be leaving until properly roadworthy. Phil made me a cup of tea. I gave a treat to Senna.

We got stuck in.

The plan for the first day was rear strut removal and subframe replacement, then assess what parts of the rear suspension required further adjustment. Every 30 minutes I would annoy Phil by breaking out the finger sander, chemicals and treat as much rust as possible while it was accessible. First up - wheels off, 17mm long bolts that secure the bottom of the struts out.


Amazingly, with breaker bars and two of us they came out without too much bother. There is an array of washers and spacers that I had to document to ensure nothing interferes at full travel. The hubs, like the front, are a bit cruddy but without defects.
The trim in the boot covers the two strut tops, but gently prying it back revealed the three 13mm nuts on both sides, and remarkbly the strusts were out before the 34th cup of tea of the morning.


New and... fossilised. Amazingly, the struts and springs still function within reasonableness. But there would defenitely need to be completely rebuilt and decrustified to be salvageable. I will tuck them away.

If the Munsters needed garage props...

Naturally, I spent a good few hours derusting the turrets with the sander, sorting out any worrying items, treating and stonechipping what I could.


Blue stuff from Bilt Hamber...


That's better...

New struts in without drama, no annoying alloy blocks to salavage from the originals, and with those in a lot fo the assembly was supported so we could tackle the subframe without too many bits falling on our precious skulls.

Various other bolts securing the handbrake cable, brackets and fripperies were loosened or removed according to Phil's knowledge.
This time I was determined not to spend hours at the end figuring out what went where, so enlisted some cardboard as a punctured inventory.

Next up - the subframe. I had treated the potentially-irreplaceable bolts securing it for a few weeks and even Phil was surprised when they loosened without too much effort. That was a big 'phew!' moment. The brake lines for the rear run througha central block attached to the subframe by 13mm bolts. This is hinged to react to suspension travel, and must be carefully removed. The lower adjustable control arms (at rear) also loosened their hold without drama, and the front (non adjustable) supports yielded soon after.


With the two of us handling it the subframe came out without drama, and a LOT of crud. Similar state to the struts then.


Phil said 'I've seen worse. At least this one is still in one piece.'!
We compared the replacements with powder coating to the old, and I broke out the packs of new bushes I had ready for pressing.
Herein we met our first snag - the 8 control arm bushes I had been sold were, in fact, stub axle bushes (of which there only two on the 164, for the longitudinally mounted transverse arms). Blast. After a fair bit of bush prodding with implements, we elected to tidy up the (not dreadful) existing arms, and I would attempt to track down new bushes to install in the new powder coated items for a supplemental visit.

Not the end of the Alfa world, but frustrating nonetheless.
The brake block cradle went in with copper slip and careful adjustment while the derusting paint dried elsewhere.

You know everything is going to plan when shiny things go on the car...


That took us to 5pm, so I still had an hour or two sanding and removing rust spots underneath, nipping up exhaust manifold bolts I hd forgotten last time and generally treating it all to a freshen up. By this time my camera was on life support so no photos, but a lot has been improved. Sadly brake disc dust covers are rarer than rare for this car, so the old ones had to go back on.
Phil consistently calls me names for taking pictures, but when reassembling he grudgingly accepted that after cleaning up all bolts, spaces and arms they were useful in getting the ordering right. Wonders will never cease.
With the rear all bolted up, Phil gave me the keys to another 100HP Panda and we called it a night.

Day 1 - A New Hope
I giddily prepped morning coffee, dog treats and donned overalls for the first day at the workshop, bounded downstairs and joined the hilariously trudging traffic to Alfacraft. Fortunately the sheer volume of grumpy morning cars meant I rarely left first gear and the handbrake was seldom used; only a few heart stopping moments as fools swerved across lanes, desperate to make up a car length or two at 8am. My jerry-rigged catch can prevented any unwanted DOT4 circulation.
The dusty, cobwebbed Alfa limped onto the lift and would not be leaving until properly roadworthy. Phil made me a cup of tea. I gave a treat to Senna.
We got stuck in.
The plan for the first day was rear strut removal and subframe replacement, then assess what parts of the rear suspension required further adjustment. Every 30 minutes I would annoy Phil by breaking out the finger sander, chemicals and treat as much rust as possible while it was accessible. First up - wheels off, 17mm long bolts that secure the bottom of the struts out.
Amazingly, with breaker bars and two of us they came out without too much bother. There is an array of washers and spacers that I had to document to ensure nothing interferes at full travel. The hubs, like the front, are a bit cruddy but without defects.
The trim in the boot covers the two strut tops, but gently prying it back revealed the three 13mm nuts on both sides, and remarkbly the strusts were out before the 34th cup of tea of the morning.
New and... fossilised. Amazingly, the struts and springs still function within reasonableness. But there would defenitely need to be completely rebuilt and decrustified to be salvageable. I will tuck them away.
If the Munsters needed garage props...
Naturally, I spent a good few hours derusting the turrets with the sander, sorting out any worrying items, treating and stonechipping what I could.
Blue stuff from Bilt Hamber...
That's better...
New struts in without drama, no annoying alloy blocks to salavage from the originals, and with those in a lot fo the assembly was supported so we could tackle the subframe without too many bits falling on our precious skulls.
Various other bolts securing the handbrake cable, brackets and fripperies were loosened or removed according to Phil's knowledge.
This time I was determined not to spend hours at the end figuring out what went where, so enlisted some cardboard as a punctured inventory.
Next up - the subframe. I had treated the potentially-irreplaceable bolts securing it for a few weeks and even Phil was surprised when they loosened without too much effort. That was a big 'phew!' moment. The brake lines for the rear run througha central block attached to the subframe by 13mm bolts. This is hinged to react to suspension travel, and must be carefully removed. The lower adjustable control arms (at rear) also loosened their hold without drama, and the front (non adjustable) supports yielded soon after.
With the two of us handling it the subframe came out without drama, and a LOT of crud. Similar state to the struts then.
Phil said 'I've seen worse. At least this one is still in one piece.'!
We compared the replacements with powder coating to the old, and I broke out the packs of new bushes I had ready for pressing.
Herein we met our first snag - the 8 control arm bushes I had been sold were, in fact, stub axle bushes (of which there only two on the 164, for the longitudinally mounted transverse arms). Blast. After a fair bit of bush prodding with implements, we elected to tidy up the (not dreadful) existing arms, and I would attempt to track down new bushes to install in the new powder coated items for a supplemental visit.
Not the end of the Alfa world, but frustrating nonetheless.
The brake block cradle went in with copper slip and careful adjustment while the derusting paint dried elsewhere.
You know everything is going to plan when shiny things go on the car...
That took us to 5pm, so I still had an hour or two sanding and removing rust spots underneath, nipping up exhaust manifold bolts I hd forgotten last time and generally treating it all to a freshen up. By this time my camera was on life support so no photos, but a lot has been improved. Sadly brake disc dust covers are rarer than rare for this car, so the old ones had to go back on.
Phil consistently calls me names for taking pictures, but when reassembling he grudgingly accepted that after cleaning up all bolts, spaces and arms they were useful in getting the ordering right. Wonders will never cease.
With the rear all bolted up, Phil gave me the keys to another 100HP Panda and we called it a night.
Edited by Spinakerr on Wednesday 27th July 15:20
Gassing Station | Readers' Cars | Top of Page | What's New | My Stuff