Alfa Romeo 164 Twinspark Super
Discussion


99t said:
Certainly makes a change from Alfa's usual choice of Chocolate as a parts material!! 
I jest, actually your 164 certainly seems to be keeping the tin worm at bay better than the Swedish Type Four variant, with which I am more familiar.
Absolutely. For a 25 year old car in regular use, it's resisted corrosion really well. I jest, actually your 164 certainly seems to be keeping the tin worm at bay better than the Swedish Type Four variant, with which I am more familiar.
The rad support looks very similar to the 166 one - yours seems to be doing rather better than the one on my 2004 166 that disintegrated as I tried to remove the radiator. It may actually be the same part! They unbolt and you can get them somewhere convenient for rust treatment. I also did the crusty brake pipes on the 166, whatever steel they use is .... poor. It's an easy job if you have the right tools.
Thanks all for the words of support - good to this little sub-annex to the giant warehouse of PH is of interest.
I went fishing in the shed today and found the power steering hose, which is unique to the 164 twinspark, much to my relief. No idea when I bought this:


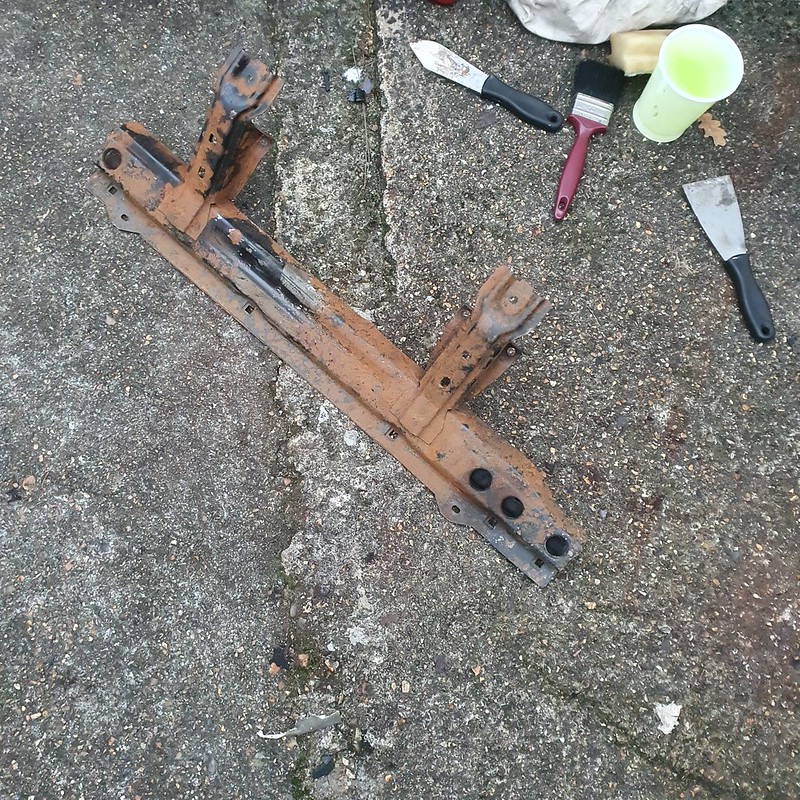
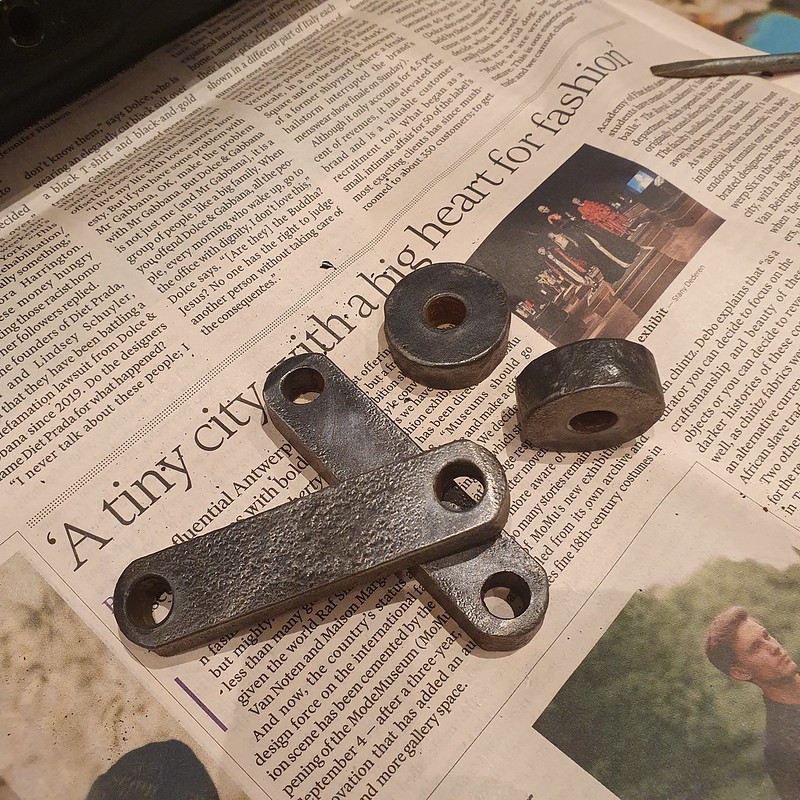
I also found the two radiator supports I appropriated from Mick at VintageAlfa last year in preparation for this job. Both are roughly at the same level of corrosion, and both significantly better than my current hobnob-resembling construction.

I think I'll select one to attach now, with some cursory rust treatment and painting, then keep the other for a more in-depth treatment and affixing to the new subframe when that project kicks off. Both have some level of crumbliness splitting the seams, which always concerns me. More prodding required.
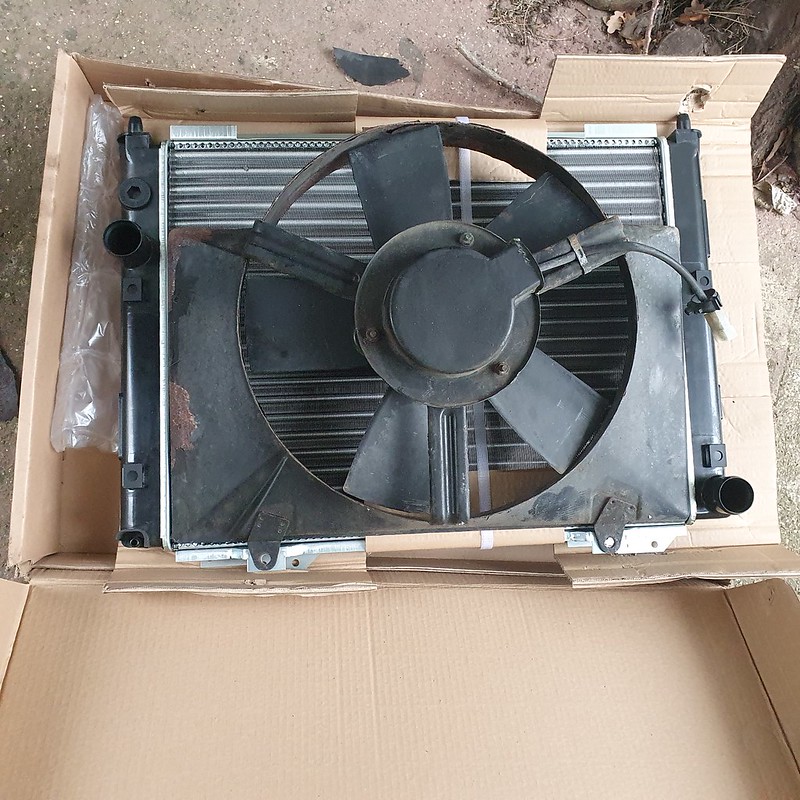
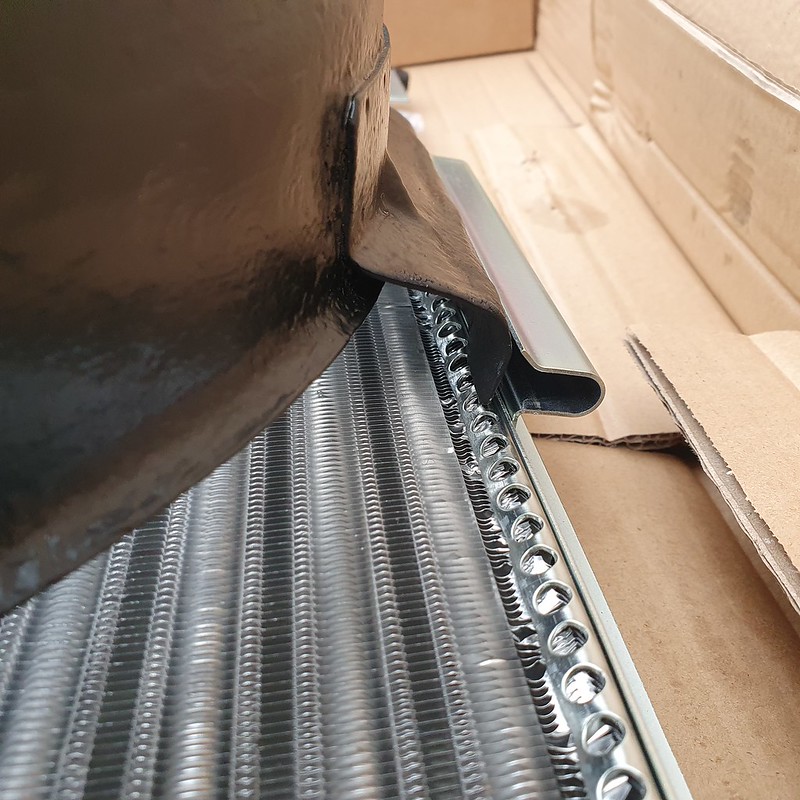
The old shroud perfectly fits the new radiator, and having failed to track a replacement down I amy decide to just roll up the sleeves, Deox this little blighter into submission and continue to keep a lookout for a replacement.
This is probably a good time to do the expansion tank too - right?
rxe said:
The rad support looks very similar to the 166 one - yours seems to be doing rather better than the one on my 2004 166 that disintegrated as I tried to remove the radiator. It may actually be the same part! They unbolt and you can get them somewhere convenient for rust treatment. I also did the crusty brake pipes on the 166, whatever steel they use is .... poor. It's an easy job if you have the right tools.
Just had another look today and it needs to go, even if I'm tackling the subframe and suspension another day. Best to remove the truly crusty, even if its technically only half the job.I went fishing in the shed today and found the power steering hose, which is unique to the 164 twinspark, much to my relief. No idea when I bought this:
I also found the two radiator supports I appropriated from Mick at VintageAlfa last year in preparation for this job. Both are roughly at the same level of corrosion, and both significantly better than my current hobnob-resembling construction.
I think I'll select one to attach now, with some cursory rust treatment and painting, then keep the other for a more in-depth treatment and affixing to the new subframe when that project kicks off. Both have some level of crumbliness splitting the seams, which always concerns me. More prodding required.
The old shroud perfectly fits the new radiator, and having failed to track a replacement down I amy decide to just roll up the sleeves, Deox this little blighter into submission and continue to keep a lookout for a replacement.
This is probably a good time to do the expansion tank too - right?
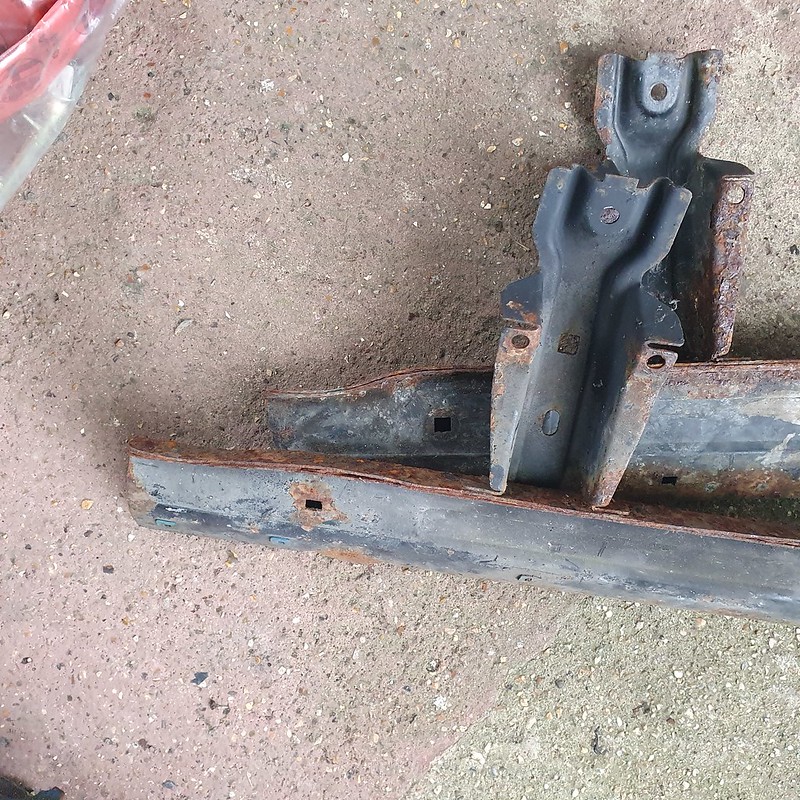
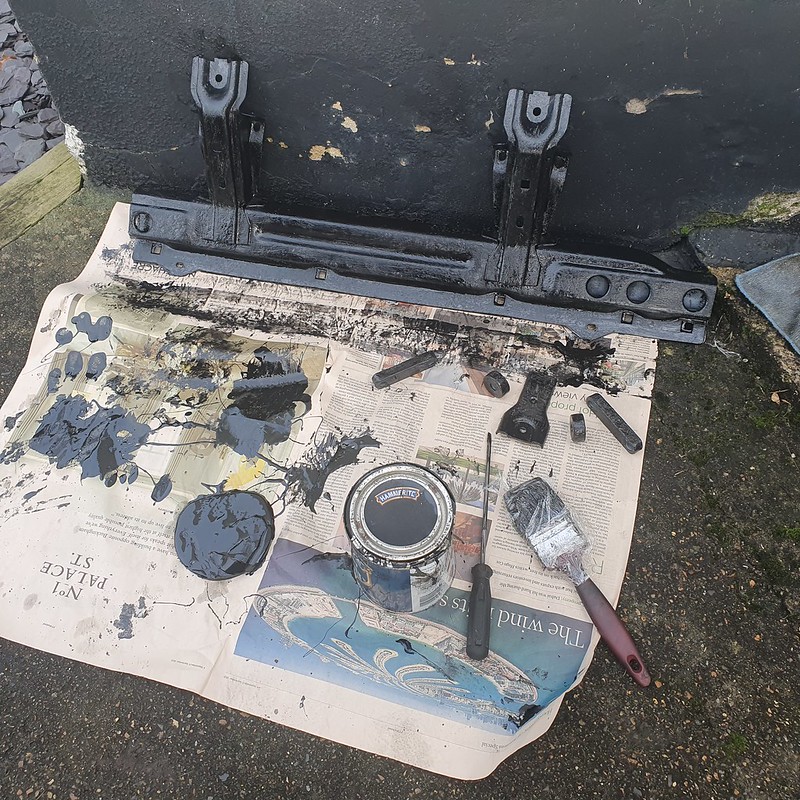
Some careful progress today in the failing light - I wanted to remove the old power steering hose and the radiator support bracket.
The rust was the main issue here - all bolts have been subsumed by crusty flakiness, all nuts a vaguely hexagonal memory and everything else taking on the frilly appearance of extravogant pastry experiments. I roped in a brown Anglepoise I rescued during lockdown for assistance.

Power steering and water lines run the length of the support. I Plusgassed the entire area and dug out two 19mm spanners to try the nearside power steering nut... success after gentle persuasion...


Let those drain for a bit and tried the banjo bolt with a 22mm... also successful...

Traditional #old and new photo - you can't fully appreciate the level of rust from this photo, but you get the gist.


Next up - attempting to remove the brackets and front support. This was just 4 10mm bolts and two 13mm nuts, but in reality it was a Time Team level of excavation with a retired screwdriver to scrape them back to hexagonal, plenty of PlusGas and then a tense effort of hammering sockets over them before attempting a loosen. With patience and a little luck, everthing came apart without a single bolt shearing. Phew.


Test fitted the new hose as I was on a roll - all ok, and fitted it up to seal the system overnight. Tomorrow derusting begins with a vengance!

The rust was the main issue here - all bolts have been subsumed by crusty flakiness, all nuts a vaguely hexagonal memory and everything else taking on the frilly appearance of extravogant pastry experiments. I roped in a brown Anglepoise I rescued during lockdown for assistance.
Power steering and water lines run the length of the support. I Plusgassed the entire area and dug out two 19mm spanners to try the nearside power steering nut... success after gentle persuasion...
Let those drain for a bit and tried the banjo bolt with a 22mm... also successful...
Traditional #old and new photo - you can't fully appreciate the level of rust from this photo, but you get the gist.
Next up - attempting to remove the brackets and front support. This was just 4 10mm bolts and two 13mm nuts, but in reality it was a Time Team level of excavation with a retired screwdriver to scrape them back to hexagonal, plenty of PlusGas and then a tense effort of hammering sockets over them before attempting a loosen. With patience and a little luck, everthing came apart without a single bolt shearing. Phew.
Test fitted the new hose as I was on a roll - all ok, and fitted it up to seal the system overnight. Tomorrow derusting begins with a vengance!
Edited by Spinakerr on Saturday 18th December 18:49
Its a dingy job for sure.
Managed to tackle most of the subframe yesterday and get the first few products on after plenty of wire brushing. Actually not as bad as I thought.


Of course I broke ut the finger sander for some of the areas around the headlights and front frame, plus some tiny bubbling I wanted ot address while cleaning the expansion tank.


Hammerite is the next stage, just to keep everything nasty at bay.
The best rad support, after much deliberation, has come up ok after initial chiselling. While blasting and powder coating might be preferrable, no one is picking up the phone or replying to emails, and I want ot get this done over Christmas period. This will be subjected to a vat of noxious products after some more brushing.
The fan shroud needs more power tools. I'm not even touching the sides with hand stuff, so contemplating rotating dervishes.
Managed to tackle most of the subframe yesterday and get the first few products on after plenty of wire brushing. Actually not as bad as I thought.
Of course I broke ut the finger sander for some of the areas around the headlights and front frame, plus some tiny bubbling I wanted ot address while cleaning the expansion tank.
Hammerite is the next stage, just to keep everything nasty at bay.
The best rad support, after much deliberation, has come up ok after initial chiselling. While blasting and powder coating might be preferrable, no one is picking up the phone or replying to emails, and I want ot get this done over Christmas period. This will be subjected to a vat of noxious products after some more brushing.
The fan shroud needs more power tools. I'm not even touching the sides with hand stuff, so contemplating rotating dervishes.
Thanks - inevitably, I ended up doing the same!
To ensure proper family time this christmas I took various rust bits with me on holiday, alongside all the various tools and chemicals to keep me occupied.
The knotted wire 'cup' was a revalation - I'm am very impressed by the level of rust and paint removal it achieves without deforming the original metal.
Before:

After:


Very satisfying. Plus sparks. I also hammered out a dent in the bottom of the rad support using my dad's bench vice.

I coated everything in Bilt Hamber Hydrate-80 and lugged it back home.

The slam panel I examined in daylight and just thought it needed more care and attention... too many small rust bubbled that I might see whenever the bonnet was opened. So I took it back again, this time with a sander.


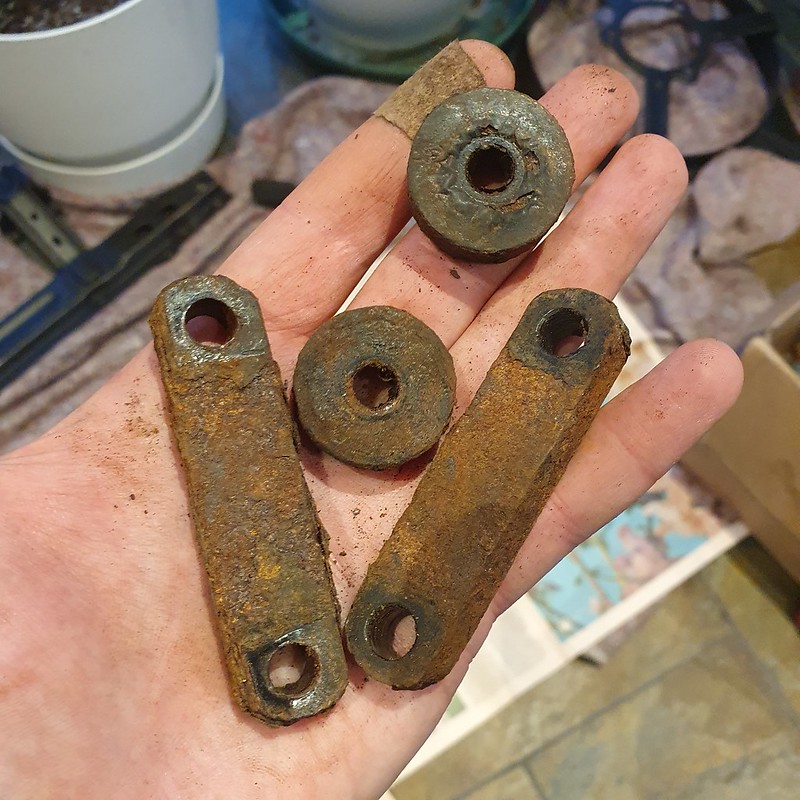
The support 'spacers' also got a knotted wheel session in a vice and came up brilliantly.
Fresh layers of Bilt Hamber and I'm ready for some wire wool, sugar soap and painting time to kick off 2022!

To ensure proper family time this christmas I took various rust bits with me on holiday, alongside all the various tools and chemicals to keep me occupied.
The knotted wire 'cup' was a revalation - I'm am very impressed by the level of rust and paint removal it achieves without deforming the original metal.
Before:
After:
Very satisfying. Plus sparks. I also hammered out a dent in the bottom of the rad support using my dad's bench vice.
I coated everything in Bilt Hamber Hydrate-80 and lugged it back home.
The slam panel I examined in daylight and just thought it needed more care and attention... too many small rust bubbled that I might see whenever the bonnet was opened. So I took it back again, this time with a sander.
The support 'spacers' also got a knotted wheel session in a vice and came up brilliantly.
Fresh layers of Bilt Hamber and I'm ready for some wire wool, sugar soap and painting time to kick off 2022!
Cambs_Stuart said:
Looks good. What did you attach the "knotted cup" to? Drill, angle grinder or dremel?
Its a DeWalt D28111 angle grinder I picked up used a little while ago for veyr little. Mains powered, works a treat. Recommended!rm36house said:
Very good job Sir! 
After Bilt Hamber Hydrate 80 what do you use next before painting with top coat(color)?
Thanks! Getting there... no such thing as 'throw away and order new one form main dealer' on this car.After Bilt Hamber Hydrate 80 what do you use next before painting with top coat(color)?
Next will be a keying with fine grade paper all round, Isopron 182 Zinc primer for everthing. Layers of Hammerite by brush on the support, brackets and subframe followed by a stonechip layer or two. The shroud and slam panel will have a careful 4-5 layers of satin black to try and give it a more eyeball-friendly appearance.
Then its time to bolt everything back together, renew all the nasty clips, put in the new power steering hose, pour in some antifreeze & Dexron III!
Edited by Spinakerr on Friday 31st December 11:22
With Brooklands New Years meet cancelled I started 2022 as I mean to go on - proper schedule of work on the Alfa after scowling at my coffee for an hour.
First up, keying all surfaces, including the aluminium fan motor cover I had forgotten about in the boot. Strange paint bubbling given the alu surfaces, but various scabs removed and sanded. All other items sanded a touch with 800 grit, sugar soaped and setup for Isopon 182 zinc primer.


After primer cured correctly, I divided the carts into the Hammerites and the Satin, and orchestrated a turf war.
No that's just nonsense - just two groups for two different paints. Ont he Hammerite site, sadly the enamally stuff didnt want to stick convincingly to the primer. Its a very old tin that may have been exposed to the elements, and as you can see by the amount of orc blood spilled was a general pain to apply.
Far more civilised on the Satin side of town, with 6 layers going on through the day.

Found a fresh tin of Hammerite and went for the subframe. Far better.

Rummaging after lunch revealed a fresh can of spray Hammerite, which went on a treat.

With light fading I made prep for the ressembly - rescuing the clips and screws from the old bracket and ensuraing all bolts were respectably derusted.

In some cases, replacements were sourced.

I also checked my stores for fresh antifreeze and power steering liqueur. Right, all set for the rebuild!
First up, keying all surfaces, including the aluminium fan motor cover I had forgotten about in the boot. Strange paint bubbling given the alu surfaces, but various scabs removed and sanded. All other items sanded a touch with 800 grit, sugar soaped and setup for Isopon 182 zinc primer.
After primer cured correctly, I divided the carts into the Hammerites and the Satin, and orchestrated a turf war.
No that's just nonsense - just two groups for two different paints. Ont he Hammerite site, sadly the enamally stuff didnt want to stick convincingly to the primer. Its a very old tin that may have been exposed to the elements, and as you can see by the amount of orc blood spilled was a general pain to apply.
Far more civilised on the Satin side of town, with 6 layers going on through the day.
Found a fresh tin of Hammerite and went for the subframe. Far better.
Rummaging after lunch revealed a fresh can of spray Hammerite, which went on a treat.
With light fading I made prep for the ressembly - rescuing the clips and screws from the old bracket and ensuraing all bolts were respectably derusted.
In some cases, replacements were sourced.
I also checked my stores for fresh antifreeze and power steering liqueur. Right, all set for the rebuild!
Thanks! Rest of the car is agreeable at floorpan/sill level - the 'main body'. Main bits left to tackle are on consumables/detachables - springs, wishbones, and of course the infamous rear crossmember.
The Alfa all went back together today - after dodging rain and other commitements over the weekend the Bank Holiday was most welcome to tackle the 164.
I built the fan up Sunday evening, renewing fitting, bolts and clips where necessary. A big improvement!


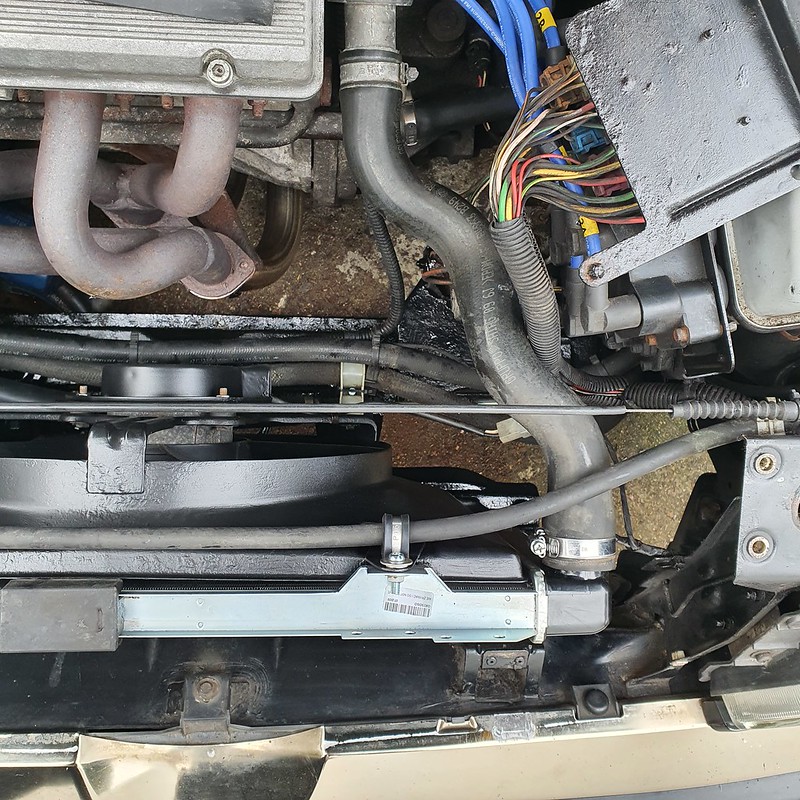
Radiator support back together too...

The rad support slotted in with its 'spacers' and all cleaned up bolts without issue. I aligned up the power steering hose with the banjo bolt and twin 19mm spanners, and rearranged a few items for order in the lower reaches. I also checked a few inaccessible areas - there are some brake pipes showing their age at the ABS pump so that's added to the list.

The expansion tank came up nicely after some of the standard internet-advised concoctions recently. Not back to bright white but I'd rather keep the original tank than change it for an unknown pattern part.

One of the radiator rubber mounts was permanently deformed from the older, incorrect radiator. Fortunately I had one from the previous 'haul' in a random bag of odments. Result! Fan sensor cleaned up with a file on the contacts and electrical paste.


First obstacle - the fan shoud did sit at the bottom in the rad's slot. I decided to bend the metal out flat, repaint with Hammerite and seat in a strip of rubber to get a close fit. It actually now hugs the radiator perfectly after also tweaking the top tabs.


Rad in and piped up, new Mikalor clamps added, hoses and wires reconnected in a neatened fashion (a few new P clips and ties).

Fresh coolant in the tank (and as much of the rad as I could get to) and Dexron 3 in the resevior.... quick check of all connections and clamps... deep breath...

Engine fires beautifully, and the power steering noises settled down after a few gentle turns. Once the engine warmed up the thermostat opened and the level dropped to the amount I had taken out (yes, I did measure what came out on both steering and coolant!).

Once warmed up a few turns to full lock and the bubbles in the power steering resevoir calmed down.

No leaks at all. I was quite chuffed with that, as something always leaks! I gingerly settled my pristine slam panel down and added the final bits of trim (which now fit, for the first time, as the radiator is the correct shape).

Very happy. I hope 2022 goes this well!
The Alfa all went back together today - after dodging rain and other commitements over the weekend the Bank Holiday was most welcome to tackle the 164.
I built the fan up Sunday evening, renewing fitting, bolts and clips where necessary. A big improvement!
Radiator support back together too...
The rad support slotted in with its 'spacers' and all cleaned up bolts without issue. I aligned up the power steering hose with the banjo bolt and twin 19mm spanners, and rearranged a few items for order in the lower reaches. I also checked a few inaccessible areas - there are some brake pipes showing their age at the ABS pump so that's added to the list.
The expansion tank came up nicely after some of the standard internet-advised concoctions recently. Not back to bright white but I'd rather keep the original tank than change it for an unknown pattern part.
One of the radiator rubber mounts was permanently deformed from the older, incorrect radiator. Fortunately I had one from the previous 'haul' in a random bag of odments. Result! Fan sensor cleaned up with a file on the contacts and electrical paste.
First obstacle - the fan shoud did sit at the bottom in the rad's slot. I decided to bend the metal out flat, repaint with Hammerite and seat in a strip of rubber to get a close fit. It actually now hugs the radiator perfectly after also tweaking the top tabs.
Rad in and piped up, new Mikalor clamps added, hoses and wires reconnected in a neatened fashion (a few new P clips and ties).
Fresh coolant in the tank (and as much of the rad as I could get to) and Dexron 3 in the resevior.... quick check of all connections and clamps... deep breath...
Engine fires beautifully, and the power steering noises settled down after a few gentle turns. Once the engine warmed up the thermostat opened and the level dropped to the amount I had taken out (yes, I did measure what came out on both steering and coolant!).
Once warmed up a few turns to full lock and the bubbles in the power steering resevoir calmed down.
No leaks at all. I was quite chuffed with that, as something always leaks! I gingerly settled my pristine slam panel down and added the final bits of trim (which now fit, for the first time, as the radiator is the correct shape).
Very happy. I hope 2022 goes this well!
Edited by Spinakerr on Monday 3rd January 19:13
Thank you both!
Next up is a big choice on suspension component purchases, then I am prepping front and rear subframes for full derustification and Epoxy/Waxoyl treatment of the entire car in spring. Can't wait... (sigh)...
I also need to treat the leather seats, then get two new front tyres. But otherwise the car is ready to march onward, and aiming for Auto Italia on the 30th April.
Here's a photo opportunity I couldn't resist down at the boatyards:

I still absolutely love how this car looks.
Next up is a big choice on suspension component purchases, then I am prepping front and rear subframes for full derustification and Epoxy/Waxoyl treatment of the entire car in spring. Can't wait... (sigh)...
I also need to treat the leather seats, then get two new front tyres. But otherwise the car is ready to march onward, and aiming for Auto Italia on the 30th April.
Here's a photo opportunity I couldn't resist down at the boatyards:
I still absolutely love how this car looks.
Gassing Station | Readers' Cars | Top of Page | What's New | My Stuff