1954 Daimler Ferret armoured car
Discussion


9 


Obviously this is technically for the 7.62mm version of the Bren, it wouldn't be hugely difficult to fabricate a replacement to be honest, putting this one on did require a few persuasive taps I know that much. Up the back of the unit I do have the bullet case catcher box that hangs off the side, it looks smart with that on.


Obviously this is technically for the 7.62mm version of the Bren, it wouldn't be hugely difficult to fabricate a replacement to be honest, putting this one on did require a few persuasive taps I know that much. Up the back of the unit I do have the bullet case catcher box that hangs off the side, it looks smart with that on.
Edited by LewG on Friday 15th July 16:55
Yep it's not bad, fairly thick gauge stuff but could probably be cold bent in a vice etc. Absolutely true about that, he is a good bloke and there's no doubt about it he's forgotten more than most people know.
Haha that'll go down a treat! We took my brother and his clan to the prom in our CVRT and made the front page of the local paper
I got a few more photos today for you of our base plate mounted at the front:


Haha that'll go down a treat! We took my brother and his clan to the prom in our CVRT and made the front page of the local paper
I got a few more photos today for you of our base plate mounted at the front:
Edited by LewG on Wednesday 23 August 22:09
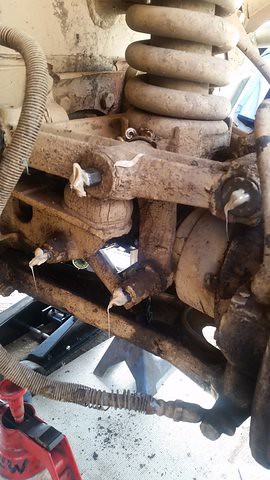
Well today was all about greasy nipples, sadly only on the Ferret. I had today off work so I thought I'd have an hour or two this morning to see if I could get any grease into the creaky suspension components. I only got one corner done so there's the rear offside to do tomorrow. I took all of the grease nipples out and cleaned them down with brake cleaner and the wire wheel, then tried digging some of the more solid dirty grease out from the galleries with a drill bit. The outer wishbone pivots have grease caps and felt seals so I took those off and cleaned behind those, the seals weren't great so I might have a go at making another with a flat O ring. What lovely weather for it though, looks like I picked the right days to have as holiday!


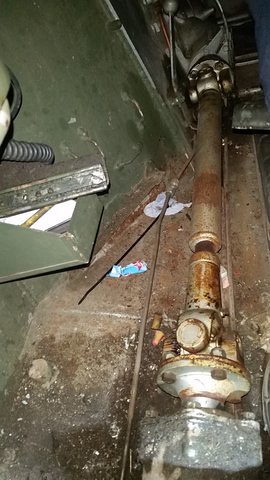
Steering box arm is weeping but at least it shows there's oil in it
Steering box arm is weeping but at least it shows there's oil in it
Edited by LewG on Wednesday 23 August 22:15
How did your mate get on at the party with it? Suspension is a lot less noisy now but still it's difficult to get grease right to the inner parts of the scroll, I suspect what's in there is so waxy and horrible the easiest path is out of the seals etc.
That is indeed, from what I can tell it's basically a Ferret hull with a Chevy V8 in it and huge coilovers I wonder what they did with the transmission because that would take a bit of engineering
That is indeed, from what I can tell it's basically a Ferret hull with a Chevy V8 in it and huge coilovers
I wonder what they did with the transmission because that would take a bit of engineering EarlOfHazard said:
Isn't that lovely! The box saying 'Delivery?' with a picture of a Transit made me laugh That's good! Unfortunately I've only got a Taymar blowtorch here and I doubt I'd get it hot enough to actually melt the waxy crap inside. I might ask work if I can take it in one Saturday and get some propane on it, that'd be ideal. I find once the gun has built up some pressure it holds itself on the nipple and then you can really heave on it. Much rather struggle now than have it all to pieces and rebush it though! The front LH corner I've just done is whisper quiet
Brilliant! Good to see so many of them together and in good hands.
I've been going here, there and everywhere in ours with no trouble at all. Tonight my mate gets in it to move it and several minutes go by with no movement. I went to have a look what the crack was, as I'd been to Old Warden show on Sunday and it was fine. We seemed to have a gear selection issue, the gear change pedal felt tight but stayed down at the floor regardless of what gear was selected on the gate.
Thought I'd check the basics first so I removed the prop cover to check the actuator rod wasn't snagged or something, all fine. Removed the seat, radio tray and gearbox panels only to find a much worse problem than anticipated.
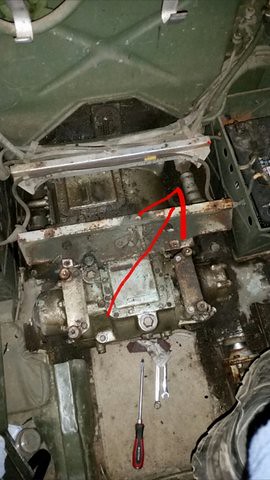
That don't look right!
Apologies for the poor quality of the pictures but this really was down in the depths, as you can see the pivot rod which changes the direction of movement to the gear change arm on the box should be held at both ends in this holder, somehow it's worked out and upon mate pressing the pedal the mechanical advantage has yanked it forwards, bending the other bracket and potentially the rod too.
Realistically there's no room to fix it down there so unfortunately I think the gearbox is going to have to come out. At least it'll give me a chance to clean it all, it's bloody filthy!
I've been going here, there and everywhere in ours with no trouble at all. Tonight my mate gets in it to move it and several minutes go by with no movement. I went to have a look what the crack was, as I'd been to Old Warden show on Sunday and it was fine. We seemed to have a gear selection issue, the gear change pedal felt tight but stayed down at the floor regardless of what gear was selected on the gate.
Thought I'd check the basics first so I removed the prop cover to check the actuator rod wasn't snagged or something, all fine. Removed the seat, radio tray and gearbox panels only to find a much worse problem than anticipated.
That don't look right!
Apologies for the poor quality of the pictures but this really was down in the depths, as you can see the pivot rod which changes the direction of movement to the gear change arm on the box should be held at both ends in this holder, somehow it's worked out and upon mate pressing the pedal the mechanical advantage has yanked it forwards, bending the other bracket and potentially the rod too.
Realistically there's no room to fix it down there so unfortunately I think the gearbox is going to have to come out. At least it'll give me a chance to clean it all, it's bloody filthy!
Edited by LewG on Tuesday 16th August 23:41
Edited by LewG on Wednesday 23 August 22:22
It certainly is! If you were sitting facing forward from the commander's seat it's directly underneath the gearbox and to the left hand side, you can see it from straight above but there's no chance of getting any tools in there!
To be honest taking the box out doesn't look all that difficult, the only thing I'm not sure on is getting to all of the bell housing bolts, as it's not like you can go underneath to do the bottom ones! At the end of the day at least it gives me a chance to clean and paint the floor. Another job I'll be doing is changing the fluid flywheel oil as that's never been done in 14 years of ownership. Guilty
To be honest taking the box out doesn't look all that difficult, the only thing I'm not sure on is getting to all of the bell housing bolts, as it's not like you can go underneath to do the bottom ones! At the end of the day at least it gives me a chance to clean and paint the floor. Another job I'll be doing is changing the fluid flywheel oil as that's never been done in 14 years of ownership. Guilty
Something of an update on the Ferret.
After a few months of laying dormant I fired it up and let it run for a good hour or so on the hand throttle to get it nice and hot and give the batteries a charge.
It was always the plan to remove the gearbox to sort the linkage problem out to one side, potentially fitting a recon gearbox I have on a pallet at the same time. At this point in time I've got a few other big car projects on and ideally I could do without another, so I decided to see if for now I can just repair the problem in situ.
I removed the left hand battery and battery box which gave lots more room, and had a go at removing the clevis pins to get some of the linkage out this evening.
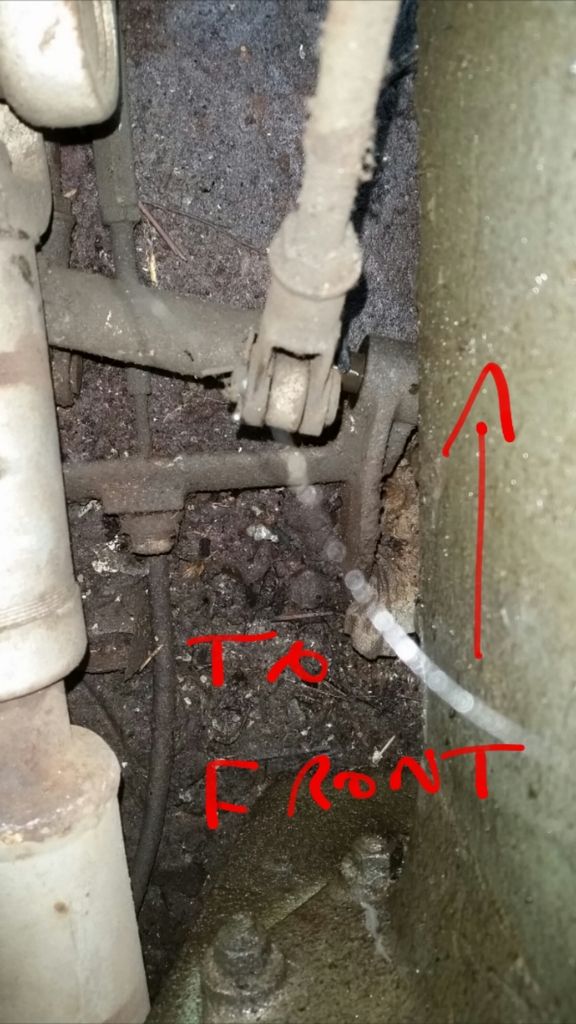
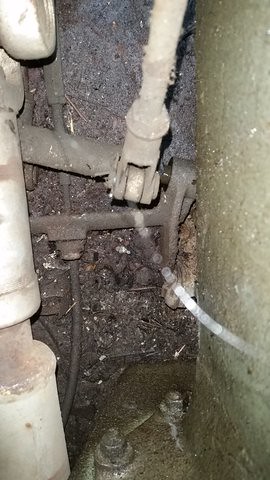
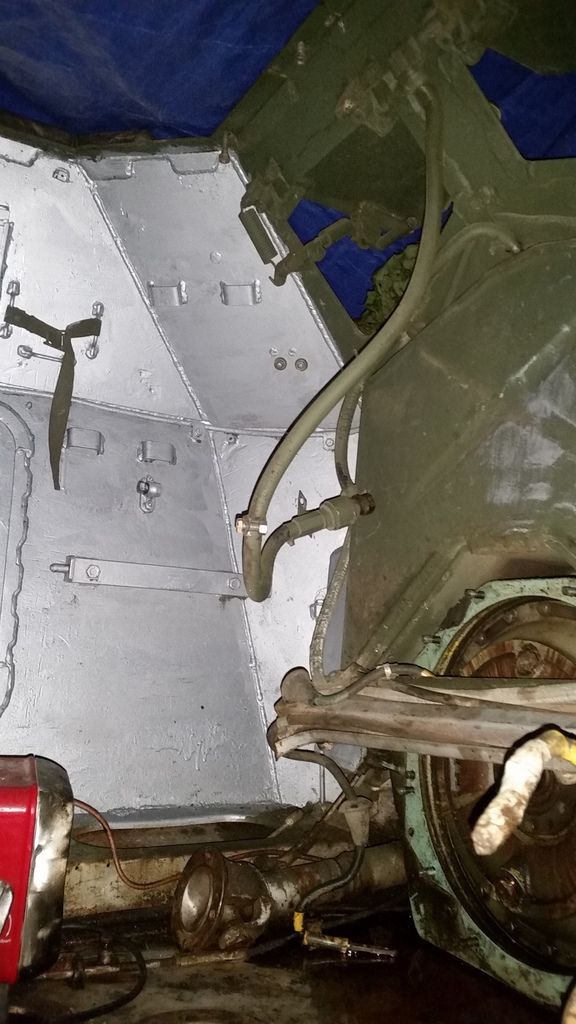
If you look on the RH side of this photo you can see a small hole in the bracket. The pivot shaft itself has a hole too and is held solid on this with a roll pin. It's where this roll pin has fallen out that has allowed the shaft to work its way free.
With great difficulty I managed to remove the clevis pin split pins and knock them out.
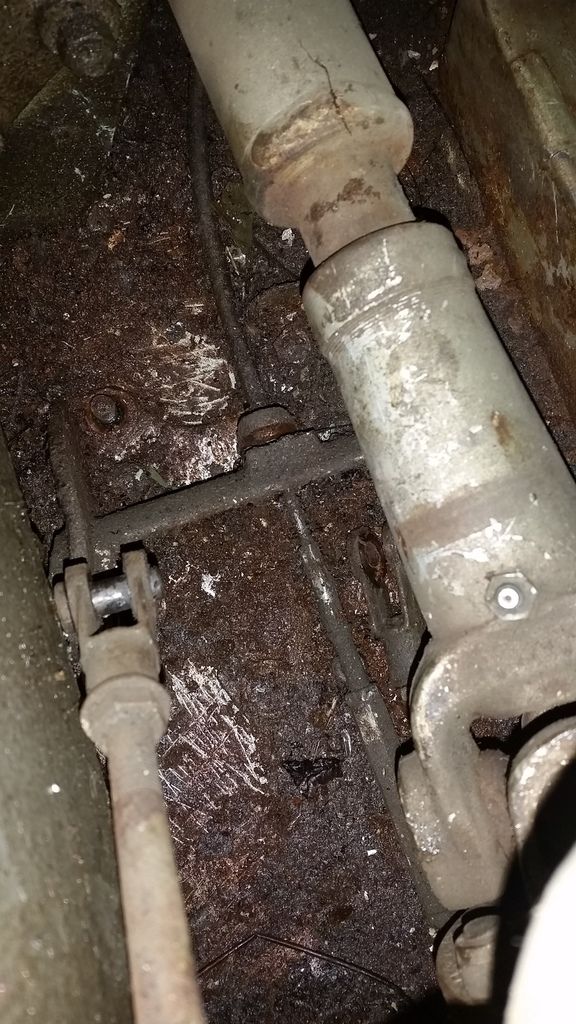
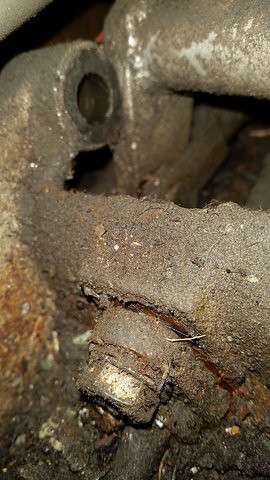
Unfortunately the pivot shaft is slightly bent, as is the bracket so that too will need to be removed from the hull. I'm not sure on how to go about this as the handbrake cable and a brake pipe runs through it in closed holes. Not really prepared to remove them at either end as that's a huge faff. Maybe the grinder will help
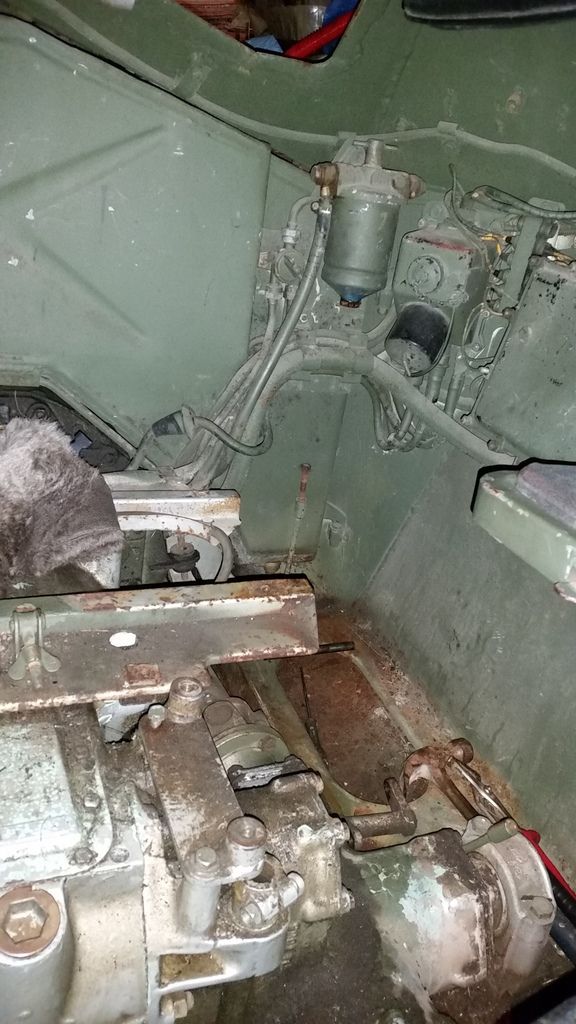
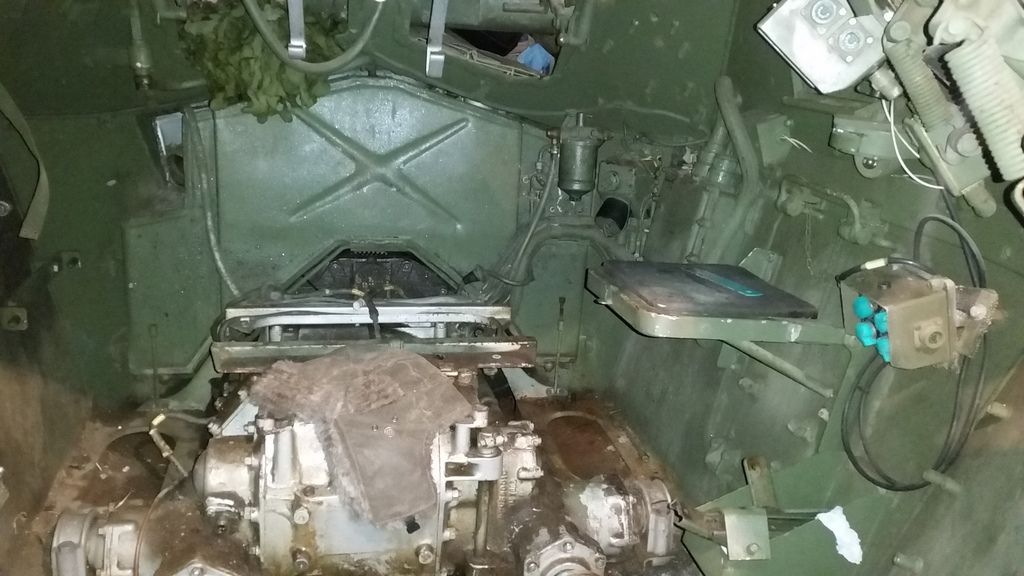
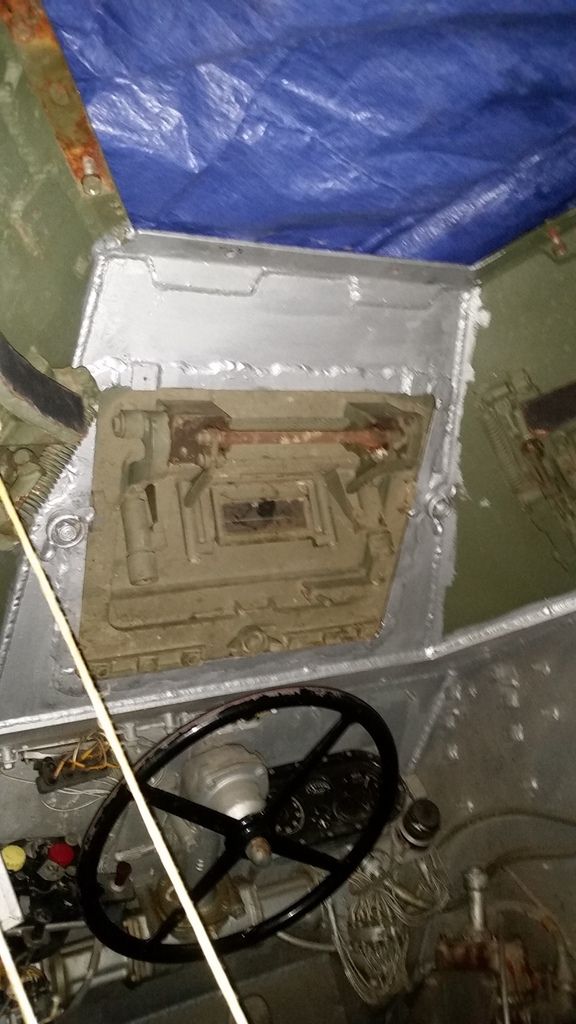
It's probably quite hard to visualize where this is happening, it is in the LH rear of the fighting compartment. This photo shows it a bit better, looking towards the rear with gearbox and fuel tank visible
After a few months of laying dormant I fired it up and let it run for a good hour or so on the hand throttle to get it nice and hot and give the batteries a charge.
It was always the plan to remove the gearbox to sort the linkage problem out to one side, potentially fitting a recon gearbox I have on a pallet at the same time. At this point in time I've got a few other big car projects on and ideally I could do without another, so I decided to see if for now I can just repair the problem in situ.
I removed the left hand battery and battery box which gave lots more room, and had a go at removing the clevis pins to get some of the linkage out this evening.

If you look on the RH side of this photo you can see a small hole in the bracket. The pivot shaft itself has a hole too and is held solid on this with a roll pin. It's where this roll pin has fallen out that has allowed the shaft to work its way free.
With great difficulty I managed to remove the clevis pin split pins and knock them out.


Unfortunately the pivot shaft is slightly bent, as is the bracket so that too will need to be removed from the hull. I'm not sure on how to go about this as the handbrake cable and a brake pipe runs through it in closed holes. Not really prepared to remove them at either end as that's a huge faff. Maybe the grinder will help
It's probably quite hard to visualize where this is happening, it is in the LH rear of the fighting compartment. This photo shows it a bit better, looking towards the rear with gearbox and fuel tank visible

Edited by LewG on Friday 23 December 00:58
That's brilliant! It'll look armed to the teeth can't have been cheap though.
I hope it's doable but we shall see, as I say in a way it'd be nice to put the other box in so I'll have a think about it.
I have heard that, though from what I remember, don't quote me on this, there's two kinds of generator and it's the earlier sort you have to do that with. Can't say I've ever bothered
can't have been cheap though. I hope it's doable but we shall see, as I say in a way it'd be nice to put the other box in so I'll have a think about it.
I have heard that, though from what I remember, don't quote me on this, there's two kinds of generator and it's the earlier sort you have to do that with. Can't say I've ever bothered
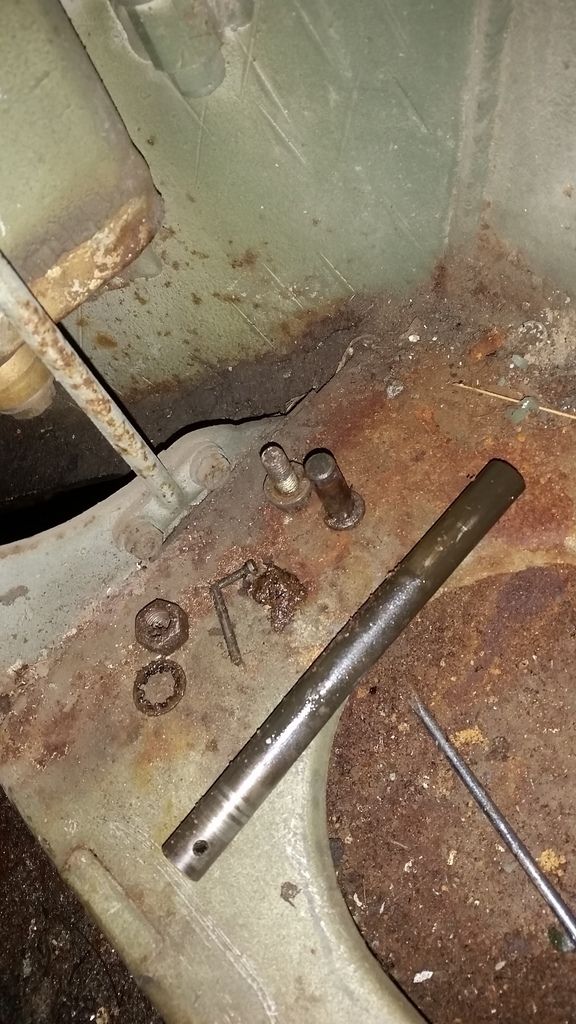
Good news, got the bracket removed today. Separated the handbrake cable at the adjuster and pulled that back through, then the pipe grommet holder was thankfully just on a separate bracket sharing the same mounting studs. It's properly bent!
When I go back to work I'll get it heated up and tweak it back as best I can, the pivot shaft itself is bent but it's only a half inch bar with a hole drilled in the end, nothing difficult to make.
When I go back to work I'll get it heated up and tweak it back as best I can, the pivot shaft itself is bent but it's only a half inch bar with a hole drilled in the end, nothing difficult to make.
Edited by LewG on Friday 30th December 01:33
Cheers Shadow, absolutely! I spent my time productively at work today and got the bracket heated up and tweaked back, then straightened the pin with a vice and some tube. It's about perfect on a straight edge so a job well done. Unfortunately the casting had a tiny crack from being bent in the first place so having heated and bent back I ground it out and carefully put a few spots of weld in there. It took a couple of goes but it's sorted.
I was going to pop it all back together but instead I started to strip a few more hull fittings out this evening as I've decided to paint it silver in there as it should be instead of the green. It deserves a real good clean up as well so I'll scrape the crap out of the floor and gunk the gearbox etc down to clean it properly. All good and well getting the pressure washer on it but at this time of year nothing seems to dry out! The plan is shut all the hatches bar one and pop the canvas on then put one of those electric heaters inside, should work!
No photos of work so far as my phone died this evening, will try and get a bit more done tomorrow
Cheers chap, to be honest crass as it sounds, I have two decent sized tins of Hammerite silver laying around and it seems to paint on these rough castings etc quite well so I may try that.
I've been cracking on a bit and to be honest I'm very much in two minds whether to go balls out and remove the gearbox or not. It'd definitely be a proper job and I imagine be a lot easier in the long run. Another bonus is that it allows drainage of the fluid flywheel oil as there is no provision underneath to actually drain it into a tub, you have to let it run onto the hull floor
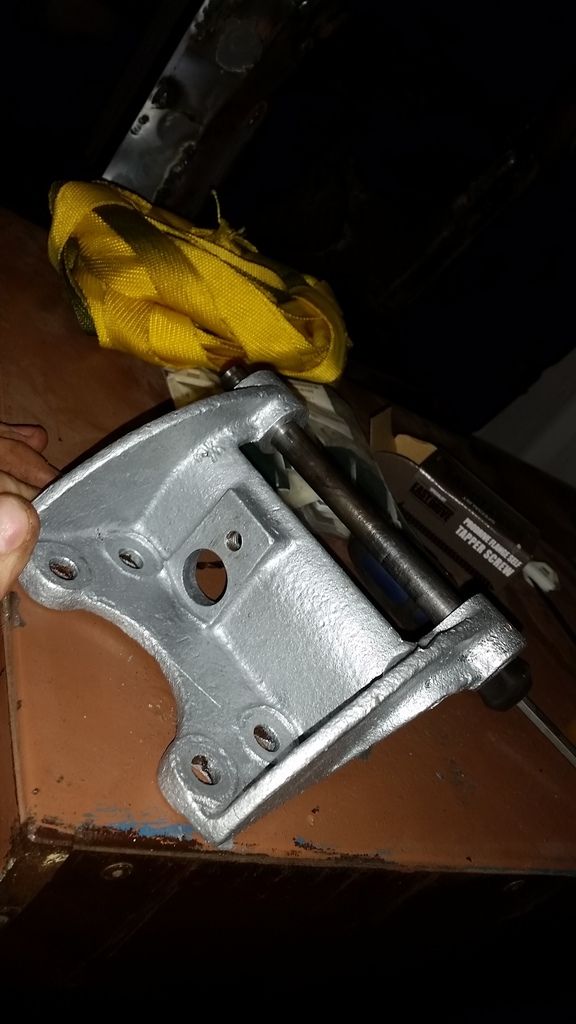
Here is the straightened gear change bracket and pin. Looking a bit better than it was previously!
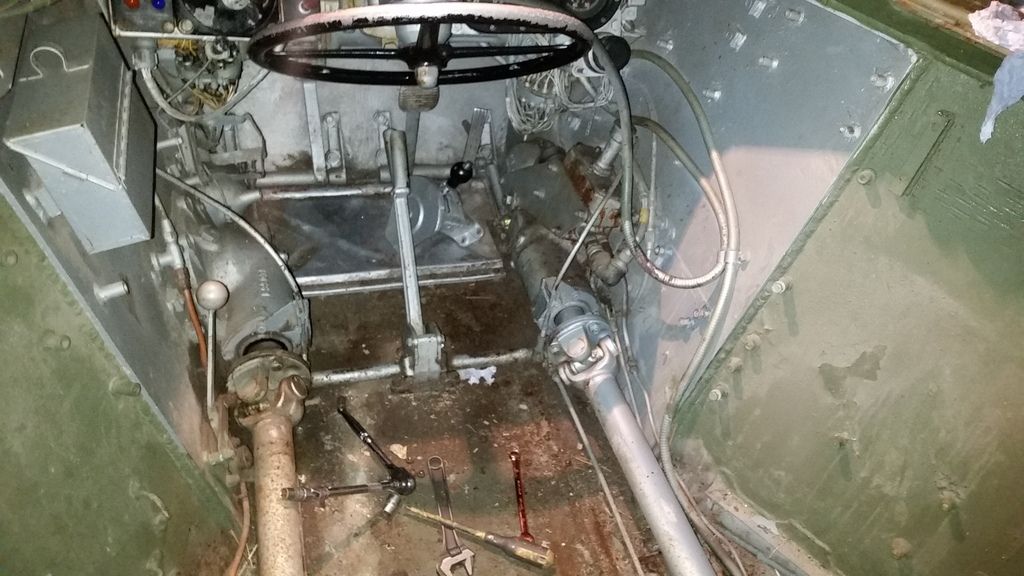
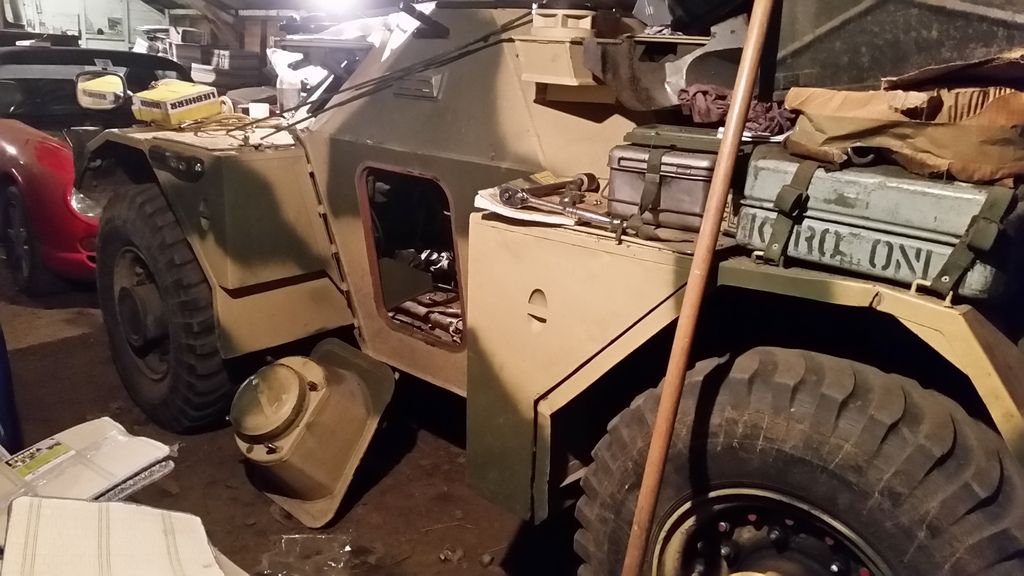
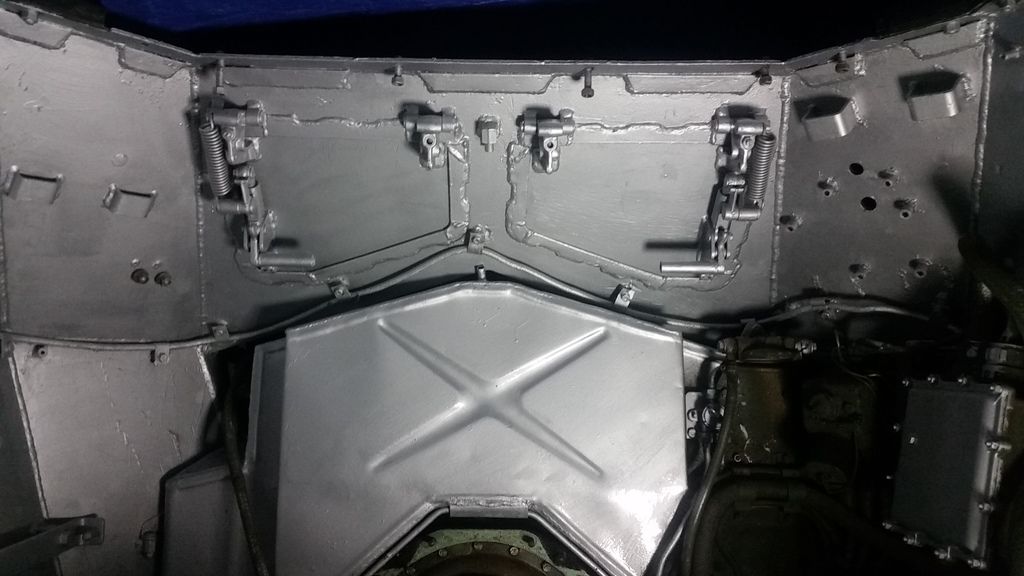
A few interior photos, there's the side seat to remove, some wiring and the intercom etc.
So far I've removed more than it looks, air filter, driver's seat, gear lever, speedo cable, vision blocks, ammo boxes, covers, map tray and both prop covers.
I've been cracking on a bit and to be honest I'm very much in two minds whether to go balls out and remove the gearbox or not. It'd definitely be a proper job and I imagine be a lot easier in the long run. Another bonus is that it allows drainage of the fluid flywheel oil as there is no provision underneath to actually drain it into a tub, you have to let it run onto the hull floor
Here is the straightened gear change bracket and pin. Looking a bit better than it was previously!

A few interior photos, there's the side seat to remove, some wiring and the intercom etc.
So far I've removed more than it looks, air filter, driver's seat, gear lever, speedo cable, vision blocks, ammo boxes, covers, map tray and both prop covers.


Edited by LewG on Sunday 8th January 20:09
Once again a bit of farting around in the shed this evening. Had a look over the reconditioned gearbox to make sure all was well and it wasn't rusty inside. With a spanner over the gear change lever it selected gears a treat and turns over with no rough spots, should be ready to just drop in after a clean up.

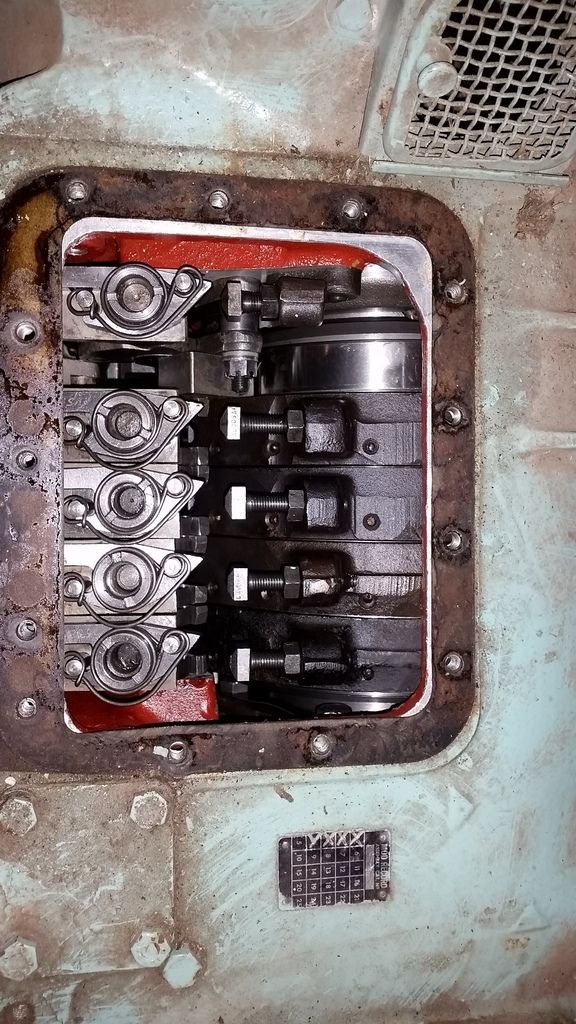
Brake bands and selectors inside.
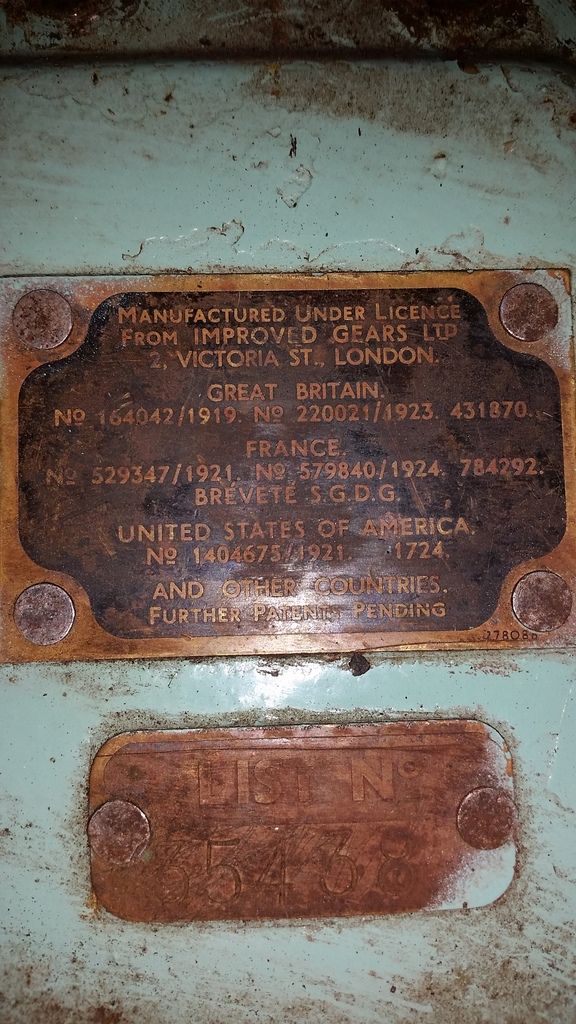
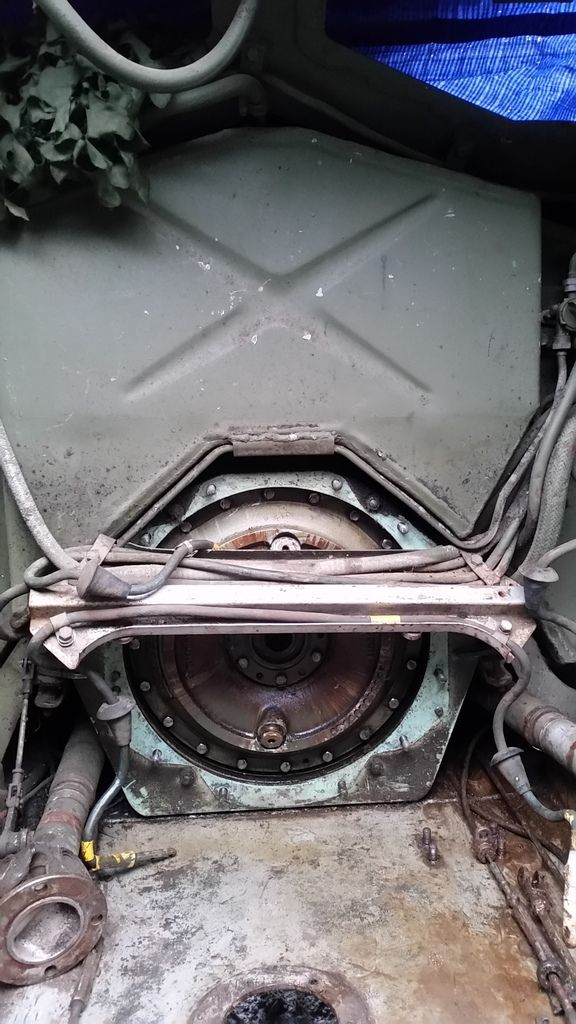
You have to love the sheer quality of the thing
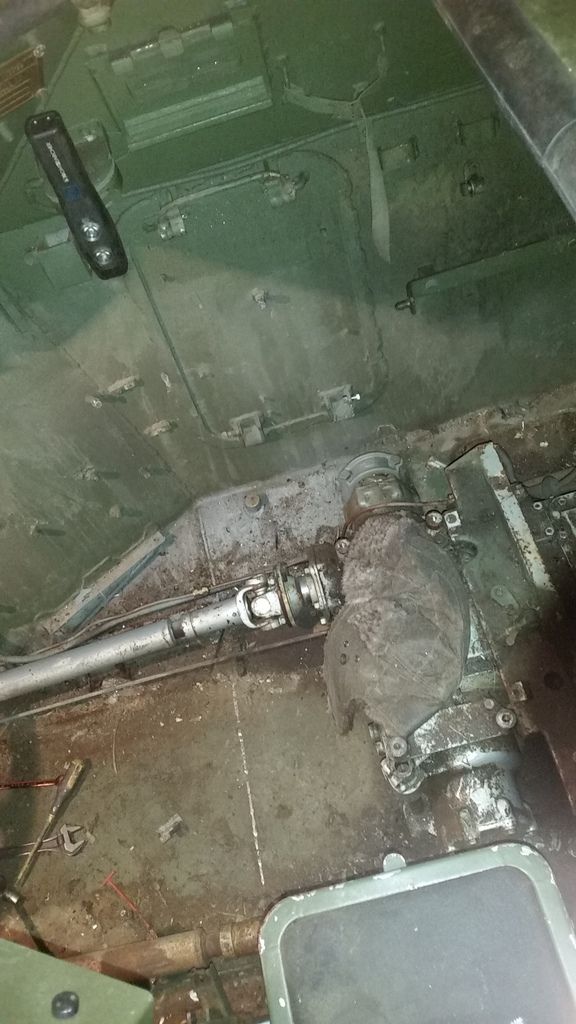
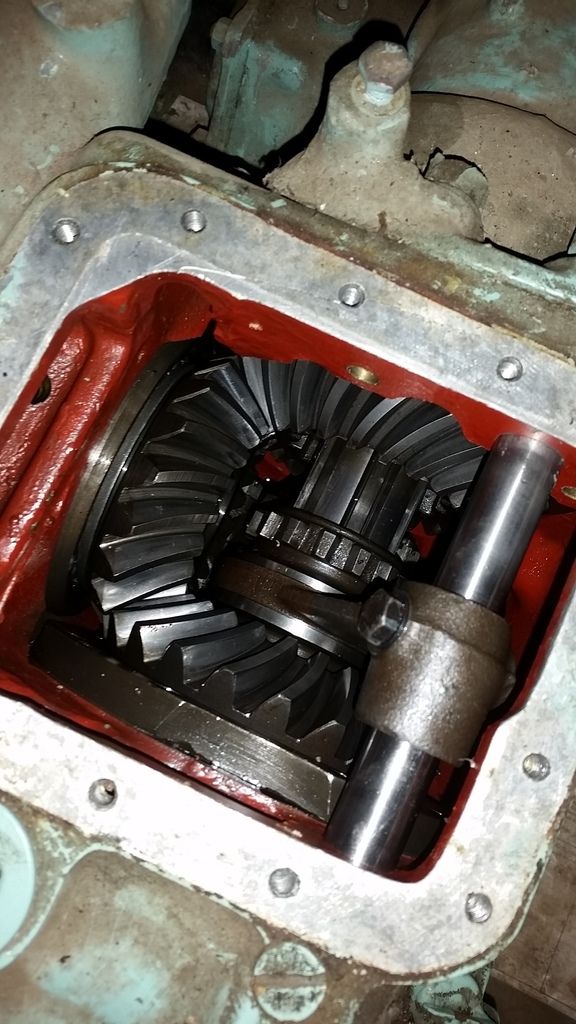
Peering inside the transfer box. This takes EP90 gear oil and the main box single grade 30 engine oil.
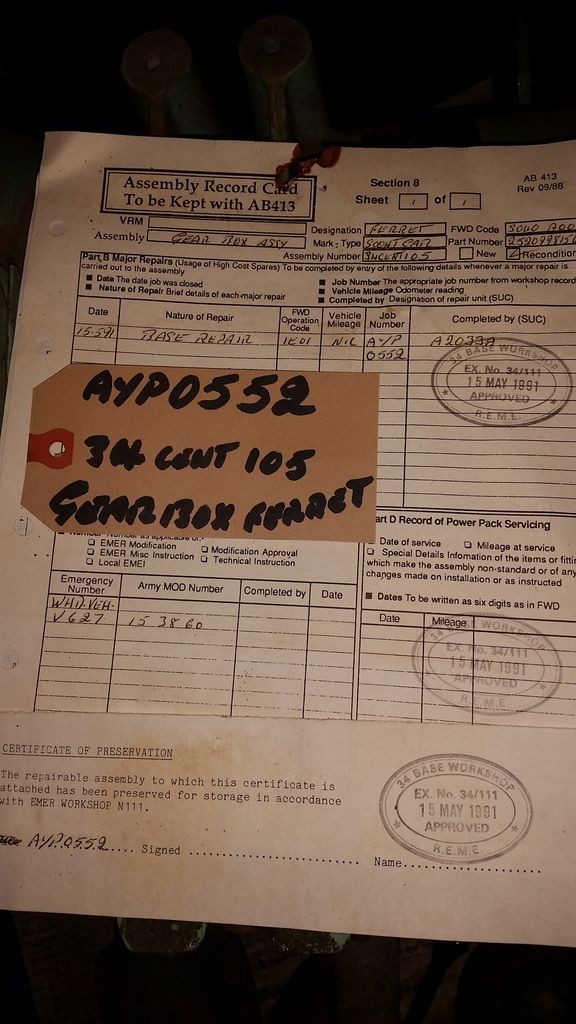
Here is the record card for the box itself, amazing they were still reconditioning this relatively antiquated stuff even back in 1991. On the back it details exactly what was changed.
Took the spare wheel and emergency hatch off the side for better access too. Bearing in mind this was supposed to be removed quickly in an emergency it took a good 5 minutes with WD40 and a hammer to get it off


Brake bands and selectors inside.
You have to love the sheer quality of the thing

Peering inside the transfer box. This takes EP90 gear oil and the main box single grade 30 engine oil.

Here is the record card for the box itself, amazing they were still reconditioning this relatively antiquated stuff even back in 1991. On the back it details exactly what was changed.

Took the spare wheel and emergency hatch off the side for better access too. Bearing in mind this was supposed to be removed quickly in an emergency it took a good 5 minutes with WD40 and a hammer to get it off

Edited by LewG on Monday 9th January 23:02
Progress!
Towed the beast out of the dark depths of the chicken shed and into the workshop this evening. Recently I purchased myself a fantastic 100 quid eBay Chinese folding engine crane and assembled it last night with a view to possibly having a go at lifting the gearbox out of the Ferret before the weekend. I was a bit dubious at the quality of the crane at first, now dubbed 'Red Chin' due to its communist tendencies and 4.8 tensile strength bolts of varying lengths, all lacking washers
With the weight taken it came off the engine a piece of cake. All was going well until we run out of height on the crane.
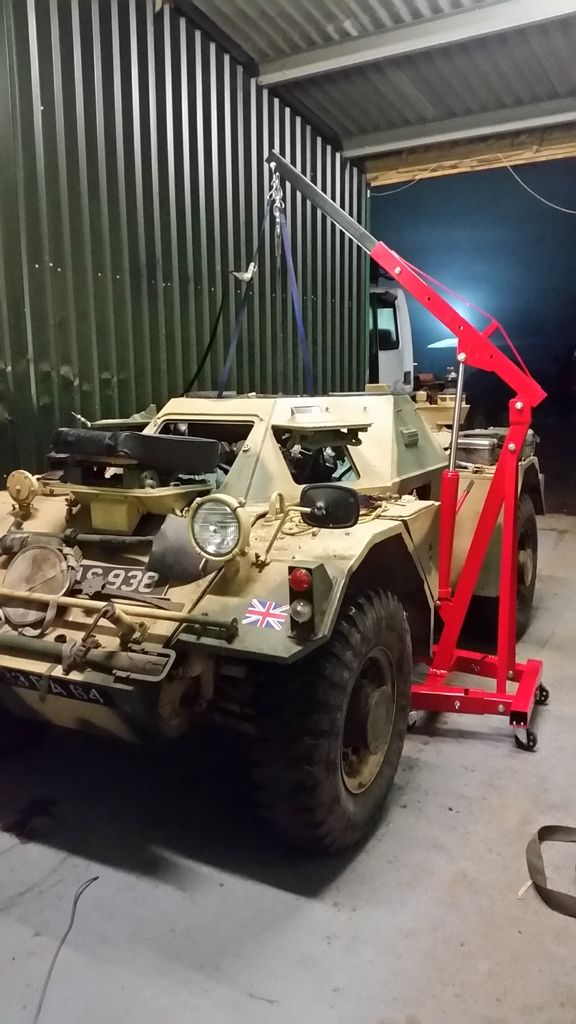
At this point I wasn't backing down so I found a bit of old fence post and rested it across the top of the hull, then strapped the gearbox in place with a pair of big ratchet straps.
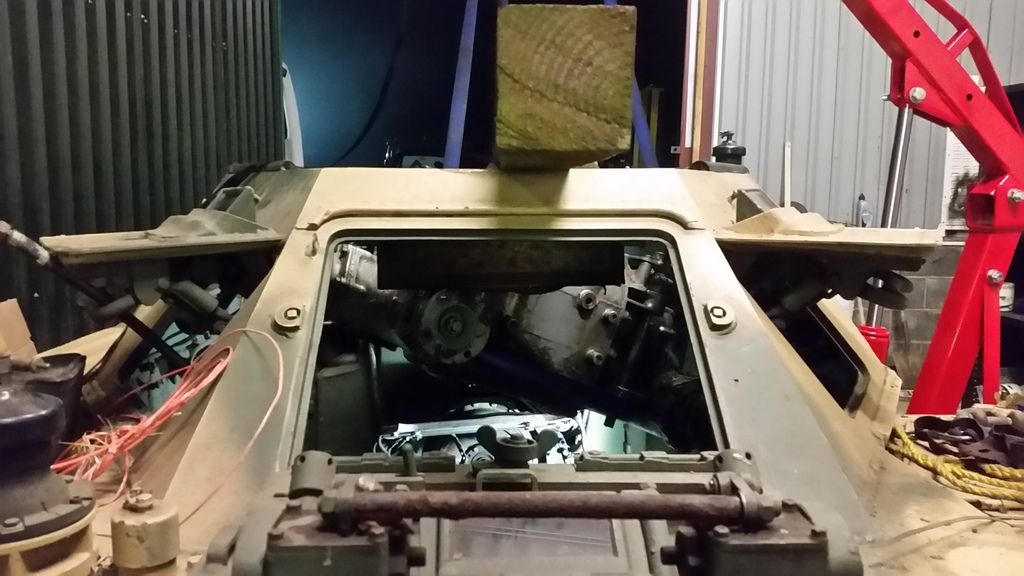
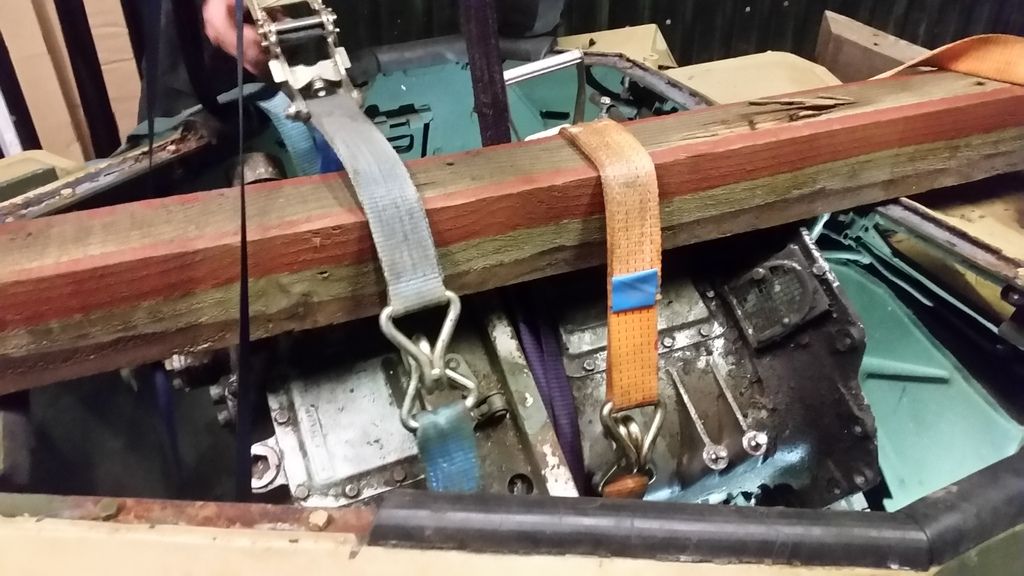
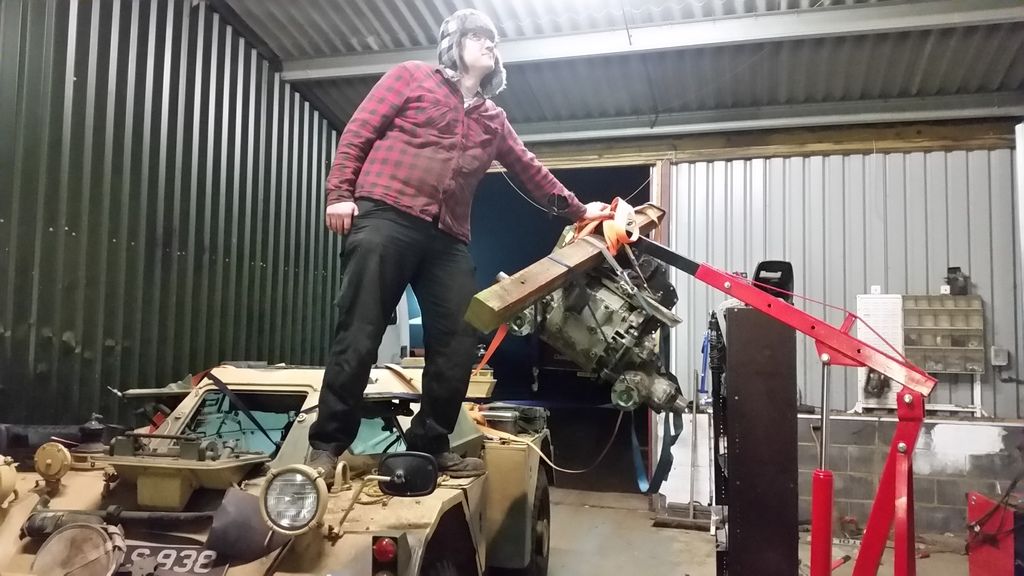
Red Chin was then repositioned, and then it could be lifted fully out. Here's my best mate posing for victory. Note only slight bowing of crane
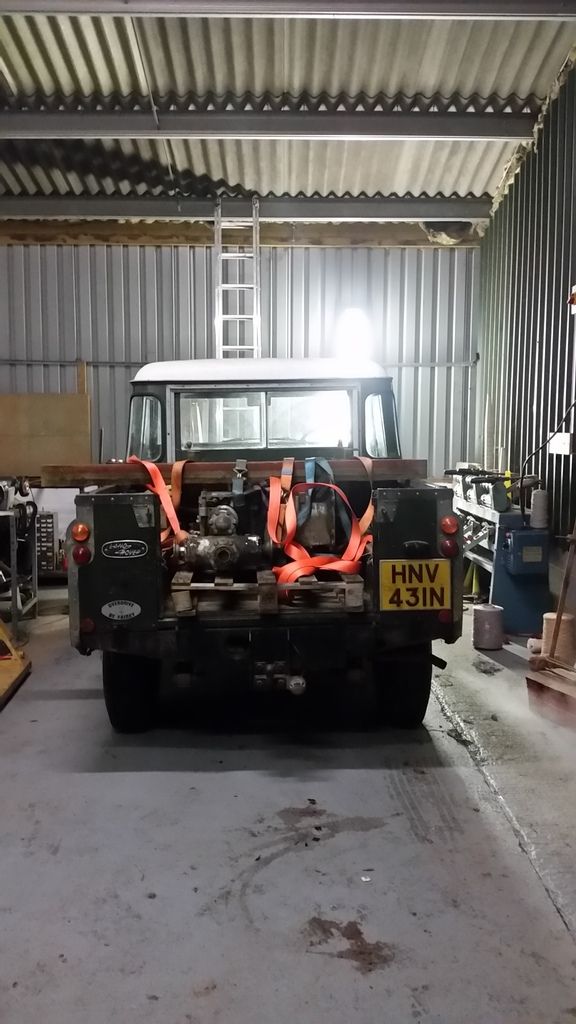
We then installed it in an old Land Rover. Not bad for an evening's work.
Towed the beast out of the dark depths of the chicken shed and into the workshop this evening. Recently I purchased myself a fantastic 100 quid eBay Chinese folding engine crane and assembled it last night with a view to possibly having a go at lifting the gearbox out of the Ferret before the weekend. I was a bit dubious at the quality of the crane at first, now dubbed 'Red Chin' due to its communist tendencies and 4.8 tensile strength bolts of varying lengths, all lacking washers
With the weight taken it came off the engine a piece of cake. All was going well until we run out of height on the crane.

At this point I wasn't backing down so I found a bit of old fence post and rested it across the top of the hull, then strapped the gearbox in place with a pair of big ratchet straps.


Red Chin was then repositioned, and then it could be lifted fully out. Here's my best mate posing for victory. Note only slight bowing of crane

We then installed it in an old Land Rover. Not bad for an evening's work.

Got a few bits done on Ferret today, for a start I drained the oil out of the fluid flywheel and scraped a load of muck out the bottom of the hull. The plan was to gunk down and pressure wash the old gearbox til we had a bit of a pressure washer malfunction, with that fixed to add insult to injury the hosepipe then froze up still, got there in the end and put the old box on a pallet in the storage shed. I then transferred a few brackets and linkage rods over to the 'new' box. Got the day off tomorrow so hopefully I can get the lower hull cleaned
still, got there in the end and put the old box on a pallet in the storage shed. I then transferred a few brackets and linkage rods over to the 'new' box. Got the day off tomorrow so hopefully I can get the lower hull cleanedDidn't get a huge amount done today but I did take the hoover up there and hoover all the main dirt and gunk out from the floor. The hoover pipe was so greasy I had to pour engine degreaser and boiling water through it several times in an attempt to get it clean again
It wants a lot more washing and degreasing but without a friend there to give us a tow over to the pressure washer that wasn't really going to happen.
I pulled the tarp over the top and shut the hatches then got my little electric heater in there to bring the temperature up a bit. Having wiped down the bigger flat surfaces on the sides of the hull I started painting. Visual progress and all that.

It wants a lot more washing and degreasing but without a friend there to give us a tow over to the pressure washer that wasn't really going to happen.

I pulled the tarp over the top and shut the hatches then got my little electric heater in there to bring the temperature up a bit. Having wiped down the bigger flat surfaces on the sides of the hull I started painting. Visual progress and all that.


The painting is definitely getting there. I've put in a couple of nights this week to try and push forward with it. Got a front hatch to paint tomorrow, around the wiring and then clean the floor up ready for a coat.
Once this is done I need to clean up the brake pipes or replace if necessary, refit the repaired bracket, top up the flywheel and heat/bend a few bust linkages etc. Feeling quite positive we'll have it back in pretty good time actually, once the main lot of this work is done I'd like to top up all my other levels as I know for a fact the hubs have leaked a fair bit out. Oh the joy of 65 year old British engineering!

Once this is done I need to clean up the brake pipes or replace if necessary, refit the repaired bracket, top up the flywheel and heat/bend a few bust linkages etc. Feeling quite positive we'll have it back in pretty good time actually, once the main lot of this work is done I'd like to top up all my other levels as I know for a fact the hubs have leaked a fair bit out. Oh the joy of 65 year old British engineering!
Gassing Station | Readers' Cars | Top of Page | What's New | My Stuff