MX5 Berkeley to MEV Exocet projec
Discussion


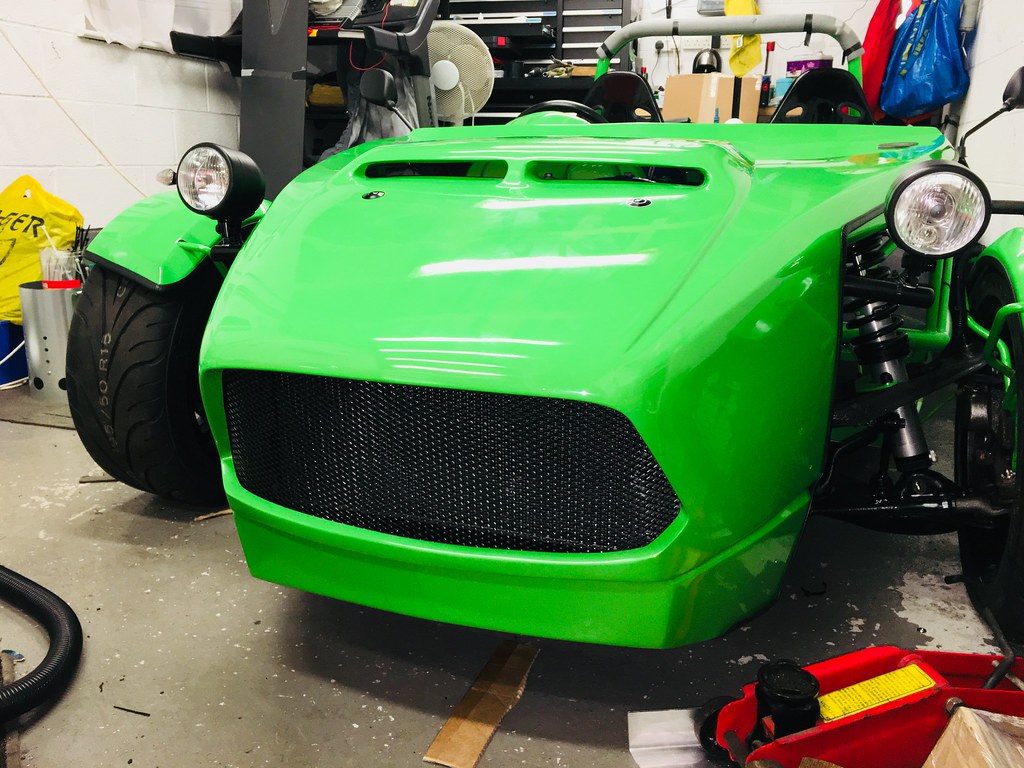
It has been a while again, so it's time for another update...
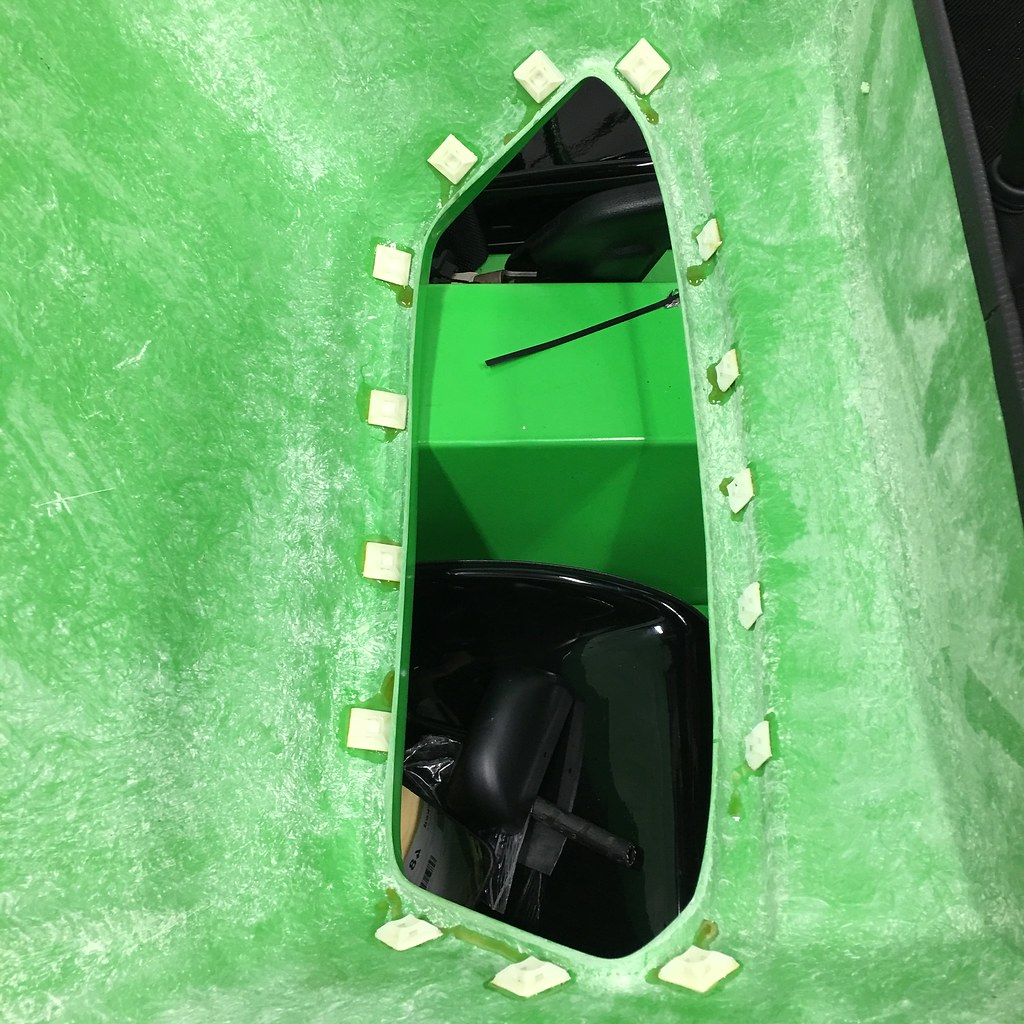
So, after last time, I carefully considered the placement and shape of the harness holes before taking the plunge and chopping into the seats, which I then finished with edge trim.
[ Untitled on Flickr
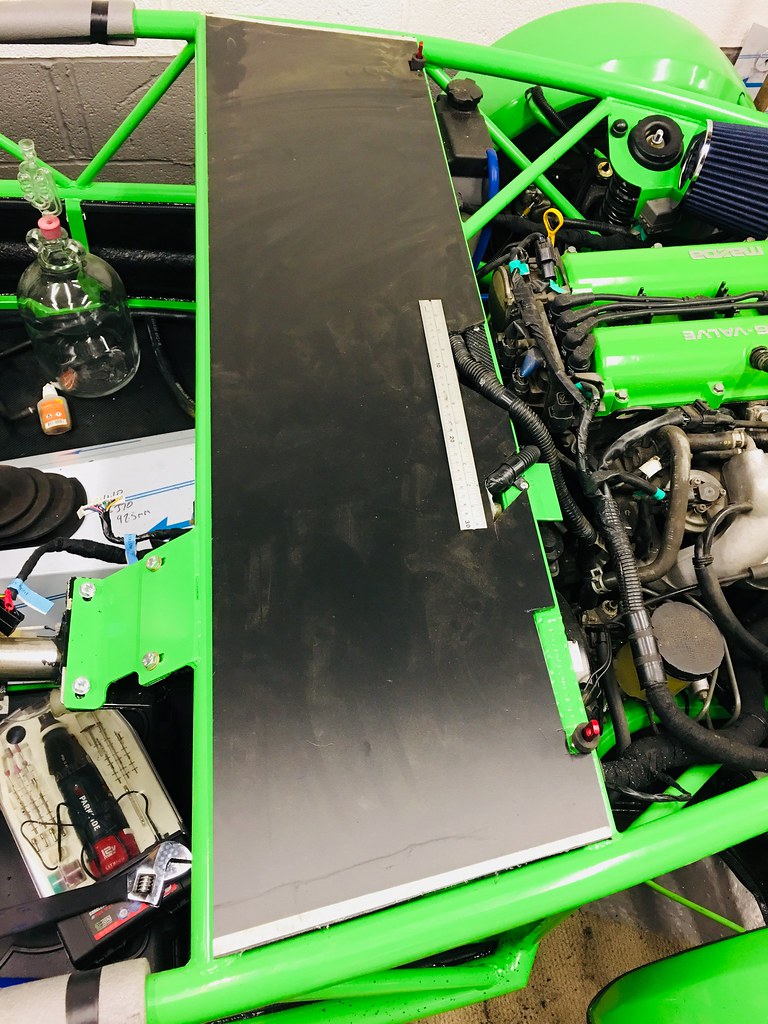
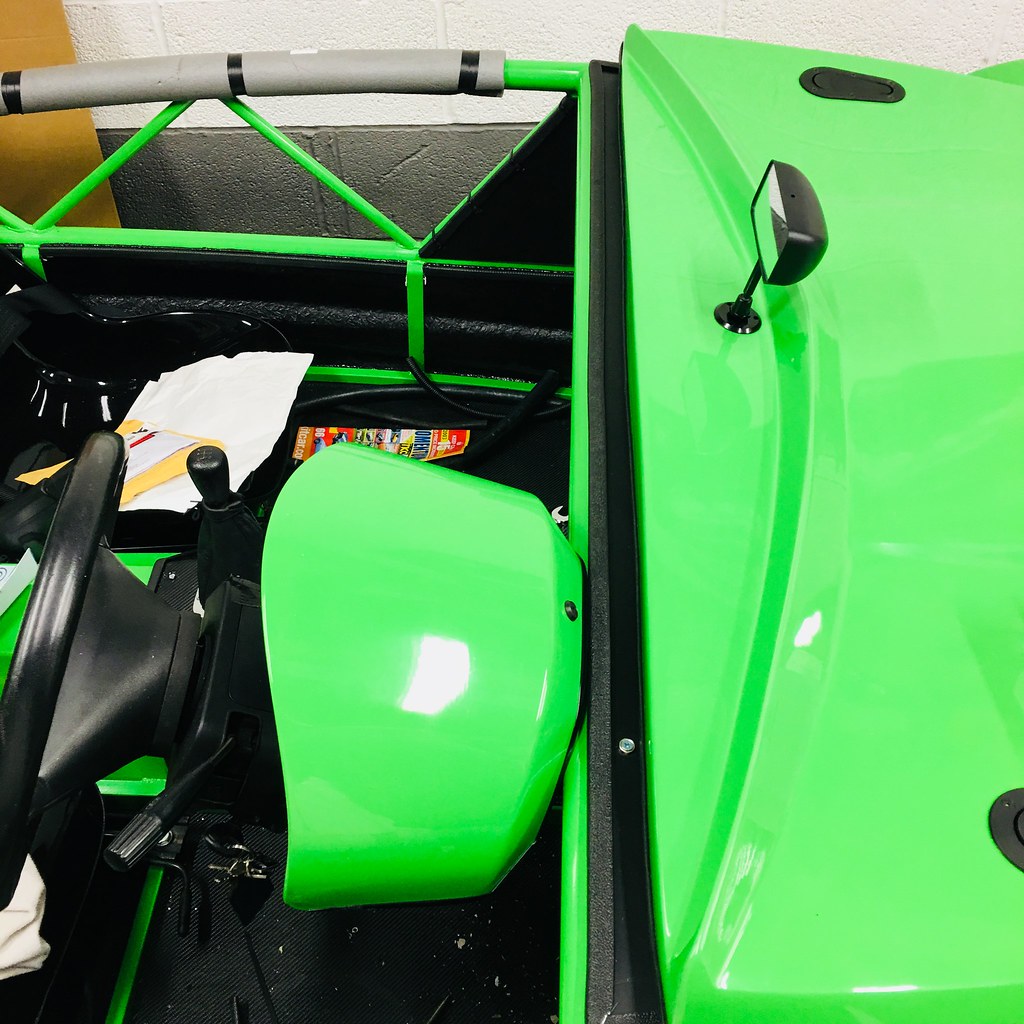
Next on the list was to tidy up the gap between the bonnet and the dash rail, so I used the now redundant black side panel material to make up a lid that covers the top of the tray and neatens up the rear edge (which I have since finished with some wide edge trim).
 Untitled on Flickr
 Untitled on Flickr
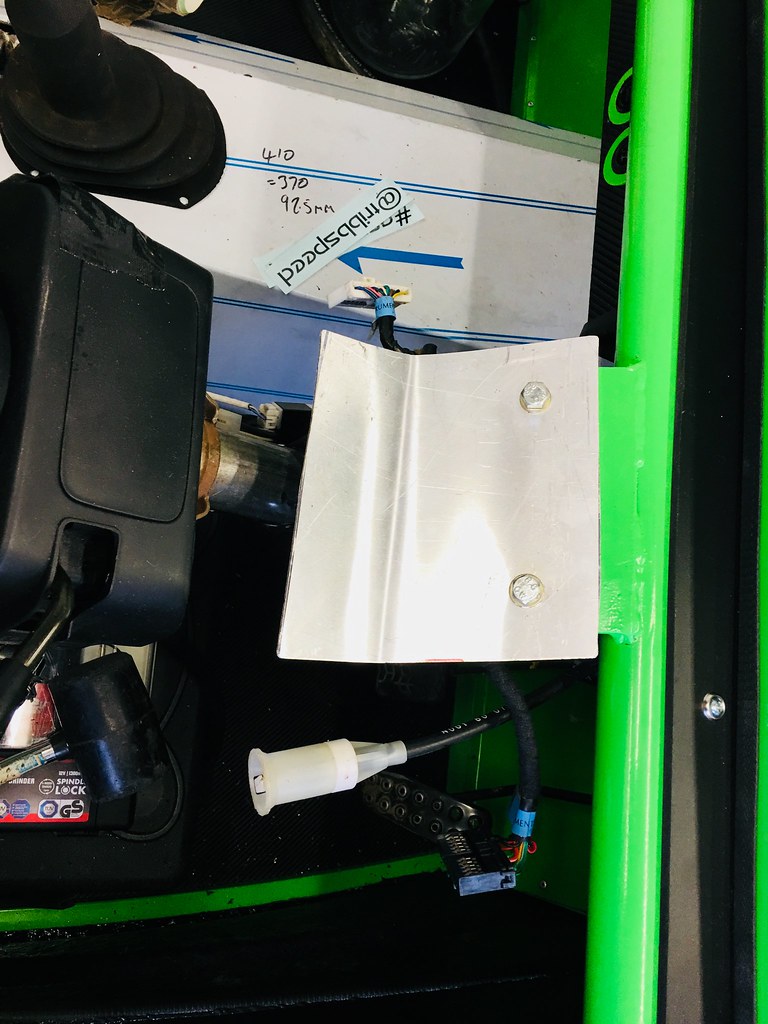
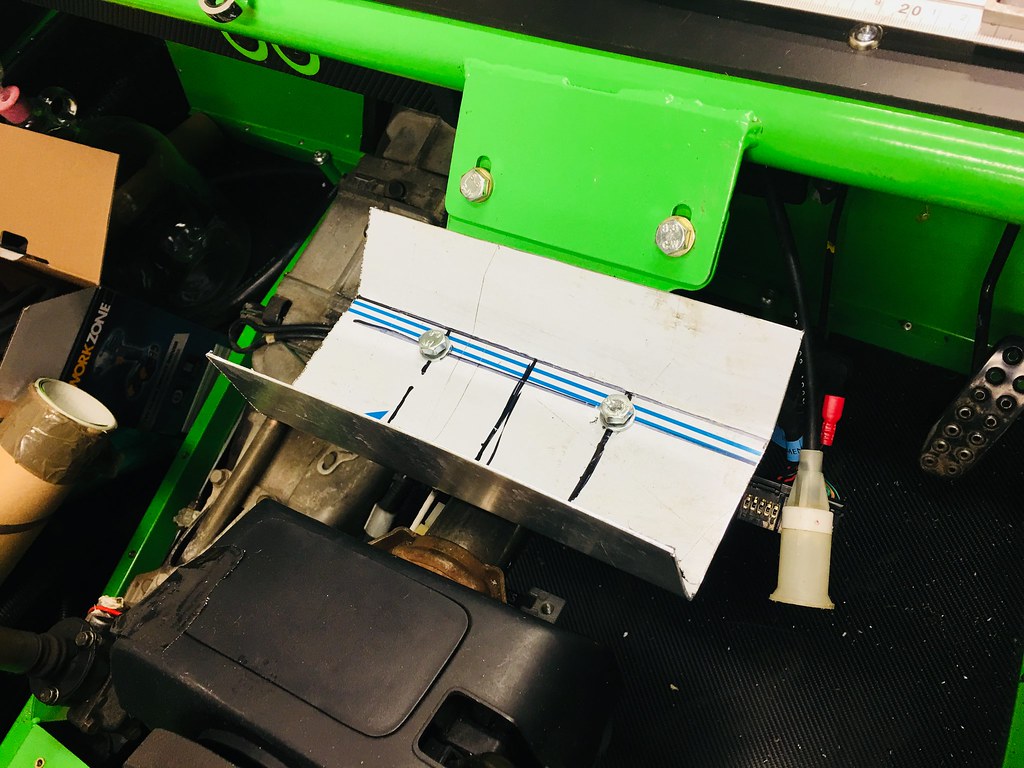
Next up was fitting the instrument binnacle, which took a few goes to get a bracket that worked:
 Untitled on Flickr
Version 1
 Untitled on Flickr
Version 2... Finally version 4 did the trick fixing on the front tabs and with an additional bracket from the rear of the housing to the dash top rail - so with the original MX5 instrument cluster stuck into the MEV GRP housing, I could fix it into place.
 Untitled on Flickr
 Untitled on Flickr
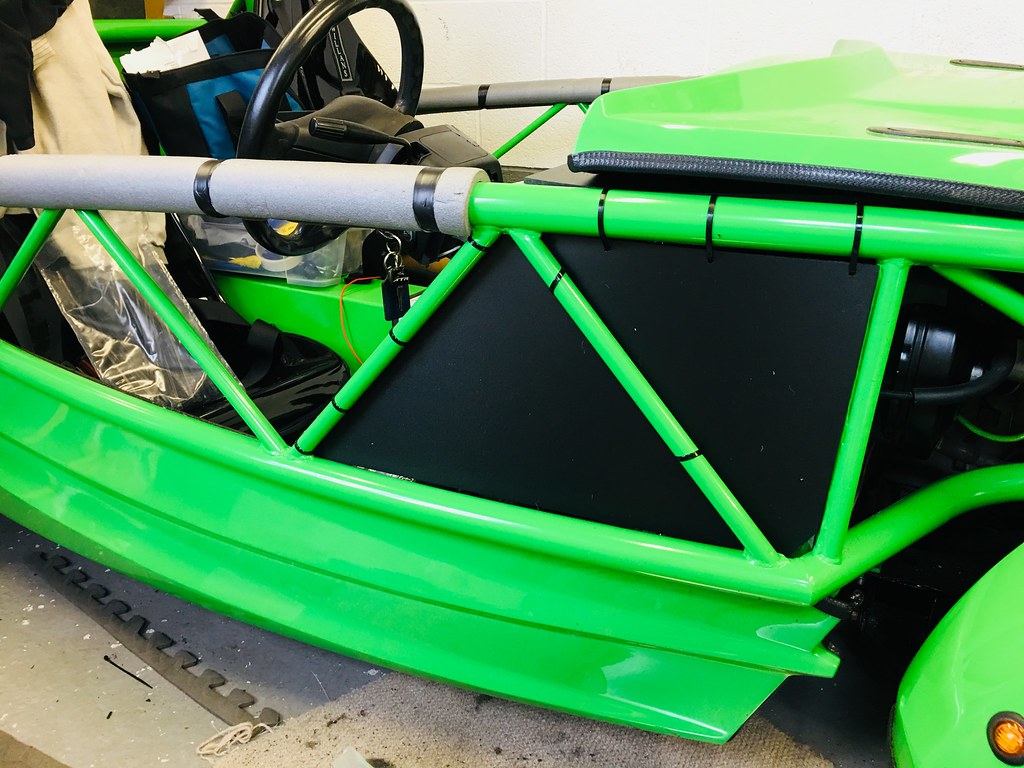
Then, I have added some infill panels on each side to help with edges for IVA - again using some of the plastic side panel material, just cable tied into place.
Untitled on Flickr
I have also done a whole load more smaller jobs - mounting the back box, wrapping and fitting the transmission tunnel and starting to work through all the edges that need trimming for IVA.
On that note, I now have a deadline - with the IVA test now booked in for June 20th, so I have a self-imposed deadline to work to, which I think is do-able, as long as I can get it up to my mate's garage for a pre-check of brakes, lights and emissions, just to be sure, but there is certainly going to be a need for some serious garage time for the next week or so!
So, after last time, I carefully considered the placement and shape of the harness holes before taking the plunge and chopping into the seats, which I then finished with edge trim.
[
Untitled on FlickrNext on the list was to tidy up the gap between the bonnet and the dash rail, so I used the now redundant black side panel material to make up a lid that covers the top of the tray and neatens up the rear edge (which I have since finished with some wide edge trim).
Untitled on FlickrUntitled on FlickrNext up was fitting the instrument binnacle, which took a few goes to get a bracket that worked:
Untitled on FlickrVersion 1
Untitled on FlickrVersion 2... Finally version 4 did the trick fixing on the front tabs and with an additional bracket from the rear of the housing to the dash top rail - so with the original MX5 instrument cluster stuck into the MEV GRP housing, I could fix it into place.
Untitled on FlickrUntitled on FlickrThen, I have added some infill panels on each side to help with edges for IVA - again using some of the plastic side panel material, just cable tied into place.
Untitled on Flickr
I have also done a whole load more smaller jobs - mounting the back box, wrapping and fitting the transmission tunnel and starting to work through all the edges that need trimming for IVA.
On that note, I now have a deadline - with the IVA test now booked in for June 20th, so I have a self-imposed deadline to work to, which I think is do-able, as long as I can get it up to my mate's garage for a pre-check of brakes, lights and emissions, just to be sure, but there is certainly going to be a need for some serious garage time for the next week or so!
Thanks guys - good to know this is of interest! Will definitely watch the cable ties (I imagine many of them might fall off post-IVA anyway!)
Exciting news today! I managed to get my replacement used injector shipped and here Friday night, so fitted that and the front is all leak free when I have had it running a good while.
So, with some trepidation, this afternoon, I borrowed some trade plates and headed out - to get fuel and then to check brakes, lights and emissions at my mate’s MOT garage...
First challenge was after about 1/2 mile, I had a rotational squeak from the nsr - which i thought as possibly the wing stay contacting the CV - but there were no marks... so i carried carefully on.
I got the the nearest filling station and began filling... and carried on, for quite some time - until I got fed up at about 35 litres (plus at least 5 already in the tank) - and discovered there was a drip from below...
So I carefully drove it up to the garage - and whipped off the rear cover to discover the filler hose clip had come slightly adrift at the tank end - which was soon solved with no more dripping.
Next it was lights - which needed a tweak but look ok, then brakes - which was mostly ok - the foot brake worked ok (and were noted by my mate as being quite sharp) - but the handbrake was not working at all on the ns...
Emissions check failed first time on lambda (at 1.05) but dropped in after holding 3000rpm for a few minutes to get it nice and hot. The CO and HC were essentially zero meaning the cat is working properly at least!
So with that done, I went for a little run round the block (and covered 20 miles!) - impressions so far are that it certainly draws some attention! It also drives very well - apart from the nsr squeak - with the brakes working well and steering feeling good - the wheel even being well centred despite setting the alignment by eye only (it will be getting a full corner weight and align after IVA). It also feels like it pulls well - although I was going relatively steady to get everything settled.
Once home, I have had a look over and spotted the brake problem. One of the pad fitting shims has slipped on the nsr and was trapped between pad and disc. As a result, it was holding the piston off - meaning that was adjusted too far out for the handbrake mechanism to engage. With the shim removed (I have a new fitting kit reserved for Tuesday collection), I have proven that the handbrake now adjusts and operates - so I think all is well.
The only other problem was the diff drain plug had rattled loose, meaning it had dropped about 100ml of fluid - so I sorted that and topped up.
Overall I am very happy that it is going to be sorted and ready for Wednesday!

Thanks again for the comments guys - guess I probably should update you all on how I've got on with the IVA.. but first (to keep you in suspense), I probably should get you up to date with some more pics and updates on the hours I've been spending in the garage over the last fortnight!
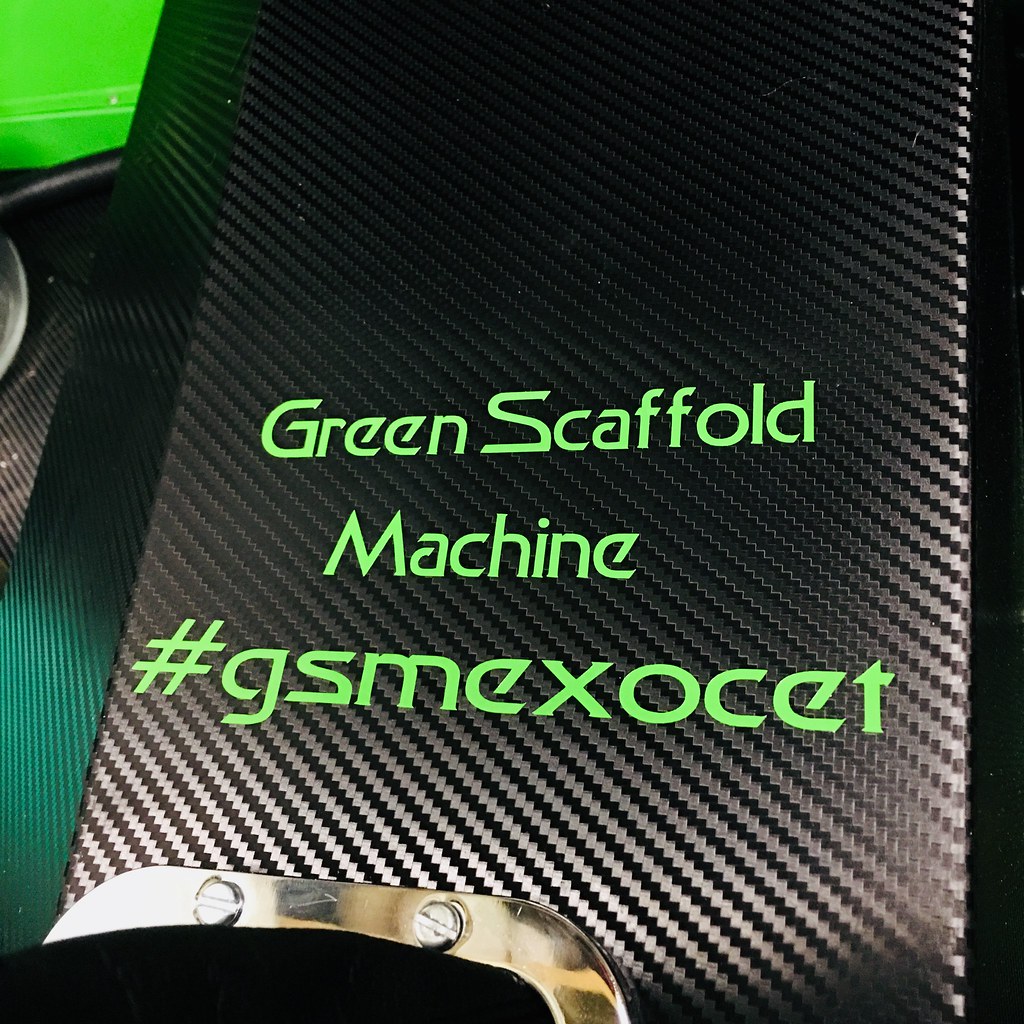
A bit of branding!
 Untitled on Flickr
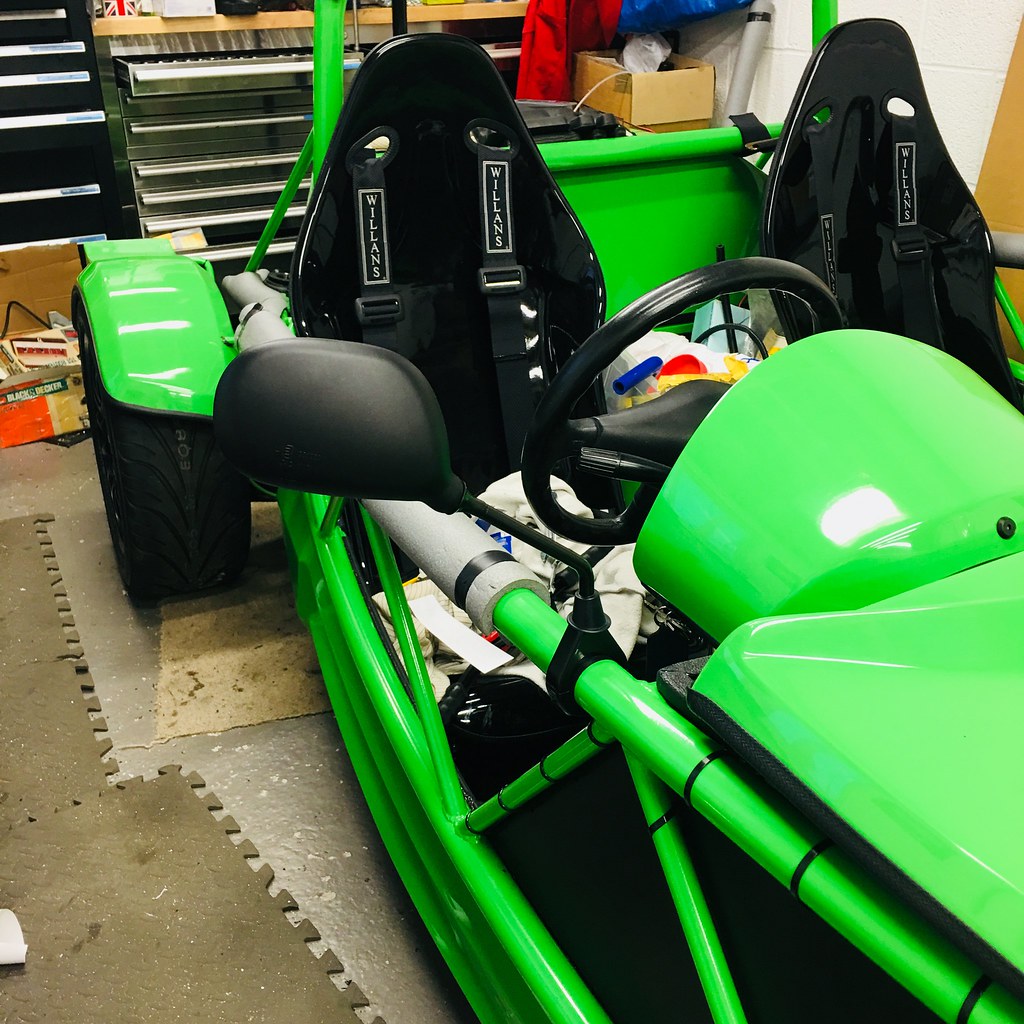
Wing mirrors fitted on the top tubes
 Untitled on Flickr
Cable tie bases glued around the grille opening and black grille mesh fitted
 Untitled on Flickr
 IMG_8955 on Flickr
 IMG_8953 on Flickr
When we got it out of the garage, my brother took some nice pics (which show how good an iPhone can be in a decent photographer's hands!), which are quite good:
 IMG_6732 on Flickr
 IMG_7178 on Flickr
 Untitled on Flickr
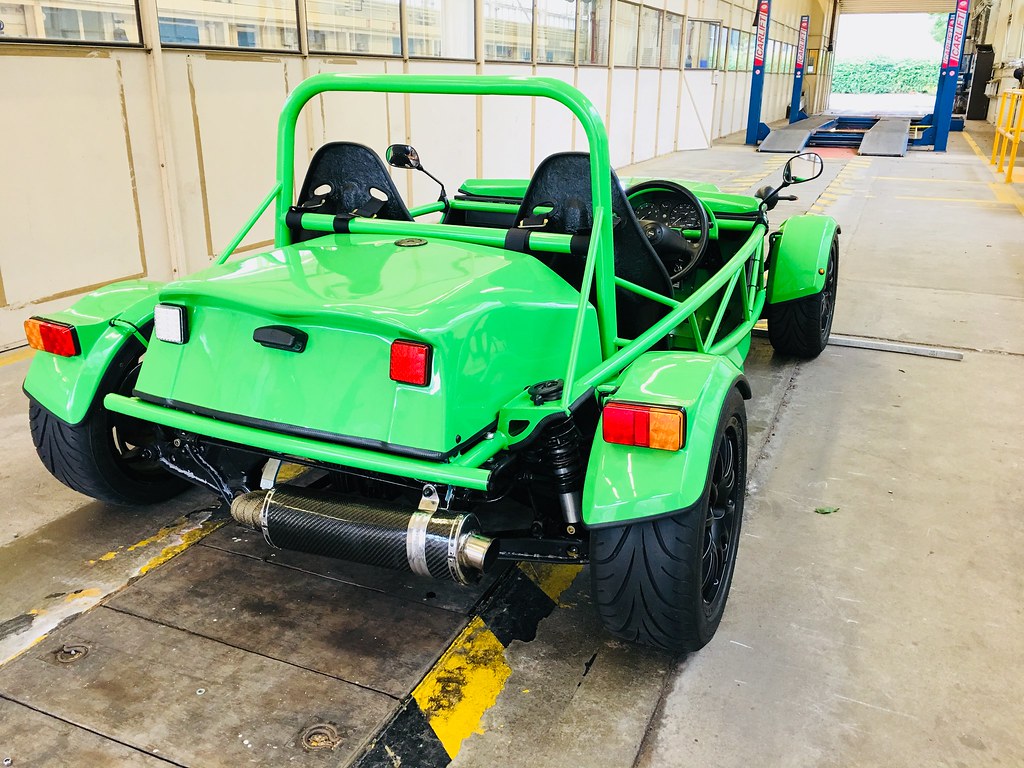
A quick snap when I took it up for emissions/brakes check:
 Untitled on Flickr
Since then I have had a busy couple of nights, adding even more edging (I bought a 50m roll of edge trim, and probably used about 30-35m of it!), nut covers on everything (with judiscious use of the hot glue gun to hold them in place, thanks to Mazda's liking of an 11mm bolt), wrapped the back section of the exhaust and sorted out my rear brakes so the handbrake worked.
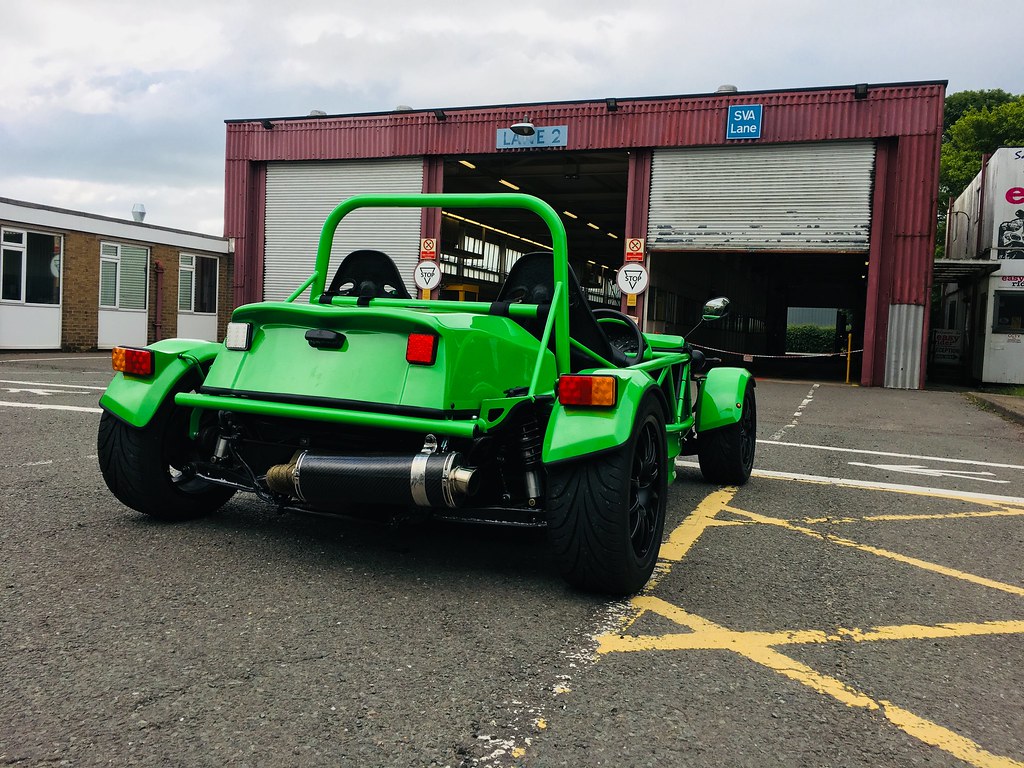
Then we get to this morning, where we loaded my mate Steve's Landy with half the contents of my garage (so we had the ability to fix pretty much anything!) and all of my paperwork in a nice big folder. Then we headed from home over to the test centre. We were lucky with the traffic and got there about 20 minutes early.
 IMG_9097 on Flickr
 Untitled on Flickr
So after a brief photo break, we were greeted by out tester who said he was looking forward to testing his first and last Exocet - it transpired that due to DVSA rearrangements, he was due to take voluntary redundancy and this was his last test - he even said that due to the changes, and a limited number of trained testers that it was likely that if I failed, I would need to go to Manchester for retest.
So the test began with pulling the car into the test lane where the speedo was checked and deemed to be bang on, so that was good. Next was to pull forward a little for the emissions test - where I had my first worry of the day! I knew the polutants were fine, but when we checked, had seen the lambda was at the top end of the MOT range - and it was the same today. With a limit of 1.03, the first test failed at 1.031, but a second test (with me holding the revs steady at 3000 - the top of the window to get everything stable between) saw the second result squeak in at 1.030! At this point, my mate was looking anxious, and thinking we were failing at the first hurdle - but we carried on!
Next was the check of edges and projections - which was interesting to watch, with our tester clearly having a thorough eye, and a system that he had used on many vehicles - and picked up a couple of small issues - the cable tie ends on my side panels were facing inwards, so we re-did them to be on the outside away from the occupant's legs, the bottom of my dash (which I had decided to ask about, rather than pre-trim) needed some trim sticking on, and we needed a little extra edging on the handbrake cable joiner. these were all swiftly sorted by digging in to my mate's little bag of pre-prepared bits, with no need to deploy the Landy-workshop! It was clear that despite being his last test, our man was going to give us a proper, but also a fair test - and was happy to talk through what we had done, and how he thought things would be appropriately resolved.
We then looked at the fuel filler and I offered up pictures of the earthing and vents on the tank, which were all ok - and there was no mention of needing a drip-tray under the tank (I had not fitted one, and had wondered if that might be a point for discussion - but was happy that it went unmentioned, so was ok). The lights (apart from headlights) were tested too, and deemed all ok.
 Untitled on Flickr
Next, I drove onto the large 4-post lift where I sat in the car while I was raised and asked to turn the wheels lock to lock - and came across another couple of small issues with one of the front brake hoses needing its clip adjusting to prevent rubbing on full lock, and a couple of sections of pipe/hose needing rubber overlays adding to prevent rubbing, which Steve duly dealt with quickly, while I sat in the car and chilled!
The headlight check was next - and the tester commented that he wasn't a fan of the "Chinese special" headlights as the beam pattern wasn't great, but he was happy enough to accept them, as they were aimed ok, just not brilliantly defined (I explained that they had already been improved a little by changing from the original bulbs to better ones).
Next stop was to roll off the ramp and to check the weights - with the corner weights working out surprisingly good, given that I had just set the coil-overs by eye! The total weight came in at 700Kg exactly (with approx 45l of fuel on board) - 388Kg front, 312 rear - so with a dry tank and some of the IVA-trim removed, 650Kg would be a reasonable target.
With the weights checked, it was brake test time - and here I was hoping that my sorting had worked (as we were getting close to the end of the test!). The brake test was looking ok until we got to the handbrake - which wouldn't disengage after the high effort test. I had a quick look, and it had pulled so far that the cable had popped loose in the caliper arm - a quick tweak and it was all ok. Thankfully, this then didn't reoccur, and wasn't raised as a fail. with the brakes numbers recorded, we moved outside for mirrors and sound level checks, while the tester took the car round the outside of the centre to check self centring.
When he joined us, the tester was very complementary about the car saying that it steered much more positively than many other kits he has tested, where they may need some help to self-centre, and that the brakes were excellent (so this gave us a confidence boost!).
The mirrors were all checked out ok, and then we came to the noise test - where I had a dB killer bung ready for the bike can just in case, but I needn't have worried - I was safely under at just 90.3dB.
So, with that, the test was over, but I wasn't sure of the final result - we were told to park up while the tester went to crunch the numbers for the brake test to see how it was. So we had a slightly anxious 15 minute wait until he then emerged... with a pass certificate, which is a result - I was confident that I had done my best to build the car properly and try to address as many points as I could ahead of time, so am very pleased that we could get it through first time!
Obviously, we were very happy with that, and so drove home, put the car away and decided to celebrate with a pub lunch and a pint!
Next job now is to fill in the DVLA forms to now get the car registered so that I can get out and enjoy it soon!
A bit of an essay, but I hope this thread has been useful to those thinking about a build - and now I can hopefully update when I get to actually drive the thing properly!
A bit of branding!
Untitled on FlickrWing mirrors fitted on the top tubes
Untitled on FlickrCable tie bases glued around the grille opening and black grille mesh fitted
Untitled on FlickrIMG_8955 on FlickrIMG_8953 on FlickrWhen we got it out of the garage, my brother took some nice pics (which show how good an iPhone can be in a decent photographer's hands!), which are quite good:
IMG_6732 on FlickrIMG_7178 on FlickrUntitled on FlickrA quick snap when I took it up for emissions/brakes check:
Untitled on FlickrSince then I have had a busy couple of nights, adding even more edging (I bought a 50m roll of edge trim, and probably used about 30-35m of it!), nut covers on everything (with judiscious use of the hot glue gun to hold them in place, thanks to Mazda's liking of an 11mm bolt), wrapped the back section of the exhaust and sorted out my rear brakes so the handbrake worked.
Then we get to this morning, where we loaded my mate Steve's Landy with half the contents of my garage (so we had the ability to fix pretty much anything!) and all of my paperwork in a nice big folder. Then we headed from home over to the test centre. We were lucky with the traffic and got there about 20 minutes early.
IMG_9097 on FlickrUntitled on FlickrSo after a brief photo break, we were greeted by out tester who said he was looking forward to testing his first and last Exocet - it transpired that due to DVSA rearrangements, he was due to take voluntary redundancy and this was his last test - he even said that due to the changes, and a limited number of trained testers that it was likely that if I failed, I would need to go to Manchester for retest.
So the test began with pulling the car into the test lane where the speedo was checked and deemed to be bang on, so that was good. Next was to pull forward a little for the emissions test - where I had my first worry of the day! I knew the polutants were fine, but when we checked, had seen the lambda was at the top end of the MOT range - and it was the same today. With a limit of 1.03, the first test failed at 1.031, but a second test (with me holding the revs steady at 3000 - the top of the window to get everything stable between) saw the second result squeak in at 1.030! At this point, my mate was looking anxious, and thinking we were failing at the first hurdle - but we carried on!
Next was the check of edges and projections - which was interesting to watch, with our tester clearly having a thorough eye, and a system that he had used on many vehicles - and picked up a couple of small issues - the cable tie ends on my side panels were facing inwards, so we re-did them to be on the outside away from the occupant's legs, the bottom of my dash (which I had decided to ask about, rather than pre-trim) needed some trim sticking on, and we needed a little extra edging on the handbrake cable joiner. these were all swiftly sorted by digging in to my mate's little bag of pre-prepared bits, with no need to deploy the Landy-workshop! It was clear that despite being his last test, our man was going to give us a proper, but also a fair test - and was happy to talk through what we had done, and how he thought things would be appropriately resolved.
We then looked at the fuel filler and I offered up pictures of the earthing and vents on the tank, which were all ok - and there was no mention of needing a drip-tray under the tank (I had not fitted one, and had wondered if that might be a point for discussion - but was happy that it went unmentioned, so was ok). The lights (apart from headlights) were tested too, and deemed all ok.
Untitled on FlickrNext, I drove onto the large 4-post lift where I sat in the car while I was raised and asked to turn the wheels lock to lock - and came across another couple of small issues with one of the front brake hoses needing its clip adjusting to prevent rubbing on full lock, and a couple of sections of pipe/hose needing rubber overlays adding to prevent rubbing, which Steve duly dealt with quickly, while I sat in the car and chilled!
The headlight check was next - and the tester commented that he wasn't a fan of the "Chinese special" headlights as the beam pattern wasn't great, but he was happy enough to accept them, as they were aimed ok, just not brilliantly defined (I explained that they had already been improved a little by changing from the original bulbs to better ones).
Next stop was to roll off the ramp and to check the weights - with the corner weights working out surprisingly good, given that I had just set the coil-overs by eye! The total weight came in at 700Kg exactly (with approx 45l of fuel on board) - 388Kg front, 312 rear - so with a dry tank and some of the IVA-trim removed, 650Kg would be a reasonable target.
With the weights checked, it was brake test time - and here I was hoping that my sorting had worked (as we were getting close to the end of the test!). The brake test was looking ok until we got to the handbrake - which wouldn't disengage after the high effort test. I had a quick look, and it had pulled so far that the cable had popped loose in the caliper arm - a quick tweak and it was all ok. Thankfully, this then didn't reoccur, and wasn't raised as a fail. with the brakes numbers recorded, we moved outside for mirrors and sound level checks, while the tester took the car round the outside of the centre to check self centring.
When he joined us, the tester was very complementary about the car saying that it steered much more positively than many other kits he has tested, where they may need some help to self-centre, and that the brakes were excellent (so this gave us a confidence boost!).
The mirrors were all checked out ok, and then we came to the noise test - where I had a dB killer bung ready for the bike can just in case, but I needn't have worried - I was safely under at just 90.3dB.
So, with that, the test was over, but I wasn't sure of the final result - we were told to park up while the tester went to crunch the numbers for the brake test to see how it was. So we had a slightly anxious 15 minute wait until he then emerged... with a pass certificate, which is a result - I was confident that I had done my best to build the car properly and try to address as many points as I could ahead of time, so am very pleased that we could get it through first time!
Obviously, we were very happy with that, and so drove home, put the car away and decided to celebrate with a pub lunch and a pint!
Next job now is to fill in the DVLA forms to now get the car registered so that I can get out and enjoy it soon!
A bit of an essay, but I hope this thread has been useful to those thinking about a build - and now I can hopefully update when I get to actually drive the thing properly!

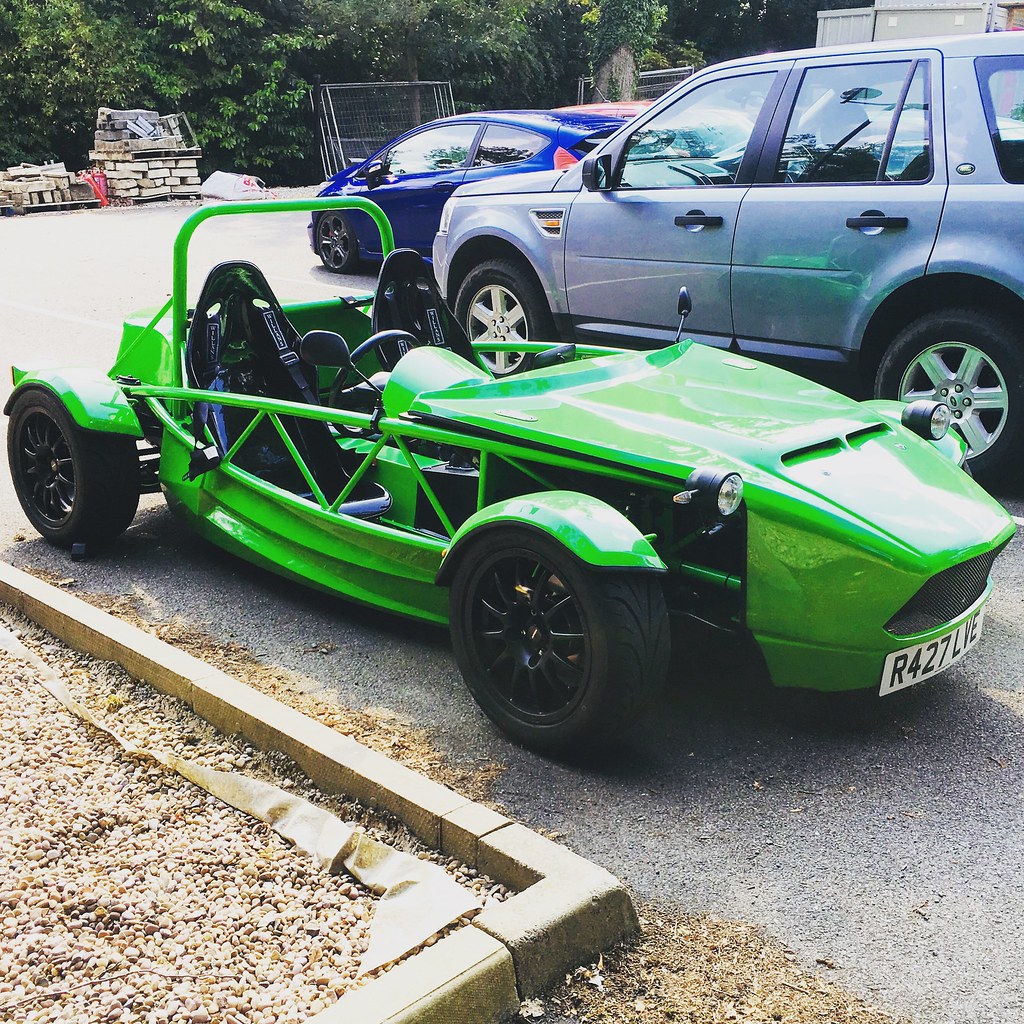
So, quick update time, and not much to report (no news is good news!)
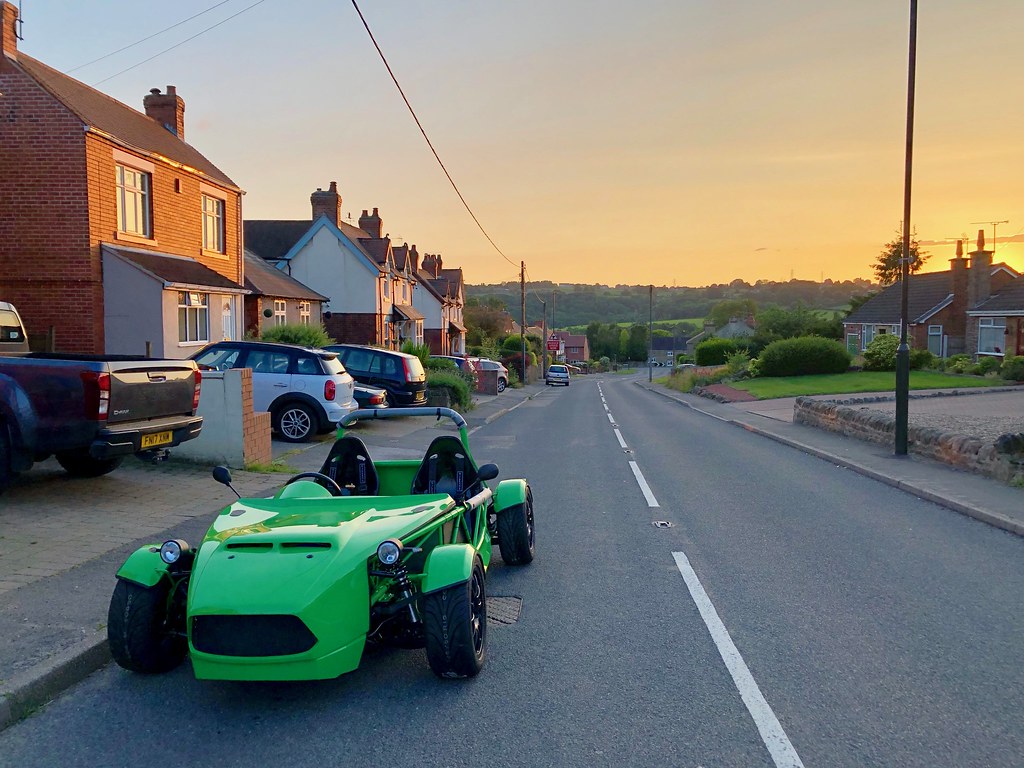
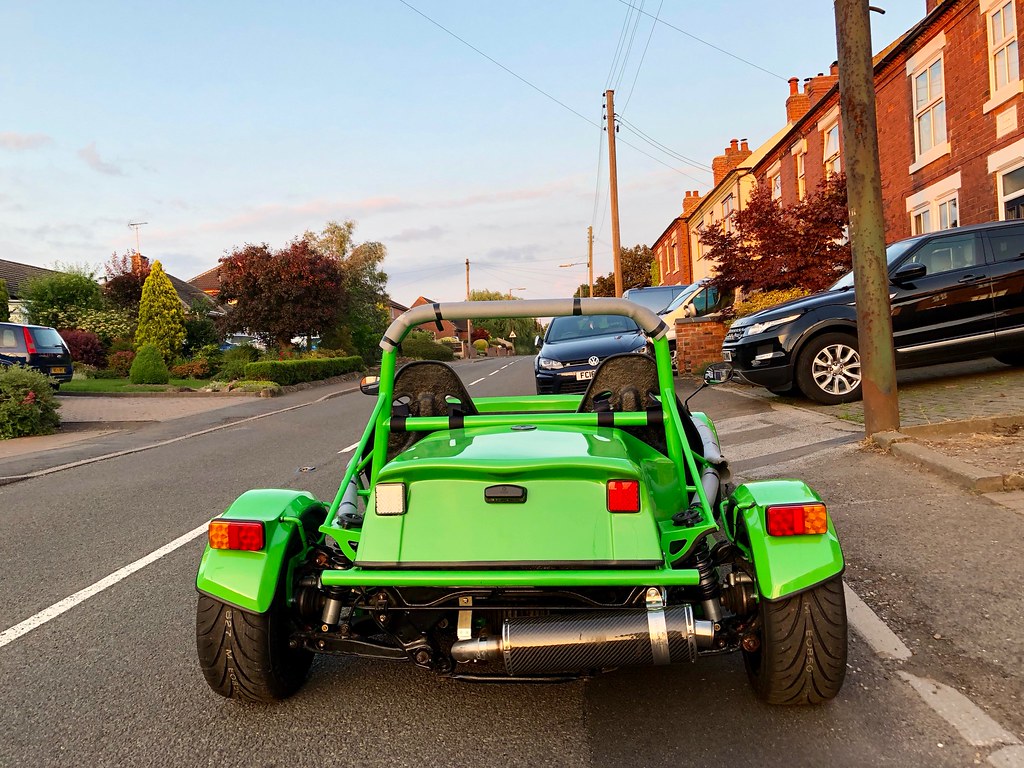
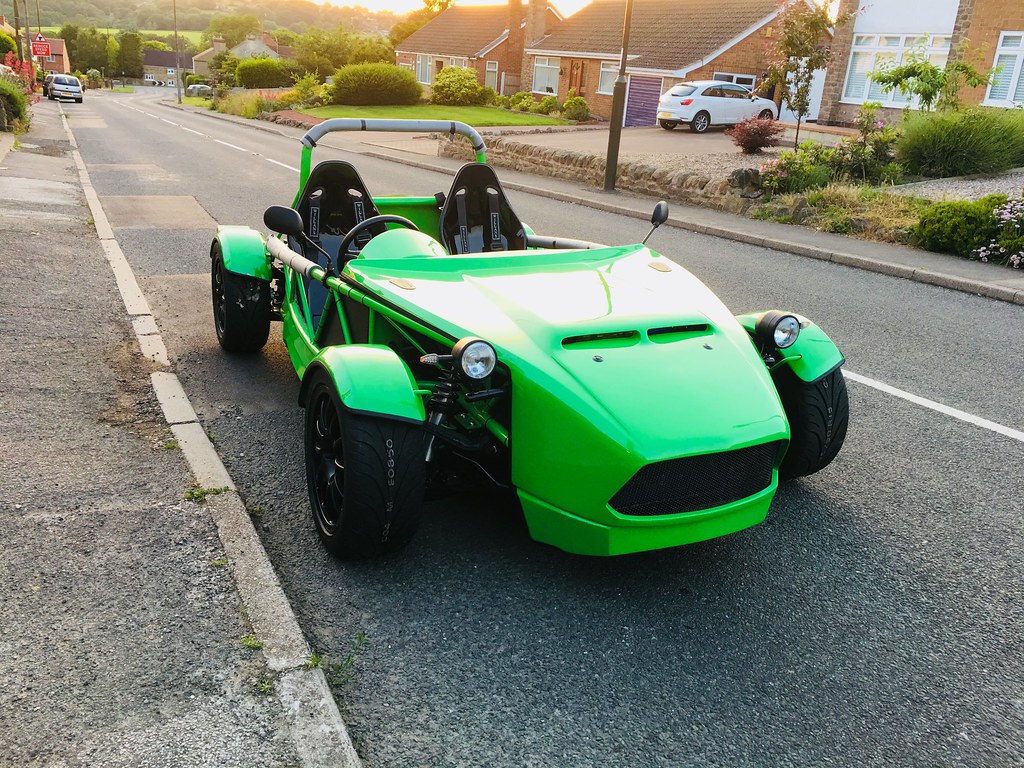
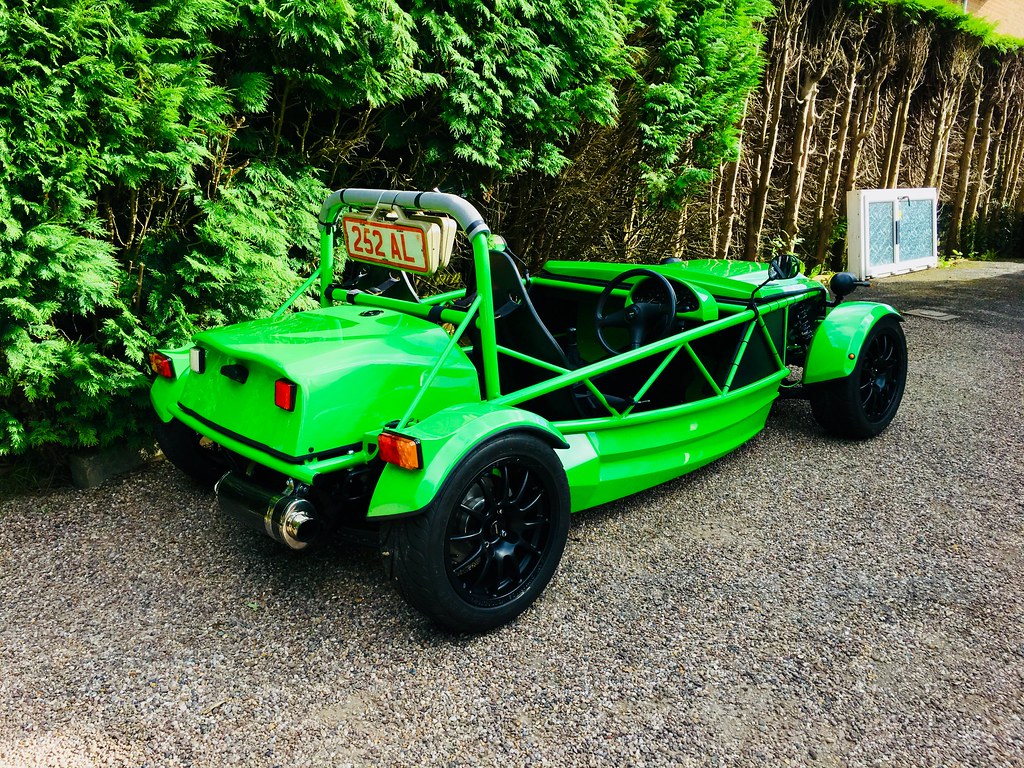
I have been taking advantage of the good weather and making some use of the green machine - even bringing it to work a few times, where it does stand out somewhat in the car park!
 Untitled on Flickr
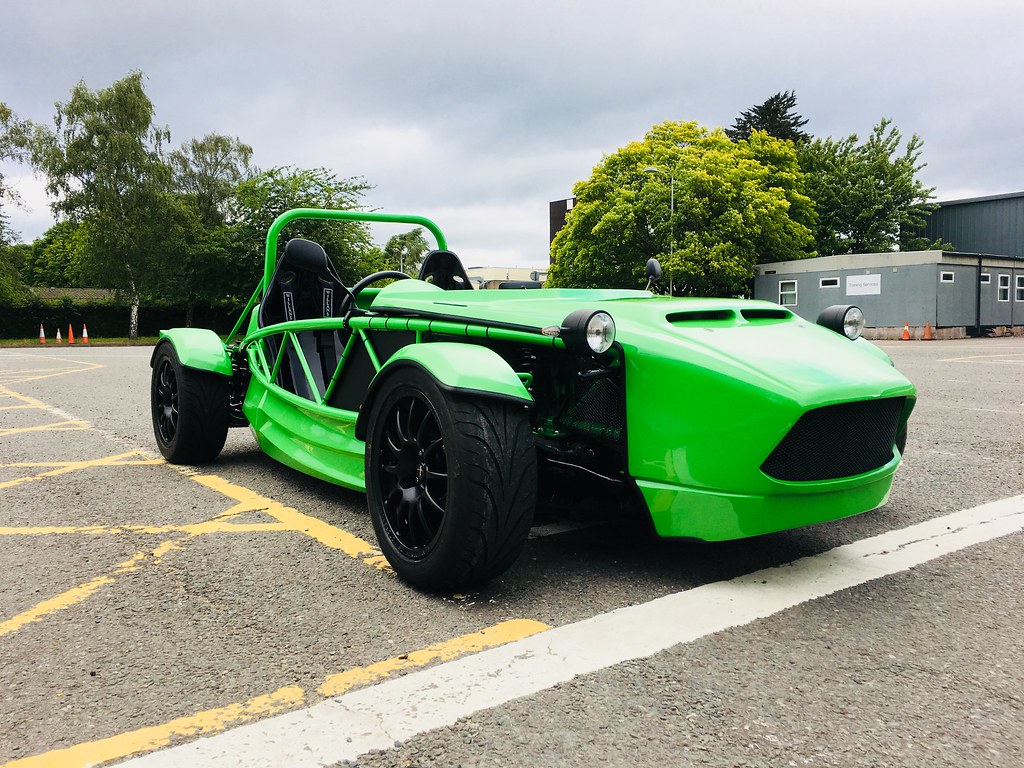
I also had a morning out down at Curborough to join the annual MEV owners meeting, where I didn't venture on track this time (I want to get everything well sorted before doing so) - but did get to chat to a few of the folks that I have been comparing notes with during the build, and get a few ideas for further tweaks to do now that I'm IVA'd
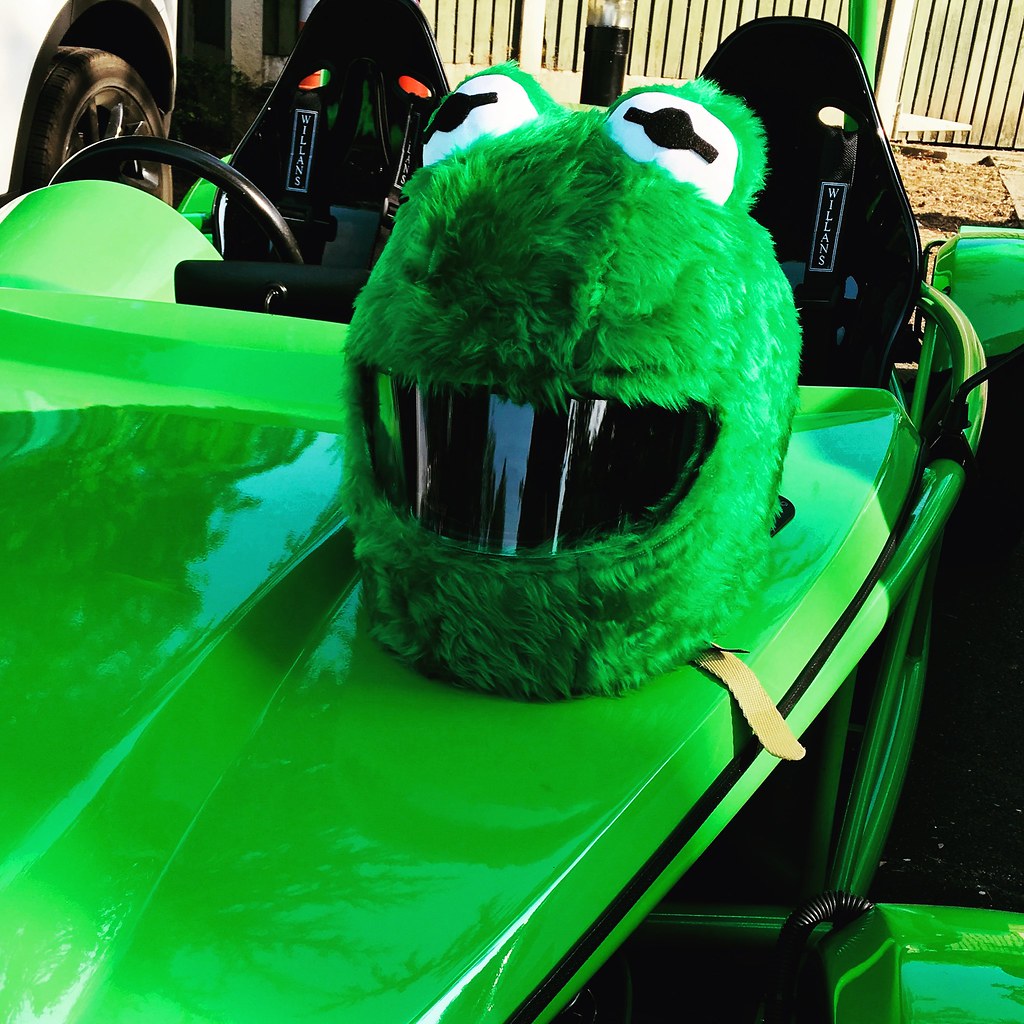
As if the exocet itself doesn't stand out enough in everyday traffic, I spotted an addition that would provide a bit of fun while driving - if I am going to wear a helmet, then I may as well make it fun - so I have added a Kermit cover, which certainly makes you get some attention when you're on the roads!
 Untitled on Flickr
So far I've done around 200 miles and all is good. There are now a few jobs that I want to tick off - I still have a slight weep from the diff, I want to sort the slow fuel filling, raise the ride height a little (it is currently <100mm from the ground) and my tail lights are apparently virtually impossible to see in sunlight, so I have got a different set of the same design to fit. With that lot done, I can then start to tweak and play with things a little more - these things really are never finished!
I have been taking advantage of the good weather and making some use of the green machine - even bringing it to work a few times, where it does stand out somewhat in the car park!
Untitled on FlickrI also had a morning out down at Curborough to join the annual MEV owners meeting, where I didn't venture on track this time (I want to get everything well sorted before doing so) - but did get to chat to a few of the folks that I have been comparing notes with during the build, and get a few ideas for further tweaks to do now that I'm IVA'd
As if the exocet itself doesn't stand out enough in everyday traffic, I spotted an addition that would provide a bit of fun while driving - if I am going to wear a helmet, then I may as well make it fun - so I have added a Kermit cover, which certainly makes you get some attention when you're on the roads!
Untitled on FlickrSo far I've done around 200 miles and all is good. There are now a few jobs that I want to tick off - I still have a slight weep from the diff, I want to sort the slow fuel filling, raise the ride height a little (it is currently <100mm from the ground) and my tail lights are apparently virtually impossible to see in sunlight, so I have got a different set of the same design to fit. With that lot done, I can then start to tweak and play with things a little more - these things really are never finished!

 KERMIT!
So, another couple of weeks and it's time for another update.
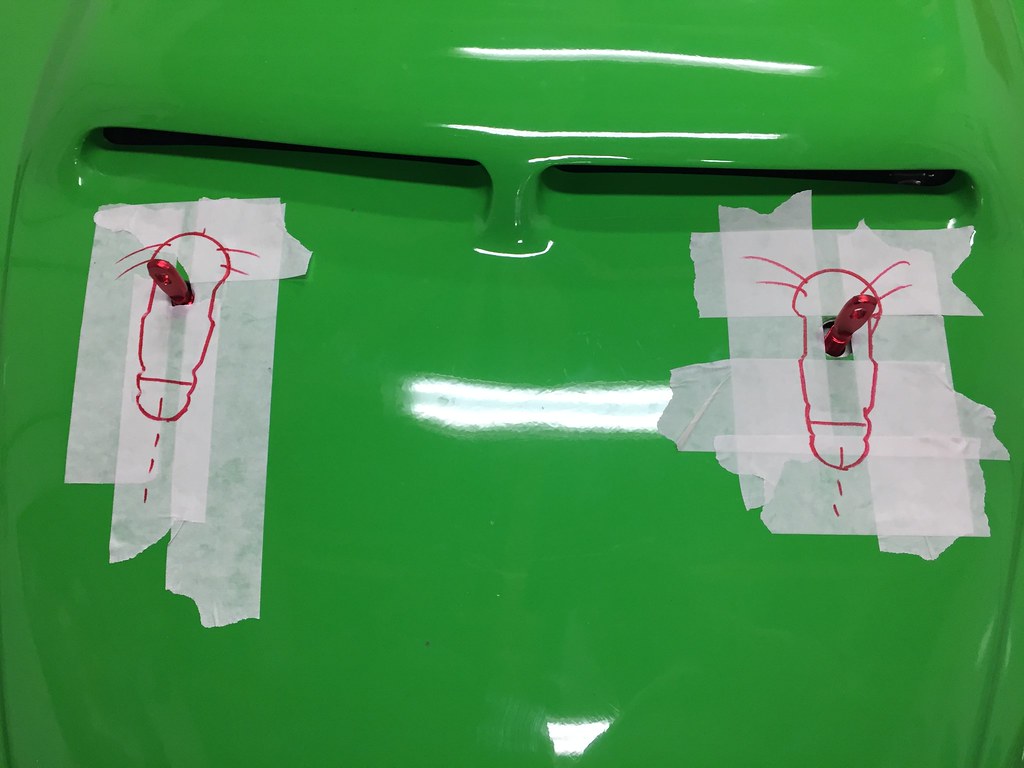
Unfortunately I haven't managed to get out in the car much, as I have been on holiday and also discovered some more jobs that needed sorting. The first oen was the front bonnet pins. With the car on the road, I had soon discovered that while the push-button pins looked very neat, they weren't brilliantly made - the centre portion holding the locking mechanism rattled loose while driving and they fell apart. I tried fixing this first time using a spare pair, which I tried to modify by putting loctite into the threads of the inner portion - but they also fell apart.
Having killed two sets within 200 miles, I started to look for something else (apologies to those who may have used these pins under my initial recommendation - I was initially very impressed with them - and would have been if they were made a bit more securely).
Initial solution was a pair of locking pins, which were a little larger than I wanted (but I was planning on trimming down the washers) - but more importantly, wouldn't lock due to the curvature of the bonnet meaning they wouldn't align properly.
 Untitled on Flickr
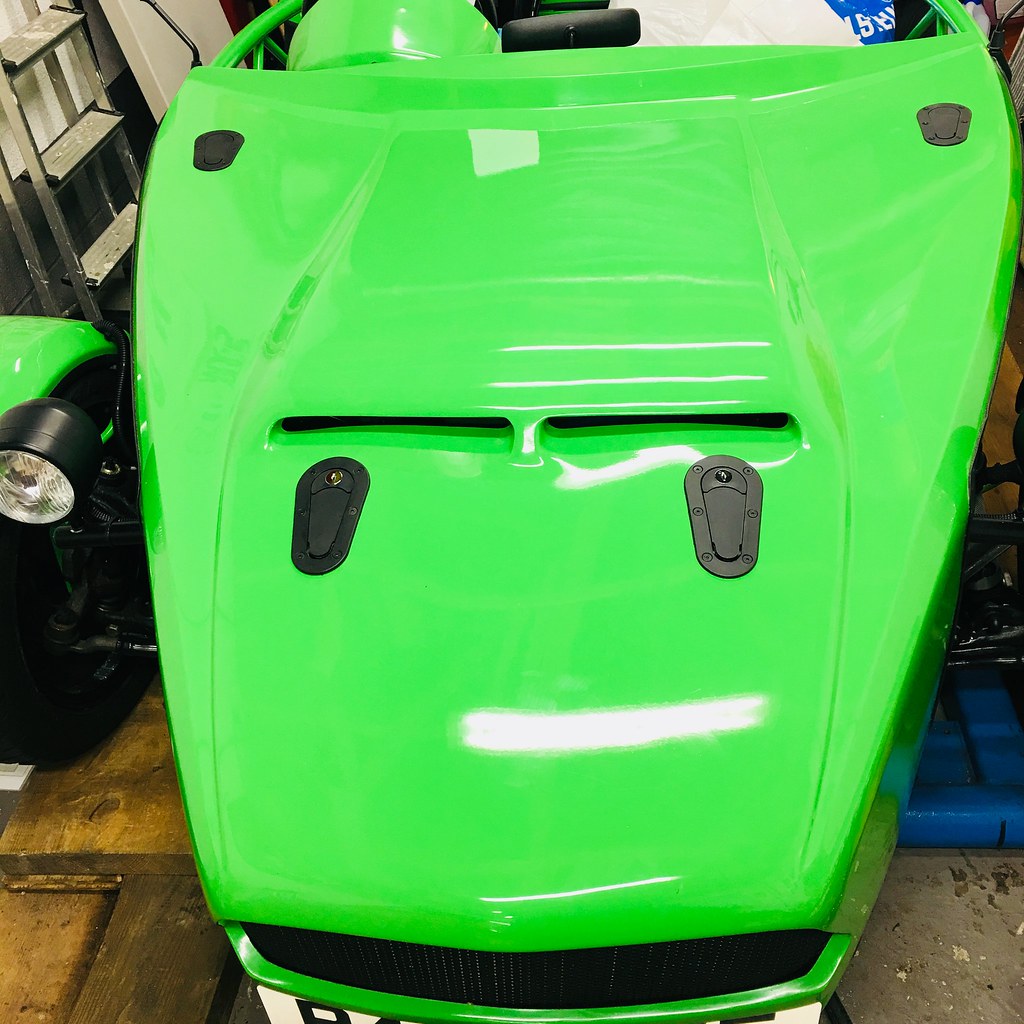
So with that option not working, it was back to what I knew would work - and a second pair of aerocatches. This meant something a bit bigger than I really wanted, but would at least mean that the bonnet can't go anywhere. First job was to fit the pins, and start marking out (which was "artistically assisted" by my brother)...
 Untitled on Flickr
Then after getting busy with the holesaw and dremel, we could fit the catches and test the bonnet. The end result is that the bonnet is much more securely held than it had been - even if it isn't quite as clean-looking as I had initially aimed for.
 on Flickr
So that is another job completed - next on the list are to replace my tail lights, which are quite dim, and to sort out my fuel tank venting to make filling up a little less painful, adjust my coilovers to give a little more ride height, and then get it properly aligned.
Unfortunately I haven't managed to get out in the car much, as I have been on holiday and also discovered some more jobs that needed sorting. The first oen was the front bonnet pins. With the car on the road, I had soon discovered that while the push-button pins looked very neat, they weren't brilliantly made - the centre portion holding the locking mechanism rattled loose while driving and they fell apart. I tried fixing this first time using a spare pair, which I tried to modify by putting loctite into the threads of the inner portion - but they also fell apart.
Having killed two sets within 200 miles, I started to look for something else (apologies to those who may have used these pins under my initial recommendation - I was initially very impressed with them - and would have been if they were made a bit more securely).
Initial solution was a pair of locking pins, which were a little larger than I wanted (but I was planning on trimming down the washers) - but more importantly, wouldn't lock due to the curvature of the bonnet meaning they wouldn't align properly.
Untitled on FlickrSo with that option not working, it was back to what I knew would work - and a second pair of aerocatches. This meant something a bit bigger than I really wanted, but would at least mean that the bonnet can't go anywhere. First job was to fit the pins, and start marking out (which was "artistically assisted" by my brother)...
Untitled on FlickrThen after getting busy with the holesaw and dremel, we could fit the catches and test the bonnet. The end result is that the bonnet is much more securely held than it had been - even if it isn't quite as clean-looking as I had initially aimed for.
on FlickrSo that is another job completed - next on the list are to replace my tail lights, which are quite dim, and to sort out my fuel tank venting to make filling up a little less painful, adjust my coilovers to give a little more ride height, and then get it properly aligned.
It's been a while, but time for a Lockdown update! I have done a few things that I have probably missed on my updates - including fitting the aero screen and swapping my open diff for a type 2 torsen.
More recently, as we started with the Coronavirus lockdown, I was hoping to get out and drive, but not allowed, so thought I would go for some upgrades... but was over-ruled as the rest of the family decided we were having a puppy instead (although he is quite cool!). As a consolation prize, I decided to buy a cheap plate to go on the car, which smartens it up a bit:


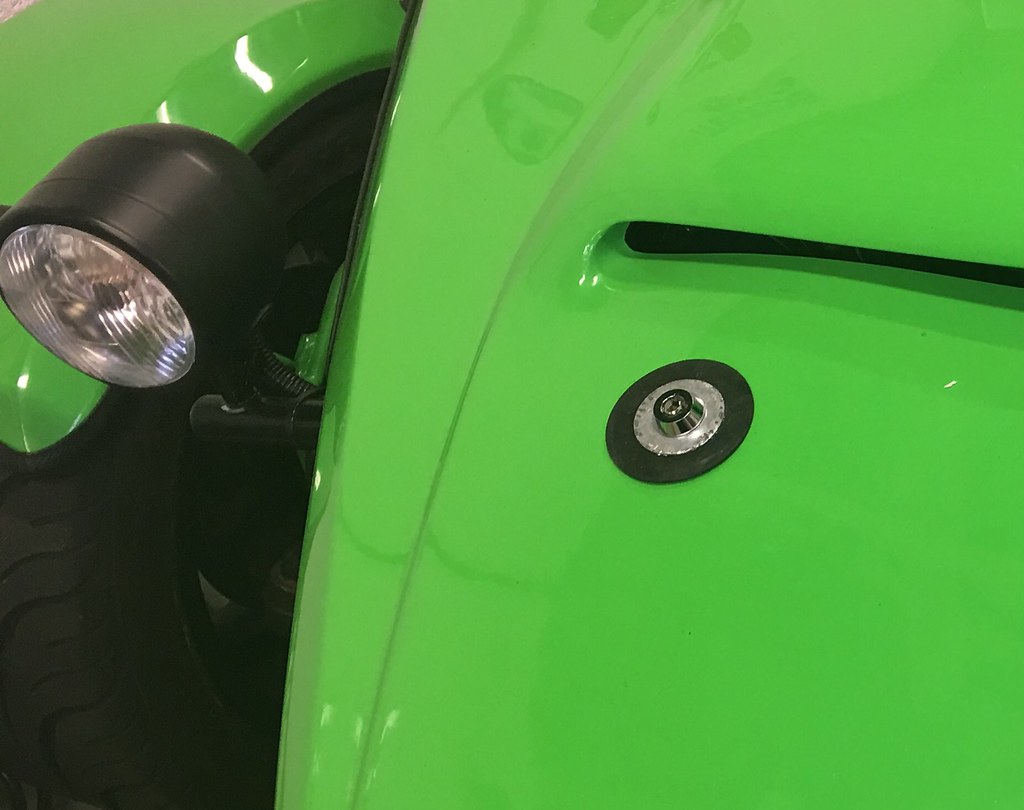
Having seen them on the facebook group, I then added a Billet oil cap from G19, because who doesn't love a bit of bling!

Having then really decided that I wanted to get in the garage, I decided to begin some pre-turbo supporting mods, and so ordered a coolant re-route kit from Bofi racing on May 8th (which still hasn't arrived, as they are awaiting the spacers), and started to strip the cooling system down - and snapped a bolt on the rear housing (but it thankfully came out with a slot cut in the end and a screwdriver bit)

So, while (im)patiently waiting for the reroute kit to arrive, I began idly browsing... and bought myself a very good condition used TD04 turbo from an impreza and a set of used RX8 injectors.

That counts as fitted, right?
Well, since I now have a starting point, it meant that I got impatient, and despite earlier sensible overtones, have ordered all fo the remaining bits that I need - G19 manifold, downpipe and clutch, ME221 and all the fixtures and fittings - so watch this space, more power will be coming along shortly!
While waiting for my deliveries, I have started stripping the car down, and currently have the manifold, downpipe, prop and ppt off, and gearbox ready to remove, just held by a couple of easy bolts, so hope I can get moving along as packages of shiny goodies begin to arrive...


More recently, as we started with the Coronavirus lockdown, I was hoping to get out and drive, but not allowed, so thought I would go for some upgrades... but was over-ruled as the rest of the family decided we were having a puppy instead (although he is quite cool!). As a consolation prize, I decided to buy a cheap plate to go on the car, which smartens it up a bit:
Having seen them on the facebook group, I then added a Billet oil cap from G19, because who doesn't love a bit of bling!
Having then really decided that I wanted to get in the garage, I decided to begin some pre-turbo supporting mods, and so ordered a coolant re-route kit from Bofi racing on May 8th (which still hasn't arrived, as they are awaiting the spacers), and started to strip the cooling system down - and snapped a bolt on the rear housing (but it thankfully came out with a slot cut in the end and a screwdriver bit)
So, while (im)patiently waiting for the reroute kit to arrive, I began idly browsing... and bought myself a very good condition used TD04 turbo from an impreza and a set of used RX8 injectors.
That counts as fitted, right?
Well, since I now have a starting point, it meant that I got impatient, and despite earlier sensible overtones, have ordered all fo the remaining bits that I need - G19 manifold, downpipe and clutch, ME221 and all the fixtures and fittings - so watch this space, more power will be coming along shortly!
While waiting for my deliveries, I have started stripping the car down, and currently have the manifold, downpipe, prop and ppt off, and gearbox ready to remove, just held by a couple of easy bolts, so hope I can get moving along as packages of shiny goodies begin to arrive...

Gassing Station | Readers' Cars | Top of Page | What's New | My Stuff