MX5 Berkeley to MEV Exocet projec
Discussion


Cheers - the replicar is a nice looking thing, and the good news is (from the MEV forums), that new owners, ANC sports cars are going to be up and running soon, and are working on building an initial demo car...
Agree that real carbon would be nice - I did consider it (and am still wondering about it for the side panels!) - but it isn't cheap, and I wondered how it might fare long-term for floor panels... I do have some carbon sheet that I will certainly be using it in some places on the car!
I have not been doing as much as I would have liked over the last couple of weeks, but have got a few bits done (I have also been getting my mini prepped for a rolling road setup, which has involved swapping carbs over and tweaking some bits).
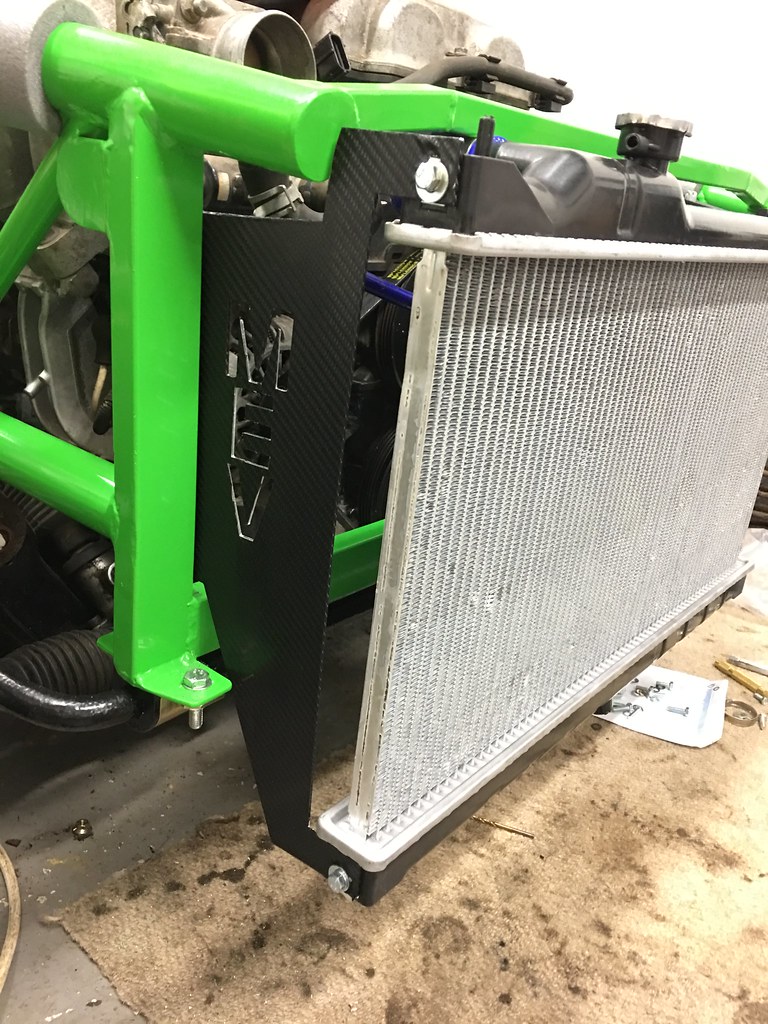
Firstly, having bought a rivnut tool, I fitted the radiator, which looks good - with the vinyl working well (we will see how that lasts once it has got hot):
 Radiator fitted on Flickr
 Radiator fitted on Flickr
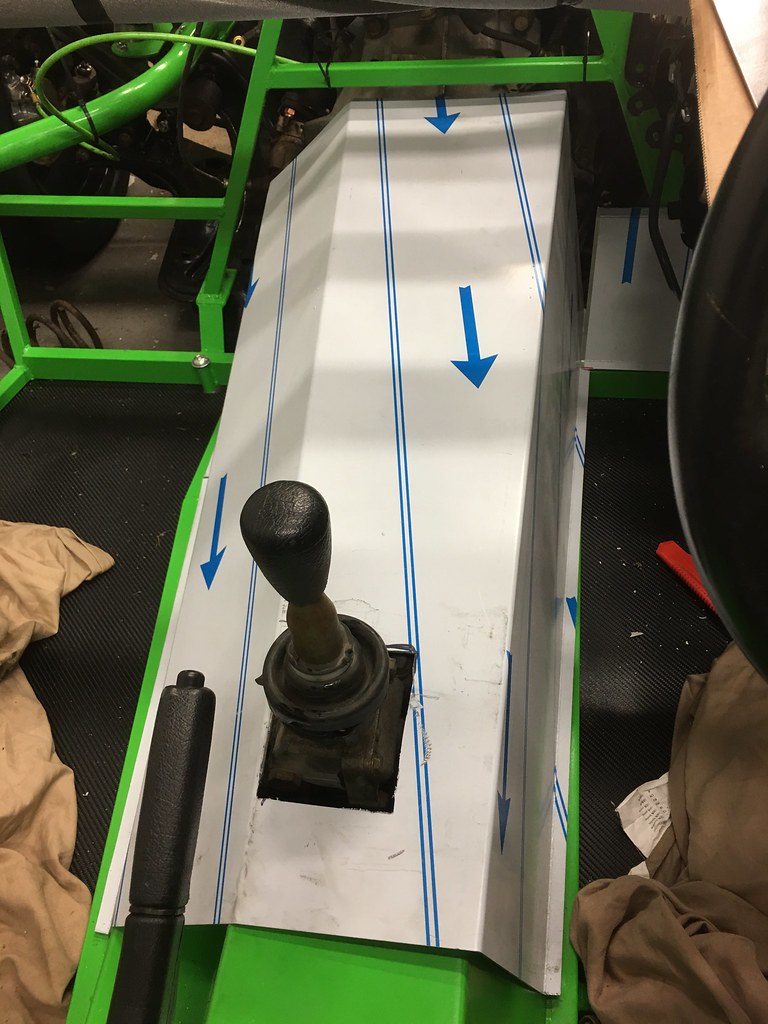
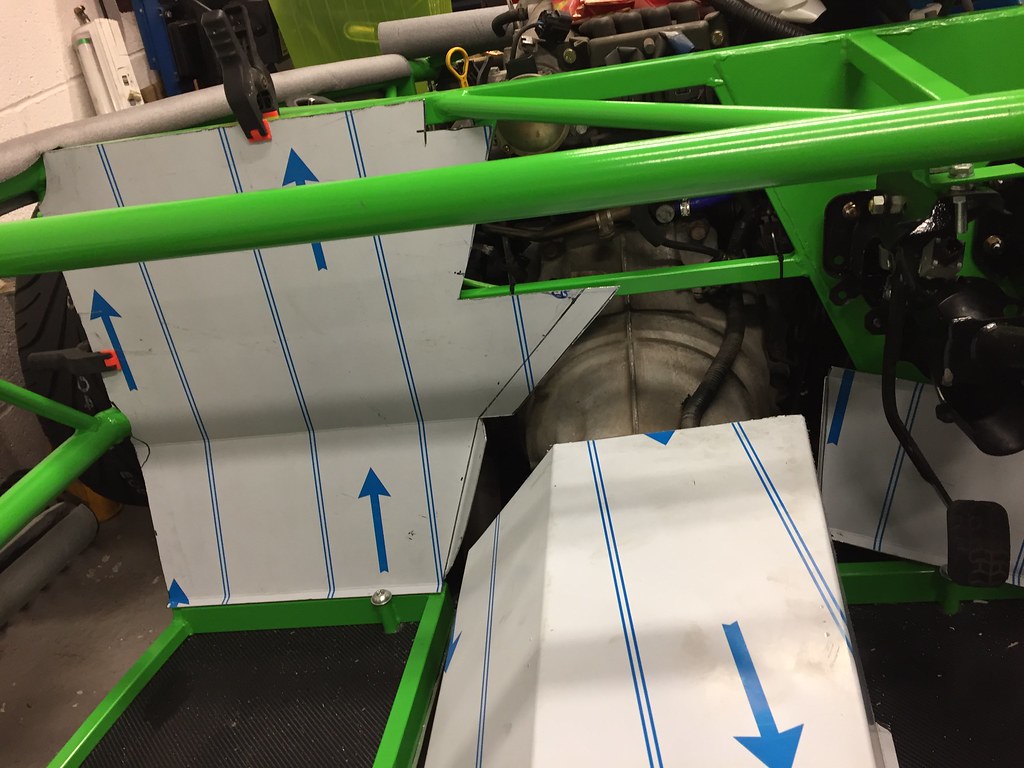
and I have been working on figuring out the 3-D puzzle that is the tunnel and bulkhead panelling! This is where the loss of history from photo bucket has really hurt, as many of the threads I looked at on here and elsewhere had great descriptions, but no pictures to be able to really visualise what was going on. I began with trying to sketch out templates for the panels that need modifying/making. having started that, I then realised that I really needed to cut the hole for the gearstick and get the tunnel in place and the front end trimmed up before I finalise my templates.
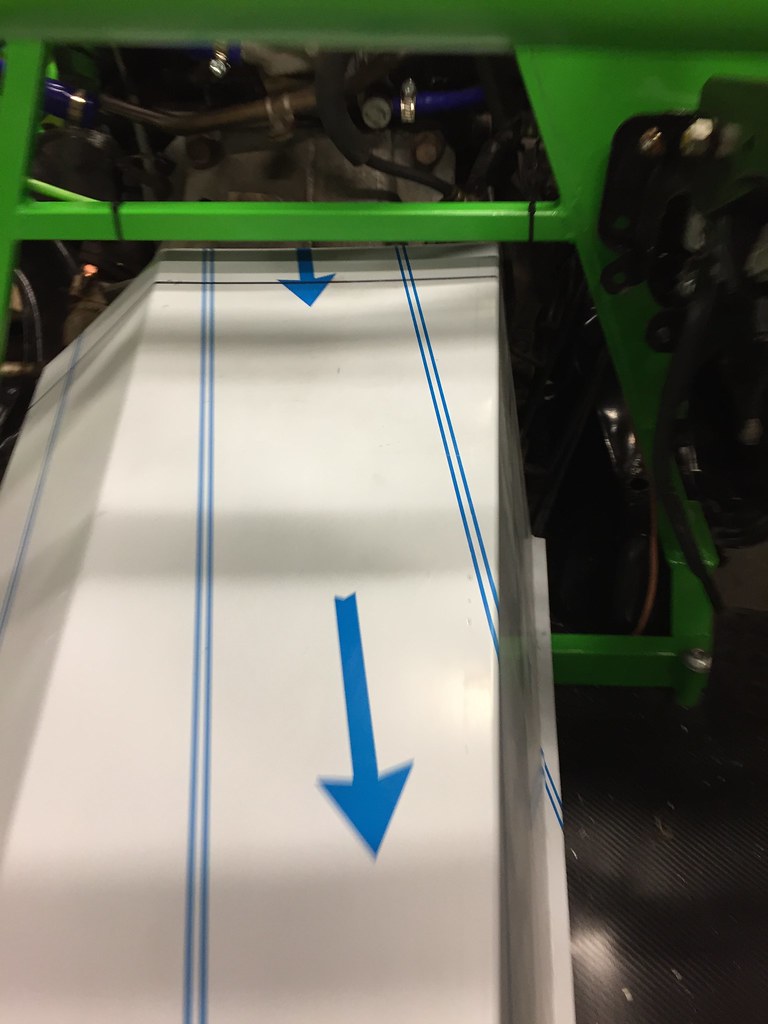
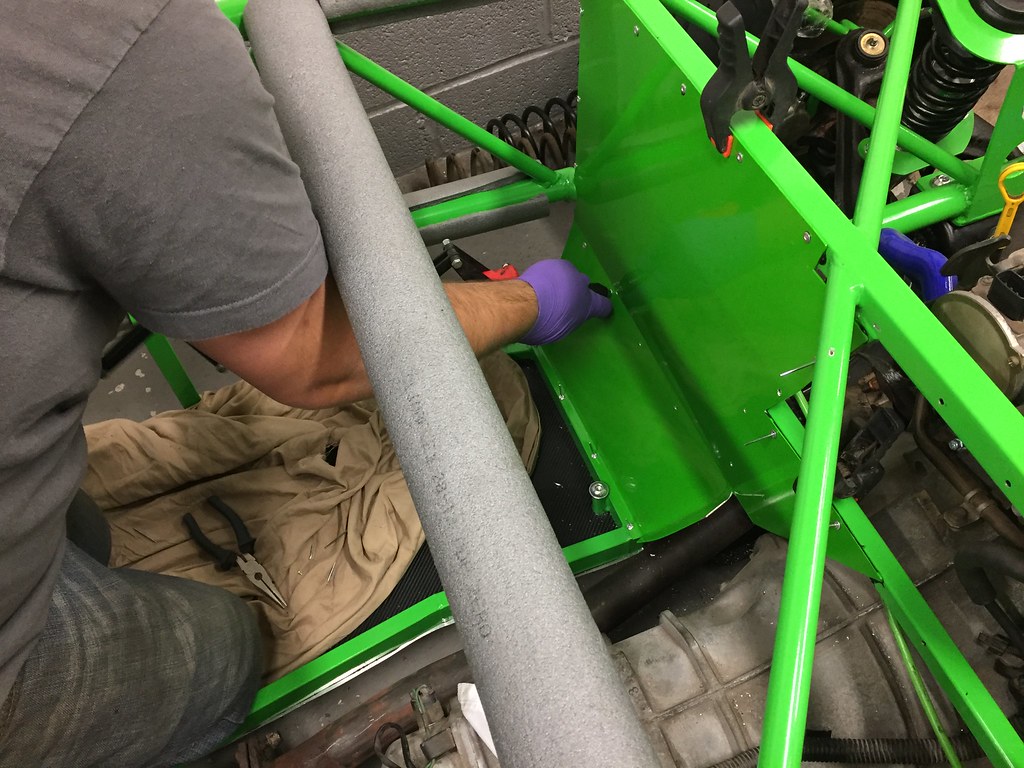
So tonights job was to do just that - and some measuring, double checking and marking was followed by a first conservative cut that was then gradually opened out to fit.
 Untitled on Flickr
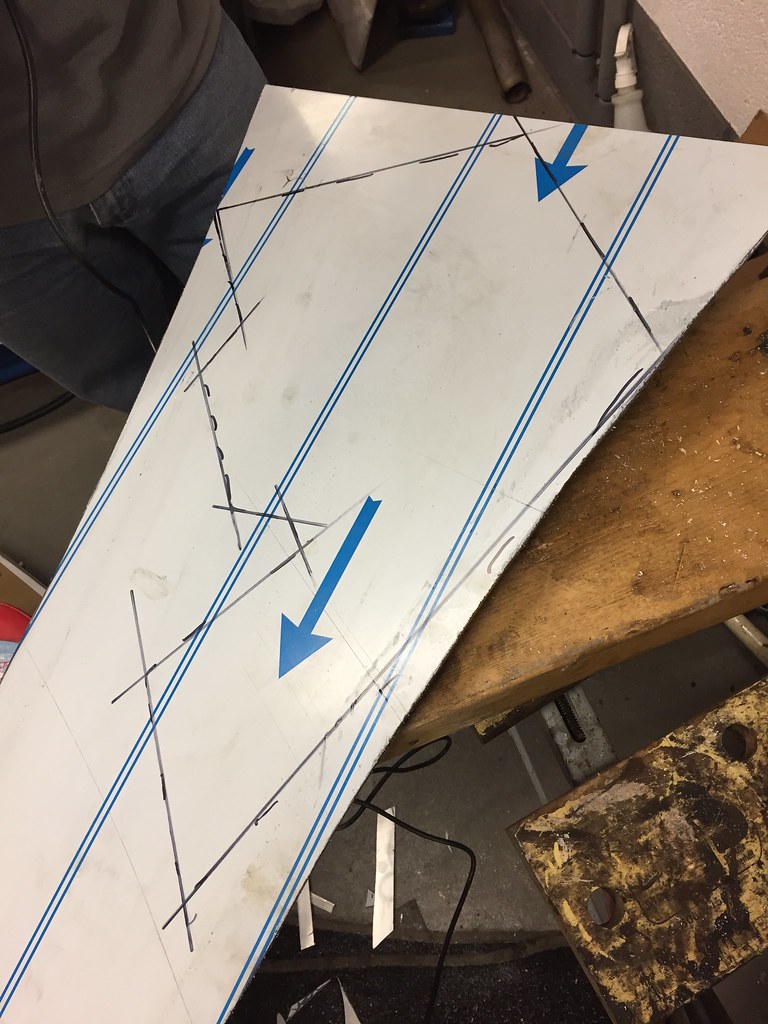
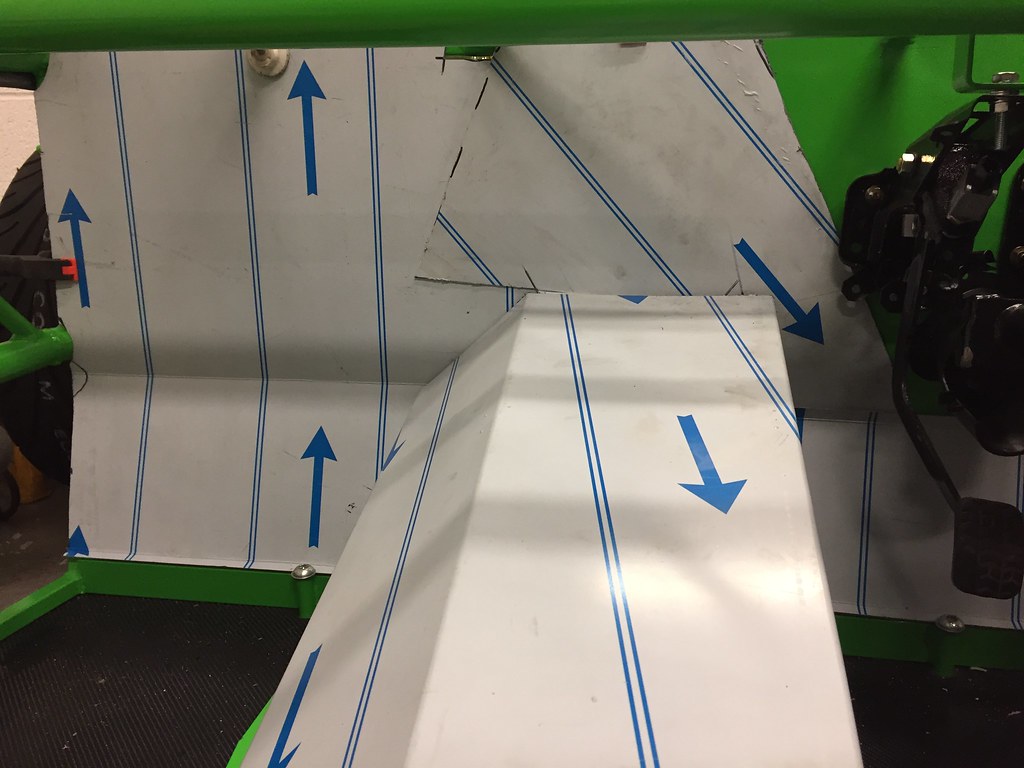
This then allowed me to put my templates into place - so I can start to refine the shapes to ensure that i get tabs in the right places to hold the front of the tunnel and also mark where the front needs a trim.
 Untitled on Flickr
 Untitled on Flickr
Not masses of progress, but still moving forwards - I now need to order more aluminium sheet, as the offcuts from the floor aren't quite big enough to make the panels as I have them templated - I might even try to make the passenger side and upper panel into a single piece, will see if that will work!
Agree that real carbon would be nice - I did consider it (and am still wondering about it for the side panels!) - but it isn't cheap, and I wondered how it might fare long-term for floor panels... I do have some carbon sheet that I will certainly be using it in some places on the car!
I have not been doing as much as I would have liked over the last couple of weeks, but have got a few bits done (I have also been getting my mini prepped for a rolling road setup, which has involved swapping carbs over and tweaking some bits).
Firstly, having bought a rivnut tool, I fitted the radiator, which looks good - with the vinyl working well (we will see how that lasts once it has got hot):
Radiator fitted on FlickrRadiator fitted on Flickrand I have been working on figuring out the 3-D puzzle that is the tunnel and bulkhead panelling! This is where the loss of history from photo bucket has really hurt, as many of the threads I looked at on here and elsewhere had great descriptions, but no pictures to be able to really visualise what was going on. I began with trying to sketch out templates for the panels that need modifying/making. having started that, I then realised that I really needed to cut the hole for the gearstick and get the tunnel in place and the front end trimmed up before I finalise my templates.
So tonights job was to do just that - and some measuring, double checking and marking was followed by a first conservative cut that was then gradually opened out to fit.
Untitled on FlickrThis then allowed me to put my templates into place - so I can start to refine the shapes to ensure that i get tabs in the right places to hold the front of the tunnel and also mark where the front needs a trim.
Untitled on FlickrUntitled on FlickrNot masses of progress, but still moving forwards - I now need to order more aluminium sheet, as the offcuts from the floor aren't quite big enough to make the panels as I have them templated - I might even try to make the passenger side and upper panel into a single piece, will see if that will work!

browno said:
and I have been working on figuring out the 3-D puzzle that is the tunnel and bulkhead panelling! This is where the loss of history from photo bucket has really hurt, as many of the threads I looked at on here and elsewhere had great descriptions, but no pictures to be able to really visualise what was going on.
There's add-ons for Firefox and Chrome that put the pics back by working around Botophucket's silliness.https://addons.mozilla.org/en-US/firefox/addon/pho... is the FF one I'm using.
A bit of a gap in updates here as I have been off travelling with work and busy with other things - but have got back onto making a little more progress.
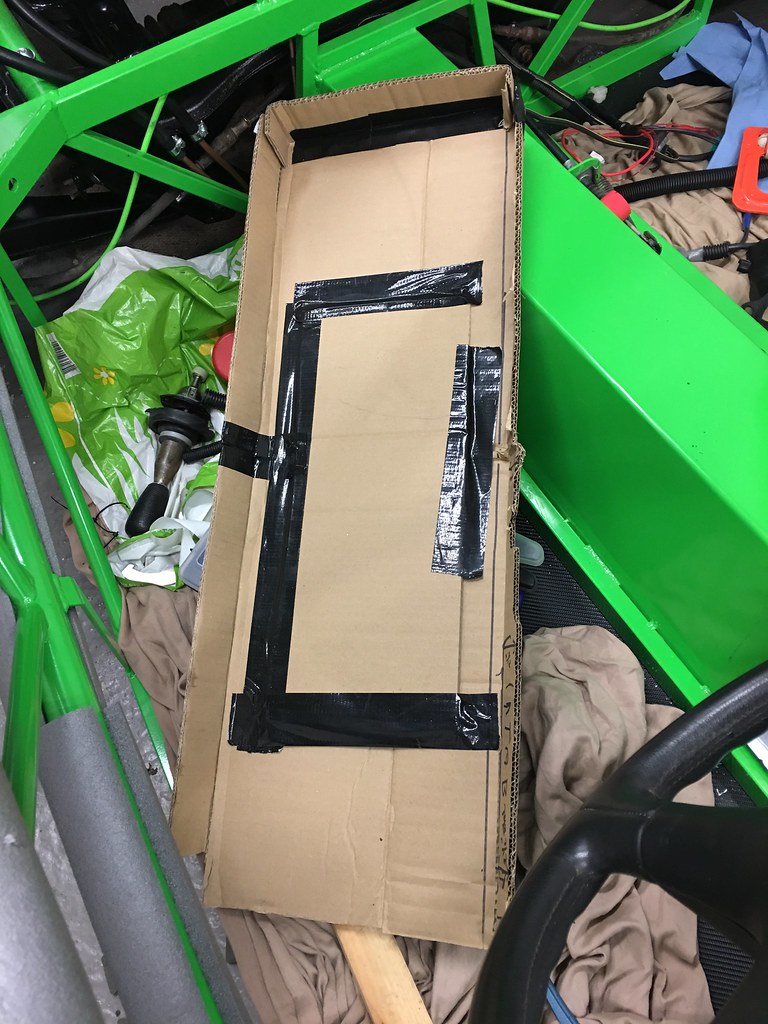
First job was to do a little more cardboard fabrication to finish the bulkhead and also work on a first draft of a wiring tray... One question on that - how deep have people made their trays, and did you feel that was right or could you have done with a bit more?
 Untitled on Flickr
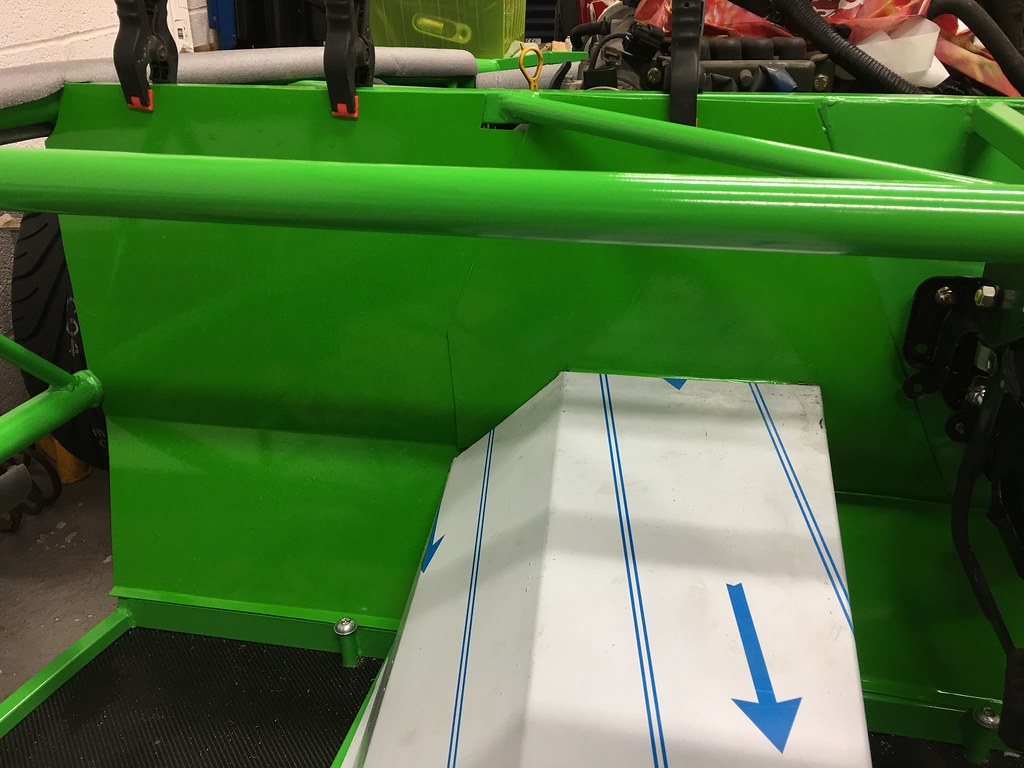
but I am not sure that cardboard will quite be suitable for the IVA man, so I marked out and trimmed off the front end of the tunnel, and then began transferring the dimensions into something a little more suitable!
 Untitled on Flickr
 Untitled on Flickr
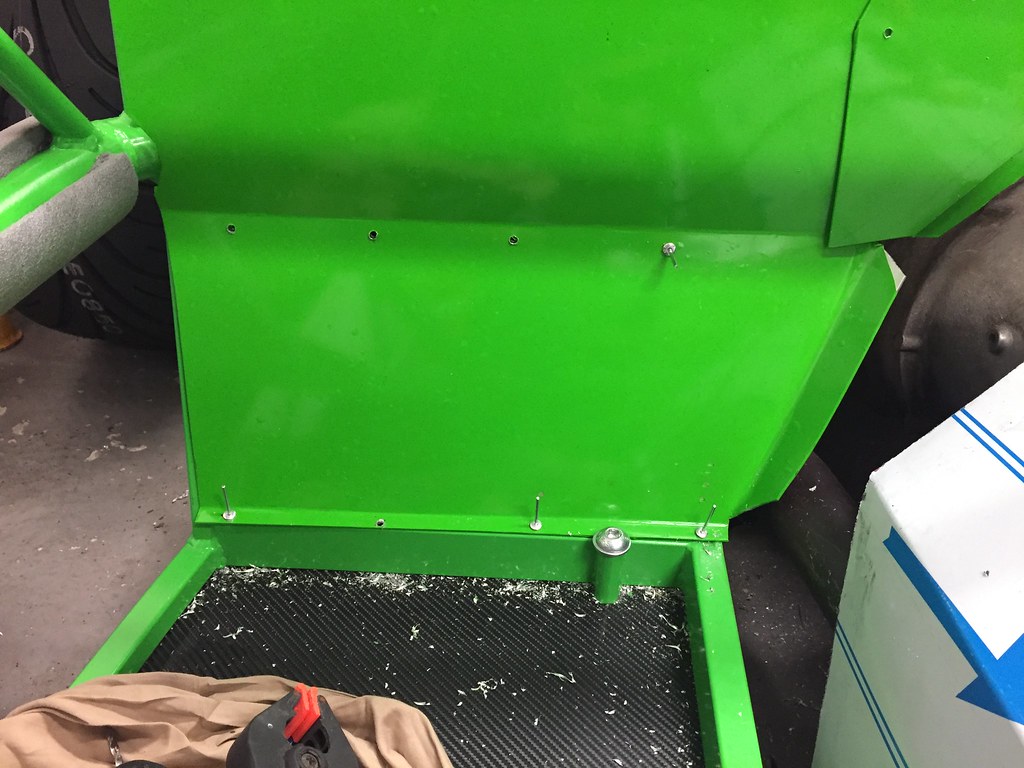
then started offering up the panels (and progressively adjusting them!) to get a decent fit:
 Untitled on Flickr
 Untitled on Flickr
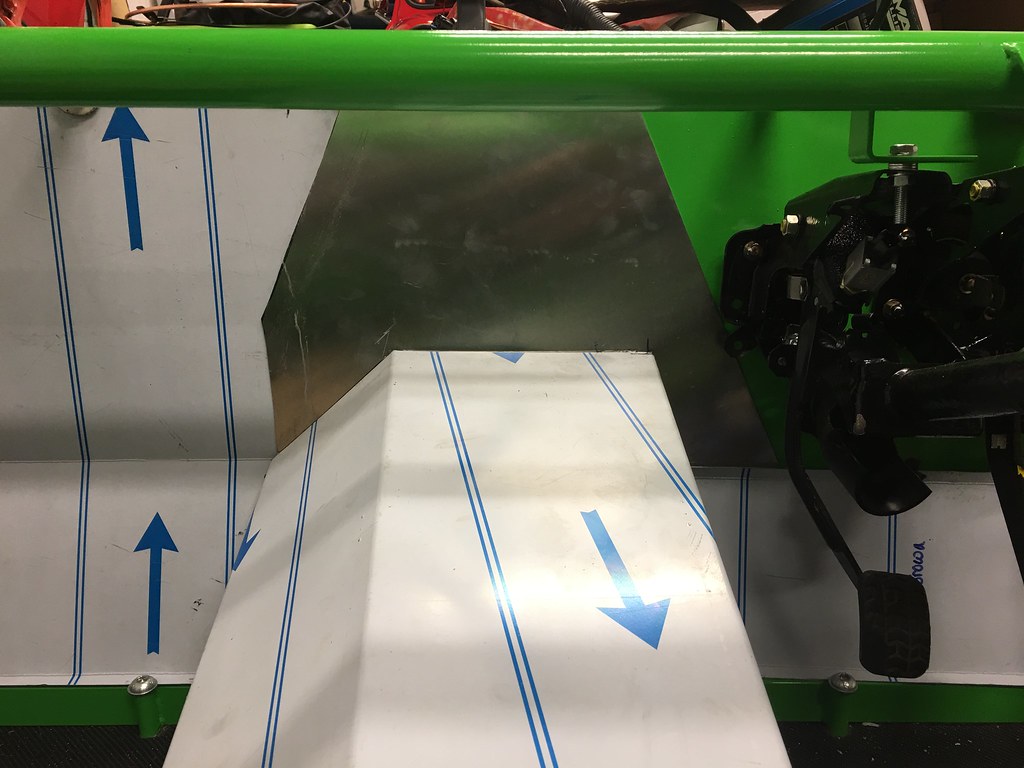
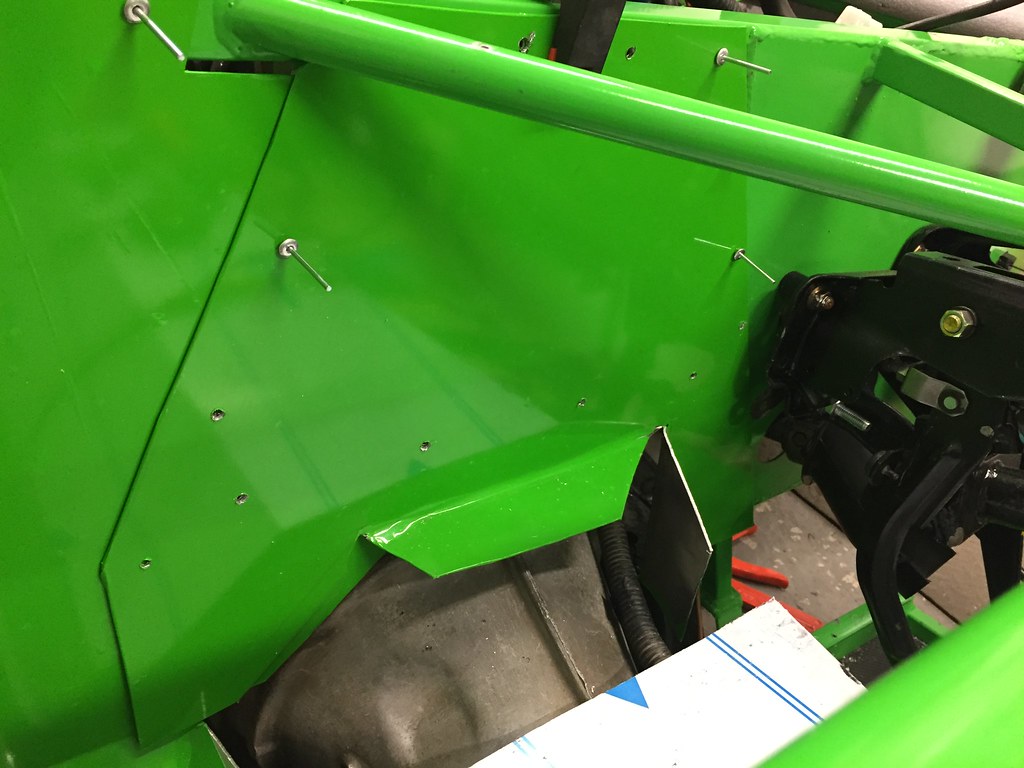
which looked ok - but I wasn't keen on the pointed edge floating on the centre panel, so then had a go at remaking an improved shape to drop the join below the tunnel and neaten things up.
 Untitled on Flickr
this version is still a work in progress as a couple of bits aren't quite straight and need a bit of tweaking - but it is looking like a good start! Having been hesitant at the start that this was going to be a very tricky 3-d jigsaw puzzle, I am very pleased with the progress to this stage - and am confident that I can get these fitted up nicely with a little adjustment (or in the worst case, making another iteration!).
So, progress has been slow, but I am still working on it, and hopefully I am now properly back on it, so will be keeping things moving along!
First job was to do a little more cardboard fabrication to finish the bulkhead and also work on a first draft of a wiring tray... One question on that - how deep have people made their trays, and did you feel that was right or could you have done with a bit more?
Untitled on Flickrbut I am not sure that cardboard will quite be suitable for the IVA man, so I marked out and trimmed off the front end of the tunnel, and then began transferring the dimensions into something a little more suitable!
Untitled on FlickrUntitled on Flickrthen started offering up the panels (and progressively adjusting them!) to get a decent fit:
Untitled on FlickrUntitled on Flickrwhich looked ok - but I wasn't keen on the pointed edge floating on the centre panel, so then had a go at remaking an improved shape to drop the join below the tunnel and neaten things up.
Untitled on Flickrthis version is still a work in progress as a couple of bits aren't quite straight and need a bit of tweaking - but it is looking like a good start! Having been hesitant at the start that this was going to be a very tricky 3-d jigsaw puzzle, I am very pleased with the progress to this stage - and am confident that I can get these fitted up nicely with a little adjustment (or in the worst case, making another iteration!).
So, progress has been slow, but I am still working on it, and hopefully I am now properly back on it, so will be keeping things moving along!
browno said:
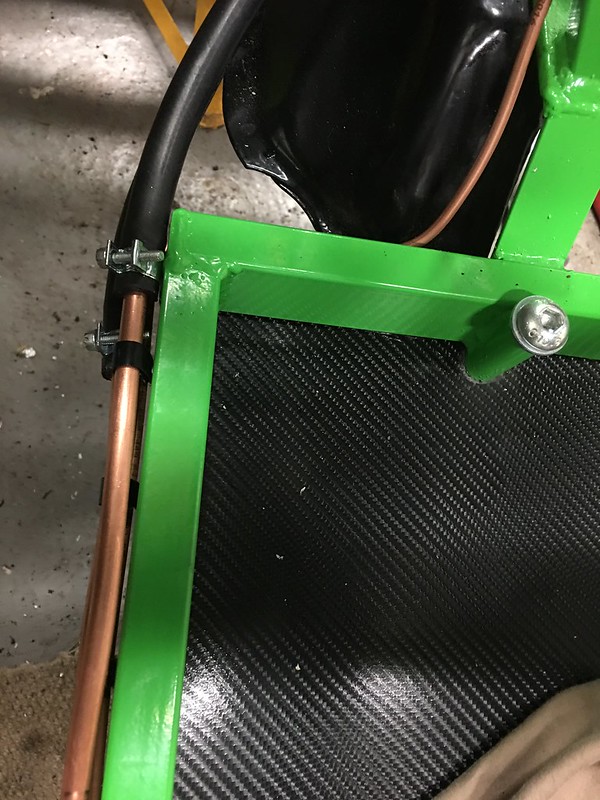
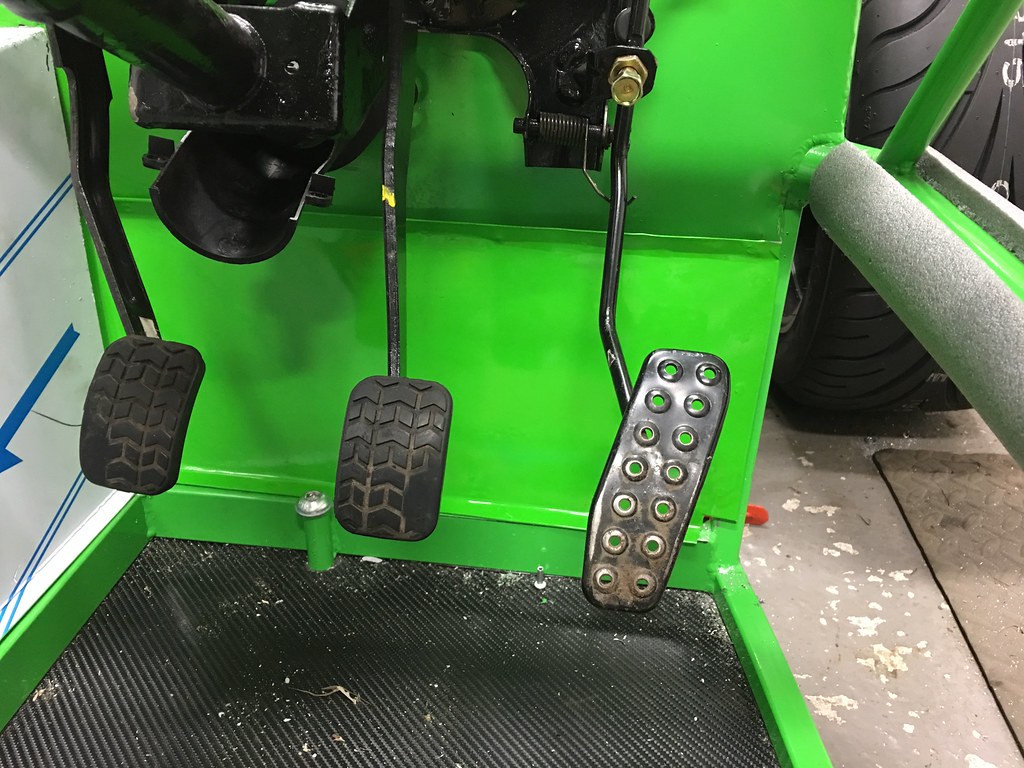
I have then been working to try and begin sorting details - so have the accelerator cable attached, handbrake cables installed and ready to bolt into place and also the clutch plumbed in and bled up, so that is now working. I have also chopped the front end of the fuel hard pipes and have fitted flexible hoses up to the fuel rail (although I have dropped one of the fuel-rail spacers, so will need to sort a replacement if it doesn't turn up on the floor!).
 Untitled by brownotribbs, on Flickr
Mate, as a quick point to add to your list of things to do if you haven't already that is, might be an idea to bead roll or get a flare on those fuel line ends. Possibly even upgrade to compression fittings as straight pipe plus little clips and 3 bar of fuel ain't your fiend.Untitled by brownotribbs, on FlickrCool build either way
chryslerben said:
Mate, as a quick point to add to your list of things to do if you haven't already that is, might be an idea to bead roll or get a flare on those fuel line ends. Possibly even upgrade to compression fittings as straight pipe plus little clips and 3 bar of fuel ain't your fiend.
Cool build either way
Thanks for spotting this - thankfully, I have already added double flares to both ends of the copper lines to make sure that they don't escape. The lines are a nice tight fit so are well clamped and have not moved or shown signs of leakage with the fuel system pressured up. The screw-type clips I have used offer much more clamping than the squeezy-type clips on the OEM fuel lines, so I am overall fairly confident that they are ok!Cool build either way
These are certainly the kids of details that I am glad for folks to pick up and make sure I check now rather than have an issue later!
browno said:
Thanks for spotting this - thankfully, I have already added double flares to both ends of the copper lines to make sure that they don't escape. The lines are a nice tight fit so are well clamped and have not moved or shown signs of leakage with the fuel system pressured up. The screw-type clips I have used offer much more clamping than the squeezy-type clips on the OEM fuel lines, so I am overall fairly confident that they are ok!
These are certainly the kids of details that I am glad for folks to pick up and make sure I check now rather than have an issue later!
I'm enjoying following your build thread tbh, I'd hate to see another thread end with tears by the road side.These are certainly the kids of details that I am glad for folks to pick up and make sure I check now rather than have an issue later!
We just like to keep you on your toes

Great build. I got shot of my rotten 1.8 NA more than 5 years ago, but with a bit more time and space (and a lot more skill) I would have been tempted to have a go at one of these. Now I have a slightly rusty manual 323 e36 BMW convertible and the idea of transforming it into one of the GKD kit cars is one I love the idea of...
Thanks again for the encouragement - it is good to keep things moving along (albeit more slowly recently!)
I have managed more progress though - having made up all of the panels, I then neatened them all up, and then it was time to get them all ready for fitting. Having pondered how to finish the bulkhead, I decided that I wanted them in body colour to tie in with the frame - so after some searching, I was able to find some vinyl in the correct (RAL6018) colour to match, and wrapped the panels - which match nicely.
 Untitled on Flickr
 Untitled on Flickr
Then it was time to get everything lined up and drilled for riveting (and all of the holes cleaned and deburred.
 Untitled on Flickr
 Untitled on Flickr
 Untitled on Flickr
Then it was finally time to apply a generous bead of tiger seal to ensure good bonding and prevent vibration/drumming of the panels and start riveting into position.
 Untitled on Flickr
 Untitled on Flickr
 Untitled on Flickr
Overall, I am happy that it is looking pretty tidy as a finished job, especially with the tunnel in place (next job is to sort the tabs that located to the front of the tunnel and get that fitted).
 Untitled on Flickr
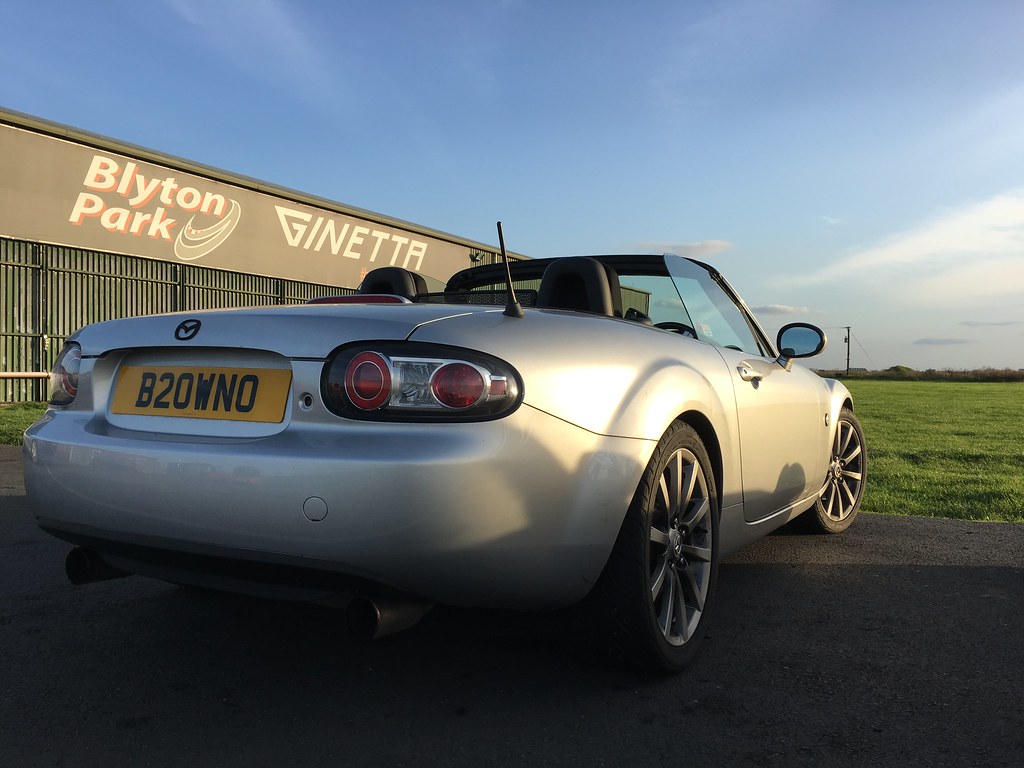
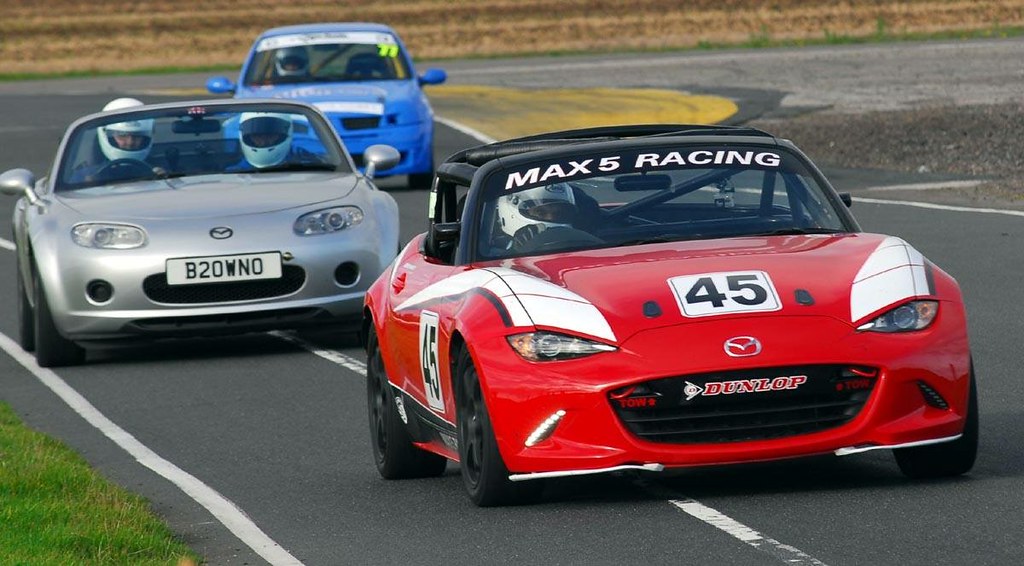
And since I am making progress - I decided that I was overdue some time to play in my other toy, so headed up to Blyton with Mazda on Track for an unseasonably sunny trackday at the weekend - which was very enjoyable!
 Untitled on Flickr
 Untitled on Flickr
I have managed more progress though - having made up all of the panels, I then neatened them all up, and then it was time to get them all ready for fitting. Having pondered how to finish the bulkhead, I decided that I wanted them in body colour to tie in with the frame - so after some searching, I was able to find some vinyl in the correct (RAL6018) colour to match, and wrapped the panels - which match nicely.
Untitled on FlickrUntitled on FlickrThen it was time to get everything lined up and drilled for riveting (and all of the holes cleaned and deburred.
Untitled on FlickrUntitled on FlickrUntitled on FlickrThen it was finally time to apply a generous bead of tiger seal to ensure good bonding and prevent vibration/drumming of the panels and start riveting into position.
Untitled on FlickrUntitled on FlickrUntitled on FlickrOverall, I am happy that it is looking pretty tidy as a finished job, especially with the tunnel in place (next job is to sort the tabs that located to the front of the tunnel and get that fitted).
Untitled on FlickrAnd since I am making progress - I decided that I was overdue some time to play in my other toy, so headed up to Blyton with Mazda on Track for an unseasonably sunny trackday at the weekend - which was very enjoyable!
Untitled on FlickrUntitled on FlickrLong time, no update! I haven't forgotten about my build - but have in fact been busy doing various things in the garage - only some of them on the Exocet.
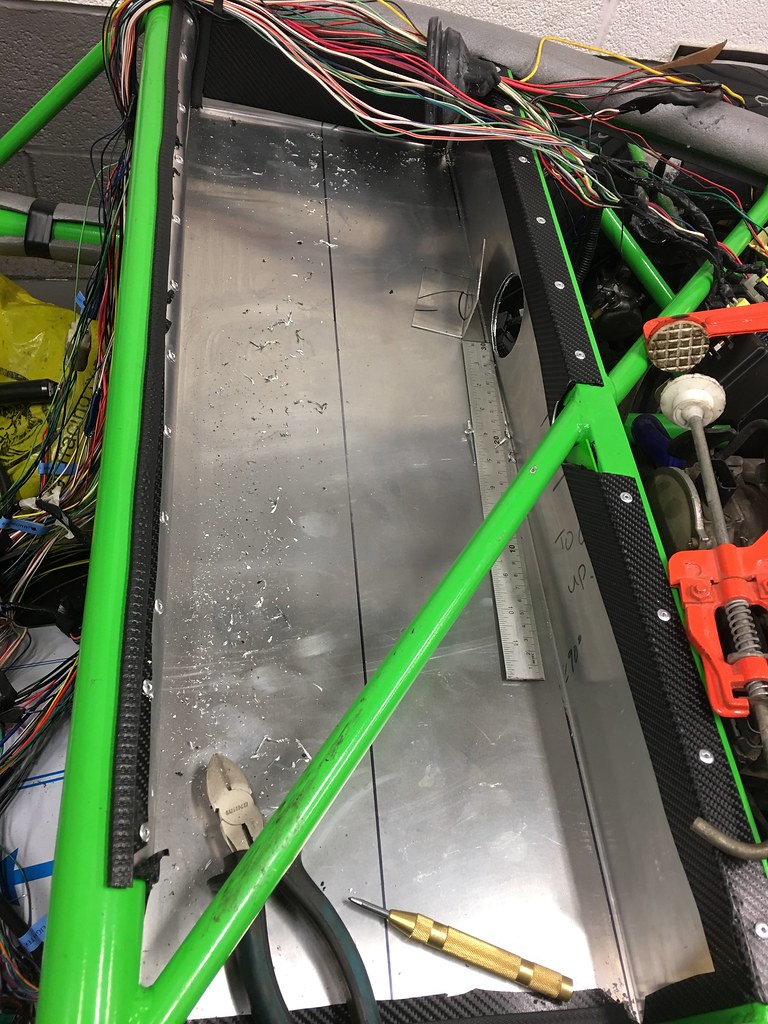
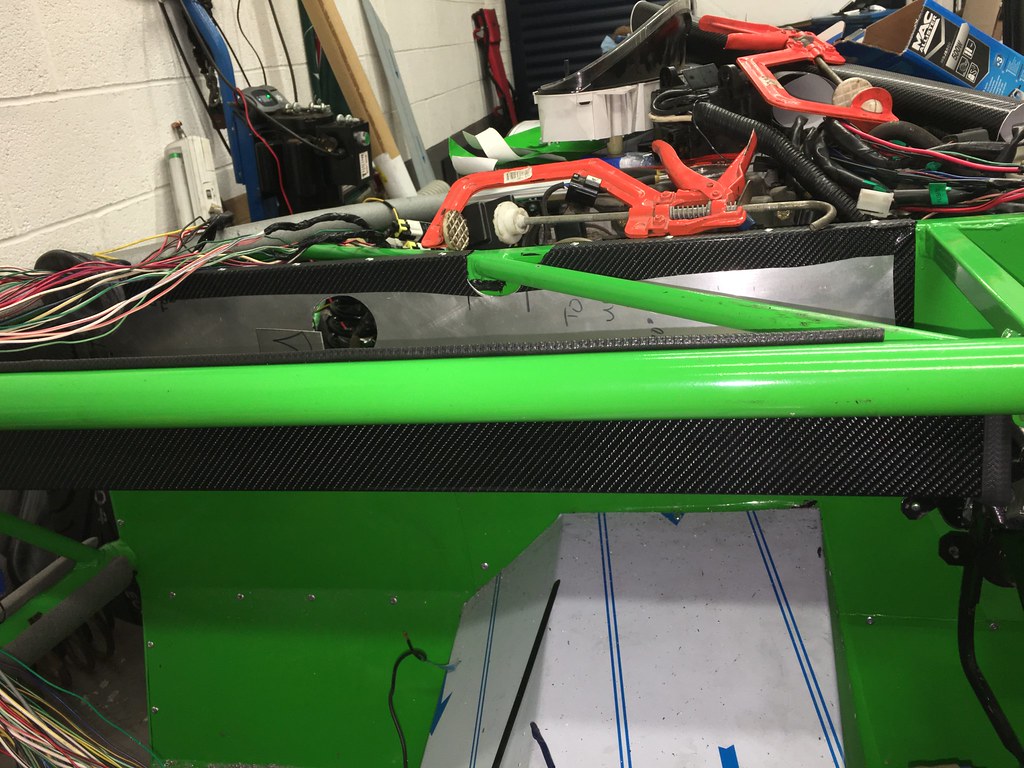
After the previous update, I had started templating a wiring tray to hold the ECU and electrics neatly - so I cut out a sheet of ally and got it folded in the workshop at work - which left me with a neat tray that just need a little adjustment to fit into place:
 Untitled on Flickr
 Untitled on Flickr
 Untitled on Flickr
Then I took a break away from the Exocet as I wanted to finally get my mini sorted and running right - this has been a very long (23 year!) build, that I finally got MOT'd in March, but needed to get setup - so took it off to Peter Burgess to get sorted on his rolling road. It was a very steady drive over with a badly set engine meaning I couldn't drive over about 35mph without serious spluttering! Having worked his magic (and had a good chat), Peter has transformed the drive - and it now has a whole 51BHP (ish!) and drives much better, pulling happily now. This meant that I could take it out for its first proper drive - and then put it to bed for winter!
 Untitled on Flickr
video on the rollers: https://youtu.be/rBlHv9IuFvg
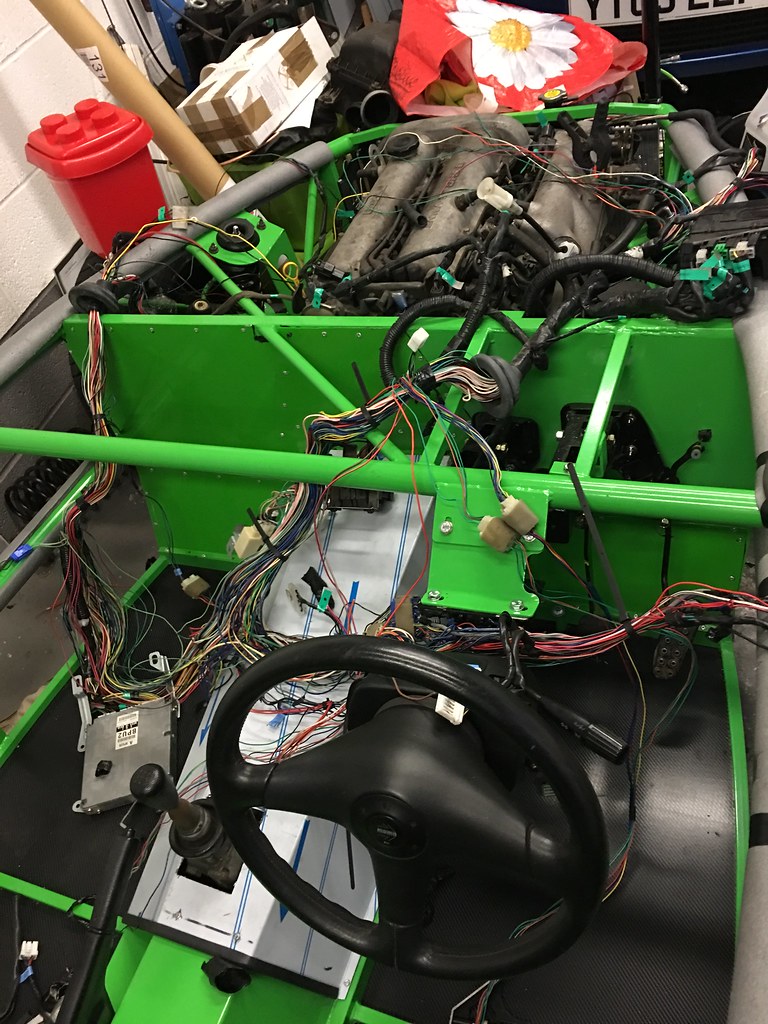
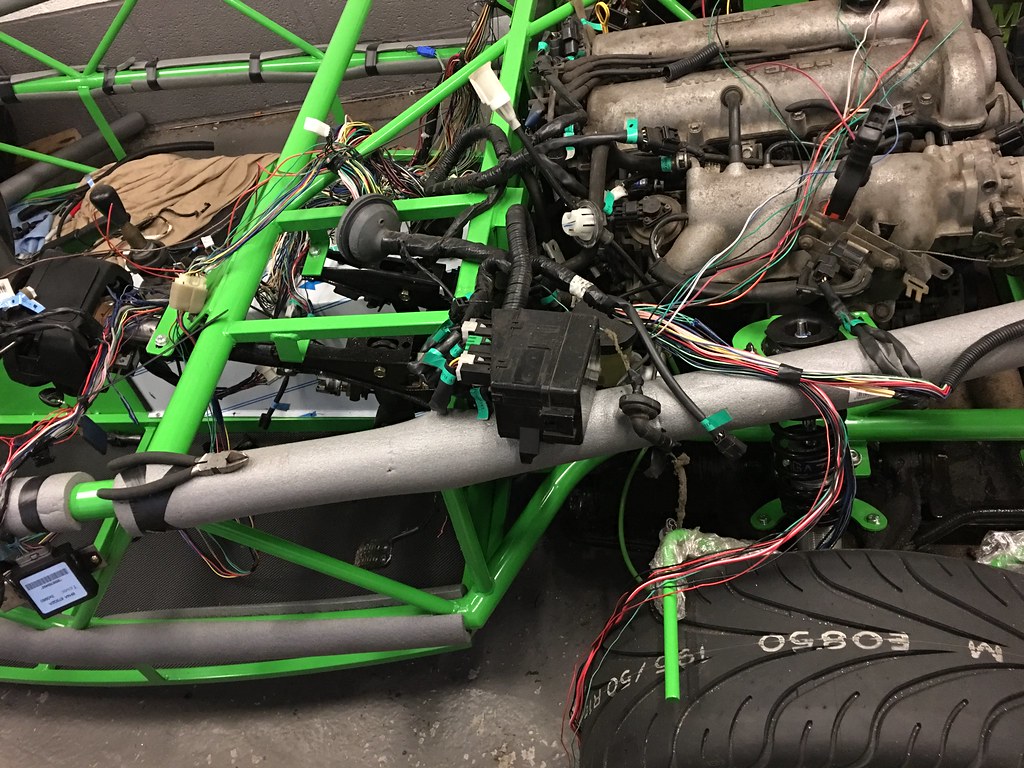
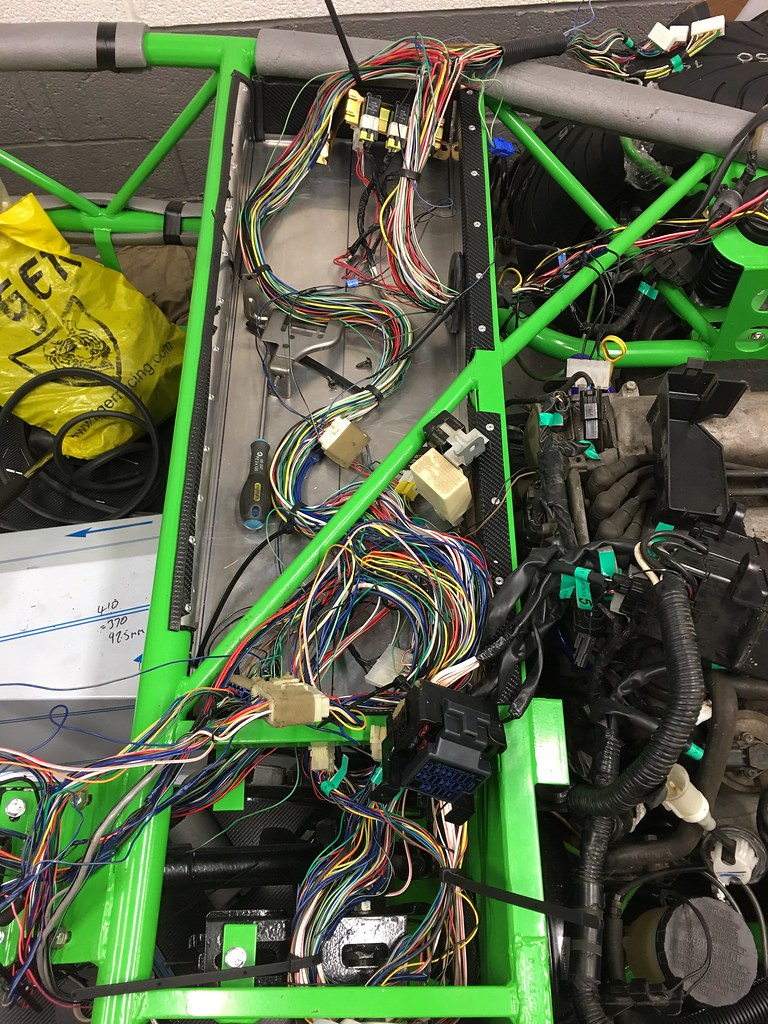
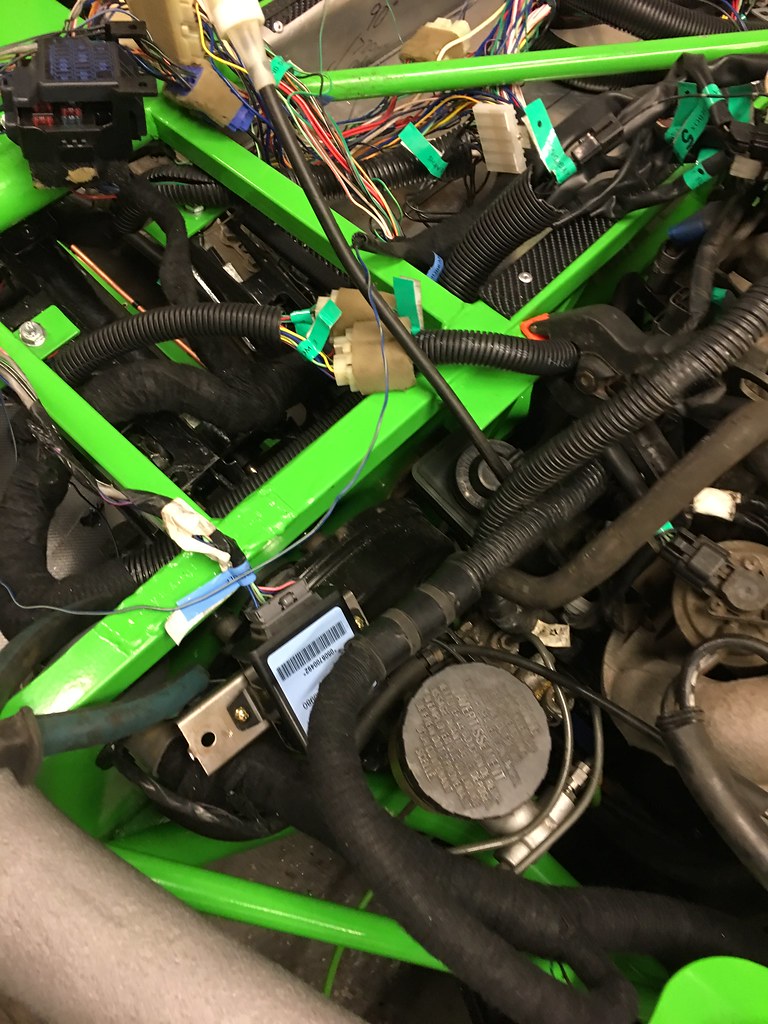
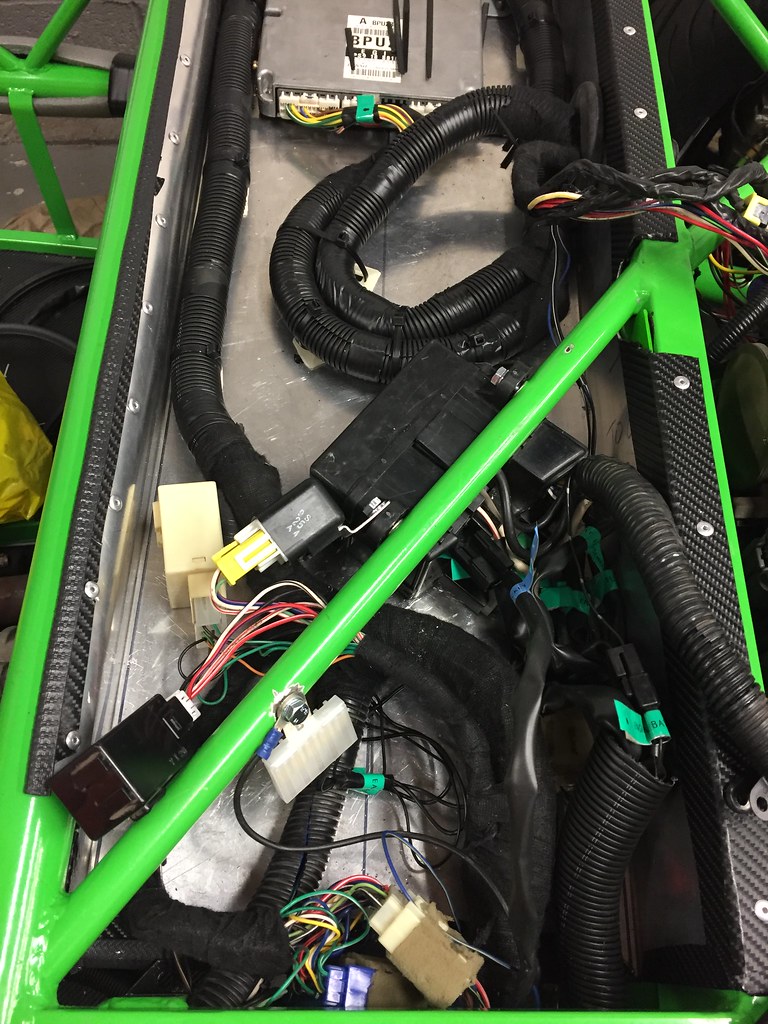
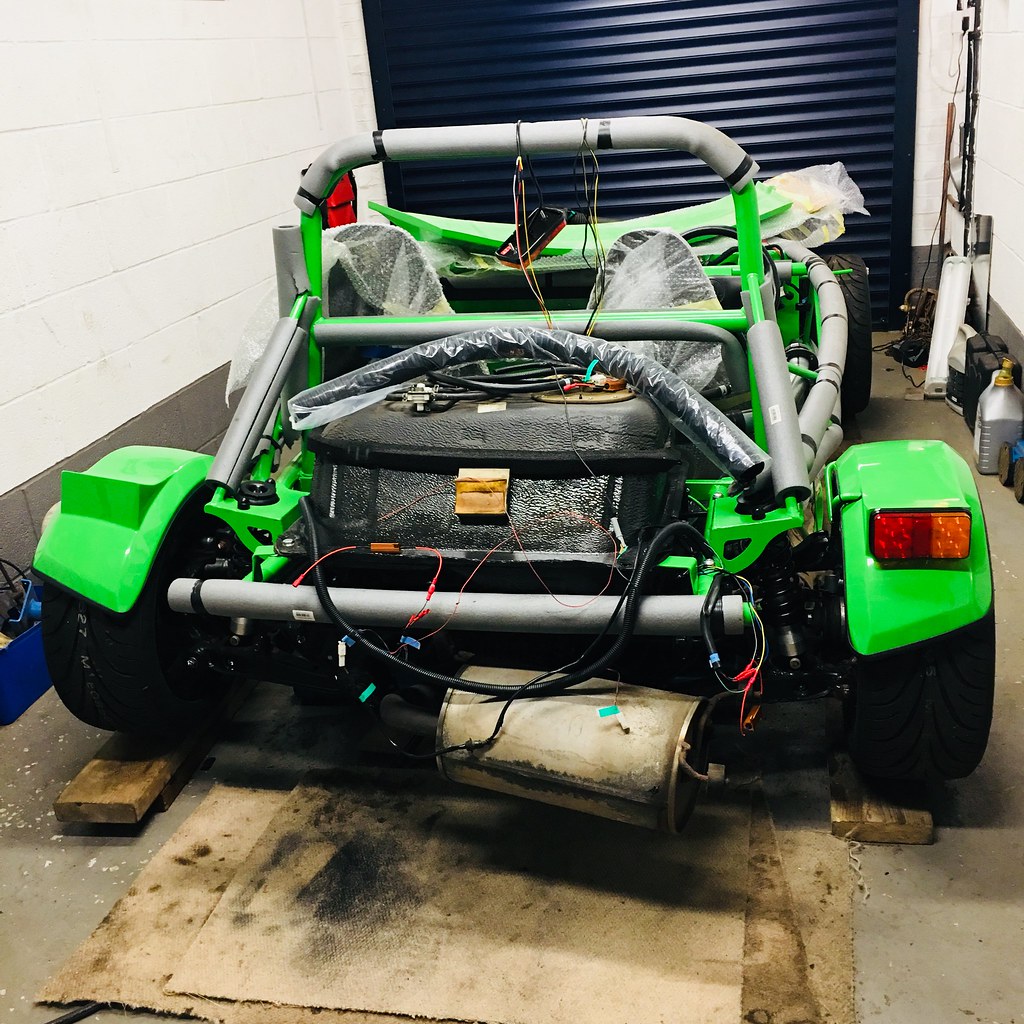
and since that, I have been starting to work on the Exocet electrics - firstly plugging the loom back into the key areas to get the engine to fire again, and then starting to strip out the unneeded wiring... so I currently have a car covered in large amounts of multi-coloured spaghetti - and lots of removed wiring!
 Untitled on Flickr
 Untitled on Flickr
 Untitled on Flickr
So I have now removed all of the wiring that I can see is unneeded (and that I dare remove!) and the engine still fires - so that's good! Next is to re-wrap the loom and then begin getting everything refitted and neatened up. However (as ever, there is always a challenge!), my brother has caught the trackday bug and has bought himself a clio 172 cup which we need to fettle a bit - and so that has been taking up some garage time too!
After the previous update, I had started templating a wiring tray to hold the ECU and electrics neatly - so I cut out a sheet of ally and got it folded in the workshop at work - which left me with a neat tray that just need a little adjustment to fit into place:
Untitled on FlickrUntitled on FlickrUntitled on FlickrThen I took a break away from the Exocet as I wanted to finally get my mini sorted and running right - this has been a very long (23 year!) build, that I finally got MOT'd in March, but needed to get setup - so took it off to Peter Burgess to get sorted on his rolling road. It was a very steady drive over with a badly set engine meaning I couldn't drive over about 35mph without serious spluttering! Having worked his magic (and had a good chat), Peter has transformed the drive - and it now has a whole 51BHP (ish!) and drives much better, pulling happily now. This meant that I could take it out for its first proper drive - and then put it to bed for winter!
Untitled on Flickrvideo on the rollers: https://youtu.be/rBlHv9IuFvg
and since that, I have been starting to work on the Exocet electrics - firstly plugging the loom back into the key areas to get the engine to fire again, and then starting to strip out the unneeded wiring... so I currently have a car covered in large amounts of multi-coloured spaghetti - and lots of removed wiring!
Untitled on FlickrUntitled on FlickrUntitled on FlickrSo I have now removed all of the wiring that I can see is unneeded (and that I dare remove!) and the engine still fires - so that's good! Next is to re-wrap the loom and then begin getting everything refitted and neatened up. However (as ever, there is always a challenge!), my brother has caught the trackday bug and has bought himself a clio 172 cup which we need to fettle a bit - and so that has been taking up some garage time too!
Time for another delayed update - as the clio mentioned previously has needed rather more attention than planned - a lumpy, missing idle wasn't solved by swapping over engine sensors, and so deeper investigation was needed. It turned out that the cambelt that had been done by the previous owner had been fitted slightly out of time (the 172 uses a floating cam setup and timing (and belt replacement in general) is a pain - so we had to open it up, get it all retimed and put in a new cambelt, water pump and aux-drivebelt, which have resulted in it running much better!
 Untitled on Flickr
So with that sorted and back out of the garage (for now - we have a full set of new springs and dampers to fit to it next!), I could get back onto the exocet.
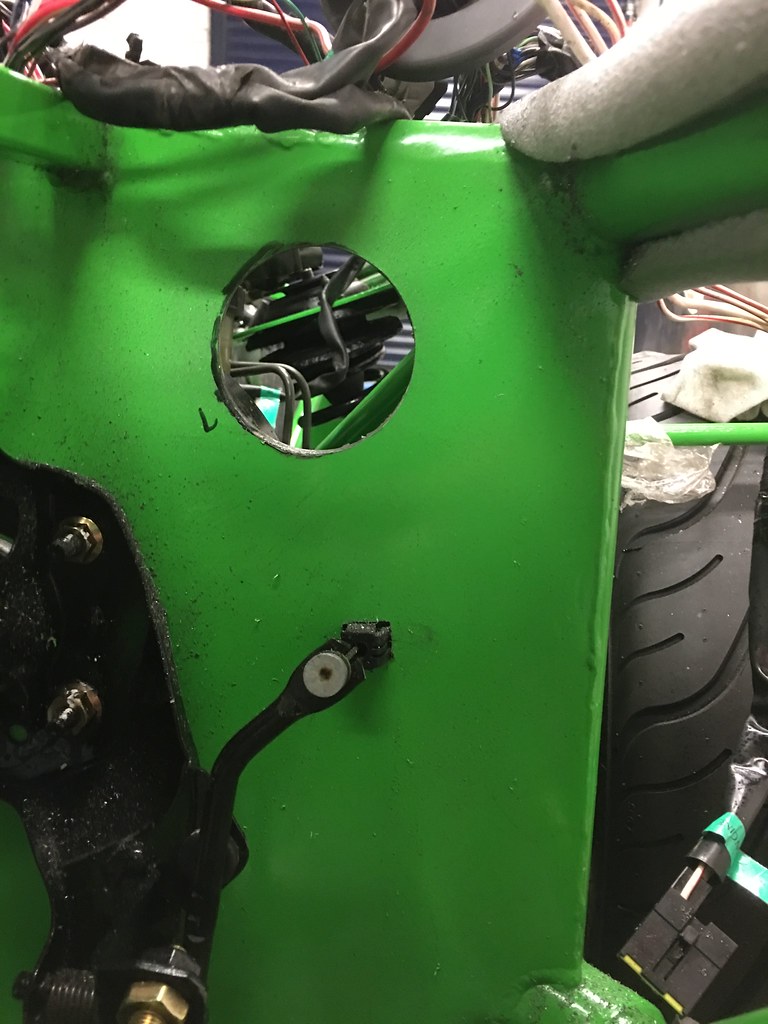
First challenge was to check where the loom could run best and then cut holes in the bulkhead for the big wiring grommets (which required a decent holesaw!)
 Untitled on Flickr
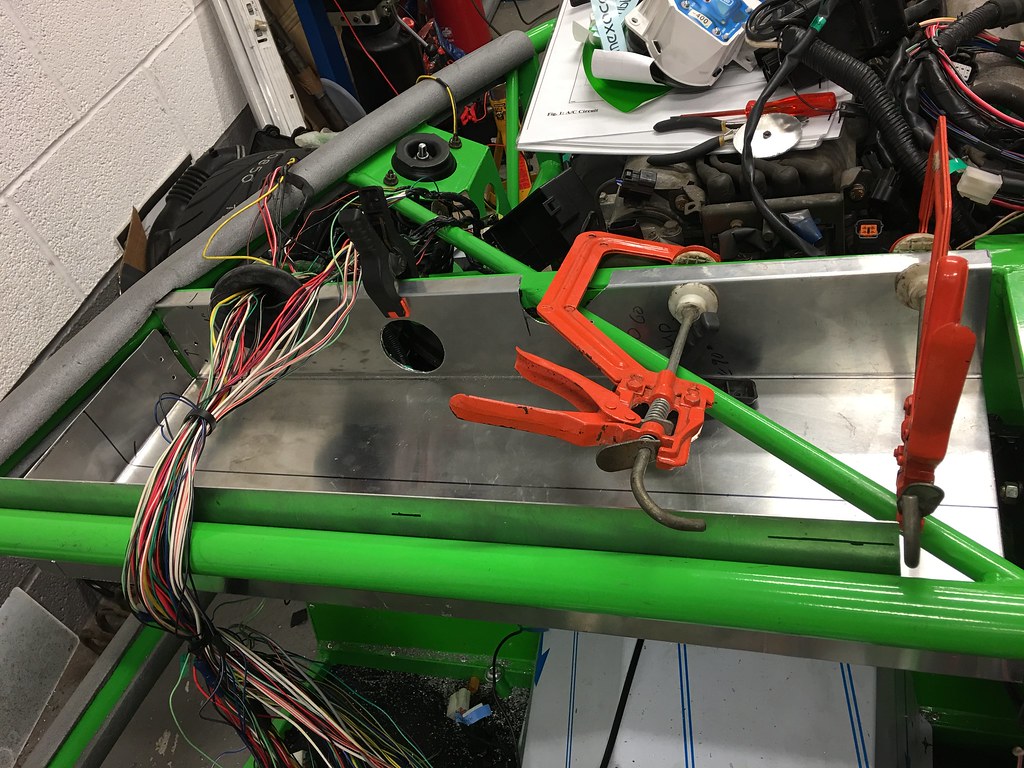
and then with the nearside also done, position the wiring tray and drill that too...
 Untitled on Flickr
and with that done, it was then time to wrap and secure the wiring tray in place.
 Untitled on Flickr
Which I think now looks quite tidy from inside (although I know I will need to sort a way to radius the lower edge rather more for IVA - I am thinking some kind of tubing stuck on might do the trick) - so the next job is to get in with routing and tidying the loom up - I have already planned and rearranged the wiring for things like the engine fusebox to move into the wiring tray, so there may be some more creative work required to make sure that it all looks neat and is routed with minimal wiring on show. (and I also need to get a knife and ruler to tidy up the edges of the wrap too!)
 Untitled on Flickr
Untitled on FlickrSo with that sorted and back out of the garage (for now - we have a full set of new springs and dampers to fit to it next!), I could get back onto the exocet.
First challenge was to check where the loom could run best and then cut holes in the bulkhead for the big wiring grommets (which required a decent holesaw!)
Untitled on Flickrand then with the nearside also done, position the wiring tray and drill that too...
Untitled on Flickrand with that done, it was then time to wrap and secure the wiring tray in place.
Untitled on FlickrWhich I think now looks quite tidy from inside (although I know I will need to sort a way to radius the lower edge rather more for IVA - I am thinking some kind of tubing stuck on might do the trick) - so the next job is to get in with routing and tidying the loom up - I have already planned and rearranged the wiring for things like the engine fusebox to move into the wiring tray, so there may be some more creative work required to make sure that it all looks neat and is routed with minimal wiring on show. (and I also need to get a knife and ruler to tidy up the edges of the wrap too!)
Untitled on FlickrSo I think it is new year, new update time for the Exocet, as I have been busy with lots of stuff (including lots on the clio mentioned previously - completing a full suspension refresh and exhaust replacement) - but have managed to find some time to make a little further progress.
So, having fitted the wiring tray, I then started to feed the (still unwrapped) loom back into place - which left me with lots of spaghetti!
 Untitled on Flickr
So in order to try and clean things up and look more organised in there, I started adding some conduit, which started to improve matters.
 Untitled on Flickr
As I had to move things around in the garage to accommodate the clio on my ramp, I had to shift the nosecone (which had been suspended above my lift) - so briefly put it into place to see how it looks with the car on its wheels.
 Untitled on Flickr
Then I started wrapping the loom (with the hope that I won't need to access the wiring, so fingers crossed the loom thinning has worked out ok!), starting in the engine bay...
 Untitled on Flickr
Then I have started fixing things down in the wiring tray - with the ecu riveted down and the large fusebox secured to the chassis with a couple of rivnuts, and also getting some of the earth points located and bolted in, and I have started to locate the conduit also - using self adhesive cable tie bases (which will be securely riveted in place for IVA - as it seems that is required).
 Untitled on Flickr
 Untitled on Flickr
So with this at this stage, I thought I'd better check that things still work, and I am glad to report that it still turns over and fires - and now that I have the earths properly fixed actually runs without cutting out after a couple of seconds - I think that the immobiliser wasn't properly earthed as I was stripping the loom and was killing the engine as soon as it fired. The horn even works too!
I have also been busy shopping for more bits and have ordered most of the lights that I need along with hazard and foglight switches - so can get some more of the wiring completed. I will also be heading to the Autosport show in a couple of weeks, so will be on the lookout for some seats that might tie in with the car well without breaking the bank (currently thinking a pair of Corbeaus might be right), along with any other bits that take my fancy!
So, having fitted the wiring tray, I then started to feed the (still unwrapped) loom back into place - which left me with lots of spaghetti!
Untitled on FlickrSo in order to try and clean things up and look more organised in there, I started adding some conduit, which started to improve matters.
Untitled on FlickrAs I had to move things around in the garage to accommodate the clio on my ramp, I had to shift the nosecone (which had been suspended above my lift) - so briefly put it into place to see how it looks with the car on its wheels.
Untitled on FlickrThen I started wrapping the loom (with the hope that I won't need to access the wiring, so fingers crossed the loom thinning has worked out ok!), starting in the engine bay...
Untitled on FlickrThen I have started fixing things down in the wiring tray - with the ecu riveted down and the large fusebox secured to the chassis with a couple of rivnuts, and also getting some of the earth points located and bolted in, and I have started to locate the conduit also - using self adhesive cable tie bases (which will be securely riveted in place for IVA - as it seems that is required).
Untitled on Flickr Untitled on FlickrSo with this at this stage, I thought I'd better check that things still work, and I am glad to report that it still turns over and fires - and now that I have the earths properly fixed actually runs without cutting out after a couple of seconds - I think that the immobiliser wasn't properly earthed as I was stripping the loom and was killing the engine as soon as it fired. The horn even works too!
I have also been busy shopping for more bits and have ordered most of the lights that I need along with hazard and foglight switches - so can get some more of the wiring completed. I will also be heading to the Autosport show in a couple of weeks, so will be on the lookout for some seats that might tie in with the car well without breaking the bank (currently thinking a pair of Corbeaus might be right), along with any other bits that take my fancy!
Edited by browno on Thursday 4th January 14:11
Time for an update again - and some more progress (but it is certainly getting to the stage where I there are a lot of jobs to do that have less to show for a lot of time!)
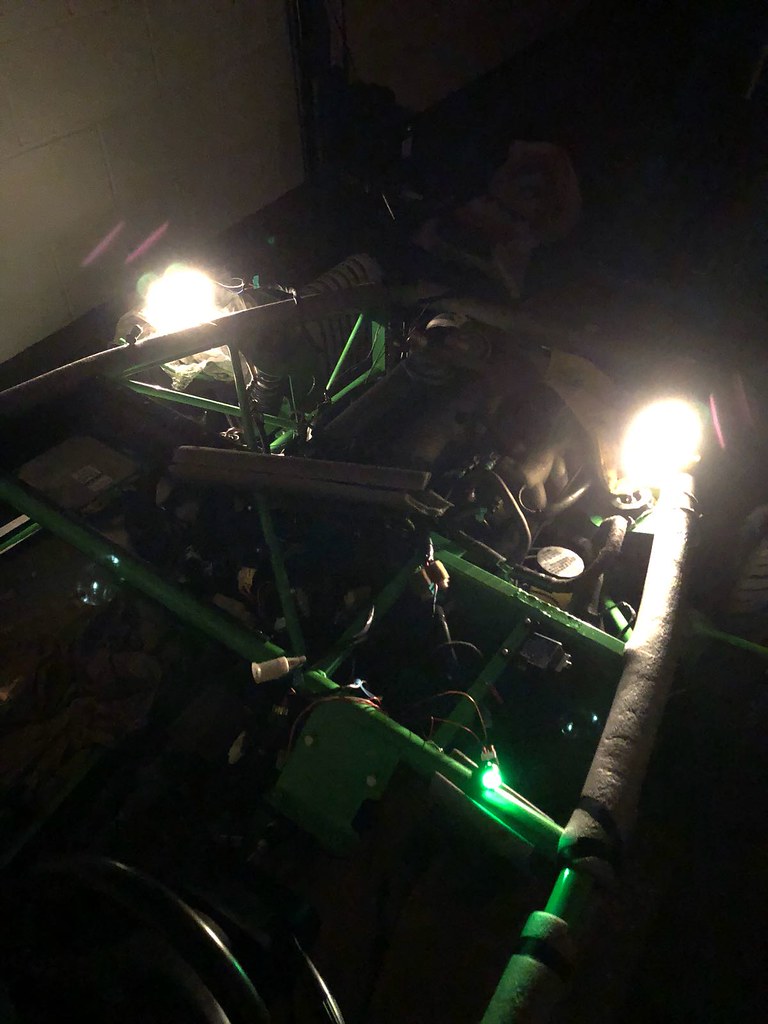
First of all, I got some deliveries - including lights, so I roughly connected the wiring to test that all worked - and was pleased to see light!
 Untitled on Flickr
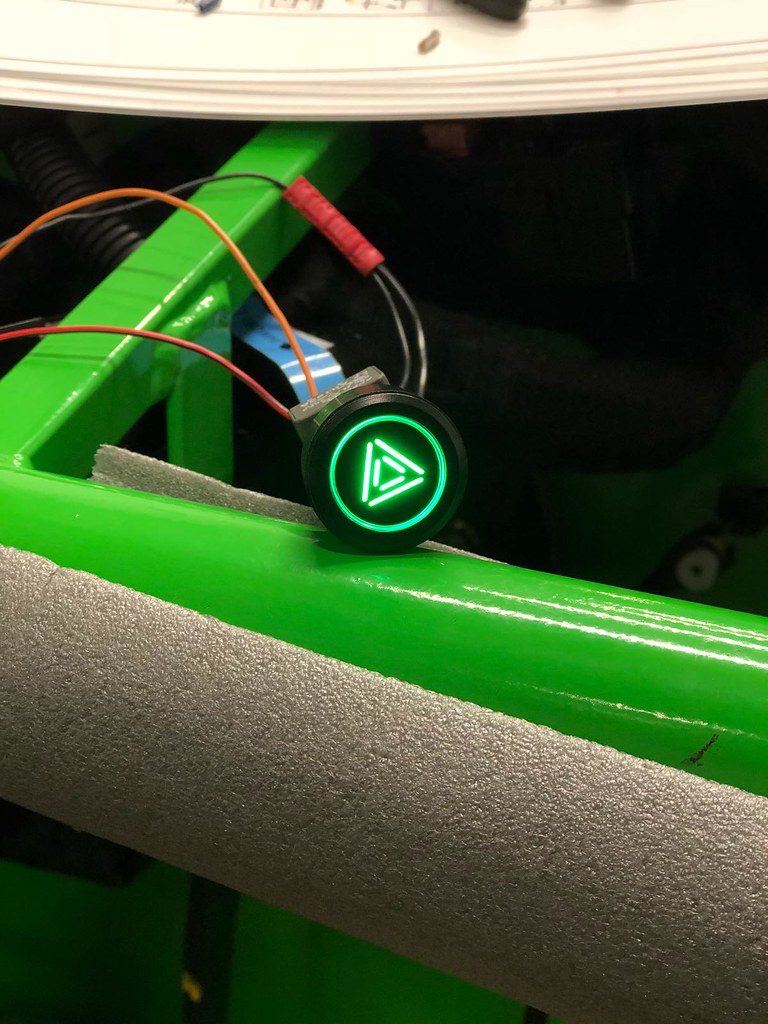
I also tried the wiring for my savage switches for the rear fog and hazard lights - which work and light up in a nicely coordinated colour...
 Untitled on Flickr
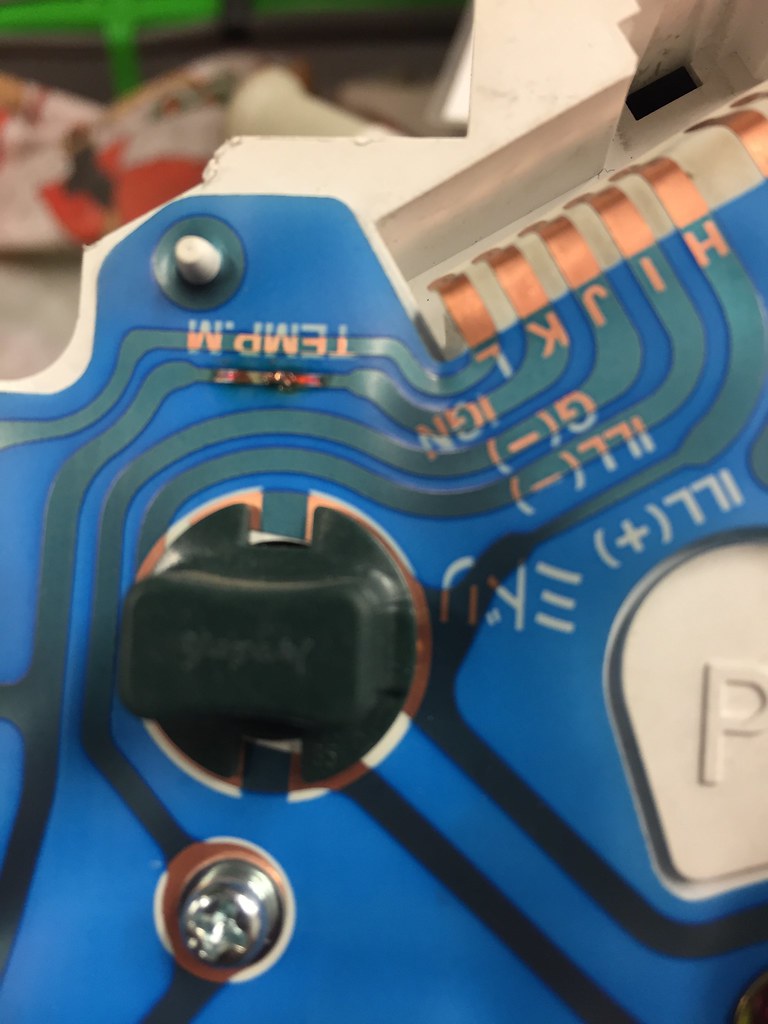
the only significant wiring issues have been sorting the earths on the panel lights and also discovering I had a dead instrument panel - which appears to be down to a broken track on the circuit board - which I will sort - but just want to check that the track hasn't broken due to high current leaking through the panel before I do so...
 Untitled on Flickr
I then started trying to tidy up some of the awkward bits that I hadn't got to and get some extra p-clips in some of the spots the IVA-man will be looking for - having bought myself a new drill and flexible drive to reach those tricky spots!
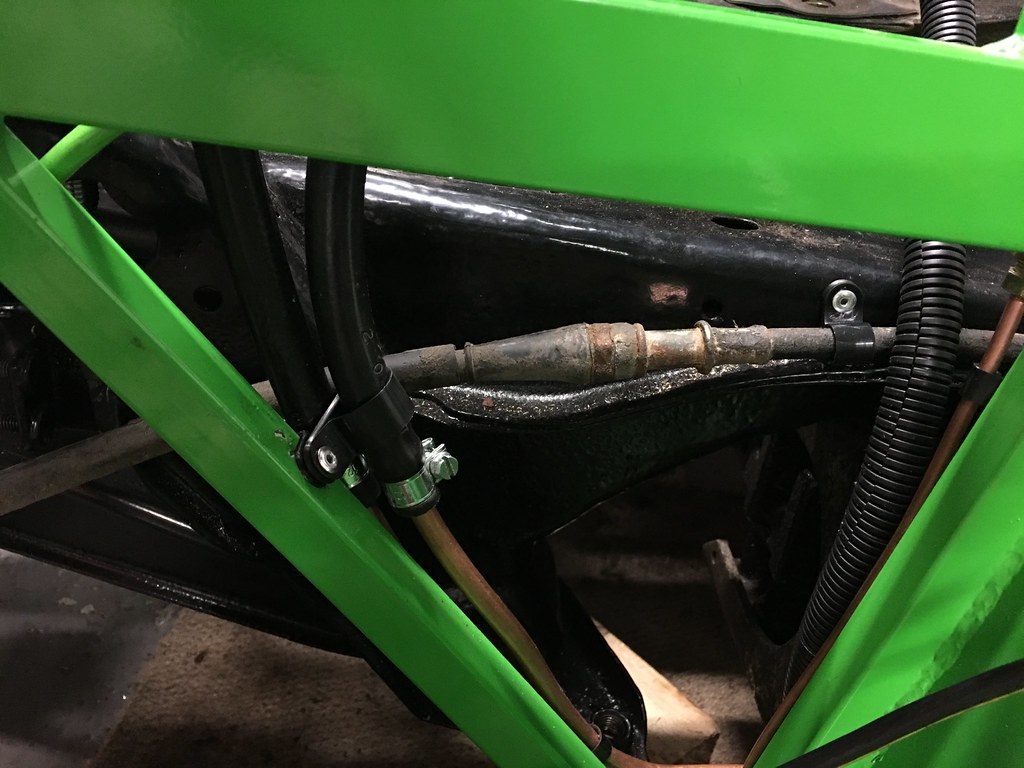 Untitled on Flickr
Handbrake cable and fuel lines
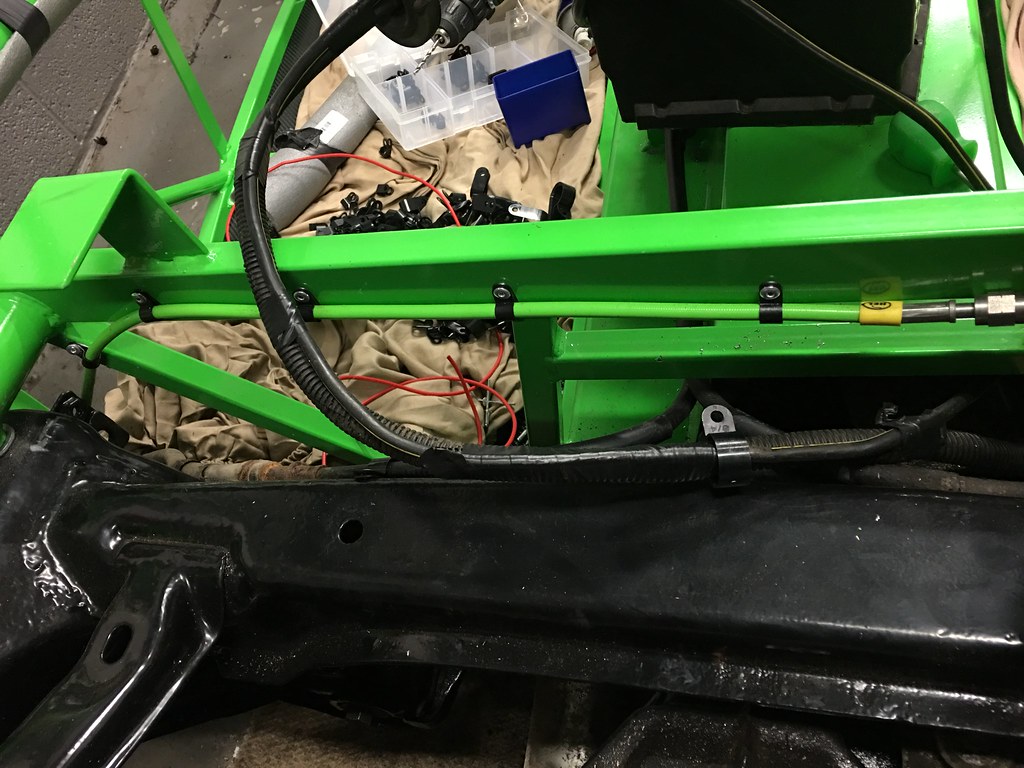 Untitled on Flickr
Rear braided lines
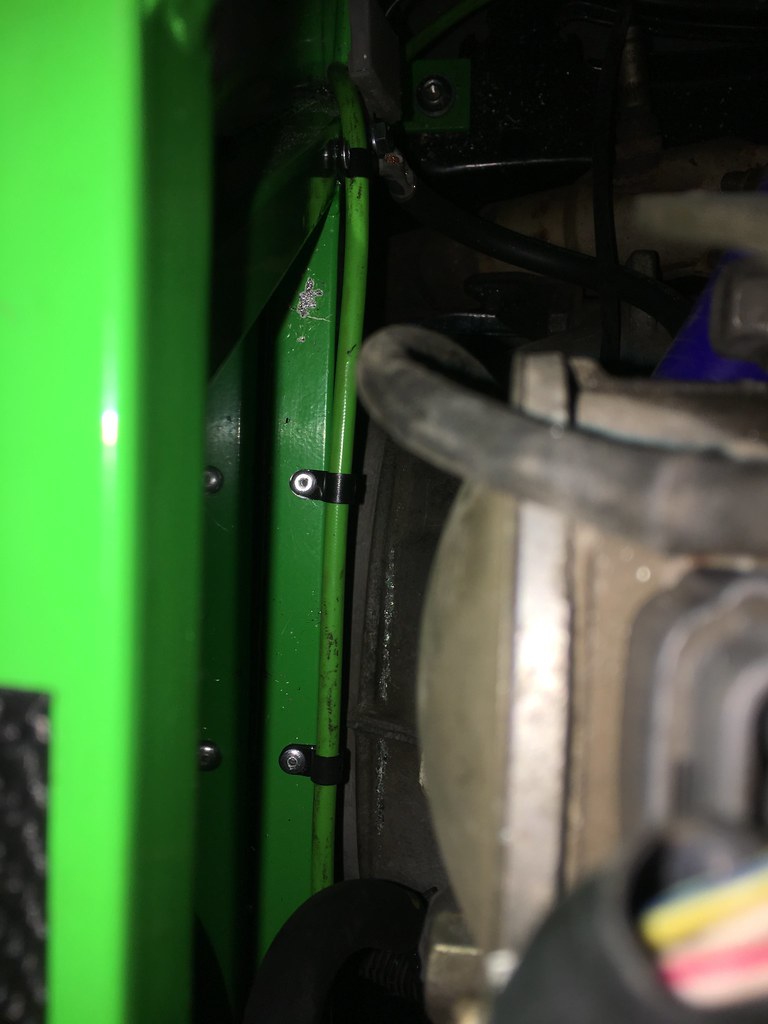 Untitled on Flickr
Front braided line across the bulkhead behind the engine
I then had a short break while I did a bit of work on my NC - service, replacement Lambda sensor and new front pads.
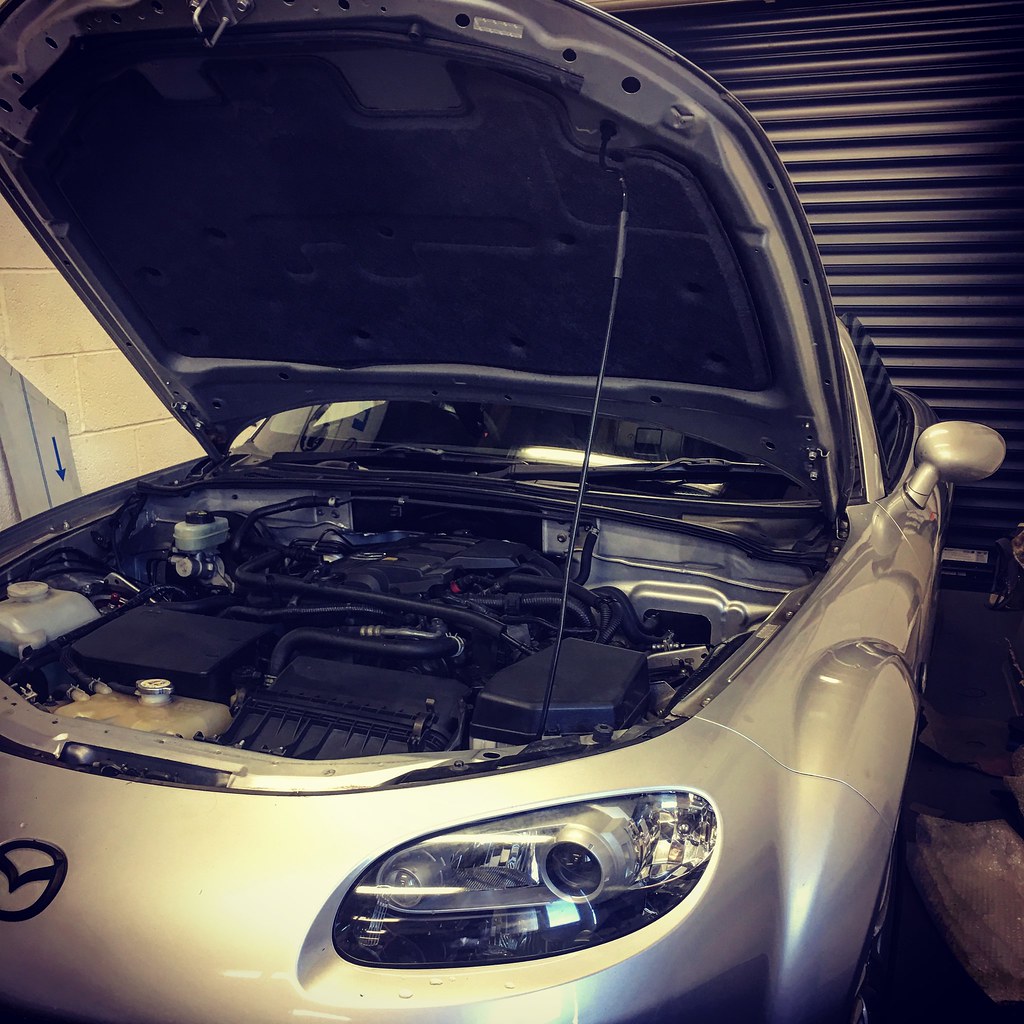 Untitled on Flickr
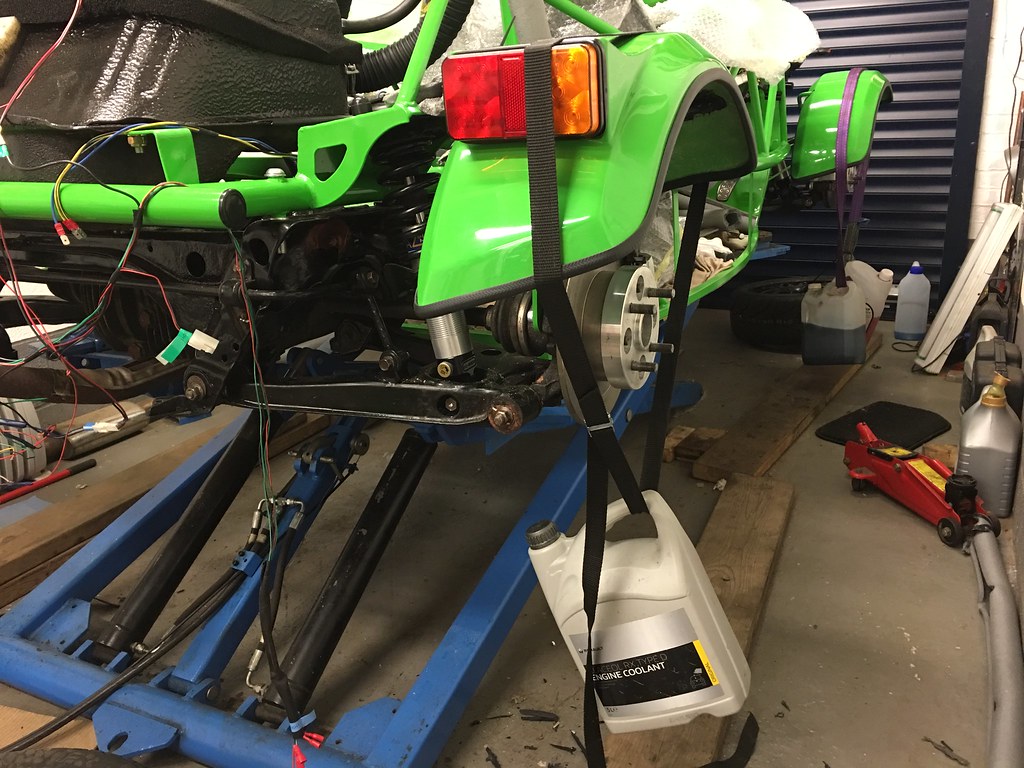
Then it was time to finally get the cooling system hooked up with a new bend in the bottom hose (which will be secured for IVA) and get some coolant into my (temporarily held) Hyundai Getz header tank....
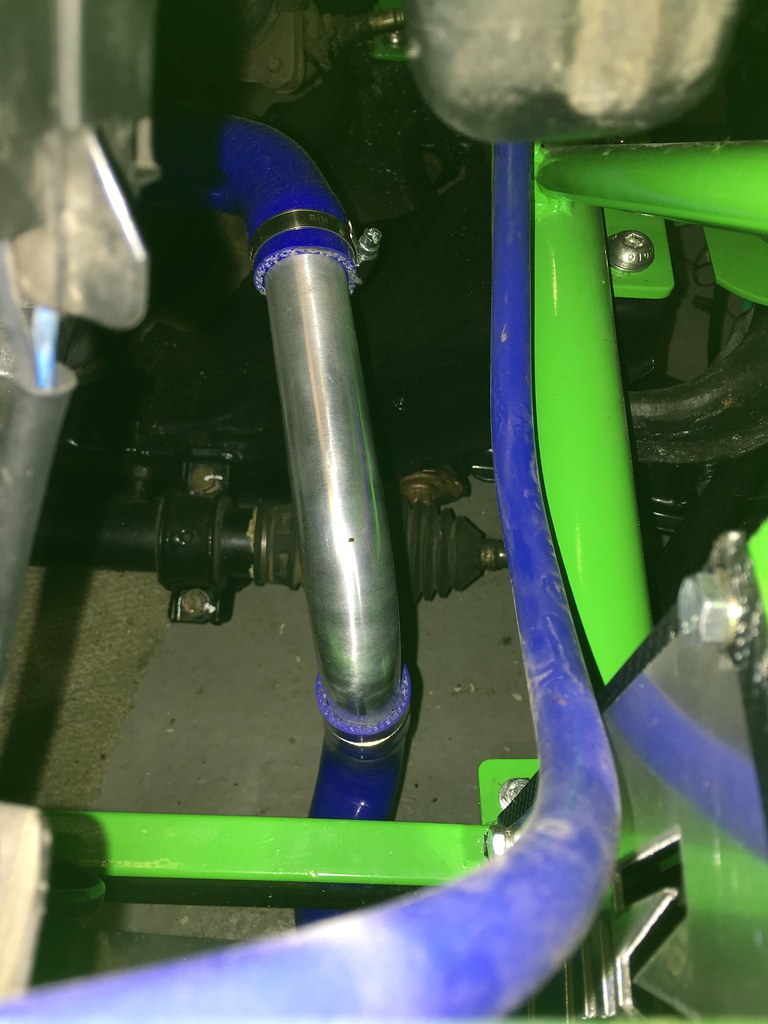 Untitled on Flickr
 Untitled on Flickr
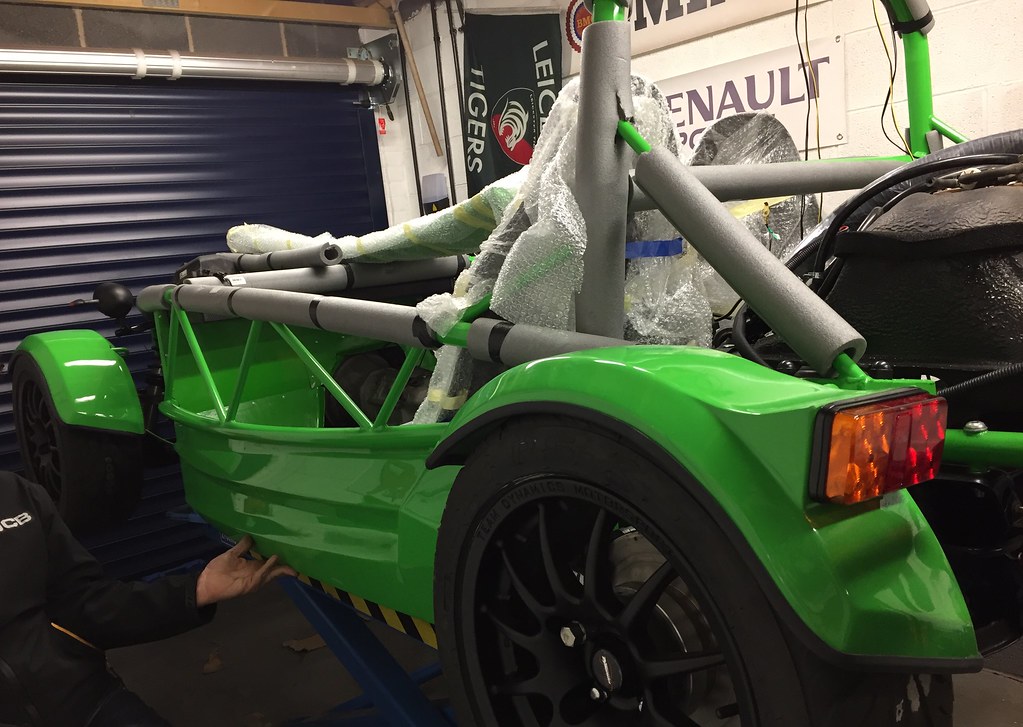
Next, I bolted down my fuel tank (I went for M10 bolts at each corner with Nylocs underneath - I expect this counts as secure enough for IVA) - and then tested that the rear bodywork fitted correctly.
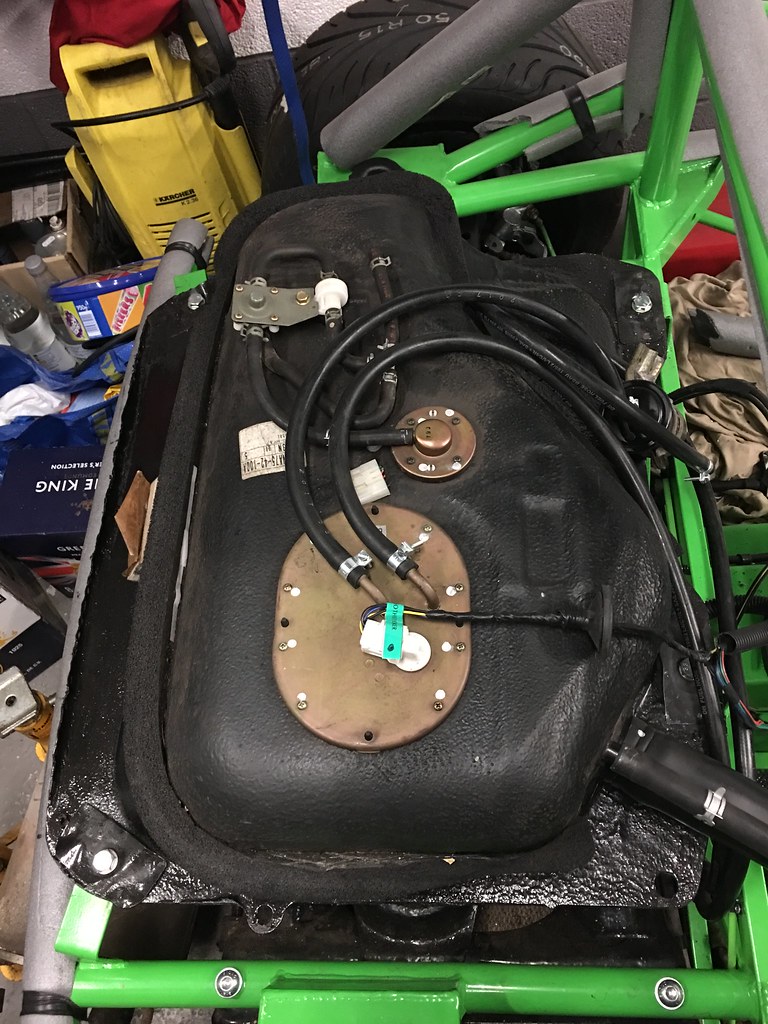 Untitled on Flickr
 Untitled on Flickr
I had deliberated about seats a lot and had swung between bare GRP and something more upholstered (like some corbeau/sparco buckets) but eventually settled on the lightweight approach and picked up a pair of MEV GRP seats, which I think will suit the minimalist nature of the car (and be a bit more weatherproof!)
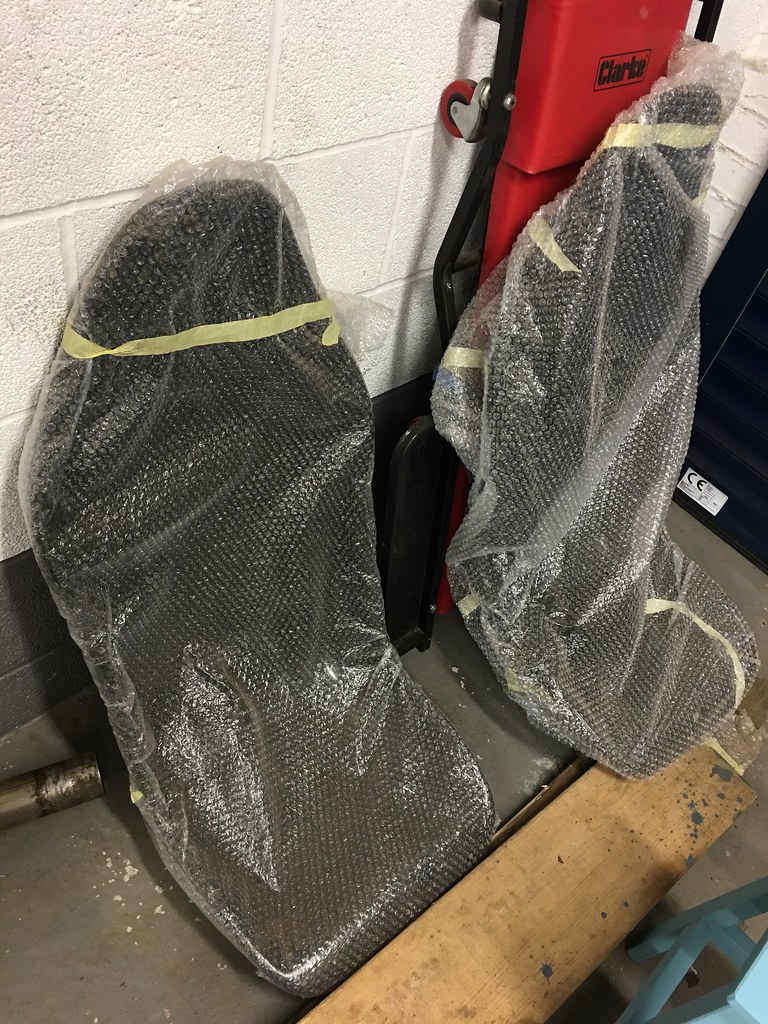 Untitled on Flickr
Then the latest fun and games - I started fitting the o/s rear wing stay and as I was tapping the hole in the hub, the M8 tap snapped off flush in the hole (just about visible by the driveshaft below)
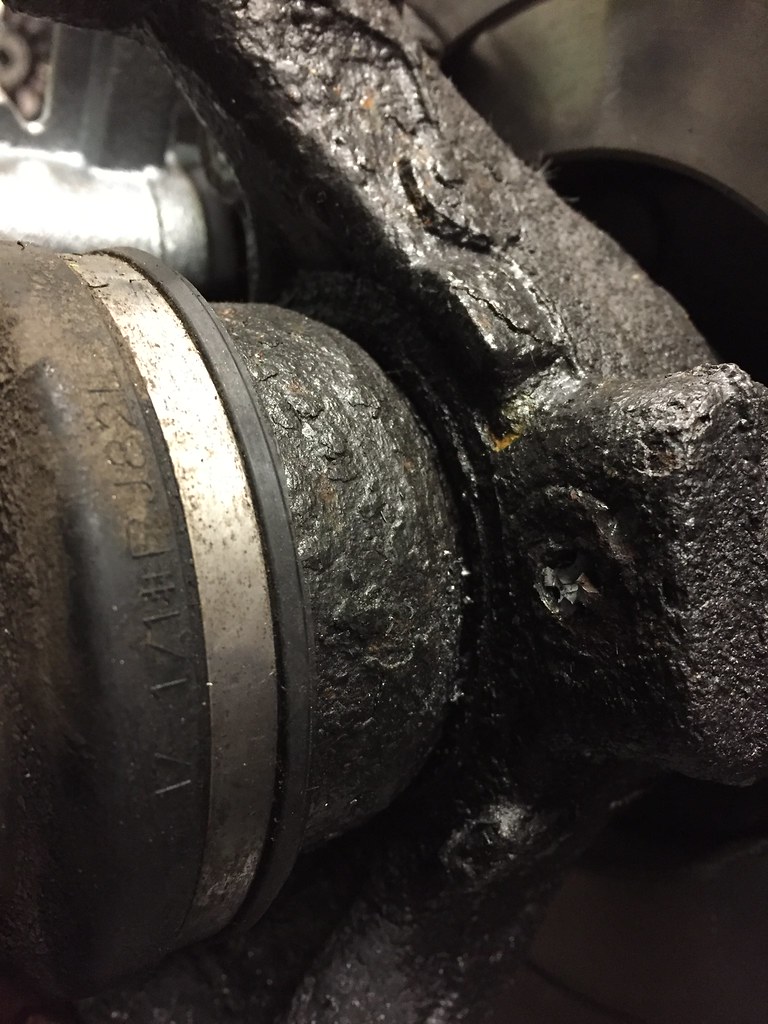 Untitled on Flickr
So, I had to whip off the hub and get it onto the bench - where thankfully, I was able to access the flutes in the tap and move it - and with some gentle persuasion thankfully managed to get the broken piece removed.
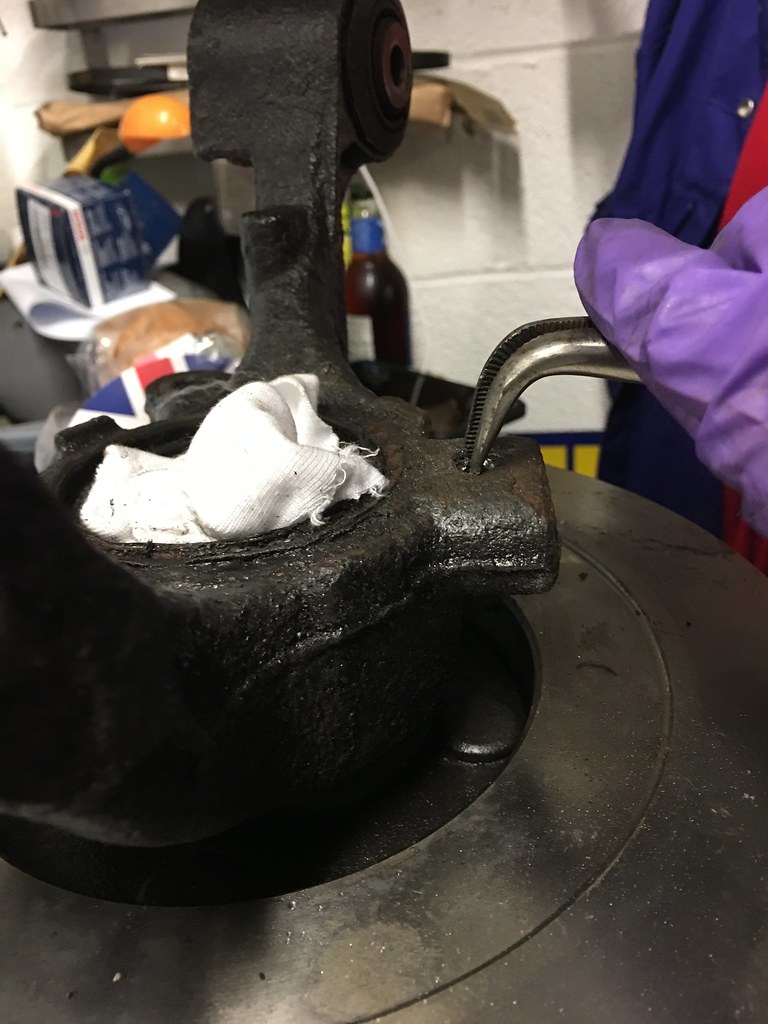 Untitled on Flickr
 Untitled on Flickr
With the messing around, it meant the hole was a little mangled, so I then drilled and retapped it to M10 to ensure that I have a secure fit, and got everything rebuilt.
So that's as far as I have got for now, and the next plans are to get the wings mounted and get the lights all fitted and working as the next step towards being ready to go!
First of all, I got some deliveries - including lights, so I roughly connected the wiring to test that all worked - and was pleased to see light!
Untitled on FlickrI also tried the wiring for my savage switches for the rear fog and hazard lights - which work and light up in a nicely coordinated colour...
Untitled on Flickrthe only significant wiring issues have been sorting the earths on the panel lights and also discovering I had a dead instrument panel - which appears to be down to a broken track on the circuit board - which I will sort - but just want to check that the track hasn't broken due to high current leaking through the panel before I do so...
Untitled on FlickrI then started trying to tidy up some of the awkward bits that I hadn't got to and get some extra p-clips in some of the spots the IVA-man will be looking for - having bought myself a new drill and flexible drive to reach those tricky spots!
Untitled on FlickrHandbrake cable and fuel lines
Untitled on FlickrRear braided lines
Untitled on FlickrFront braided line across the bulkhead behind the engine
I then had a short break while I did a bit of work on my NC - service, replacement Lambda sensor and new front pads.
Untitled on FlickrThen it was time to finally get the cooling system hooked up with a new bend in the bottom hose (which will be secured for IVA) and get some coolant into my (temporarily held) Hyundai Getz header tank....
Untitled on FlickrUntitled on FlickrNext, I bolted down my fuel tank (I went for M10 bolts at each corner with Nylocs underneath - I expect this counts as secure enough for IVA) - and then tested that the rear bodywork fitted correctly.
Untitled on FlickrUntitled on FlickrI had deliberated about seats a lot and had swung between bare GRP and something more upholstered (like some corbeau/sparco buckets) but eventually settled on the lightweight approach and picked up a pair of MEV GRP seats, which I think will suit the minimalist nature of the car (and be a bit more weatherproof!)
Untitled on FlickrThen the latest fun and games - I started fitting the o/s rear wing stay and as I was tapping the hole in the hub, the M8 tap snapped off flush in the hole (just about visible by the driveshaft below)
Untitled on FlickrSo, I had to whip off the hub and get it onto the bench - where thankfully, I was able to access the flutes in the tap and move it - and with some gentle persuasion thankfully managed to get the broken piece removed.
Untitled on FlickrUntitled on FlickrWith the messing around, it meant the hole was a little mangled, so I then drilled and retapped it to M10 to ensure that I have a secure fit, and got everything rebuilt.
So that's as far as I have got for now, and the next plans are to get the wings mounted and get the lights all fitted and working as the next step towards being ready to go!
So, last time I was sorting out my rear wing mount, which I (eventually) got into place and so it was time to try and fit the wings...
 Untitled on Flickr
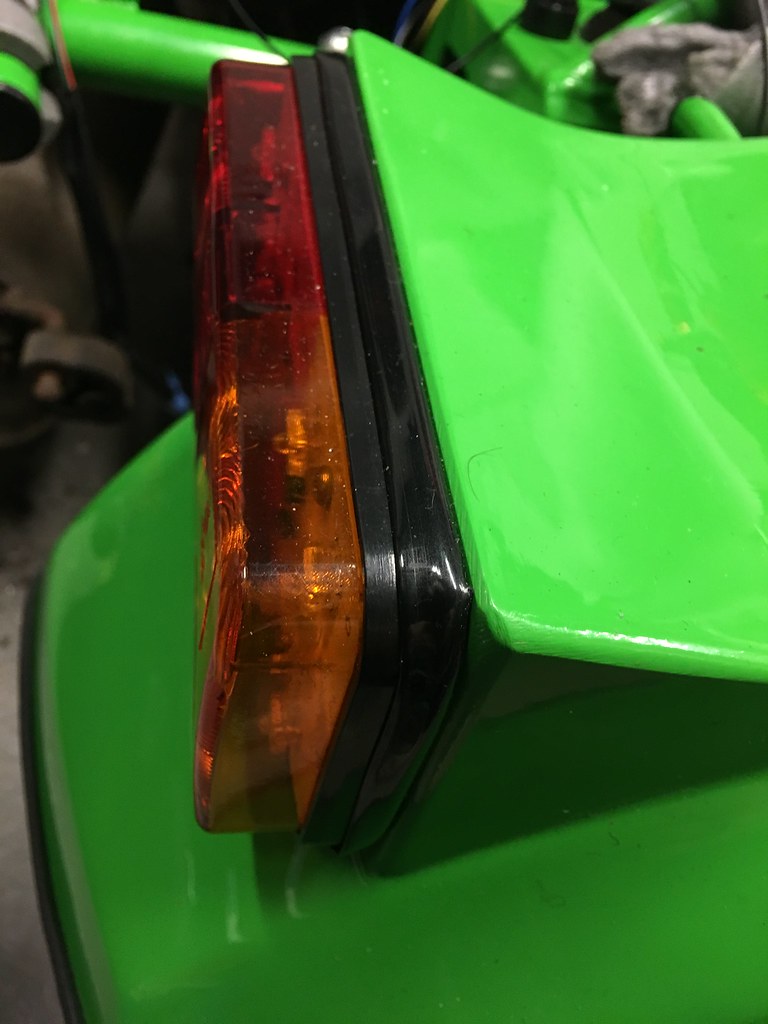
So the first job was to mount the rear light into the wing (with some edge trim to fill in any gaps), which I thought looked like a good start.
 Untitled on Flickr
then we could mark and drill the holes for mounting and get some tiger seal applied to fix it in place...
 Untitled on Flickr
The only slight downside is that having put the wheel on, I had put the wing about 5-10mm too far into the stay and the tyre is catching slightly on the outside of the wing - so i need to redo the mounting again - and of course the remaining three. In the meantime, I decided to move onto other things, so I have also bought LOTS of edge trim - figuring I will need plenty for IVA, I have ordered a 50m reel (which took some finding - but I discovered Rejel do 25 and 50m reels) - which has cost me about the same as buying 20m by the metre, and means I can trim everything and more ready for the IVA man.
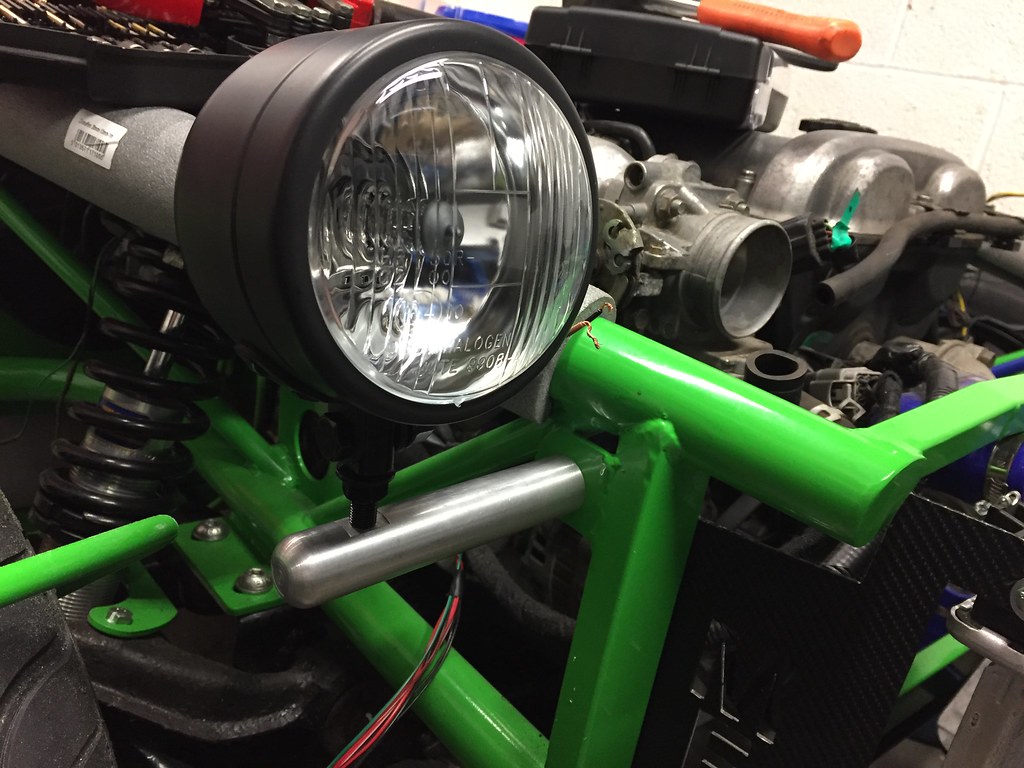
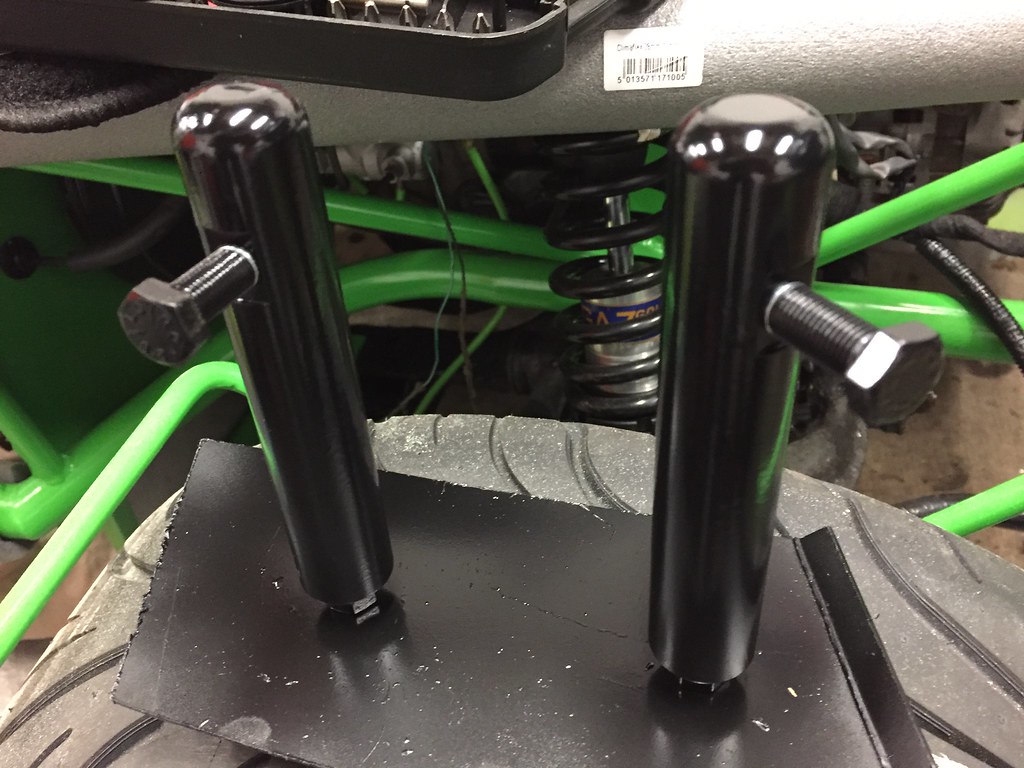
One thing that I had been wondering about was mounting the headlights - and I wanted to work out a mount that looked neat and tidy - so having sketched a few things up, I got some Aluminium bar machined up with a radiused end and suitable holes for mounting the lights and to bolt through to the frame - I did have to do a rethink on the dominator light threads having originally made (what I thought was) M8 thread, and realising the lights didn't fit - I then measured and rethreaded to the correct 3/8" UNF thread for my lights.
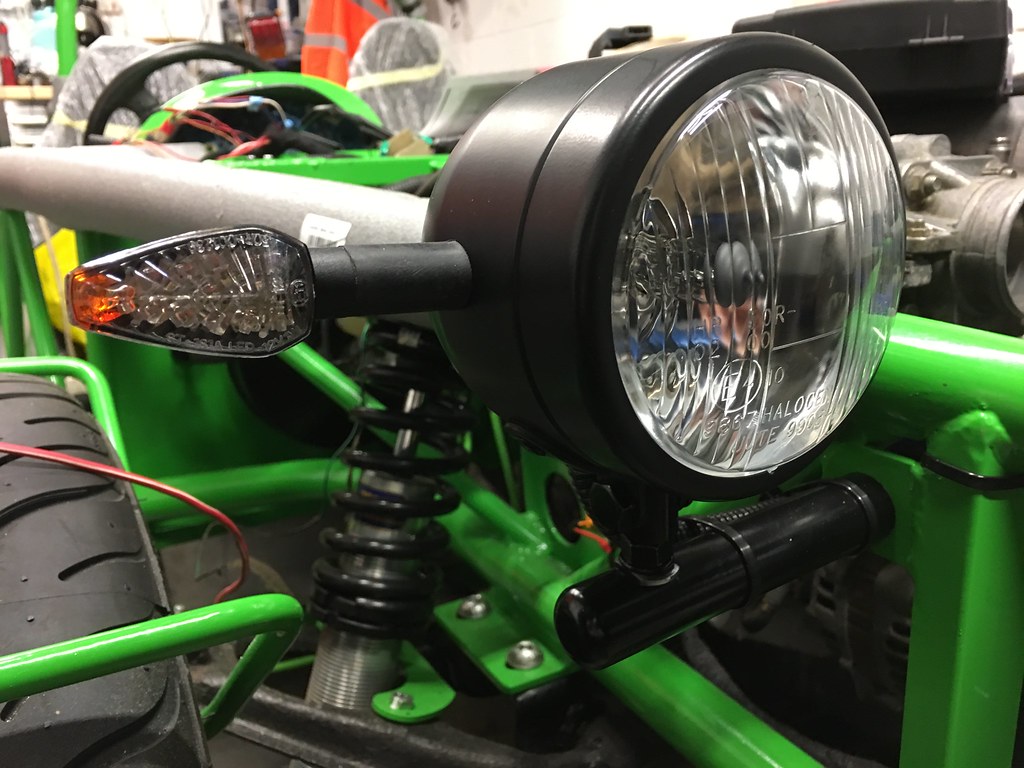
This then allowed me to test-fit, which I thought looked a good start before then painting the mounts up and fitting the lamps:
 Untitled on Flickr
 Untitled on Flickr
Then I added my indicators onto the sides of the lights and started wiring as neatly as possible, and I am very happy with the result - and something that I think is a nice touch at tidying up the front end.
 Untitled on Flickr
 Untitled on Flickr
 Untitled on Flickr
So I am happy with my progress so far - and have done a few other bits including mounting my header tank properly (if there is one thing I will change at some point, it will be to get rid of the blue hoses, and get something more in keeping with the green and black of everything else...)
 Untitled on Flickr
Untitled on FlickrSo the first job was to mount the rear light into the wing (with some edge trim to fill in any gaps), which I thought looked like a good start.
Untitled on Flickrthen we could mark and drill the holes for mounting and get some tiger seal applied to fix it in place...
Untitled on FlickrThe only slight downside is that having put the wheel on, I had put the wing about 5-10mm too far into the stay and the tyre is catching slightly on the outside of the wing - so i need to redo the mounting again - and of course the remaining three. In the meantime, I decided to move onto other things, so I have also bought LOTS of edge trim - figuring I will need plenty for IVA, I have ordered a 50m reel (which took some finding - but I discovered Rejel do 25 and 50m reels) - which has cost me about the same as buying 20m by the metre, and means I can trim everything and more ready for the IVA man.
One thing that I had been wondering about was mounting the headlights - and I wanted to work out a mount that looked neat and tidy - so having sketched a few things up, I got some Aluminium bar machined up with a radiused end and suitable holes for mounting the lights and to bolt through to the frame - I did have to do a rethink on the dominator light threads having originally made (what I thought was) M8 thread, and realising the lights didn't fit - I then measured and rethreaded to the correct 3/8" UNF thread for my lights.
This then allowed me to test-fit, which I thought looked a good start before then painting the mounts up and fitting the lamps:
Untitled on FlickrUntitled on FlickrThen I added my indicators onto the sides of the lights and started wiring as neatly as possible, and I am very happy with the result - and something that I think is a nice touch at tidying up the front end.
Untitled on FlickrUntitled on FlickrUntitled on FlickrSo I am happy with my progress so far - and have done a few other bits including mounting my header tank properly (if there is one thing I will change at some point, it will be to get rid of the blue hoses, and get something more in keeping with the green and black of everything else...)
Untitled on FlickrAfraid that I have been busy tinkering for the last few weeks - so am overdue another update to the thread! I have been making more progress - although I am now getting into some of the fiddly bits that are really taking quite a bit of time and thought to get right (and even then, some things are taking a couple of attempts until I am really happy that they are up to standard.
First job for this instalment was to clean out the garage (and get my brother's clio out!) then I could move the exocet forward on to my lift for the first time (and in fact the furthest it has so far moved since being on it's wheels).
 Untitled on Flickr
 Untitled on Flickr
And to go with the wings being sat in place, we also offered up the next addition - which is a pair of new g-type side panels from MEV, which I saw and thought would finish off the sides rather more neatly than the standard black plastic panelling.
 Untitled on Flickr
The next job was then to actually drill the remaining three wings and offer them up into place:
 Untitled on Flickr
and then tiger seal them into place with some suitable load on each wing...
 Untitled on Flickr
Next, we carefully measured, marked, measured again and then cut out and mounted the fuel filler and fog/reverse lights in the rear tank cover.
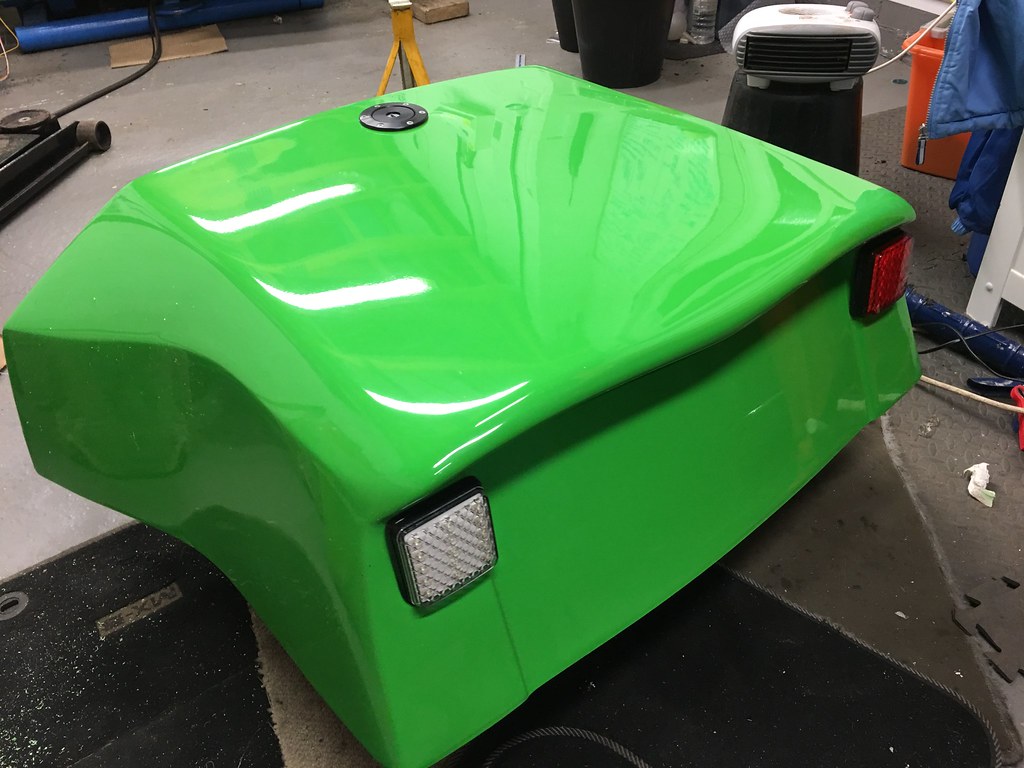 Untitled on Flickr
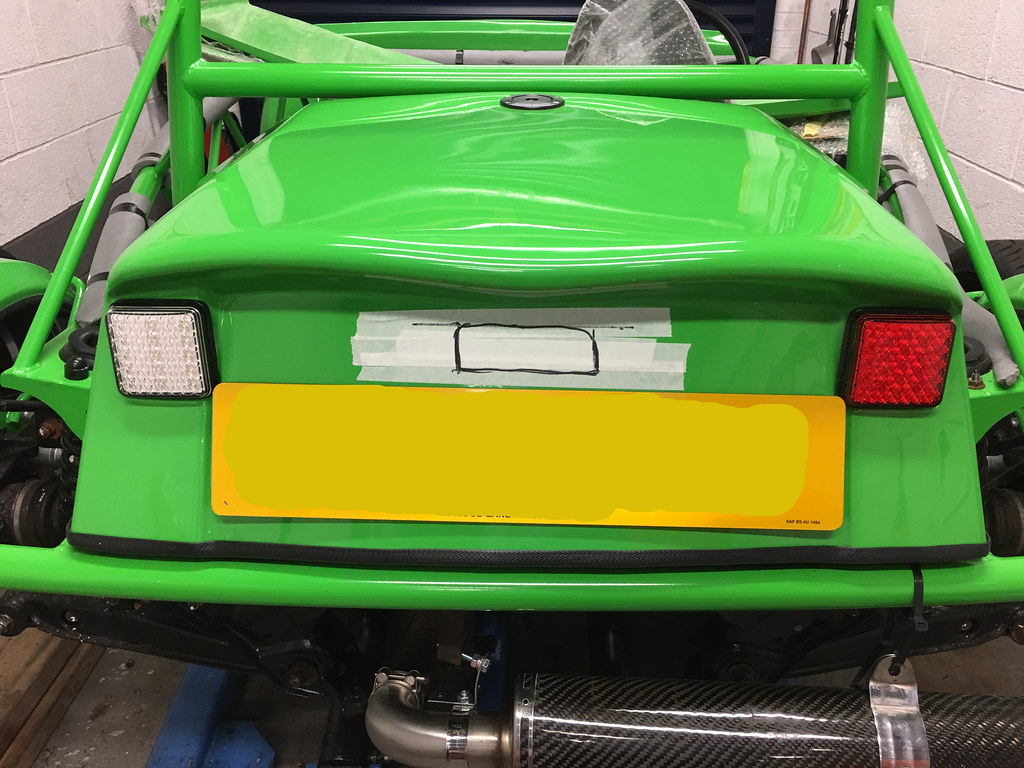
Which meant we could then test-fit the cover onto the rear end to see how it is all going to look (I have ordered a number plate light, but think it may be too small to light the whole plate - time for some more IVA manual checking and shopping, I think).
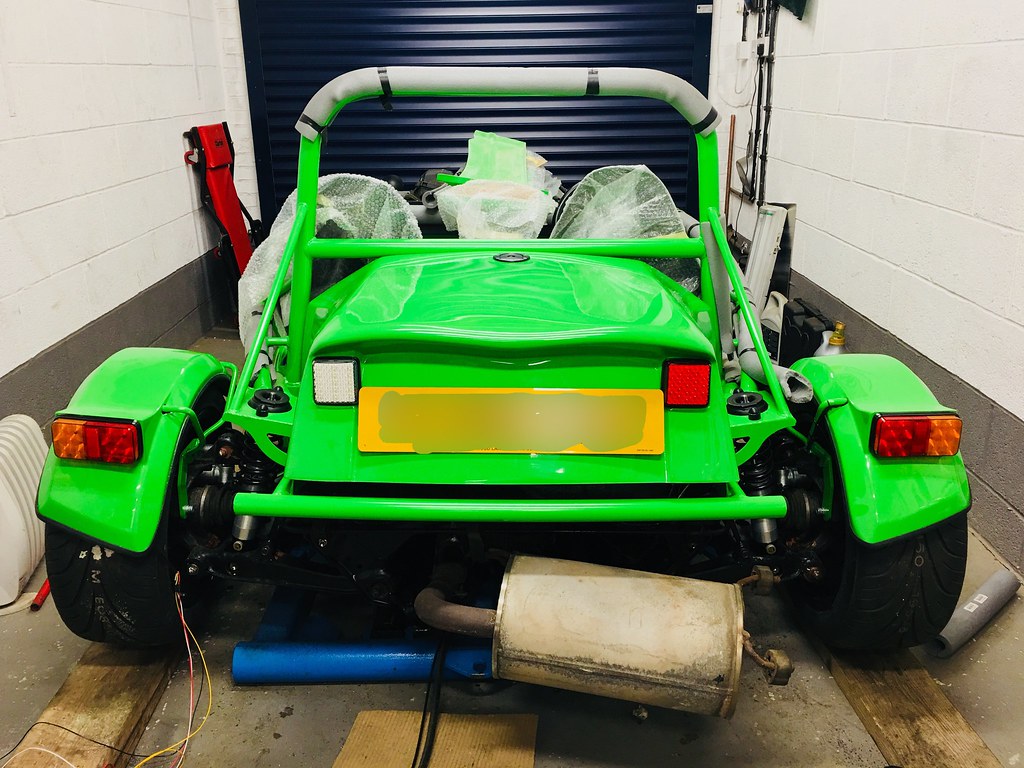 Untitled on Flickr
Before the cover can be properly fitted, the pipework and wiring all needed tidying up
 Untitled on Flickr
and then getting the fuel filter mounted - using the tank mount which also doubled up as a good earth point.
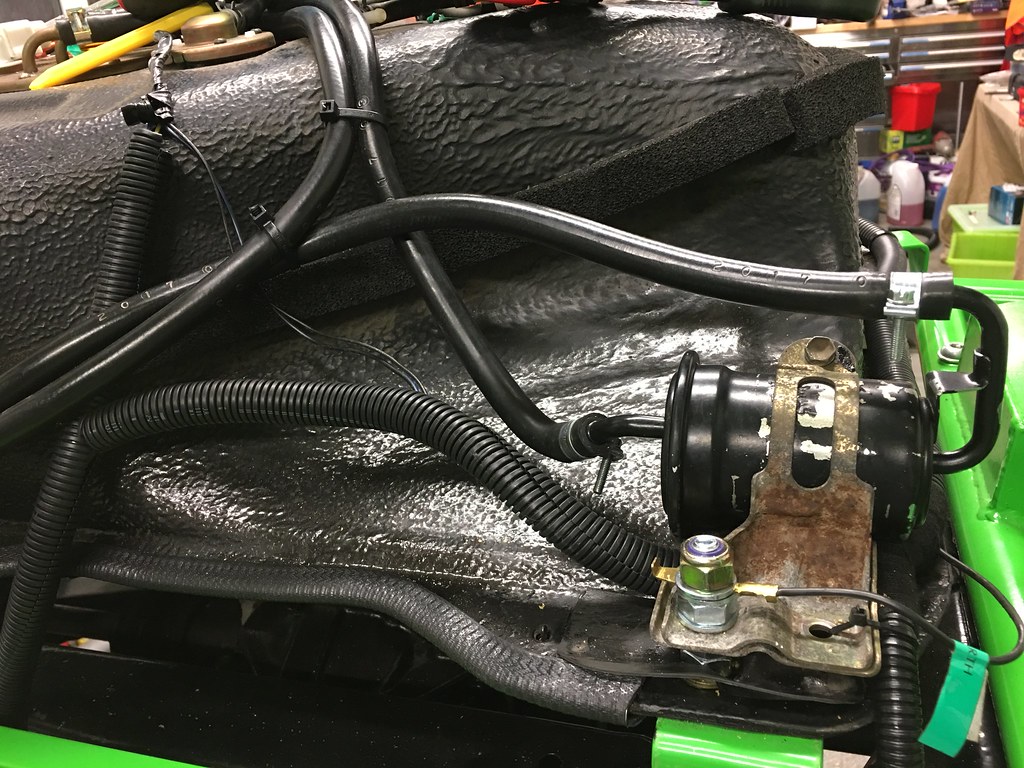 Untitled on Flickr
In the meantime, I have been wondering what to do about an exhaust, and after a bit of an eBay session came up with something that will at least provide me with a solution that's neater than the big standard box hanging out the back, but that isn't too expensive to replace when I eventually go turbo and might want to replace the whole system (as I currently have the less-used 475mm cat).
 Untitled on Flickr
and with a bend and some clamps (and some highly secure cable ties) I could test fit it, and I think it looks pretty tidy.
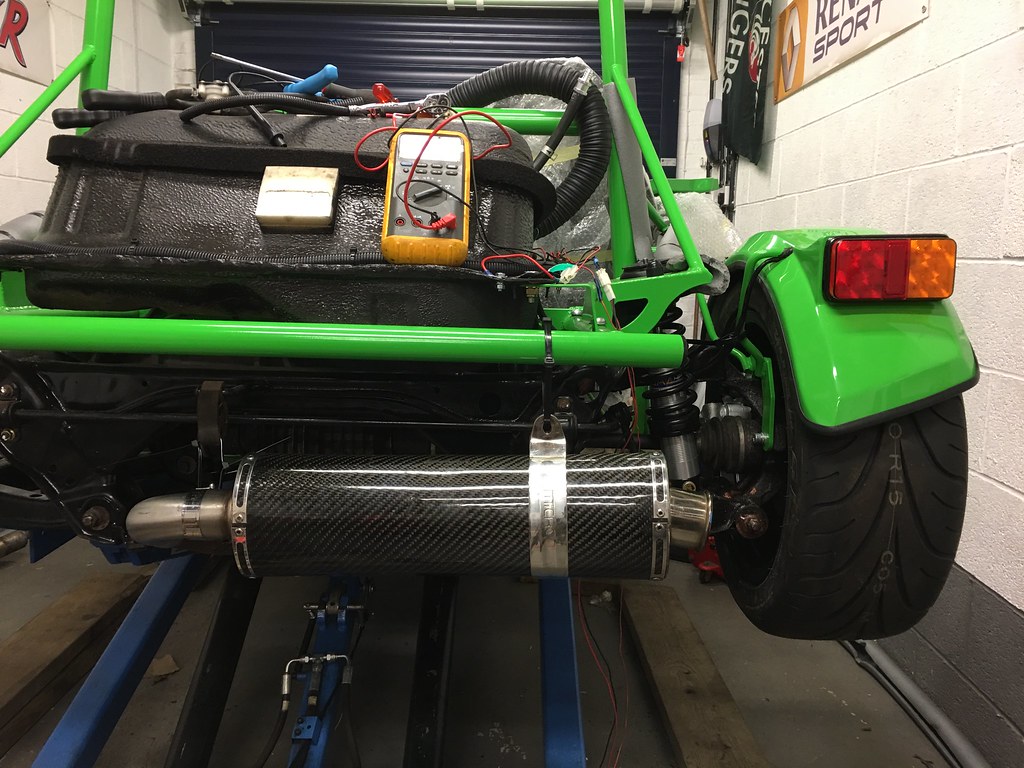 Untitled on Flickr
So there is some more work to do, next major job being to get the rear cover fitted and sorted, which I hope to get onto this week.
First job for this instalment was to clean out the garage (and get my brother's clio out!) then I could move the exocet forward on to my lift for the first time (and in fact the furthest it has so far moved since being on it's wheels).
Untitled on FlickrUntitled on FlickrAnd to go with the wings being sat in place, we also offered up the next addition - which is a pair of new g-type side panels from MEV, which I saw and thought would finish off the sides rather more neatly than the standard black plastic panelling.
Untitled on FlickrThe next job was then to actually drill the remaining three wings and offer them up into place:
Untitled on Flickrand then tiger seal them into place with some suitable load on each wing...
Untitled on FlickrNext, we carefully measured, marked, measured again and then cut out and mounted the fuel filler and fog/reverse lights in the rear tank cover.
Untitled on FlickrWhich meant we could then test-fit the cover onto the rear end to see how it is all going to look (I have ordered a number plate light, but think it may be too small to light the whole plate - time for some more IVA manual checking and shopping, I think).
Untitled on FlickrBefore the cover can be properly fitted, the pipework and wiring all needed tidying up
Untitled on Flickrand then getting the fuel filter mounted - using the tank mount which also doubled up as a good earth point.
Untitled on FlickrIn the meantime, I have been wondering what to do about an exhaust, and after a bit of an eBay session came up with something that will at least provide me with a solution that's neater than the big standard box hanging out the back, but that isn't too expensive to replace when I eventually go turbo and might want to replace the whole system (as I currently have the less-used 475mm cat).
Untitled on Flickrand with a bend and some clamps (and some highly secure cable ties) I could test fit it, and I think it looks pretty tidy.
Untitled on FlickrSo there is some more work to do, next major job being to get the rear cover fitted and sorted, which I hope to get onto this week.
So, it has been a little while since I last updated - so here is the latest instalment in my build!
The first job from last time was to get a number plate light fitted - which started out with some careful marking and positioning...
 Untitled on Flickr
and got the lights in the cover all connected up and tested:
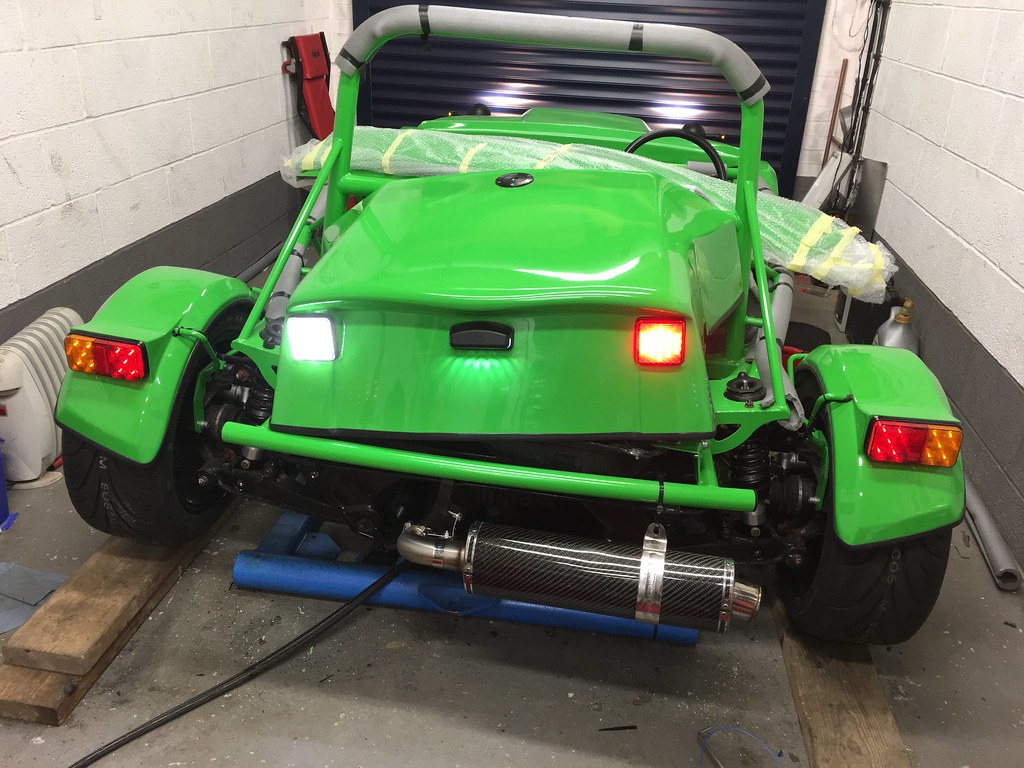 Untitled on Flickr
so I could then secure the rear cover into place (the silver screws have since been replaced with some nice black allen-head bolts and countersink washers)
 Untitled on Flickr
then I fitted the side repeaters into the cycle wings and wired those in
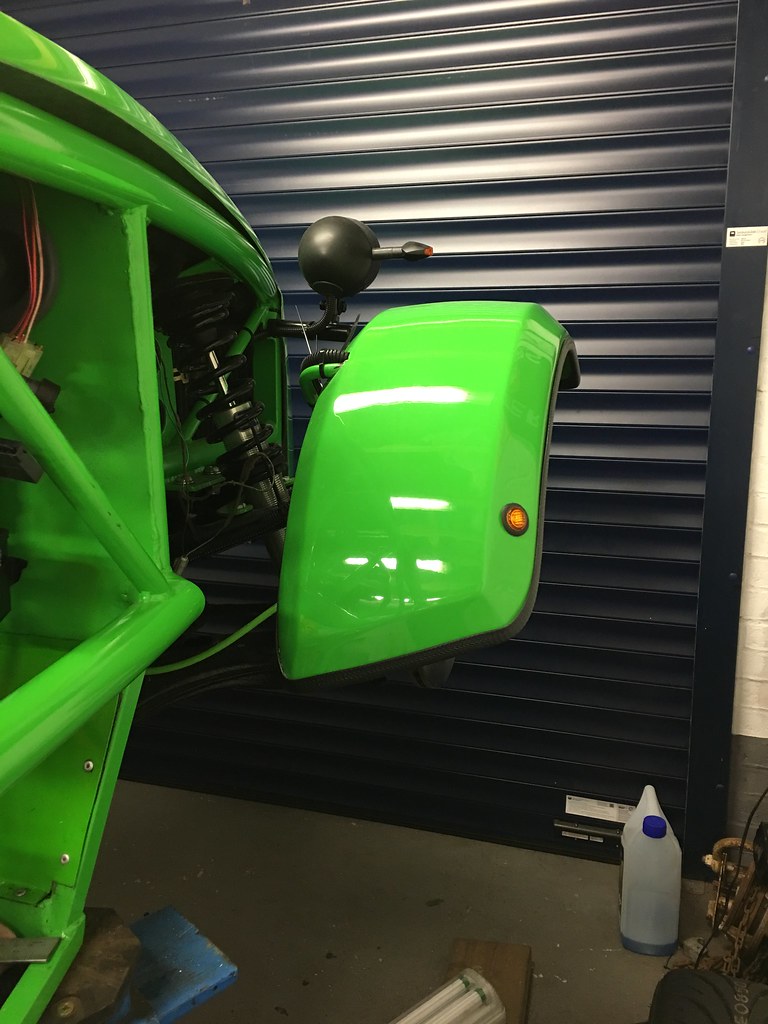 Untitled on Flickr
Next were some painting jobs to get out of the way:
Priming and painting the cam cover:
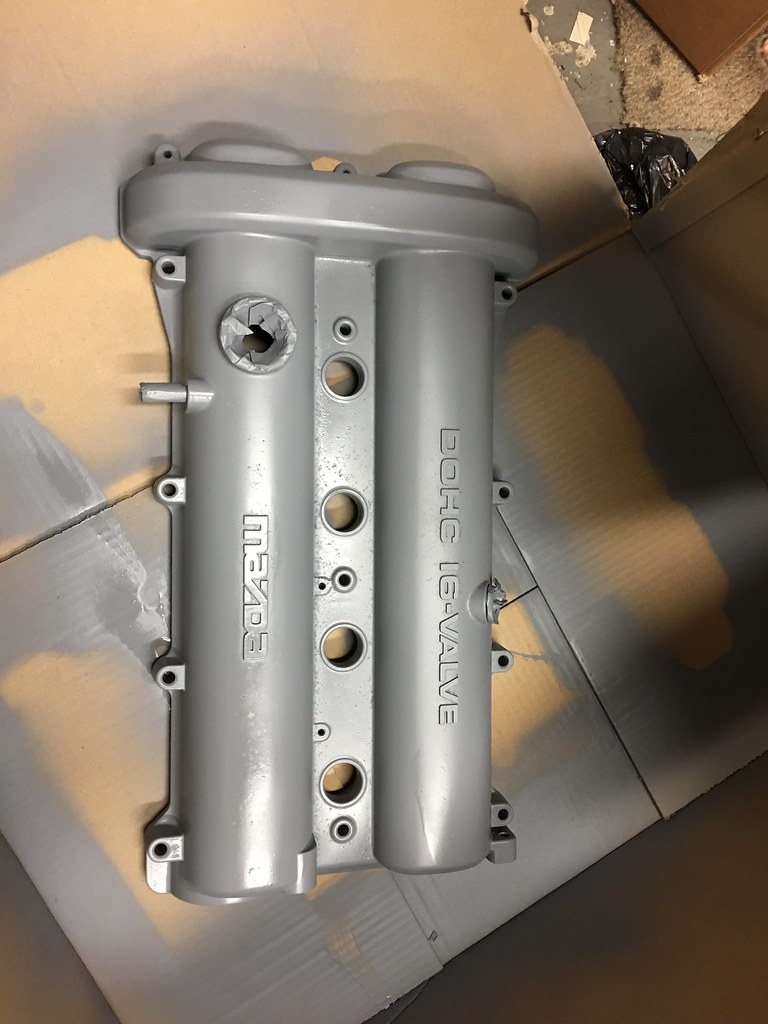 Untitled on Flickr
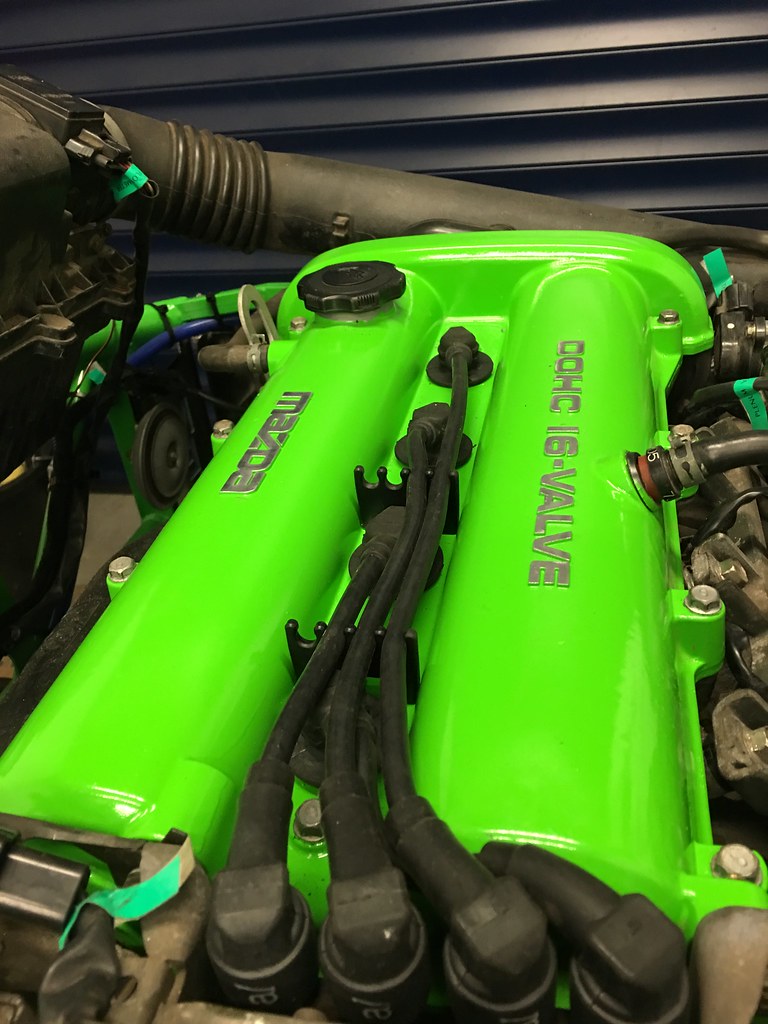 Untitled on Flickr
and a coat of black gloss over the backs of my GRP seats to finish them off
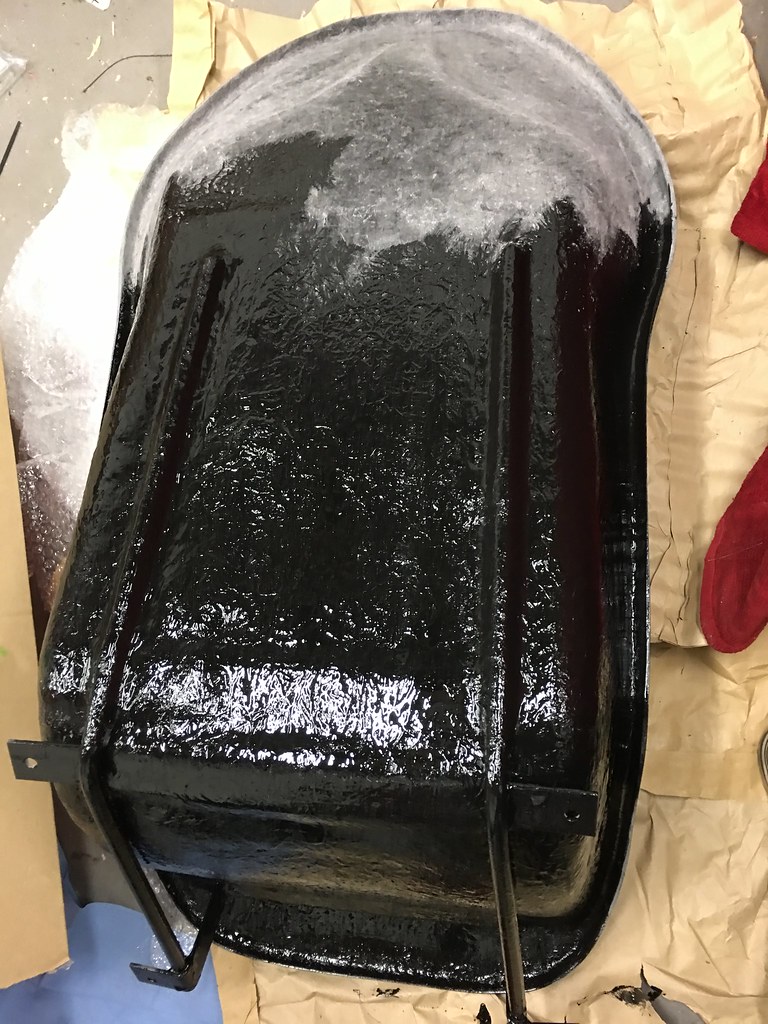 Untitled on Flickr
Fitted my fog and reverse light switches (with rings due to a *slight* error with the initial drill placement).
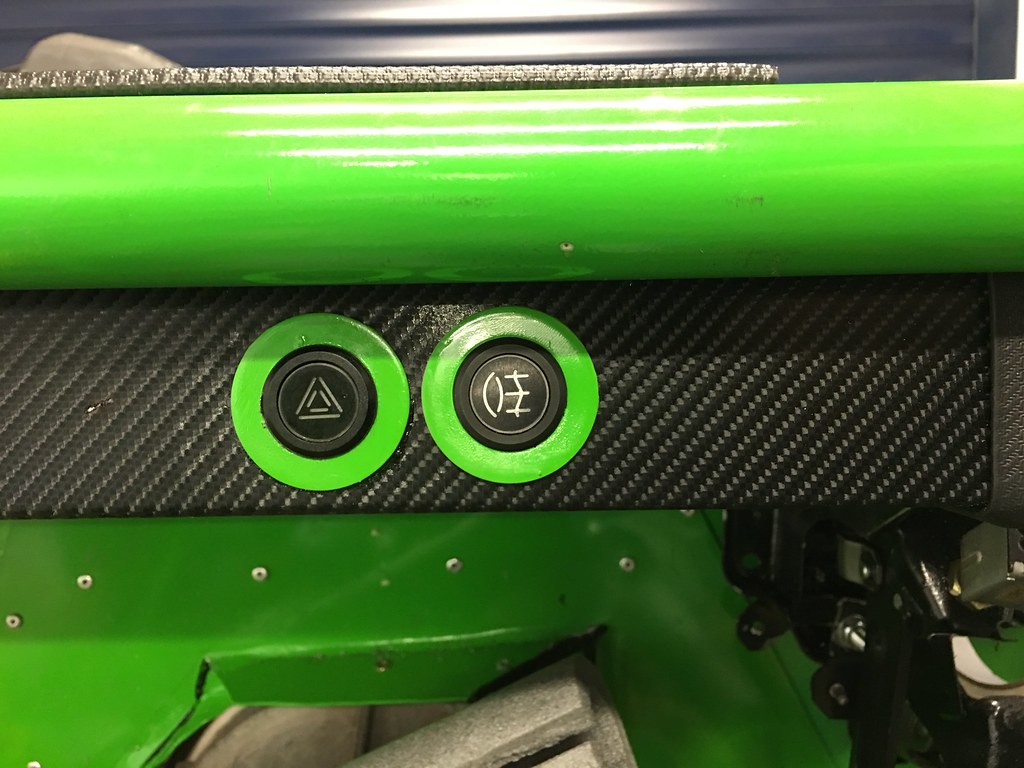 Untitled on Flickr
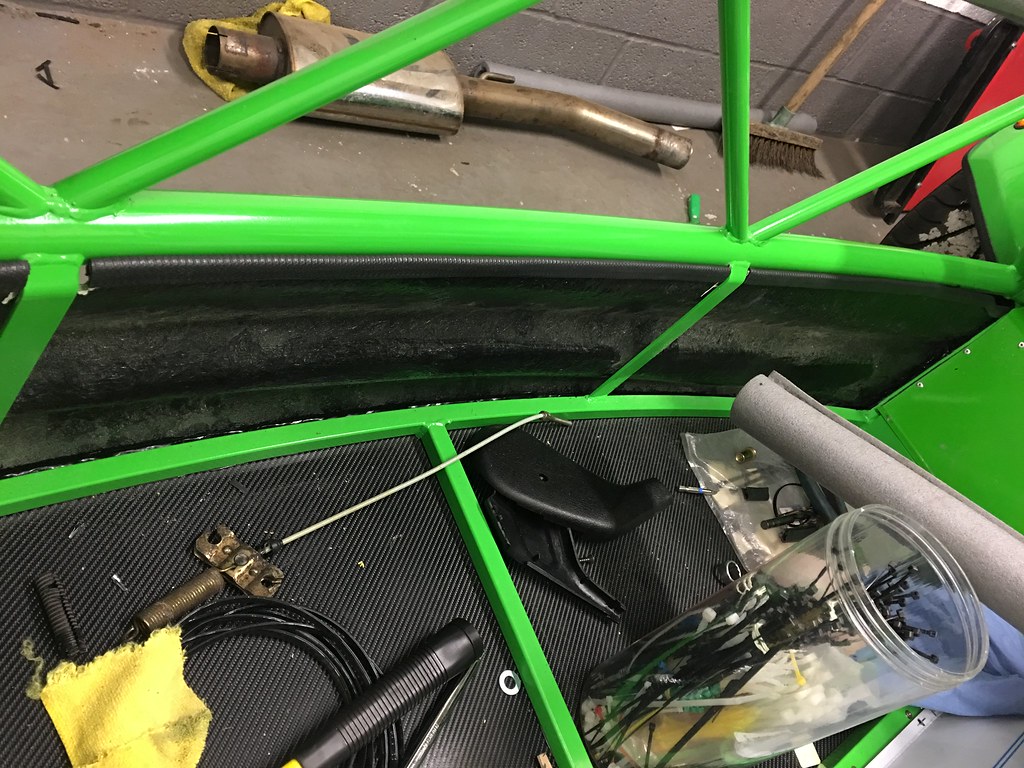
Next was a bit of cardboard templating and cutting out the rear bulkhead ready to be fitted:
 Untitled on Flickr
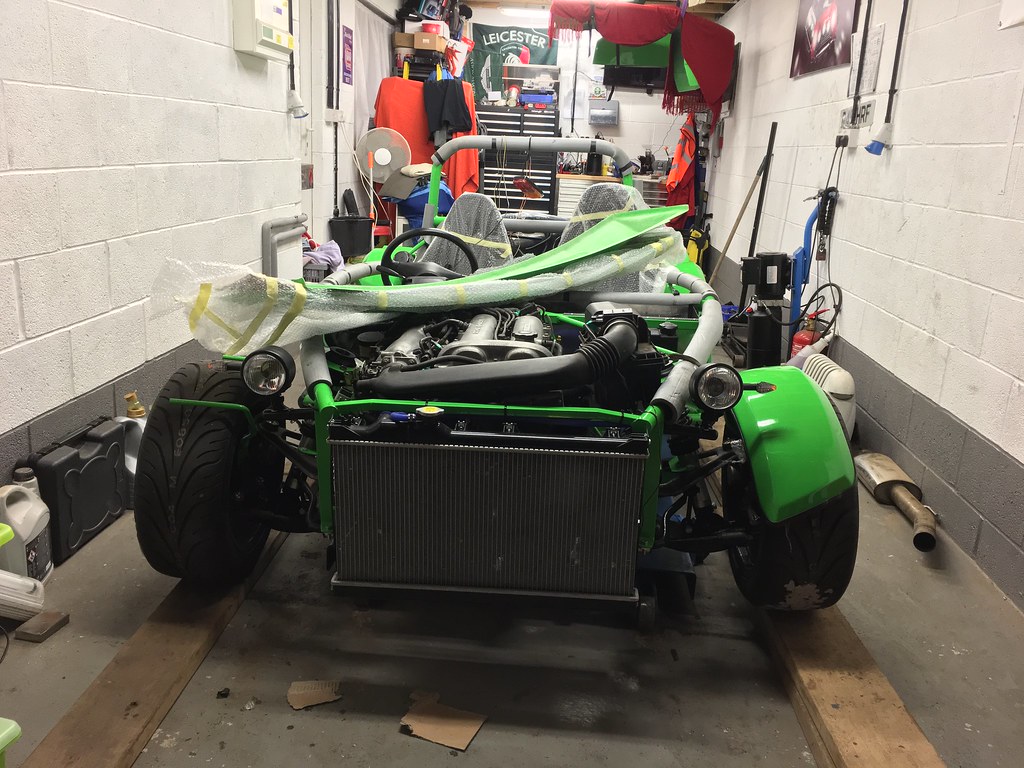
and then the bit I hadn't been looking forward to - fitting the nose. Unfortunately, even with the radiator moved as far back as possible (the fan housing is hard against the frame) and the inside of the bonnet contacting the radiator, there is still a gap of about 20mm between the back edge of the bonnet and the top bulkhead rail - which is a shame, but something I can't see a way around without further modification - so I will address the gap somehow instead.
Nervously cutting out the openings for the aero catches:
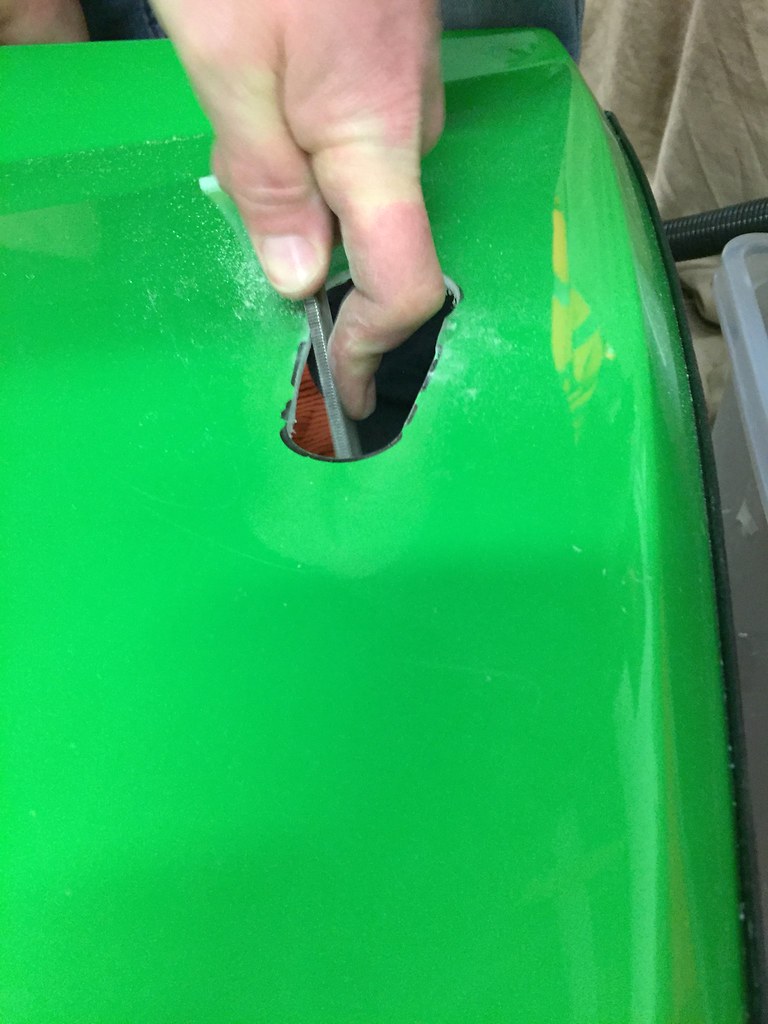 Untitled on Flickr
and fitting them
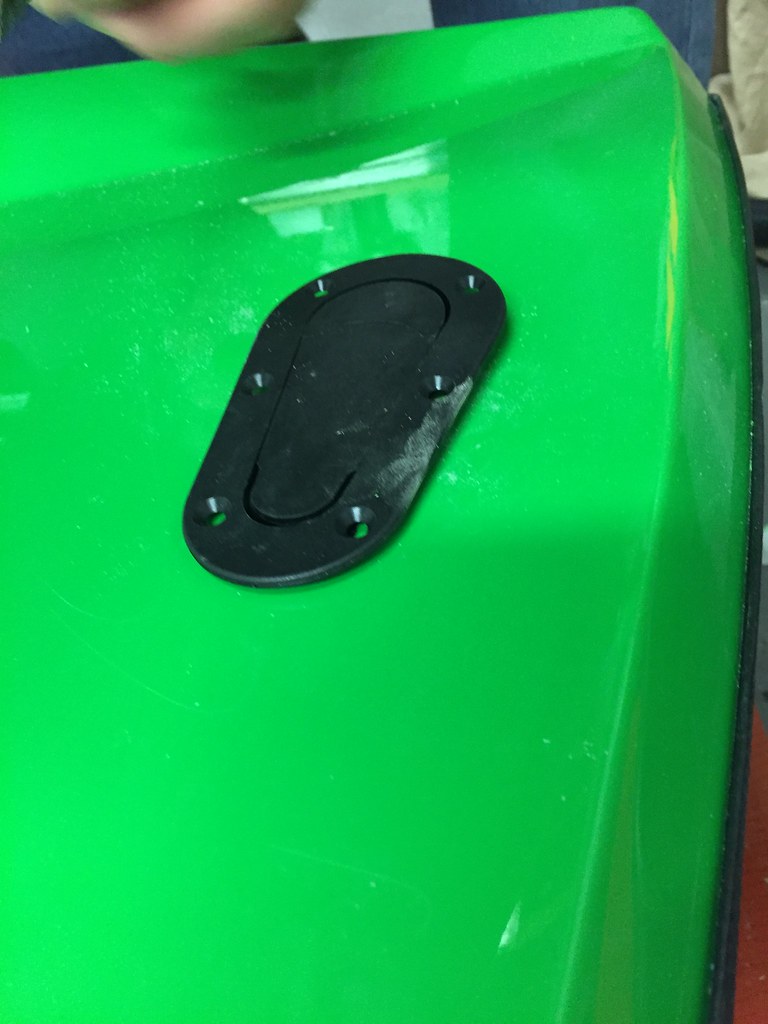 Untitled on Flickr
and bonnet fitted (but with a noticeable gap)
 Untitled on Flickr
finally, I have added a couple of push-button pins onto the front end to secure that - and everything is nice and secure.
 Untitled on Flickr
I have tonight started to trim up my side panels ready to fit them up - so hopefully I can get them and my seats all fitted up very shortly. I am pleased with how it is coming together and am managing to tick off some of the jobs that I wasn't looking forward to as well!
The first job from last time was to get a number plate light fitted - which started out with some careful marking and positioning...
Untitled on Flickrand got the lights in the cover all connected up and tested:
Untitled on Flickrso I could then secure the rear cover into place (the silver screws have since been replaced with some nice black allen-head bolts and countersink washers)
Untitled on Flickrthen I fitted the side repeaters into the cycle wings and wired those in
Untitled on FlickrNext were some painting jobs to get out of the way:
Priming and painting the cam cover:
Untitled on FlickrUntitled on Flickrand a coat of black gloss over the backs of my GRP seats to finish them off
Untitled on FlickrFitted my fog and reverse light switches (with rings due to a *slight* error with the initial drill placement).
Untitled on FlickrNext was a bit of cardboard templating and cutting out the rear bulkhead ready to be fitted:
Untitled on Flickrand then the bit I hadn't been looking forward to - fitting the nose. Unfortunately, even with the radiator moved as far back as possible (the fan housing is hard against the frame) and the inside of the bonnet contacting the radiator, there is still a gap of about 20mm between the back edge of the bonnet and the top bulkhead rail - which is a shame, but something I can't see a way around without further modification - so I will address the gap somehow instead.
Nervously cutting out the openings for the aero catches:
Untitled on Flickrand fitting them
Untitled on Flickrand bonnet fitted (but with a noticeable gap)
Untitled on Flickrfinally, I have added a couple of push-button pins onto the front end to secure that - and everything is nice and secure.
Untitled on FlickrI have tonight started to trim up my side panels ready to fit them up - so hopefully I can get them and my seats all fitted up very shortly. I am pleased with how it is coming together and am managing to tick off some of the jobs that I wasn't looking forward to as well!
Edited by browno on Thursday 29th March 00:08
It has been a few weeks, so it's time for another update!
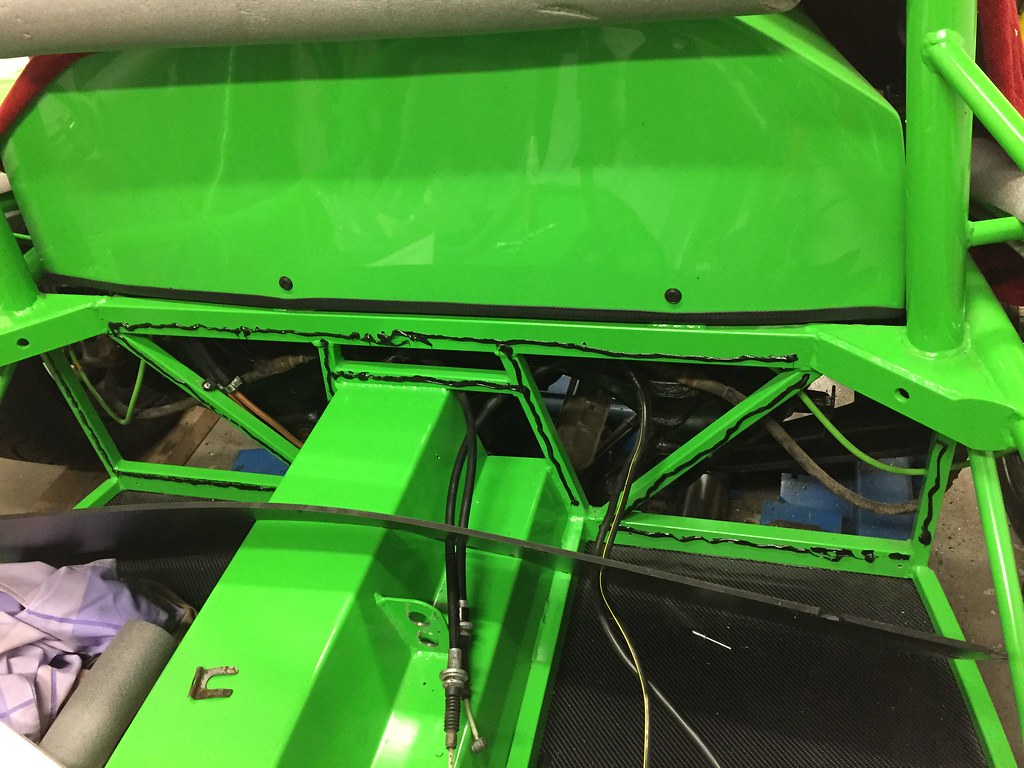
First job was to fix my rear bulkhead with a combination of a good bead of tiger seal and some rivets - as seen here in progress...
 Untitled on Flickr
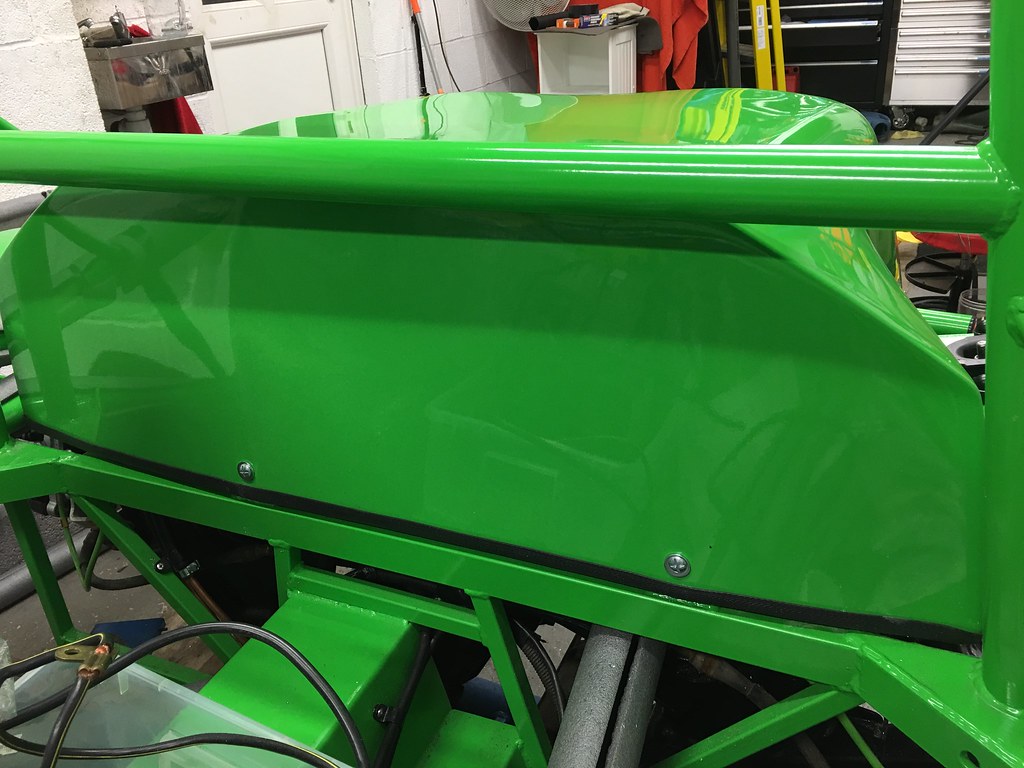
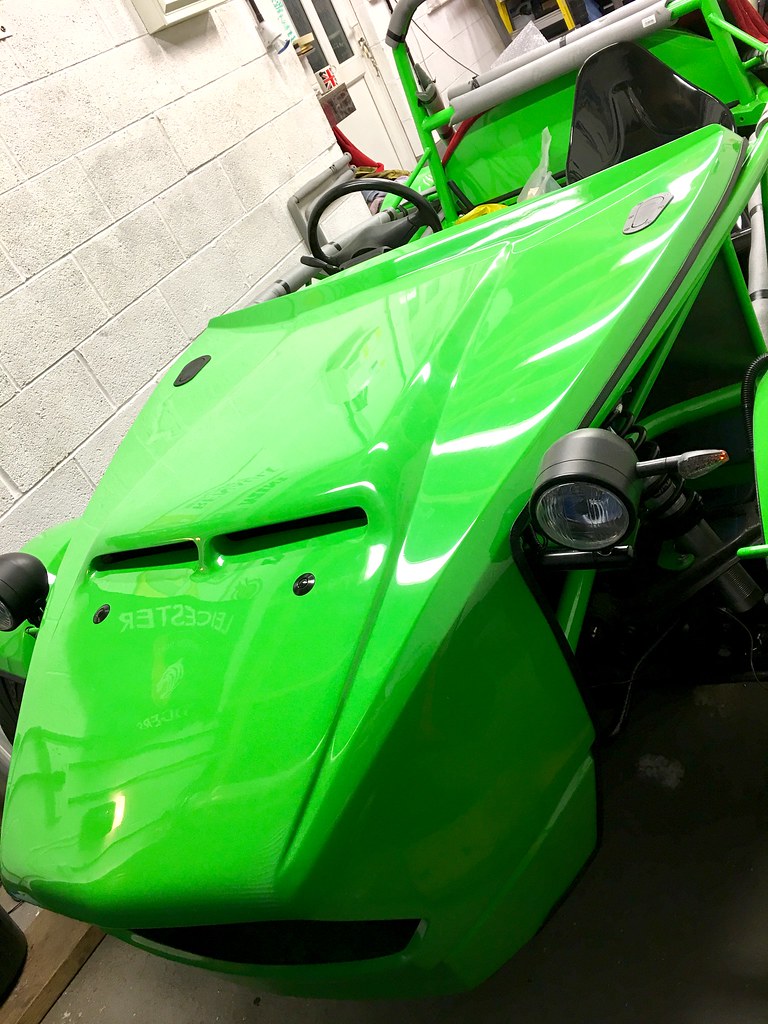
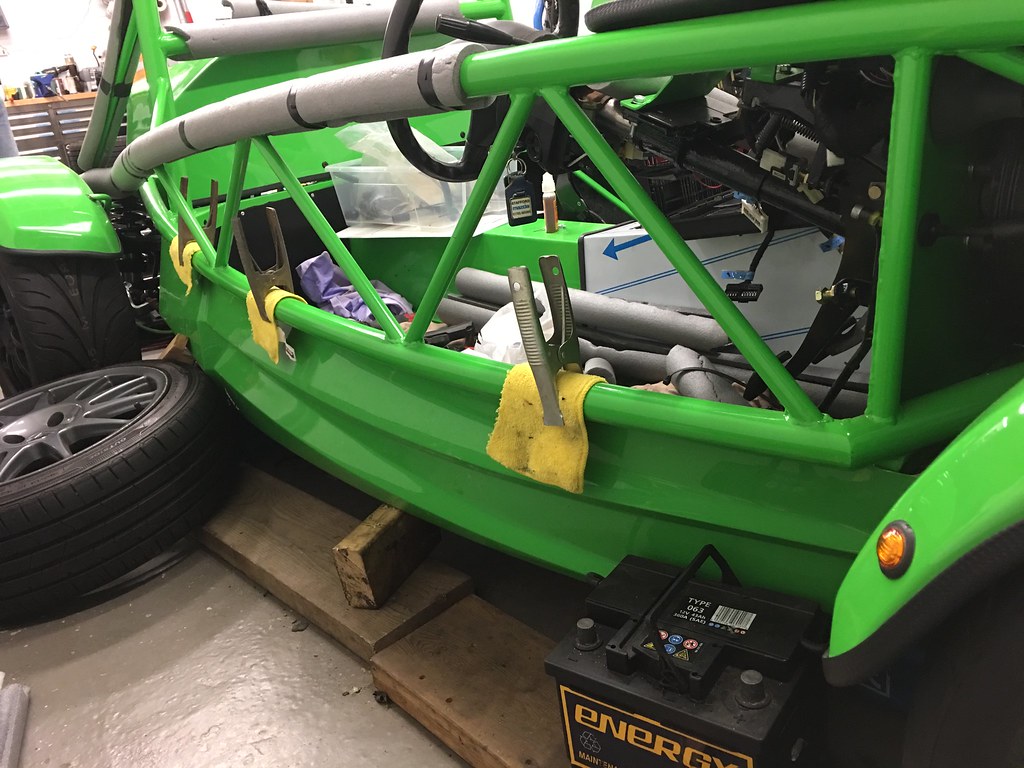
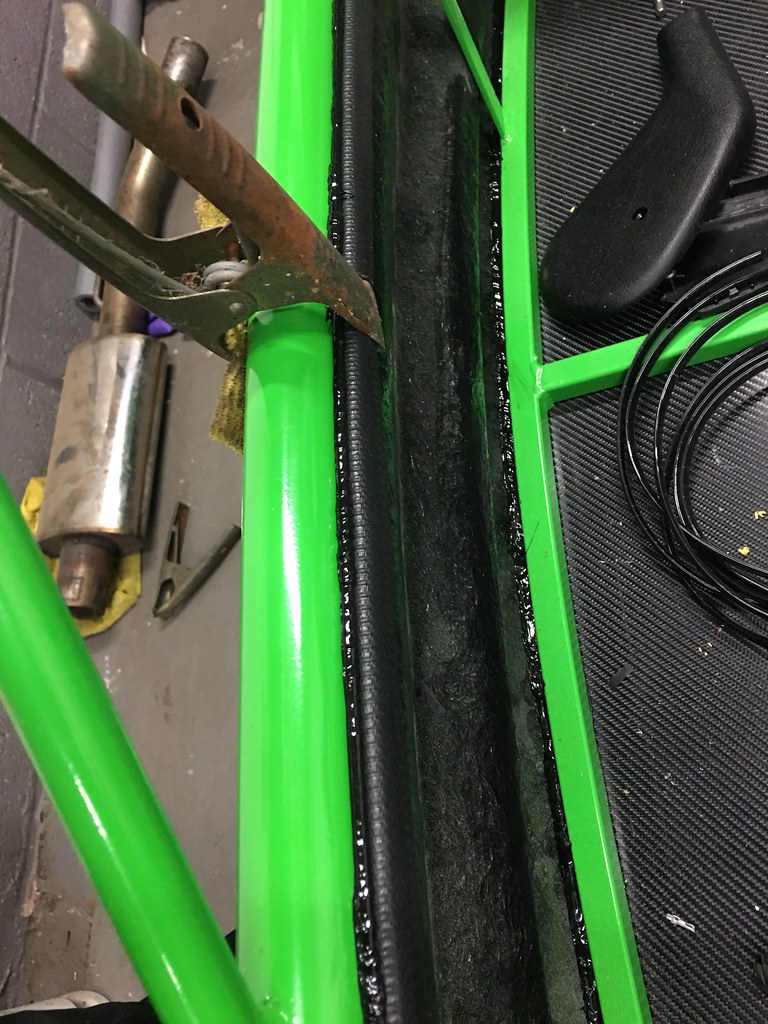
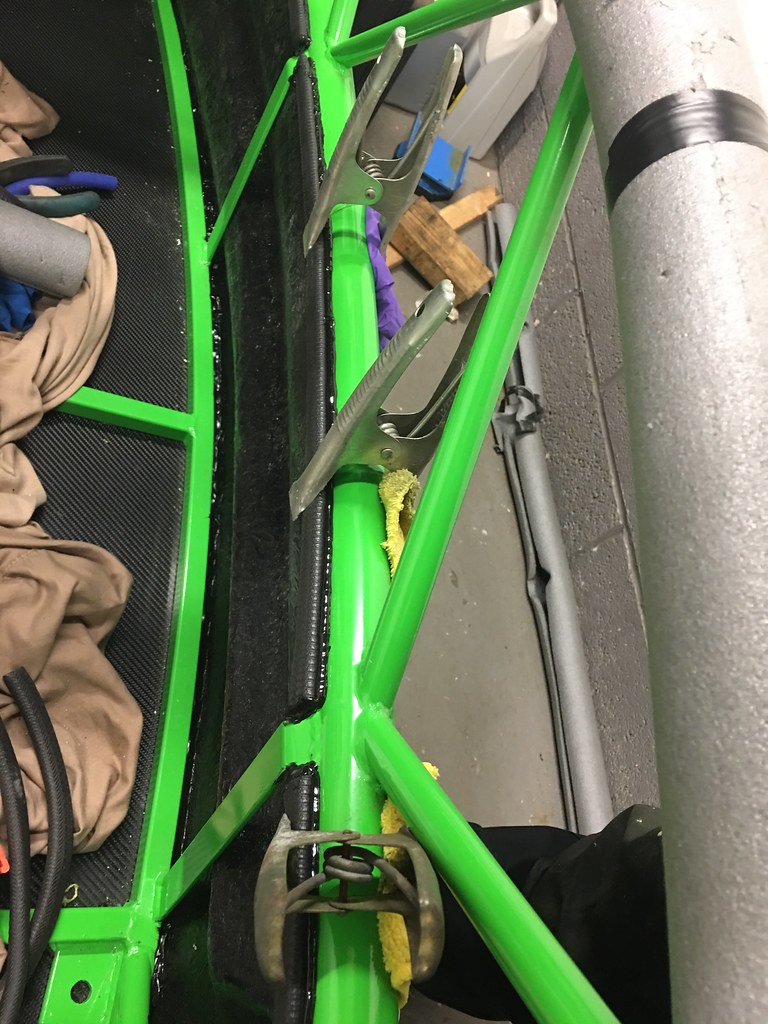
Next up (after some trimming and double checking fitment!) was to fit my side panels, which I secured using LOTS of tiger seal! I used a full tube across the bottoms which was then allowed to go off (and a further bead added on the inside and outside of the bottom edge to fill out the space), and then 2/3rds of a tube for the top edges. I added edge trim along the bottom, front and rear edges after fitting, and along the top edges (glued on), before then securing the top with a (mostly) neat bead along the top edge.
 Untitled on Flickr
 Untitled on Flickr
 Untitled on Flickr
 Untitled on Flickr
I then added a bit of identification...
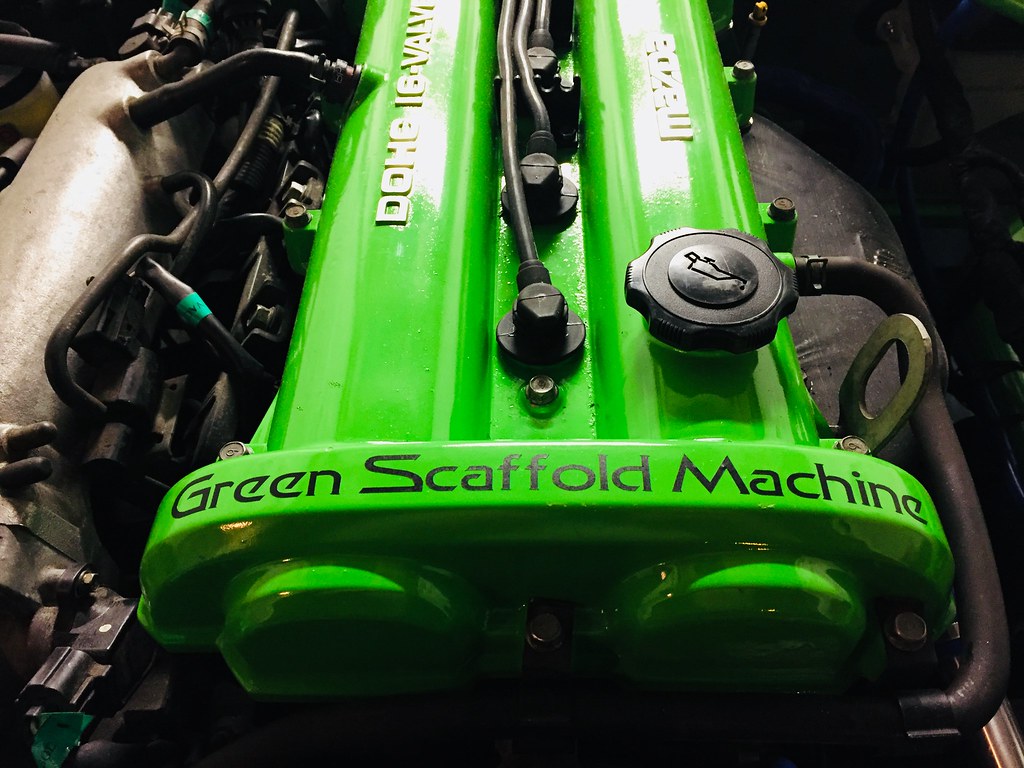 Untitled on Flickr
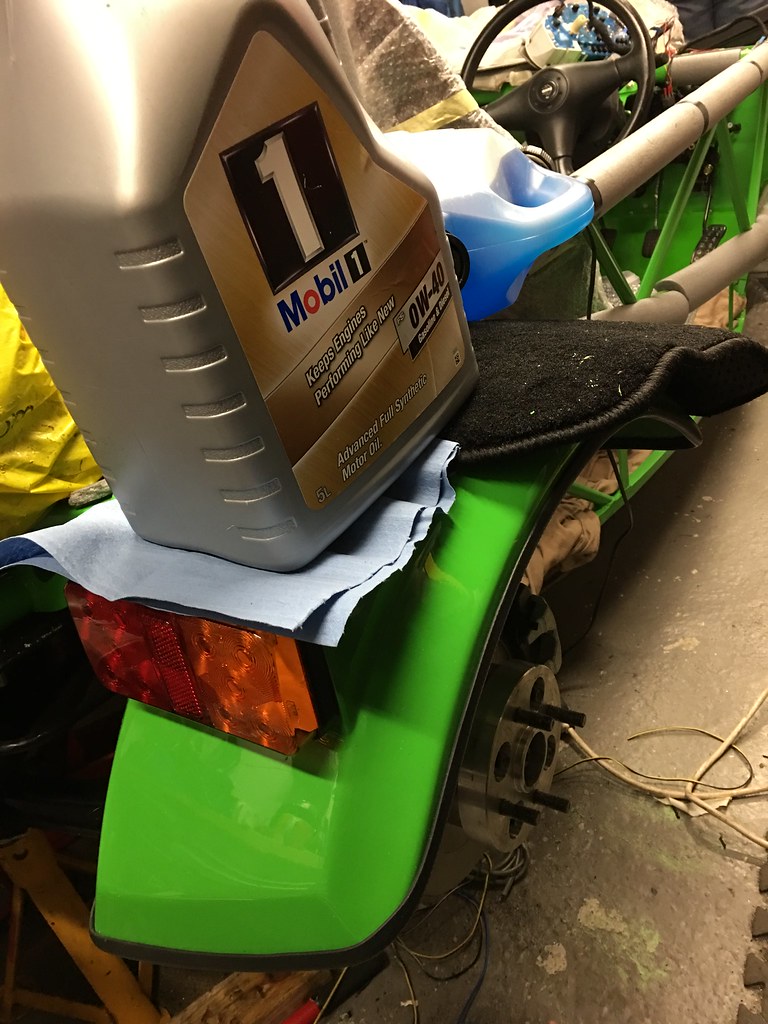
I have then been doing a whole series of smaller jobs (changing the oil and filter, torquing bolts and sorting a blow in the exhaust), which aren't so photogenic!
I have also bought a battery box, which is positioned ready to be bolted in, but I have been diverted by trying to get my seats in and fitted up. I had sold my donor seat runners along with the seats, so needed to buy a set of runners, which turned out to be mk2 runners, so needed a little tweaking to allow them to fit. Having fitted the runners and edge trimmed the seats, I spent some time playing with position and adjustments, I got the drill out and made the necessary holes which have allowed me to test fit my seats. I now need to get some shorter bolts to final fix them, and to cut out the holes for the harnesses (which I have the lower eye bolts prepped for).
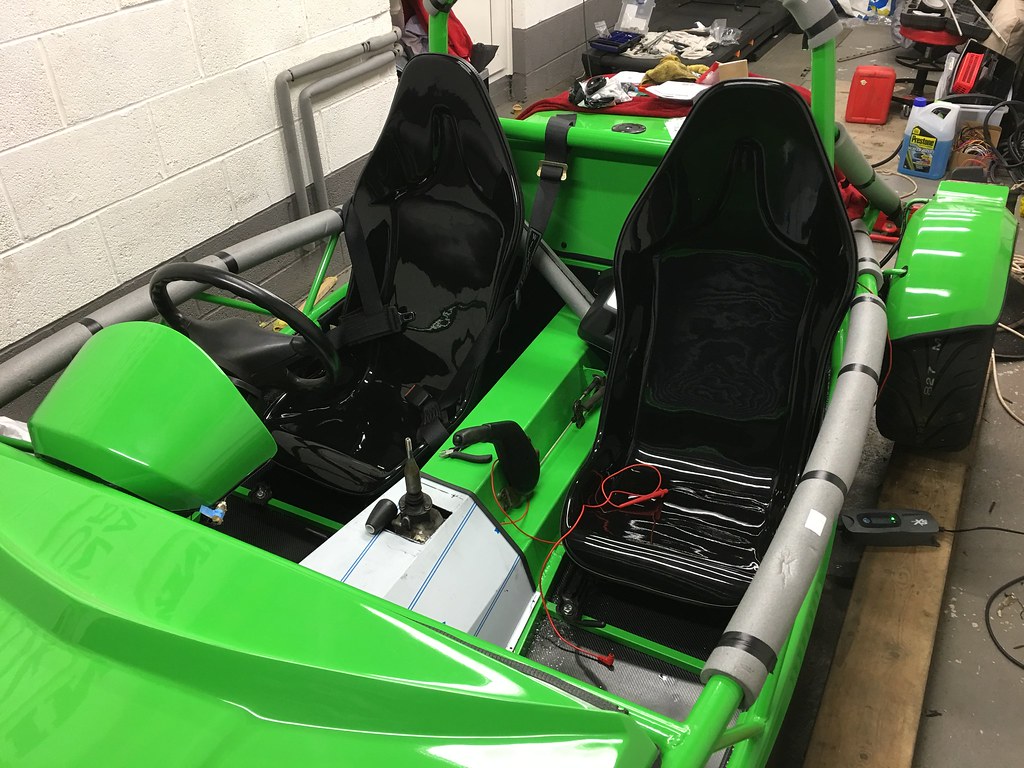 Untitled on Flickr
 Untitled on Flickr
Next jobs are to fit the battery box and then I am into final prep for IVA, where I plan to take it for a pre-check at a mate's garage with MOT bay, so we can check brakes, lights and emissions. I think that I am going to be ready to submit my paperwork very soon to get it ready for the road!
First job was to fix my rear bulkhead with a combination of a good bead of tiger seal and some rivets - as seen here in progress...
Untitled on FlickrNext up (after some trimming and double checking fitment!) was to fit my side panels, which I secured using LOTS of tiger seal! I used a full tube across the bottoms which was then allowed to go off (and a further bead added on the inside and outside of the bottom edge to fill out the space), and then 2/3rds of a tube for the top edges. I added edge trim along the bottom, front and rear edges after fitting, and along the top edges (glued on), before then securing the top with a (mostly) neat bead along the top edge.
Untitled on FlickrUntitled on FlickrUntitled on FlickrUntitled on FlickrI then added a bit of identification...
Untitled on FlickrI have then been doing a whole series of smaller jobs (changing the oil and filter, torquing bolts and sorting a blow in the exhaust), which aren't so photogenic!
I have also bought a battery box, which is positioned ready to be bolted in, but I have been diverted by trying to get my seats in and fitted up. I had sold my donor seat runners along with the seats, so needed to buy a set of runners, which turned out to be mk2 runners, so needed a little tweaking to allow them to fit. Having fitted the runners and edge trimmed the seats, I spent some time playing with position and adjustments, I got the drill out and made the necessary holes which have allowed me to test fit my seats. I now need to get some shorter bolts to final fix them, and to cut out the holes for the harnesses (which I have the lower eye bolts prepped for).
Untitled on FlickrUntitled on FlickrNext jobs are to fit the battery box and then I am into final prep for IVA, where I plan to take it for a pre-check at a mate's garage with MOT bay, so we can check brakes, lights and emissions. I think that I am going to be ready to submit my paperwork very soon to get it ready for the road!
Gassing Station | Readers' Cars | Top of Page | What's New | My Stuff