Knackered old Porsche with loads of miles - 996 content
Discussion


Mikeeb said:
Thanks for the info. Plus for the Cobra is, I have a light grey interior and they can trim it to match.
I have the Cobra Nogaros in my Cayman and (whilst not disputing SlippyDiff's experience) I have been impressed by how solid they feel. I have an FIA Corbeau full containment seat in my race car and I think the Nogaros have less flex than they do. For a road car, I think they are a good compromise. Comfortable enough for long distances but supportive enough to be pounded round the track (albeit not as supporting round the hips as a proper, deep bucket seat).LennyM1984 said:
I have the Cobra Nogaros in my Cayman and (whilst not disputing SlippyDiff's experience) I have been impressed by how solid they feel. I have an FIA Corbeau full containment seat in my race car and I think the Nogaros have less flex than they do. For a road car, I think they are a good compromise. Comfortable enough for long distances but supportive enough to be pounded round the track (albeit not as supporting round the hips as a proper, deep bucket seat).
Without trying to steal PPBB thread. Thank for the feedback. Just waiting for some leather samples. Slippydiff said:
That's great info, many thanks.
I'm knocking on a bit now (59) and my night vision has deteriorated markedly over the past 3 years, the 996's lights are pretty poor compared with that of my daily driver. So ...
Are the Osram and Philips bulb upgrades they offer worthwhile ? If so do you have a preference for the Osram or Philips HID/Xenon bulb options they offer ? I'm not looking for increased "cool blueness" btw.
Any benefits (in light output) to the LED high beam bulb option they offer ?
I've always used Osram with good results, H7 LEDs are generally pretty bloody good but cooling them in an OE enclosure not designed for them can be problematic - I'd just run a good halogen in the high beam. I'm knocking on a bit now (59) and my night vision has deteriorated markedly over the past 3 years, the 996's lights are pretty poor compared with that of my daily driver. So ...
Are the Osram and Philips bulb upgrades they offer worthwhile ? If so do you have a preference for the Osram or Philips HID/Xenon bulb options they offer ? I'm not looking for increased "cool blueness" btw.
Any benefits (in light output) to the LED high beam bulb option they offer ?
Slippydiff said:
I note they state this in their sales pitch :
Is it worthwhile uprating the ballasts as they've suggested ? Especially as they don't look to be particularly expensive.
I don't think so as the OE ballasts are absolutely fine and also tightly integrated to the back of the headlight unit. To run different ones will need a bit of chopping of wiring etc. as (to be fair) they make clear in their description. Is it worthwhile uprating the ballasts as they've suggested ? Especially as they don't look to be particularly expensive.
Slippydiff said:
And so to other matters. Nice to see your replacement brake pipe ends have been given a good coating of wax/protectant where they screw into the connector block 
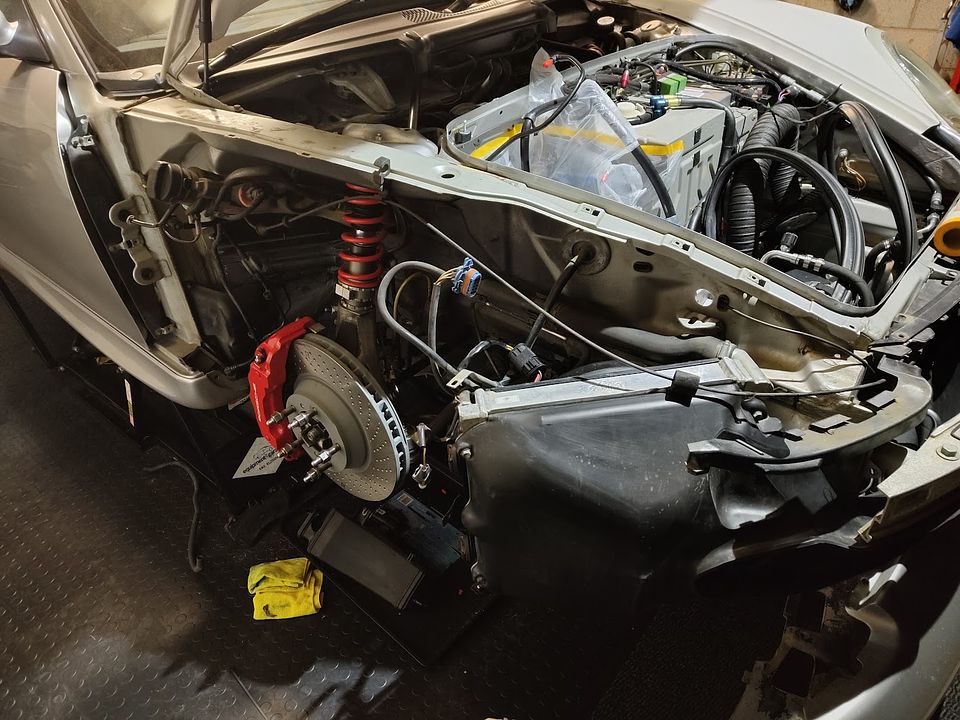
My car failed it's MOT just before Christmas when it ruptured a brake pipe whilst on the brake rollers. Initially I was somewhat fed up they'd "broken" the car whilst testing it, but as the day wore on, I realised I just dodged the mother of all bullets ...
I'd be really interested to hear your take on this failure, as you'll no doubt recognise the location, which is behind the arch liner AND the washer bottle, and thus as can be seen from the pipes and the area generally, it's both clean and dry. All of which points to the brake pipe rotting from the inside out ...
It's usually a defect in the coating or it's been caught/rubbed by something else. It's hard to say if it could be inside to outside without seeing a cross section further up/down but if it was you'd have a lot of other grotty/failing brake components as the brake fluid would have a lot of water content! My car failed it's MOT just before Christmas when it ruptured a brake pipe whilst on the brake rollers. Initially I was somewhat fed up they'd "broken" the car whilst testing it, but as the day wore on, I realised I just dodged the mother of all bullets ...
I'd be really interested to hear your take on this failure, as you'll no doubt recognise the location, which is behind the arch liner AND the washer bottle, and thus as can be seen from the pipes and the area generally, it's both clean and dry. All of which points to the brake pipe rotting from the inside out ...
At the age these cars are now there will always be the odd bit that 20 years ago had a nick or scratch during fitting that turns into this two decades later.
You can replaced them all with new steel lines (although the one over the engine is a pain in the arse!) or make up copper-nickel lines (which I have done), copper-nickel is a great material as it resists corrosion almost permanently and has a very high burst pressure but is also soft as cheese so can be easily damaged by poor lifting of the car or impact........
Slippydiff said:
Any reason for the carbon fibre front wings ? Weight saving, corrosion resistance or something else ?
Both, the weight saving isn't massive but it's there. The bigger reason is that at 23 years and 20 winters the front wings have lost a lot of their galvanising (it is sacrificial after all) around areas of heavy stone chipping so even if repaired and repainted they'll never last as long again. Carbon however lasts forever, unless you set it on fire 
I'm a devil for lighting upgrades, can't leave anything standard. Was unhappy with the standard halogen lamps on my daily Mondeo, picked up a set of Bi-Xenon headlamps from a top spec car and they were an improvement but 8 year old projectors were probably worn, as we're the standard Osram D1S bulbs. Ended up buying some adapter plates and fitted some copies of a Hella projector, took a small bit of modification to fit the 3" projectors into the place designed for 2.5". These projectors are a copy of the projectors used in the facelifted F10 5-series. I coupled that with some Osram 6000 kelvin bulbs but they were a bit too blue so swapped them recently for some 4300k bulbs for the full OEM look - fitted some headlight washer caps for the look too😃 drove that yesterday and hopped into my MK1 TT this morning and with factory xenon that was like being in darkness - that will be upgraded before long, bought a spare pair of headlights to modify and swap in as it's way easier to modify everything without any time pressure and you can get a vastly modified upgraded lamp that would pass for OE.
Firstly a big thank you, I'm really very touched that people enjoy my cocking around with an old 911! So without further ado the latest update - in full disclosure I've been a bit busy recently with general life stuff but progress is still..... progressing 
So first off the inner heat shields were unrecoverable and new ones have a lead time so having had a good work out what they're actually protecting I've replaced them with some genuine race car stick on gold which should stop the rear light clusters melting!
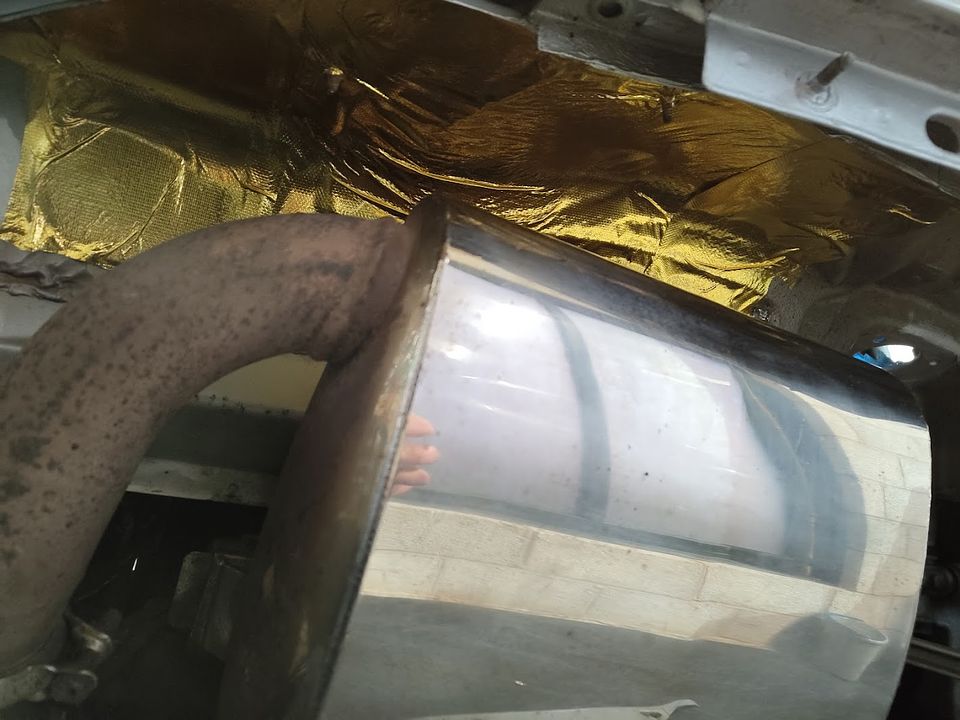
I wouldn't try this on a 996 turbo as the surface temps etc. are way higher in the exhaust but for mine where it's only really dealing with radiated heat from the exhaust cans this should do the trick, especially as one has been completely missing since a Monaco rally in 2018
With both sides done the rear bumper went back on with new captive thread plates where required:
It'll need to come back off for paint but at the very least I can make sure all the fittings are present, correct and useable at this point!
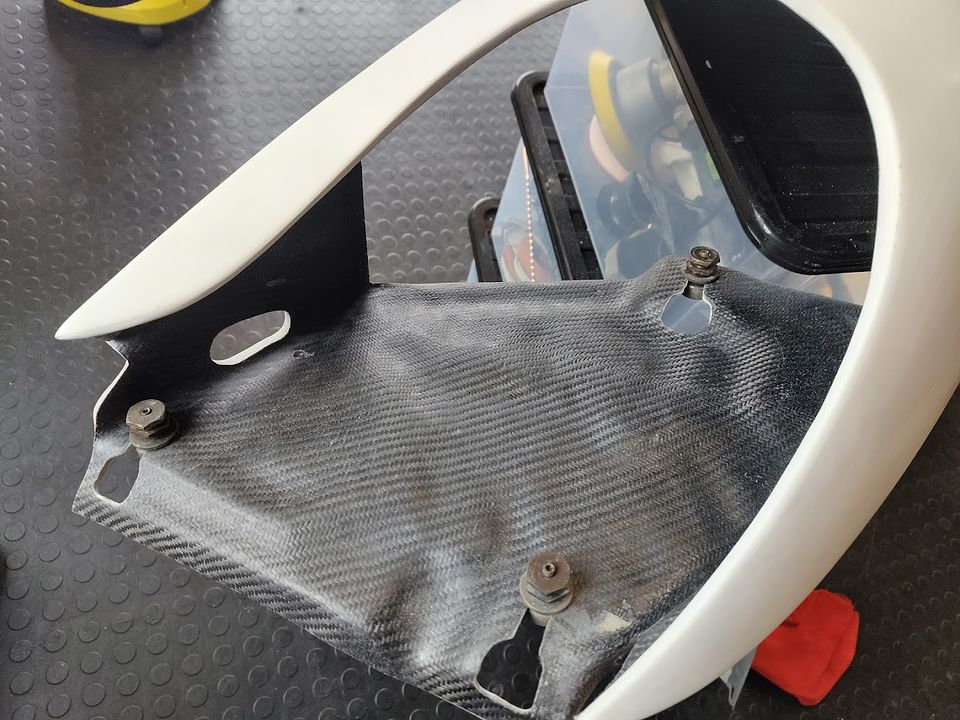
I'd dragged all the carbon bits out of storage before Xmas so as I couldn't find anything else to delay the inevitable I unwrapped them all and wiped them down:
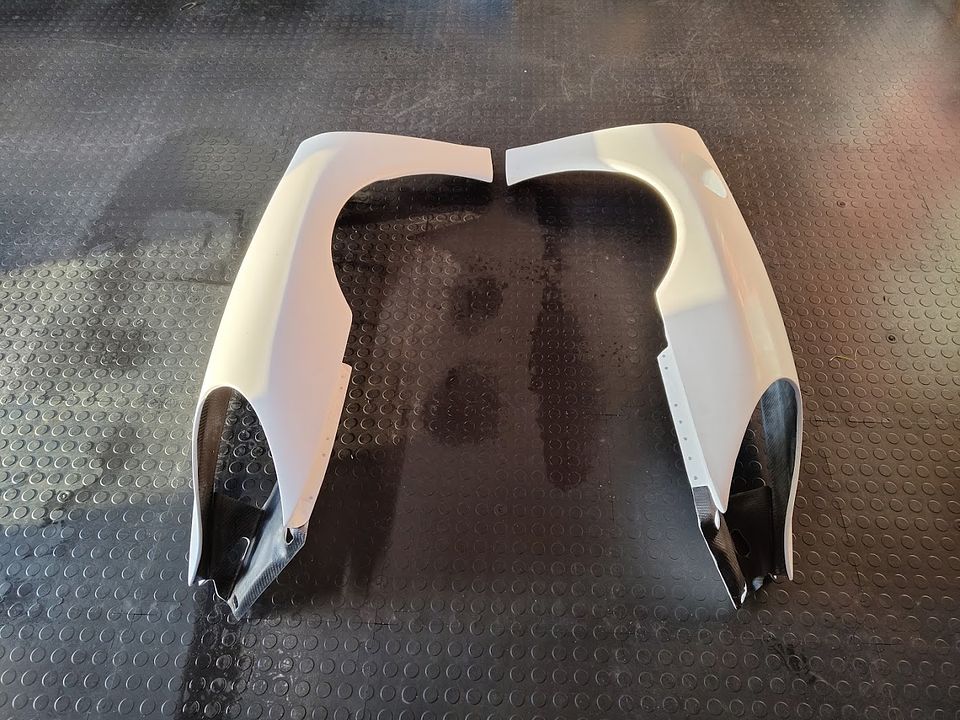
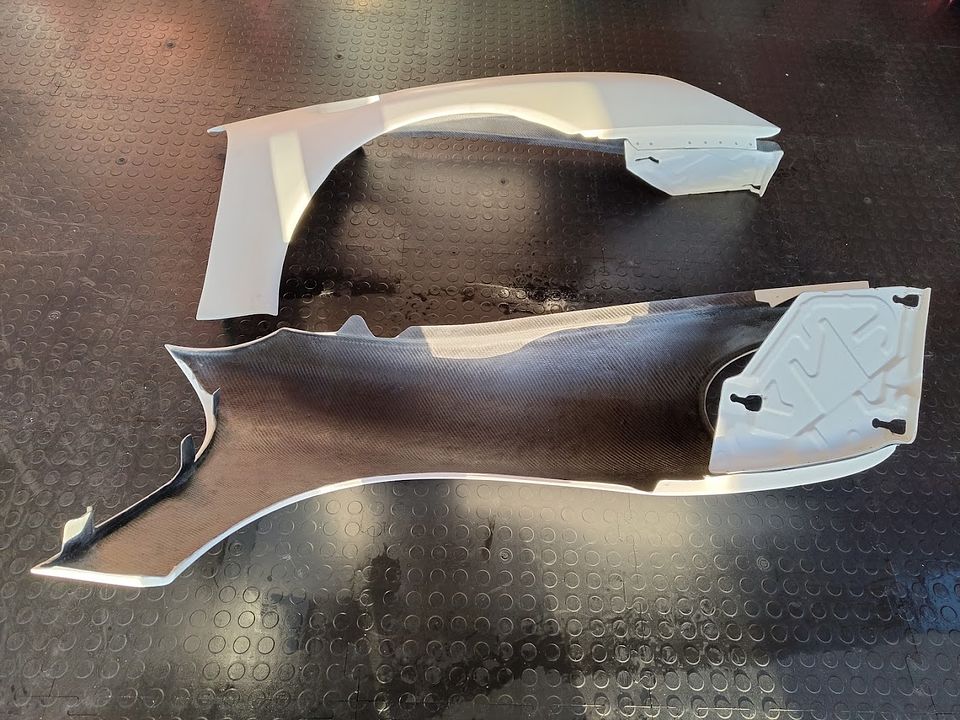
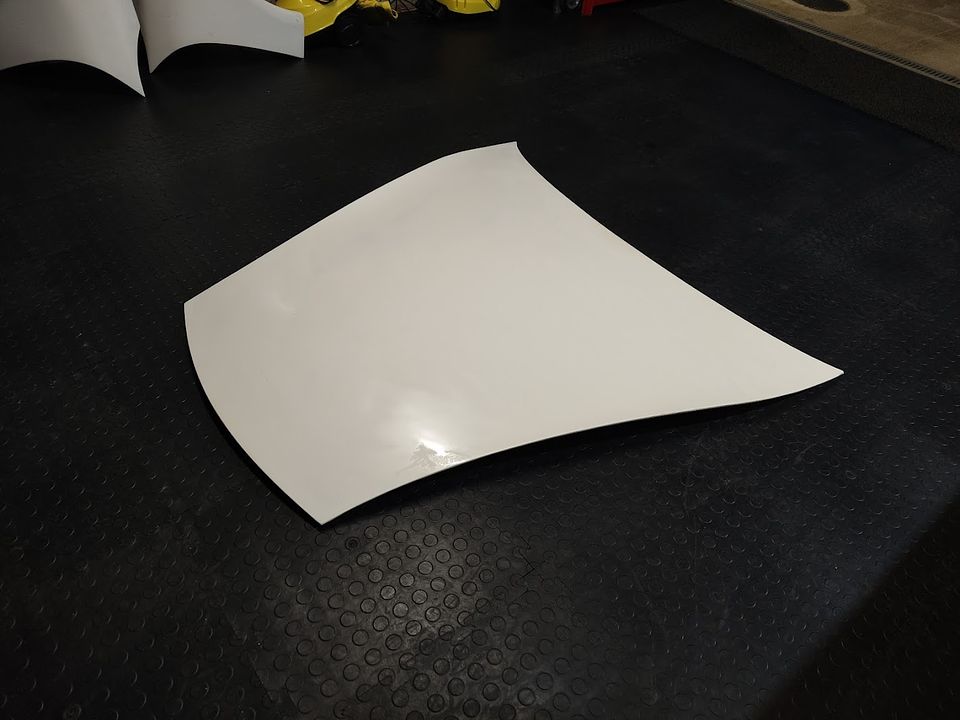
These are very much rally car parts designed to be stronger and lighter than the originals but not with the ultimate level of weight saving in mind..... although the combination of wings and bonnet are many kilos lighter than the originals! They're produced from splash moulds of the original parts so some cutting out required but they're as accurate as anything off that sort of tooling could possibly be, to the point I'm quite impressed despite my function over form approach.
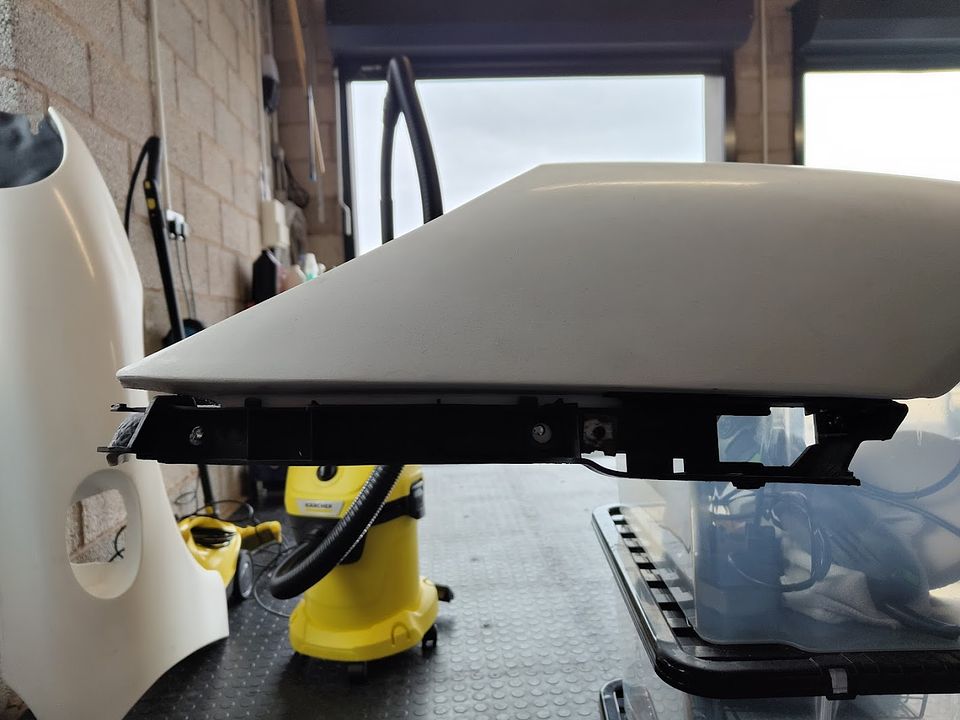
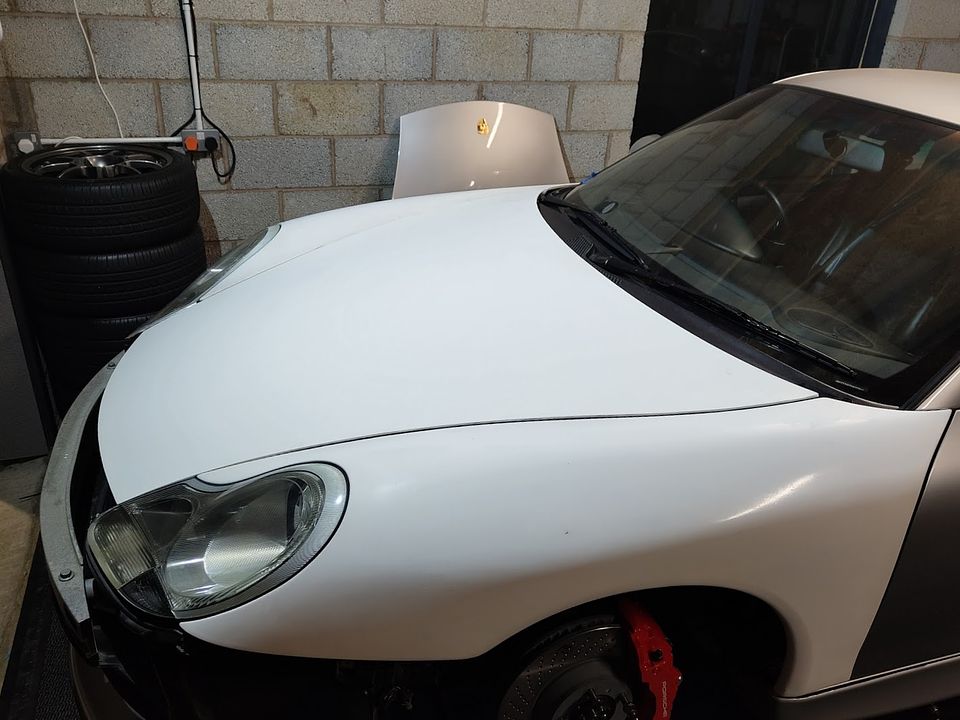
First job was to fit the bonnet and gap check against the original front wings. I made a template off the original bonnet to set the gap, in the end it was a super easy fit:
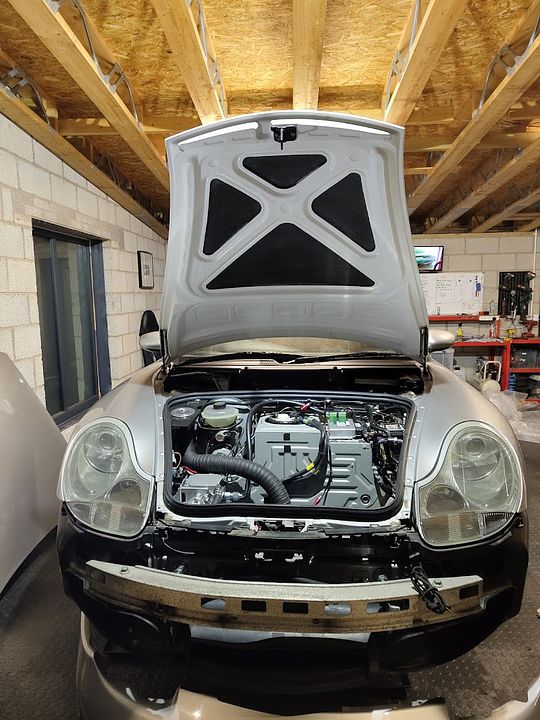
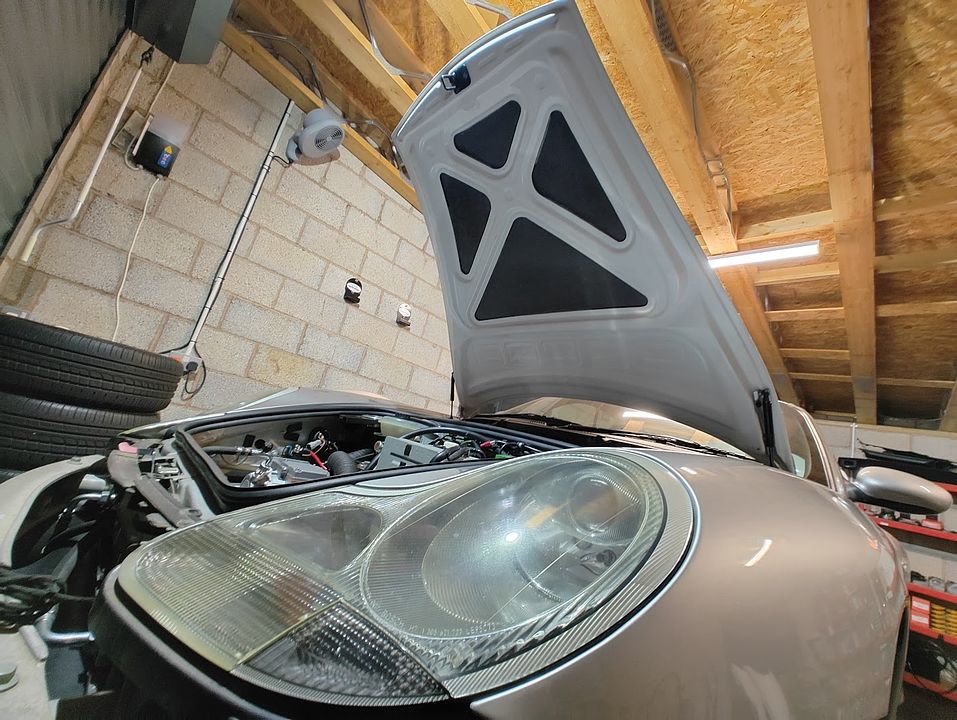

The bonnet is produced from two pieces bonded together to replicate the original upper and lower surfaces. As such it goes on with all the original hardware including the bonnet catch. It was a key thing for me that this didn't look carbon from outside and that the bonnet still secured off the original catch etc. (although I will run a limit strap on it just in case) as bonnet pins are for racing cars! Very pleased with the initial fit, the sizing is pretty spot on (not a given with composite!) and the panel gap against the original wings was good enough in terms of consistency of gap without having to mess about too much - if it still is on the composite ones we'll find out in due course
In a push to avoid having to start on the wings I decided to change the brake master which was well out of life by that point:
Came apart easily:
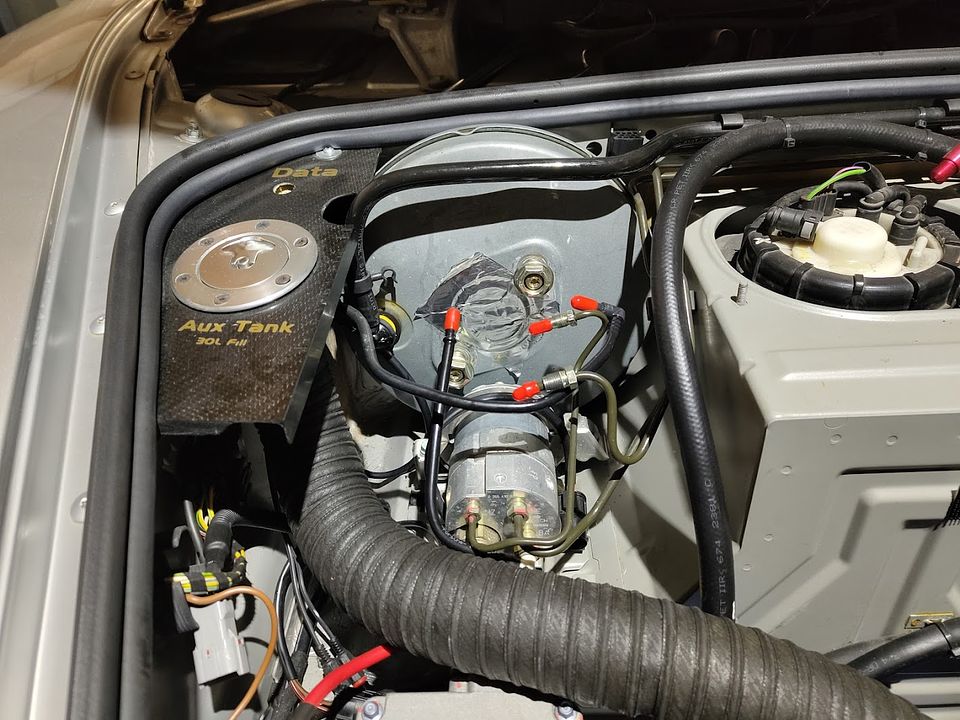
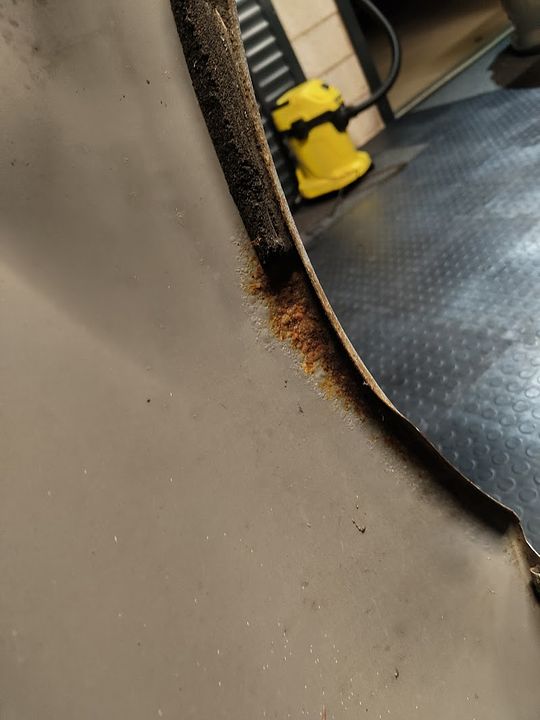
But the master had been weeping into the servo very slightly, in fact just enough to create the slightest mist of brake fluid under the servo.... just enough to bubble the paint so that meant the rest had to come out:
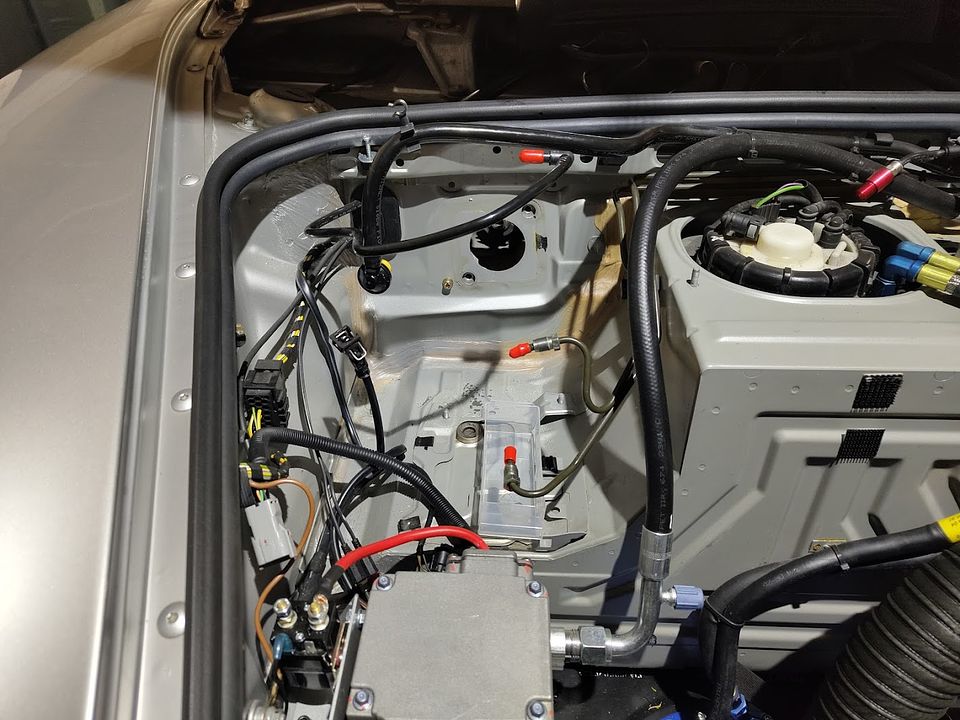
You can see the darker silver flecks where the brake fluid has done a mega job of stripping the paint. So now I'm waiting for some paint to arrive so I can make a reasonable repair as there's no excuse for leaving it to rust and I need some replacement long servo bolts as they are single use.
Still means I don't have to start on the wings just yet! Which is good because having properly assessed what I need to do to get them on I'm even less keen Some highlights are getting the head light trays to fit properly, creating a mounting location for the fuel flap mechanism (not sure if I am going to salvage the metal one from the original wing and bolt in...) along with a stop for said flap and cutting in all the mounting holes etc. function over form though, right?
So first off the inner heat shields were unrecoverable and new ones have a lead time so having had a good work out what they're actually protecting I've replaced them with some genuine race car stick on gold which should stop the rear light clusters melting!
I wouldn't try this on a 996 turbo as the surface temps etc. are way higher in the exhaust but for mine where it's only really dealing with radiated heat from the exhaust cans this should do the trick, especially as one has been completely missing since a Monaco rally in 2018
With both sides done the rear bumper went back on with new captive thread plates where required:
It'll need to come back off for paint but at the very least I can make sure all the fittings are present, correct and useable at this point!
I'd dragged all the carbon bits out of storage before Xmas so as I couldn't find anything else to delay the inevitable I unwrapped them all and wiped them down:
These are very much rally car parts designed to be stronger and lighter than the originals but not with the ultimate level of weight saving in mind..... although the combination of wings and bonnet are many kilos lighter than the originals! They're produced from splash moulds of the original parts so some cutting out required but they're as accurate as anything off that sort of tooling could possibly be, to the point I'm quite impressed despite my function over form approach.
First job was to fit the bonnet and gap check against the original front wings. I made a template off the original bonnet to set the gap, in the end it was a super easy fit:
The bonnet is produced from two pieces bonded together to replicate the original upper and lower surfaces. As such it goes on with all the original hardware including the bonnet catch. It was a key thing for me that this didn't look carbon from outside and that the bonnet still secured off the original catch etc. (although I will run a limit strap on it just in case) as bonnet pins are for racing cars! Very pleased with the initial fit, the sizing is pretty spot on (not a given with composite!) and the panel gap against the original wings was good enough in terms of consistency of gap without having to mess about too much - if it still is on the composite ones we'll find out in due course
In a push to avoid having to start on the wings I decided to change the brake master which was well out of life by that point:
Came apart easily:
But the master had been weeping into the servo very slightly, in fact just enough to create the slightest mist of brake fluid under the servo.... just enough to bubble the paint
so that meant the rest had to come out:You can see the darker silver flecks where the brake fluid has done a mega job of stripping the paint. So now I'm waiting for some paint to arrive so I can make a reasonable repair as there's no excuse for leaving it to rust and I need some replacement long servo bolts as they are single use.
Still means I don't have to start on the wings just yet!
Which is good because having properly assessed what I need to do to get them on I'm even less keen Some highlights are getting the head light trays to fit properly, creating a mounting location for the fuel flap mechanism (not sure if I am going to salvage the metal one from the original wing and bolt in...) along with a stop for said flap and cutting in all the mounting holes etc. function over form though, right? Mikeeb said:
I delighted to see you can procrastinate almost as well as me in avoiding those horrible jobs.
The trick is to always have something else that can be considered productive to do instead. That way you're not procrastinating you're just working through the required jobs list in a none linear order..... as they all need doing! poppopbangbang said:
The trick is to always have something else that can be considered productive to do instead. That way you're not procrastinating you're just working through the required jobs list in a none linear order..... as they all need doing!
There’s a remarkable similarity in our methodology 
Well maybe not blow by blow but I took a couple of pictures.... It wasn't as bad as it could have been although having said that I still have one side to go and that's the side which is even more of a pain in the arse!
As these are untrimmed for the most part the first job was to put in all the holes required to attached them to the car. First off everything was piloted, which usually you wouldn't do but there's little chance of accuracy otherwise due to the surface finish:

 [/URL]
Before being opened up to 10mm:

They look a bit unround in that pic but that's only the surface fibres, a quick touch with the flap wheel makes them look perfectly round.
With that done it's time to break out the death wheel and start chopping bits to clearance for all the bolt on bits, like the side repeater carrier / bumper mount:
And then finally the head light carrier mounts and a few holes to carry the wing support bar.
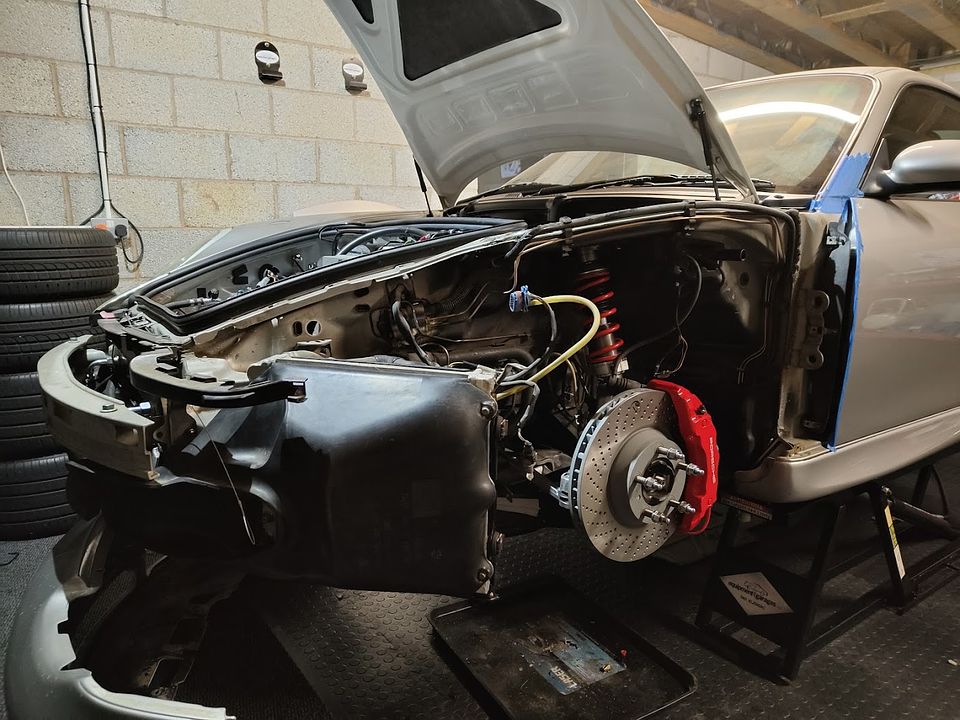
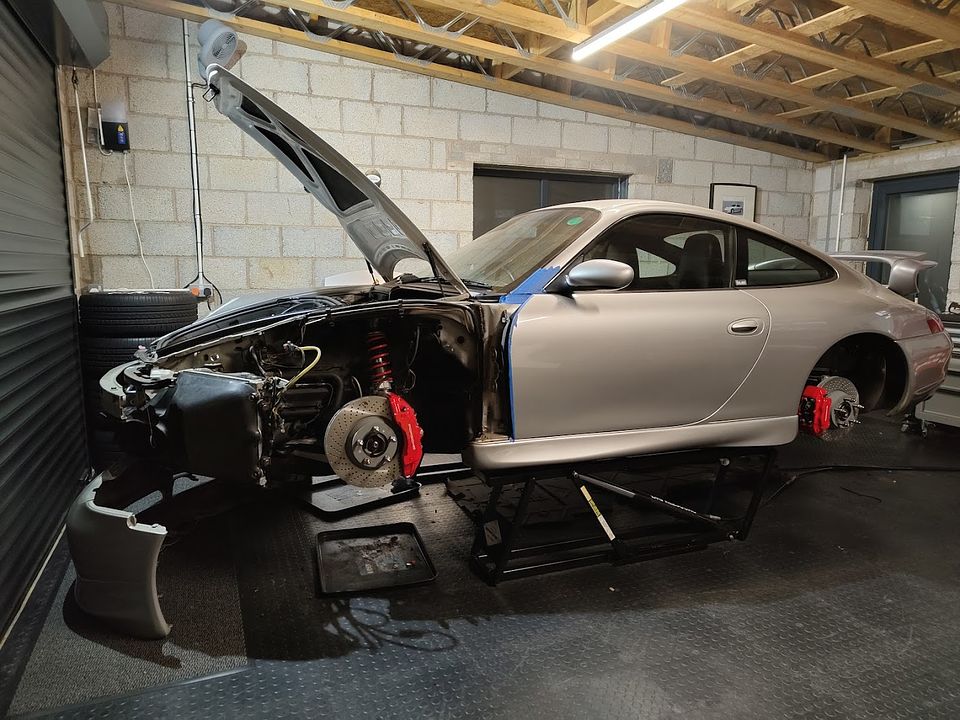
Then onto throwing it at the car and seeing how much it doesn't fit:
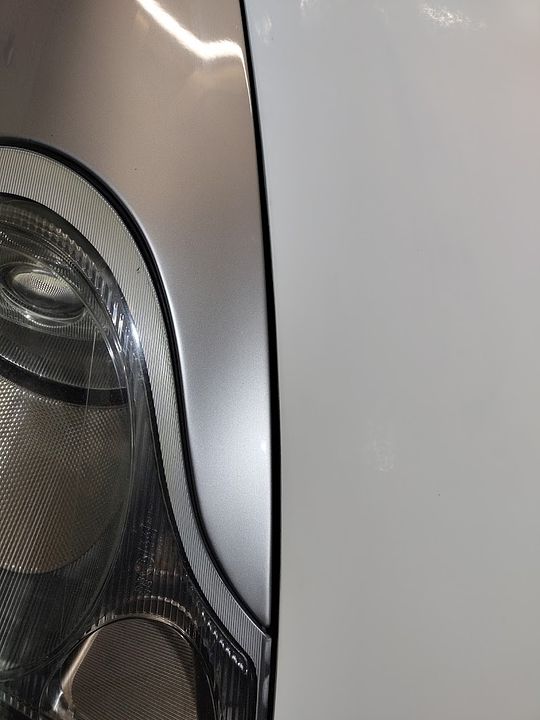
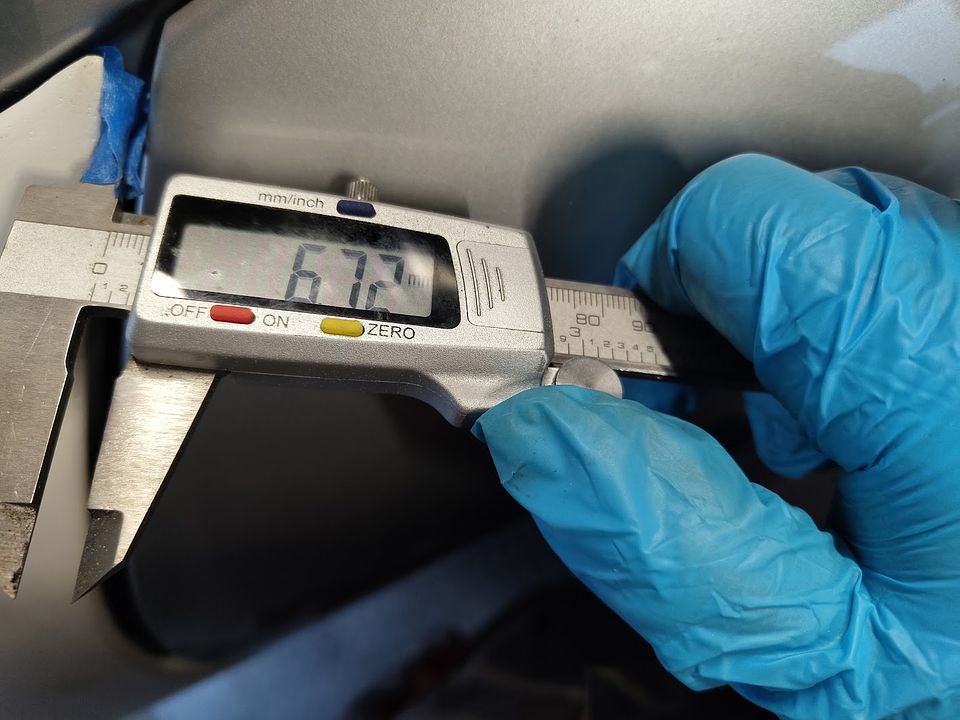
An hour or so of dicking around later and we were getting somewhere, carbon panels are always a massive pain as they don't bend like steel does and generally speaking have different thickness properties which means it's never one on and one off. Still these are the panel gaps between the standard, never been off the car, steel wing on one side and the carbon wing on the other:
Standard:
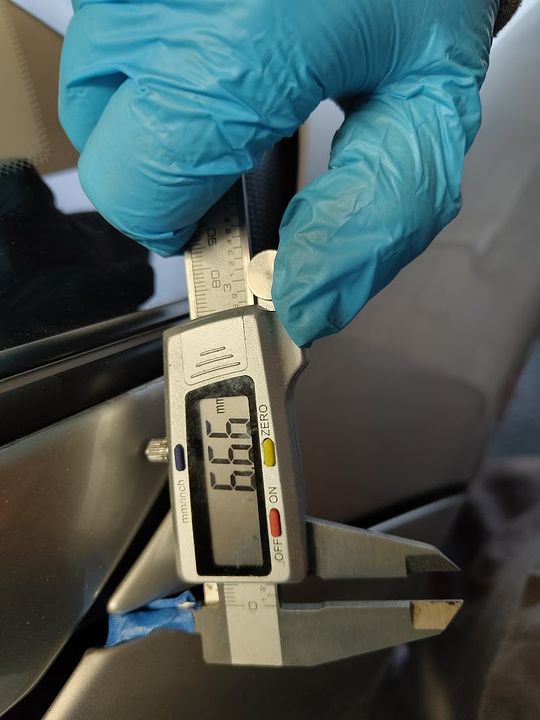
Carbon:
 [/URL]
Less than a tenth of a mm difference, I'll take that
Another hour of dicking around to get the headlight correct, all the adjustment here is in the tray so there is a lot of on and off required to set the mounts.
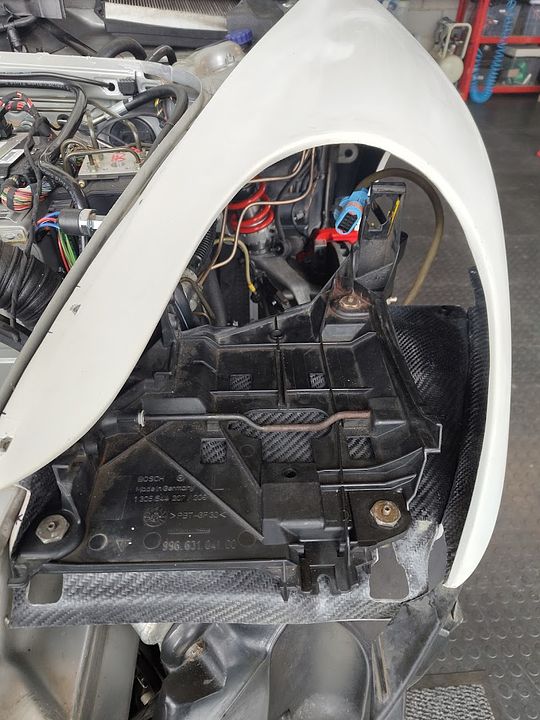
All fits up well in the end though, top tip is to keep one side as per so you have something to compare against - we're not going to insane concourse here - just no worse than standard
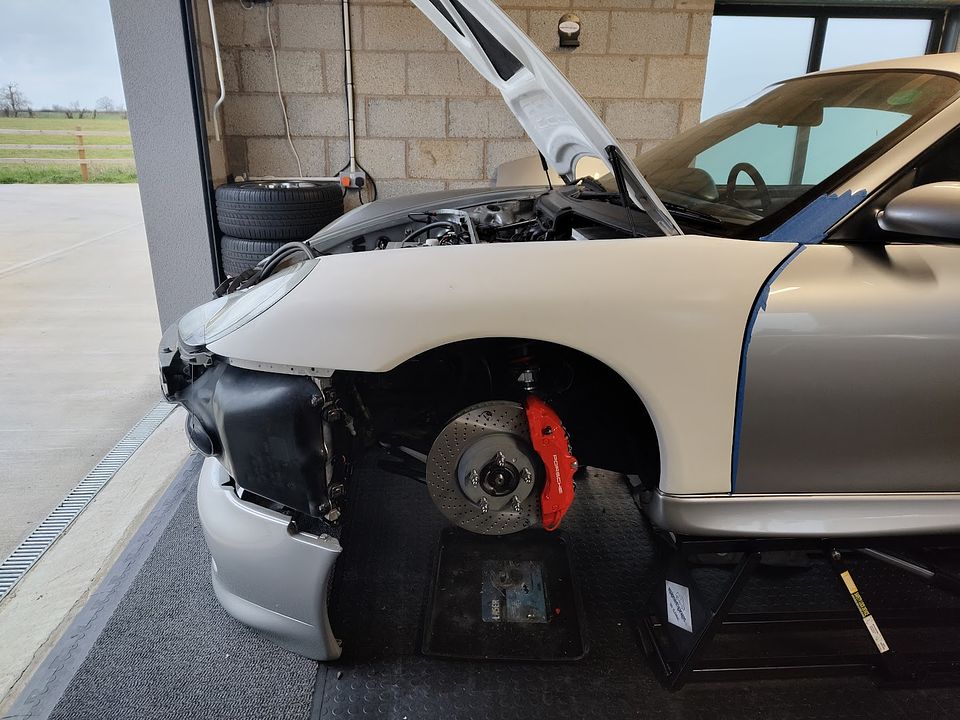
And with that side done I stripped the other wing off ready to make a start on that:
Of course this all needs to come back off again for final trim and both wings need some big heads bonding on for the lower wing mounts and side repeater carriers but for the most part this is 90% of the arse ache as it all lines up and fits. Here's hoping the other side does too!
Finally here's why the old wings had to go:
All of this could be fixed and isn't untypical for a very well used 996 but hey, good excuse to make a load of work and take some weight off right!
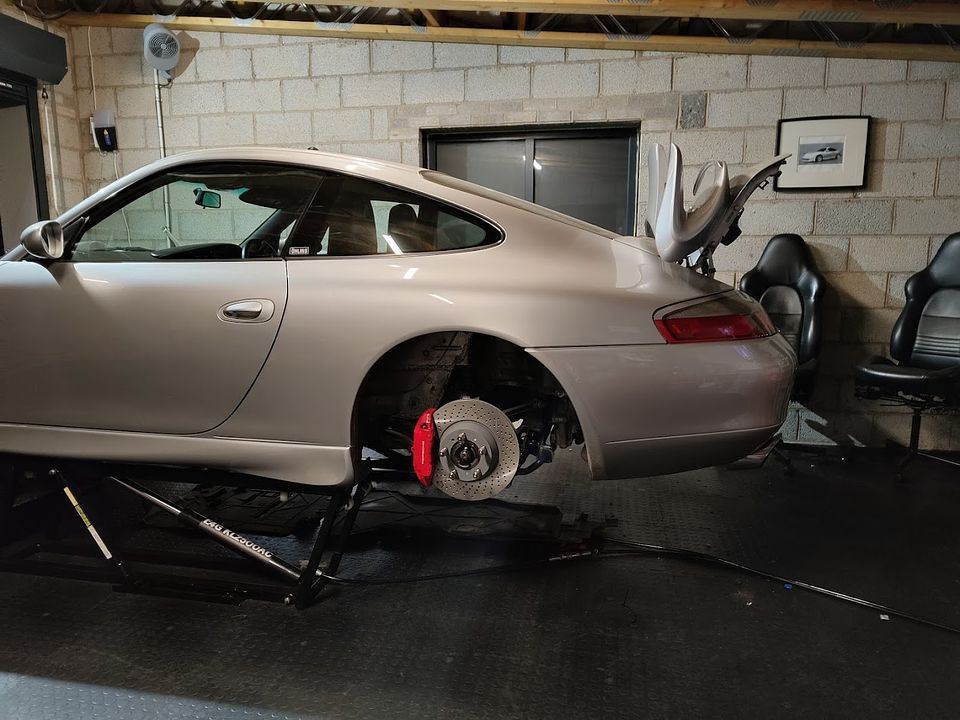
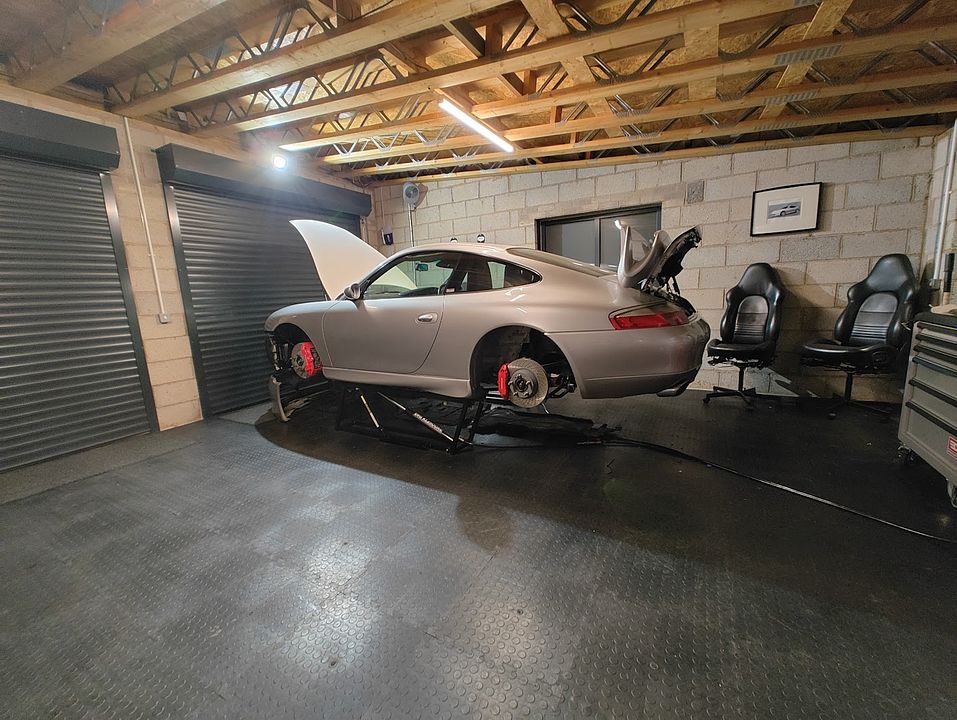
I'm expecting Ohlins to deliver the middle of the month so it can go back on its wheels then, I better get a wiggle on as I've got a bit in the rear arches to do before then too!
although having said that I still have one side to go and that's the side which is even more of a pain in the arse! As these are untrimmed for the most part the first job was to put in all the holes required to attached them to the car. First off everything was piloted, which usually you wouldn't do but there's little chance of accuracy otherwise due to the surface finish:
[/URL]Before being opened up to 10mm:
They look a bit unround in that pic but that's only the surface fibres, a quick touch with the flap wheel makes them look perfectly round.
With that done it's time to break out the death wheel and start chopping bits to clearance for all the bolt on bits, like the side repeater carrier / bumper mount:
And then finally the head light carrier mounts and a few holes to carry the wing support bar.
Then onto throwing it at the car and seeing how much it doesn't fit:
An hour or so of dicking around later and we were getting somewhere, carbon panels are always a massive pain as they don't bend like steel does and generally speaking have different thickness properties which means it's never one on and one off. Still these are the panel gaps between the standard, never been off the car, steel wing on one side and the carbon wing on the other:
Standard:
Carbon:
[/URL]Less than a tenth of a mm difference, I'll take that
Another hour of dicking around to get the headlight correct, all the adjustment here is in the tray so there is a lot of on and off required to set the mounts.
All fits up well in the end though, top tip is to keep one side as per so you have something to compare against - we're not going to insane concourse here - just no worse than standard
And with that side done I stripped the other wing off ready to make a start on that:
Of course this all needs to come back off again for final trim and both wings need some big heads bonding on for the lower wing mounts and side repeater carriers but for the most part this is 90% of the arse ache as it all lines up and fits. Here's hoping the other side does too!
Finally here's why the old wings had to go:
All of this could be fixed and isn't untypical for a very well used 996 but hey, good excuse to make a load of work and take some weight off right!
I'm expecting Ohlins to deliver the middle of the month so it can go back on its wheels then, I better get a wiggle on as I've got a bit in the rear arches to do before then too!
poppopbangbang said:
Well maybe not blow by blow but I took a couple of pictures.... It wasn't as bad as it could have been although having said that I still have one side to go and that's the side which is even more of a pain in the arse!
Thanks for explaining and sharing pictures - I can now understand why it really was a bit of a faff in places - really good std of fitment to get that close to the OE panel gaps - will be completely stealth when painted although having said that I still have one side to go and that's the side which is even more of a pain in the arse! 
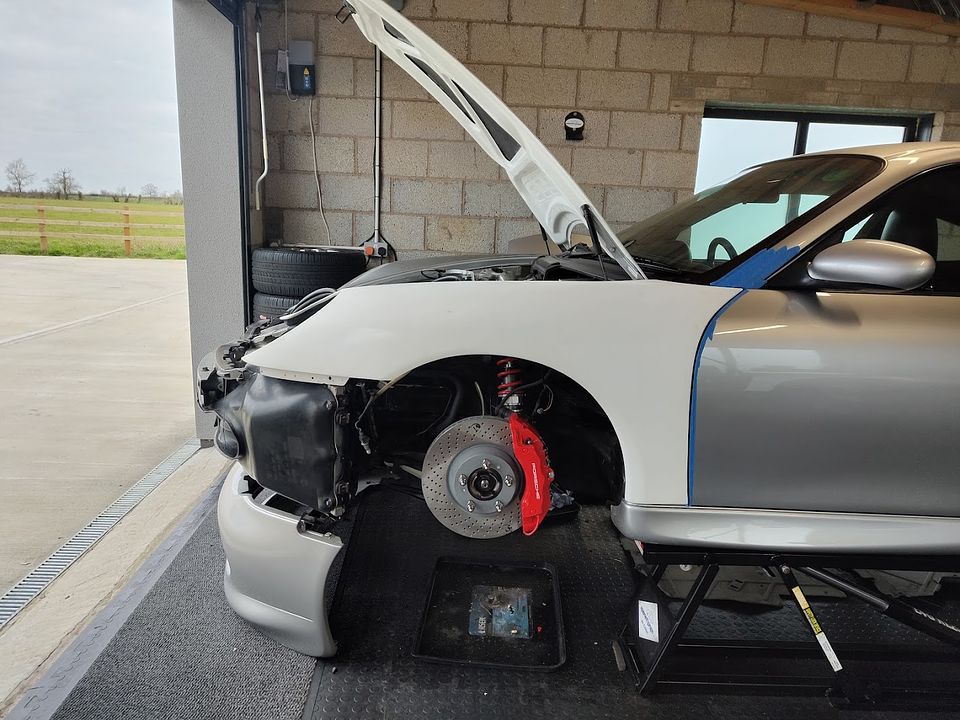
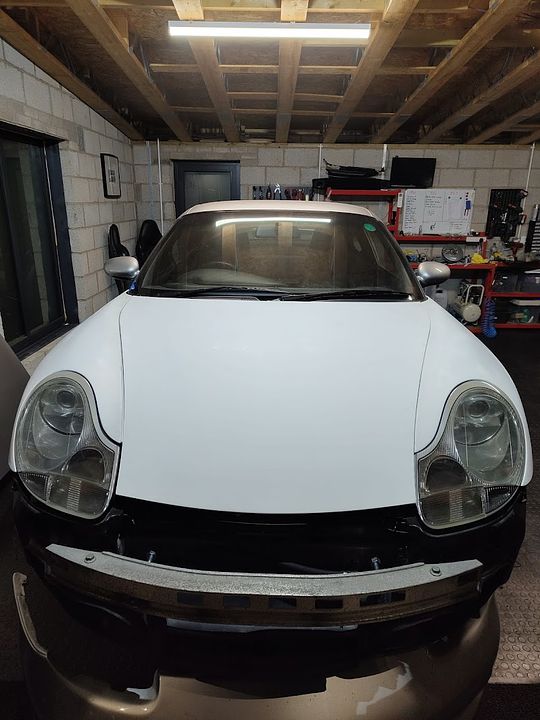
Other side is on:

 [/URL]
Now it's all got to come back off again to cut in the rest of the bonnet bits (like the rubber stop block holes), bond on the big heads that secure the lower wing sections, oval a few holes where a bit more adjustment is required and then put it all back together again with acceptable panel gaps....... but it's on, it'll all fit and the critical gaps are all spot on so the rest will bend to fit from there
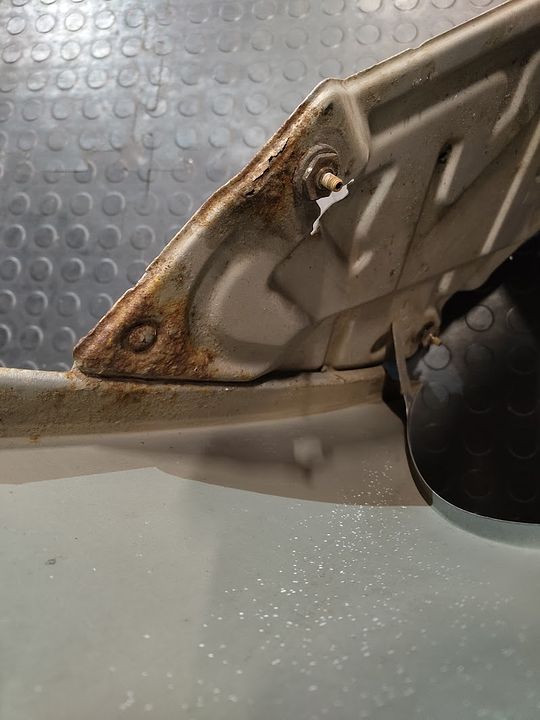
Oh and this is a total result:

Fuel filler and surround fit a treat - just got to sort out fitting the flap now!
The ends not quite in sight yet as I've still got to sort and fit new side skirts and a load of associated bits as well as fit all the bits that are currently on order..... like the rear dampers.
[/URL]Now it's all got to come back off again to cut in the rest of the bonnet bits (like the rubber stop block holes), bond on the big heads that secure the lower wing sections, oval a few holes where a bit more adjustment is required and then put it all back together again with acceptable panel gaps....... but it's on, it'll all fit and the critical gaps are all spot on so the rest will bend to fit from there
Oh and this is a total result:
Fuel filler and surround fit a treat - just got to sort out fitting the flap now!
The ends not quite in sight yet as I've still got to sort and fit new side skirts and a load of associated bits as well as fit all the bits that are currently on order..... like the rear dampers.
Gassing Station | Readers' Cars | Top of Page | What's New | My Stuff