Mazda MX6 2.5 V6 manual
Discussion


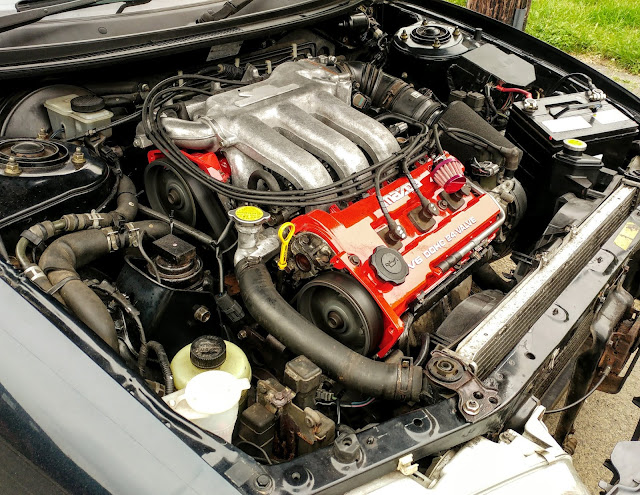
I managed to have a busy day in the garage yesterday, I've finally got the motor back together. The battery was quite flat so I've left it charging, fingers crossed it all leaps into life when I turn the key, I've not tried it yet...

Besides nailing everything back down I had a few more parts to finish installing. I put a couple of new temp sensors in, the gauge wasn't getting to the 12 o'clock position even though the engine seemed to be running hot, I'm hoping these with the new thermostat will have the cooling issues sorted.

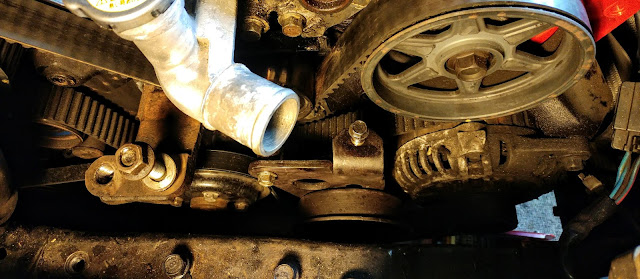
I fitted the new drive belts. As I had deleted the air con and removed the compressor, a new shorter belt just runs the alternator now. The second belt drives the water pump and power steering.
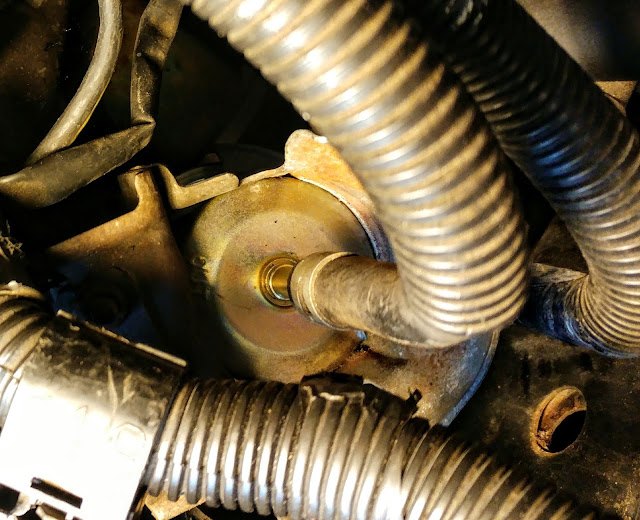
And for good measure I dropped in a new fuel filter. The engine was running slightly lean before causing an MOT fail, I wanted to rule out a blocked fuel filter causing a drop in fuel rail pressure, plus had no idea when it was last changed...
Besides nailing everything back down I had a few more parts to finish installing. I put a couple of new temp sensors in, the gauge wasn't getting to the 12 o'clock position even though the engine seemed to be running hot, I'm hoping these with the new thermostat will have the cooling issues sorted.
I fitted the new drive belts. As I had deleted the air con and removed the compressor, a new shorter belt just runs the alternator now. The second belt drives the water pump and power steering.
And for good measure I dropped in a new fuel filter. The engine was running slightly lean before causing an MOT fail, I wanted to rule out a blocked fuel filter causing a drop in fuel rail pressure, plus had no idea when it was last changed...
...so, she lives again. The motor fired up with no problems so everything seems to be reconnected okay, it just took a little while for pressurise to build up in the fuel rails again. I had a high idle which I was expecting as I obviously didn't know the where the TB bleed screw needed to be set, so backed it off so something more reasonable.
Annoyingly I've still got a somewhat hessitant/lumpy idle that surges a bit, I was crossing my fingers and hoping that getting rid of any potential vacuum leaks and a potentially faulty IACV would have improved this. I noticed that the distributer cap contacts aren't in the best shape when I removed and inspected the cap so I'm planning to change that and the rotor. I'm also still wondering whether I should get the injectors cleaned, I'm thinking I probably will...
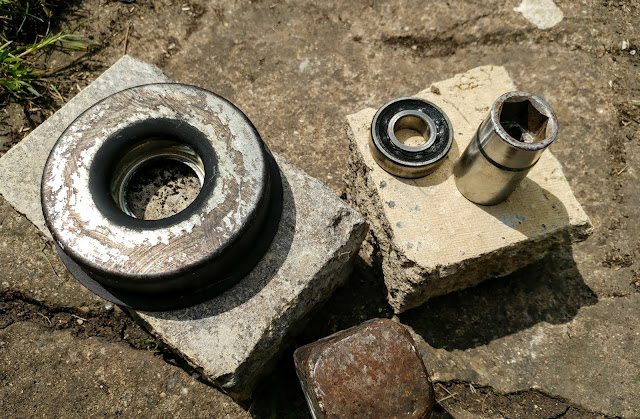
I forgot that I had a noisy metal grinding sound when the engine was running before, so I soon rediscovered that. When I removed the alternator belt tensioner pulley I found this to be the culprit with a knackered bearing. The noise seems even worse now, probably due to the new drive belt being tighter than the old one was. A new pulley seems very expensive at £40+ when I looked, but I found out that these have a 6203 DDR bearing which I ordered for £4.85 and can just press in to fix my current one.
Anyhow besides these few issues the engine seems responsive and rev's cleanly up to the limiter. I'm planning to go for a quick spin up and down the road to she how things feel and if there are any other foibles.
Annoyingly I've still got a somewhat hessitant/lumpy idle that surges a bit, I was crossing my fingers and hoping that getting rid of any potential vacuum leaks and a potentially faulty IACV would have improved this. I noticed that the distributer cap contacts aren't in the best shape when I removed and inspected the cap so I'm planning to change that and the rotor. I'm also still wondering whether I should get the injectors cleaned, I'm thinking I probably will...
I forgot that I had a noisy metal grinding sound when the engine was running before, so I soon rediscovered that. When I removed the alternator belt tensioner pulley I found this to be the culprit with a knackered bearing. The noise seems even worse now, probably due to the new drive belt being tighter than the old one was. A new pulley seems very expensive at £40+ when I looked, but I found out that these have a 6203 DDR bearing which I ordered for £4.85 and can just press in to fix my current one.
Anyhow besides these few issues the engine seems responsive and rev's cleanly up to the limiter. I'm planning to go for a quick spin up and down the road to she how things feel and if there are any other foibles.
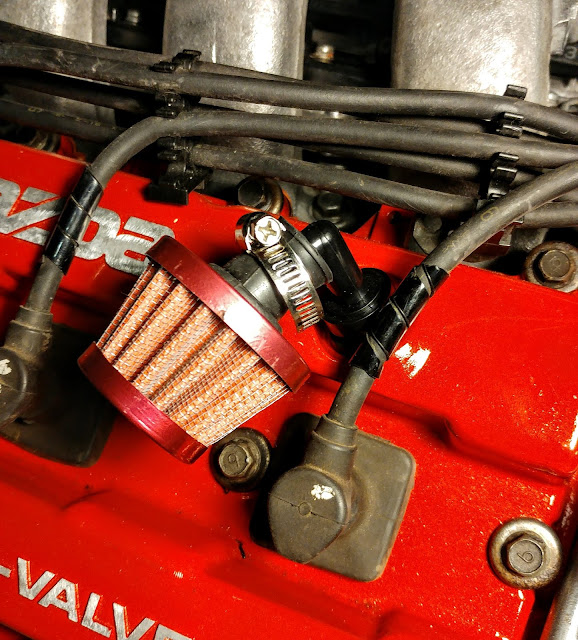
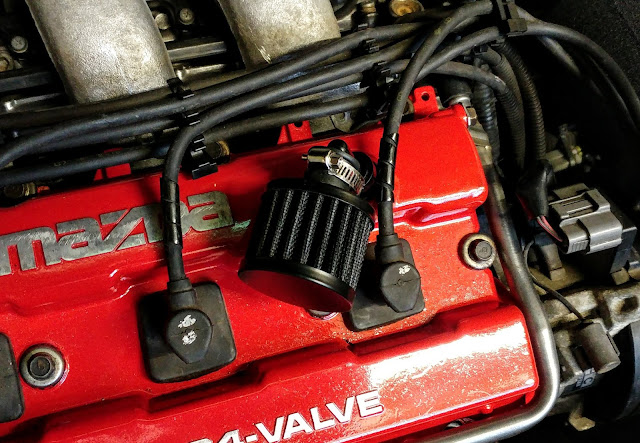
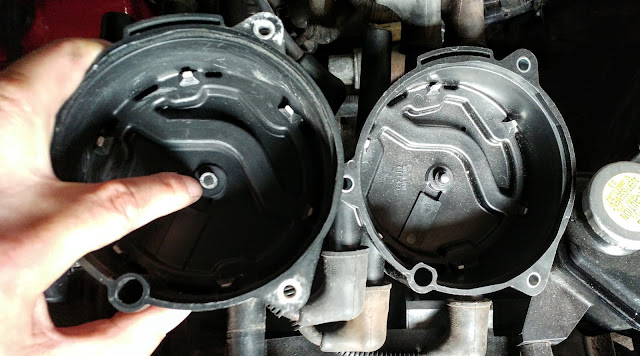
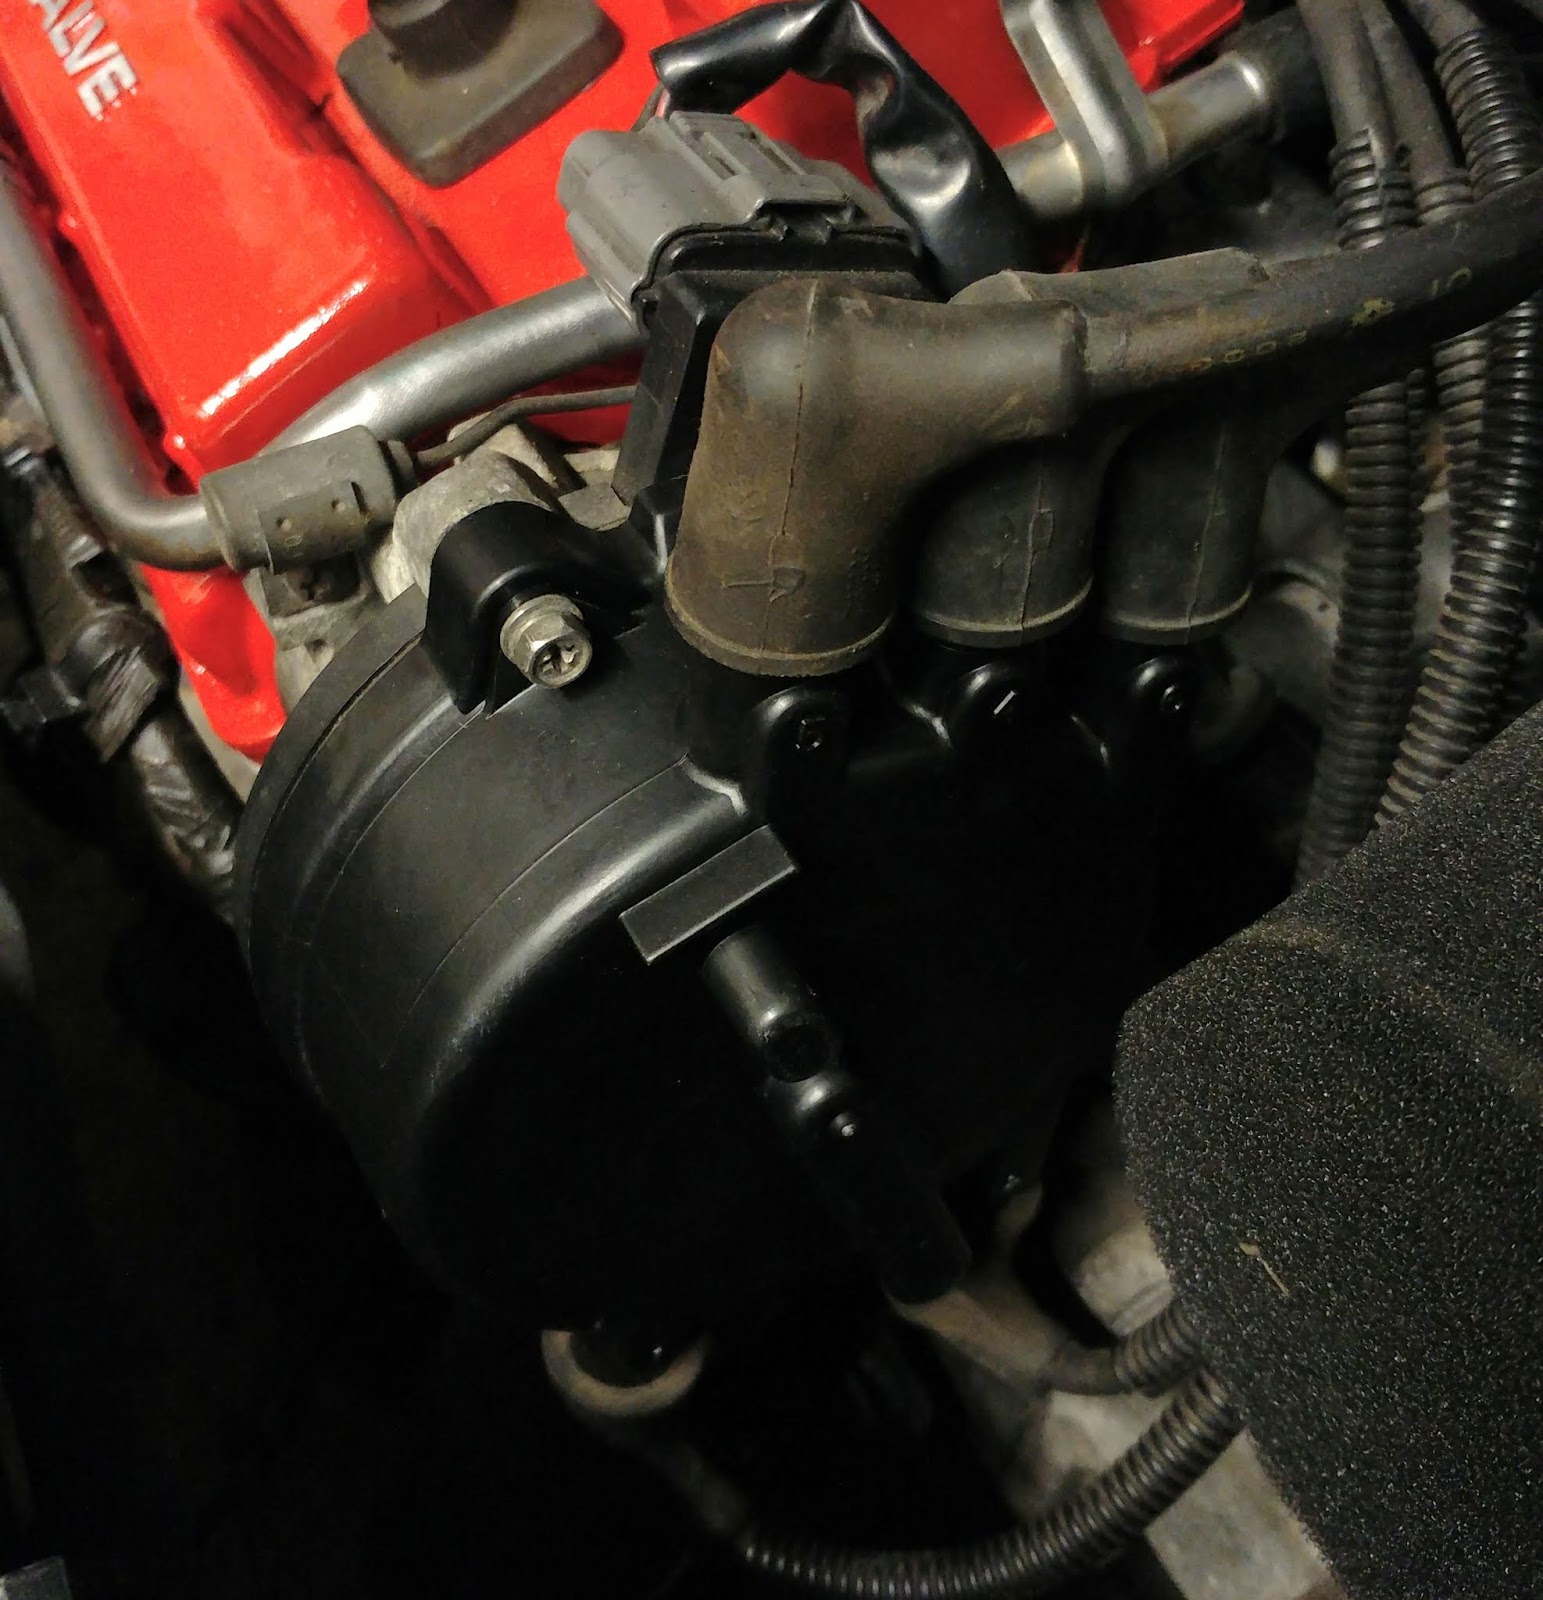
Thanks Brett. I've had a play around and managed to get the KL-DE idling better now. One change is that I've fitted a breather filter to the PCV valve now, as standard it has a vacuum line that connects to a port on the intake manifold which I've now capped off (for emissions reasons the PCV basically recirculates crankcase fumes into the intake and burns them, but the engine should run better without ingesting oil vapors). I think there must have been an excessive amount of unmetered air being drawn in, the idle seems significantly more stable than it was with much less surging and lumpyness.
The breather filter now just vents to atmosphere, I bought it a while ago as a cheapy ebay item, it was supposed to be red but unfortunately it looks pink! It will do for now but I have ordered a black one.
I took the '6 for a quick spin up and down the road, the engine seems to be pulling nicely. One issue I still have is that the engine is running hot so the new thermostat hasn't sorted that. It could be that the rad is blocked or the water pump isn't pumping enough (I have a new pump waiting in abeyance), I'm pretty sure there is a fault with the cooling system, hoping it's not something more sinister like head gasket failure... In other news I seem to have broken the brakes as they now don't work. I'm not sure whether the caliper pistons have stuck from lack of use or the servo isn't getting vacuum which seems the more likely as I had the hose off... may have failed to refit the check valve, investigation required.
Edited by MX6 on Friday 1st June 13:59
Another KL job bashed out yesterday afternoon, quite literally in fact. As previously mentioned my alternator belt tensioner pulley has been making an unseemly row so I looked into getting a new one. The pulleys themselves seem to go for around £40-50+ which seemed steep to me, but after some online investigations I managed to find out the size and type of bearing they use so ordered up one of those for a much more cheapskate budget friendly £4.85. It was a 6203 2RS DDU C3 required, that's a 17x40x12mm size with a double rubber seal.

I popped the new bearing in the freezer and heated the pulley so that they would contract and expand respectively to make fitment somewhat easier. I just put the pulley across a couple of bricks to hammer out the old bearing with a socket over it. The new one was then pressed in with the vice.
The V6 idles nice and quietly now so that was another good improvement, pleased. The nexy thing I'm planning to do it pluck the rad out of the car and flush it through with water to see if it's partially blocked, I feel is that it probably is. If so I guess I will have to order a new one...
Edited by MX6 on Tuesday 5th June 12:28
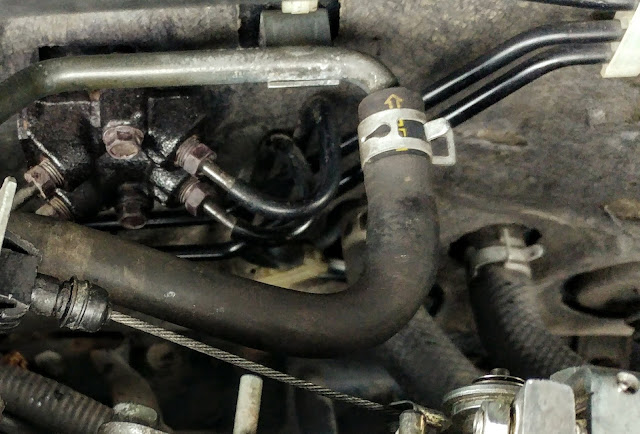
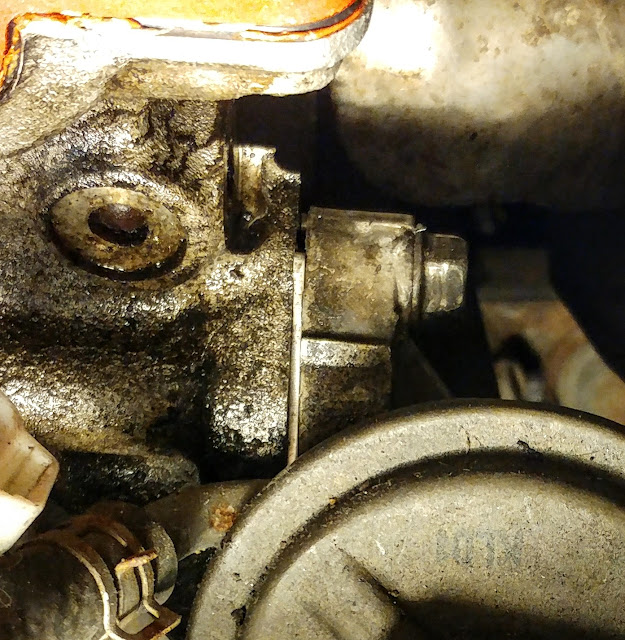
I fairly quickly realised why the brakes weren't working, the vac hose to the intake manifold has the one way check valve inside it, and I'd put it back on the wrong way around, brain fail. The yellow with the obscured text "ENG" should be facing the manifold, not the line to the servo.
So, finally off the stands and back t'road after an unintentionally long hiatus, brrrm brrrm
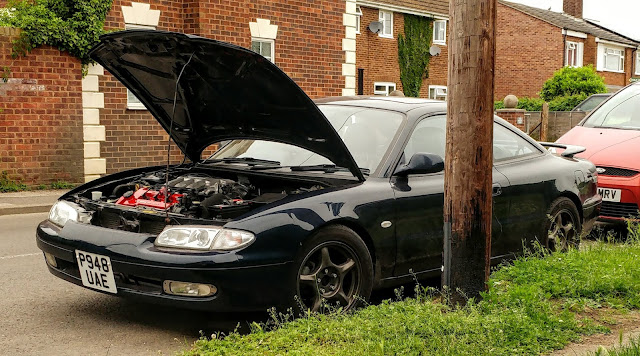
So, finally off the stands and back t'road after an unintentionally long hiatus, brrrm brrrm
Edited by MX6 on Tuesday 5th June 14:01
Thanks, the engine side of things is coming together but there's still work to do in there. I wasn't able to do anything over the weekend but got a bit of garage bit in last night so managed to get a few small jobs done.
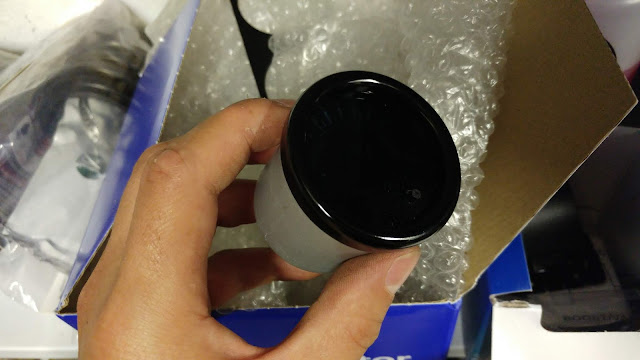
I couldn't abide by the pink PCV breather filter for much longer so it was a relief when the new black one finally arrived from China, it was a better fit as well, tighter.
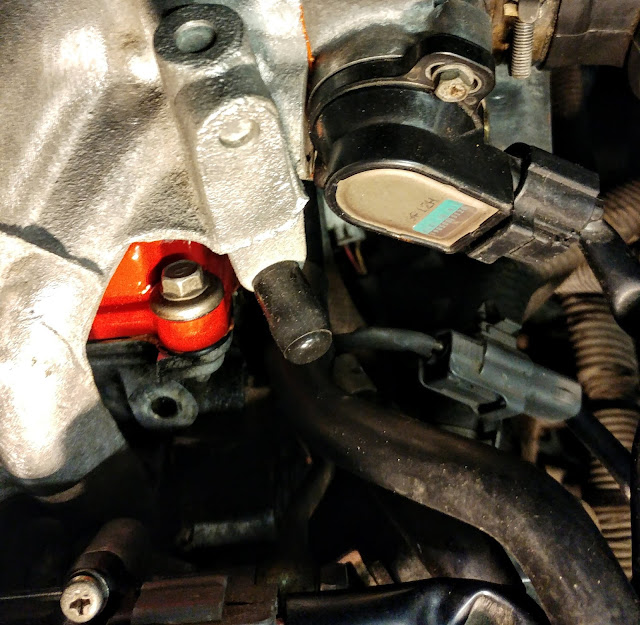
I've planned to fit an EGR blanking plate but had forgotten about it to be honest, rediscovered it on the parts shelf.

I had already disconnected the plug to the EGR and capped off the vacuum port but now it is properly blocked off at least.
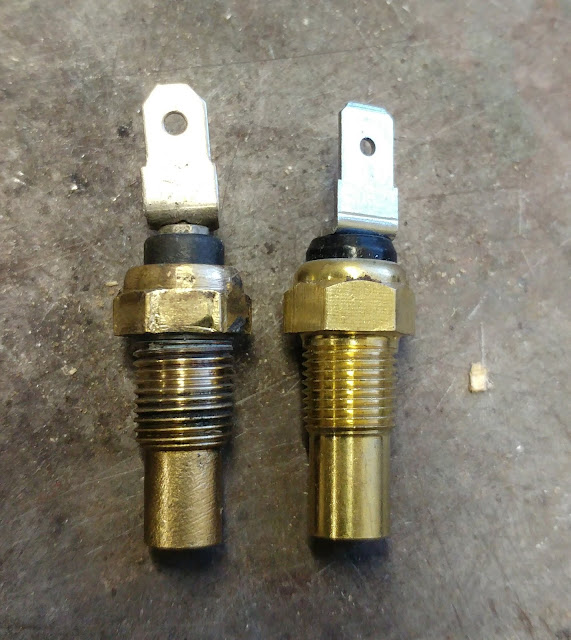
I cleaned up one of the coolant temp sensors previously but I still wasn't sure about it, I had a new one on the shelf so decided to pop that in.
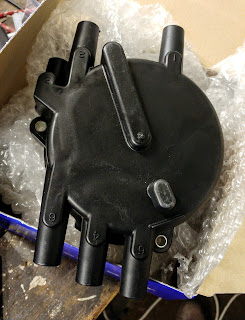
I did a grand unboxing of a new dissy that turned up this week, I've not fitted it yet, a job for another evening...
I couldn't abide by the pink PCV breather filter for much longer so it was a relief when the new black one finally arrived from China, it was a better fit as well, tighter.
I've planned to fit an EGR blanking plate but had forgotten about it to be honest, rediscovered it on the parts shelf.
I had already disconnected the plug to the EGR and capped off the vacuum port but now it is properly blocked off at least.
I cleaned up one of the coolant temp sensors previously but I still wasn't sure about it, I had a new one on the shelf so decided to pop that in.
I did a grand unboxing of a new dissy that turned up this week, I've not fitted it yet, a job for another evening...
So new dissy nailed on. As I suspected it was a bit of a weak link, upon inspection I found the sprung central pin that makes contact with the rotor was worn away to nothing, right down to the plastic! So I'm not really sure how it even still worked...
It seems to be another incremental improvement, the motor seems to run a little smoother now.
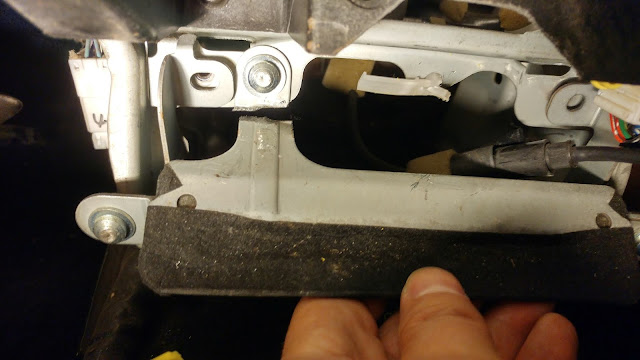
Another fix was the airbag warning light, it blinks when the airbag is removed (I'm running an aftermarket steering wheel) so I wanted/needed this sorted for the impending MOT. I checked the wiring schematic and found out which lines to the airbag module need a resistive load to mimic an install airbag, it's the red and yellow wires on this white socket. I put a 2.7 Ohm MRS25 resistor across the terminals, it worked so that's sorted. I just need to wire the horn now but ran out of time last night, think that's the only outstanding MOT issue, onwards and upwards.

It seems to be another incremental improvement, the motor seems to run a little smoother now.
Another fix was the airbag warning light, it blinks when the airbag is removed (I'm running an aftermarket steering wheel) so I wanted/needed this sorted for the impending MOT. I checked the wiring schematic and found out which lines to the airbag module need a resistive load to mimic an install airbag, it's the red and yellow wires on this white socket. I put a 2.7 Ohm MRS25 resistor across the terminals, it worked so that's sorted. I just need to wire the horn now but ran out of time last night, think that's the only outstanding MOT issue, onwards and upwards.
Well, a little update, issues. I had the car MOT'ed again and passed on everything besides the fast idle lambda, again. It seems to have improved a bit from the last MOT attempt (before I attempted to iron out any potential vaccum leaks) but was still reading lean with a lambda reading of 1.06 (an MOT pass is between 0.97 and 1.03).
I've been having a think about what is causing this under-fueling. Obvious parts to consider are the lambda sensors themselves, though they usually fail reading lean and hence the ECU compensates by over-fuels to give a rich mixture rather than lean. After a visual inspection it appears that the lambda sensors aren't original and look as if they have been previously replaced, I'm planning to have a better check over the wiring but all seems fine after a cursory squint.
Another consideration is the aftermarket intake set-up I am running, I've a foam cone air filter in place of the standard airbox. If this flows more air like it should then the ECU may not be compensating by adding extra fuel. One reason for this is that the KL-DE in the MX6 has a low-tech VAF sensor (vane airflow sensor) as opposed to a MAF the like of which is found in just about every car these days. The vane is basically a sprung cone in the intake tract, the incoming air pressure pushes back the cone and this movement controls a variable resistor to give the ECU the sensor reading. The problem is with it that it is a lot less accurate than a MAF particular at small throttle openings where there is little to no vane movement. As such the ECU is effectively running an open loop fuel map at light throttle so extra air may not be accounted for.
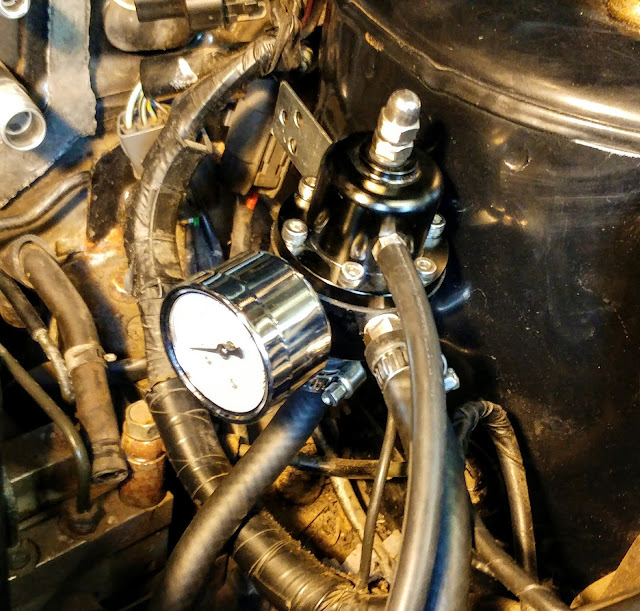
So, ways to sort out the fueling. I've already mentioned in this thread that I've got an alternative ECU to run the engine, one from a manual Xedos 9 that had the same KL_DE 2.5 V6 engine. It's a more high-tech ECU that works this a MAF sensor and has better control over fueling, it is more or less plug 'n' play so I'm planning to give this a go. I've also ordered a few cheap parts, one of which is a cheap narrowband lambda gauge. This won't give accurate lambda or AFR readings but it will show whether the sensors are in fact working and if they are seeing a generally rich or lean mixture in the exhaust. I've ordered a three hole din gauge panel to mount 52mm gauges under the radio where the clock currently resides.

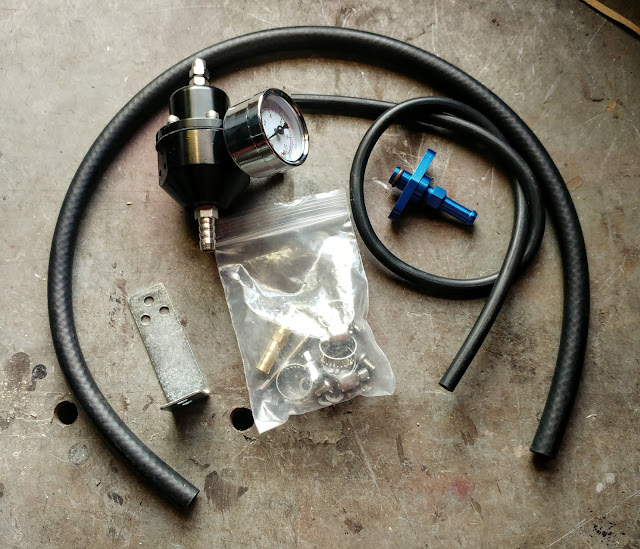
I've also bought an adjustable fuel pressure regulator, which will simply allow me to increase fuel pressure in an attempt to get the lambda closer to stoich and a reading of 1.0. If the lambda sensors are faulty it might be that the ECU will try and lean out the mixture again by decreasing the injector duty cycle, I'm guessing that it won't but we'll see. I may also be that there is a problem with the current fuel pressure regulator in which case this may well fix that problem.
I had an advisory for the CV boots on the passenger side so I bought another new driveshaft, having already replaced the drivers side a little while ago...

I've been having a think about what is causing this under-fueling. Obvious parts to consider are the lambda sensors themselves, though they usually fail reading lean and hence the ECU compensates by over-fuels to give a rich mixture rather than lean. After a visual inspection it appears that the lambda sensors aren't original and look as if they have been previously replaced, I'm planning to have a better check over the wiring but all seems fine after a cursory squint.
Another consideration is the aftermarket intake set-up I am running, I've a foam cone air filter in place of the standard airbox. If this flows more air like it should then the ECU may not be compensating by adding extra fuel. One reason for this is that the KL-DE in the MX6 has a low-tech VAF sensor (vane airflow sensor) as opposed to a MAF the like of which is found in just about every car these days. The vane is basically a sprung cone in the intake tract, the incoming air pressure pushes back the cone and this movement controls a variable resistor to give the ECU the sensor reading. The problem is with it that it is a lot less accurate than a MAF particular at small throttle openings where there is little to no vane movement. As such the ECU is effectively running an open loop fuel map at light throttle so extra air may not be accounted for.
So, ways to sort out the fueling. I've already mentioned in this thread that I've got an alternative ECU to run the engine, one from a manual Xedos 9 that had the same KL_DE 2.5 V6 engine. It's a more high-tech ECU that works this a MAF sensor and has better control over fueling, it is more or less plug 'n' play so I'm planning to give this a go. I've also ordered a few cheap parts, one of which is a cheap narrowband lambda gauge. This won't give accurate lambda or AFR readings but it will show whether the sensors are in fact working and if they are seeing a generally rich or lean mixture in the exhaust. I've ordered a three hole din gauge panel to mount 52mm gauges under the radio where the clock currently resides.
I've also bought an adjustable fuel pressure regulator, which will simply allow me to increase fuel pressure in an attempt to get the lambda closer to stoich and a reading of 1.0. If the lambda sensors are faulty it might be that the ECU will try and lean out the mixture again by decreasing the injector duty cycle, I'm guessing that it won't but we'll see. I may also be that there is a problem with the current fuel pressure regulator in which case this may well fix that problem.
I had an advisory for the CV boots on the passenger side so I bought another new driveshaft, having already replaced the drivers side a little while ago...
Edited by MX6 on Thursday 5th July 12:17
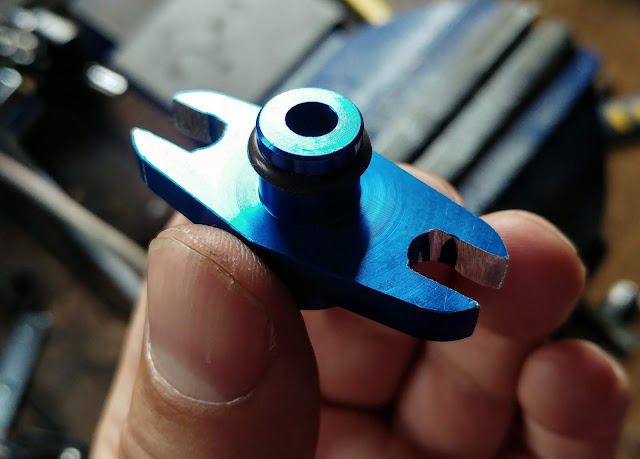
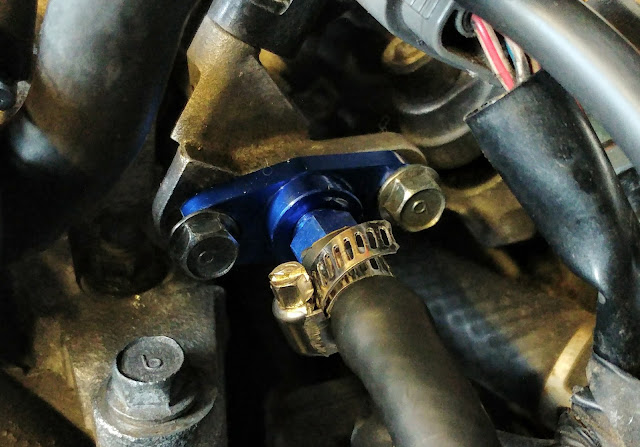
...so I've now fitted the adjustable fuel pressure regulator, nice and simple. It's just a cheap one (ebay £17.50) but seems to work fine so far. To fit the return fuel line to the fuel rail in place of the I needed an adapter so managed to find a cheapo one I thought would work, unfortunately in anodized blue not black (ebay £4.99).
The adapter fitted into the fuel rail nicely but the pitch of the fixing holes was too narrow so I opened out the holes to slots. I had to use some PTFE tape on the threads of the fitting as it leaked a little fuel at first.
I mounted the regulator with the bracket provided to an unused fixing stud already sticking out of the strut tower.
More soon...

MX6 said:
Thanks. 
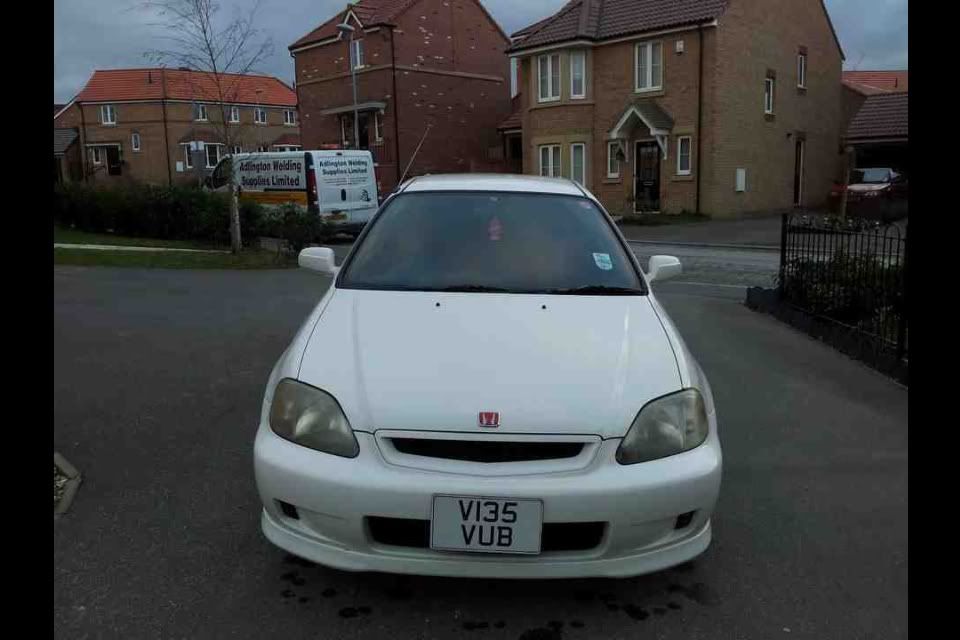
Do you mean a plate like this? I deleted the plastic holder for the rectangle plate and have put a square plate in the bumper recess behind it...
this is the japanese size that you want, 13x7Do you mean a plate like this? I deleted the plastic holder for the rectangle plate and have put a square plate in the bumper recess behind it...
http://www.tegiwaimports.com/jdm-size-13-x-7-squar...

Edited by fernando the frog on Thursday 2nd August 16:25
Edited by fernando the frog on Thursday 2nd August 16:26
Edited by fernando the frog on Thursday 2nd August 16:27
Well the JDM plate should fill the recess correctly so it should definitely look better. I notice that you mention re-badging too, I've actually been considering that. I do prefer the de-badged look but annoyingly removing them has left the fixing holes in the bonnet and boot lid. I was thinking that I'll fill and paint them but to be honest I just want to get the car tidy without making a lot of work for myself, so I'm thinking I might go down the blacked out badge route, what do you think?
So as I've mentioned before, I'm going for the Xedos 9 ECU and MAF swap/upgrade, since I have the parts I decided to get on with it. Removing the dash surround/bezel was easy enough.

Actually pulling the ECU wasn't so straight forward though, as it had a weird steel plate with tamper proof fixings retaining it, so I had to hacksaw through it.
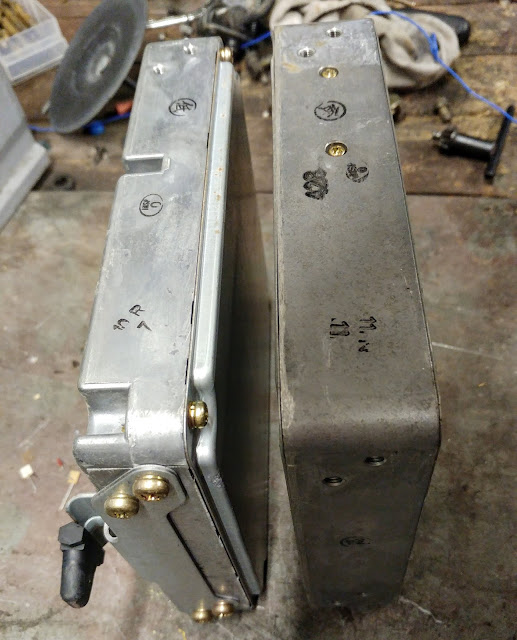
So once removed I could see that as expected the connectors are the same, the third socket from the left has no pins as it's for auto transmission equiped variants (I was very lucky to find the Xedos 9 2.5 V6 manual ECU, and for very cheap). They are the same physical size with the same fixing positions so it's essentially a plug-n-play swap, besides the wiring for the MAF and IAT sensors.

So while the dash surround is off I'm going to fit a DIN three hole gauge panel. I've bought an Addco air/fuel ratio gauge (£27.95) so that will be the first to be fitted. I choose this one as it can be switched to meter narrowband or wideband lambda sensors, as I want to use it narrowband initially, then wideband down the line for turbo. Plus it has a switchable backlight colour that can be set to green, to match the dash instrumentation.

Just to add, the DIN slot where the gauge panel is going is in place of the clock which I am deleting, the above slot is for the headunit, planning to get a cheapy bluetooth one to fill that hole...
So as I've mentioned before, I'm going for the Xedos 9 ECU and MAF swap/upgrade, since I have the parts I decided to get on with it. Removing the dash surround/bezel was easy enough.
Actually pulling the ECU wasn't so straight forward though, as it had a weird steel plate with tamper proof fixings retaining it, so I had to hacksaw through it.
So once removed I could see that as expected the connectors are the same, the third socket from the left has no pins as it's for auto transmission equiped variants (I was very lucky to find the Xedos 9 2.5 V6 manual ECU, and for very cheap). They are the same physical size with the same fixing positions so it's essentially a plug-n-play swap, besides the wiring for the MAF and IAT sensors.
So while the dash surround is off I'm going to fit a DIN three hole gauge panel. I've bought an Addco air/fuel ratio gauge (£27.95) so that will be the first to be fitted. I choose this one as it can be switched to meter narrowband or wideband lambda sensors, as I want to use it narrowband initially, then wideband down the line for turbo. Plus it has a switchable backlight colour that can be set to green, to match the dash instrumentation.
Just to add, the DIN slot where the gauge panel is going is in place of the clock which I am deleting, the above slot is for the headunit, planning to get a cheapy bluetooth one to fill that hole...
Edited by MX6 on Friday 3rd August 12:54
So, new parts. I've ordered a pair of new lambda sensors (£19.99 each) so I'm thinking these should help sort out my lean running issues. Plus I've bought a kit of 3" intake piping to rig up the MAF and IAT with a so called cold air induction setup.
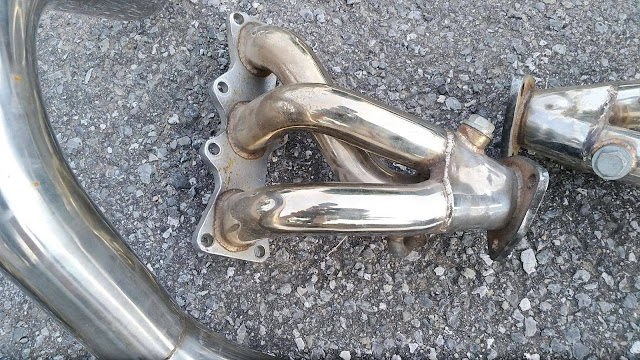
The big new purchase which I'm quite excited about though is a set of turbo manifold/downpipe exhaust pipes! I've been wanting these for a while and already have procured the turbo, but have been waiting for a cheaper set to come up. I've not seen these available is the UK, such is the lack of aftermarket parts for the MX6 here, so was looking at getting some sent across the pond from the States. Anyhow, a set that are secondhand but in pretty much unused condition came up for sale on a Facebook group, with a chap in Canada, so a deal was done. I'll have to wait a while for them to arrive but I'm not in any rush to fit them.
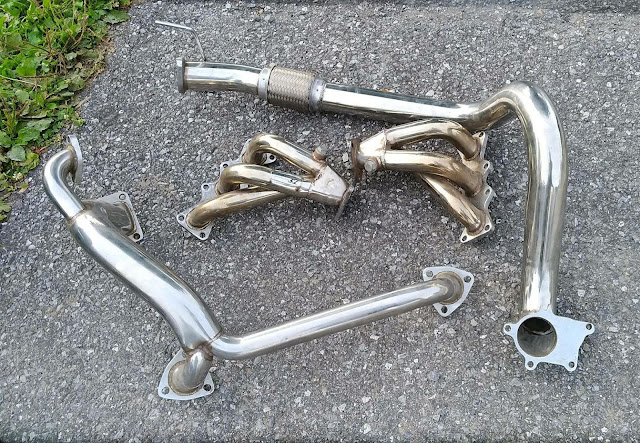
They are essentially your standard ebay Chinese efforts, branded Top Speed Pro 1 Performance (who seem to be the US import outfit), plenty of accounts of these type of pipes being used to good effect. The basic spec is 304 stainless, equally length primary headers with lambda sensor bosses, with T3 turbo flanges, external wastegate flange (which I'll run with a screamer pipe) and they plumb into the cat.
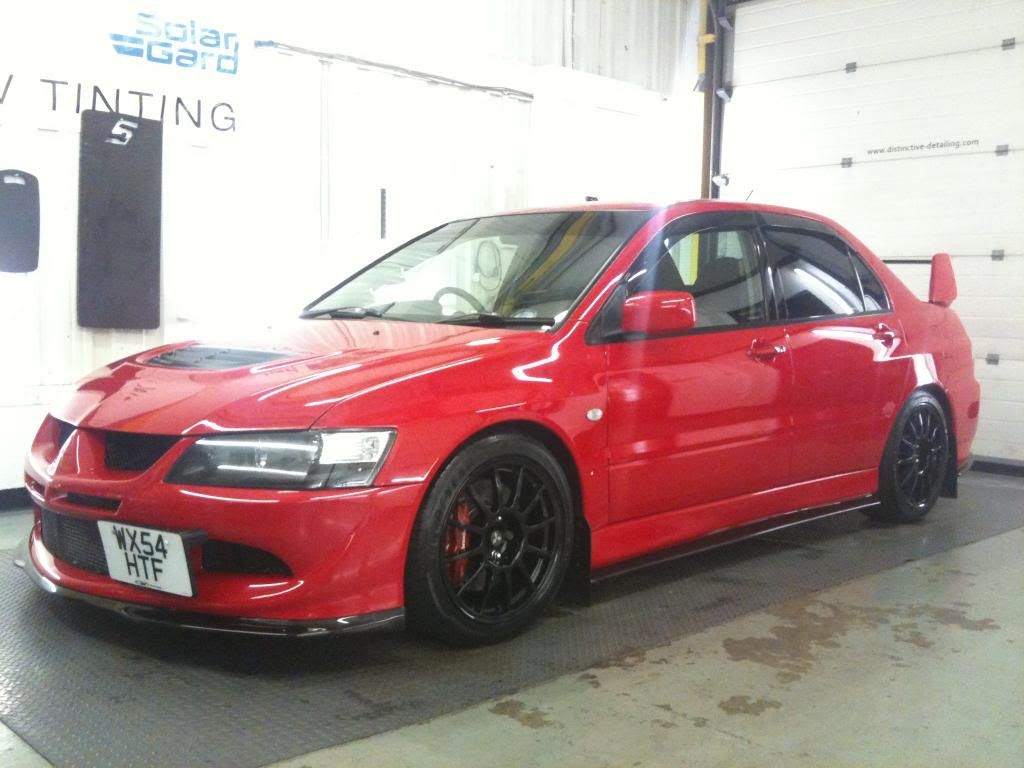
This is a random pic' from google of the same type of V6 turbo setup, with the turbo is positioned in the front right side of the bay. I'm planning to run a low boost arrangement @ circa 5psi, should be good for 250bhp-ish.
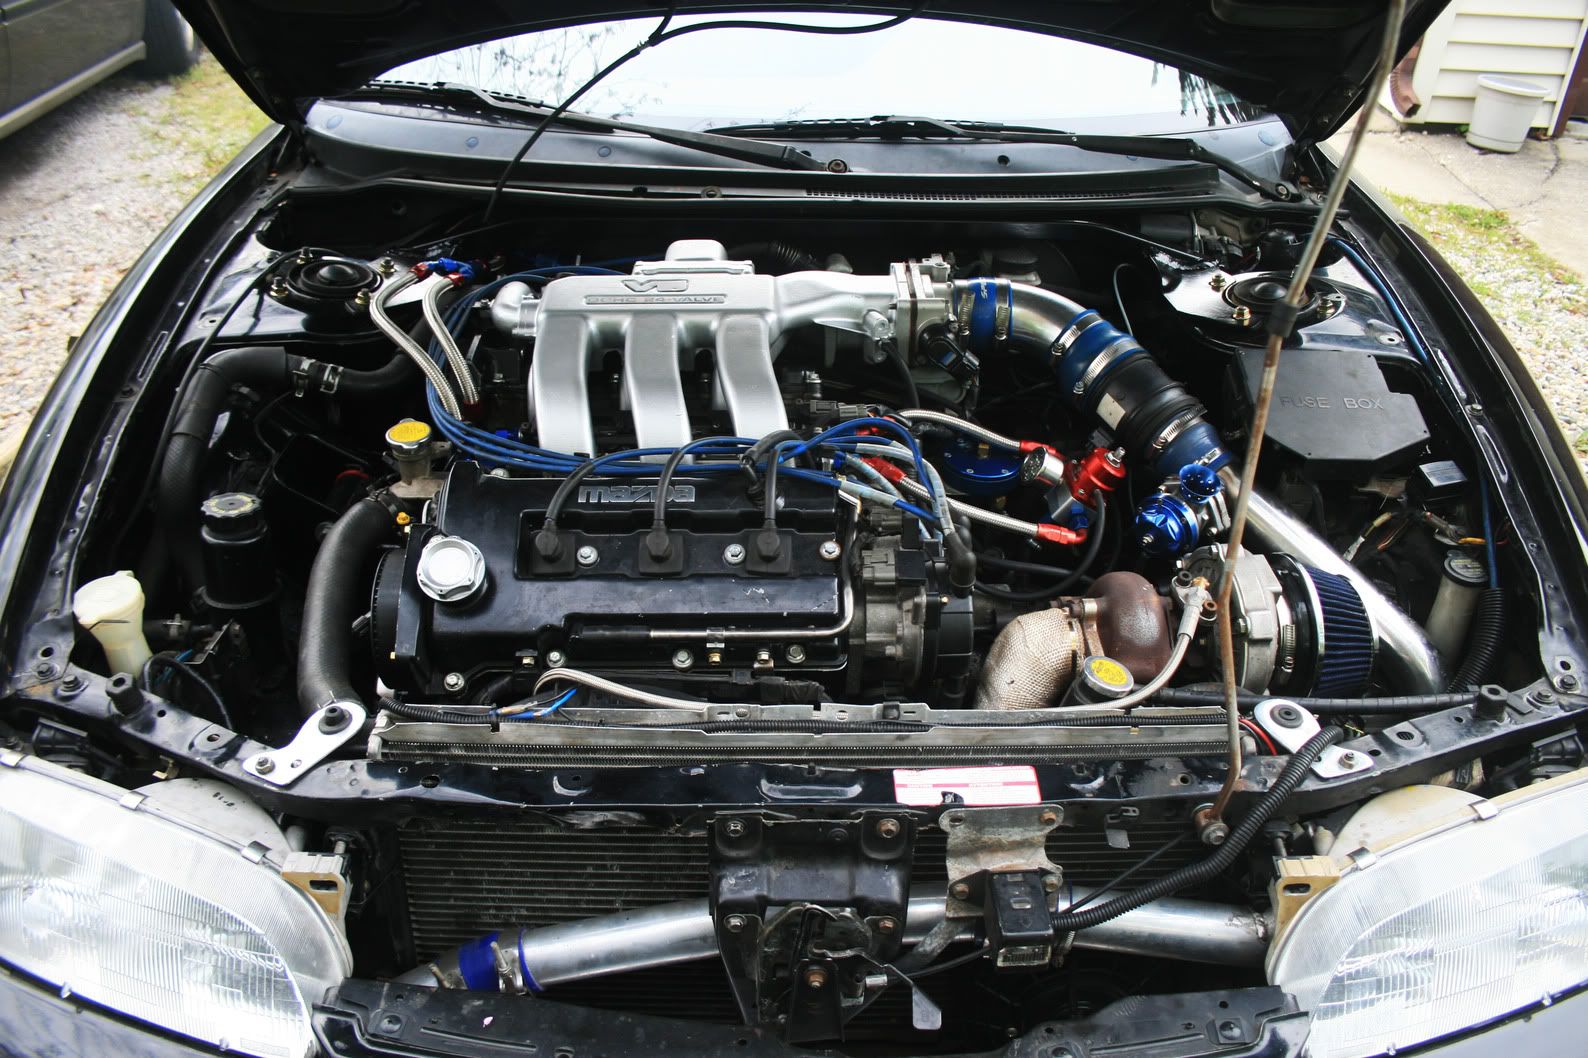
Going turbo is a second phase of my project so isn't happening soon, at the moment I'm concentrating on getting things running nicely as NA...
The big new purchase which I'm quite excited about though is a set of turbo manifold/downpipe exhaust pipes! I've been wanting these for a while and already have procured the turbo, but have been waiting for a cheaper set to come up. I've not seen these available is the UK, such is the lack of aftermarket parts for the MX6 here, so was looking at getting some sent across the pond from the States. Anyhow, a set that are secondhand but in pretty much unused condition came up for sale on a Facebook group, with a chap in Canada, so a deal was done. I'll have to wait a while for them to arrive but I'm not in any rush to fit them.
They are essentially your standard ebay Chinese efforts, branded Top Speed Pro 1 Performance (who seem to be the US import outfit), plenty of accounts of these type of pipes being used to good effect. The basic spec is 304 stainless, equally length primary headers with lambda sensor bosses, with T3 turbo flanges, external wastegate flange (which I'll run with a screamer pipe) and they plumb into the cat.
This is a random pic' from google of the same type of V6 turbo setup, with the turbo is positioned in the front right side of the bay. I'm planning to run a low boost arrangement @ circa 5psi, should be good for 250bhp-ish.
Going turbo is a second phase of my project so isn't happening soon, at the moment I'm concentrating on getting things running nicely as NA...
Edited by MX6 on Friday 3rd August 15:37
Gassing Station | Readers' Cars | Top of Page | What's New | My Stuff