Caterham Seven 360R
Discussion


FELIX_5 said:
Great thread!! Interested to hear your thoughts on the ST, as that's an itch I need to scratch?!! Please start a thread! 
Hmmm, I might just do that. I've taken it around Anglesey circuit and done a couple of tweaks so will have a bit to talk about I suppose.dibblecorse said:
Not sure how I missed this first time round, great thread and great to see it being properly enjoyed post build.
Thank you very much.Minor update...
Last time I made a list of things that needed doing before April when I was due to re-tax the car:
- Fit new tyres (currently piled up in my office)
..........fronts done. Rears to do, still have 2mm on originals - drift practice maybe?
- Replace the rear wing that got smashed at Blyton.
..........done.
- Fit cat-less collector. Should make a nicer noise with added flames.
..........done.
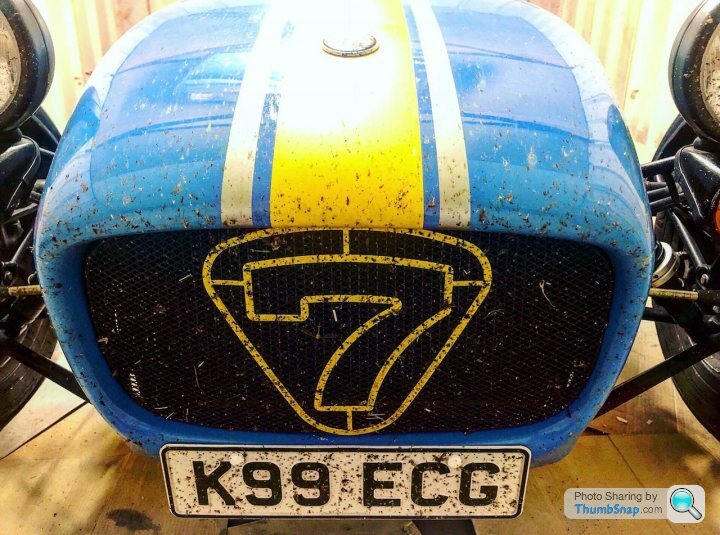
- Change stripes and repaint "7" emblem in the nose cone grill.
..........done.
- Proper spanner check.
..........I'm lazy, see point after next.
- Apply a liberal coat of ACF50. Hoping this will leave me less inclined to shy away from wet roads!
..........pretty much done. Sooooo boring so only did the front wishbones, then from the gearbox back.
- Finally, down to Caterham for their official 12 month service
.........in progress. I’ve left the spanner check to them – may as well get my money’s worth!
This wouldn't be an update without any pictures would it...?
Old stripes to come off:
After a while I had this:


The old stripes were stuck like sh*t to a blanket but peeled off eventually after some intervention with a hairdryer.
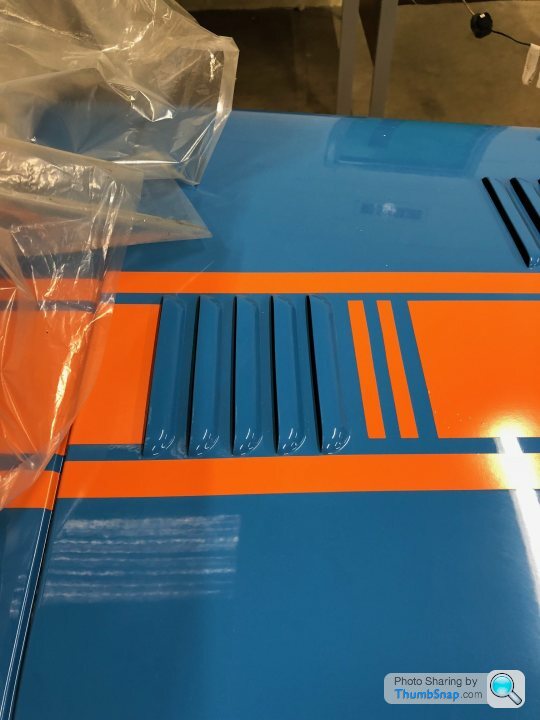
Then began the laborious process of sticking the new stripes on. Last time, I did it dry (euphemism not intended) which kind of showed if you looked closely. There was the odd air bubble and some of the stripes were a bit wobbly.
This time round, I sprayed a mist of soapy water onto the bodywork which allowed final adjustments to be made once the stripes had hit home, plus any air bubbles could be squeegeed out quite easily.
This took much longer but I'm happier with the neater result.
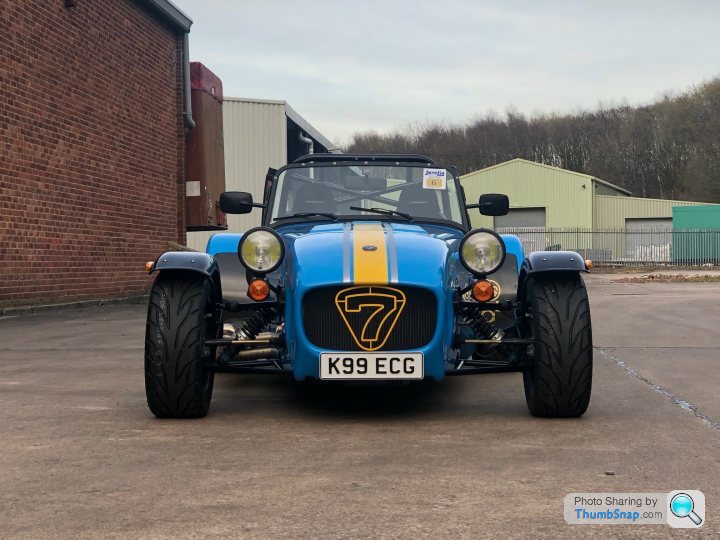
I really liked the look of the 420R Donington Edition but didn't want to completely copy so I came up with my own colour scheme.
The eagle eyed amongst you will notice the absence of the rear wings. I had to take one off to be replaced, on the other side it made it easier to pull the silencer off and allow me to sandwich the side stripes between the body and wing when it was back in situ.


Silencer back on after fitting the de-cat.

"7" powder-coated yellow to match the stripes. Last time I used Plasti-dip which did the job but with it being soft, it was difficult to clean the cast of “A Bugs Life” off after every brisk outing.

Now onto putting the passenger seat back.....which didn't go too smoothly.
When I first built the car, I chose to fit the rear wings, followed by the radius arms. Meaning I needed to undo the radius arms to remove the rear wings. The caphead bolt for the arms is conveniently blocked by the seats, so the fixed passenger seat has to come out too. (Luckly, the driver's can be slid forward enough to gain access.)
To avoid this, most people cut a notch in each wing allowing it to slip over the radius arm during assembly/removal. I have done exactly this. Better late than never I suppose...
During one particular enthusiastic drive with a heavy passenger, the car bottomed out with a bit of a bang coming from the passenger's side. Upon inspection, it was clear the bolt that goes through the floor and into the seat rail had been the only point of contact. "No bother" I thought and forgot all about it.
This little incident had actually bent the seat rail and displaced one of the rivnuts within it:
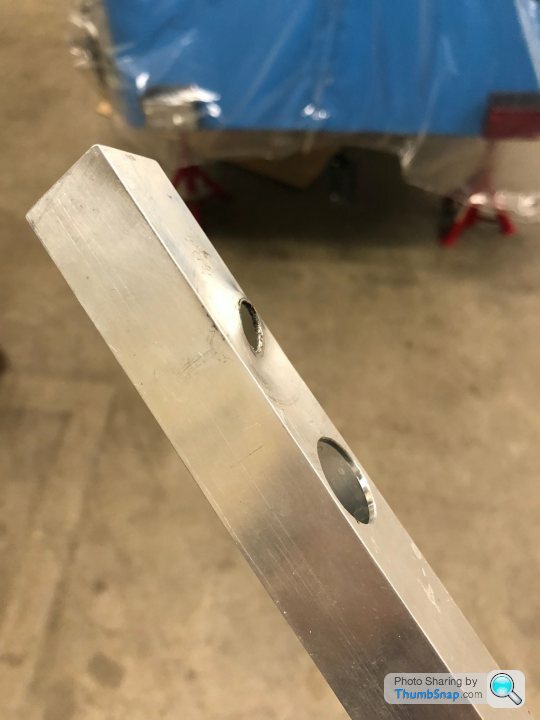
When I came to putting the seat back in, the bolt went half way into the rivnut until it started spinning. The same happened when I tried to undo it...
Disc-cutter to the rescue, and new rail ordered:
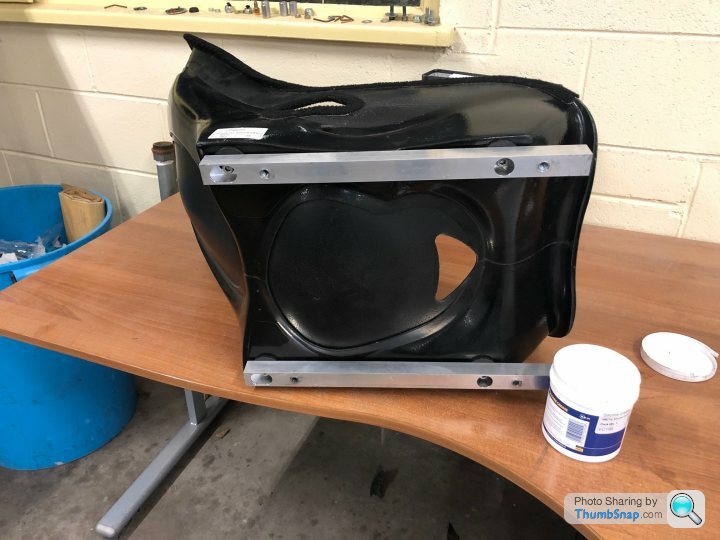
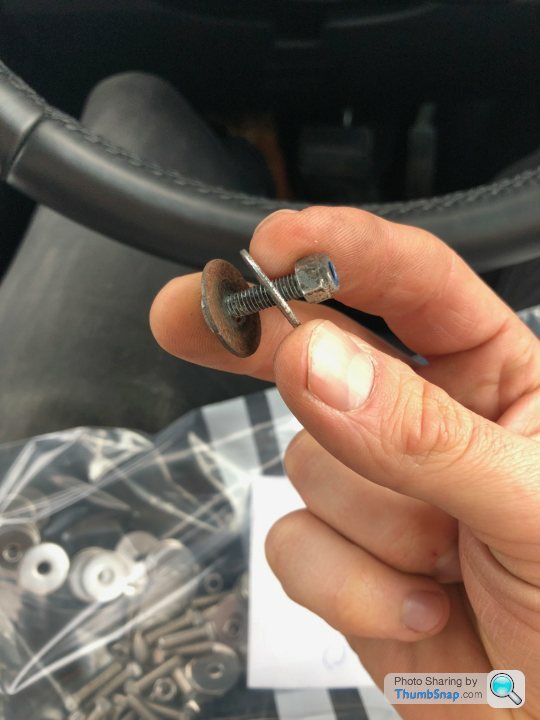
This time, I threadlocked grub screws into the rails, then used brass nuts to secure the assembly to the car - tightening using an allen-key to stop the grub screw spinning. This gives me a couple of options when/if I need to take the seat out again.
Job done:

Next was to re-fit the rear wings. After faffing about getting the wing protector rivetted to the new wing and headlight hole drilled, everything went back together just fine.
The old fixings had become rusty so I replaced them with stainless versions:

Done:

I fitted my new number plate whilst I was at it. The old one fell off somewhere between Huddersfield and Wakefield....
I also bought a small bike plate for the front. Due to the size of “legal” number plates, I never fitted one to the front before. To me, a smaller plate looks much more in proportion.
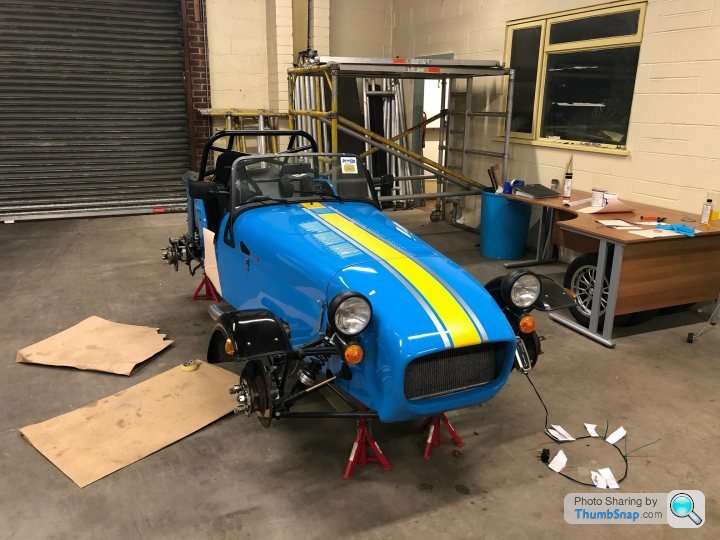
Car finally on the ground before its first outing of the year:


Back home safe after a very slippy 50 miles or so. 2mm tread and cold, dry salty roads don't mix well with a heavy right foot. **Must exercise more restraint**

I can confirm the new cat-less collecter allows a flame or two to be spat out the side of the car which really satisfies my childlike mind. It also has a pleasingly “parpier” sounds to it without being much louder than the cat-ted setup.
That's it for now as the car is down at Donington awaiting a service next week. I took a chance on Monday when it was sunny and made it down there in the dry.
I don't have a preference over the old or new stripes - they both look good to me. Time will make my mind up.
Cadwell booked in a couple of weeks which I am pretty nervous about.... it looks great fun but very little margin for error. If it's p*ssing it down, I may wuss out and take the Fezzy...
More next time...
ECG1000 said:
Thank you very much.
Minor update...
Last time I made a list of things that needed doing before April when I was due to re-tax the car:
- Fit new tyres (currently piled up in my office)
..........fronts done. Rears to do, still have 2mm on originals - drift practice maybe?
- Replace the rear wing that got smashed at Blyton.
..........done.
- Fit cat-less collector. Should make a nicer noise with added flames.
..........done.
- Change stripes and repaint "7" emblem in the nose cone grill.
..........done.
- Proper spanner check.
..........I'm lazy, see point after next.
- Apply a liberal coat of ACF50. Hoping this will leave me less inclined to shy away from wet roads!
..........pretty much done. Sooooo boring so only did the front wishbones, then from the gearbox back.
- Finally, down to Caterham for their official 12 month service
.........in progress. I’ve left the spanner check to them – may as well get my money’s worth!
This wouldn't be an update without any pictures would it...?
Old stripes to come off:
After a while I had this:
The old stripes were stuck like sh*t to a blanket but peeled off eventually after some intervention with a hairdryer.
Then began the laborious process of sticking the new stripes on. Last time, I did it dry (euphemism not intended) which kind of showed if you looked closely. There was the odd air bubble and some of the stripes were a bit wobbly.
This time round, I sprayed a mist of soapy water onto the bodywork which allowed final adjustments to be made once the stripes had hit home, plus any air bubbles could be squeegeed out quite easily.
This took much longer but I'm happier with the neater result.
I really liked the look of the 420R Donington Edition but didn't want to completely copy so I came up with my own colour scheme.
The eagle eyed amongst you will notice the absence of the rear wings. I had to take one off to be replaced, on the other side it made it easier to pull the silencer off and allow me to sandwich the side stripes between the body and wing when it was back in situ.
Silencer back on after fitting the de-cat.
"7" powder-coated yellow to match the stripes. Last time I used Plasti-dip which did the job but with it being soft, it was difficult to clean the cast of “A Bugs Life” off after every brisk outing.
Now onto putting the passenger seat back.....which didn't go too smoothly.
When I first built the car, I chose to fit the rear wings, followed by the radius arms. Meaning I needed to undo the radius arms to remove the rear wings. The caphead bolt for the arms is conveniently blocked by the seats, so the fixed passenger seat has to come out too. (Luckly, the driver's can be slid forward enough to gain access.)
To avoid this, most people cut a notch in each wing allowing it to slip over the radius arm during assembly/removal. I have done exactly this. Better late than never I suppose...
During one particular enthusiastic drive with a heavy passenger, the car bottomed out with a bit of a bang coming from the passenger's side. Upon inspection, it was clear the bolt that goes through the floor and into the seat rail had been the only point of contact. "No bother" I thought and forgot all about it.
This little incident had actually bent the seat rail and displaced one of the rivnuts within it:
When I came to putting the seat back in, the bolt went half way into the rivnut until it started spinning. The same happened when I tried to undo it...
Disc-cutter to the rescue, and new rail ordered:
This time, I threadlocked grub screws into the rails, then used brass nuts to secure the assembly to the car - tightening using an allen-key to stop the grub screw spinning. This gives me a couple of options when/if I need to take the seat out again.
Job done:
Next was to re-fit the rear wings. After faffing about getting the wing protector rivetted to the new wing and headlight hole drilled, everything went back together just fine.
The old fixings had become rusty so I replaced them with stainless versions:
Done:
I fitted my new number plate whilst I was at it. The old one fell off somewhere between Huddersfield and Wakefield....
I also bought a small bike plate for the front. Due to the size of “legal” number plates, I never fitted one to the front before. To me, a smaller plate looks much more in proportion.
Car finally on the ground before its first outing of the year:
Back home safe after a very slippy 50 miles or so. 2mm tread and cold, dry salty roads don't mix well with a heavy right foot. **Must exercise more restraint**
I can confirm the new cat-less collecter allows a flame or two to be spat out the side of the car which really satisfies my childlike mind. It also has a pleasingly “parpier” sounds to it without being much louder than the cat-ted setup.
That's it for now as the car is down at Donington awaiting a service next week. I took a chance on Monday when it was sunny and made it down there in the dry.
I don't have a preference over the old or new stripes - they both look good to me. Time will make my mind up.
Cadwell booked in a couple of weeks which I am pretty nervous about.... it looks great fun but very little margin for error. If it's p*ssing it down, I may wuss out and take the Fezzy...
More next time...
Sorry could not spend ours breaking your post down, but CC provide a very nice off the shelf kit that would help you mount with those rails!Minor update...
Last time I made a list of things that needed doing before April when I was due to re-tax the car:
- Fit new tyres (currently piled up in my office)
..........fronts done. Rears to do, still have 2mm on originals - drift practice maybe?
- Replace the rear wing that got smashed at Blyton.
..........done.
- Fit cat-less collector. Should make a nicer noise with added flames.
..........done.
- Change stripes and repaint "7" emblem in the nose cone grill.
..........done.
- Proper spanner check.
..........I'm lazy, see point after next.
- Apply a liberal coat of ACF50. Hoping this will leave me less inclined to shy away from wet roads!
..........pretty much done. Sooooo boring so only did the front wishbones, then from the gearbox back.
- Finally, down to Caterham for their official 12 month service
.........in progress. I’ve left the spanner check to them – may as well get my money’s worth!
This wouldn't be an update without any pictures would it...?
Old stripes to come off:
After a while I had this:
The old stripes were stuck like sh*t to a blanket but peeled off eventually after some intervention with a hairdryer.
Then began the laborious process of sticking the new stripes on. Last time, I did it dry (euphemism not intended) which kind of showed if you looked closely. There was the odd air bubble and some of the stripes were a bit wobbly.
This time round, I sprayed a mist of soapy water onto the bodywork which allowed final adjustments to be made once the stripes had hit home, plus any air bubbles could be squeegeed out quite easily.
This took much longer but I'm happier with the neater result.
I really liked the look of the 420R Donington Edition but didn't want to completely copy so I came up with my own colour scheme.
The eagle eyed amongst you will notice the absence of the rear wings. I had to take one off to be replaced, on the other side it made it easier to pull the silencer off and allow me to sandwich the side stripes between the body and wing when it was back in situ.
Silencer back on after fitting the de-cat.
"7" powder-coated yellow to match the stripes. Last time I used Plasti-dip which did the job but with it being soft, it was difficult to clean the cast of “A Bugs Life” off after every brisk outing.
Now onto putting the passenger seat back.....which didn't go too smoothly.
When I first built the car, I chose to fit the rear wings, followed by the radius arms. Meaning I needed to undo the radius arms to remove the rear wings. The caphead bolt for the arms is conveniently blocked by the seats, so the fixed passenger seat has to come out too. (Luckly, the driver's can be slid forward enough to gain access.)
To avoid this, most people cut a notch in each wing allowing it to slip over the radius arm during assembly/removal. I have done exactly this. Better late than never I suppose...
During one particular enthusiastic drive with a heavy passenger, the car bottomed out with a bit of a bang coming from the passenger's side. Upon inspection, it was clear the bolt that goes through the floor and into the seat rail had been the only point of contact. "No bother" I thought and forgot all about it.
This little incident had actually bent the seat rail and displaced one of the rivnuts within it:
When I came to putting the seat back in, the bolt went half way into the rivnut until it started spinning. The same happened when I tried to undo it...
Disc-cutter to the rescue, and new rail ordered:
This time, I threadlocked grub screws into the rails, then used brass nuts to secure the assembly to the car - tightening using an allen-key to stop the grub screw spinning. This gives me a couple of options when/if I need to take the seat out again.
Job done:
Next was to re-fit the rear wings. After faffing about getting the wing protector rivetted to the new wing and headlight hole drilled, everything went back together just fine.
The old fixings had become rusty so I replaced them with stainless versions:
Done:
I fitted my new number plate whilst I was at it. The old one fell off somewhere between Huddersfield and Wakefield....
I also bought a small bike plate for the front. Due to the size of “legal” number plates, I never fitted one to the front before. To me, a smaller plate looks much more in proportion.
Car finally on the ground before its first outing of the year:
Back home safe after a very slippy 50 miles or so. 2mm tread and cold, dry salty roads don't mix well with a heavy right foot. **Must exercise more restraint**
I can confirm the new cat-less collecter allows a flame or two to be spat out the side of the car which really satisfies my childlike mind. It also has a pleasingly “parpier” sounds to it without being much louder than the cat-ted setup.
That's it for now as the car is down at Donington awaiting a service next week. I took a chance on Monday when it was sunny and made it down there in the dry.
I don't have a preference over the old or new stripes - they both look good to me. Time will make my mind up.
Cadwell booked in a couple of weeks which I am pretty nervous about.... it looks great fun but very little margin for error. If it's p*ssing it down, I may wuss out and take the Fezzy...
More next time...
Plus it has the advantage that it’s nice a low profile and does not stick out to get caught on speed bumps etc!
https://caterhamparts.co.uk/fittings/5903-seat-fix...
573 said:
Oooh, nice work.
Cheers 
Peanut Gallery said:
Epic!
In relation to your first question, - what to do with well worn tyres, - no question, drift them to submission!
There's quite a big yard at work....I'm sure they wont mind.In relation to your first question, - what to do with well worn tyres, - no question, drift them to submission!
nigelpugh7 said:
Sorry could not spend ours breaking your post down, but CC provide a very nice off the shelf kit that would help you mount with those rails!
Plus it has the advantage that it’s nice a low profile and does not stick out to get caught on speed bumps etc!
https://caterhamparts.co.uk/fittings/5903-seat-fix...
Thanks Nigel, although I'm hoping my latest solution will solve the problem.Plus it has the advantage that it’s nice a low profile and does not stick out to get caught on speed bumps etc!
https://caterhamparts.co.uk/fittings/5903-seat-fix...


nigelpugh7 said:
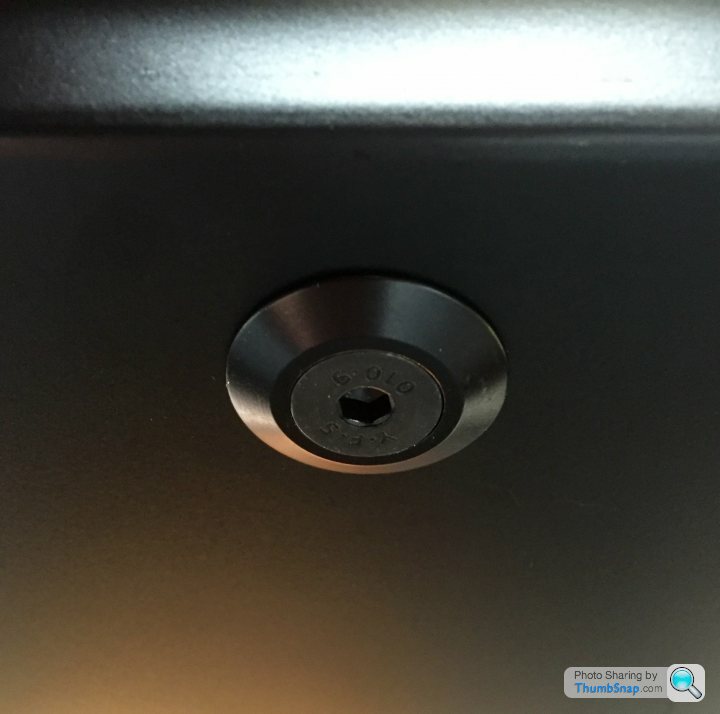
No worries, this is what they look like fitted!
They look really neat.Only problem is if the rivnut in your seat rail starts spinning, you're going to have a job on undoing them. Attacking with a cutting disc will be tricky too.
I'm hoping if a rivnut spins on mine, I can just hold the grub screw in place with an allen-key, then undo the brass nut with a ratchet spanner.

Bedford - 18th of June
I missed Bylton (Outer) at the beginning of June due to another cracked sump. Sadly couldn't get it welded up in time...
Very kindly, Javelin let me keep the amount I spent on Blyton as credit to put towards/spend on another day. Just getting a clear calendar that's the problem. Everyone seems to be getting married or having stag do's this summer!

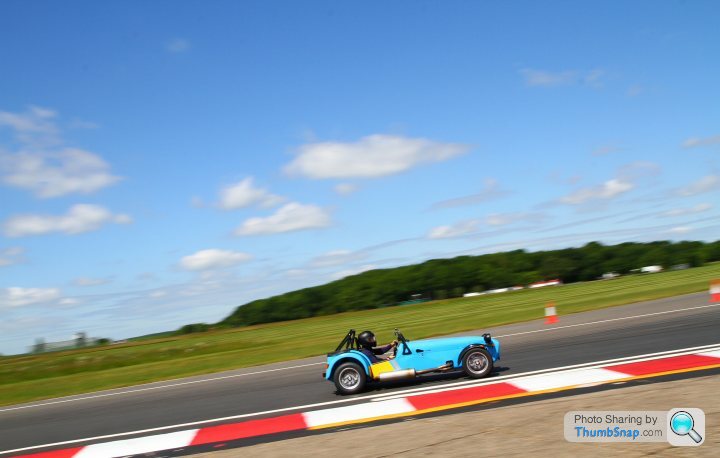
I've since had the ride height lifted a touch and the geometry re-done at Gemzoe Motorsport. Here's to sump preservation!
I missed Bylton (Outer) at the beginning of June due to another cracked sump. Sadly couldn't get it welded up in time...
Very kindly, Javelin let me keep the amount I spent on Blyton as credit to put towards/spend on another day. Just getting a clear calendar that's the problem. Everyone seems to be getting married or having stag do's this summer!
I've since had the ride height lifted a touch and the geometry re-done at Gemzoe Motorsport. Here's to sump preservation!
Well, I've done something I thought I'd never do. The Caterham is up for sale - advert in the classifieds section on here.
Got myself into a position of buying a dream car so both my toys have to go in order to free up funds.
I gave it a service and a good clean last night ready for any potential viewings.
The Seven has taught me a lot about car control and driving quickly so we have formed quite a bond over the last year or so. If I could keep it, I would.
Still not 100% sure I want to let it go...
Edited by ECG1000 on Tuesday 7th August 16:23
Hey, this guy is selling a Caterham with exactly the same colour scheme as the one in this thread. Looks really good! - pity no photos of the greasy bits, I always look for those in an advert, it's why you would buy a Caterham anyway!
https://www.pistonheads.com/classifieds/used-cars/...
https://www.pistonheads.com/classifieds/used-cars/...
eltax91 said:
I know you can’t advertise. But I’m asking directly for you to post a linky so that I may peruse.
Erm, “Peanut Gallery” seems to have done it for me. Peanut Gallery said:
Hey, this guy is selling a Caterham with exactly the same colour scheme as the one in this thread. Looks really good! - pity no photos of the greasy bits, I always look for those in an advert, it's why you would buy a Caterham anyway!
https://www.pistonheads.com/classifieds/used-cars/...
Yep... that’s my advert https://www.pistonheads.com/classifieds/used-cars/...
ECG1000 said:
eltax91 said:
I know you can’t advertise. But I’m asking directly for you to post a linky so that I may peruse.
Erm, “Peanut Gallery” seems to have done it for me. Peanut Gallery said:
Hey, this guy is selling a Caterham with exactly the same colour scheme as the one in this thread. Looks really good! - pity no photos of the greasy bits, I always look for those in an advert, it's why you would buy a Caterham anyway!
https://www.pistonheads.com/classifieds/used-cars/...
Yep... that’s my advert https://www.pistonheads.com/classifieds/used-cars/...
Gassing Station | Readers' Cars | Top of Page | What's New | My Stuff