Discussion


So I spent some time on the car today trying to get it back together.
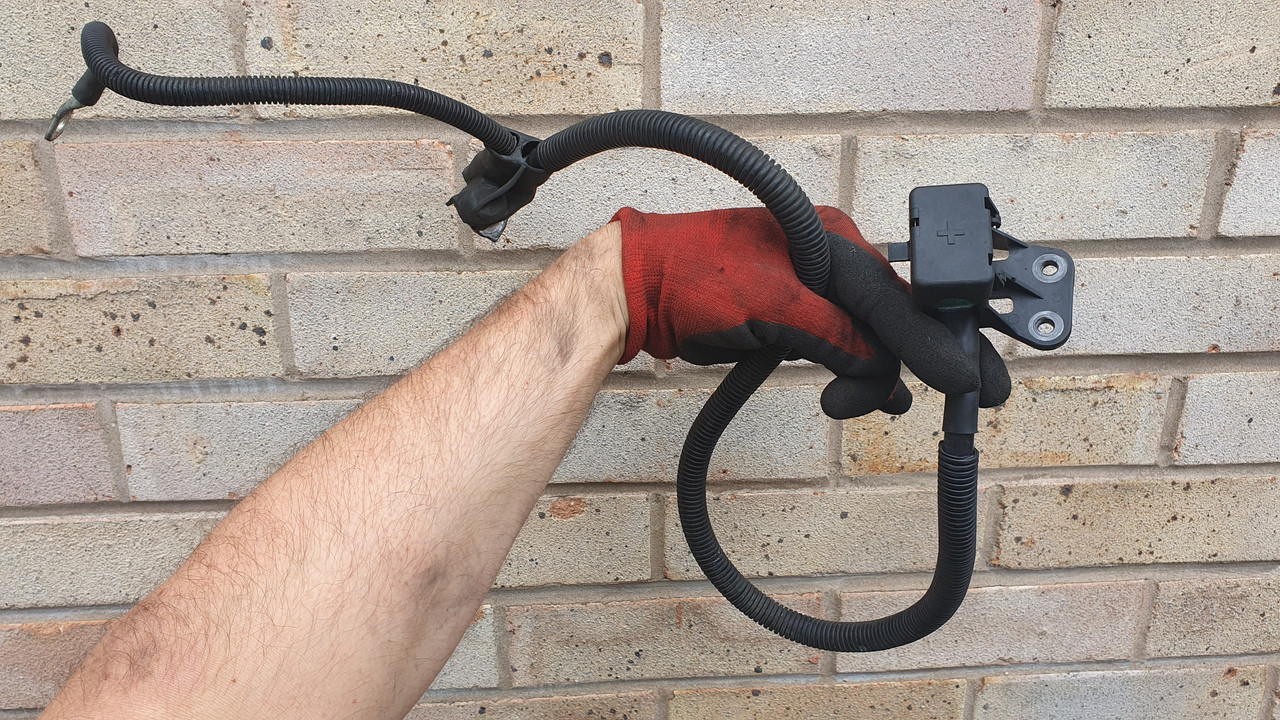
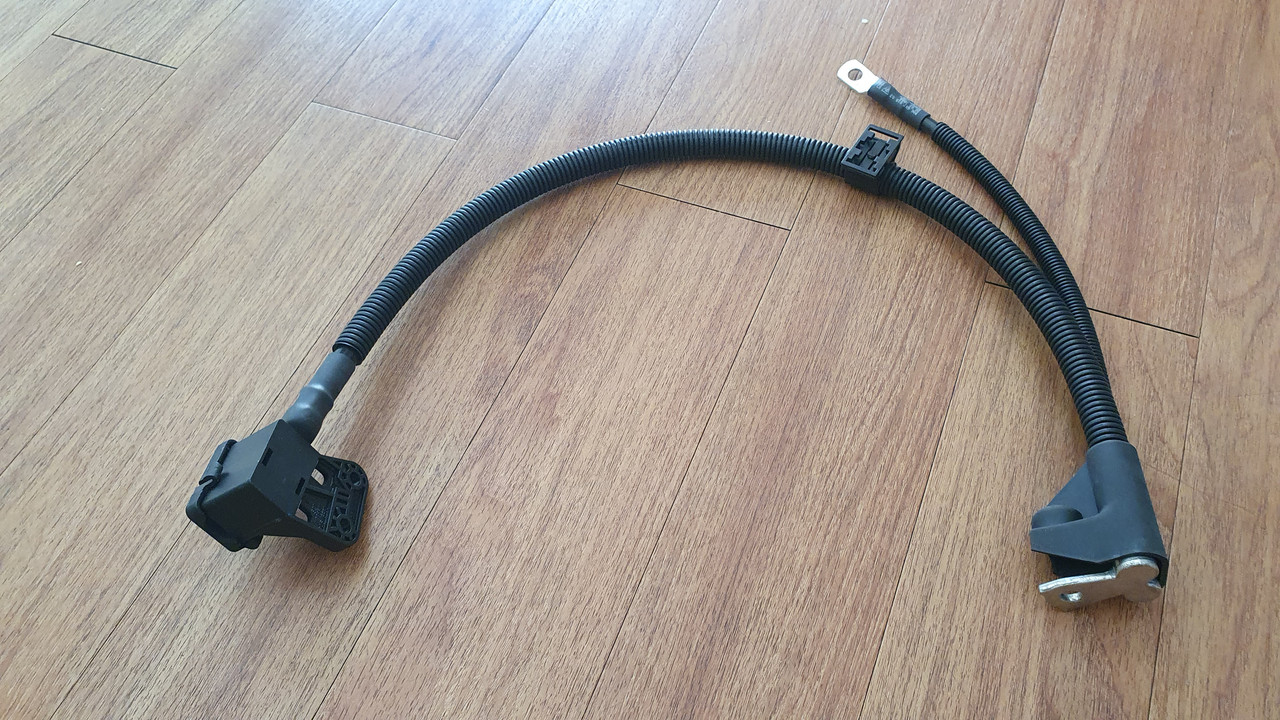
Y cable fitted - this probably took 30 seconds max. So if anyone is considering it I will say it is easy once the starter and alternator are off the car.
The trickiest part for me was the plenum t piece and its jubilee clips. Anyone who is not interested can just forward past this next paragraph to the final one. The starter went on easy. I had to refer to some pics to figure out which bit of the y cable bolted to it. The alternator was really easy too. Refitting the drive belt is a piece of cake.
At first I forgot I needed new jubilee clips. The first 4 I bought were too small, they were 80 to 100mm. So I bought some which were 90 to 120 I think. This presented a problem of the extra threaded section once through the clasp got in the way or interfered with other stuff. Just pushing the plenum into position isn't obvious. I kept wiggling until I thought it was right. Then I had problems with the breather type hose fitting [top left in pic 2] interfering with the jubilee clip and I had to reposition the jubilee. Then when I tried to refit the throttle body I realised that the t piece needed to be rotated some more. So yes this all took way longer than I thought it should.
So when I ran out of time or light all that remains is refitting the throttle cable and then the air box.
ATM said:
Taking a fresh look today. Got the accelerator cable on. Next is airbox.
Wait
What's this plug for?
Anyone know?

Panic overWait
What's this plug for?
Anyone know?
It connects to this solenoid - I think that's what its called
I can confirm the engine now runs
So I have replaced -
Alternator
Starter
Y cable
And it has been in pieces since the beginning of July so it was lingering a bit but now the engine electrical bits are done

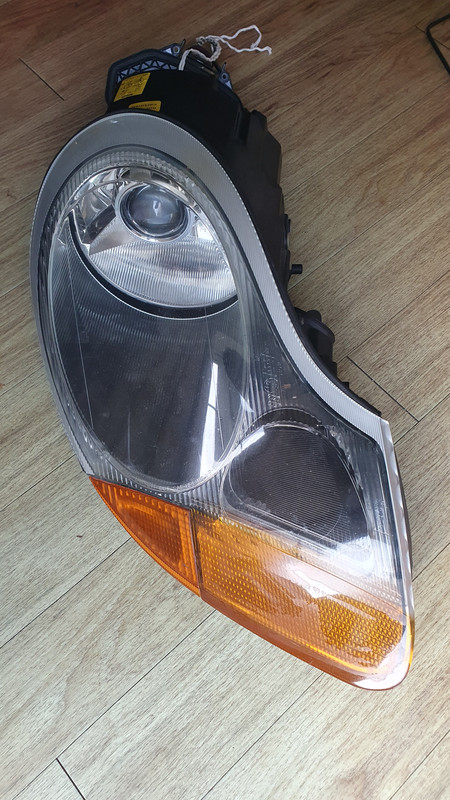
So I have had these zenon converted headlamps for 5 years but never used them because one of the clips is broke and therefore the light flaps around inside
My bodge is to use this rubber band to keep tension on the light unit and stop it wobbling around
Now I just need to secure it to something and see if it holds

My bodge is to use this rubber band to keep tension on the light unit and stop it wobbling around
Now I just need to secure it to something and see if it holds
So for now I am using this claw like bracket which holds the cover in position.
If anyone has fitted lights like this before with the boxes and gubbins hanging out the back do these need securing or can they flap around?
Also where the wires go through the backing plate which has been cut or drilled to provide a hole does this need to be quite water tight or not that important?
Thanks....

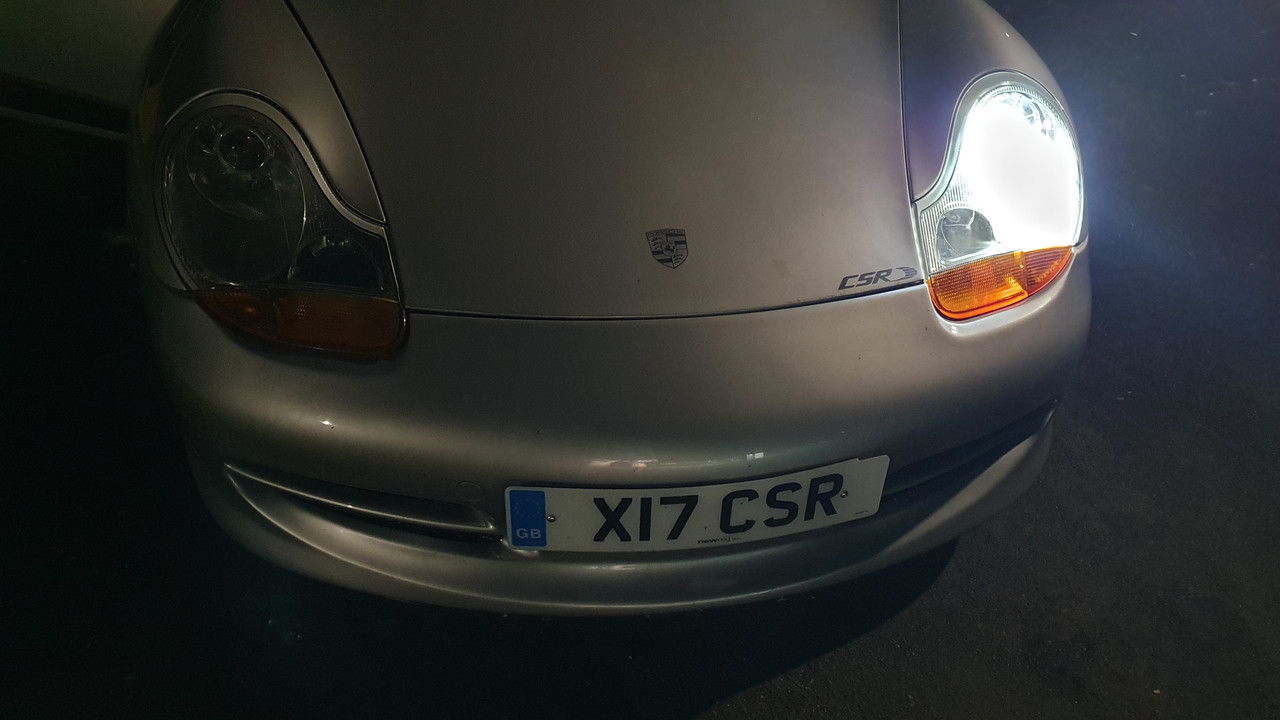
So I fitted these lights to my other working 996 to test them out. I suppose therefore I should post this in the other cars blog but I can't be arsssed.
So fitting was a bit finickety. I did tape the gubbins to the back of the light using gaffer tape - pic 2. Took a few trial and error goes to get the bracket to click them in solidly.
Then when I closed the carbon bonnet - pic 4 - which doesn't fit well, it pressed on the driver side light and pushed it out slightly. Not sure if I should do anything about this or just pretend I don't know.
Tested the lights on the drive.
Side lights do not work.
Dipped zenons work both sides.
Main beam only works on passenger side - pic 5
Now I'm waiting for it to get dark so I can probably see the adjustment is all over the place just to really hammer it home that I shouldn't have bothered really.
Pics....
I did some testing last night with the zenon converted lights on the other car. Here are a couple of snaps. The good news is yes the light thrown is much much better than the truly dreadful light fron the original headlamps. Hopefully that should be obvious or a given.
In summary the driver side wasn't fully working at first and then got dislodged while driving / braking and it all went off. So I have had a fiddle with this today and it seems better now. I will try more testing later in the dark and report back or update the other thread for the other car maybe.

Back to this car ..
So the nicer lights fron my working 996 are now on and obviously look much better.
I am nearly there now with my list of jobs from the previous MOT failure.
Horn not working - probably an earth issue with the momo wheel boss
Rear brake binding a bit hopefully just from lack of use


In summary the driver side wasn't fully working at first and then got dislodged while driving / braking and it all went off. So I have had a fiddle with this today and it seems better now. I will try more testing later in the dark and report back or update the other thread for the other car maybe.
Back to this car ..
So the nicer lights fron my working 996 are now on and obviously look much better.
I am nearly there now with my list of jobs from the previous MOT failure.
Horn not working - probably an earth issue with the momo wheel boss
Rear brake binding a bit hopefully just from lack of use

ATM said:
Rear exhaust silencer flexi disconnected so exhaust blowing and could not be emissions tested
Driver door exterior handle inoperative
Headlamps clouded up
Rear Driver side caliper binding a bit - probably due to lack of use and disc all covered in rust
Horn not working - it is a bit intermittent so assume dodgy connection in the momo adapter
To DoDriver door exterior handle inoperative
Headlamps clouded up
Rear Driver side caliper binding a bit - probably due to lack of use and disc all covered in rust
Horn not working - it is a bit intermittent so assume dodgy connection in the momo adapter
Horn
Rear exhaust flexi - hopefully first thing in morning before it gets too hot for rolling around under a car wearing overalls
Done
Freed up Rear brake - hopefully - untested
Headlamps changed - untested but were fine on donor vehicle
Locks or door catches changed both sides - working fine
Other
New Starter
New Y cable
Refurbished Alternator
Yes that MOT failure says November 2022

ATM said:
Rear exhaust flexi - hopefully first thing in morning before it gets too hot for rolling around under a car wearing overalls
Attempted this job today Found the loose bracket and replaced with a temporary U clamp
Then ran the engine while having a feel around for leaks
The flexi on the passenger side is blowing
I'm assuming this means I need a new back box or maybe the flexi can be replaced


The horn is a common thing with aftermarket wheels
The aftermarket boss grounds through the column
The column is not a good earth on these early cars
Memory is hazy but you need to run a wire I think
Ah https://www.911uk.com/viewtopic.php?t=118164&p...
The aftermarket boss grounds through the column
The column is not a good earth on these early cars
Memory is hazy but you need to run a wire I think
Ah https://www.911uk.com/viewtopic.php?t=118164&p...
was8v said:
You can chop the Flexi bit out and use a clamp on Flexi repair from eBay etc
Actually thinking about that Flexi.My 99 3.4 didn't have flexis there at all. The original 3.4 exhaust didn't have them, just piped through
The exhaust you have must be a replacement, when my 3.4 exhaust failed on the seams (as they all do) I replaced with 3.6 boxes and noted the addition of the Flexi.
So you could just chop the Flexi out and replace with a straight clamp on repair section as there isn't much room
Edited by was8v on Sunday 10th September 09:24
A very kind gentleman has donated some used Dansk silencers for this. I've been to collect them today. I think the last MOT failure item was the passenger side silencer bust or split at the flexi. Interestingly one of these free to me silencers has already been repaired with a replacement flexi. Not sure yet which side. It would make sense of it was the same side.
Gassing Station | Readers' Cars | Top of Page | What's New | My Stuff