Classic Aston Martin V8's
Discussion


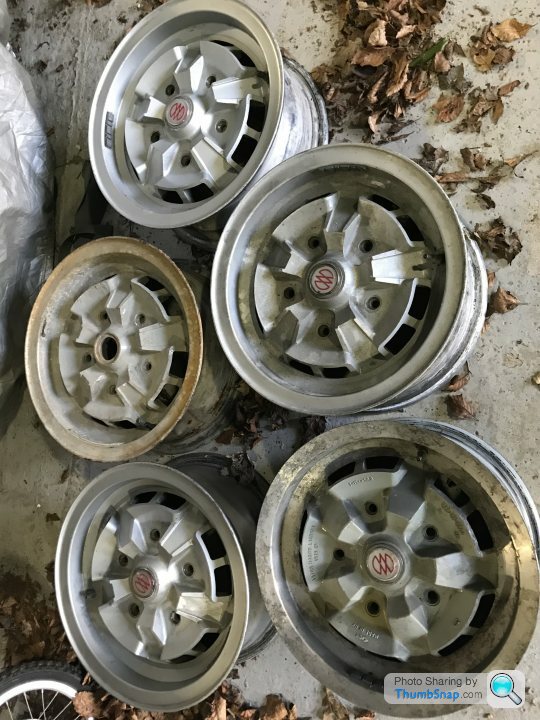
As I was now keeping the GKN wheels, I needed to have a look at what I actually had. Five wheels came with the car, four were the correct earlier style to accept a tubed tyre and the last was from a later V8 for a tubeless tyre. They were in poor cosmetic condition but looked solid. The later wheel is the bottom right, without a lip around the outside edge of the rim and now ridges on the outside of the internal spokes.
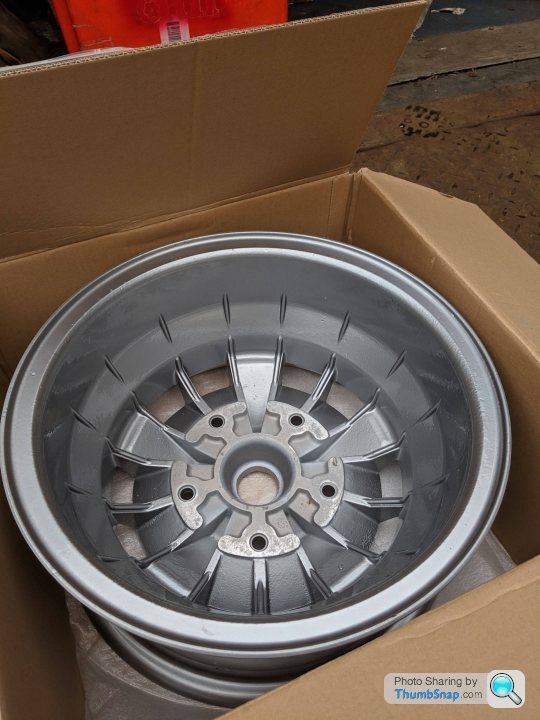
I was recommended Prestine wheels in Milton Keynes by a number of people and a phone call confirmed they were the right people for the job. I took them up there and we went through the different finishes available. Although when new the wheels were finished in a sort of cream colour (which I had on my DBS V8 - see photo on page 1), I don't like that finish. So I went for a finish that was 80% silver with a small amount of anthracite and diamond finish around the edges of the rim. It's come out a little darker than I'd like but I'm happy with the result.


I was recommended Prestine wheels in Milton Keynes by a number of people and a phone call confirmed they were the right people for the job. I took them up there and we went through the different finishes available. Although when new the wheels were finished in a sort of cream colour (which I had on my DBS V8 - see photo on page 1), I don't like that finish. So I went for a finish that was 80% silver with a small amount of anthracite and diamond finish around the edges of the rim. It's come out a little darker than I'd like but I'm happy with the result.
With the wheels ready, next on the list was tyres. I wanted to fit the correct spec size, as I've seen so V8's many with tyres that are either too big (SUV style tyres) or too modern with a profile that's too low. Both look wrong but given the much higher cost of the correct size, it's understandable why owners fit them.
I spoke with Longstone tyres who were extremely helpful. When new the Aston came with either 235/70R15 or 225/70R15 depending on whether the car was manual or automatic, both made by Avon. As mine was now a manual, I went for the 225/70 tyres and the best option was the Michelin XWX.
Here's how they look on the wheel.

The suspension is sitting high in this photo but will settle when driven, it's just come off the jack.
I spoke with Longstone tyres who were extremely helpful. When new the Aston came with either 235/70R15 or 225/70R15 depending on whether the car was manual or automatic, both made by Avon. As mine was now a manual, I went for the 225/70 tyres and the best option was the Michelin XWX.
Here's how they look on the wheel.
The suspension is sitting high in this photo but will settle when driven, it's just come off the jack.


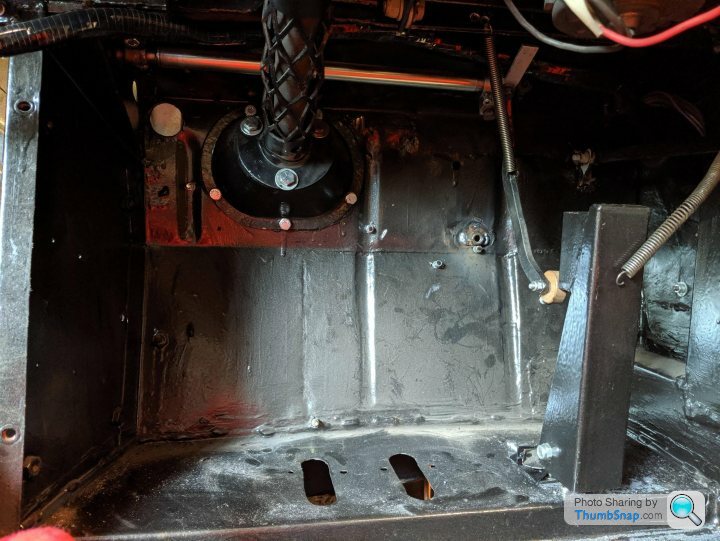
Accelerator pedal and all linkages in place. This doesn't look like much but there are a ridiculous number of components that run from the pedal upto the main hex bar on the engine. Some were available from Works Service, others we had to manufacture.
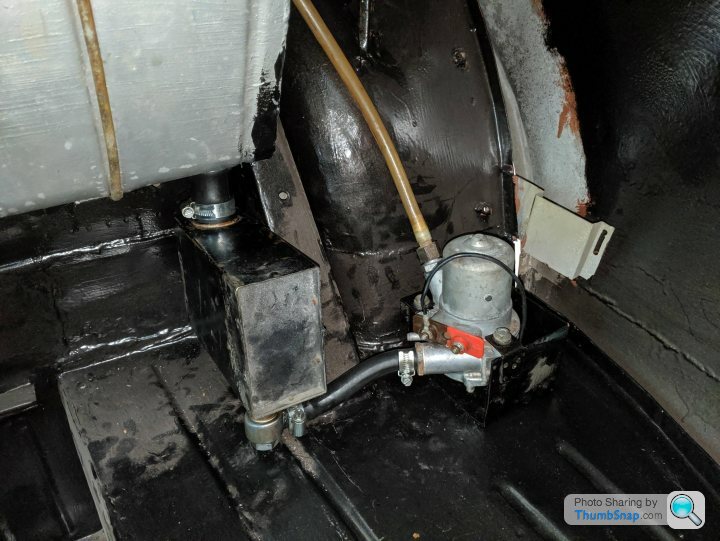
Fuel tank fitted. The fuel pump is also now installed in the car and the other attachments into the tank fitted.

We have managed to track down the correct door mirrors. They are shared with the Mercedes W115 and a set was ordered from an Ebay seller in Holland. The stem has to be at a particular angle to stop the mirror hitting the window.

All the side glass is in the car, including the OS rear quarter. I had the frame but not the glass, but we found a firm that could cut the required piece.
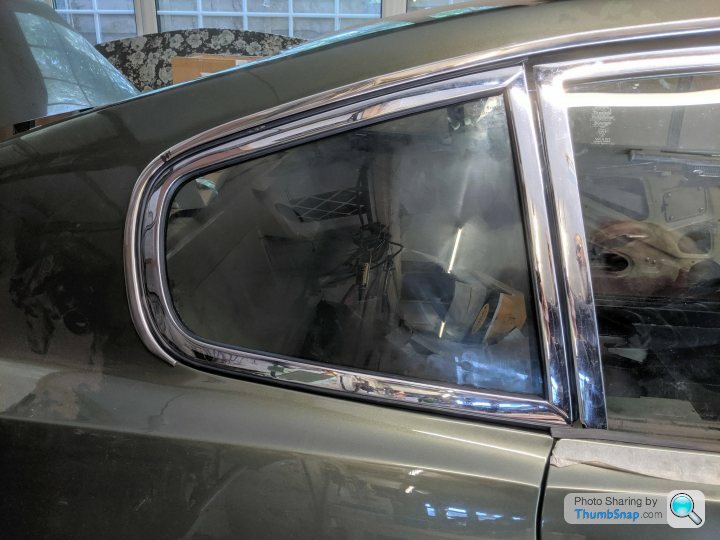
That brings us pretty much upto date. I will continue posting bits and pieces as and when things happen. But at the moment it's mostly sourcing lots of small parts that are missing, which isn't very exciting!
Fuel tank fitted. The fuel pump is also now installed in the car and the other attachments into the tank fitted.
We have managed to track down the correct door mirrors. They are shared with the Mercedes W115 and a set was ordered from an Ebay seller in Holland. The stem has to be at a particular angle to stop the mirror hitting the window.
All the side glass is in the car, including the OS rear quarter. I had the frame but not the glass, but we found a firm that could cut the required piece.
That brings us pretty much upto date. I will continue posting bits and pieces as and when things happen. But at the moment it's mostly sourcing lots of small parts that are missing, which isn't very exciting!
Apologies, it's been a while since I've updated this thread. Things are moving... slowly but surely.
June 2019
Another one of the parts missing from my car was the speedo assembly drive. This sits at the back of the gearbox and is where the speedo cable attaches from the back of the dial to the gearbox.

My gearbox came from a race car and it seems this part was removed. I tried all the Aston specialists but nobody had the part in stock. One specialist, who shall remain nameless told me.."if I can find one its going to be around £2000 plus any shipping costs and vat etc, if that’s acceptable let me know and I will check.." Needless to say I told him not to bother! Another specialist was sitting on a gearbox with exactly the same part missing and told me it was a very difficult part to find and they had had no luck so far...
The gearbox is made by ZF, specifically it's a ZF S5-24-2. I then spent a huge amount of time looking pictures of various different gearboxes to see if the part was common to other ZF's. But sadly no other ZF's came with a part like this
However, I knew that as well as Aston V8's, the gearbox was also used in the Maserati Khamsin, Maserati Kyalami and the Maserati Quattroporte III.
So, due to the Maserati connection and the fact I was sure it was a ZF part rather than an Aston Martin part, I decided to start contacting Maserati specialists in the UK and also the US where they were perhaps sold in greater numbers. Within no time at all, I found a Maserati parts supplier in the US and, as luck would have it, he had one new old stock speedo assembly on the shelf! It was $600 but that was cheaper than trying to re-manufacture this part. The only other option was to look at an electronic option but this would have meant changing the speedo and I did not want to do that.

But these things are never straightforward and we have hit a stumbling block! The part arrived and the cog that is visible in the photo above slots into the gearbox, with the speedo cable going into the bottom of the sleeve at a 90 degree right angle. Unfortunately, the cog will not slide into place in our gearbox. We think that although the part is the same for both the Aston and the Maserati, the actual cog on the end is different. We think we may have located the correct one via a contact a specialist has with ZF so fingers crossed.
June 2019
Another one of the parts missing from my car was the speedo assembly drive. This sits at the back of the gearbox and is where the speedo cable attaches from the back of the dial to the gearbox.
My gearbox came from a race car and it seems this part was removed. I tried all the Aston specialists but nobody had the part in stock. One specialist, who shall remain nameless told me.."if I can find one its going to be around £2000 plus any shipping costs and vat etc, if that’s acceptable let me know and I will check.." Needless to say I told him not to bother! Another specialist was sitting on a gearbox with exactly the same part missing and told me it was a very difficult part to find and they had had no luck so far...
The gearbox is made by ZF, specifically it's a ZF S5-24-2. I then spent a huge amount of time looking pictures of various different gearboxes to see if the part was common to other ZF's. But sadly no other ZF's came with a part like this
However, I knew that as well as Aston V8's, the gearbox was also used in the Maserati Khamsin, Maserati Kyalami and the Maserati Quattroporte III.
So, due to the Maserati connection and the fact I was sure it was a ZF part rather than an Aston Martin part, I decided to start contacting Maserati specialists in the UK and also the US where they were perhaps sold in greater numbers. Within no time at all, I found a Maserati parts supplier in the US and, as luck would have it, he had one new old stock speedo assembly on the shelf! It was $600 but that was cheaper than trying to re-manufacture this part. The only other option was to look at an electronic option but this would have meant changing the speedo and I did not want to do that.
But these things are never straightforward and we have hit a stumbling block! The part arrived and the cog that is visible in the photo above slots into the gearbox, with the speedo cable going into the bottom of the sleeve at a 90 degree right angle. Unfortunately, the cog will not slide into place in our gearbox. We think that although the part is the same for both the Aston and the Maserati, the actual cog on the end is different. We think we may have located the correct one via a contact a specialist has with ZF so fingers crossed.
June 2019
The front valance and the 3 rear sections (after some repairs) have been painted in the correct matt back finish.

For the rear, you have two side pieces and a centre piece where the number plate sits.


The head light cowls have both been painted the same olive green along with the side vent funnels too. Also the headlight apertures have been painted after riveting the support rims in place after having to re-make one which was unuseable.


The front valance and the 3 rear sections (after some repairs) have been painted in the correct matt back finish.
For the rear, you have two side pieces and a centre piece where the number plate sits.
The head light cowls have both been painted the same olive green along with the side vent funnels too. Also the headlight apertures have been painted after riveting the support rims in place after having to re-make one which was unuseable.
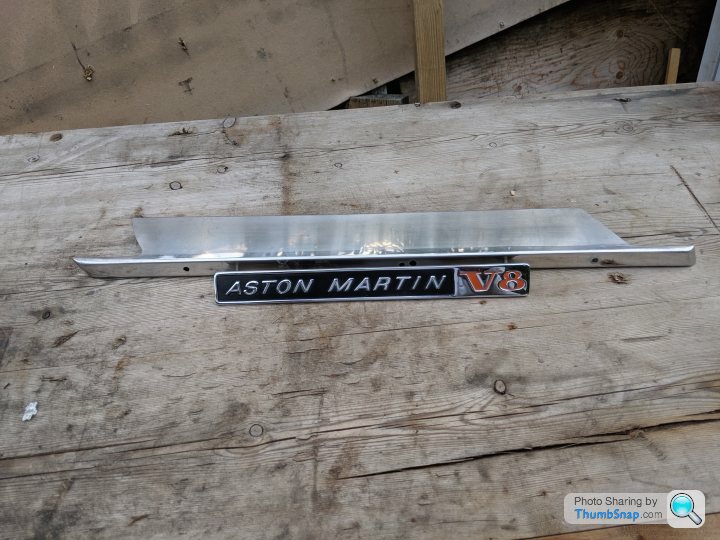
On aligning side trims with the badges, its clear by the exposed holes that these trims should have had the earlier and longer “Aston Martin DBSV8 “ strip badges.
However, although the early AM V8 single headlight mechanically fuel injected cars were indeed fitted with the DBS V8 badges, this was just to use up existing stock. Mine is not an early car therefore it's unlikely that Aston Martin were still using up the supply of these badges on my car so it remains a mystery why I have these.
Anyway, we decided to still fit the shorter badges as I felt these were correct, and weld up the exposed end holes, then metal finish and polish.
I think hey've come out very well.

July 2019

The new air con radiator is loosely in place on the car as the hoses still need to be sorted and fitted.
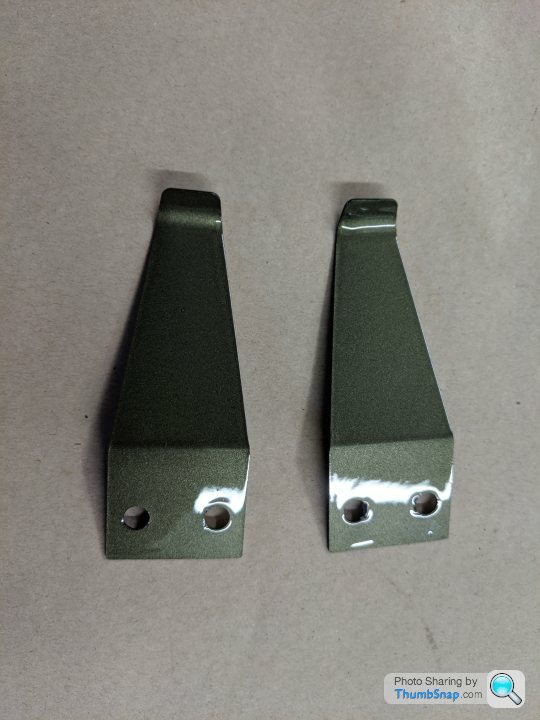
We had to make bespoke brackets to fit to the original locations.

Bonnet springs: we have eventually got around to painting these!
Dash sections: These sections are in place between threading the wires and cables into place.

The new air con radiator is loosely in place on the car as the hoses still need to be sorted and fitted.
We had to make bespoke brackets to fit to the original locations.
Bonnet springs: we have eventually got around to painting these!
Dash sections: These sections are in place between threading the wires and cables into place.
Edited by CQ8 on Tuesday 10th September 21:17
Front view of the car with the number plate fitted. Being a 1972 car, it's debatable if it should have black and silver plates or white and yellow. I like the black and silver but may change to the later style at some point.

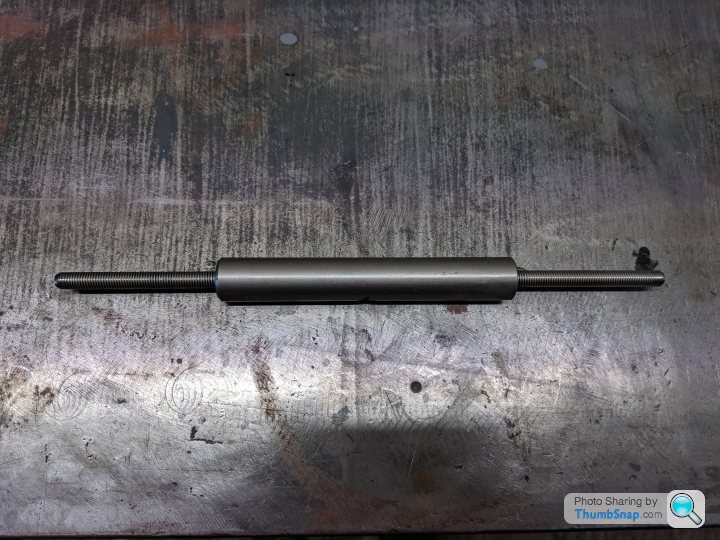
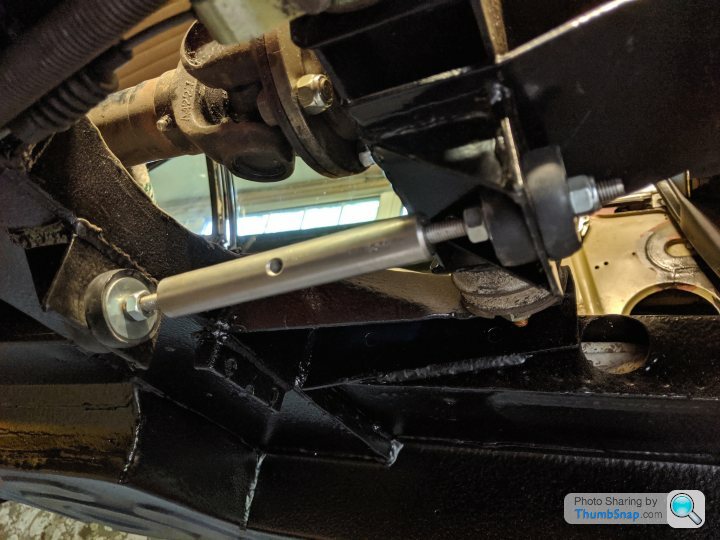
Gearbox reaction rod: The actual rod is obsolete from the factory, so we have made a new one in stainless steel, which saves painting it. The rod is secured in place with the new rubbers and washers.
Horn switch: This was the switch I managed to find which has the end cap missing. I’m not sure how the original switch was to fit inside the housing as this switch has 2 bolt holes but seemingly nowhere to attach. By checking one on another car, the problem was solved by fixing 2 studs inside the casing.

Oil filter and hoses : This unit is now secured in place with the new hoses we had made up copied from the old hoses.

Pedal box: The long awaited pedal box is now in place with all new copper brake pipes connected.

Radiator & cowling: The cowling sections needed repairing and black powder-coating. All the water hoses are now attached with new hose clips.

Trimmed roof panel: Fitted in place but electric cables had to be made up which connect to the courtesy lights above the doors. The old cables had been previously removed and replacements were not in the collection of wires with the new harness. It was a bit tricky threading them up through the inside of the screen pillars!
Gassing Station | Readers' Cars | Top of Page | What's New | My Stuff