Pembleton mkII - Tin Tub
Discussion


With the hole for the heel recess now cut out the floor was now ready for fitting. I wiped down the chassis with some isopropyl and put a healthy bead of SikaFlex 552 structural adhesive on all the mating faces of the chassis with the floor. This isn't required in the (basic) instructions, but I want it to be strong, feel sound and waterproof.

Main section bonded down
Then the rear bulkhead and trunk floor
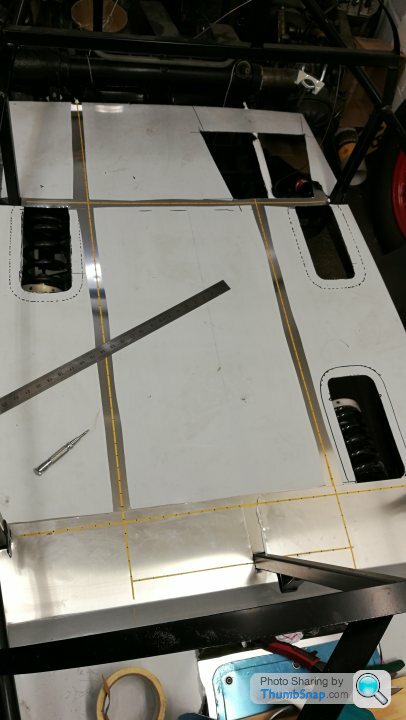
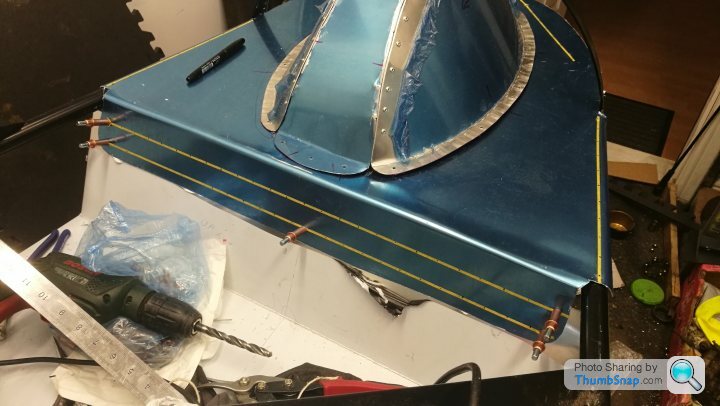
I then started marking up for rivets. I bought some 3mm masking tape to ensure I got a neat straight line and decided in 1" spacing...
Time to drill them holes! The amount of drill bits I went through was frankly a joke, either from snapping, or just blunting. Thankfully 1/8" HSS drill bits are only a few quid for 10. I might get the stubby double ended ones next time.
I drilled the 170 odd holes and put the rivets in...

All lined up, ready to pop like a druggy at a rave!

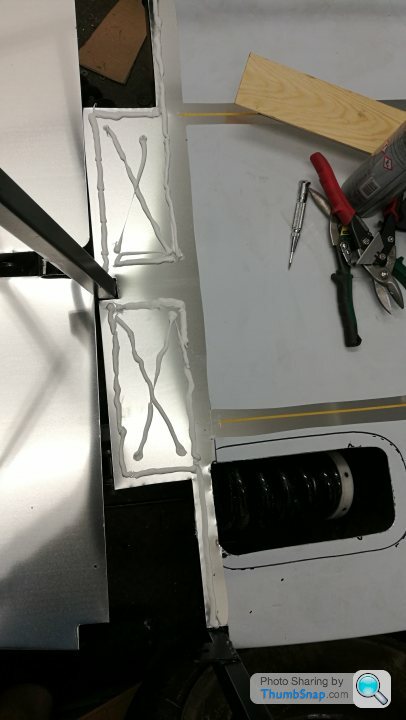
I also fitted one of the heel recesses. I didnt fit the other one yet as I need to have a rethink on my fuel line routing as I planned to have it right where I want the heel recess...
Main section bonded down
Then the rear bulkhead and trunk floor
I then started marking up for rivets. I bought some 3mm masking tape to ensure I got a neat straight line and decided in 1" spacing...
Time to drill them holes! The amount of drill bits I went through was frankly a joke, either from snapping, or just blunting. Thankfully 1/8" HSS drill bits are only a few quid for 10. I might get the stubby double ended ones next time.
I drilled the 170 odd holes and put the rivets in...
All lined up, ready to pop like a druggy at a rave!
I also fitted one of the heel recesses. I didnt fit the other one yet as I need to have a rethink on my fuel line routing as I planned to have it right where I want the heel recess...
ivanhoew said:
Very interesting thread thank you for your diligence in updating it ...bookmarked !
Thanks, this is the only place where I'm doing a build log and I'm trying to keep it as thorough as possible with plenty of pictures. I feel like I'm on a bit of a roll now, although once the lower floor and bulkheads are in I'll have a bit of a lull again as I get into working out the handbrake, pedalbox and gear change.
Once that's done I'll be cracking on with some further aluminium work.
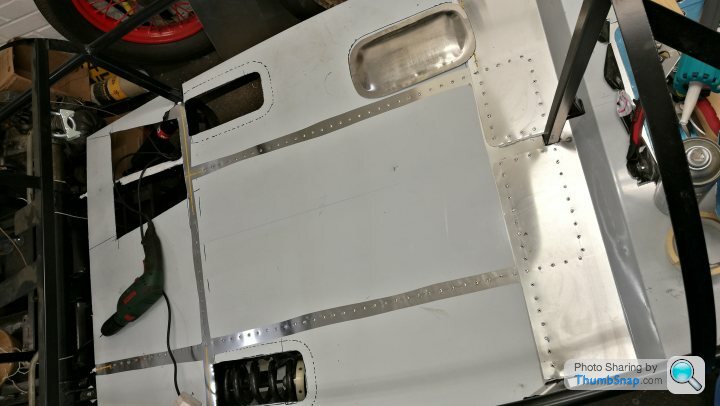
The rear deck is now bonded in and secured with Clecos.
I've marked up where the rivets will be going too...
The armadillo is still loose and will be fixed later.
I'm also not 100% happy with the span of unsupported material in the middle of the floor and it does have a bit if flex, so I've decided to fold up a channel in aluminium and bond/rivet it to the floor from the underside.
This will add a shed load of panel stiffness to it.
I finished off drilling and setting all the rivets for the rear deck area...
I probably put about 100% more rivets than required, but it looks cool and its strong


Next up was the channel for the floor as mentioned above.
I marked up and folded the channel in aluminium by clamping in timber and knocking over.

I then finished one of the ends by cutting and folding over...
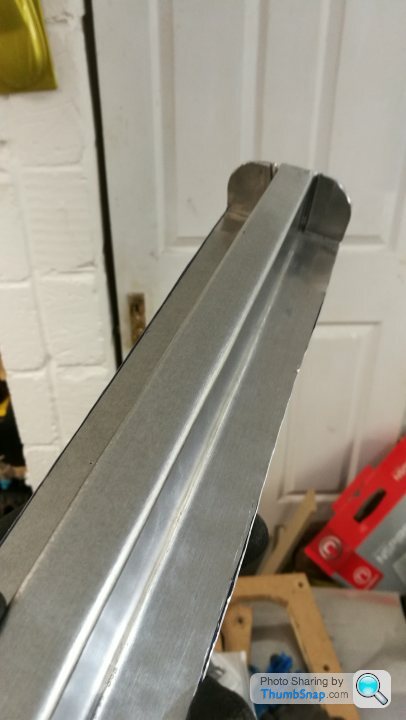
Once I'd marked up the exact width, the other end got the same treatment...

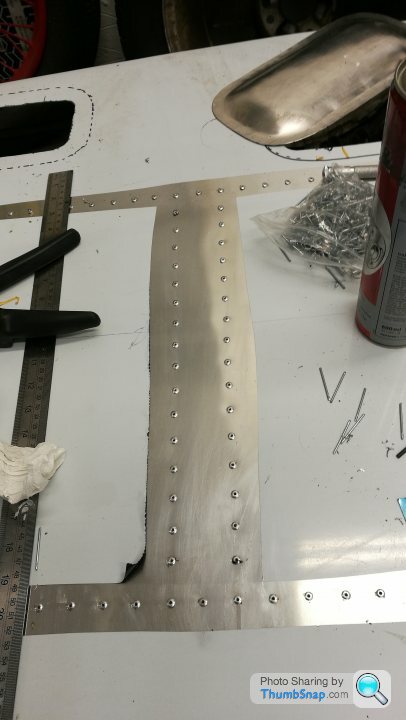
Another healthy bead of structural adhesive and pushed up from below. I then marked up and drilled the rivet holes.

Once all fully riveted to the floor I drilled the tab flanges and riveted to the chassis rails
I probably put about 100% more rivets than required, but it looks cool and its strong
Next up was the channel for the floor as mentioned above.
I marked up and folded the channel in aluminium by clamping in timber and knocking over.
I then finished one of the ends by cutting and folding over...
Once I'd marked up the exact width, the other end got the same treatment...
Another healthy bead of structural adhesive and pushed up from below. I then marked up and drilled the rivet holes.
Once all fully riveted to the floor I drilled the tab flanges and riveted to the chassis rails
 I can't think of a situation in modern life which could be described as 'comfprrable' and yet earplugs are required anyway
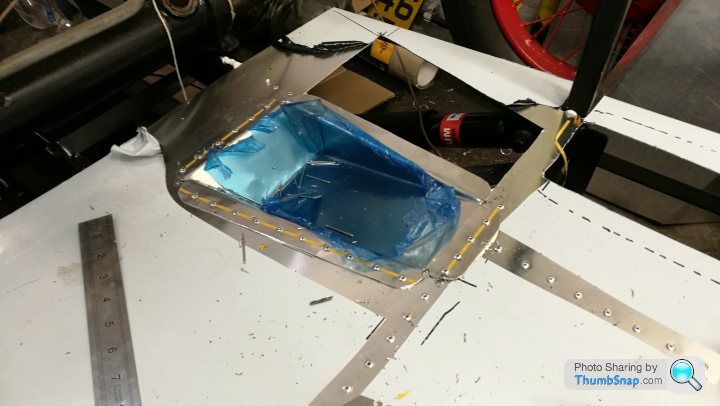
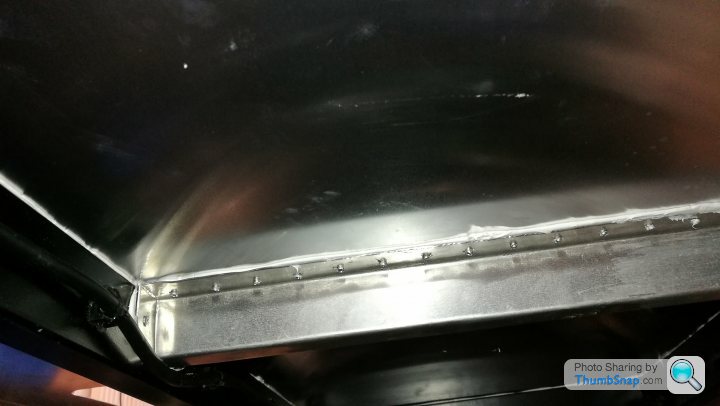
 I've also bonded and riveted in one if the blisters (the rear one).
If you look closely you'll see the rivets along the back edge aren't aligned. This is because its right on the edge if the chassis rail and the drill bits kept glancing off and breaking. I think I broke 4 drill bits on these few holes...
It's not the end of the world though as it'll be under the seat...

Retroguy said:
Could you post an image of the rear brake line 'clock spring' arrangement? I thought the original coiled spring was used.... Is it the same thing?
Many thanks in advance!!
Its the same thing. Many thanks in advance!!
The wheelbase is longer than a standard 2cv, so new brake lines are required anyway. I've exited the brake line part way through the cross tube though... will try and get some pictures tonight for you.
Ambleton said:
Its the same thing.
The wheelbase is longer than a standard 2cv, so new brake lines are required anyway. I've exited the brake line part way through the cross tube though... will try and get some pictures tonight for you.
Thanks. Am I correct in thinking that an off-side rear coiled line is required even though the rear arm is reversed?The wheelbase is longer than a standard 2cv, so new brake lines are required anyway. I've exited the brake line part way through the cross tube though... will try and get some pictures tonight for you.
Just planning on what I need to order for my SS build......
Ambleton said:
I'd recommend buying a pembleton specific brake line kit from either Phil or Bonapart. As everything then comes in the correct lengths and with the right connectors/adaptors etc. I think it is around £80/£90...
Excellent - that's the way for me, then! I'll hopefully visit Phil very soon with a list.I'd highly recommend sourcing a 2cv donor first (unless you already have one).
Even super crusty partial ones that are "spare parts only" are getting close to £1k now. By the time all the bearings/seals etc are replaced and parts refurbished then it could be expensive. I was fortunate with my donors.
Even super crusty partial ones that are "spare parts only" are getting close to £1k now. By the time all the bearings/seals etc are replaced and parts refurbished then it could be expensive. I was fortunate with my donors.
Ambleton said:
I'd highly recommend sourcing a 2cv donor first (unless you already have one).
Even super crusty partial ones that are "spare parts only" are getting close to £1k now. By the time all the bearings/seals etc are replaced and parts refurbished then it could be expensive. I was fortunate with my donors.
I got my donor a few years ago and completely stripped/cleaned/refurbished most of the components I need. Rick Pembro refurbished the gearbox for me. I split the original engine and it's just about ready to re-assemble (pending new seals etc). I modded the rear swing arm, then put everything on hold a couple of years ago but am now ready to proceed.Even super crusty partial ones that are "spare parts only" are getting close to £1k now. By the time all the bearings/seals etc are replaced and parts refurbished then it could be expensive. I was fortunate with my donors.
I've got a list of 2CV parts that I need to buy to complete the refurbishment proper, which I hope to source from Der Franzose and Burton (carb kit, brake components, suspension components, clutch, 123 ignition, etc).
Your build is inspiring me!!
One of my problems is indecision.... For example, I'm not sure whether to go short or long wheelbase (am just over 6ft, medium build) and can't make up my mind on original or wire wheels.
Edited by Retroguy on Wednesday 13th March 09:54
Edited by Retroguy on Wednesday 13th March 09:56
Retroguy said:
I got my donor a few years ago and completely stripped/cleaned/refurbished most of the components I need. Rick Pembro refurbished the gearbox for me. I split the original engine and it's just about ready to re-assemble (pending new seals etc). I modded the rear swing arm, then put everything on hold a couple of years ago but am now ready to proceed.
I've got a list of 2CV parts that I need to buy to complete the refurbishment proper, which I hope to source from Der Franzose and Burton (carb kit, brake components, suspension components, clutch, 123 ignition, etc).
Your build is inspiring me!!
One of my problems is indecision.... For example, I'm not sure whether to go short or long wheelbase (am just over 6ft, medium build) and can't make up my mind on original or wire wheels.
Its borderline if you're 6ft, I'd probably go lwb, but my dad is 6ft and he's okay in Victoria (swb). I have one of each here if you want to try out for size! I'm in Northampton.I've got a list of 2CV parts that I need to buy to complete the refurbishment proper, which I hope to source from Der Franzose and Burton (carb kit, brake components, suspension components, clutch, 123 ignition, etc).
Your build is inspiring me!!
One of my problems is indecision.... For example, I'm not sure whether to go short or long wheelbase (am just over 6ft, medium build) and can't make up my mind on original or wire wheels.
I also have a few sets of keihin carbs if you want to go that route?
Wheels are easy to change post build, but means you double up on wings.
I still have the wings and 2cv wheels I removed from Victoria when I changed if you need them? As well as exhaust manifolds and a few other bits!
A lot of people I know have had 2 pembletons. Either bought or built the first one, then built a second one exactly as they want it! I also have one new Burton damper as I bought a set of four if you need. Pm me.
Edited by Ambleton on Wednesday 13th March 10:09
Gassing Station | Readers' Cars | Top of Page | What's New | My Stuff