Pembleton mkII - Tin Tub
Discussion


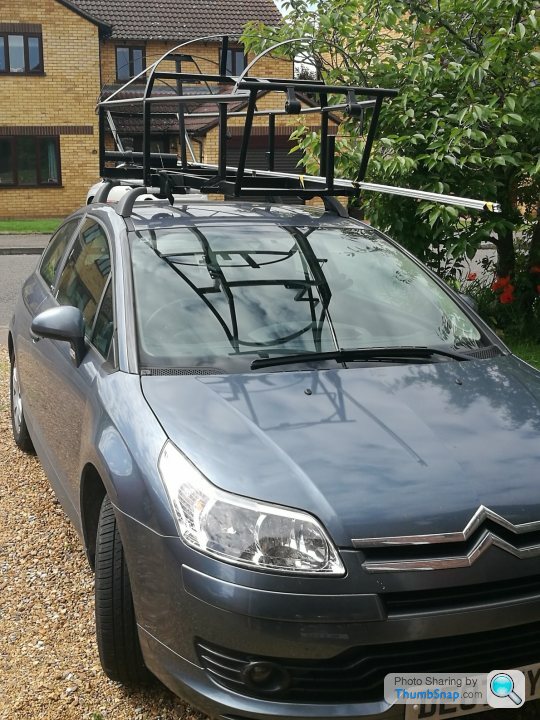
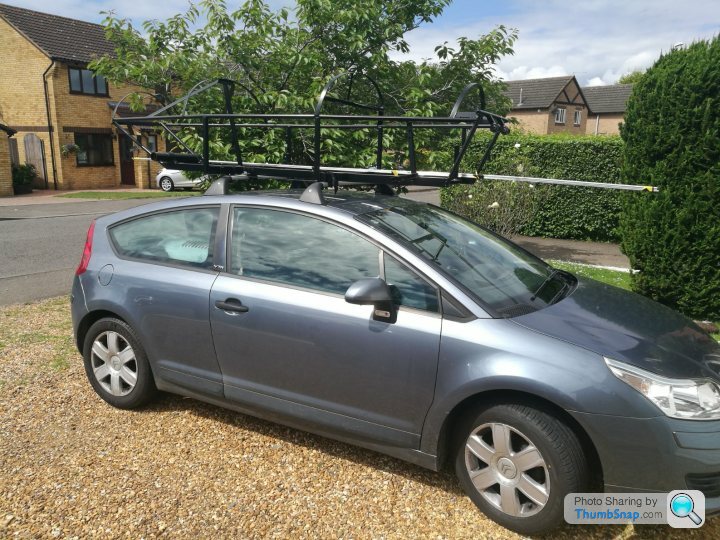
Updates galore....
No real progress has been made on the build, however, my "bits buying" situation is getting worse. Fortunately I have a VERY understanding and supportive wife.
First news is regarding the moto guzzi engine I acquired for this car.... plans have changed.
I was debating wether to first change the engine in Victoria (my current Pembleton) so I could apply all my knowledge to the new build and get it cock on, trouble is, that means sourcing another engine, a potential nightmare.
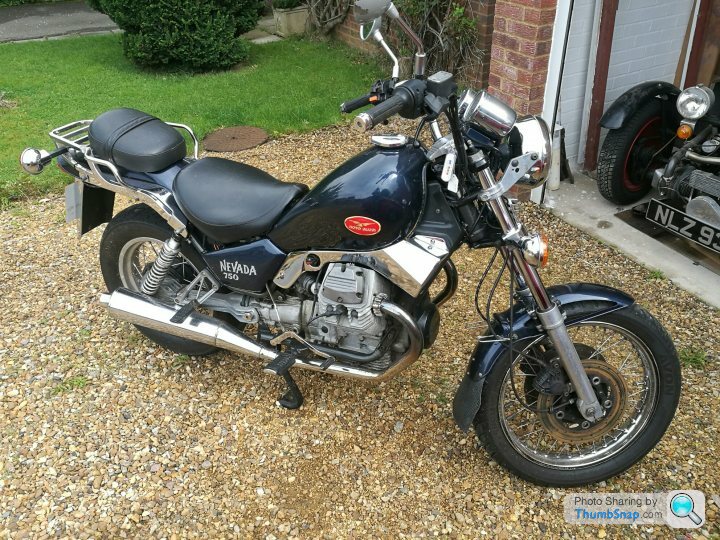
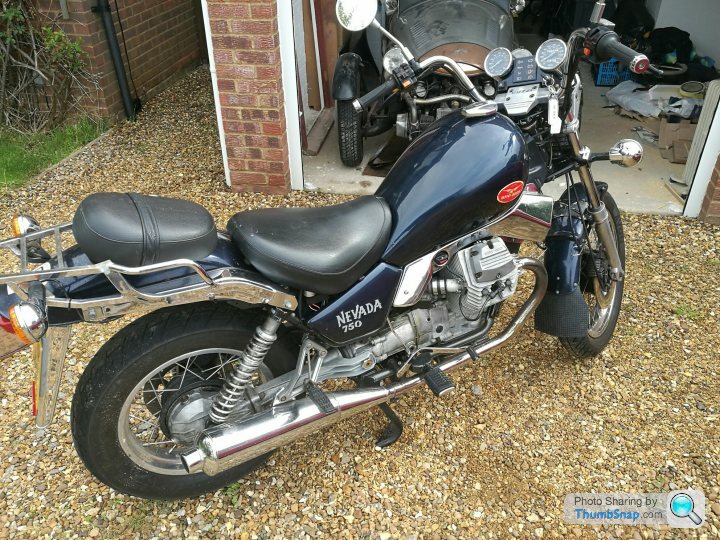
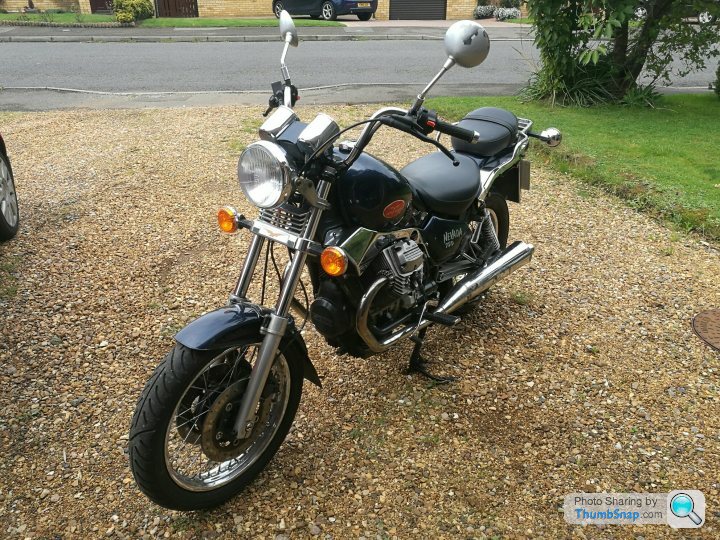
Wind on to September and I had been looking to source another small block guzzi on the side for a little while, but everything was so expensive. Then a complete bike popped up on ebay. The right 750 carb engine, a later 1997 model with only 10k on the clock?! Surely not in my price bracket...
A cheeky offer was made, accepted and deposit sent. A van hired for the following friday night/sat morning and 450mile round trip to the lake district saw a genuinely excellent bike on my drive.
It breaks my heart to think I bought it for the sole purpose of stealing its motor, it really is in fantastic condition. Still, the price I paid was less than I would've got everything I required from a breakers yard with a s t load more miles in an unknown state and I will probably be able to recoup about 40-50% on selling the rest of the bike.
I have also got a local machine shop to manufacture a couple of sets of adaptor plates to allow me to fit the small block guzzi to the 2cv gearbox/flywheel/clutch.
This now means that the original engine I bought, a 1991 750T engine with circa 45k under its belt, will instead be stripped and rebuilt for the current Pembleton - see that on it's own thread.... with the newer lower mileage engine for the new build, do I have a problem?
No real progress has been made on the build, however, my "bits buying" situation is getting worse. Fortunately I have a VERY understanding and supportive wife.
First news is regarding the moto guzzi engine I acquired for this car.... plans have changed.
I was debating wether to first change the engine in Victoria (my current Pembleton) so I could apply all my knowledge to the new build and get it cock on, trouble is, that means sourcing another engine, a potential nightmare.
Wind on to September and I had been looking to source another small block guzzi on the side for a little while, but everything was so expensive. Then a complete bike popped up on ebay. The right 750 carb engine, a later 1997 model with only 10k on the clock?! Surely not in my price bracket...
A cheeky offer was made, accepted and deposit sent. A van hired for the following friday night/sat morning and 450mile round trip to the lake district saw a genuinely excellent bike on my drive.
It breaks my heart to think I bought it for the sole purpose of stealing its motor, it really is in fantastic condition. Still, the price I paid was less than I would've got everything I required from a breakers yard with a s
t load more miles in an unknown state and I will probably be able to recoup about 40-50% on selling the rest of the bike.I have also got a local machine shop to manufacture a couple of sets of adaptor plates to allow me to fit the small block guzzi to the 2cv gearbox/flywheel/clutch.
This now means that the original engine I bought, a 1991 750T engine with circa 45k under its belt, will instead be stripped and rebuilt for the current Pembleton - see that on it's own thread.... with the newer lower mileage engine for the new build, do I have a problem?
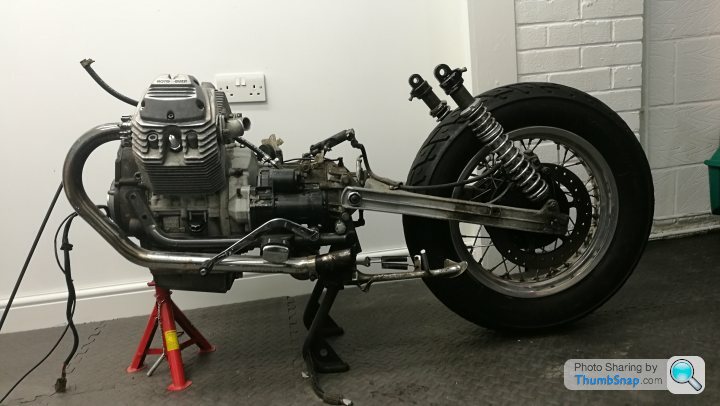
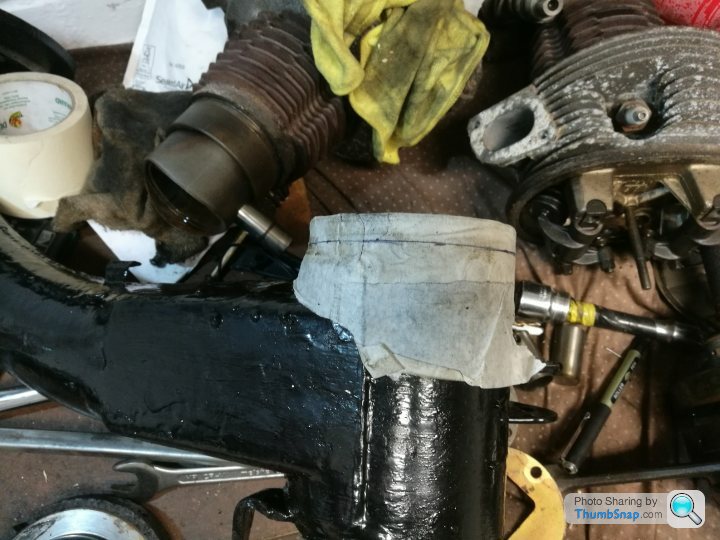
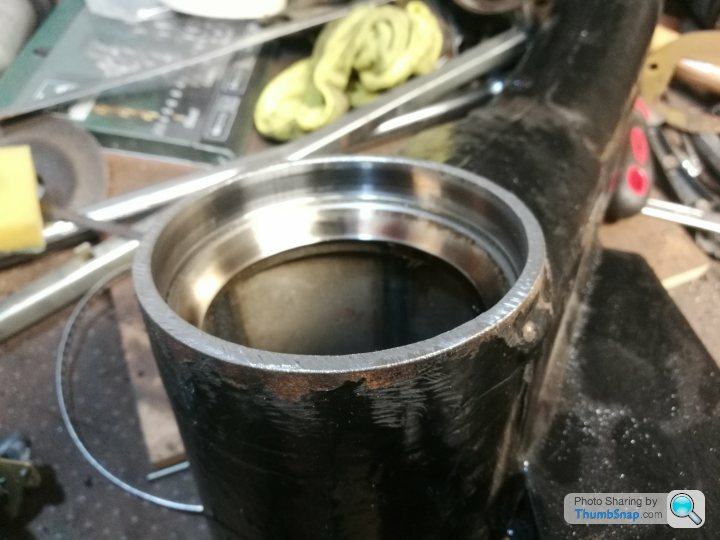
I suppose its probably about high time for an update. For those of you following my other thread for Victoria Pembleton, you'll know I spent most of the autumn/winter rebuilding the bare (ish) guzzi engine I bought. With that engine now complete, but without Carbs, I needed to wait to pull the complete bike apart and get the carbs off. TinTub will have brand new carbs.
After spending a few weekends finishing of the garage and laying some flooring, I could finally get on and start stripping the bike.
It doesn't take long to go from this....
To this....
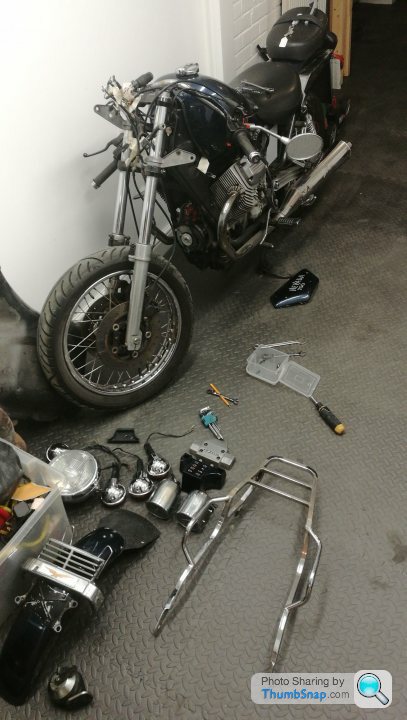
To this....
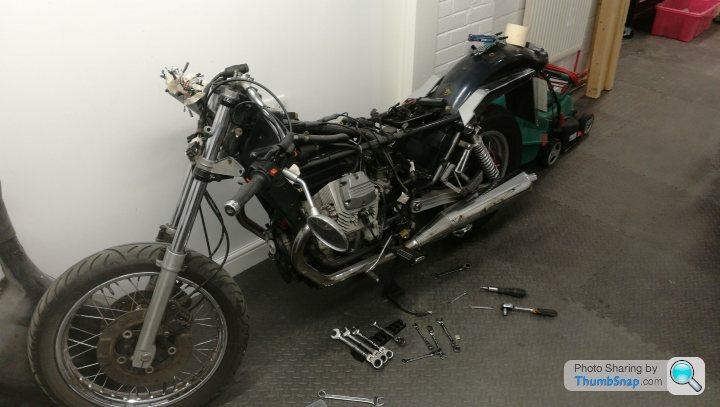
To this...
The thing that took the longest time on the strip down was the wiring. I wanted to know where everything came from and went, so I could pick out the charging and ignition systems without any damage at all.
Brilliantly it became apparent pretty early on that this bike was well looked after, and had been fitted with an Elektronik Sachse electronic ignition system, which is around £350.
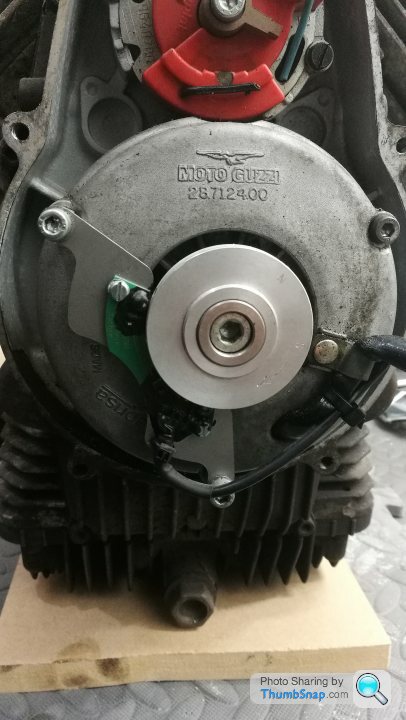
Other than a visual tart up, I don't plan on pulling this engine apart too much as it's only done 10.6k miles and is sweet as a nut. The last engine had done around 45k miles....
After spending a few weekends finishing of the garage and laying some flooring, I could finally get on and start stripping the bike.
It doesn't take long to go from this....
To this....
To this....
To this...
The thing that took the longest time on the strip down was the wiring. I wanted to know where everything came from and went, so I could pick out the charging and ignition systems without any damage at all.
Brilliantly it became apparent pretty early on that this bike was well looked after, and had been fitted with an Elektronik Sachse electronic ignition system, which is around £350.
Other than a visual tart up, I don't plan on pulling this engine apart too much as it's only done 10.6k miles and is sweet as a nut. The last engine had done around 45k miles....
With most bits from the motorbike now sold I've made a decent amount back. By the time the rest of the bits go, I'll be left with a completely free engine, with carbs, electronic ignition, charging system, wiring loom etc. Some bits seem to be hanging around, which is unusual, but they'll sell eventually.
A few weeks ago my wife and I went to visit our respective families for mothering sunday. My wife's parents live in shropshire, so I made plans on the saturday morning to go and visit Phil just over the border near kiddermister who is the founder and runs and the Pembleton motor company.
The business has changed a little over the last few years. Phil still operates his self build business, selling chassis and components for home builders. There are quite a few chassis to choose from now:
- The classic short wheel base 3wheeler, barrel back (with the spare wheel on the back)
- Short wheel base wide body 3wheeler Barrel back (3inches wider)
- Long wheel base 3wheeler barrel back (3inches wider and nearly 8inches longer)
Then there's bullet tail versions of all of the above, and 4wheeler (brooklands) of all of the above.
Guy (Phil's son) operates a factory build business. These are quite different. They use a brand new crate Guzzi small block injection engine and everything else is factory refurbished for a brand new car. These are called Vsports, but the chassis is also different. The Vsport chassis looks the same until you inspect them side by side or see one build up. The engine and gearbox are mounted further rearward so the engine is almost in line with front of the wheels, the engine mounting in general is quite different to allow for the new engines. When you get to the cabin, the width is the same as the wide body version, but it's the same wheel base, however, a custom fuel tank allows the rear bulkhead to be moved back (and the seat) giving nearly 3inches extra length in the cockpit. Guy's aim was to have one chassis for all the Vsport builds. This makes a lot of sense as then all the body panels are the same. They are fantastic looking machines.
Whilst there I placed the order for my chassis - a LWB 3wheeler Bullet tail. Chassis build times are 8-10wks, so I'm still a few weeks off getting it yet. In the meantime I've got some donor components to refurbish!
Parts restored up to now...
Rear drum, arm end plates and brackets, drive shafts, rear swing arm and steering tube. I've also do the steering tie rods too, but they're not in the picture. I'll be doing a BMW ball joint conversion when the bits arrive...
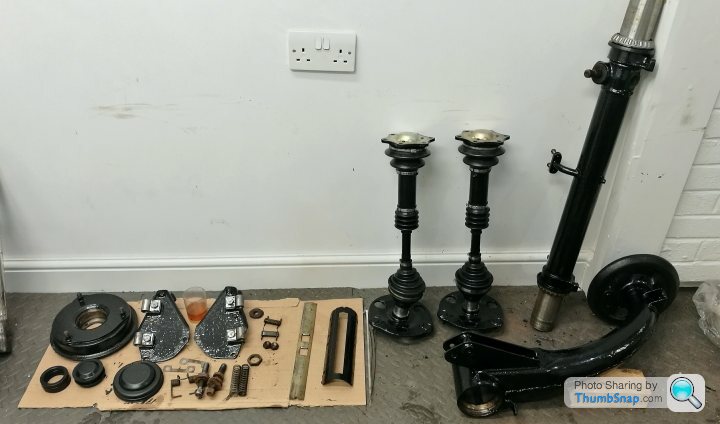
Next jobs will be brake calipers and master cylinder. The front arms are with PMC (pembleton motor company) for modification to the castor angle. All bearings and seals are new.
The drive shaft gaitors were a pain in the arse to fit. Ended up cutting a lemonade bottle for the plastic and creating a cone, a healthy smear of oil and they went on with a bit of force.
Rear drum, arm end plates and brackets, drive shafts, rear swing arm and steering tube. I've also do the steering tie rods too, but they're not in the picture. I'll be doing a BMW ball joint conversion when the bits arrive...
Next jobs will be brake calipers and master cylinder. The front arms are with PMC (pembleton motor company) for modification to the castor angle. All bearings and seals are new.
The drive shaft gaitors were a pain in the arse to fit. Ended up cutting a lemonade bottle for the plastic and creating a cone, a healthy smear of oil and they went on with a bit of force.
Edited by Ambleton on Monday 2nd April 10:39
TooMany2cvs said:
Ambleton said:
I'll be doing a BMW ball joint conversion when the bits arrive...
Replacing TREs or kingpins?The king pin conversion is expensive and looks ugly on an open wheel car. Fundamentally theres nothing wrong with king pins if they're well cared for.
TooMany2cvs said:
Indeed - but it's normally the kingpins that people swear at. TREs aren't that bad, especially if you get the castles with grease nips in.
I've not seen the balljoint conversion - got a link?
For the TREs a guy in the club makes and sells them with new steering arms...I've not seen the balljoint conversion - got a link?

For the king pin conversion this is the only image I can find at the mo....

Edited by Ambleton on Monday 2nd April 11:05
Well, my pile of renewed parts is growing:

My front arms are with PMC having the castor angle modified. My chassis should be ready to collect in about a fortnight as it is now at the powder-coaters.
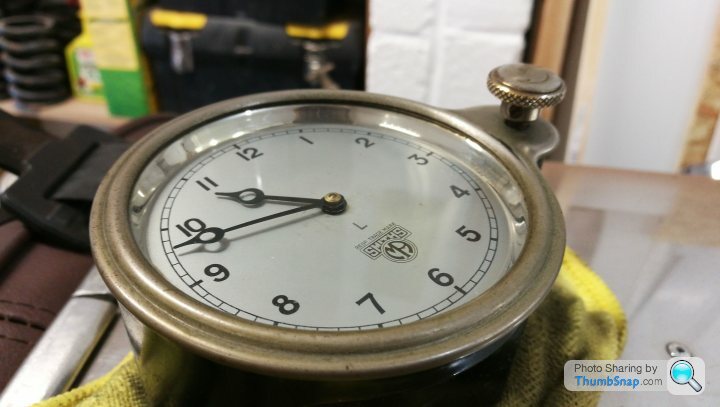
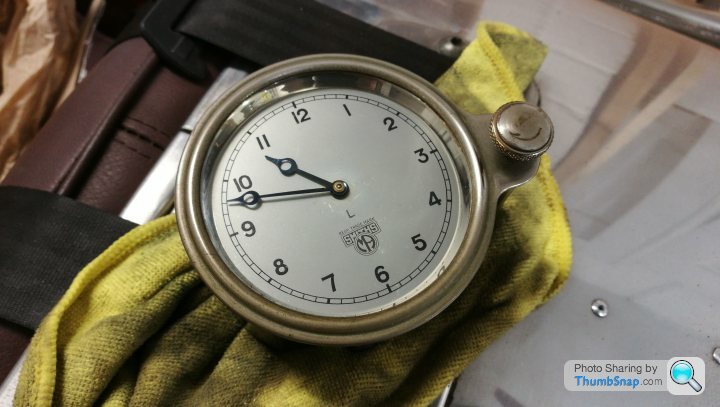
I've also been hunting on ebay and managed to acquire a pre-war smiths mechanical clock.
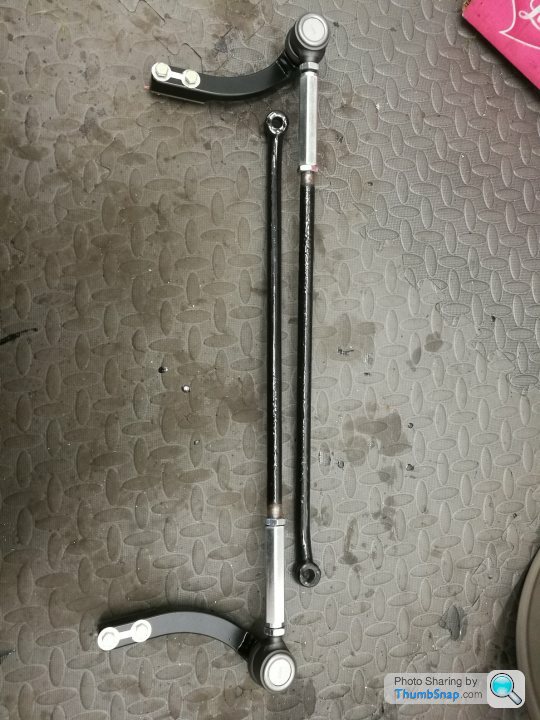
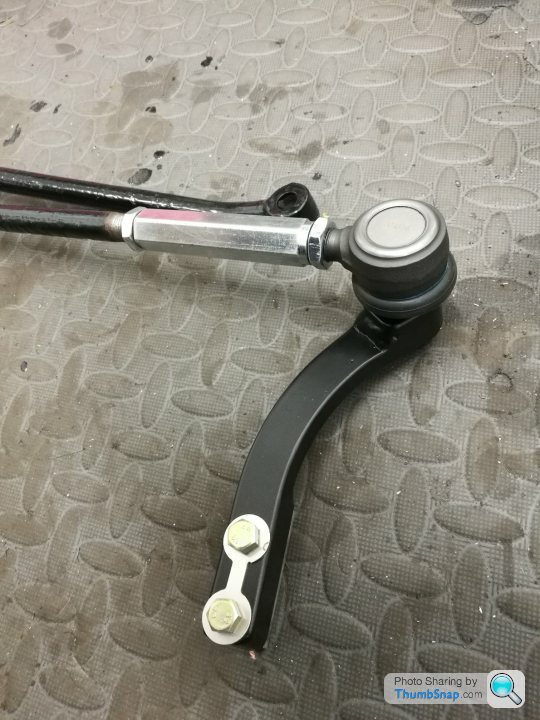
My TRE conversion has also arrived and they look great.
My front arms are with PMC having the castor angle modified. My chassis should be ready to collect in about a fortnight as it is now at the powder-coaters.
I've also been hunting on ebay and managed to acquire a pre-war smiths mechanical clock.
My TRE conversion has also arrived and they look great.
In addition to all the stuff above, I now have from Burton2cv the following:
Master cylinder rebuild kit
Caliper rebuild kit x 2
New wheel bearings all round
Lightened flywheel
New clutch
New dampers
New uprated springs
New brake reservoir (I dropped something on my donor one)
New brake discs and pads
Plus a few other bits I cant remember
Master cylinder rebuild kit
Caliper rebuild kit x 2
New wheel bearings all round
Lightened flywheel
New clutch
New dampers
New uprated springs
New brake reservoir (I dropped something on my donor one)
New brake discs and pads
Plus a few other bits I cant remember
I've been picking up quite a few bits as and when they appear on ebay that are period or just "look right"
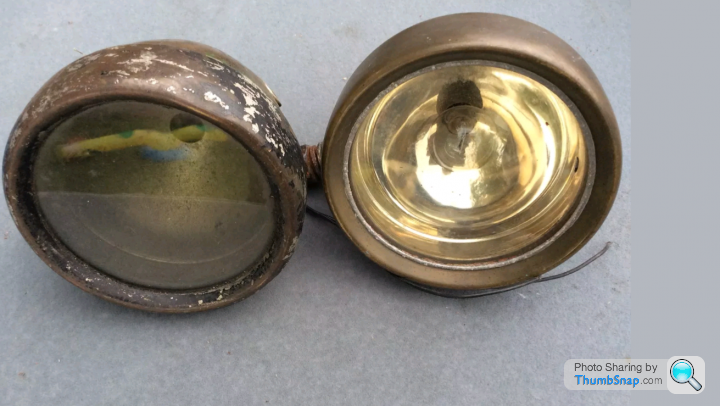
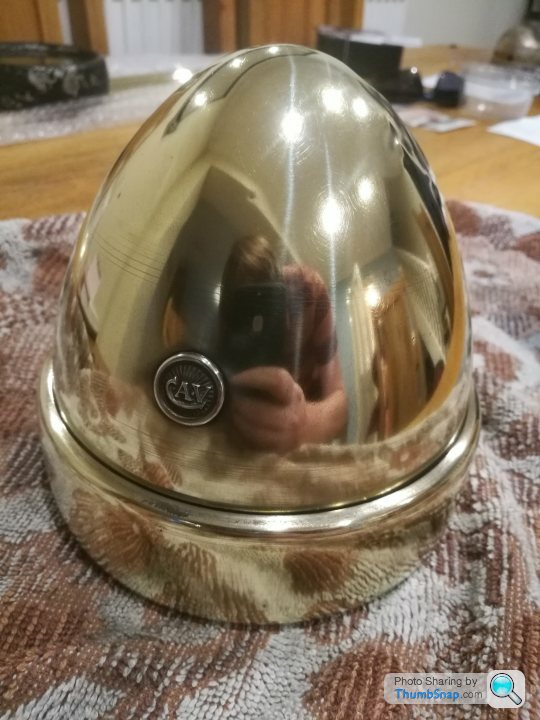
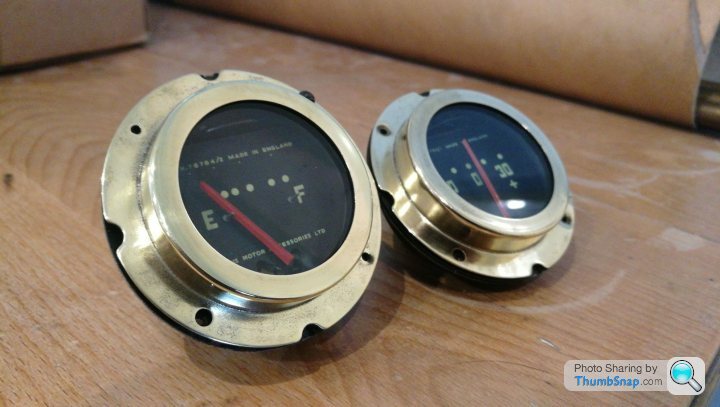
This week ive snapped up some old military brass gauges - ammeter and fuel level, as well as a pair of pre war brass headlamps.
I've decided im going to go all brass and aluminium on this car, because its shiny and looks cool whether is polished or tarnished.
I need to change the reflectors and lamps to MOT compliant modern units, but the bowels and bezels are devine.
The ebay ad had these images...
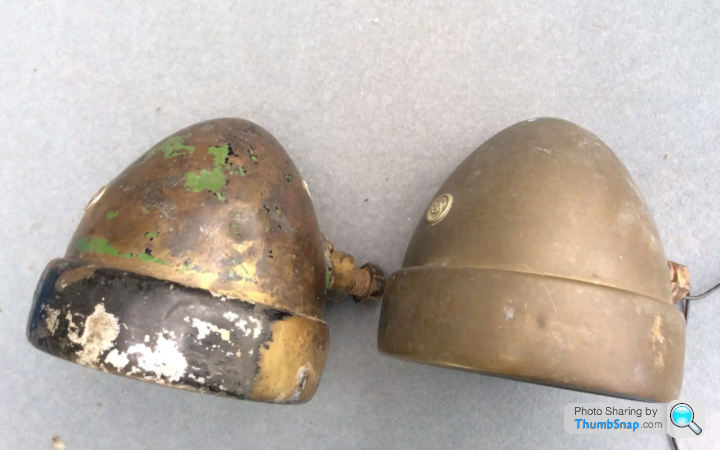

I cleaned up the better one first... the worst one had some pretty bad cracks at the back. I thought about silver solder to repair it, but one of the fabricators at work said the heat may be the last straw as it was thin and weak.
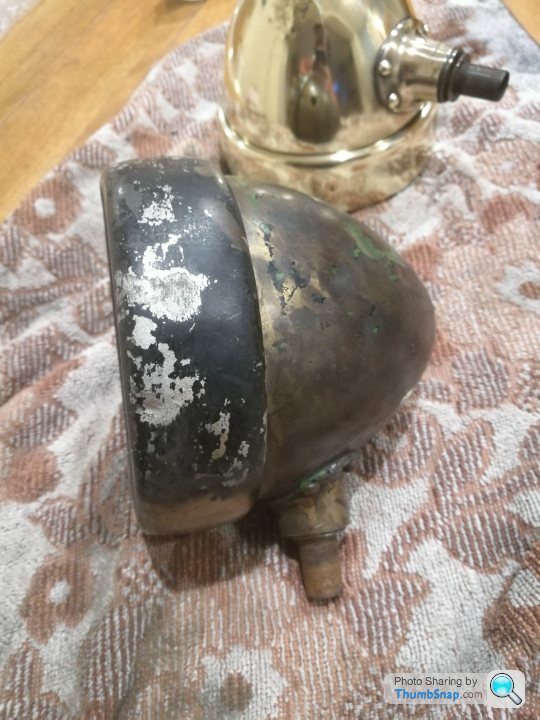
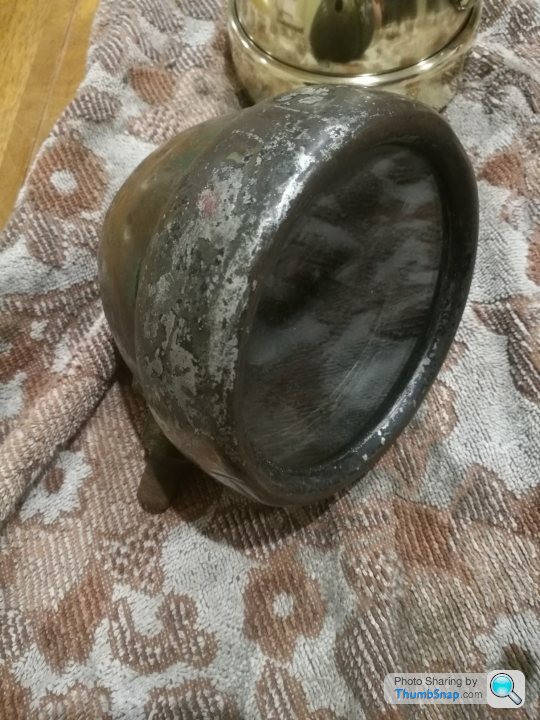

I decided to wet lay a little GRP at the back of the bowl, allowing some resin to seep through.
Once stripped of paint, sanded and polished, they now look like this...


Personally I really like the dents, they give them history and character.
More to come...
This week ive snapped up some old military brass gauges - ammeter and fuel level, as well as a pair of pre war brass headlamps.
I've decided im going to go all brass and aluminium on this car, because its shiny and looks cool whether is polished or tarnished.
I need to change the reflectors and lamps to MOT compliant modern units, but the bowels and bezels are devine.
The ebay ad had these images...
I cleaned up the better one first... the worst one had some pretty bad cracks at the back. I thought about silver solder to repair it, but one of the fabricators at work said the heat may be the last straw as it was thin and weak.
I decided to wet lay a little GRP at the back of the bowl, allowing some resin to seep through.
Once stripped of paint, sanded and polished, they now look like this...
Personally I really like the dents, they give them history and character.
More to come...
Thanks, there's something very satisfying about taking something old and ugly, and polishing the st out of it, accentuating its imperfections and history, but making it all shiny and fresh at the same time.
I also managed to pick up some old solid brass stair rods. These will be fabricated into a picnic rack for the back with some blocks of hardwood. I have enough to do two, so ill practice on the current one first...
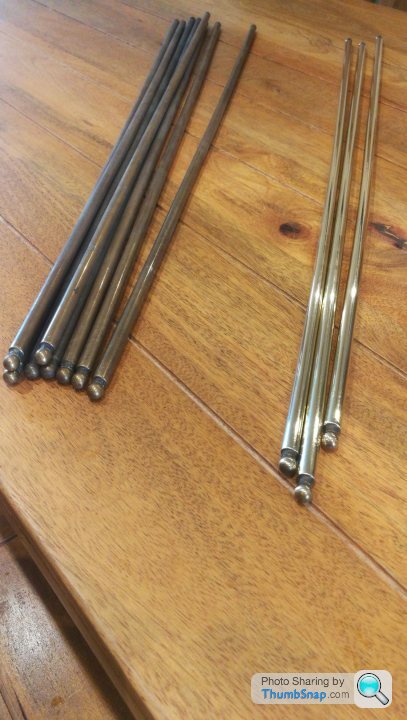
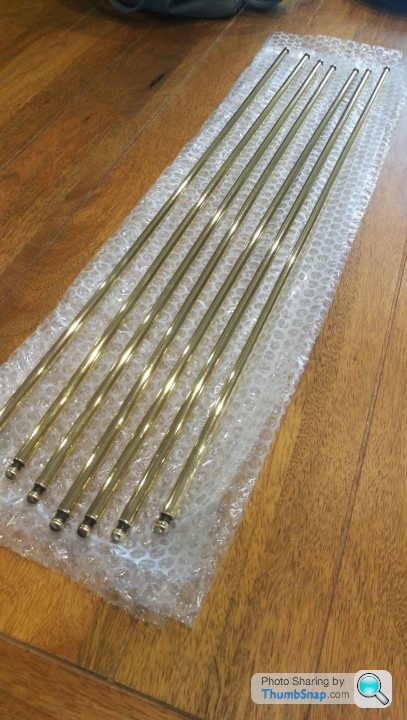
t out of it, accentuating its imperfections and history, but making it all shiny and fresh at the same time.I also managed to pick up some old solid brass stair rods. These will be fabricated into a picnic rack for the back with some blocks of hardwood. I have enough to do two, so ill practice on the current one first...

Arriving home with the chassis strapped to the roof!
Placed on stands on the driveway with bonnet, brass cowl and spun tail piece roughly placed in position.


Next to the other one side by side.

I've measured it across the hips, and its 65mm wider. Maybe a little narrower than I was hoping. Its definitely longer, but at this stage its difficult to tell where, the chassis are quite different between them!
Placed on stands on the driveway with bonnet, brass cowl and spun tail piece roughly placed in position.
Next to the other one side by side.
I've measured it across the hips, and its 65mm wider. Maybe a little narrower than I was hoping. Its definitely longer, but at this stage its difficult to tell where, the chassis are quite different between them!
Before I start putting the Pembletons mechanicals together, I need to go and visit a chap called Duncan in Yorkshire. He's a fellow Pembletonista and all round good egg, serial car builder and metalworker by trade.
He's offered to help me make the floor for TinTub. The floor is the most challenging bit of the bodywork as it has to fit absolutely right - this determines the shape of the rest of the body side panels and skirt. It also has 2 curved flanges along the sides, which is difficult to get good results without the correct equipment.
On my trip, I need to collect a newly rebuilt steering rack and a pair of freshly built Austin7 19" wheels.
In the meantime I've been prepping all the other mechanicals to be fitted.
The rear suspension arm is turned around on the 3wheeler. This causes a dilemma because the flange length is different on each side of the arm. The flange must therefore be trimmed in order to get the arn and bearing to sit properly. 13mm must be removed from the outside edge to match the inner distance so it can be turned around without bother.
After careful marking I got Mr Angry Grinder out and set about with trepidation.
I cut probably 11mm off, then ground the rest down to flat. I'd rather cut short and grind, than cut too much!
The magic number we're looking for is 16mm from race to lip.

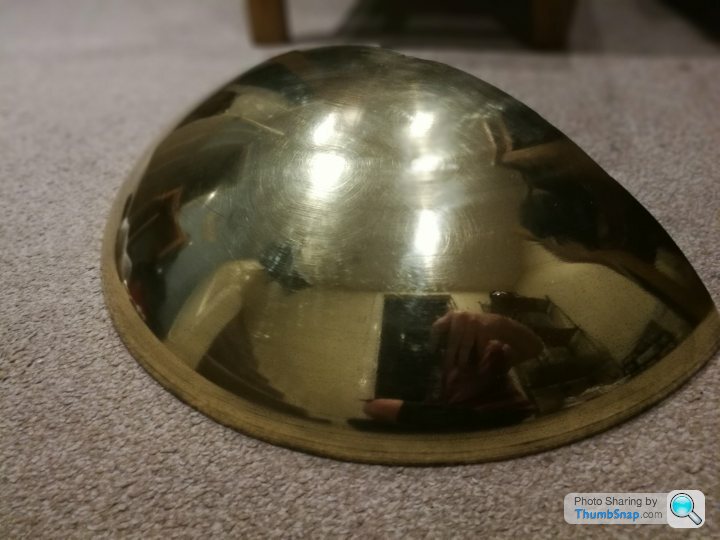
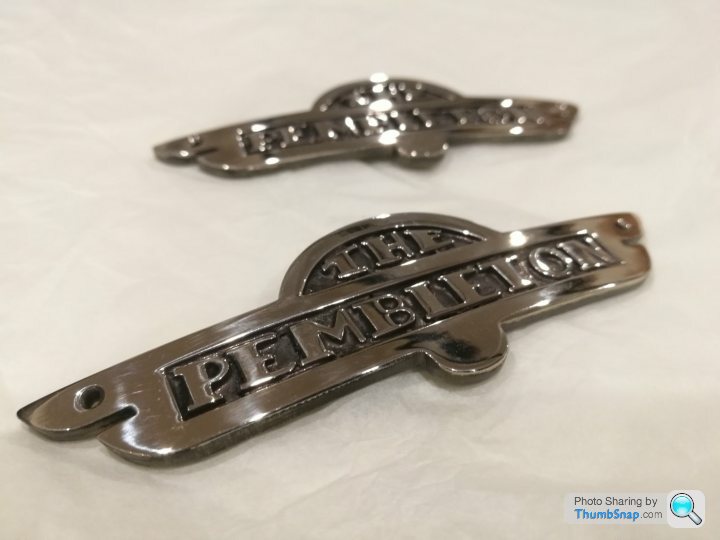
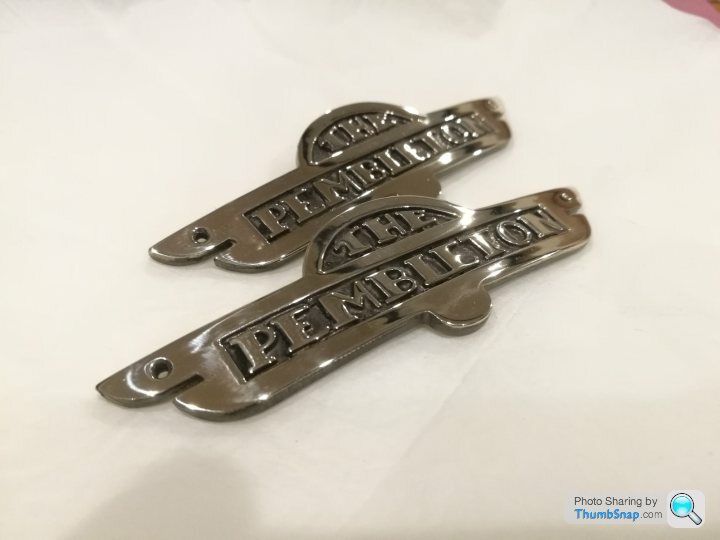
I also spent a little time preparing the shiny bits for fitting later down the line. The brass cowl I got had quite a few manufacturing marks so I gave that a quick rub down and polish and I also prepped the badges for later on. These came rough cast, so needed a little work.
He's offered to help me make the floor for TinTub. The floor is the most challenging bit of the bodywork as it has to fit absolutely right - this determines the shape of the rest of the body side panels and skirt. It also has 2 curved flanges along the sides, which is difficult to get good results without the correct equipment.
On my trip, I need to collect a newly rebuilt steering rack and a pair of freshly built Austin7 19" wheels.
In the meantime I've been prepping all the other mechanicals to be fitted.
The rear suspension arm is turned around on the 3wheeler. This causes a dilemma because the flange length is different on each side of the arm. The flange must therefore be trimmed in order to get the arn and bearing to sit properly. 13mm must be removed from the outside edge to match the inner distance so it can be turned around without bother.
After careful marking I got Mr Angry Grinder out and set about with trepidation.
I cut probably 11mm off, then ground the rest down to flat. I'd rather cut short and grind, than cut too much!
The magic number we're looking for is 16mm from race to lip.
I also spent a little time preparing the shiny bits for fitting later down the line. The brass cowl I got had quite a few manufacturing marks so I gave that a quick rub down and polish and I also prepped the badges for later on. These came rough cast, so needed a little work.
On Sunday I had an early start...
I was up to yorkshire with the chassis for assistance in cutting and folding the floor, lower front and rear bulkhead.
I was to spend the day with Duncan, a serial pembleton builder, cycle car builder and artisan metalworker by trade. He has an expansive workshop with all the tools and equipment a man could dream of, plus the talent and experience to boot.
I loaded up the car on saturday night with a few bits and bobs he was buying off me, and the all important paper patterns. At (almost) he crack of dawn I got up and the wife and I hauled the chassis back onto the roof rack of the stroen.
All tied down we set off at 7.30am. 2hrs 45 later we rolled up at stop off number one to collect a rebuilt steering rack I had purchased with the added grease points and new balls/cups etc. Another 30mins on the road and we rolled up outside Duncans workshop and unloaded the chassis. He had a sheet of ali on his bench ready and a couple of heavy duty trestle for the chassis to sit on at waist height.
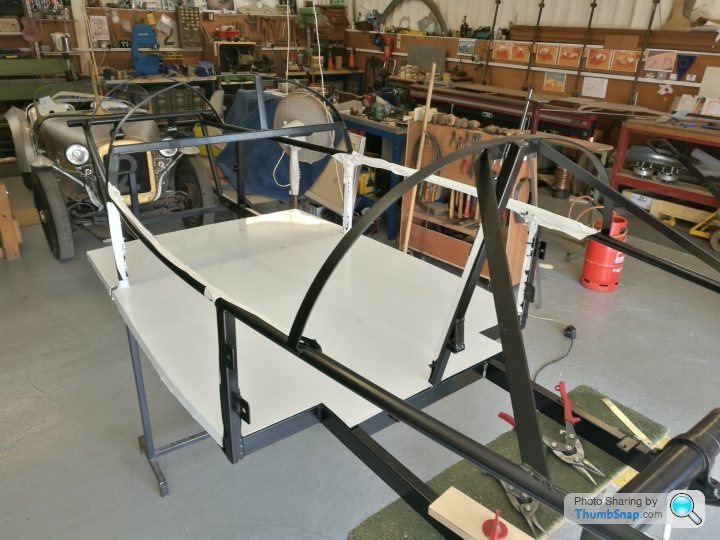
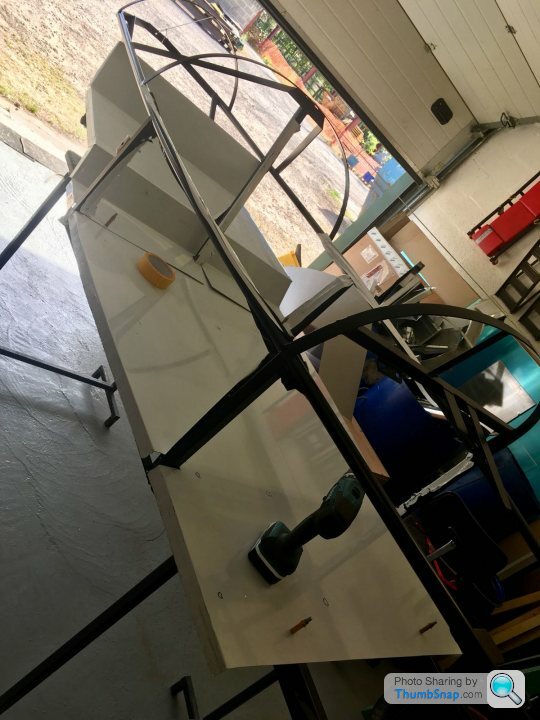
First job was the floor. This has 2x curved flanges along the bottom that point down. This flange dictates the body shape down the side of the vehicle, so its important to get it right. We marked out the pattern on the aluminium and cut it out by hand using a mix of handed shears and tin snips. The curved cut edge has to be smooth and continuous.
Duncan assured me that hand cutting is the best way as you can control it more and gives a cleaner cut if you know what your doing. I didnt, but I was soon put right. Its tiring work on your hand if you're not used to it!
After dressing the edges Duncan then produced a very nice piece of equipment that follows the edge of the cut at a set distance, allowing you to apply pressure between a pair of roller bearings and create a flange. Being curved, this makes the whole panel go banana shaped, but a few minutes on the shrinker/stretcher straightened this out sweetly.
Time for a trial fit... with everything crossed, it nearly went in. A few tweaks here and there, opening up slots for chassis members etc and all was good. Panel done. You can see Duncans Austin Special Cycle car he's working on at the back of the workshop in this image

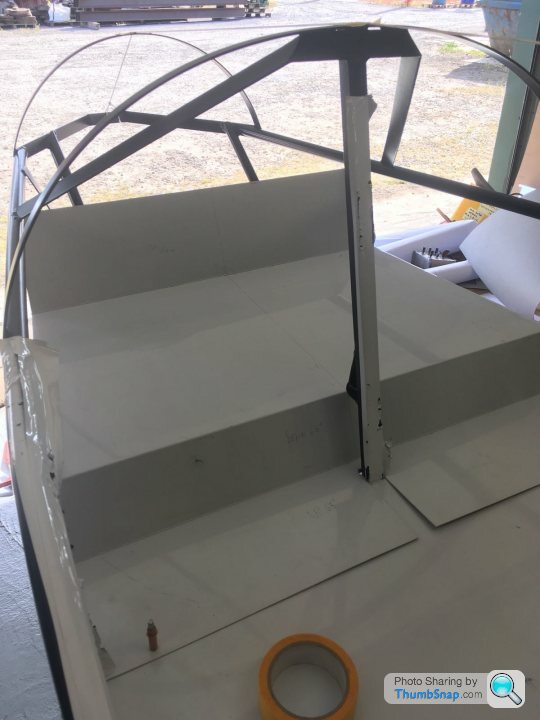
Next was rear lower bulkhead. This has a small portion of the floor, a slanted wall up, rearward of the seat back, in front of the fuel tank, boot floor, and wall at the rear of the boot in front of the rear wheel.
Again, we carefully marked out the paper pattern, cut this by hand and folded as per the instructions (another 2x curved flanges on this piece too). We offered it up to the chassis.
Bugger. Well this is well out!
We marked the centre of the car with a line and carefully measured. Some parts of the chassis aren't exactly plumb, this isn't a massive issue as you only see the outside. But the pattern was well out. The forward part of the panel was okay, but it was far too wide at the back and didn't run in line with the chassis. +60mm on one side and +40mm on the other.
After very carefully remarking and a bit of improvisation, we removed the panel and bashed out the folds we had put in, re-cut to the shape we wanted and set about re-instating the folds in the right place for the chassis. Here it is held in place with a few cleco pins.
All this mucking about wasted a good hour and a half, but I'm glad that this happened with Duncan at hand. If I was doing this at home, I wouldn't have known where to start the correction process!
We also did the lower front bulkhead, but no photos of this presently. Whilst I was cutting out the front bulkhead (my hands were screaming at this point), Duncan knocked up a foot blister for me. This sits by the throttle pedal and allows room for your foot.
More pictures to follow....
I was up to yorkshire with the chassis for assistance in cutting and folding the floor, lower front and rear bulkhead.
I was to spend the day with Duncan, a serial pembleton builder, cycle car builder and artisan metalworker by trade. He has an expansive workshop with all the tools and equipment a man could dream of, plus the talent and experience to boot.
I loaded up the car on saturday night with a few bits and bobs he was buying off me, and the all important paper patterns. At (almost) he crack of dawn I got up and the wife and I hauled the chassis back onto the roof rack of the s
troen.All tied down we set off at 7.30am. 2hrs 45 later we rolled up at stop off number one to collect a rebuilt steering rack I had purchased with the added grease points and new balls/cups etc. Another 30mins on the road and we rolled up outside Duncans workshop and unloaded the chassis. He had a sheet of ali on his bench ready and a couple of heavy duty trestle for the chassis to sit on at waist height.
First job was the floor. This has 2x curved flanges along the bottom that point down. This flange dictates the body shape down the side of the vehicle, so its important to get it right. We marked out the pattern on the aluminium and cut it out by hand using a mix of handed shears and tin snips. The curved cut edge has to be smooth and continuous.
Duncan assured me that hand cutting is the best way as you can control it more and gives a cleaner cut if you know what your doing. I didnt, but I was soon put right. Its tiring work on your hand if you're not used to it!
After dressing the edges Duncan then produced a very nice piece of equipment that follows the edge of the cut at a set distance, allowing you to apply pressure between a pair of roller bearings and create a flange. Being curved, this makes the whole panel go banana shaped, but a few minutes on the shrinker/stretcher straightened this out sweetly.
Time for a trial fit... with everything crossed, it nearly went in. A few tweaks here and there, opening up slots for chassis members etc and all was good. Panel done. You can see Duncans Austin Special Cycle car he's working on at the back of the workshop in this image
Next was rear lower bulkhead. This has a small portion of the floor, a slanted wall up, rearward of the seat back, in front of the fuel tank, boot floor, and wall at the rear of the boot in front of the rear wheel.
Again, we carefully marked out the paper pattern, cut this by hand and folded as per the instructions (another 2x curved flanges on this piece too). We offered it up to the chassis.
Bugger. Well this is well out!
We marked the centre of the car with a line and carefully measured. Some parts of the chassis aren't exactly plumb, this isn't a massive issue as you only see the outside. But the pattern was well out. The forward part of the panel was okay, but it was far too wide at the back and didn't run in line with the chassis. +60mm on one side and +40mm on the other.
After very carefully remarking and a bit of improvisation, we removed the panel and bashed out the folds we had put in, re-cut to the shape we wanted and set about re-instating the folds in the right place for the chassis. Here it is held in place with a few cleco pins.
All this mucking about wasted a good hour and a half, but I'm glad that this happened with Duncan at hand. If I was doing this at home, I wouldn't have known where to start the correction process!
We also did the lower front bulkhead, but no photos of this presently. Whilst I was cutting out the front bulkhead (my hands were screaming at this point), Duncan knocked up a foot blister for me. This sits by the throttle pedal and allows room for your foot.
More pictures to follow....
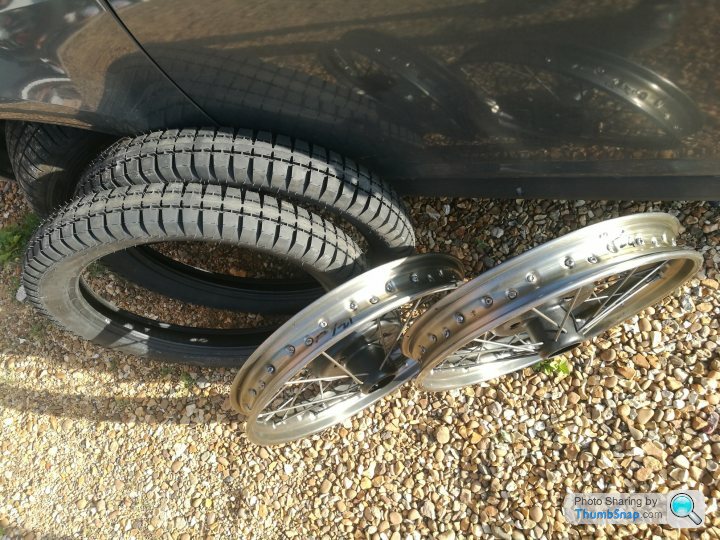
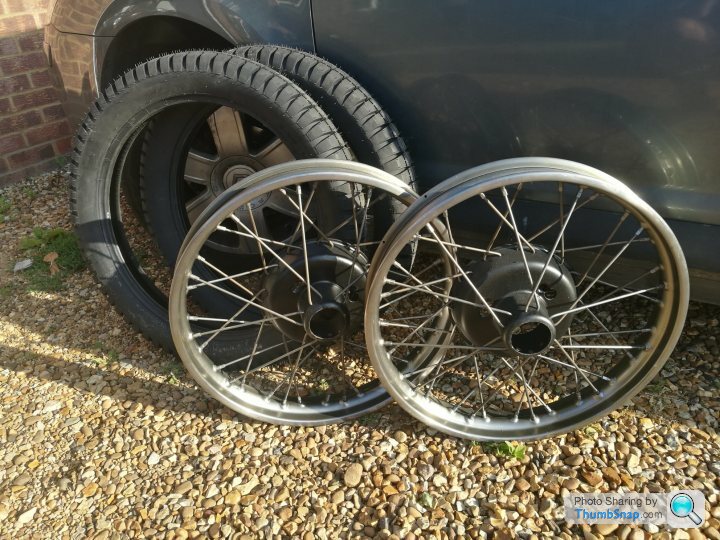
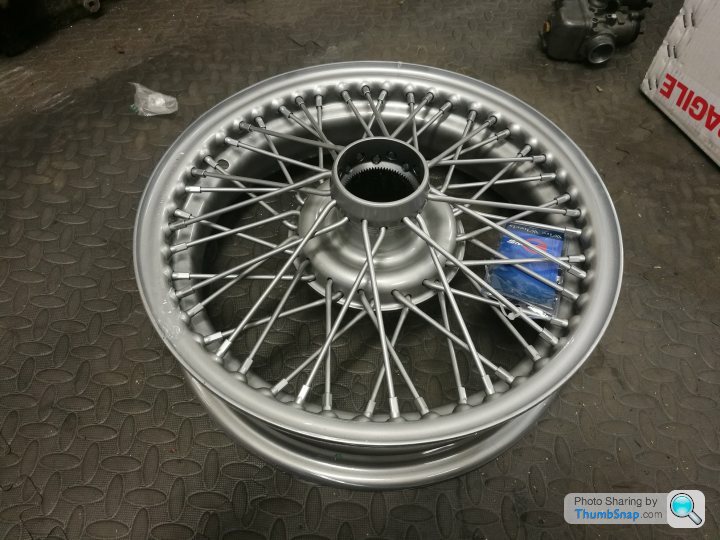
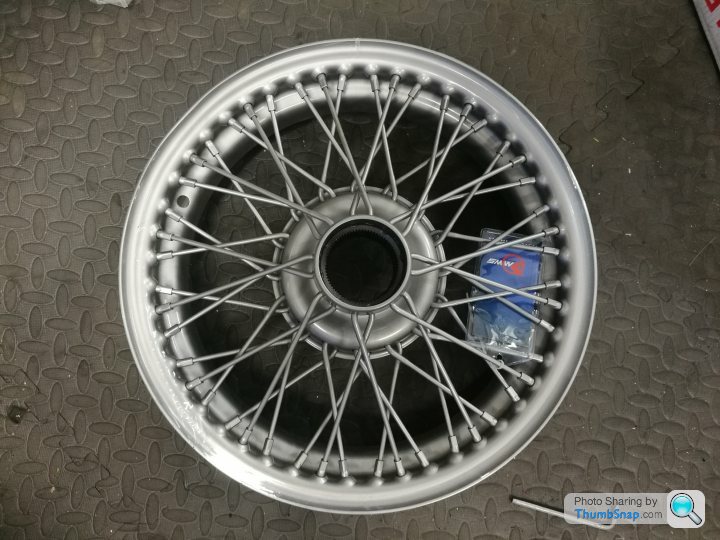
Whilst I was up in Yorkshire, I also collected my new wheels for the next build. These have only just been built using 19" rims, Austin 7 centres and thicker spokes. They only need painting now, bit boy are they glorious.
I also bought a pair of tyres for them that arrived today. I've gone for 350/19 Longstone 3block. These are the same size as would have been fitted on the a7 chummy, and the 3 block pattern gives a cool vintage look. They look more like bicycle tyres to be honest at 3.5inches wide. They're nice and tall too, so will gear the car up quite a bit.

I also bought a brand new rear wheel, 15" outer 48 spoked. I already have a splined adaptor for this. I need to trial fit, but I may need to get the rear arm shortened to ensure the rear wheel sits centrally.
I also bought a pair of tyres for them that arrived today. I've gone for 350/19 Longstone 3block. These are the same size as would have been fitted on the a7 chummy, and the 3 block pattern gives a cool vintage look. They look more like bicycle tyres to be honest at 3.5inches wide. They're nice and tall too, so will gear the car up quite a bit.
I also bought a brand new rear wheel, 15" outer 48 spoked. I already have a splined adaptor for this. I need to trial fit, but I may need to get the rear arm shortened to ensure the rear wheel sits centrally.
NERD ALERT!
I've been doing a bit more research into engine/gearbox/tyres over the last few days.
I know my engine and gearbox were originally from an Ami and matching - ie, not changed. Other than this i have little info to go on.
The engine plaque has AM2-M on it. This is good. This makes it a higher compression, higher power engine - not that I'm using it. This also means it is from one of two cars.
Option 1 -
Ami-6 from May 1968 onwards
Gear ratios:
1st - 5.603
2nd - 2.86
3rd - 1.923
4th - 1.316
Crown wheel and pinion - 3.875
Option 2 -
Ami-8 from March 1969 to December 1970
Gear ratios:
1st - 5.749
2nd - 2.935
3rd - 1.923
4th - 1.35
Crown wheel and pinion - 3.875
My new 19" front wheels and tyres give a rolling diameter of 669mm
This means theoretically cruising at 70mph in top gear is 4555rpm with an Ami-6 gearbox or 4670rpm with the Ami-8 gearbox.
To put this into comparison, my current Pembleton has a later 2cv6 standard gearbox and i'm currently running standard 2cv wheels with Toyo 310 15/135 tyres. these have a rolling diameter of 599mm. Giving a theoretical 5415rpm at 70mph. This means a reduction of nearly 900rpm at 70mph (if its the ami-6 box) - this should make for a much more comfortable cruise!
Doofus said:
I might venture that 70mph in any Pembleton couldn't really be described as "comfortable" 
70 is fine on a dual carriageway, but earplugs are a must. There's a long downhill straight country lane near where I live. When you VMax+gravity it down there things start to get interesting in the current car, no idea what speed it is as the speedo bounces all over the shop.With the Guzzi engine revving to almost 7k rpm and the bigger wheels, theoretical top speed of TinTub will be about 105mph... It'll probably never see more than 80mph though
TooMany2cvs said:
Does the engine have an oil filter on it? If so, then it's later than that. I'm surprised if there's a pre-filter M28 still kicking about, tbh
It does not have an oil filter... does this make it more or less valuable? Rarer, but for good reason?TooMany2cvs said:
I guess you're getting those from Cats' website?
I am indeed - very handy websiteTooMany2cvs said:
Would you post a pic of the engine number plate? If you're going to obscure the number, leave the fourth digit visible.
TooMany2cvs said:
Won't be hard to figure the ratios out - tape on the input shaft, rotate the driveshaft stubs in gear, and count the rotations of each.
This is true, but I'm not really that fussed. I have 2 gearboxes, one standard late 2cv too just in case.Gassing Station | Readers' Cars | Top of Page | What's New | My Stuff