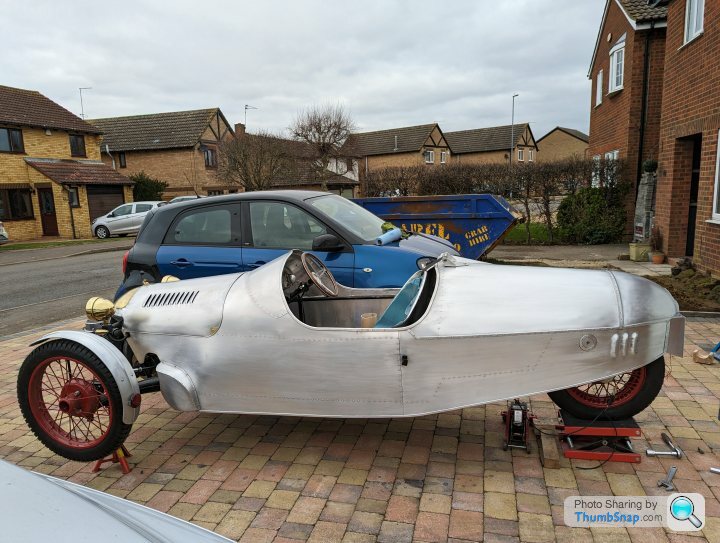
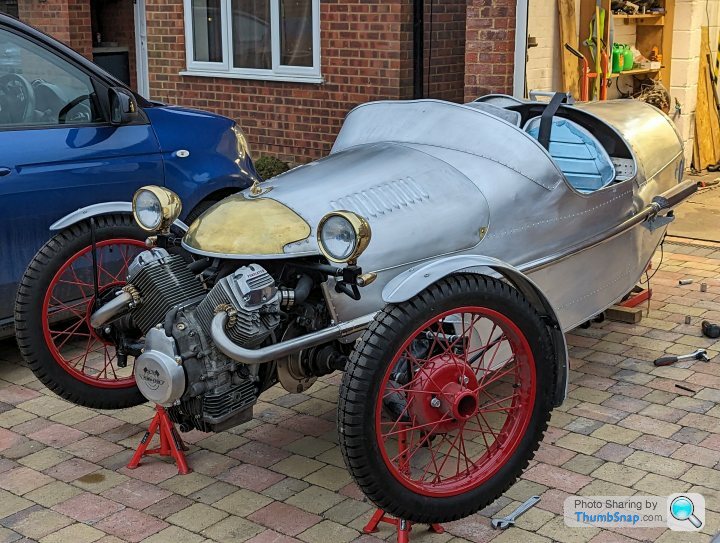
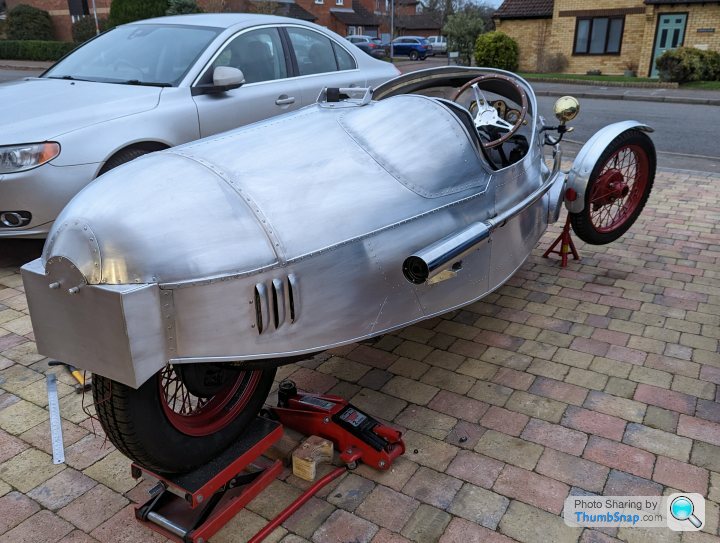
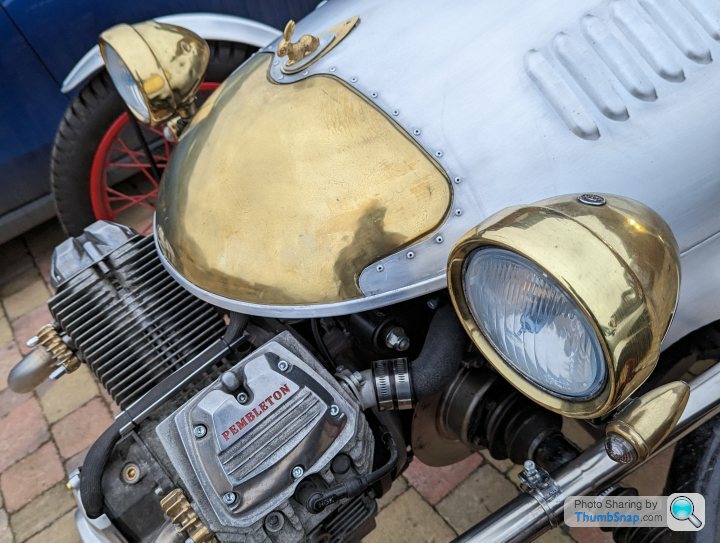
Pembleton mkII - Tin Tub
Discussion


Doofus said:
Ambleton said:
Not sure I'd want to do it again!
If that were true, you'd have started cutting corners 
Thats exactly why I'm not cutting corners! I don't intend on selling it or building another so I'm trying to get it right first time, hence I'm dithering!
If it was a quick fleeting fancy I would've bashed it out, used it for a season or two and shifted on!
I'm trying to get the big single hit items right like the bodywork and shape. Some things can easily be amended or added later. (screens, luggage rack, seating mods, etc)
Finished the dash (clocks, warning lights and switch) wiring today and made a cover. This doubles up as a "hidey" cover, but also will protect our from muck and detritus from under the bonnet and that.
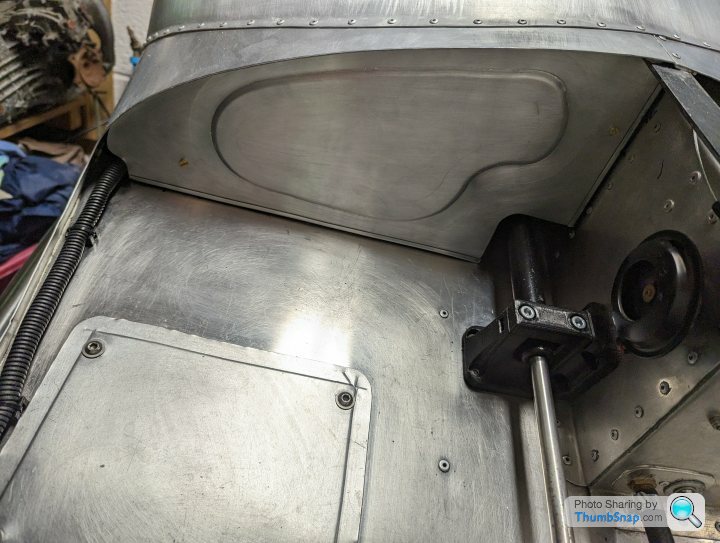
At the moment is held in place with some M4 button heads but I've ordered some knurled thumb screws for easier access should I need it.
This is a list for myself more than anything....
List of jobs still to do:
1- Work out how to mount and latch passenger seat
2- upholster and fit seats
3- fit seat belts
BOOK MSVA
4- final fit of column
5- fit mirrors
6- adjust handbrake
7- set up suspension properly and set bump stops
8- do tracking
9- set up carbs
10- set up Speedo
11- make and fit front mudguard brows
12- fit engine guard
I have a whole list of jobs to do post MSVA too, which includes carpeting out the boot area and painting the inside of the cockpit. I did the last one in stonechip pick-up bed liner and it worked well and looked really good too.
I also want to make a luggage rack and a tonneau cover. And possibly rig up an external handbrake...
Right... I have actually been doing stuff in the background but I've also had some fairly upsetting family issues that I won't bore you with....
Regardless, we have more progress.

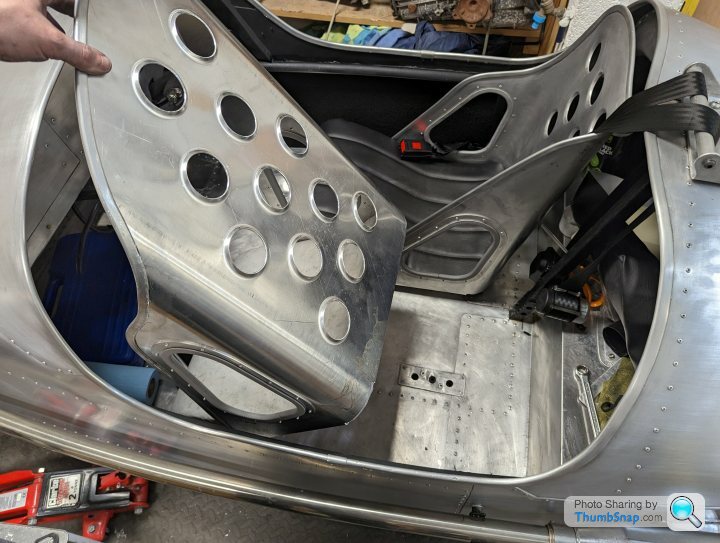
After my good lady made the seat covers for me I redid the seat backs (yes, again lol).
This time in 2mm aluminium NS4 half hard. Had the 2d flat patter laser cut and got my colleague at work to throw them on the brake and rollers.


I got in touch with PMC and got 3x 3m lengths of the smaller edge trim. The same as I used on the skirt. It's 13mm tall for reference...

With doubler plates and trim around the belt pass through holes I mounted them to the bases and trimmed to the barrel back. Next joy was actually forming the edge trim... What an arse of a job that is


Driver's seat dearly ready for final fit. Got a little bit more work to do on passenger seat but coming along...
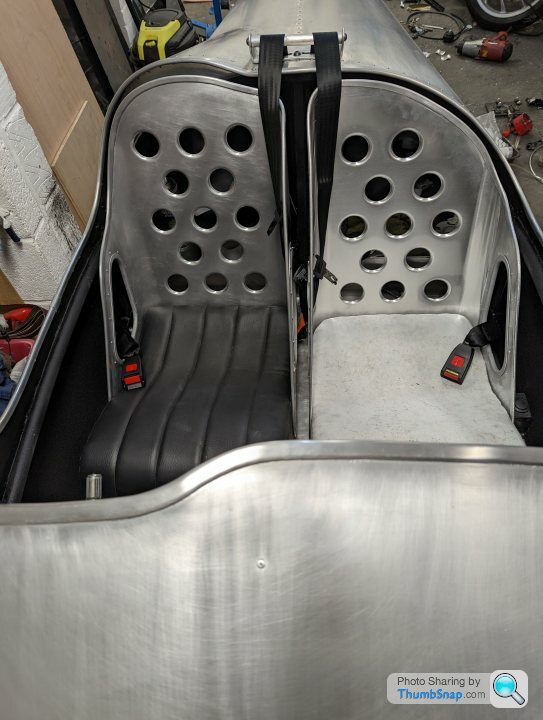

Sharp eyed amongst you may notice I've carpeted the interior lower sides and painted above the chassis rail in crinkle black.

Still got the seat cover to put on the passenger seat as well as the striker for the latch, which is under the floor and allows the whole passenger seat to hinge forward. The driver's seat is on rails.
Button is located on the floor just to the left of the seat.
Regardless, we have more progress.
After my good lady made the seat covers for me I redid the seat backs (yes, again lol).
This time in 2mm aluminium NS4 half hard. Had the 2d flat patter laser cut and got my colleague at work to throw them on the brake and rollers.
I got in touch with PMC and got 3x 3m lengths of the smaller edge trim. The same as I used on the skirt. It's 13mm tall for reference...
With doubler plates and trim around the belt pass through holes I mounted them to the bases and trimmed to the barrel back. Next joy was actually forming the edge trim... What an arse of a job that is
Driver's seat dearly ready for final fit. Got a little bit more work to do on passenger seat but coming along...
Sharp eyed amongst you may notice I've carpeted the interior lower sides and painted above the chassis rail in crinkle black.
Still got the seat cover to put on the passenger seat as well as the striker for the latch, which is under the floor and allows the whole passenger seat to hinge forward. The driver's seat is on rails.
Button is located on the floor just to the left of the seat.
Ahhh, a bank holiday weekend.
I'd provisionally pencilled in 3 days of tinker time but apparently my OH actually wanted to spend some time with me (jokes on her... I think).
As such I sacrificed my Sunday to potter around a national trust property and gardens. It wasn't all bad news though because a coffee and a slice of cake was my reward.... Plus I got to witness a father of two boisterous boys try for about 30mins to fish a frisbee out of a big pond using a variety of branches he'd selected from the nearby woodland, without falling in himself. It was prime entertainment.
So... What did I do with my Saturday and Monday?
Actually rather a lot. I'm in full "prep for MSVA" mode now.
Saturday I did the timing and balanced the carbs, set up the throttle cable and clutch etc. It's now running absolutely sweet as a nut with an idle of 740rpm
Today I did a whole bunch of other stuff:
1- ride height raised a bit
2- bump stops fitted
3- tracking (this is a bit tricky on a three wheeler)
4- mudguard brows made and bonded on
5- wheel centres fitted
6- bled the brakes
7- calibrated the speedo
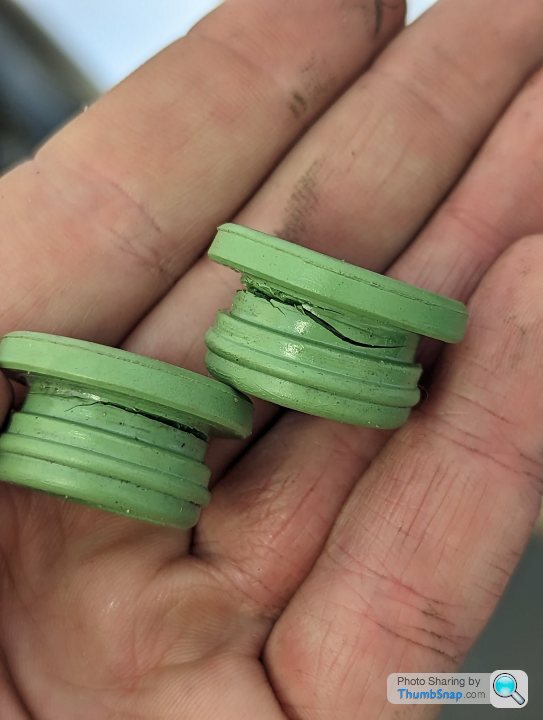
The other week I also fitted a sump spacer to the engine. The oil works very hard in the small block. Not only are they fully air cooled, but there's also only 1.85L of oil in there as standard. The sump spacer increases the oil capacity by over 1L, to a smidge under 3L total capacity. I also have a temp gauge to fit to monitor bulk oil temp.
I've also been suffering with a brake fluid loss. IMO there's two fluids you don't want pissing. One is brake fluid, the other is fuel.
At first I thought it was a caliper as the LHM was dripping off the brake disc. In the end it turned out to be donut seals around the reservoir-M.Cylinder. The fluid was running along the body of the M.cyl and then tracking along the brake line, onto the caliper and then onto the disc.
These seals were split (new M.Cyl). I had another, old master cyl and those seals were much more supple and squidgy so stole those to fit.
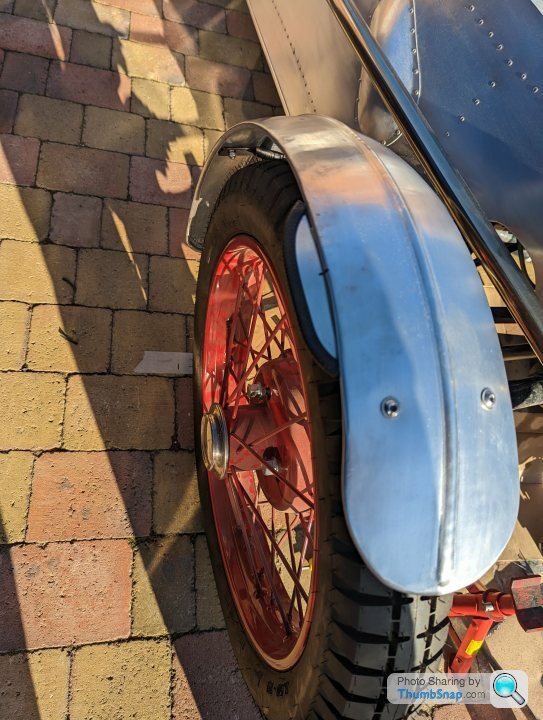
Here's a pic of the wing eyebrows to cover the wheel centres in a true plan view (required for MSVA)
I'd provisionally pencilled in 3 days of tinker time but apparently my OH actually wanted to spend some time with me (jokes on her... I think).
As such I sacrificed my Sunday to potter around a national trust property and gardens. It wasn't all bad news though because a coffee and a slice of cake was my reward.... Plus I got to witness a father of two boisterous boys try for about 30mins to fish a frisbee out of a big pond using a variety of branches he'd selected from the nearby woodland, without falling in himself. It was prime entertainment.
So... What did I do with my Saturday and Monday?
Actually rather a lot. I'm in full "prep for MSVA" mode now.
Saturday I did the timing and balanced the carbs, set up the throttle cable and clutch etc. It's now running absolutely sweet as a nut with an idle of 740rpm
Today I did a whole bunch of other stuff:
1- ride height raised a bit
2- bump stops fitted
3- tracking (this is a bit tricky on a three wheeler)
4- mudguard brows made and bonded on
5- wheel centres fitted
6- bled the brakes
7- calibrated the speedo
The other week I also fitted a sump spacer to the engine. The oil works very hard in the small block. Not only are they fully air cooled, but there's also only 1.85L of oil in there as standard. The sump spacer increases the oil capacity by over 1L, to a smidge under 3L total capacity. I also have a temp gauge to fit to monitor bulk oil temp.
I've also been suffering with a brake fluid loss. IMO there's two fluids you don't want pissing. One is brake fluid, the other is fuel.
At first I thought it was a caliper as the LHM was dripping off the brake disc. In the end it turned out to be donut seals around the reservoir-M.Cylinder. The fluid was running along the body of the M.cyl and then tracking along the brake line, onto the caliper and then onto the disc.
These seals were split (new M.Cyl). I had another, old master cyl and those seals were much more supple and squidgy so stole those to fit.
Here's a pic of the wing eyebrows to cover the wheel centres in a true plan view (required for MSVA)
MSVA application assessed and approved.
Paid for and booked for 7th June (earliest availability).
Need to look into hiring a trailer to get it there and back. I don't fancy an hour+ either way in rush hour on its maiden voyage!
Fitted the mirrors this weekend. I didn't much like drilling the bodywork!
Paid for and booked for 7th June (earliest availability).
Need to look into hiring a trailer to get it there and back. I don't fancy an hour+ either way in rush hour on its maiden voyage!
Fitted the mirrors this weekend. I didn't much like drilling the bodywork!
Well...
Time is dwindling fast!
The passenger seat still wasn't finished so I thought I'd spend the weekend setting the latch and putting the upholstery cover on. My wife proclaimed the seat wasn't padded enough either...
After pissing about for a few hours It was clear It needed a rethink and doing again a bit different/better...
So I remade the seat base and remounted the latch in the floor. Keen motorcyclists among us may recognise the latch/striker as it's fitted to a tonne of Jap bikes (Yamaha. Kawasaki, Suzuki). Seat base cut, front hinge fitted first, then the seat latch. Once I was happy with that I could turn it into the seat. next up drilling off the holes for the seat back and then rebuild the seat base before padding (a lot more at the request of my wife) and fitting the cover she made, before then refitting the seat back, hinge and striker. The latch is under the floor operated by a push button next to the seat.
Seat fit and belts bolted in. Pleased now though.


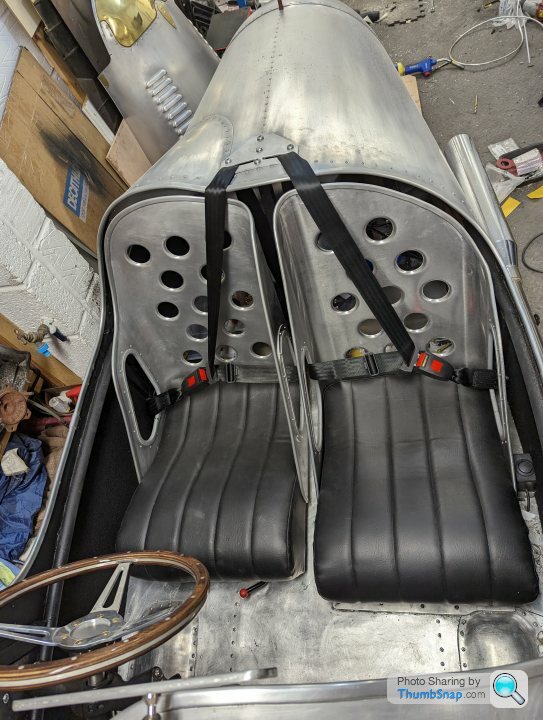
Wife is happy too as theres now 2.5" of foam padding in there instead of 1.5".
Next up is just odds n sods.
Need to check the valve clearances, headlight aim, make sure all the radii are good for the MSVA. Secure the gear leaver pass through surround, tidy up some cable and pipe routing.
Time is dwindling fast!
The passenger seat still wasn't finished so I thought I'd spend the weekend setting the latch and putting the upholstery cover on. My wife proclaimed the seat wasn't padded enough either...
After pissing about for a few hours It was clear It needed a rethink and doing again a bit different/better...
So I remade the seat base and remounted the latch in the floor. Keen motorcyclists among us may recognise the latch/striker as it's fitted to a tonne of Jap bikes (Yamaha. Kawasaki, Suzuki). Seat base cut, front hinge fitted first, then the seat latch. Once I was happy with that I could turn it into the seat. next up drilling off the holes for the seat back and then rebuild the seat base before padding (a lot more at the request of my wife) and fitting the cover she made, before then refitting the seat back, hinge and striker. The latch is under the floor operated by a push button next to the seat.
Seat fit and belts bolted in. Pleased now though.
Wife is happy too as theres now 2.5" of foam padding in there instead of 1.5".
Next up is just odds n sods.
Need to check the valve clearances, headlight aim, make sure all the radii are good for the MSVA. Secure the gear leaver pass through surround, tidy up some cable and pipe routing.
Ambleton said:
Armed with a bucket of soapy water and a scouring pad (I know that sounds wrong!) I gave her a rub down and towel dried. It's uneven at the minute but once it oxidises it goes to a more even dull all over finish.
Can I ask why you’re using a scouring pad? Presumably on aluminium?85Carrera said:
Ambleton said:
Armed with a bucket of soapy water and a scouring pad (I know that sounds wrong!) I gave her a rub down and towel dried. It's uneven at the minute but once it oxidises it goes to a more even dull all over finish.
Can I ask why you’re using a scouring pad? Presumably on aluminium?My last one was polished and it was an absolute pain in the ass. As soon as you polish it, it picks up marks and or oxides and needs doing again. With a dull/brushed finish you don't have to worry about any of that
Gassing Station | Readers' Cars | Top of Page | What's New | My Stuff