1964 Alvis Stalwart
Discussion


Finally an update worth posting!
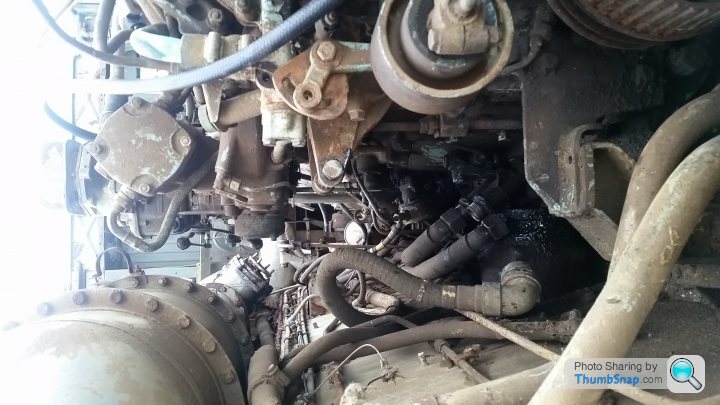
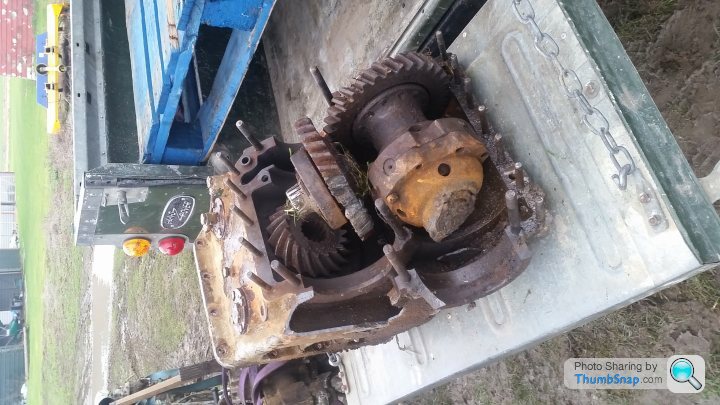
I removed the front left hand bevel to shaft drive pinion with the disintegrated bearing. This was in an effort to get an extra pry on the drive sleeve tooth from the side with a crowbar as I was having no luck from above through the inspection hole. As usual it would not budge and after much swearing I snapped the tooth off. Time to get radical.
Borrowed some oxyacetylene and set to work this evening, cutting the no spin differential out of the centre and then cutting the strengthening webs out of the transfer box casing. I expected it to be much easier than it was, the job still took a good 2 hours! It was bloody difficult to cut through as everything kept melting into a big pool in the bottom and gluing itself back together, the molten dirt and ancient gear oil fumes I fear have shortened my life expectancy by at least 20 years
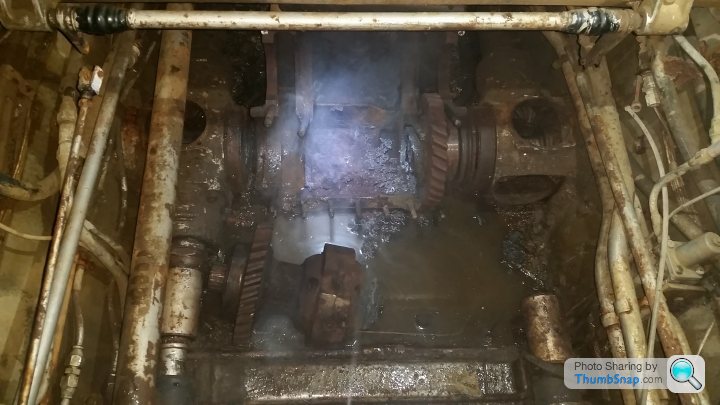
With the diff section out of the way I cut the webs out of the case, the remaining gear and bearing sits in a recess in the case so unfortunately I still couldn't slide the gear back towards the centre. I didn't want to cut the bottom of the casing out for worry of blowing big holes in the floor of the truck. Not ideal on something I'd like to float in the distant future. What I did instead was cut the teeth off of the gear itself and them rotated it so it would clear the recess. Hey presto out she comes!
Interestingly even with all this out the drive sleeve still required about 20 proper wallops with a sledgehammer to force it back into the bevel box. Not a chance in hell I was ever going to slide it back over the splines too with a crowbar!


Now the final steps can be taken toward engine/box removal. Clutch pipes disconnected and starter motor cables. That's about it!
I removed the front left hand bevel to shaft drive pinion with the disintegrated bearing. This was in an effort to get an extra pry on the drive sleeve tooth from the side with a crowbar as I was having no luck from above through the inspection hole. As usual it would not budge and after much swearing I snapped the tooth off. Time to get radical.
Borrowed some oxyacetylene and set to work this evening, cutting the no spin differential out of the centre and then cutting the strengthening webs out of the transfer box casing. I expected it to be much easier than it was, the job still took a good 2 hours! It was bloody difficult to cut through as everything kept melting into a big pool in the bottom and gluing itself back together, the molten dirt and ancient gear oil fumes I fear have shortened my life expectancy by at least 20 years
With the diff section out of the way I cut the webs out of the case, the remaining gear and bearing sits in a recess in the case so unfortunately I still couldn't slide the gear back towards the centre. I didn't want to cut the bottom of the casing out for worry of blowing big holes in the floor of the truck. Not ideal on something I'd like to float in the distant future. What I did instead was cut the teeth off of the gear itself and them rotated it so it would clear the recess. Hey presto out she comes!
Interestingly even with all this out the drive sleeve still required about 20 proper wallops with a sledgehammer to force it back into the bevel box. Not a chance in hell I was ever going to slide it back over the splines too with a crowbar!
Now the final steps can be taken toward engine/box removal. Clutch pipes disconnected and starter motor cables. That's about it!
Beaten to it they are lovely pieces of kit. I don't believe they were ever all that common. Very few survive now, the only one I've seen in the flesh was as a static display down at the RAF Hendon museum. Interestingly the early brochures for Stalwart and prototypes look very similar to a Salamander but with a pickup type body.
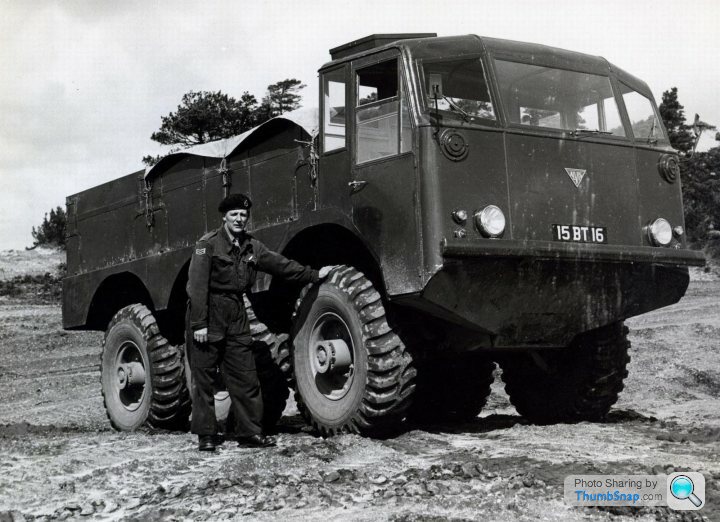
they are lovely pieces of kit. I don't believe they were ever all that common. Very few survive now, the only one I've seen in the flesh was as a static display down at the RAF Hendon museum. Interestingly the early brochures for Stalwart and prototypes look very similar to a Salamander but with a pickup type body.Great stuff, it's a museum I keep meaning to visit as it's not too far away, especially with a keen interest for this sort of thing and old Jags
Christmas shopping about sorted today under orders of Herr better half so if I get some time tomorrow I'll get the last engine bits disconnected
Christmas shopping about sorted today under orders of Herr better half so if I get some time tomorrow I'll get the last engine bits disconnected
LewG said:
Great stuff, it's a museum I keep meaning to visit as it's not too far away, especially with a keen interest for this sort of thing and old Jags
Christmas shopping about sorted today under orders of Herr better half so if I get some time tomorrow I'll get the last engine bits disconnected
They have a ferret next but one to the Stalwart too!Christmas shopping about sorted today under orders of Herr better half so if I get some time tomorrow I'll get the last engine bits disconnected
Max_Torque said:
Yup, you're right, you can always do Christmas tomorrow....... ;-)
Love it Boxing day is here and cracking on, as we speak the clutch is disconnected, starter motor cables off. Final step really is mounts and oil pipes.
The starter cables were surprisingly easy as they're simply a pin in a boss on the motor that the cable is jubilee clipped onto a bit like a hose.
All ready for the big lift now. Removed oil pipes both sides/breather piping, fan assembly brackets and engine mount bolts. I could see the generator being a problem lifting it all out between the two swim jet tunnels as it adds about 3 inches onto the total width of the engine so I removed that. As far as I can tell it seems to be made of lead, it's ludicrously heavy!


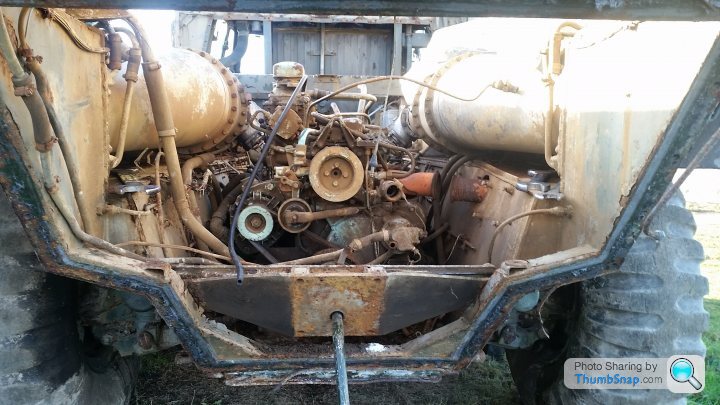
Made final preparations today for removing the engine as a chap in the yard with a Hiab crane on a lorry has agreed to help us lift it tomorrow. He mentioned he may want to sell it soon as it's not getting the use anymore. Very tempted as it'd come in really handy for doing big stuff like this and he doesn't want a huge amount of money for it. We'll see about that one.
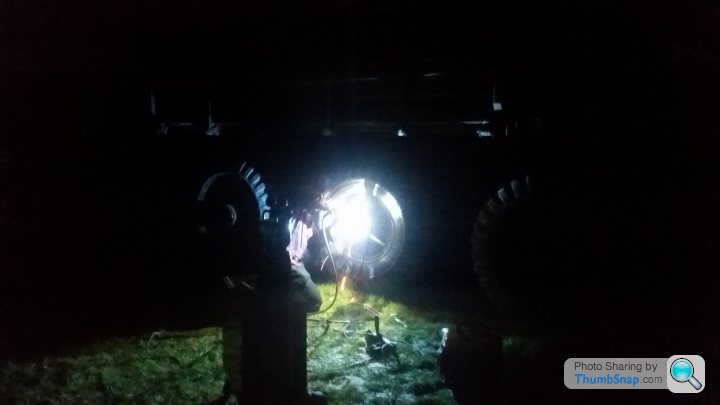
We may lift it and then roll the truck from underneath so we took the hub gear and bearing out of the wheel that we refitted it to when trying to get the transfer box turning. That was a right bugger of a job as the outer race of the bearing had wedged in the hub. We welded some big lumps on it and used some big crowbars to work it out as grips weren't touching it. Here's poor old Matt welding away in the dark
Anyway hopefully should have a proper post tomorrow if all goes well.
Tadaaa! Out it came. Unfortunately where she's sat outside at the moment is like a genuine reenactment of the Somme due to all the crappy weather we've been having, really didn't make things easy!
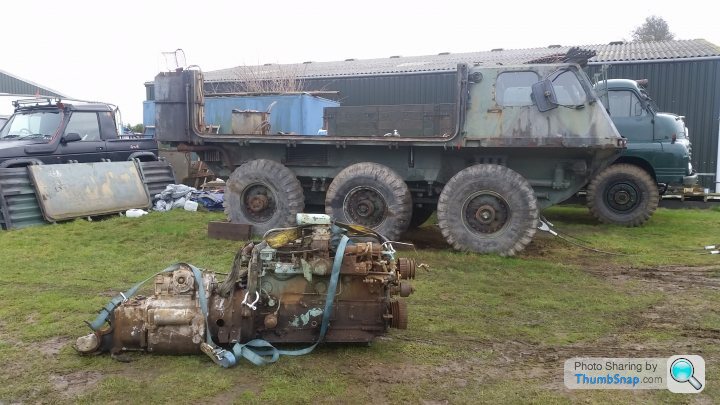

We separated engine and gearbox with some big bars whilst it was on the deck, then split gearbox and (remains of) transfer box. It put up one last fight, with the gear clinging onto the output shaft of the gearbox. In the mud we strapped it up on engine hoist and then clouted the end of the shaft with socket and sledgehammer.
It let go and then finally we were able to send that blasted transfer box off to the scrappy!
As we lifted it the transfer box drain hose pulled off and only then did I remember the diesel I put in there all those months ago! Welcome to Lake Alvis

After a good sort out of the shed everything is now in and under cover, not easy but ultimately a very successful day!
We separated engine and gearbox with some big bars whilst it was on the deck, then split gearbox and (remains of) transfer box. It put up one last fight, with the gear clinging onto the output shaft of the gearbox. In the mud we strapped it up on engine hoist and then clouted the end of the shaft with socket and sledgehammer.
It let go and then finally we were able to send that blasted transfer box off to the scrappy!
As we lifted it the transfer box drain hose pulled off and only then did I remember the diesel I put in there all those months ago! Welcome to Lake Alvis
After a good sort out of the shed everything is now in and under cover, not easy but ultimately a very successful day!
Cheers guys, I appreciate your comments as sometimes I do wonder whether I've gone a step too far! The next step will be moving the truck in under cover, at the moment they are sat in a little paddock behind mine and my Dad's units, the paddock is due to have a small aircraft hangar built on it in the next few weeks due to there being an airfield next door, so this has brought a tad more urgency to the operation.
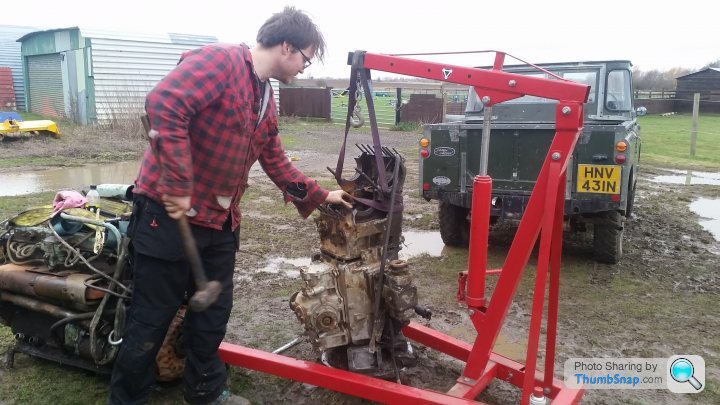
Moving the engine over to the storage shed was a big move in itself. I'm impressed my little 2 ton Chinese engine crane actually picked it up off the floor rather than blowing the ram to pieces or folding up because it is one heavy lump. When we lowered it into the back of the Landy on a pallet the rear leaf springs went completely flat if not a bit further! We managed to drop it down onto the pallet in the shed using the engine crane but biased towards one end because the legs wouldn't stretch out wide enough at the shorter higher capacity reach. Unfortunately the storage shed is an old chicken barn with a compacted dirt floor, man handling it into position with a pallet truck and two of us was near impossible
Dad has kindly agreed to let us keep the Stolly in his unit for the time being as long as we have his huge 70s Dodge pickup in our workshop. Thankfully that starts, runs and drives so will be a lot easier than having to drag a 9 ton hulk out every time I want to use the ramp.
Next weekend I was planning to go up to Bicester Heritage again for their first Sunday Scramble of the year. A guy on the Stolly FB group called Simon keeps his Mk1 Stalwart there along with a few other post war British military vehicles so that should be good to meet up and chew the fat.

Gassing Station | Readers' Cars | Top of Page | What's New | My Stuff