1964 Alvis Stalwart
Discussion


I'm up for a mass help session, it can only move things on a bit 
I can honestly say after this I'll probably never try and do up anything big again. Maybe push to a chassis and bulkhead on my old Landy but that'll do me!
Did get a few more bits done today. I rebuilt the one side of the calliper I painted in the week, wire brushed and cleaned the other half, sprayed it, then repaired a couple of rusty brake pistons as they had pitting on the bore faces. I wire brushed all the rust out leaving just the clean 'pits' visible and mixed up a tiny bit of JB Weld epoxy and smoothed it in like body filler with a razor blade. I'll give this a sand back and try it in the bore of the as yet incomplete calliper half. Hopefully it'll work OK, at the end of the day people repair engine blocks with the stuff. I do have some new pistons in stock but as I remember they were about 30 quid each and with the 3 callipers the other side to rebuild if I can mend and make do with what I have on this one then that makes sense.

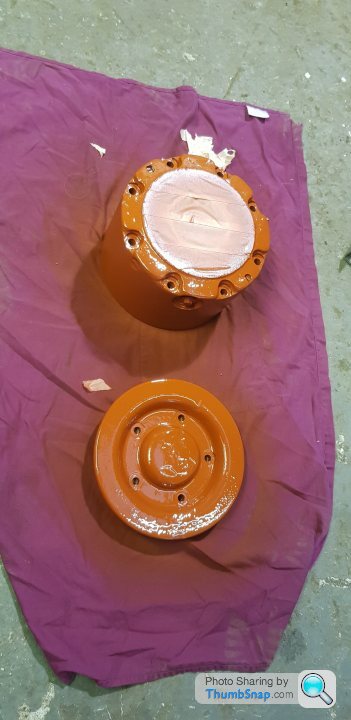
The hub casing and end plate got prepped and some red oxide
My good mate Tyler cleaned up the annulus gearing to within an inch of its life, no joke it's almost better than new! No pics of that bit sadly.
I cleaned off the drive pieces and the suspension on this station with the pressure washer then out with the knotted wire wheel and grinder. There was a bit of grinder damage on the top wishbone from cutting the suspension pins as with a 9 inch grinder it was unavoidable. I ground it out and preheated then tried splodging it in a bit with the welder. Seems OK but time will tell. Finally a bit more good old red oxide on it all. It's looking cracking and should only only look better for some NATO green!


I can honestly say after this I'll probably never try and do up anything big again. Maybe push to a chassis and bulkhead on my old Landy but that'll do me!
Did get a few more bits done today. I rebuilt the one side of the calliper I painted in the week, wire brushed and cleaned the other half, sprayed it, then repaired a couple of rusty brake pistons as they had pitting on the bore faces. I wire brushed all the rust out leaving just the clean 'pits' visible and mixed up a tiny bit of JB Weld epoxy and smoothed it in like body filler with a razor blade. I'll give this a sand back and try it in the bore of the as yet incomplete calliper half. Hopefully it'll work OK, at the end of the day people repair engine blocks with the stuff. I do have some new pistons in stock but as I remember they were about 30 quid each and with the 3 callipers the other side to rebuild if I can mend and make do with what I have on this one then that makes sense.
The hub casing and end plate got prepped and some red oxide
My good mate Tyler cleaned up the annulus gearing to within an inch of its life, no joke it's almost better than new! No pics of that bit sadly.
I cleaned off the drive pieces and the suspension on this station with the pressure washer then out with the knotted wire wheel and grinder. There was a bit of grinder damage on the top wishbone from cutting the suspension pins as with a 9 inch grinder it was unavoidable. I ground it out and preheated then tried splodging it in a bit with the welder. Seems OK but time will tell. Finally a bit more good old red oxide on it all. It's looking cracking and should only only look better for some NATO green!

Another day another calliper all but complete bar putting the pads in
 thankfully the piston repair once sanded back appeared to go together nicely with fresh seals etc so time will tell if it ends up leaking in the future.
Spent some time this evening splitting the hub and brake disc to prep for paint, surprisingly this went more smoothly than expected and we even ended up with some primer on it, the discs are a bit scored due to previous owner running the pads down to the metal, but I imagine will bed in again with new ones

I have got a small touch up spray gun on order at the moment as I think getting into the nooks and crannies of the wishbone assemblies etc with a full size gun may be a pain, it'll be really nice to see it start to come together ready to be bolted on again
Is red oxide primer the best for the job Lew? I would think there are better products on the market nowadays. Think of the forth bridge, paint supplied by the same company for decades but now they use a coating developed for the oil rigs, lasts much longer.
Look forward to next load of photographs, keep up the good work
Look forward to next load of photographs, keep up the good work
I certainly agree there are better products to be had these days but for what I'm trying to achieve I think it should do the job, it dries quickly and above all else is relatively cheap
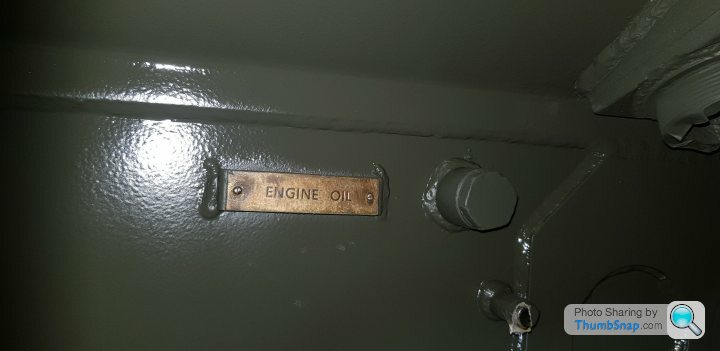
For the inside of the hull I'm thinking a 2 pack primer then the silver top coat as this does seem to be particularly hard wearing and oil resistant.

A few of the components are in paint now, annoyingly the NATO green they've sent is marked as satin but looks to be a gloss finish, I'm not too worried about that at this point as when finished and back on wheels the whole vehicle will get a final 'finish' coat of paint. For the most part these components won't be visible anyway but at least I know they're as good as they can be. Most military 'restorations' you see tend to be a good pressure wash off underneath to get the dirt and oil off, then spray straight over the top of everything in sight.
I've knocked in the bearing races for the wheel bearings, the planetary gearset is refitted into the hub and all threads retapped etc so in the next couple of weeks it should start to come together looking rather nice indeed
For the inside of the hull I'm thinking a 2 pack primer then the silver top coat as this does seem to be particularly hard wearing and oil resistant.
A few of the components are in paint now, annoyingly the NATO green they've sent is marked as satin but looks to be a gloss finish, I'm not too worried about that at this point as when finished and back on wheels the whole vehicle will get a final 'finish' coat of paint. For the most part these components won't be visible anyway but at least I know they're as good as they can be. Most military 'restorations' you see tend to be a good pressure wash off underneath to get the dirt and oil off, then spray straight over the top of everything in sight.
I've knocked in the bearing races for the wheel bearings, the planetary gearset is refitted into the hub and all threads retapped etc so in the next couple of weeks it should start to come together looking rather nice indeed
Edited by LewG on Friday 28th October 21:59

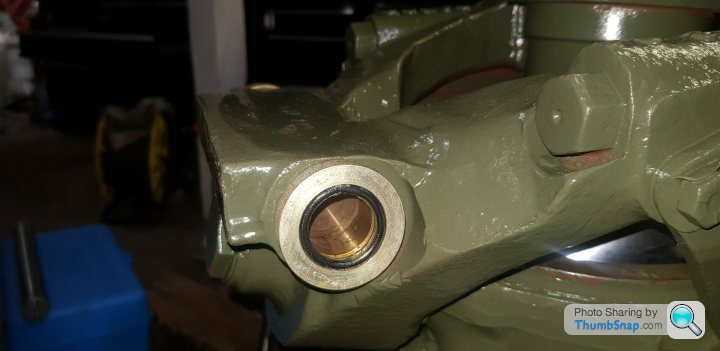
A fairly busy day today but not a huge amount of visual progress. The upright got new brass bushes and O ring caps fitted, I tried a couple of O rings out of a metric selection kit I have and by some miracle they fit spot on.

The big hub nut we built the super socket for holds two hub seals inside it that fit 'back to back'. The charred remains of these were still left inside from heating it up to undo. I drifted them out and cleaned it all up as rust had set in down the backs of the seals, with it all greased up the new seals were fitted and inner wheel bearing packed with fresh grease and placed in the race. Once brake disc and hub were reunited the hub nut was fitted and tightened up to a torque of F.T there's a small locking tab that has to line up and bolts in to prevent it loosening.

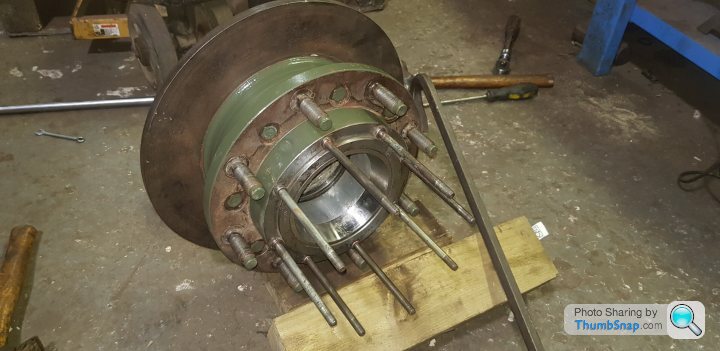
Removed all studs for the hub planetary casing to clean up the surfaces then refitted, technically these don't use a gasket when mated together as they were supposedly finely machined enough not to need one! Unsurprisingly being built in Coventry 60ish years ago they're well known for leaking so this will definitely be getting a liberal application of gasket splodge when it all goes together.
The steering arm that steers the centre wheel has been bare metalled and painted, no pics of that at present unfortunately as it looks cracking, Tyler has been busy with that and stripping the front handbrake assembly. We located the bevel boxes bought for each corner and checked they'd fit OK as they're Mk2 Stalwart items, not Mk1 as this example is. I assumed they would be but do have different part numbers in the manual. From what we've seen so far it appears they should fit fine, which is a huge relief as to find Mk1 only boxes would be pretty much impossible
The big hub nut we built the super socket for holds two hub seals inside it that fit 'back to back'. The charred remains of these were still left inside from heating it up to undo. I drifted them out and cleaned it all up as rust had set in down the backs of the seals, with it all greased up the new seals were fitted and inner wheel bearing packed with fresh grease and placed in the race. Once brake disc and hub were reunited the hub nut was fitted and tightened up to a torque of F.T
there's a small locking tab that has to line up and bolts in to prevent it loosening. Removed all studs for the hub planetary casing to clean up the surfaces then refitted, technically these don't use a gasket when mated together as they were supposedly finely machined enough not to need one! Unsurprisingly being built in Coventry 60ish years ago they're well known for leaking so this will definitely be getting a liberal application of gasket splodge when it all goes together.
The steering arm that steers the centre wheel has been bare metalled and painted, no pics of that at present unfortunately as it looks cracking, Tyler has been busy with that and stripping the front handbrake assembly. We located the bevel boxes bought for each corner and checked they'd fit OK as they're Mk2 Stalwart items, not Mk1 as this example is. I assumed they would be but do have different part numbers in the manual. From what we've seen so far it appears they should fit fine, which is a huge relief as to find Mk1 only boxes would be pretty much impossible
This is the trouble it's mostly this... but another 5 times
I'd absolutely love to drive the thing, if it was left in a better state after sitting for all those years it'd be more tempting to make it a rolling project that can be enjoyed whilst coming back to full strength. As it is I'd probably do more damage than it's worth to achieve that. There's a fair bit of welding to do which I must confess I don't particularly enjoy but I'm sure once into it we'll get there. The other side is tight up against the wall so once this side is done it'll need dragging out and spinning round to crack on with that. The engine appears to be a fairly healthy runner so that's a case of service, replace broken tensioner bearing, try and make it look prettier and replace belts etc, gearbox and transfer box are recon replacements so in theory should be a bolt in job. If I wasn't bothered about making it all look better along the way and worked every hour possible it could probably be up and running in a year or so. It's been 5 years to this point so far so I won't be going anywhere for the foreseeable
I'd absolutely love to drive the thing, if it was left in a better state after sitting for all those years it'd be more tempting to make it a rolling project that can be enjoyed whilst coming back to full strength. As it is I'd probably do more damage than it's worth to achieve that. There's a fair bit of welding to do which I must confess I don't particularly enjoy but I'm sure once into it we'll get there. The other side is tight up against the wall so once this side is done it'll need dragging out and spinning round to crack on with that. The engine appears to be a fairly healthy runner so that's a case of service, replace broken tensioner bearing, try and make it look prettier and replace belts etc, gearbox and transfer box are recon replacements so in theory should be a bolt in job. If I wasn't bothered about making it all look better along the way and worked every hour possible it could probably be up and running in a year or so. It's been 5 years to this point so far so I won't be going anywhere for the foreseeable
In the week I managed to synchronize the hub planetary gears to each other ready for assembly. Without the annulus fitted the sun gear will slide into the planets and spin nicely, with annulus fitted it won't, and if it does it all ends up locking up. Apparently many a Stolly hub was destroyed like this back in the day when they were rebuilt.
The planet gears should be marked with a dot to point inwards as per the manual

Thanks to Stalwart 6x6 group on FB for publishing all the manuals, most helpful.
Finding the dots however proved difficult, no matter how many times I turned the gears with a torch on them it wasn't exactly clear! I scratched any doubtful bits off and found one tooth on each that looked more likely than the others. I must have been somewhere near right as it all went together and spun nicely. Each gear was then marked to make it more clear on proper reassembly

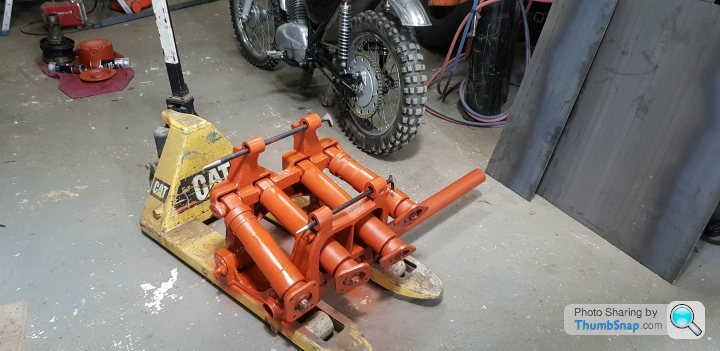
The wishbones and shocks got dragged out yesterday and a good coat of paint, the mini gravity fed gun I bought is a godsend for doing stuff like this!

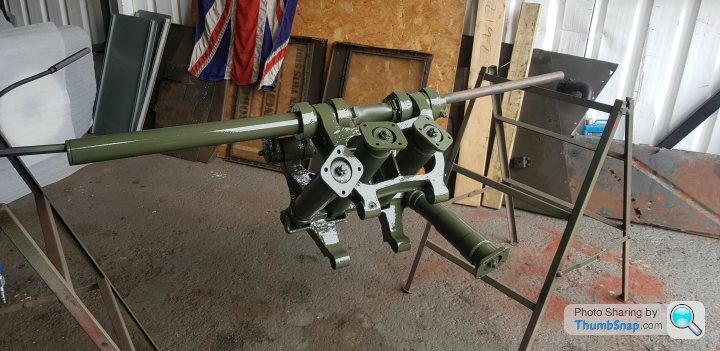
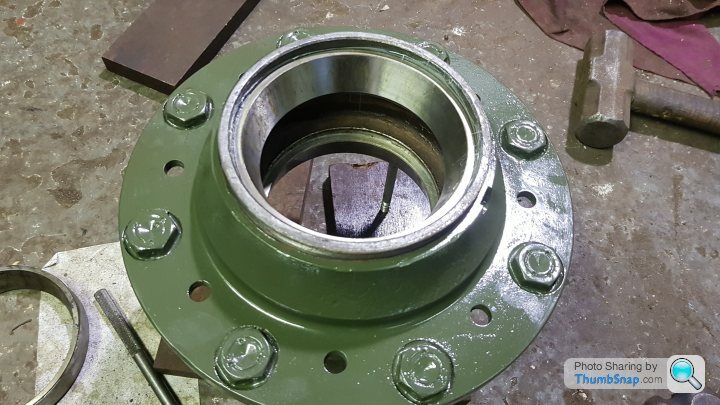
The main hub unit was then fully reassembled, wheel bearing packed and annulus bolted back on to retain it with the shims it came out with as that sets the preload on the bearing behind it. Although the bearings are new it felt right, not too much drag and no detectable play so I left it at that.

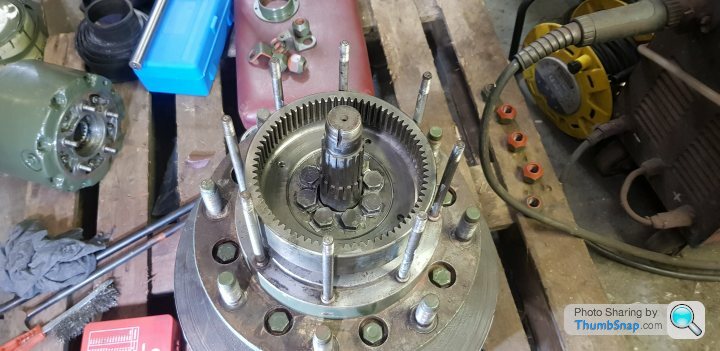
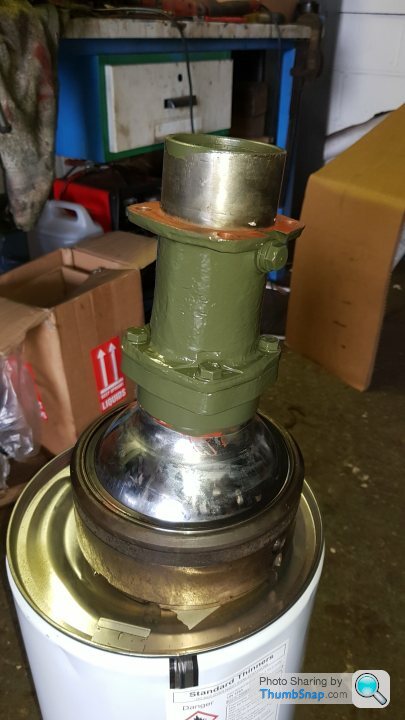
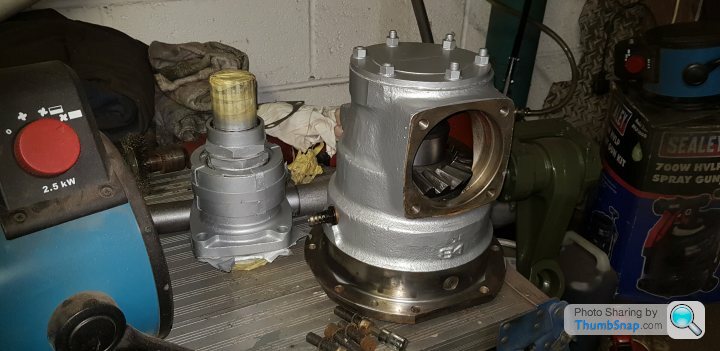
The planetary casing on top

New outer support bearing knocked in and locking nut fitted. Cap on and hurrah!

Only 5 to go
The planet gears should be marked with a dot to point inwards as per the manual
Thanks to Stalwart 6x6 group on FB for publishing all the manuals, most helpful.
Finding the dots however proved difficult, no matter how many times I turned the gears with a torch on them it wasn't exactly clear! I scratched any doubtful bits off and found one tooth on each that looked more likely than the others. I must have been somewhere near right as it all went together and spun nicely. Each gear was then marked to make it more clear on proper reassembly
The wishbones and shocks got dragged out yesterday and a good coat of paint, the mini gravity fed gun I bought is a godsend for doing stuff like this!
The main hub unit was then fully reassembled, wheel bearing packed and annulus bolted back on to retain it with the shims it came out with as that sets the preload on the bearing behind it. Although the bearings are new it felt right, not too much drag and no detectable play so I left it at that.
The planetary casing on top
New outer support bearing knocked in and locking nut fitted. Cap on and hurrah!
Only 5 to go
Edited by LewG on Sunday 6th November 12:05
Some more progress today, I almost started the welding then caved in and did something more interesting instead

Drive spline removed from bevel box, cleaned up and mocked up in the hull, thankfully it fits a treat.
Out it came again for a spruce up.
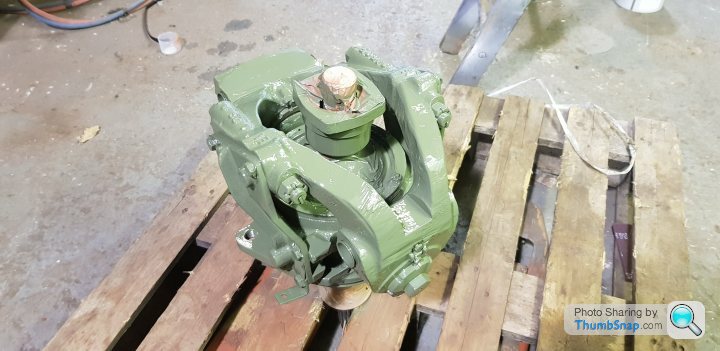
Some better green paint arrived so obviously the stuff needed testing, and what a nice result
Drive spline removed from bevel box, cleaned up and mocked up in the hull, thankfully it fits a treat.
Out it came again for a spruce up.
Some better green paint arrived so obviously the stuff needed testing, and what a nice result
Well done Lew, must be very satisfying to see the results of your labours.
I rebuilt a 1961 Austin healey sprite as my first rebuild and the satisfaction in completing a part of the re build was tremendous, minor I know compared to what you are achieving but same satisfaction, cannot wait to see completed project
I rebuilt a 1961 Austin healey sprite as my first rebuild and the satisfaction in completing a part of the re build was tremendous, minor I know compared to what you are achieving but same satisfaction, cannot wait to see completed project
You are doing an epic job. I have been a huge fan of these things since childhood (my older brother had the BP Matchbox one) and seeing you bring one back from the dead is great - thank you for for taking the time to write it all up.
I was thrilled to see one at A Sunday Scramble in October last year.
Such an insane specific role vehicle.
I can’t wait until you get to drive it out of your workshop!
Eta: not corgi!
I was thrilled to see one at A Sunday Scramble in October last year.
Such an insane specific role vehicle.
I can’t wait until you get to drive it out of your workshop!
Eta: not corgi!
Edited by Crook on Saturday 12th November 20:53
Thanks chaps, it is indeed very satisfying. To actually see parts come back together looking as I imagine the end result to look is great! A few years back when I had the XJ-S I fully rebuilt the rear subframe/axle back to immaculate and that took an absolute age, lots of time and patience. Amazing that one assembly could take so long so anyone that has restored a whole car etc I take my hat off to.
The Stolly at Sunday Scramble is a mate of ours, he has a couple of spare suspension bushes for me I need to go and collect which is much appreciated. That is one nice running Stolly, and regularly goes swimming.
We've had a good result as spare parts collection goes as I've managed to source 3 more NOS/recon wheel station drives, collecting tomorrow. Will all need a coat of paint as a minimum but should make things a bit easier!
A very minor update of late, last weekend we picked up the 3 NOS wheel stations from Mark, the former owner of the lovely white Stalwart pictured earlier in the thread. He has just sold it and his Leyland DAF 'DROPS' used for carting it about to Crouch Recovery of the 'Trucking Hell' TV programme. It was about the best rig money could buy, Mark is over 70 now so after nearly 30 years of Stolly ownership he is probably the last of the 'original' group of Stolly owners to sell up. Always a pleasure to deal with as he is a cracking bloke and has been extremely helpful over the past few years.
Not sure if already posted but here is the pair of them at Brooklands Military Vehicle day 2018
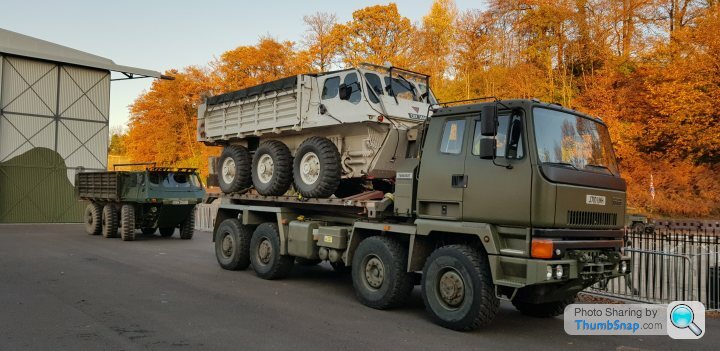
As a bonus he also had a full exhaust system for sale so I stretched the account a little further and bought that too, telling myself it'll save me money in the long run
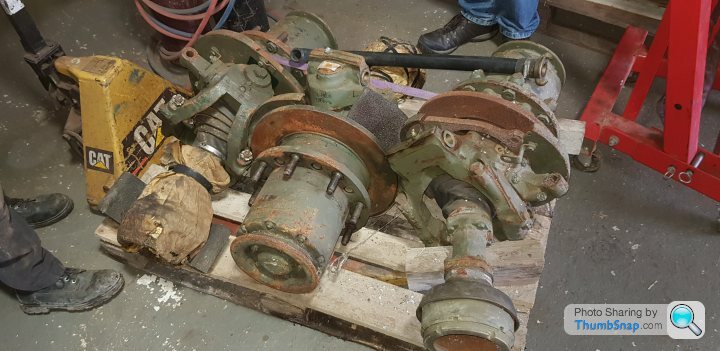
More old scrap on a pallet about the place
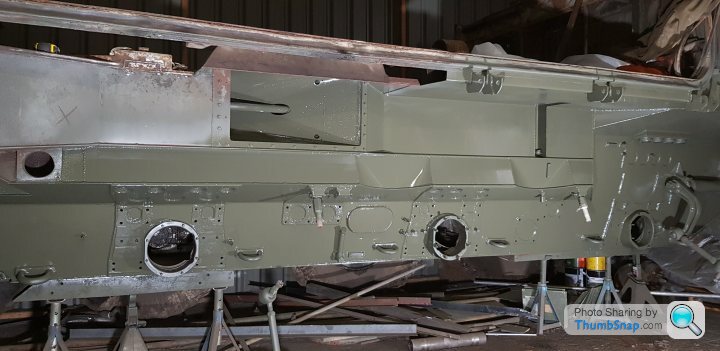
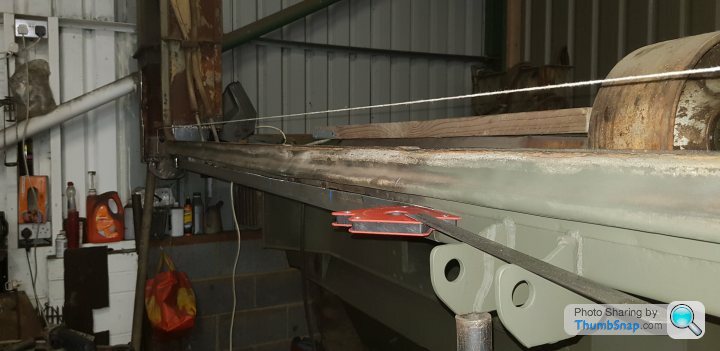
I finally got round to prepping some of the side panel for welding, it took a lot of trial and error but is now ready to tack in. I need to cut the flat panels for the bottom and get the reinforcing U sections cut then it should come together pretty easy
Not sure if already posted but here is the pair of them at Brooklands Military Vehicle day 2018
As a bonus he also had a full exhaust system for sale so I stretched the account a little further and bought that too, telling myself it'll save me money in the long run
More old scrap on a pallet about the place
I finally got round to prepping some of the side panel for welding, it took a lot of trial and error but is now ready to tack in. I need to cut the flat panels for the bottom and get the reinforcing U sections cut then it should come together pretty easy
A minor update, sadly I'm stuck in the house with super man flu at the moment so not a whole lot of cracking on!

We finally have some metalwork! Need to tidy it all up, and get the U channels glued back in for strength, it has pulled very slightly after welding resulting in a slight bow along the side so I'll probably need to apply some heat and then pull it back into place. The drop side panel will need to be remounted on the existing mounts to mock up where to weld the hinge brackets back onto that were cut off during cutting all the grot out. It is amazing how much time all this welding and fabbing takes, especially when you're not very good at it
We finally have some metalwork! Need to tidy it all up, and get the U channels glued back in for strength, it has pulled very slightly after welding resulting in a slight bow along the side so I'll probably need to apply some heat and then pull it back into place. The drop side panel will need to be remounted on the existing mounts to mock up where to weld the hinge brackets back onto that were cut off during cutting all the grot out. It is amazing how much time all this welding and fabbing takes, especially when you're not very good at it
Gassing Station | Readers' Cars | Top of Page | What's New | My Stuff