I'll AX this only once... though there is an Echo in here
Discussion
This fine TU1 engine is leaking oil in not one, not two, but three separate places.
The crankshaft oil seal, the sump, and the head gasket. Mick the mechanic has had some good results with an additive designed to soften seals, so we've tried that for the crankshaft oil seal.
It will be booked back in either way to do the sump, but it would be nice to avoid having to take the gearbox off for now. Might be something I'll tackle when it's a bit warmer if I have to.
There have been thoughts of TU3 and TU5 engine swaps, but they're probably unrealistic.
A strange rubbing sound that developed after the wheel refurbishment turned out to be the nearside handbrake cable rubbing on the inside of the rear tyre having become dislodged from its clip. An easy fix to pop it back in, and back it up with a cable tie.
More annoyingly, the incontinence problem is back.
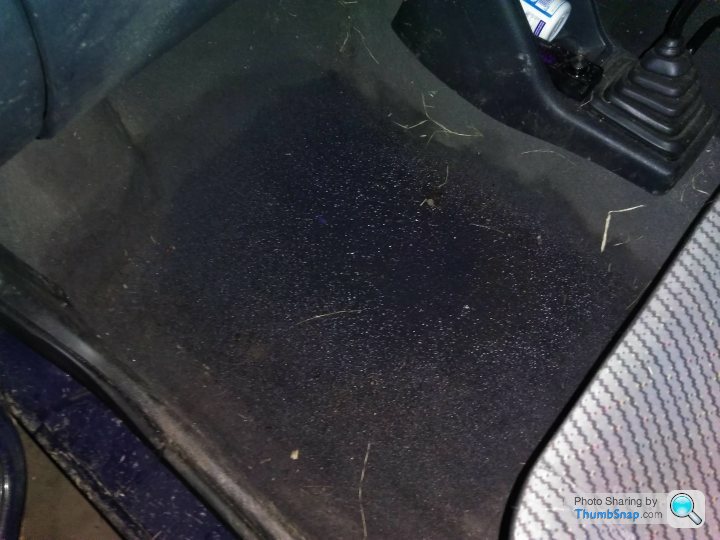
Only on thy passenger footwell, which last time turned out to be the door seal. Having changed that already (it's still nice and springy), I'll need to check the sunroof drains again (as there were no obvious holes in the floorplan that I could see.
It's currently in the back yard with a dehumidifier in. If I can dry it out, I can then try and work out where it's coming from this time....
The crankshaft oil seal, the sump, and the head gasket. Mick the mechanic has had some good results with an additive designed to soften seals, so we've tried that for the crankshaft oil seal.
It will be booked back in either way to do the sump, but it would be nice to avoid having to take the gearbox off for now. Might be something I'll tackle when it's a bit warmer if I have to.
There have been thoughts of TU3 and TU5 engine swaps, but they're probably unrealistic.
A strange rubbing sound that developed after the wheel refurbishment turned out to be the nearside handbrake cable rubbing on the inside of the rear tyre having become dislodged from its clip. An easy fix to pop it back in, and back it up with a cable tie.
More annoyingly, the incontinence problem is back.

Only on thy passenger footwell, which last time turned out to be the door seal. Having changed that already (it's still nice and springy), I'll need to check the sunroof drains again (as there were no obvious holes in the floorplan that I could see.
It's currently in the back yard with a dehumidifier in. If I can dry it out, I can then try and work out where it's coming from this time....
It was cold but dry today so I did some investigation into the leak.
Water was seen coming out from one of the trim screws about 150mm about the floor, so I started by taking the trim off.
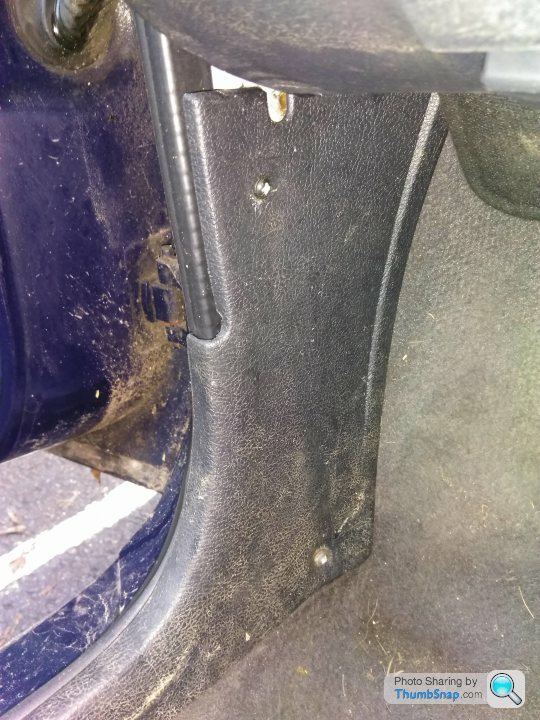
This revealed no gasping holes, so having double checked the door seal, which is still fine
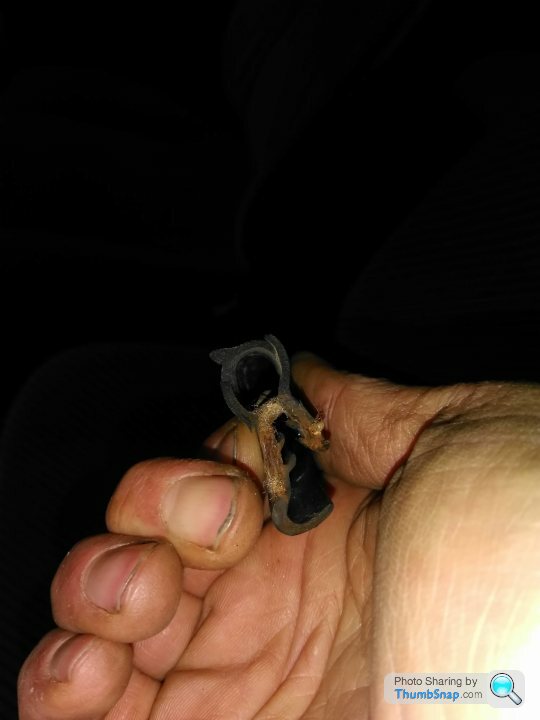
I went to investigate the sunroof instead.
Easy to pop the sunroof out to get at the drain holes and run some stainless steel gear cable wire down there :
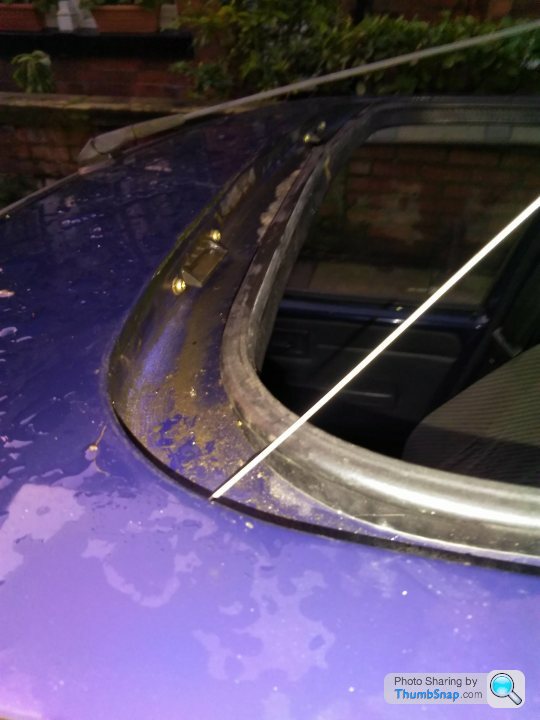
This may have cleared some gunk out, but I decided to renew the seals anyway. The Metal House who sell online offer a range of seals, it's just a matter of measuring up. So new sunroof inner and outer seals on the way.
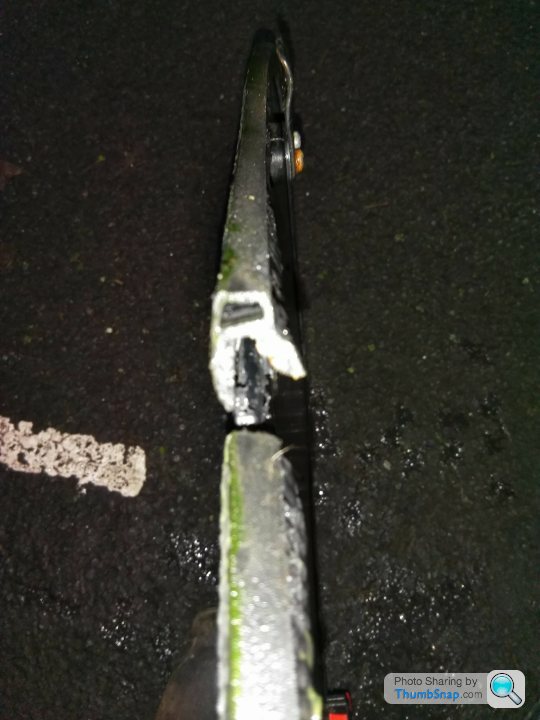
The old ones are pretty manky and will be allowing some moisture in.
There's still a small oil leak, so I need to get the sump sorted, but I might need to do some more testing on the Corrado first.
Water was seen coming out from one of the trim screws about 150mm about the floor, so I started by taking the trim off.

This revealed no gasping holes, so having double checked the door seal, which is still fine

I went to investigate the sunroof instead.
Easy to pop the sunroof out to get at the drain holes and run some stainless steel gear cable wire down there :

This may have cleared some gunk out, but I decided to renew the seals anyway. The Metal House who sell online offer a range of seals, it's just a matter of measuring up. So new sunroof inner and outer seals on the way.

The old ones are pretty manky and will be allowing some moisture in.
There's still a small oil leak, so I need to get the sump sorted, but I might need to do some more testing on the Corrado first.
Had to take a long journey to go and look at a bridge today, and the weather wasn't brilliant. The heater knob fell off, the washer jets froze up and it took me 5 minutes and a lighter to get into the car, as the locks were frozen.
All of that being said, AXs are excellent in snow and ice - presumably due to being light and having skinny tyres. So much so, I decided to take the more direct route back over the North Pennines. Stunning.
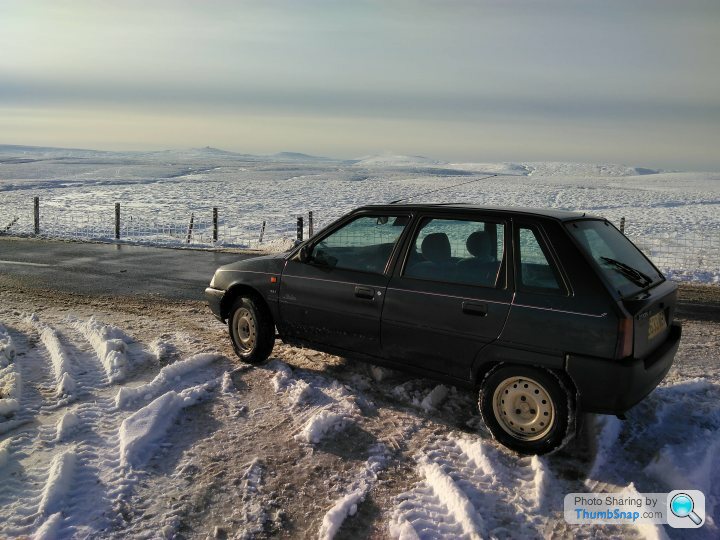
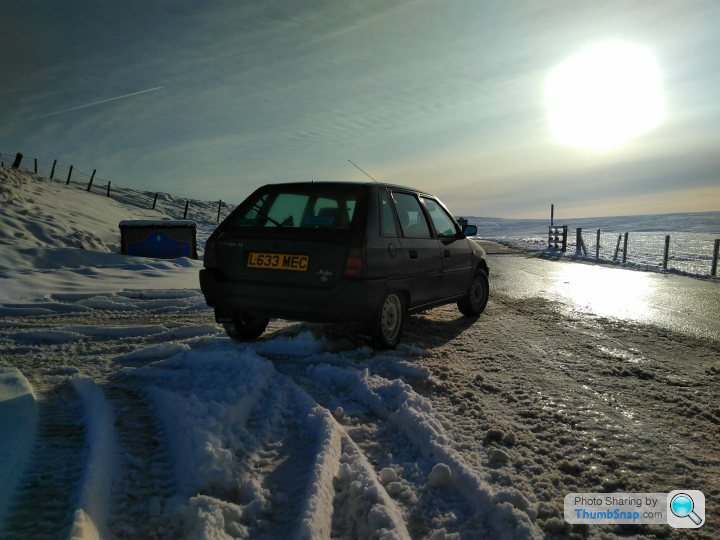
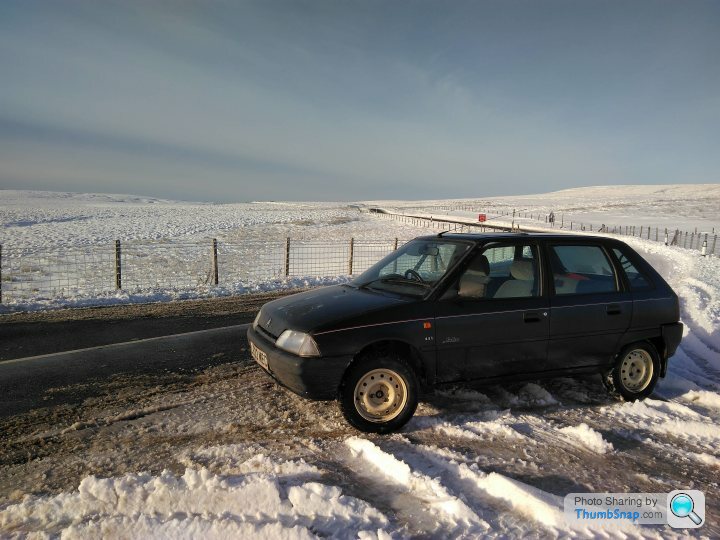
All of that being said, AXs are excellent in snow and ice - presumably due to being light and having skinny tyres. So much so, I decided to take the more direct route back over the North Pennines. Stunning.


A few AX updates, not entirely positive, but worth posting an update...
Firstly the water leak into the cabin - back with a vengeance as I found when it was raining on my feet as was sat in the passenger seat.
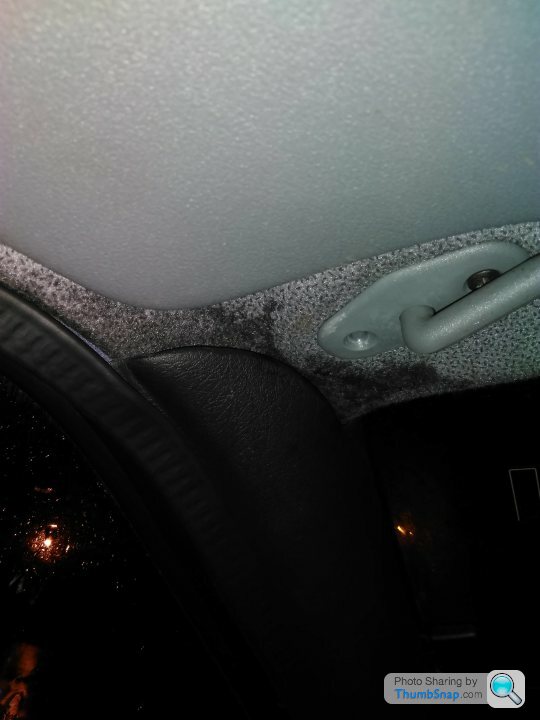
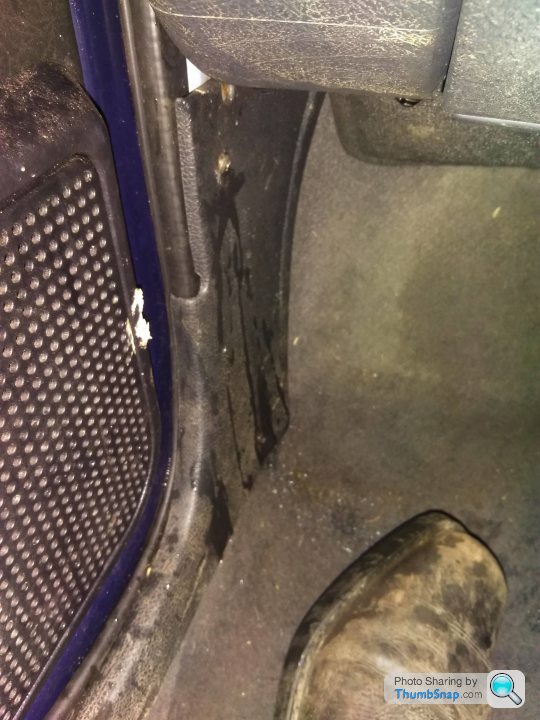
In some ways it was positive as it meant that I could investigate in real time as it was raining heavily. Not the sunroof drains then nor the door seal, but it seems to be coming in at the top of the windscreen. The headlining is damp at the top and then running down inside the dash and coming out in the passenger footwell. Not ideal.
Further investigation shows that someone has already had a go with silicone sealant. Might have to do something similar....
Other developments? Well it's getting increasingly difficult to put into certain gears. I'm hoping that it's not the gearbox, as it's not making a noise when I'm gear, so I'm starting with a clutch cable (as it's only £7).
The oil leak hasn't improved with the additive. The crankshaft oil seal and sump need sorting, and due to a lack of space and available tools due to our ongoing building work I'm farming this out to my friendly local garage... Not going to be a cheap job given the labour involved I don't think, but I'm getting embarrassed about marking my territory wherever I park.
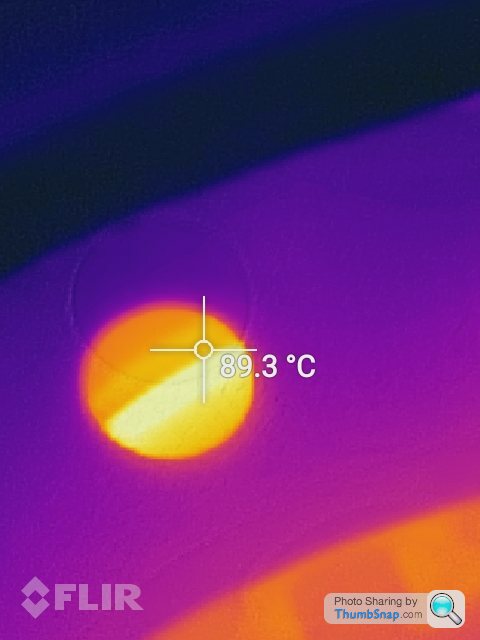
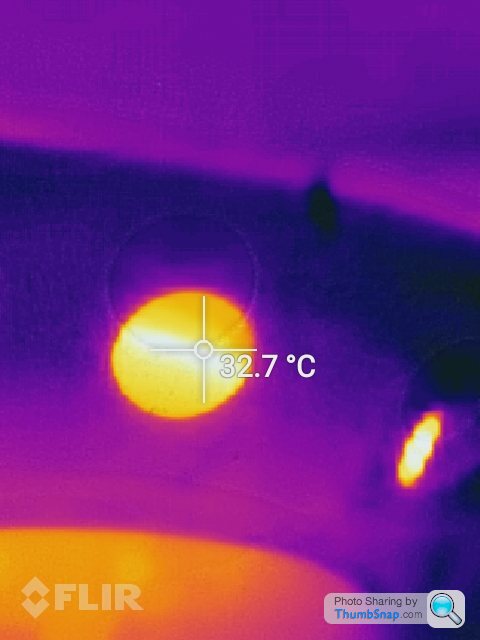
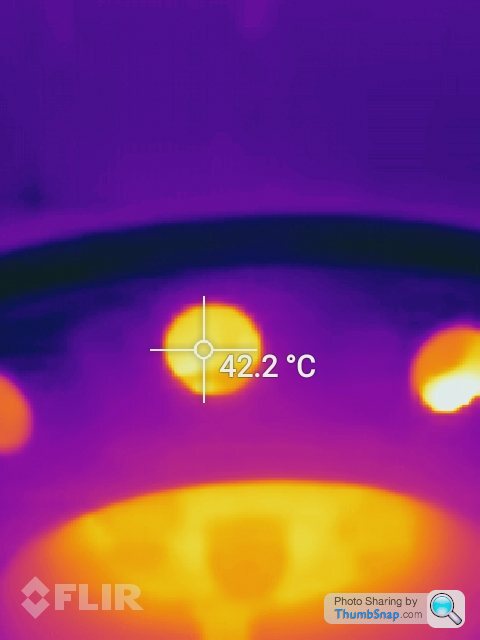
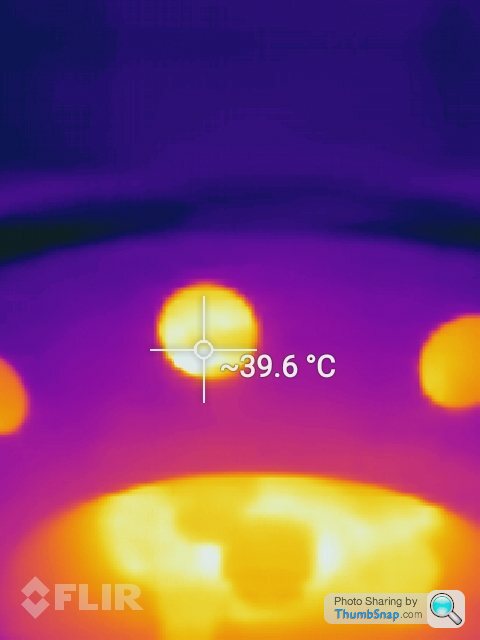
The brakes.. Well, they were getting worse and I knew that the offside caliper was sticking. Now the brake pad warming light has come on, presumably due to the O/S pad being down to a fag paper thickness.... That's the most pressing job (IR photos below for comparison).
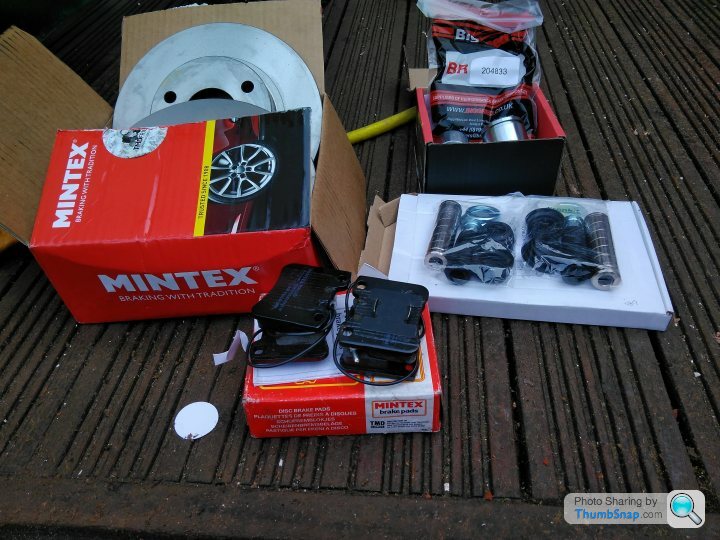
I have a full brake rebuild kit and new Mintex disks and pads too go on (£25 for the set).
The driveshaft on the nearside is knocking on lock again. Brilliant. Really annoying given the replacement a few years ago, that's reconditioned driveshafts for you I suppose.
I also think that the wheel bearing on the nearside is going as well, although the noise maybe the knackered brake pad on that side.
There are probably other things that I've forgotten, it's really not plain sailing at the moment. For all this though, I'm persisting for now. In fact, I'm contemplating keeping the AX over the Corrado if we have to make a choice.
As I've said before, I'm clearly sick.
Firstly the water leak into the cabin - back with a vengeance as I found when it was raining on my feet as was sat in the passenger seat.


In some ways it was positive as it meant that I could investigate in real time as it was raining heavily. Not the sunroof drains then nor the door seal, but it seems to be coming in at the top of the windscreen. The headlining is damp at the top and then running down inside the dash and coming out in the passenger footwell. Not ideal.
Further investigation shows that someone has already had a go with silicone sealant. Might have to do something similar....
Other developments? Well it's getting increasingly difficult to put into certain gears. I'm hoping that it's not the gearbox, as it's not making a noise when I'm gear, so I'm starting with a clutch cable (as it's only £7).
The oil leak hasn't improved with the additive. The crankshaft oil seal and sump need sorting, and due to a lack of space and available tools due to our ongoing building work I'm farming this out to my friendly local garage... Not going to be a cheap job given the labour involved I don't think, but I'm getting embarrassed about marking my territory wherever I park.
The brakes.. Well, they were getting worse and I knew that the offside caliper was sticking. Now the brake pad warming light has come on, presumably due to the O/S pad being down to a fag paper thickness.... That's the most pressing job (IR photos below for comparison).


I have a full brake rebuild kit and new Mintex disks and pads too go on (£25 for the set).
The driveshaft on the nearside is knocking on lock again. Brilliant. Really annoying given the replacement a few years ago, that's reconditioned driveshafts for you I suppose.
I also think that the wheel bearing on the nearside is going as well, although the noise maybe the knackered brake pad on that side.
There are probably other things that I've forgotten, it's really not plain sailing at the moment. For all this though, I'm persisting for now. In fact, I'm contemplating keeping the AX over the Corrado if we have to make a choice.
As I've said before, I'm clearly sick.
Brakes today. I've previously stated how nice and simple they are to work on...that might have been a mistake, especially as the back yard is a building site and there has to be no car there by Monday..
..
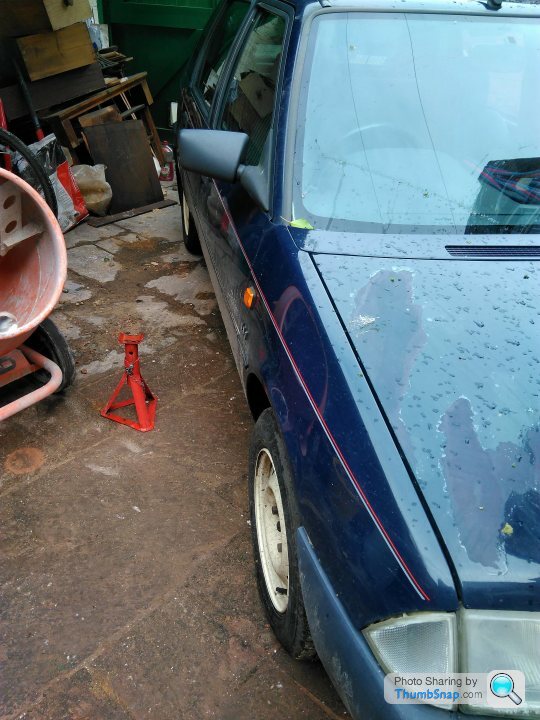
Up it goes to discover the reason behind the driveshaft knock. Grease everywhere on both sides.
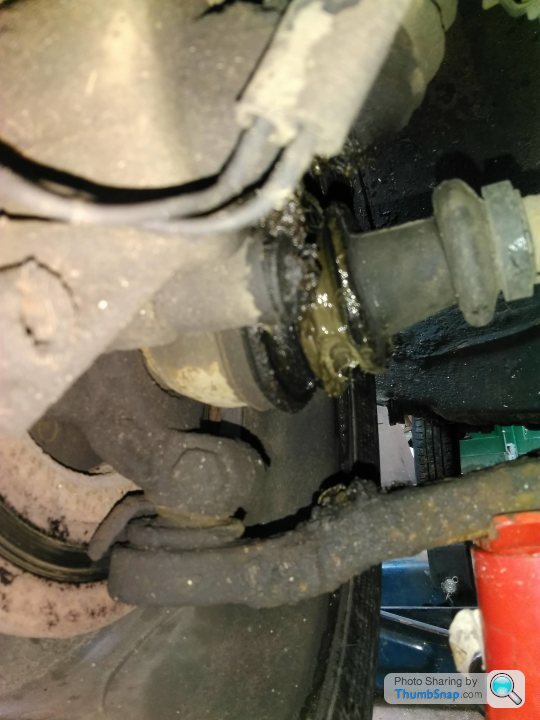
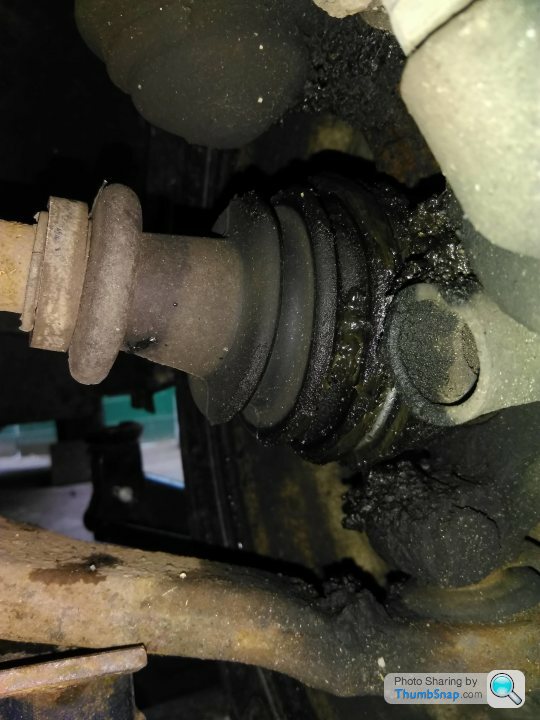
Not impressed given how recently they were replaced. I can't be bothered wrestling with a boot if it's knocking already, so have ordered a pair of replacements again. A different (online) firm, rather than the local motor factors, so fingers crossed (good reviews, they're a motorsport company).
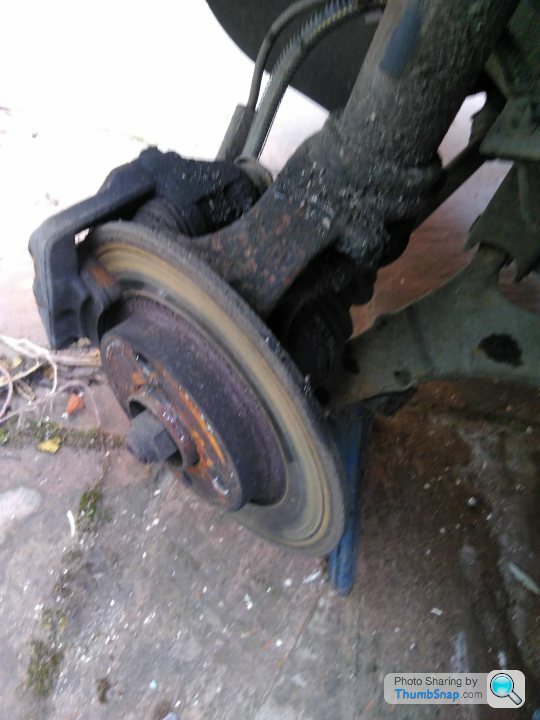
Anyway, the brakes have seen better days :
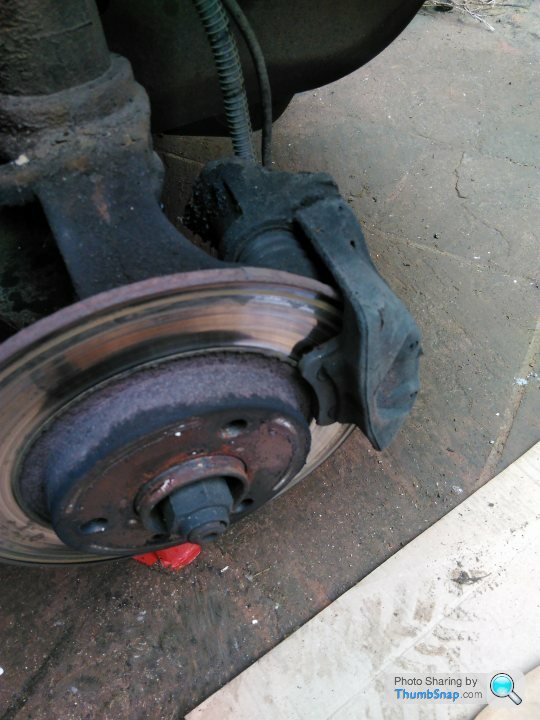
Let's try and make good use of this lot then....
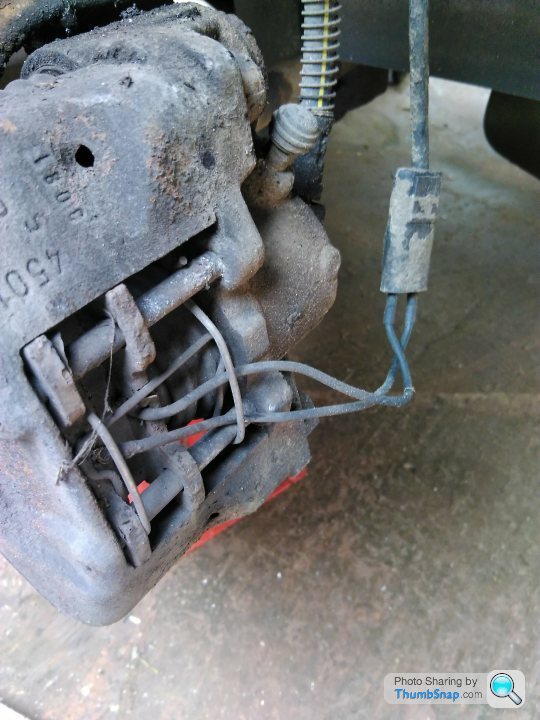
We know the drill, all least one of the pins will be seized and need cutting in half... Damn, I hate being proved right. Glad I kept the spares from a couple of years ago.
Still, I got the caliper off (a mixture of T40 torx at the bottom, and an 18mm socket for the top)
and started stripping it.
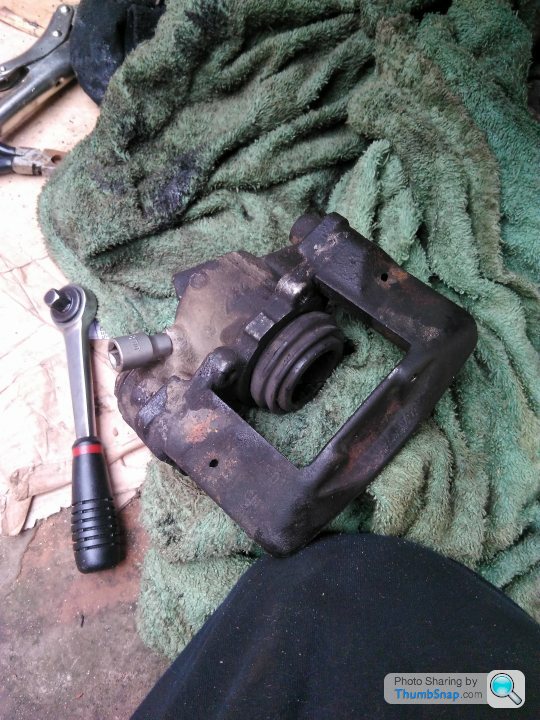
Managed to get both slider pins out with a few taps....
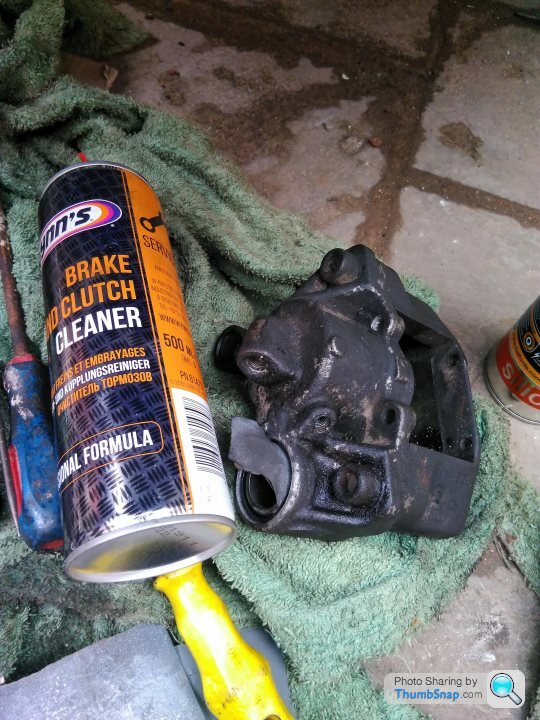
Then got the piston out.... to discover the replacement pistons are the wrong size.
Nice and clean inside though, and the seal and existing piston looked OK (I was careful with the removal).
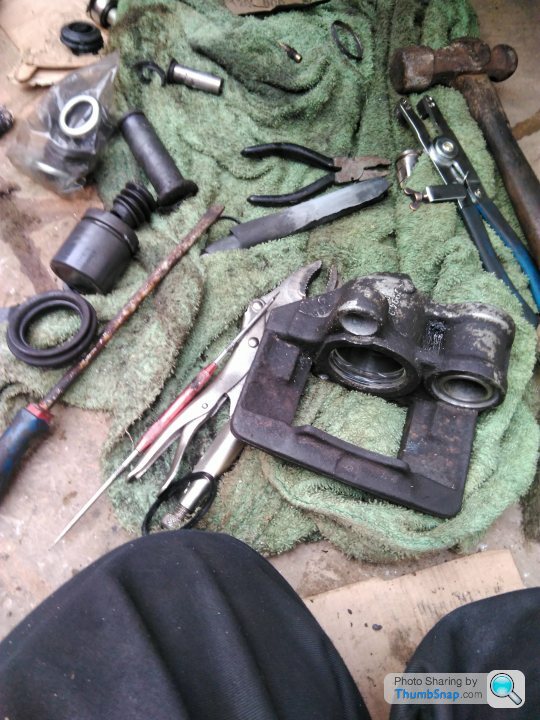
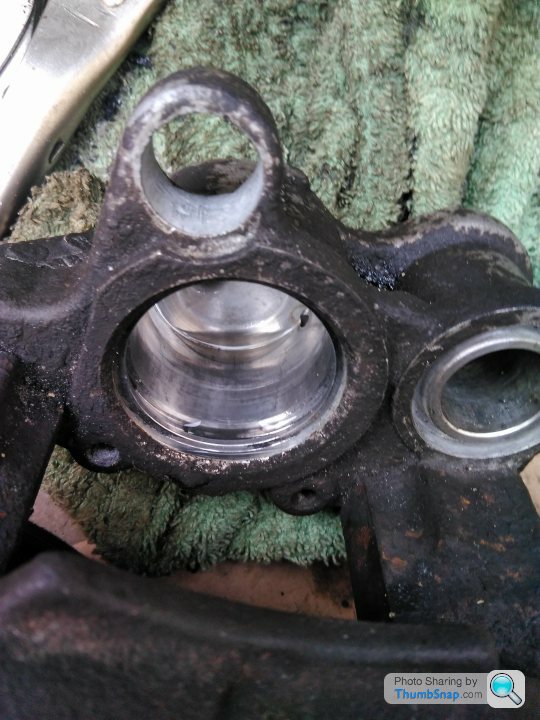
Motorbike brakes are easier to work on and get the pistons out from though.
However, it's all now reassembled with new sliders, and a new disk and pads on. I'll get some photos when I do the nearside tomorrow (and I'm going to leave the piston well alone).
Hopefully get the driveshafts done next weekend, if I can find my extra long breaker bar for the hub nuts in the chaos of packed away tools!
..

Up it goes to discover the reason behind the driveshaft knock. Grease everywhere on both sides.


Not impressed given how recently they were replaced. I can't be bothered wrestling with a boot if it's knocking already, so have ordered a pair of replacements again. A different (online) firm, rather than the local motor factors, so fingers crossed (good reviews, they're a motorsport company).
Anyway, the brakes have seen better days :


Let's try and make good use of this lot then....

We know the drill, all least one of the pins will be seized and need cutting in half... Damn, I hate being proved right. Glad I kept the spares from a couple of years ago.

Still, I got the caliper off (a mixture of T40 torx at the bottom, and an 18mm socket for the top)
and started stripping it.

Managed to get both slider pins out with a few taps....

Then got the piston out.... to discover the replacement pistons are the wrong size.
Nice and clean inside though, and the seal and existing piston looked OK (I was careful with the removal).


Motorbike brakes are easier to work on and get the pistons out from though.
However, it's all now reassembled with new sliders, and a new disk and pads on. I'll get some photos when I do the nearside tomorrow (and I'm going to leave the piston well alone).
Hopefully get the driveshafts done next weekend, if I can find my extra long breaker bar for the hub nuts in the chaos of packed away tools!
Second verse, same as the first.....
Inspired by the shiny, I started on the nearside.
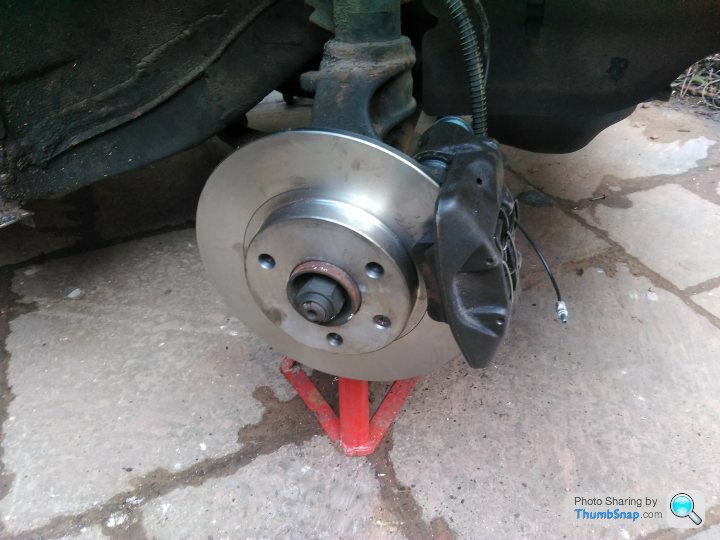
Predictably enough, the bottom retaining pin needed cutting out despite being soaked in plushgas yesterday.
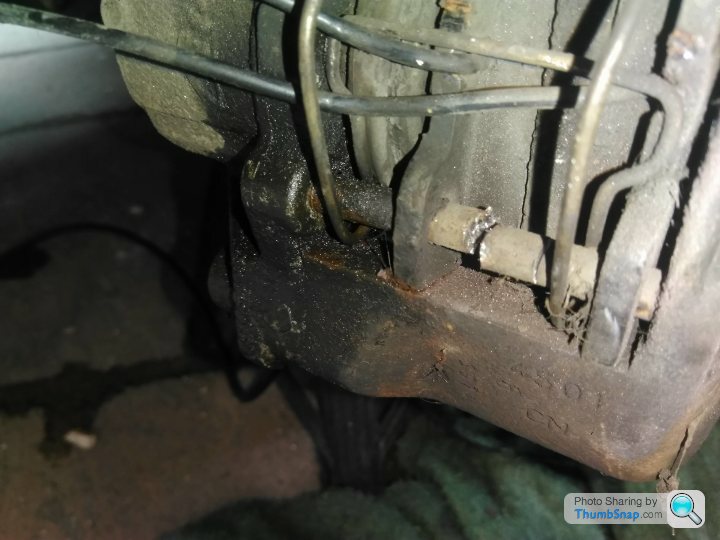
The caliper was covered in grease, the brake line clamp failed resulting in a lot of fluid everywhere (and was too slippery to reattach). The brake disk retaining screw had previously sheared, and after the first reassembly, it wasn't smooth on the slider pins, so I had to take it all apart again... tearing one of the new seals in the process. Luckily I'd saved one of the old ones when I took the caliper apart.
Not much fun.... Here's a few shots of the new sliders etc. though.
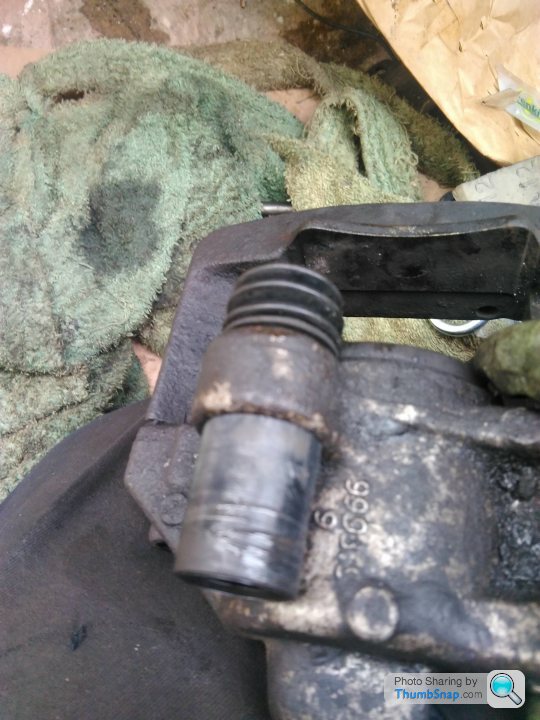
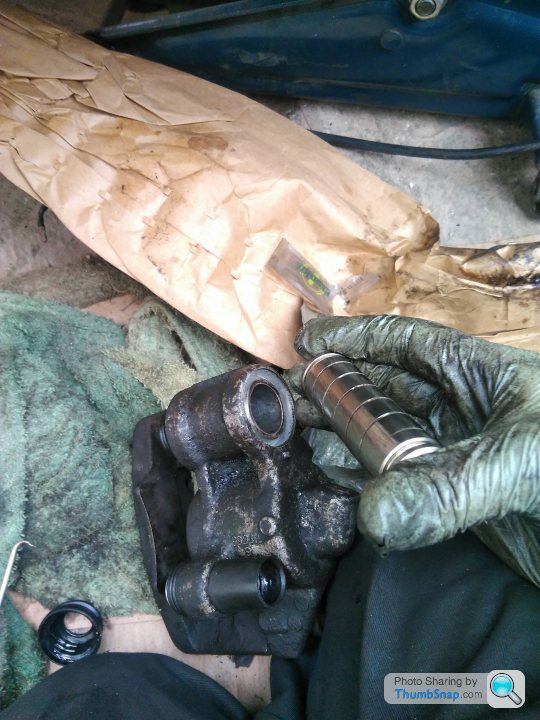
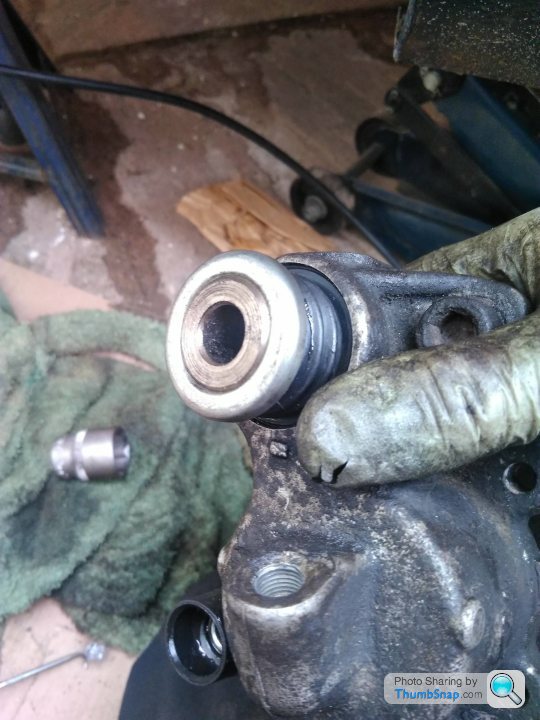
A quick test drive later though, and the brakes are no longer binding, so all is good.
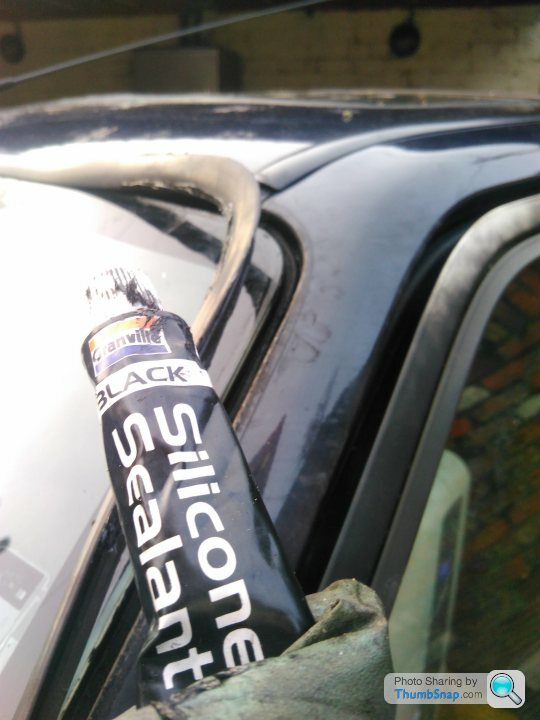
I also tried to bodge the outer windscreen seal to see if that fixes the leak, fingers crossed.
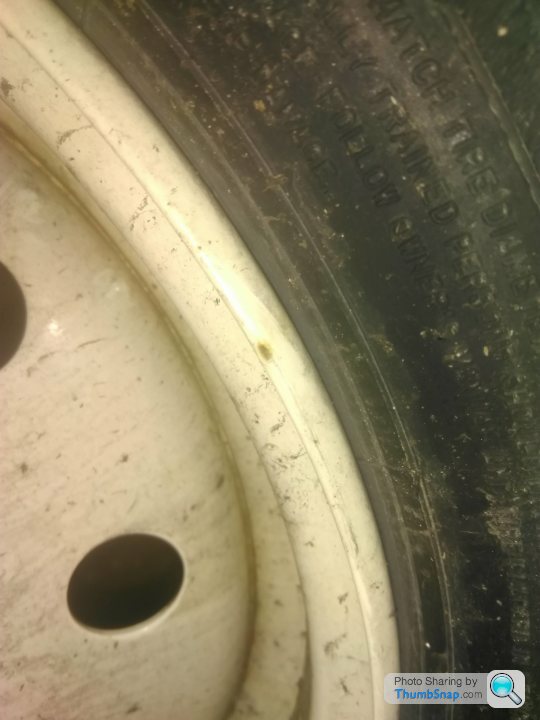
Oh yes, and I need to give the wheel refurb place a call, as a month after the wheels were done, this is what the back looks like....
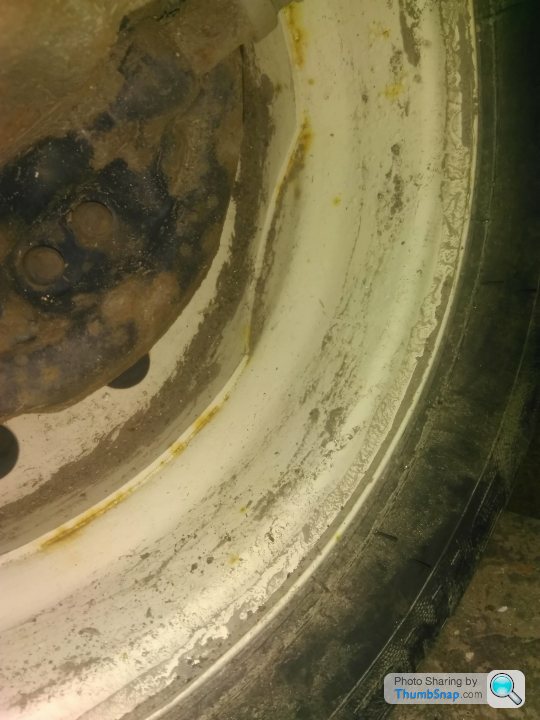
The front lips are starting to go as well. Balls.
Inspired by the shiny, I started on the nearside.

Predictably enough, the bottom retaining pin needed cutting out despite being soaked in plushgas yesterday.

The caliper was covered in grease, the brake line clamp failed resulting in a lot of fluid everywhere (and was too slippery to reattach). The brake disk retaining screw had previously sheared, and after the first reassembly, it wasn't smooth on the slider pins, so I had to take it all apart again... tearing one of the new seals in the process. Luckily I'd saved one of the old ones when I took the caliper apart.
Not much fun.... Here's a few shots of the new sliders etc. though.


A quick test drive later though, and the brakes are no longer binding, so all is good.


I also tried to bodge the outer windscreen seal to see if that fixes the leak, fingers crossed.

Oh yes, and I need to give the wheel refurb place a call, as a month after the wheels were done, this is what the back looks like....

The front lips are starting to go as well. Balls.

Edited by darkyoung1000 on Monday 1st February 17:24
Much better day today, Ian Jemison were excellent, and said to pop round so they could work out what to do next. The car was filthy though, so I needed to clean up the wheels for inspection, so I did the lot.
Very good therapy!
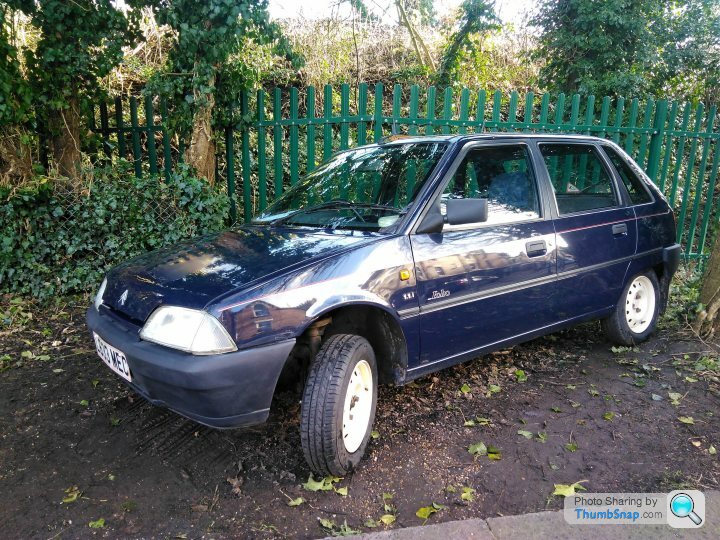
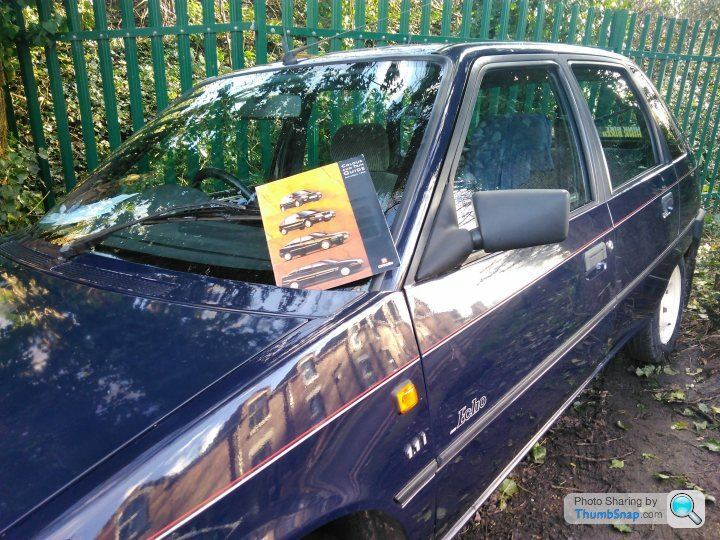
Once cleaned, I remembered the chance find from eBay that would hopefully solve the lack of paint code... The 1993 Colour and Trim booklet for a range of Citroëns!
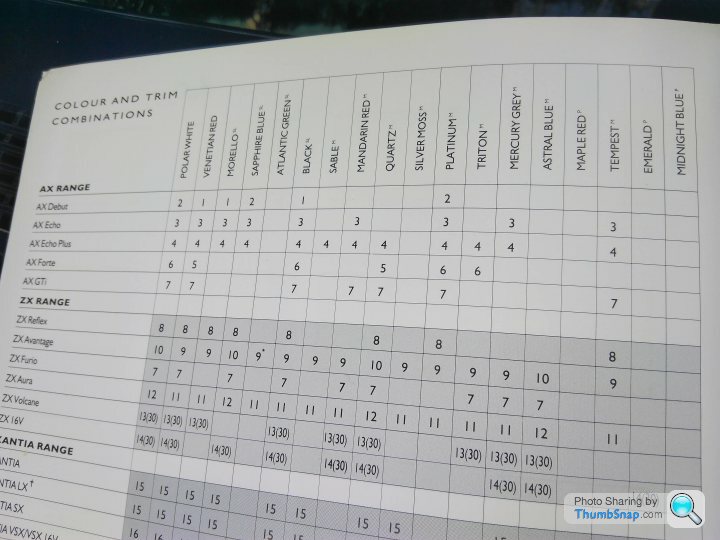
In the unlikely event that anyone else needs this information, get in touch
Velour check.... check!
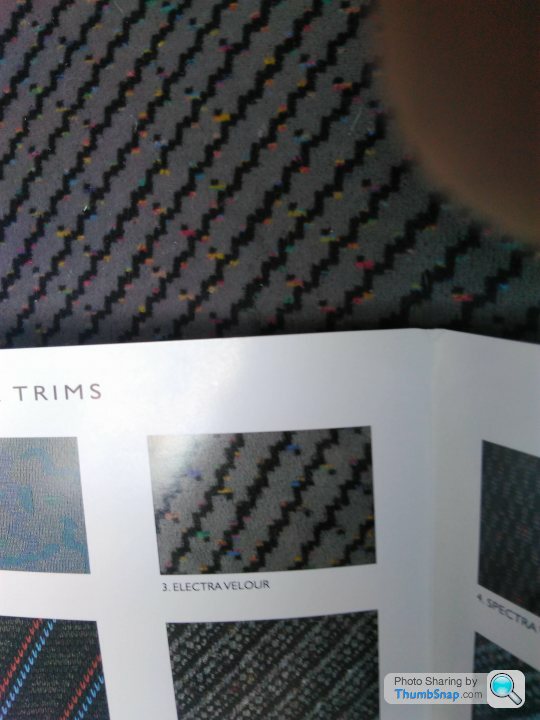
....and I think we have a winner on the paint colour too!
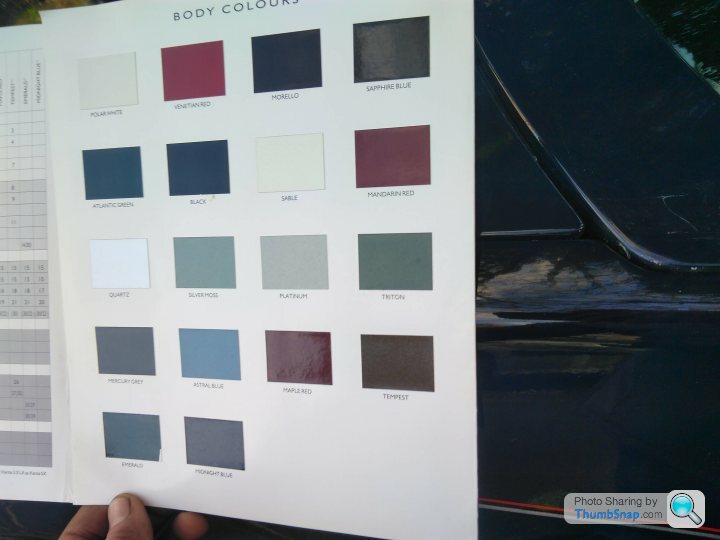
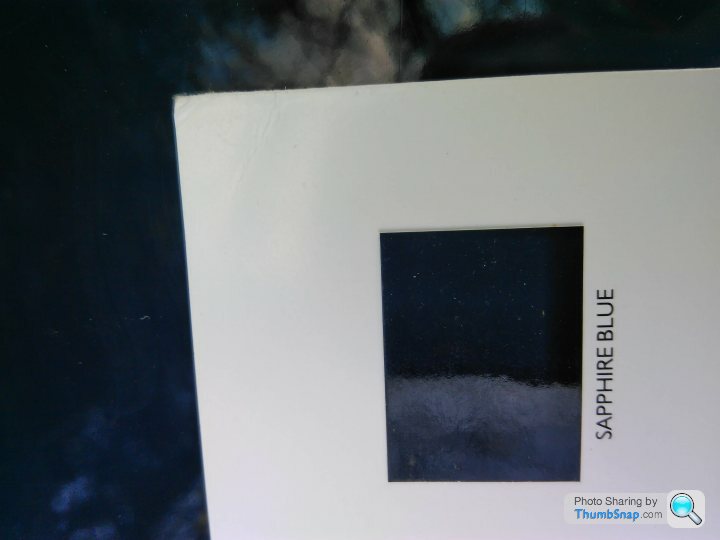
Sapphire Blue it is! Brilliant, I can now track down the code for it and get some touch up paint, but more importantly, once the other bits are done, the bonnet can get spayed without needing someone to make up a match which will save me quite a bit.
Very good therapy!

Once cleaned, I remembered the chance find from eBay that would hopefully solve the lack of paint code... The 1993 Colour and Trim booklet for a range of Citroëns!

In the unlikely event that anyone else needs this information, get in touch


Velour check.... check!

....and I think we have a winner on the paint colour too!


Sapphire Blue it is! Brilliant, I can now track down the code for it and get some touch up paint, but more importantly, once the other bits are done, the bonnet can get spayed without needing someone to make up a match which will save me quite a bit.
Thanks both, nice to hear that, it echoes my feelings of delight from driving it!
On which note, a delivery yesterday of shiny new drive shafts.
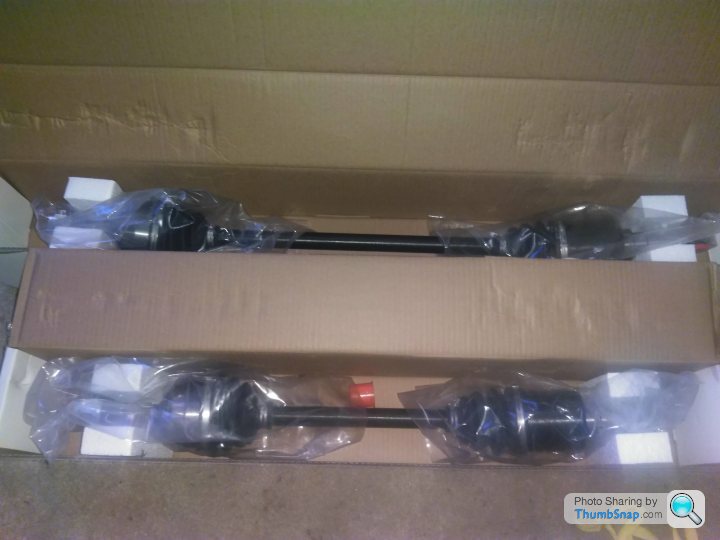
Just waiting for the oil seals to arrive then they can be fitted when the crankshaft oil seal is done.
For anyone who listens to the Smith and Sniff podcast BTW, I've never had a wheel come off when cornering hard!
On which note, a delivery yesterday of shiny new drive shafts.

Just waiting for the oil seals to arrive then they can be fitted when the crankshaft oil seal is done.
For anyone who listens to the Smith and Sniff podcast BTW, I've never had a wheel come off when cornering hard!

The oil seals have arrived, so I'm just waiting for a garage slot.
Ian Jemison were excellent and have said they will redo the wheels because of the rust coming through (which they've said is very unusual).
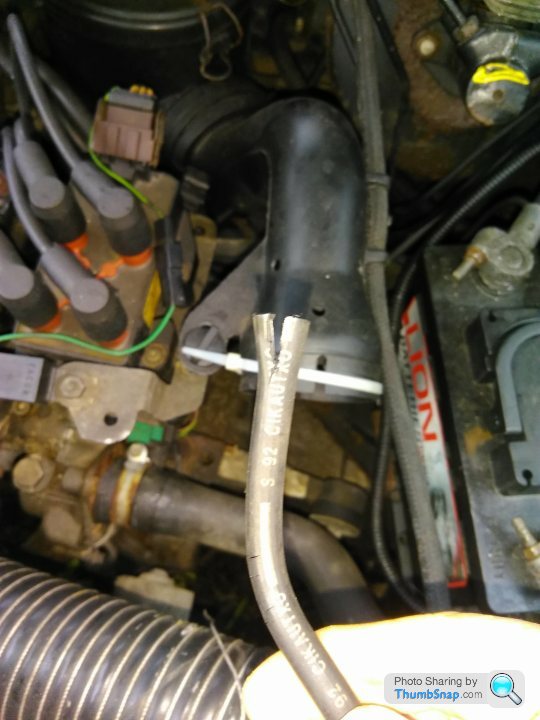
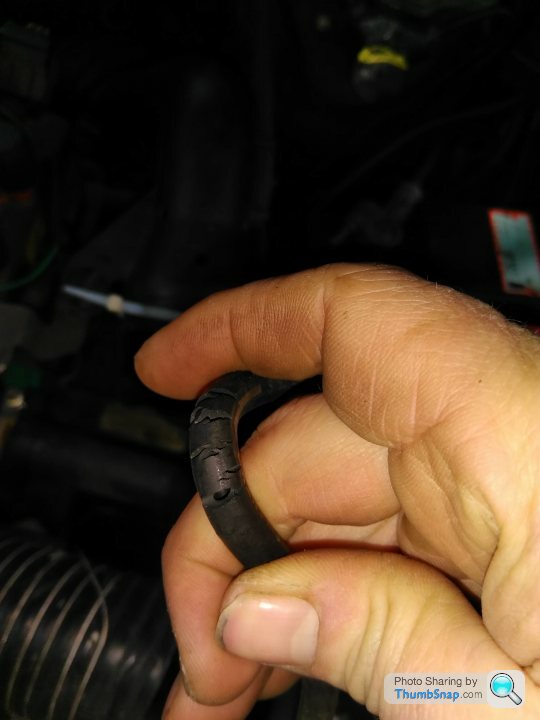
While or wasn't raining, I thought I'd adjust the clutch as its becoming difficult to get into gear sometimes (and the clutch cable is the easiest place to start). A simple matter of a 10mm lock nut and a 13mm adjuster nut, so we'll see how it feels. While I was there, I found some perished vacuum hose.
Bad news on the windscreen sealing front, the bodge of the sealant hasn't worked. There's still water coming form from the A pillar into the footwell.
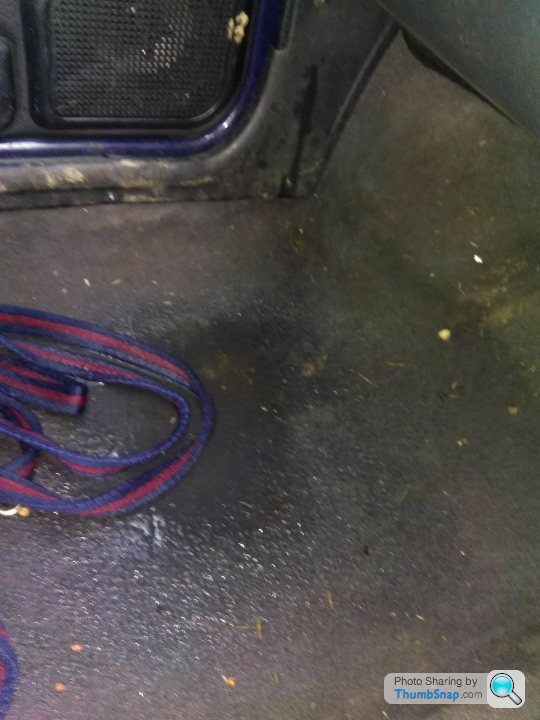
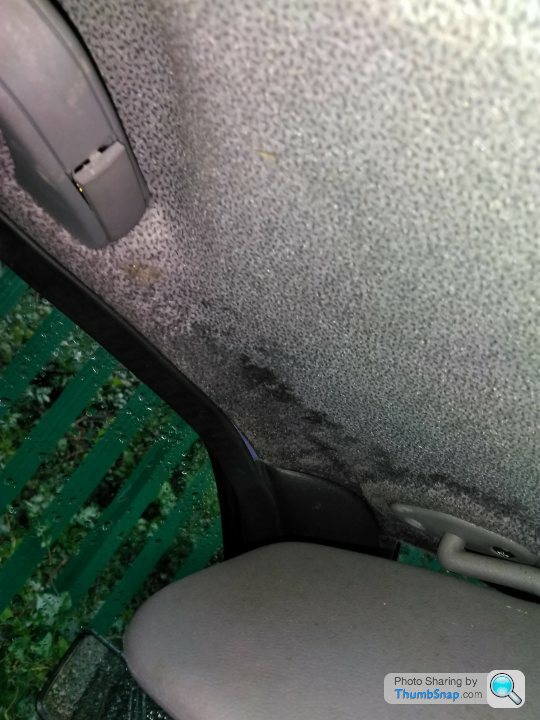
Next investigation before taking the headlining out will be to pour water down that drain hole (which I know to be clear) and see if it's corroded away allowing water to leak in from there. If not I'll consider getting the windscreen replaced.....
Having bought the sunroof seals,I fitted those (not the source of the water leak, but they did look tired).
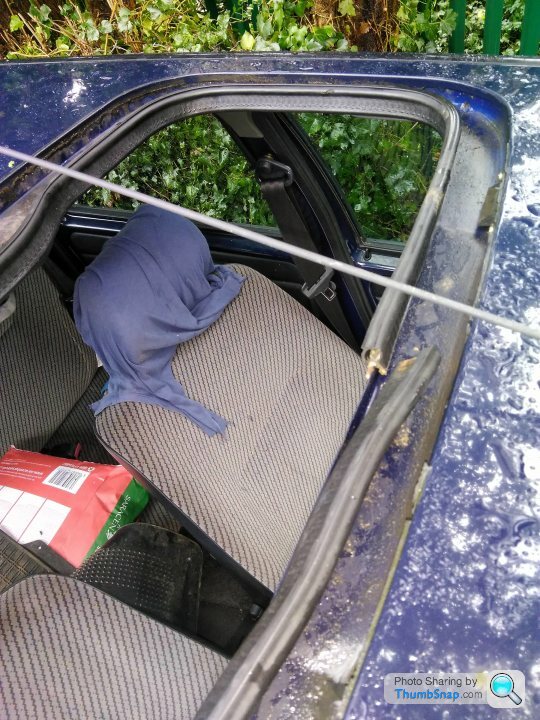
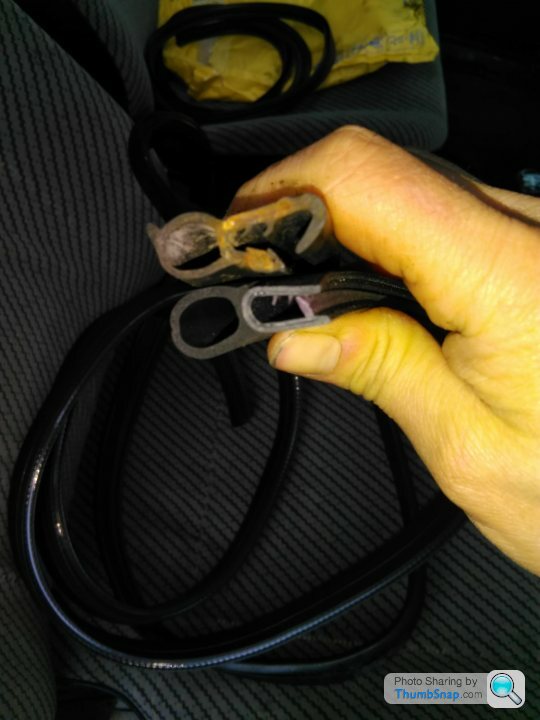
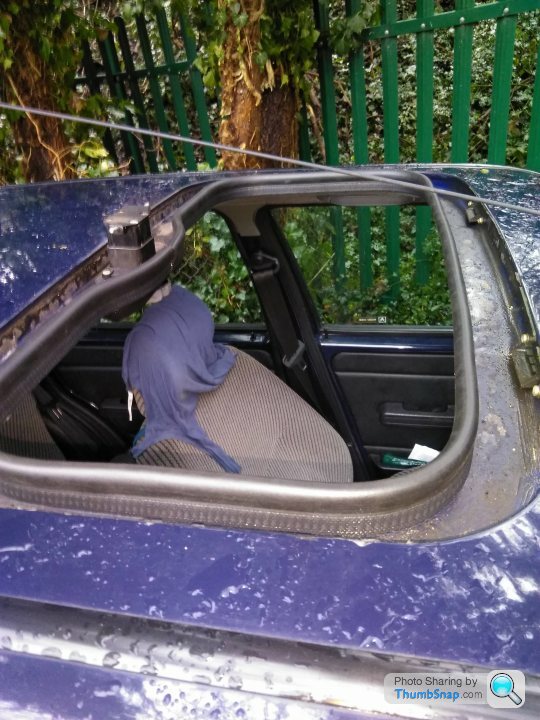
I also did the seal around the roof glass itself, but didn't take a photo. Every little helps when it comes to keeping it dry!
Ian Jemison were excellent and have said they will redo the wheels because of the rust coming through (which they've said is very unusual).
While or wasn't raining, I thought I'd adjust the clutch as its becoming difficult to get into gear sometimes (and the clutch cable is the easiest place to start). A simple matter of a 10mm lock nut and a 13mm adjuster nut, so we'll see how it feels. While I was there, I found some perished vacuum hose.


Bad news on the windscreen sealing front, the bodge of the sealant hasn't worked. There's still water coming form from the A pillar into the footwell.


Next investigation before taking the headlining out will be to pour water down that drain hole (which I know to be clear) and see if it's corroded away allowing water to leak in from there. If not I'll consider getting the windscreen replaced.....
Having bought the sunroof seals,I fitted those (not the source of the water leak, but they did look tired).


I also did the seal around the roof glass itself, but didn't take a photo. Every little helps when it comes to keeping it dry!
Some AX developments, not entirely positive.
It's in getting the crankshaft oil seal, driveshafts etc. done, and when you get a message from the mechanic asking you to come and have a look, you know there may be issues....
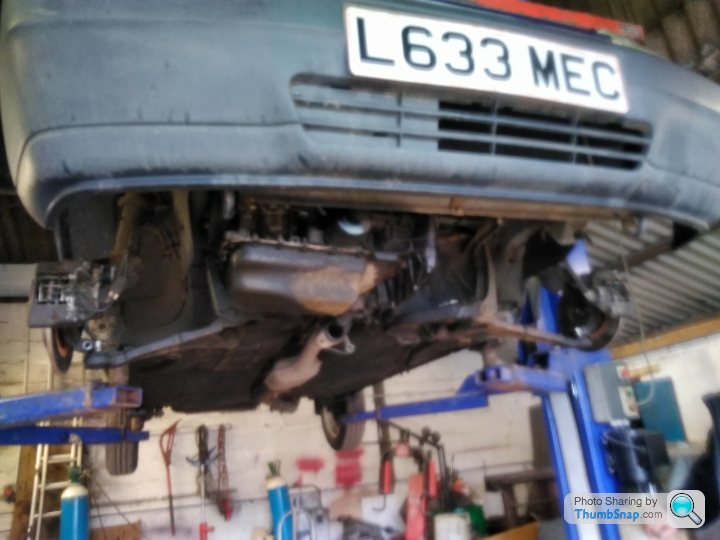
Oil related issues....
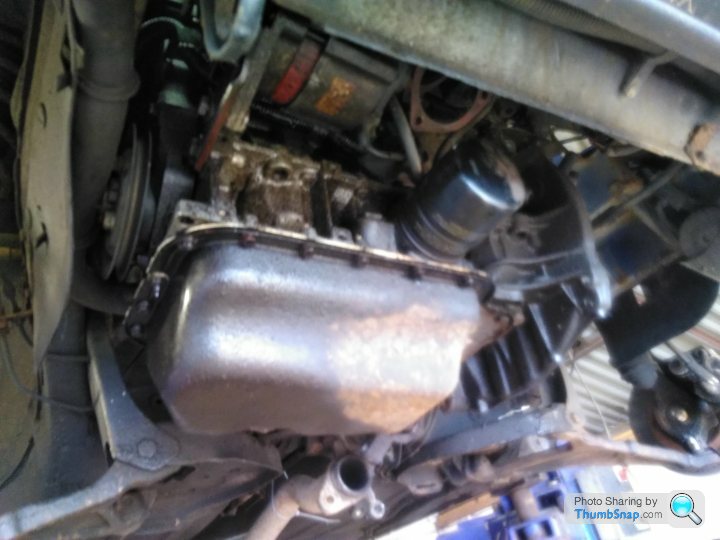
The weep from the head gasket has become a rivulet, and is contaminating the alternator belt in the process. It's also not going to pass the upcoming MOT like that. Blast.
Well, when the automotive Gods throw your those matters, some thinking is required. About half a second.
That Spoox Motorsports 1.4 8v TU3 alloy engine I'd been watching is now on its way. Time for some spannering....
It's in getting the crankshaft oil seal, driveshafts etc. done, and when you get a message from the mechanic asking you to come and have a look, you know there may be issues....

Oil related issues....

The weep from the head gasket has become a rivulet, and is contaminating the alternator belt in the process. It's also not going to pass the upcoming MOT like that. Blast.
Well, when the automotive Gods throw your those matters, some thinking is required. About half a second.
That Spoox Motorsports 1.4 8v TU3 alloy engine I'd been watching is now on its way. Time for some spannering....
The course of engine swaps never did run smooth....
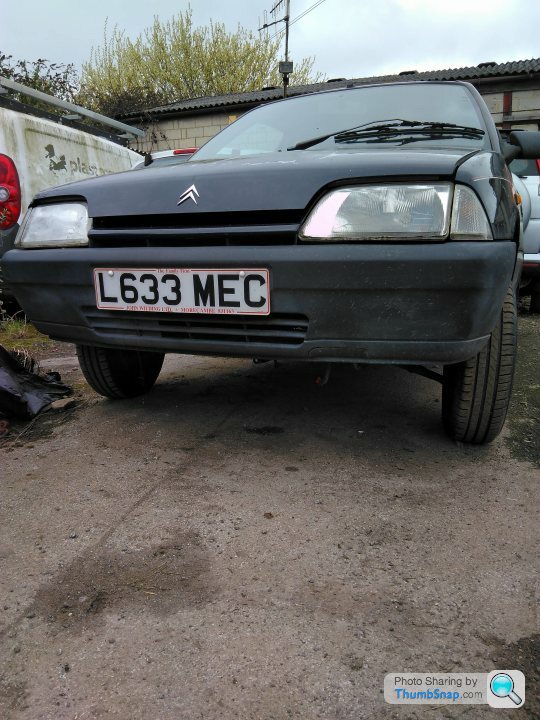
I went to visit this high rider over the weekend and to try and make some progress. The new engine was waiting on a pallet, and the old one was awaiting strip down.
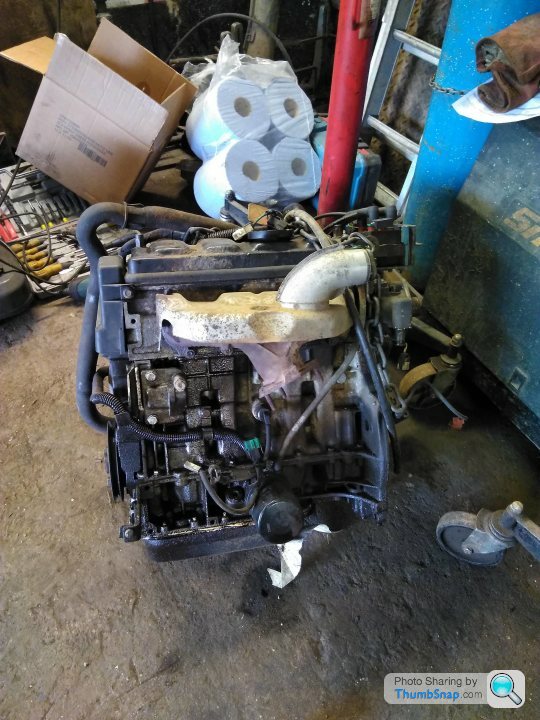
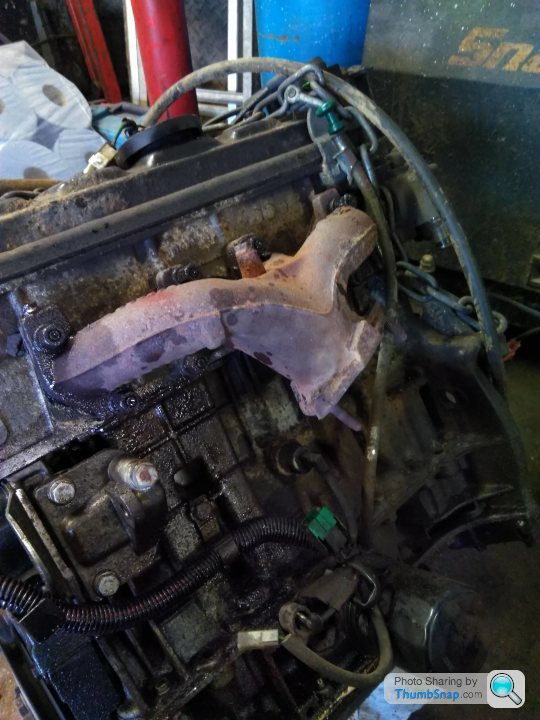
So, manifolds off, single point injection unit off, ignition module off.... Snapping two flimsy torx head bolts in the progress.
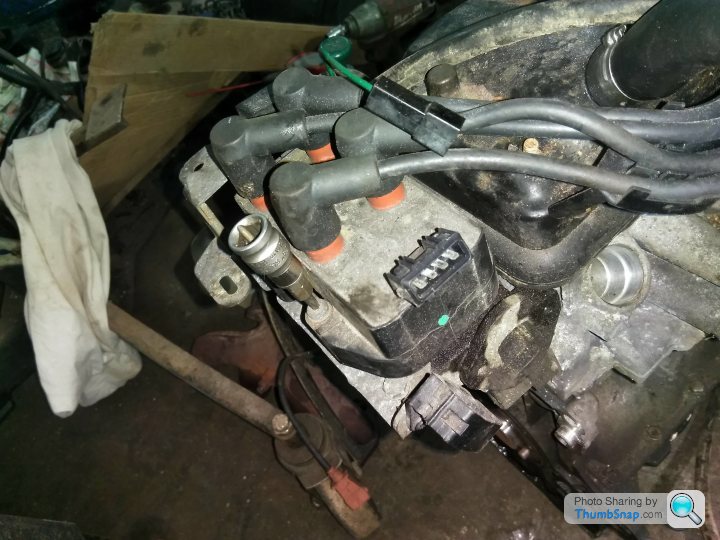
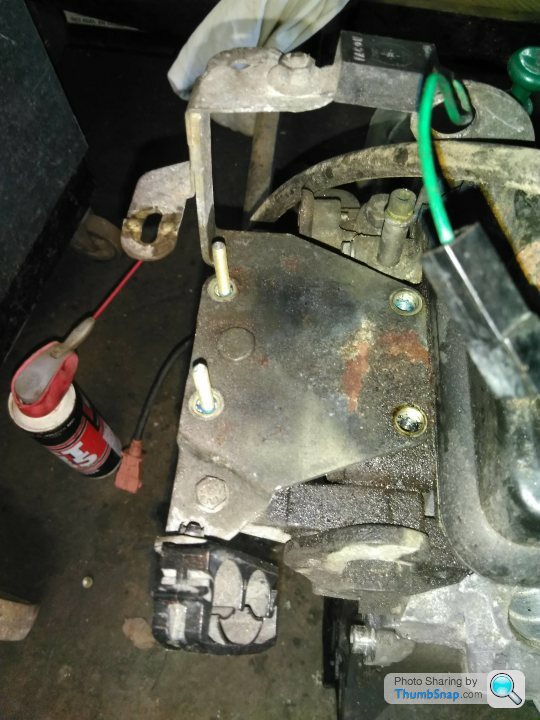
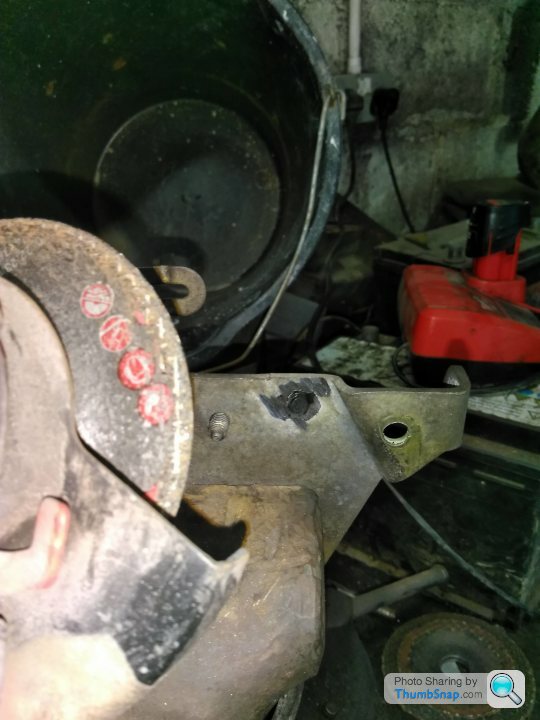
These required intervention from a grinder to take the captive nuts off before they finally gave up.
Then thermostat and oil housings off the end of the old block (different single combined unit on the other one).
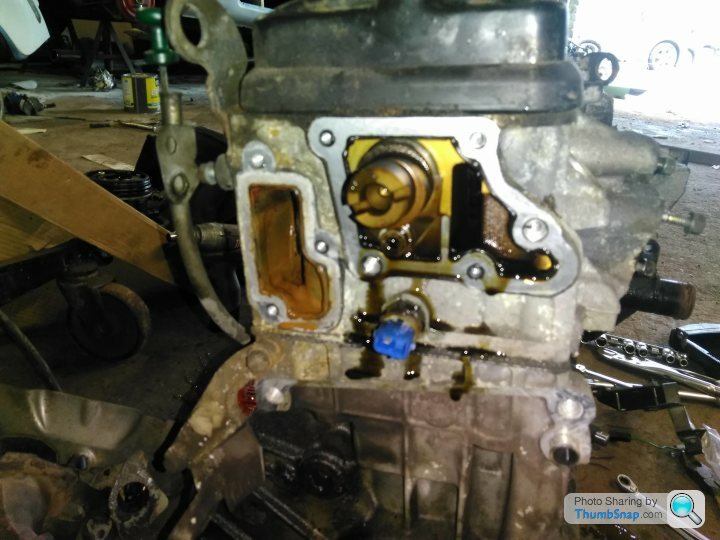
Missing exhaust studs wound out of the old block and into the new
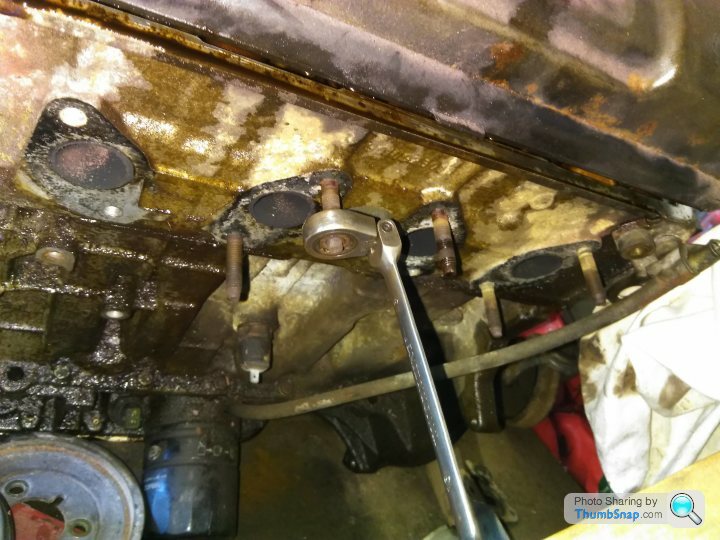
Sensors and blanking plugs swapped over. Splendid, all done, now time for the larger parts....
Oh balls.
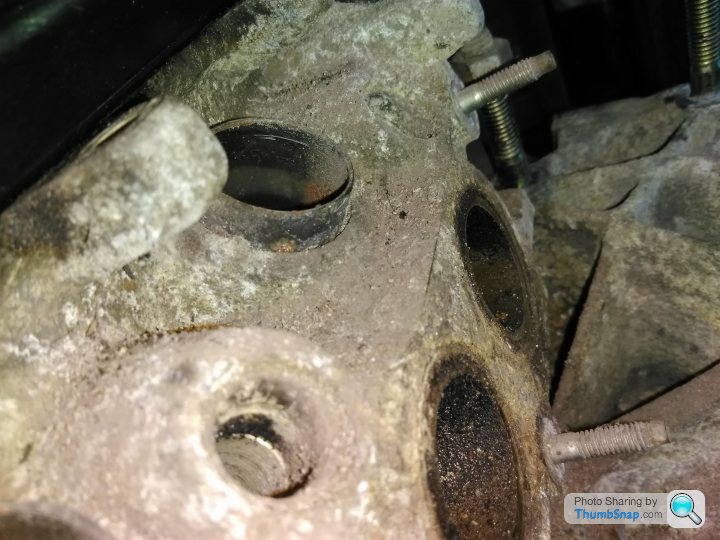
The new head is different, how have I only just noticed? It has metal sleeves in the top of the plug recesses for different leads. Ah well that's not insurmountable.
Oh, it has holes for fuel injectors. That's more of a problem.
Oh, it doesn't have the same inlet manifold alignment, or the coolant holes for the area under the single point injection . That IS insurmountable.
So, the next question is, do I just revert to plan A, replace the head gasket in the original engine and write the purchase of the 1.4 engine off as a bad job? It's an awful lot of work to go to for marginal power gains and an awful lot of expense and paperwork.

I went to visit this high rider over the weekend and to try and make some progress. The new engine was waiting on a pallet, and the old one was awaiting strip down.


So, manifolds off, single point injection unit off, ignition module off.... Snapping two flimsy torx head bolts in the progress.


These required intervention from a grinder to take the captive nuts off before they finally gave up.

Then thermostat and oil housings off the end of the old block (different single combined unit on the other one).

Missing exhaust studs wound out of the old block and into the new

Sensors and blanking plugs swapped over. Splendid, all done, now time for the larger parts....
Oh balls.

The new head is different, how have I only just noticed? It has metal sleeves in the top of the plug recesses for different leads. Ah well that's not insurmountable.
Oh, it has holes for fuel injectors. That's more of a problem.
Oh, it doesn't have the same inlet manifold alignment, or the coolant holes for the area under the single point injection . That IS insurmountable.
So, the next question is, do I just revert to plan A, replace the head gasket in the original engine and write the purchase of the 1.4 engine off as a bad job? It's an awful lot of work to go to for marginal power gains and an awful lot of expense and paperwork.
Edited by darkyoung1000 on Tuesday 23 March 22:15
Thanks all, I'm coming down in favour of plan A, the known good* engine with a new head gasket.

The 1.4 waterways and head gasket were in a much worse state than the original. Good job I didn't pursue the oh so simple 'just put the other engine in' (yeah right) strategy,it wouldn't have lasted 5 minutes. I should point out this is no fault of the seller, it a cheap engine for a reason - it had sat around for 4 years and they recommended a thorough inspection before installation.

The head has gone to be skimmed and I hope to make more progress this weekend when I return armed with a coke bottle (bleeding it last time was a pig, I hope I've learned my lesson).
- apart from the leaking sump, head gasket (at the left hand side) and crankshaft oil seals.

The 1.4 waterways and head gasket were in a much worse state than the original. Good job I didn't pursue the oh so simple 'just put the other engine in' (yeah right) strategy,it wouldn't have lasted 5 minutes. I should point out this is no fault of the seller, it a cheap engine for a reason - it had sat around for 4 years and they recommended a thorough inspection before installation.

The head has gone to be skimmed and I hope to make more progress this weekend when I return armed with a coke bottle (bleeding it last time was a pig, I hope I've learned my lesson).
Brother D I'd agree with you on both counts. The plastics are flimsy... and the time and effort I'm putting into this car are ridiculous considering its worth. Not going to stop me any time soon though!
The plan is underway. The head has been skimmed and looks lovely, so I can just put it back on the block, right?

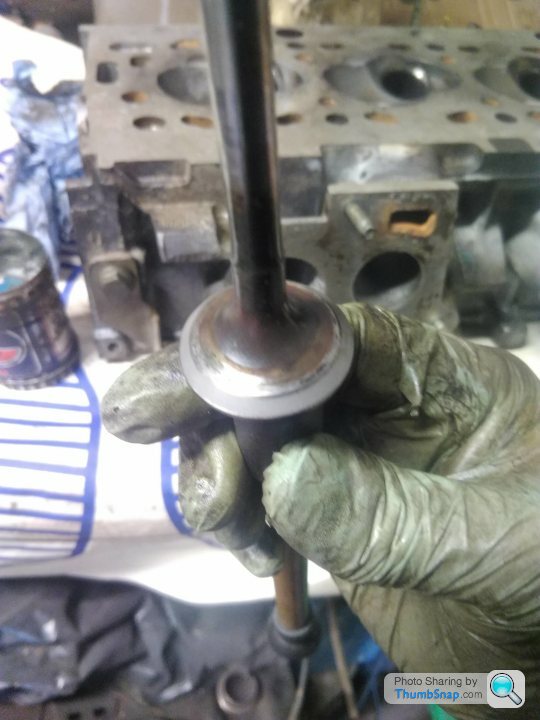
No, not if I'm going to do this properly (and given the effort spent so far, that seems sensible). Head on the bench and valves out, and then a gentle decarbonisation of the combustion chambers and valves with a wire wheel.
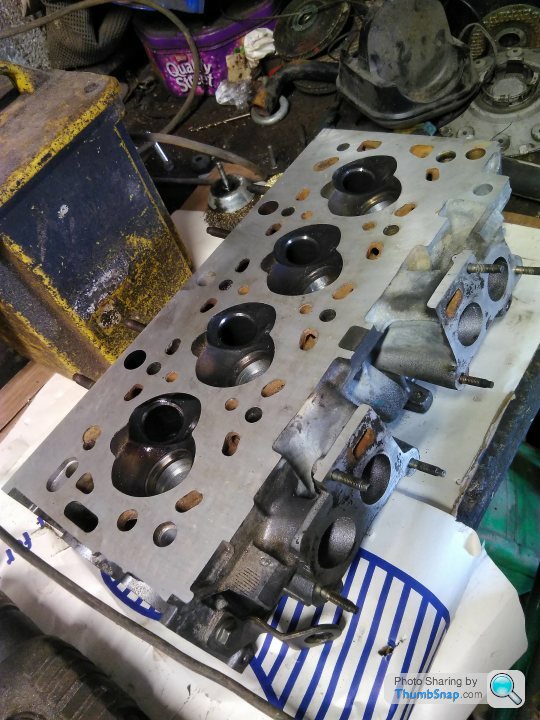

There then followed a therapeutic session with a suckered stick and some paste.
 [url]
[url]
 |https://thumbsnap.com/XiMK3ozW[/url]
Until finally, at the end of the day, the head and valves seats looked like this:


Reassembly starts next Friday.. . .
As an aside, for anyone interested in the development of the TU engine in the 90s, at some point Citroën changed the design of their rocker arms from solid to roller (or that may just be in the bigger displacement engine).

The plan is underway. The head has been skimmed and looks lovely, so I can just put it back on the block, right?

No, not if I'm going to do this properly (and given the effort spent so far, that seems sensible). Head on the bench and valves out, and then a gentle decarbonisation of the combustion chambers and valves with a wire wheel.


There then followed a therapeutic session with a suckered stick and some paste.
 [url]
[url] |https://thumbsnap.com/XiMK3ozW[/url]
Until finally, at the end of the day, the head and valves seats looked like this:


Reassembly starts next Friday.. . .
As an aside, for anyone interested in the development of the TU engine in the 90s, at some point Citroën changed the design of their rocker arms from solid to roller (or that may just be in the bigger displacement engine).

Back to the garage today for more engine work.
Set the valve stem seals soaking in oil, then got them installed using a socket to tap them into place without touching the soft rubber
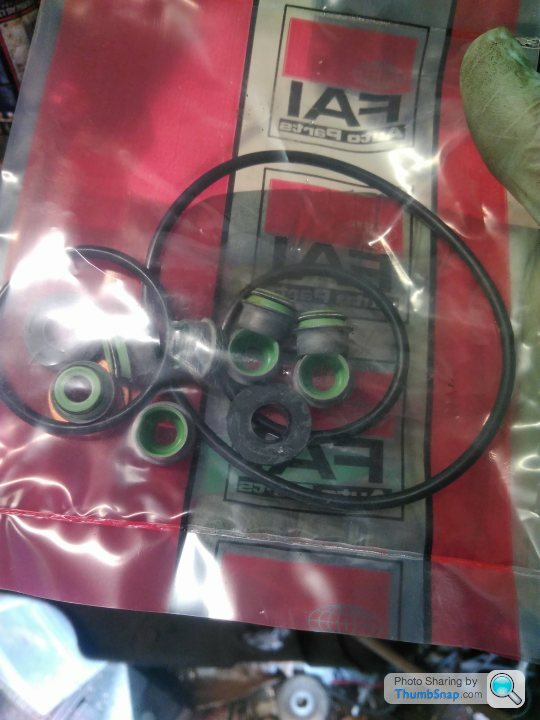

Then put all the valves in:

Realised I'd been an idiot, and took them all out again (bar one) making sure to keep them in the correct order. Then broke out the spring compressors.

All valves successfully back in the head, put the camshaft back in (torquing that to 80Nm was fun).

Then on with the thermostat housing :

Followed by the inlet manifold. There's a lot of space for increasing the sizes in the head, which I'm assuming is what they did in other iterations of the TU engine.

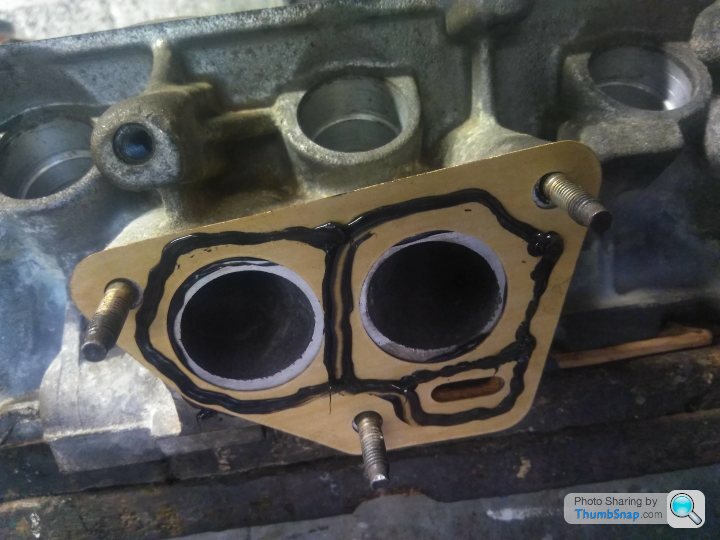

Will hope to get the belt on and get the engine timed up tomorrow ready to go back in here....

Set the valve stem seals soaking in oil, then got them installed using a socket to tap them into place without touching the soft rubber


Then put all the valves in:

Realised I'd been an idiot, and took them all out again (bar one) making sure to keep them in the correct order. Then broke out the spring compressors.

All valves successfully back in the head, put the camshaft back in (torquing that to 80Nm was fun).

Then on with the thermostat housing :

Followed by the inlet manifold. There's a lot of space for increasing the sizes in the head, which I'm assuming is what they did in other iterations of the TU engine.


Will hope to get the belt on and get the engine timed up tomorrow ready to go back in here....

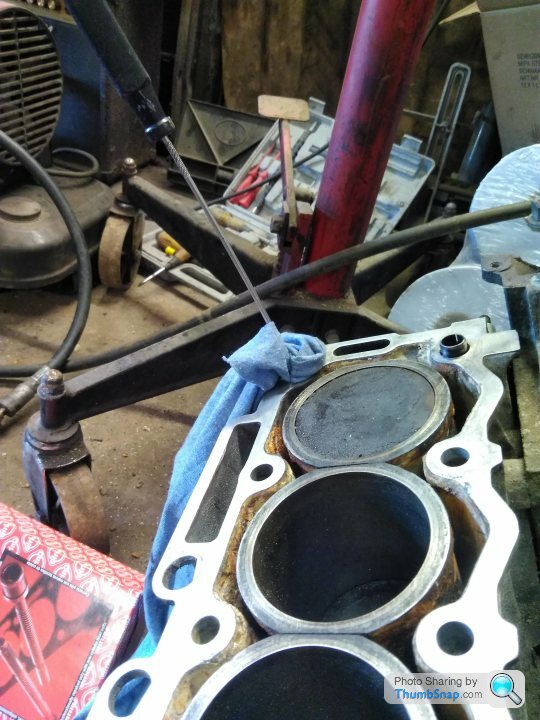
More re-assembly work on the engine today, but first I cleaned up the top of the bottom end and all of the holes where the new head bolts were going to go. I left cleaning the piston crowns as the procedure for supporting the liners is quite involved:

Then gasket on, head on (it went straight onto the dowels, lovely) and bolts in for torquing up. They are of course male torx heads, so I Was paranoid about the socket slipping, but all went well. 3 stage tightening - 20Nm, then 120 degrees, then another 120 degrees. Glad Mick had the degree tool as it wasn't something I'd used before.


With the head on, it looked more like an engine, but the ambitions of getting the belt on had to wait as I'd conveniently forgotten the crankshaft oil seal replacement. The reason the car came in so many weeks ago!
110Nm for the bolt holding the sprocket in....then a puller to get it off (due to surface rust on the inside as it turned out)

Old oil seal actually looked in decent nick, but was changed having got this far!
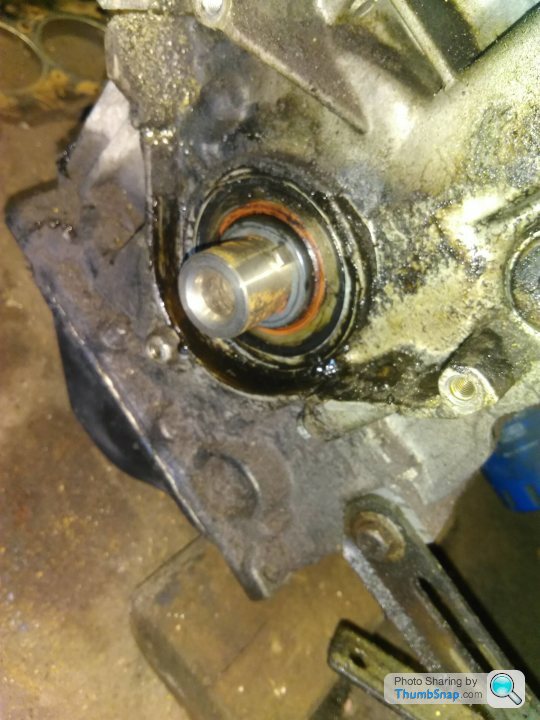

Sprocket back on having cleaned up the inside and lightly smeared oil over the mating surfaces. Then onto the water pump, which unsurprisingly was pretty gunked up inside, presumably from the engine having stood:
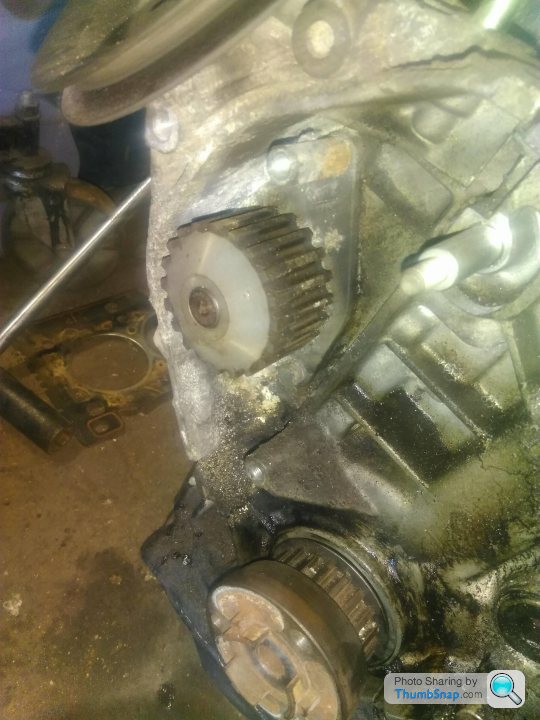


More progress next weekend I hope. This wasn't supposed to turn into quite the project, but I'm learning a lot as I go, and if it works, I'll be very happy to have rebuilt it!


Then gasket on, head on (it went straight onto the dowels, lovely) and bolts in for torquing up. They are of course male torx heads, so I Was paranoid about the socket slipping, but all went well. 3 stage tightening - 20Nm, then 120 degrees, then another 120 degrees. Glad Mick had the degree tool as it wasn't something I'd used before.


With the head on, it looked more like an engine, but the ambitions of getting the belt on had to wait as I'd conveniently forgotten the crankshaft oil seal replacement. The reason the car came in so many weeks ago!
110Nm for the bolt holding the sprocket in....then a puller to get it off (due to surface rust on the inside as it turned out)

Old oil seal actually looked in decent nick, but was changed having got this far!


Sprocket back on having cleaned up the inside and lightly smeared oil over the mating surfaces. Then onto the water pump, which unsurprisingly was pretty gunked up inside, presumably from the engine having stood:


More progress next weekend I hope. This wasn't supposed to turn into quite the project, but I'm learning a lot as I go, and if it works, I'll be very happy to have rebuilt it!
Thanks for the positive comments all, I'm back to it this Saturday....
However, a small update arrived in the post today. I'll start by saying that this wasn't part of the original plan, but after the original cast iron manifold snapped the heat shield bolts, then started disintegrating when they were forcibly extracted, then snapped off a tap...well you can see where this is going, right?

Oh dear, I appear to have accidentally purchased a 4-2-1 stainless exhaust manifold.
In my defence, second hand, equally tatty original manifolds are £30 + postage on ebay. This is lighter too thereby fitting in with the AX philosophy. Erm....no that's it. It was shiny...?

Yes, shiny.
Most importantly (as this project has taught me), is that the space between the bolt holes for the studs matches the existing head.

For anyone interested in the approximate dimensions in mm bergen the studs in a TU1 head, there you go. The exhaust is actually for a 1.4 8v Saxo (TU3), but before ordering, I checked that the 1.1 original manifold fitted on a 1.4 head that I happened to have lying around....
Let's see what Saturday brings!
However, a small update arrived in the post today. I'll start by saying that this wasn't part of the original plan, but after the original cast iron manifold snapped the heat shield bolts, then started disintegrating when they were forcibly extracted, then snapped off a tap...well you can see where this is going, right?

Oh dear, I appear to have accidentally purchased a 4-2-1 stainless exhaust manifold.
In my defence, second hand, equally tatty original manifolds are £30 + postage on ebay. This is lighter too thereby fitting in with the AX philosophy. Erm....no that's it. It was shiny...?

Yes, shiny.
Most importantly (as this project has taught me), is that the space between the bolt holes for the studs matches the existing head.

For anyone interested in the approximate dimensions in mm bergen the studs in a TU1 head, there you go. The exhaust is actually for a 1.4 8v Saxo (TU3), but before ordering, I checked that the 1.1 original manifold fitted on a 1.4 head that I happened to have lying around....
Let's see what Saturday brings!
A little more progress yesterday, although none of it exhaust related unfortunately (although I did line it up by eye and its looking hopeful) .
Instead, it was picking up where I left off and cleaning up the water pump aperture, before fitting the new one:

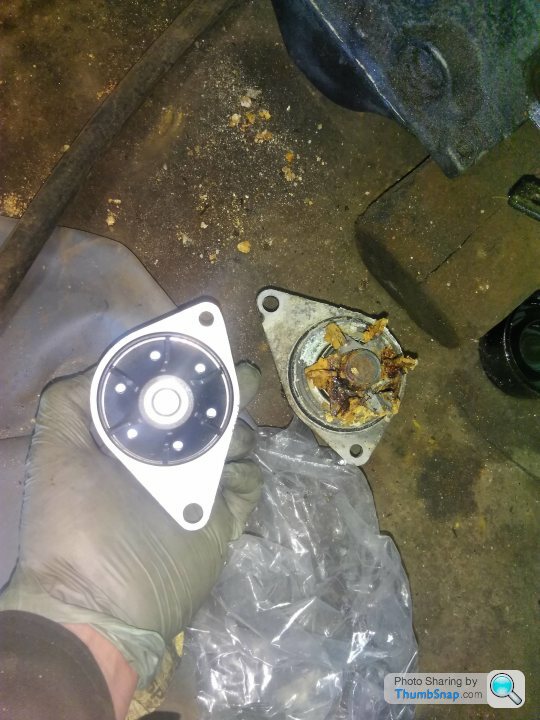
Having done that, I went to put the timing belt on...and it was too short. There then followed a tooth counting session on the water pump and top and bottom sprockets (all the same), then the belt. The old belt has 108 teeth, the new one 104.
Blast.
By this point, the factors were closed, so the new belt will have to wait, and any thoughts of engine installation yesterday vanished.
Ah well, I put the old belt on, tensioned it up and then (with some trepidation) turned it over using a socket in the bottom pulley. Having done some revolutions with no valve/piston clash, I pinned it up again...and it all lined up! Marvellous.
When the new belt turns up, I'll put that on (the old one actually looks OK, but it would be stupid not to).
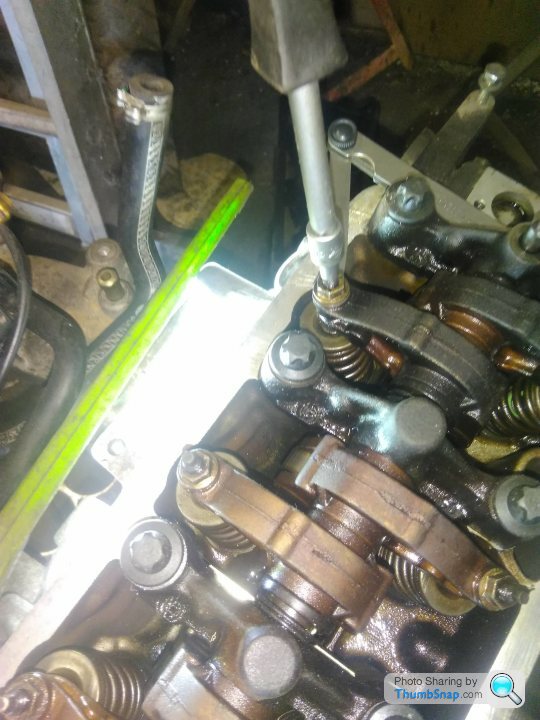
As it was all turning over, I then spent a good amount of time setting and checking the valve clearances.
To the sound of bagpipes.

He's a mate of the chap who runs the garage, and comes by to practice out of deference to his neighbours.
Anyway, 0.20mm for the inlets, 0.40mm for the exhaust valves. 4mm socket to adjust the clearance and a 10mm lock nut to hold it in place.

Then onto THE REASON THE CAR WAS IN HERE IN THE FIRST PLACE!
Flywheel off and change the crankshaft oil seal :
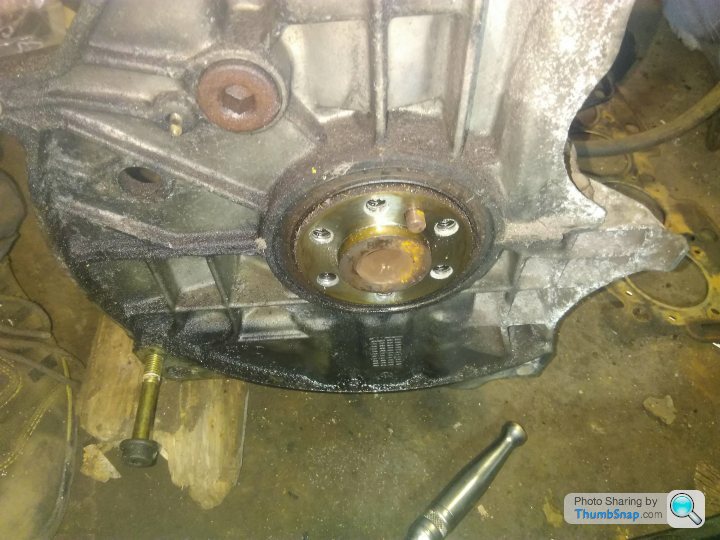

Its a good size, and I'm glad it comes with a device for slipping it over, as I suspect its easy to damage, and that would get frustrating quite quickly....
Flywheel back on with new 17mm bolts (which despite there being 6 of... come in packs of 5).

...and bloody hell, it's starting to look like an engine again.

New belt next week, then clutch, gearbox, driveshafts etc. Sounds so simple when I say it quickly!
Instead, it was picking up where I left off and cleaning up the water pump aperture, before fitting the new one:


Having done that, I went to put the timing belt on...and it was too short. There then followed a tooth counting session on the water pump and top and bottom sprockets (all the same), then the belt. The old belt has 108 teeth, the new one 104.
Blast.
By this point, the factors were closed, so the new belt will have to wait, and any thoughts of engine installation yesterday vanished.
Ah well, I put the old belt on, tensioned it up and then (with some trepidation) turned it over using a socket in the bottom pulley. Having done some revolutions with no valve/piston clash, I pinned it up again...and it all lined up! Marvellous.
When the new belt turns up, I'll put that on (the old one actually looks OK, but it would be stupid not to).
As it was all turning over, I then spent a good amount of time setting and checking the valve clearances.

To the sound of bagpipes.

He's a mate of the chap who runs the garage, and comes by to practice out of deference to his neighbours.
Anyway, 0.20mm for the inlets, 0.40mm for the exhaust valves. 4mm socket to adjust the clearance and a 10mm lock nut to hold it in place.

Then onto THE REASON THE CAR WAS IN HERE IN THE FIRST PLACE!
Flywheel off and change the crankshaft oil seal :


Its a good size, and I'm glad it comes with a device for slipping it over, as I suspect its easy to damage, and that would get frustrating quite quickly....
Flywheel back on with new 17mm bolts (which despite there being 6 of... come in packs of 5).

...and bloody hell, it's starting to look like an engine again.

New belt next week, then clutch, gearbox, driveshafts etc. Sounds so simple when I say it quickly!
Time for the regular Saturday update...
The correct timing belt with 108 teeth had been delivered, so that was fitted. Un-pinned the engine and turned it over 10 rotations as recommended, then pinned it back up, released the tension, fettled the belt and repeated.
All seemed well, so I did the final tension and tightened up the tensioner bolt to 23Nm.
Engine finally timed up with a new belt, other things needed sorting!
A little premature, but I replaced the driveshaft oil seals.
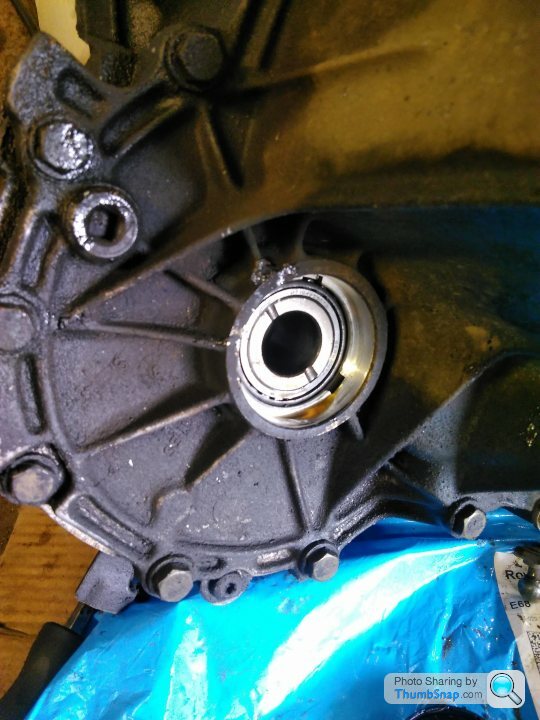
Today's main event, was the clutch though.


New kit fitted and aligned by eye (quite pleased by that as it went straight on)...and crikey, suddenly it looks a lot more complete! There was some shuffling required to get it all lined up against the block, but it came good after that!

After this, I have started putting the wiring loom back on, and as part of that, cracked the lambada sensor in the exhaust.

I'll get the loom back on this Friday as I have a day off, and then we'll see about getting the engine back in the car!

The correct timing belt with 108 teeth had been delivered, so that was fitted. Un-pinned the engine and turned it over 10 rotations as recommended, then pinned it back up, released the tension, fettled the belt and repeated.
All seemed well, so I did the final tension and tightened up the tensioner bolt to 23Nm.
Engine finally timed up with a new belt, other things needed sorting!
A little premature, but I replaced the driveshaft oil seals.

Today's main event, was the clutch though.


New kit fitted and aligned by eye (quite pleased by that as it went straight on)...and crikey, suddenly it looks a lot more complete! There was some shuffling required to get it all lined up against the block, but it came good after that!

After this, I have started putting the wiring loom back on, and as part of that, cracked the lambada sensor in the exhaust.

I'll get the loom back on this Friday as I have a day off, and then we'll see about getting the engine back in the car!
Edited by darkyoung1000 on Sunday 18th April 08:12
Sufficient progress has been made that is was time to play the - 'how many connectors in the loom, where do they go, did this really come out of here?' game
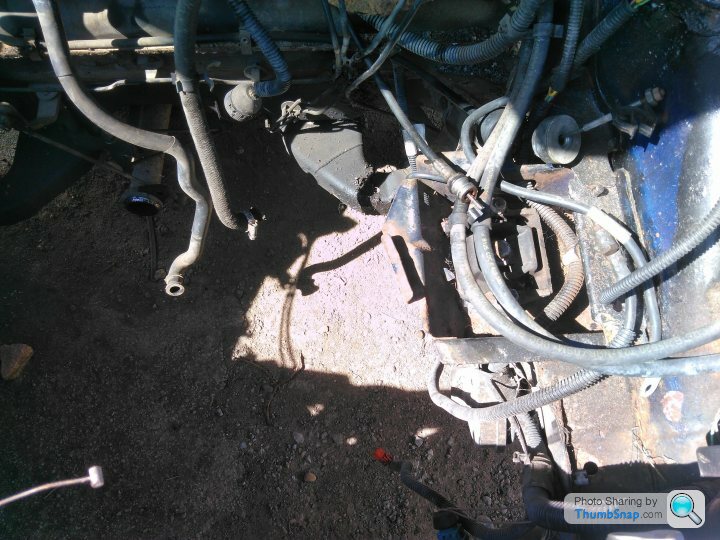
Bearing in mind, I didn't take the engine and box out, there was some test fitting and reassembling to try and work out what should go back where...

I still haven't worked out where this goes, for example!

However, today there was a 4 post lift and an engine crane added to to party with some positive results.


The manifold, as well as being shiny, is a perfect fit! Brilliant!
It turns out that you need to put the rear engine mount in before you bolt up the exhaust though. This I now know....

However, its in, it fits, the gear linkages and loom are all connected, and maybe, just maybe, next week it will fire...

Bearing in mind, I didn't take the engine and box out, there was some test fitting and reassembling to try and work out what should go back where...

I still haven't worked out where this goes, for example!

However, today there was a 4 post lift and an engine crane added to to party with some positive results.


The manifold, as well as being shiny, is a perfect fit! Brilliant!
It turns out that you need to put the rear engine mount in before you bolt up the exhaust though. This I now know....

However, its in, it fits, the gear linkages and loom are all connected, and maybe, just maybe, next week it will fire...
Gassing Station | Readers' Cars | Top of Page | What's New | My Stuff


