Phoenix from the flames - Porsche Boxster with an Audi 2.7T
Discussion


Bumper off to bleed the charge cooler system.
 P6220495
I had to buy new gear cables for the 6 speed gearbox, they came with the shift knob and boot which were grey leather. My handbrake was looking quite sorry for itself also so I sent them off for a re-trim.
 P6060381
Went for charcoal alcantara with a red stitch. While I was at it, decided to get the seatbelts done in red. Felt it could do with a splash of colour.
 P6170401
I needed to make up new downpipes, I bought a pair of flanges to suit the RS6 turbos as they have a different bolt pattern to the RS4 turbos. I used a 3.5" to 2.5" reducer. I only had one in the garage, wanted to buy another but could only find Chinese suppliers with long delivery times. I decided to cut one out of the exhaust I'd used previously on my 986. I also cut out the exhaust vac fitting. I'm not going to be using that exhaust so thought I may as well recover what I can from it.
 P6220501
This is the section I need to make up, pretty straight forward.
 P6250503
 P6250504
The dirty sections were out of an old exhaust I cut up, didn't realise I was out of 2.5" until the time came to make the exhaust.
 P6280506
All wrapped up.
 P6280509
The major challenge was working out how to tie the suspension carriers together, I did hope I wouldn't have to change stuff but the 6 speed was too bulky to use what I had before. The brace dictates where the suspension carriers are so if my new one is different my alignment that's only just been done would be off. I measured up the distances on the suspension carriers before I put the engine in so I knew what I needed. I decided it's probably best to make a jig of the old brace to give me a fighting chance.
 P6140398
 P6140399
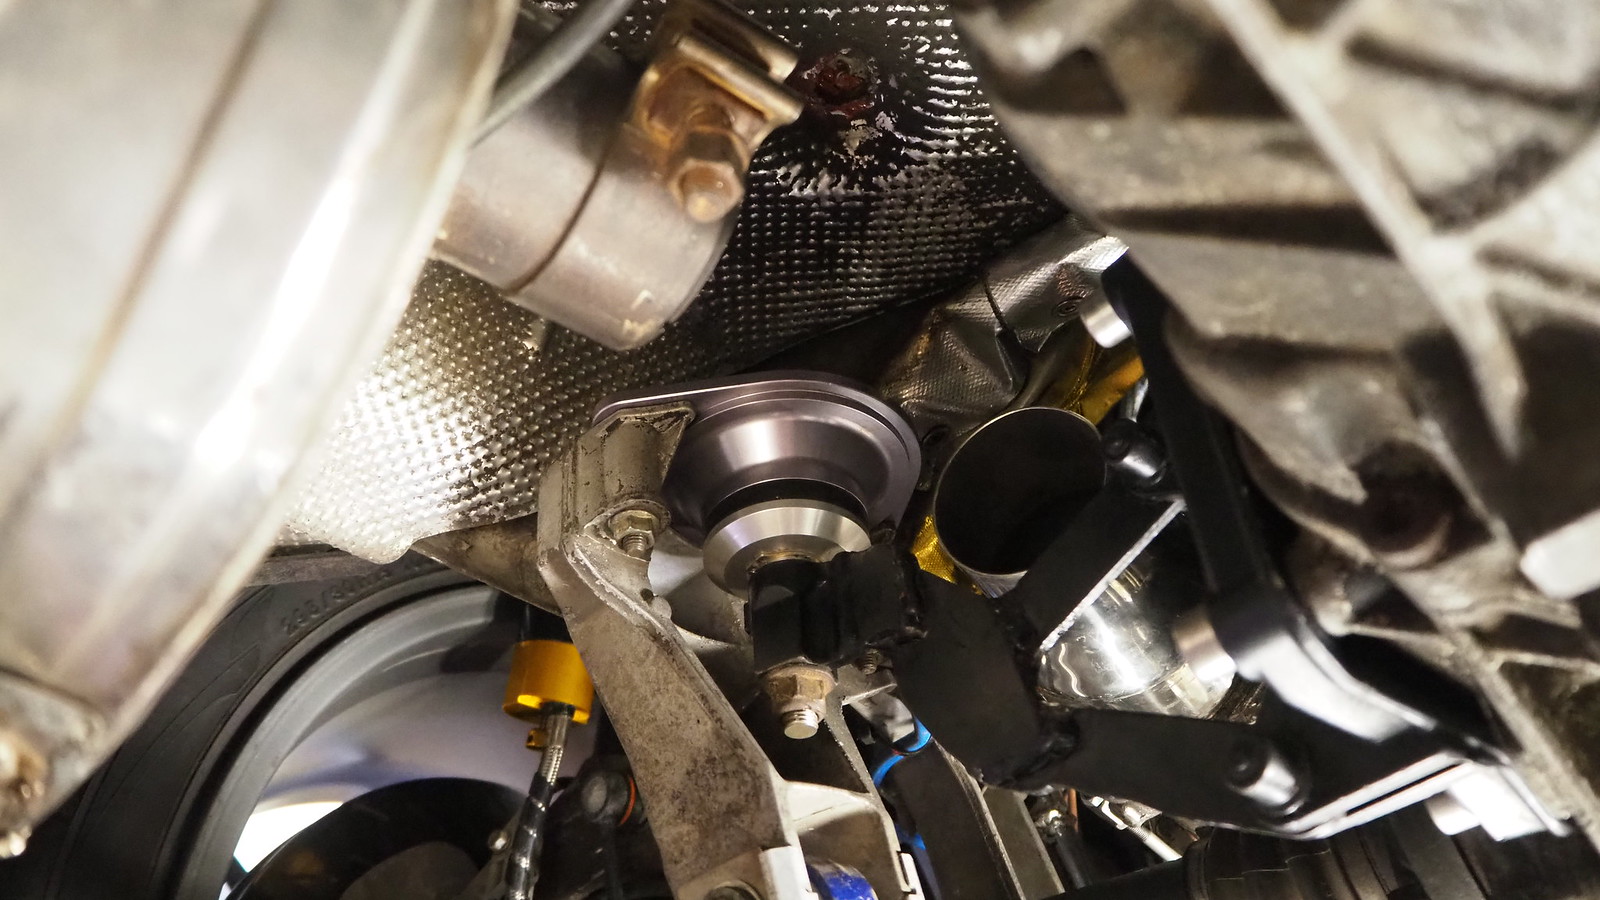
Once that part of the frame was made I decided I wanted to do a bit more to try and increase stiffness of the rear end. I know on the newer Boxster's that frame is also tied into the suspension carriers and people also run extra braces at the rear of the suspension carriers so I knew there were improvements to be had. I decided to do the same. It took a bit of working out how best to go about it, I couldn't make it in one piece as I can't get it on and off due to the angle of some of the bits. Decided to make plates that it bolts to. I rattle canned it black, will probably get it powder coated over the winter, want to car on the road for the summer.
 P6280510
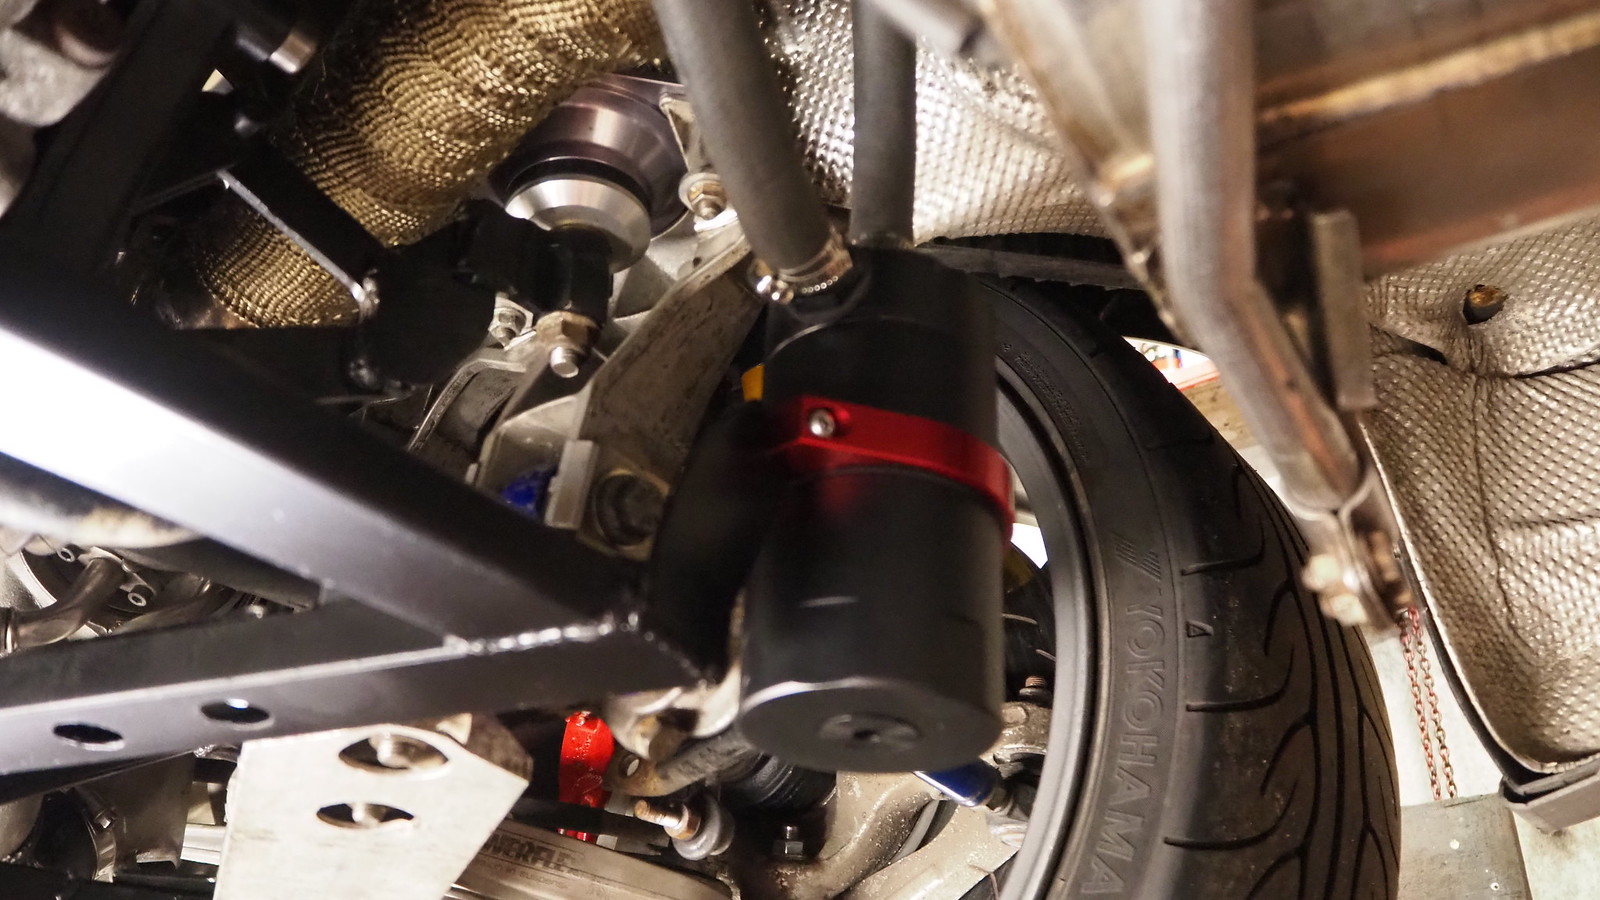
Mounted on the car, it is tight up against the aluminium braces and is bolted to the suspension carrier in 3 places each side. I'm quite happy with how it turned out. It's probably easier to see on the video.
 P6290512
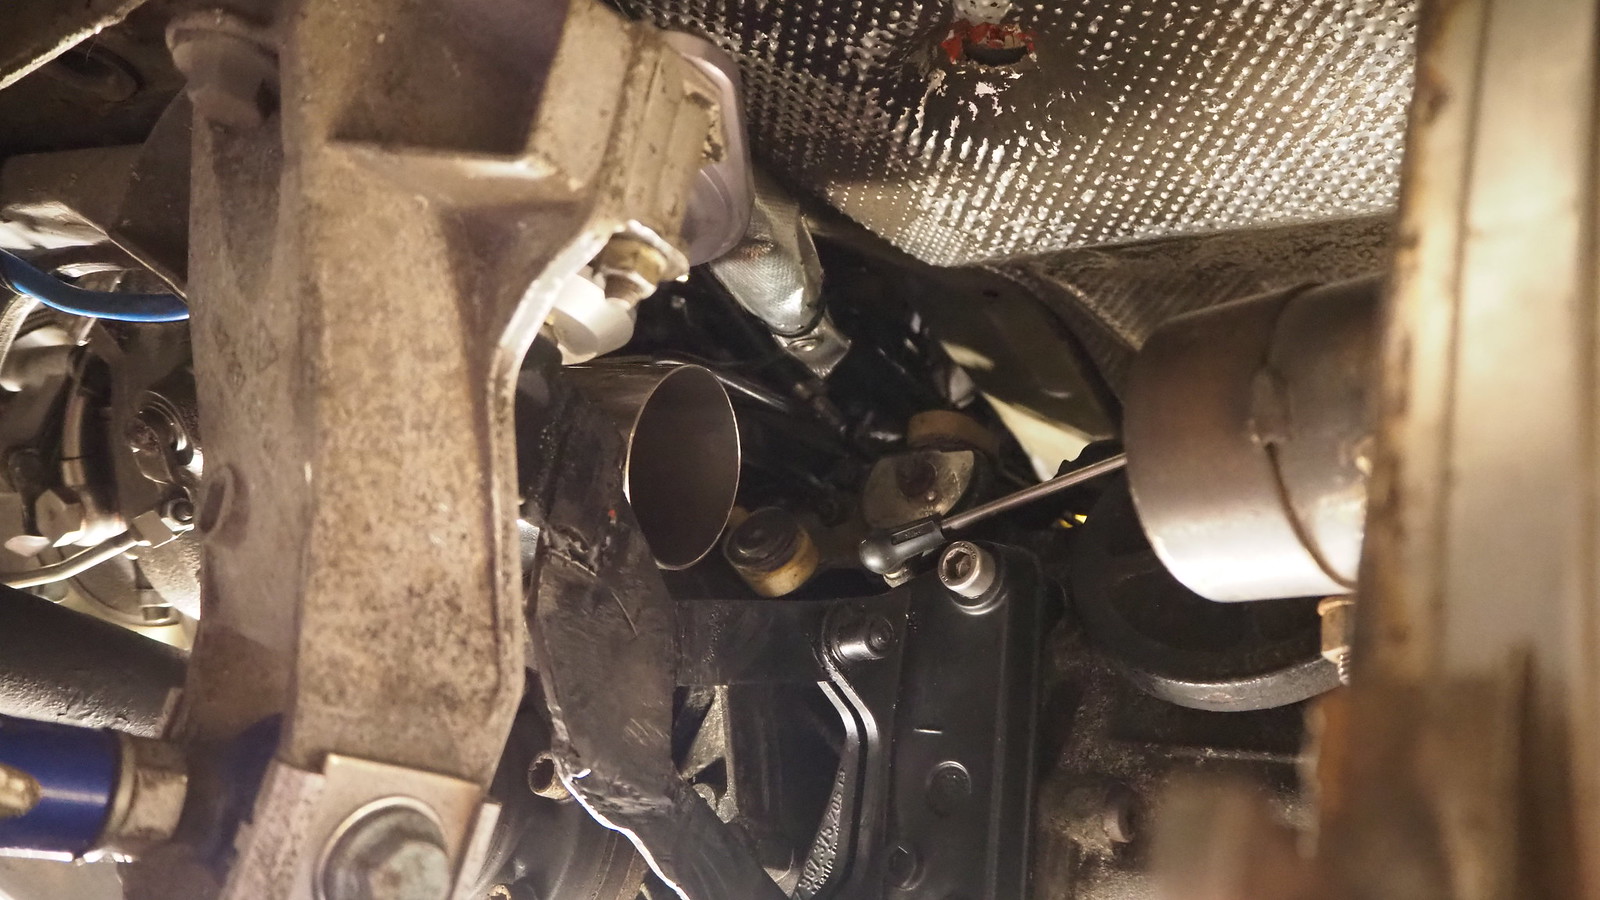
Added my catch can which feeds into the exhaust.
 P6290513
Put some oil in it and was ready to start it up.
 P6300515
Starting it up didn't go as planned. I noticed the revs shown were jumping about as it cranked. I took an event log and noticed my crank angle trace was a mess. Getting to the crank sensor was a big job, subframe and exhaust off so I started at the plug, this was a good call.
 P6300520
Broken wire on the plug (must have completely broken as I unplugged it). The insulation on all 3 wires was damaged in the same place, this is why you shouldn't probe wires! I had a spare loom so swapped over a new plug. It's typical, all that work I've done, have had the engine in bits and a non starting issue is completely un-related to any of it.
I P6300521
With that plug sorted, I fired it up and the engine sounds really sweet, better than before. I haven't run it long as it was late. I still need to make up inlet pipes and sort out some wiring but I'm targeting a first drive this weekend and I cannot wait.
P6220495I had to buy new gear cables for the 6 speed gearbox, they came with the shift knob and boot which were grey leather. My handbrake was looking quite sorry for itself also so I sent them off for a re-trim.
P6060381Went for charcoal alcantara with a red stitch. While I was at it, decided to get the seatbelts done in red. Felt it could do with a splash of colour.
P6170401I needed to make up new downpipes, I bought a pair of flanges to suit the RS6 turbos as they have a different bolt pattern to the RS4 turbos. I used a 3.5" to 2.5" reducer. I only had one in the garage, wanted to buy another but could only find Chinese suppliers with long delivery times. I decided to cut one out of the exhaust I'd used previously on my 986. I also cut out the exhaust vac fitting. I'm not going to be using that exhaust so thought I may as well recover what I can from it.
P6220501This is the section I need to make up, pretty straight forward.
P6250503P6250504The dirty sections were out of an old exhaust I cut up, didn't realise I was out of 2.5" until the time came to make the exhaust.
P6280506All wrapped up.
P6280509The major challenge was working out how to tie the suspension carriers together, I did hope I wouldn't have to change stuff but the 6 speed was too bulky to use what I had before. The brace dictates where the suspension carriers are so if my new one is different my alignment that's only just been done would be off. I measured up the distances on the suspension carriers before I put the engine in so I knew what I needed. I decided it's probably best to make a jig of the old brace to give me a fighting chance.
P6140398P6140399Once that part of the frame was made I decided I wanted to do a bit more to try and increase stiffness of the rear end. I know on the newer Boxster's that frame is also tied into the suspension carriers and people also run extra braces at the rear of the suspension carriers so I knew there were improvements to be had. I decided to do the same. It took a bit of working out how best to go about it, I couldn't make it in one piece as I can't get it on and off due to the angle of some of the bits. Decided to make plates that it bolts to. I rattle canned it black, will probably get it powder coated over the winter, want to car on the road for the summer.
P6280510Mounted on the car, it is tight up against the aluminium braces and is bolted to the suspension carrier in 3 places each side. I'm quite happy with how it turned out. It's probably easier to see on the video.
P6290512Added my catch can which feeds into the exhaust.
P6290513Put some oil in it and was ready to start it up.
P6300515Starting it up didn't go as planned. I noticed the revs shown were jumping about as it cranked. I took an event log and noticed my crank angle trace was a mess. Getting to the crank sensor was a big job, subframe and exhaust off so I started at the plug, this was a good call.
P6300520Broken wire on the plug (must have completely broken as I unplugged it). The insulation on all 3 wires was damaged in the same place, this is why you shouldn't probe wires! I had a spare loom so swapped over a new plug. It's typical, all that work I've done, have had the engine in bits and a non starting issue is completely un-related to any of it.
I
P6300521With that plug sorted, I fired it up and the engine sounds really sweet, better than before. I haven't run it long as it was late. I still need to make up inlet pipes and sort out some wiring but I'm targeting a first drive this weekend and I cannot wait.

Thanks for the nice comments. I can't wait to see how it is on the new turbos.
https://www.ebay.co.uk/itm/283935042101
Fuzzy69r said:
Amazing project that just keeps getting better , can I ask who you got to do your seatbelts in red ?
I used JW Autotrim, his work is good, the turn around was fast but he pulled a bit of a prick move regarding payment, my advice would be go through ebay and not to him directly.https://www.ebay.co.uk/itm/283935042101
A constant thorn in my side has been air filter placement. They've always been down low and not ideal for wet conditions. Since I'd slightly changed where the turbos are mounted I now had the option of running the inlet pipes up the side of the engine and into the side vents.
 P7040536
There is an O-ring on the turbo inlet so these pipes slide over that to seal. There is a tab to attach them to a rubber mount which are on the charge coolers.
 P7030524
Fitted. They are pretty tight for space, glad it all worked out.

I ended up going one high and one low, not ideal in terms of aesthetics but it's how they had to be.
 P7040527
 P7040526
 P7040525
With them sorted, I ran the engine and got this huge cloud of smoke.
 P7050537
Found signs of oil in the boost pipes and the exhaust. Both banks.
 P7050543
 P7050544
I monitor crank case pressure so didn't take long to work out by exhaust venturi pipe wasn't pulling a strong enough vacuum. I ended up ditching it. I wanted to pull a vacuum to try and stop oil leaks and it improves piston ring seal and therefore power. I had a few secondary air pumps knocking about so decided to use one as a vacuum pump by spinning it backwards. I've got a one way valve and a filter so it breathes through that unless on boost then it turns the pump on. When testing, at idle it pulls 2" (70mbar) of vacuum, doesn't sound a crazy amount but some quick maths says it's holding the oil cap down with about 0.5kg of force. I've since tested it at 2800mbar (25psi of positive boost), it stays around 1000mbar (which it atmospheric pressure), not great but not bad either, it's keeping up. This new set-up has solved the smoke issue.
 P7130572
P7040536There is an O-ring on the turbo inlet so these pipes slide over that to seal. There is a tab to attach them to a rubber mount which are on the charge coolers.
P7030524Fitted. They are pretty tight for space, glad it all worked out.
I ended up going one high and one low, not ideal in terms of aesthetics but it's how they had to be.
P7040527P7040526P7040525With them sorted, I ran the engine and got this huge cloud of smoke.
P7050537Found signs of oil in the boost pipes and the exhaust. Both banks.
P7050543P7050544I monitor crank case pressure so didn't take long to work out by exhaust venturi pipe wasn't pulling a strong enough vacuum. I ended up ditching it. I wanted to pull a vacuum to try and stop oil leaks and it improves piston ring seal and therefore power. I had a few secondary air pumps knocking about so decided to use one as a vacuum pump by spinning it backwards. I've got a one way valve and a filter so it breathes through that unless on boost then it turns the pump on. When testing, at idle it pulls 2" (70mbar) of vacuum, doesn't sound a crazy amount but some quick maths says it's holding the oil cap down with about 0.5kg of force. I've since tested it at 2800mbar (25psi of positive boost), it stays around 1000mbar (which it atmospheric pressure), not great but not bad either, it's keeping up. This new set-up has solved the smoke issue.
P7130572The exhaust venturi has gone now. You'd normally feed your crankcase gasses (which is what escapes past the piston rings) back into your inlet manifold or your air intake so that the engine itself pulls the vacuum. That results in oily pipes and lowers the octane rating in the cylinders as your burning the gasses.
Lots of modified cars just run the lines to the atmosphere, it can be smelly plus having a vacuum on your crankcase promotes piston ring seal and apparently increases power. The main reason I wanted to have a vacuum is to keep the crankcase from pressurising and developing oil leaks.
I forgot to post the link to my video.

Gassing Station | Readers' Cars | Top of Page | What's New | My Stuff