460hp Lotus Exige V6
Discussion


I'm going to try to keep this thread a bit more up to date now...
SeriouslyLotus were having their open day on Good Friday and it coincided with when my service was due, so I was going to go up a day early, they'd service my car and then I'd stay over for the open day. My car had other ideas, lots of trouble and all that. A bit before the drive up, the car had developed quite a bad vibration above 60mph on moderate or more throttle input. I balanced the wheels hoping for an easy fix, but that didn't help, then John from SeriouslyLotus had a guess that it might be driveshafts. I ended up setting off the night before I was due, so if I broke down I could get an AA relay the rest of the way. The 250 mile journey wasn't much fun at 60mph, but I did make it... Just about.
So it turned out that the driveshaft had a LOT of play on one side, and also the lower bush in the rear upright had a lot of movement in it.
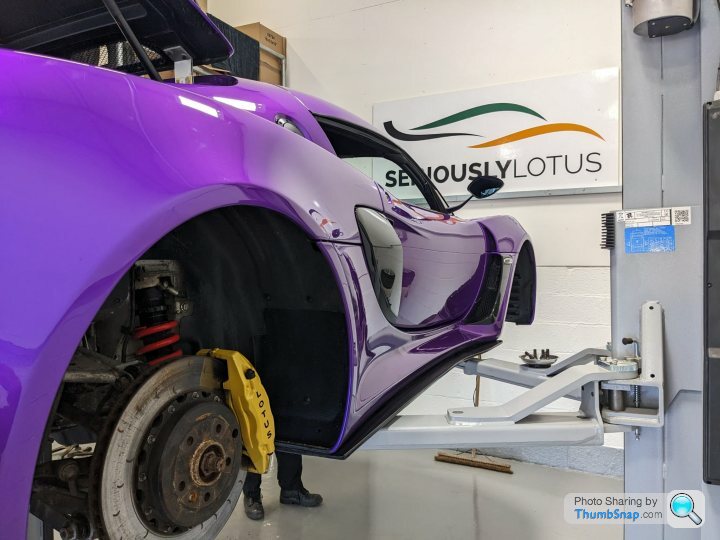
Due to time, it was too big a job to get done in one day, so I left the car in their safe hands. SeriouslyLotus are known to be one of the best Lotus specialists in the UK and their attention to detail is very impressive, so I asked them to have a really really thorough look over the car while it was with them. I also decided now was a good time to replace all bushes in the car. It has just shy of 70k miles now and I've replaced some bushes, but I feel a bit like I'm waiting for the next one to fail.
I have actually quite regularly cleaned and protected the components using Lanoguard, which has done quite a good job, but Lanoguard is sticky and seems to attract dirt, so it was all looking a bit nasty.
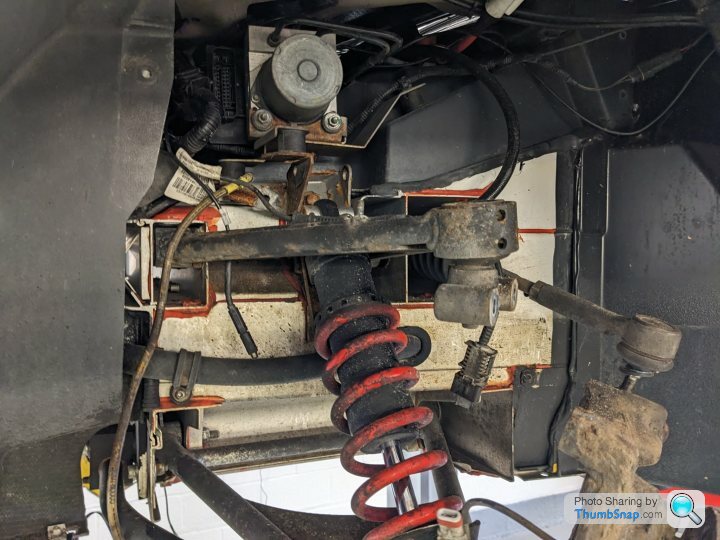
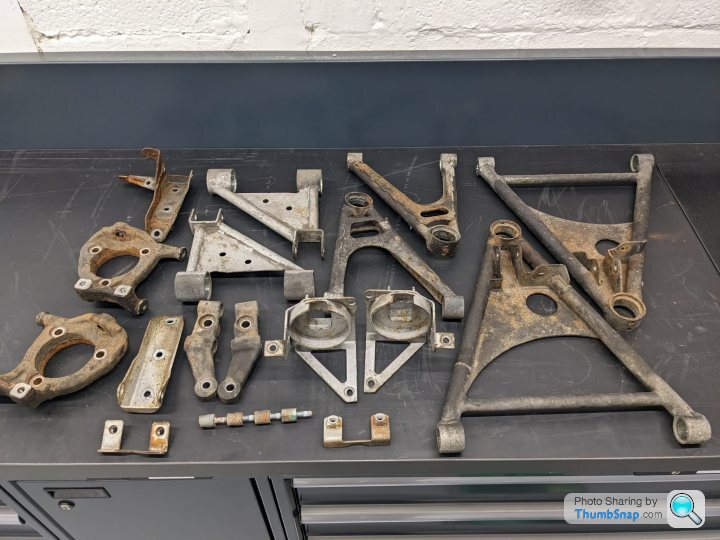
The wishbones are steel on an Exige, and they only have a thin coating from the factory. The uprights don't have any coating from Lotus, so tend to come with a nicer layer of surface rust. I decided now was a good time to get the wishbones, uprights and some brackets, blasted, then cerakoted. I considered lots of different coatings, and Cerakote came out on top, maybe not for looks, but for longevity of the coating and corrosion resistance.
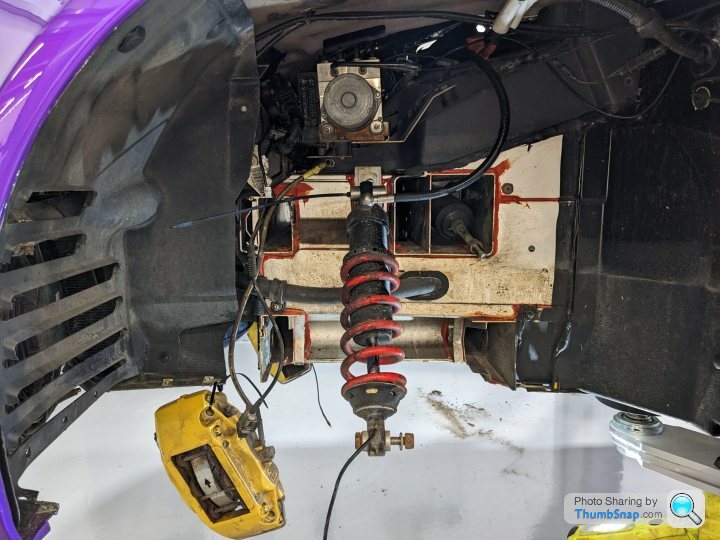
John and Dave made quick work of getting things stripped
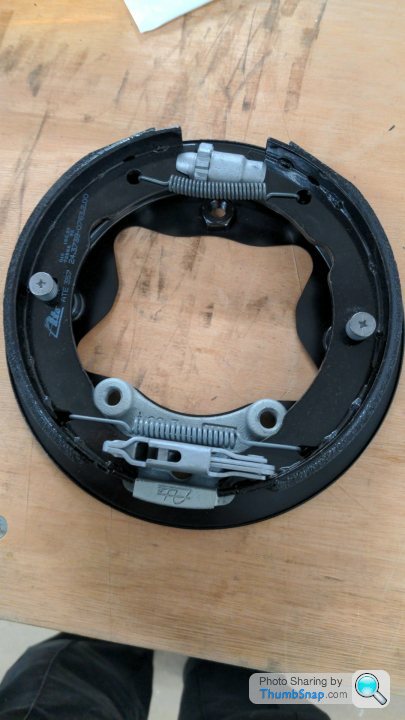
Handbrake had very much seen better days, I'm impressed it got through the MOT in this state.
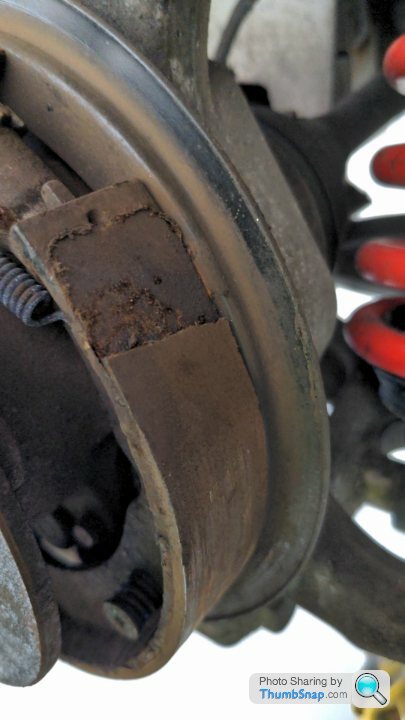
Handbrake cable also looking horrible so will be replaced.

New Handbrake drums
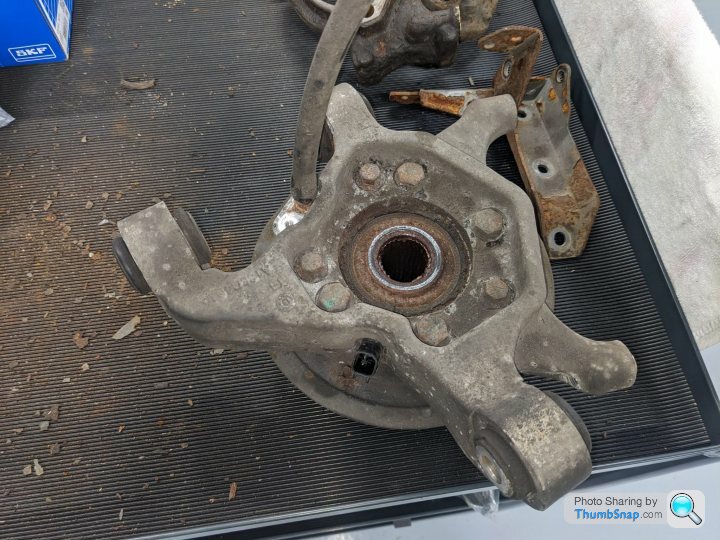
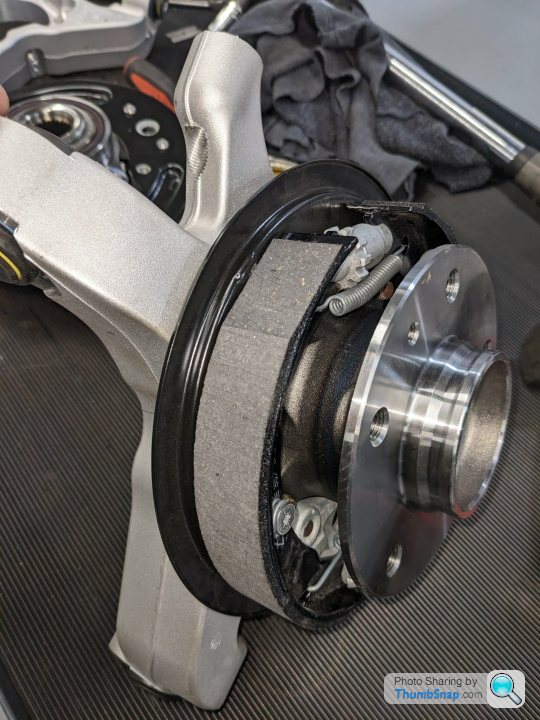
Rear uprights off the car, these will be replaced with new parts, and as they're aluminium I won't bother getting them coated. We'll also put new hubs in.
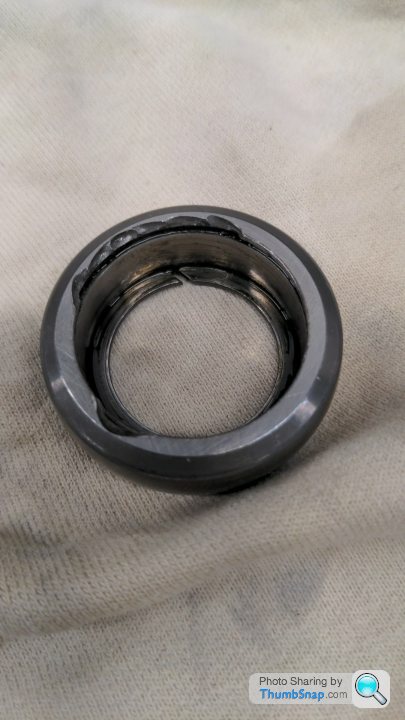
This was one of the bearings inside the driveshaft which explains the horrible vibration
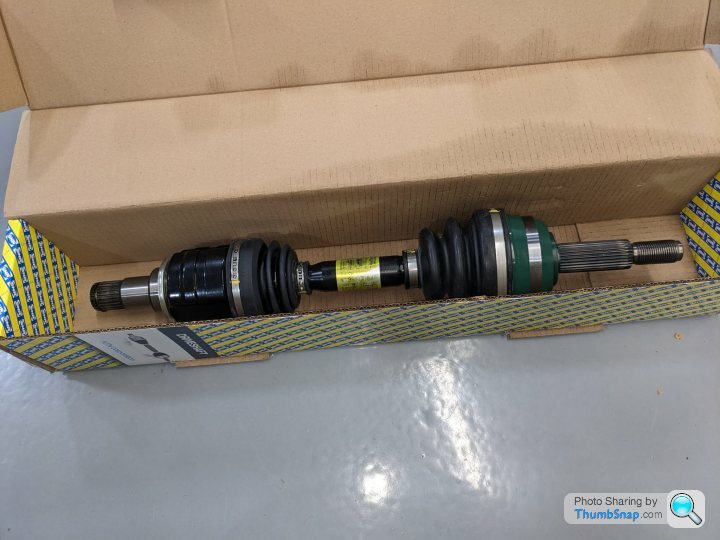
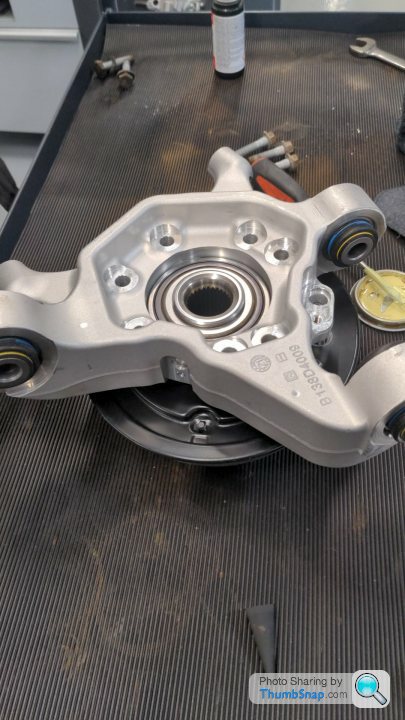
New driveshaft ready to go on soon
This is where we're at now, basically all my suspension on a work bench, ready to be sent off. Next stage is the really exciting one where things are nice and clean.
SeriouslyLotus were having their open day on Good Friday and it coincided with when my service was due, so I was going to go up a day early, they'd service my car and then I'd stay over for the open day. My car had other ideas, lots of trouble and all that. A bit before the drive up, the car had developed quite a bad vibration above 60mph on moderate or more throttle input. I balanced the wheels hoping for an easy fix, but that didn't help, then John from SeriouslyLotus had a guess that it might be driveshafts. I ended up setting off the night before I was due, so if I broke down I could get an AA relay the rest of the way. The 250 mile journey wasn't much fun at 60mph, but I did make it... Just about.
So it turned out that the driveshaft had a LOT of play on one side, and also the lower bush in the rear upright had a lot of movement in it.
Due to time, it was too big a job to get done in one day, so I left the car in their safe hands. SeriouslyLotus are known to be one of the best Lotus specialists in the UK and their attention to detail is very impressive, so I asked them to have a really really thorough look over the car while it was with them. I also decided now was a good time to replace all bushes in the car. It has just shy of 70k miles now and I've replaced some bushes, but I feel a bit like I'm waiting for the next one to fail.
I have actually quite regularly cleaned and protected the components using Lanoguard, which has done quite a good job, but Lanoguard is sticky and seems to attract dirt, so it was all looking a bit nasty.
The wishbones are steel on an Exige, and they only have a thin coating from the factory. The uprights don't have any coating from Lotus, so tend to come with a nicer layer of surface rust. I decided now was a good time to get the wishbones, uprights and some brackets, blasted, then cerakoted. I considered lots of different coatings, and Cerakote came out on top, maybe not for looks, but for longevity of the coating and corrosion resistance.
John and Dave made quick work of getting things stripped
Handbrake had very much seen better days, I'm impressed it got through the MOT in this state.
Handbrake cable also looking horrible so will be replaced.
New Handbrake drums
Rear uprights off the car, these will be replaced with new parts, and as they're aluminium I won't bother getting them coated. We'll also put new hubs in.
This was one of the bearings inside the driveshaft which explains the horrible vibration
New driveshaft ready to go on soon
This is where we're at now, basically all my suspension on a work bench, ready to be sent off. Next stage is the really exciting one where things are nice and clean.
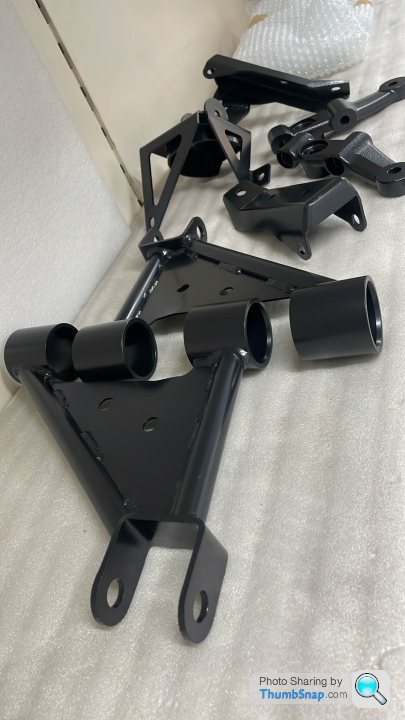
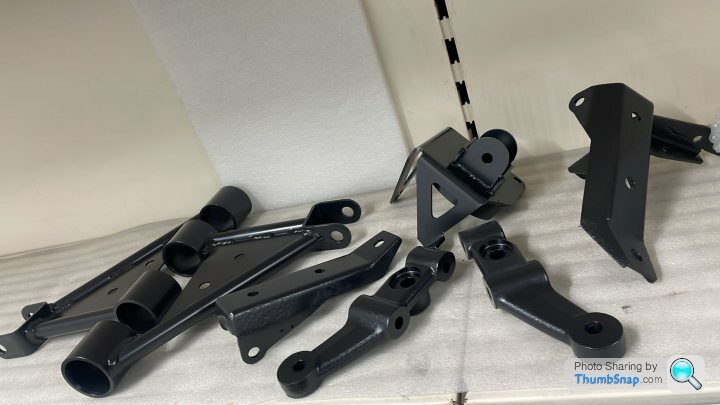
The cerakote is now done - interestingly, it’s so thin that you don’t have to mask off where the bushes go like you would with powder coating. The downside is visually there is no filling to cover up any pitting on the metal, but the parts are looking rather nice and will be very well protected for the future!
MDifficult said:
Looking fantastic as always.. but I'm increasingly concerned you'll have more trepidation about driving it after this latest round of work.
I really hope you take it out afterwards and get it absolutely filthy
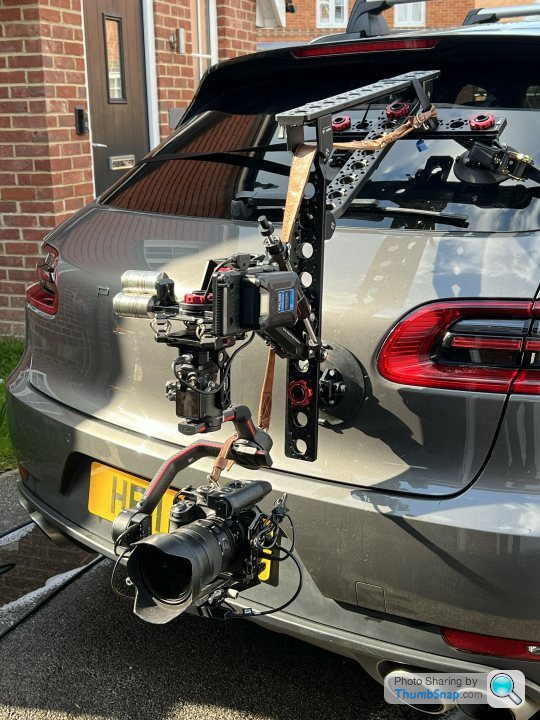
It's a 250 mile drive home, I'm going up with a friend in my Macan, then we'll take it back through the Peak District and do a little shoot on the way back, and get some practice with my new camera setup..I really hope you take it out afterwards and get it absolutely filthy
I've never been against using the Exige, which the mileage will confirm, the whole point of doing all of this is to make it more usable and not be worrying about it rusting, bushes going etc. Hopefully it lasts even more than the next 70k miles!
GFWilliams said:
It's a 250 mile drive home, I'm going up with a friend in my Macan, then we'll take it back through the Peak District and do a little shoot on the way back, and get some practice with my new camera setup..
I've never been against using the Exige, which the mileage will confirm, the whole point of doing all of this is to make it more usable and not be worrying about it rusting, bushes going etc. Hopefully it lasts even more than the next 70k miles!
That's the spirit! Can't wait to see the pictures..I've never been against using the Exige, which the mileage will confirm, the whole point of doing all of this is to make it more usable and not be worrying about it rusting, bushes going etc. Hopefully it lasts even more than the next 70k miles!
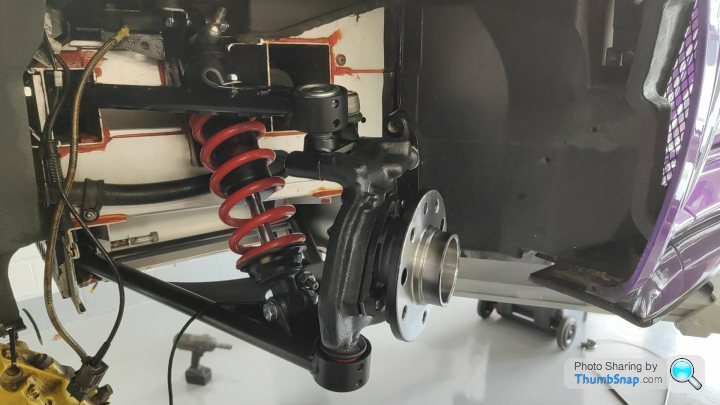
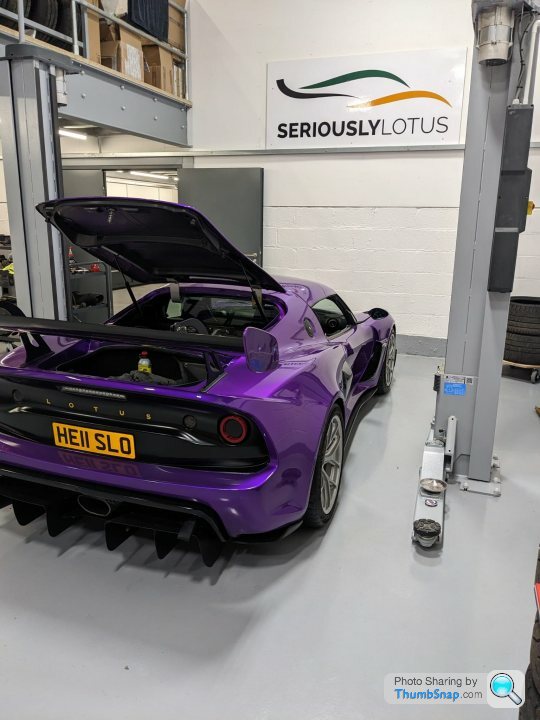
Car is back on it's wheels and the ride heights will now be set, then it'll all be aligned.
Some other parts have been spotted and fixed while the car was with SeriouslyLotus...
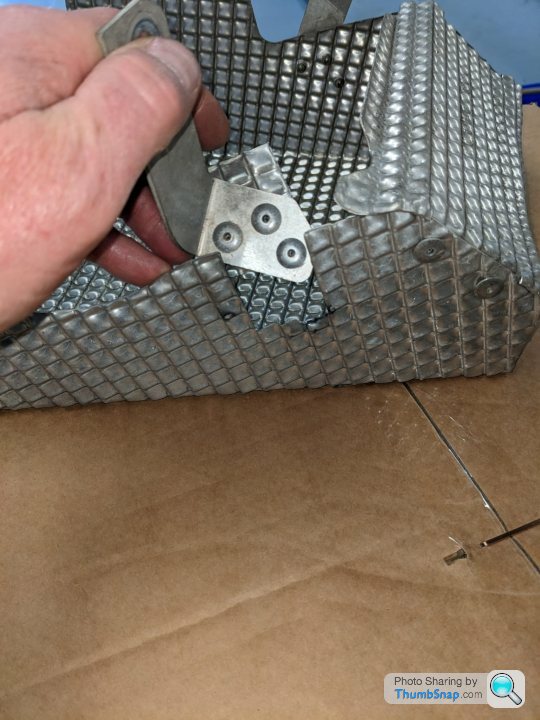
Pretty much all the heat shields looked like this. They've made new brackets where needed and fixed them.
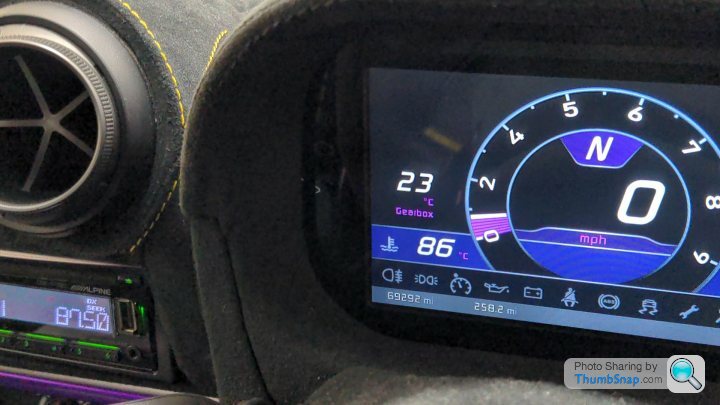
Gearbox temperature sensor is now working for the first time. Someone else had plumbed it in by the oil cooler, which would give a bit of a delayed reading. It's now plumbed into the bottom of the gearbox, and coded correctly. This will hopefully show the gearbox cooler works, and if it ever gets too hot I can stop and let it cool in future which should mean longer gearbox life I hope!
I've also had a new set of rear Cup 2s, in 265 instead of 285 due to availability.
The idler pulleys have also been quite noisy for a while, despite being replaced last year. Turns out that the Komotec 460 kit uses a different idler pulley and the oe Lotus one had been fitted incorrectly. Because of this, it was all running a bit tight. So that's being replaced, plus a second idler pulley which was also a bit noisy, and as the belt is off anyway, they're replacing that too.
Really impressed with the level of detail SeriouslyLotus have gone to. They're not finished yet and it's by far the best service I've had with my car, helped by the fact they're Komotec approved dealers, so know exactly how a 460 kit should be.
I'll be collecting my car, then heading to the Motorist Hub for about 11am on Saturday if anyone from here is about and wants to drop in.
Some other parts have been spotted and fixed while the car was with SeriouslyLotus...
Pretty much all the heat shields looked like this. They've made new brackets where needed and fixed them.
Gearbox temperature sensor is now working for the first time. Someone else had plumbed it in by the oil cooler, which would give a bit of a delayed reading. It's now plumbed into the bottom of the gearbox, and coded correctly. This will hopefully show the gearbox cooler works, and if it ever gets too hot I can stop and let it cool in future which should mean longer gearbox life I hope!
I've also had a new set of rear Cup 2s, in 265 instead of 285 due to availability.
The idler pulleys have also been quite noisy for a while, despite being replaced last year. Turns out that the Komotec 460 kit uses a different idler pulley and the oe Lotus one had been fitted incorrectly. Because of this, it was all running a bit tight. So that's being replaced, plus a second idler pulley which was also a bit noisy, and as the belt is off anyway, they're replacing that too.
Really impressed with the level of detail SeriouslyLotus have gone to. They're not finished yet and it's by far the best service I've had with my car, helped by the fact they're Komotec approved dealers, so know exactly how a 460 kit should be.
I'll be collecting my car, then heading to the Motorist Hub for about 11am on Saturday if anyone from here is about and wants to drop in.
giveitfish said:
I guess you won’t want to go hooning about until you’ve bedded it in, but on the off chance you do there’s an excellent loop of roads around there. They’re usually not too busy even on a Saturday morning.
Can PM you a route if you like?
That’s kind of you, but I think we’ll head through the Peak District on the way back. I want to visit some spots i used to take photos at about 10 years when I was at uni in Nottingham!Can PM you a route if you like?
Olivera said:
OP, what's your thoughts on the Komotec 460 kit that you have? Would you do it again? Does the gearbox start to wear badly at this power?
Also how much difference does the LSD make?
Thanks!
There hasn’t been a single negative on the engine side, it’s been faultless for about 40k miles now, doesn’t use a drop of oil either which always impresses me.Also how much difference does the LSD make?
Thanks!
With the gearbox, I’ve had a few rebuilds, I can’t be certain, but I think I had accelerated wear as I wasn’t using a gearbox cooler for quite a long time. Clutch tends to be the first failure point, I had a 400 series clutch and it lasted 35k miles before the pressure plate cracked.
LSD is brilliant, I had a Quaiffe ATB before and it worked well for about 20k miles before not locking anymore (one wheel would spin noticeably). I now have a Drexler plated LSD, and it finds a lot more traction than the ATB ever did. I’m told that although the plated diff is in theory suppose to require more maintenance, in reality they last longer than ATB as the build quality is so much higher.
I think the reality is that 350hp vs 460hp, you put more stress and strain on the car. This will accelerate the wear, and I just accept this.
On the road, 350hp was never lacking, but it’s always nice to have more…
giveitfish said:
I guess you won’t want to go hooning about until you’ve bedded it in, but on the off chance you do there’s an excellent loop of roads around there. They’re usually not too busy even on a Saturday morning.
Can PM you a route if you like?
I'd be interested to know this route if you wouldn't mind..?Can PM you a route if you like?

Little update
Around where the carbon louvres were put into the body, the filler had sunk a bit, likely not helped by the different expansion rates of fibreglass and carbon. We let it settle for a year, then decided to fix it.
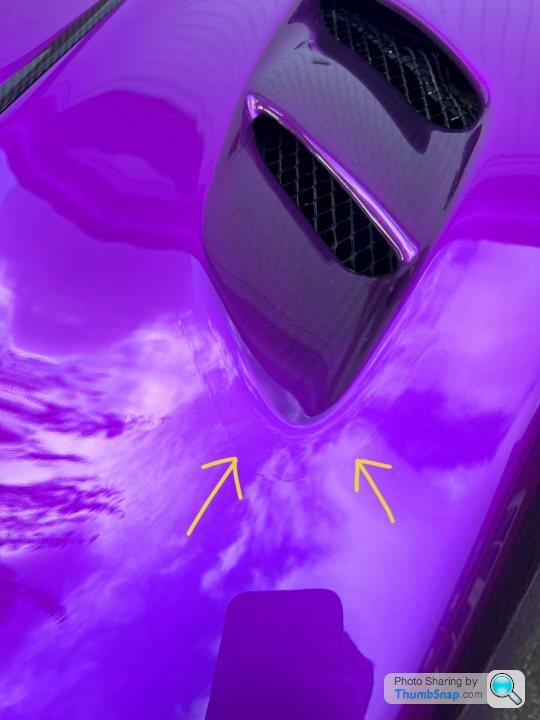
There were also some other defects which had appeared over time, so it was decided to fix them.
When I fitted the boot lid on my own originally, I annoyingly caught it. This was a good change to fix it.
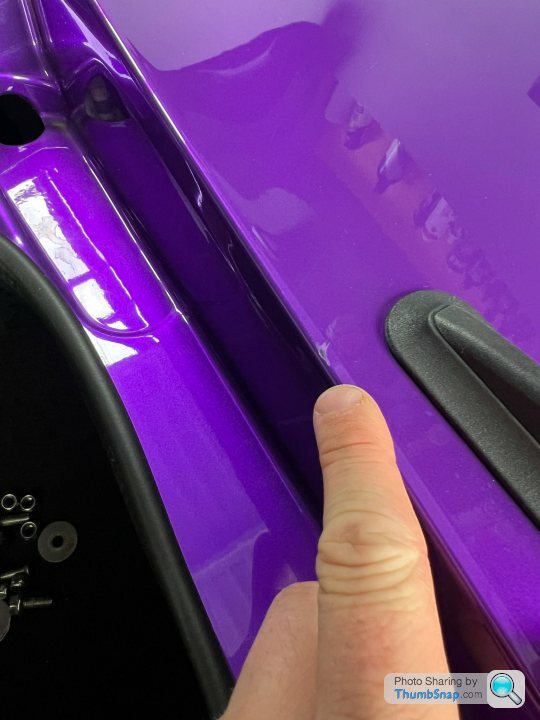
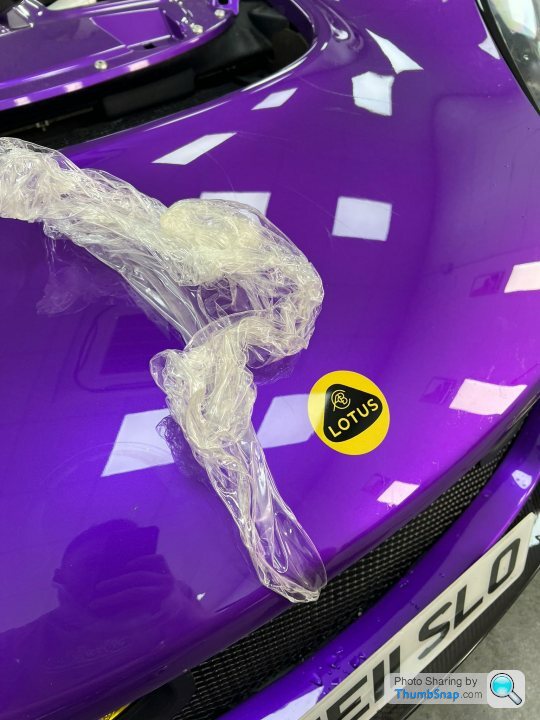
Annoyingly, the PPF had to come off the front of the car, but it did show it works, as the paint under was in great condition still.
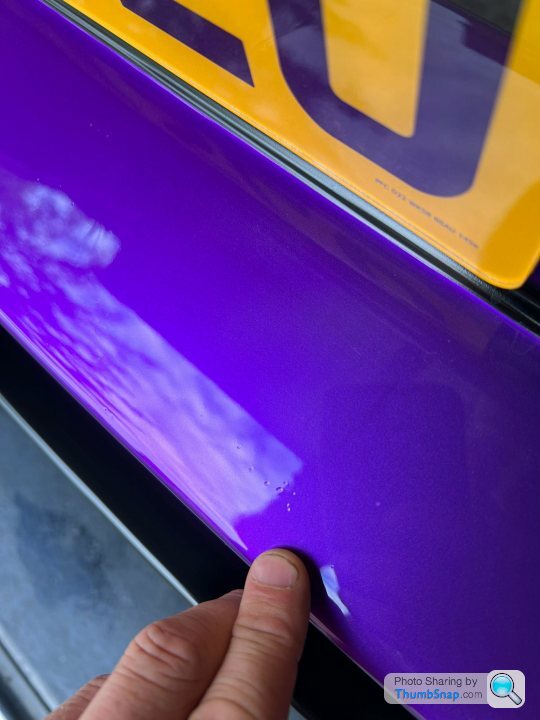
When I resprayed the car originally, I bought a crash damaged rear clam with a big crack down the side of the rear arch, which was then repaired. It's hard to show in photos, but the crack started to show again, so I asked for this to be sorted too.
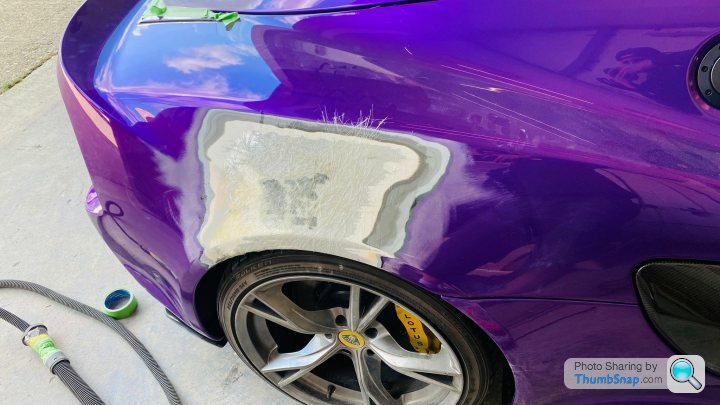
The repairs were done on the car and blended. Luckily the colour is super easy to match.
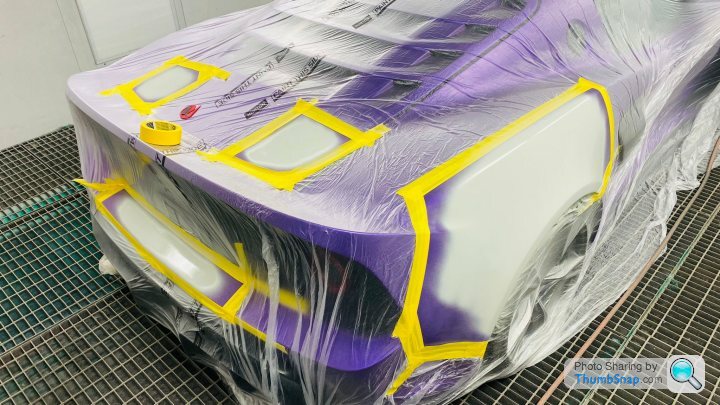
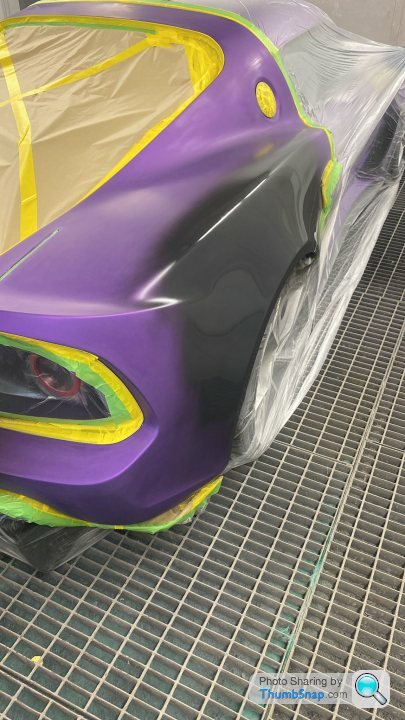
It was finished yesterday and is flawless now, so I'm very happy. You'd never know anything had been done.
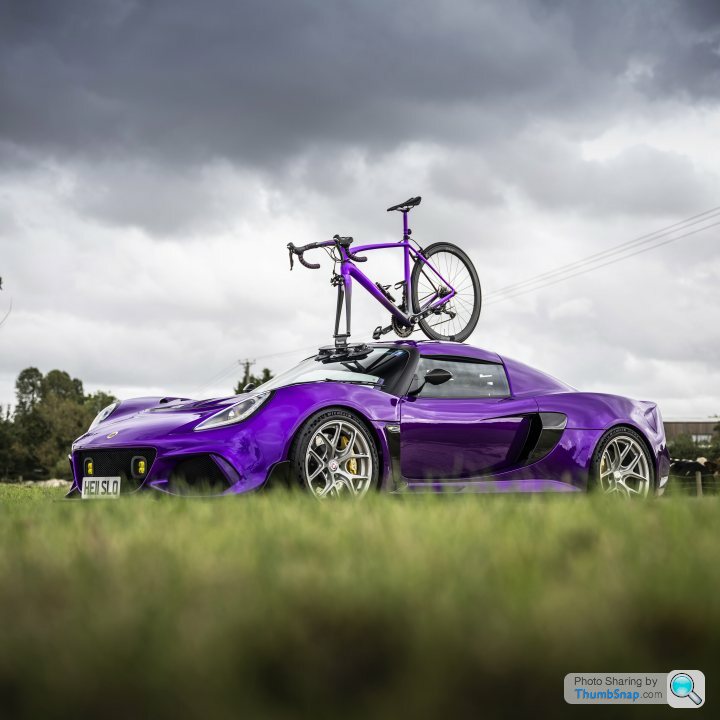
I dropped it off in storage for at least a few weeks to let it all settle before PPF, then cycled home.
Around where the carbon louvres were put into the body, the filler had sunk a bit, likely not helped by the different expansion rates of fibreglass and carbon. We let it settle for a year, then decided to fix it.
There were also some other defects which had appeared over time, so it was decided to fix them.
When I fitted the boot lid on my own originally, I annoyingly caught it. This was a good change to fix it.
Annoyingly, the PPF had to come off the front of the car, but it did show it works, as the paint under was in great condition still.
When I resprayed the car originally, I bought a crash damaged rear clam with a big crack down the side of the rear arch, which was then repaired. It's hard to show in photos, but the crack started to show again, so I asked for this to be sorted too.
The repairs were done on the car and blended. Luckily the colour is super easy to match.
It was finished yesterday and is flawless now, so I'm very happy. You'd never know anything had been done.
I dropped it off in storage for at least a few weeks to let it all settle before PPF, then cycled home.
Over winter, there were a few things I wanted to address, which have turned out to be quite a bit of work!
The main thing was my air conditioning, which worked a little up to 20c ambient temperatures, but stopped working after.
First step was to get under trays off and get the car on axle stands. Never a fun job in my single garage. I also then took the headlights out as I had some ideas to improve them.

Front clam actually came off quite easily this time, helped by using all new bolts when I reassembled it last time.

It was also a good opportunity to get my front splitter tidied up. Note the naca ducts in the splitter, they'll be relevant later...

I also wanted to sort the arch Louvre vents. When I fitted the louvres, I cut my old arch liners and bonded a grill to them. This wasn't a hugely tidy solution, and you could see through the louvres to the back of the headlight, which also got things much dirtier than they should be.

On the 430 Cup, they have an extra bit of plastic which allows a bit of air flow, but seals things to the clam. I bought this part and started cutting things up even more to make them fit.

I also cut up the new part, as I wanted to allow more airflow. I will add a new grill before they go back on the car, as I want to reduce the chance of chipping the paint on the louvres.

As I stripped the cooling system down, I was quite pleased to see the AC condenser quite corroded and falling apart. This confirmed that this was my AC problem!

As it's quite a big job to get to, I decided to replace the AC condenser, AC Drier, Main Radiator, Auxiliary Radiator and Fans, which I got from SeriouslyLotus.

It's a nice feeling cleaning everything up, and fitting new parts!

I used Lanoguard grease and Dynax to try and prevent corrosion in the future. Since this photo, I also thoroughly sealed all air gaps around the radiator to make sure things are as efficient as possible.

The next thing I wanted to try to improve was something caused by my 460 kit charge cooler radiator. The fresh air inlets for the heater box (which is also for the AC) have the charge cooler directly in front of them. This means that the hot air exiting the CC radiator will be going directly into these inlets. In this photo, you can see they are the two inlets built into the crash structure, with mesh grills on them.

I removed the grills, then cut holes so I could route some ducting from underneath, which would be connected to the naca ducts in my front splitter (seen above)

I then set about making a part which meant I could connect the ducting to the inlets. This would have been an ideal project for 3D printing, but I fancied a project, so cut some plastic sheet up, and connected them to some duct flanges. A bit messy at this stage...

The plan was to then cover them in carbon to add strength, and so they perfectly fit to the crash box. I covered the crash box in release tape, hoping that I'd be able to remove the parts with a perfect fit.

My first time doing carbon, lots learnt, and turns out it's not easy!

It was a relative success though, they were removable, and didn't look too bad!

Here you can see them finished and fitted, along with the charge cooler in front of them. I'm quite pleased with how they came out, almost a shame after so much work that you can't see them when the car is assembled... It likely won't make a huge difference to the AC, but anything I can do to optimise it is worth it.

I then started piecing things back together. I cleaned everything as I did this, and have done my best to either replace, paint and protect everything as I've done this.

I also assed a heater bypass. I don't have any photos of this, but basically, a vacuum operated switch can re-route the hot coolant so it doesn't enter the heater box. I had to do a bit of wiring for this, and tried to do things the proper way, wiring it into the fuse box, and as it's wired to ignition, it'll open the valve again when the car is turned off. This was important as when the car is hot and you turn the engine off, it pumps coolant through the full system to aid with cooling down the engine block.

After the above photo was taken, I've been reinstalling the front wiring loom, tidying up anything that's been bodged previously, and cleaning anything that doesn't look so nice.
It was a bit of a relief when the cooling system held pressure okay!

Onto the headlights...

I've replaced both the high beam and low beams with more modern units. It really wasn't easy to make things fit, but the light output will make things a lot safer on the road at night!

It's also quite nice to have got rid of the chrome reflector inside the headlight.

It was a relief when things actually worked. I need to get the clam back on to test the alignment before I do final assembly.

That's where I'm at now, fluids will go back in next week, then the front clam can go back on. I will then book it in for a service to get it all checked over and the AC gas can be filled up.
The main thing was my air conditioning, which worked a little up to 20c ambient temperatures, but stopped working after.
First step was to get under trays off and get the car on axle stands. Never a fun job in my single garage. I also then took the headlights out as I had some ideas to improve them.
Front clam actually came off quite easily this time, helped by using all new bolts when I reassembled it last time.
It was also a good opportunity to get my front splitter tidied up. Note the naca ducts in the splitter, they'll be relevant later...
I also wanted to sort the arch Louvre vents. When I fitted the louvres, I cut my old arch liners and bonded a grill to them. This wasn't a hugely tidy solution, and you could see through the louvres to the back of the headlight, which also got things much dirtier than they should be.
On the 430 Cup, they have an extra bit of plastic which allows a bit of air flow, but seals things to the clam. I bought this part and started cutting things up even more to make them fit.
I also cut up the new part, as I wanted to allow more airflow. I will add a new grill before they go back on the car, as I want to reduce the chance of chipping the paint on the louvres.
As I stripped the cooling system down, I was quite pleased to see the AC condenser quite corroded and falling apart. This confirmed that this was my AC problem!
As it's quite a big job to get to, I decided to replace the AC condenser, AC Drier, Main Radiator, Auxiliary Radiator and Fans, which I got from SeriouslyLotus.
It's a nice feeling cleaning everything up, and fitting new parts!
I used Lanoguard grease and Dynax to try and prevent corrosion in the future. Since this photo, I also thoroughly sealed all air gaps around the radiator to make sure things are as efficient as possible.
The next thing I wanted to try to improve was something caused by my 460 kit charge cooler radiator. The fresh air inlets for the heater box (which is also for the AC) have the charge cooler directly in front of them. This means that the hot air exiting the CC radiator will be going directly into these inlets. In this photo, you can see they are the two inlets built into the crash structure, with mesh grills on them.
I removed the grills, then cut holes so I could route some ducting from underneath, which would be connected to the naca ducts in my front splitter (seen above)
I then set about making a part which meant I could connect the ducting to the inlets. This would have been an ideal project for 3D printing, but I fancied a project, so cut some plastic sheet up, and connected them to some duct flanges. A bit messy at this stage...
The plan was to then cover them in carbon to add strength, and so they perfectly fit to the crash box. I covered the crash box in release tape, hoping that I'd be able to remove the parts with a perfect fit.
My first time doing carbon, lots learnt, and turns out it's not easy!
It was a relative success though, they were removable, and didn't look too bad!
Here you can see them finished and fitted, along with the charge cooler in front of them. I'm quite pleased with how they came out, almost a shame after so much work that you can't see them when the car is assembled... It likely won't make a huge difference to the AC, but anything I can do to optimise it is worth it.
I then started piecing things back together. I cleaned everything as I did this, and have done my best to either replace, paint and protect everything as I've done this.
I also assed a heater bypass. I don't have any photos of this, but basically, a vacuum operated switch can re-route the hot coolant so it doesn't enter the heater box. I had to do a bit of wiring for this, and tried to do things the proper way, wiring it into the fuse box, and as it's wired to ignition, it'll open the valve again when the car is turned off. This was important as when the car is hot and you turn the engine off, it pumps coolant through the full system to aid with cooling down the engine block.
After the above photo was taken, I've been reinstalling the front wiring loom, tidying up anything that's been bodged previously, and cleaning anything that doesn't look so nice.
It was a bit of a relief when the cooling system held pressure okay!
Onto the headlights...
I've replaced both the high beam and low beams with more modern units. It really wasn't easy to make things fit, but the light output will make things a lot safer on the road at night!
It's also quite nice to have got rid of the chrome reflector inside the headlight.
It was a relief when things actually worked. I need to get the clam back on to test the alignment before I do final assembly.
That's where I'm at now, fluids will go back in next week, then the front clam can go back on. I will then book it in for a service to get it all checked over and the AC gas can be filled up.
Great update. The headlight in my old Elise S3 were crap, borderline dangerous at night. I always thought about doing a modification like this but never got around to it. It would be lovely to see the difference. I assume they are LED now?
Great looking car, you were name dropped by Chris Cooper on the collecting cars podcast recently, by the way!
Great looking car, you were name dropped by Chris Cooper on the collecting cars podcast recently, by the way!
Gassing Station | Readers' Cars | Top of Page | What's New | My Stuff