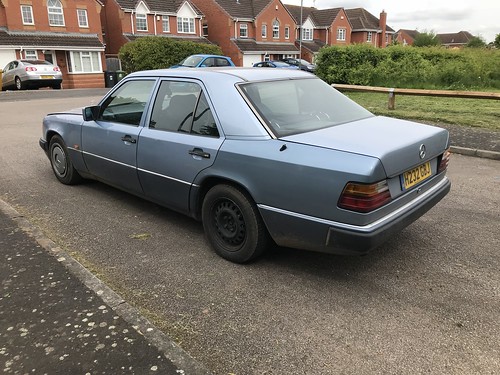
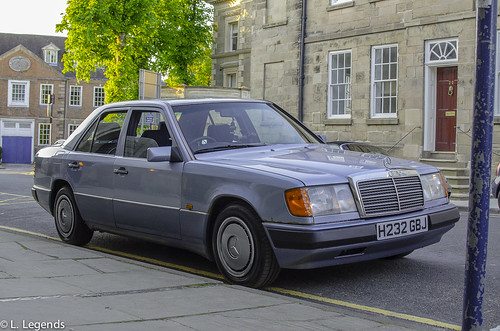
1991 Mercedes W124 250D Manual
Discussion


I previously mentioned that I planned to take the W124 to the Laon Historique. As a result I've been sorting out alot of the issues with it. They basically are:
-[s]Vibration at high speed that gets severe[/s]; I changed the brake caliper but I'll need to drive it to confirm that
-[s]Crank seal leak, it's leaking quite a bit.[/s]
-Sort out the exterior; I doubt that will happen
-[s]Give it an oil change; That's inadvertently happening![/s]
-Finish off the ICE; I threw my Alpine 9887R in, and then a CDE-178BT. I was going to sell the 9887R but I ended up selling the easier to install HU of the two, being me. Unfortunately the W124's interior is a pain to take apart, and the 9887R requires a bluetooth module fitting! Oh and I need to still sort the wiring; it's dimming the HU lighting it's that poor! But the Alpine can consume alot of power in 9887R form.
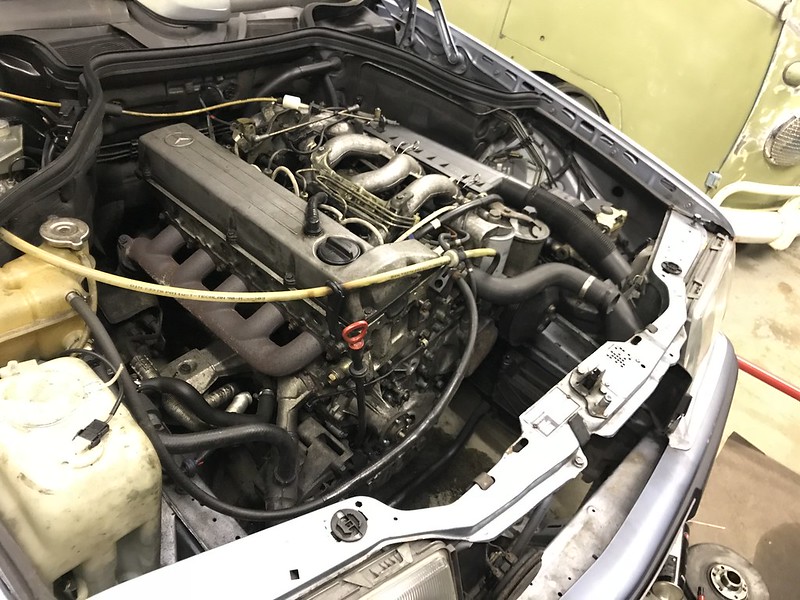
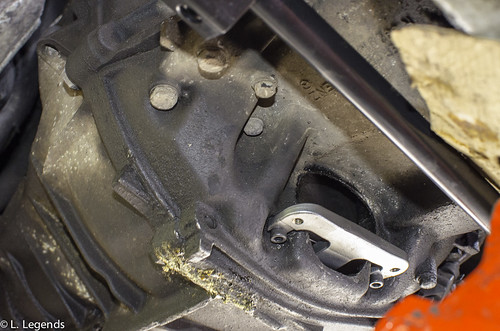
I decided to sort out the crank seal. After all, it's leaking like mental and marking its territory wherever it goes! With that in mind I cracked on with stripping the front end of the engine down. I forgot just how oily the front engine of that engine is! It's a mess!
 W124 crank seal saga by Charlieboy, on Flickr
Once this was done it was time to clean down the front of the engine. Wow, this thing was filthy in front! Carb cleaner was just about breaking through the grime, with it coming off in chunks! As soon as I finished cleaning it I progressed onto removing the old crank seal.
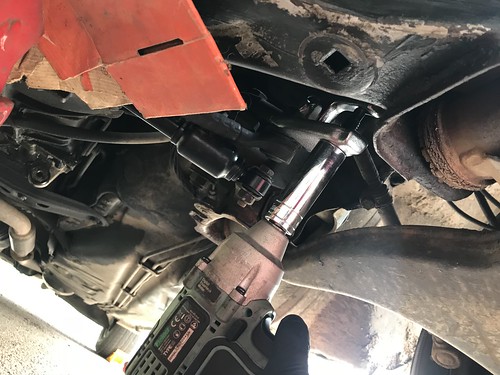
I was not prepared for how stubborn it would be to remove! I also didn't bank of the woodruff key falling into the sump!
 W124 crank seal saga by Charlieboy, on Flickr
I'm hoping not to remove the sump! It basically involves lifting the engine slightly, and only then removing the sump, with many of those fixings looking not to have been disturbed for quite some time.
 W124 crank seal saga by Charlieboy, on Flickr
It's fair to say I am annoyed and it really has put an extra bit of work in prior to the car being ready for the Laon Historique, which is now only a month away!
 W124 Woodruff Saga by Charlieboy, on Flickr
Will it be done or will the towel be thrown in?
-[s]Vibration at high speed that gets severe[/s]; I changed the brake caliper but I'll need to drive it to confirm that
-[s]Crank seal leak, it's leaking quite a bit.[/s]
-Sort out the exterior; I doubt that will happen
-[s]Give it an oil change; That's inadvertently happening![/s]
-Finish off the ICE; I threw my Alpine 9887R in, and then a CDE-178BT. I was going to sell the 9887R but I ended up selling the easier to install HU of the two, being me. Unfortunately the W124's interior is a pain to take apart, and the 9887R requires a bluetooth module fitting! Oh and I need to still sort the wiring; it's dimming the HU lighting it's that poor! But the Alpine can consume alot of power in 9887R form.
I decided to sort out the crank seal. After all, it's leaking like mental and marking its territory wherever it goes! With that in mind I cracked on with stripping the front end of the engine down. I forgot just how oily the front engine of that engine is! It's a mess!
W124 crank seal saga by Charlieboy, on FlickrOnce this was done it was time to clean down the front of the engine. Wow, this thing was filthy in front! Carb cleaner was just about breaking through the grime, with it coming off in chunks! As soon as I finished cleaning it I progressed onto removing the old crank seal.
I was not prepared for how stubborn it would be to remove! I also didn't bank of the woodruff key falling into the sump!
W124 crank seal saga by Charlieboy, on FlickrI'm hoping not to remove the sump! It basically involves lifting the engine slightly, and only then removing the sump, with many of those fixings looking not to have been disturbed for quite some time.
W124 crank seal saga by Charlieboy, on FlickrIt's fair to say I am annoyed and it really has put an extra bit of work in prior to the car being ready for the Laon Historique, which is now only a month away!
W124 Woodruff Saga by Charlieboy, on FlickrWill it be done or will the towel be thrown in?
I left the thread with it looking like I'd be taking the sump off. I was worried that I wouldn't be able to!
I then started on attempting to remove the woodruff key. Initially I drained the sump. Unfortunately it didn't do alot! With a speaker magnet I then progressed to get out the woodruff key. I could hear something rattling about with the magnet inside but I just could not get it out! Since I had drained the oil and got further into the job I then proceeded to buy the following:
-Gulf 10W40 oil
-Mann Oil Filter
-Gold Plug sump plug. These have a strong Neodymium magnet. I can confirm these are very strong!
-New Woodruff key. Since the old one came out I figured it was wise to fit a new item
-An extendable Magnet. I do have one of these somewhere but I could not find it!
With that in mind there was nothing left to do but to crack on with the job.
 W124 crank seal saga by Charlieboy, on Flickr
 W124 crank seal saga by Charlieboy, on Flickr
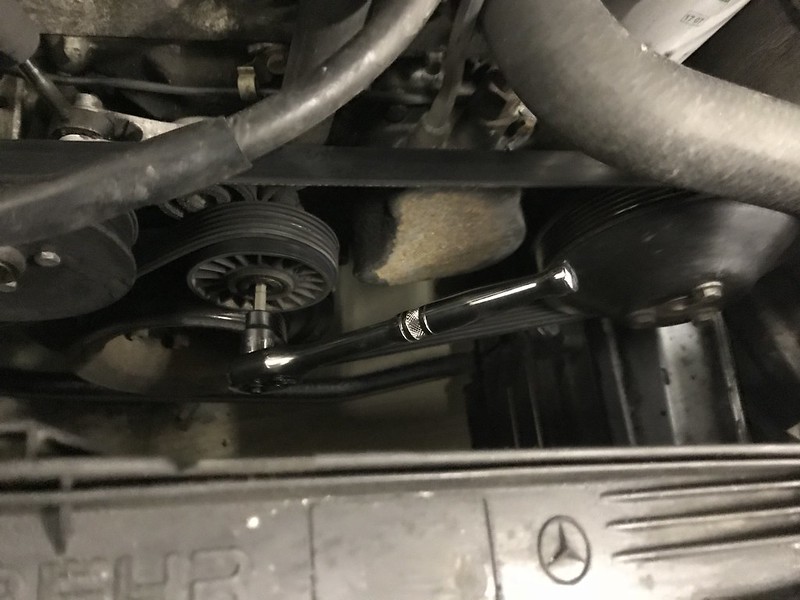
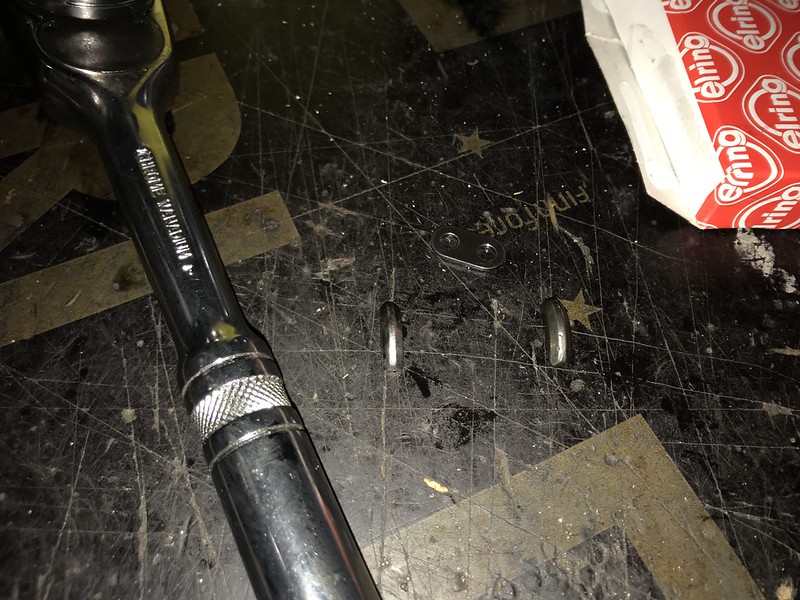
Initially I installed the Gold sump plug. With the magnet I then went on to fish out the metal particle. Except it wasn't the key! It was instead the remains of a chain link! The strange thing is the link looked undamaged! I then ended up checking both the oil pump chain and the cam chain through both apertures with each of them seeming fine. I can only assume that the link was dropped down into there when the chain was changed many years ago. Mechanics, you have to love them! On the plus side, the little I could see of the cam chain tensioner pad confirmed all was well. One thing I found strange was how I could see the cam chain from the tensioner pivot bolt aperture! It was strange how the this pivot bolt was very loose when I removed it too! Was this the reason the link was present in the sump?
I then measured the potential thread engagement of the bolt with the tensioner spacer in place. It would never hit the tensioner or cam chain unless the spacer was missing. I then cleaned the super grubby tensioner. Only then did it became apparent that the tensioner itself had been replaced at some point in the past. It explained why the pivot bearing felt fine and why the idler pulley felt like new; both had been changed fairly recently in the car's life. But why was the bolt loose? In short, I don't think the mechanic tightened it enough. With a 12mm allen key the Haynes manual says this bolt should be done to 100Nm. Yup, it's tight, tighter than I'd go without seeing to factory figures! With that in mind I torqued it up and yes it is quite tight in there now, with the pulley once again being straight!
W124 crank seal saga by Charlieboy, on Flickr
Along the way I cleaned up all of the removed pulleys in carb cleaner. A cleaner engine in a diesel is a nicer thing to work on after all!
I then went on to remove the oil level sender at the side of the sump where I then placed my magnet.Strangely, I found the woodruff key on top of the oil pickup pipe strainer! As soon as I fished that out there was a large sigh of relief!
 W124 Woodruff Saga by Charlieboy, on Flickr
After that it was a case of fitting in yet another crank seal, but at £8 it was hardly a deal breaker! Once that was done I got a little carried away for the night. In short, I refitted the crank pulley back on, which I'll torque check later on (it's meant to be at 320Nm, yikes on a 27mm headed bolt!). After that, once I cleaned up all of the pulleys I fitted the Gold Plug, removed the oil filter and refilled the engine with oil, refitted the level sender, refitted all of the cleaned ancillaries up front with the exception of the viscous fan and shroud, as well as refitting the radiator, and filling it up with coolant. I then went to fire it up where it is nice to not have an engine that leaks!
The above took me about 4 hours, including tool packing and cleaning time; diesels are filthy things to work on! I'm not the quickest worker it can be said! But at least the car is no longer leaking and the car is once again drivable and not filthy underneath!
Now to go onto the fun stuff! ICE if I can find a home for the bluetooth box behind the HU, and possibly a seat repair! I may even change the wings!
I then started on attempting to remove the woodruff key. Initially I drained the sump. Unfortunately it didn't do alot! With a speaker magnet I then progressed to get out the woodruff key. I could hear something rattling about with the magnet inside but I just could not get it out! Since I had drained the oil and got further into the job I then proceeded to buy the following:
-Gulf 10W40 oil
-Mann Oil Filter
-Gold Plug sump plug. These have a strong Neodymium magnet. I can confirm these are very strong!
-New Woodruff key. Since the old one came out I figured it was wise to fit a new item
-An extendable Magnet. I do have one of these somewhere but I could not find it!
With that in mind there was nothing left to do but to crack on with the job.
W124 crank seal saga by Charlieboy, on FlickrW124 crank seal saga by Charlieboy, on FlickrInitially I installed the Gold sump plug. With the magnet I then went on to fish out the metal particle. Except it wasn't the key! It was instead the remains of a chain link! The strange thing is the link looked undamaged! I then ended up checking both the oil pump chain and the cam chain through both apertures with each of them seeming fine. I can only assume that the link was dropped down into there when the chain was changed many years ago. Mechanics, you have to love them! On the plus side, the little I could see of the cam chain tensioner pad confirmed all was well. One thing I found strange was how I could see the cam chain from the tensioner pivot bolt aperture! It was strange how the this pivot bolt was very loose when I removed it too! Was this the reason the link was present in the sump?
I then measured the potential thread engagement of the bolt with the tensioner spacer in place. It would never hit the tensioner or cam chain unless the spacer was missing. I then cleaned the super grubby tensioner. Only then did it became apparent that the tensioner itself had been replaced at some point in the past. It explained why the pivot bearing felt fine and why the idler pulley felt like new; both had been changed fairly recently in the car's life. But why was the bolt loose? In short, I don't think the mechanic tightened it enough. With a 12mm allen key the Haynes manual says this bolt should be done to 100Nm. Yup, it's tight, tighter than I'd go without seeing to factory figures! With that in mind I torqued it up and yes it is quite tight in there now, with the pulley once again being straight!
W124 crank seal saga by Charlieboy, on FlickrAlong the way I cleaned up all of the removed pulleys in carb cleaner. A cleaner engine in a diesel is a nicer thing to work on after all!
I then went on to remove the oil level sender at the side of the sump where I then placed my magnet.Strangely, I found the woodruff key on top of the oil pickup pipe strainer! As soon as I fished that out there was a large sigh of relief!
W124 Woodruff Saga by Charlieboy, on FlickrAfter that it was a case of fitting in yet another crank seal, but at £8 it was hardly a deal breaker! Once that was done I got a little carried away for the night. In short, I refitted the crank pulley back on, which I'll torque check later on (it's meant to be at 320Nm, yikes on a 27mm headed bolt!). After that, once I cleaned up all of the pulleys I fitted the Gold Plug, removed the oil filter and refilled the engine with oil, refitted the level sender, refitted all of the cleaned ancillaries up front with the exception of the viscous fan and shroud, as well as refitting the radiator, and filling it up with coolant. I then went to fire it up where it is nice to not have an engine that leaks!
The above took me about 4 hours, including tool packing and cleaning time; diesels are filthy things to work on! I'm not the quickest worker it can be said! But at least the car is no longer leaking and the car is once again drivable and not filthy underneath!
Now to go onto the fun stuff! ICE if I can find a home for the bluetooth box behind the HU, and possibly a seat repair! I may even change the wings!
I left the thread with it looking like I'd be taking the sump off. I was worried that I wouldn't be able to!
I then started on attempting to remove the woodruff key. Initially I drained the sump. Unfortunately it didn't do alot! With a speaker magnet I then progressed to get out the woodruff key. I could hear something rattling about with the magnet inside but I just could not get it out! Since I had drained the oil and got further into the job I then proceeded to buy the following:
-Gulf 10W40 oil
-Mann Oil Filter
-Gold Plug sump plug. These have a strong Neodymium magnet. I can confirm these are very strong!
-New Woodruff key. Since the old one came out I figured it was wise to fit a new item
-An extendable Magnet. I do have one of these somewhere but I could not find it!
With that in mind there was nothing left to do but to crack on with the job.
W124 crank seal saga by Charlieboy, on Flickr
W124 crank seal saga by Charlieboy, on Flickr
Initially I installed the Gold sump plug. With the magnet I then went on to fish out the metal particle. Except it wasn't the key! It was instead the remains of a chain link! The strange thing is the link looked undamaged! I then ended up checking both the oil pump chain and the cam chain through both apertures with each of them seeming fine. I can only assume that the link was dropped down into there when the chain was changed many years ago. Mechanics, you have to love them! On the plus side, the little I could see of the cam chain tensioner pad confirmed all was well. One thing I found strange was how I could see the cam chain from the tensioner pivot bolt aperture! It was strange how the this pivot bolt was very loose when I removed it too! Was this the reason the link was present in the sump?
I then measured the potential thread engagement of the bolt with the tensioner spacer in place. It would never hit the tensioner or cam chain unless the spacer was missing. I then cleaned the super grubby tensioner. Only then did it became apparent that the tensioner itself had been replaced at some point in the past. It explained why the pivot bearing felt fine and why the idler pulley felt like new; both had been changed fairly recently in the car's life. But why was the bolt loose? In short, I don't think the mechanic tightened it enough. With a 12mm allen key the Haynes manual says this bolt should be done to 100Nm. Yup, it's tight, tighter than I'd go without seeing to factory figures! With that in mind I torqued it up and yes it is quite tight in there now, with the pulley once again being straight!
W124 crank seal saga by Charlieboy, on Flickr
Along the way I cleaned up all of the removed pulleys in carb cleaner. A cleaner engine in a diesel is a nicer thing to work on after all!
I then went on to remove the oil level sender at the side of the sump where I then placed my magnet.Strangely, I found the woodruff key on top of the oil pickup pipe strainer! As soon as I fished that out there was a large sigh of relief!
W124 Woodruff Saga by Charlieboy, on Flickr
After that it was a case of fitting in yet another crank seal, but at £8 it was hardly a deal breaker! Once that was done I got a little carried away for the night. In short, I refitted the crank pulley back on, which I'll torque check later on (it's meant to be at 320Nm, yikes on a 27mm headed bolt!). After that, once I cleaned up all of the pulleys I fitted the Gold Plug, removed the oil filter and refilled the engine with oil, refitted the level sender, refitted all of the cleaned ancillaries up front with the exception of the viscous fan and shroud, as well as refitting the radiator, and filling it up with coolant. I then went to fire it up where it is nice to not have an engine that leaks!
The above took me about 4 hours, including tool packing and cleaning time; diesels are filthy things to work on! I'm not the quickest worker it can be said! But at least the car is no longer leaking and the car is once again drivable and not filthy underneath!
It would be another week before I tackled the car again. But it was all heading in the right direction>
This weekend turned into a bit of a car-centric Sunday! I started off by going to the Bicester Sunday Scramble, where there were tons of awesome cars about! I'll provide an update on that in a separate thread.

While I was busy enjoying my day there the Mercedes needed work doing to it, fast! Given that my Merc day of Saturday turned into cleaning off the patio and then wreaking of algae for an age I really put some time in on Sunday somehow!
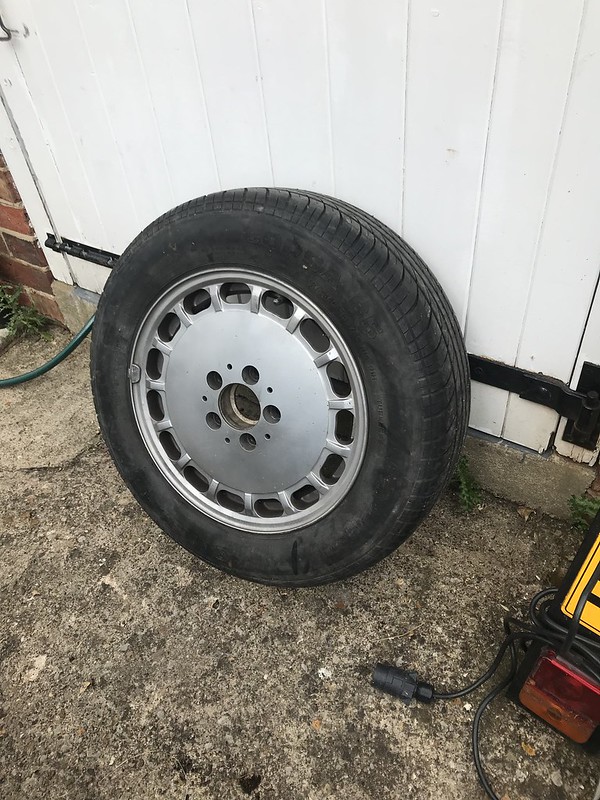
Firstly, I went to an old friend who breaks Mercs for a living to source a few bits. This included a spare wheel as well as two working window switches. His Mrs. breaks a few parts; look out for Jasmine, aka FrauBenz for selling decent used parts. My bill. That said I did a straight swap for my early alloy spare for the steel wheel.
 W124 April 2018 by Charlieboy, on Flickr
Some will say I should have been offered money. In truth, I was happy to not travel miles away or pay a fortune like what most sellers want for a steel spare wheel. The alternative was to get alloy wheel nuts but that seemed like more hassle than it was worth personally!
So, I now have 4 working windows instead of two in addition to having a usable spare wheel with decent tread. This left the music scenario!
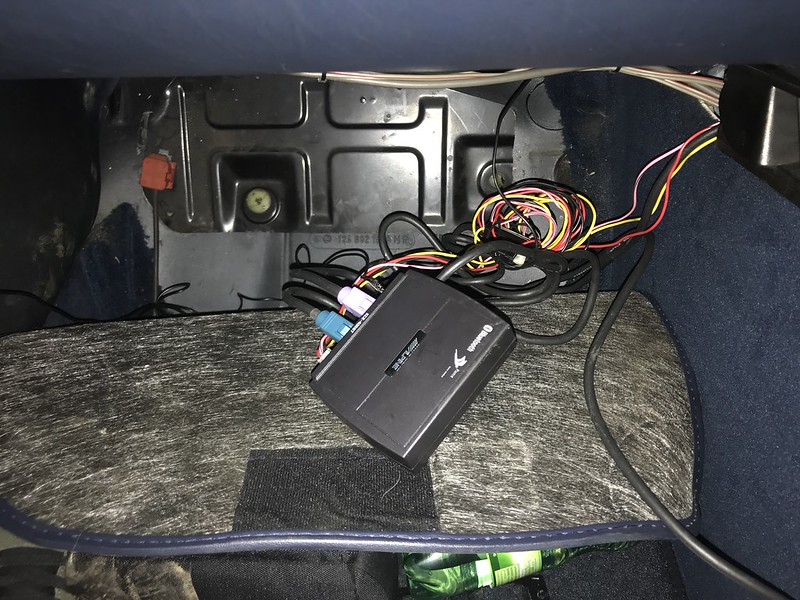
As much as I love the sound of a 5 pot it's great to have some tunes on a long road trip, especially in a cruiser like a W124! With that in mind I had a second go at installing the Bluetooth box into the Merc, onto my Alpine. In short, it worked very well!
 W124 April 2018 by Charlieboy, on Flickr
 W124 April 2018 by Charlieboy, on Flickr
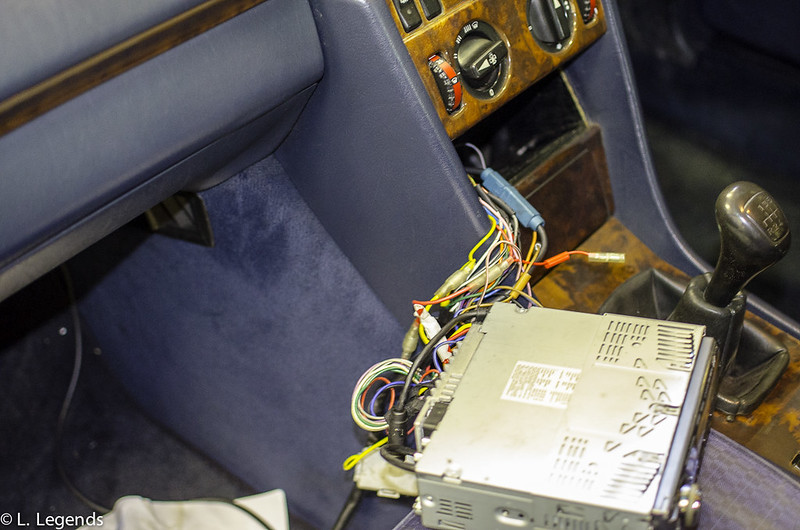
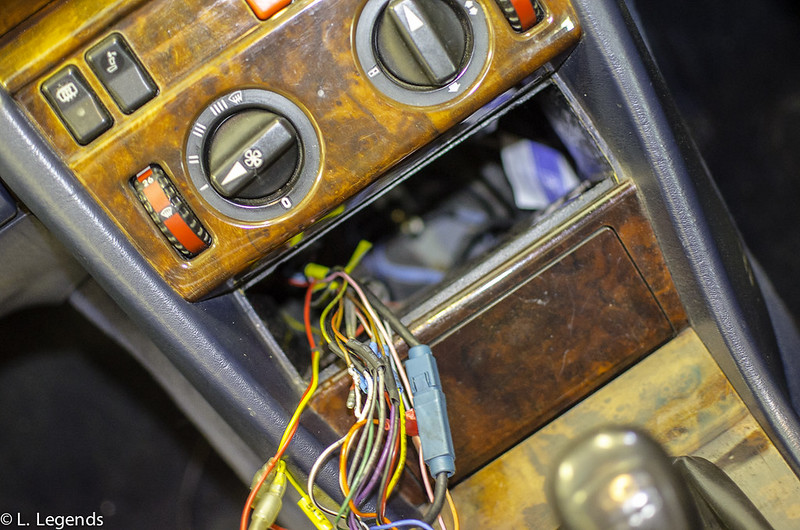
As the keen eyed may be able to see I alluded to the HU's wiring being very sketchy previously! I plan to fire up the soldering iron and sort that out. If I then get time the ICE may get a further makeover. Seeing as it may not happen and that it will improve things alot if my plans do come to fruition I'm going to keep those plans to myself for now .
.
What I can say is that I dialed in the crossovers and EQ on the Alpine and the W124 actually sounds very pleasant inside now! Unfortunately I cannot really enjoy the sound while driving the car. Why, I hear you ask?
W124 April 2018 by Charlieboy, on Flickr
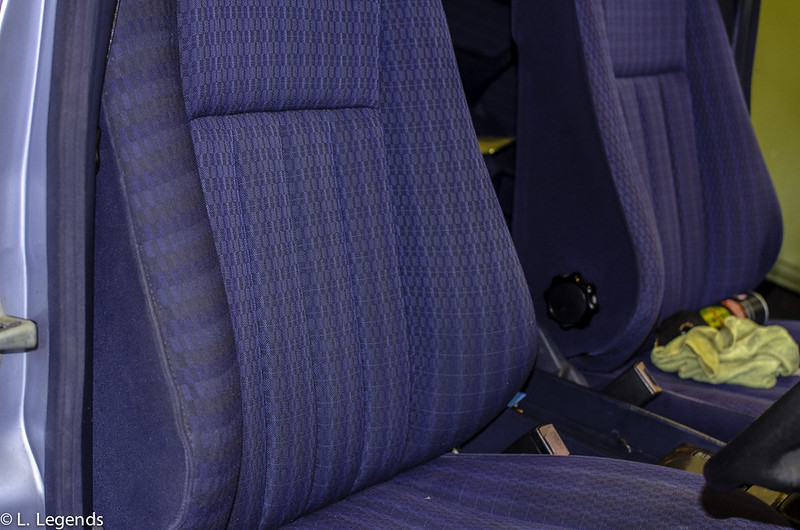
There is something missing in the form of a seat! In truth, I've sent it off to a friend of mine to retrim the bolster, using material from another seat that I picked up from Jasmine.
With the deadline drawing closer things were getting more tense!
[added piece]
So, I had two weeks to have a working and driving car for the Laon Historique. It was almost there but not quite. At the start of this post I had a headunit where its sound worked by telepathy, no driver's seat with it being down at the trimmers and finally I still have some minor mechanical work to do. The latter can be left but it would be nice to deal with all. Oh, and I still had the front end of the engine in pieces.
Since the last post I was not looking forward to doing the wiring on the W124's HU Harness! Mainly because the masking tape was proving tricky to cut off, while attempting not to injure myself with the craft knife!
With that in mind I moved to finishing off the work in the engine bay! I still needed to find a means to hold the crankshaft while I tightened up the crank bolt; it's done up to 320Nm, and the in gear trick isn't really enough, and I wonder how the clutch will fare with that much torque against it! I shall have to investigate what other options there are for tightening the crank bolt. I know for a fact it's tightened over 150Nm, but of course is that enough? I put the bolt in with my Kielder rattle gun, so it's a question of how tight that got the bolt. Ideas here are welcome.
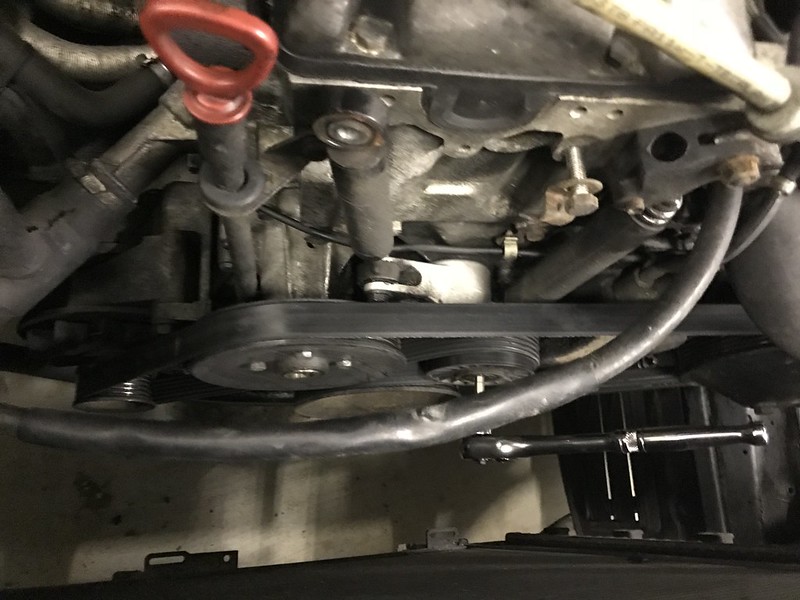
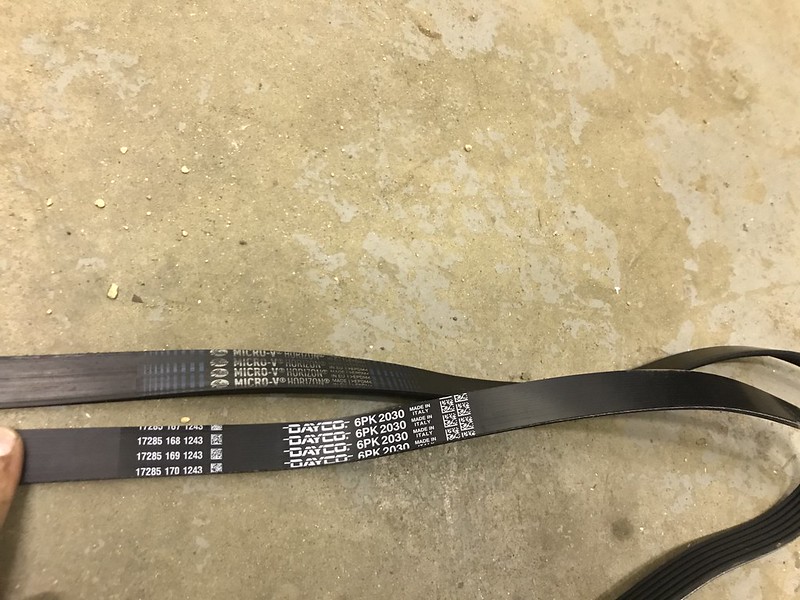
While I was deliberating that it seemed it would be a good time to refit the auxiliary belt and refill the cooling system with OAT coolant:
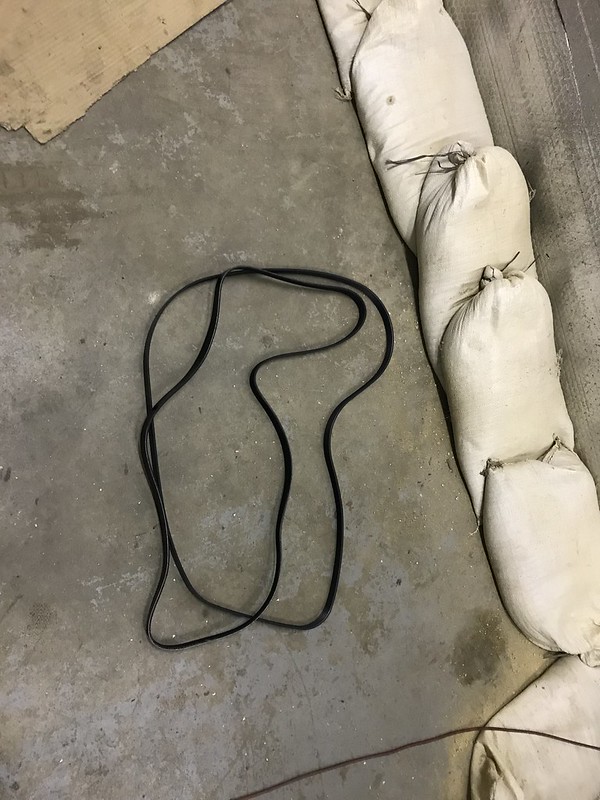 W124 work April 2018 by Charlieboy, on Flickr
As always, this is a cheap car but it doesn't mean I am skimping on things or getting the poorest quality items! This arrived from CP4L for £17 and being a Dayco item should last well. It's a shame the relatively new Gates belt couldn't be kept but I suspect it had worn funny from the previously loose tensioner on the engine. Thankfully the car is now silent from the pulley area.
 W124 work April 2018 by Charlieboy, on Flickr
I initially had a problem with an airlock in the system. Coming back a week later to top the coolant up right to the top of the reservoir however seems have solved this thankfully, with the car having toasty heaters once more!
But there was nothing for it. I'd have to tackle that shonky wiring if I ever wanted a reliable audio system in this car, especially with my rare Alpine 9887R headunit fitted! In the end however I am glad to report that there were no trips to A&E surprisingly! I merely got my craft knife out, and just went for it, albeit precariously at times!
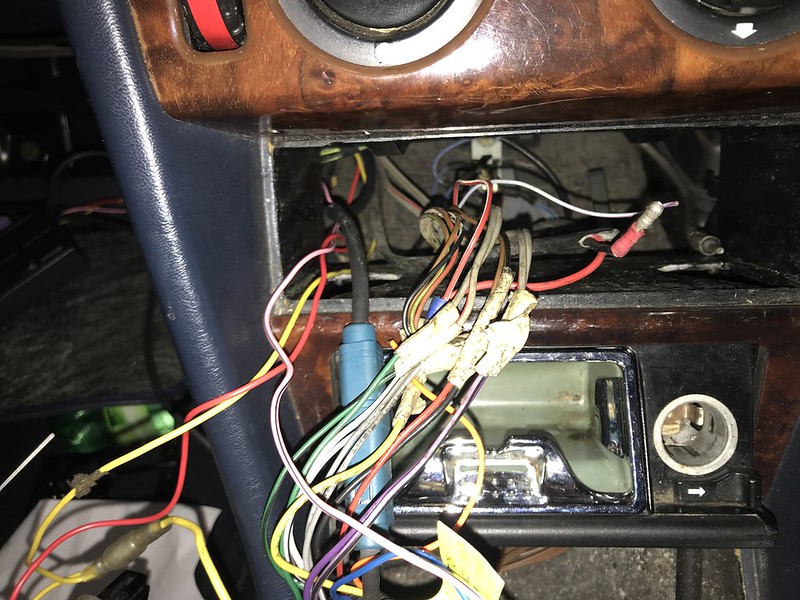 W124 work April 2018 by Charlieboy, on Flickr
Once the insulation was done it was time to sort out the speaker wiring! I say sort as the channels were wired incorrectly! It went soemthing like this:
Headunit Wiring - Speaker Wiring
Left Front - Left Right
Left Right; Left Front
Rear Left & Right - correct but the polarity was wrong on both!
I ended up getting a 9 volt battery, tracing the wires back and then checking the polarity of the speakers that way! By the evening I had all of the wires soldered up, the wiring is now correct in addition to the speakers no longer cutting out on their own! Some people are against soldering here but IME I've almost always had those Halfords style crimps fail on me, where here I wanted a longer lasting solution!
But while the sound of the car had improved there was still room for improvement! My car has lost its factory speakers some time ago, where instead of the factory fitted speakers it now has 10cm JBLs up front:
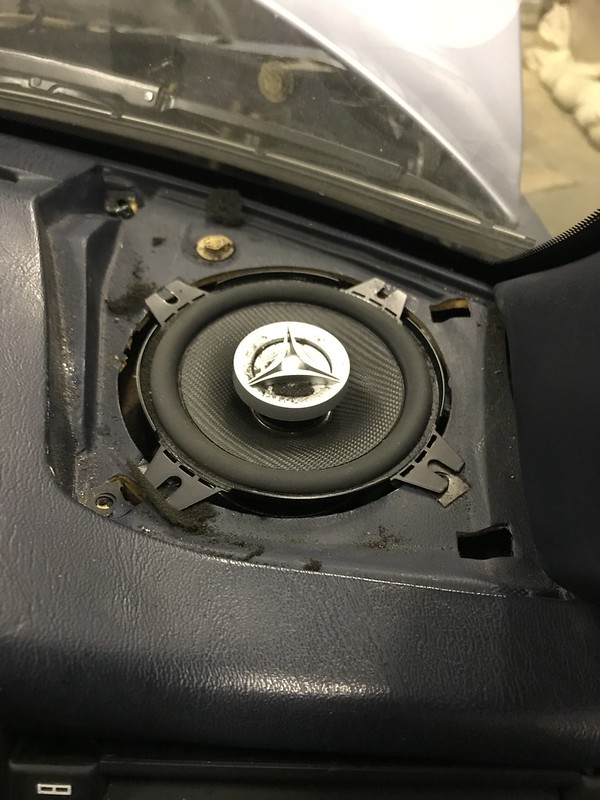 W124 work April 2018 by Charlieboy, on Flickr
To quite a few of you the above would be fine with the above installation I suspect but the audio conscious will be aware that you can get some cancellation without a decent baffle for the speaker. Not a problem I thought; I have a HU which has fully active crossovers (i.e it takes place of the speaker crossover boxes, giving much more flexibility) and so I better put an audio setup in! Stuff which I haven't used for about 4 years now! In my mind I put out the kit list to include:
HU; Alpine 9887R with the BT-400 iPod/Bluetooth box
Amps: Genesis Series 3 4 channel with a Phase Linear Monoblock for the sub
Sub: Phase Linear Aliante Si 12" in a ported box.
But what about speakers? Enter stage left:
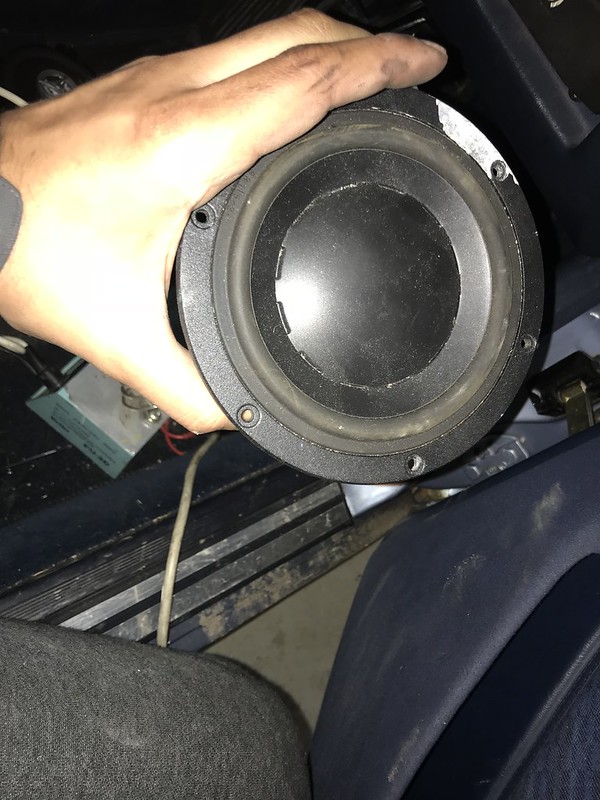 W124 work April 2018 by Charlieboy, on Flickr
These are a pair of Dynaudio GT240 5.25" components. I've been after a set of Dynaudios for a very long time and when these came up at a bargain price years ago I snapped them up. Now it was just a case of fitting them. Or so I thought:
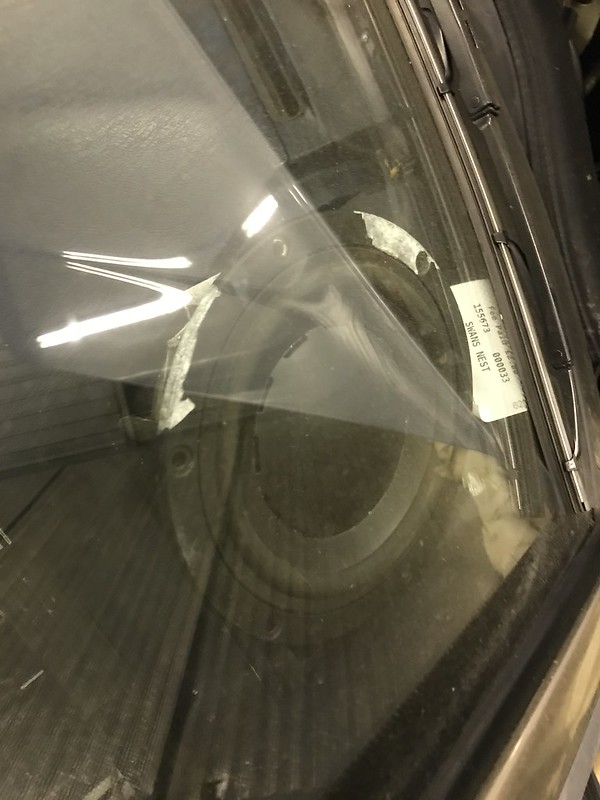 W124 work April 2018 by Charlieboy, on Flickr
It's sort of in there.
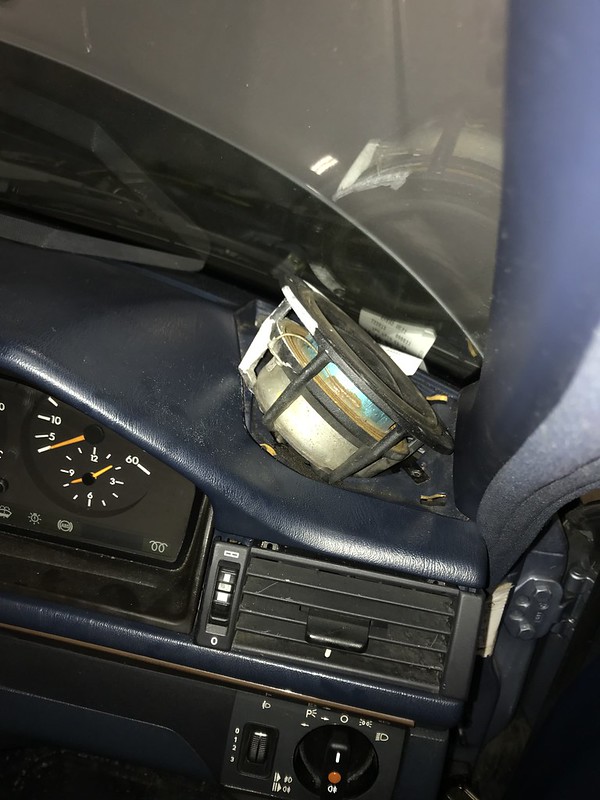 W124 work April 2018 by Charlieboy, on Flickr
No, that isn't going to work!
The above created a bit of a stumbling block for me. I assumed the W124 speaker apertures were 13cm like the Dynaudios, but it was not to be. It turns out they are 12cm with Mercedes' own fastening scheme which thankfully is still intact! I then considered a set of original factory speakers and even Rainbow's Custom Fit offerings, albeit at £100. I'd have to sell the Dynaudios to buy them, but I already have a few people asking me to buy the things off me! Further research ensued. A known face in the W124 in the form of Nick Bolide informed me that while the Merc stock speakers weren't great, the Rainbows weren't much better! With that in mind it was back to the drawing board. Without alot of effort and time it will be tricky getting the Dynaudios/ICE in with other jobs still to do on the car.
I may well fit the Dynaudios in, but it will be in a non-invasive fashion, and probably with the mids in the kick panels of the car. But that wouldn't help me now! I debated making a baffle for the JBLs but seeing as they may not be used for the long term it seemed like alot of effort to go to for not much of a gain. They are £30 speakers after all.
Later on I came up with the idea of using some SecondSkin Damplifier Pro sound material to seal off the mids. It is fair to say that it looks quite Heath Robinson in my attempts:
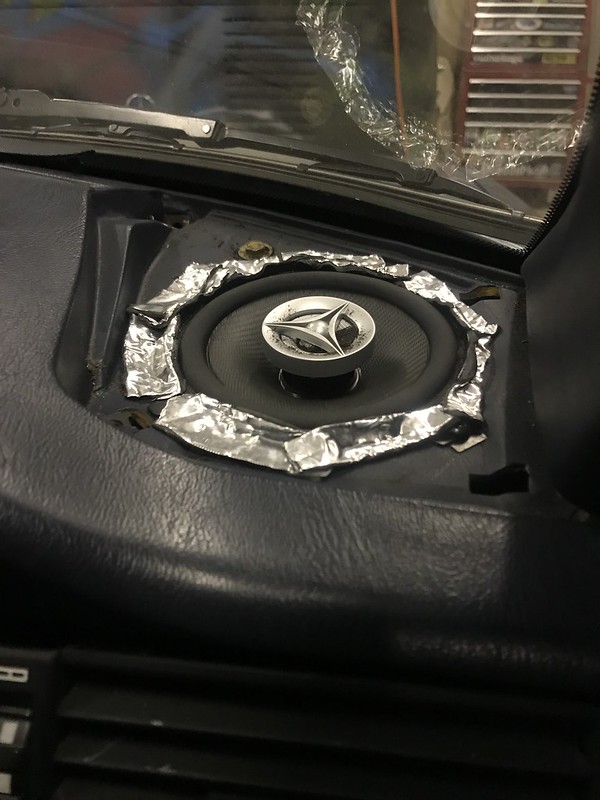 W124 work April 2018 by Charlieboy, on Flickr
However, it made a bigger difference than I imagined! For 10cm speakers they actually have some bass! This was very apparent though a back to back comparison! Furthermore, the ear-piercing midrange in the vocals (remember, these are cheap JBL speakers) is now much more forgiving. Not great but acceptable now. It sounds sounds alot nicer and with less volume from the headunit required now that alot of that cancellation has gone.
All that was left for me to do there was to refit the stock speaker grilles and then do some EQing to make it a little nicer. It now has the mid-range tamed down a little more still (but still nowhere near as bad before I did the above and tried EQing) and generally sounds fine for an old Mercedes inside, just how it should be! As I have alluded to above, I may do one more thing to the audio side of things prior to going to Laon, but we will see.
[/added piece]
That brought us to last weekend.
Bank Holidays. they are great for many people out there. A day off work to do as they please. Some go away for a weekend. Others go on a weekend binge, while some go and meet their family and friends. Me? I may have dabbled in all of the above, but did not lose sight of the goal in mind. The Laon Historique.
With the 2 week deadline fast approaching I had my aforementioned list to work through. With that in mind I went down to the unit and progressed with working on the car again.
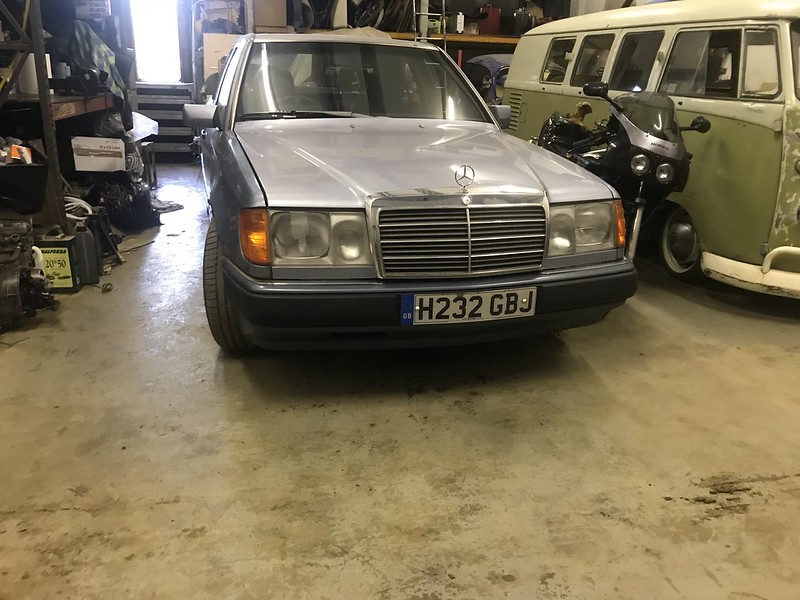
This is probably the first time the old girl has seen daylight for almost two months.
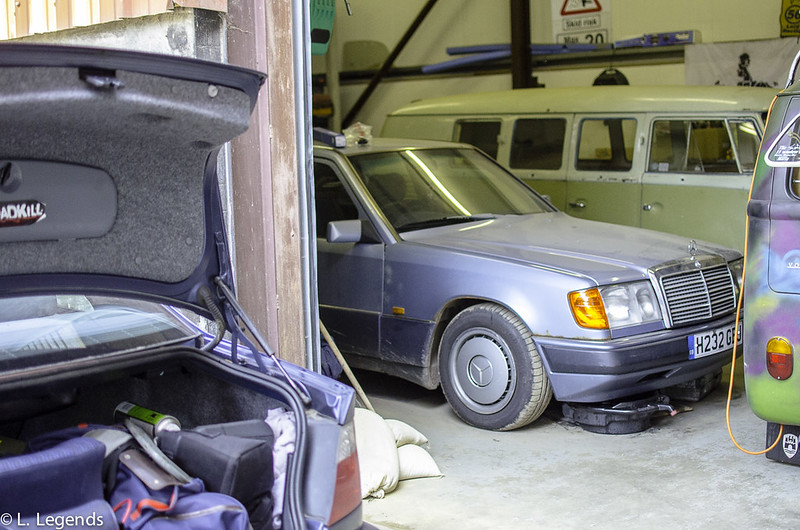 Mercedes Laon Prepartions (1 of 15) by Charlieboy, on Flickr
Firstly, I would finish off the previously botched wiring:
 Mercedes Laon Prepartions (2 of 15) by Charlieboy, on Flickr
As you can see, the wiring is becoming an improved. All signs of the twisted/masking tape wiring have gone!
 Mercedes Laon Prepartions (3 of 15) by Charlieboy, on Flickr
All that was left to do was the tape up the wiring into a tidier form and then refit the lot. Oh, and still checked that everything worked! Thanfully it did!
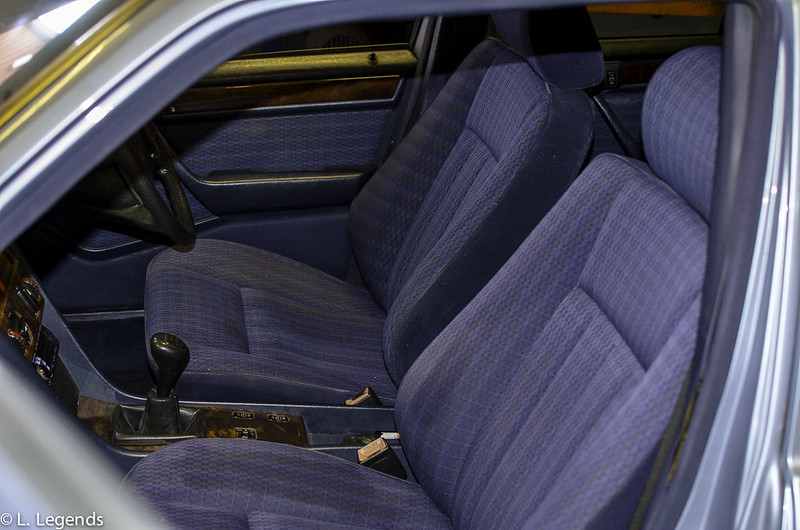
With that done and me still looking quite clean I decided to refit the repaired driver's seat; it had a ripped driver's bolster. Unfortunately I had no pre-repair shots but at least the interior is looking fine again courtesy of The Trim Shed.
 Mercedes Laon Prepartions (6 of 15) by Charlieboy, on Flickr
 Mercedes Laon Prepartions (8 of 15) by Charlieboy, on Flickr
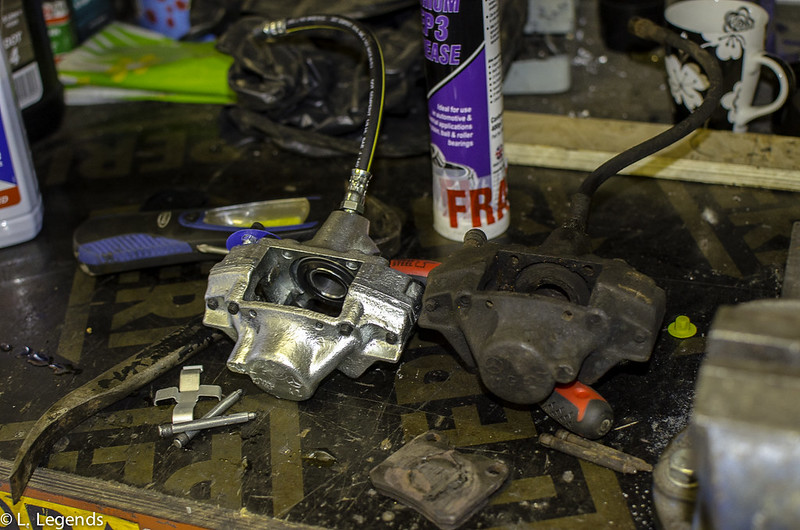
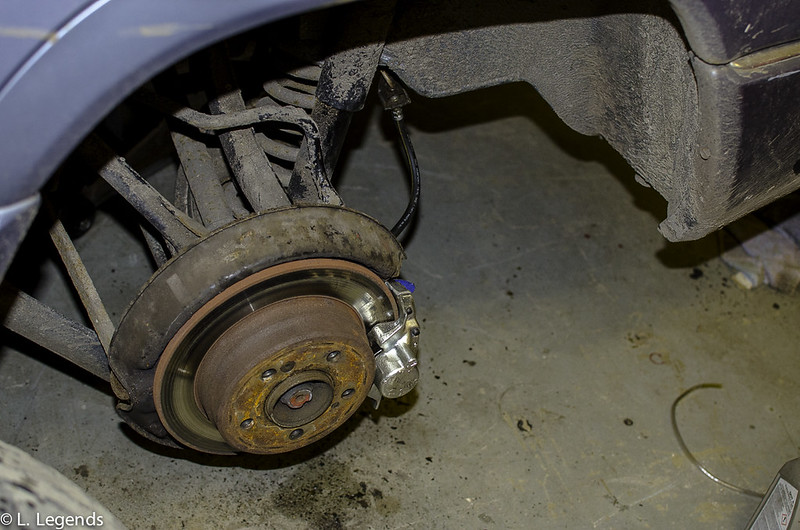
With the driver's seat refitted it was time to move onto the brakes. A fellow RRer saw that I changed the other rear caliper and suggested that I change the other side. I begrudgingly bought one from ECP. After all, with a basic inspection the wheel was working fine.
 Mercedes Laon Prepartions (9 of 15) by Charlieboy, on Flickr
However, he was right. Upon further inspection, 1 piston hadn't been working for some while but it wasn't catching the disc. The other was OK. But the seals were not so great on both. But look how shiny the new parts are!:
 Mercedes Laon Prepartions (10 of 15) by Charlieboy, on Flickr
Yup, at least the new caliper would look a little blingier! With that in mine I cracked on and fitted the new items onto the car.
 Mercedes Laon Prepartions (11 of 15) by Charlieboy, on Flickr
The bleeding didn't go so well I admit! I used the Eezibleed to bleed the brakes. Normally, this is a simple operation. I am aware some people hate them. This time however, something caught me out. Despite previously using the Eezibleed on cars with no hiccups this was not to be. It blew the clutch master cylinder hose clean off the reservoir! Very swiftly I ended up grabbing a load of water and started pouring over all of where the brake fluid had gone from the reservoir! The other difference this time was I used the rear tyre and not the spare; after all, I normally only use an Eezibleed at 20PSI, and no more! Being a wheel at 30PSI may have affected things. However, I have decided to fit on a jubilee clip onto the master cylinder reservoir line for future purposes.
On the plus side the rear brake was bled in time and with all of the air taken out. With both rear calipers changed the pedal position has dropped a little but is still at less than 50% pedal travel, possibly as a result of having 4 pistons working on the back of the car as opposed to 1 1/2! I am hoping that with the previous owner doing the master cylinder and these calipers being changed, that this end of the braking woes and the intermittent floor pedal scenario. Reading around it seems it should be with the logic also making sense.
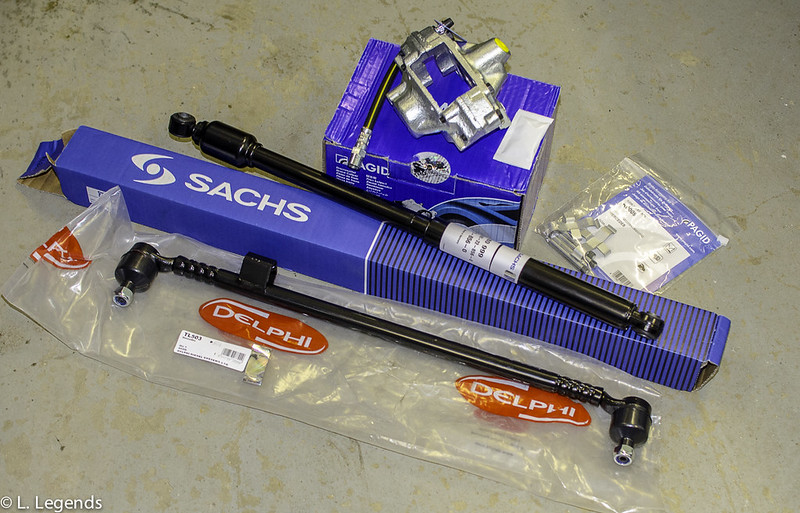
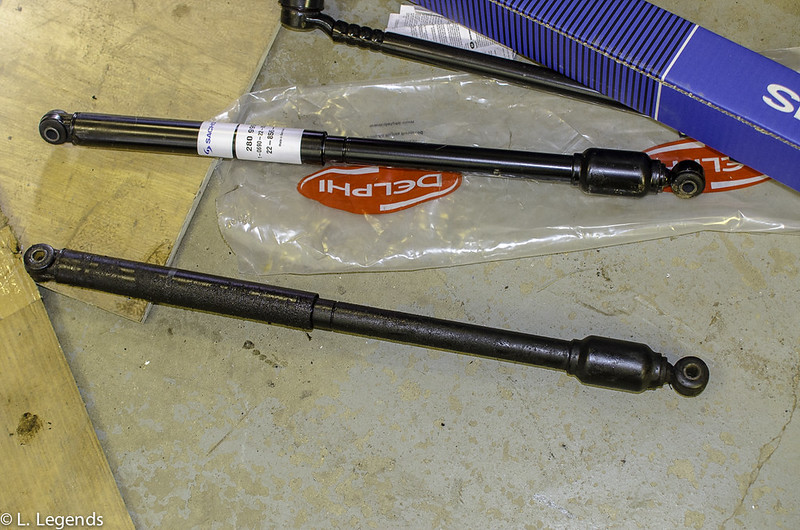
But it's fair to say I had to cheer the old girl up. I had some treats in store after all! Yes, I may be trying to do things on the cheap but it was not going to be getting budget parts fitted either! We had Delphi, Sachs & Pagid in the house! Amazingly, most of those parts came from DoctorCarParts, a retailer who sells decent quality parts for reasonable prices. I've gone outside of ECP for some parts it for the Carina I had to use DCP, but it was no bad thing. Here they delivered again.
 Mercedes Laon Prepartions (5 of 15) by Charlieboy, on Flickr
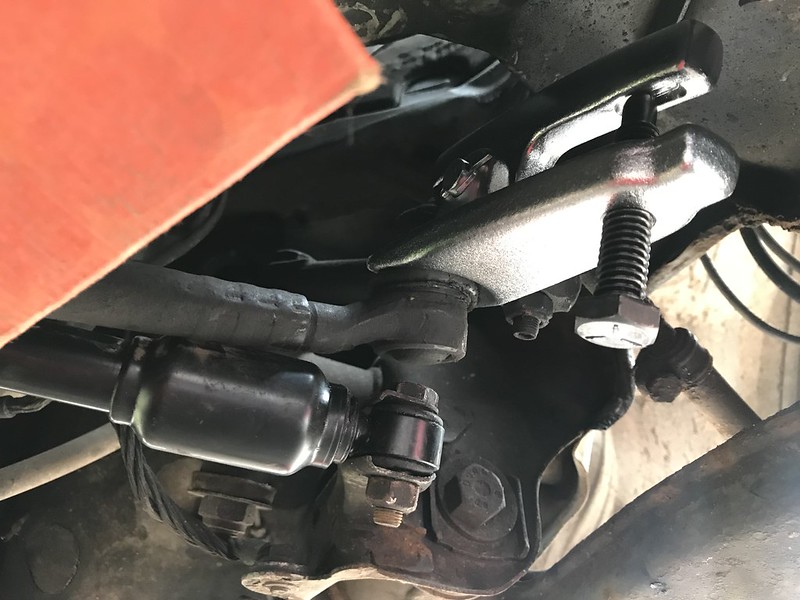
It was then time to change the steering damper and drag link. The drag link I was unable to do since my tools in the unit could not get enough of a fit onto the nuts. I did debate persevering but also didn't want to damage things and make life awkward later. In truth, the nuts will come off with a flexible spanner/flexible ratchet spanner as well as going from above with a rattle gun. I have both, but none were down at the unit. Since I could do the steering damper I persevered on with the suspension repairs.
It is said that the steering dampers can go weak on many old Mercs. Mine was shot to be fair. With the damper nearly compressed all seemed fine and it almost worked as good as the new one. But with the damper semi-extented it would go in quickly for an inch then then stop, sometimes boucing back to the position I left it in. Yup, it was a little shot! With that in mind I continued with fitting the new damper:
 Mercedes Laon Prepartions (12 of 15) by Charlieboy, on Flickr
It was certainly grubby, was the old item I removed! The bushes weren't great either where it attaches to the body and the drag link. But it was then time to clean off all of the old grime from the old unit. It's always interesting to see what you are removing after all.
 Mercedes Laon Prepartions (14 of 15) by Charlieboy, on Flickr
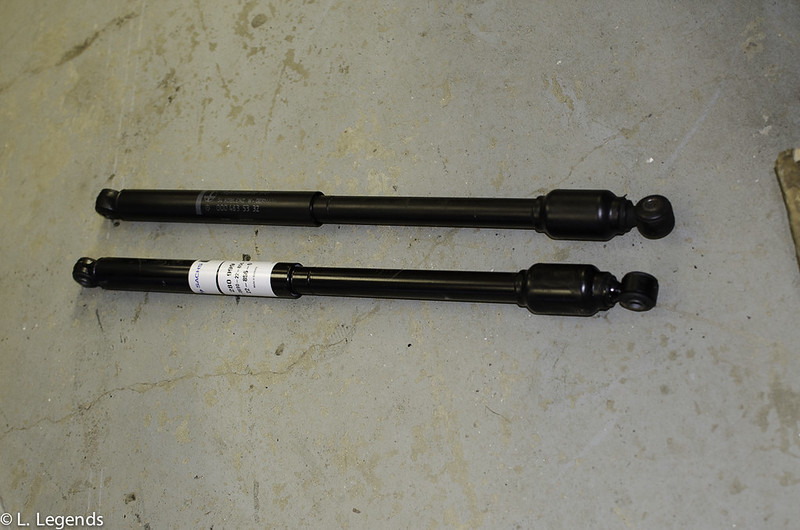
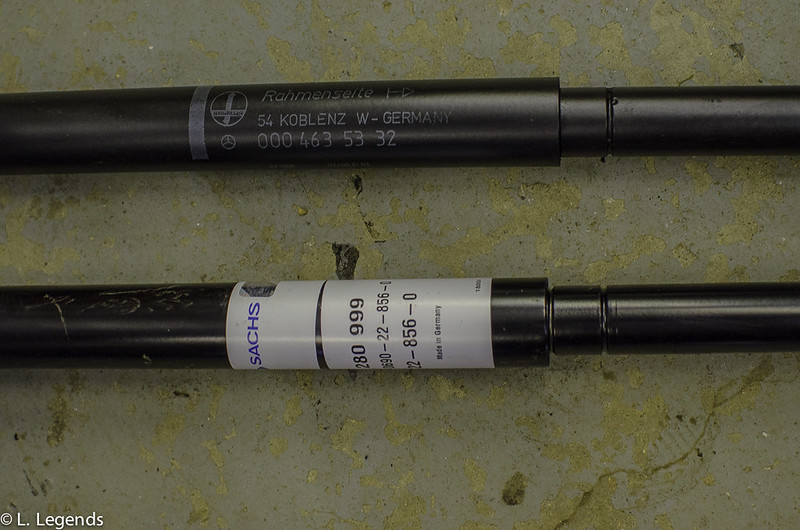
Both of them look perfect right? Well, one of them is working as intended, and it's not the older one! Upon closer inspection, the damper I removed was the original damper to the car. It was a genuine Stabillus item and dated back to 1990. Considering the age and the mileage of the damper it hadn't done too badly.
 Mercedes Laon Prepartions (13 of 15) by Charlieboy, on Flickr
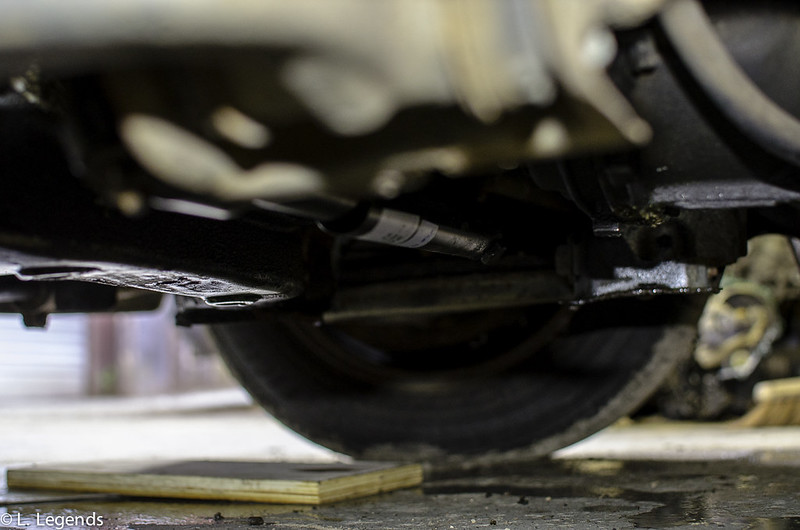
All that was left to do was the fit the new damper to the car. To my surprise the steering is a little heavier than previously with the damper swap, but still quite on the light side! It will be interesting to see how the car drives when I take it on its road test prior to Laon.
 Mercedes Laon Prepartions (15 of 15) by Charlieboy, on Flickr
It's fair to say that the car is almost getting there. It's certainly ready for the roadtrip, despite me doing more than I planned with the car in addition to jobs I have been putting off for some time like the headunit wiring. So much for this being 'just a winter smoker' eh?
I then started on attempting to remove the woodruff key. Initially I drained the sump. Unfortunately it didn't do alot! With a speaker magnet I then progressed to get out the woodruff key. I could hear something rattling about with the magnet inside but I just could not get it out! Since I had drained the oil and got further into the job I then proceeded to buy the following:
-Gulf 10W40 oil
-Mann Oil Filter
-Gold Plug sump plug. These have a strong Neodymium magnet. I can confirm these are very strong!
-New Woodruff key. Since the old one came out I figured it was wise to fit a new item
-An extendable Magnet. I do have one of these somewhere but I could not find it!
With that in mind there was nothing left to do but to crack on with the job.
W124 crank seal saga by Charlieboy, on FlickrW124 crank seal saga by Charlieboy, on FlickrInitially I installed the Gold sump plug. With the magnet I then went on to fish out the metal particle. Except it wasn't the key! It was instead the remains of a chain link! The strange thing is the link looked undamaged! I then ended up checking both the oil pump chain and the cam chain through both apertures with each of them seeming fine. I can only assume that the link was dropped down into there when the chain was changed many years ago. Mechanics, you have to love them! On the plus side, the little I could see of the cam chain tensioner pad confirmed all was well. One thing I found strange was how I could see the cam chain from the tensioner pivot bolt aperture! It was strange how the this pivot bolt was very loose when I removed it too! Was this the reason the link was present in the sump?
I then measured the potential thread engagement of the bolt with the tensioner spacer in place. It would never hit the tensioner or cam chain unless the spacer was missing. I then cleaned the super grubby tensioner. Only then did it became apparent that the tensioner itself had been replaced at some point in the past. It explained why the pivot bearing felt fine and why the idler pulley felt like new; both had been changed fairly recently in the car's life. But why was the bolt loose? In short, I don't think the mechanic tightened it enough. With a 12mm allen key the Haynes manual says this bolt should be done to 100Nm. Yup, it's tight, tighter than I'd go without seeing to factory figures! With that in mind I torqued it up and yes it is quite tight in there now, with the pulley once again being straight!
W124 crank seal saga by Charlieboy, on FlickrAlong the way I cleaned up all of the removed pulleys in carb cleaner. A cleaner engine in a diesel is a nicer thing to work on after all!
I then went on to remove the oil level sender at the side of the sump where I then placed my magnet.Strangely, I found the woodruff key on top of the oil pickup pipe strainer! As soon as I fished that out there was a large sigh of relief!
W124 Woodruff Saga by Charlieboy, on FlickrAfter that it was a case of fitting in yet another crank seal, but at £8 it was hardly a deal breaker! Once that was done I got a little carried away for the night. In short, I refitted the crank pulley back on, which I'll torque check later on (it's meant to be at 320Nm, yikes on a 27mm headed bolt!). After that, once I cleaned up all of the pulleys I fitted the Gold Plug, removed the oil filter and refilled the engine with oil, refitted the level sender, refitted all of the cleaned ancillaries up front with the exception of the viscous fan and shroud, as well as refitting the radiator, and filling it up with coolant. I then went to fire it up where it is nice to not have an engine that leaks!
The above took me about 4 hours, including tool packing and cleaning time; diesels are filthy things to work on! I'm not the quickest worker it can be said! But at least the car is no longer leaking and the car is once again drivable and not filthy underneath!
It would be another week before I tackled the car again. But it was all heading in the right direction>
This weekend turned into a bit of a car-centric Sunday! I started off by going to the Bicester Sunday Scramble, where there were tons of awesome cars about! I'll provide an update on that in a separate thread.
While I was busy enjoying my day there the Mercedes needed work doing to it, fast! Given that my Merc day of Saturday turned into cleaning off the patio and then wreaking of algae for an age I really put some time in on Sunday somehow!
Firstly, I went to an old friend who breaks Mercs for a living to source a few bits. This included a spare wheel as well as two working window switches. His Mrs. breaks a few parts; look out for Jasmine, aka FrauBenz for selling decent used parts. My bill. That said I did a straight swap for my early alloy spare for the steel wheel.
W124 April 2018 by Charlieboy, on FlickrSome will say I should have been offered money. In truth, I was happy to not travel miles away or pay a fortune like what most sellers want for a steel spare wheel. The alternative was to get alloy wheel nuts but that seemed like more hassle than it was worth personally!
So, I now have 4 working windows instead of two in addition to having a usable spare wheel with decent tread. This left the music scenario!
As much as I love the sound of a 5 pot it's great to have some tunes on a long road trip, especially in a cruiser like a W124! With that in mind I had a second go at installing the Bluetooth box into the Merc, onto my Alpine. In short, it worked very well!
W124 April 2018 by Charlieboy, on FlickrW124 April 2018 by Charlieboy, on FlickrAs the keen eyed may be able to see I alluded to the HU's wiring being very sketchy previously! I plan to fire up the soldering iron and sort that out. If I then get time the ICE may get a further makeover. Seeing as it may not happen and that it will improve things alot if my plans do come to fruition I'm going to keep those plans to myself for now
.What I can say is that I dialed in the crossovers and EQ on the Alpine and the W124 actually sounds very pleasant inside now! Unfortunately I cannot really enjoy the sound while driving the car. Why, I hear you ask?
W124 April 2018 by Charlieboy, on FlickrThere is something missing in the form of a seat! In truth, I've sent it off to a friend of mine to retrim the bolster, using material from another seat that I picked up from Jasmine.
With the deadline drawing closer things were getting more tense!
[added piece]
So, I had two weeks to have a working and driving car for the Laon Historique. It was almost there but not quite. At the start of this post I had a headunit where its sound worked by telepathy, no driver's seat with it being down at the trimmers and finally I still have some minor mechanical work to do. The latter can be left but it would be nice to deal with all. Oh, and I still had the front end of the engine in pieces.
Since the last post I was not looking forward to doing the wiring on the W124's HU Harness! Mainly because the masking tape was proving tricky to cut off, while attempting not to injure myself with the craft knife!
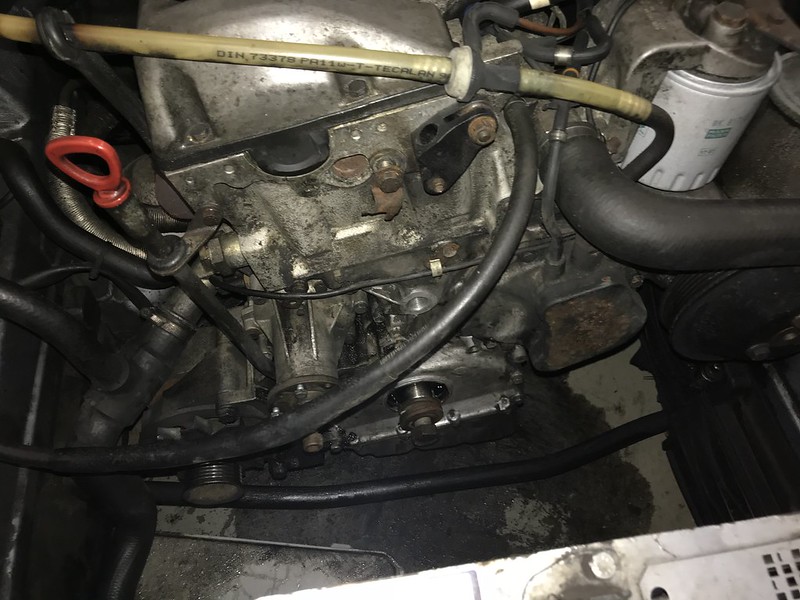
With that in mind I moved to finishing off the work in the engine bay! I still needed to find a means to hold the crankshaft while I tightened up the crank bolt; it's done up to 320Nm, and the in gear trick isn't really enough, and I wonder how the clutch will fare with that much torque against it! I shall have to investigate what other options there are for tightening the crank bolt. I know for a fact it's tightened over 150Nm, but of course is that enough? I put the bolt in with my Kielder rattle gun, so it's a question of how tight that got the bolt. Ideas here are welcome.
While I was deliberating that it seemed it would be a good time to refit the auxiliary belt and refill the cooling system with OAT coolant:
W124 work April 2018 by Charlieboy, on FlickrAs always, this is a cheap car but it doesn't mean I am skimping on things or getting the poorest quality items! This arrived from CP4L for £17 and being a Dayco item should last well. It's a shame the relatively new Gates belt couldn't be kept but I suspect it had worn funny from the previously loose tensioner on the engine. Thankfully the car is now silent from the pulley area.
W124 work April 2018 by Charlieboy, on FlickrI initially had a problem with an airlock in the system. Coming back a week later to top the coolant up right to the top of the reservoir however seems have solved this thankfully, with the car having toasty heaters once more!
But there was nothing for it. I'd have to tackle that shonky wiring if I ever wanted a reliable audio system in this car, especially with my rare Alpine 9887R headunit fitted! In the end however I am glad to report that there were no trips to A&E surprisingly! I merely got my craft knife out, and just went for it, albeit precariously at times!
W124 work April 2018 by Charlieboy, on FlickrOnce the insulation was done it was time to sort out the speaker wiring! I say sort as the channels were wired incorrectly! It went soemthing like this:
Headunit Wiring - Speaker Wiring
Left Front - Left Right
Left Right; Left Front
Rear Left & Right - correct but the polarity was wrong on both!
I ended up getting a 9 volt battery, tracing the wires back and then checking the polarity of the speakers that way! By the evening I had all of the wires soldered up, the wiring is now correct in addition to the speakers no longer cutting out on their own! Some people are against soldering here but IME I've almost always had those Halfords style crimps fail on me, where here I wanted a longer lasting solution!
But while the sound of the car had improved there was still room for improvement! My car has lost its factory speakers some time ago, where instead of the factory fitted speakers it now has 10cm JBLs up front:
W124 work April 2018 by Charlieboy, on FlickrTo quite a few of you the above would be fine with the above installation I suspect but the audio conscious will be aware that you can get some cancellation without a decent baffle for the speaker. Not a problem I thought; I have a HU which has fully active crossovers (i.e it takes place of the speaker crossover boxes, giving much more flexibility) and so I better put an audio setup in! Stuff which I haven't used for about 4 years now! In my mind I put out the kit list to include:
HU; Alpine 9887R with the BT-400 iPod/Bluetooth box
Amps: Genesis Series 3 4 channel with a Phase Linear Monoblock for the sub
Sub: Phase Linear Aliante Si 12" in a ported box.
But what about speakers? Enter stage left:
W124 work April 2018 by Charlieboy, on FlickrThese are a pair of Dynaudio GT240 5.25" components. I've been after a set of Dynaudios for a very long time and when these came up at a bargain price years ago I snapped them up. Now it was just a case of fitting them. Or so I thought:
W124 work April 2018 by Charlieboy, on FlickrIt's sort of in there.
W124 work April 2018 by Charlieboy, on FlickrNo, that isn't going to work!
The above created a bit of a stumbling block for me. I assumed the W124 speaker apertures were 13cm like the Dynaudios, but it was not to be. It turns out they are 12cm with Mercedes' own fastening scheme which thankfully is still intact! I then considered a set of original factory speakers and even Rainbow's Custom Fit offerings, albeit at £100. I'd have to sell the Dynaudios to buy them, but I already have a few people asking me to buy the things off me! Further research ensued. A known face in the W124 in the form of Nick Bolide informed me that while the Merc stock speakers weren't great, the Rainbows weren't much better! With that in mind it was back to the drawing board. Without alot of effort and time it will be tricky getting the Dynaudios/ICE in with other jobs still to do on the car.
I may well fit the Dynaudios in, but it will be in a non-invasive fashion, and probably with the mids in the kick panels of the car. But that wouldn't help me now! I debated making a baffle for the JBLs but seeing as they may not be used for the long term it seemed like alot of effort to go to for not much of a gain. They are £30 speakers after all.
Later on I came up with the idea of using some SecondSkin Damplifier Pro sound material to seal off the mids. It is fair to say that it looks quite Heath Robinson in my attempts:
W124 work April 2018 by Charlieboy, on FlickrHowever, it made a bigger difference than I imagined! For 10cm speakers they actually have some bass! This was very apparent though a back to back comparison! Furthermore, the ear-piercing midrange in the vocals (remember, these are cheap JBL speakers) is now much more forgiving. Not great but acceptable now. It sounds sounds alot nicer and with less volume from the headunit required now that alot of that cancellation has gone.
All that was left for me to do there was to refit the stock speaker grilles and then do some EQing to make it a little nicer. It now has the mid-range tamed down a little more still (but still nowhere near as bad before I did the above and tried EQing) and generally sounds fine for an old Mercedes inside, just how it should be! As I have alluded to above, I may do one more thing to the audio side of things prior to going to Laon, but we will see.
[/added piece]
That brought us to last weekend.
Bank Holidays. they are great for many people out there. A day off work to do as they please. Some go away for a weekend. Others go on a weekend binge, while some go and meet their family and friends. Me? I may have dabbled in all of the above, but did not lose sight of the goal in mind. The Laon Historique.
With the 2 week deadline fast approaching I had my aforementioned list to work through. With that in mind I went down to the unit and progressed with working on the car again.
This is probably the first time the old girl has seen daylight for almost two months.
Mercedes Laon Prepartions (1 of 15) by Charlieboy, on FlickrFirstly, I would finish off the previously botched wiring:
Mercedes Laon Prepartions (2 of 15) by Charlieboy, on FlickrAs you can see, the wiring is becoming an improved. All signs of the twisted/masking tape wiring have gone!
Mercedes Laon Prepartions (3 of 15) by Charlieboy, on FlickrAll that was left to do was the tape up the wiring into a tidier form and then refit the lot. Oh, and still checked that everything worked! Thanfully it did!
With that done and me still looking quite clean I decided to refit the repaired driver's seat; it had a ripped driver's bolster. Unfortunately I had no pre-repair shots but at least the interior is looking fine again courtesy of The Trim Shed.
Mercedes Laon Prepartions (6 of 15) by Charlieboy, on FlickrMercedes Laon Prepartions (8 of 15) by Charlieboy, on FlickrWith the driver's seat refitted it was time to move onto the brakes. A fellow RRer saw that I changed the other rear caliper and suggested that I change the other side. I begrudgingly bought one from ECP. After all, with a basic inspection the wheel was working fine.
Mercedes Laon Prepartions (9 of 15) by Charlieboy, on FlickrHowever, he was right. Upon further inspection, 1 piston hadn't been working for some while but it wasn't catching the disc. The other was OK. But the seals were not so great on both. But look how shiny the new parts are!:
Mercedes Laon Prepartions (10 of 15) by Charlieboy, on FlickrYup, at least the new caliper would look a little blingier! With that in mine I cracked on and fitted the new items onto the car.
Mercedes Laon Prepartions (11 of 15) by Charlieboy, on FlickrThe bleeding didn't go so well I admit! I used the Eezibleed to bleed the brakes. Normally, this is a simple operation. I am aware some people hate them. This time however, something caught me out. Despite previously using the Eezibleed on cars with no hiccups this was not to be. It blew the clutch master cylinder hose clean off the reservoir! Very swiftly I ended up grabbing a load of water and started pouring over all of where the brake fluid had gone from the reservoir! The other difference this time was I used the rear tyre and not the spare; after all, I normally only use an Eezibleed at 20PSI, and no more! Being a wheel at 30PSI may have affected things. However, I have decided to fit on a jubilee clip onto the master cylinder reservoir line for future purposes.
On the plus side the rear brake was bled in time and with all of the air taken out. With both rear calipers changed the pedal position has dropped a little but is still at less than 50% pedal travel, possibly as a result of having 4 pistons working on the back of the car as opposed to 1 1/2! I am hoping that with the previous owner doing the master cylinder and these calipers being changed, that this end of the braking woes and the intermittent floor pedal scenario. Reading around it seems it should be with the logic also making sense.
But it's fair to say I had to cheer the old girl up. I had some treats in store after all! Yes, I may be trying to do things on the cheap but it was not going to be getting budget parts fitted either! We had Delphi, Sachs & Pagid in the house! Amazingly, most of those parts came from DoctorCarParts, a retailer who sells decent quality parts for reasonable prices. I've gone outside of ECP for some parts it for the Carina I had to use DCP, but it was no bad thing. Here they delivered again.
Mercedes Laon Prepartions (5 of 15) by Charlieboy, on FlickrIt was then time to change the steering damper and drag link. The drag link I was unable to do since my tools in the unit could not get enough of a fit onto the nuts. I did debate persevering but also didn't want to damage things and make life awkward later. In truth, the nuts will come off with a flexible spanner/flexible ratchet spanner as well as going from above with a rattle gun. I have both, but none were down at the unit. Since I could do the steering damper I persevered on with the suspension repairs.
It is said that the steering dampers can go weak on many old Mercs. Mine was shot to be fair. With the damper nearly compressed all seemed fine and it almost worked as good as the new one. But with the damper semi-extented it would go in quickly for an inch then then stop, sometimes boucing back to the position I left it in. Yup, it was a little shot! With that in mind I continued with fitting the new damper:
Mercedes Laon Prepartions (12 of 15) by Charlieboy, on FlickrIt was certainly grubby, was the old item I removed! The bushes weren't great either where it attaches to the body and the drag link. But it was then time to clean off all of the old grime from the old unit. It's always interesting to see what you are removing after all.
Mercedes Laon Prepartions (14 of 15) by Charlieboy, on FlickrBoth of them look perfect right? Well, one of them is working as intended, and it's not the older one! Upon closer inspection, the damper I removed was the original damper to the car. It was a genuine Stabillus item and dated back to 1990. Considering the age and the mileage of the damper it hadn't done too badly.
Mercedes Laon Prepartions (13 of 15) by Charlieboy, on FlickrAll that was left to do was the fit the new damper to the car. To my surprise the steering is a little heavier than previously with the damper swap, but still quite on the light side! It will be interesting to see how the car drives when I take it on its road test prior to Laon.
Mercedes Laon Prepartions (15 of 15) by Charlieboy, on FlickrIt's fair to say that the car is almost getting there. It's certainly ready for the roadtrip, despite me doing more than I planned with the car in addition to jobs I have been putting off for some time like the headunit wiring. So much for this being 'just a winter smoker' eh?
Edited by SebringMan on Sunday 13th May 09:21
I saw in your Retrorides thread that you have tried installing Dynaudio speakers in this car. I would be very keen to hear how you get on with that. However, I would (very politely) disagree with Mr Bolide about the Rainbows. I have them in my 124, front and rear (12cm in the dash, 10cm in the rear doors), and I am quite favourably impressed by them, the fronts at least. What I would say is that they need a bit of running in and they definitely benefit from separate amplification. Mine sounded much better when run through a little Alpine amp than when driven off the headunit. However, I suspect they would not be a patch on the Dynaudios, so please do persevere!
ian316 said:
Some good diy going on there 
Thanks for the comments! You'll be glad to know that thanks to r129's efforts and thread comparison there has been even more work being seen to!I've added in "[added piece]" above so as to highlight the post that I was meant to add.
It's been quite a few crazy weekends lately! Mainly a few family weddings, a milestone in my mum's birthday, thus ensuing celebrations, working on the car with some spare time as well as housework. But would we have it any other way? Unlikely I suspect! It's about time this thread was updated slightly more
.r129sl said:
I saw in your Retrorides thread that you have tried installing Dynaudio speakers in this car. I would be very keen to hear how you get on with that. However, I would (very politely) disagree with Mr Bolide about the Rainbows. I have them in my 124, front and rear (12cm in the dash, 10cm in the rear doors), and I am quite favourably impressed by them, the fronts at least. What I would say is that they need a bit of running in and they definitely benefit from separate amplification. Mine sounded much better when run through a little Alpine amp than when driven off the headunit. However, I suspect they would not be a patch on the Dynaudios, so please do persevere!
Aha, we have a lurker on RR as well? It does seem there is a bit of a crossover between a few of the forums, and I know of a few people on both myself .The Dynaudios are possible to get in but I won't be destroying a dash (well, maybe not) in order to fit them. The kick panels in many ways make far more sense to mount them; I will just need a spare set of panels, that's all
. But it's not something that will happen overnight .To be fair to Nick, he did compare his Rainbows with decent W124 speakers driven off the headunit, where the stock speakers would give a better sound due to the speaker efficiency favouring the stock items more over the less efficient Rainbows. He did say that with an amplifier the game could change to being in favour of the Rainbows. I tried to find out if that was the case with little to show for it but it seems the information was had by a poster here all along!
.I suspect you are right about the sound. The ease of the Rainbows being installed is a plus point however! But the effort may well be worth it with the Dynaudios. Watch this space.
Since you have added an amplifier how do you suggest to route in a power wire from the engine bay to the boot? I was going to look but I have a few other things to do on the car, albeit that list has shrunk alot lately
.The car's not been sitting idle however. It's now come out to play again for the first time in 2 months. After all, I fancy giving it a roadtest prior to me leaving!
With Laon now only a week away things are getting real! Really tense that is! With that in mind I got the W124 out of the unit after its two month hibernation.
Firstly, I started off by removing the centre drag link.
 Weekendwork by Charlieboy, on Flickr
People don't like these tools but in my experience they don't destroy the boots when they are used carefully. In my case the boots on the drag links had split anyway! I did cheat however with the balljoint splitter! The impact wrench also came in handy for removing the drag link bolts without needing to use a counterforce to hold the balljoints, since I didn't split them and the taper was holding them in place.
 Weekendwork by Charlieboy, on Flickr
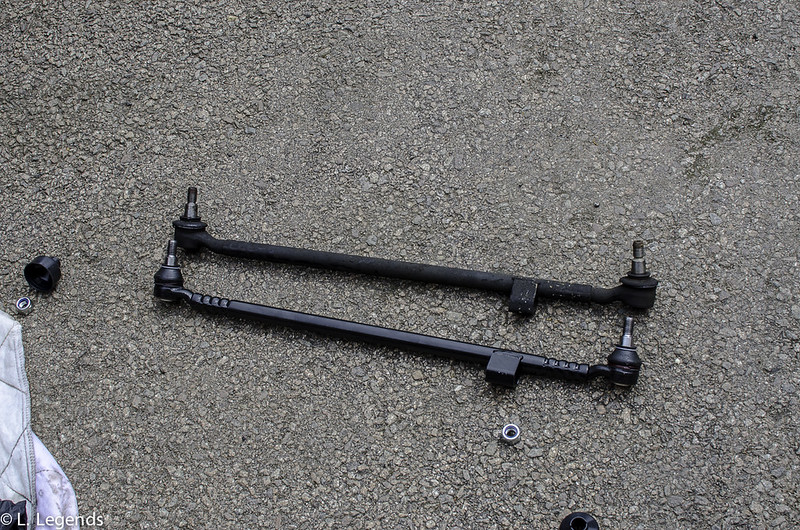
Before I knew it the old item was out. On first inspection both looked fine. But it was deeper where the flaws became apparent.
 Mercedes Laon Prepartions v2 (1 of 8) by Charlieboy, on Flickr
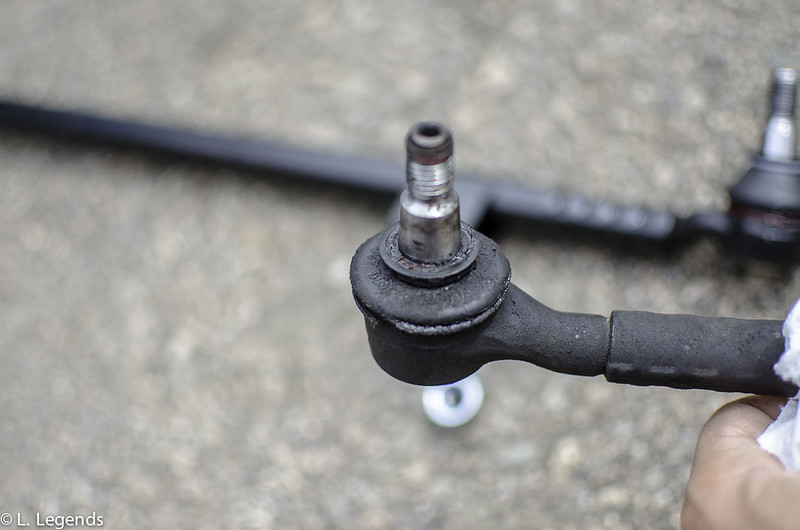 Mercedes Laon Prepartions v2 (3 of 8) by Charlieboy, on Flickr
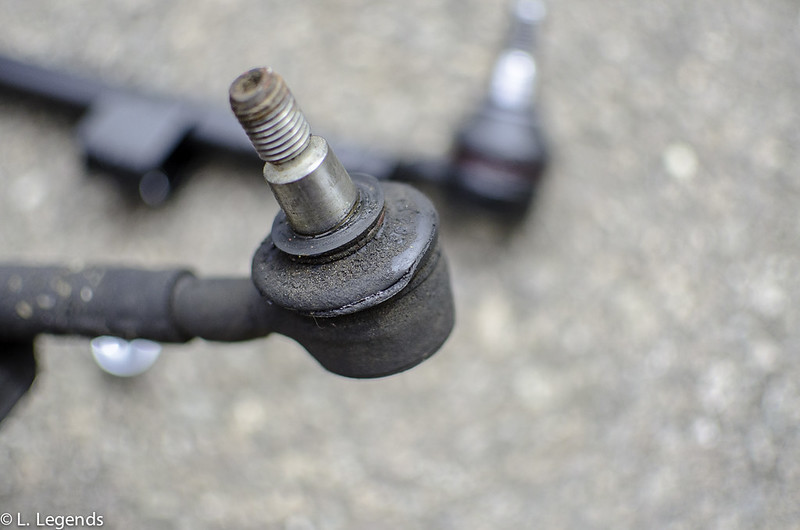 Mercedes Laon Prepartions v2 (2 of 8) by Charlieboy, on Flickr
Originally I thought only one balljont boot was split! It turned out that both were in exactly the same place! It seems they may have been split for some time as the balljoints were gritty in them operation. It was no bad thing that I was changing the drag link it seemed!
With that done I fitted on the new drag link, torqued up the bar and didn't refit the steering damper. Why? I was still thinking about the crankshaft bolt that I didn't tighten up correctly as discussed here. My previous attempts didn't allow me to! With that in mind it seems the car Gods looked favourably on me this weekend! Firstly, I have a couple of package arrive! One of them was for the crank locking tool I had ordered from Germany.
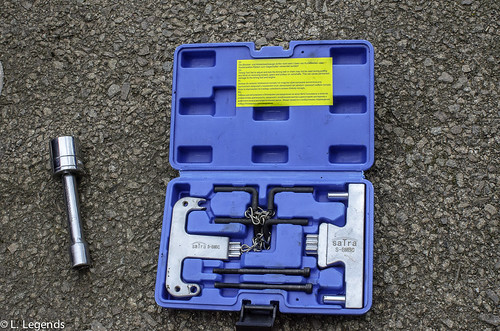 Mercedes Laon Prepartions v2 (7 of 8) by Charlieboy, on Flickr
It looks a little specialised and I wasn't convinced that two M6 x 90mm bolts would be man enough to hold the flywheel! Since the crossmember prevented me from getting in a crowbar I had no choice except to precariously fit the new flywheel lock:
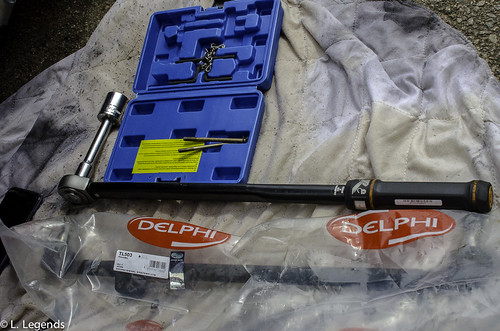
 Mercedes Laon Prepartions v2 (5 of 8) by Charlieboy, on Flickr
All that was left to do was to grab my torque wrench and set it to 320Nm. It's the first time I have ever set it to its maximum torque! You can just make out the removed sump bolts in that photo!
 Mercedes Laon Prepartions v2 (6 of 8) by Charlieboy, on Flickr
The linked thread should describe things. But I really was expecting something to break with that much torwue! When I finally heard that torque wrench go click it was a massive weight off my mind! With that done it was time to deal with the second parcel!
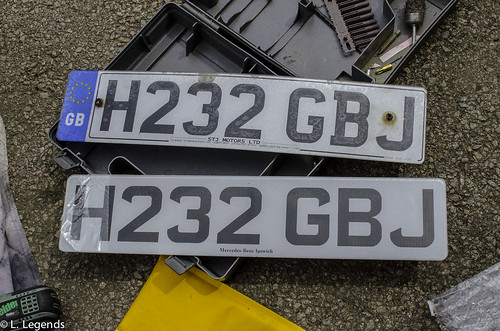 Mercedes Laon Prepartions v2 (8 of 8) by Charlieboy, on Flickr
Yup, I acquired and sort of faked a set of Mercedes dealer plates as if the car came with those plates as if it came out of the showroom! It didn't help that the old ones were looking unkempt and generally tatty! Fitting those was a doddle but that can wait until next time! The poor car really needs a clean!
It's fair to say that it is getting there!
Edited by SebringMan on Sunday 13th May 09:39
Edited by SebringMan on Sunday 13th May 10:03
JakeT said:
I like those types of ball joint splitter too. Especially when combined with an impact doing them up. A pickle fork always destroys the gaiters and seems to not work as quickly or easily.
I found exactly the same thing! The two tools make balljoints a relatively easy removal process!As tradition with these threads, it's time to come onto detailing. Or rather to not try! This was how it looked after being stored for 2 months in the unit. It did indeed look like a genuine 'barn find'! Maybe I missed a trick here. Maybe I should have put my investor hat on and pointed it was a barn find, a super rare W124 at that!
 Weekendwork by Charlieboy, on Flickr
But, that's not me. It doesn't really help that I am enjoying the relaxing yet surprisingly swift progress! I've been busy cleaning the Mercedes prior to the trip. The bodywork on mine isn't the best as some of you know! But at least it doesn't stop me using it, unlike me trying to save the M3! The polishing has given mixed results but overall for the better, I suspect. It took some mopping, cleaning, and waxing to get it here with various products!
 Final Preparations W124 (21 of 21) by Charlieboy, on Flickr
 Final Preparations W124 (18 of 21) by Charlieboy, on Flickr
 Final Preparations W124 (16 of 21) by Charlieboy, on Flickr
I even installed a USB cigar voltmeter as another way to keep an eye on things:
 Final Preparations W124 (14 of 21) by Charlieboy, on Flickr
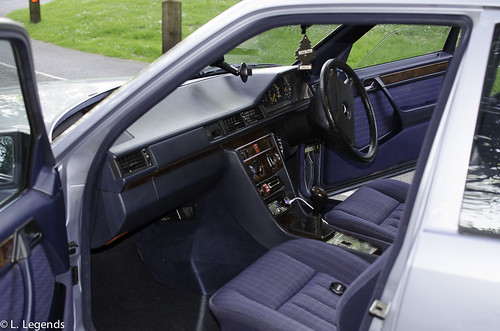 Final Preparations W124 (13 of 21) by Charlieboy, on Flickr
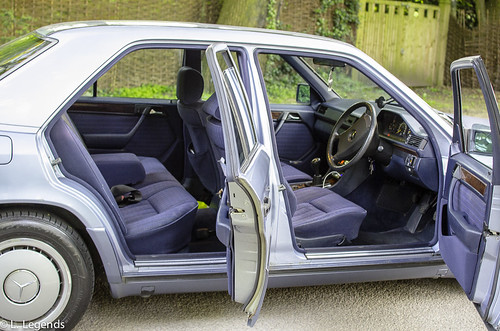 Final Preparations W124 (10 of 21) by Charlieboy, on Flickr
 Final Preparations W124 (8 of 21) by Charlieboy, on Flickr
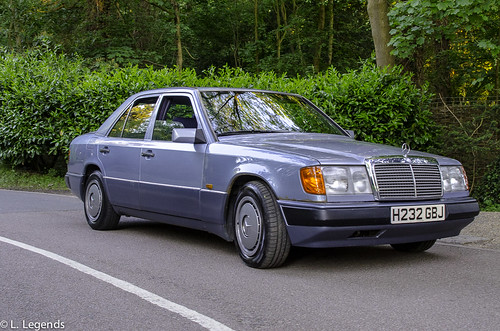 Final Preparations W124 (7 of 21) by Charlieboy, on Flickr
 Final Preparations W124 (6 of 21) by Charlieboy, on Flickr
 Final Preparations W124 (4 of 21) by Charlieboy, on Flickr
I enjoy your old Merc thread. It reminds me why I prefer to own and fix BMWs!
That era of Mercedes really was when “they made them better in the olden days”.
What’s the big trip? Your car does appear to have some slight colour variations from panel to panel (not intended as a criticism-just an observation, mine has new front wings which are darker than the rest).
That era of Mercedes really was when “they made them better in the olden days”.
What’s the big trip? Your car does appear to have some slight colour variations from panel to panel (not intended as a criticism-just an observation, mine has new front wings which are darker than the rest).
helix402 said:
I enjoy your old Merc thread. It reminds me why I prefer to own and fix BMWs!
That era of Mercedes really was when “they made them better in the olden days”.
What’s the big trip? Your car does appear to have some slight colour variations from panel to panel (not intended as a criticism-just an observation, mine has new front wings which are darker than the rest).
Cheers! I think it's those reasons for why I bought it! Yup the bodywork is a mismatch. The front wing and rear quarter aren't the best! At least both now have a shine; I now wonder if when the wing was changed the rear quarter was also done.That era of Mercedes really was when “they made them better in the olden days”.
What’s the big trip? Your car does appear to have some slight colour variations from panel to panel (not intended as a criticism-just an observation, mine has new front wings which are darker than the rest).
As for the trip, it's not the biggest I've been on, but still a bit of a car getting on for almost 30 years old. It's the Laon Historique.
The iteneray will include around 400 miles of roads, albeit on French D roads! I'm glad it's not in the M3! But we shall see how I get on
.So, I mentioned Laon recently and how I felt I was pushing things a bit close!
Before I knew it. I had a clean engine bay, a new crank seal installed, a new Dayco belt in addition to a car that didn't mark its territory wherever it went.
I still had the small matter of correctly torquing the crank pulley! Without locking the engine correctly I could tell it was done to at least 150Nm, quite a way short of the correct figure. But we'll get to that later. I would end up buying a tool begrudingly and using it with care! Thankfully this ensure the pulley was tightened correctly! Wow, 320Nm is bloody tight! The tensioner bolt turned out to have the same issue. The bolt is meant to be done to 100Nm, in the timing chain cover! Yup, that is not a misprint! With a firm tug of a breaker bar I had the pulley lined up in no time! To be honest, I never would have gone that tight without consulting the manual!
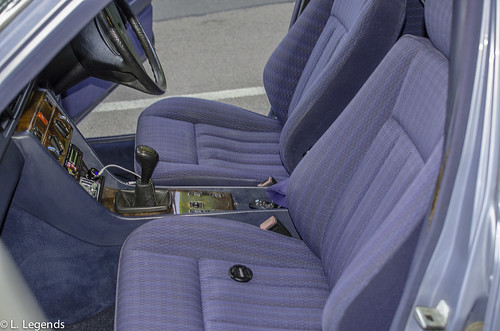
While all of the above was going on I sent the seat away to Stu at the Trim Shed! It seemed crazy to let the bolster get destroyed for the sake of worn material, especially when Blue seats are super rare in the Mercedes world. I saw a couple of blue interiors go for £100 a set in similar condition to my ripped driver's seat, in addition to Blue MB Tex seats seeming not to exist! I did consider beige leather seats but I knew it could come back to bite me! Still, after the retrim, it transformed the tatty interior of the car and really improved things! Simultaneously, the seat runners were freed courtesty of a vacuum and WD40, truly helping one to enjoy the W124 experience. The wet vac of inside also erradicated any iffy odours as did removing what looked like ancient leaves buildup under the seats!
With a week left to go it was fair to say that the car was almost ready, with some serious issues like the brakes and wiring dealt with! I then decided to the balljoint on the centre drag link. Along with a new steering damper this weighed up the steering a bit more and make the car more stable over bumps in the road! Always a bonus
 !
!
Finally, I somehow had the car ready a week before we were due to go! I just had one thing left to do. A mop! The paintwork on this car isn't the best I wasn't expecting in miracles and in truth they didn't happen! But some careful application of 3M Fast Cut Plus, Meguiars 105 and 205 as well as Collinte 476S wax soon had the car looking a little more presentable! Oh, and some new period numberplates for the car.
[img]https://farm1.staticflickr.com/957/40306882160_a84fbf2667.jpg[img]
Well, before I knew it the car was ready! All I had to do now was to test it! After not driving a car for a couple of months and messing around with key parts, it's always unnerving driving an old retro! But I needn't have worried! The car behaved perfectly! It drove beautifully and I soon felt that W124 charm coming back!
With a 200 mile test drive done over a week it was finally time to hit the Dover docks. On that Friday morning I truly was in for a treat! But would it last?
Before I knew it. I had a clean engine bay, a new crank seal installed, a new Dayco belt in addition to a car that didn't mark its territory wherever it went.
I still had the small matter of correctly torquing the crank pulley! Without locking the engine correctly I could tell it was done to at least 150Nm, quite a way short of the correct figure. But we'll get to that later. I would end up buying a tool begrudingly and using it with care! Thankfully this ensure the pulley was tightened correctly! Wow, 320Nm is bloody tight! The tensioner bolt turned out to have the same issue. The bolt is meant to be done to 100Nm, in the timing chain cover! Yup, that is not a misprint! With a firm tug of a breaker bar I had the pulley lined up in no time! To be honest, I never would have gone that tight without consulting the manual!
While all of the above was going on I sent the seat away to Stu at the Trim Shed! It seemed crazy to let the bolster get destroyed for the sake of worn material, especially when Blue seats are super rare in the Mercedes world. I saw a couple of blue interiors go for £100 a set in similar condition to my ripped driver's seat, in addition to Blue MB Tex seats seeming not to exist! I did consider beige leather seats but I knew it could come back to bite me! Still, after the retrim, it transformed the tatty interior of the car and really improved things! Simultaneously, the seat runners were freed courtesty of a vacuum and WD40, truly helping one to enjoy the W124 experience. The wet vac of inside also erradicated any iffy odours as did removing what looked like ancient leaves buildup under the seats!
With a week left to go it was fair to say that the car was almost ready, with some serious issues like the brakes and wiring dealt with! I then decided to the balljoint on the centre drag link. Along with a new steering damper this weighed up the steering a bit more and make the car more stable over bumps in the road! Always a bonus
!Finally, I somehow had the car ready a week before we were due to go! I just had one thing left to do. A mop! The paintwork on this car isn't the best I wasn't expecting in miracles and in truth they didn't happen! But some careful application of 3M Fast Cut Plus, Meguiars 105 and 205 as well as Collinte 476S wax soon had the car looking a little more presentable! Oh, and some new period numberplates for the car.
[img]https://farm1.staticflickr.com/957/40306882160_a84fbf2667.jpg[img]
Well, before I knew it the car was ready! All I had to do now was to test it! After not driving a car for a couple of months and messing around with key parts, it's always unnerving driving an old retro! But I needn't have worried! The car behaved perfectly! It drove beautifully and I soon felt that W124 charm coming back!
With a 200 mile test drive done over a week it was finally time to hit the Dover docks. On that Friday morning I truly was in for a treat! But would it last?
ian316 said:
You'll get there and back without breaking sweat, just sit back and enjoy the cruise
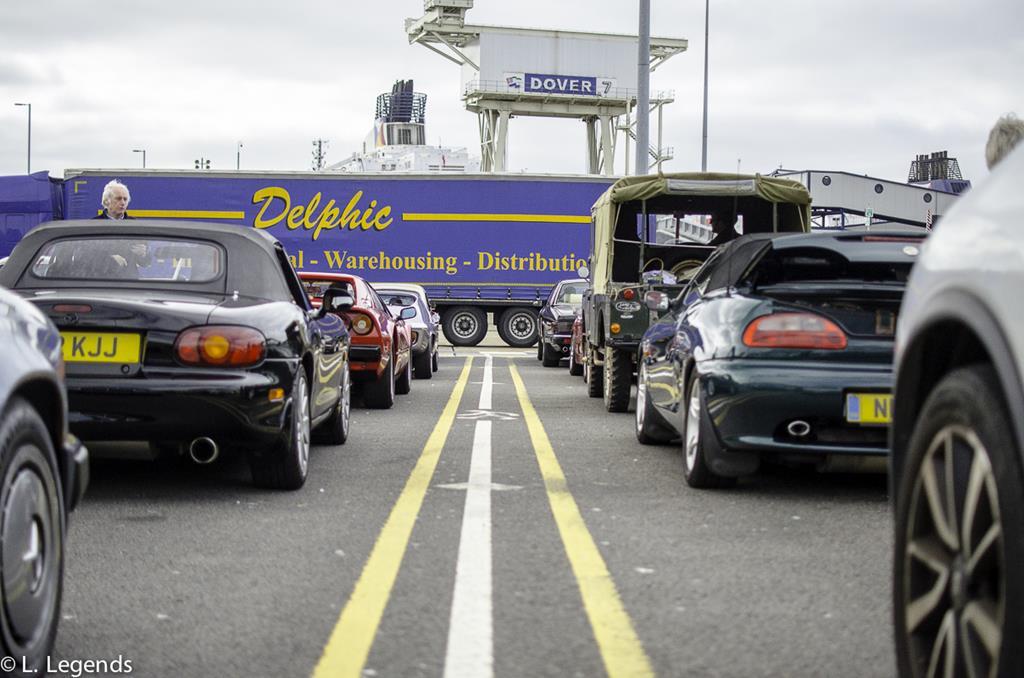
It would be spoiling things if I did say how it went. You might just be right!Turning up at the Docks really was quite something! From this moment I knew it was going to be a great trip! There was such a variety of cars there for everyone! Part of the guys there were waiting to go on the Spa Classic tour, also done by Scenic Car Tours.
You may not like the TTs but age hasn't treated them badly! The Z3M Roadster was a lovely thing!
 Laon 2018 Friday & Saturday (1 of 51) by Charlieboy, on Flickr
So, a variety of Cobra reps, a clean NSX, XKs and Granadas of varying marques all in one place? This is the place to go!
These two cars would end up sharing the hotel car park with us! That is the Maserati Bora, and and the 997 Carrera S.
 Laon 2018 Friday & Saturday (8 of 51) by Charlieboy, on Flickr
It was then a case of cruising down to Laon. This is where the W124 really excels. It's not exactly a racer but it can hold motorway speeds superbly! I did seem to be overtaking alot of cars too without breaking the speed limit!
But Scenic laid on a mini show for us on the first day. That was to take place in Arras! I didn't realise it initially but I had been here a few years ago! Then it was full of XMas Market traders. Now, it was full of classic cars!
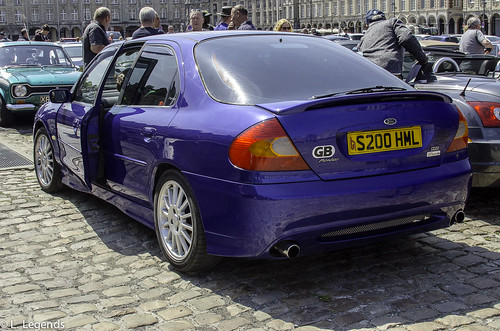
Which one for you? The Blue Pill or the errr...... Black pill?
 Laon 2018 Friday & Saturday (9 of 51) by Charlieboy, on Flickr
The Jag presence was strong there! The D-Type Replica was a lovely looking thing too! It was a shame for it to have been driven there on a trailer mind you!
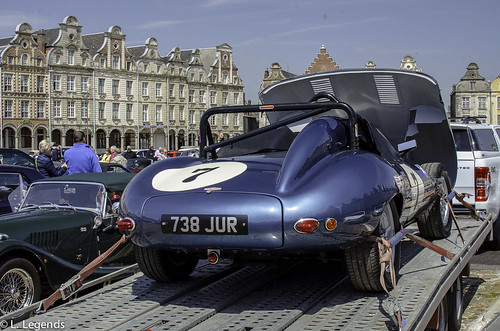 Laon 2018 Friday & Saturday (11 of 51) by Charlieboy, on Flickr
 Laon 2018 Friday & Saturday (12 of 51) by Charlieboy, on Flickr
 Laon 2018 Friday & Saturday (16 of 51) by Charlieboy, on Flickr
There's my mate looking chuffed! I don't know why, he had only paid his bit and turned up at this point! Maybe he had the last laugh with being a passenger for then:
 Laon 2018 Friday & Saturday (17 of 51) by Charlieboy, on Flickr
This 'B brought back many memories for me! I often thought recently that I shouldn't have sold my Sebring bodied 'B. But if I did have it still I'm not entirely sold on the black! Either way it was a nicely finished car for a Sebring:
 Laon 2018 Friday & Saturday (20 of 51) by Charlieboy, on Flickr
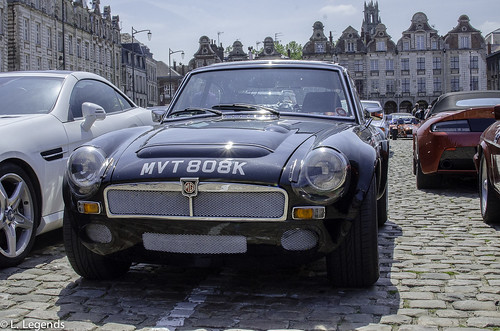 Laon 2018 Friday & Saturday (21 of 51) by Charlieboy, on Flickr
These may be on the edge of retro, but when was the last time you ever saw one? It was the only ST to make it there, amongst the plethora of MkI & II Escorts and Granadas!
 Laon 2018 Friday & Saturday (22 of 51) by Charlieboy, on Flickr
 Laon 2018 Friday & Saturday (25 of 51) by Charlieboy, on Flickr
This Carrera 2 looked lovely! Just as the doctor ordered!
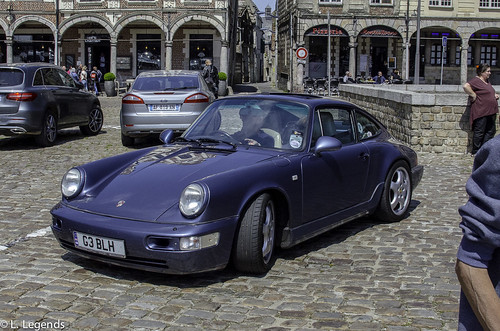 Laon 2018 Friday & Saturday (27 of 51) by Charlieboy, on Flickr
A special mention goes to this chap in the Fiesta! He was quite a youngun who was clearly a grafter. By the looks of it the car wasn't just a chequebook exercise! There were a couple of standout cars. From being a 1.0 Fiesta Popular Plus the Plus part actually counted for something! Gone was the wheezy 950cc Valencia/HCS engine and in went a 1.6 CVH, together with a Kent cam, RS1600i rocker cover, XR2 carburettor (or a 38DGMS; I can't remember), tubular manifold, with an Escort RS Turbo gearbox completed with a Quaife ATB! Sure, the black Recaros didn't quite match inside being generic units, but when the package looks this good in the flesh and it is a homebuilt car you can do nothing but admire their efforts!
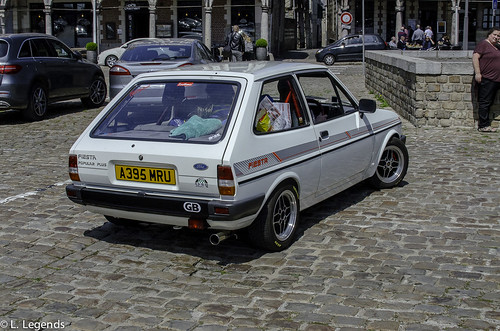 Laon 2018 Friday & Saturday (28 of 51) by Charlieboy, on Flickr
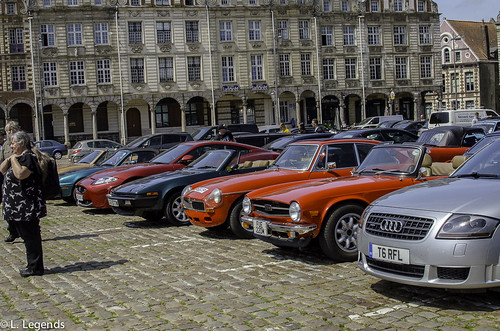 Laon 2018 Friday & Saturday (29 of 51) by Charlieboy, on Flickr
There are more shots here to look at! Of course, this album will be growing over time. With the Arras car show done, meeting some people and enjoying a spot of lunch, it was time to go to my humble abode in Laon and get used to a few things. The first was the lovely achitecture there and the 'Frenchness' of everything. The other? Stairs, and hills. Big ones, and many of them! Stay tuned for the next installment!
 Laon 2018 Friday & Saturday (31 of 51) by Charlieboy, on Flickr
Edited by SebringMan on Monday 25th June 22:19
ian316 said:
Some stunning looking cars there looks like a great trip
It was a great trip, thanks . Things are about to spice up a little though!After enjoying a few beers and having a meal it was time to go to bed and to recover from walking the many hills of Laon! You almost need a holiday after walking all of those massive hills, especially since we were staying in the outskirts of Laon! But at least there were a few cars to admire right in the heart of the old town!
The first one was an Aston Martin DB2/4!
 Laon 2018 Friday & Saturday (32 of 51) by Charlieboy, on Flickr
This fabulous 2002 Baur was a great looker too. Did they ever made a full on drop top I wonder?
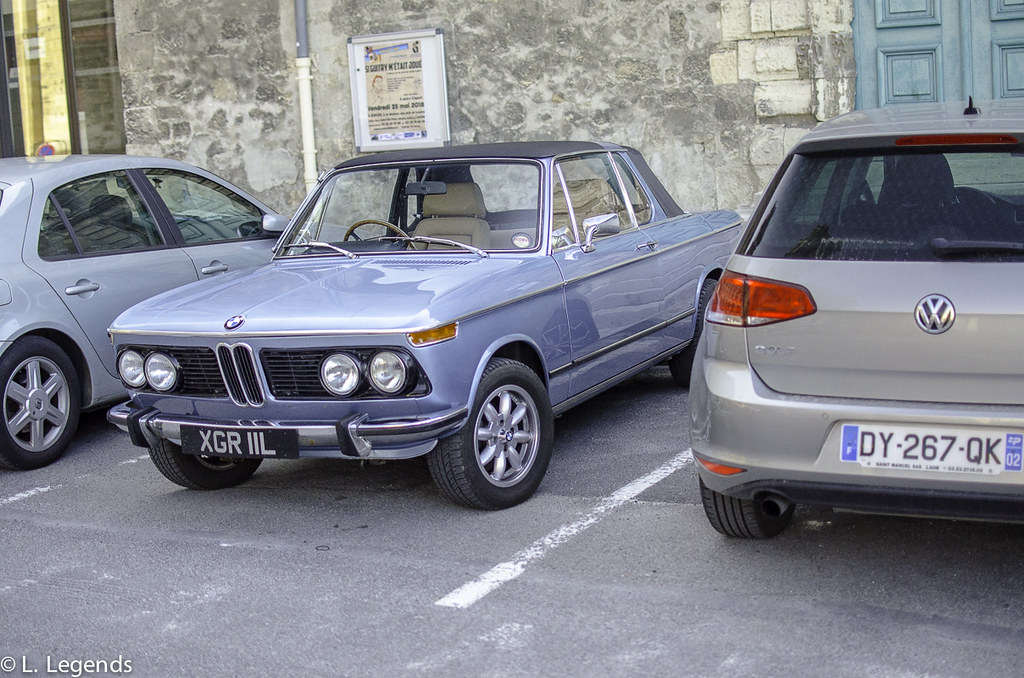 Laon 2018 Friday & Saturday (33 of 51) by Charlieboy, on Flickr
Of course then we retired back at the hotel. That wasn't so bad after all, with some wonderful stuff in the car park! The E-Type there wasn't the most concours example I've ever seen but it did have a lovely honesty about it despite the photos making it look great:
 Laon Friday and Saturday Shots. by Charlieboy, on Flickr
 Laon Friday and Saturday Shots. by Charlieboy, on Flickr
And what about the Mercedes? Despite being called a taxi, and the multicoloured car it got down to Laon very well indeed! The MPG was also the best I have ever seen from it! After filling up at the local petrol station my findings showed it to have done 46MPG! 46! Yup. No higher tyre pressures, nothing like that really! It seems a good service and fixing the brakes really helped things there! I was doing about 80MPH going down towards Laon too!
The very next day was the day all of the fun would begin! From seeing a load of bits we were now seeing a load of other cars, both from France as well as Belgium!
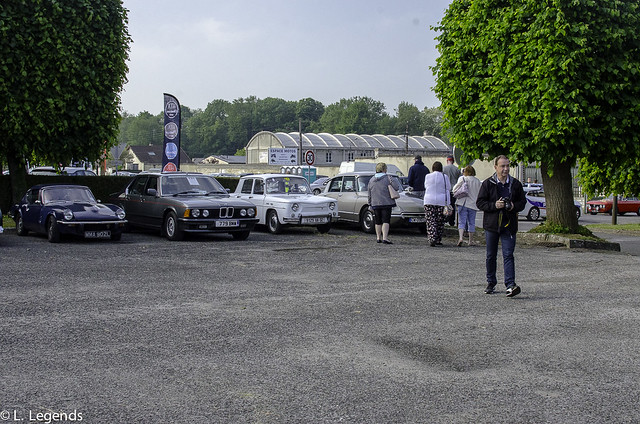 Laon 2018 Friday & Saturday (34 of 51) by Charlieboy, on Flickr
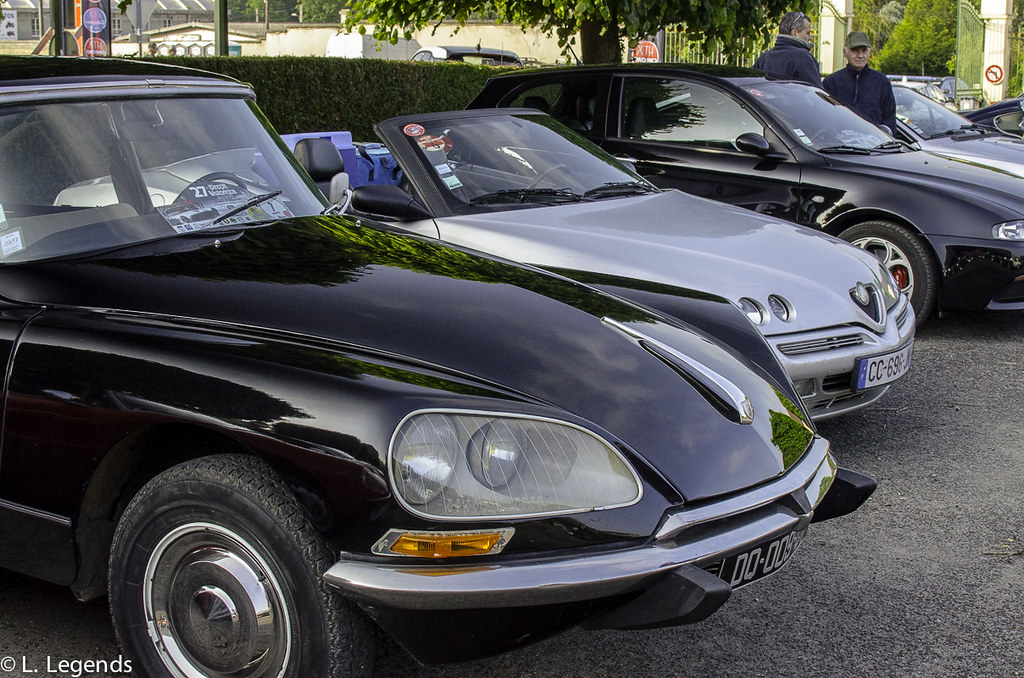 Laon 2018 Friday & Saturday (36 of 51) by Charlieboy, on Flickr
Yup, it was getting busy! These pictures only cover one of the two car parks as well at Parc Foch!
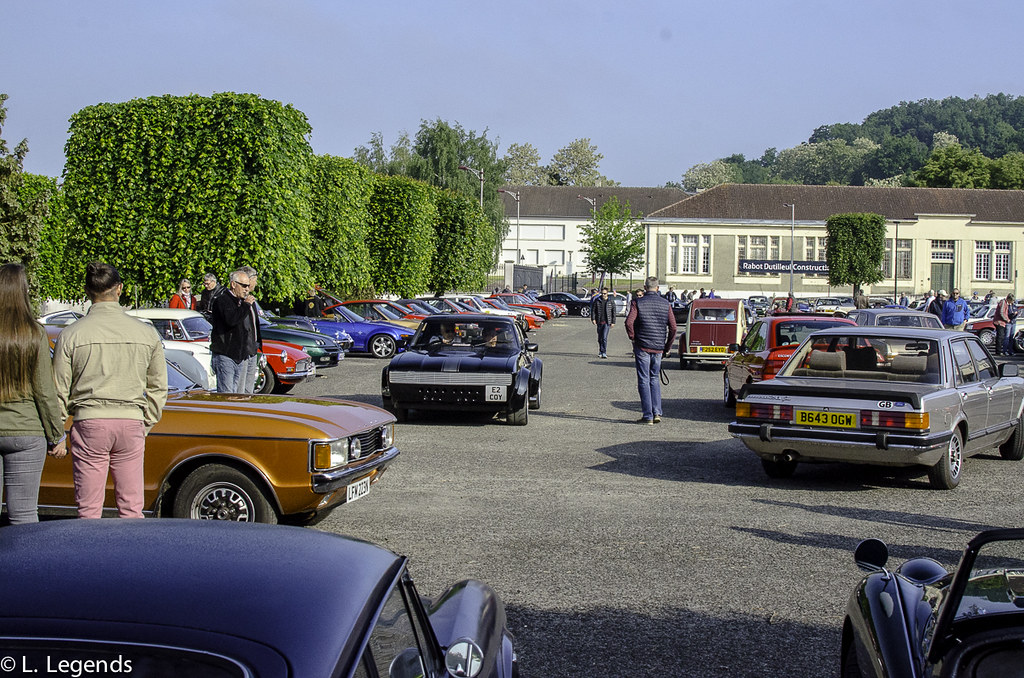 Laon 2018 Friday & Saturday (37 of 51) by Charlieboy, on Flickr
 Laon 2018 Friday & Saturday (39 of 51) by Charlieboy, on Flickr
You have to love a Capri in such style
 Laon 2018 Friday & Saturday (35 of 51) by Charlieboy, on Flickr
When I was speaking of the French being there I wasn't kidding! Just look at those chinos! It's a lovely 356 Replica there mind you!
 Laon 2018 Friday & Saturday (40 of 51) by Charlieboy, on Flickr
Another mention goes to this chap! It's a 1999 Alpina B3.2! This car is a great example of how retros should be owned! Despite having what some would call a high mileage of 121,000 miles it was immaculate from the top to the bottom of it! The seats were in perfect condition, and the bodywork also! Sure, it had been titivated in the past but the car is in use, enjoyed and I understand is a regular attender of the Circuit Historique, just how retros should be done and enjoyed.
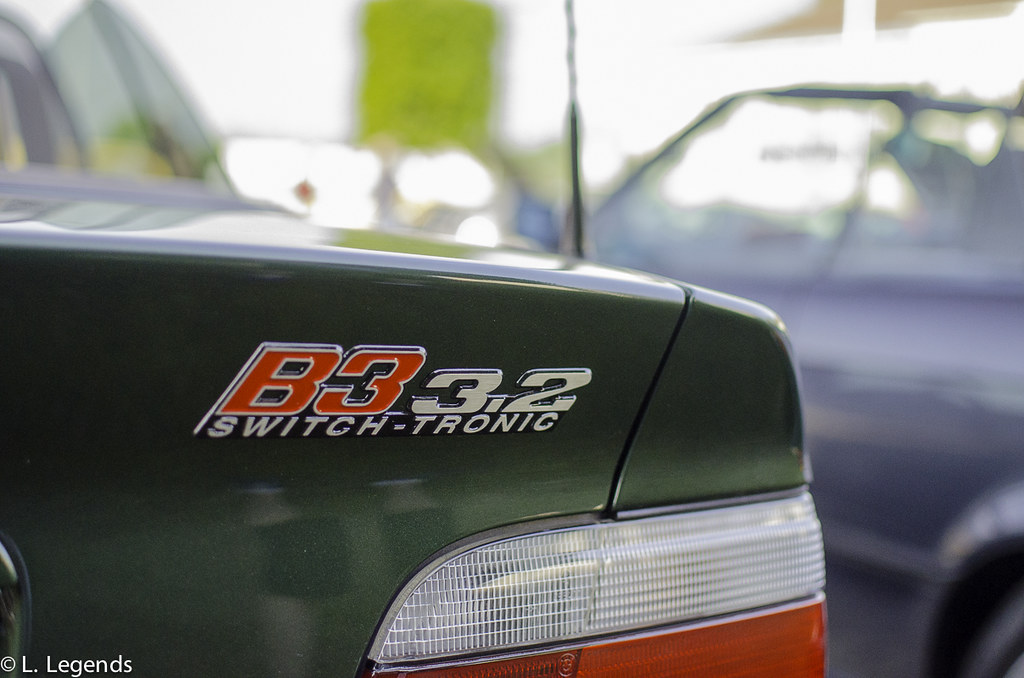 Laon 2018 Friday & Saturday (42 of 51) by Charlieboy, on Flickr
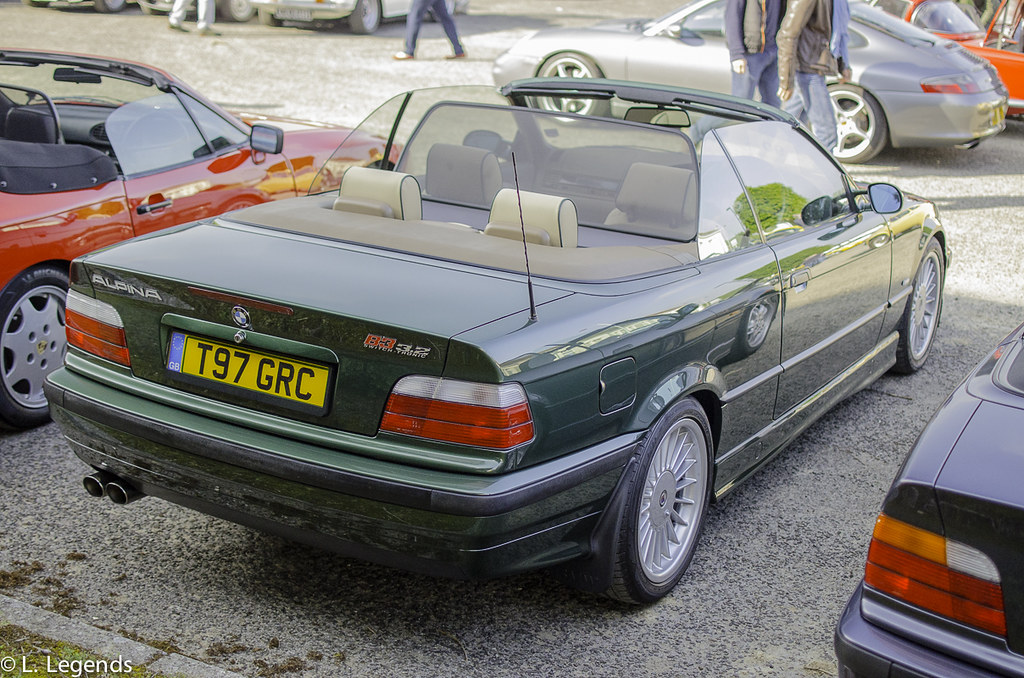 Laon 2018 Friday & Saturday (43 of 51) by Charlieboy, on Flickr
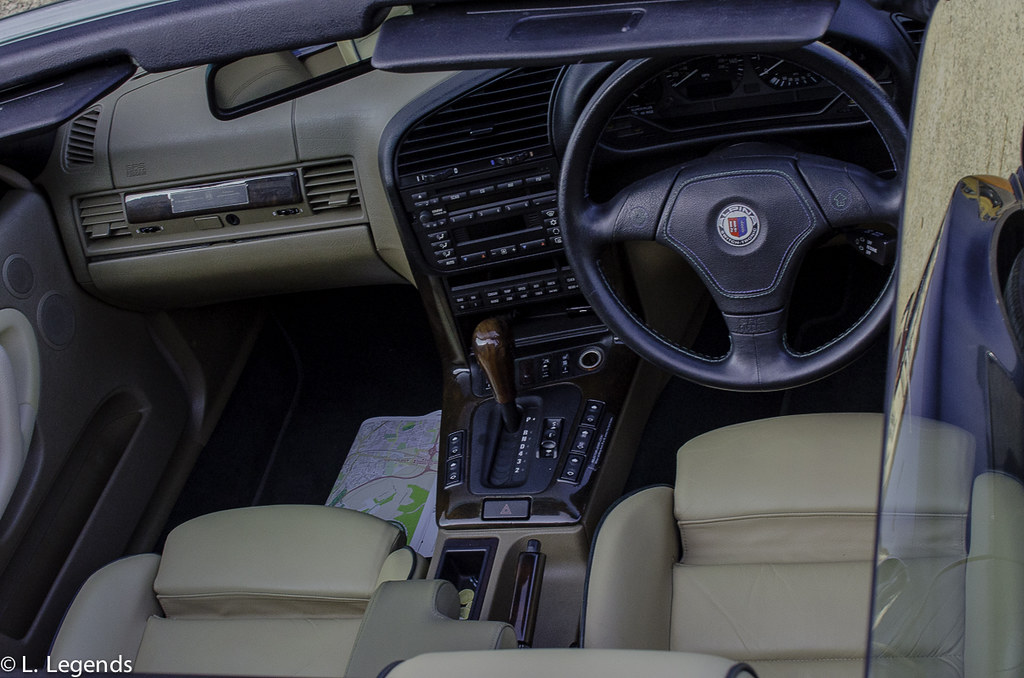 Laon 2018 Friday & Saturday (44 of 51) by Charlieboy, on Flickr
Some people however were not as lucky as the rest of us! Paul who some of you know here had his fantastic Cortina Crusador Estate come down to Laon, which I believe is his second time! For those that don't know this car is sporting a wide arch kit of sorts, possibly made by Paul himself, a 5 speed 'box along with a Scorpio Cosworth V6! The difference here however is what induction it has. His is now sporting Tripple Webber IDFs! It sounds absolutely awesome and it really compliments the looks of the car!
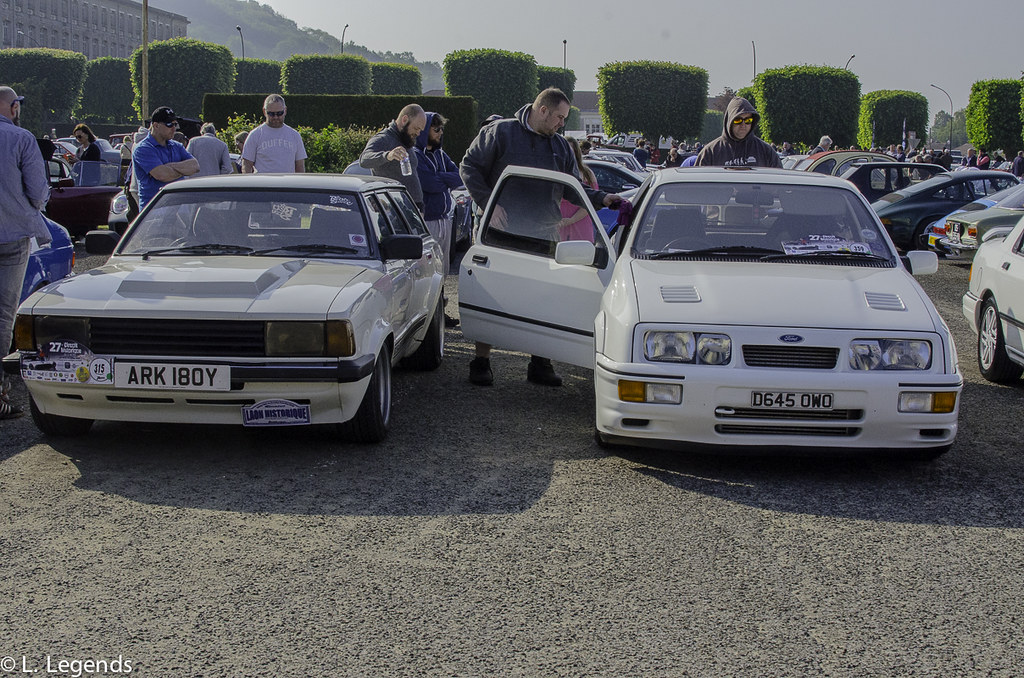 Laon 2018 Friday & Saturday (46 of 51) by Charlieboy, on Flickr
Unfortunately for Paul, one of the Webers decided that its float would get stuck. It ended up with him have a carburetor flood itself and then catch fire, right in the Dover Docks! It's crazy to think I was having a conversation with him only an hour or so before he went on! Thankfully and very luckily he had the fire put out, albeit with now a messier engine bay full of extinguishing powder! Paul however, is not one to get down by such things! While he missed the boat scheduled for him, he did make it down in the end, and what a pleasure it was to meet him
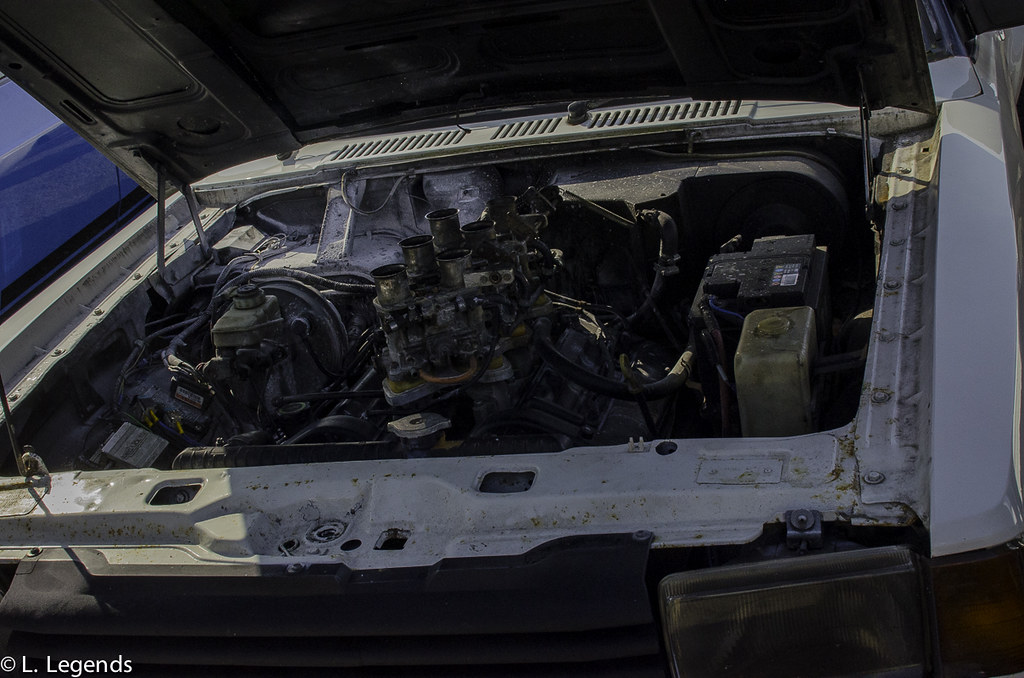 Laon 2018 Friday & Saturday (45 of 51) by Charlieboy, on Flickr
If you lust after Renault Alpines this is the place for you! There were more of their fair share here and how great it was to see them all!
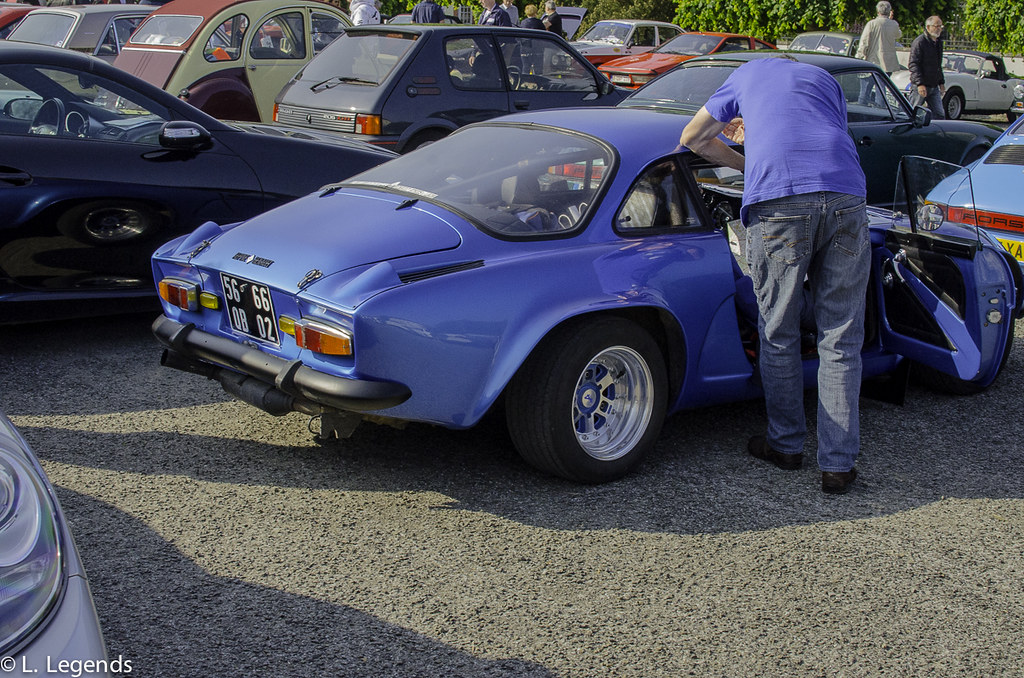 Laon 2018 Friday & Saturday (47 of 51) by Charlieboy, on Flickr
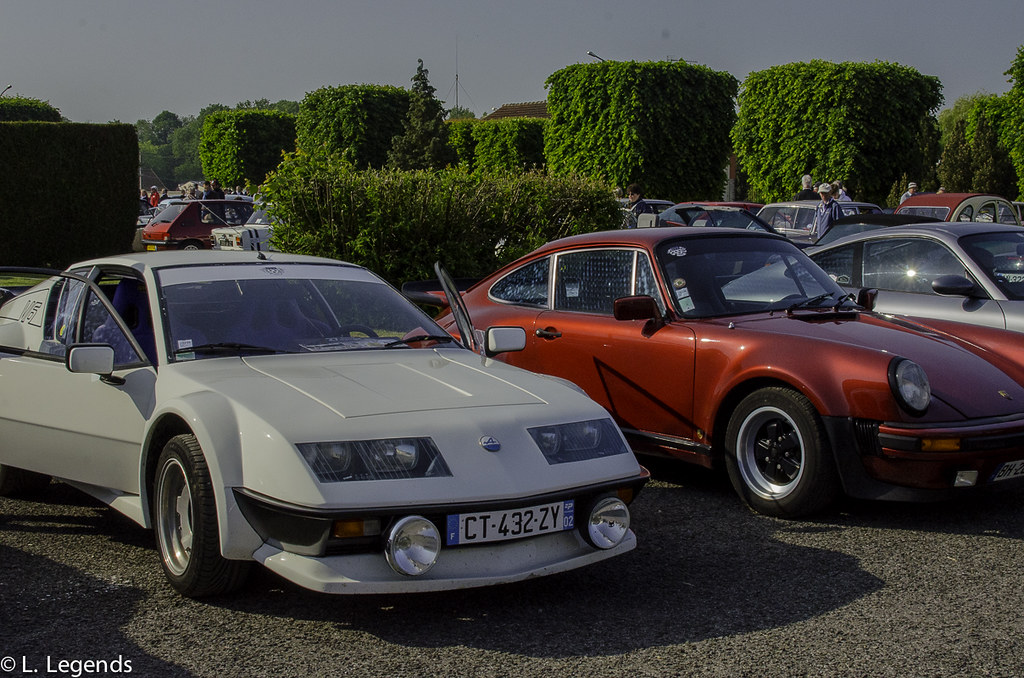 Laon 2018 Friday & Saturday (48 of 51) by Charlieboy, on Flickr
Left or right?
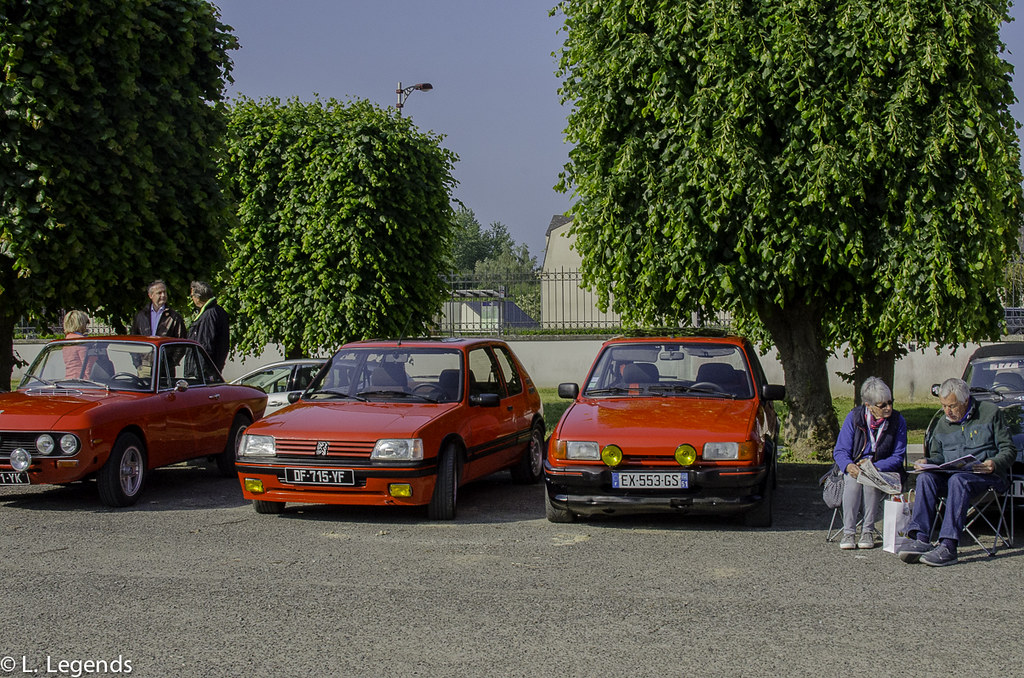 Laon 2018 Friday & Saturday (49 of 51) by Charlieboy, on Flickr
Before we knew it, we had our rally plan and were ready to go! The Mercedes actually did the rally superbly! There we were in comfort and even on the forrest roads it was a joy driving the old girl around! if only it had more power behind its right foot! It was great going through a number of towns and admiring the French scenery!
But I have to dash out for now! More will come soon! All I shall say for now is that we ended up at this place:
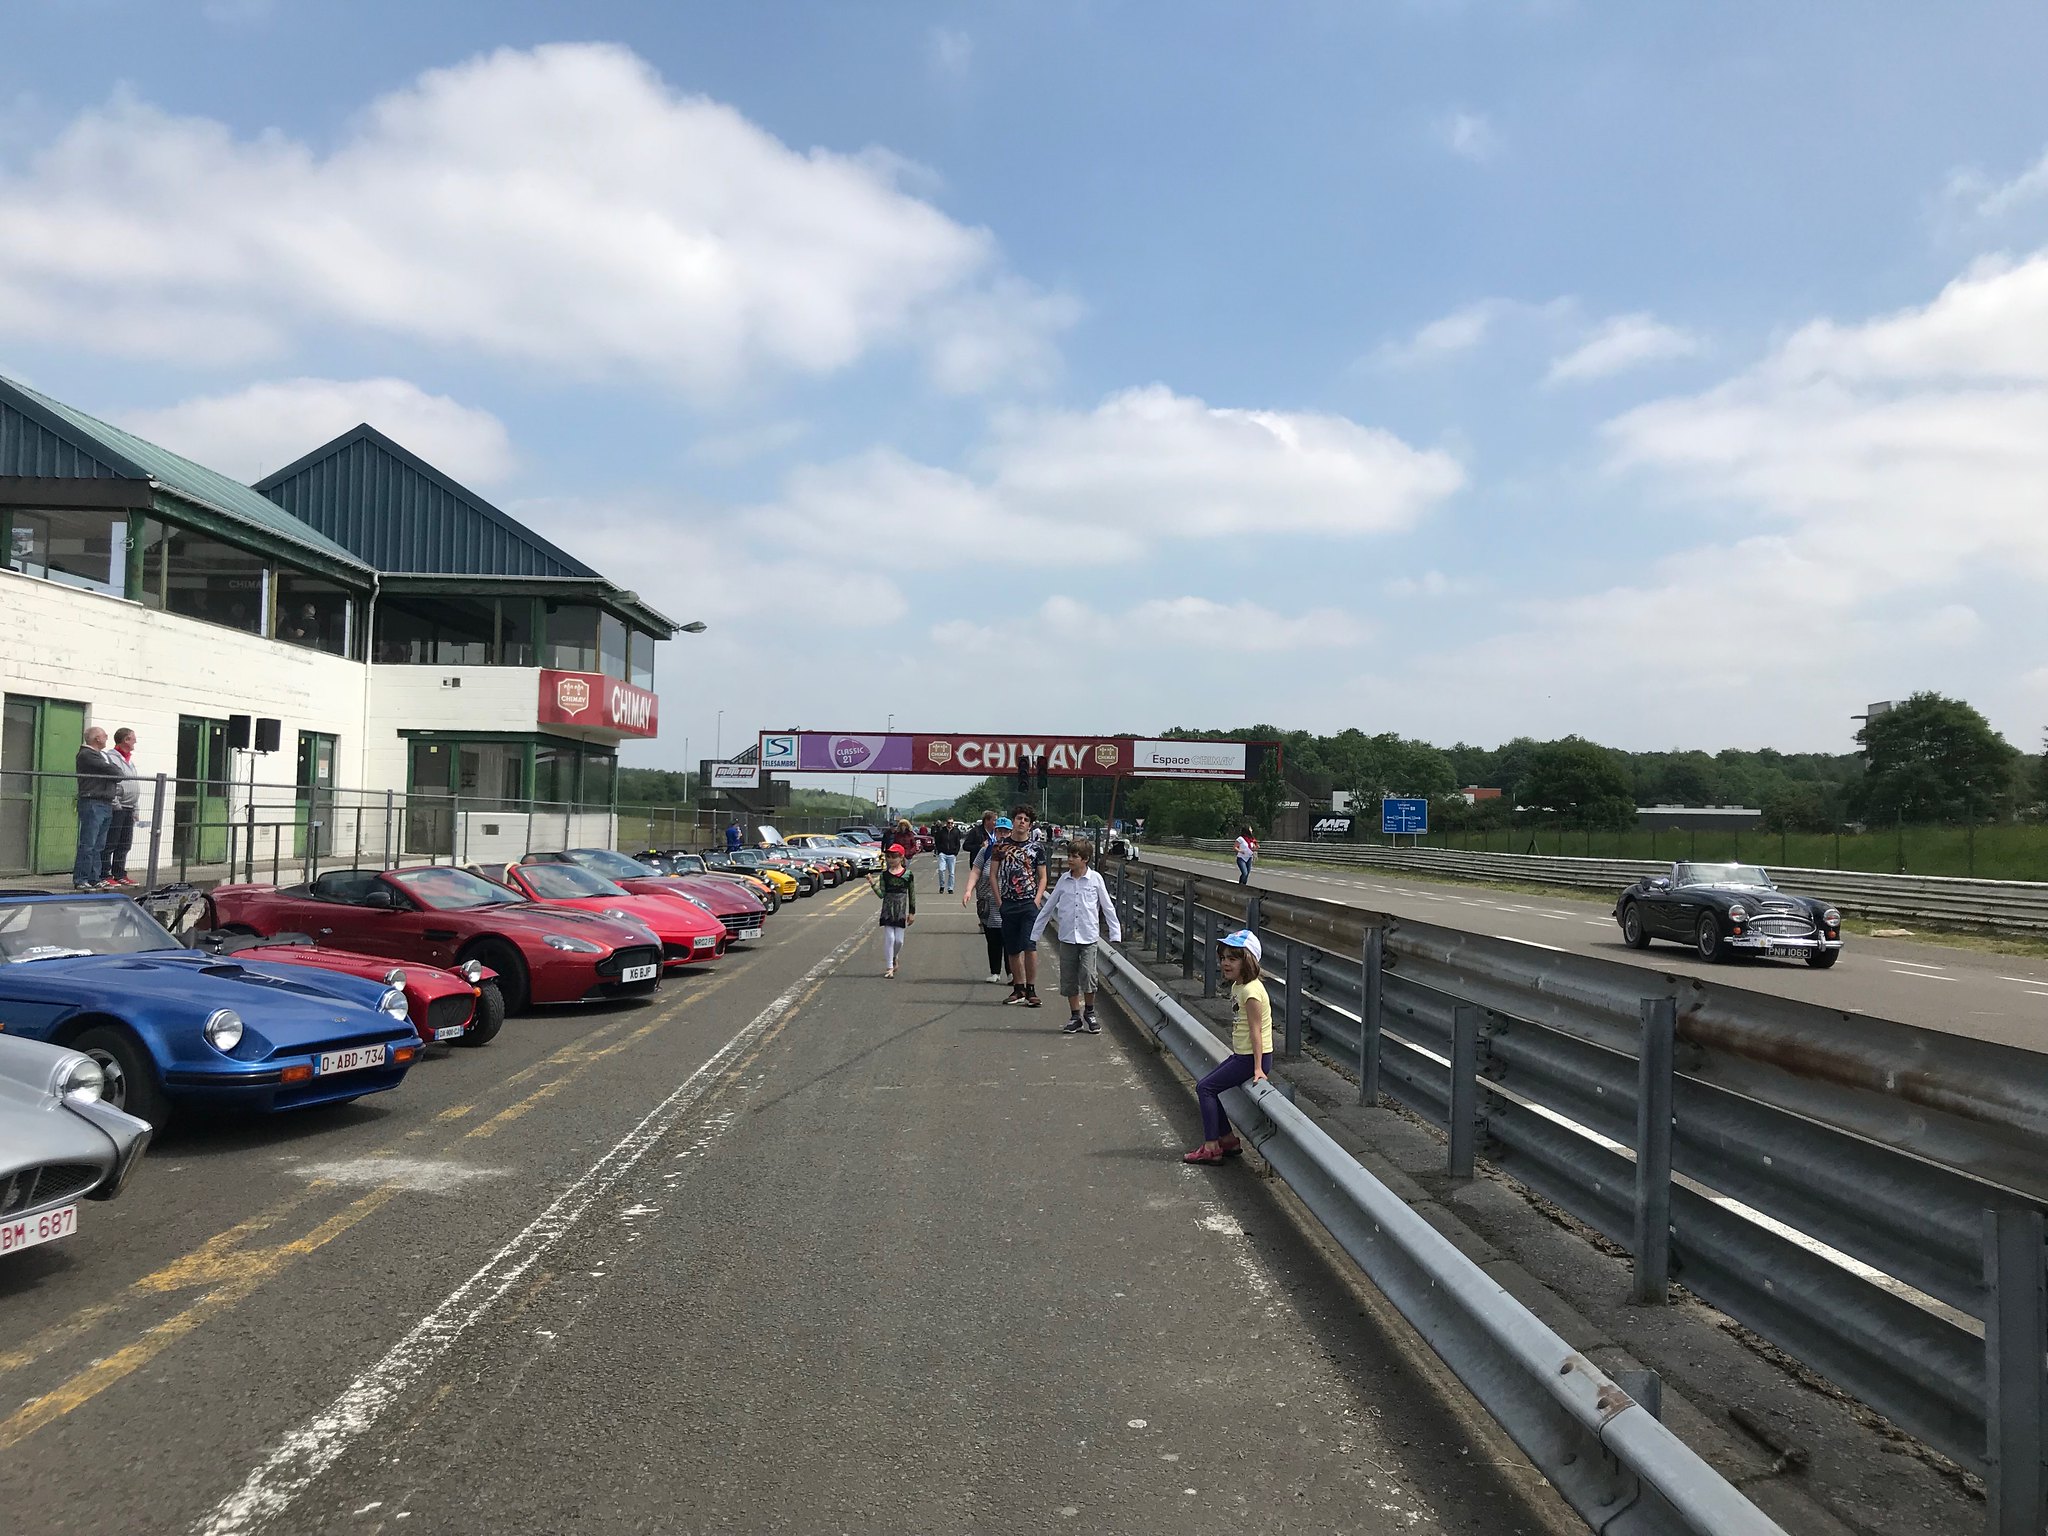 Laon Friday and Saturday Shots. by Charlieboy, on Flickr
EarlOfHazard said:
Awesome read of your work on the Merc. And the trip looked fab aswell !
Cheers! The trip was great!So, I hinted that I was heading over to Chimay! What I didn't detail was that it was part of a road rally! This isn't everyone's cup of tea and I must admit I had my hesitations about it! It's not like my mate or I have a stellar reputation for getting to places either! But, it's the taking part that counts, right? Maybe.
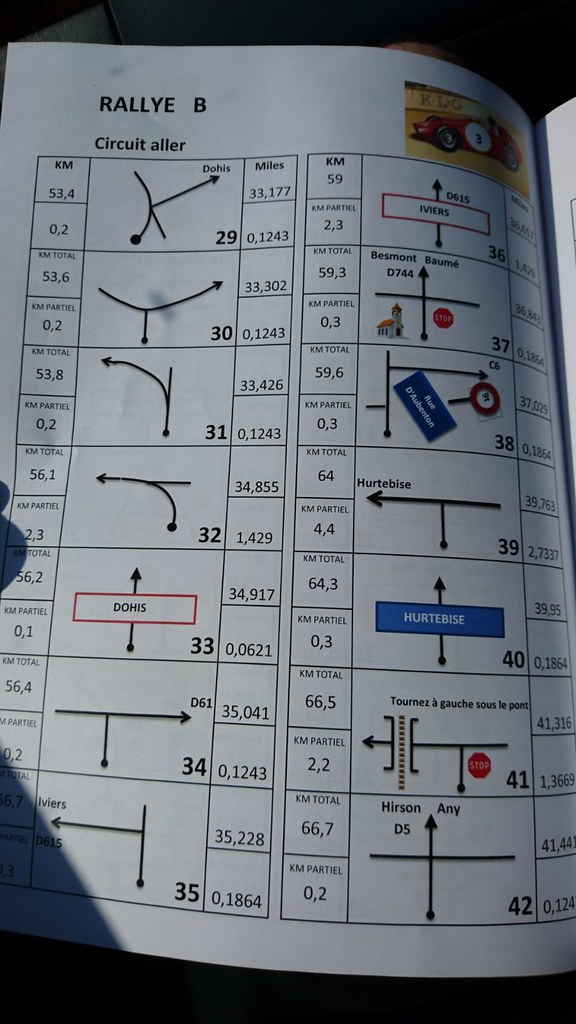 Chimay Shennagegans by Charlieboy, on Flickr
But in truth, it was actually pretty good! Yes there were some boring parts at times but these times are what you make them! It's about having a laugh, trusting your instincts when the bloke in front of you wonders off another way, and most of all, being fair! Which is why of course we switched the driving at various parts! I do have dull video footage of yours truly driving about the place but I'll save that for another time
. At least until my PC gets past the buffering part!But before we knew it, without really getting lost, we got to Chimay! And what a treat we were in for! You could almost tell the event was made a little for Brits! Upon completing the rally we got treated to a glass of Chimay at the end! No, that is no joke! Oh, and a sandwich! But I was hoping to escape some public matters back at home! It seems you can't always escape them all however! But we all like different things eh? It seemed the Royal Wedding being on the big screen did attract over various people. From France, Belgium and of course, the UK.
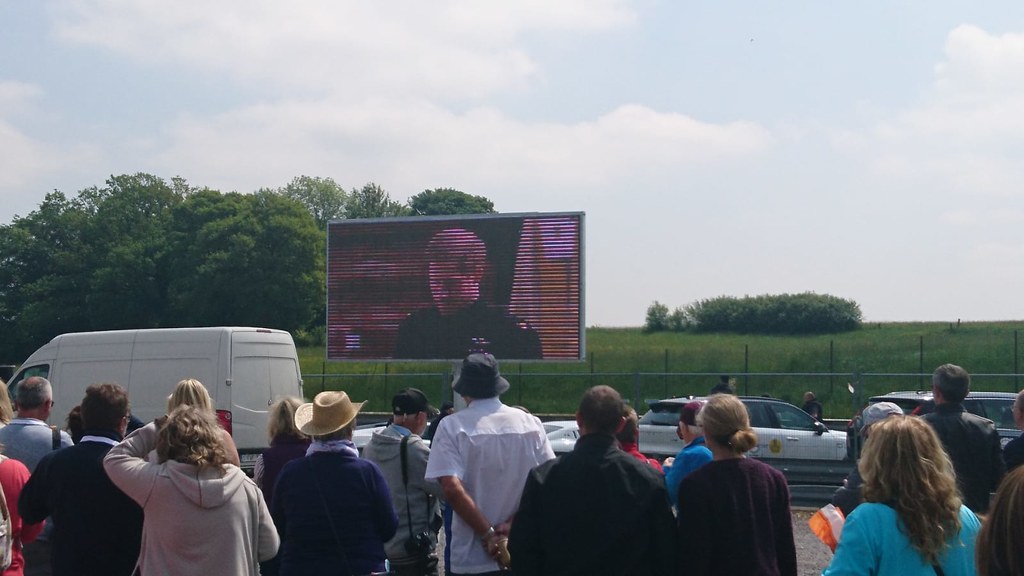 Chimay Shennagegans by Charlieboy, on Flickr
But, I'm not writing about this to comment about the lady from Suits. No no no. I'm here to talk about why all of us made the pilgramage over to Belgium! Chimay, the race circuit and the cars! And man, there were some cars there! It's almost hard to know where to start from!
Firstly, I did feel sorry for this Jag owner! It overheated just outside of the entrance! But why would you try to restart and overheated engine, especially in slow moving traffic! Thankfully, others thought the same and pushed him to the side of the road where that could be fixed later. Trust a Jag to show the side up! The other Jags seemed fine I must say. Including one I will mention later
.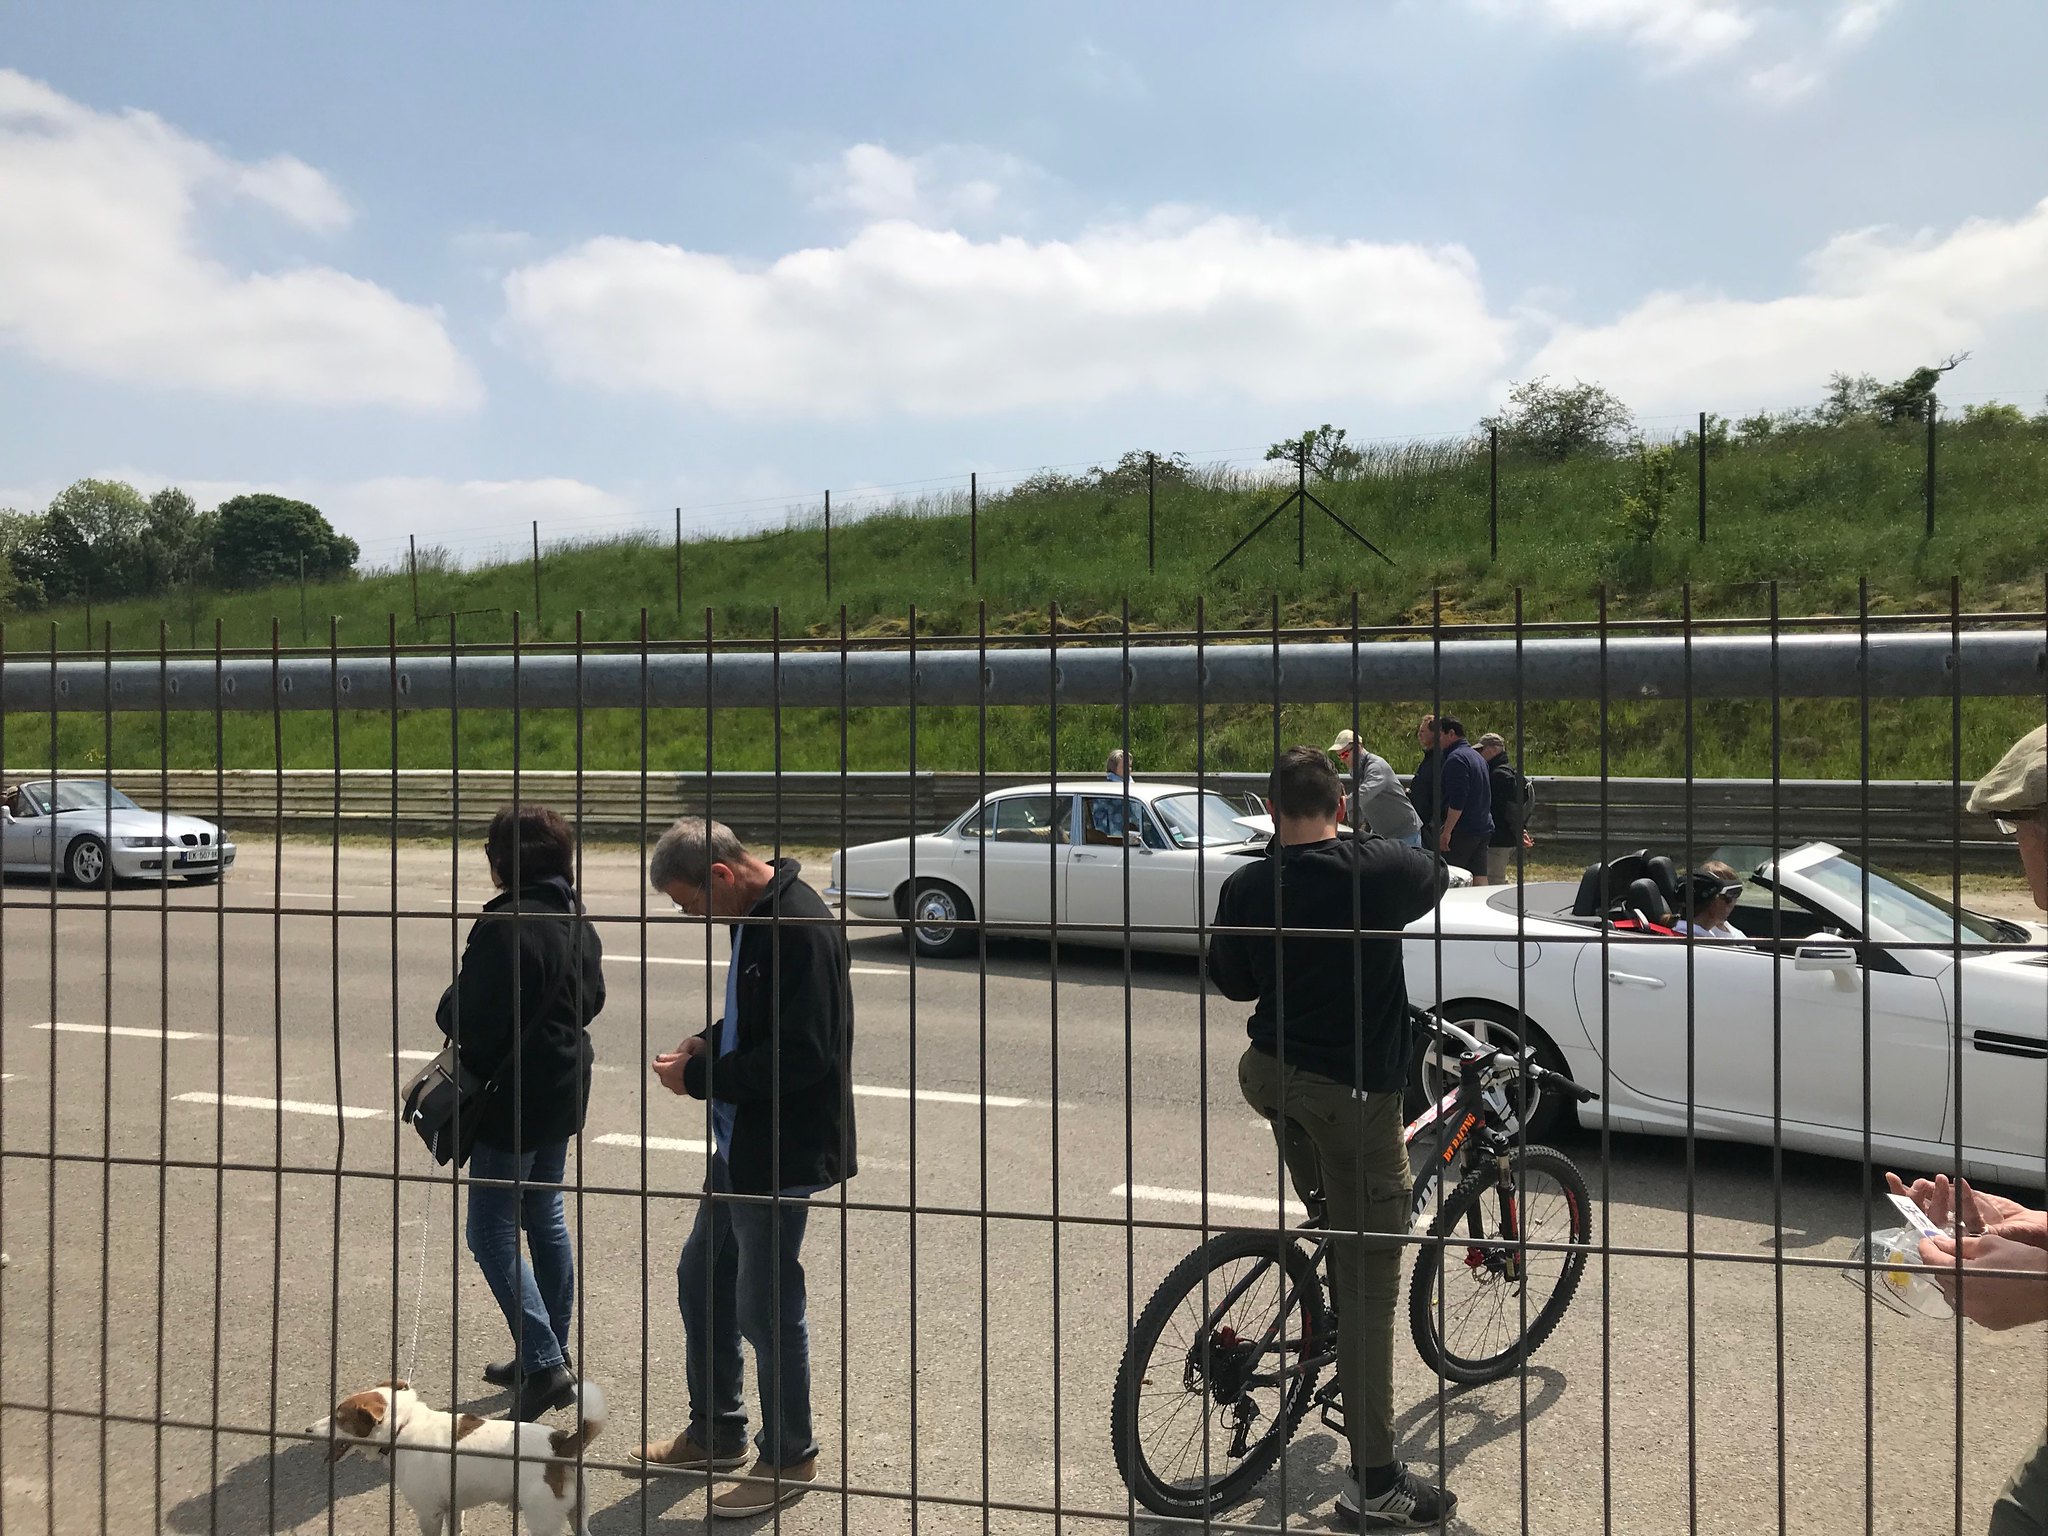 Laon Friday and Saturday Shots. by Charlieboy, on Flickr
I mean, it was only a field full of cars. Really:
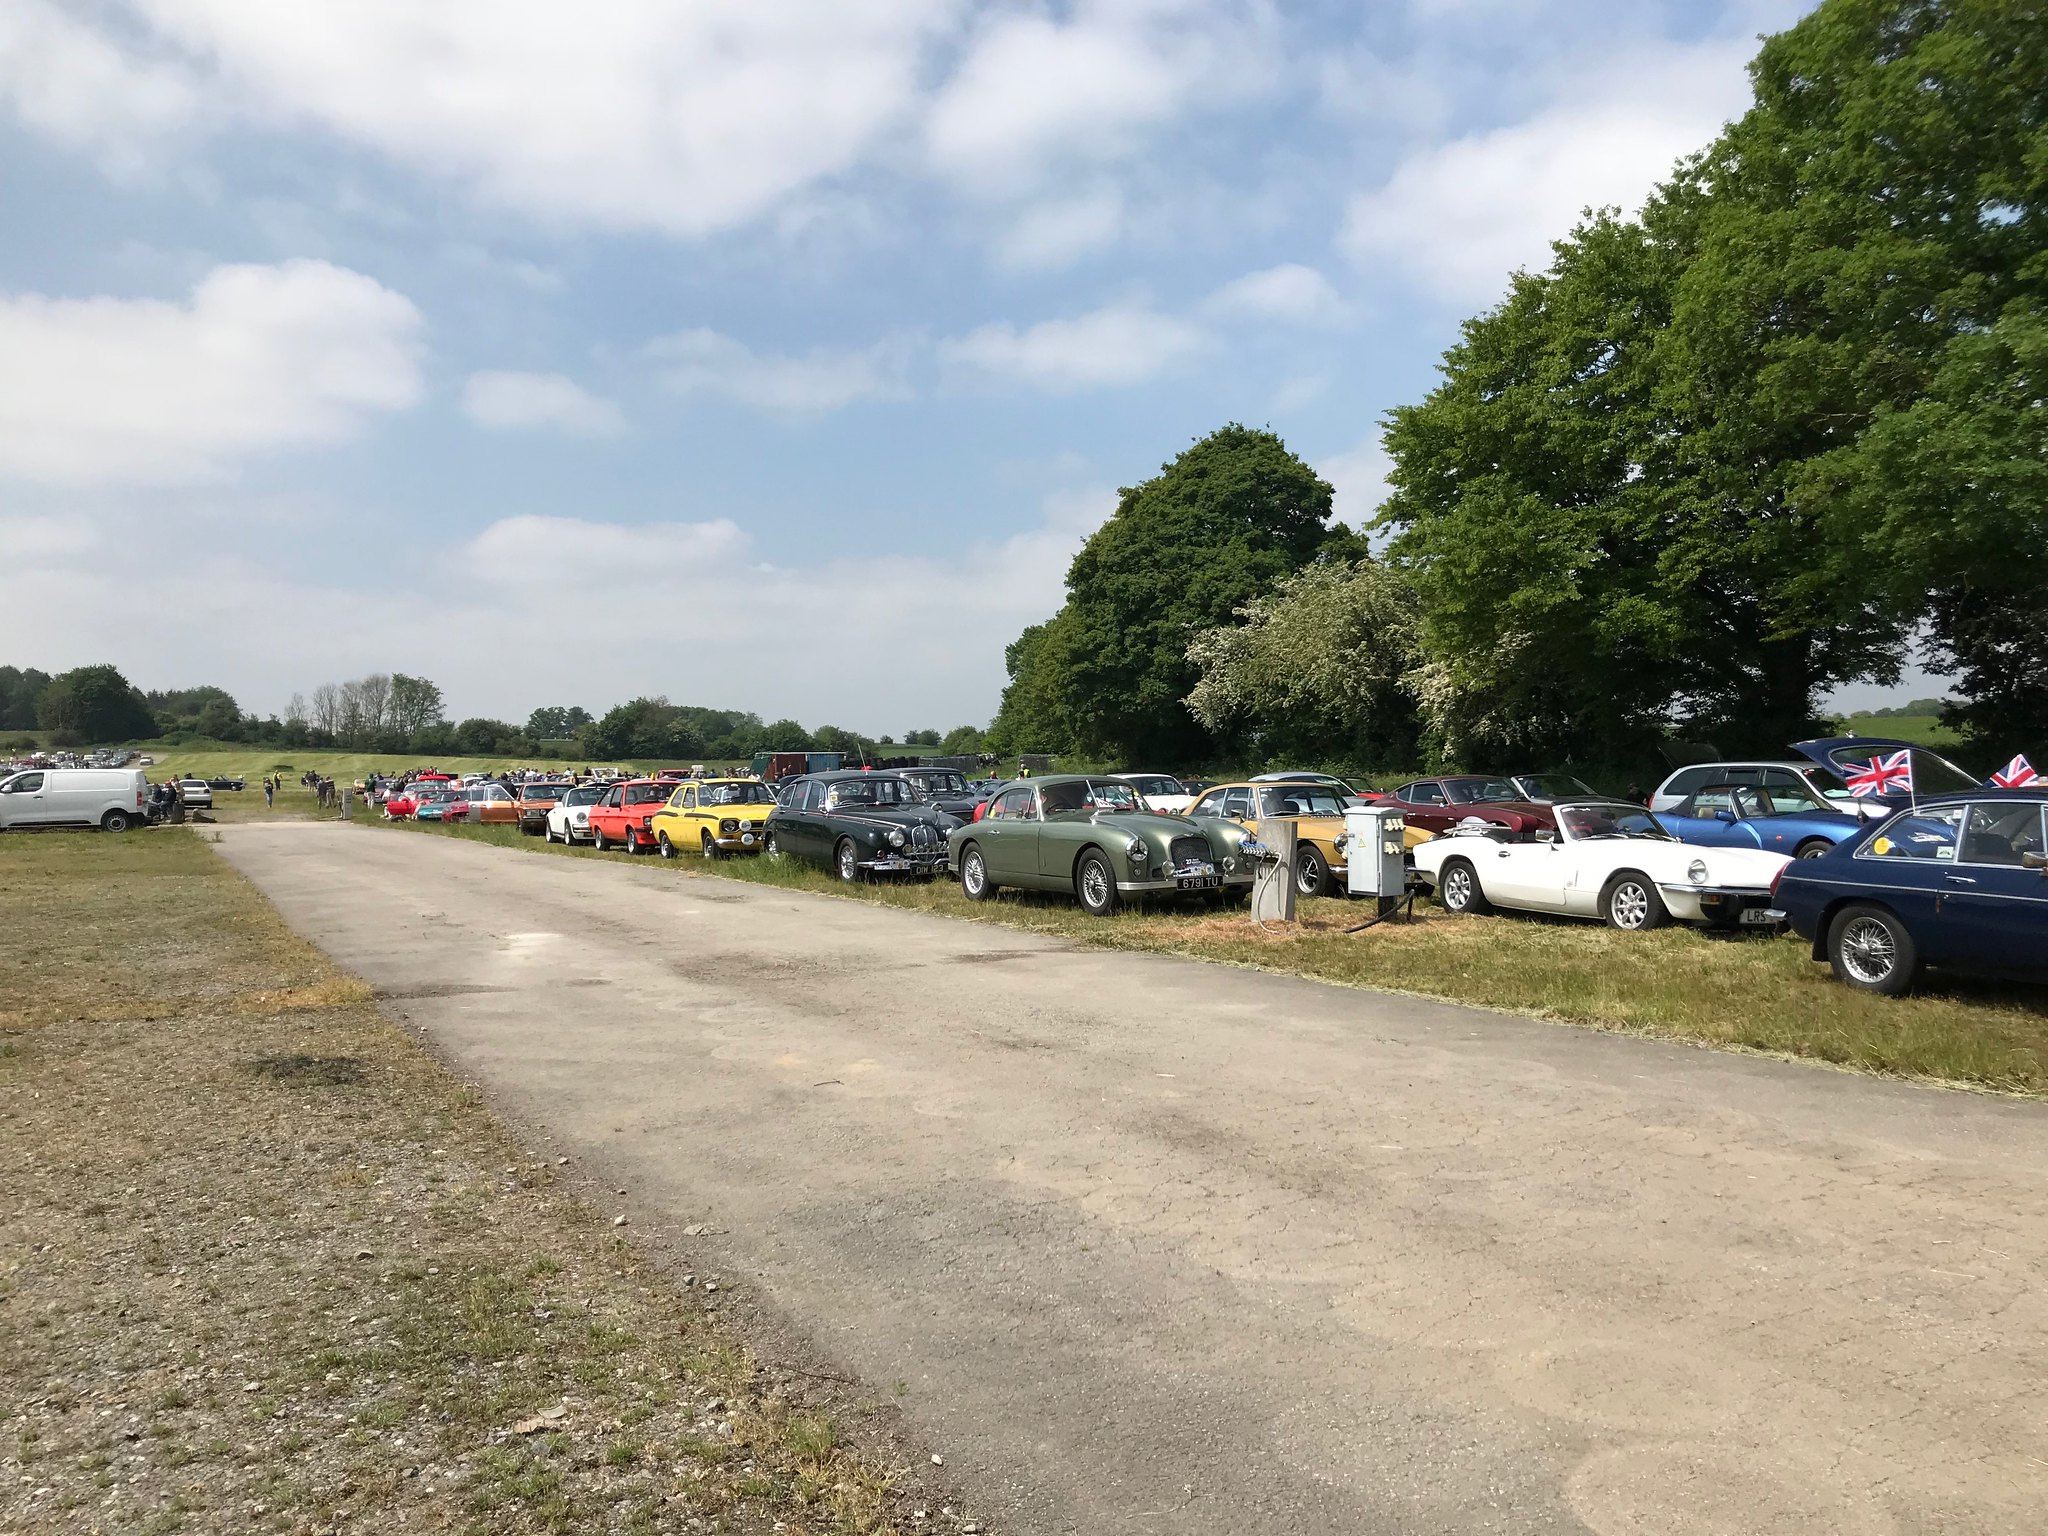 Laon Friday and Saturday Shots. by Charlieboy, on Flickr
OK, I lied:
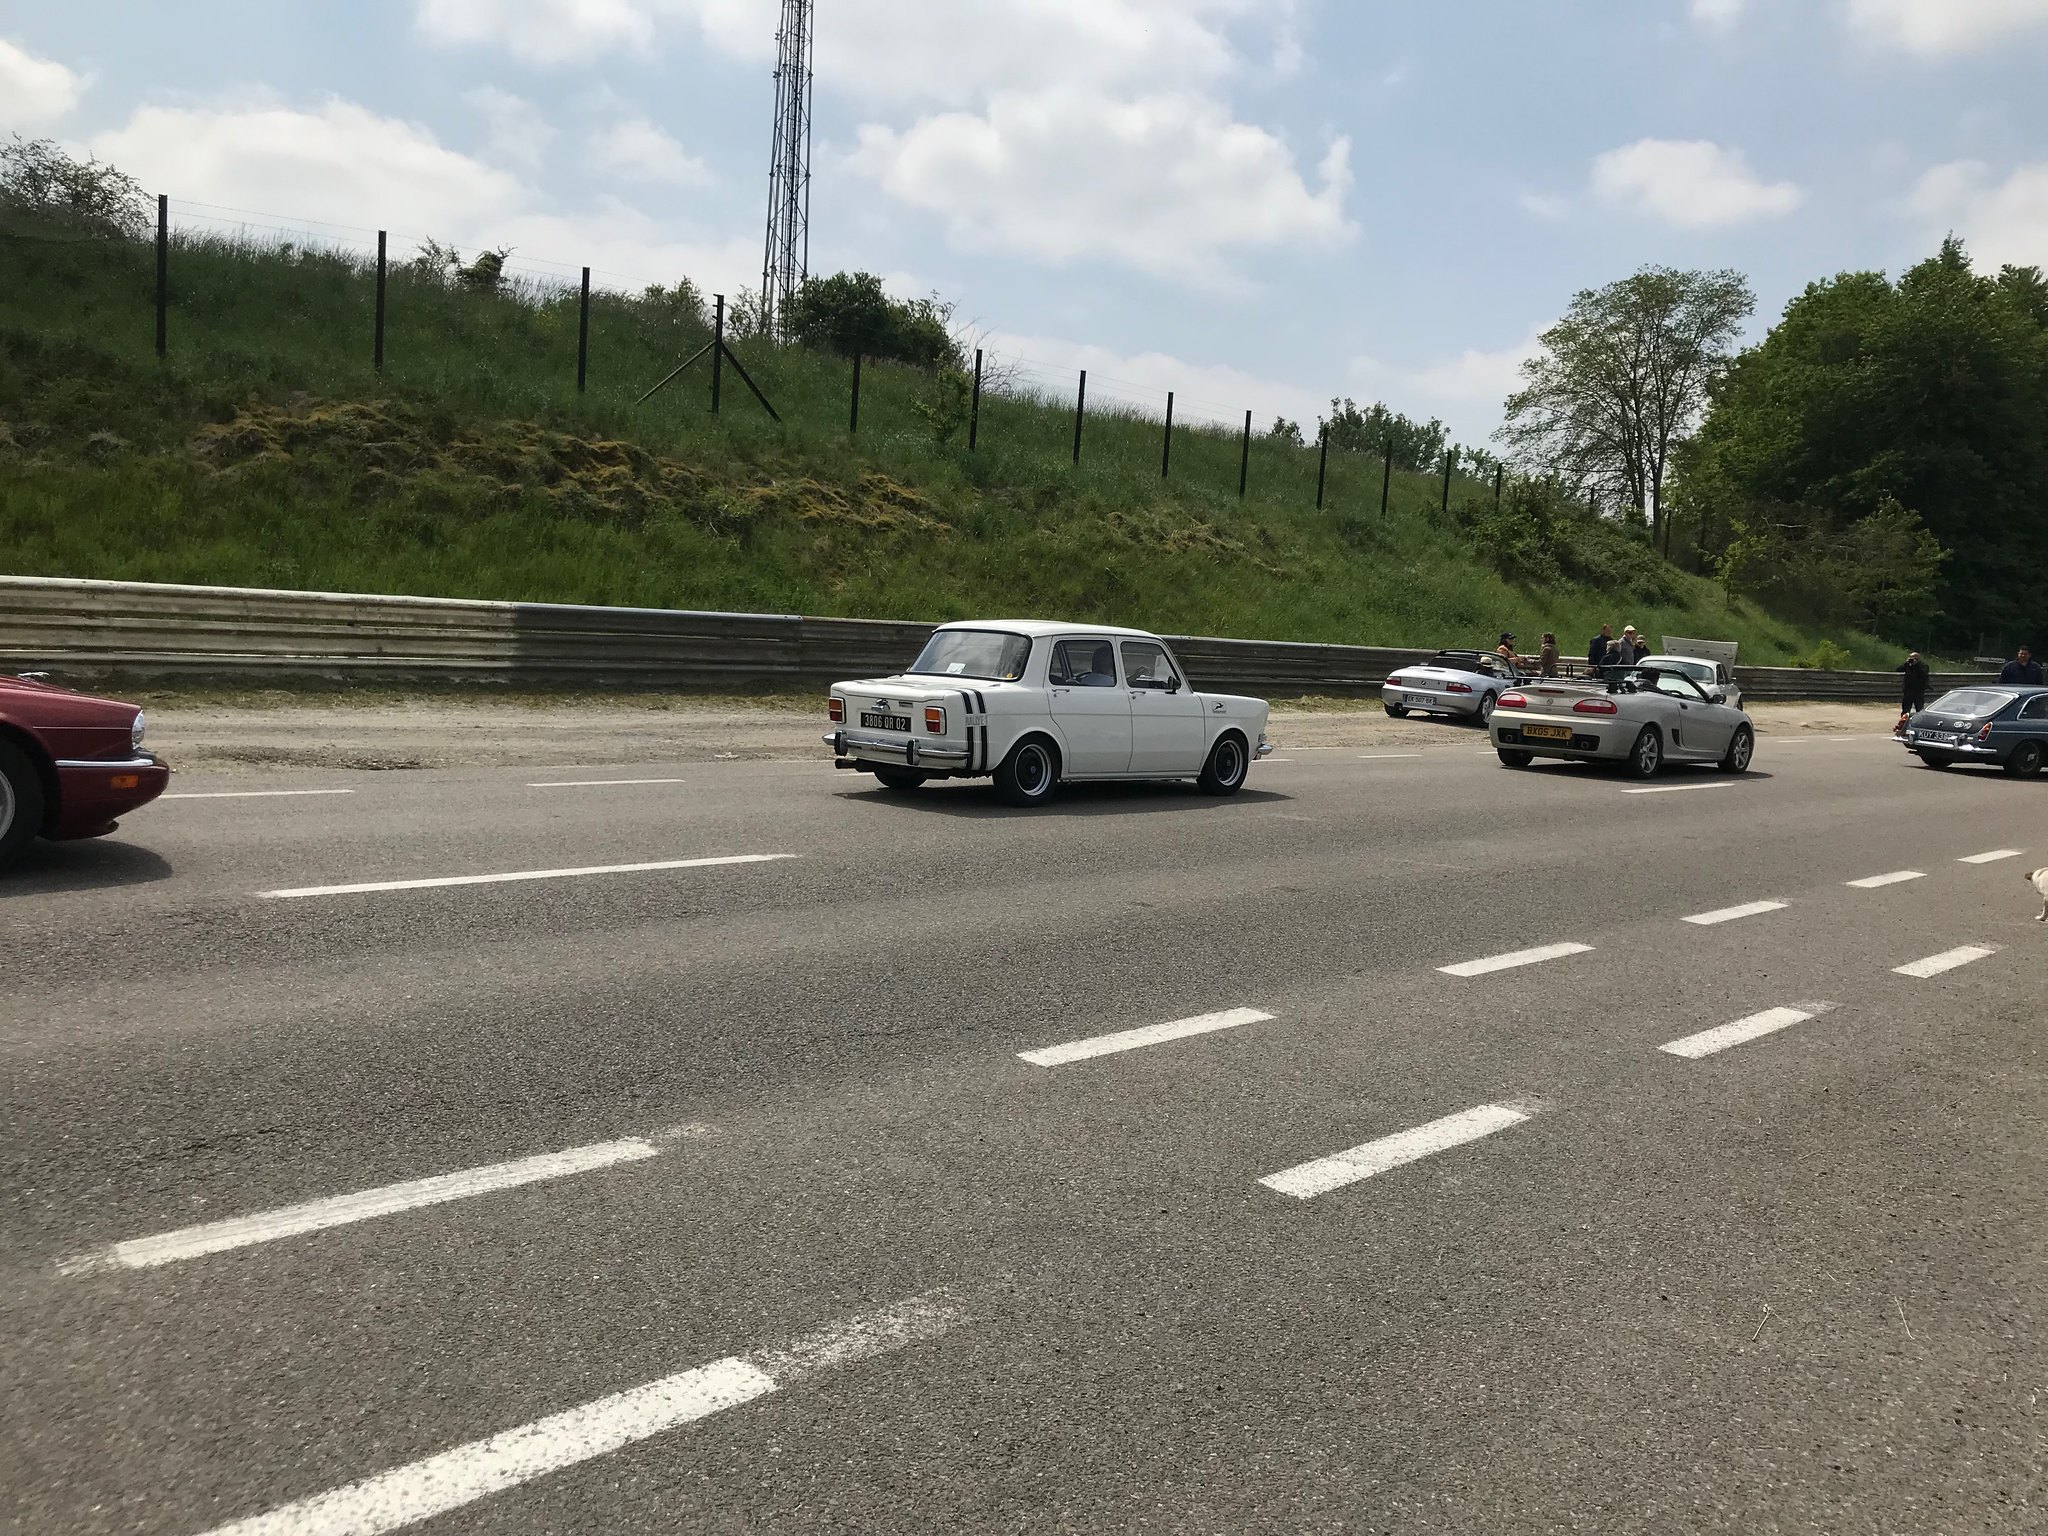 Laon Friday and Saturday Shots. by Charlieboy, on Flickr
While you had a plethora of BL and Ford stuff present plenty of Renaults and Simcas were around!
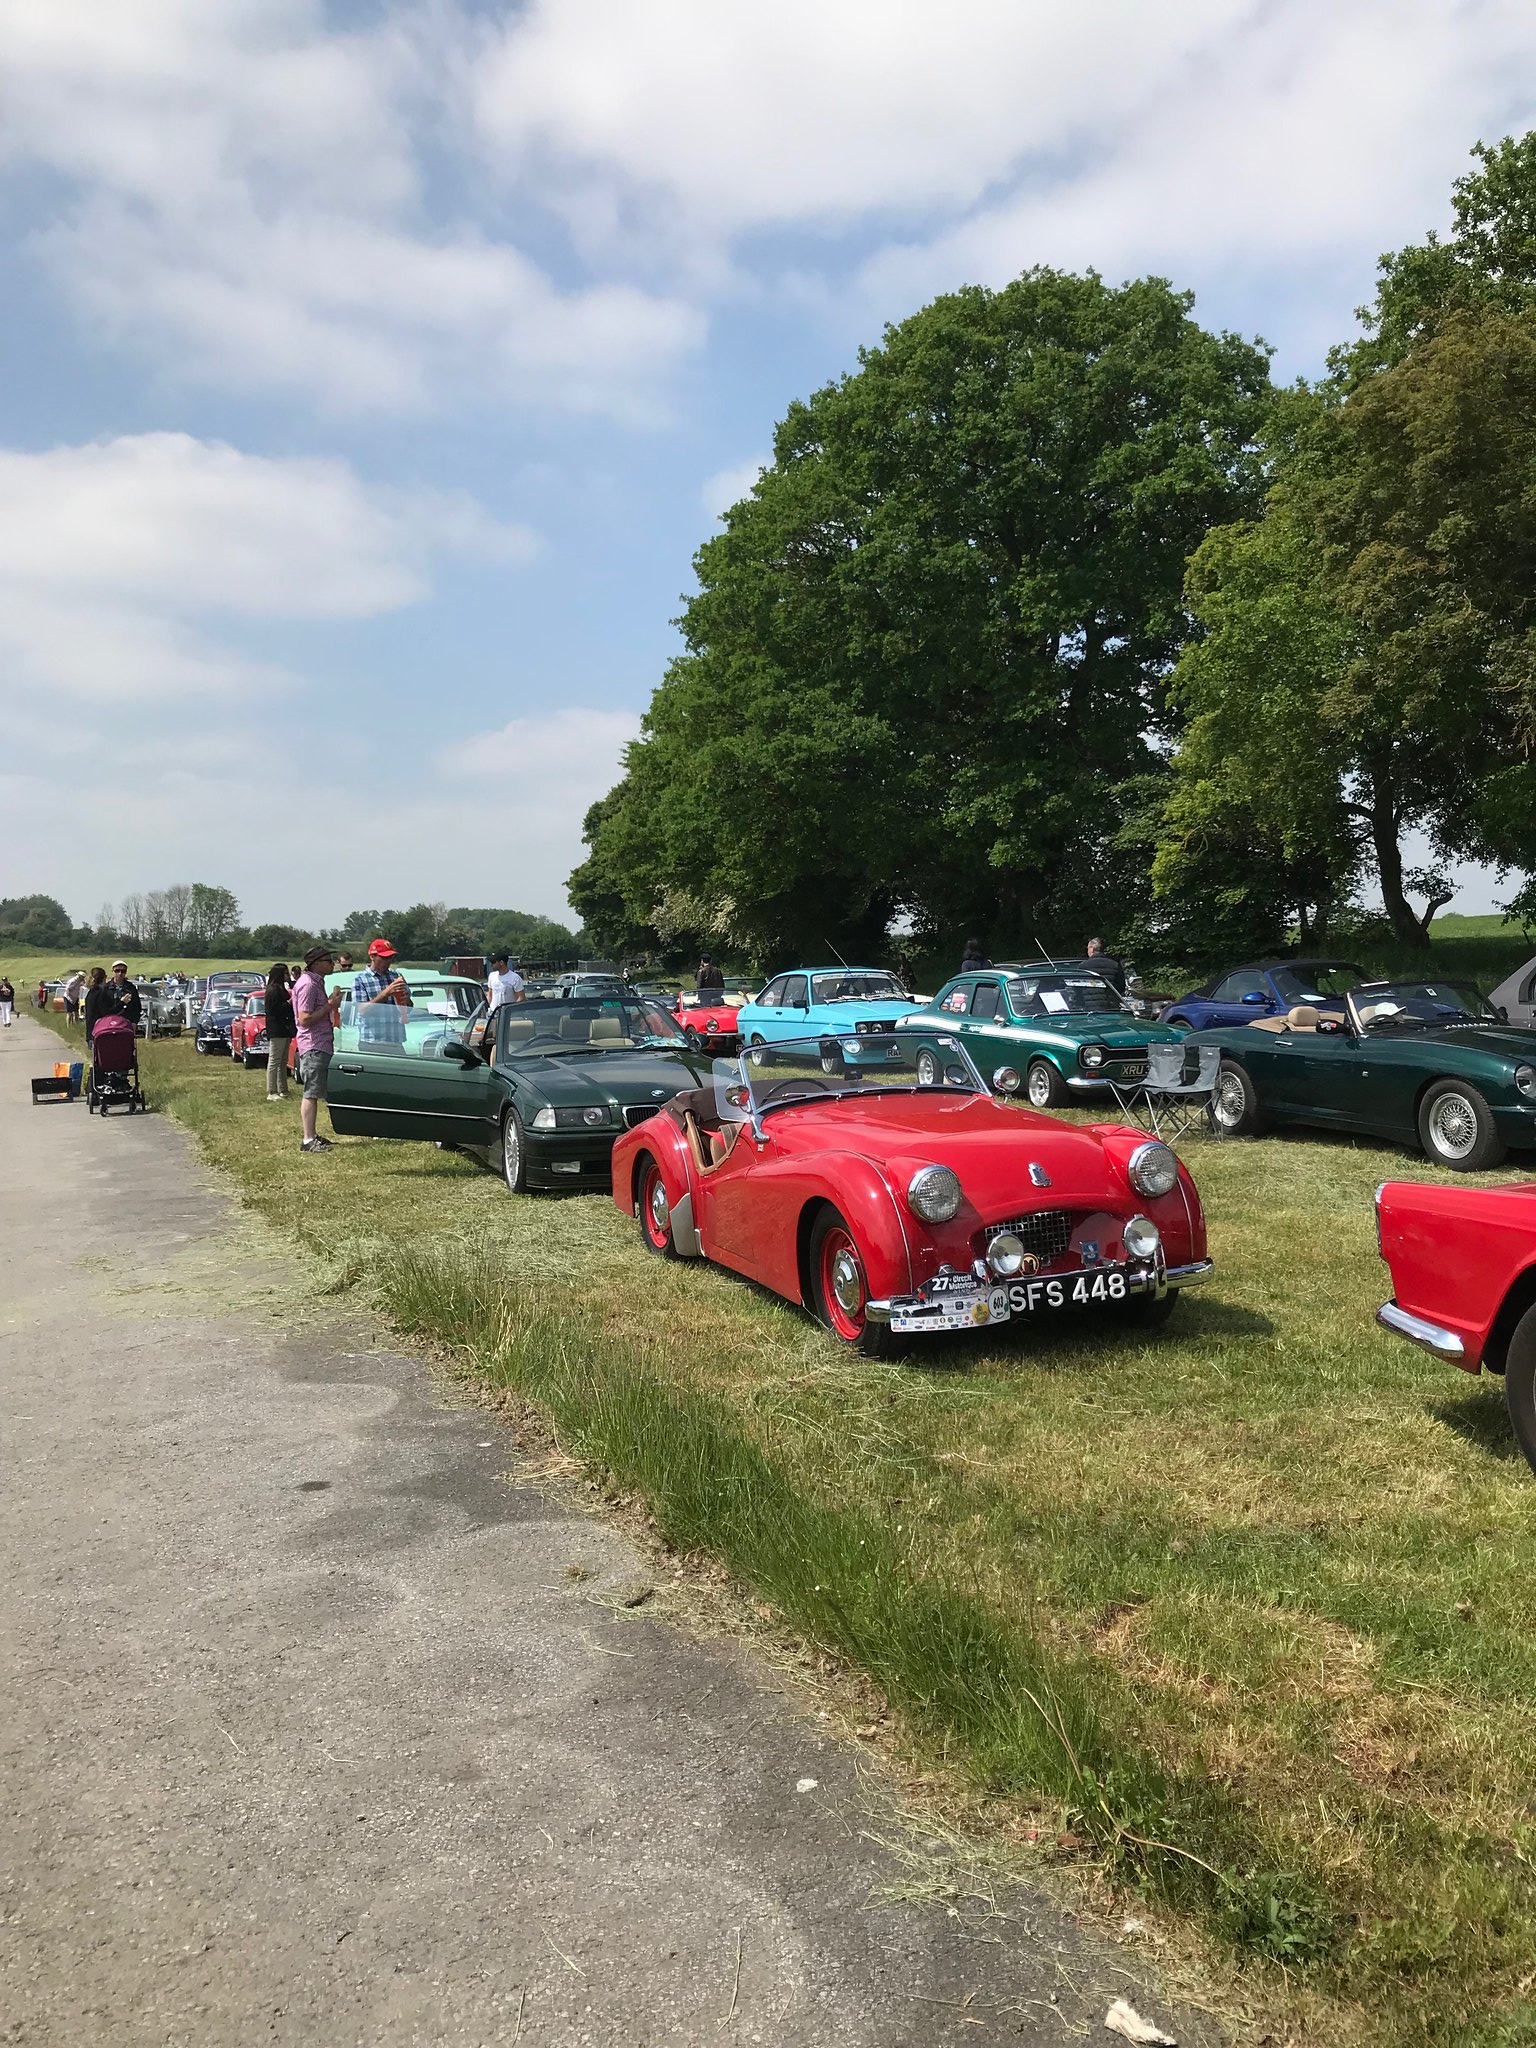 Laon Friday and Saturday Shots. by Charlieboy, on Flickr
This Peugeot was sublime to look at! What a quirky thing!
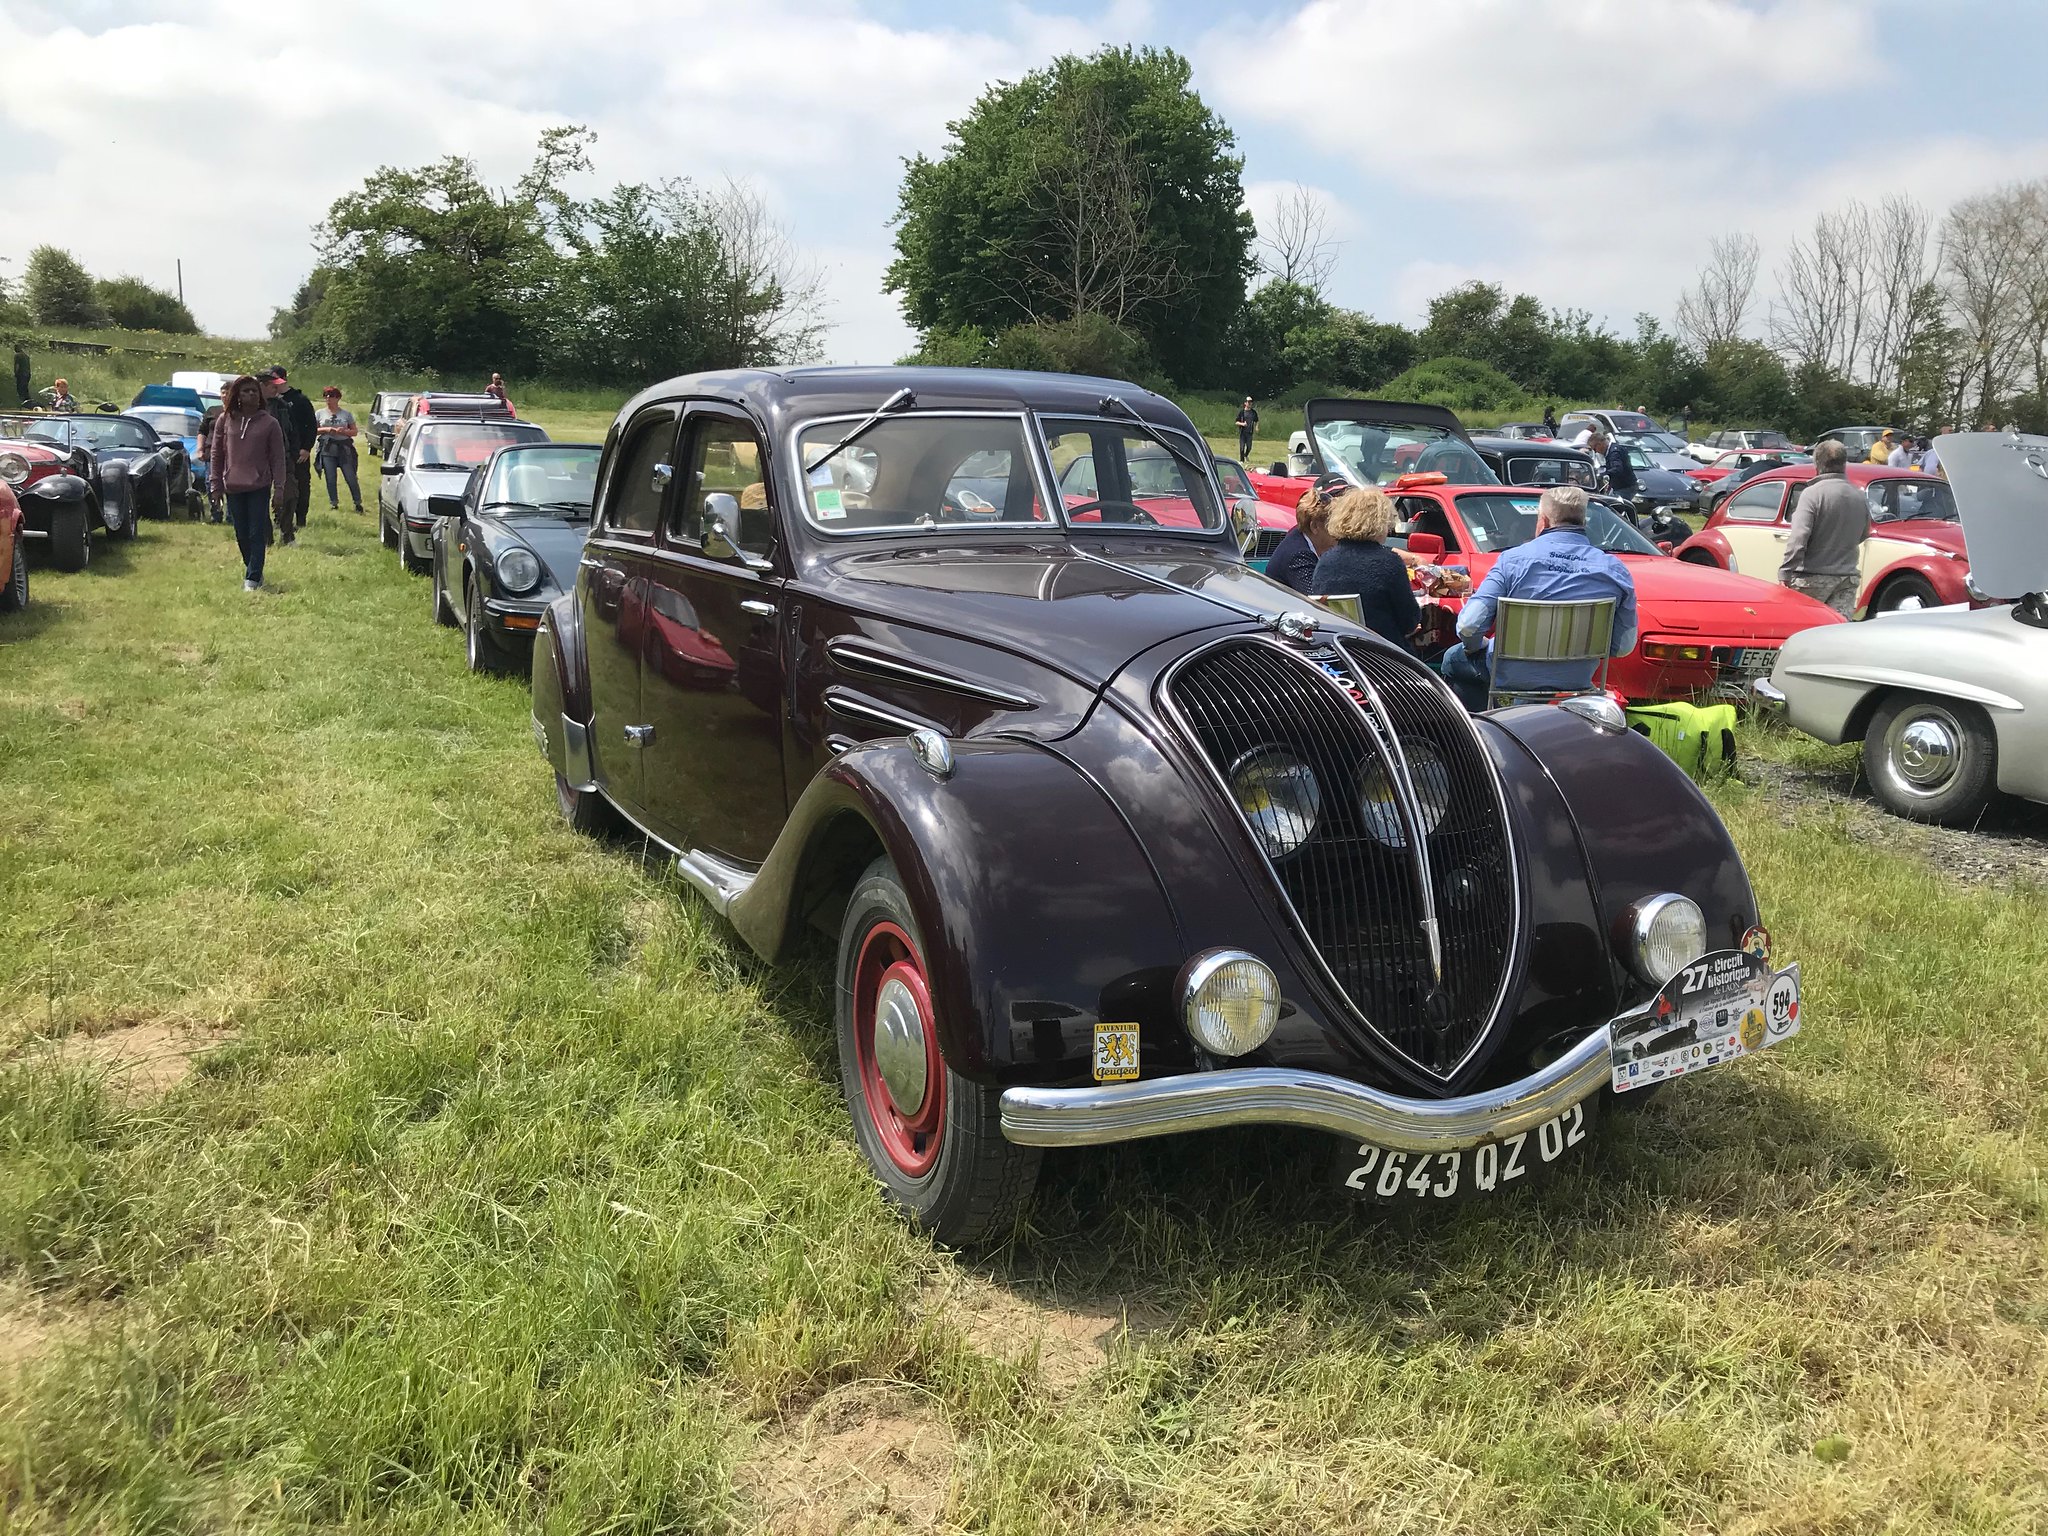 Laon Friday and Saturday Shots. by Charlieboy, on Flickr
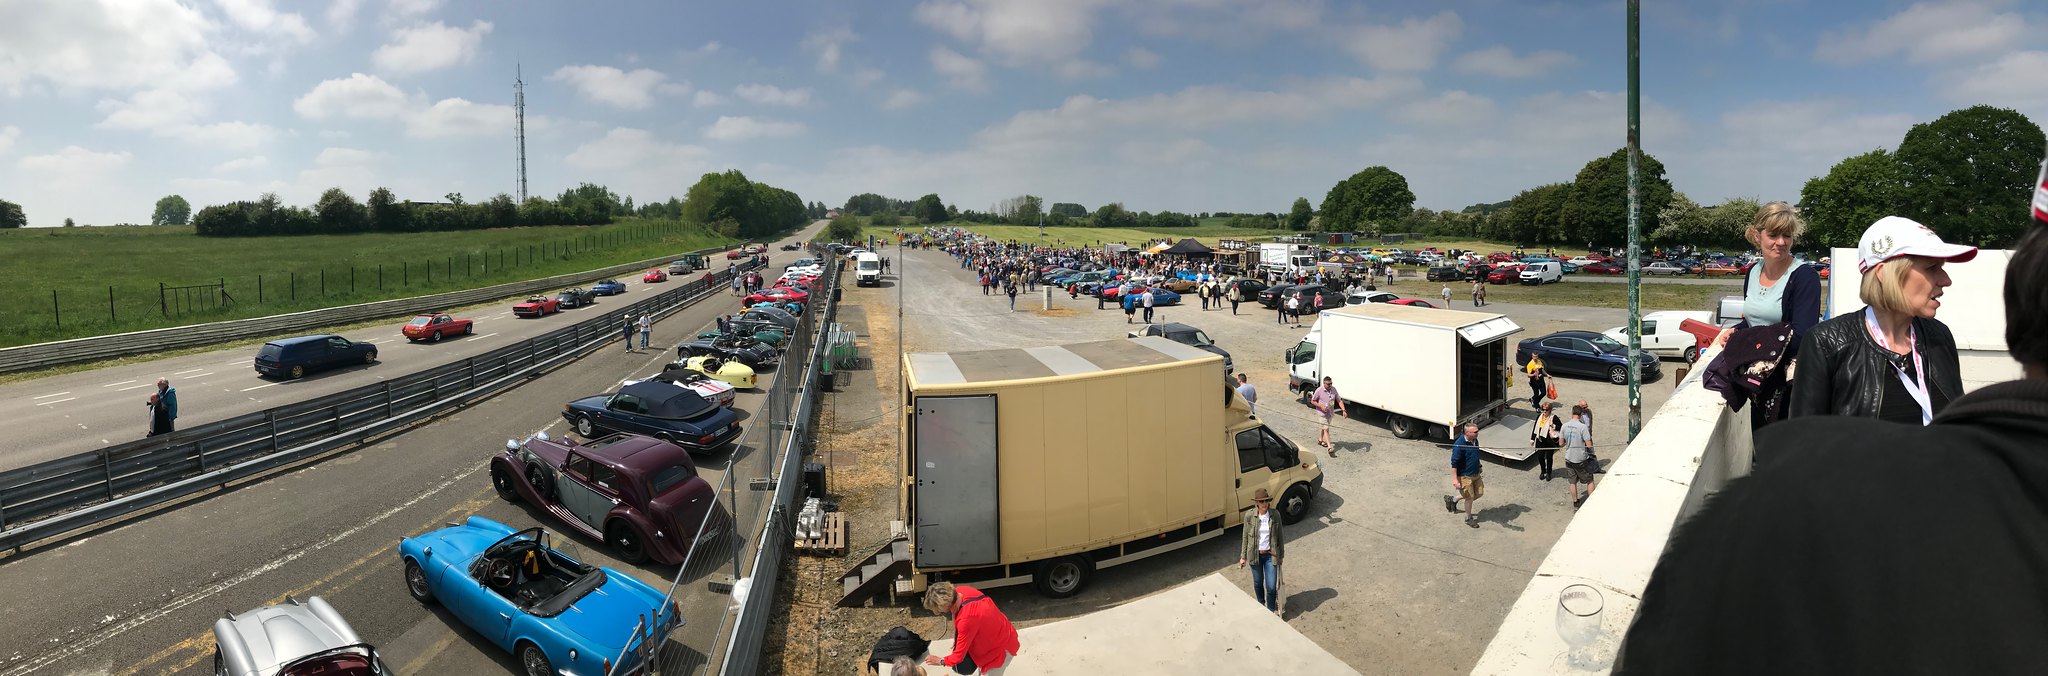 Laon Friday and Saturday Shots. by Charlieboy, on Flickr
If you think the British made quirky sports cars the French were of course the best at it!
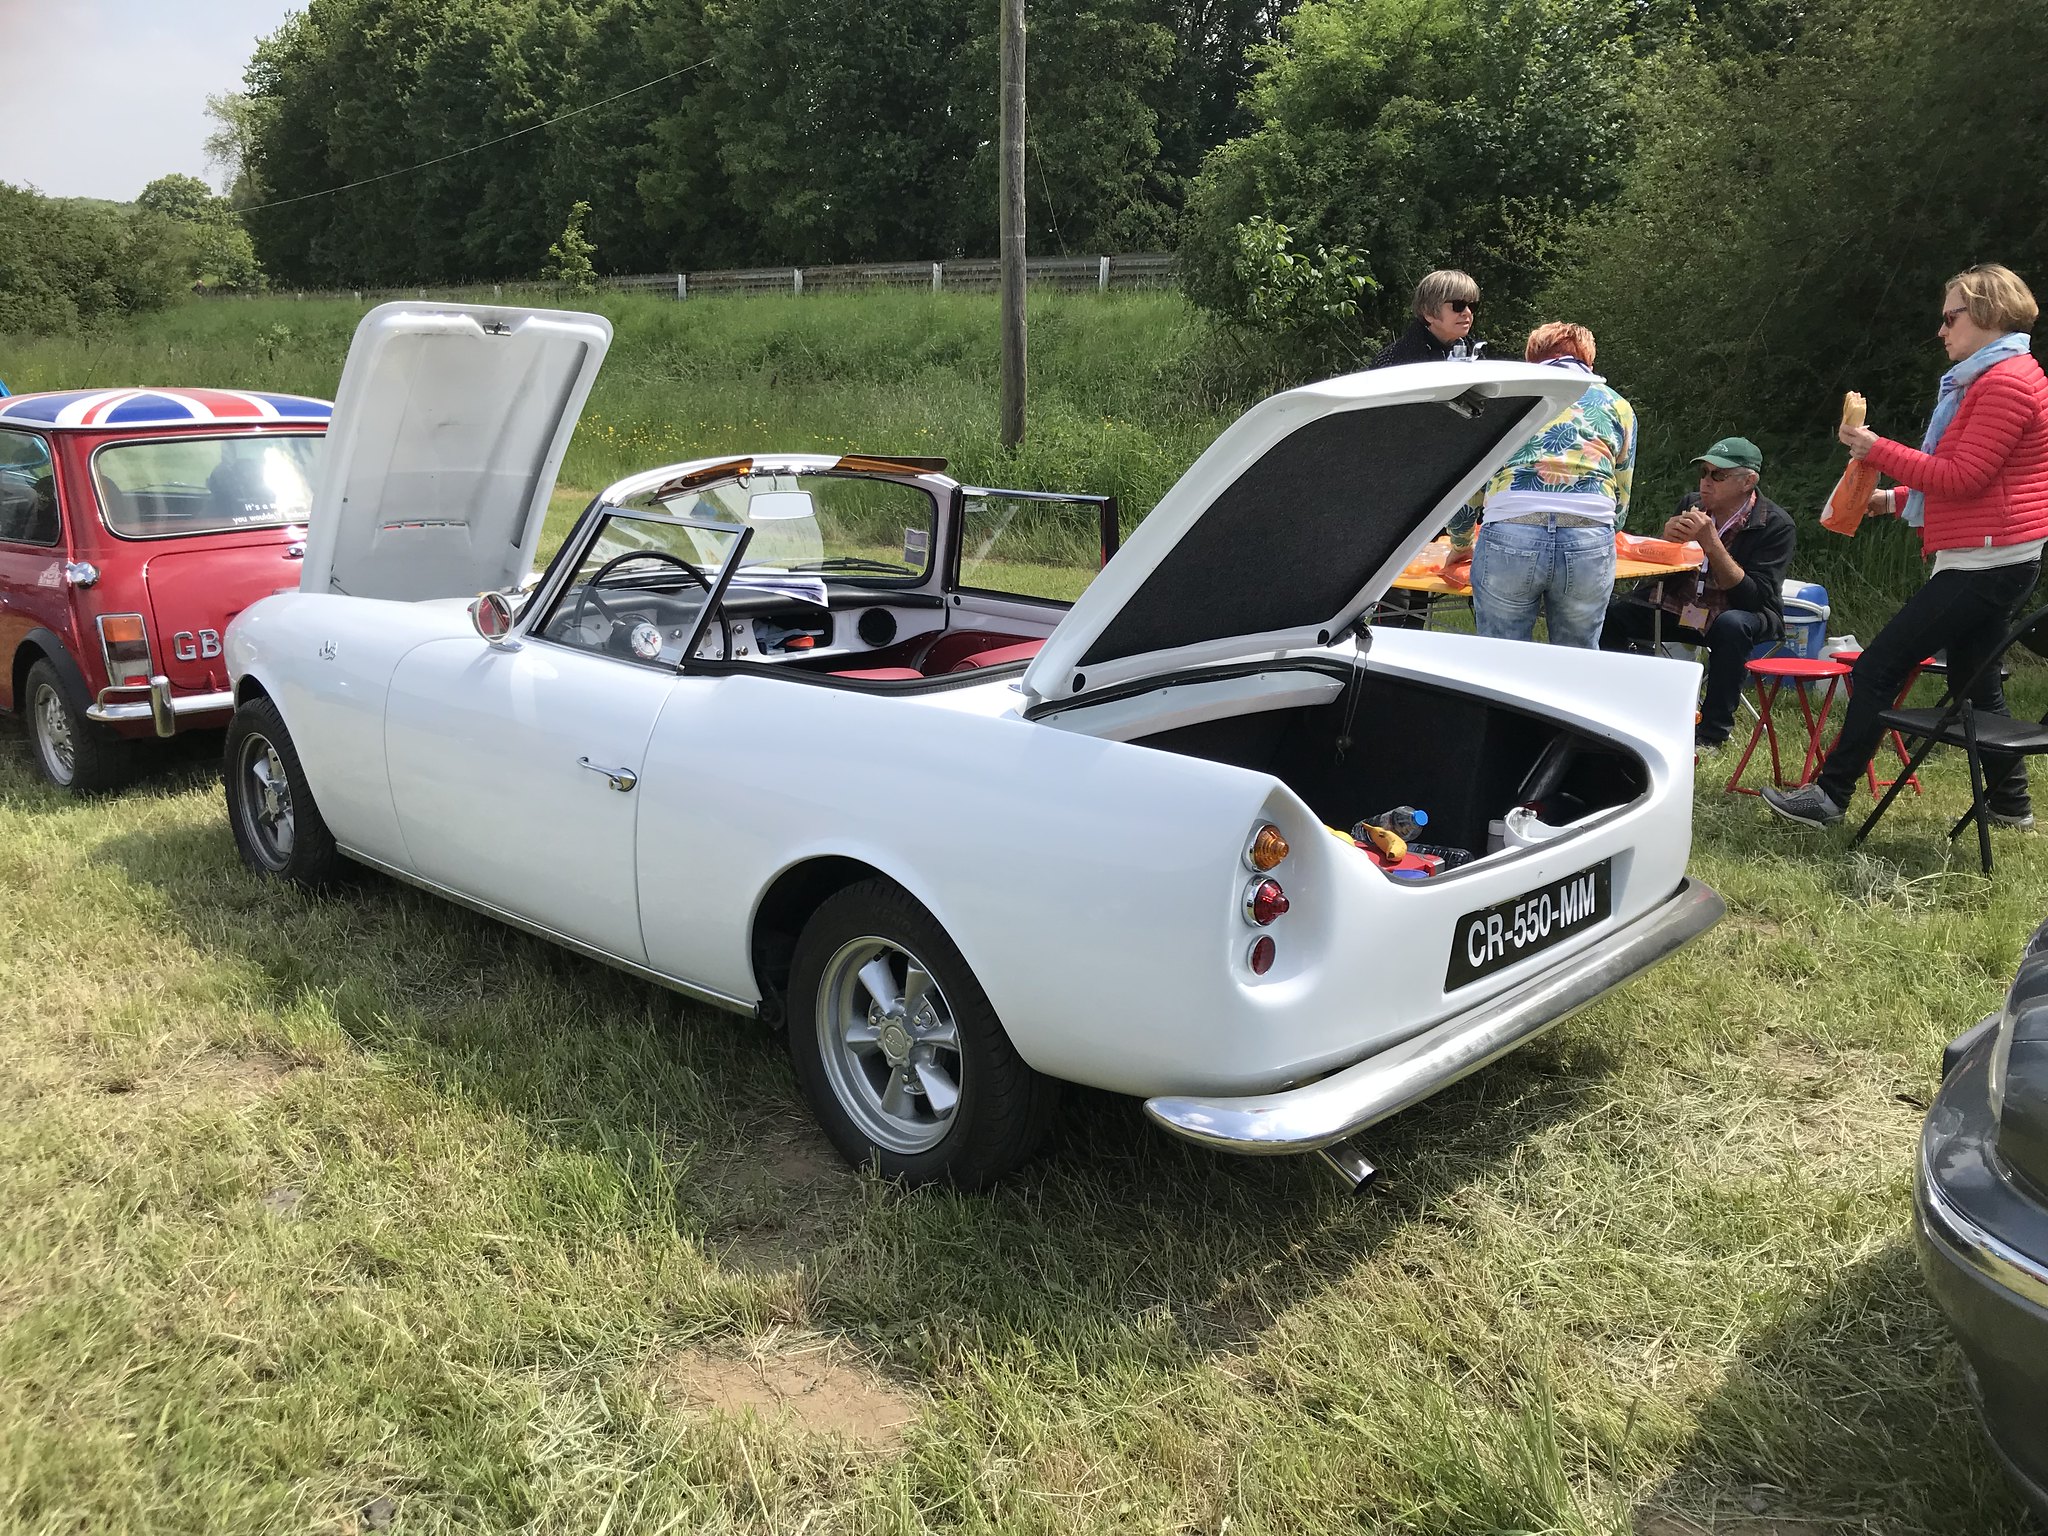 Laon by Charlieboy, on Flickr
Basic Motoring at its best! But which is it for you? The elegant 2CV or the more "fun" Mehari? You have to love how the French can lay a meal on the back of a car and do a great lunch!! It's something more of us should do at shows!
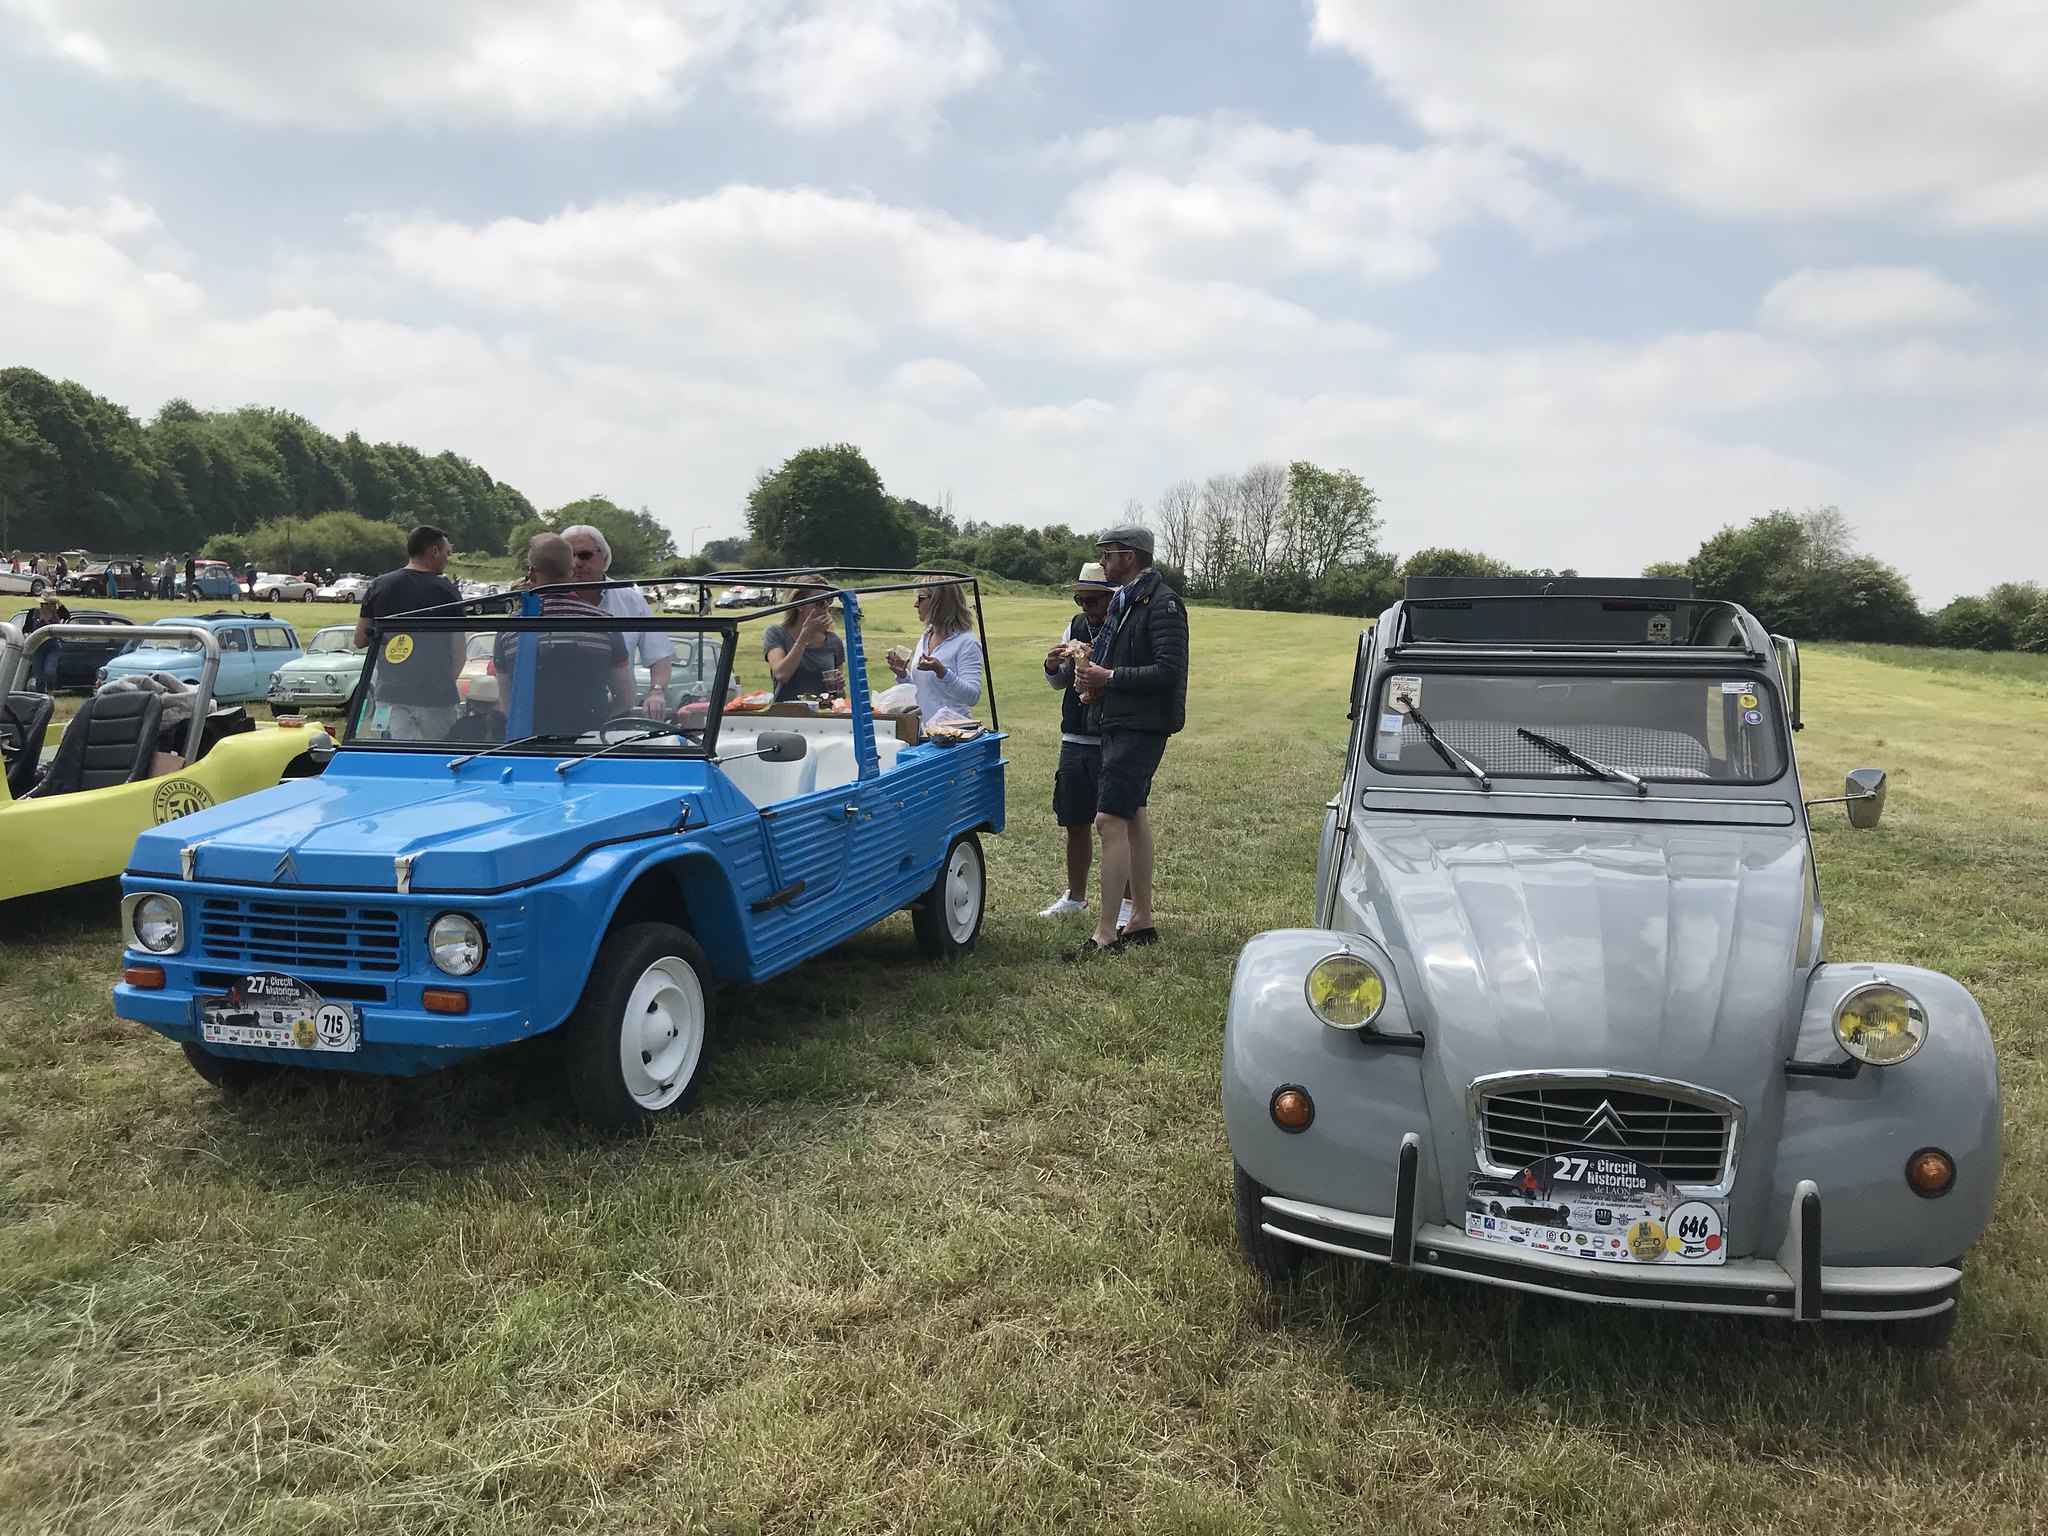 Laon by Charlieboy, on Flickr
But I'm leaving the highlight of the show for me. A truly wonderful Simplex made it down! It had people guessing how many cylinders it had and what it even was! But wow, just look at that! And yes, the bloke really did drove that from Laon to Chimay and stuck to the route! Many hero points to many that!
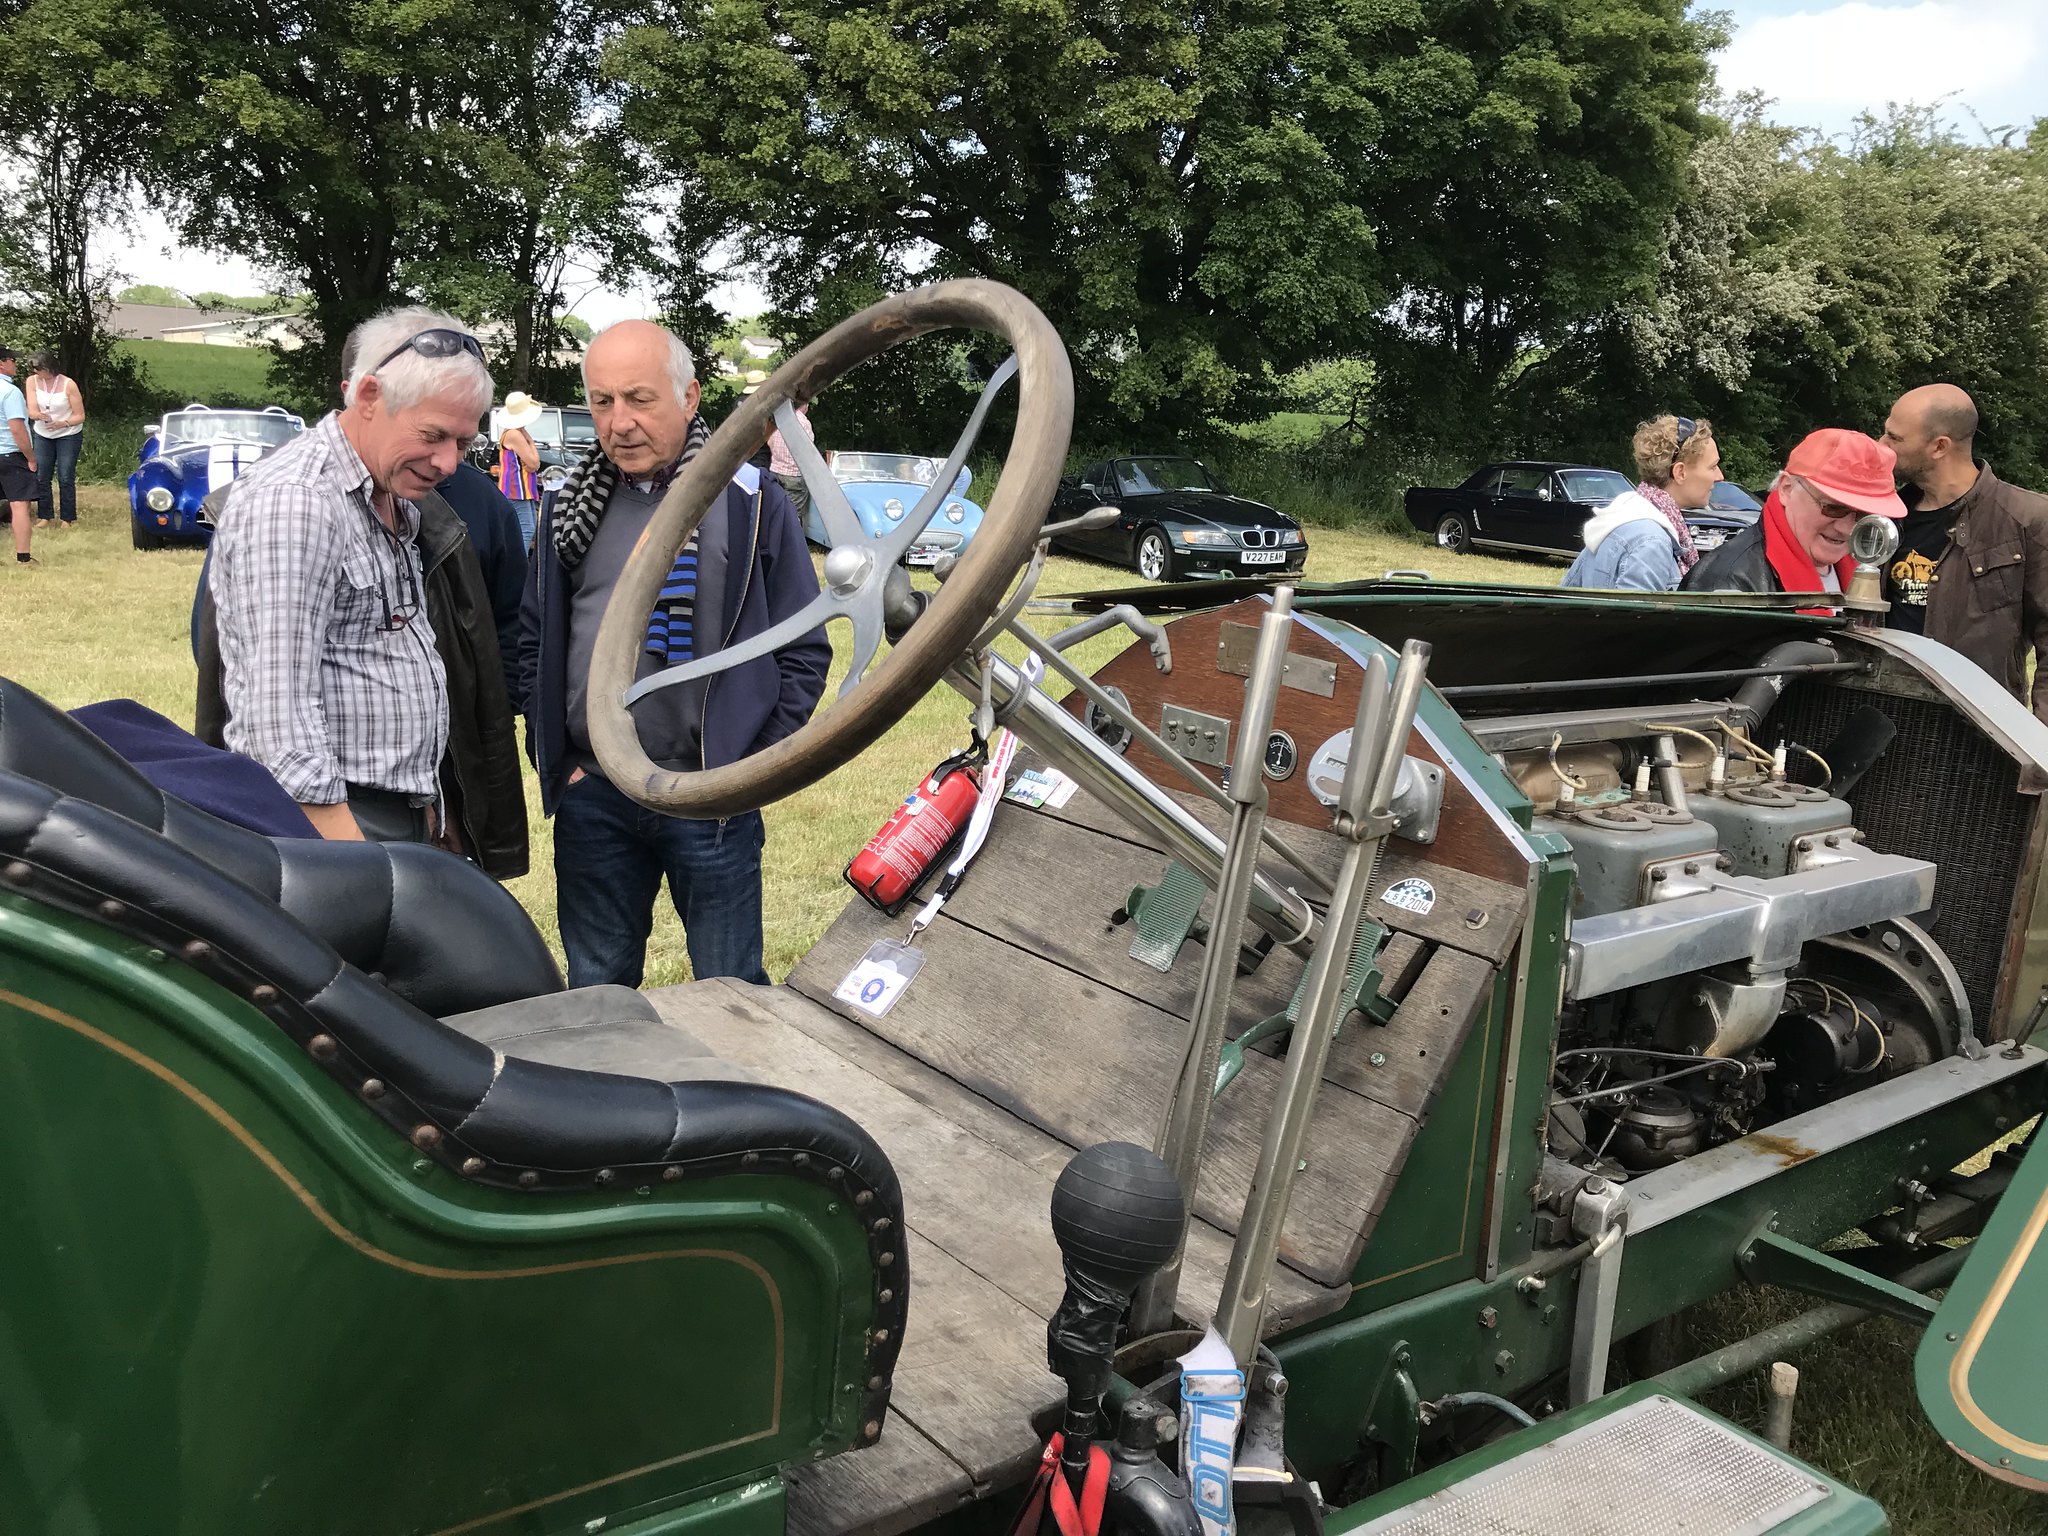 Laon by Charlieboy, on Flickr
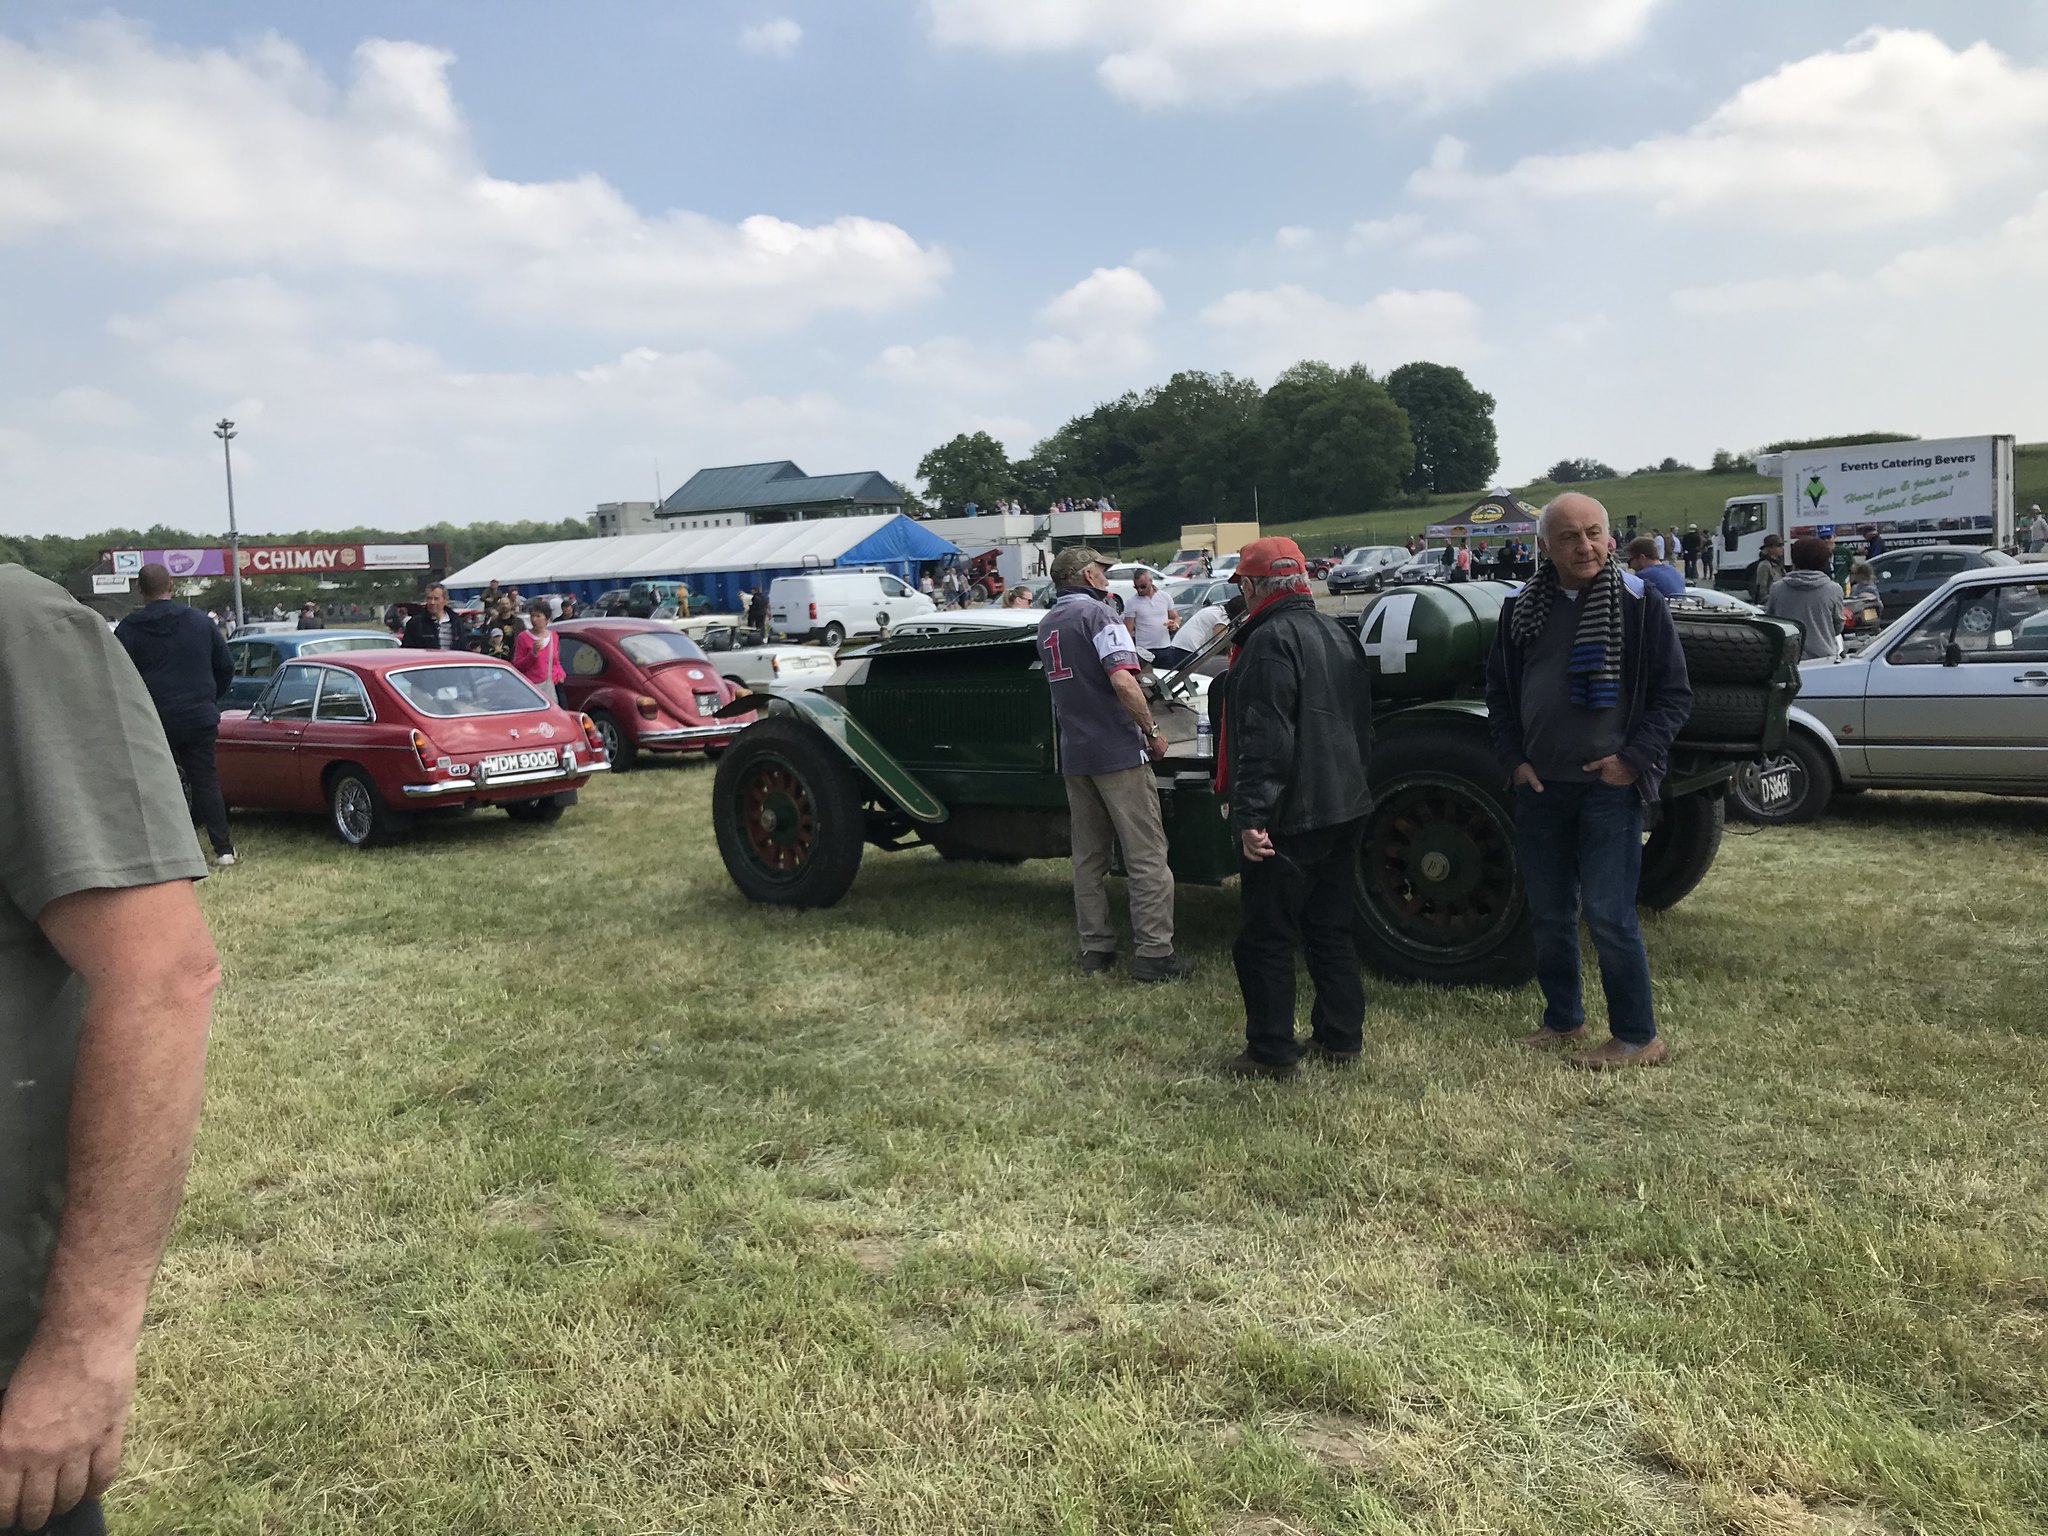 Chimay and Laon by Charlieboy, on Flickr
 Chimay and Laon by Charlieboy, on Flickr
Was it a 3, 6 or a 12 cylinder? Who knows? It did sound great however!
But it was then time for the parade to start come 4pm for the trip back to Laon. I should have filmed more in hindsight but there is always next time. Or maybe you folks might come down as well
.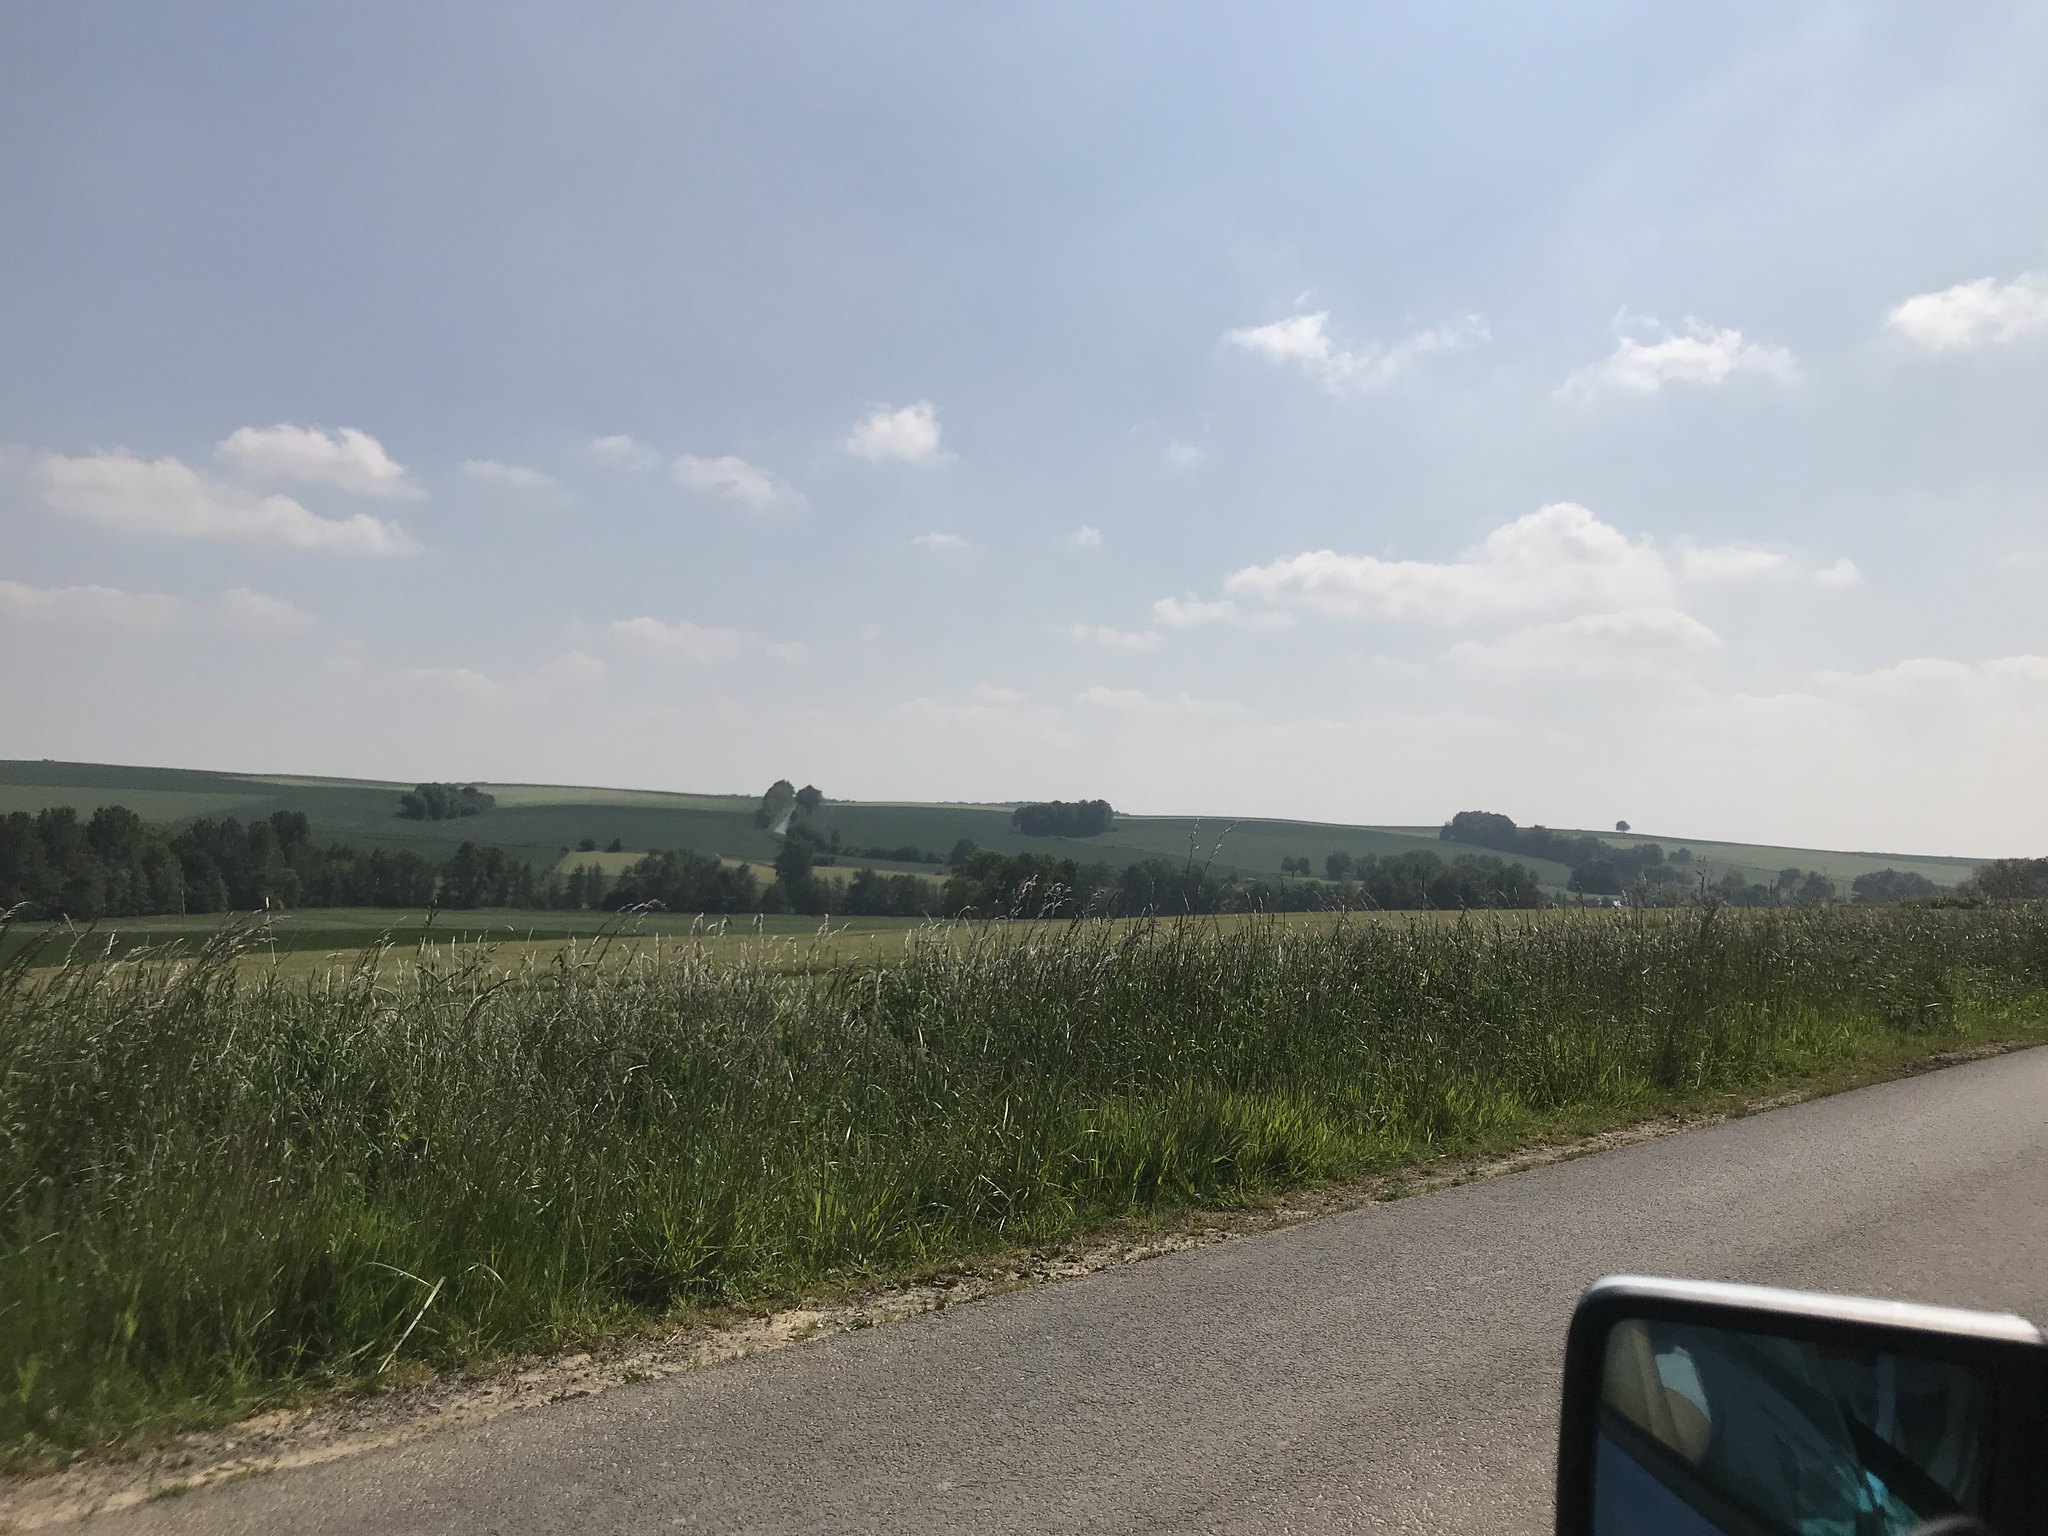 Chimay and Laon by Charlieboy, on Flickr
And so we came back to Parc Foch, Laon once more! The W124, like for the many drivers acrossed the world proved it's worth! It had been a very dependable and humble companion!
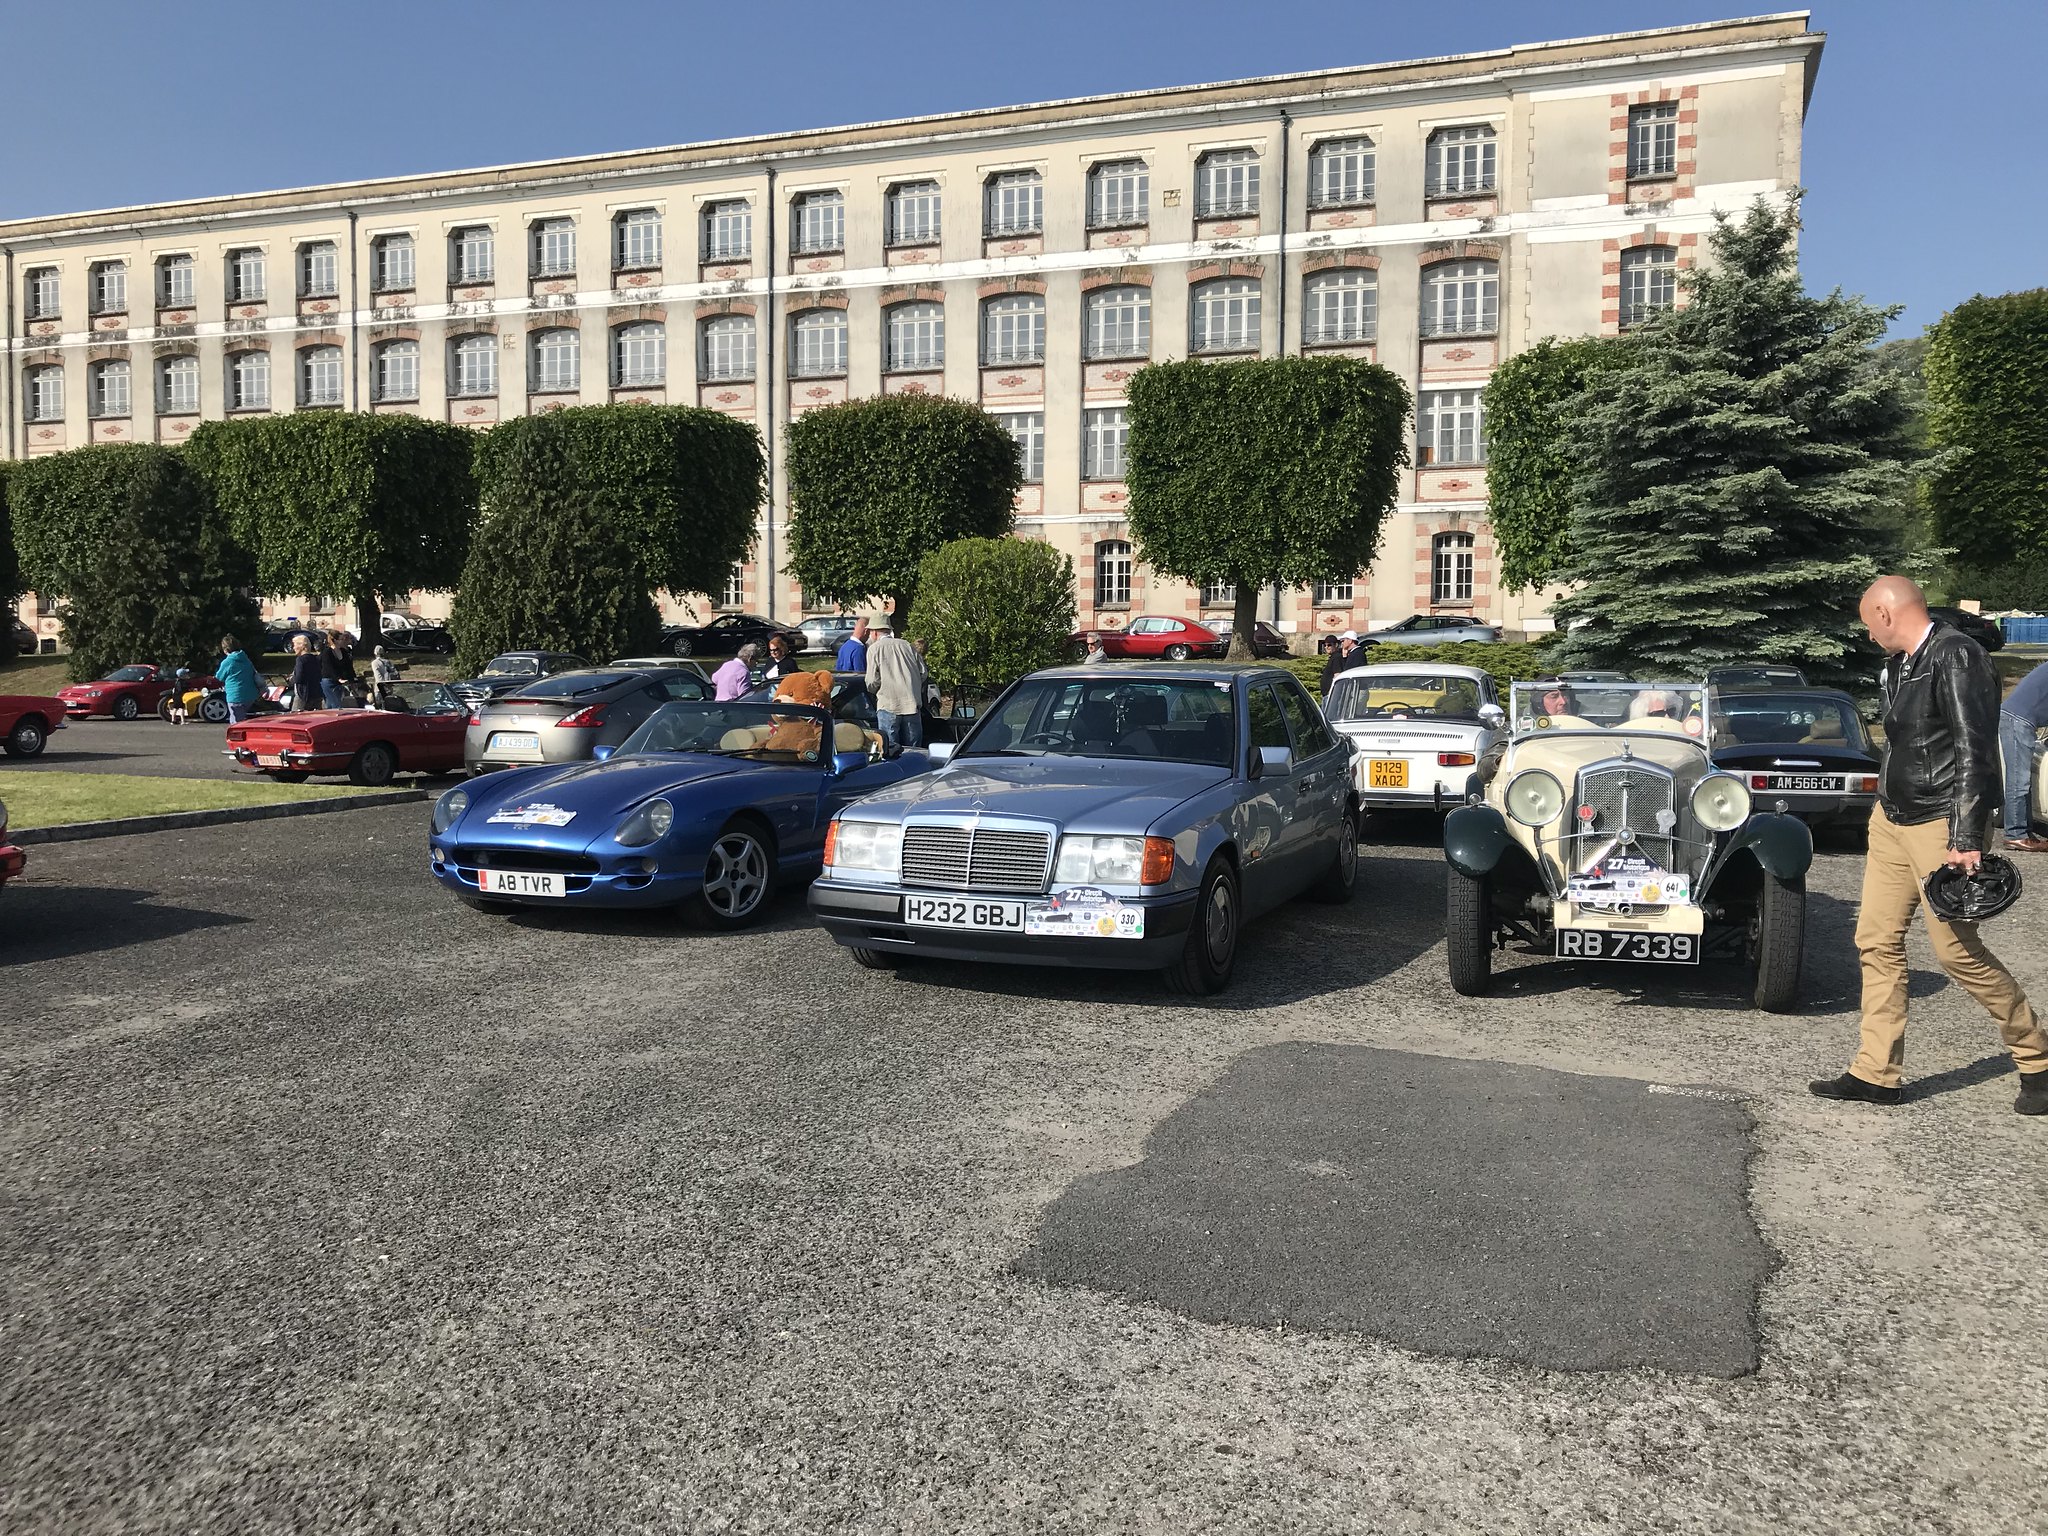 Chimay and Laon by Charlieboy, on Flickr
But let's get back to the Frenchies. Or rather the Alpines! Maybe the Citroens
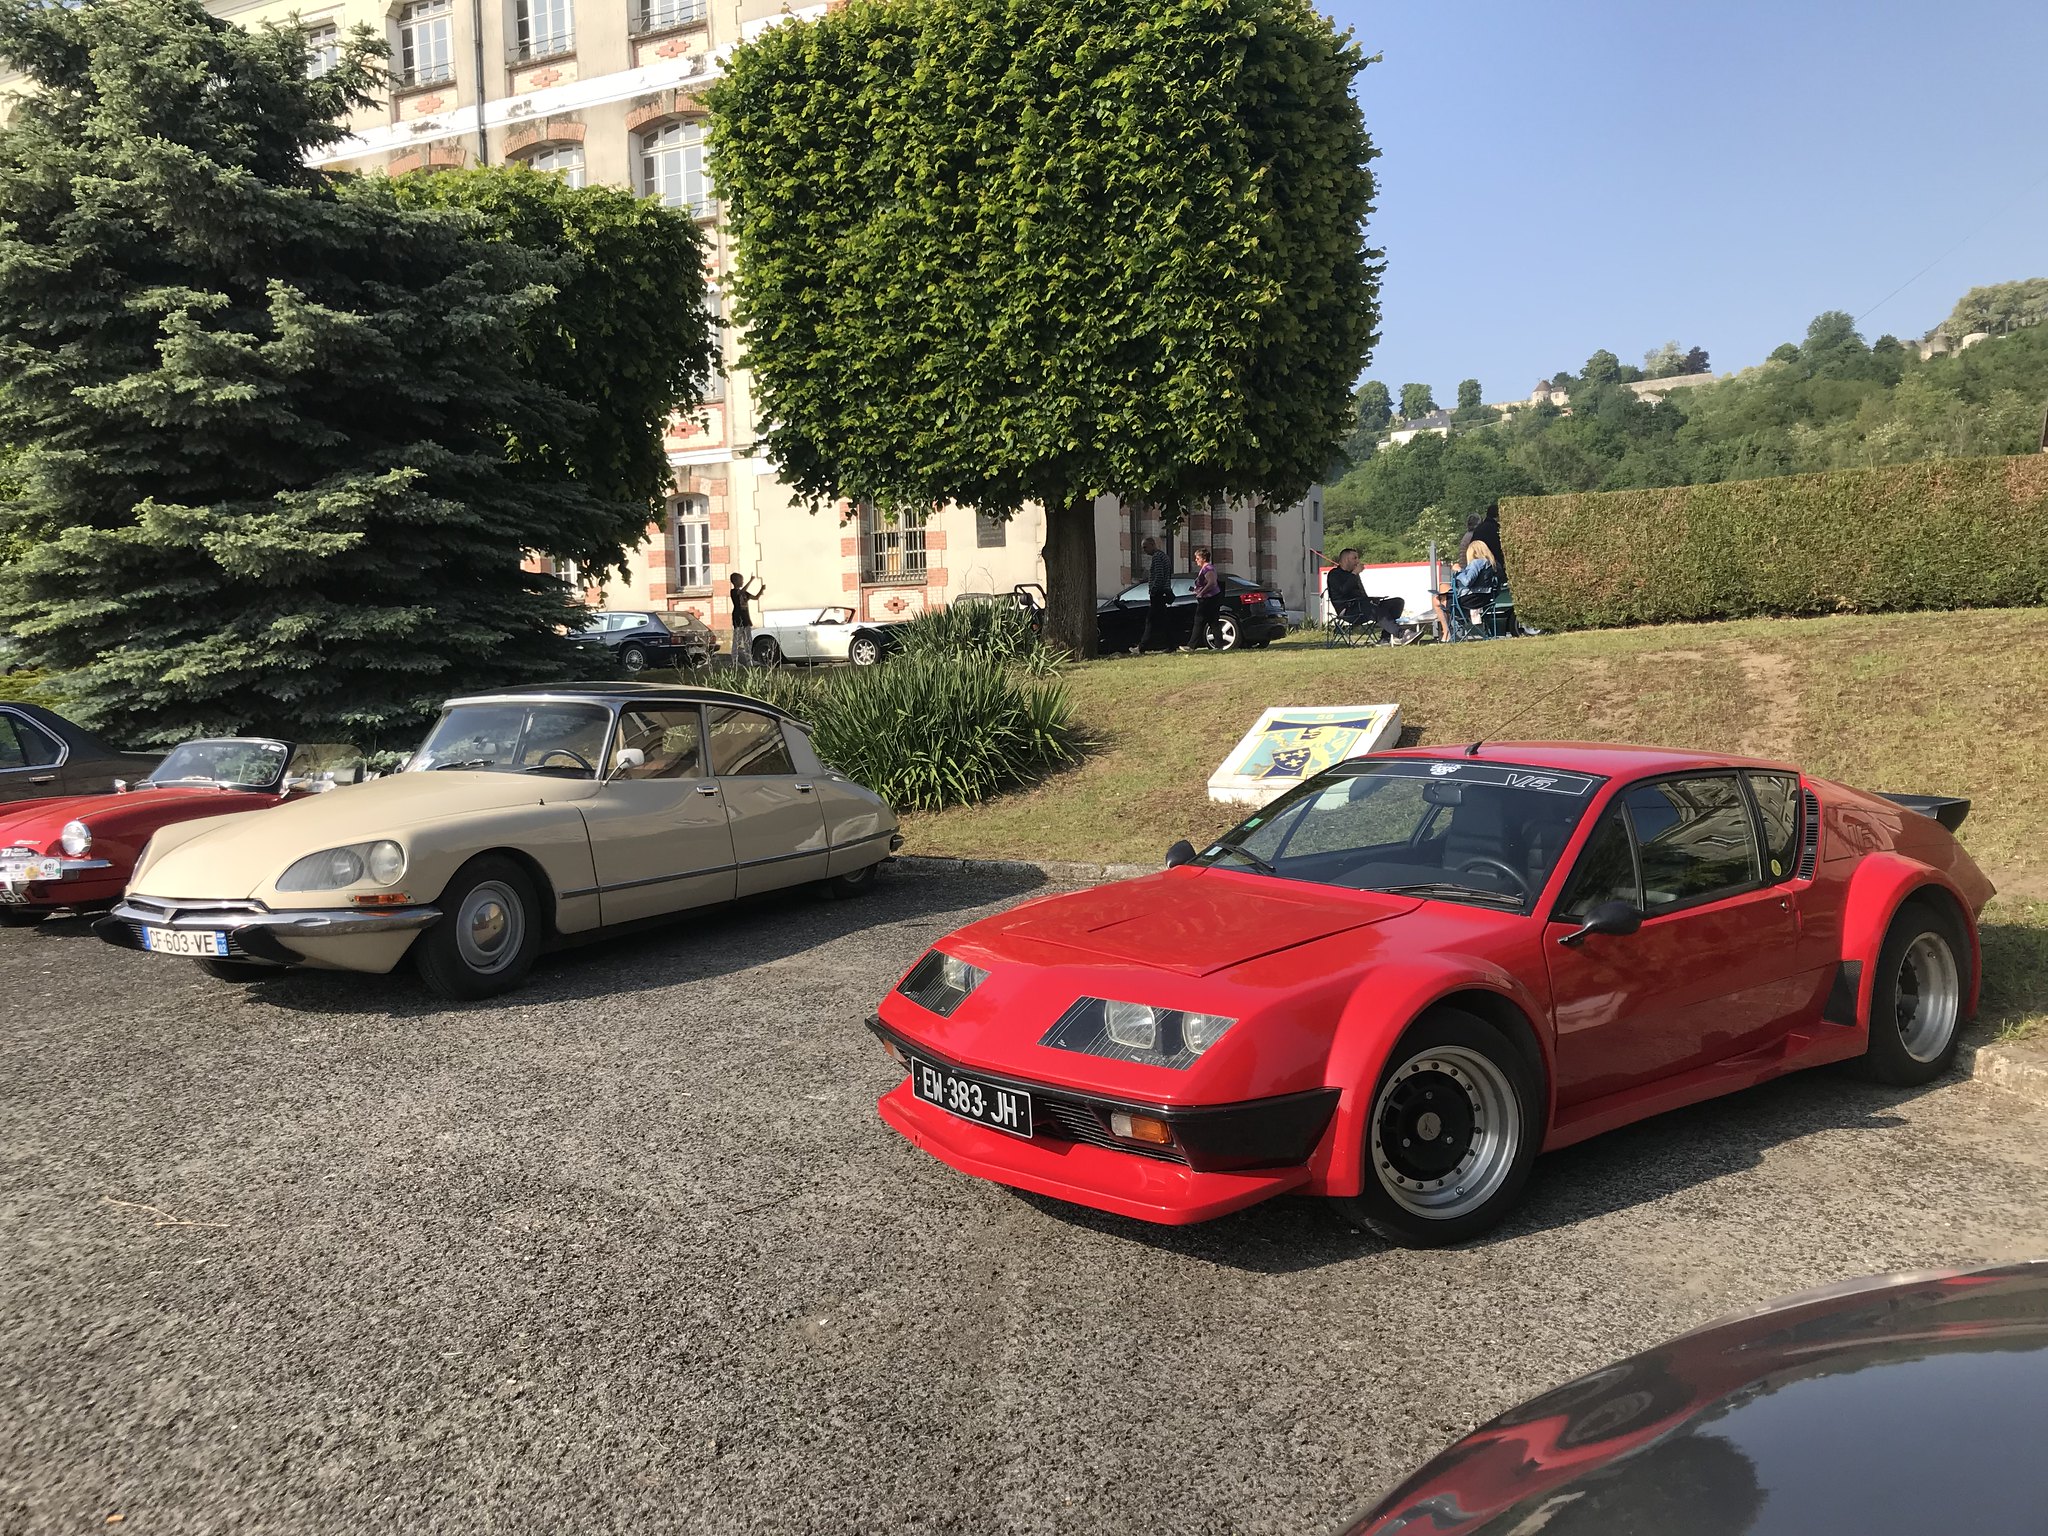 Chimay and Laon by Charlieboy, on Flickr
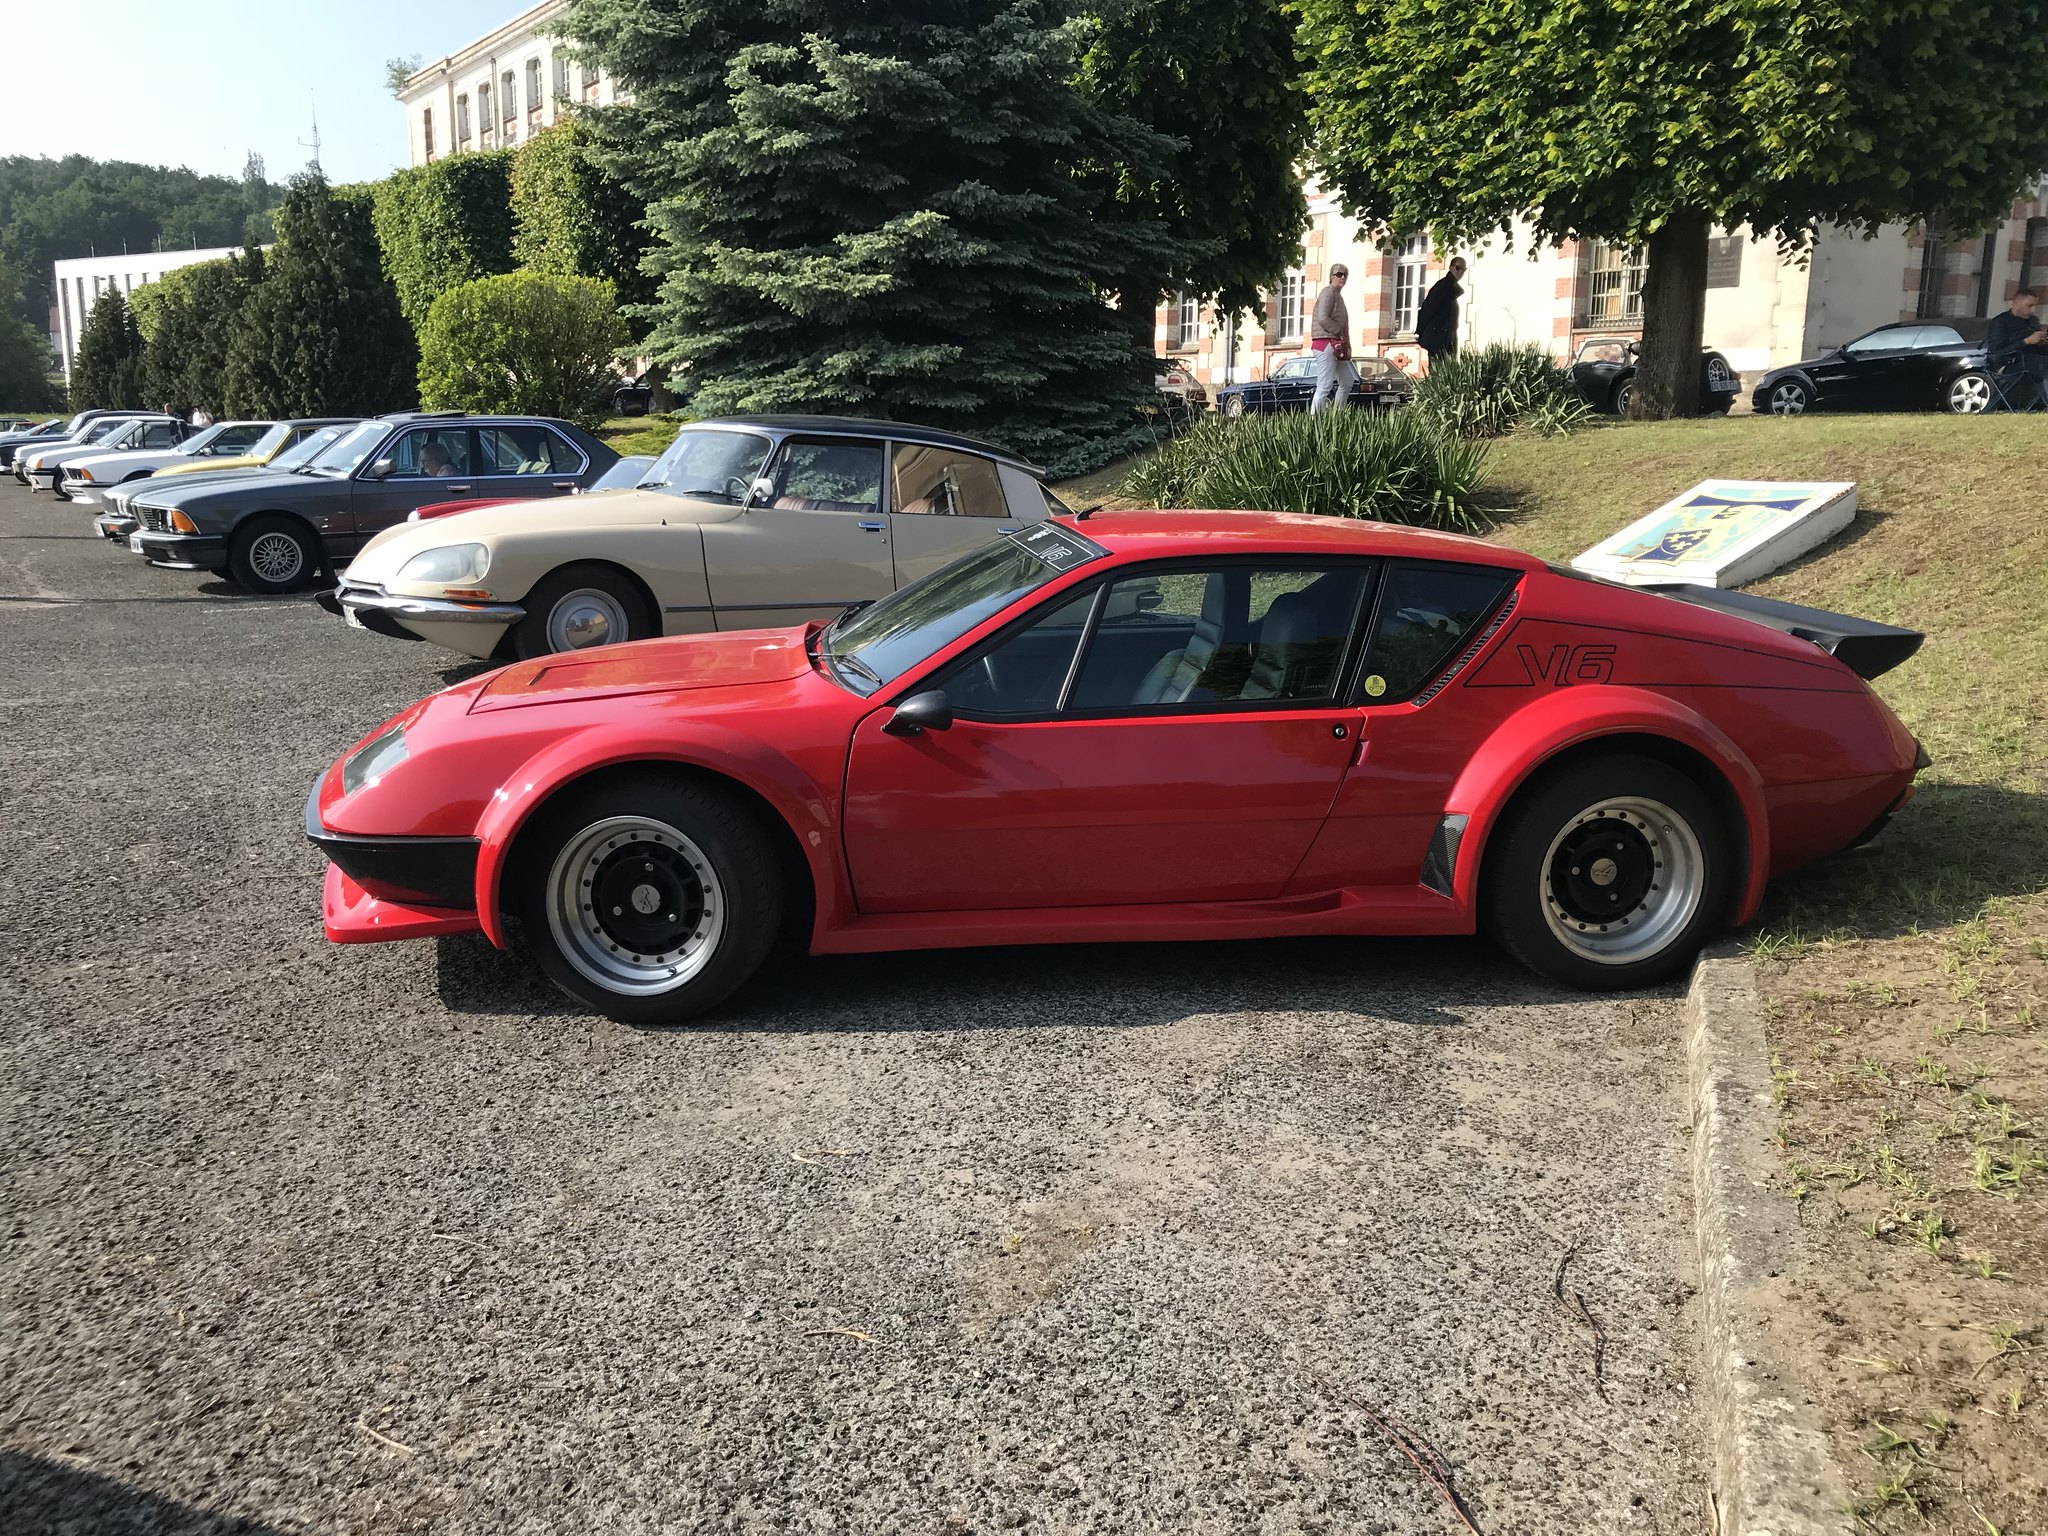 Chimay and Laon by Charlieboy, on Flickr
Another 2CV you say?
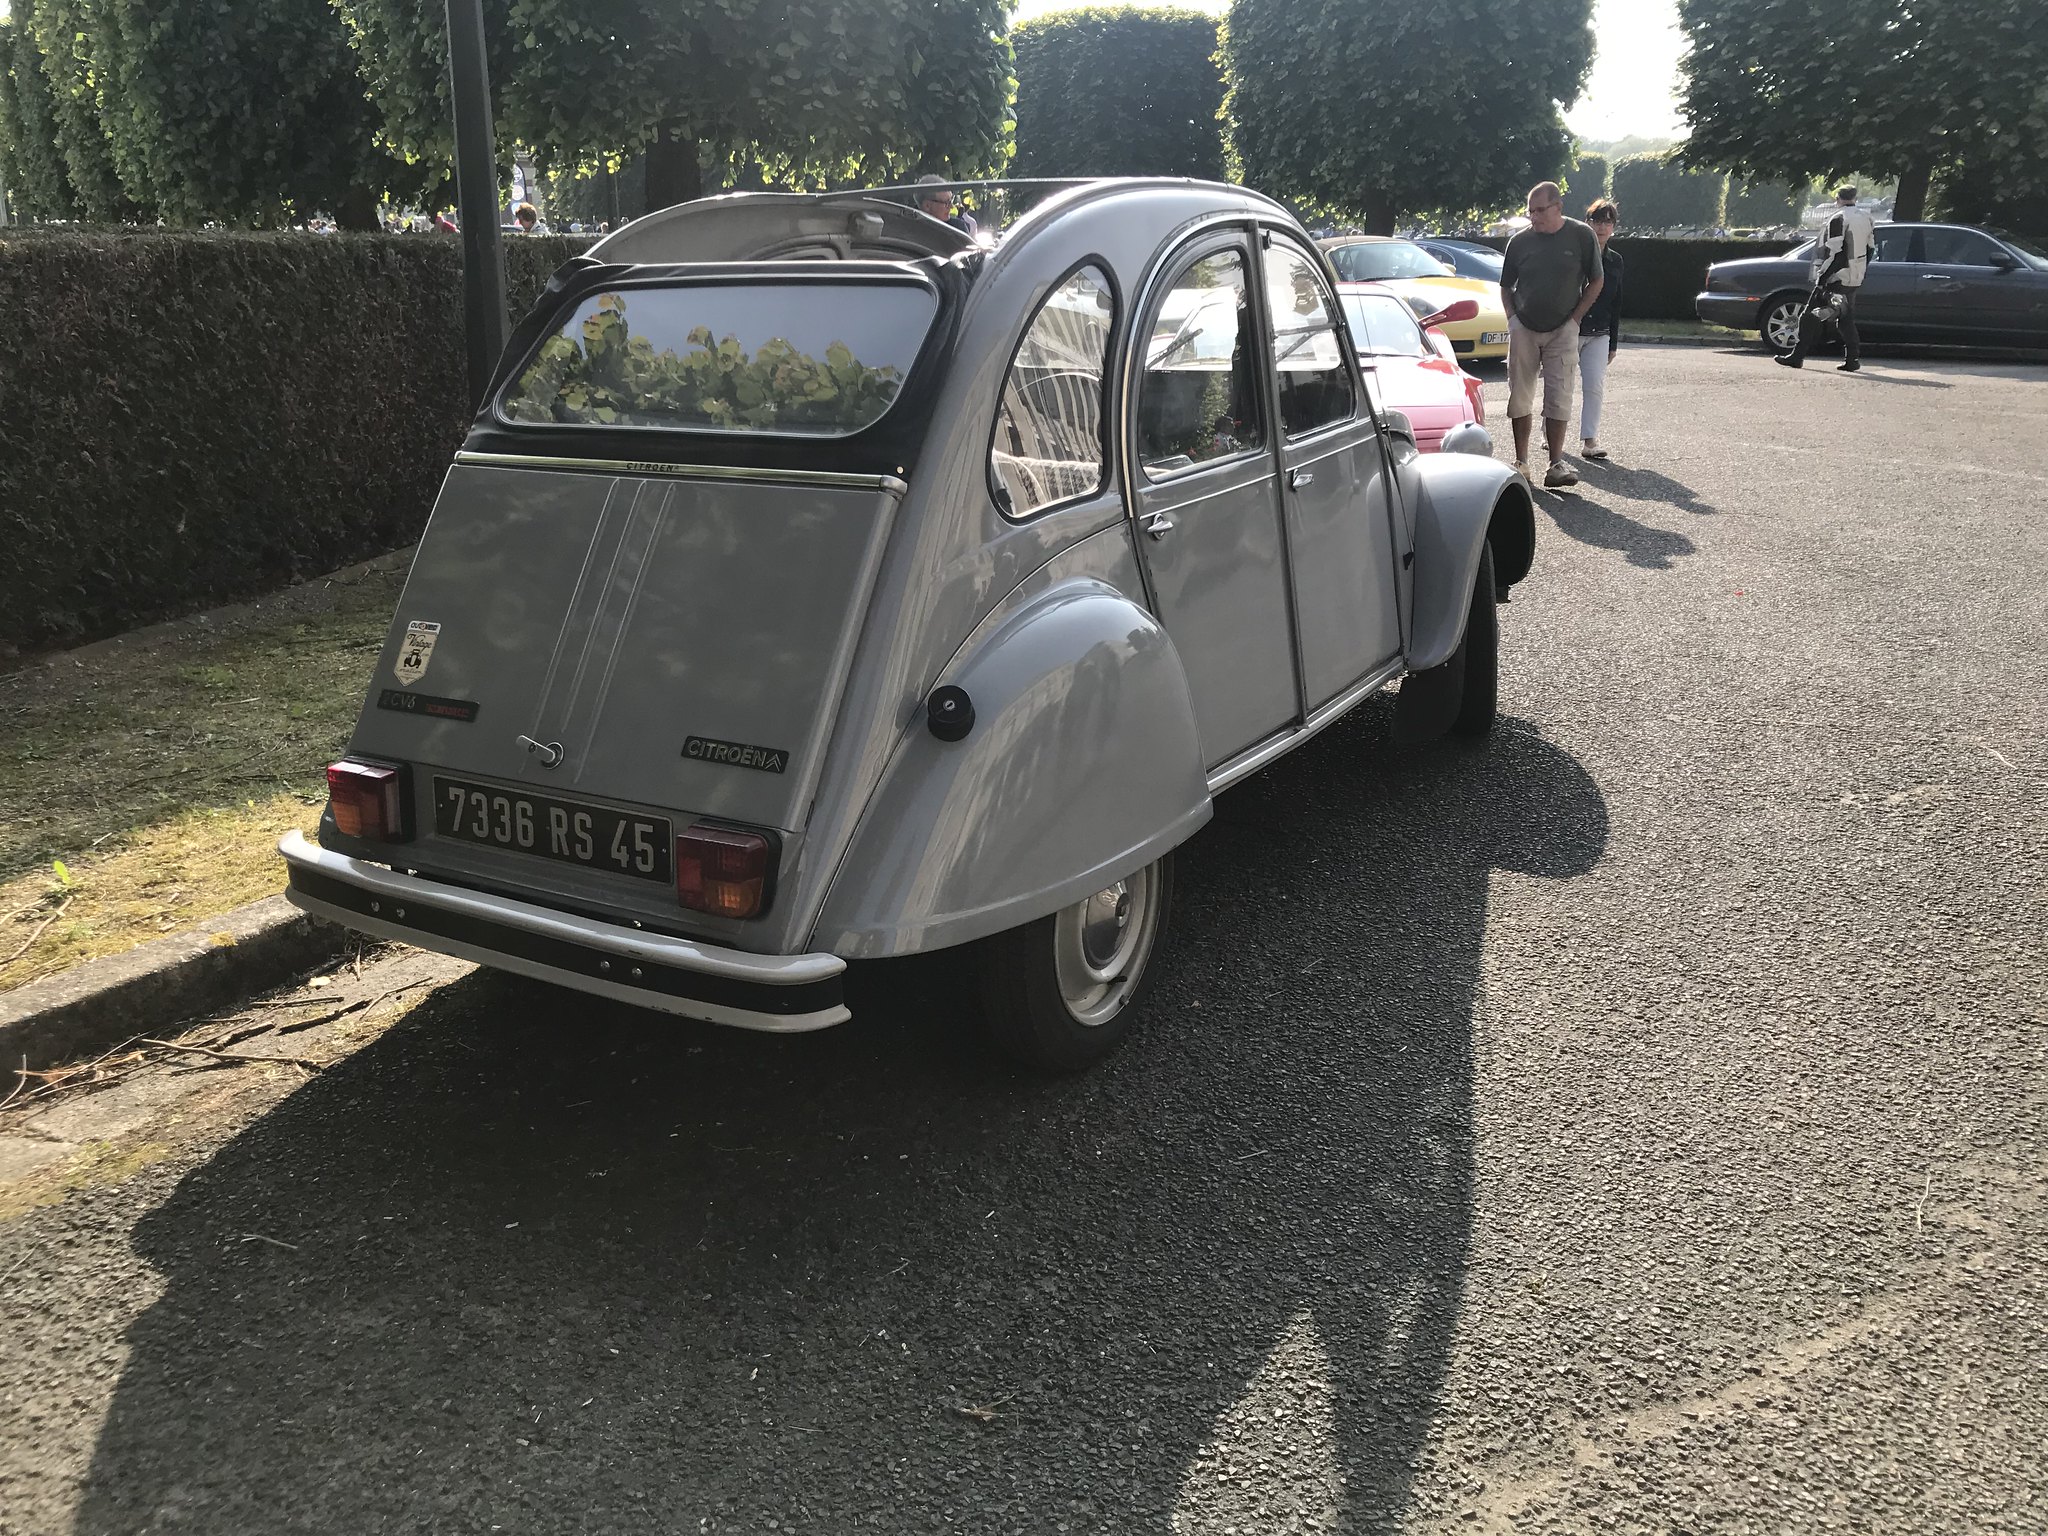 Chimay and Laon by Charlieboy, on Flickr
How about a French registered TVR? Or even a funky Matra?
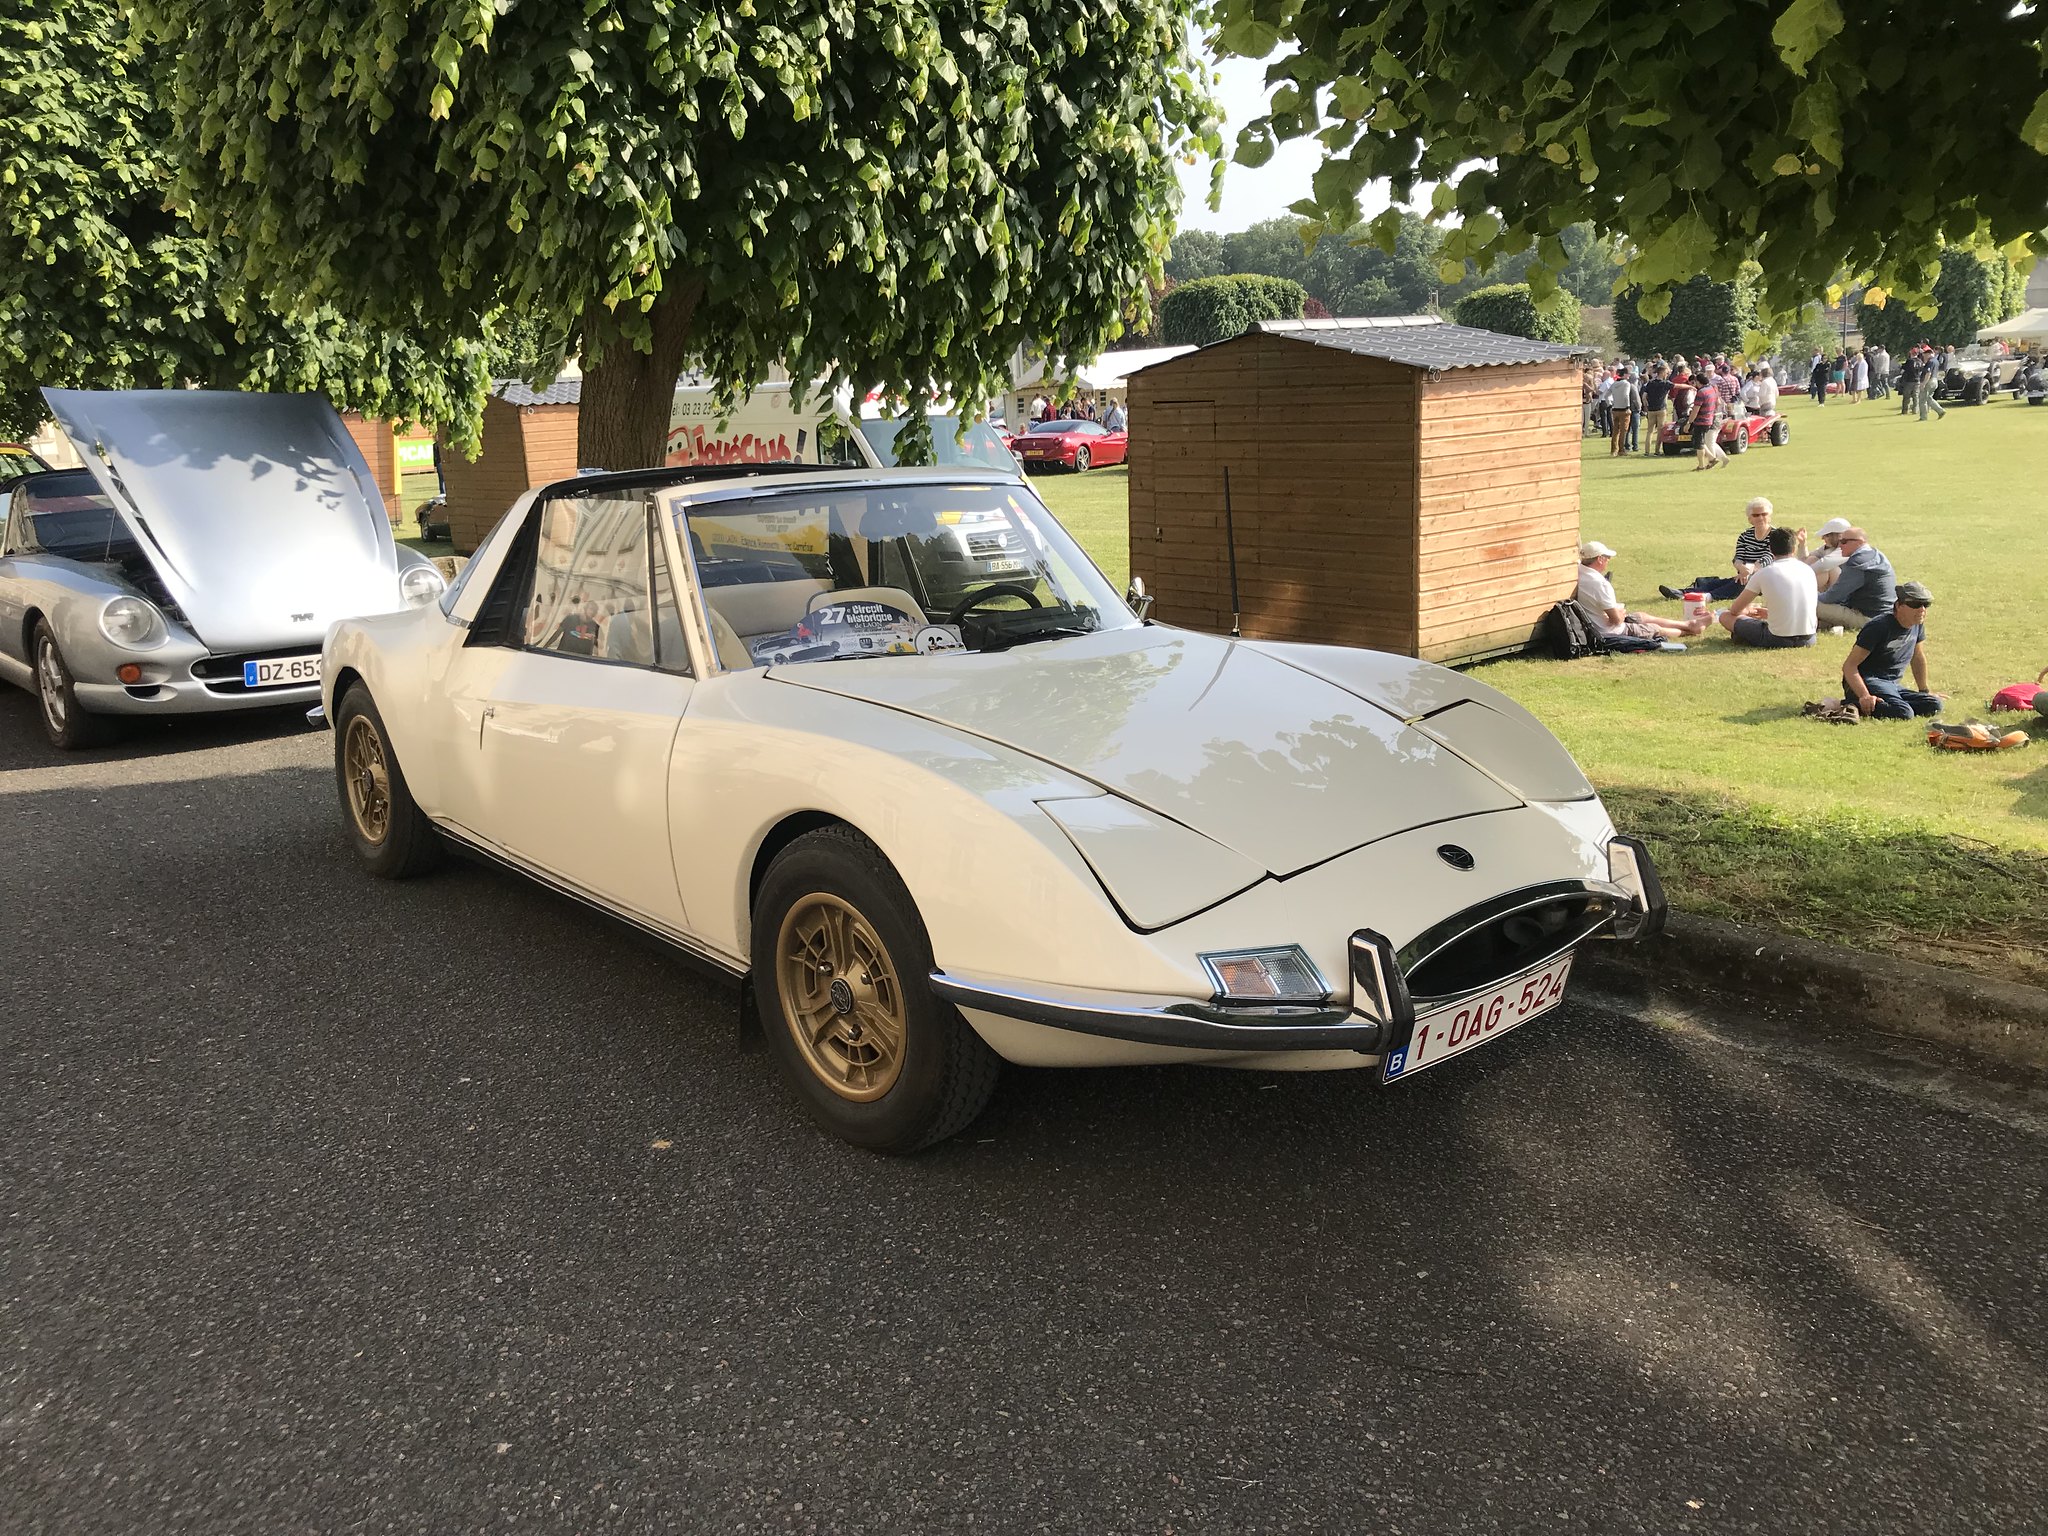 Chimay and Laon by Charlieboy, on Flickr
 Chimay and Laon by Charlieboy, on Flickr
As always, there were a few breakdowns even back at Laon. In the case of this pair, who really did almost look like a bunch of 70s mechanics/racers their downpipe caught the exit of the car park, leaving them with a massive blow! This Elan looked very tatty, with bilstered and cracked paint wherever you looked! Under the bonnet however it was very clean! Gone was the expensive and now hard to find brake servo. But on were a pair of new Sidedraught Dellortos, refurbished head, larger capacity rad with two Kenlowe fans, CV jointed rear end amongst a lowering job. If some cars can be used to partially express the RR way this Lotus was it! No rhyme, no reason! Just there to be enjoyed and unlike a few Loti, be reliable! Well, I guess it couldn't even do that, even if it was the bloke's fault to a degree!
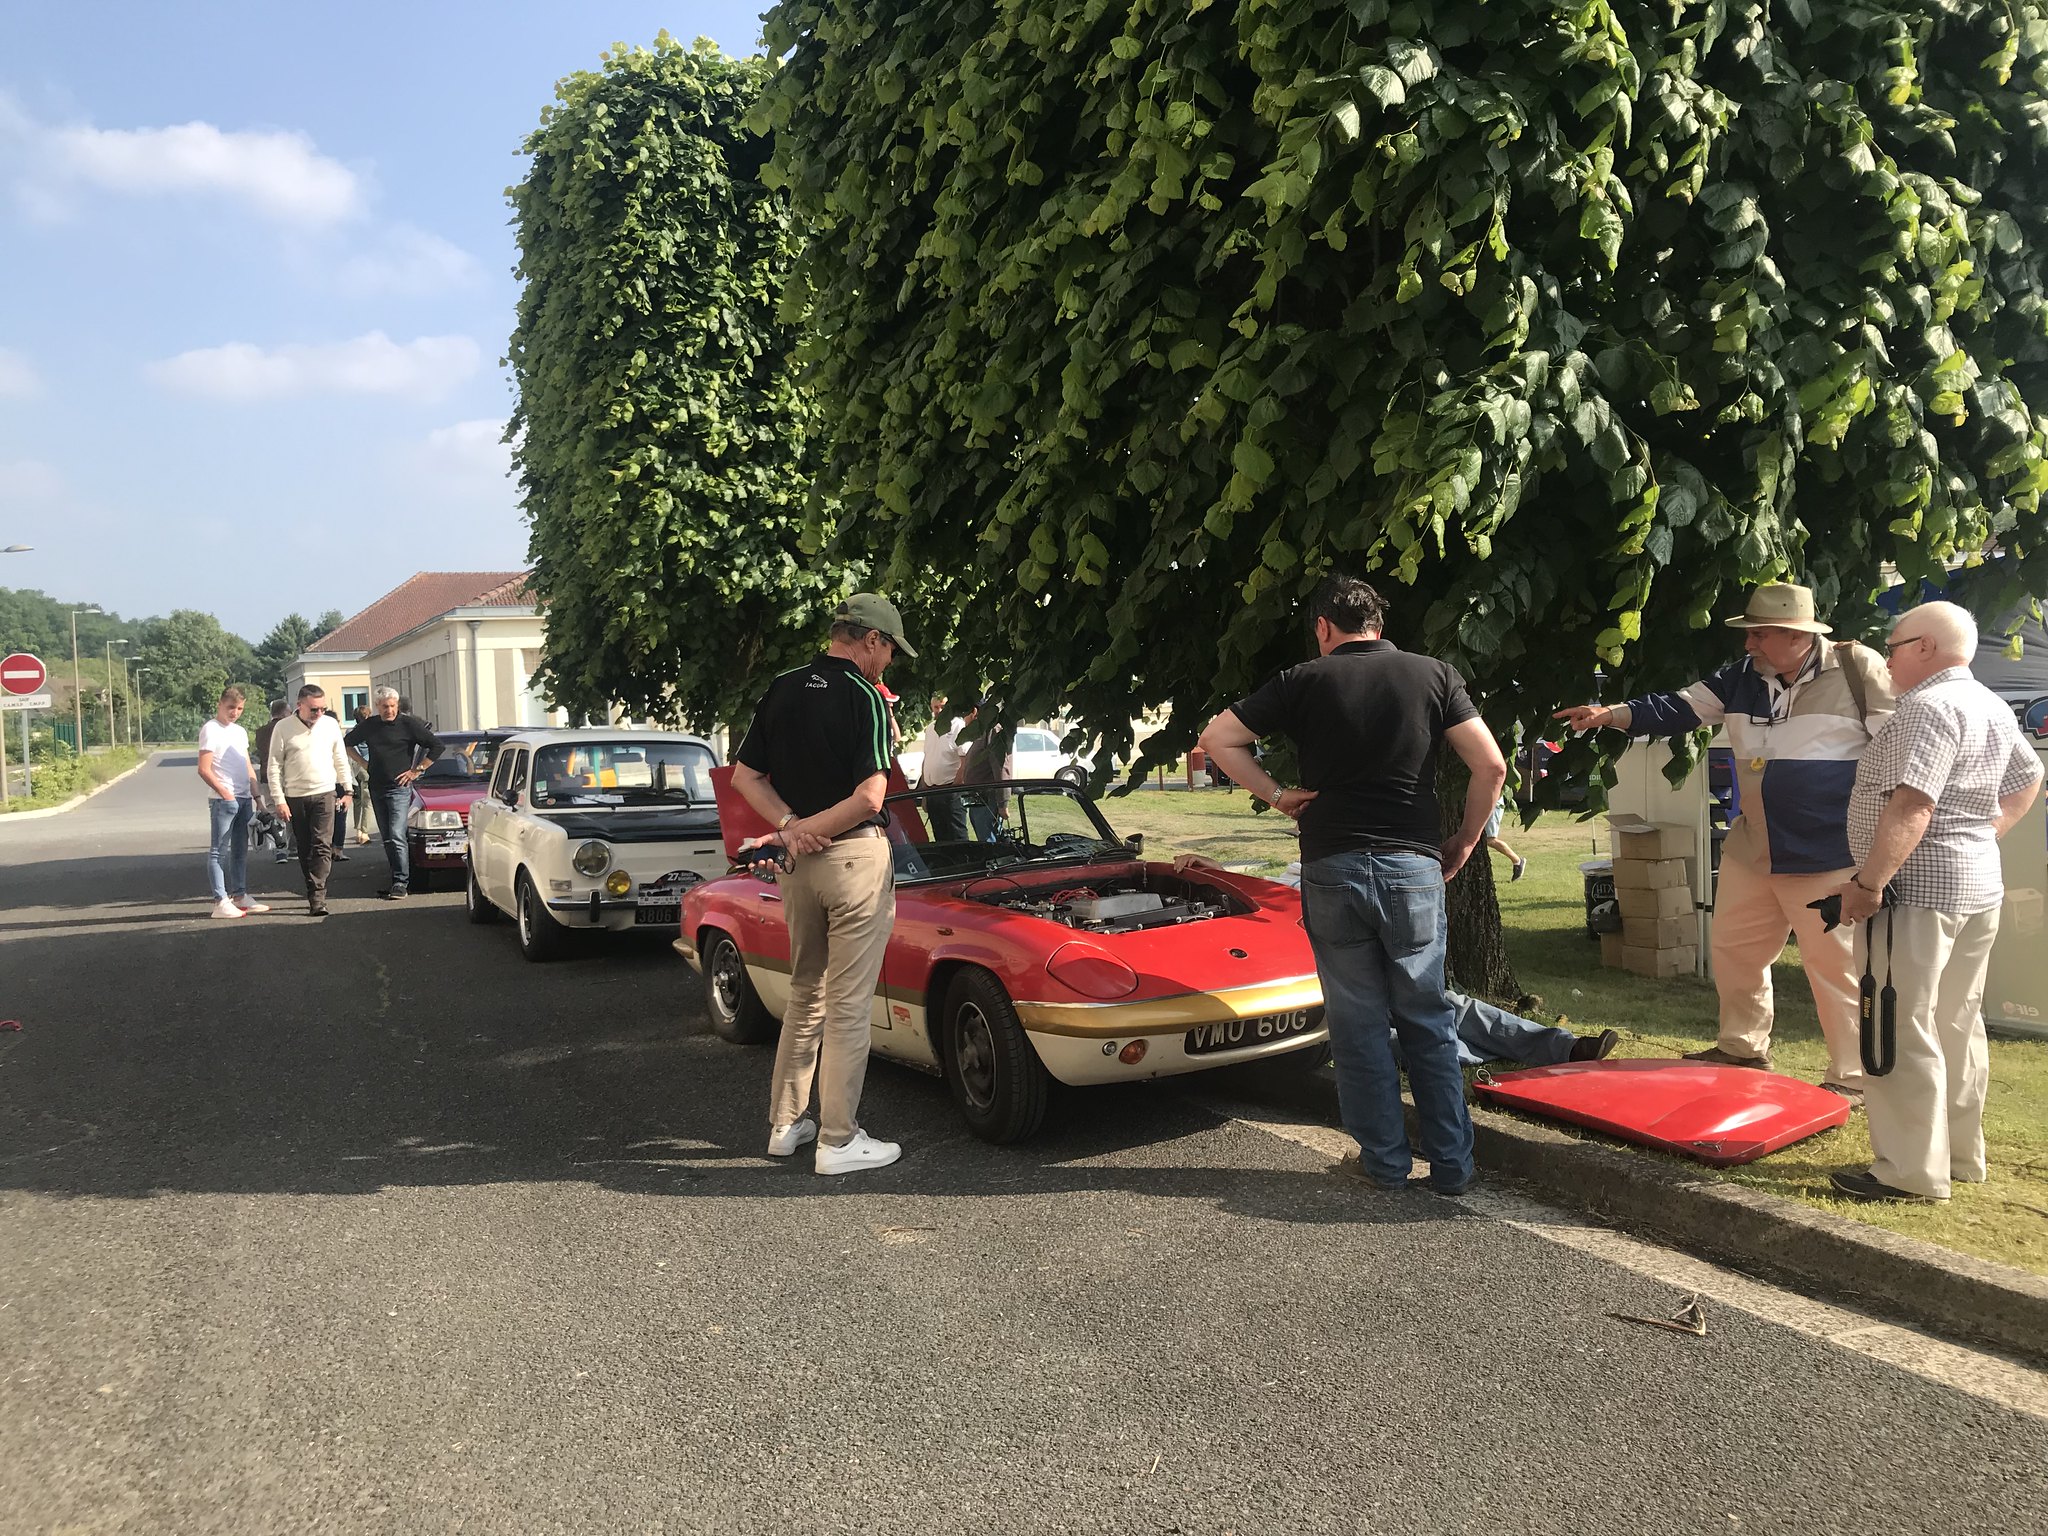 Chimay and Laon by Charlieboy, on Flickr
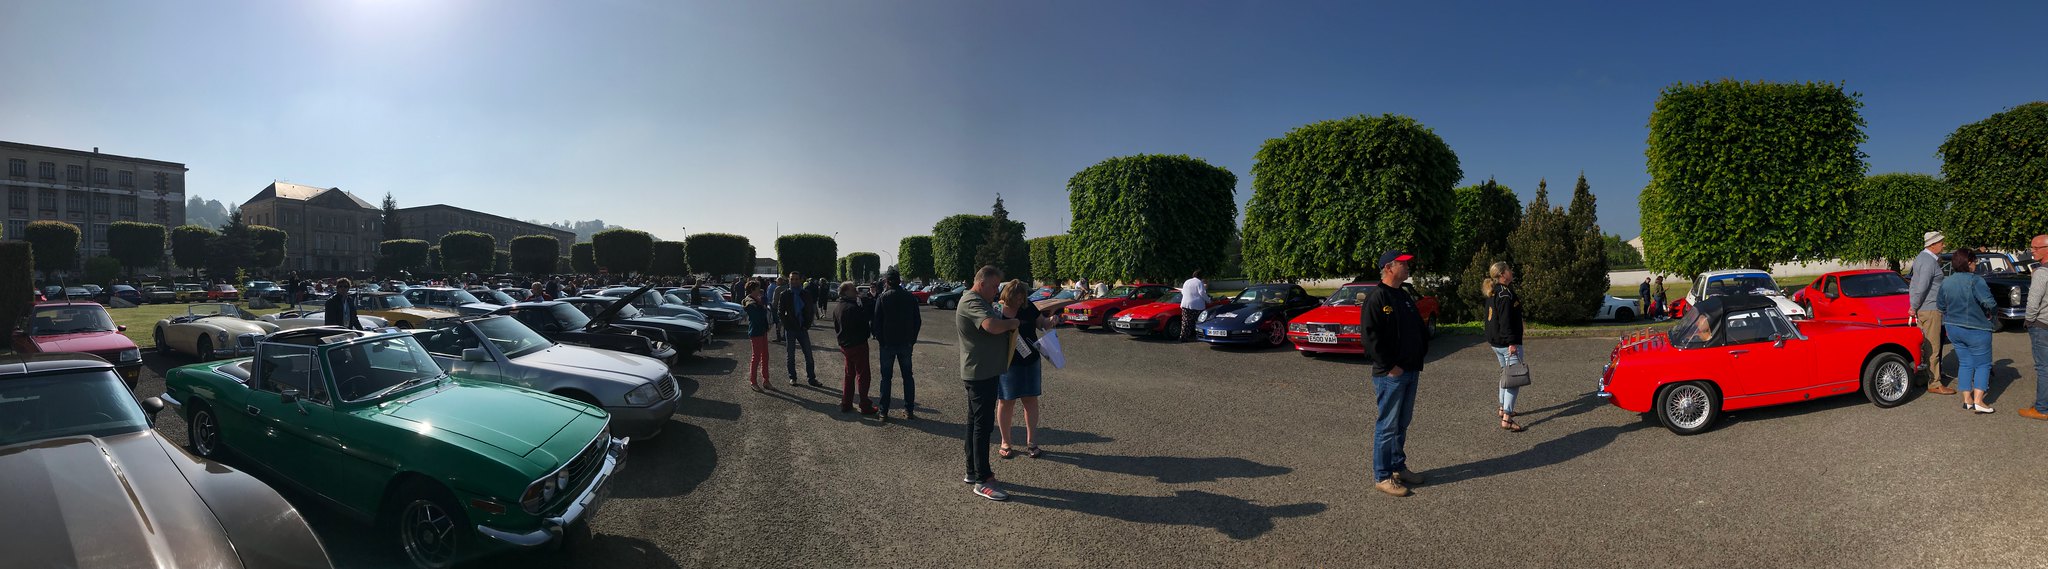 Laon Friday and Saturday Shots. by Charlieboy, on Flickr
Despite it being 6pm by this point it had been quite a long day, but a superb one! Yet again, we went back into town and slowed down for the night! There was one more leg left of this adventure. But it seems I can't stand still these days! That update will arrive soon!
Haven't finish your latest update yet, but what is the meaning of this. You can't sell, your running reports are a great read, made all the better for being about the 124.
https://www.carandclassic.co.uk/car/C1007518
https://www.carandclassic.co.uk/car/C1007518
sprouting said:
Haven't finish your latest update yet, but what is the meaning of this. You can't sell, your running reports are a great read, made all the better for being about the 124.
https://www.carandclassic.co.uk/car/C1007518
I am tempted to keep it, I'll be honest and I may well do that! I may well need another winter car and this does do the job very well! But it was only ever bought as a winter smoker! It also happened to fit the bill for the Laon Historique. Besides, there are always plenty of things for me to tinker on. The M3 I doubt will leave me tinker free; it's still not completely free of issues https://www.carandclassic.co.uk/car/C1007518
:https://www.pistonheads.com/gassing/topic.asp?h=0&...
Gassing Station | Readers' Cars | Top of Page | What's New | My Stuff