2001 Honda S2000
Discussion


Koolkat969 said:
Enjoying the updates once again. Great work. My question is, did you take any steps to stop the water ingress through the rear lights and the air vent in the boot? I'm assuming that needs to be addressed to prevent rust in the boot floor again in the future.
Hey Koolkat, thanks for the kind words. I found the culprit was the drivers side tail light gasket so I have ordered a new set of foam gaskets for both sides just to be safe. It's a really simple job but I might take some pics and do a write up in case anyone would like to see/know how it's done.Cheers,
Melly
MELLY-WRC said:
Hey Koolkat, thanks for the kind words. I found the culprit was the drivers side tail light gasket so I have ordered a new set of foam gaskets for both sides just to be safe. It's a really simple job but I might take some pics and do a write up in case anyone would like to see/know how it's done.
Cheers,
Melly
Yes Melly, that would be great if you can do a write up. It will come in very handy for future reference. I've never checked my boot floor but will be doing so having seen yours so fingers crossed. If there are any rust issues, at least now I'm aware of the possible causes and solutions so thanks for sharing that. One problematic area that I am aware of though is the roof drains which can get blocked thereby causing rust issues with the Sill below the driver and passenger doors so worth checking if you haven't done so already. Cheers! Cheers,
Melly
Koolkat969 said:
Yes Melly, that would be great if you can do a write up. It will come in very handy for future reference. I've never checked my boot floor but will be doing so having seen yours so fingers crossed. If there are any rust issues, at least now I'm aware of the possible causes and solutions so thanks for sharing that. One problematic area that I am aware of though is the roof drains which can get blocked thereby causing rust issues with the Sill below the driver and passenger doors so worth checking if you haven't done so already. Cheers!
Not a problem, I will take some pics and add a small write up on it for you. I have yet to check my soft top drains actually, thanks for the reminder. I will have a root about this weekend with a welding wire to see what the drain path is like. Hopefully it's nice and clear!
Cheers,
Melly
Time for another update.
It’s been a number of weeks since my last update and I have made good use of the fantastic weather to get a few jobs done on the car.
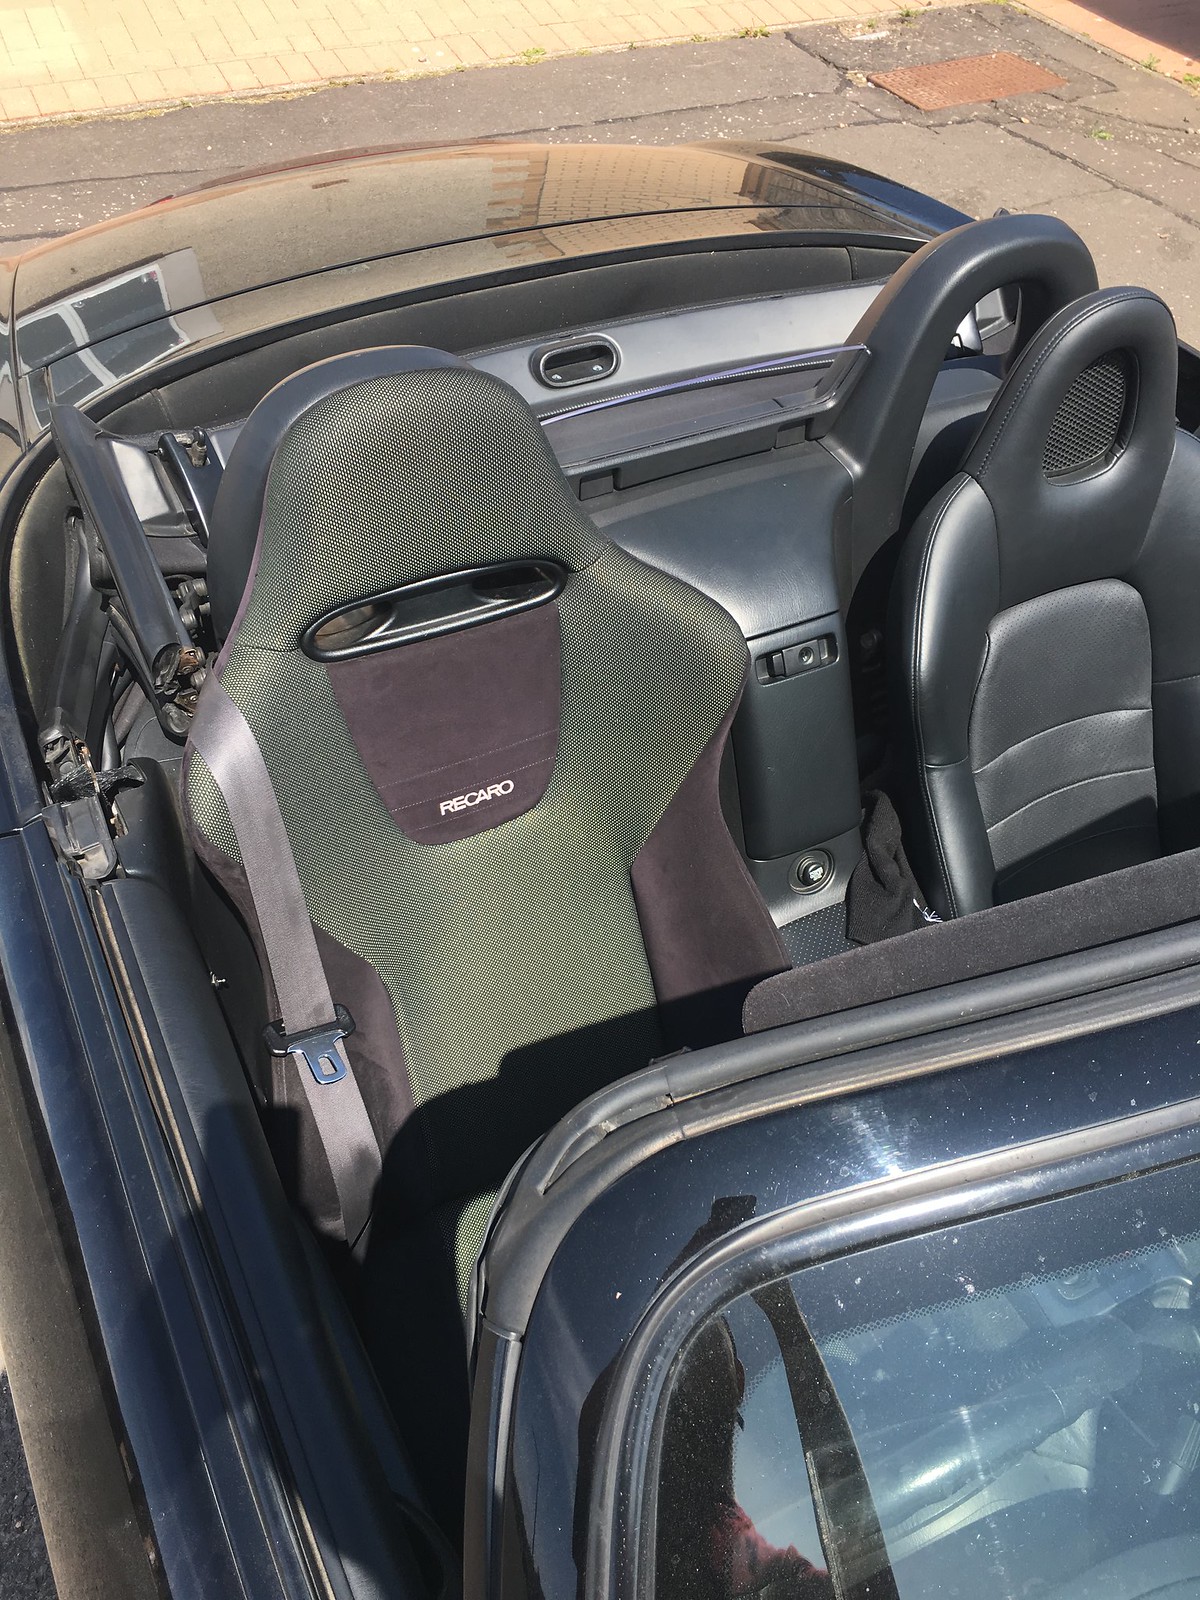
Picking up from my last post, I’ve finally got the new seats fitted. I’ll be honest though, it was an absolute nightmare of a job with most every step forward requiring another alteration or modification. The fact that on occasion, I have my young lad in the car with me meant I couldn’t cut any corners or have a ”that will do” attitude. On the final fit I used quality grade 8 bolts and nyloc nuts to keep it all together whilst retaining the factory fastenings when bolting the seats to the floor and the female seatbelt receptacles. I didn’t take as many pictures as I usually do owing to the fact it was a bit of a ball ache as previously mentioned.
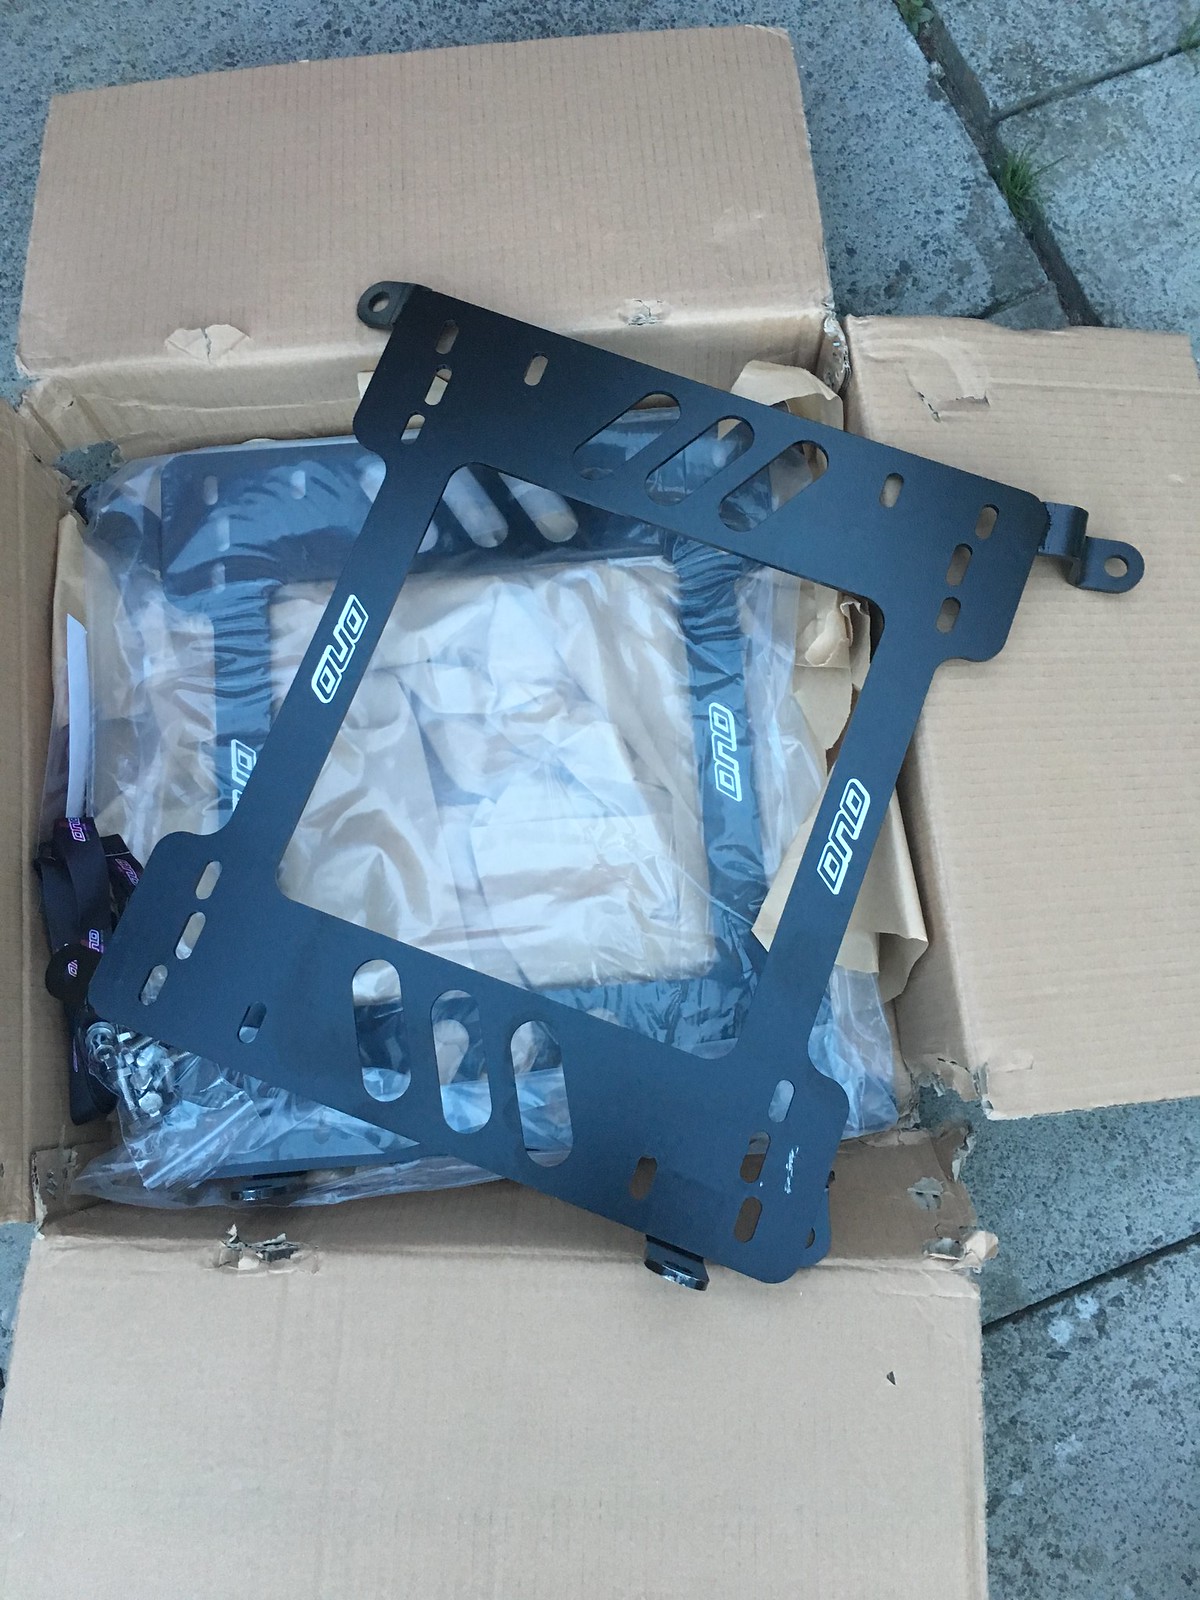
The whole idea started when I was watching a video on youtube of a lad fitting Recaros to his S2000. He had purchased a set of S2000 specific, universal base plates and apart from opening up a couple of holes in the sliders to mount them to the base plate, it was pretty straight forward stuff and had the added benefit of lowering the seat height too. The cabin is a bit tight in an S2000 and any extra room that can be found is welcome, especially when dropping the seat height to give more room between your thighs and the wheel as the factory steering column is non-adjustable.
Now, I’d heard that DC5/2 Recaros can be a bit of a tight squeeze to fit in an S2000. The problem is their width. The bolsters touch the door and can also block the centre cubby from opening up. The fact that a mint set of them can cost £500 and the possible width problems put me off. I was chatting to a friend of mines about it over an online game of Call of Duty and he mentioned that he had a set of very clean Accord Type R recaros sitting in his bedroom being used as a clothes horse. They are basically the same seats from the EP3 Premier Edition I sold at the beginning of the year but in a different colour. I loved how comfortable those seats were so over the next few games we talked it over and a deal was done. I found the company Mr Youtube used in the states and ordered the same base plates he used in the video. Delivery was very quick, and they marked them down as a $10 part to save me paying any import tax which was ace.
 Untitled by Paul Meldrum, on Flickr
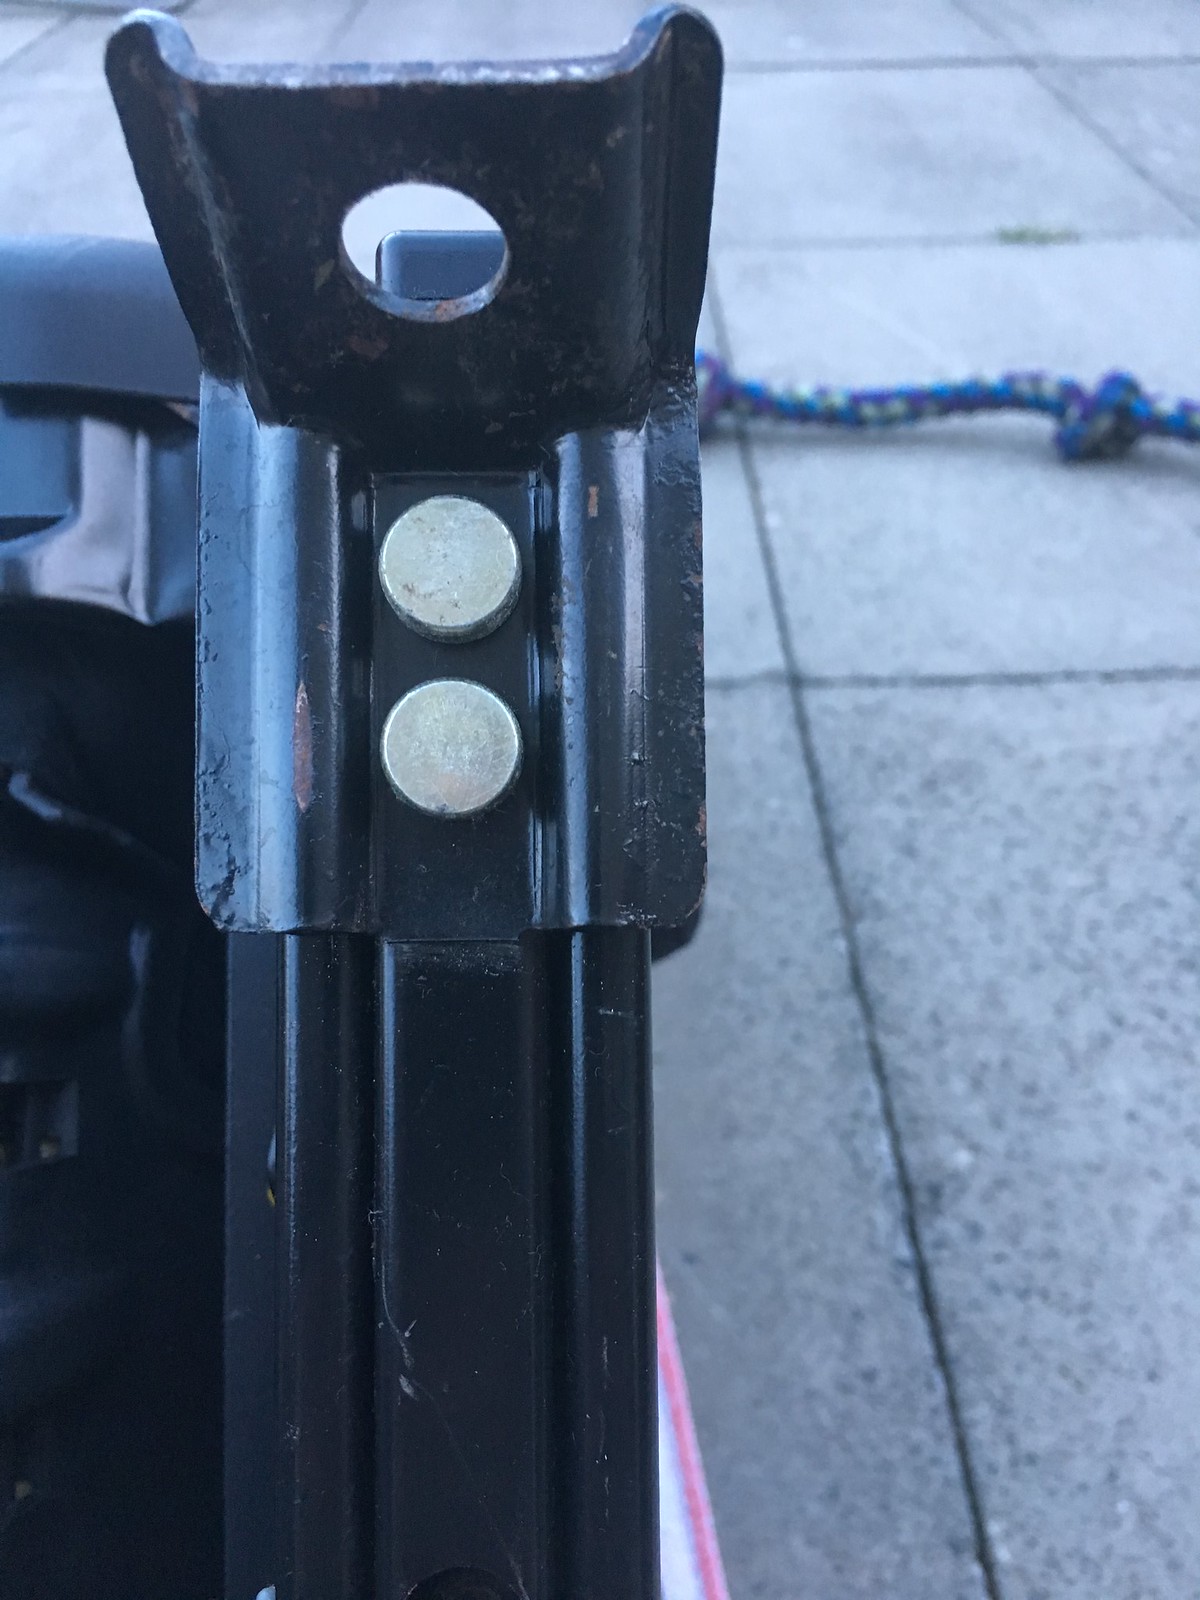
I thought I now had everything I needed to crack on with the job, so I made a start to it over the bank holiday weekend. Instantly I hit my first roadblock, the Accord specific mounting feet are fitted to the rails using some sort of press stud from factory. I’ve never done anything like this before and I was a bit surprised to find that all of the seat components are built that way.
 Untitled by Paul Meldrum, on Flickr
 Untitled by Paul Meldrum, on Flickr
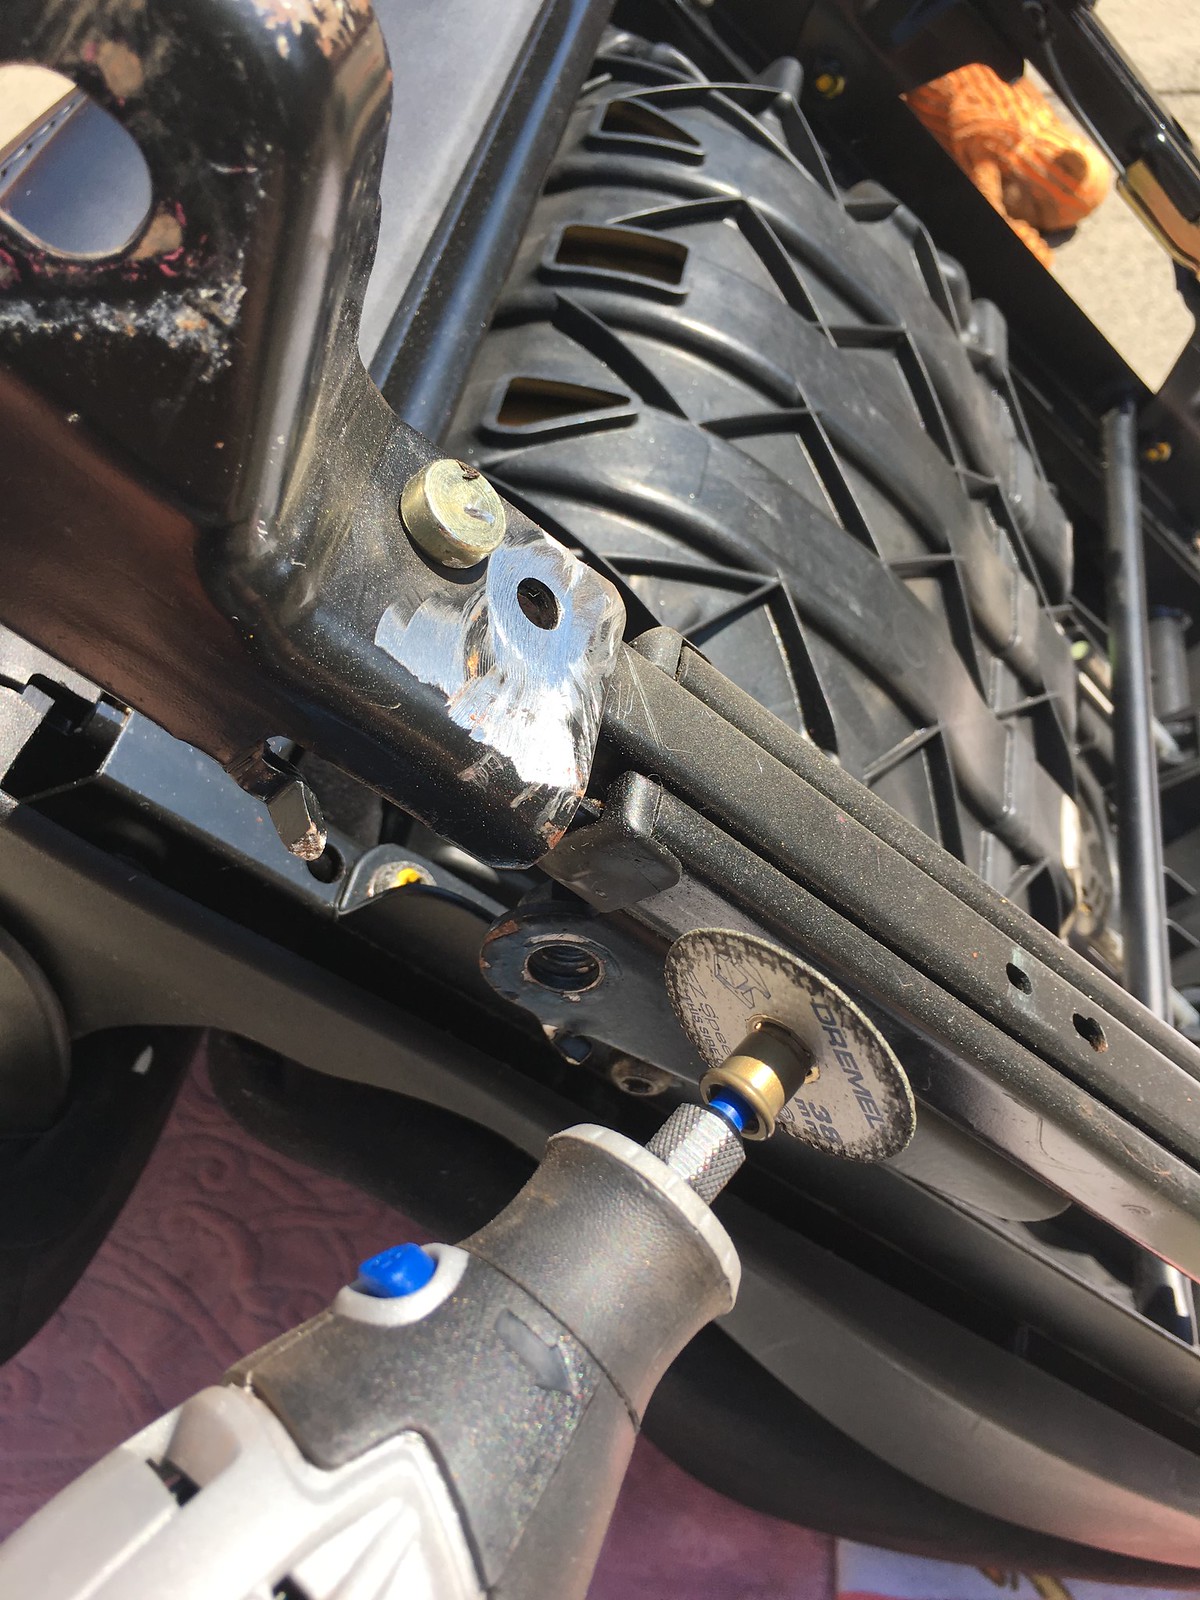
Nothing for it but to get the grinder out and cut them off. I didn’t have my angle grinder at home so the Dremel had to do.
 Untitled by Paul Meldrum, on Flickr
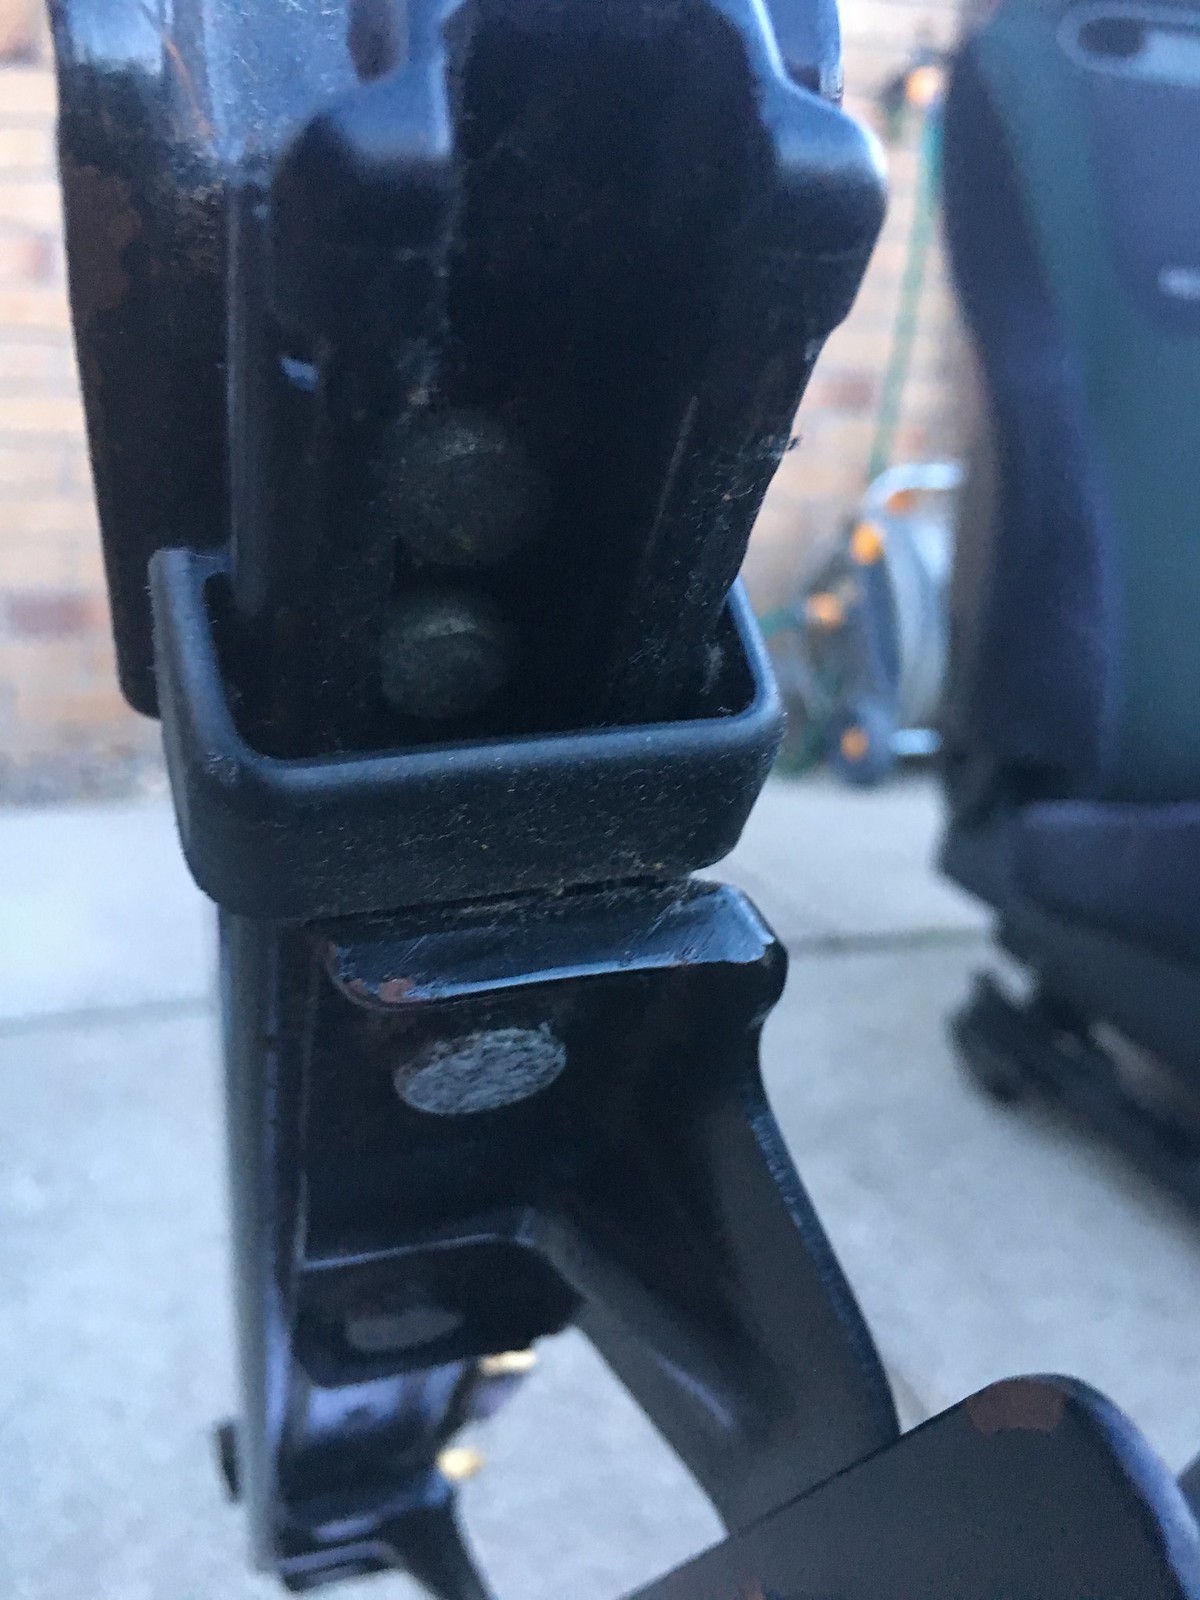
Took much longer than I had planned but I got there in the end. Once id removed the feet I offered up the base plate to the runners, only to find that the frame between the base of the seat and the runners was offset by about an inch.
 Untitled by Paul Meldrum, on Flickr
At this point I had a cup of tea and a wee think about it and released I had to remove the metal frame between the seat base and the runners so that I could bolt the runners directly to the seat bases themselves. This would save me around 2.5” in seat height too.
 Untitled by Paul Meldrum, on Flickr
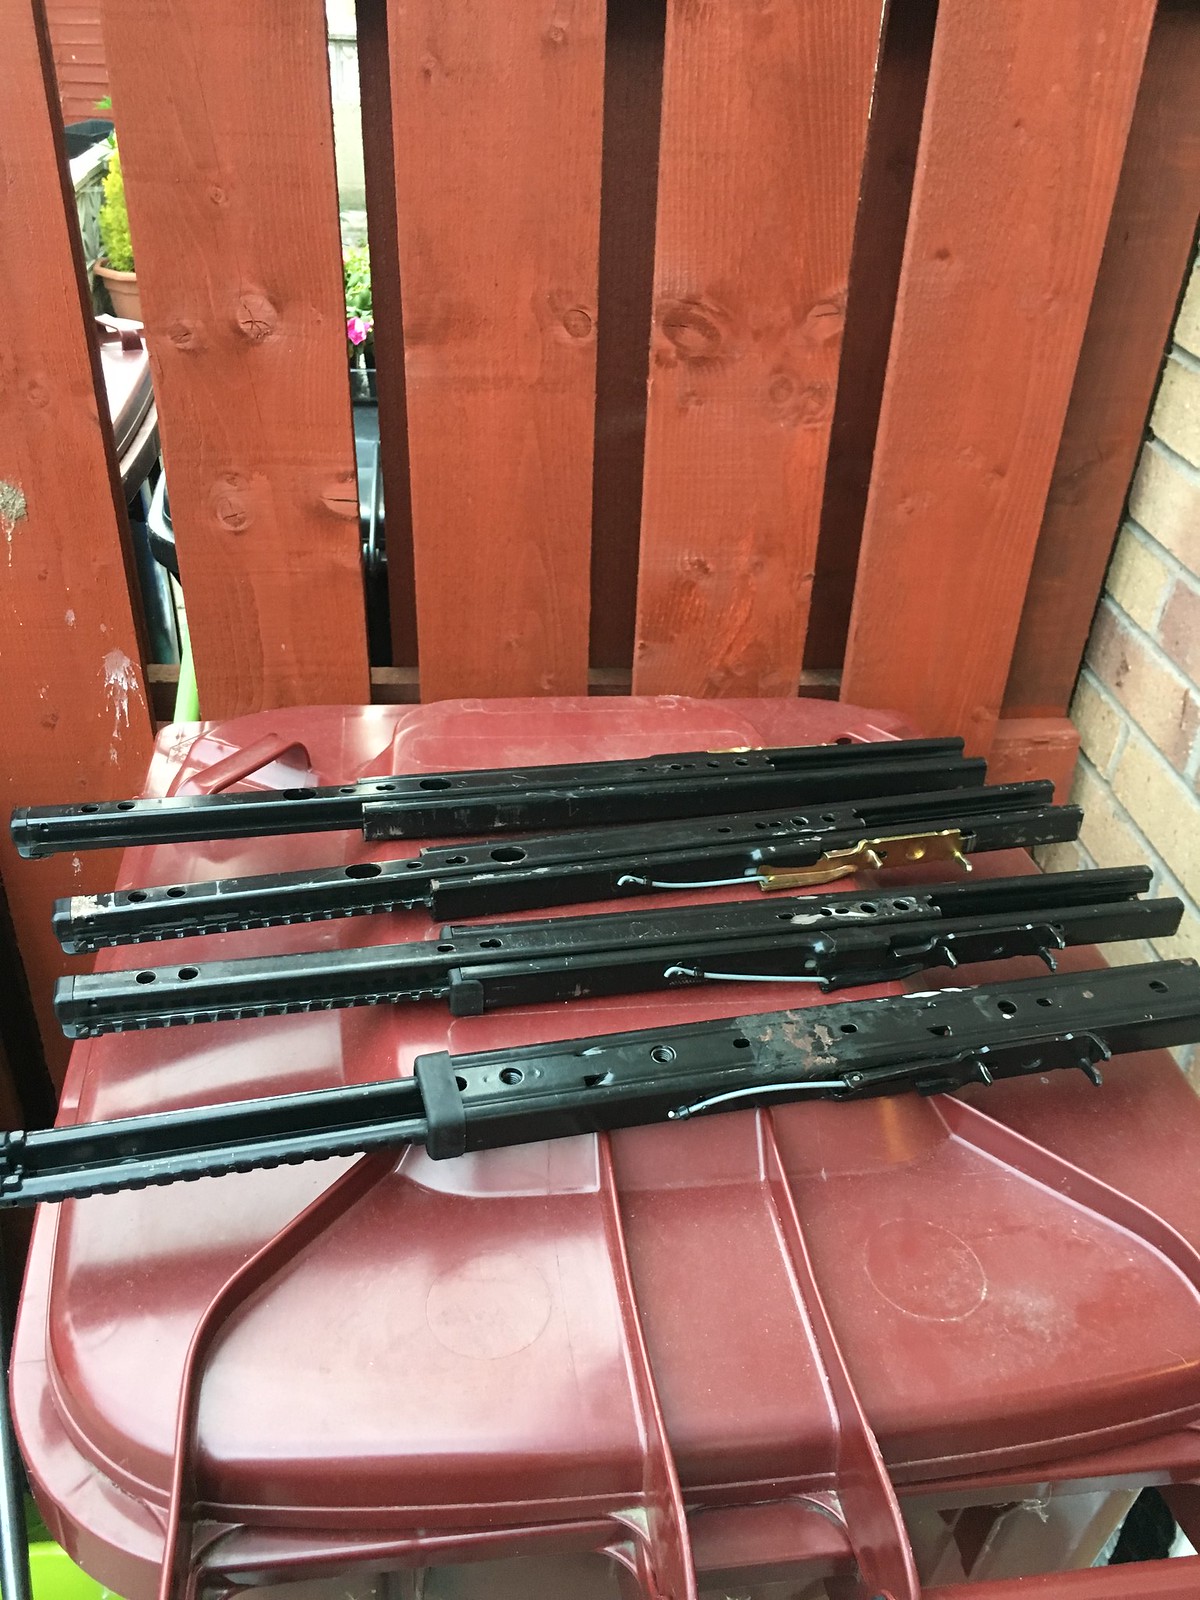
Annoyingly the V brackets were also fitted to the runners by press stud, so they had to be ground out too. Once done I had a clean set of runners I could bolt on to the base of the seats.
 Untitled by Paul Meldrum, on Flickr
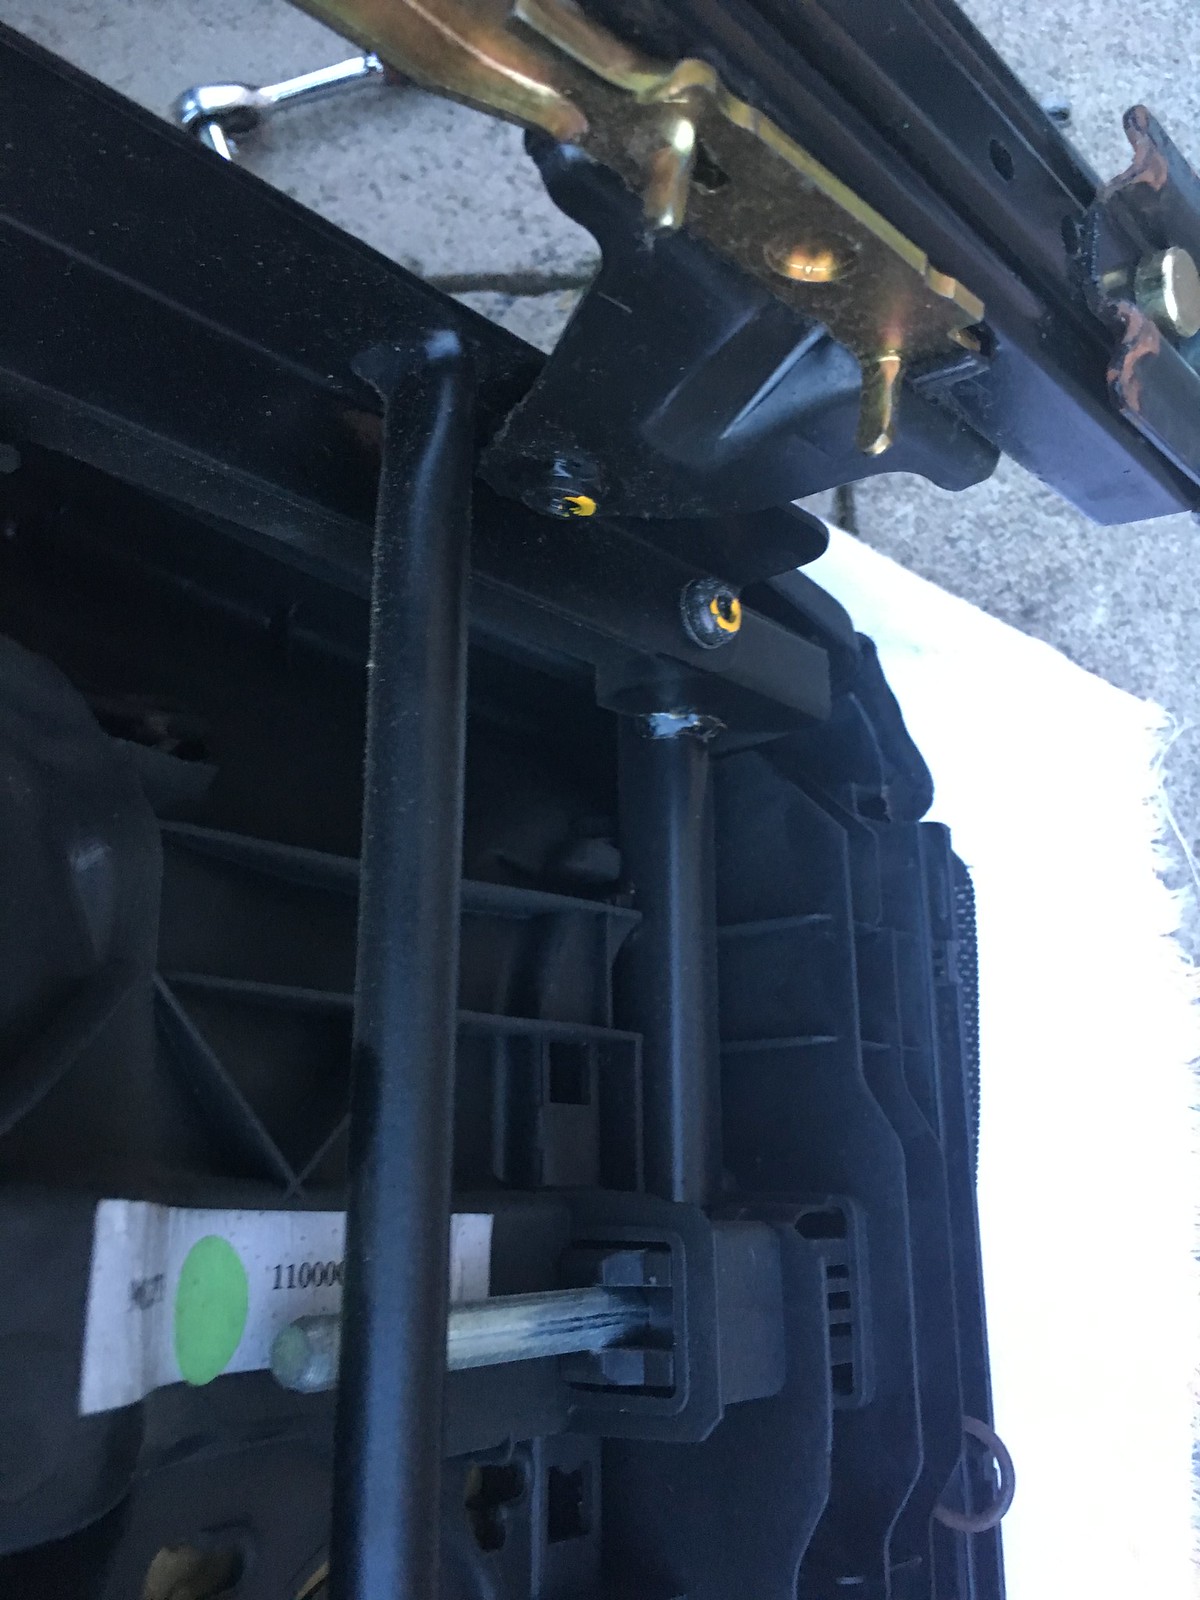
I had to elongate a few of the holes in the runners for them to line up perfectly but it was more time consuming than difficult. Due to the shape of the lower seat cushion it causes a dip under the seat. This was then interfering with the new base plates I had bought. Clearly this is why the standard set up had those V brackets to clear the hump. I had to make a set of spacers from aluminium that would clear the interference (16mm) and use longer securing bolts between the runners and the base plate. I was also able to re-use the standard seat belt holders from the S2000 seats and the bolted straight on without too much hassle.
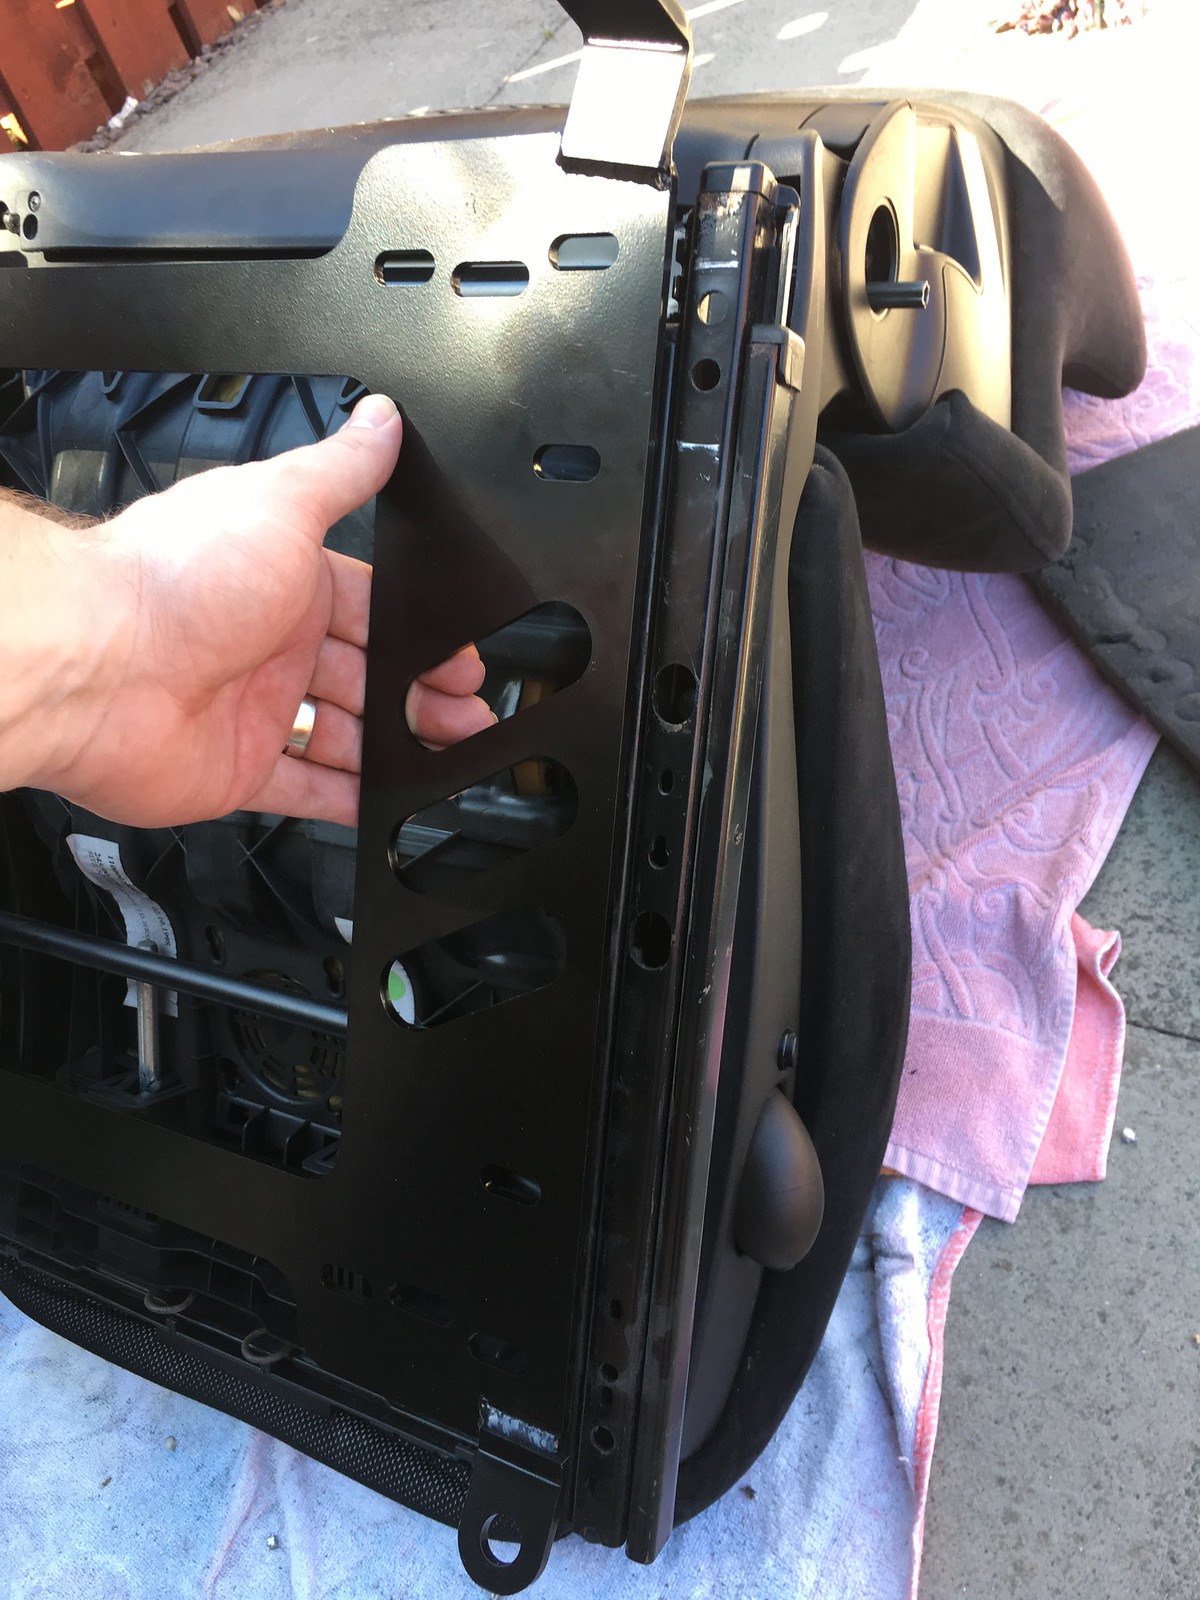
Due to all the faffing about I was concentrating on only one seat so that any mistakes or miss step would/should only need fixed/solved once. After removing the standard seat I gave the carpet and plastics a good hoover and clean then fit the new drivers seat. Although it was a really tight fit, and I mean tight!!! I managed to get all of the bolts in and secured then got the seat set up for my driving position. Sadly, due to the shape of the floor on the driverside I couldn’t retain the handle for adjusting the sliders as it was fouling on the hump in the footwell causing it to always be pushed up and the ratchet mechanism could never click into place. I can refit it (at a struggle) if I ever need to move the seat to get to the anchor bolts to remove them but as it’s only ever me that will drive this car I don’t really mind too much.
So, a picture of half way through fitting showing the difference in appearance between the old and new
 Untitled by Paul Meldrum, on Flickr
 Untitled by Paul Meldrum, on Flickr
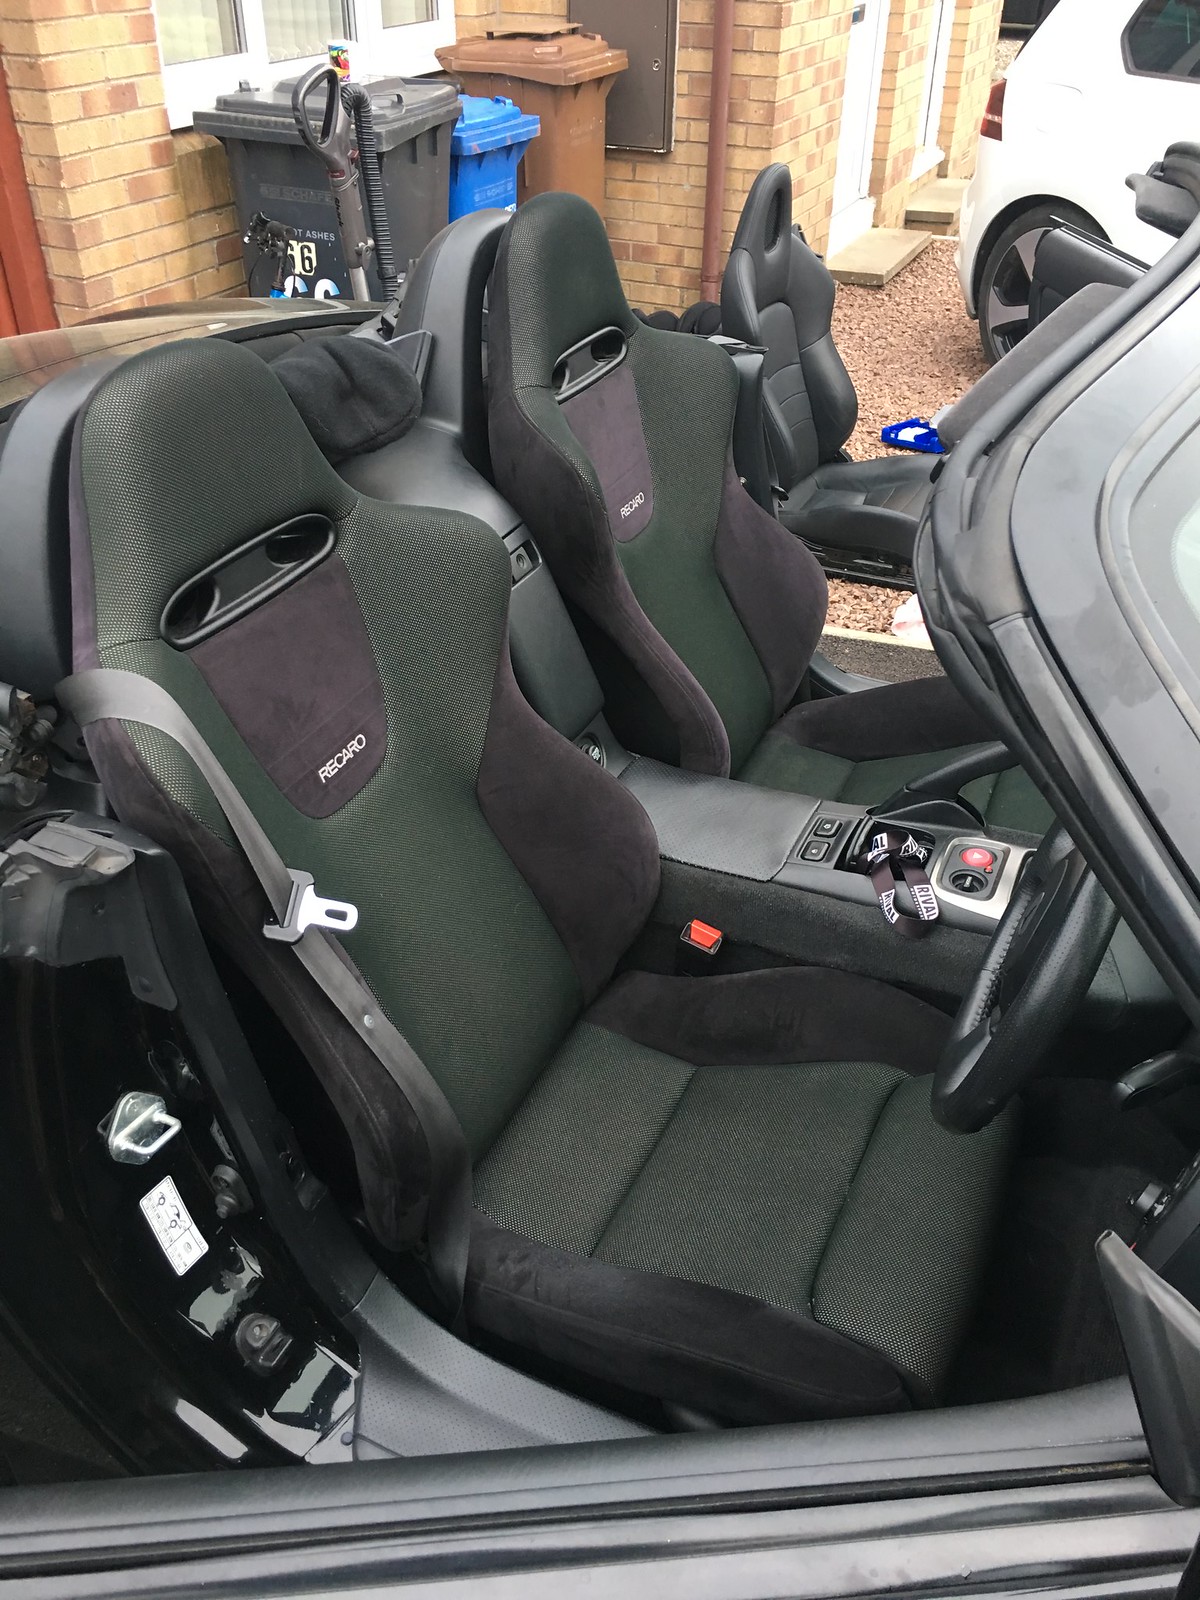
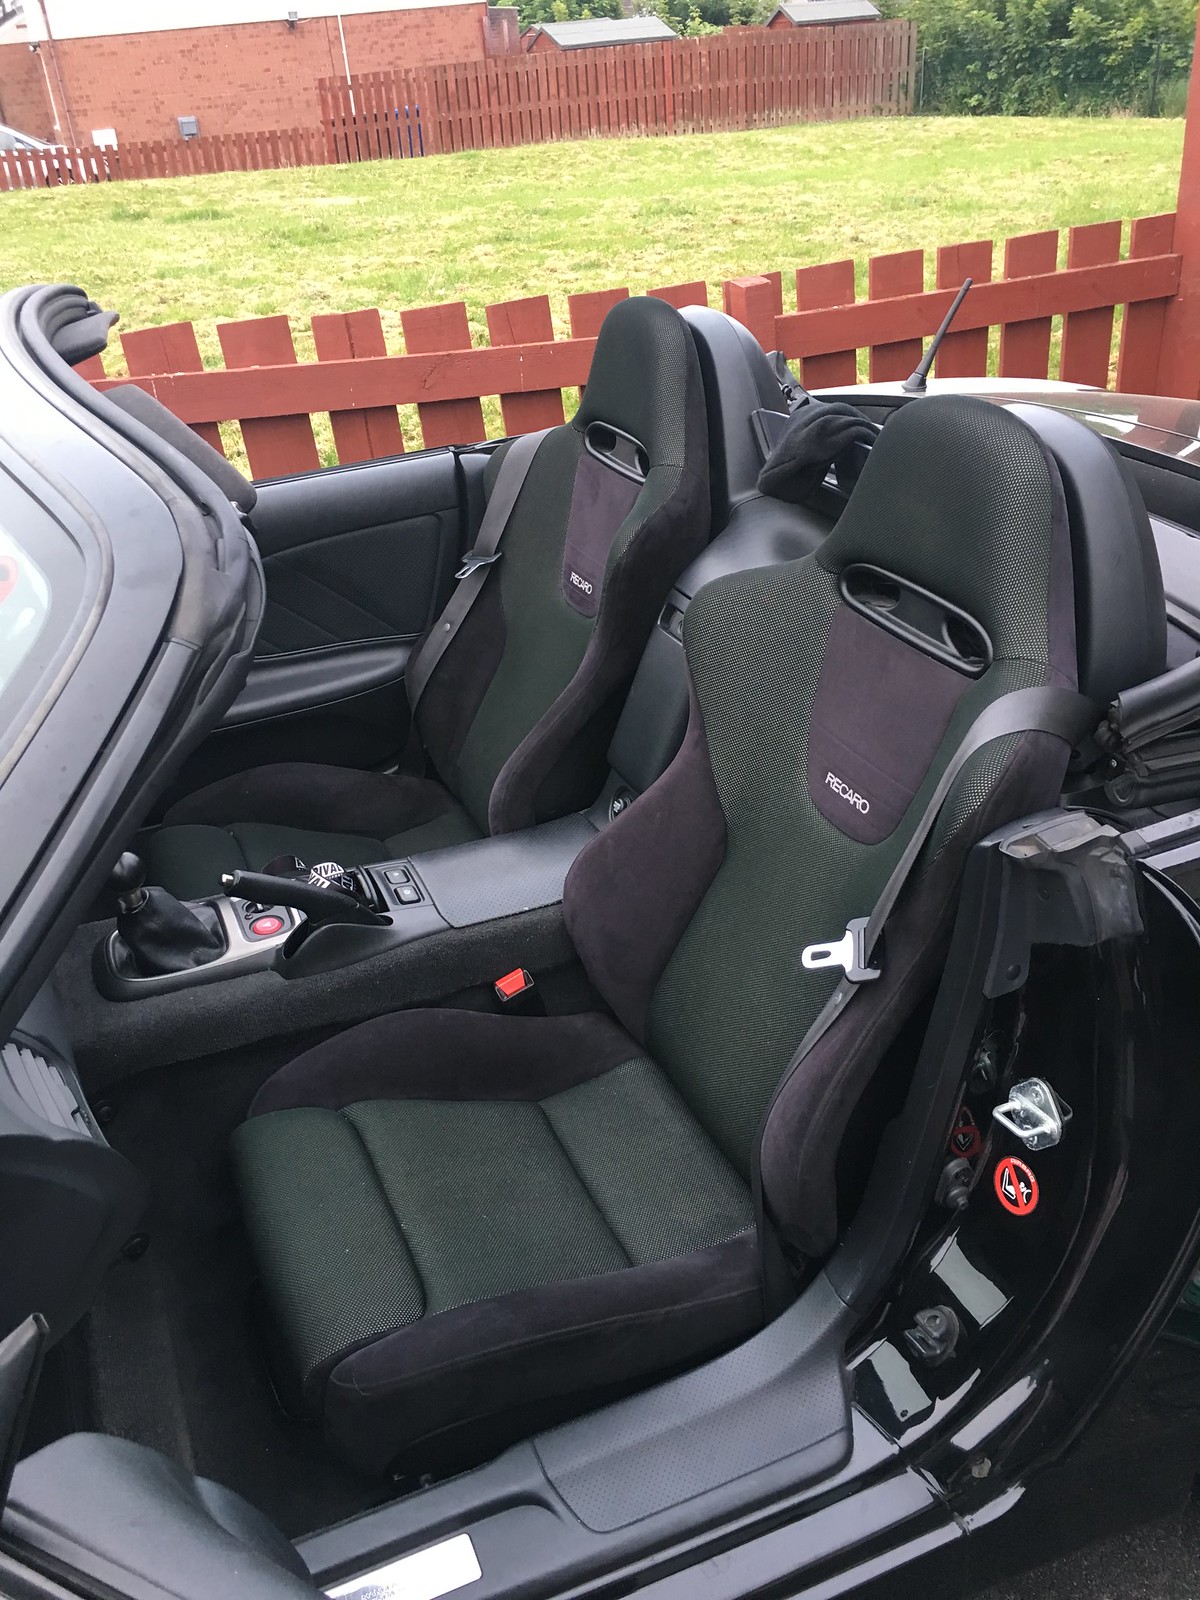
The passenger side was much more straight forward and I fit it one night after work. Plus the footwell doesn’t have that strange hump in it like the driverside so the seat is fully adjustable too.
 Untitled by Paul Meldrum, on Flickr
 Untitled by Paul Meldrum, on Flickr
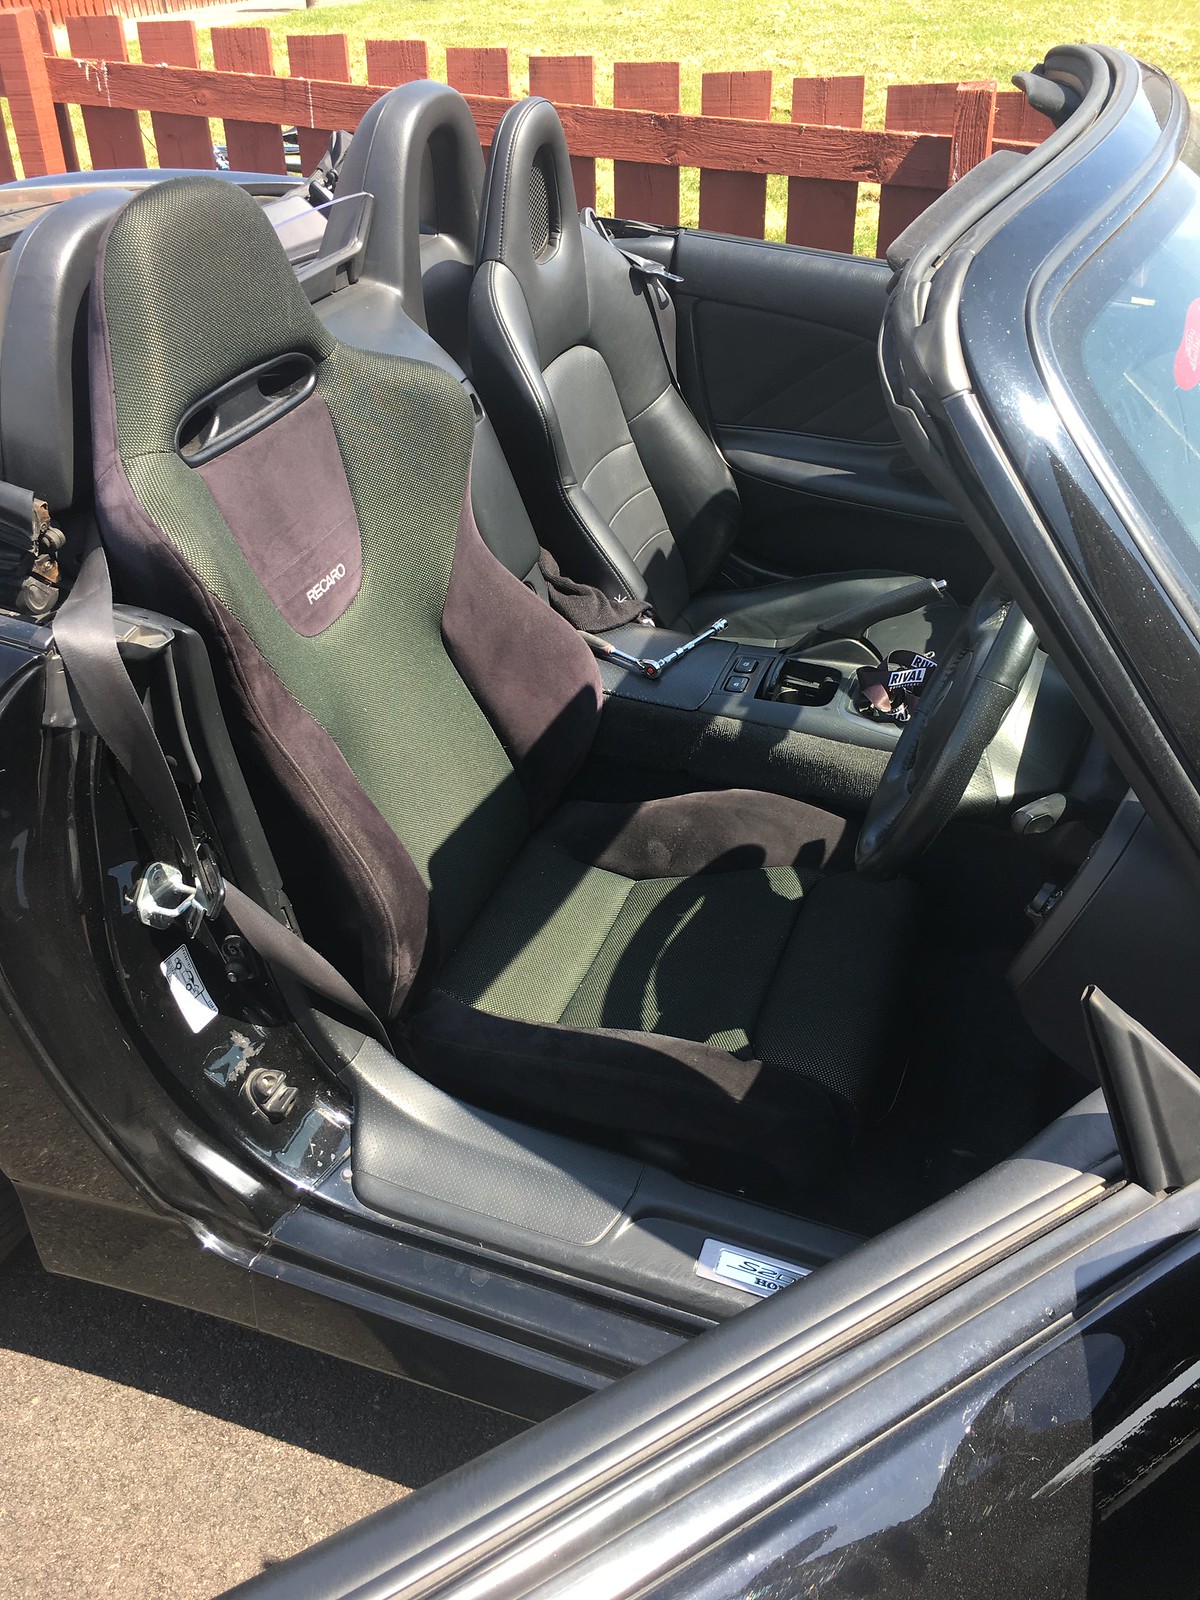
I’m absolutely made up with how it all turned out. The seats are super comfortable, have the inflatable bolsters (still hold pressure fine), have the extendable thigh support on the base cushions and look like they could be OEM. A few of my friends mentioned how they weren’t so sure when I sent them pictures but when they seen them and the car as a whole they think it’s a nice looking upgrade.
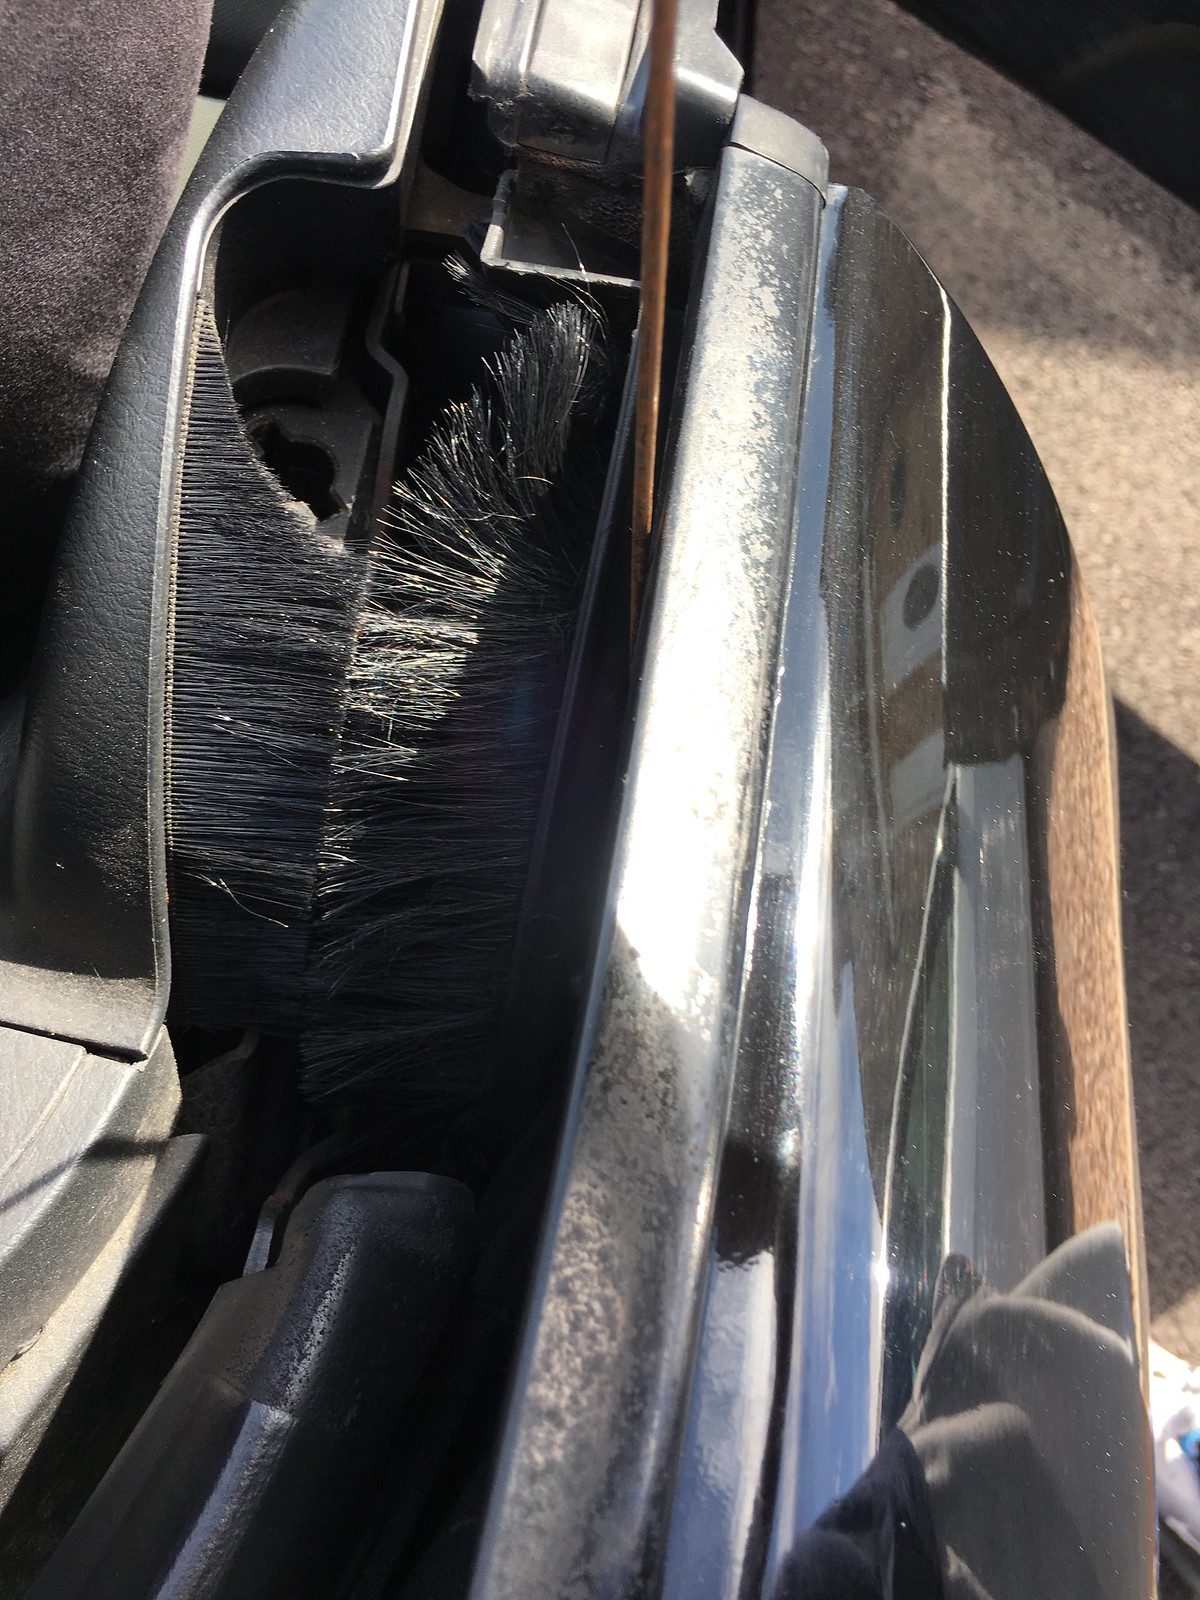
The next task was to have a look at the drains for the soft top. I’ve heard of a few horror stories resulting in rust and water leaking into the interior when the drains become blocked. I had a quick look on google to find out exactly where they are and how to check if they are blocked or not. I dropped the roof down partly to gain access and pushed a welding rod in to the drain between the interior trim and the rear quarter.
 Untitled by Paul Meldrum, on Flickr
There was no resistance found so I then poured a glass of water down both sides and it was flowing perfectly out of the drain tube inside the rear wheel well. While I was doing all of this I noticed there was a bit of algae/green moss building up where the soft top goes into the back of the car and it was quite thick and crusty around the plastic trim pieces too.
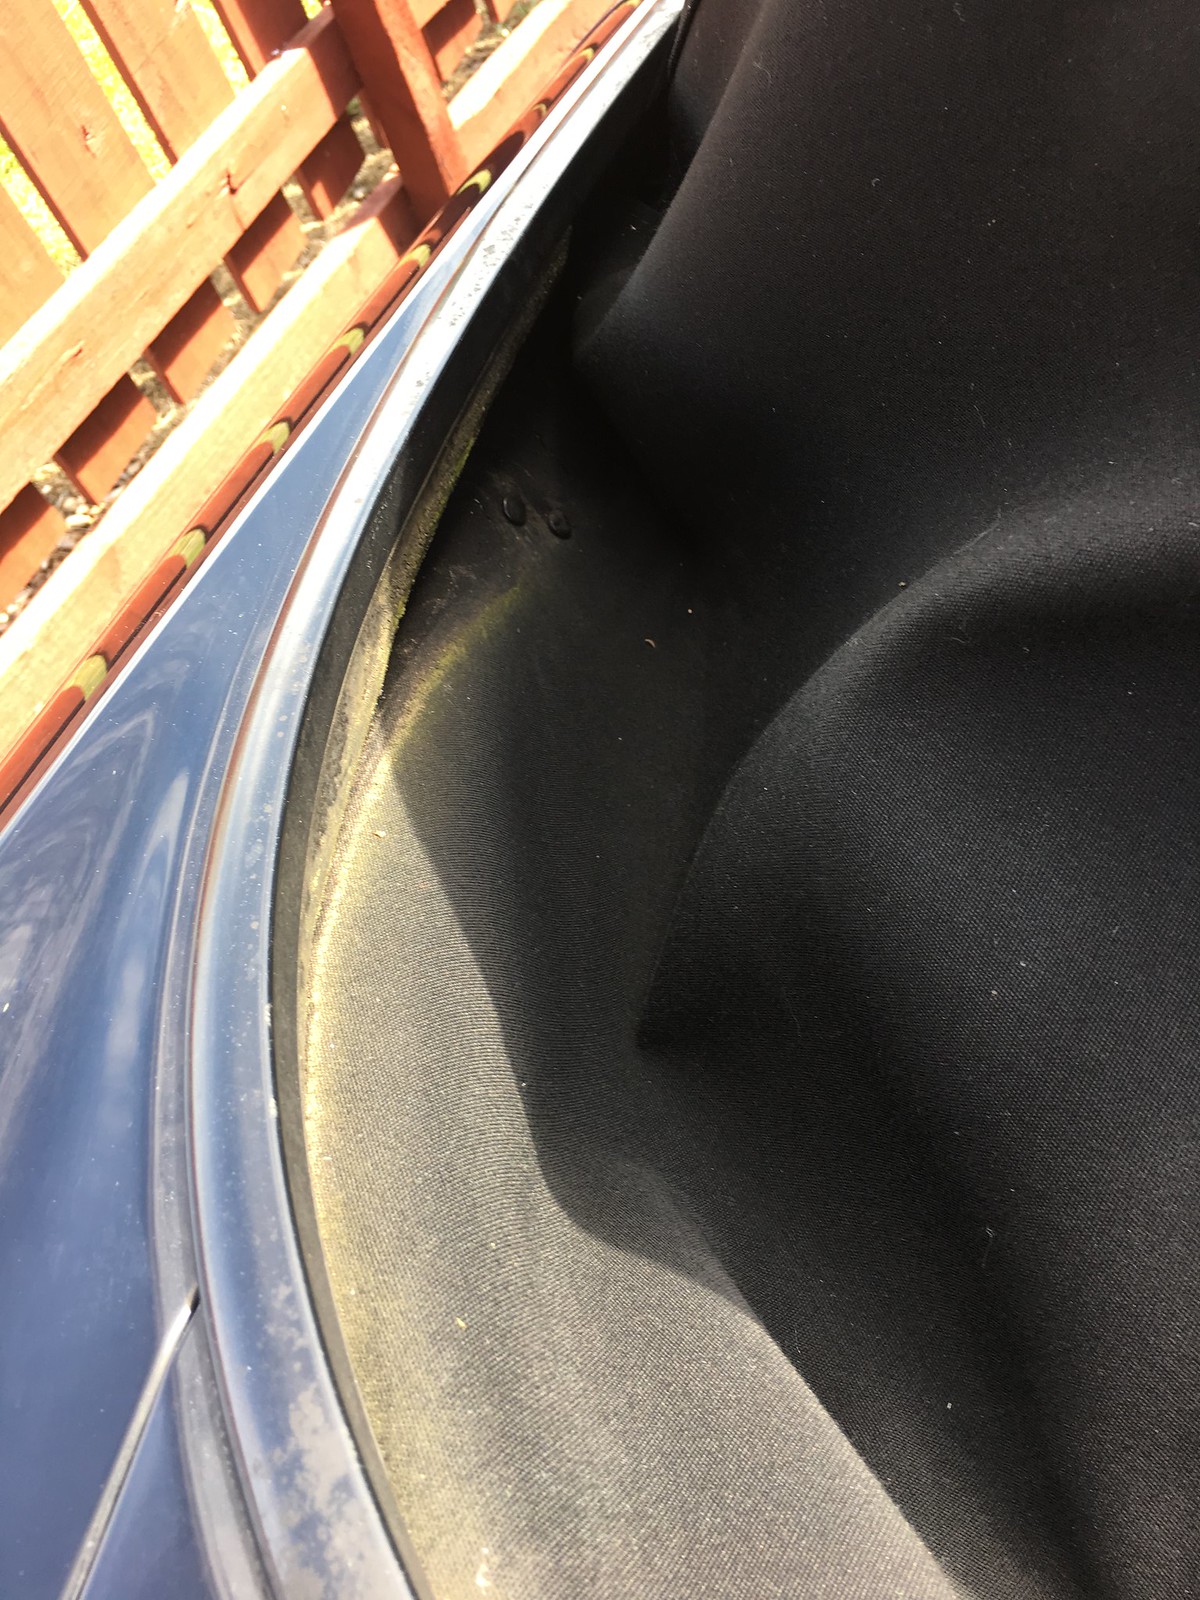 Untitled by Paul Meldrum, on Flickr
 Untitled by Paul Meldrum, on Flickr
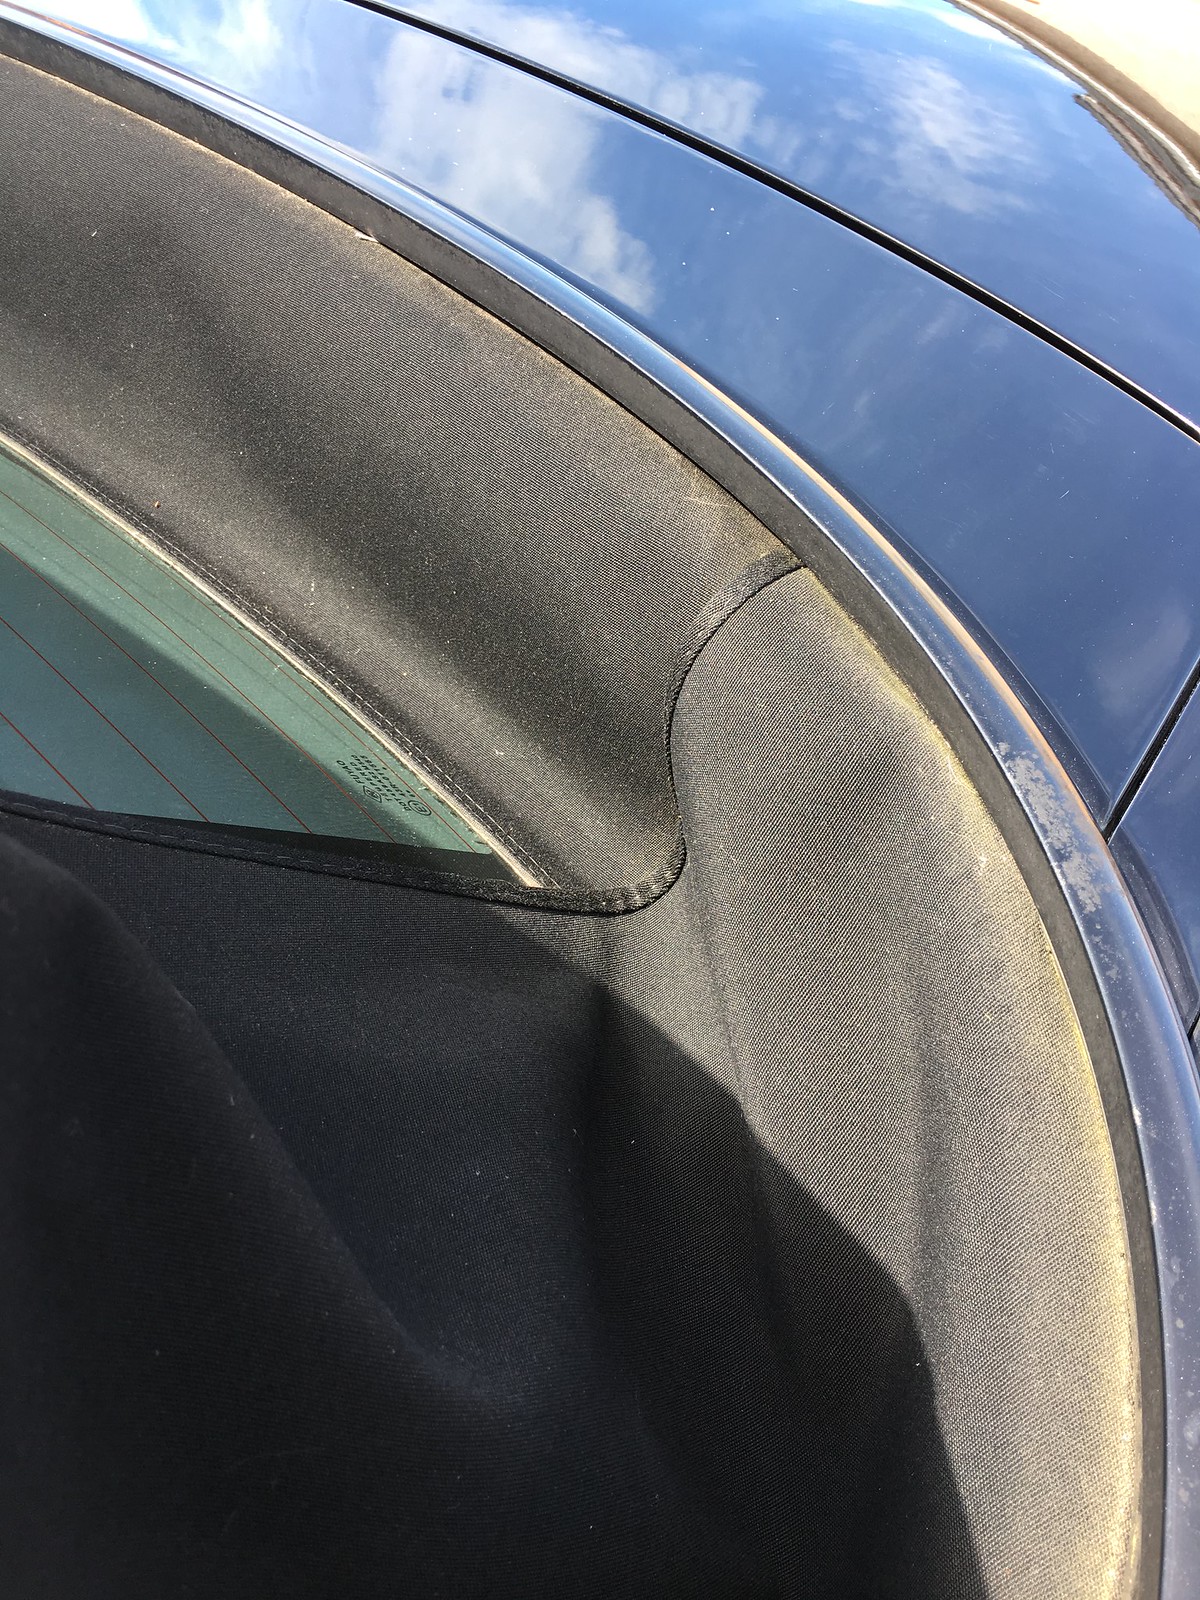
So I gave it a proper scrub and it cleaned up rather well.
 Untitled by Paul Meldrum, on Flickr
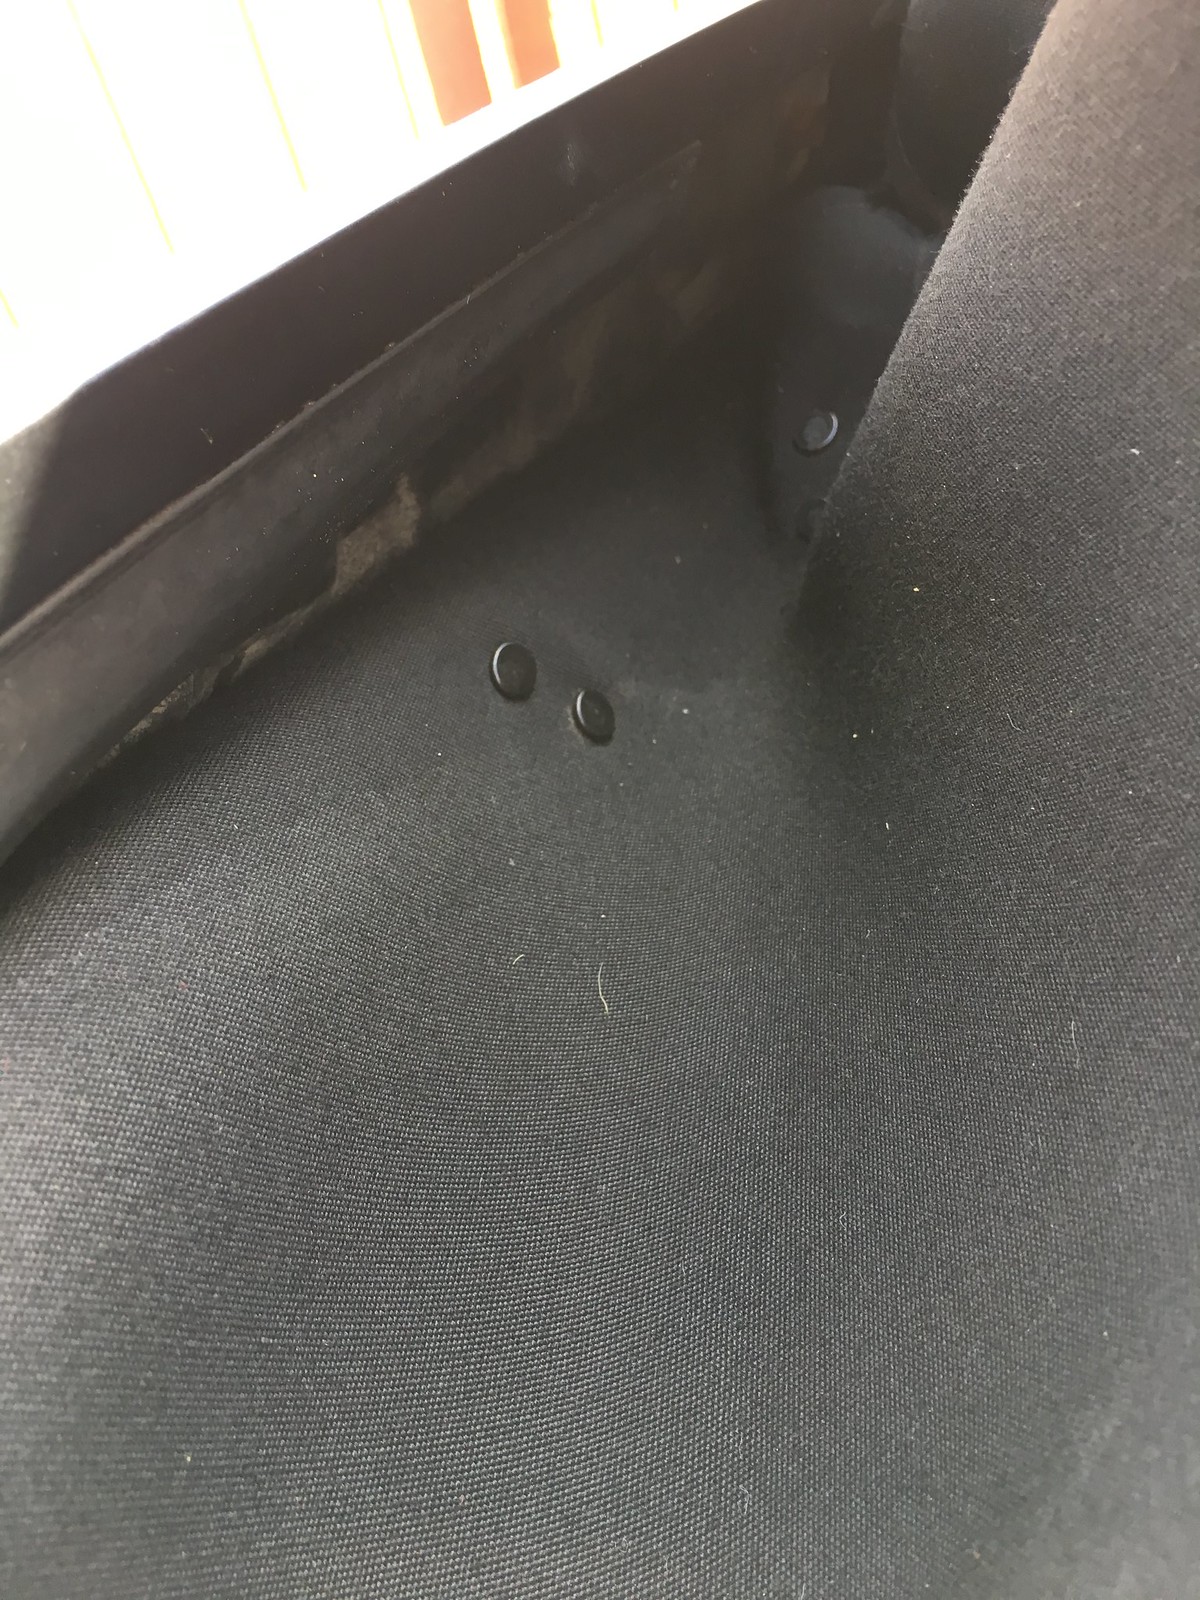
When I purchased my S2000 it was advertised as a roadster, so you can imagine my surprise when I found it had the GT hardtop brackets and the electrical connection for the rear demister. I have purchased these brackets separately for a previous S2000 and they were pretty expensive, so this is a right result and will save me a bit of cash should I choose to buy a hardtop.
 Untitled by Paul Meldrum, on Flickr
 Untitled by Paul Meldrum, on Flickr
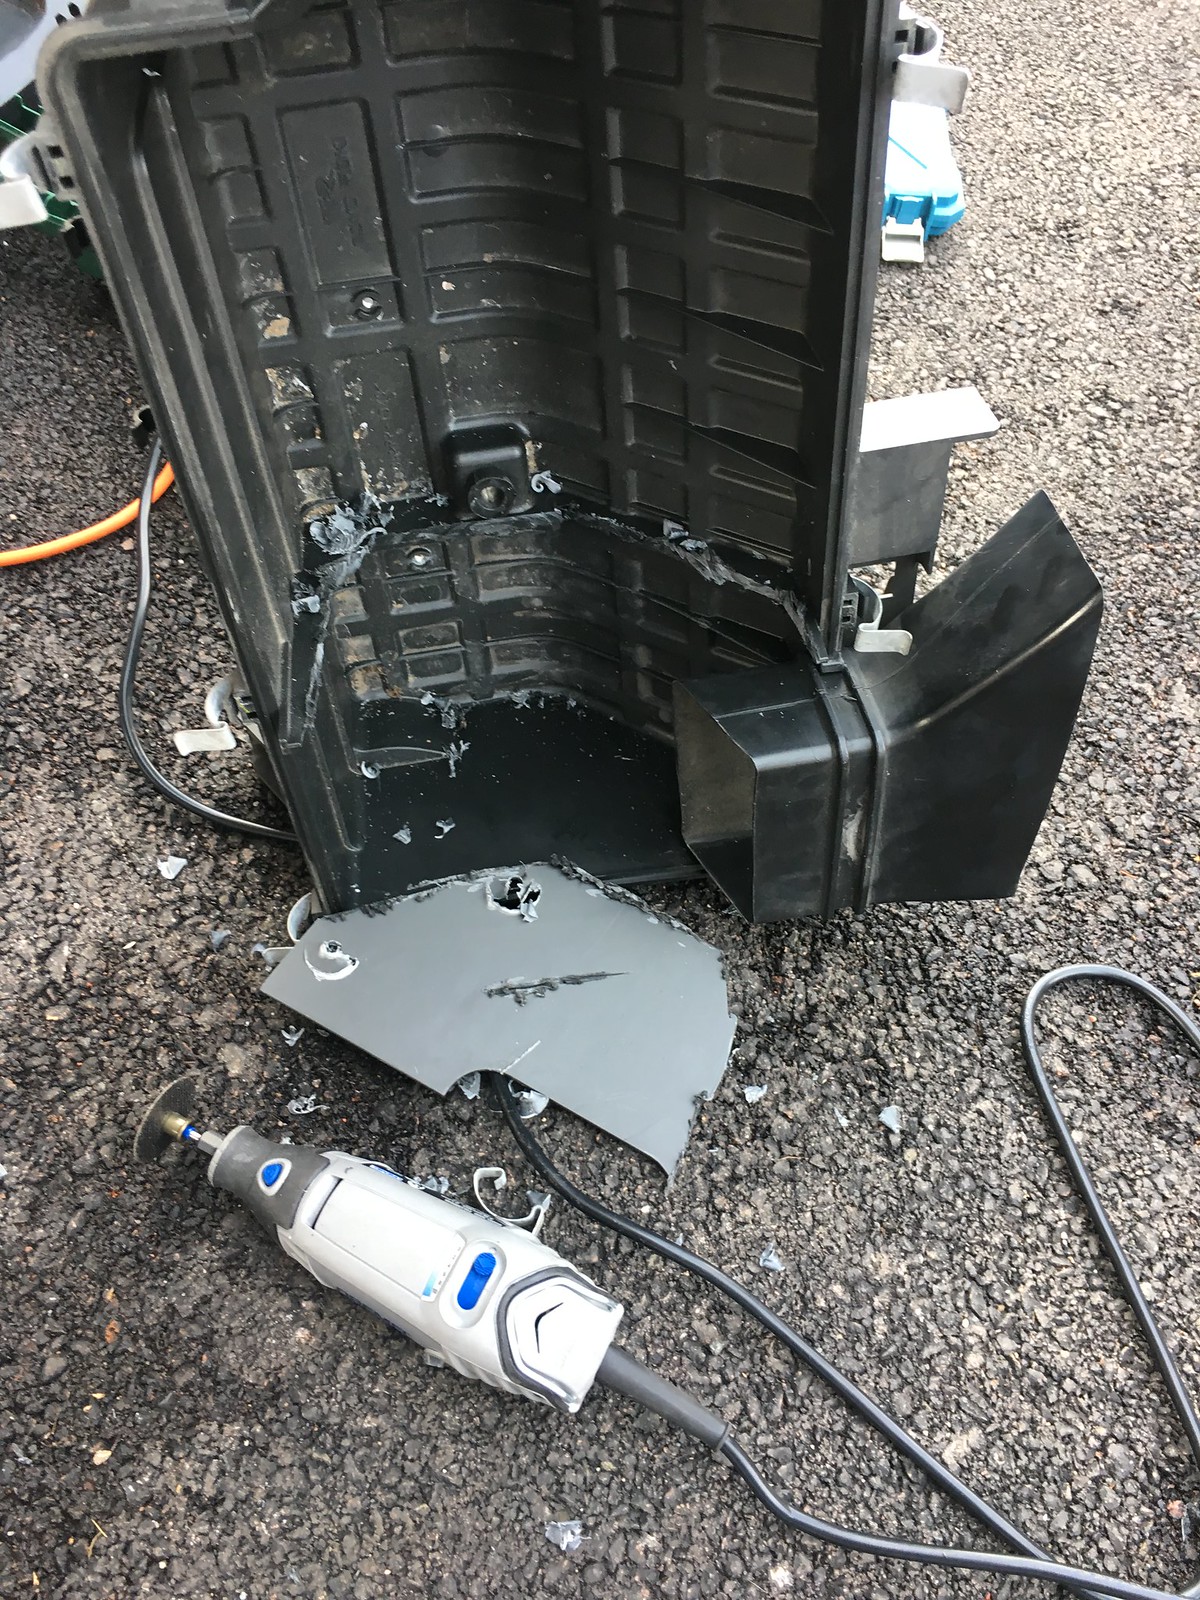
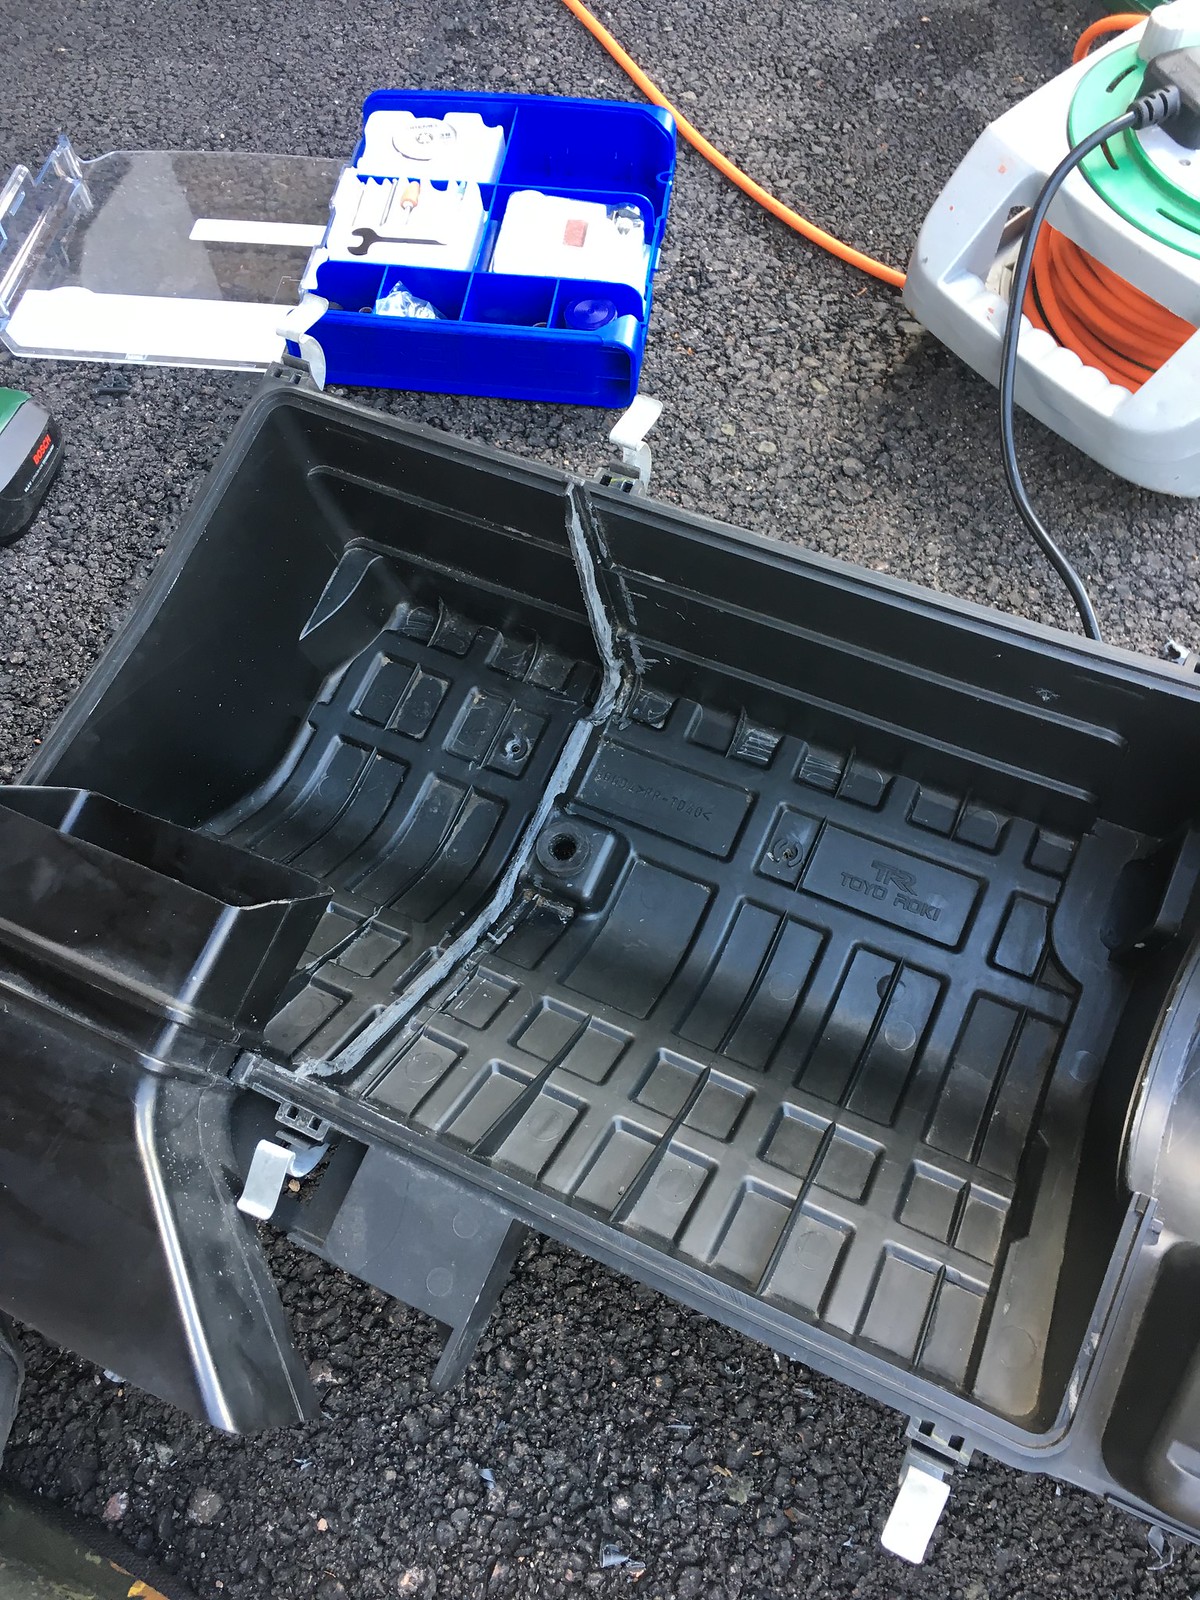
The last bit of work that I have done recently will take us right up to date with the car. I decided I didn’t want to fit an open cone intake system on the car. The last time I did that the car suffered from horrendous heat soak resulting in reduced power or even worse kangarooing like a madman when navigating through stop start traffic. I decided to perform the Hondata airbox mod and fit a K&N replacement drop in filter in the standard airbox. Removing the airbox was pretty straight forward. Just undo the 6 spring clips to remove the lid and gently remove the vacuum lines, wiring and sensor from the airbox. Slacken off the hose clamp to remove the intake tube and filter, then remove the 3, 10mm bolts holding the airbox in place.
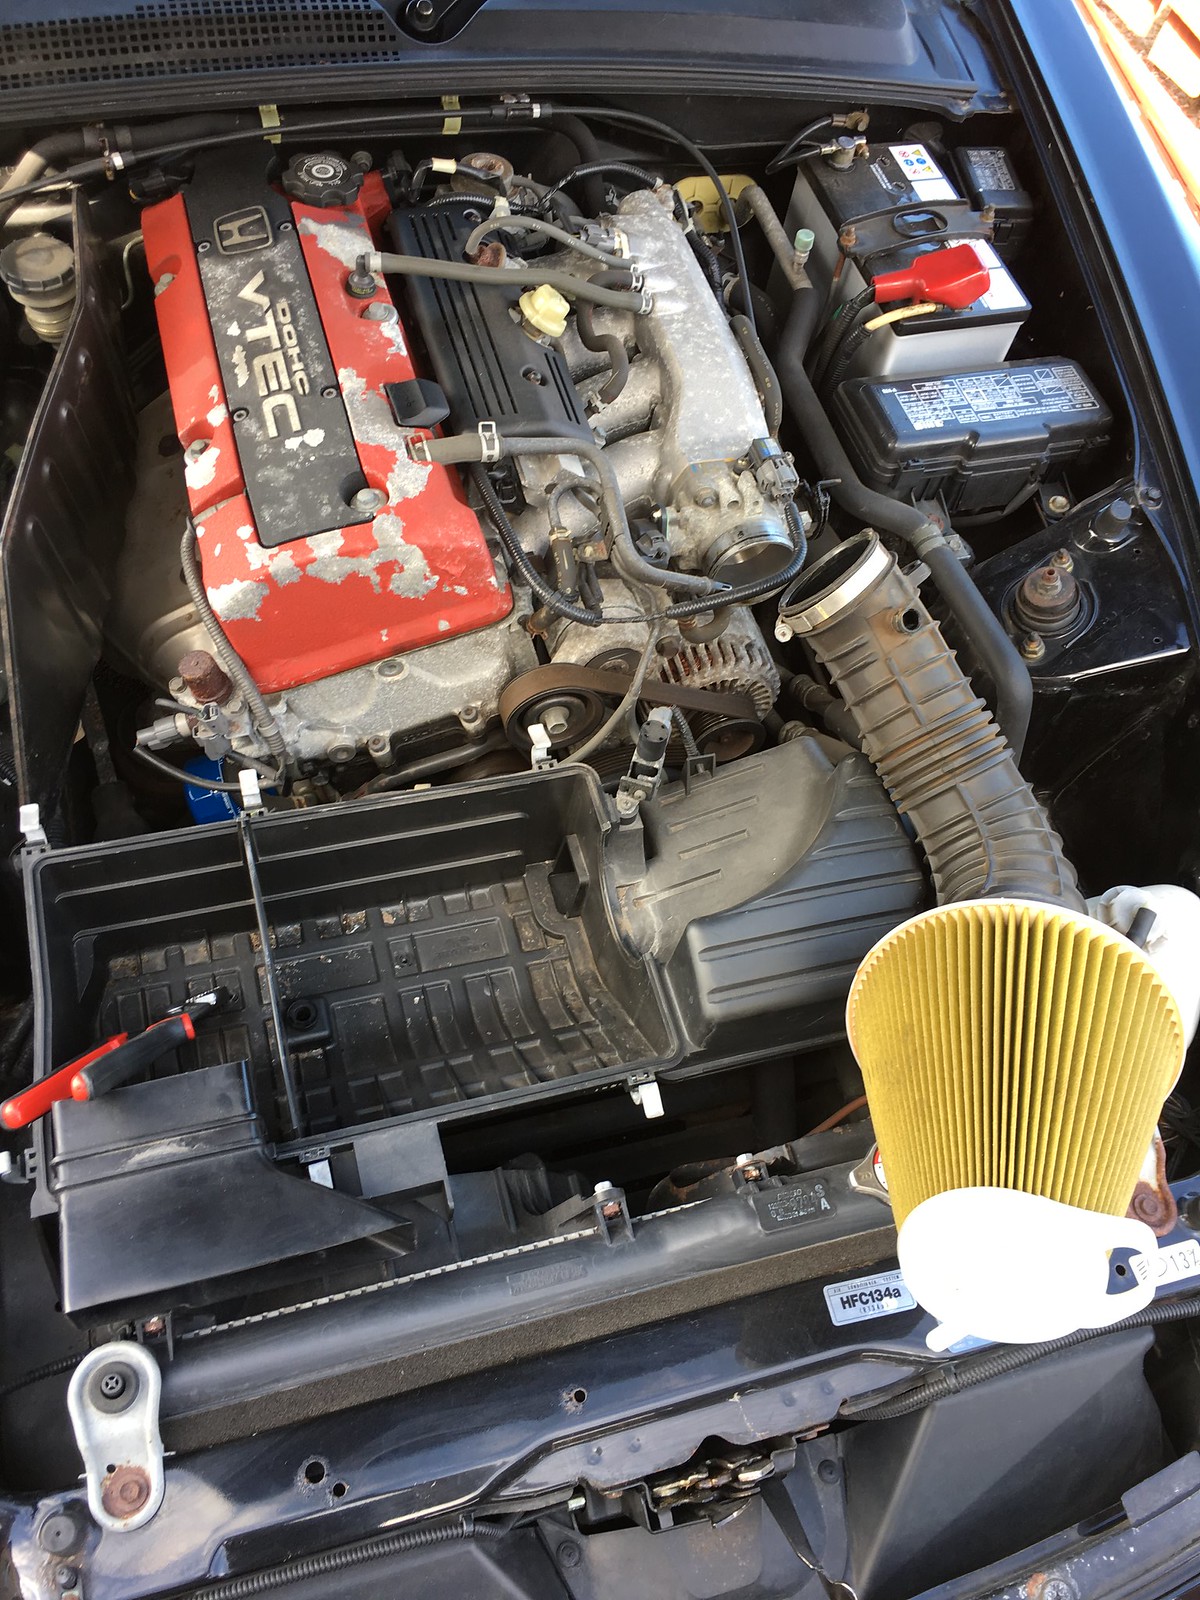 Untitled by Paul Meldrum, on Flickr
Excuse the flaky rocker cover, it’s on the list of jobs to do……..
Once you have the airbox out you need to cut out the centre divider, then clean and dress the plastic.
 Untitled by Paul Meldrum, on Flickr
 Untitled by Paul Meldrum, on Flickr
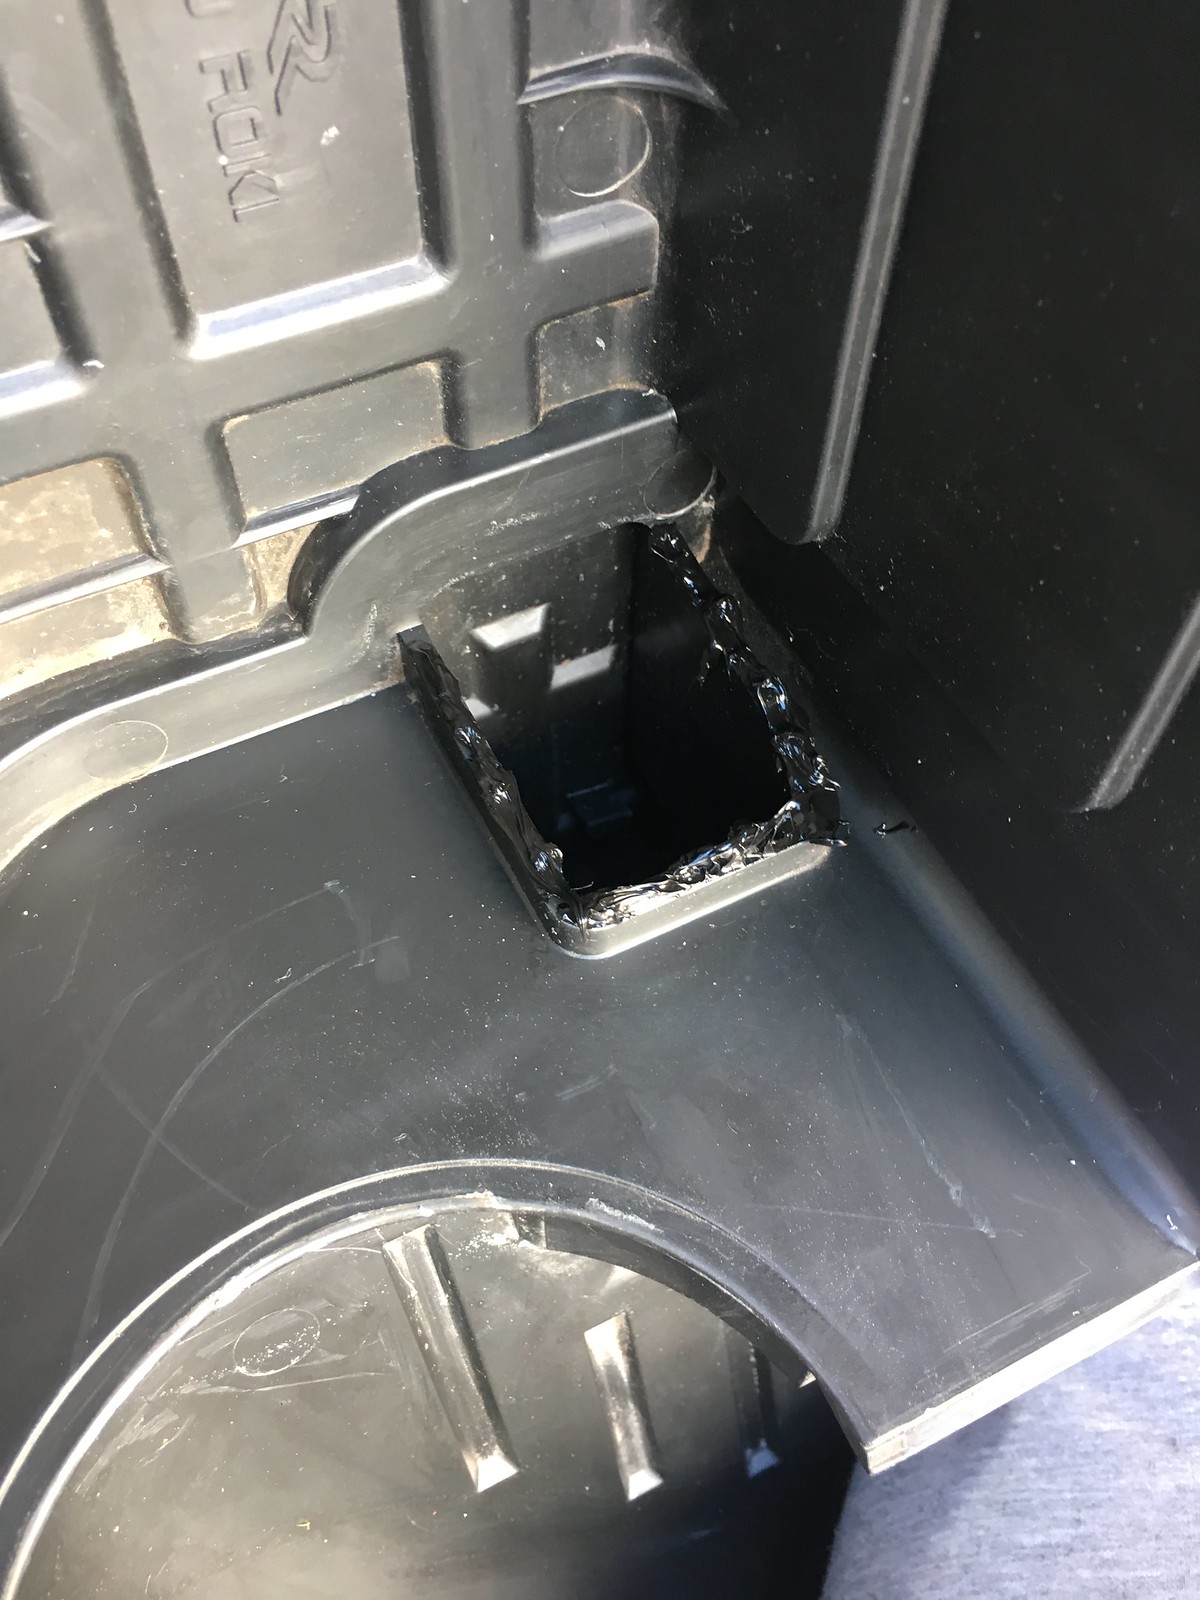
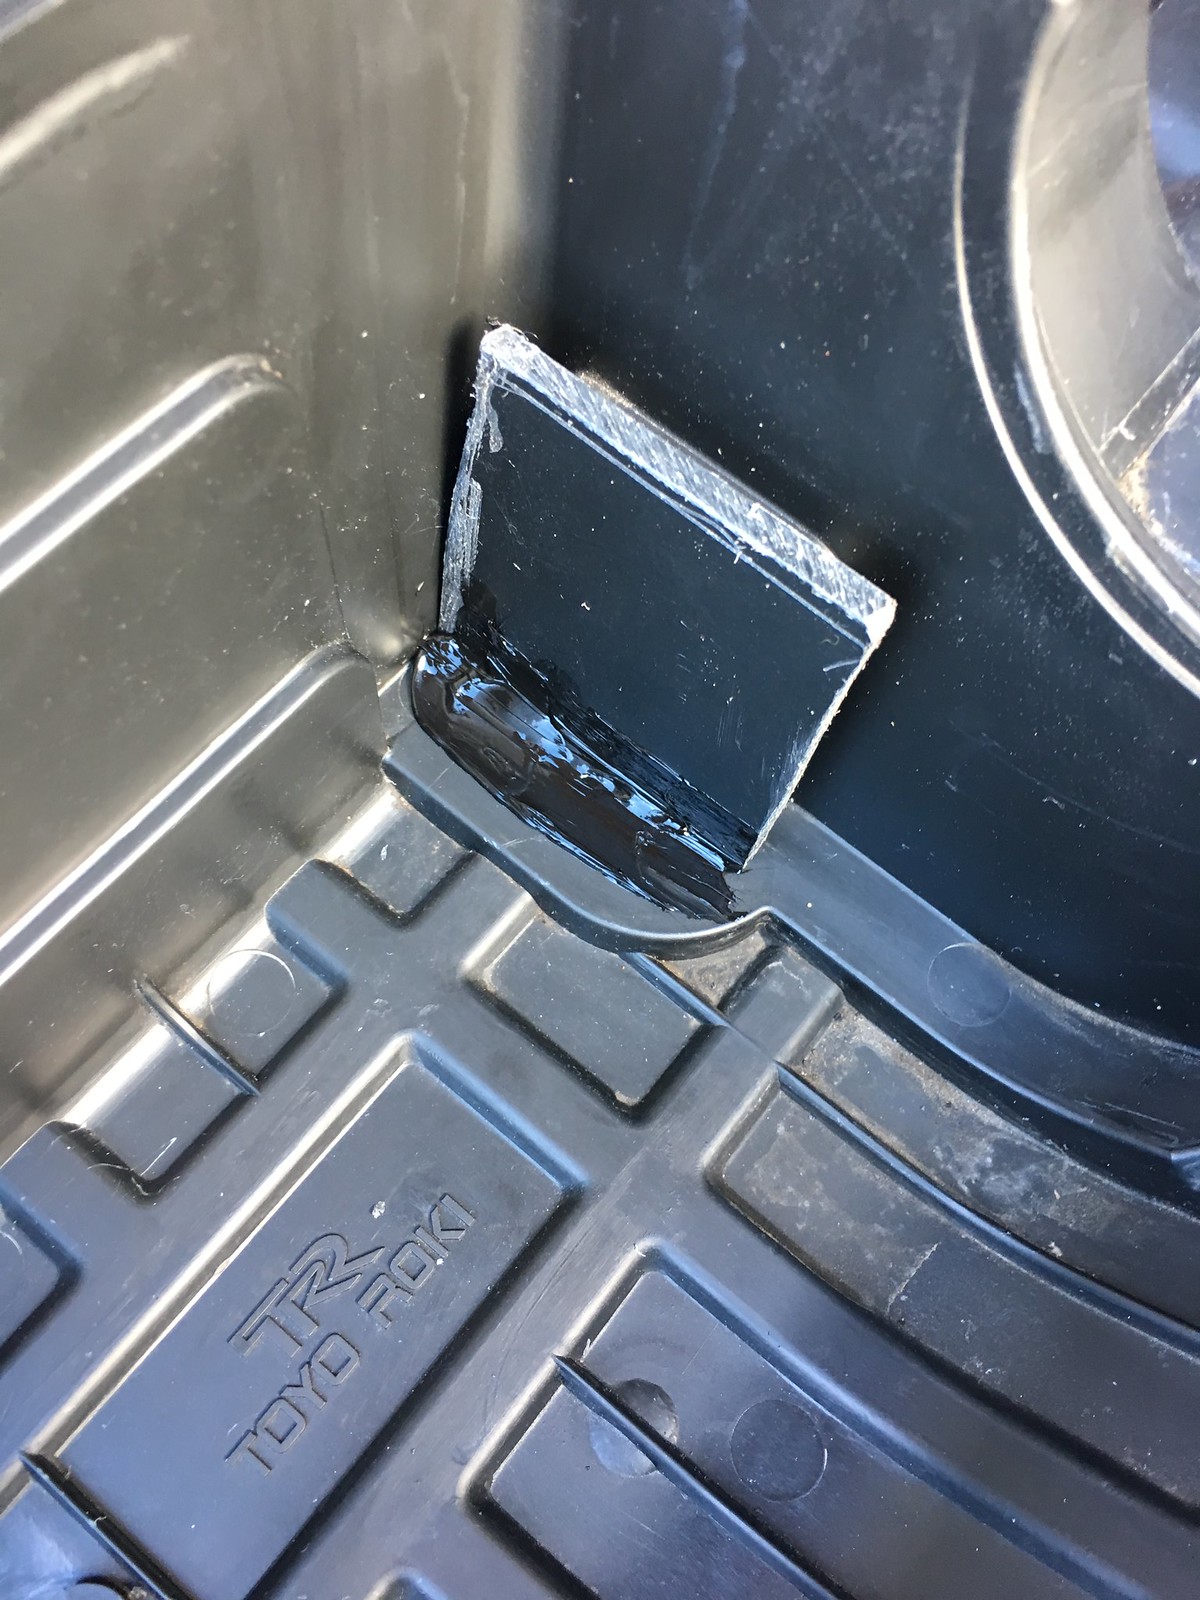
The second part of the job is to cut out a square from the plastic divider you just removed. Use this to block off the resonator from the chamber. I glued mines on with silicone.
 Untitled by Paul Meldrum, on Flickr
I also used a little silicone to fill the hole at the bottom too.
 Untitled by Paul Meldrum, on Flickr
I built it all back up then let it dry over night before taking it for a blast the next morning. There is definitely a more mechanical resonance and induction roar from the intake and the cross over is much more pronounced now too. It will never be as manic sounding as a full on cone filter but I get most of the benefits with none of the drawbacks so it was worth it to me.
Other than the work I’ve carried out I’ve just been enjoying the roof down action in this great weather we have been having. I’ve attended a few local meets and been thinking over the direction I want to go with the car and what the next tasks to tackle are. As always whatever I get up to I will post it up on here. Thanks for reading and I hope you enjoyed my latest ramblings.
Cheers,
Melly
It’s been a number of weeks since my last update and I have made good use of the fantastic weather to get a few jobs done on the car.
Picking up from my last post, I’ve finally got the new seats fitted. I’ll be honest though, it was an absolute nightmare of a job with most every step forward requiring another alteration or modification. The fact that on occasion, I have my young lad in the car with me meant I couldn’t cut any corners or have a ”that will do” attitude. On the final fit I used quality grade 8 bolts and nyloc nuts to keep it all together whilst retaining the factory fastenings when bolting the seats to the floor and the female seatbelt receptacles. I didn’t take as many pictures as I usually do owing to the fact it was a bit of a ball ache as previously mentioned.
The whole idea started when I was watching a video on youtube of a lad fitting Recaros to his S2000. He had purchased a set of S2000 specific, universal base plates and apart from opening up a couple of holes in the sliders to mount them to the base plate, it was pretty straight forward stuff and had the added benefit of lowering the seat height too. The cabin is a bit tight in an S2000 and any extra room that can be found is welcome, especially when dropping the seat height to give more room between your thighs and the wheel as the factory steering column is non-adjustable.
Now, I’d heard that DC5/2 Recaros can be a bit of a tight squeeze to fit in an S2000. The problem is their width. The bolsters touch the door and can also block the centre cubby from opening up. The fact that a mint set of them can cost £500 and the possible width problems put me off. I was chatting to a friend of mines about it over an online game of Call of Duty and he mentioned that he had a set of very clean Accord Type R recaros sitting in his bedroom being used as a clothes horse. They are basically the same seats from the EP3 Premier Edition I sold at the beginning of the year but in a different colour. I loved how comfortable those seats were so over the next few games we talked it over and a deal was done. I found the company Mr Youtube used in the states and ordered the same base plates he used in the video. Delivery was very quick, and they marked them down as a $10 part to save me paying any import tax which was ace.
Untitled by Paul Meldrum, on FlickrI thought I now had everything I needed to crack on with the job, so I made a start to it over the bank holiday weekend. Instantly I hit my first roadblock, the Accord specific mounting feet are fitted to the rails using some sort of press stud from factory. I’ve never done anything like this before and I was a bit surprised to find that all of the seat components are built that way.
Untitled by Paul Meldrum, on FlickrUntitled by Paul Meldrum, on FlickrNothing for it but to get the grinder out and cut them off. I didn’t have my angle grinder at home so the Dremel had to do.
Untitled by Paul Meldrum, on FlickrTook much longer than I had planned but I got there in the end. Once id removed the feet I offered up the base plate to the runners, only to find that the frame between the base of the seat and the runners was offset by about an inch.
Untitled by Paul Meldrum, on FlickrAt this point I had a cup of tea and a wee think about it and released I had to remove the metal frame between the seat base and the runners so that I could bolt the runners directly to the seat bases themselves. This would save me around 2.5” in seat height too.
Untitled by Paul Meldrum, on FlickrAnnoyingly the V brackets were also fitted to the runners by press stud, so they had to be ground out too. Once done I had a clean set of runners I could bolt on to the base of the seats.
Untitled by Paul Meldrum, on FlickrI had to elongate a few of the holes in the runners for them to line up perfectly but it was more time consuming than difficult. Due to the shape of the lower seat cushion it causes a dip under the seat. This was then interfering with the new base plates I had bought. Clearly this is why the standard set up had those V brackets to clear the hump. I had to make a set of spacers from aluminium that would clear the interference (16mm) and use longer securing bolts between the runners and the base plate. I was also able to re-use the standard seat belt holders from the S2000 seats and the bolted straight on without too much hassle.
Due to all the faffing about I was concentrating on only one seat so that any mistakes or miss step would/should only need fixed/solved once. After removing the standard seat I gave the carpet and plastics a good hoover and clean then fit the new drivers seat. Although it was a really tight fit, and I mean tight!!! I managed to get all of the bolts in and secured then got the seat set up for my driving position. Sadly, due to the shape of the floor on the driverside I couldn’t retain the handle for adjusting the sliders as it was fouling on the hump in the footwell causing it to always be pushed up and the ratchet mechanism could never click into place. I can refit it (at a struggle) if I ever need to move the seat to get to the anchor bolts to remove them but as it’s only ever me that will drive this car I don’t really mind too much.
So, a picture of half way through fitting showing the difference in appearance between the old and new
Untitled by Paul Meldrum, on FlickrUntitled by Paul Meldrum, on FlickrThe passenger side was much more straight forward and I fit it one night after work. Plus the footwell doesn’t have that strange hump in it like the driverside so the seat is fully adjustable too.
Untitled by Paul Meldrum, on FlickrUntitled by Paul Meldrum, on FlickrI’m absolutely made up with how it all turned out. The seats are super comfortable, have the inflatable bolsters (still hold pressure fine), have the extendable thigh support on the base cushions and look like they could be OEM. A few of my friends mentioned how they weren’t so sure when I sent them pictures but when they seen them and the car as a whole they think it’s a nice looking upgrade.
The next task was to have a look at the drains for the soft top. I’ve heard of a few horror stories resulting in rust and water leaking into the interior when the drains become blocked. I had a quick look on google to find out exactly where they are and how to check if they are blocked or not. I dropped the roof down partly to gain access and pushed a welding rod in to the drain between the interior trim and the rear quarter.
Untitled by Paul Meldrum, on FlickrThere was no resistance found so I then poured a glass of water down both sides and it was flowing perfectly out of the drain tube inside the rear wheel well. While I was doing all of this I noticed there was a bit of algae/green moss building up where the soft top goes into the back of the car and it was quite thick and crusty around the plastic trim pieces too.
Untitled by Paul Meldrum, on FlickrUntitled by Paul Meldrum, on FlickrSo I gave it a proper scrub and it cleaned up rather well.
Untitled by Paul Meldrum, on FlickrWhen I purchased my S2000 it was advertised as a roadster, so you can imagine my surprise when I found it had the GT hardtop brackets and the electrical connection for the rear demister. I have purchased these brackets separately for a previous S2000 and they were pretty expensive, so this is a right result and will save me a bit of cash should I choose to buy a hardtop.
Untitled by Paul Meldrum, on FlickrUntitled by Paul Meldrum, on FlickrThe last bit of work that I have done recently will take us right up to date with the car. I decided I didn’t want to fit an open cone intake system on the car. The last time I did that the car suffered from horrendous heat soak resulting in reduced power or even worse kangarooing like a madman when navigating through stop start traffic. I decided to perform the Hondata airbox mod and fit a K&N replacement drop in filter in the standard airbox. Removing the airbox was pretty straight forward. Just undo the 6 spring clips to remove the lid and gently remove the vacuum lines, wiring and sensor from the airbox. Slacken off the hose clamp to remove the intake tube and filter, then remove the 3, 10mm bolts holding the airbox in place.
Untitled by Paul Meldrum, on FlickrExcuse the flaky rocker cover, it’s on the list of jobs to do……..
Once you have the airbox out you need to cut out the centre divider, then clean and dress the plastic.
Untitled by Paul Meldrum, on FlickrUntitled by Paul Meldrum, on FlickrThe second part of the job is to cut out a square from the plastic divider you just removed. Use this to block off the resonator from the chamber. I glued mines on with silicone.
Untitled by Paul Meldrum, on FlickrI also used a little silicone to fill the hole at the bottom too.
Untitled by Paul Meldrum, on FlickrI built it all back up then let it dry over night before taking it for a blast the next morning. There is definitely a more mechanical resonance and induction roar from the intake and the cross over is much more pronounced now too. It will never be as manic sounding as a full on cone filter but I get most of the benefits with none of the drawbacks so it was worth it to me.
Other than the work I’ve carried out I’ve just been enjoying the roof down action in this great weather we have been having. I’ve attended a few local meets and been thinking over the direction I want to go with the car and what the next tasks to tackle are. As always whatever I get up to I will post it up on here. Thanks for reading and I hope you enjoyed my latest ramblings.
Cheers,
Melly

Gassing Station | Readers' Cars | Top of Page | What's New | My Stuff