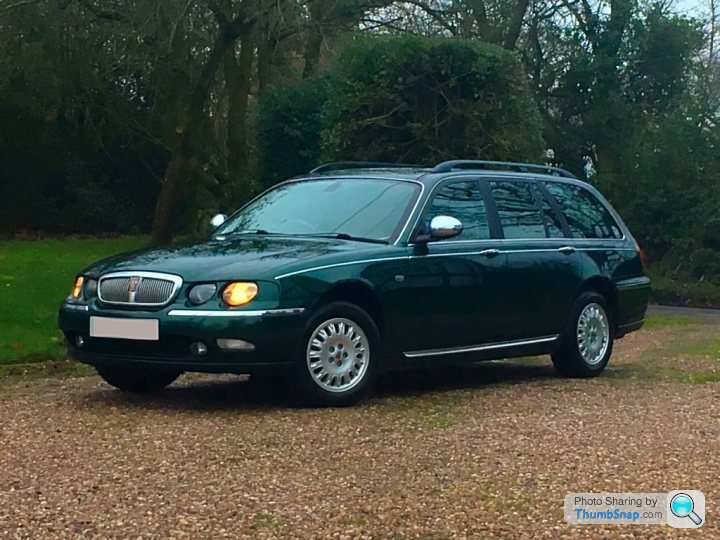
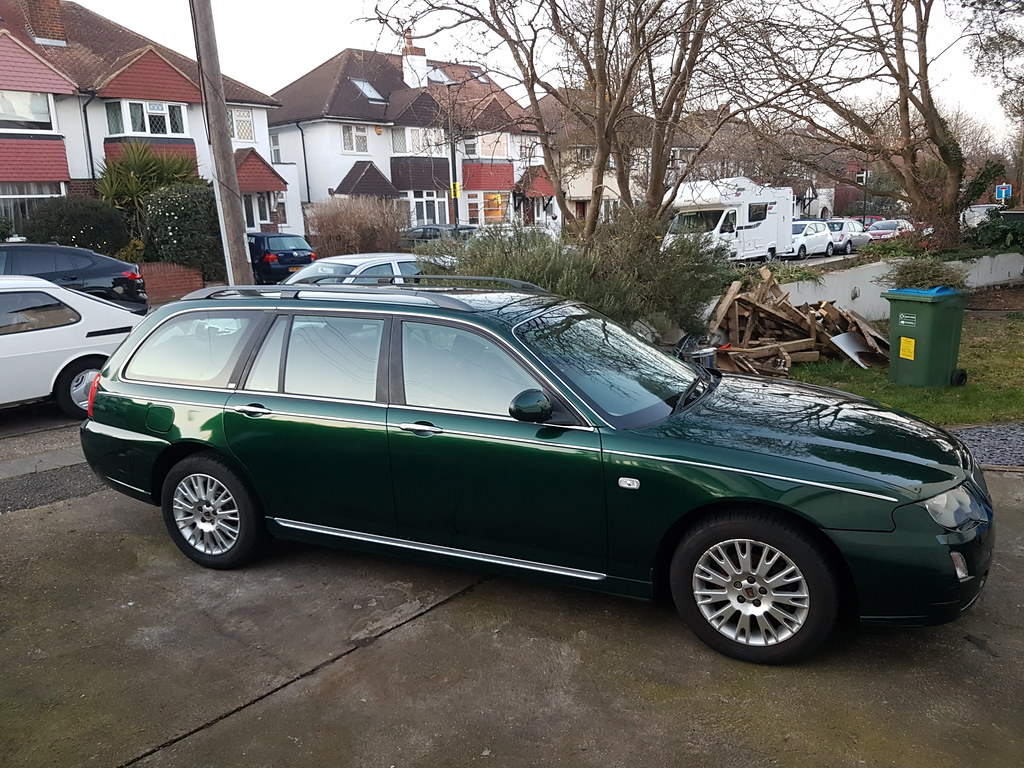
Rover 75 CDTi Tourer
Discussion


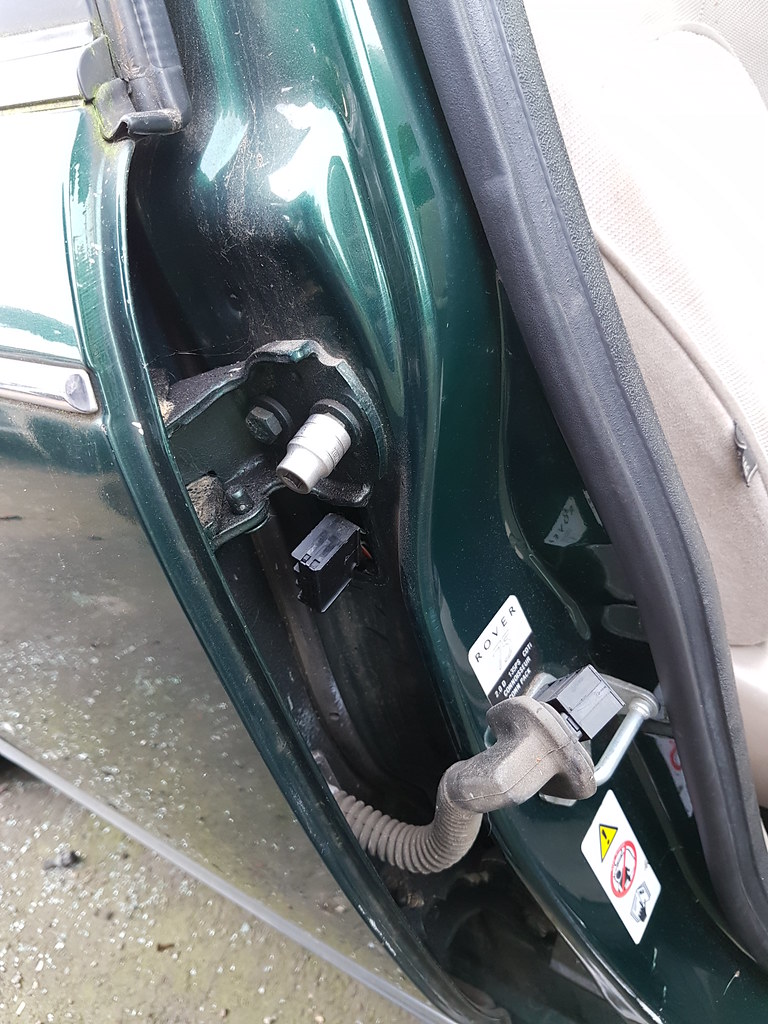
One final item in the archives - the pollen filter. Very cheap and easy to change, but fiddly to access without spiderfingers.
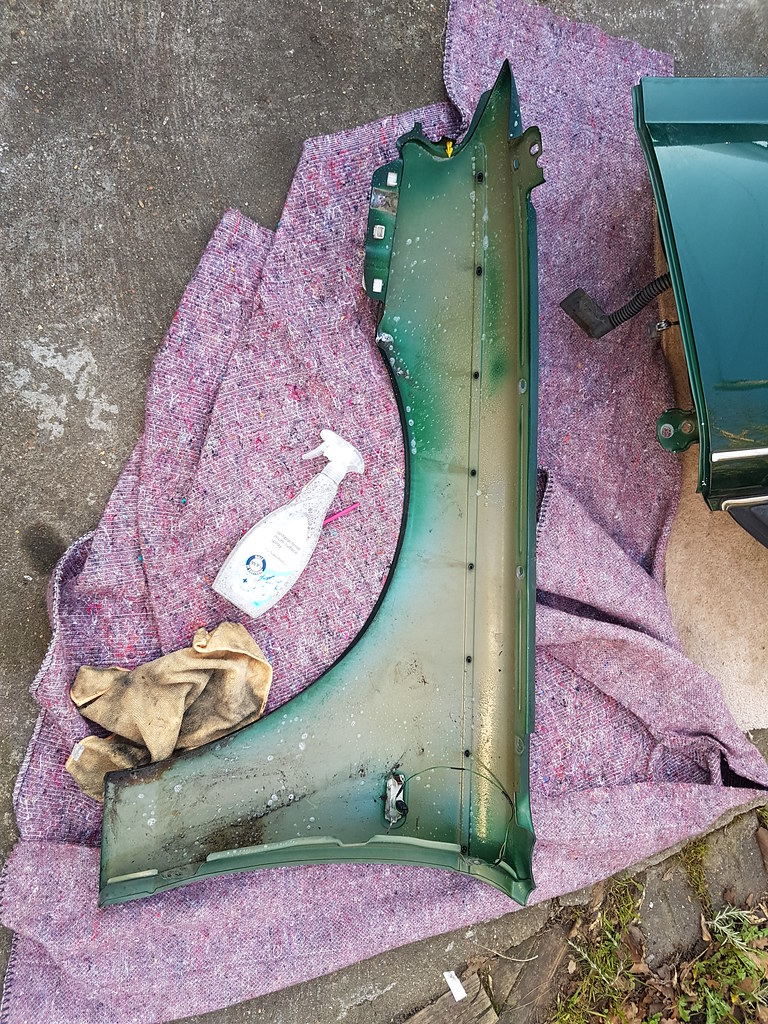
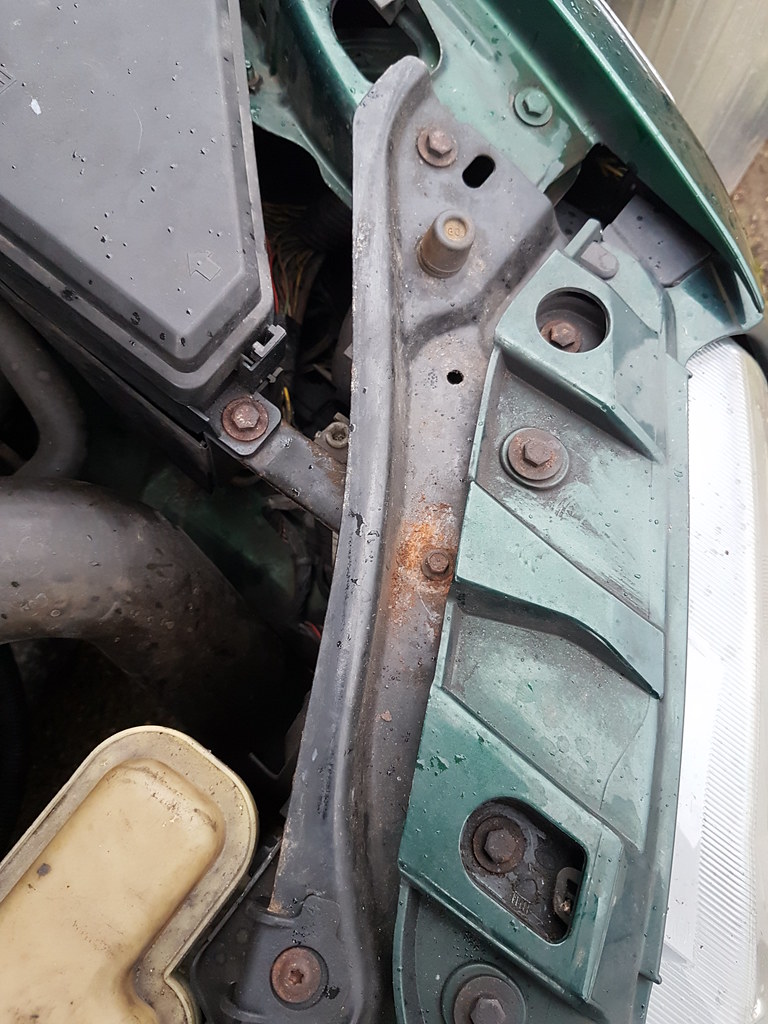
Offside scuttle cover unscrewed:
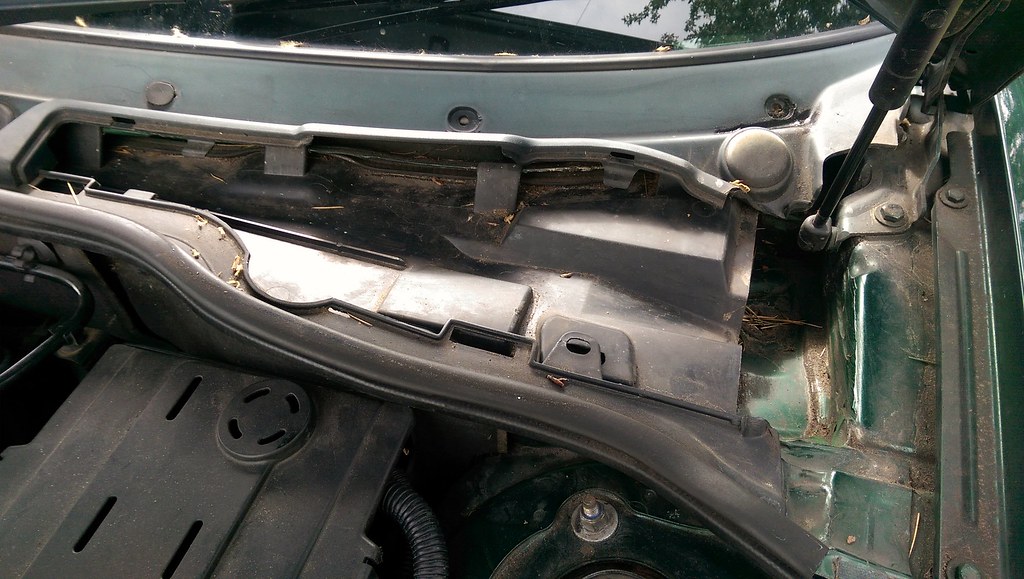 2017-12-26_10-30-47 by Clifton Tausberger, on Flickr
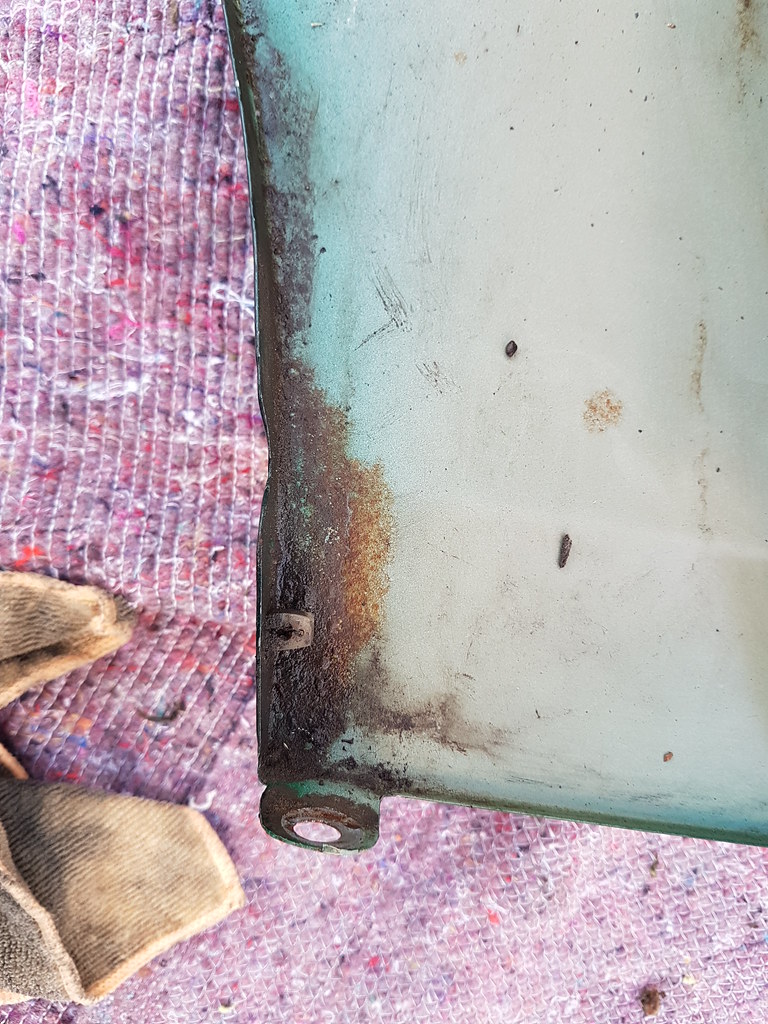
Pollen filter is clipped in against the bulkhead. The plastic here is particularly fragile so take extra care unclipping:
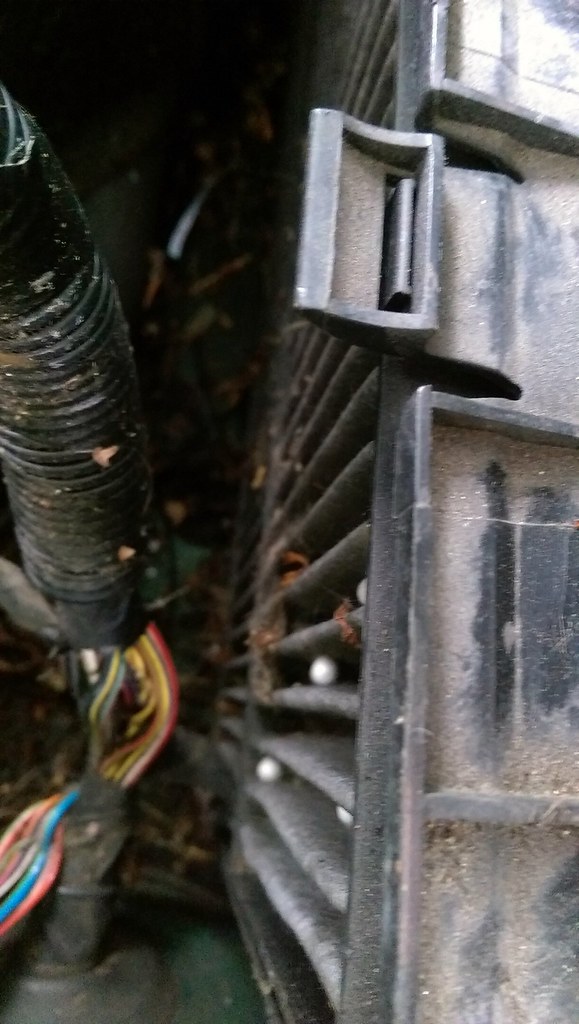 2017-12-26_10-30-56 by Clifton Tausberger, on Flickr
Old and new. Those are mothballs and spidereggs, not BB pellets:
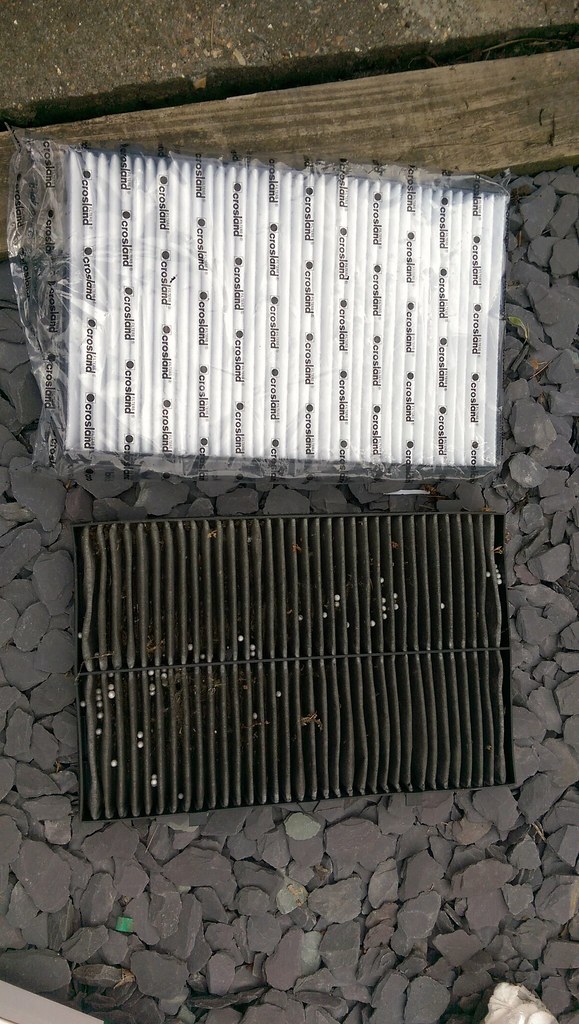 2017-12-26_10-31-20 by Clifton Tausberger, on Flickr
Other than standard maintenance, tyres, windscreen wipers and oil that's the entire history thus far. Phew.
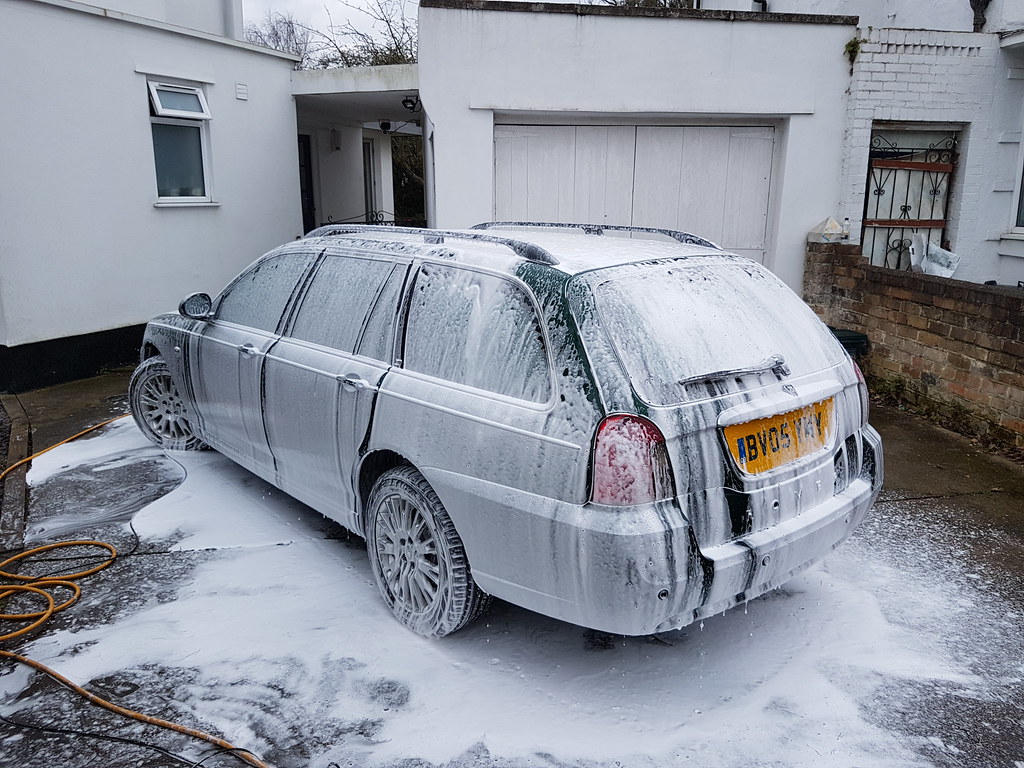
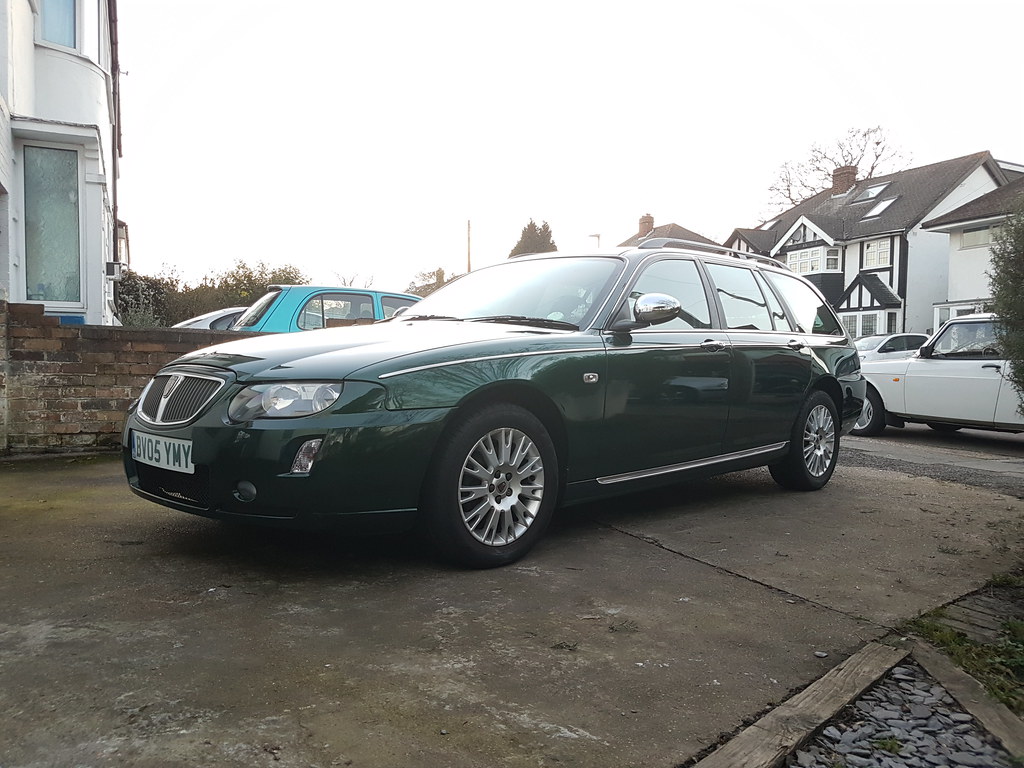
Last weekend I took the plunge and actually washed it properly for the first time in three years. The salt and grit has turned the underside into a crystalline being from a Bjork video, so I spent a good hour with the pressure washer taking it all off. Or diluting it, most likely. I am experimenting with a snow foam applicator for the first time. As the car was truly hideously filthy I didn't expect too much, and I'll likely have to go at it again when I get a free day.
 20180325_125039 by Clifton Tausberger, on Flickr
 20180325_133446 by Clifton Tausberger, on Flickr
Offside scuttle cover unscrewed:
2017-12-26_10-30-47 by Clifton Tausberger, on FlickrPollen filter is clipped in against the bulkhead. The plastic here is particularly fragile so take extra care unclipping:
2017-12-26_10-30-56 by Clifton Tausberger, on FlickrOld and new. Those are mothballs and spidereggs, not BB pellets:
2017-12-26_10-31-20 by Clifton Tausberger, on FlickrOther than standard maintenance, tyres, windscreen wipers and oil that's the entire history thus far. Phew.
Last weekend I took the plunge and actually washed it properly for the first time in three years. The salt and grit has turned the underside into a crystalline being from a Bjork video, so I spent a good hour with the pressure washer taking it all off. Or diluting it, most likely. I am experimenting with a snow foam applicator for the first time. As the car was truly hideously filthy I didn't expect too much, and I'll likely have to go at it again when I get a free day.
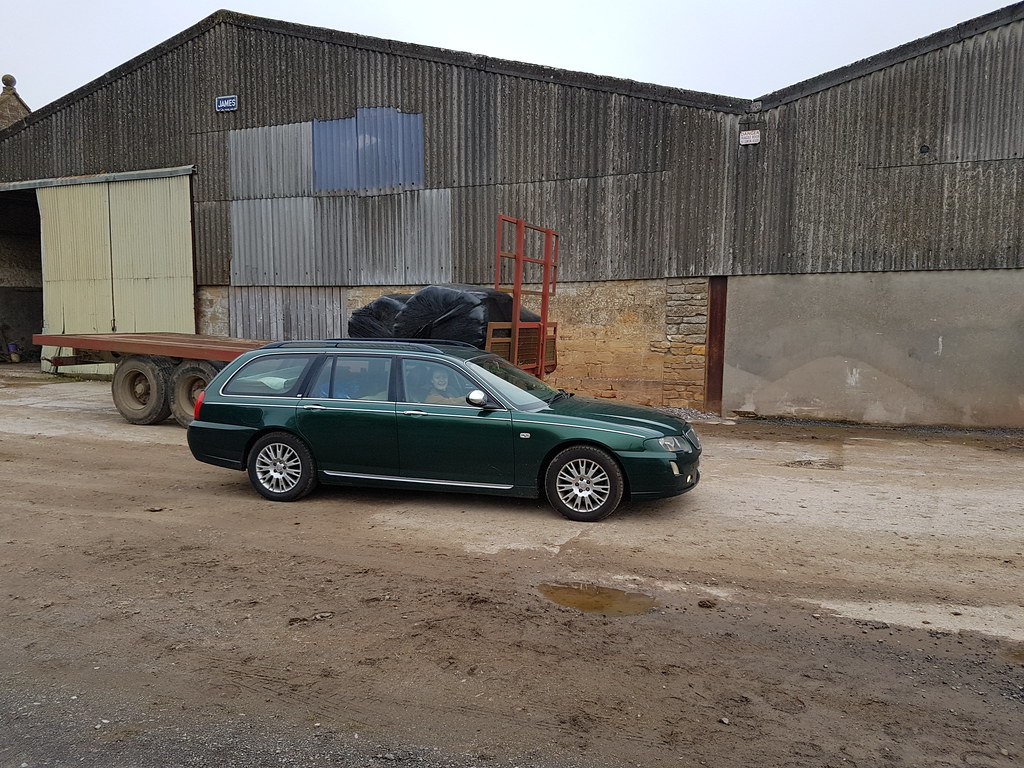
20180325_125039 by Clifton Tausberger, on Flickr20180325_133446 by Clifton Tausberger, on FlickrAll is well in 75 land, it sailed through 152k with the haughty disinterest of a well built Rover, and has been accumulating dirt as a useful car should.
 20180414_101426 by Clifton Tausberger, on Flickr
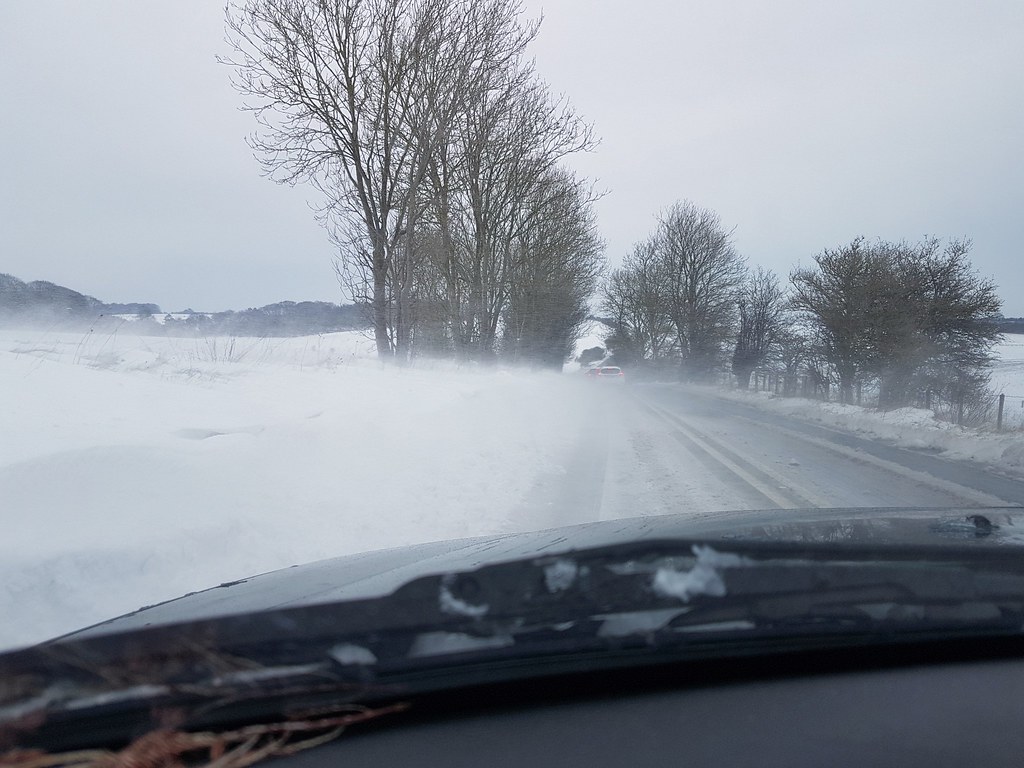
I was particularly impressed by its performance in the random snowstorm we experienced. We covered many miles with the winter tyres and it never disappointed.
 2018-05-19_01-08-58 by Clifton Tausberger, on Flickr
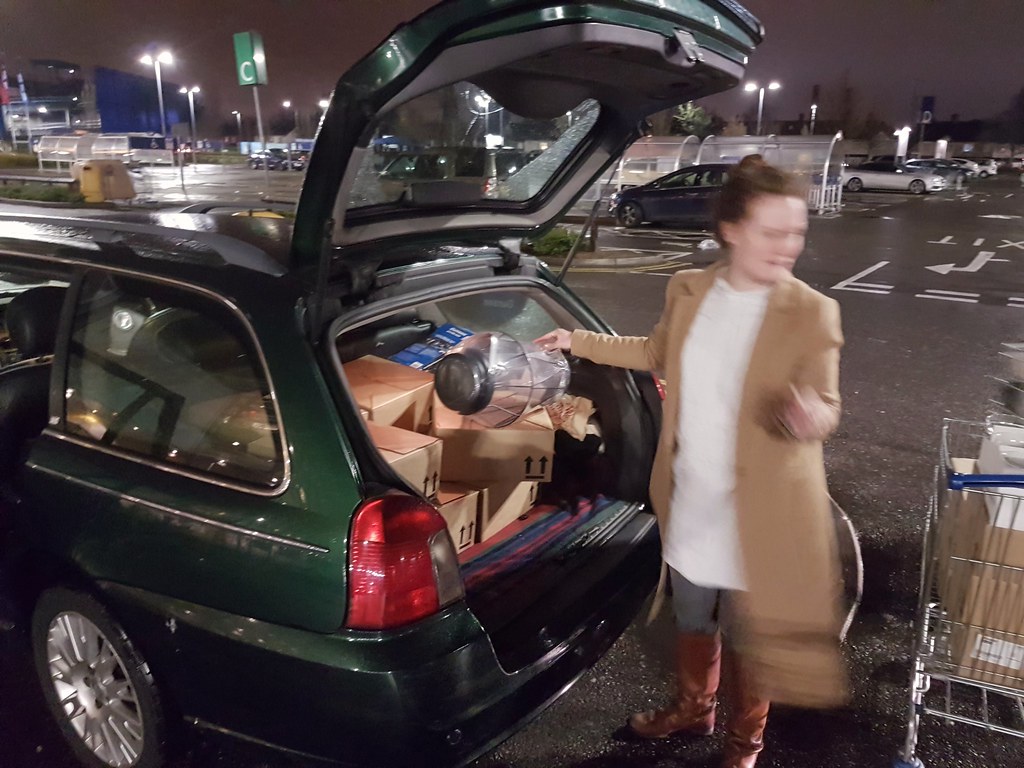
We are always the last in Ikea.
 2018-05-19_01-07-53 by Clifton Tausberger, on Flickr
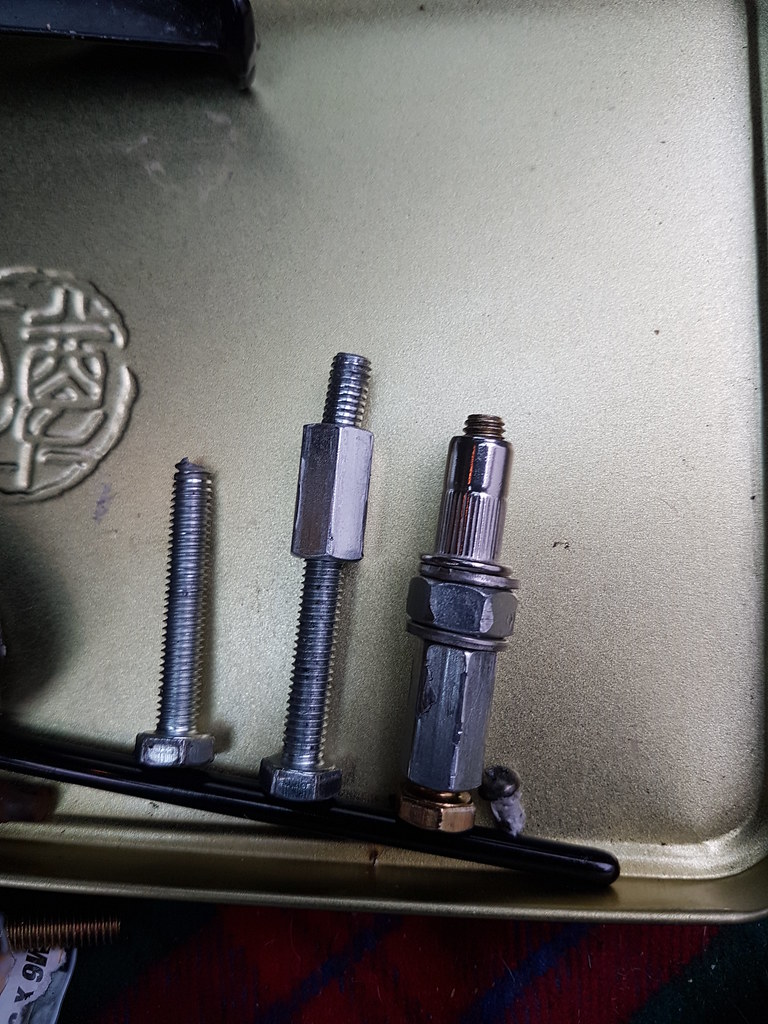
Two minor repairs - rear number plate bulbs had blown and so were replaced with LEDs:
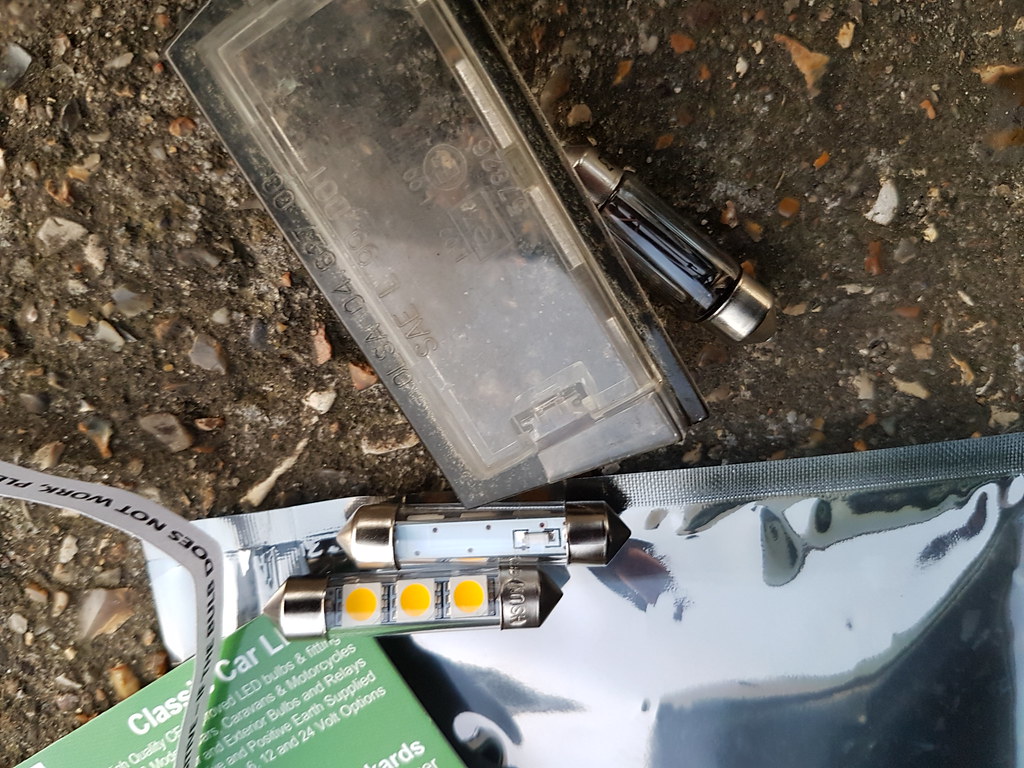 20180419_194115 by Clifton Tausberger, on Flickr
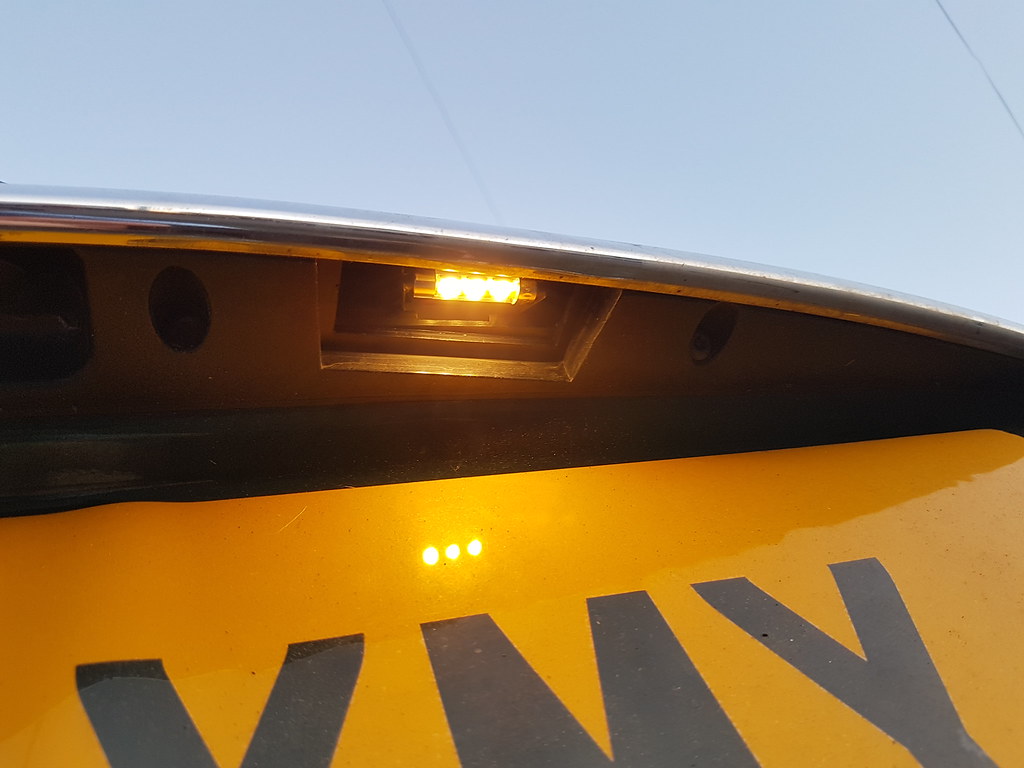 20180419_194456 by Clifton Tausberger, on Flickr
The plastic covers are fragile so I carefully exercised the thinnest screwdriver I had to tease them out.
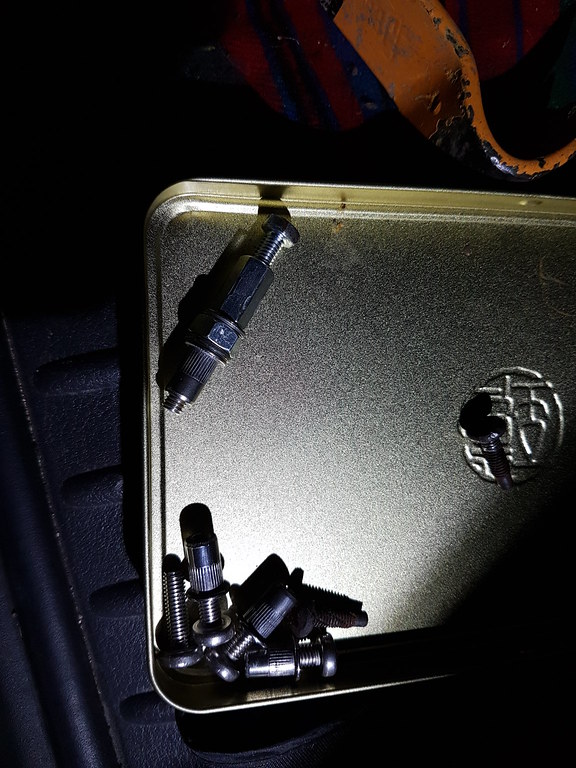
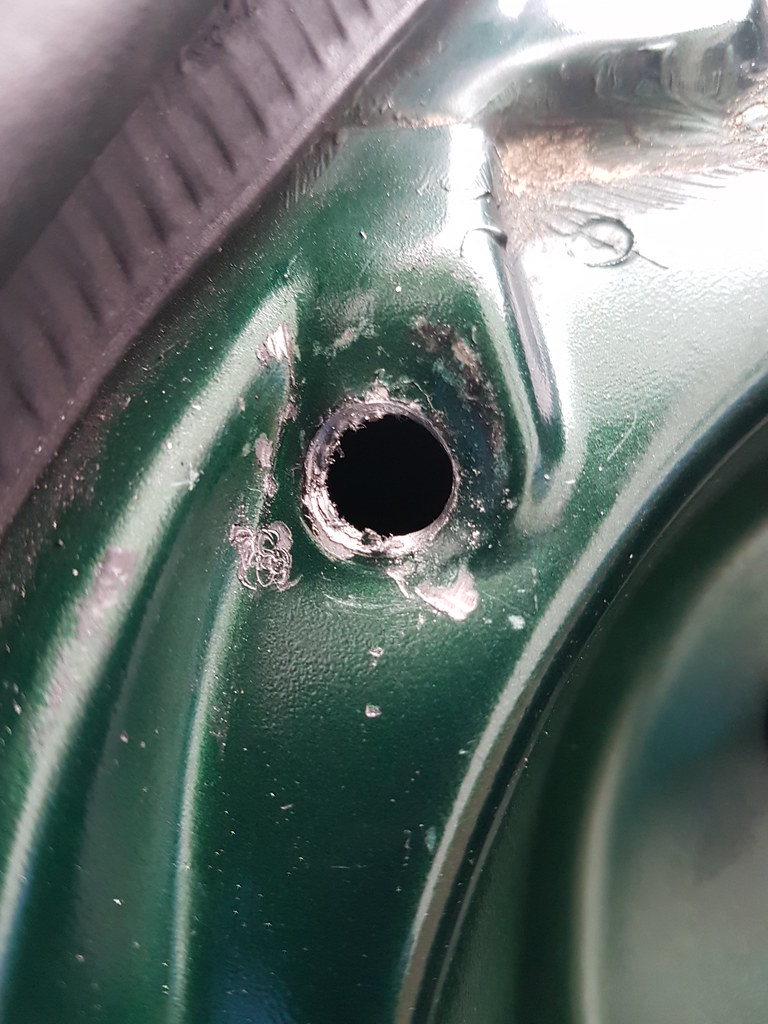
Finally, the tops of the front suspension turrets were developing rust pustules (rustules, if you will) so I scraped them back, cleaned them up and applied several coats of Bilt Hamber to keep it under control.
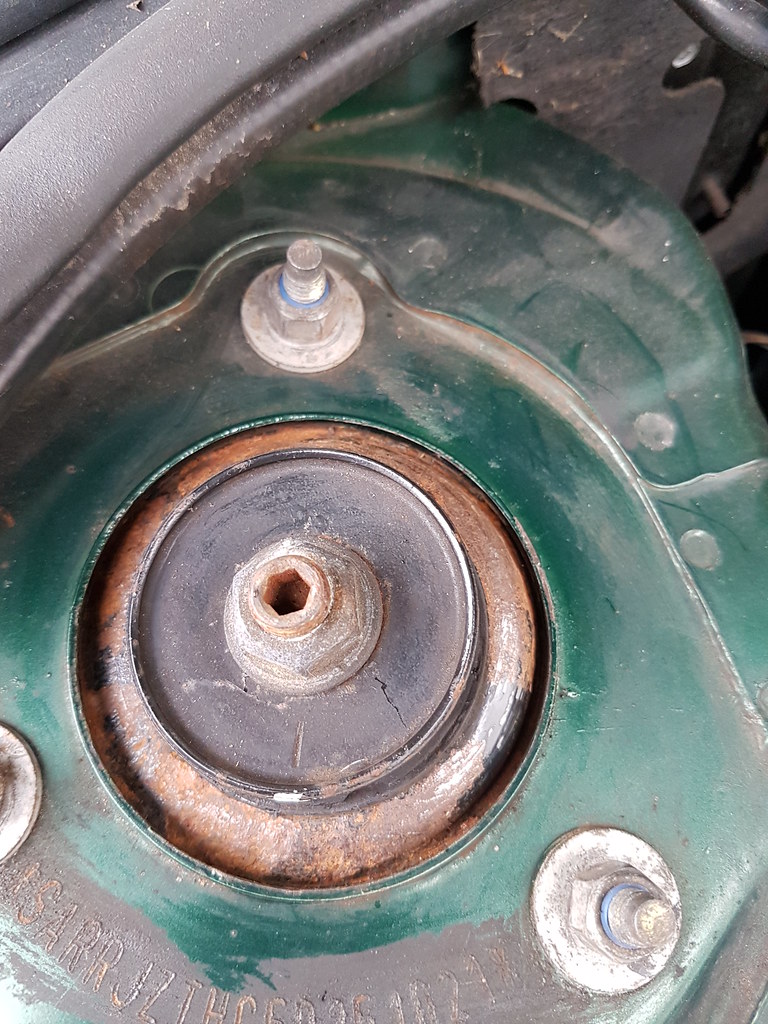 20180512_130113 by Clifton Tausberger, on Flickr
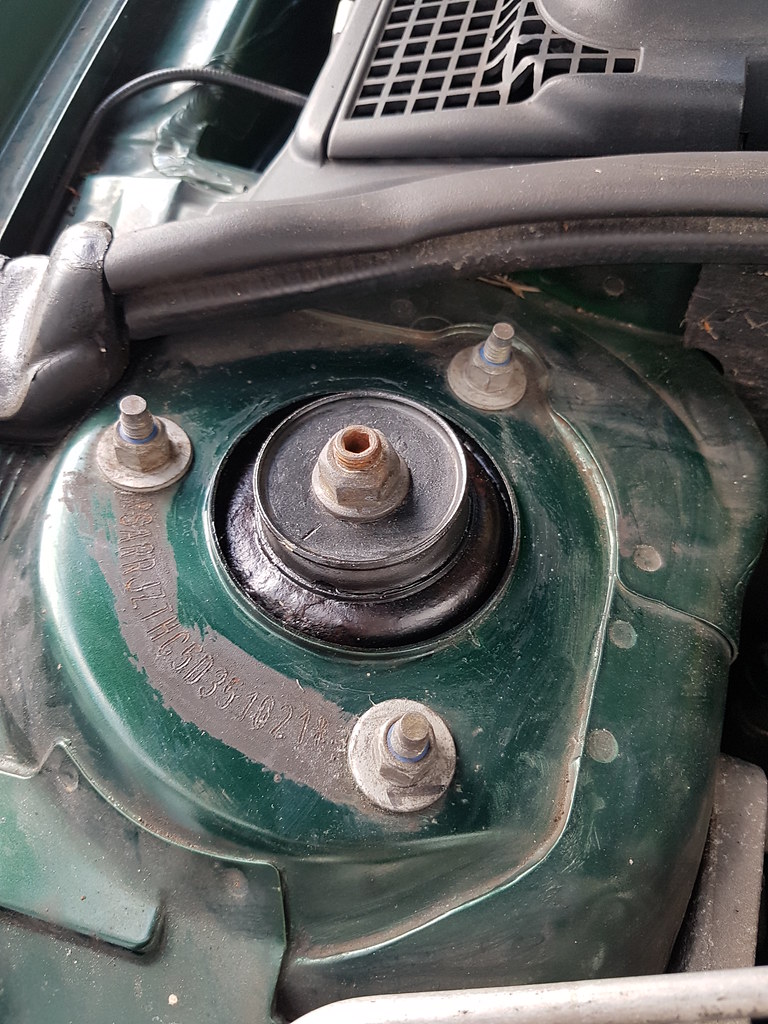 20180513_160908 by Clifton Tausberger, on Flickr
The low brake pad warning light has just come on, and I recall the discs all round being worn at purchase, so it's time for all four paws to get the full treatment. The Rover wizards are bemoaning the quality of replacement disks, so more research is required!
20180414_101426 by Clifton Tausberger, on FlickrI was particularly impressed by its performance in the random snowstorm we experienced. We covered many miles with the winter tyres and it never disappointed.
2018-05-19_01-08-58 by Clifton Tausberger, on FlickrWe are always the last in Ikea.
2018-05-19_01-07-53 by Clifton Tausberger, on FlickrTwo minor repairs - rear number plate bulbs had blown and so were replaced with LEDs:
20180419_194115 by Clifton Tausberger, on Flickr20180419_194456 by Clifton Tausberger, on FlickrThe plastic covers are fragile so I carefully exercised the thinnest screwdriver I had to tease them out.
Finally, the tops of the front suspension turrets were developing rust pustules (rustules, if you will) so I scraped them back, cleaned them up and applied several coats of Bilt Hamber to keep it under control.
20180512_130113 by Clifton Tausberger, on Flickr20180513_160908 by Clifton Tausberger, on FlickrThe low brake pad warning light has just come on, and I recall the discs all round being worn at purchase, so it's time for all four paws to get the full treatment. The Rover wizards are bemoaning the quality of replacement disks, so more research is required!
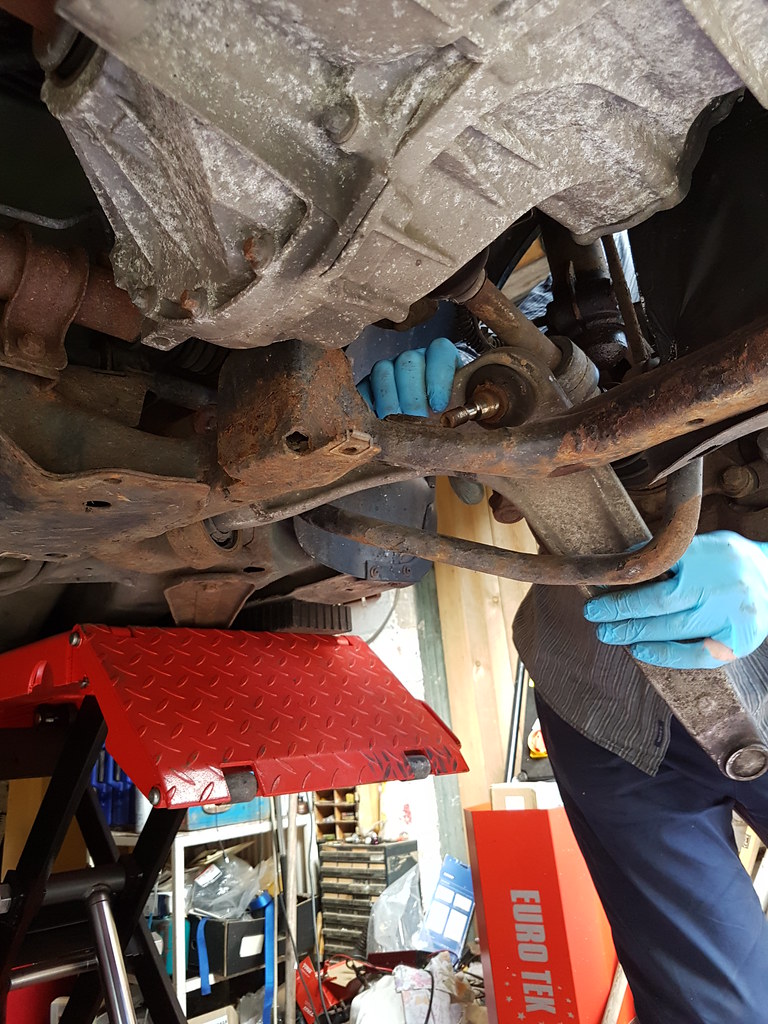
It's not often that I curse the 75, usually it is the most reliable car in our fleet, but this bank holiday has me set in a proper grumblemood. The entire clutch system was replaced two years ago, master, slave, DMF and some pipes, all with the approved parts int he Roverbeard world (many, many garbage variants out there) and fitted by Jules in Colwyn Bay. Unfortunately, the replacement master seals have gone, explaining the gradually slacker clutch these past months:
 20180526_124519 by Clifton Tausberger, on Flickr
 20180526_132325 by Clifton Tausberger, on Flickr
This is one of the primary killers of 75s and ZTTs - bad quality parts, incorrect fitting an the truly awful access to do anything leads to giant quotes, shrugged shoulders and Rovers being scrapped. I am determined this will not be the case with this car.
We really needed the 75 this weekend for a long load-lugging triangle to Bristol, Glastonbury and home so despite the evidence I thought I would try to bleed it and replace lost liquid.
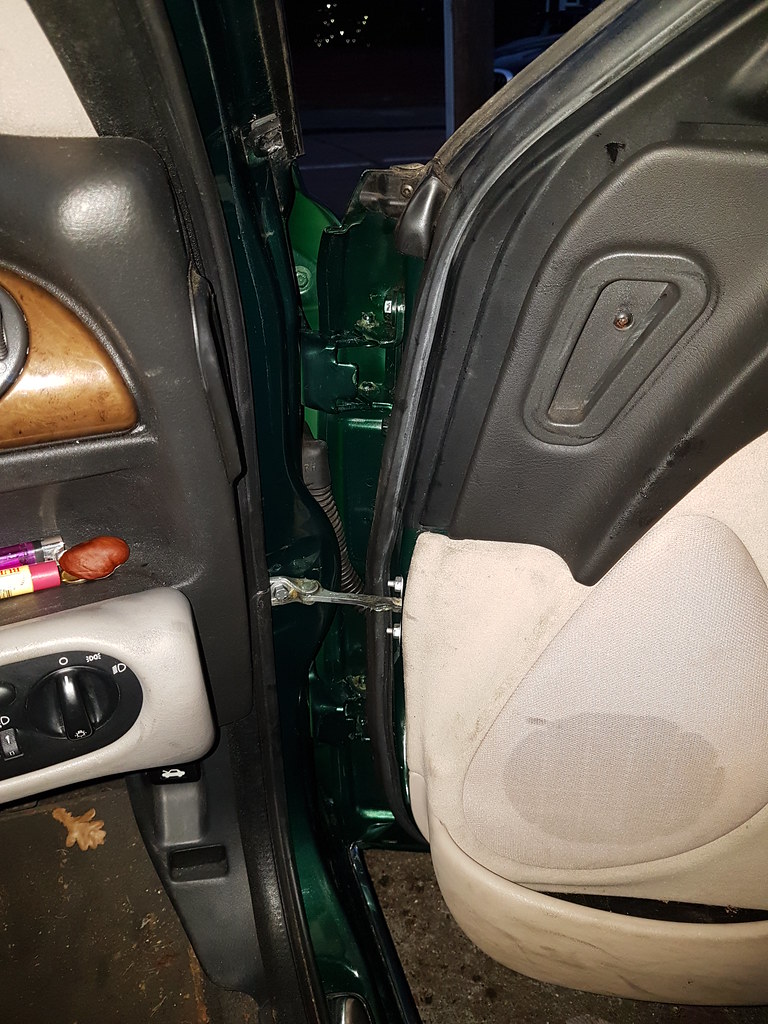
Access is dreadful, so out comes the lower dash trim after two screw and some unclippage:
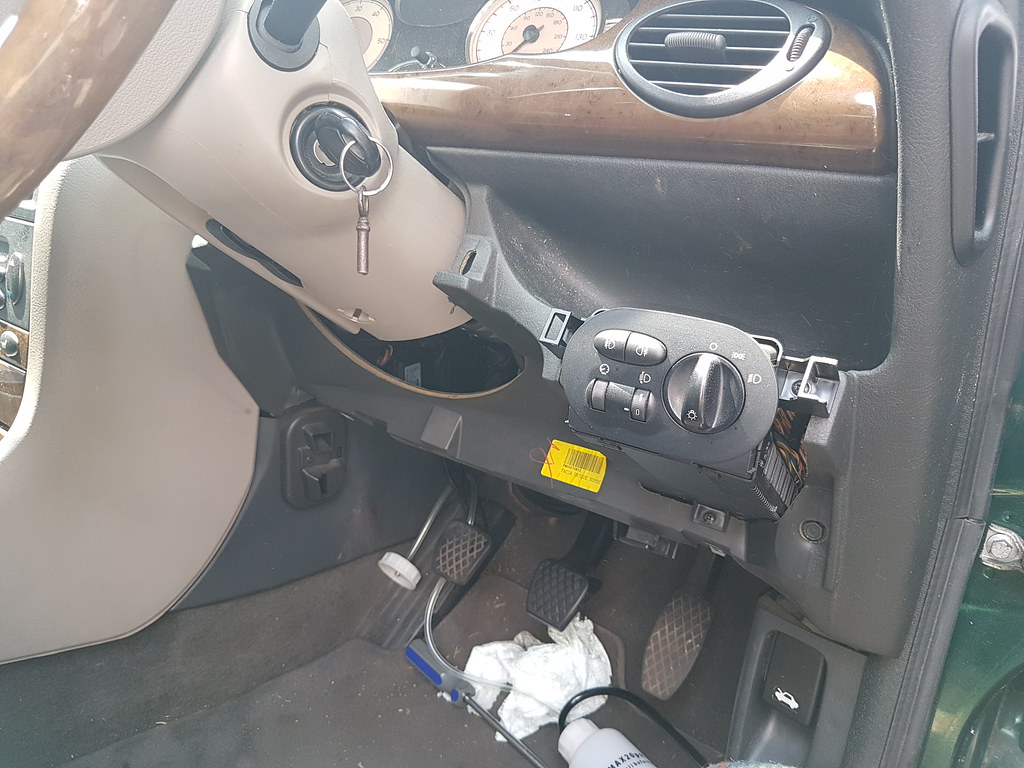 20180526_135107 by Clifton Tausberger, on Flickr
Many, many paper towels and newspaper should be installed in the footwell, and gloves worn. This is never fun or clean.
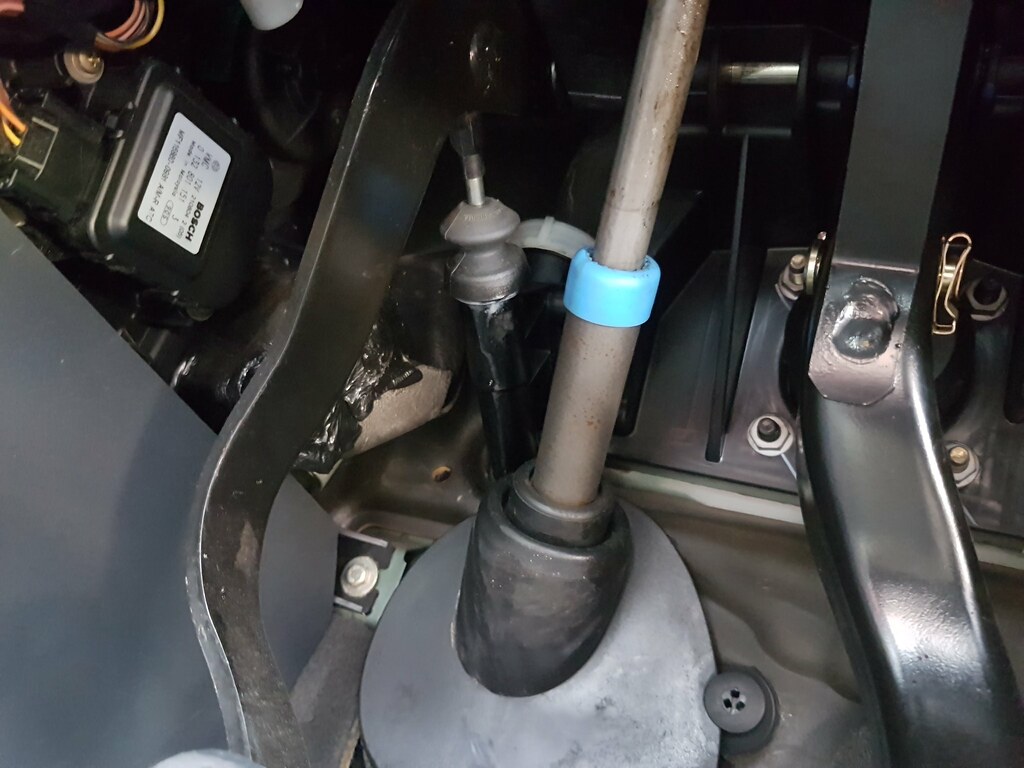
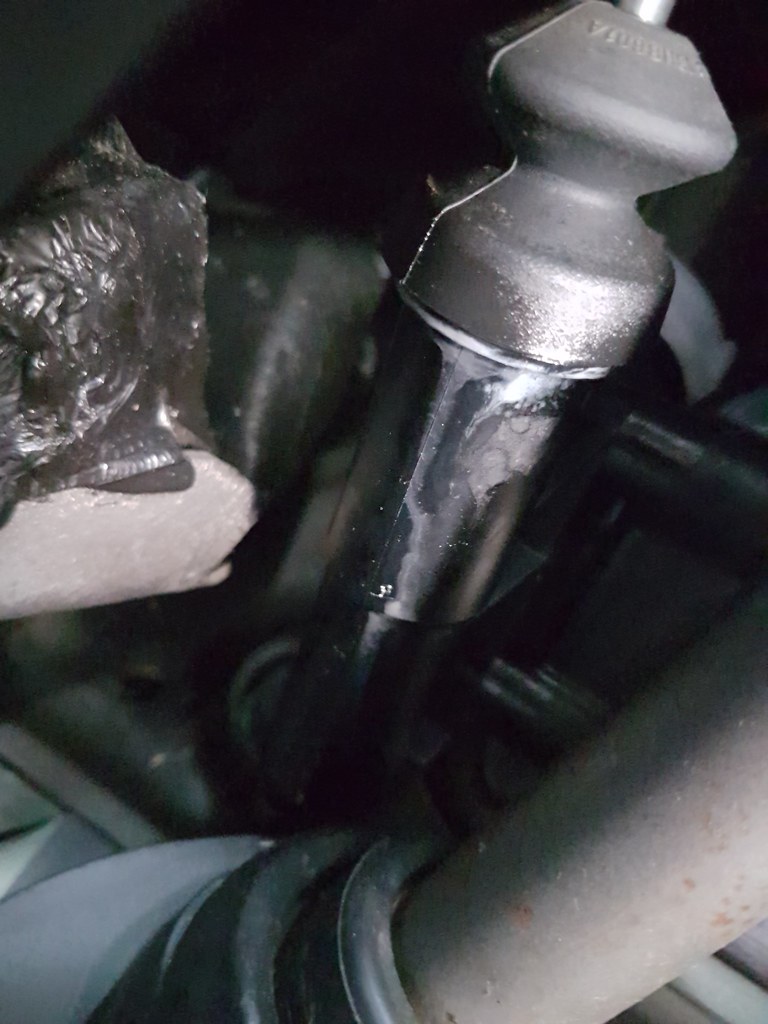
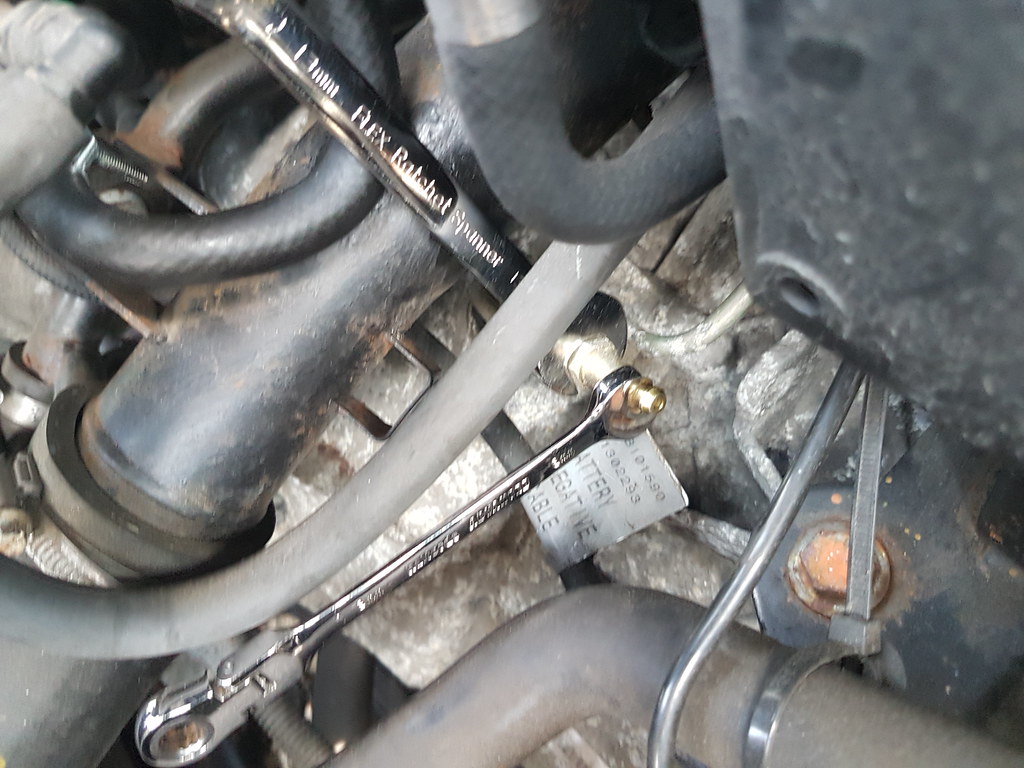
Under the bonnet, the bleed nipple is in front of the battery, and you can get better access by unclipping various pliable hoses in this area. Set up old bottle and hose, add 13mm and 8mm spanners (it may be 12mm on Mk1s)
 20180526_131210 by Clifton Tausberger, on Flickr
 20180526_131304 by Clifton Tausberger, on Flickr
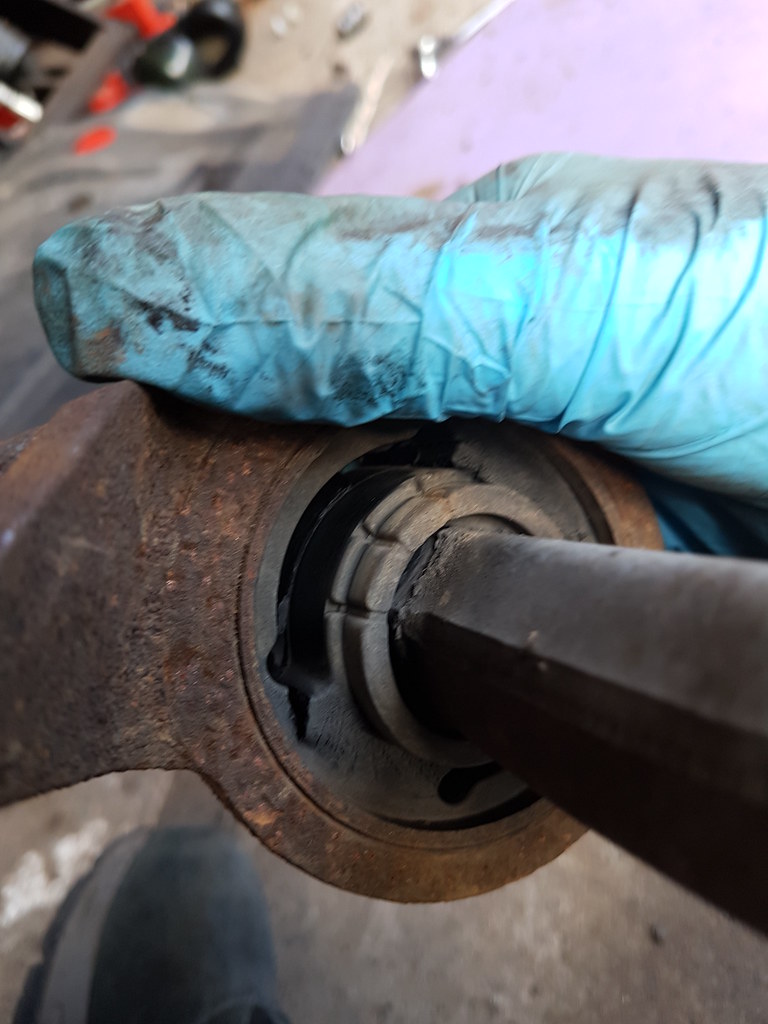
Back in the driver's footwell, a large flat bladed screwdriver can be angled onto the white notches in the master cap to unscrew it. Ow, bleeding fingers. It's easiest to attack it horizontally, looking through the hole left by the trim removed. Cap and weird rubber sock is usually tucked into some other material and must be wrestled free.
 2018-05-28_10-00-49 by Clifton Tausberger, on Flickr
 20180526_133016 by Clifton Tausberger, on Flickr
With all the seals intact, a Gunson kit can be added, air from a spare tyre at 20 psi added and your bleed at your leisure. In this case, I put it down to 12 psi and rushed frantically to get as much liquid as possible in, ensure the leaks were mopped and rush to the bonnet to let some other air and old fluid out.
 20180526_135439 by Clifton Tausberger, on Flickr
This was Not Fun. However, after some stern words with myself, a full bottle of fresh DOT 4 is in, some bizarrely grey liquid out (disintegrated seal evidence?) and the clutch returned to usable levels. Still, time to see what the Rover 75 acolytes have uncovered for a better replacement in the past 2 years.
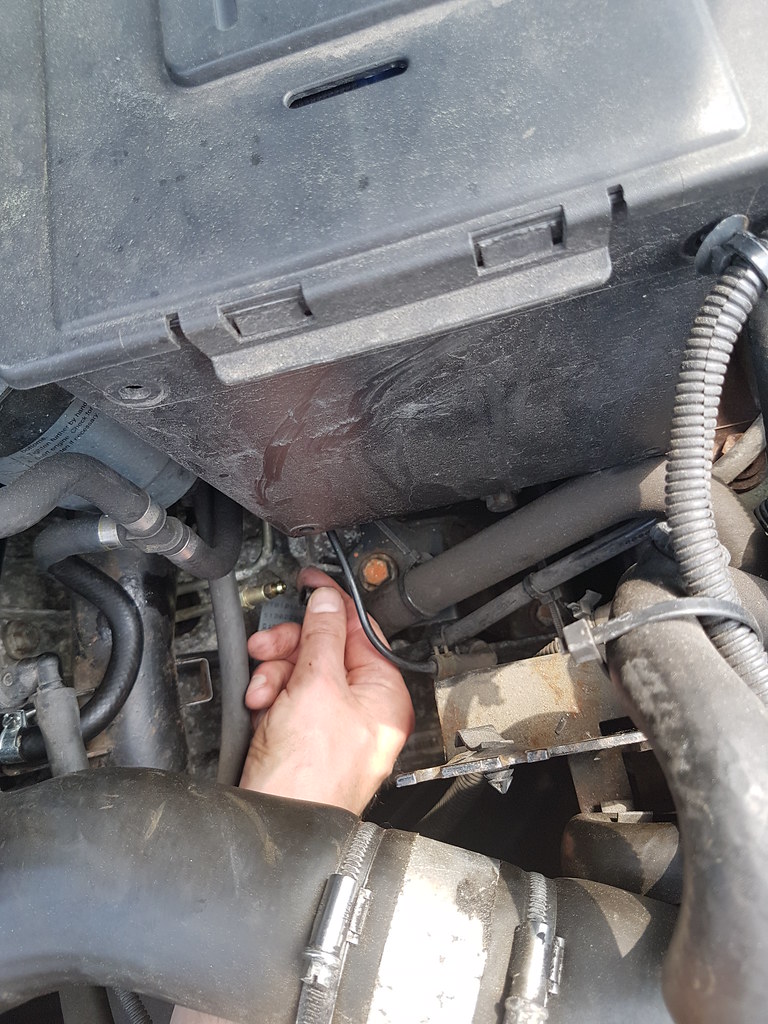
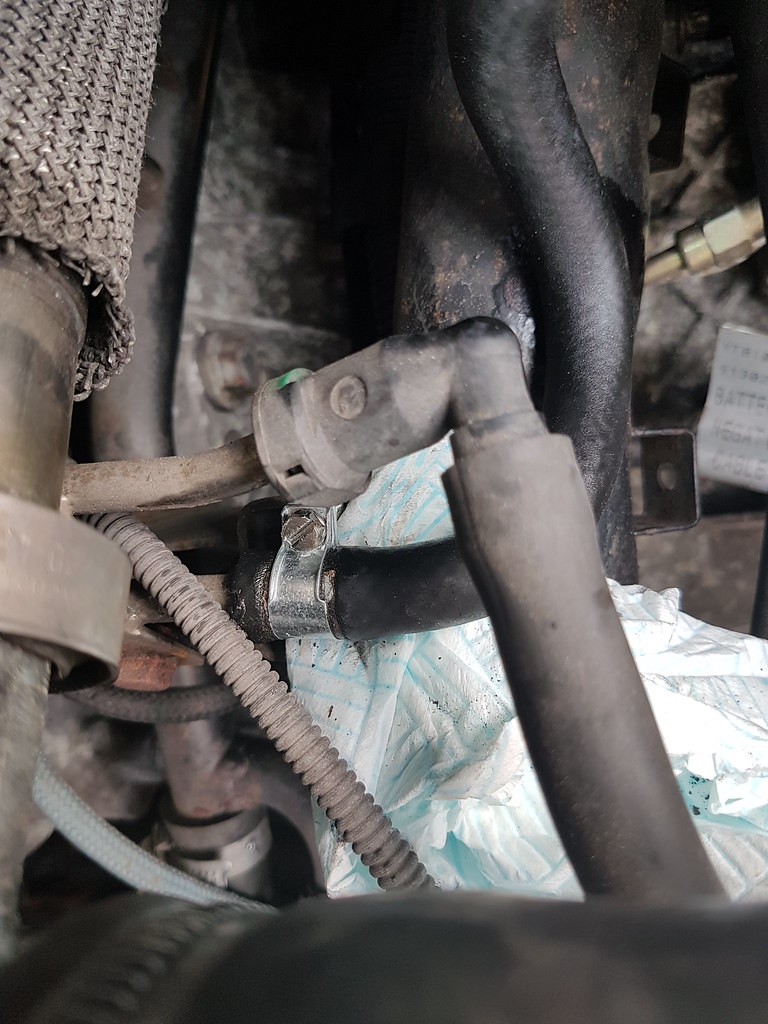
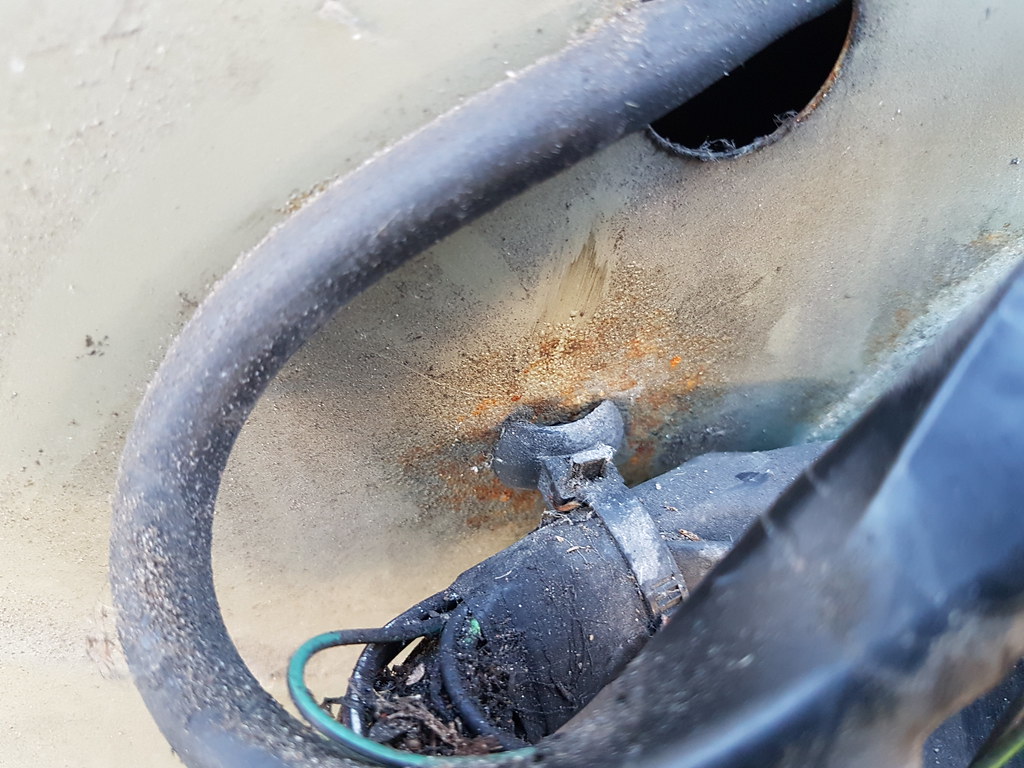
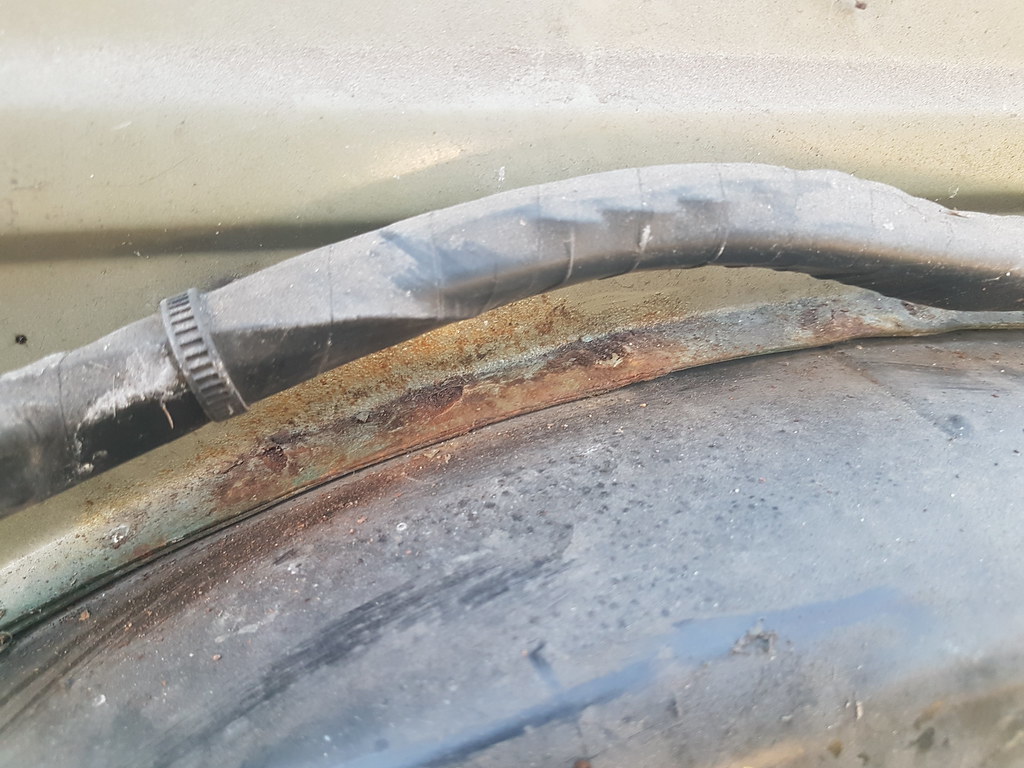
While under the bonnet I noticed a fuel line clip disintegrating:
 20180526_130051 by Clifton Tausberger, on Flickr
Luckily an easy replacement, but the hoses are looking a little old so time to look into some refreshment in the fuel system.
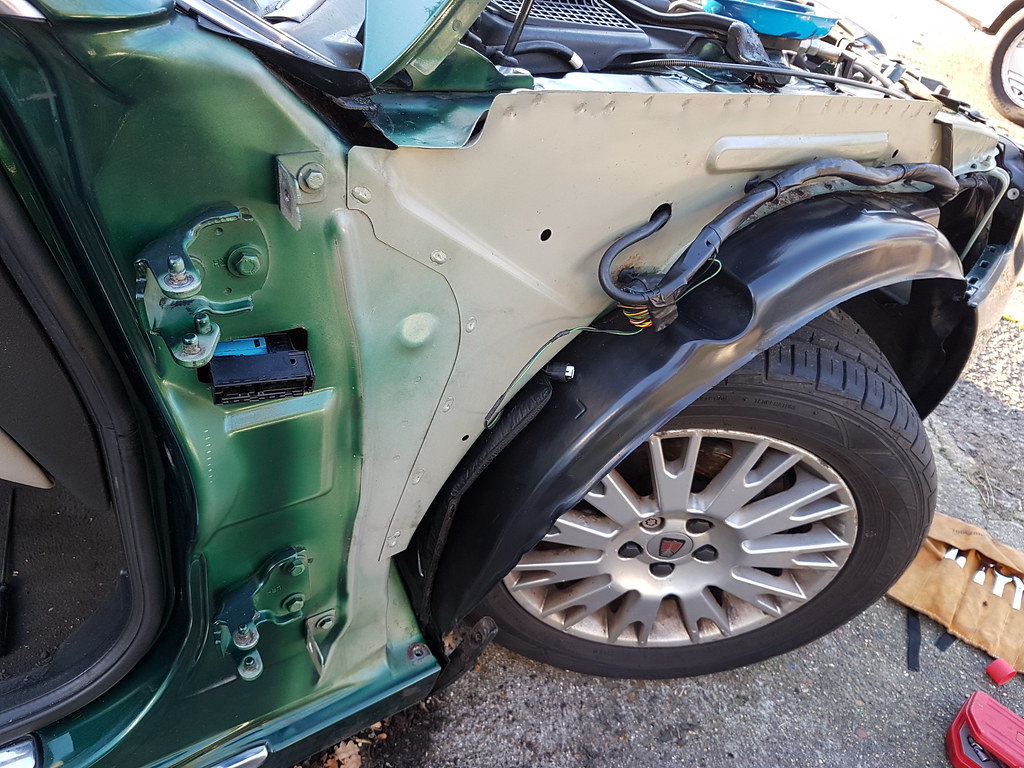
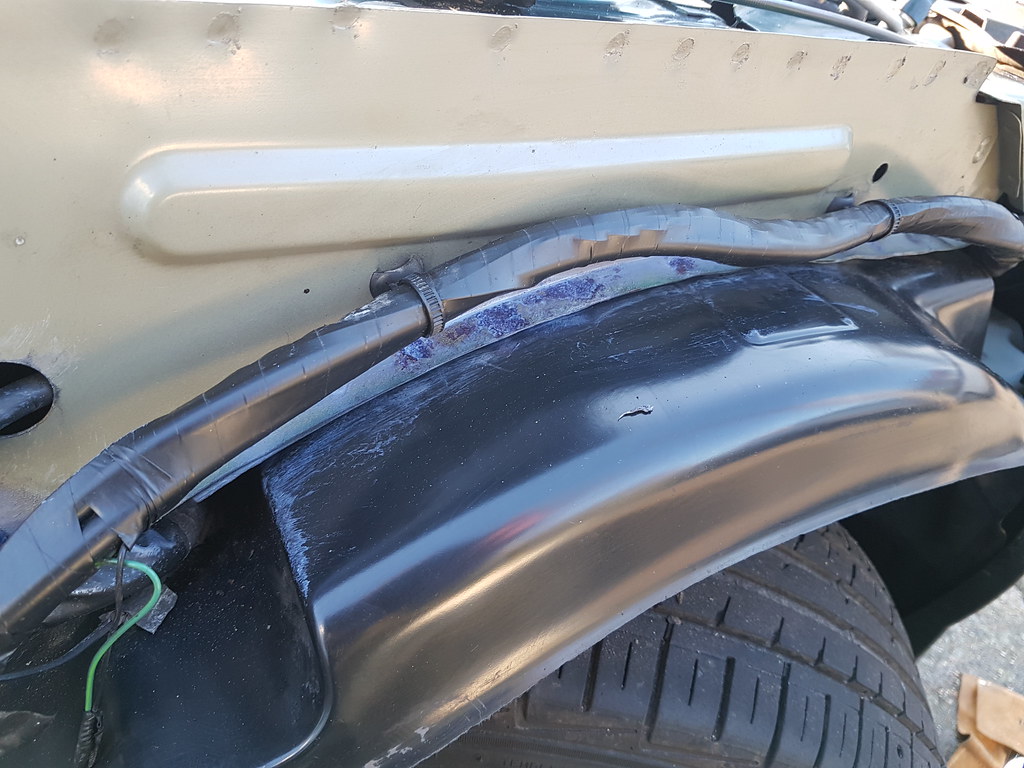
 20180526_130740 by Clifton Tausberger, on Flickr
300 miles fully laden was duly dispatched, and the 75 lazily clicked over 152k.
20180526_124519 by Clifton Tausberger, on Flickr20180526_132325 by Clifton Tausberger, on FlickrThis is one of the primary killers of 75s and ZTTs - bad quality parts, incorrect fitting an the truly awful access to do anything leads to giant quotes, shrugged shoulders and Rovers being scrapped. I am determined this will not be the case with this car.
We really needed the 75 this weekend for a long load-lugging triangle to Bristol, Glastonbury and home so despite the evidence I thought I would try to bleed it and replace lost liquid.
Access is dreadful, so out comes the lower dash trim after two screw and some unclippage:
20180526_135107 by Clifton Tausberger, on FlickrMany, many paper towels and newspaper should be installed in the footwell, and gloves worn. This is never fun or clean.
Under the bonnet, the bleed nipple is in front of the battery, and you can get better access by unclipping various pliable hoses in this area. Set up old bottle and hose, add 13mm and 8mm spanners (it may be 12mm on Mk1s)
20180526_131210 by Clifton Tausberger, on Flickr20180526_131304 by Clifton Tausberger, on FlickrBack in the driver's footwell, a large flat bladed screwdriver can be angled onto the white notches in the master cap to unscrew it. Ow, bleeding fingers. It's easiest to attack it horizontally, looking through the hole left by the trim removed. Cap and weird rubber sock is usually tucked into some other material and must be wrestled free.
2018-05-28_10-00-49 by Clifton Tausberger, on Flickr20180526_133016 by Clifton Tausberger, on FlickrWith all the seals intact, a Gunson kit can be added, air from a spare tyre at 20 psi added and your bleed at your leisure. In this case, I put it down to 12 psi and rushed frantically to get as much liquid as possible in, ensure the leaks were mopped and rush to the bonnet to let some other air and old fluid out.
20180526_135439 by Clifton Tausberger, on FlickrThis was Not Fun. However, after some stern words with myself, a full bottle of fresh DOT 4 is in, some bizarrely grey liquid out (disintegrated seal evidence?) and the clutch returned to usable levels. Still, time to see what the Rover 75 acolytes have uncovered for a better replacement in the past 2 years.
While under the bonnet I noticed a fuel line clip disintegrating:
20180526_130051 by Clifton Tausberger, on FlickrLuckily an easy replacement, but the hoses are looking a little old so time to look into some refreshment in the fuel system.
20180526_130740 by Clifton Tausberger, on Flickr300 miles fully laden was duly dispatched, and the 75 lazily clicked over 152k.
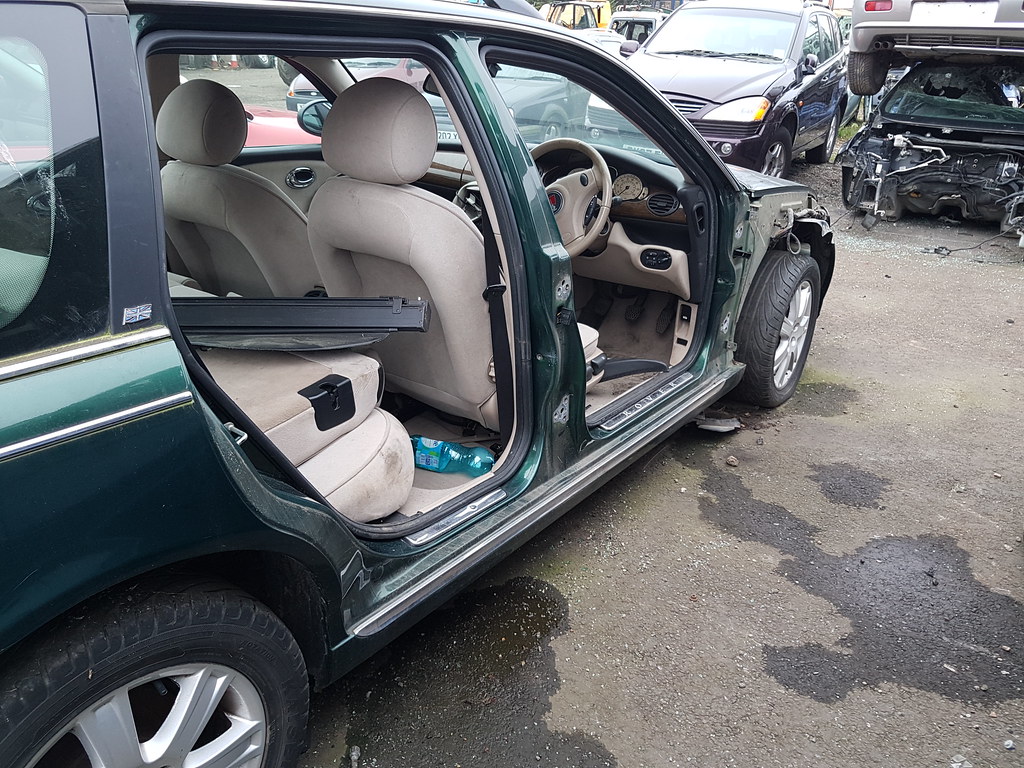
It's one of my most anticipated times of the year - no, not the Revival, though that is a close second, but the annual pilgrimage to Wales to see Rover 75 guru Jules Anderson and poke about the innards of the Tourer. Usually the list I had formulated has to be adjusted upon uncovering higher priority items, reviewing the budget and what parts are actually available. This time was no exception. My planned list:
Front brake inspection, renewal of discs/flexis/pipes.
Rear brake inspection, renewal of discs/pads/flexis.
Gear lever play - replacement cables.
Air con inspection (slight leak).
Inspection of front suspension (see rusty turrets above).
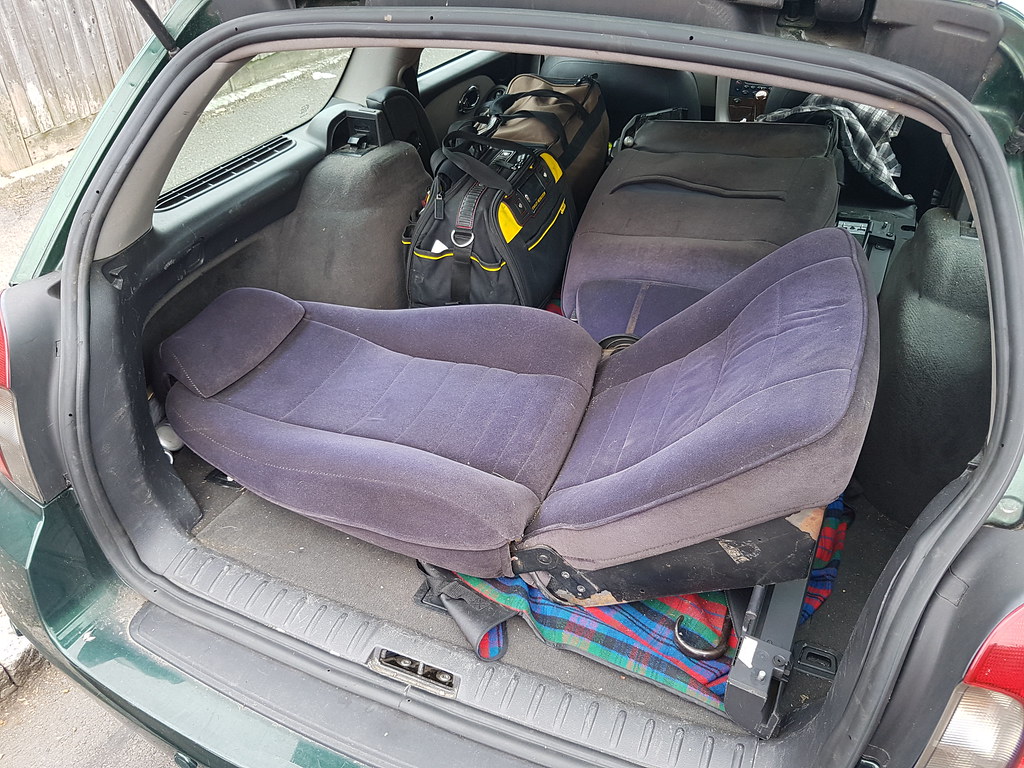
Firstly, I had been helping a friend pull up the floor of his new house when an auction listing for two Saab 900 Turbo seats came up for the incredible sum of £25, just down the road. I couldn't pass these up, so they joined me for the trip to Wales:
 20180904_150400 by Clifton Tausberger, on Flickr
Next up, 250 miles to Colwyn Bay to accommodation. Simply one of the most beautiful places on the planet.
 20180905_085947 by Clifton Tausberger, on Flickr
There's no mistaking the specialty of the guru on the scenic approach.
 20180905_092431 by Clifton Tausberger, on Flickr
 20180905_092512 by Clifton Tausberger, on Flickr
 20180905_092756 by Clifton Tausberger, on Flickr
9:30am. Inspection had some good news - with cleaning and testing front brakes are given a good bill of health.
 20180905_101558 by Clifton Tausberger, on Flickr
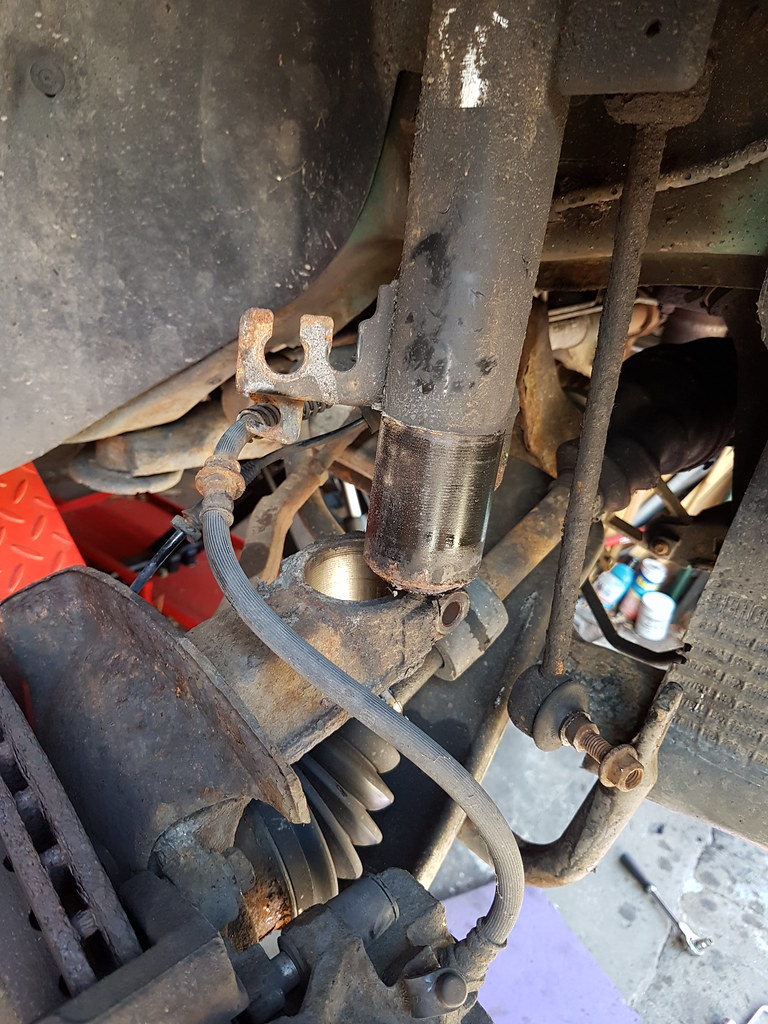
Rear brakes however was a slight bother. Slight pull and vibration down to really only the right side being effective, and although the handbrake held (see previous work on compensator and adjustment), it wasn't perfect on both sides. Hmm.
 20180905_111338 by Clifton Tausberger, on Flickr
 20180905_112342 by Clifton Tausberger, on Flickr
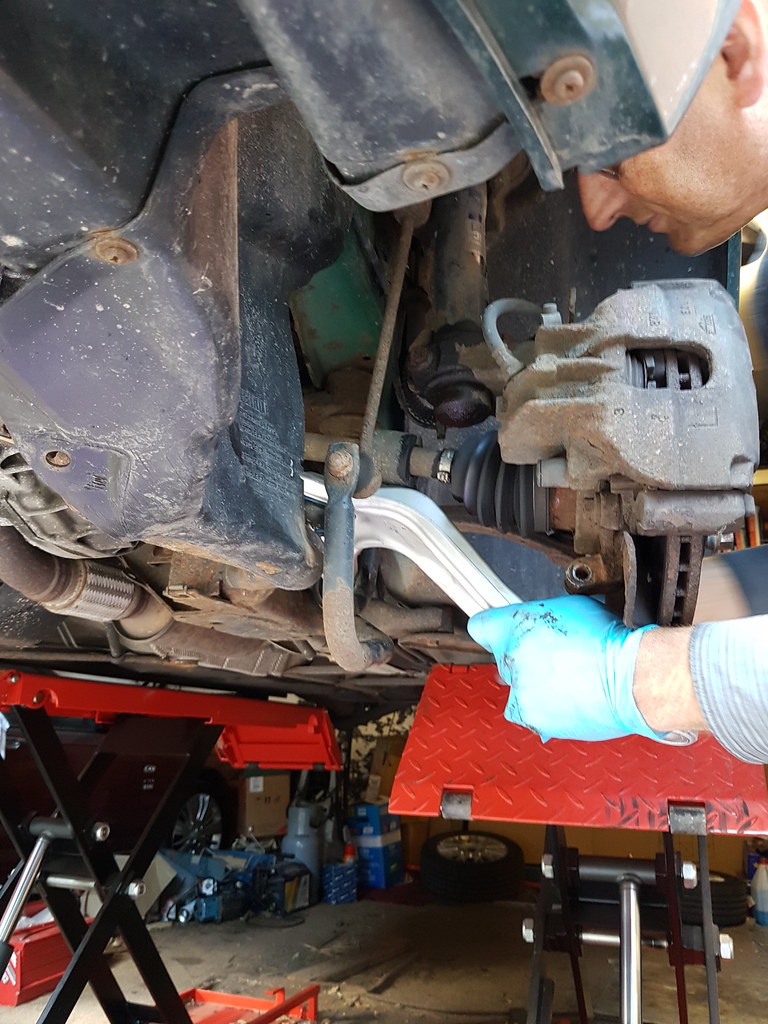
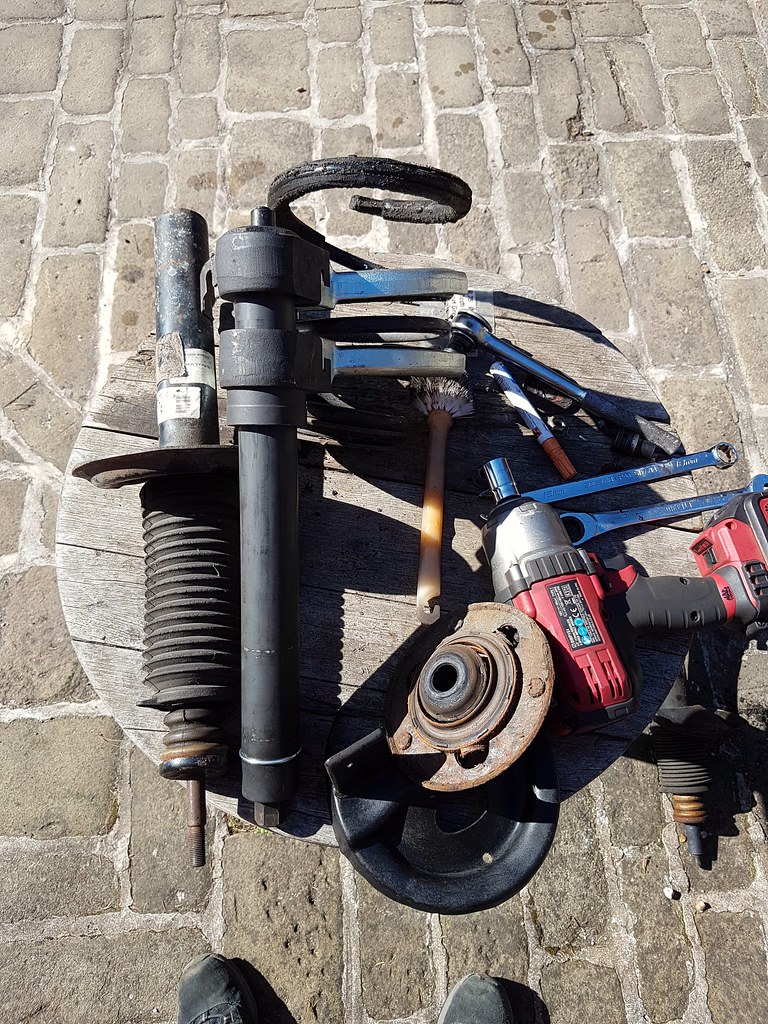
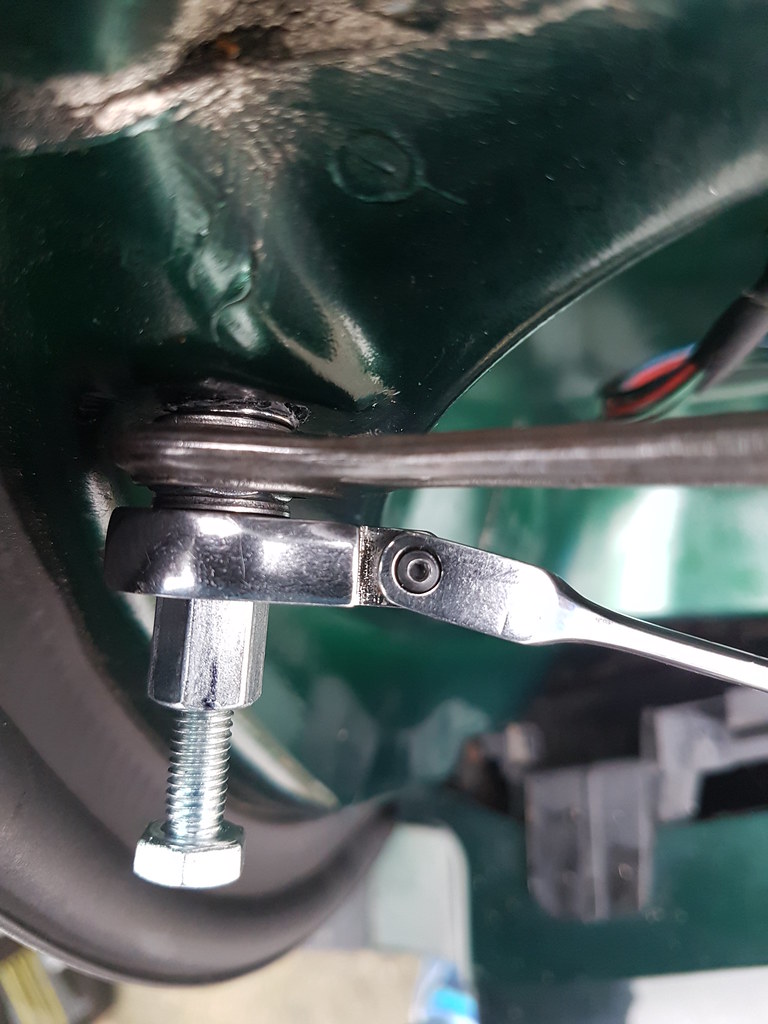
Next up, waggling and prodding revealed play in the front left wishbone bushes, a lower quality part identified so it was to come out. Also the front right damper was leaking and not long for this world. In lieu of front brakes, we tackled both. The lower quality wishbone had been installed with the might of Thor and the care to threads & torque settings of the Hulk. Many hours were spent with wedges and gritted teeth attempting to free it.
Pinch bolt:
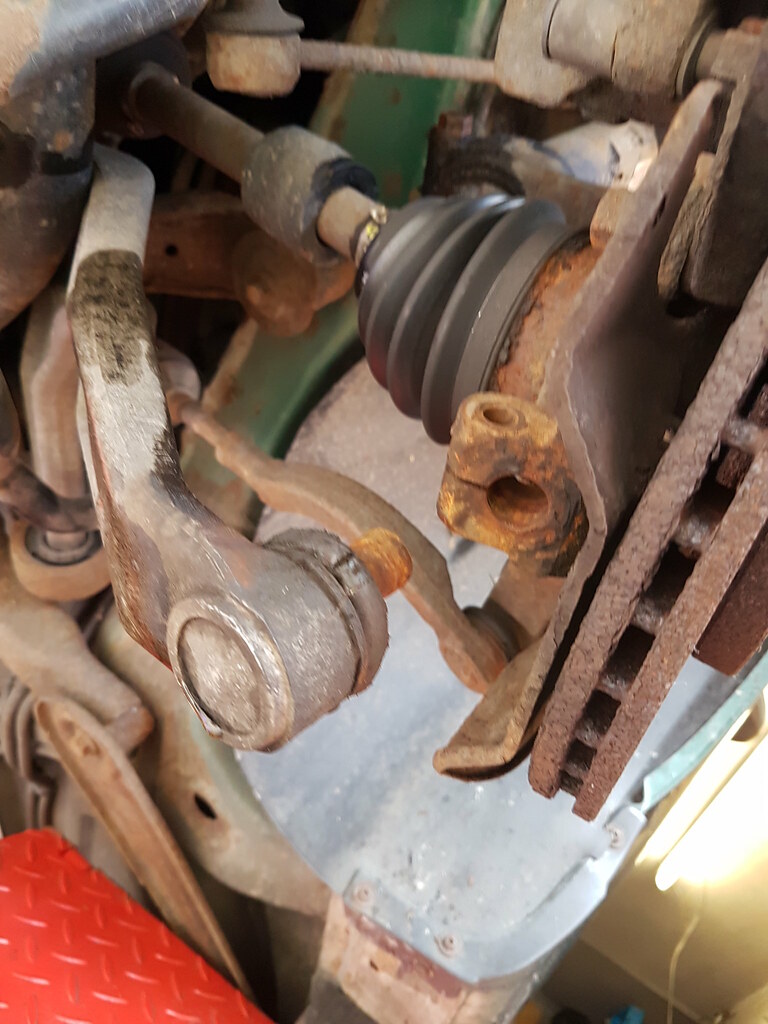 20180905_120908 by Clifton Tausberger, on Flickr
Two 18mm rear bolts and a 22mm centre bolt:
 20180905_131758 by Clifton Tausberger, on Flickr
Nasty splits giving play:
 20180905_131920 by Clifton Tausberger, on Flickr
Shiny TRW part in:
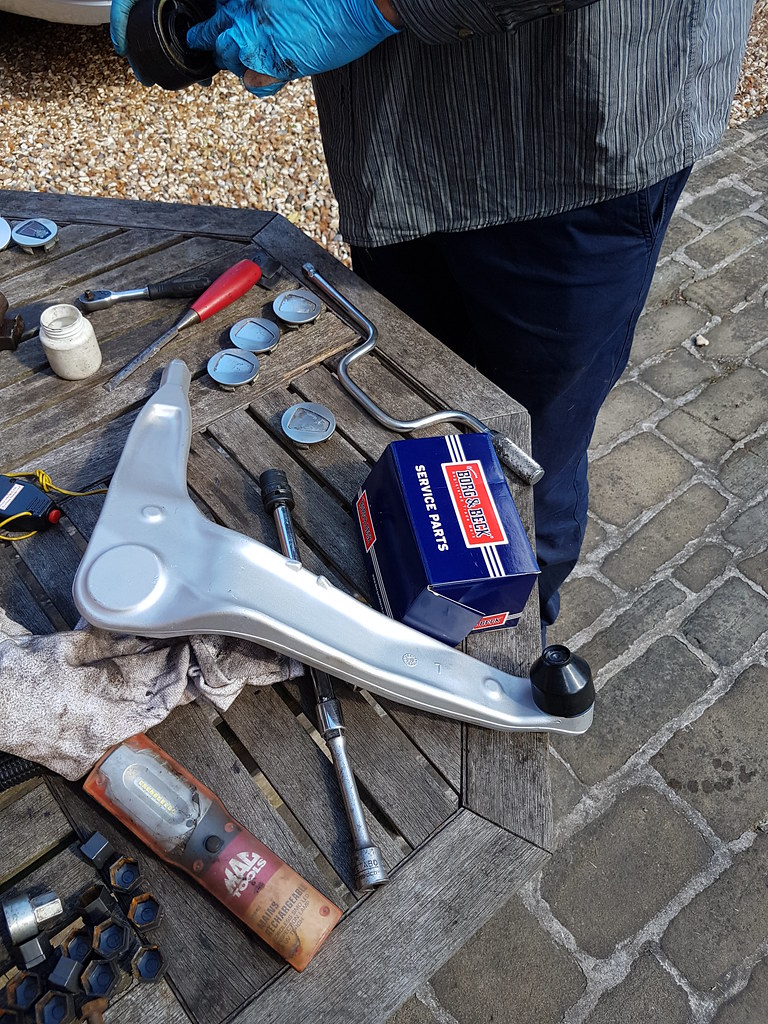 20180905_133029 by Clifton Tausberger, on Flickr
 20180905_133123 by Clifton Tausberger, on Flickr
Lunchtime. Now, the strut. Luckily Jules has adapted tools and all the knowledge to efficiently swap these out.
 20180905_102134 by Clifton Tausberger, on Flickr
Again, pinch bolts, arms and top bolts undone:
 20180905_143230 by Clifton Tausberger, on Flickr
We swapped the damper for a lower mileage item to match the other side, plus the top rusty plate with bearing for a new one.
 20180905_154809 by Clifton Tausberger, on Flickr
Spring guard, spring and all other components transferred over, with some fettling and jack lifting the assembly it all slipped in nicely.
 2018-09-07_11-04-47 by Clifton Tausberger, on Flickr
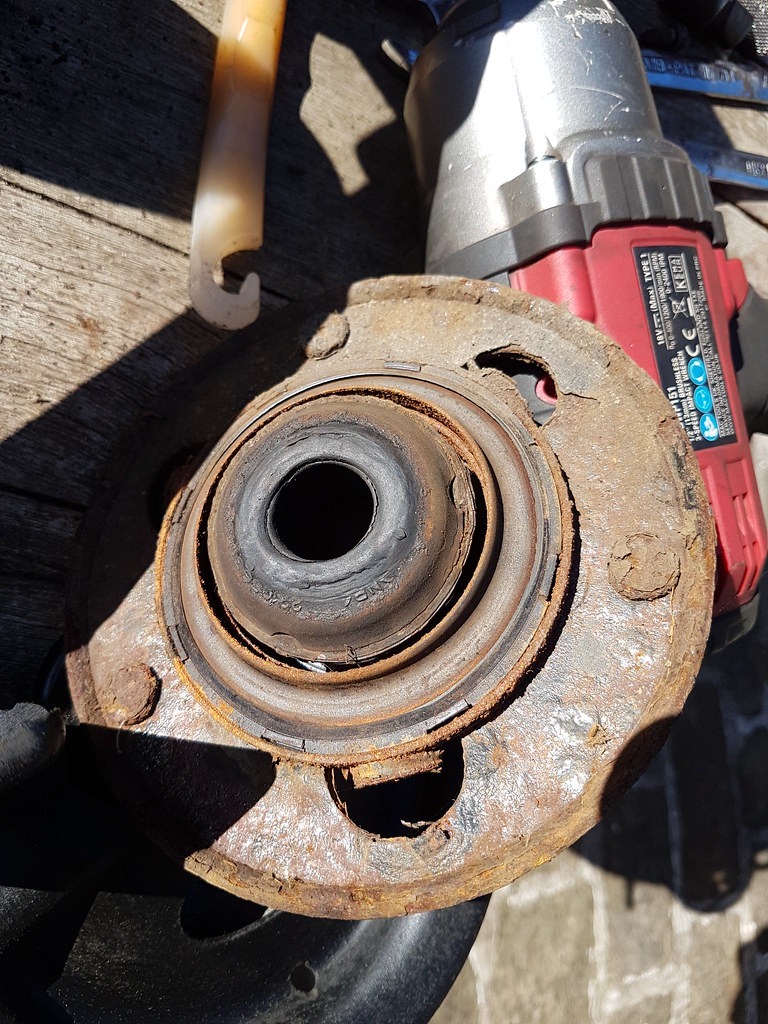
Teatime. Rear brakes now - taking off the discs revealed a clear imbalance. This is the Venn diagram of Rover rear discs - what you know needs replacement, what you don't know needs replacement and a middle of what definitely needs to be replaced.
 20180905_130342 by Clifton Tausberger, on Flickr
The handbrake assembly (springs and screws to hold in the shoes that act on the inside of the discs) on the rear left had disintegrated, and were all resting at the bottom of the discs, like wet rags in a washing machine. This is a narrow escape - nothing had 'stuck on' or interrupted the rotation.
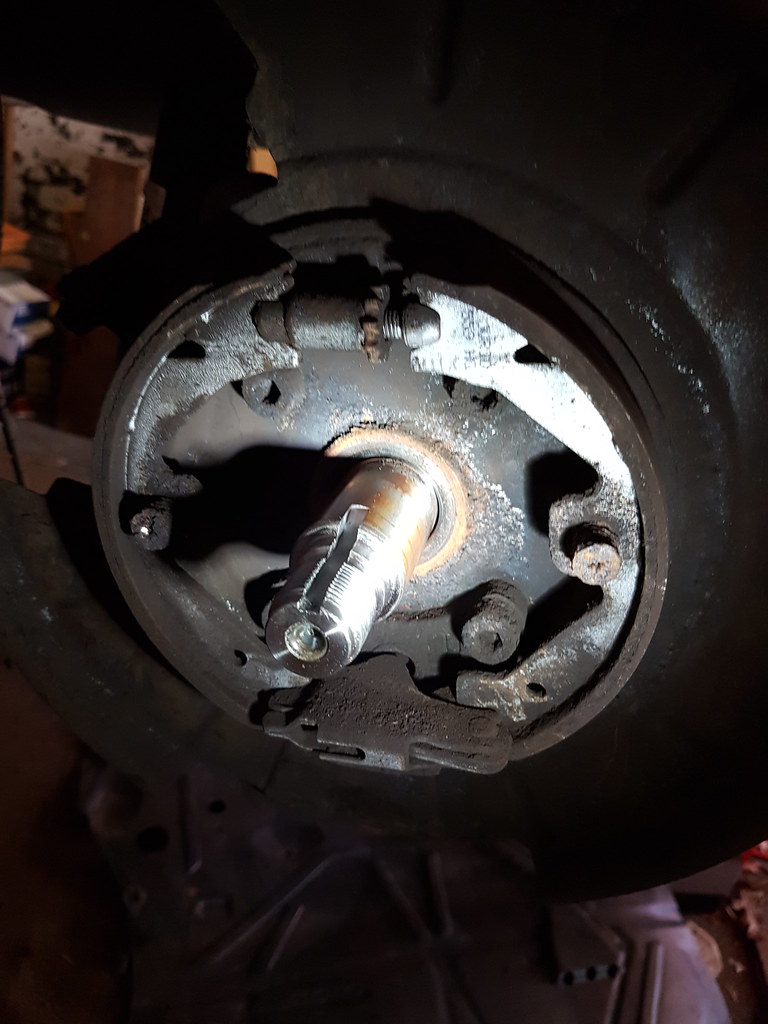 20180905_140928 by Clifton Tausberger, on Flickr
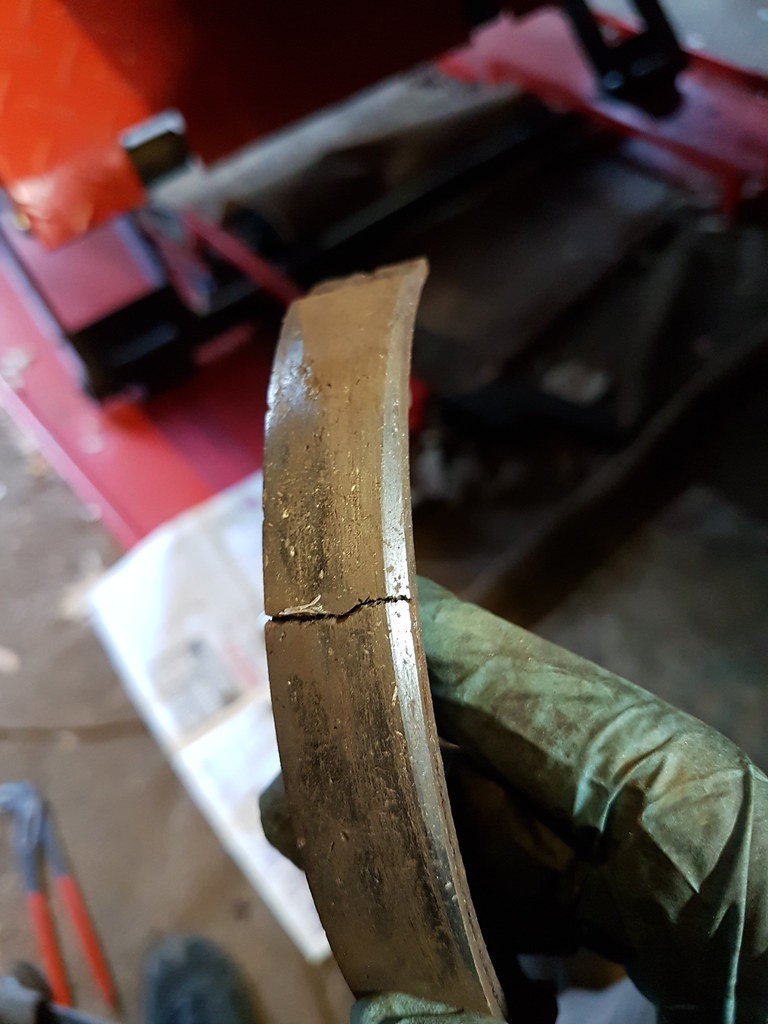
The handbrake still operated somewhat but pushed the shoes out at an angle with limited force, wearing just a corner and cracking them.
 20180905_182352 by Clifton Tausberger, on Flickr
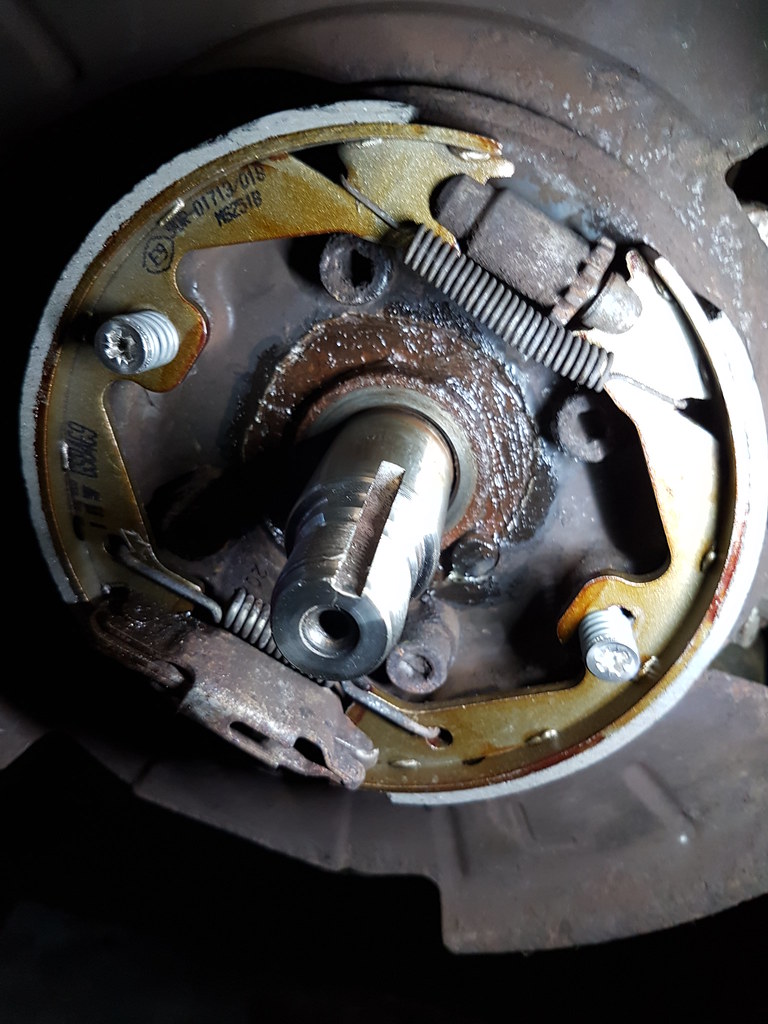
The back plate holes, where the shoes and springs attach, had corroded so Jules has a fix with stainless bolts and nuts. Rusting on the back plates can also expand to push out the other components, so this was chiselled out and treated. Luckily both rear bearings were in good operation (including ABS sensors) and were all cleaned and reused.
 20180905_183055 by Clifton Tausberger, on Flickr
 20180905_184333 by Clifton Tausberger, on Flickr
All this, plus general cleaning and degrunging and adjustments along the way saw us to a 21:00 finish after a brake bleed. The most Rover 75 day I have ever had. Phew.
Next morning, I opted to swap out the clutch master with a NOS cylinder Jules had, as it was still weeping and this was 'a twenty minute job' according to Rover beards on the forums.
 20180906_114615 by Clifton Tausberger, on Flickr
Pinch pin and split pin removed, plus the usual trim and two 8mm bolts holding it in with the worst access imaginable, this can all be done from the cabin:
 20180906_115951 by Clifton Tausberger, on Flickr
Separated with bolts removed:
 20180906_120432 by Clifton Tausberger, on Flickr
New Rover stock master in:
 20180906_120720 by Clifton Tausberger, on Flickr
We also reattached a steering grommet that is one of the biggest causes of noise tranferral to the cabin. Four hours in total but no evidence of leaks, and I was on the road and back in London five hours later.
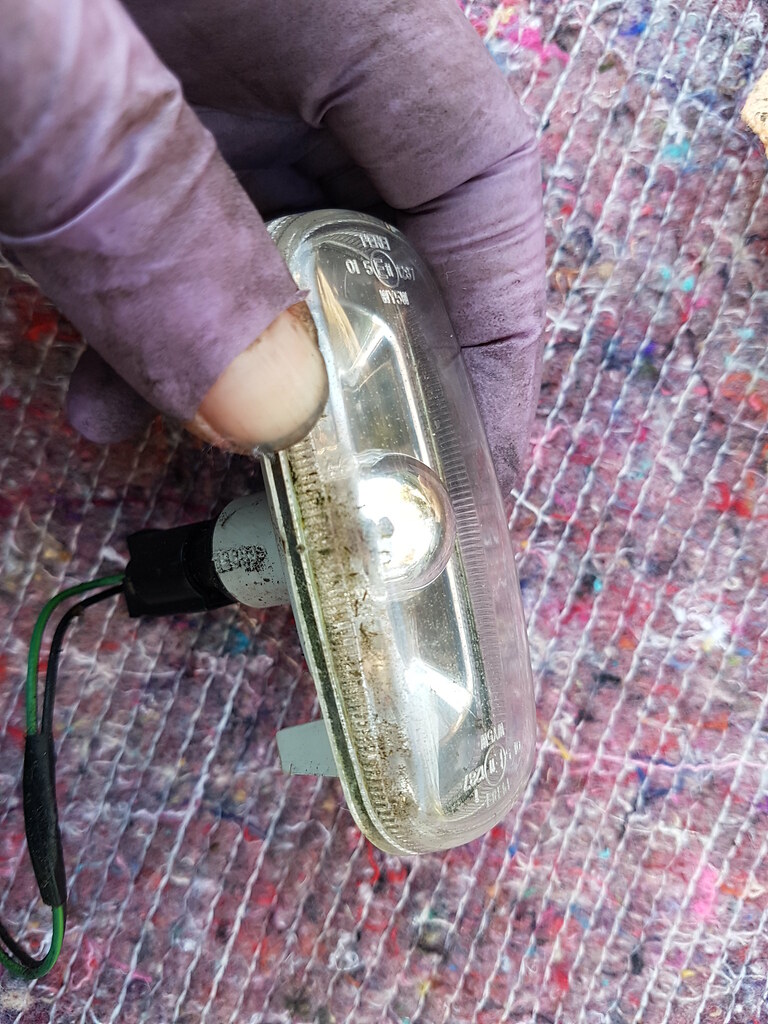
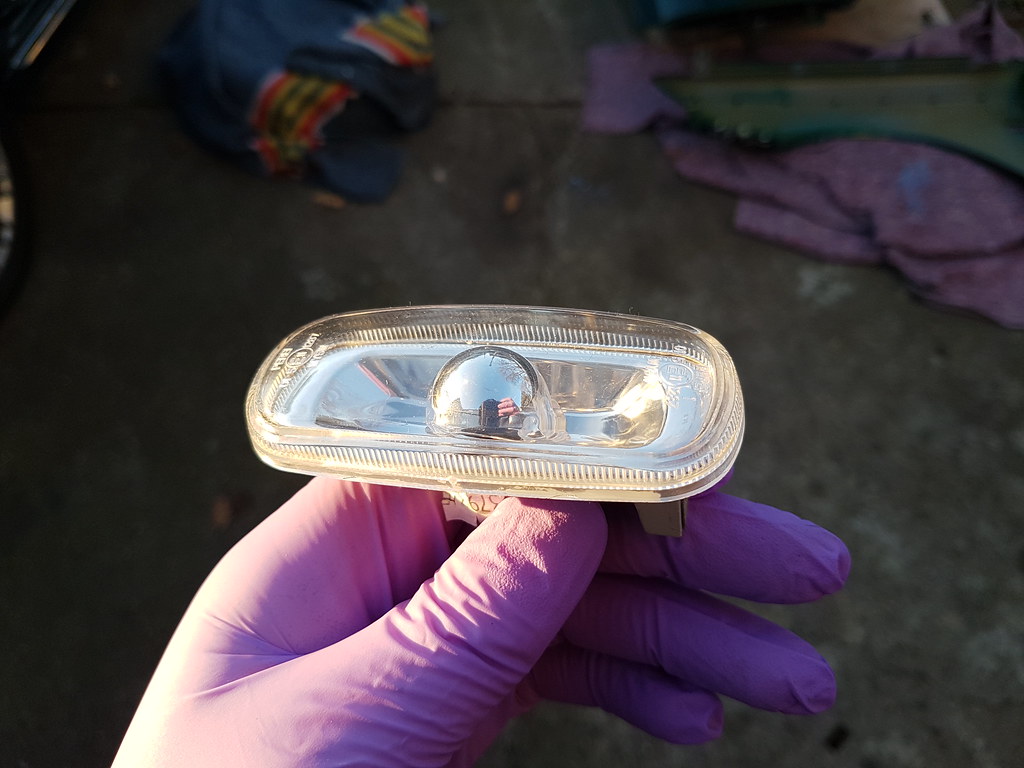
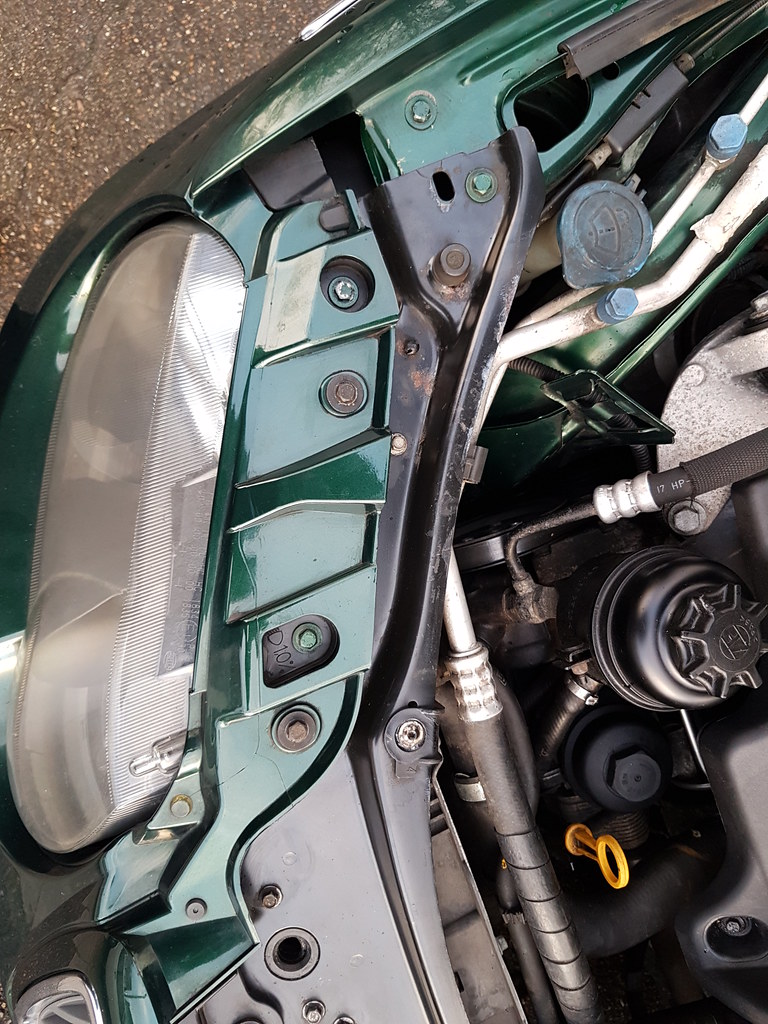
I also couldn't resist two NOS indicators to match my refurbshed headlights...
 20180906_125924 by Clifton Tausberger, on Flickr
Hopefully this sets the 75 up for another year of happy motoring. The drive home, despite rush hour traffic and the gradual increase in driver aggression as I approached London, was bliss. Vibration and noise was reduced, and it's never ridden so comprehensively over pot holes and rubbish surfaces. Big smile affixed, I crawled out of the cabin into a waiting bath, content in the knowledge it is safe and set for while. The only item left on my list for this year is a thorough scraping and underseal for the undercarriage, but I'll give it a month or so and amass the right products before the roads start getting salted.
Some people go to yoga camps, hike the Peak District or learn yoghurt weaving in Glastonbury. This is my therapy retreat, and again I learnt incalculable amounts from Jules. Highly recommended.
Front brake inspection, renewal of discs/flexis/pipes.
Rear brake inspection, renewal of discs/pads/flexis.
Gear lever play - replacement cables.
Air con inspection (slight leak).
Inspection of front suspension (see rusty turrets above).
Firstly, I had been helping a friend pull up the floor of his new house when an auction listing for two Saab 900 Turbo seats came up for the incredible sum of £25, just down the road. I couldn't pass these up, so they joined me for the trip to Wales:
20180904_150400 by Clifton Tausberger, on FlickrNext up, 250 miles to Colwyn Bay to accommodation. Simply one of the most beautiful places on the planet.
20180905_085947 by Clifton Tausberger, on FlickrThere's no mistaking the specialty of the guru on the scenic approach.
20180905_092431 by Clifton Tausberger, on Flickr20180905_092512 by Clifton Tausberger, on Flickr20180905_092756 by Clifton Tausberger, on Flickr9:30am. Inspection had some good news - with cleaning and testing front brakes are given a good bill of health.
20180905_101558 by Clifton Tausberger, on FlickrRear brakes however was a slight bother. Slight pull and vibration down to really only the right side being effective, and although the handbrake held (see previous work on compensator and adjustment), it wasn't perfect on both sides. Hmm.
20180905_111338 by Clifton Tausberger, on Flickr20180905_112342 by Clifton Tausberger, on FlickrNext up, waggling and prodding revealed play in the front left wishbone bushes, a lower quality part identified so it was to come out. Also the front right damper was leaking and not long for this world. In lieu of front brakes, we tackled both. The lower quality wishbone had been installed with the might of Thor and the care to threads & torque settings of the Hulk. Many hours were spent with wedges and gritted teeth attempting to free it.
Pinch bolt:
20180905_120908 by Clifton Tausberger, on FlickrTwo 18mm rear bolts and a 22mm centre bolt:
20180905_131758 by Clifton Tausberger, on FlickrNasty splits giving play:
20180905_131920 by Clifton Tausberger, on FlickrShiny TRW part in:
20180905_133029 by Clifton Tausberger, on Flickr20180905_133123 by Clifton Tausberger, on FlickrLunchtime. Now, the strut. Luckily Jules has adapted tools and all the knowledge to efficiently swap these out.
20180905_102134 by Clifton Tausberger, on FlickrAgain, pinch bolts, arms and top bolts undone:
20180905_143230 by Clifton Tausberger, on FlickrWe swapped the damper for a lower mileage item to match the other side, plus the top rusty plate with bearing for a new one.
20180905_154809 by Clifton Tausberger, on FlickrSpring guard, spring and all other components transferred over, with some fettling and jack lifting the assembly it all slipped in nicely.
2018-09-07_11-04-47 by Clifton Tausberger, on FlickrTeatime. Rear brakes now - taking off the discs revealed a clear imbalance. This is the Venn diagram of Rover rear discs - what you know needs replacement, what you don't know needs replacement and a middle of what definitely needs to be replaced.
20180905_130342 by Clifton Tausberger, on FlickrThe handbrake assembly (springs and screws to hold in the shoes that act on the inside of the discs) on the rear left had disintegrated, and were all resting at the bottom of the discs, like wet rags in a washing machine. This is a narrow escape - nothing had 'stuck on' or interrupted the rotation.
20180905_140928 by Clifton Tausberger, on FlickrThe handbrake still operated somewhat but pushed the shoes out at an angle with limited force, wearing just a corner and cracking them.
20180905_182352 by Clifton Tausberger, on FlickrThe back plate holes, where the shoes and springs attach, had corroded so Jules has a fix with stainless bolts and nuts. Rusting on the back plates can also expand to push out the other components, so this was chiselled out and treated. Luckily both rear bearings were in good operation (including ABS sensors) and were all cleaned and reused.
20180905_183055 by Clifton Tausberger, on Flickr20180905_184333 by Clifton Tausberger, on FlickrAll this, plus general cleaning and degrunging and adjustments along the way saw us to a 21:00 finish after a brake bleed. The most Rover 75 day I have ever had. Phew.
Next morning, I opted to swap out the clutch master with a NOS cylinder Jules had, as it was still weeping and this was 'a twenty minute job' according to Rover beards on the forums.
20180906_114615 by Clifton Tausberger, on FlickrPinch pin and split pin removed, plus the usual trim and two 8mm bolts holding it in with the worst access imaginable, this can all be done from the cabin:
20180906_115951 by Clifton Tausberger, on FlickrSeparated with bolts removed:
20180906_120432 by Clifton Tausberger, on FlickrNew Rover stock master in:
20180906_120720 by Clifton Tausberger, on FlickrWe also reattached a steering grommet that is one of the biggest causes of noise tranferral to the cabin. Four hours in total but no evidence of leaks, and I was on the road and back in London five hours later.
I also couldn't resist two NOS indicators to match my refurbshed headlights...
20180906_125924 by Clifton Tausberger, on FlickrHopefully this sets the 75 up for another year of happy motoring. The drive home, despite rush hour traffic and the gradual increase in driver aggression as I approached London, was bliss. Vibration and noise was reduced, and it's never ridden so comprehensively over pot holes and rubbish surfaces. Big smile affixed, I crawled out of the cabin into a waiting bath, content in the knowledge it is safe and set for while. The only item left on my list for this year is a thorough scraping and underseal for the undercarriage, but I'll give it a month or so and amass the right products before the roads start getting salted.
Some people go to yoga camps, hike the Peak District or learn yoghurt weaving in Glastonbury. This is my therapy retreat, and again I learnt incalculable amounts from Jules. Highly recommended.
Thanks for the kind words - it's definitely a keeper, for as long as the UK still actually allows diesel cars on the road.
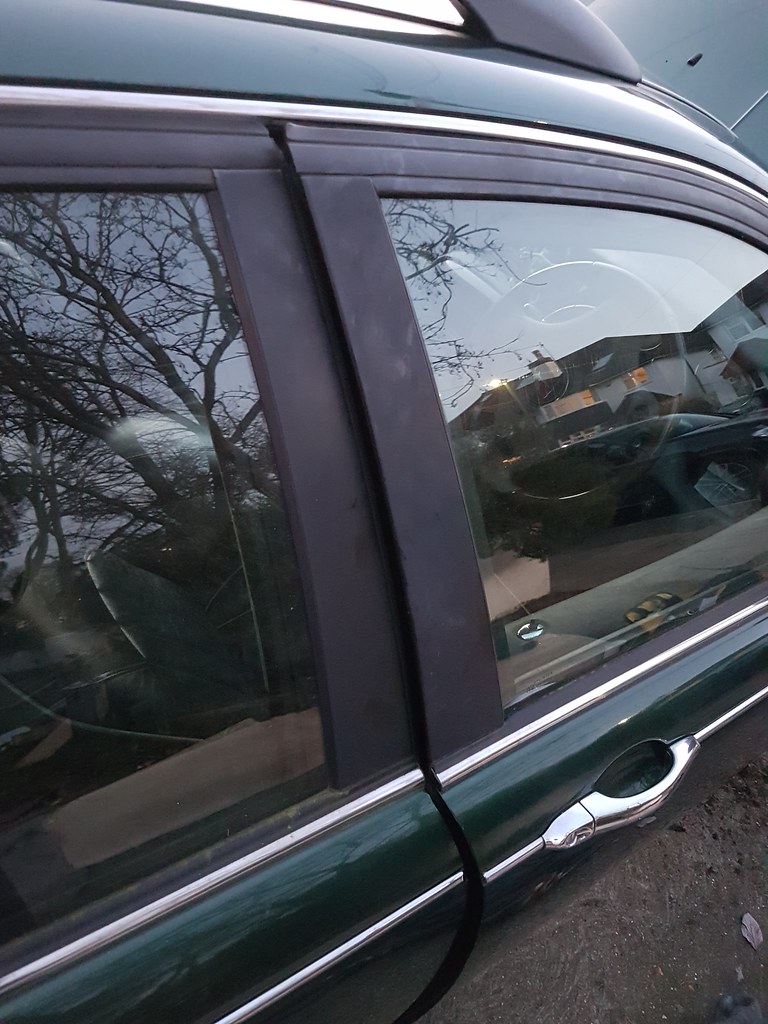
One item I left off were the wheel centre caps - the Mk2 have a neutered viking ship, so I had purchased a set of Mk1s years ago and consistently forgotten to fit them whenever the wheels were off. This time, with an alarm specially set for CENTRE CAPS I finally took them. Of course, they are different sizes:
 20180905_101827 by Clifton Tausberger, on Flickr
Big sigh. Fortunately, Jules pull a set of adhesive stickers from his stores, and I spent a happy few minutes easing out the old logos with a hair dryer and a chisel.
 20180906_112712 by Clifton Tausberger, on Flickr
MOT passes guaranteed with these installed.
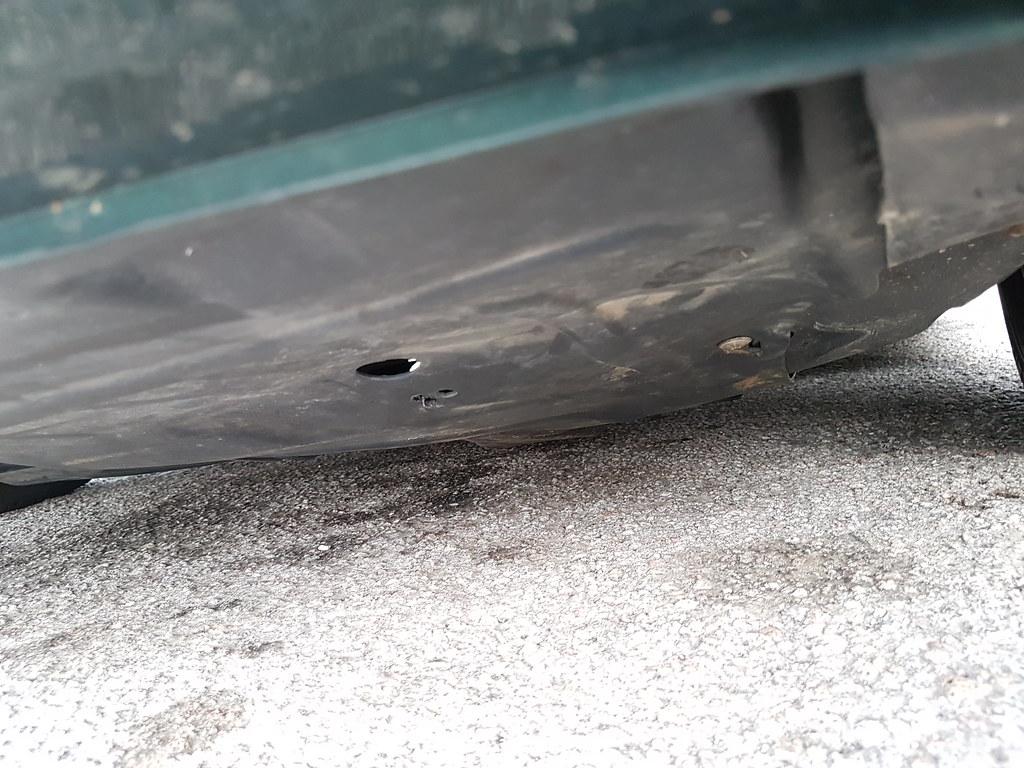
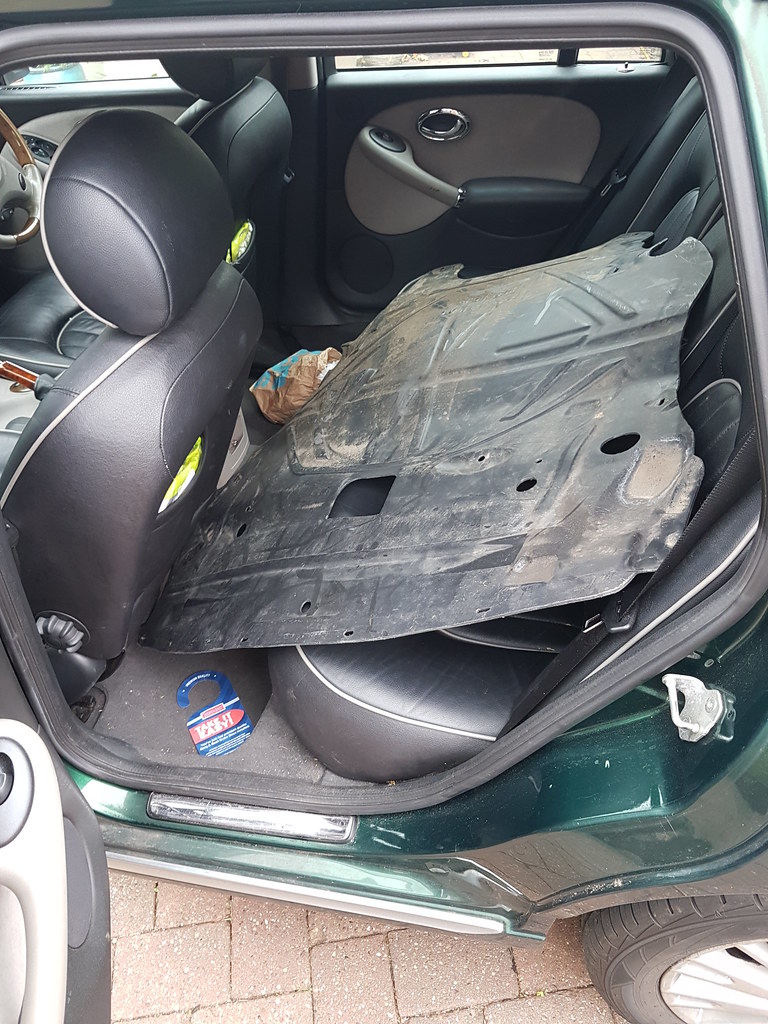
The 75 did another few hundred miles this weekend, taking us to a wedding and riding finely, at least until the aftermarket undertray started the catch on every speed bump. Although fully attached in the right places, it has flexed bizarrely and had to come off. Unfortunately good used items are in short supply, and not easy to ship! Oh well, another item back on the list.
 20180907_163452 by Clifton Tausberger, on Flickr
 20180909_110923 by Clifton Tausberger, on Flickr
mattyprice4004 said:
Good to see one of my NOS master cylinders going to a good home... 
My own ZTT is currently away for what I can only describe as a ‘complete refresh’ after an ABS issue and subsequent investigation found pretty much everything was knackered....
Yes that sounds like a similar situation to many - we definitely got lucky with this one, largely as it was one of the last, but Jules is starting to see some proper 'classic' issues now on the early Mk1s. It'll be worth it, especially as you have all the parts!My own ZTT is currently away for what I can only describe as a ‘complete refresh’ after an ABS issue and subsequent investigation found pretty much everything was knackered....
One item I left off were the wheel centre caps - the Mk2 have a neutered viking ship, so I had purchased a set of Mk1s years ago and consistently forgotten to fit them whenever the wheels were off. This time, with an alarm specially set for CENTRE CAPS I finally took them. Of course, they are different sizes:
20180905_101827 by Clifton Tausberger, on FlickrBig sigh. Fortunately, Jules pull a set of adhesive stickers from his stores, and I spent a happy few minutes easing out the old logos with a hair dryer and a chisel.
20180906_112712 by Clifton Tausberger, on FlickrMOT passes guaranteed with these installed.
The 75 did another few hundred miles this weekend, taking us to a wedding and riding finely, at least until the aftermarket undertray started the catch on every speed bump. Although fully attached in the right places, it has flexed bizarrely and had to come off. Unfortunately good used items are in short supply, and not easy to ship! Oh well, another item back on the list.
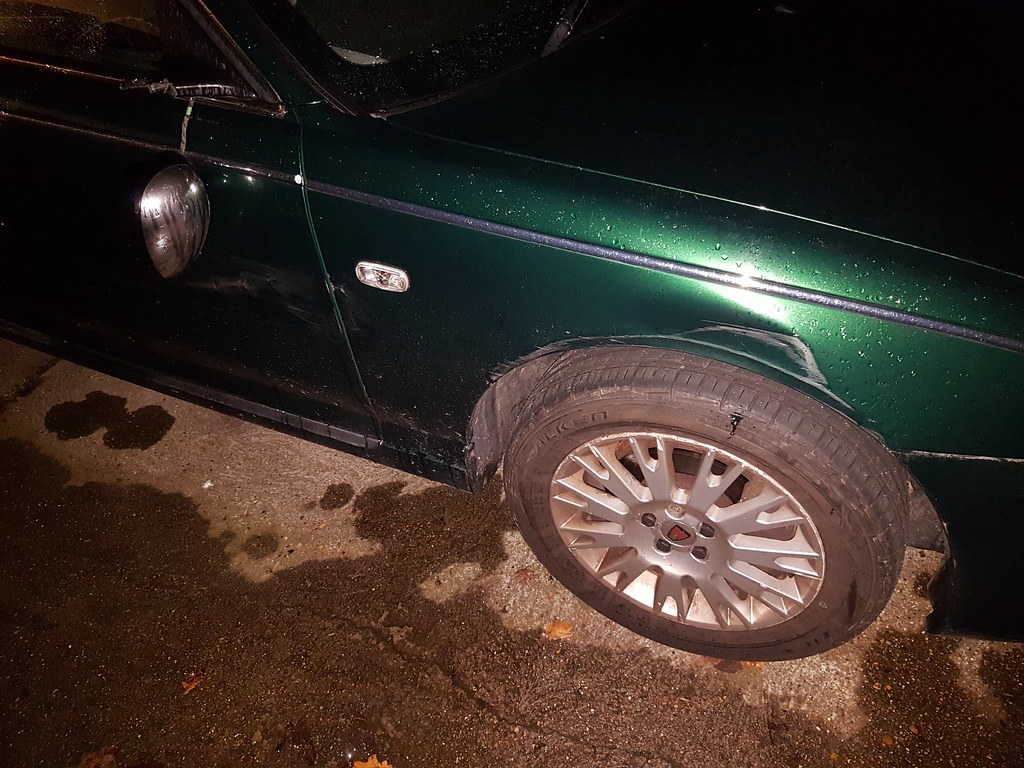
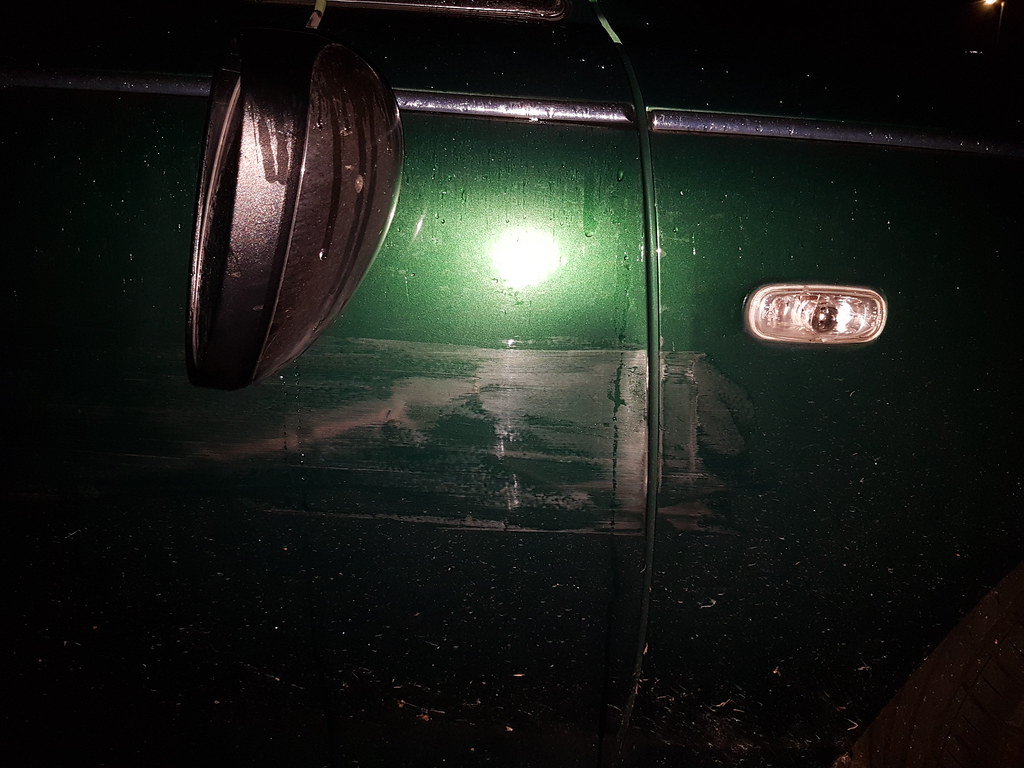
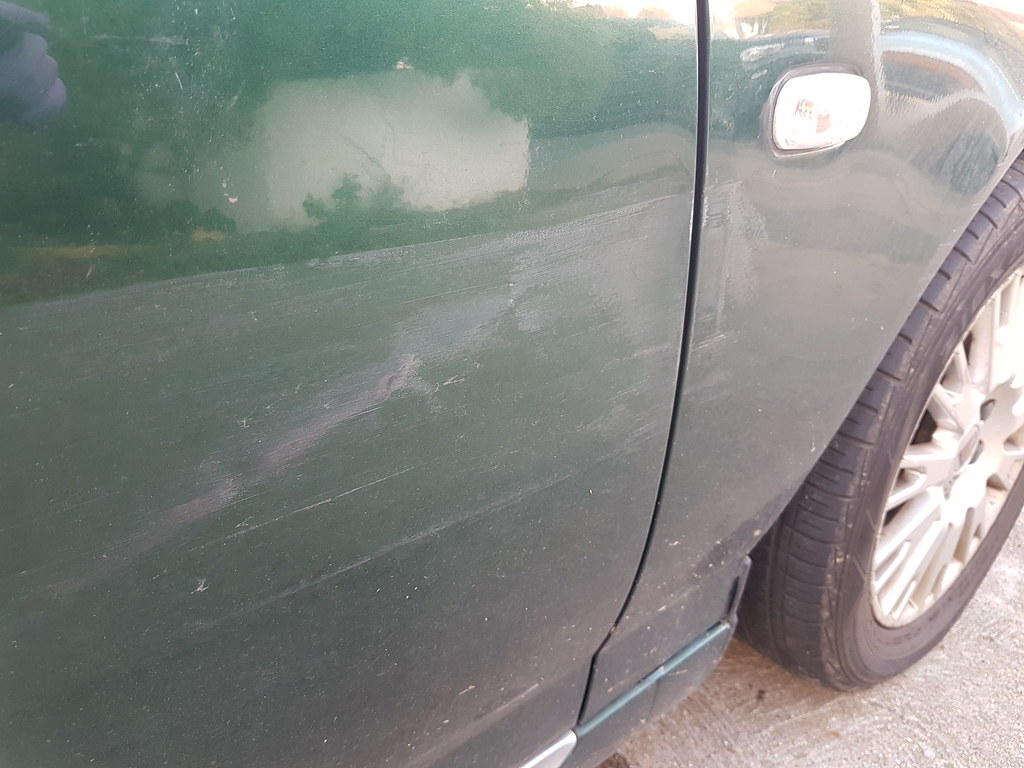
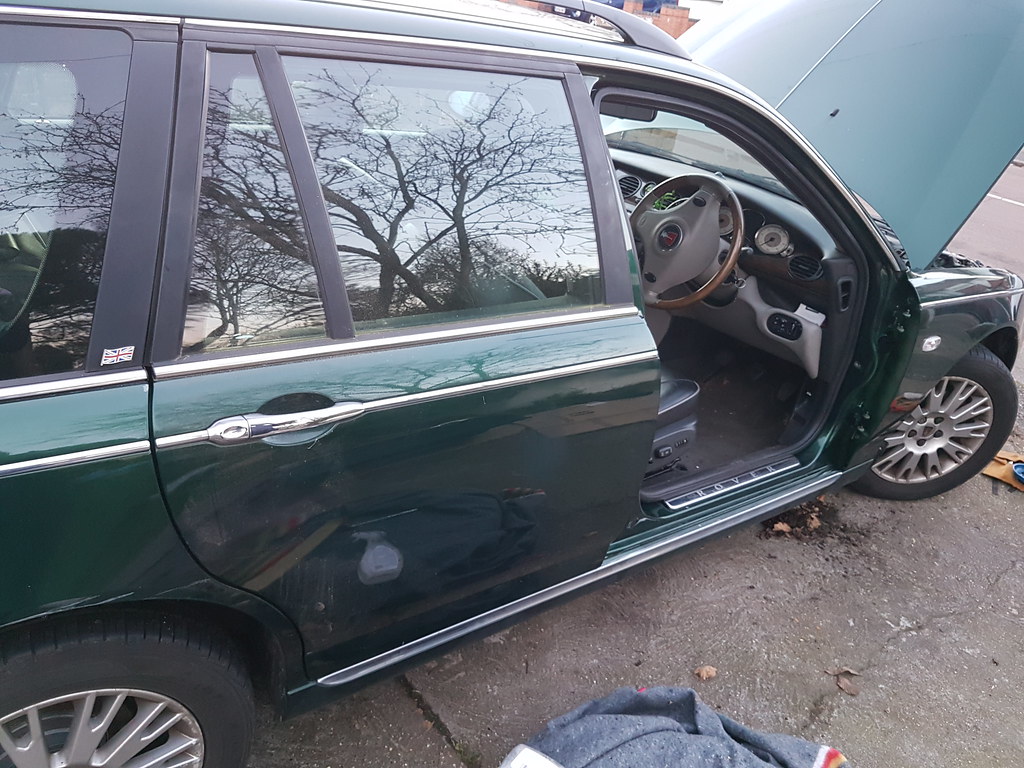
20180907_163452 by Clifton Tausberger, on Flickr20180909_110923 by Clifton Tausberger, on FlickrBad news on the Rover - a van driver sideswiped it on a roundabout, and almost squeezed it into a bollard.
 20181204_211529
 20181204_211602
 20181204_211610
According to my wife, who got him to stop, after much gesticulating he admitted fault at the scene. We'll see how that pans out - I'm most worried about it being written off and her policy/the car's status being impacted as on the books it's not worth a large amount.
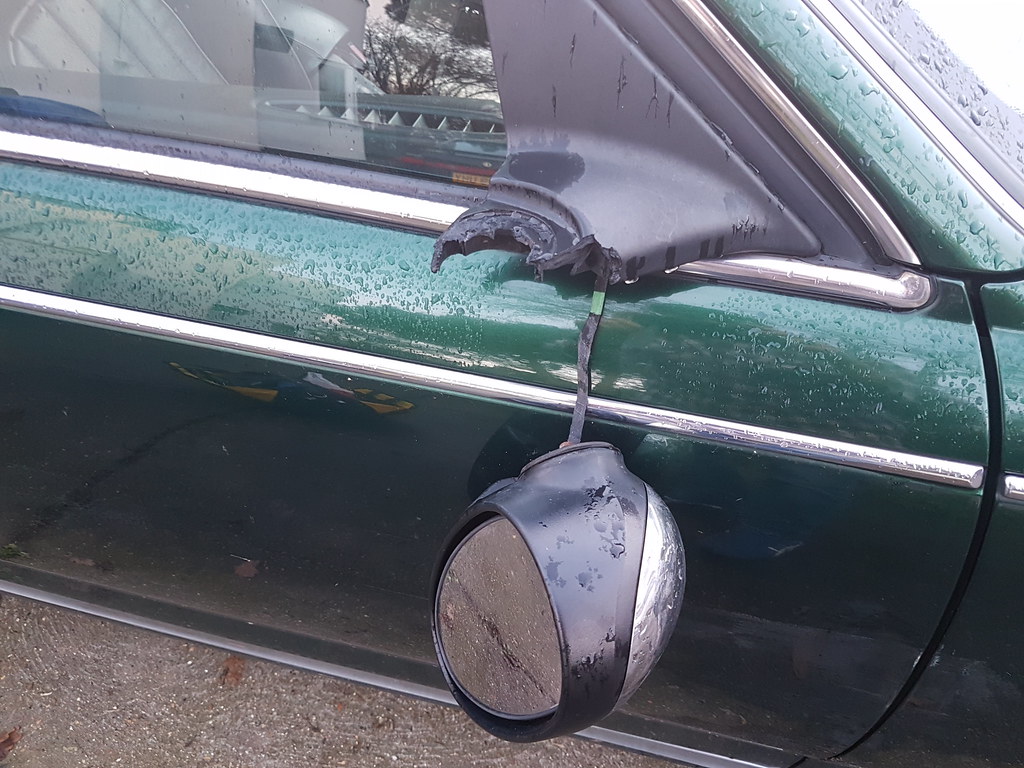
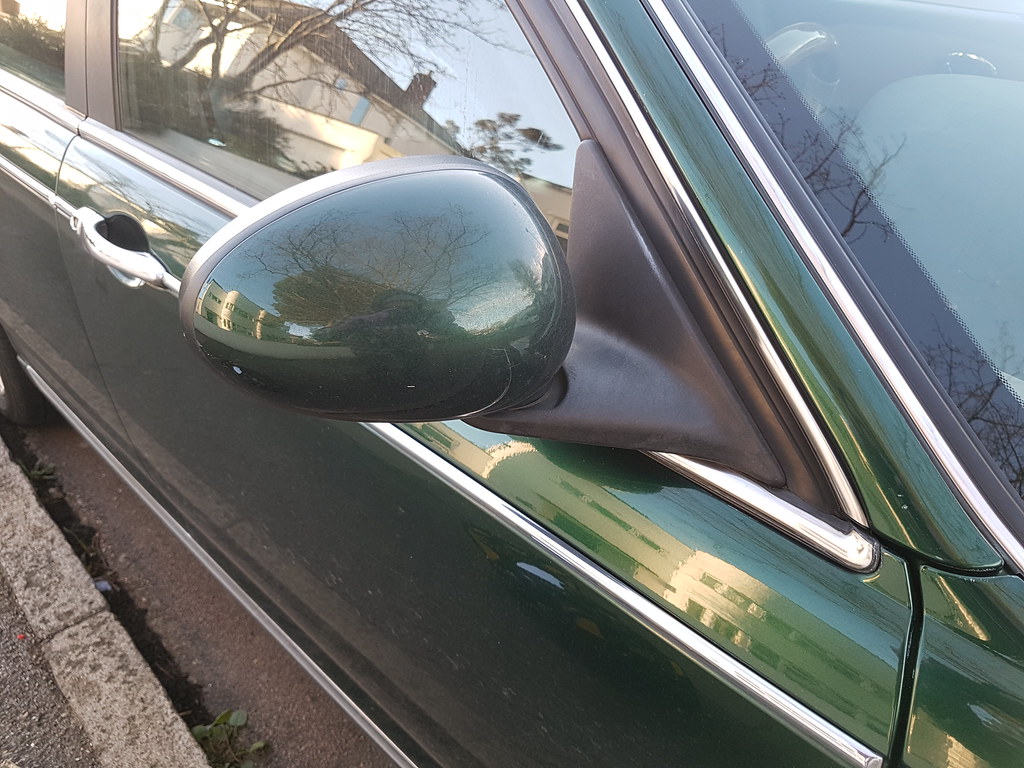
Wing mirror broken off.
Side repeater smashed.
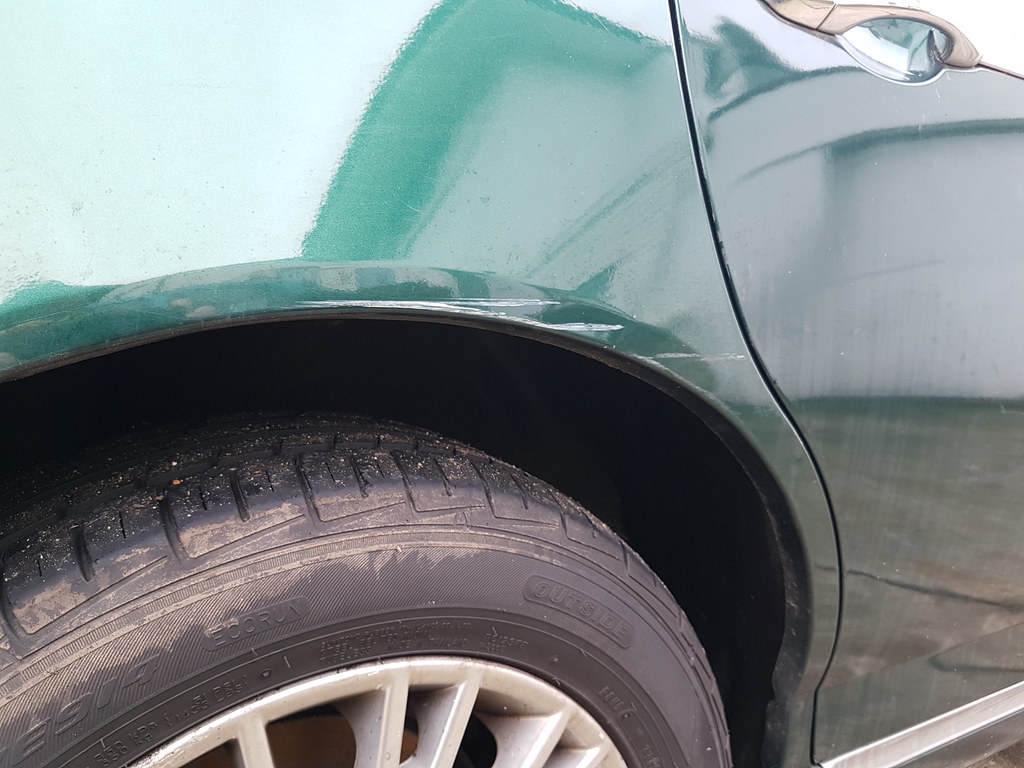
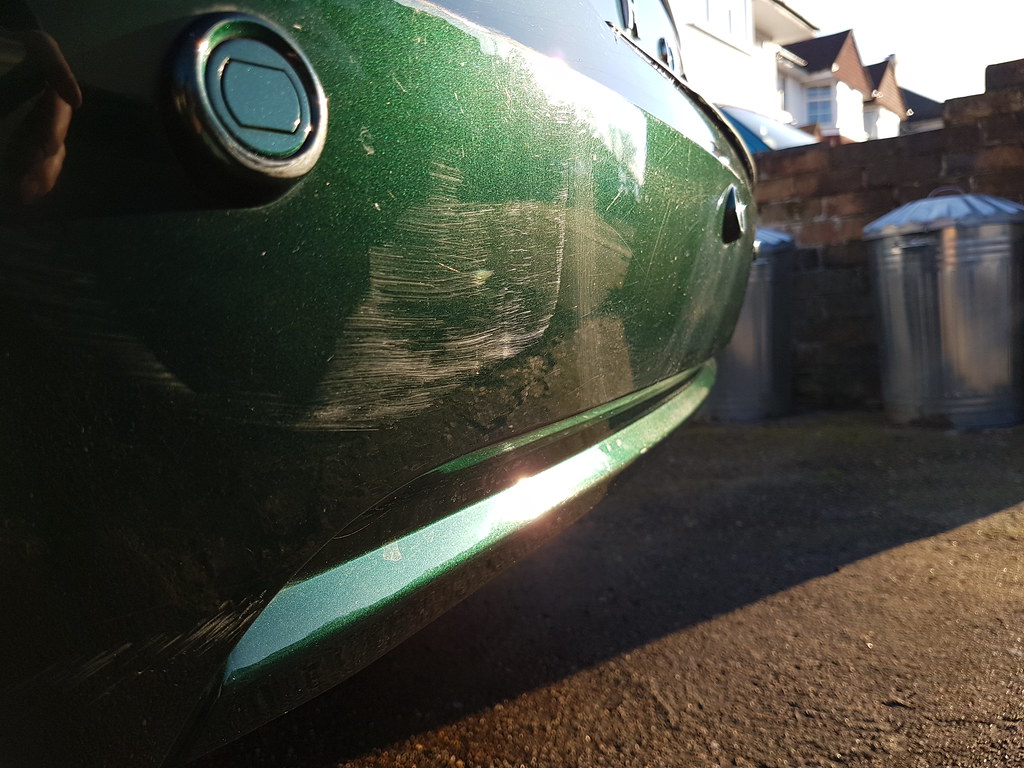
OSF wheel arch crinkled and scratched.
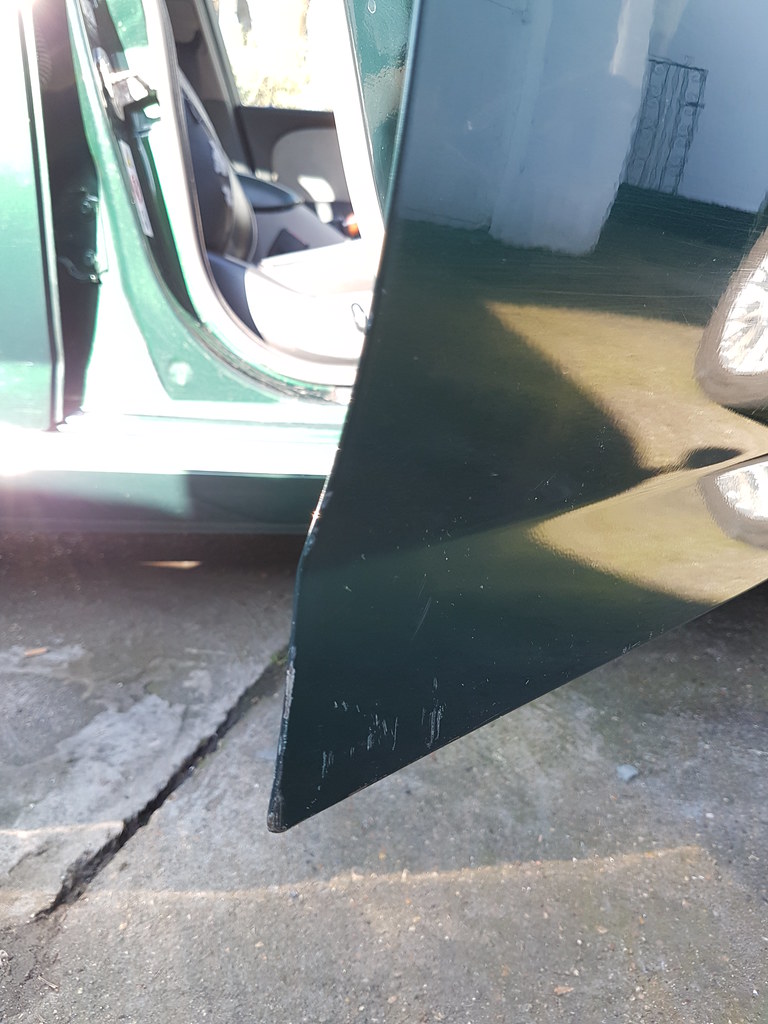
Driver's door kinked and heavily scratched.
Passenger door kinked and scratched.
Rear wheelarch slightly scratched.
So a pretty comprehensive driver's side cosmetic demolition.
We're patently not parting with the car under any circumstances, but it will likely be cheaper and easier to source the panels and bits (paint code HFF, if anyone knows one being broken!) and do it ourselves.
Incredible frustrating. Bah.
20181204_21152920181204_21160220181204_211610According to my wife, who got him to stop, after much gesticulating he admitted fault at the scene. We'll see how that pans out - I'm most worried about it being written off and her policy/the car's status being impacted as on the books it's not worth a large amount.
Wing mirror broken off.
Side repeater smashed.
OSF wheel arch crinkled and scratched.
Driver's door kinked and heavily scratched.
Passenger door kinked and scratched.
Rear wheelarch slightly scratched.
So a pretty comprehensive driver's side cosmetic demolition.
We're patently not parting with the car under any circumstances, but it will likely be cheaper and easier to source the panels and bits (paint code HFF, if anyone knows one being broken!) and do it ourselves.
Incredible frustrating. Bah.
Thanks for the kind words, and those that sent PMs with advice.
Wife is all ok, just incandescent with fury, snd happy that it didn't happen in her beloved Saab 900 T16.
I have travked down a Tourer in the same green, HFF, that is being broken and has good panels, so hopefully this will all end well. Wing mirror and side repeater already en route!
On a positive note, this may solve the long standing annoyance of deep scratches on the driver's glass. Change door. Done.
Also may be able to source a driver's seat in better condition and a fabled original undertray.
Insurance company is keen to give us money and not write off the car at all, which is enscouraging but I'm worried the other party may suddenly start to dispute fault (and facts). Fingers, toes and every tool in the toolbox crossed.
Step 1: Make car roadworthy again.
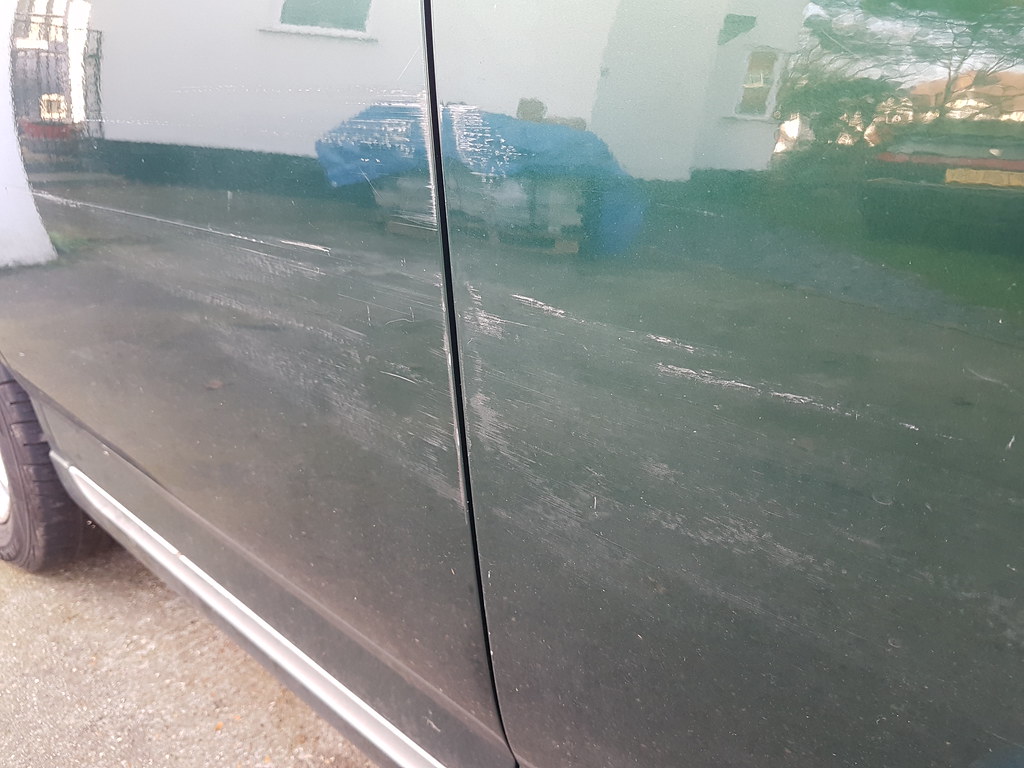
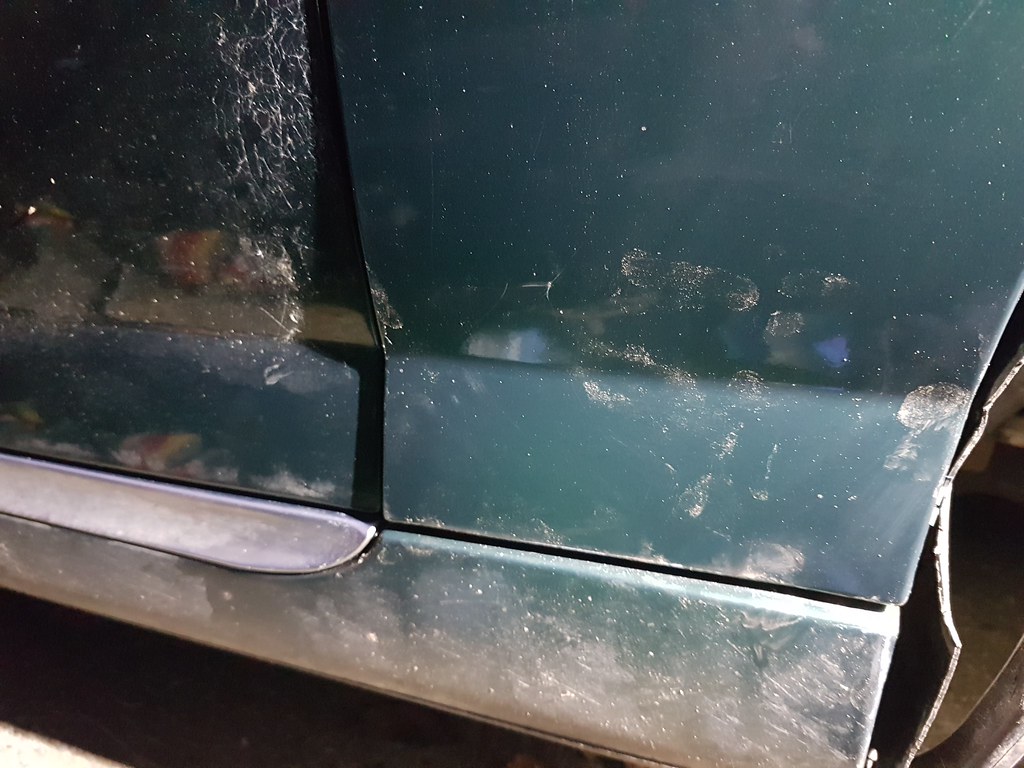
In the grey light of day it actually doesn't look too bad, and even a gentle wipe took off a lot of van paint but left the doors looking almost acceptable.
 20181208_153333
Roadworthiness entailed a change of a wing mirror, side repeater, check of the geometry and all door operations.
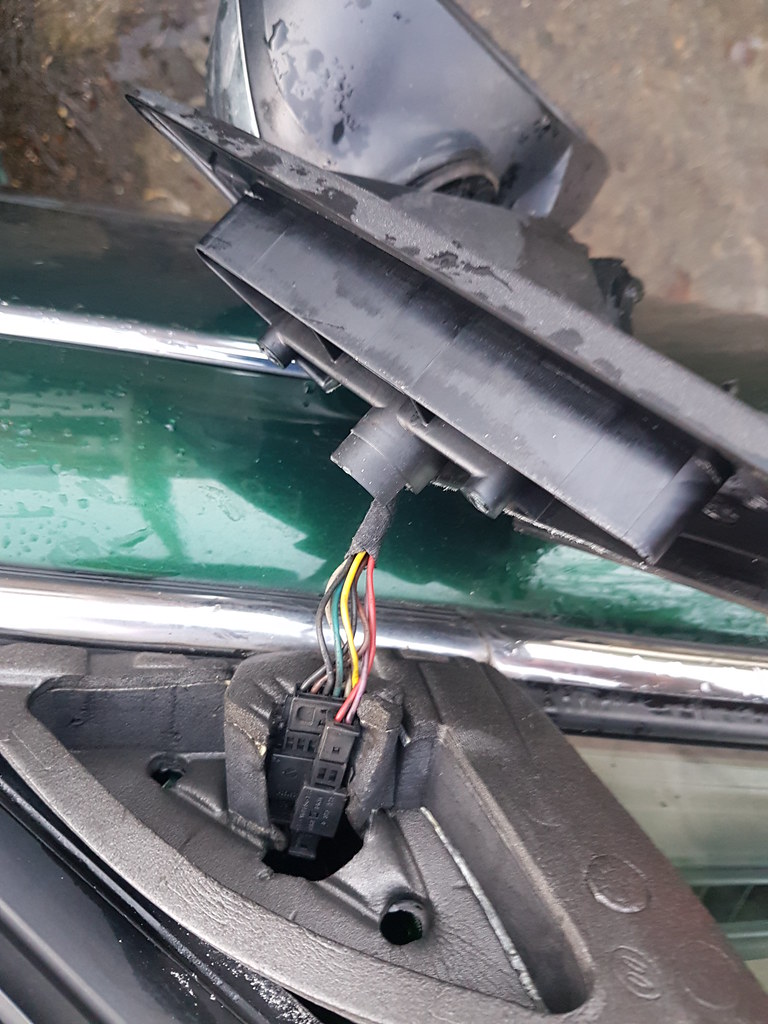
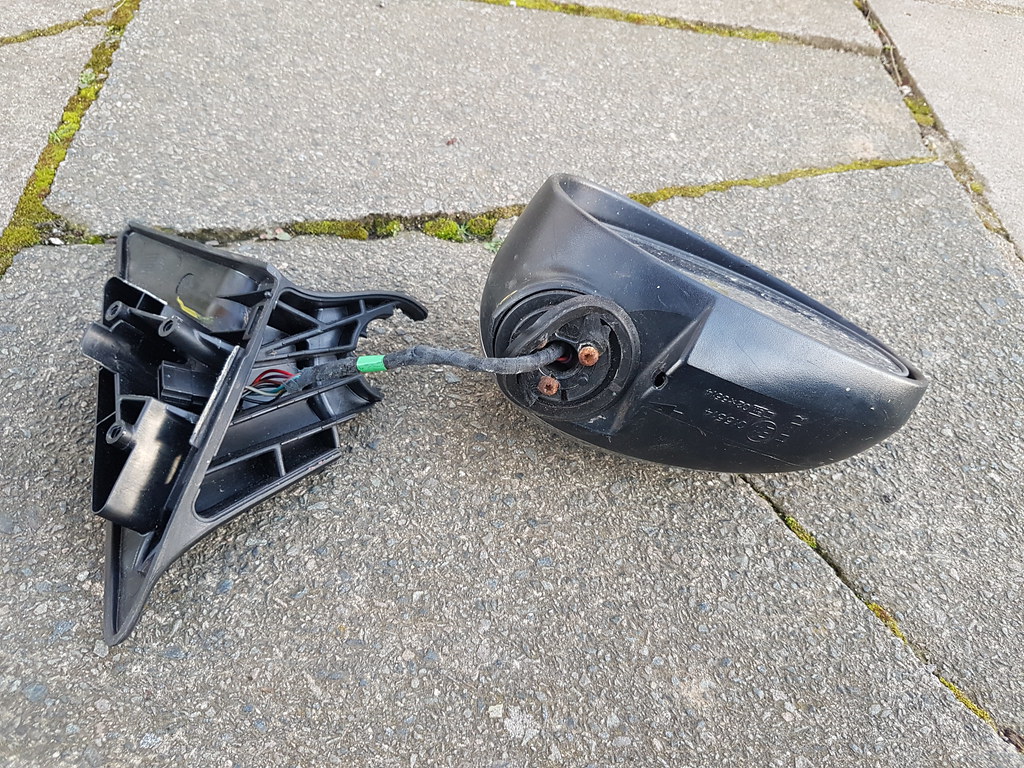
A wing mirror was sourced for a few pounds and arrived this morning. This doesn't have the folding function and is knocked up, but I'll hopefully be getting a better one from the donor car in the coming weeks. I'm glad these were electric - if not for the cable we would have lost it!
 20181208_153355
Gently prise off trim and tweeter, loosened but did not remove the door card for expedience. Three 8mm bolts:
 20181208_153652
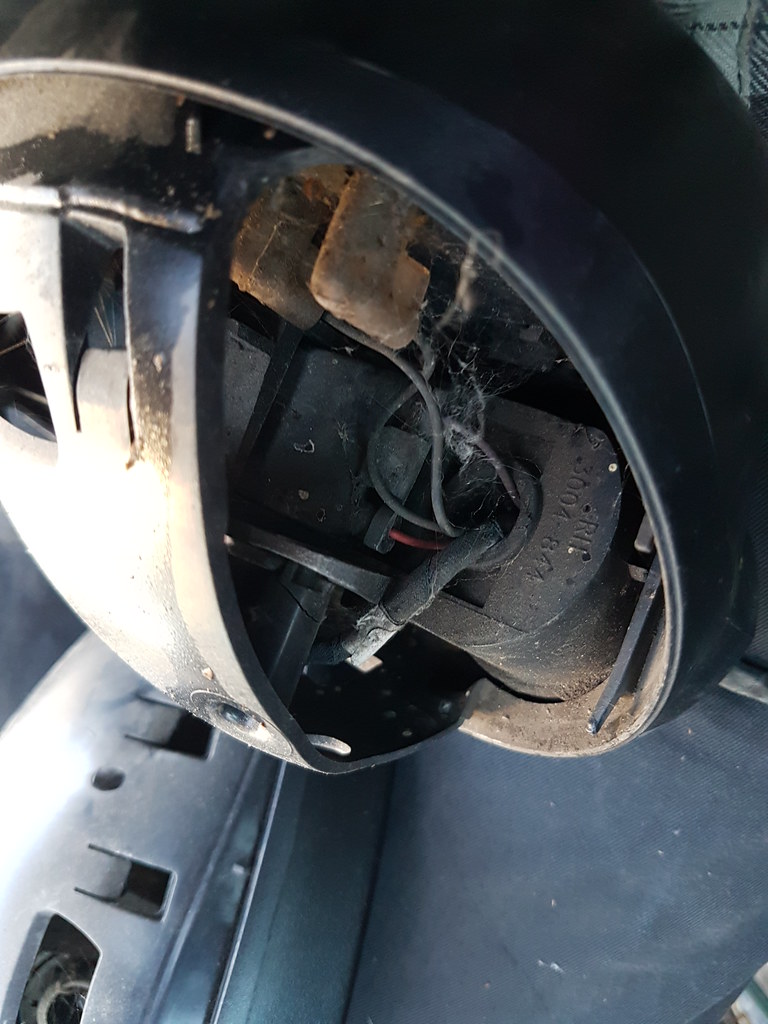
Bigger block for the adjustment motors, smaller connector for the PowerFold(TM) feature on higher spec models:
 20181208_154031
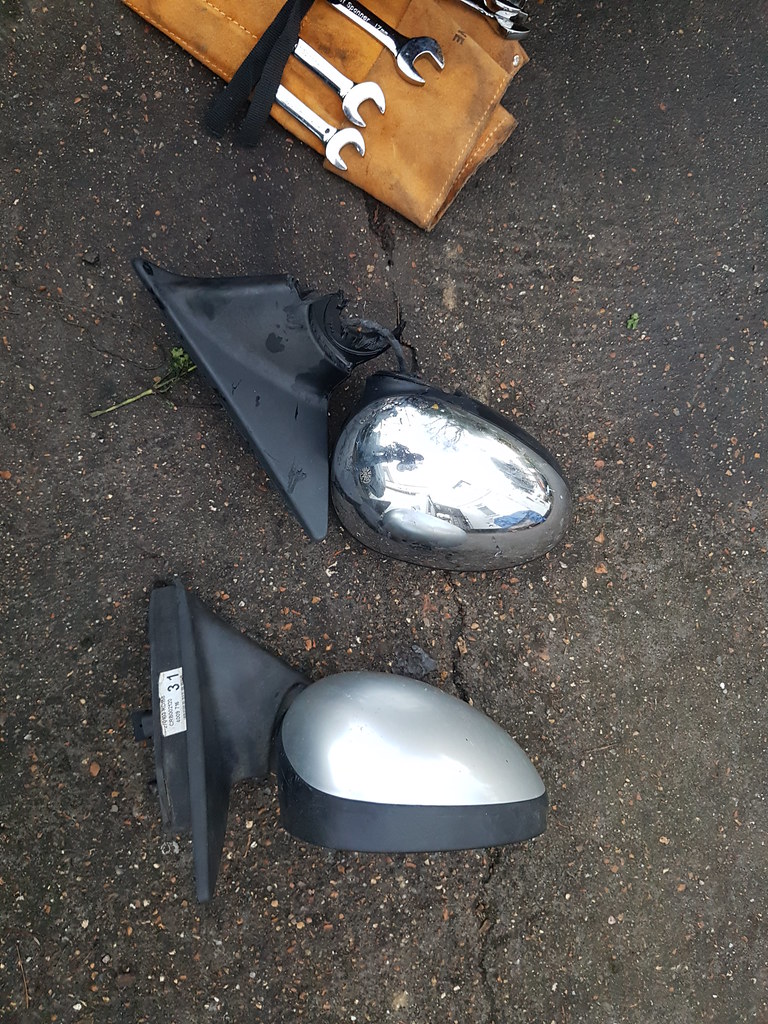
New item is tattered but working, sadly boring matt silver:
 20181208_154344
Surprising how dreadful that looks:
 20181208_155731
Fortunately the side repeater was just dislodged and cracked, so it is working now. Doors all open and close without issue, and the car drives straight and true without shenanigans or audible complaints.
It's now set for a long journey to pick up its donor organs next weekend. More to follow.
In the grey light of day it actually doesn't look too bad, and even a gentle wipe took off a lot of van paint but left the doors looking almost acceptable.
20181208_153333Roadworthiness entailed a change of a wing mirror, side repeater, check of the geometry and all door operations.
A wing mirror was sourced for a few pounds and arrived this morning. This doesn't have the folding function and is knocked up, but I'll hopefully be getting a better one from the donor car in the coming weeks. I'm glad these were electric - if not for the cable we would have lost it!
20181208_153355Gently prise off trim and tweeter, loosened but did not remove the door card for expedience. Three 8mm bolts:
20181208_153652Bigger block for the adjustment motors, smaller connector for the PowerFold(TM) feature on higher spec models:
20181208_154031New item is tattered but working, sadly boring matt silver:
20181208_154344Surprising how dreadful that looks:
20181208_155731Fortunately the side repeater was just dislodged and cracked, so it is working now. Doors all open and close without issue, and the car drives straight and true without shenanigans or audible complaints.
It's now set for a long journey to pick up its donor organs next weekend. More to follow.
Edited by Spinakerr on Saturday 8th December 18:36
davepoth said:
I had something very similar happen to my 75 back in the summer - both doors, the wing, and the mirror on mine though. After checking the book value of the car I realised that any work more substantial than a full valet would cause it to be written off so I declined to make a claim.
As luck would have it my local MGR garage/dismantler (MJN Motors in Bristol, very good guy) had a car in to break in the right colour - all sorted for less than the excess on my policy.
Sorry to hear that, but glad it was resolved. Similar situation here, though as my wife wasn't at fault and we may have some camera evidence, the payout (without a write off) might keep us on the road for quite some time. Unfortunately the careful explanation of my consultancy and handiworks costs are met with desultory comments.As luck would have it my local MGR garage/dismantler (MJN Motors in Bristol, very good guy) had a car in to break in the right colour - all sorted for less than the excess on my policy.
Mr Tidy said:
That's a great read OP - thanks for sharing your journey!
I hope you can get the damage sorted for sensible money.
It's looking positive - Stage 2: Obtain the parts.I hope you can get the damage sorted for sensible money.
I tracked down a 2004 Tourer in a breakers two hours away, so with yesterday morning looking entirely delightful, I loaded up the tools, cleared the boot and headed off. Terrible picture, but it was lovely:
 20181215_075746
The donor was 61,000 mile car that had been scrapped under one of the dealer schemes. Other than flat tyres it was very good indeed - a travesty that society is this wasteful, but I was resolute in ensuring it's pointless sacrifice wasn't in vain. I resolved to get everything I could, and ensure the various 75 bods I knew were alerted to its existence.
The site manager was affable and really helpful, moving a few pieces so I could back my car right up and get to work, but said I had 1 hour before he closed early! To work...
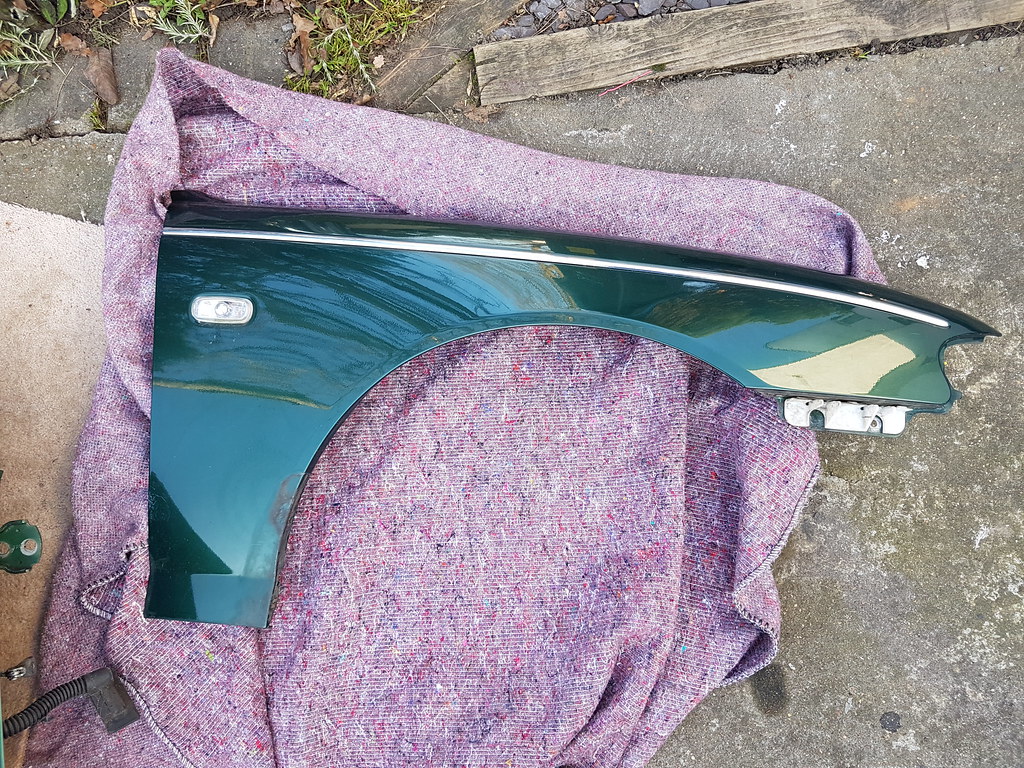
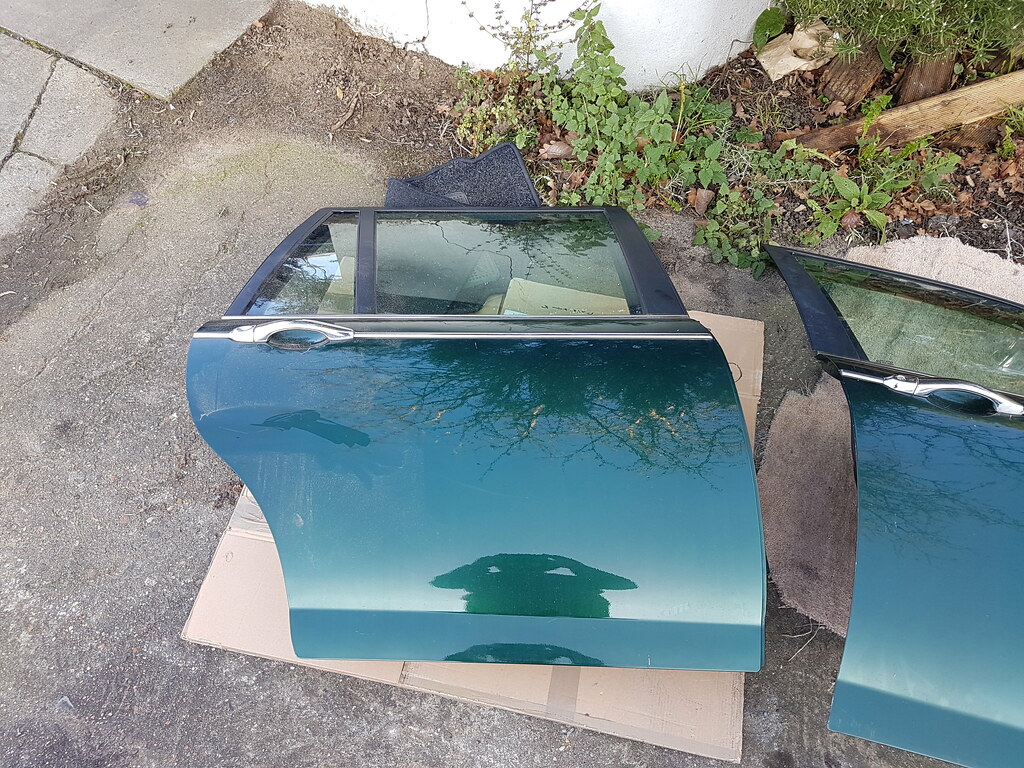
Fortunately, clean panels on the driver's side:
 20181215_104100
With a suitable tyre for support, the doors came off quickly with 10mm and 13mm sockets, plus careful removal of the multiplug connectors. The front wing simply unbolts with a 10mm once mudflaps, arch liners and various clips are removed. Easy.
 20181215_105722
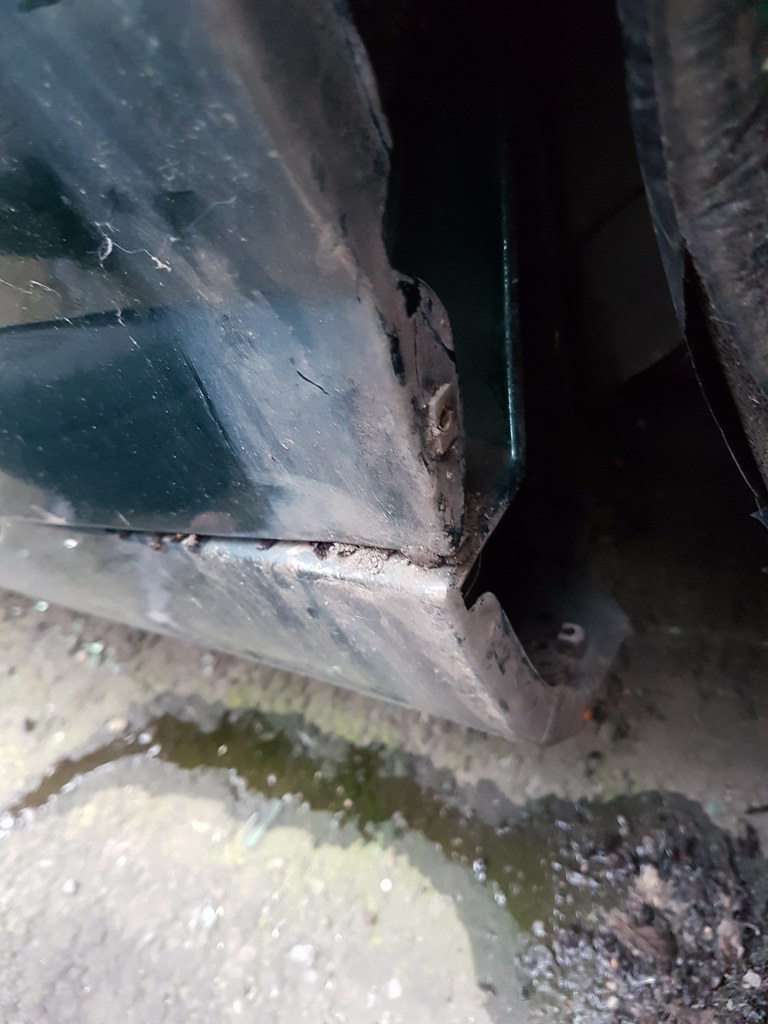 20181215_111510
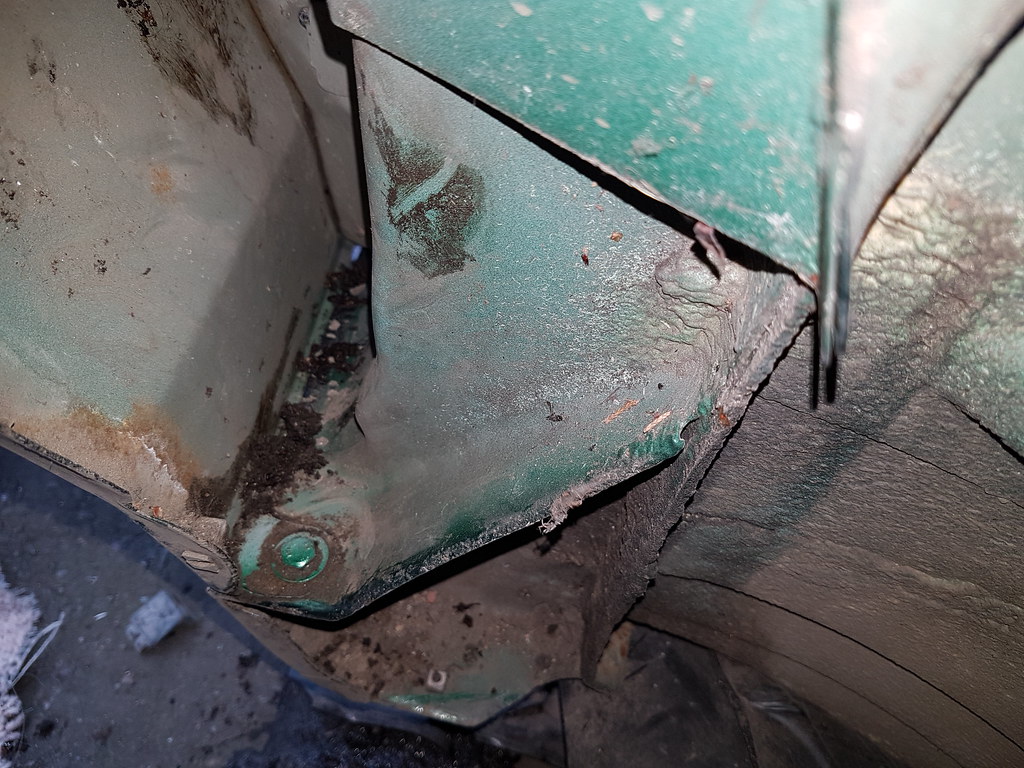 20181215_111854
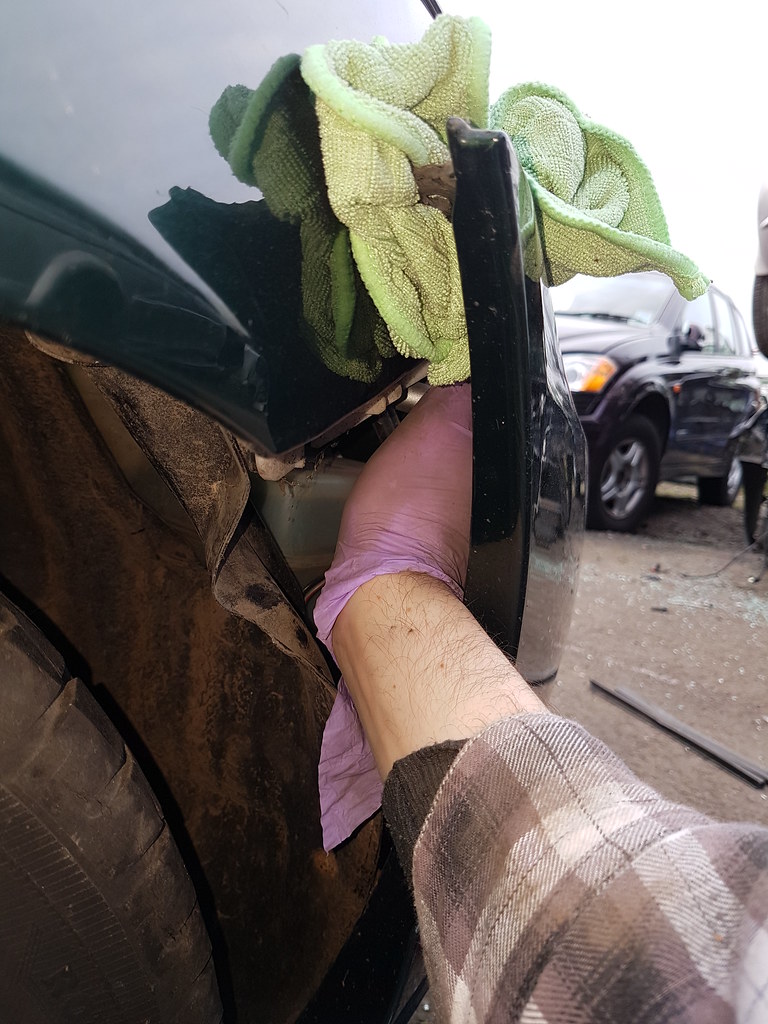 20181215_112436
 20181215_113201
And that was it. Rather sad, but there was no way legally I could have got it back on the road. Open the the element now, but the interior was actually the worse part of it already - I think a family of dogs used it as a human car.
 20181215_124738
For reference, you can get all those panels in the back of another 75 without issue. Amazing car. I should have got a picture of the two together, blast.
I had a cup of tea with the owner of the yard and got chatting. He said he was happy to wait another half an hour if I wanted any bits, and as he'd charged me £150 for all the stuff I wanted, I couldn't turn it down!
Immaculate pair of rear lights - no leaks, no moss, and all tabs and fixings original.
 20181215_125836
A working cup holder.
Original hi vis jacket and warning triangle.
Wheel arch bulb covers.
A cuddly toy. Just kidding.
Plus many, many other bits and bobs that were missing, worn out rusty or otherwise on my car. I may be back for another load in January!
Car full, secured and back by 2pm. Unfortunately couldn't get started on the replacement work, as the car is off somewhere now doing yet more miles, but I'm happy so far with my boot of booty!
 20181215_141011
Edited by Spinakerr on Sunday 16th December 19:15
littlebasher said:
Did you take the mirror as well
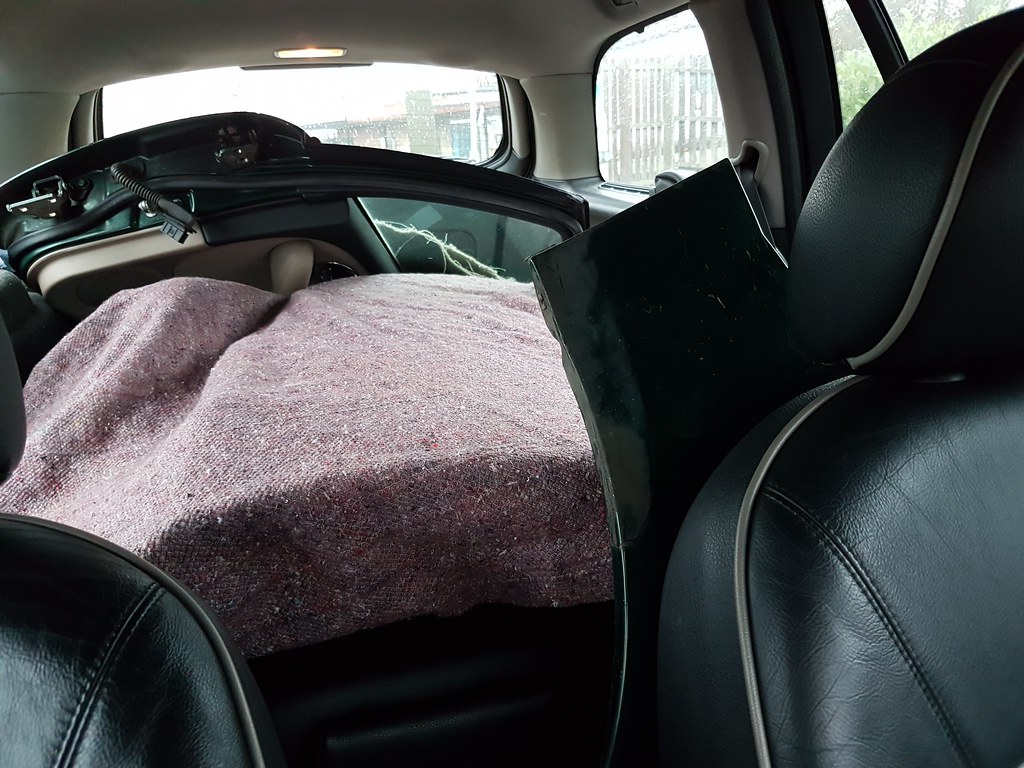
Yes! I took the entire door; hook, line and wing mirror. Plenty of stuff to be resold once the picks of the litter have been deduced.Inclement weather and lack of time have put the larger scale panel repairs on hold, but after another instance of being skulldented by a sluggish boot I had to renew the gas struts. Same as the bonnet - nitrolift. Seem to work.
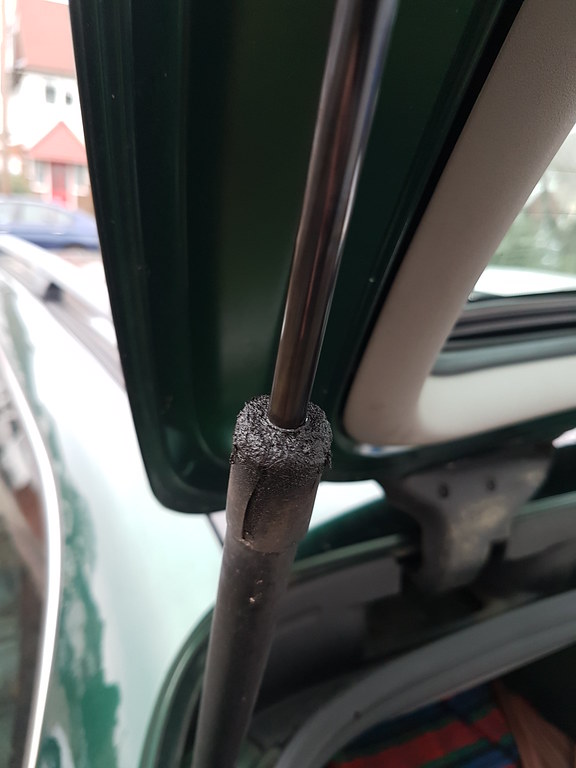 20190112_143021
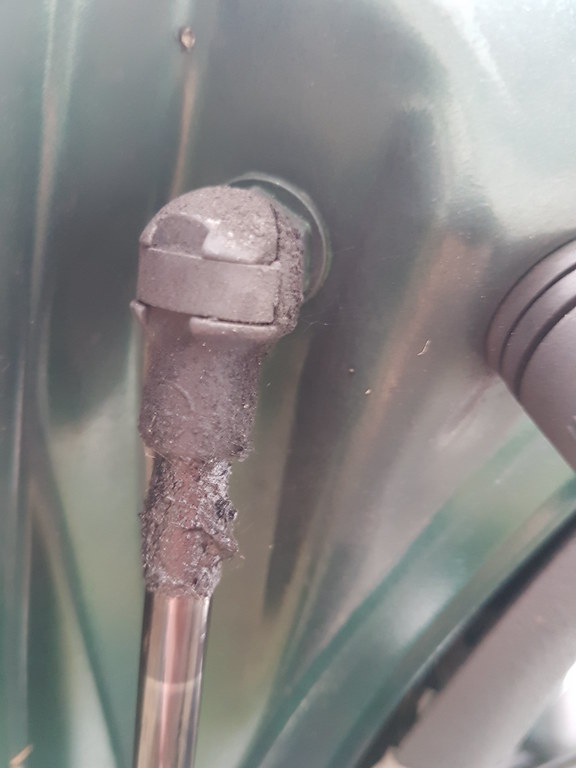 20190112_143026
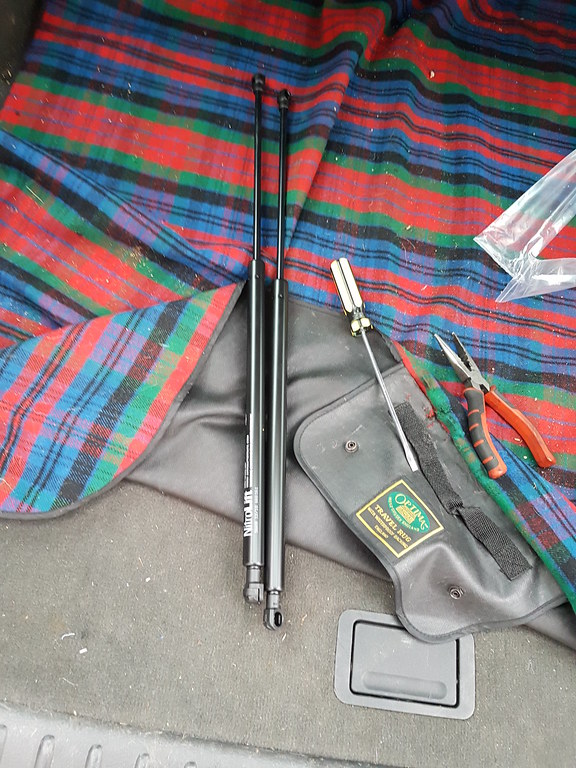 20190112_143054
As always, the boot now threatens to chin anyone opening it as opposed to a slow drop, but anyway:
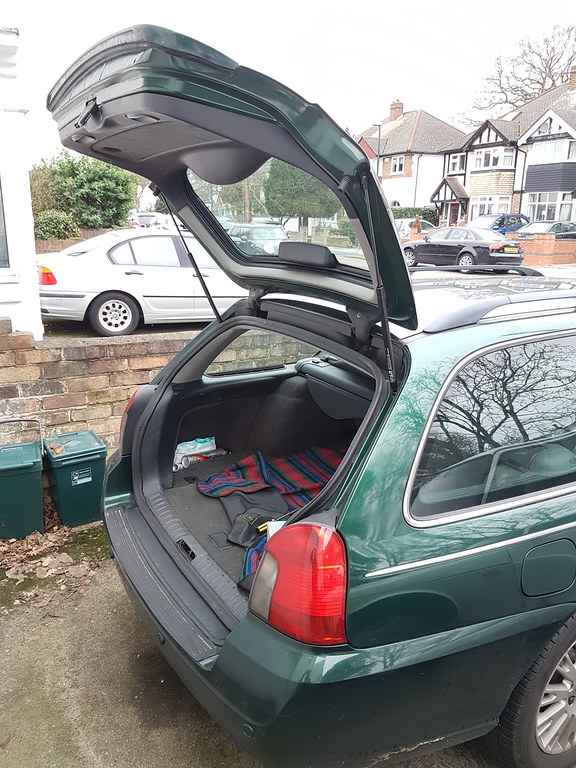 20190112_143833
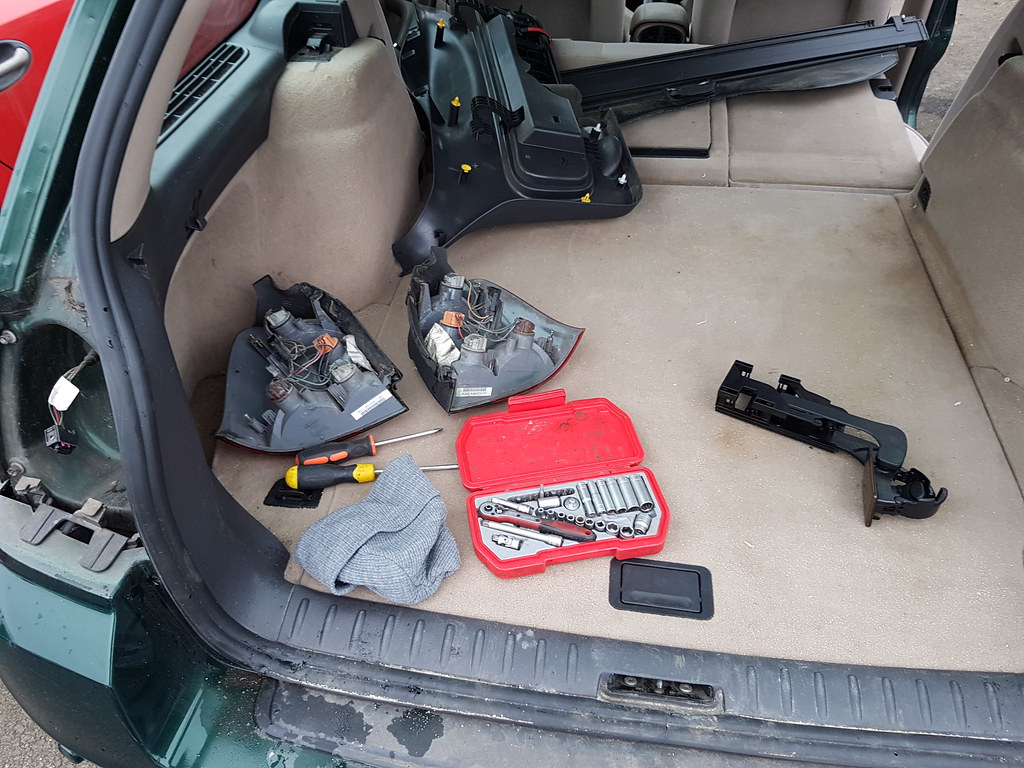
This allowed me to work on what I thought would be a quick job - the rear lights. The originals had started to separate and were loosing bulbs rather more quickly, and the harness wires were starting to look a bit chewed.
 20190112_143853
In my haul from the breakers two units in fantastic condition:
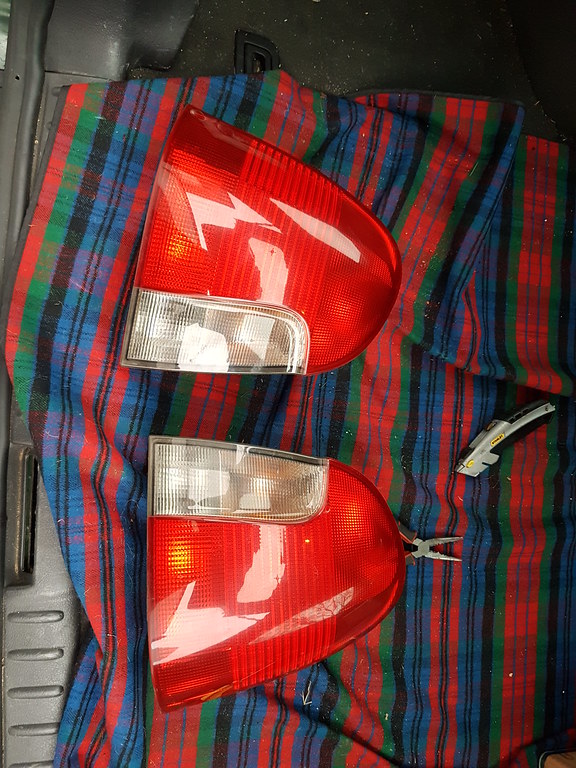 20190112_144633
But upon removal it was apparent the fixing were all on their last legs. This is a very common Tourer ailment - stuck screws, rusty mountings and broken plastic retainers. I had some broken brackets, a hodgepodge of screw types, some rusted fast, and plastic retainers in states of dilapidation.
 20190112_150630
I paused work and ordered a mounting kit from the Rover community, which comes with stronger clips and new bolts, as well as a crimper for the bolt housings.
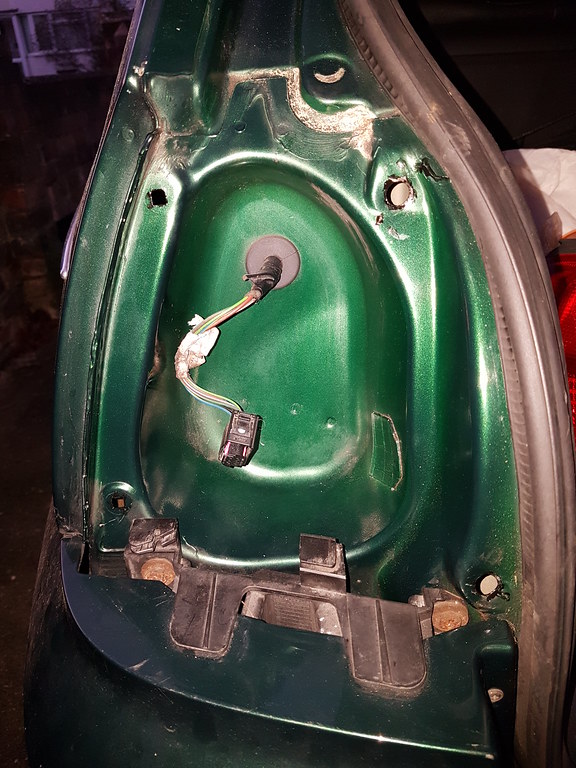
Once received, I set to work on the old bits - clips easily out with a screwdriver, but the bolts required various methods of persuasion - the last, an oversized torx bolt, took a 'metal' drillbit, followed by my spotweld cobalt bit at 10mm.
 20190113_161022
Old nonsense out, hammerite applied.
 20190113_163604
New clips went in with a dab of sealant and a gentle push from the centre, per the detailed instructions:
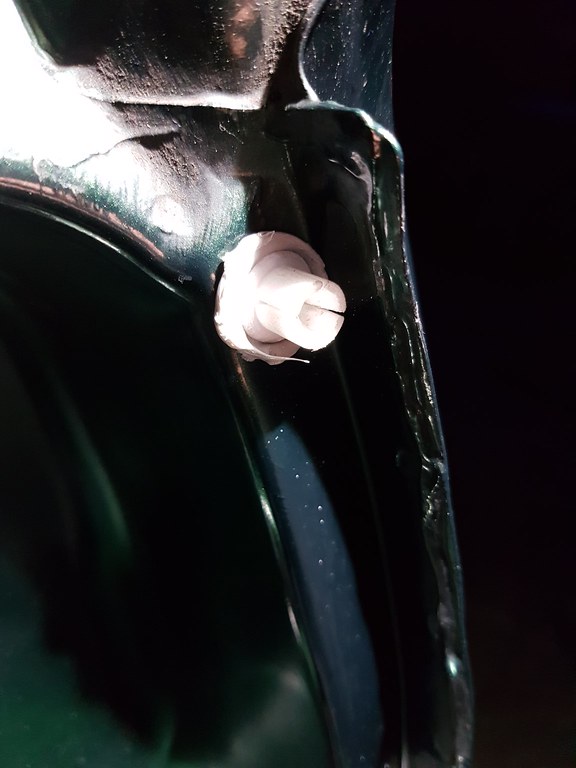 20190113_165031
Then, as night fell, a failure - I overtightened the bolt housing with the crimper and it split the bolt.
 20190113_170046
 20190113_170856
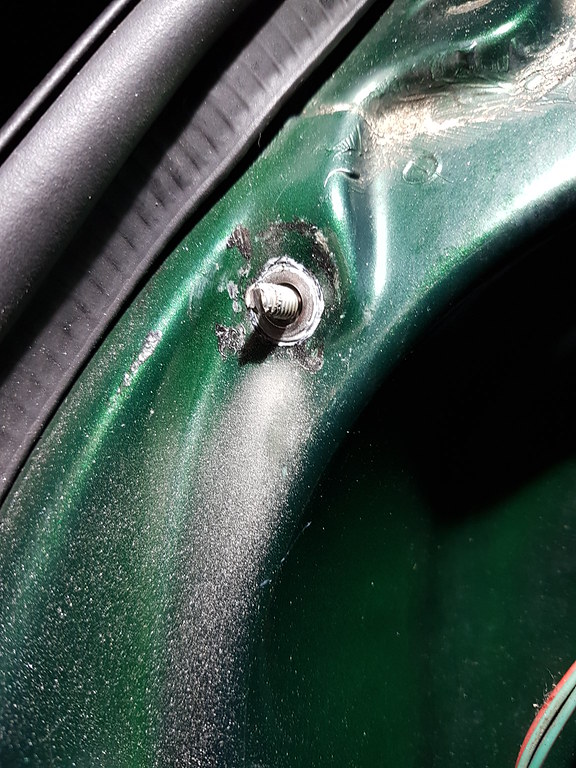 20190113_171729
Fortunately there was enough protruding to get a dremel onto it and unscrew, but the thread is kaput and will need a new housing as well as the crimper tool. Darn. Ah well, that'll do for today.
Yes indeed great cars, sadly this year we'll have a surcharge for driving them into central London at any hour, and this one has moved so many of our friends and family or helped out with eBay furniture and car part bargains it'll be annoying. But, the charge doesn't apply to classics, so we'll assess whether an old Volvo or Merc might replace it. Unlikely.
Rear light saga completed, though not without loss of patience and a great deal of irritation.
To pick up where we left off, cobalt 10mm drillbit made quick work of the badly crimped fixing.
 20190119_132002
A new kit arrived with daylight and careful setup I set to it.
 20190119_134142
Unfortunately every fixing either bent to bolt or damaged the thread, so I had to get a pack of the toughest M6 bolts and dremel off the long nut each time. Painful.
 20190119_142458
Finally, all four crimped in successfully. Of course, 2 of the 4 had crimped such that they interferred with the internal thread, and no bolt could get in. Ugh. Dull.
To cap it off, a trial fit with plenty of grease on the ball sockets for the new lights resulted in two of the new plastic plugs disintegrating.
 20190119_154953
As I had a new set of plugs from the second kit I ordered, these went in and seemed to stay.
The new lights stay on, and look great. Everything works. I never want to go near rear lights of a tourer ever again.
Rear light saga completed, though not without loss of patience and a great deal of irritation.
To pick up where we left off, cobalt 10mm drillbit made quick work of the badly crimped fixing.
20190119_132002A new kit arrived with daylight and careful setup I set to it.
20190119_134142Unfortunately every fixing either bent to bolt or damaged the thread, so I had to get a pack of the toughest M6 bolts and dremel off the long nut each time. Painful.
20190119_142458Finally, all four crimped in successfully. Of course, 2 of the 4 had crimped such that they interferred with the internal thread, and no bolt could get in. Ugh. Dull.
To cap it off, a trial fit with plenty of grease on the ball sockets for the new lights resulted in two of the new plastic plugs disintegrating.
20190119_154953As I had a new set of plugs from the second kit I ordered, these went in and seemed to stay.
The new lights stay on, and look great. Everything works. I never want to go near rear lights of a tourer ever again.
Stage 3: Fit the new parts.
Following the rear light debacle I was keen to replace all the damaged panels and get the car respectable again. A dry Saturday and good light made it all possible, and it was a relatively straightforward job.
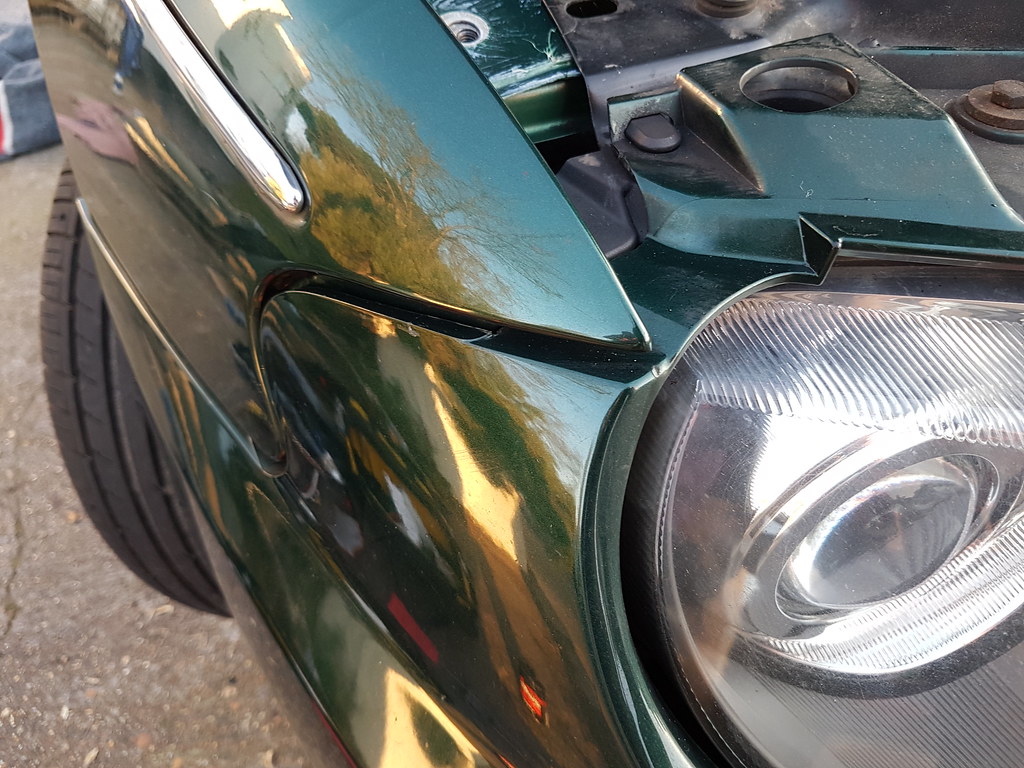
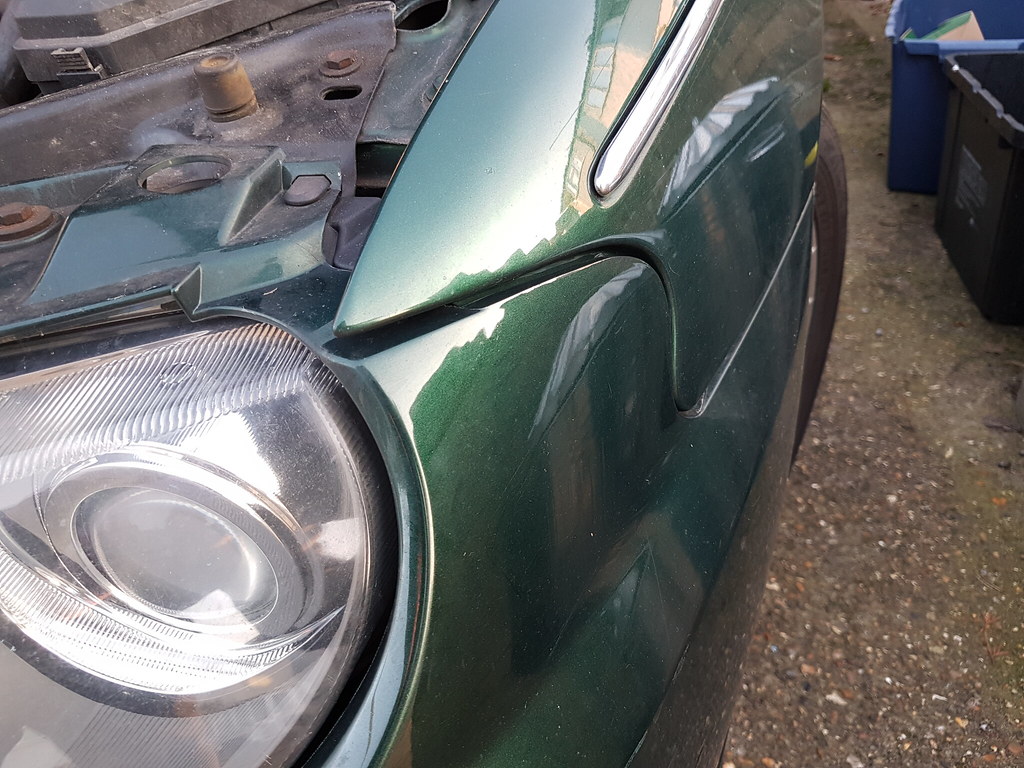
Recap - RH front wing, RH front and rear doors rippled and scratched beyond economical repair. The dents don't actually look too bad in these photos but they are deep and miserable, I assume you.
 20190120_122705
 20190120_122711
Here are the new additions in matching HFF green. They photograph well but do have the usual marks and grime from 10 years on the road. Note the wing mirror, also in great condition.
 20190120_123431
 20190120_123439
 20190120_123443
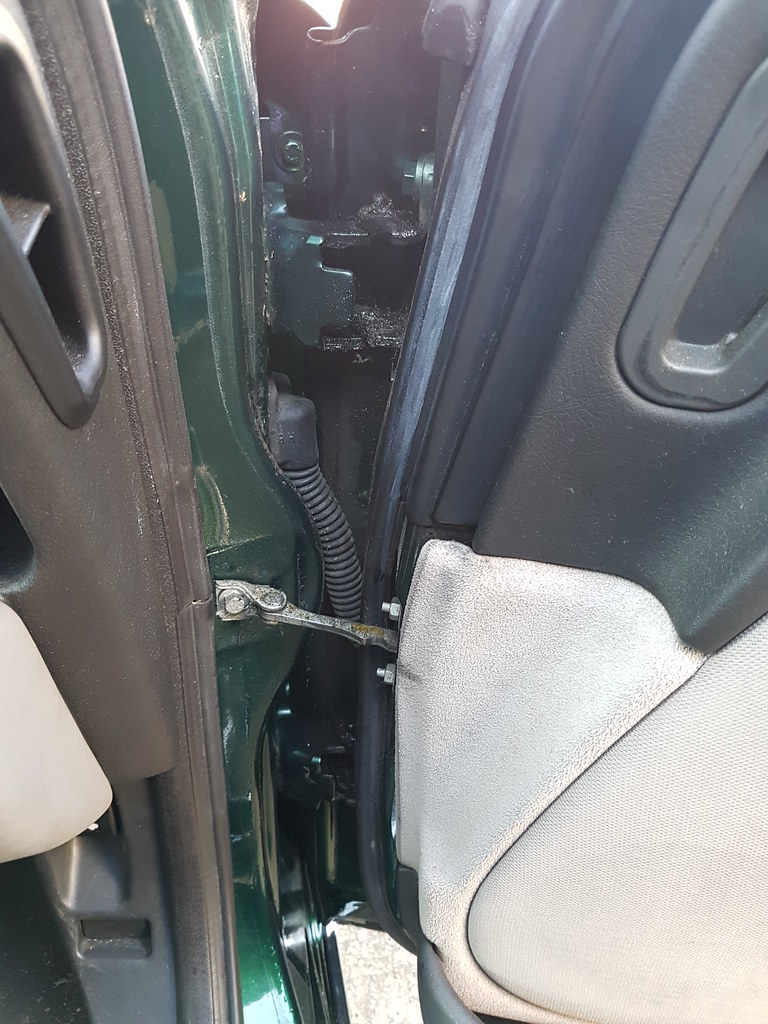
Doors off first to allow better access to the front wing bolts, this is as simply as putting the spare tyre underneath covered with a blanket for support, undoing the 10mm check strap bolt and then using a small screwdriver to unhook the two clips on the top of each hinge. Then the rubber sleeve for the electrical connections can be teased out and unclipped. Doors lift up and off, and are surprisingly heavy.
 20190120_125424
 20190120_131309
 20190120_131624
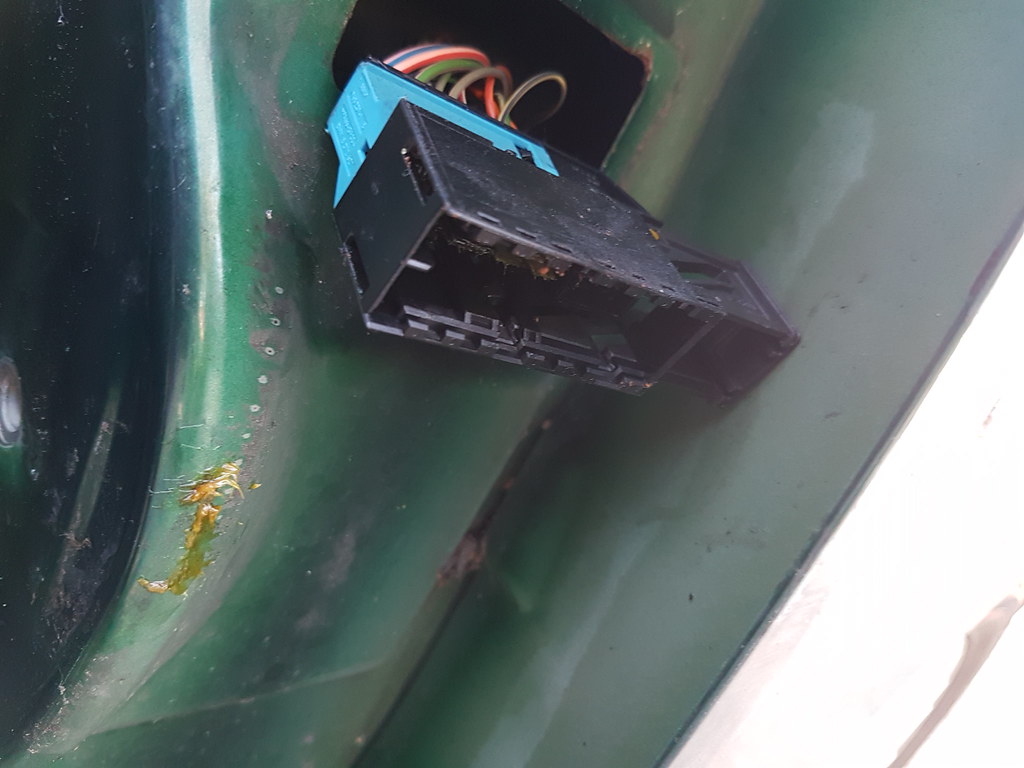
Whoever designed this plug deserves a medal - very satisfying and reassuring connection action using an inbuilt slider to tighten and lock. Clearly not in the 'rear light housing' design department.
 20190120_131629
Easy enough.
 20190120_132447
Front wing had a number of 10mm bolts, along the top under the bonnet and then at each corner. All allow easy adjustment for panel fit, and the only snag is the front point by the headlight, which is very awkward to get to. I spent about 15 minutes blind with a spanner to get the bolt out as I refused to unbolt the bumper. After a frank discussion with my wrists and knuckles,we decided to take of the bumper. Next time.
 20190120_132544
 20190120_135716
 20190120_130101
There are two at the bottom of the A pillar that require the mudguard strip to be removed. These four screws were very much rustified and so the Dremel once again converted posidrive to flathead.
 20190120_135920
 20190120_140435
Mudguard and inner wheel arch moved, the last bolts were easily out.
 20190120_141710
I know how you all like a nudiecar shot, even with a tattered gloveflap in the shot.
 20190120_141958
All looked relatively good, fortunately no more damage underneath, though the start of some bubbling.
 20190120_142147
 20190120_142205
 20190120_142207
A good clean up, especially the mud and guts in the wiring, followed by rust converter and protector in the crannies.
 20190120_143457
 20190120_145558
A quick clean of the new panel unfortunately revealed some iron oxide, and so once again some scraping, cleaning and rustproofing was deployed.
 20190120_143704
 20190120_143806
 20190120_145551
The smashed side repeater needed replacement, and sadly the new panel had the standard Rover 75 in-built green grot creeping into the plastic.
I ordered a new one previously for Stage 1, so this was installed.
 20190120_143728
 20190120_152815
A particularly fearless robin was particularly interested in my spanners, and we had a good chat about British build quality and German wiring looms over a tea break.
 20190120_153306
Right, 'refitting is the reverse of removal', or however the old joke goes. The wing glid (glidded? glouded?) in with ease. A quick check with the other side confirmed that yes, this was the panel gap for the facelift Mk2.
 20190120_153427
 20190120_153432
Careful tightening of bolts for initial fit, with some play left for when the doors were mounted.
 20190120_154954
A pleasant few minutes were spent cleaning the new door jams. All this means is that at some stage I'll be taking the other side off to get them this clean... oh well. The front wing probably needs removal to dump the kilo of leaves and twigs that have accumulated in any case.
 20190120_161609
Passenger side on with ease, and the two clips and check strap added. Perfect fit first time. Whole assembly greased and test-shut a few times. Lovely.
 20190120_162021
Little bit of grease on the rubber boot for the wiring connection, carefully stuffed in with a thin screwdriver.
 20190120_162024
Happy with that. Note the dirtiness and ingrained grime of the 'new' door.
 20190120_162252
 20190120_162257
Driver's door a bit more awkward trying to position it for the lift as the plug is bigger, the door heavier and the wing somewhat in the way. Likely much easier with two people.
 20190120_165111
Slight tweaking required to get perfect...
 20190120_165216
The wing bolts were luckily very easy to tweak into a perfect flush fit.
 20190120_165938
All done! Ready for the next van to take a swing at it.
 20190120_172410
 20190120_172424
Door cards and trim will have to be swapped over next time. Well done Rover for logical design and solid build quality.
Following the rear light debacle I was keen to replace all the damaged panels and get the car respectable again. A dry Saturday and good light made it all possible, and it was a relatively straightforward job.
Recap - RH front wing, RH front and rear doors rippled and scratched beyond economical repair. The dents don't actually look too bad in these photos but they are deep and miserable, I assume you.
20190120_12270520190120_122711Here are the new additions in matching HFF green. They photograph well but do have the usual marks and grime from 10 years on the road. Note the wing mirror, also in great condition.
20190120_12343120190120_12343920190120_123443Doors off first to allow better access to the front wing bolts, this is as simply as putting the spare tyre underneath covered with a blanket for support, undoing the 10mm check strap bolt and then using a small screwdriver to unhook the two clips on the top of each hinge. Then the rubber sleeve for the electrical connections can be teased out and unclipped. Doors lift up and off, and are surprisingly heavy.
20190120_12542420190120_13130920190120_131624Whoever designed this plug deserves a medal - very satisfying and reassuring connection action using an inbuilt slider to tighten and lock. Clearly not in the 'rear light housing' design department.
20190120_131629Easy enough.
20190120_132447Front wing had a number of 10mm bolts, along the top under the bonnet and then at each corner. All allow easy adjustment for panel fit, and the only snag is the front point by the headlight, which is very awkward to get to. I spent about 15 minutes blind with a spanner to get the bolt out as I refused to unbolt the bumper. After a frank discussion with my wrists and knuckles,we decided to take of the bumper. Next time.
20190120_13254420190120_13571620190120_130101There are two at the bottom of the A pillar that require the mudguard strip to be removed. These four screws were very much rustified and so the Dremel once again converted posidrive to flathead.
20190120_13592020190120_140435Mudguard and inner wheel arch moved, the last bolts were easily out.
20190120_141710I know how you all like a nudiecar shot, even with a tattered gloveflap in the shot.
20190120_141958All looked relatively good, fortunately no more damage underneath, though the start of some bubbling.
20190120_14214720190120_14220520190120_142207A good clean up, especially the mud and guts in the wiring, followed by rust converter and protector in the crannies.
20190120_14345720190120_145558A quick clean of the new panel unfortunately revealed some iron oxide, and so once again some scraping, cleaning and rustproofing was deployed.
20190120_14370420190120_14380620190120_145551The smashed side repeater needed replacement, and sadly the new panel had the standard Rover 75 in-built green grot creeping into the plastic.
I ordered a new one previously for Stage 1, so this was installed.
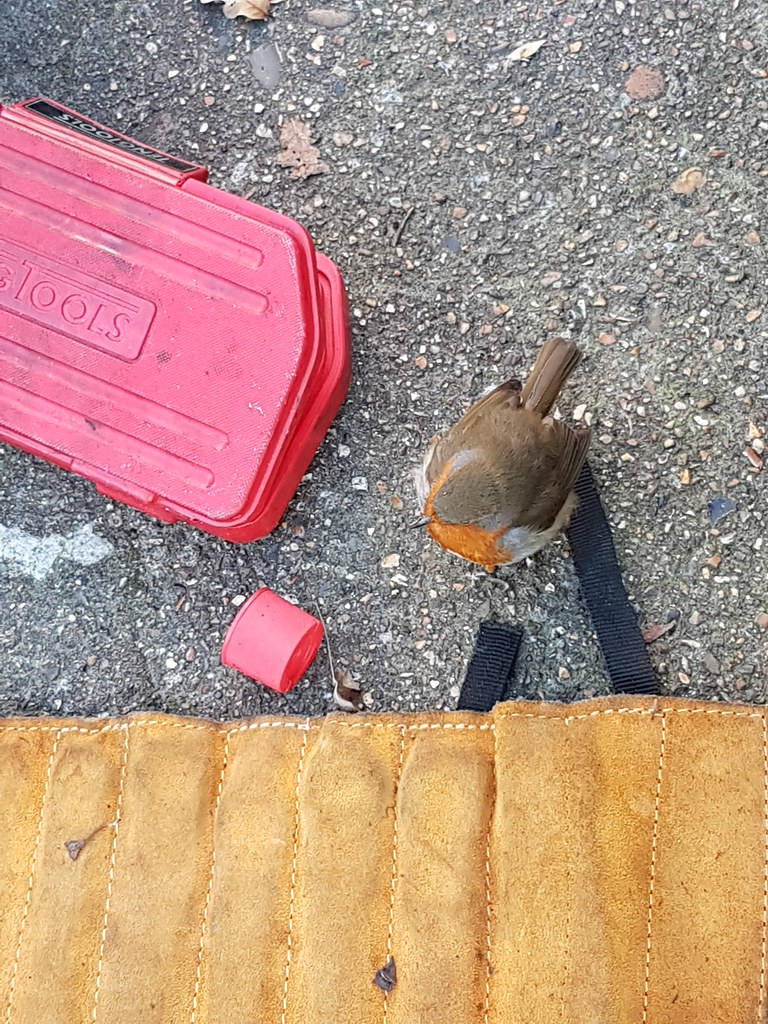
20190120_14372820190120_152815A particularly fearless robin was particularly interested in my spanners, and we had a good chat about British build quality and German wiring looms over a tea break.
20190120_153306Right, 'refitting is the reverse of removal', or however the old joke goes. The wing glid (glidded? glouded?) in with ease. A quick check with the other side confirmed that yes, this was the panel gap for the facelift Mk2.
20190120_15342720190120_153432Careful tightening of bolts for initial fit, with some play left for when the doors were mounted.
20190120_154954A pleasant few minutes were spent cleaning the new door jams. All this means is that at some stage I'll be taking the other side off to get them this clean... oh well. The front wing probably needs removal to dump the kilo of leaves and twigs that have accumulated in any case.
20190120_161609Passenger side on with ease, and the two clips and check strap added. Perfect fit first time. Whole assembly greased and test-shut a few times. Lovely.
20190120_162021Little bit of grease on the rubber boot for the wiring connection, carefully stuffed in with a thin screwdriver.
20190120_162024Happy with that. Note the dirtiness and ingrained grime of the 'new' door.
20190120_16225220190120_162257Driver's door a bit more awkward trying to position it for the lift as the plug is bigger, the door heavier and the wing somewhat in the way. Likely much easier with two people.
20190120_165111Slight tweaking required to get perfect...
20190120_165216The wing bolts were luckily very easy to tweak into a perfect flush fit.
20190120_165938All done! Ready for the next van to take a swing at it.
20190120_17241020190120_172424Door cards and trim will have to be swapped over next time. Well done Rover for logical design and solid build quality.
Edited by Spinakerr on Sunday 27th January 12:49
Thanks for all the kind words, and I'm glad the old 75 is of interest to some on PH. It's our least PH-car but it just deals with whatever we chuck at (or in) it, and I have definitely spent far more time and money over the years than ever intended.
Many items on these are not scary (take a look at this one from page 1), but a clutch system given to a non-R75 specialist will cause you no end of woes, for example, so read up on the big bill items for sub 80k cars. Oh, and either install or find one with cruise control!
This example is spartan spec - plastic everywhere and fabric suits, so will put a few people off. MOT history looks ok, but I would prefer a higher spec and lots of R75-specific love at the price. Good luck, they're well worth it!
Or as tdm34 says, find one not in bits, put 2k in the glovebox and drive to Colwyn Bay to give it to Jules.
Or as Jules tells me every year "Haven't you opened your own garage for these down south yet?"
Straff99 said:
Watch out for those Robins. One acts as a decoy while three others nick your wheels! 
There's an early morning squadron that guard our garden from screeching green parakeets. We keep the robin-sized birdfeeders well stocked, and we don't ask questions.helix402 said:
Well done BMW! That’s one of their a-pillar plugs.
Everyone who has worked on a car should experience this plug. It's amazing. /carboregman88667733 said:
Would such a low mileage at this age be a concern? I'm after a reliable commuter car and this looks fantastic. Most I've seen are at 80k miles or more. What is their high mileage longevity like?
Great car, but depends entirely on the history for diesels. I would rather have a well maintained, and regularly oil-serviced M47 with a high mileage than a low mileage unknown. At that price I would look out for a Rover 75 club member's car that's had all the mods in this thread done, or be prepared to buy cheaper and deal with the backlog! The diesel seems to be indestructible if cared for. Chain drive doesn't need tri-annual gold offerings and ours is touching on 160k with nary a worry. Suspension and undercarraige rust are starting to eat away the older cars, no matter the mileage...Many items on these are not scary (take a look at this one from page 1), but a clutch system given to a non-R75 specialist will cause you no end of woes, for example, so read up on the big bill items for sub 80k cars. Oh, and either install or find one with cruise control!
This example is spartan spec - plastic everywhere and fabric suits, so will put a few people off. MOT history looks ok, but I would prefer a higher spec and lots of R75-specific love at the price. Good luck, they're well worth it!
Or as tdm34 says, find one not in bits, put 2k in the glovebox and drive to Colwyn Bay to give it to Jules.
Or as Jules tells me every year "Haven't you opened your own garage for these down south yet?"
Changed the rear door card for my original item - straightforward job.
Donor car's grotty sandstone items:
These were truly filthy, before I got my hands on them I hasten to add.
One screw in the door handle, then tease out the electric switch and unplug, rotate the door handle to ensure it can fit through the hole:

The it's just a case of pulling and wedging to pull the plastic clips out.

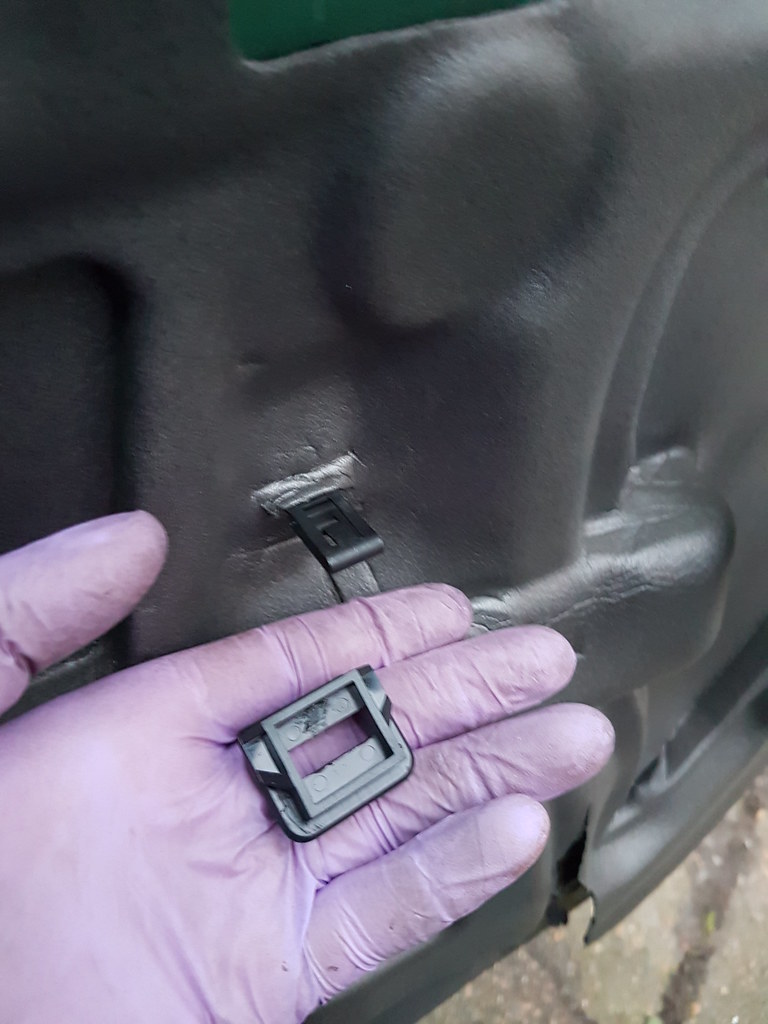
Some had broken, some broke and yet it all come out. On my original door I was bit more careful, and between the two there amounted enough good clips for the refit.

There is a central clip that goes over a metal mounting - these seem to break no matter the care taken 50% of the time, but fortunately mine stayed together.
Unfortunately the driver's door was a bit more complicated - the key barrel needed to be swapped over, and that means the glass needs to come out... I have paused it there for the moment as I think this is a good opportunity to source an unscratched driver's window. More to follow - good glass leads gratefully received!
Donor car's grotty sandstone items:
These were truly filthy, before I got my hands on them I hasten to add.
One screw in the door handle, then tease out the electric switch and unplug, rotate the door handle to ensure it can fit through the hole:
The it's just a case of pulling and wedging to pull the plastic clips out.
Some had broken, some broke and yet it all come out. On my original door I was bit more careful, and between the two there amounted enough good clips for the refit.
There is a central clip that goes over a metal mounting - these seem to break no matter the care taken 50% of the time, but fortunately mine stayed together.
Unfortunately the driver's door was a bit more complicated - the key barrel needed to be swapped over, and that means the glass needs to come out... I have paused it there for the moment as I think this is a good opportunity to source an unscratched driver's window. More to follow - good glass leads gratefully received!
Jimmy Recard said:
I’ve come across a lot of those plugs through my cocking about with Opels/Vauxhalls. Excellent stuff. Their clips for the doors are even better - a plug that twists to click beautifully into place. A little like a (much better) version of the modern trailer plug
This is something that you have to really like cars to even notice, let alone appreciate!
I may have to use the plugs in my house renovation. Can't get enough of them.This is something that you have to really like cars to even notice, let alone appreciate!
Some final Roverbeard items - the front bolts for the slam panel and headlights on our car had all degraded, so I took the opportunity to swipe as many good ones as I could find in the donor car, and clean up/derust the front.
Before:

After, with some derusting and protection in between:

Very dull, but it is a very soothing job.
Next up - in four years I haven't ever clayed and properly waxed the car. I think with the new panels it's a sign to properly tidy up the exterior, and also fill in the scratches on the rear quarter panel.
Then it's solely a derust and waxoil underneath (which I will likely take to Rustbuster to perform), a new driver's seat as the leather is worn and torn and doesn't have a working heating element, and a genuine undertray. Then... that's it! Goodness. The end of my original list last year is in sight!
TR4man said:
It is never finished. There will always be something else to do.
True. I see a derusting and underseal turning into a rebushing and suspension refresh, with a 2nd hand stainless exhaust thrown in...Muddle238 said:
Impressed with your dedication and hard work! Mighty fine looking 75 there.
My own 75, also HFF (arguably the best colour) is still going strong. Replaced quite a lot of suspension bits last year, as well as a lot of servicing - I choose to drop the oil and filter every 5k miles, everything else every 10k. I read your tail light saga with amusement - I had a similar experience recently while swapping the indicator bulbs for ones that were sufficiently orange to satisfy the MOT man.
That looks lovely - our car is crying out for a proper clean and a scrub, then I might have to finally post up some 'full body shots' or suchlike. Plenty of paint left by dismal London parkers to be T-cutted off, and likely a kilnworth of clay bar to be deployed.My own 75, also HFF (arguably the best colour) is still going strong. Replaced quite a lot of suspension bits last year, as well as a lot of servicing - I choose to drop the oil and filter every 5k miles, everything else every 10k. I read your tail light saga with amusement - I had a similar experience recently while swapping the indicator bulbs for ones that were sufficiently orange to satisfy the MOT man.
BlueHave said:
I have a Mk1 but I just can't warm to the MK2 styling.
What's not to like? The flimsy Airfix badges? The panel gaps around the restyled headlights? Entirely fake wood trim? Cumulative Project Drive penny pinching? Oh. You're right. Still, for us DIYers and improvers the Mk2 is a bit easier to work with as all sorts of plugs and bits of the loom are already present for upgrades.THENUK said:
I have just finished doing the rear light mod, therefore no more worrying when I need to change a light bulb that the brackets or ball & knuckle sockets might break.
I also changed all the slam/bumper bolts for stainless steel ones.
Good stuff - these cars do seem to inspire fanatacism, in a positive way! I have to admit one of the rusty bolts that was left I had to replace required taking one from the donor rover, cutting it with a Dremel and filing it for about 10 minutes. If my parents were nearby one would likely say to the other "We need to talk about Spinakerr."I also changed all the slam/bumper bolts for stainless steel ones.
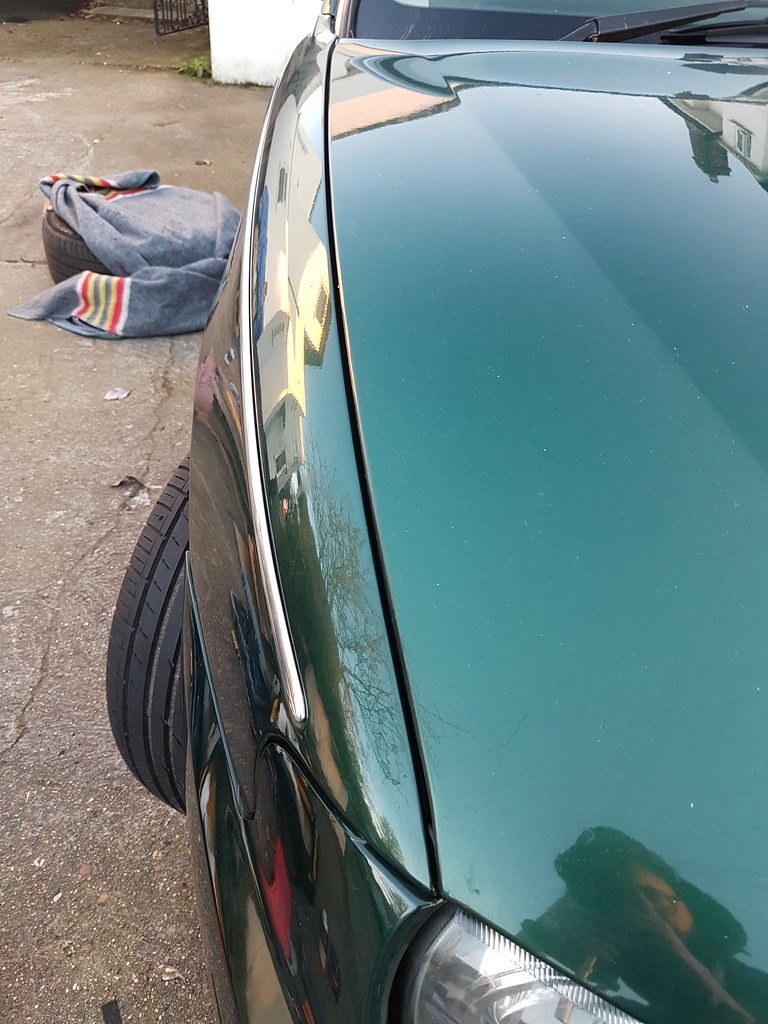
After four years of faithful service, last weekend it was time to give the 75 a proper clean, check the colour match of the new panels, touch in a paint chips and bring it up the respectability scale.
Before:
Nasty mould in the new panels and doors,
Various dings and scratches:
New driver's door had borne the brunt of previous owner's carelessness:
A day of scrubbing, a clay bar, some G3 scratch remover, wax and paint later:
New doors and wing came up nicely though still 'weathered'. Colour match is spot on and the rear quarter turned out to be primarily paint from the offending van that can off with a clay and elbow grease.

Even the alloys, which are starting to bubble, came up well and have been heavily sealed.
Ready for another 160k, surely? I think this needs a heavier wax for protection, and perhaps a set of interim alloys while these get refurbished. I do love the tuning forks.
This summer we'll tackle some underseal and derusting, but for now we're set!
Before:
Nasty mould in the new panels and doors,
Various dings and scratches:
New driver's door had borne the brunt of previous owner's carelessness:
A day of scrubbing, a clay bar, some G3 scratch remover, wax and paint later:
New doors and wing came up nicely though still 'weathered'. Colour match is spot on and the rear quarter turned out to be primarily paint from the offending van that can off with a clay and elbow grease.
Even the alloys, which are starting to bubble, came up well and have been heavily sealed.
Ready for another 160k, surely? I think this needs a heavier wax for protection, and perhaps a set of interim alloys while these get refurbished. I do love the tuning forks.
This summer we'll tackle some underseal and derusting, but for now we're set!
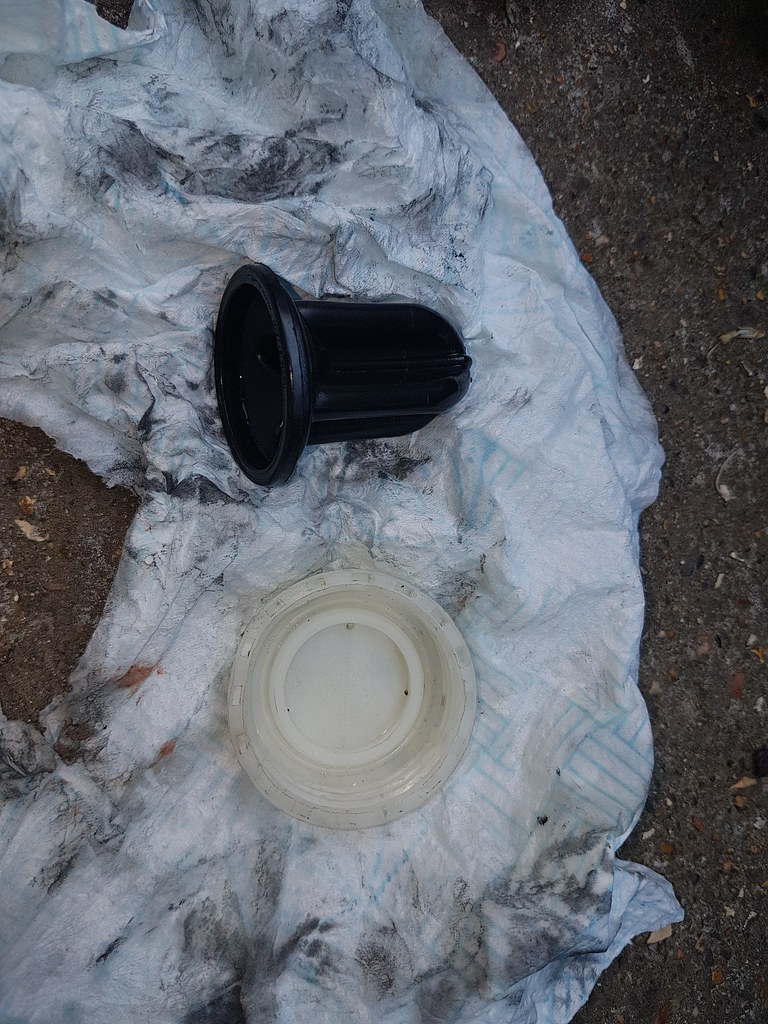
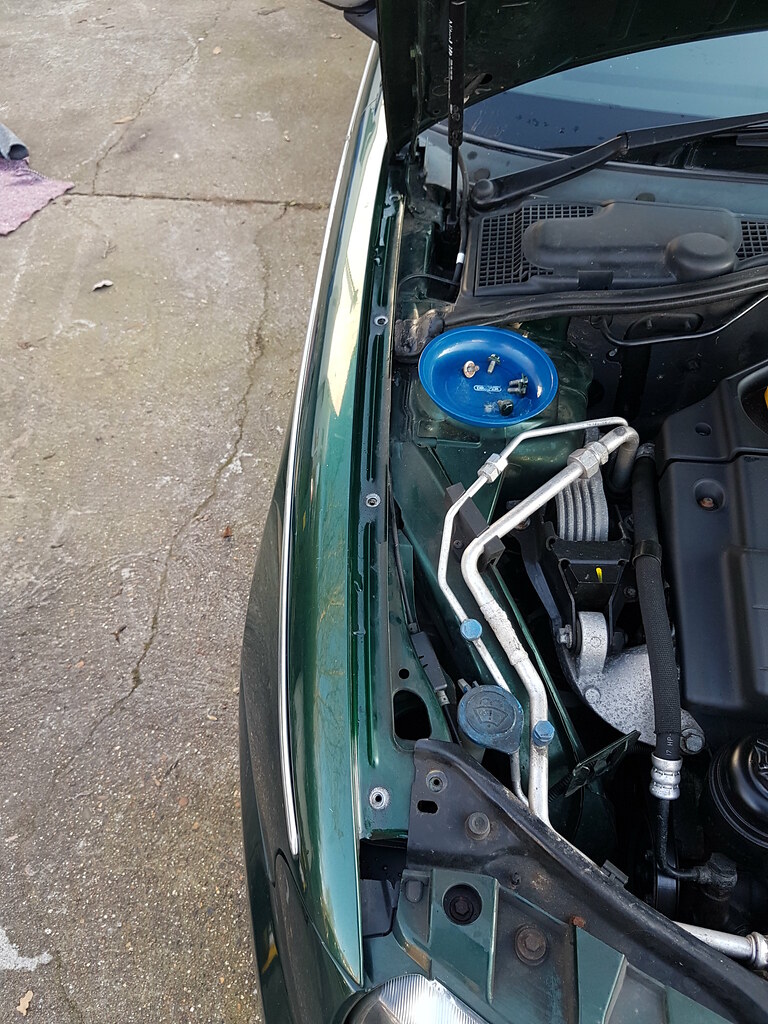
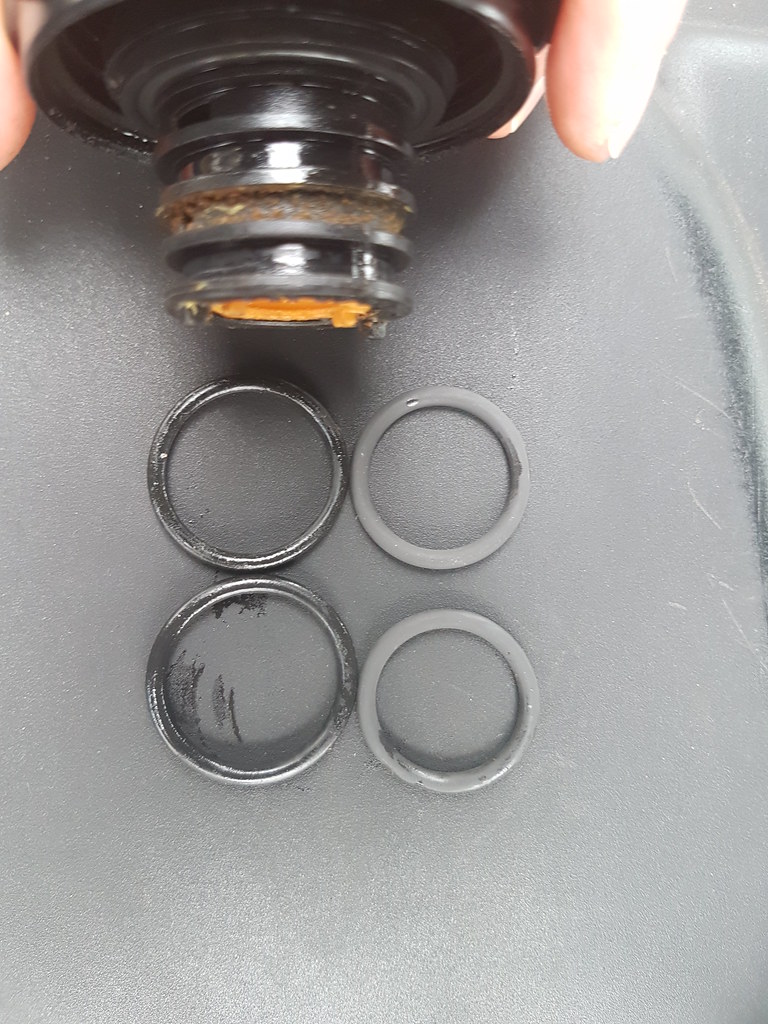
A slight gurgling from behind the dash brought me to a state of panic that the heater matrix had given up, or the 75 was a little too keen on John Carpenter's The Thing. Fortunately it was just low coolant, and the suspect was soon identified. Spray near the turbo hoses, and a residue on top of the expansion tank means only one thing...
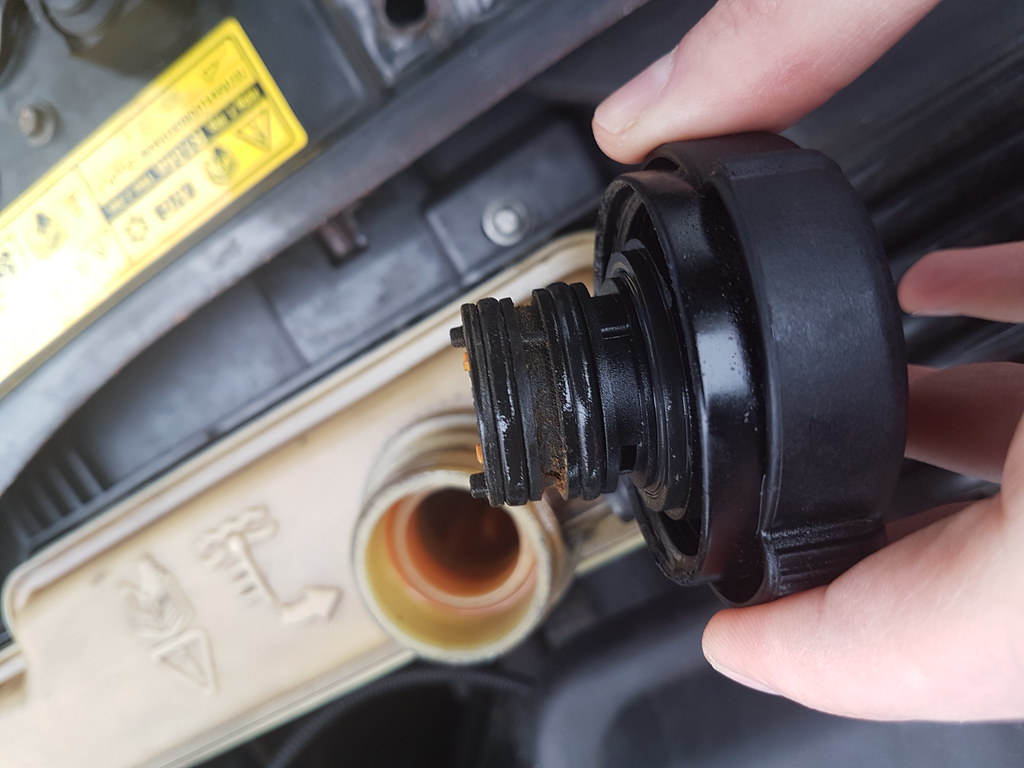
...the cap had lots pressure. O rings often fail, mine looked a bit flat but were in one piece. Replacements much smaller and tighter:
After the thorough clean, the flimsy rippled number plate had to go:
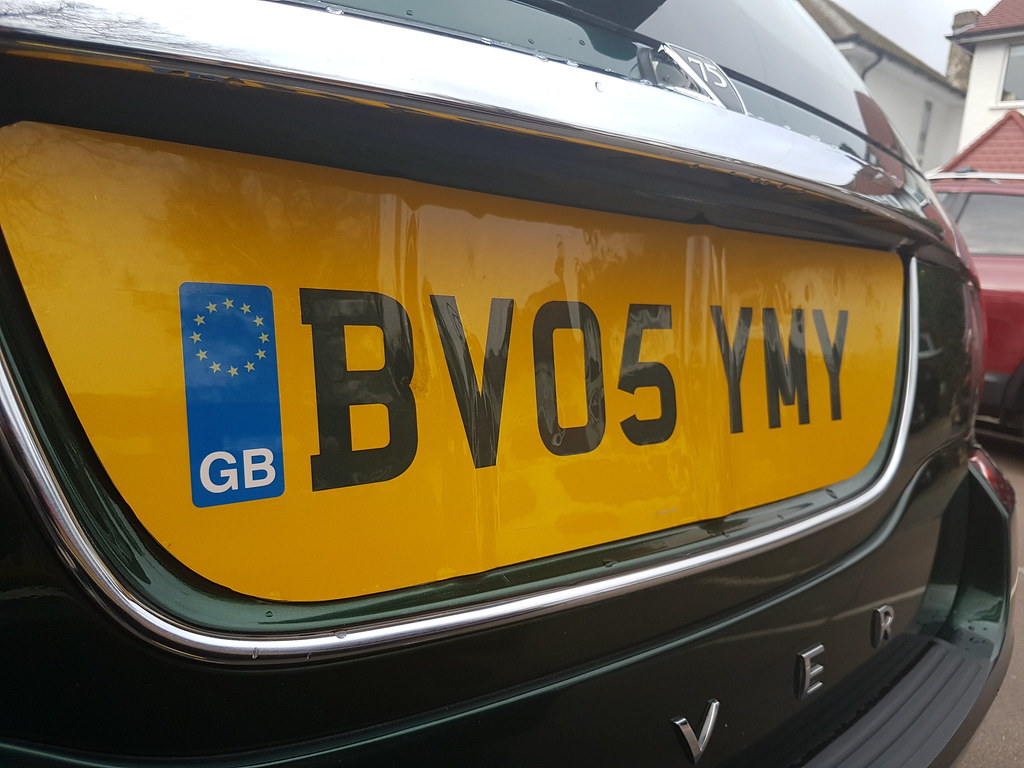
Demon Plates came up with a more substantial example, and I drilled some holes to keep it in place. Much neater.

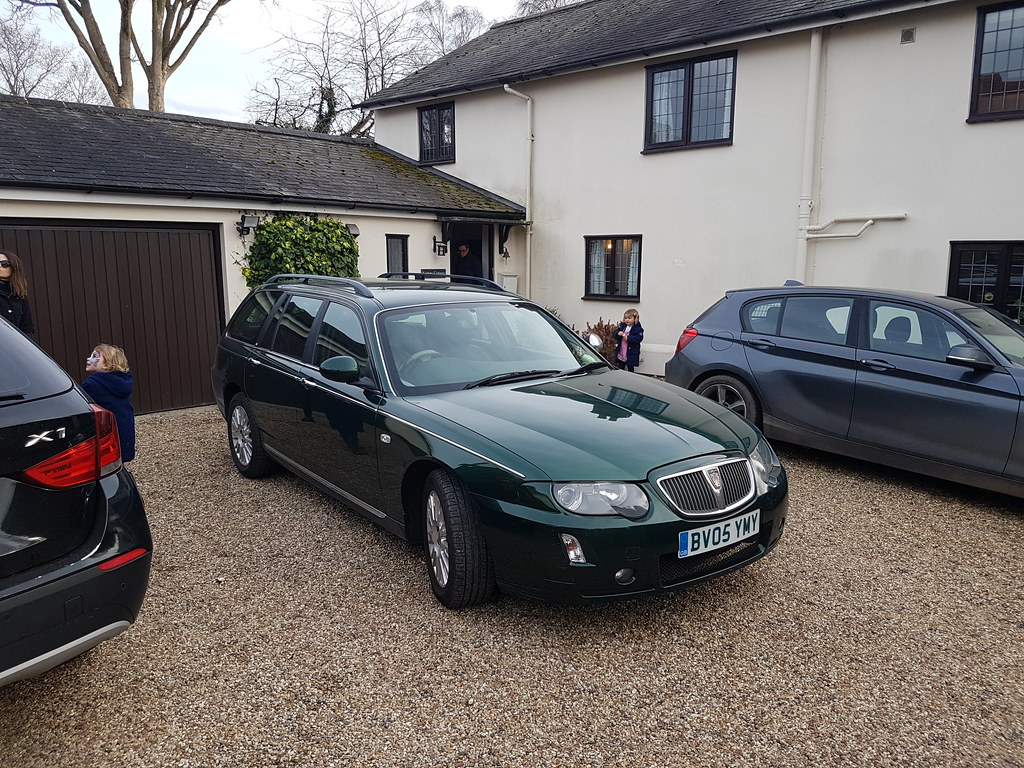
The car then completed a 400 mile weekend - to Bristol, then Cambridge and back home. Of course that means it now needs a clean after being forced off the road by bloated SUVs driven by unaware fools, but never mind.
...the cap had lots pressure. O rings often fail, mine looked a bit flat but were in one piece. Replacements much smaller and tighter:
After the thorough clean, the flimsy rippled number plate had to go:
Demon Plates came up with a more substantial example, and I drilled some holes to keep it in place. Much neater.
The car then completed a 400 mile weekend - to Bristol, then Cambridge and back home. Of course that means it now needs a clean after being forced off the road by bloated SUVs driven by unaware fools, but never mind.
Cambs_Stuart said:
Another great thread. Your white saab, Alfa 164 and this are among my favourite reads in the readers cars section.
Hope the rover keeps eating up the miles.
This made my day - thanks! I'm pretty much wedded to Reader's Cars, and to hear other people enjoying the story is great to hear. I'm a frustrated Practical Classic columnist at heart. Oh the 164...that reminds me...erm...Hope the rover keeps eating up the miles.
I get an email a month from this thread asking for advice, which is strange as I thought everyone would head to the 75/ZT forums, but it's fun to be able to offer an opinion or advice based on my limited skills and only-this-one experience.
BlueHave said:
No idea how much more those big plates are £45 each my local spares place wanted. Normal pair of plates are £9.
Surprised they are still making them with the EU flags since we're less than a month to freedom day.
£25 from Demon Plates delivered, and a quality item thank goodness. I am not at all surprised they have stock with the EU flag on.Surprised they are still making them with the EU flags since we're less than a month to freedom day.
Thanks for the notes and Mat - love the numberplate!
The 75 is due its oil change next week but I attempted first to swap over the guts of the powerfold mirror into one of the new ones I now possessed. Remember, I bought one in silver as an emergency stop gap, then had a nice HFF green example that came attached to the donor door.
Unfortunately neither possessed my beloved powerfold function, so now when tackling narrow spaces at alarmingly calm speed I have to wind down the window and fold it in 'manually', of all things. Clearly, this couldn't continue.
I thought it would be easy to transplant but the broken unit was clearly symbioted to its motor, and after dismantling as much as I could, I gave up and just swapped over the chrome to get the car symetrical. I may put the green one back on so it has a wabi-sabi approach, but in the meantime I'll track down a powerful for less than £400 and call myself lucky. Honestly, these things are almost as prized as wooden handbrake grips.

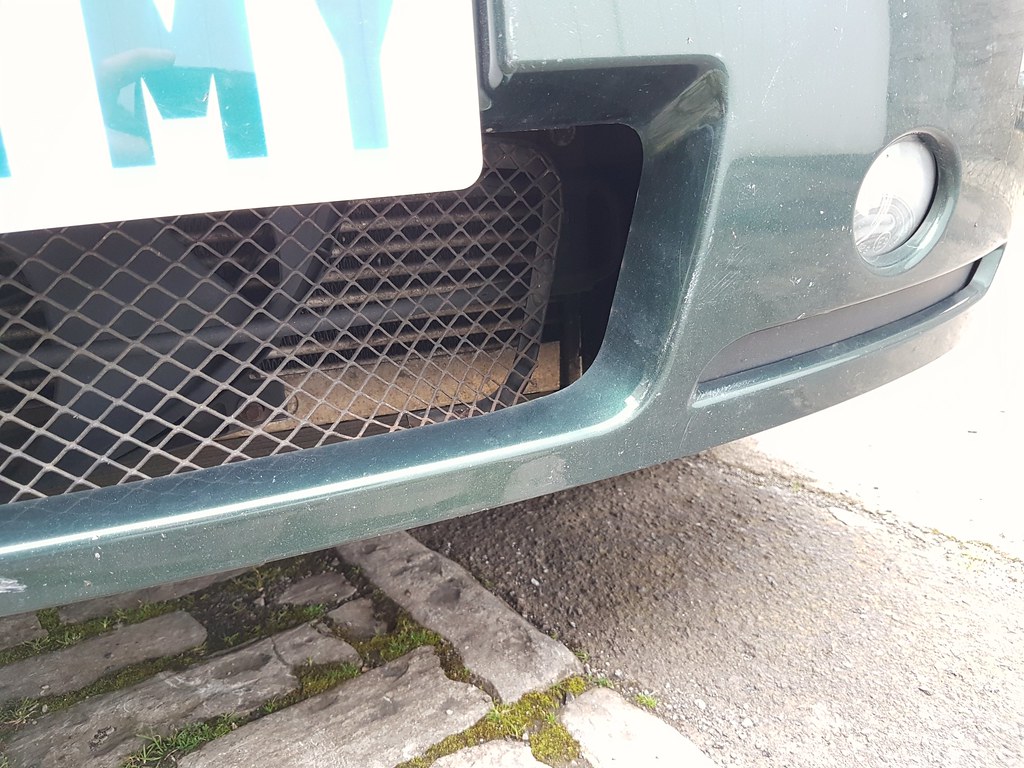
On a A303 run this weekend we couldn't avoid a large branch and the front took quite a hit. Immediately a new waspish noise filled the cabin and we pulled over for a look. We lucked out - just the lower grill taking a beating and some clips & screw, nothing that can't be fixed. Phew - nothing expensive!
Also the coolant leak is fixed following the cap seals, and I think next week the Rover is due a good under-bonnet clean and de-wintering to prep it for the spring.
The 75 is due its oil change next week but I attempted first to swap over the guts of the powerfold mirror into one of the new ones I now possessed. Remember, I bought one in silver as an emergency stop gap, then had a nice HFF green example that came attached to the donor door.
Unfortunately neither possessed my beloved powerfold function, so now when tackling narrow spaces at alarmingly calm speed I have to wind down the window and fold it in 'manually', of all things. Clearly, this couldn't continue.
I thought it would be easy to transplant but the broken unit was clearly symbioted to its motor, and after dismantling as much as I could, I gave up and just swapped over the chrome to get the car symetrical. I may put the green one back on so it has a wabi-sabi approach, but in the meantime I'll track down a powerful for less than £400 and call myself lucky. Honestly, these things are almost as prized as wooden handbrake grips.
On a A303 run this weekend we couldn't avoid a large branch and the front took quite a hit. Immediately a new waspish noise filled the cabin and we pulled over for a look. We lucked out - just the lower grill taking a beating and some clips & screw, nothing that can't be fixed. Phew - nothing expensive!
Also the coolant leak is fixed following the cap seals, and I think next week the Rover is due a good under-bonnet clean and de-wintering to prep it for the spring.
Gassing Station | Readers' Cars | Top of Page | What's New | My Stuff