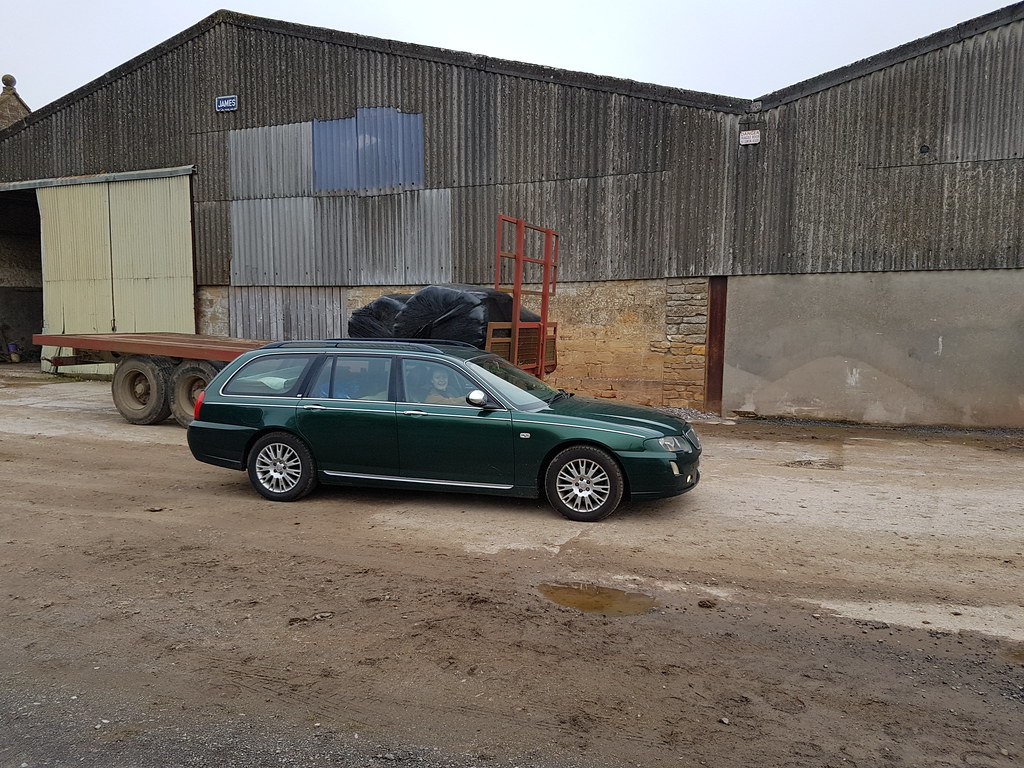
Rover 75 CDTi Tourer
Discussion


This is an excellent thread and an excellent car.
I too decided to put a second thermostat in mine, seemed more logical than fiddling with the original if it were only to go wrong again. Amazingly simple, yet boosted my economy by 7-10mpg.
I am intrigued by the cruise control addition, my Club SE Tourer doesn't have it and it's the one thing I wish it had. Was it relatively easy to do or would you advise an expert to look at it? Also after retrofitting, was Testbook required to enable it or did it work straight from the box, so to speak?
Looking forward to more updates with this thread
Muddle238 said:
This is an excellent thread and an excellent car.
I too decided to put a second thermostat in mine, seemed more logical than fiddling with the original if it were only to go wrong again. Amazingly simple, yet boosted my economy by 7-10mpg.
I am intrigued by the cruise control addition, my Club SE Tourer doesn't have it and it's the one thing I wish it had. Was it relatively easy to do or would you advise an expert to look at it? Also after retrofitting, was Testbook required to enable it or did it work straight from the box, so to speak?
Looking forward to more updates with this thread
Yes the R5 thermostat in the diesel is hands down the best mpg-to-gbp ratio improvement I have ever made to a car. Good stuff.I too decided to put a second thermostat in mine, seemed more logical than fiddling with the original if it were only to go wrong again. Amazingly simple, yet boosted my economy by 7-10mpg.
I am intrigued by the cruise control addition, my Club SE Tourer doesn't have it and it's the one thing I wish it had. Was it relatively easy to do or would you advise an expert to look at it? Also after retrofitting, was Testbook required to enable it or did it work straight from the box, so to speak?
Looking forward to more updates with this thread
I see your earlier green tourer thread - looks great. I'll have to let you know where the secret R75 caches are for the decent parts! Make sure you check the scuttle and unblock all the drains/purchase a leave barrier from Jules Anderson if you haven't already.
Cruise control - it's easy if the wiring is in place (as was the case in my facelift version). My advice would be - break down the front console and diagnose if you have the wiring in place. If it's there, and you're not adverse to unbolting steering wheel/cutting dash items and sourcing bits & bobs, you should be fine. If there is no wiring in place, either prep well, read lots of guides and prepare a weekend for wiring, or drive up to Wales after booking in with Jules. The diesel is the easiest to retro-fit in either case.
Here's some useful guides and user experiences from the community:
https://www.the75andztclub.co.uk/forum/showthread....
http://www.mgf.ultimatemg.com/ztt/cruise_control/
https://the75andztclub.co.uk/forum/showthread.php?...
Good luck!
Edited by Spinakerr on Saturday 24th March 12:13
 )
)davepoth said:
sjc said:
When Jules drove all the way from Wales to Essex to purchase my Fifth Gear car ( which was automatic)he swapped the cruise control on to my new V6 manual.
It needs to be T’4d to work though.
I had an idea that cruise was diesel only - can it be fitted to any 75 do you know?It needs to be T’4d to work though.
davepoth said:
sjc said:
When Jules drove all the way from Wales to Essex to purchase my Fifth Gear car ( which was automatic)he swapped the cruise control on to my new V6 manual.
It needs to be T’4d to work though.
I had an idea that cruise was diesel only - can it be fitted to any 75 do you know?It needs to be T’4d to work though.
Yes the KV6 needs a vacuum pump and pipe for cruise control, whereas the diesel is 'fly by wire' and so requires less parts. They are usually advertised as kits complete from a car being broken, so I would recommend just getting a single lot that was working before being excised!
The contradictory Ford 4.6 V8 in a Rover (eh?) had cruise control as standard I believe.
The contradictory Ford 4.6 V8 in a Rover (eh?) had cruise control as standard I believe.
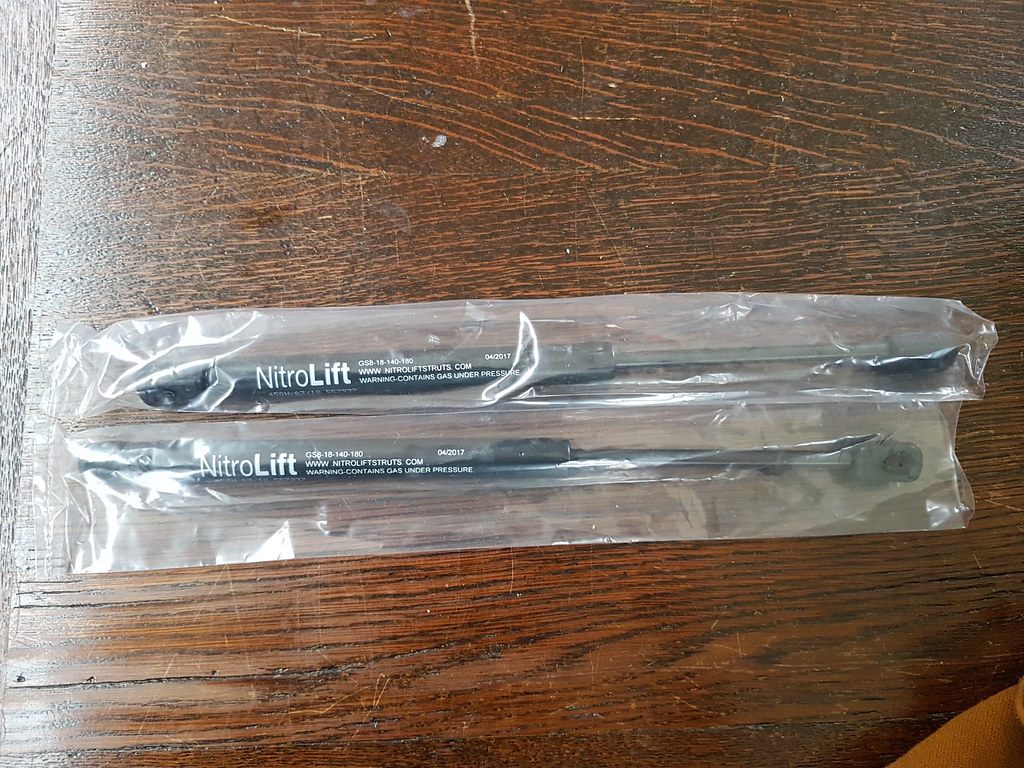
During the MOT yesterday the failed gas struts claimed another victim - the tester! If there's ever anything to nudge an MOT into fail territory, actual bodily harm by the vehicle is likely top of the list. Luckily he walked off the pain with a few choice phrases, but the struts arrived at home and I took a few minutes to attach them. 60 second job.
New struts from SGS - nitrolift are the correct size:
 20180324_095312 by Clifton Tausberger, on Flickr
Hold up bonnet with suitable prop, long thin-bladed screwdriver into the retainer clip:
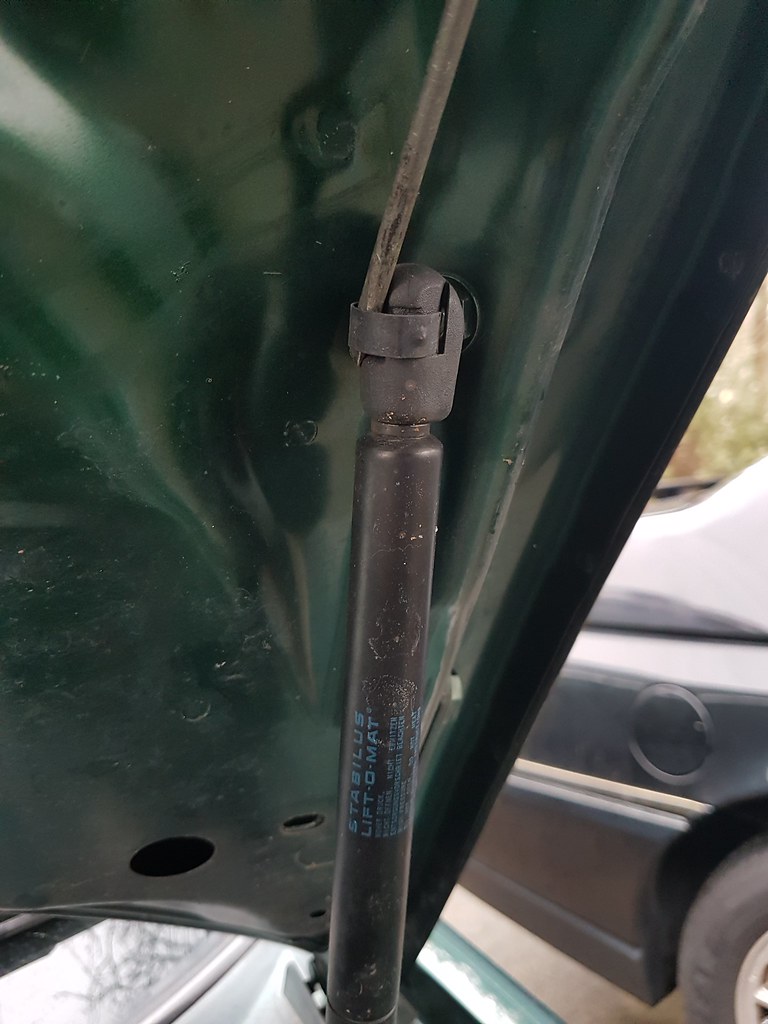 20180324_095610 by Clifton Tausberger, on Flickr
Simply tap the new struts on.
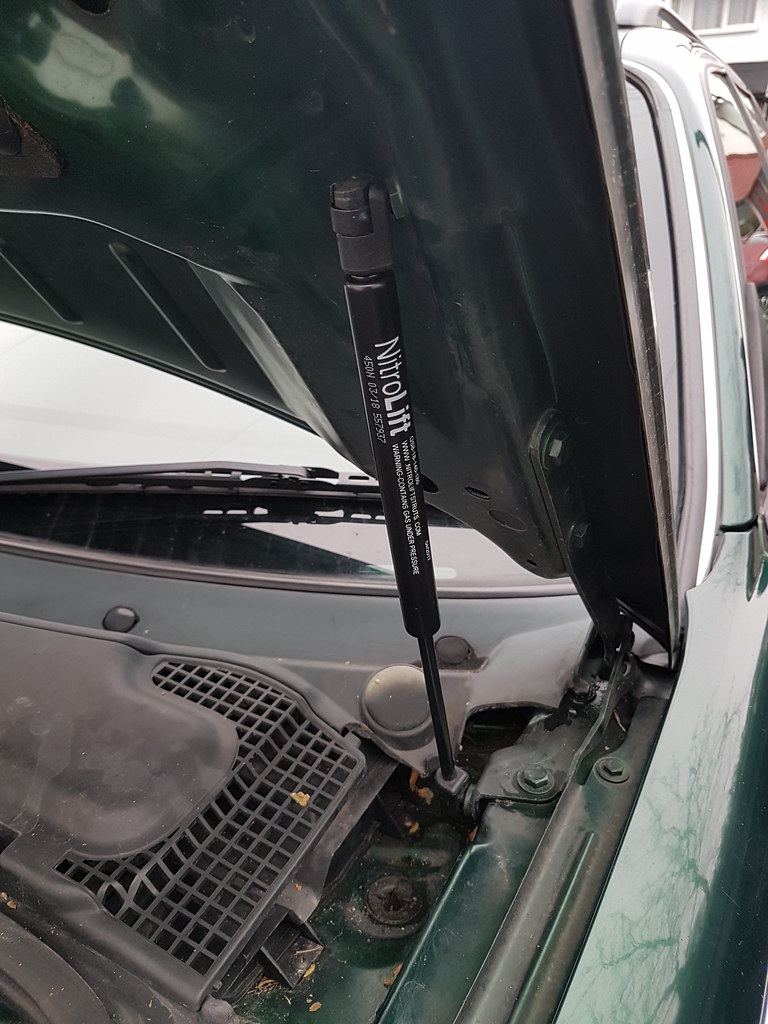 20180324_095842 by Clifton Tausberger, on Flickr
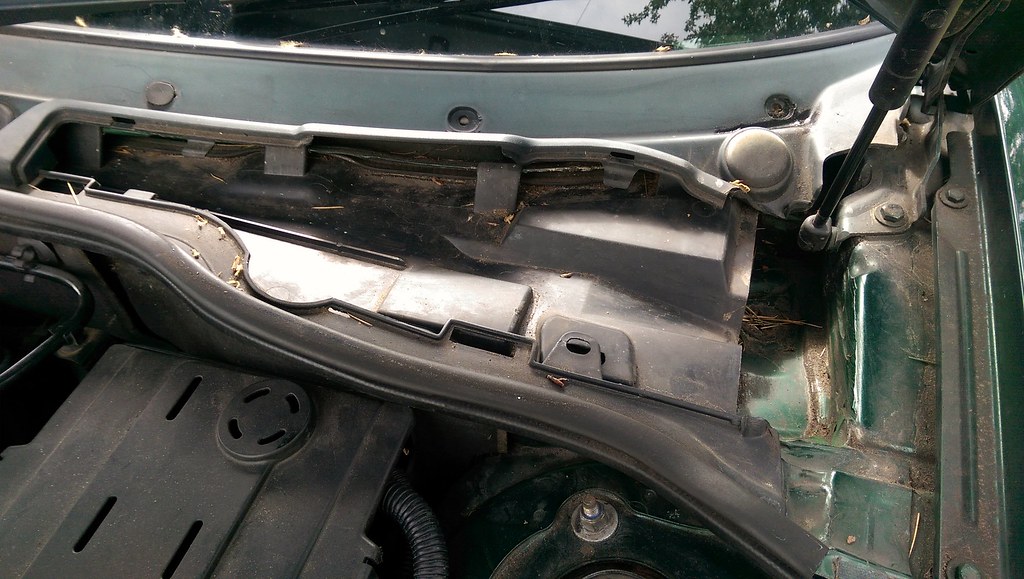
 20180324_100152 by Clifton Tausberger, on Flickr
Done. Only problem now is the bonnet needs quite a slam!
New struts from SGS - nitrolift are the correct size:
20180324_095312 by Clifton Tausberger, on FlickrHold up bonnet with suitable prop, long thin-bladed screwdriver into the retainer clip:
20180324_095610 by Clifton Tausberger, on FlickrSimply tap the new struts on.
20180324_095842 by Clifton Tausberger, on Flickr20180324_100152 by Clifton Tausberger, on FlickrDone. Only problem now is the bonnet needs quite a slam!
Spinakerr said:
Yes the R5 thermostat in the diesel is hands down the best mpg-to-gbp ratio improvement I have ever made to a car. Good stuff.
I see your earlier green tourer thread - looks great. I'll have to let you know where the secret R75 caches are for the decent parts! Make sure you check the scuttle and unblock all the drains/purchase a leave barrier from Jules Anderson if you haven't already.
Cruise control - it's easy if the wiring is in place (as was the case in my facelift version). My advice would be - break down the front console and diagnose if you have the wiring in place. If it's there, and you're not adverse to unbolting steering wheel/cutting dash items and sourcing bits & bobs, you should be fine. If there is no wiring in place, either prep well, read lots of guides and prepare a weekend for wiring, or drive up to Wales after booking in with Jules. The diesel is the easiest to retro-fit in either case.
Here's some useful guides and user experiences from the community:
https://www.the75andztclub.co.uk/forum/showthread....
http://www.mgf.ultimatemg.com/ztt/cruise_control/
https://the75andztclub.co.uk/forum/showthread.php?...
Good luck!
Thanks for that, I'll take a look into it. I checked the plenum recently and it was clean, however I don't trust the design (although I suppose it's survived since 2004) so I will be getting a leaf guard pronto, just in case. I see your earlier green tourer thread - looks great. I'll have to let you know where the secret R75 caches are for the decent parts! Make sure you check the scuttle and unblock all the drains/purchase a leave barrier from Jules Anderson if you haven't already.
Cruise control - it's easy if the wiring is in place (as was the case in my facelift version). My advice would be - break down the front console and diagnose if you have the wiring in place. If it's there, and you're not adverse to unbolting steering wheel/cutting dash items and sourcing bits & bobs, you should be fine. If there is no wiring in place, either prep well, read lots of guides and prepare a weekend for wiring, or drive up to Wales after booking in with Jules. The diesel is the easiest to retro-fit in either case.
Here's some useful guides and user experiences from the community:
https://www.the75andztclub.co.uk/forum/showthread....
http://www.mgf.ultimatemg.com/ztt/cruise_control/
https://the75andztclub.co.uk/forum/showthread.php?...
Good luck!
Edited by Spinakerr on Saturday 24th March 12:13
Luckily we're not a million miles from the Shropshire/Welsh border, a trip to see Jules may well be in order.
One final item in the archives - the pollen filter. Very cheap and easy to change, but fiddly to access without spiderfingers.
Offside scuttle cover unscrewed:
 2017-12-26_10-30-47 by Clifton Tausberger, on Flickr
Pollen filter is clipped in against the bulkhead. The plastic here is particularly fragile so take extra care unclipping:
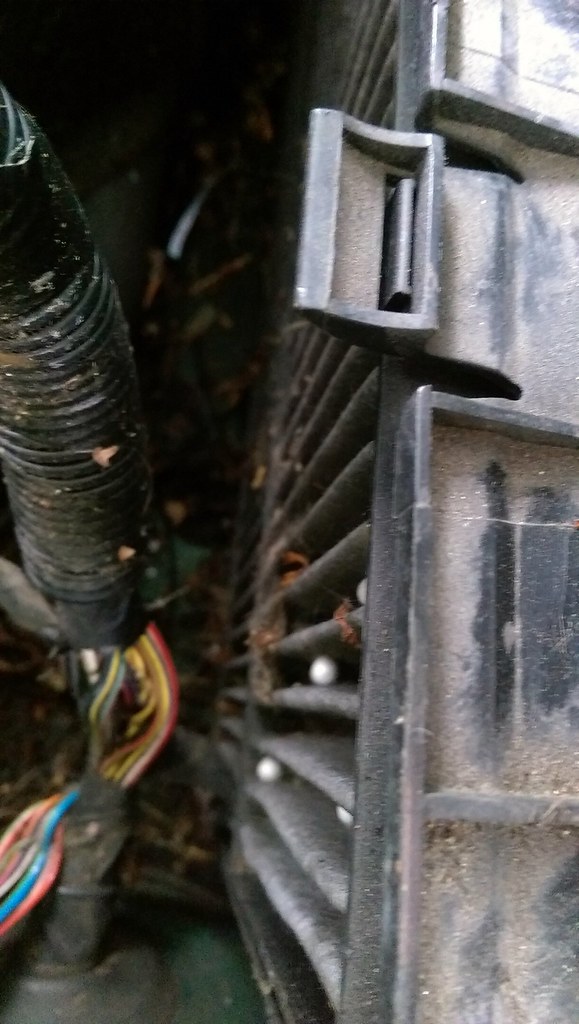 2017-12-26_10-30-56 by Clifton Tausberger, on Flickr
Old and new. Those are mothballs and spidereggs, not BB pellets:
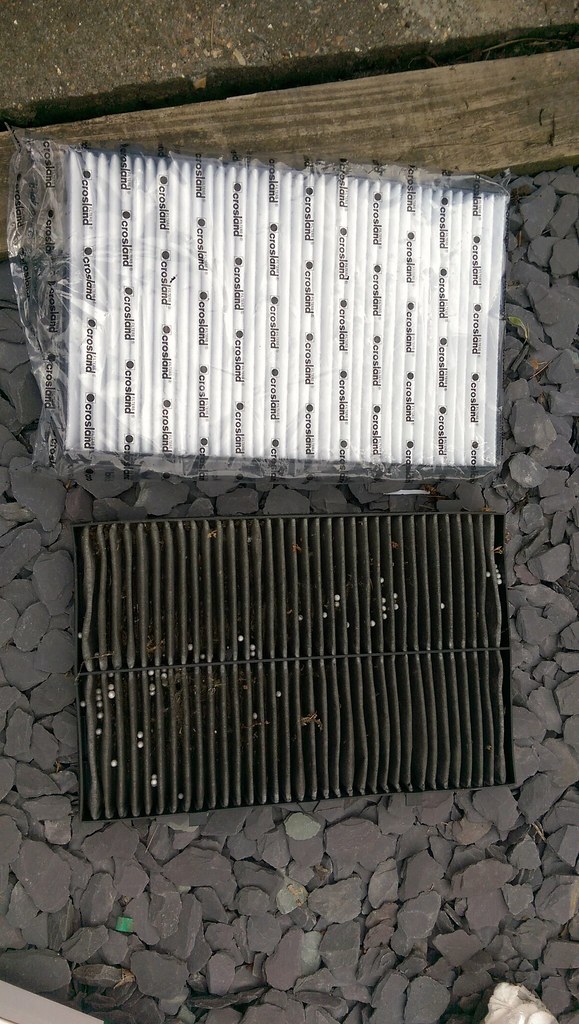 2017-12-26_10-31-20 by Clifton Tausberger, on Flickr
Other than standard maintenance, tyres, windscreen wipers and oil that's the entire history thus far. Phew.
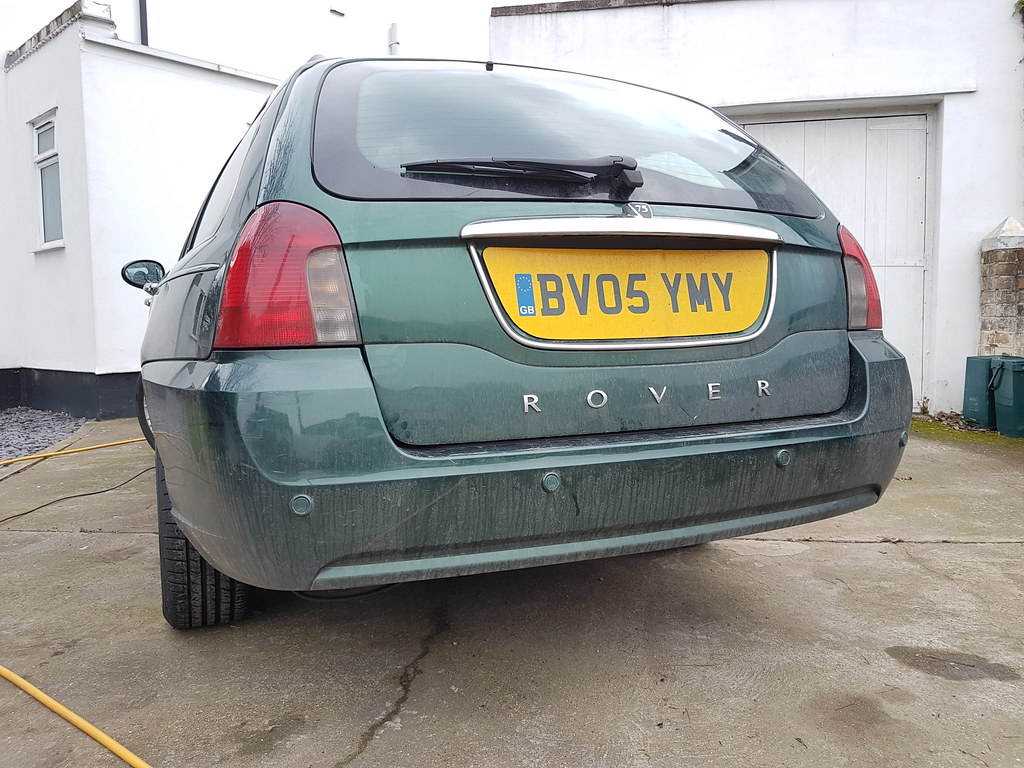
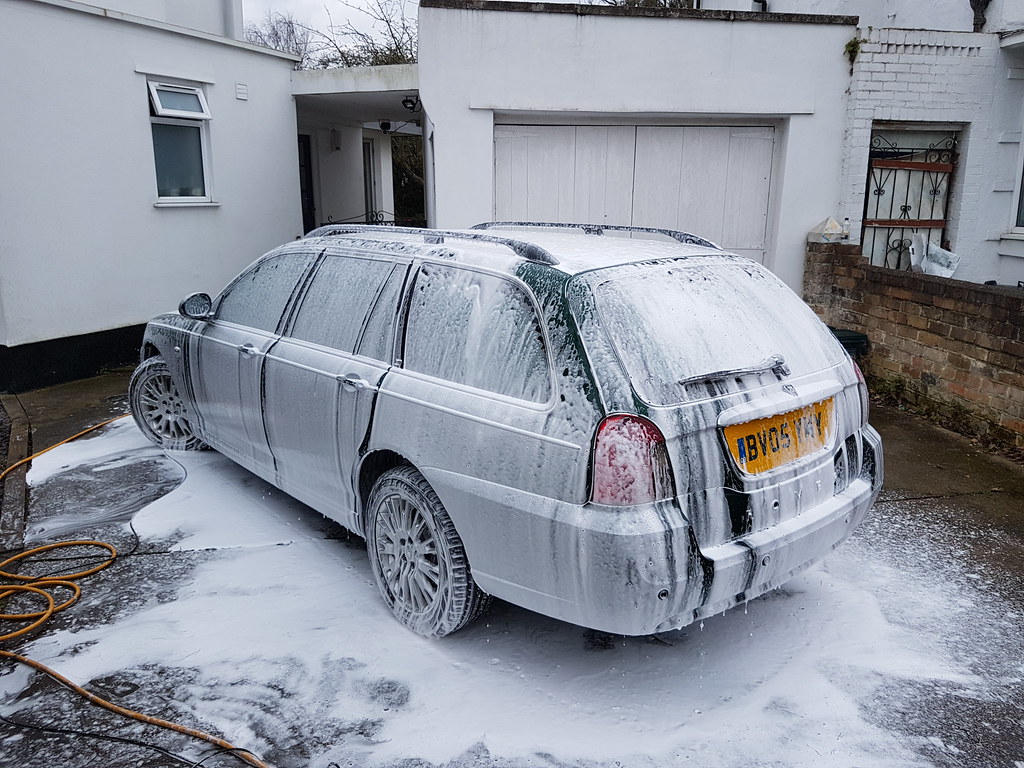
Last weekend I took the plunge and actually washed it properly for the first time in three years. The salt and grit has turned the underside into a crystalline being from a Bjork video, so I spent a good hour with the pressure washer taking it all off. Or diluting it, most likely. I am experimenting with a snow foam applicator for the first time. As the car was truly hideously filthy I didn't expect too much, and I'll likely have to go at it again when I get a free day.
 20180325_125039 by Clifton Tausberger, on Flickr
 20180325_133446 by Clifton Tausberger, on Flickr
Offside scuttle cover unscrewed:
2017-12-26_10-30-47 by Clifton Tausberger, on FlickrPollen filter is clipped in against the bulkhead. The plastic here is particularly fragile so take extra care unclipping:
2017-12-26_10-30-56 by Clifton Tausberger, on FlickrOld and new. Those are mothballs and spidereggs, not BB pellets:
2017-12-26_10-31-20 by Clifton Tausberger, on FlickrOther than standard maintenance, tyres, windscreen wipers and oil that's the entire history thus far. Phew.
Last weekend I took the plunge and actually washed it properly for the first time in three years. The salt and grit has turned the underside into a crystalline being from a Bjork video, so I spent a good hour with the pressure washer taking it all off. Or diluting it, most likely. I am experimenting with a snow foam applicator for the first time. As the car was truly hideously filthy I didn't expect too much, and I'll likely have to go at it again when I get a free day.
20180325_125039 by Clifton Tausberger, on Flickr20180325_133446 by Clifton Tausberger, on FlickrAll is well in 75 land, it sailed through 152k with the haughty disinterest of a well built Rover, and has been accumulating dirt as a useful car should.
 20180414_101426 by Clifton Tausberger, on Flickr
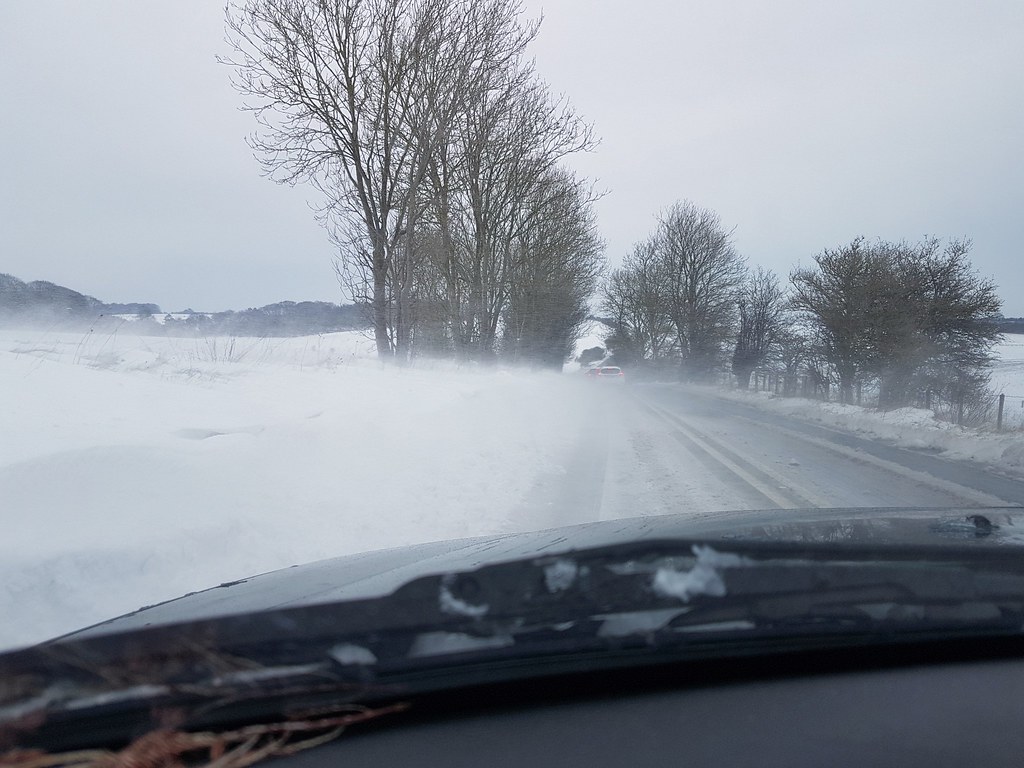
I was particularly impressed by its performance in the random snowstorm we experienced. We covered many miles with the winter tyres and it never disappointed.
 2018-05-19_01-08-58 by Clifton Tausberger, on Flickr
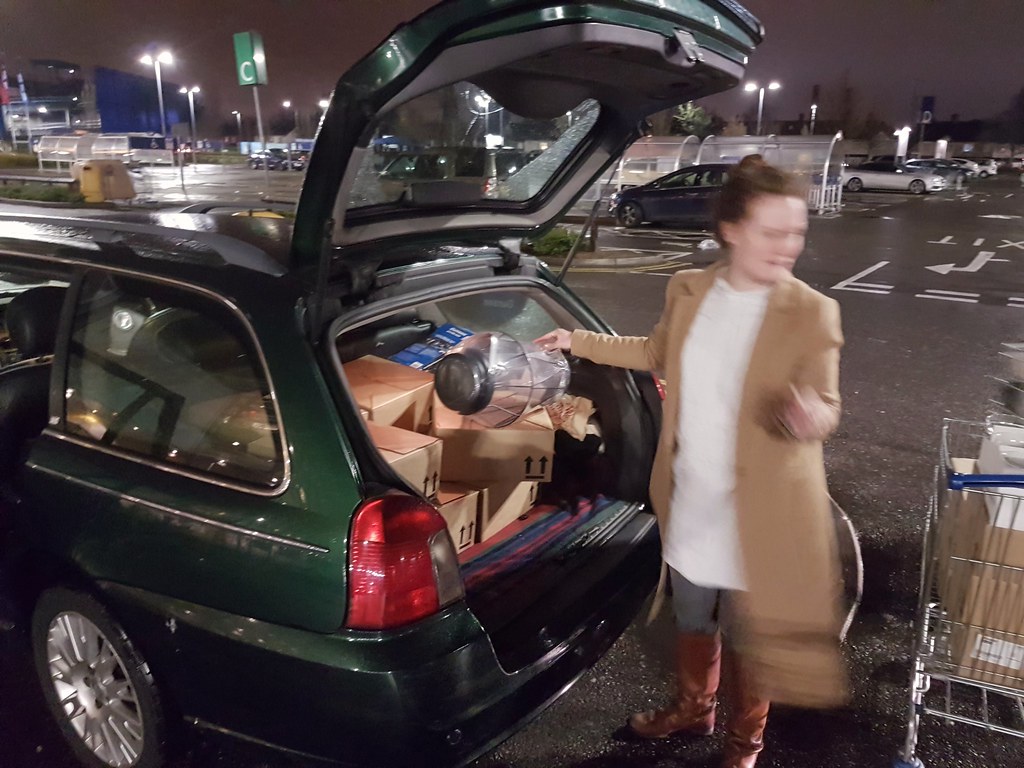
We are always the last in Ikea.
 2018-05-19_01-07-53 by Clifton Tausberger, on Flickr
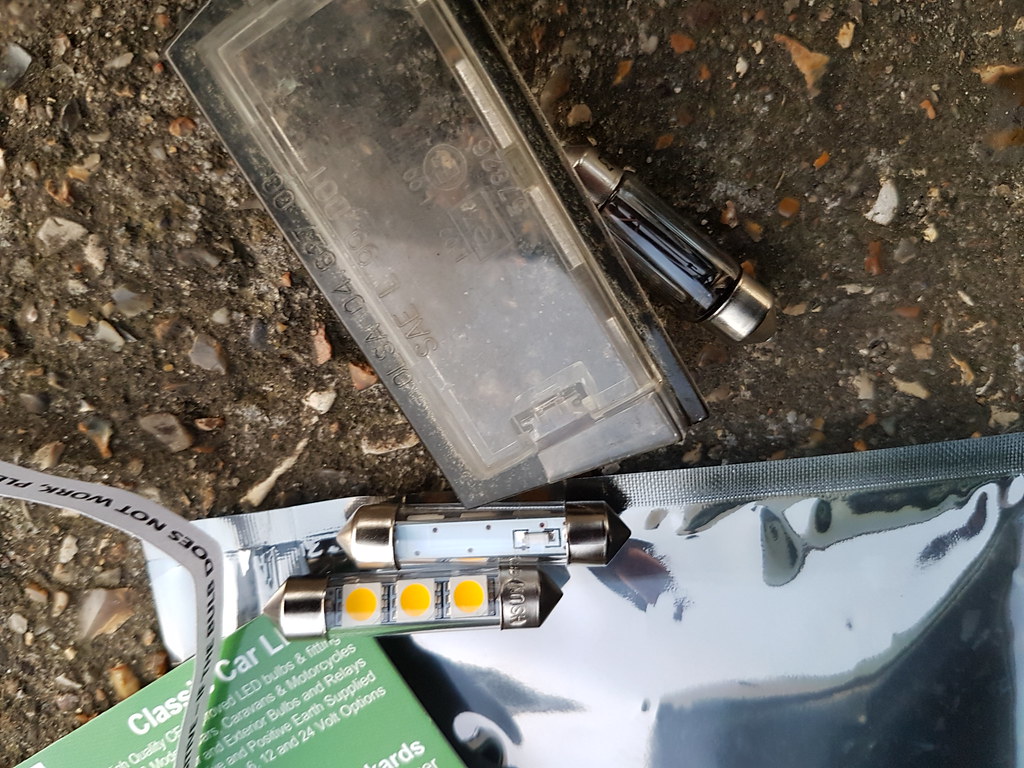
Two minor repairs - rear number plate bulbs had blown and so were replaced with LEDs:
 20180419_194115 by Clifton Tausberger, on Flickr
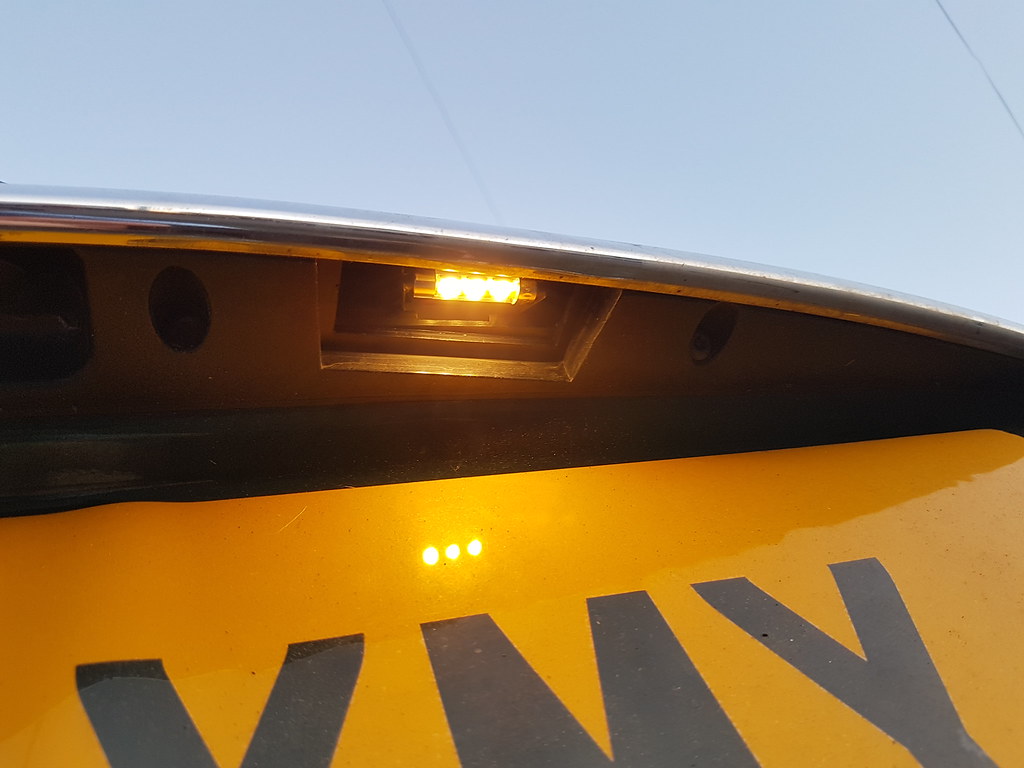 20180419_194456 by Clifton Tausberger, on Flickr
The plastic covers are fragile so I carefully exercised the thinnest screwdriver I had to tease them out.
Finally, the tops of the front suspension turrets were developing rust pustules (rustules, if you will) so I scraped them back, cleaned them up and applied several coats of Bilt Hamber to keep it under control.
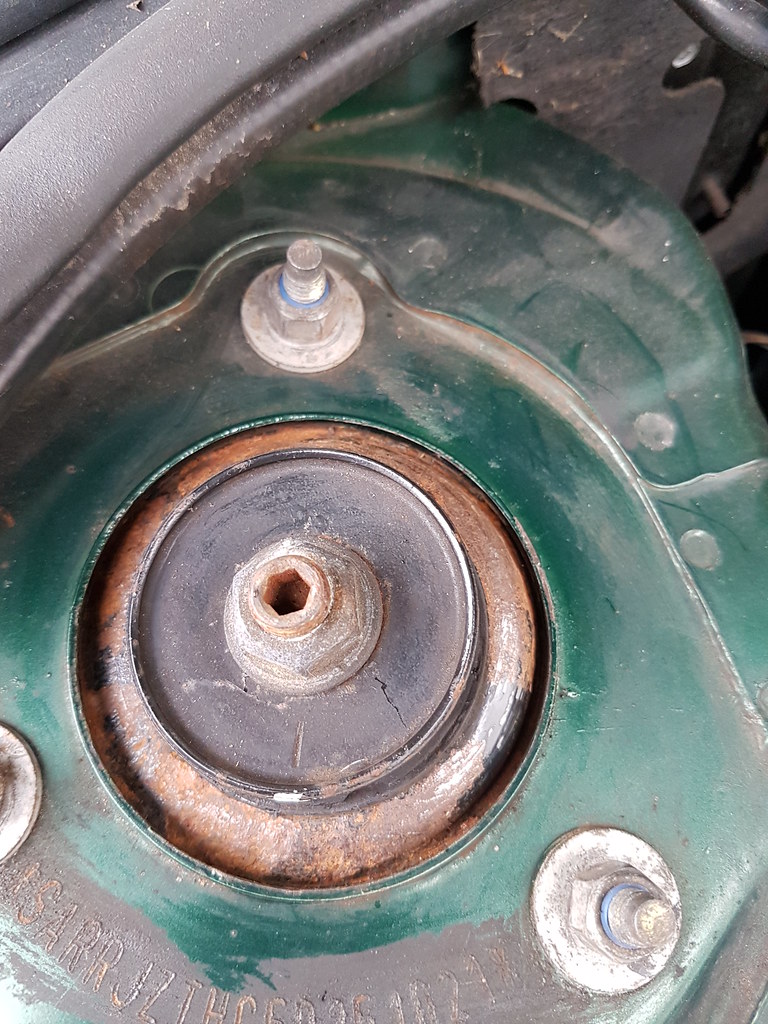 20180512_130113 by Clifton Tausberger, on Flickr
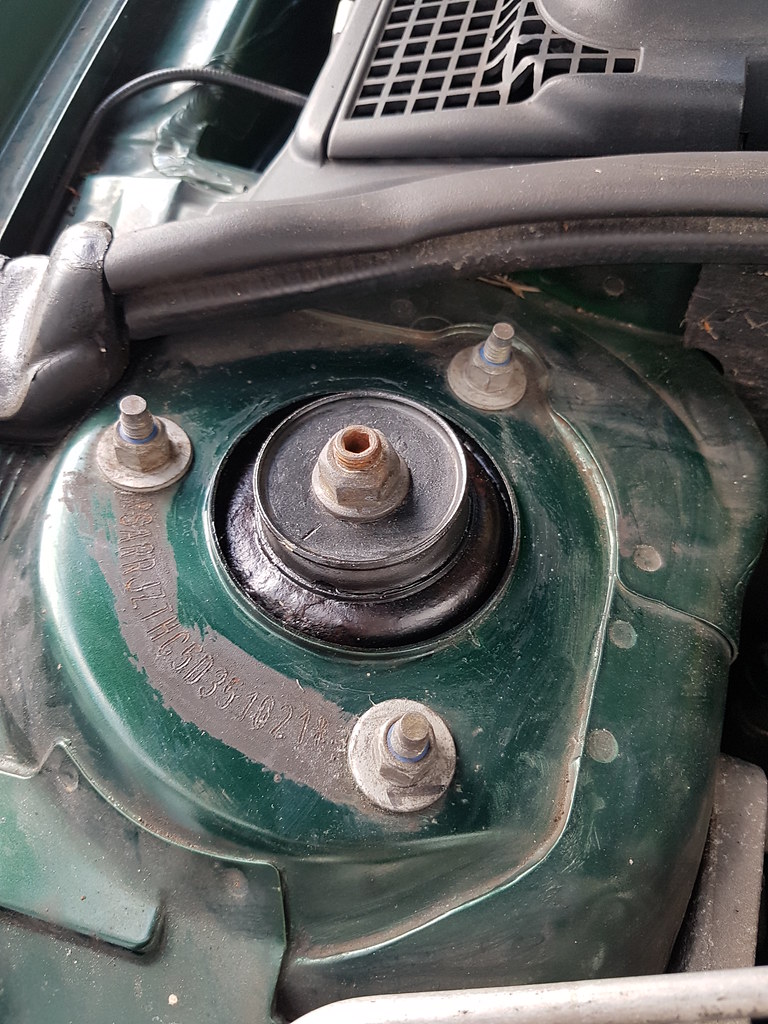 20180513_160908 by Clifton Tausberger, on Flickr
The low brake pad warning light has just come on, and I recall the discs all round being worn at purchase, so it's time for all four paws to get the full treatment. The Rover wizards are bemoaning the quality of replacement disks, so more research is required!
20180414_101426 by Clifton Tausberger, on FlickrI was particularly impressed by its performance in the random snowstorm we experienced. We covered many miles with the winter tyres and it never disappointed.
2018-05-19_01-08-58 by Clifton Tausberger, on FlickrWe are always the last in Ikea.
2018-05-19_01-07-53 by Clifton Tausberger, on FlickrTwo minor repairs - rear number plate bulbs had blown and so were replaced with LEDs:
20180419_194115 by Clifton Tausberger, on Flickr20180419_194456 by Clifton Tausberger, on FlickrThe plastic covers are fragile so I carefully exercised the thinnest screwdriver I had to tease them out.
Finally, the tops of the front suspension turrets were developing rust pustules (rustules, if you will) so I scraped them back, cleaned them up and applied several coats of Bilt Hamber to keep it under control.
20180512_130113 by Clifton Tausberger, on Flickr20180513_160908 by Clifton Tausberger, on FlickrThe low brake pad warning light has just come on, and I recall the discs all round being worn at purchase, so it's time for all four paws to get the full treatment. The Rover wizards are bemoaning the quality of replacement disks, so more research is required!
It's not often that I curse the 75, usually it is the most reliable car in our fleet, but this bank holiday has me set in a proper grumblemood. The entire clutch system was replaced two years ago, master, slave, DMF and some pipes, all with the approved parts int he Roverbeard world (many, many garbage variants out there) and fitted by Jules in Colwyn Bay. Unfortunately, the replacement master seals have gone, explaining the gradually slacker clutch these past months:
 20180526_124519 by Clifton Tausberger, on Flickr
 20180526_132325 by Clifton Tausberger, on Flickr
This is one of the primary killers of 75s and ZTTs - bad quality parts, incorrect fitting an the truly awful access to do anything leads to giant quotes, shrugged shoulders and Rovers being scrapped. I am determined this will not be the case with this car.
We really needed the 75 this weekend for a long load-lugging triangle to Bristol, Glastonbury and home so despite the evidence I thought I would try to bleed it and replace lost liquid.
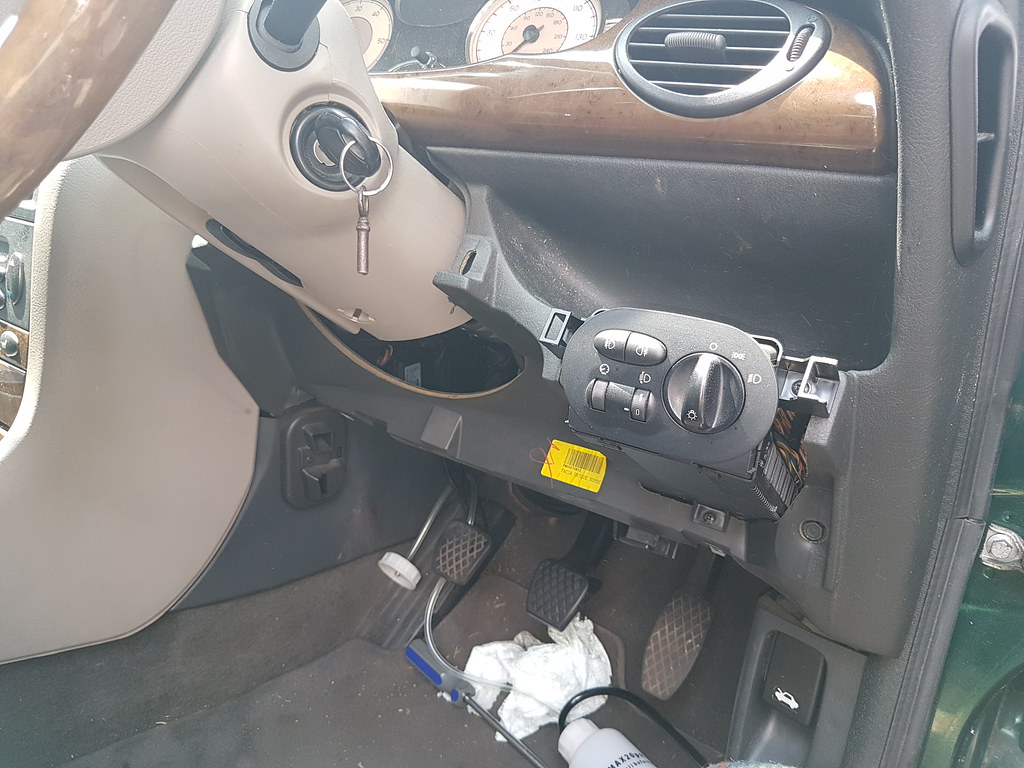
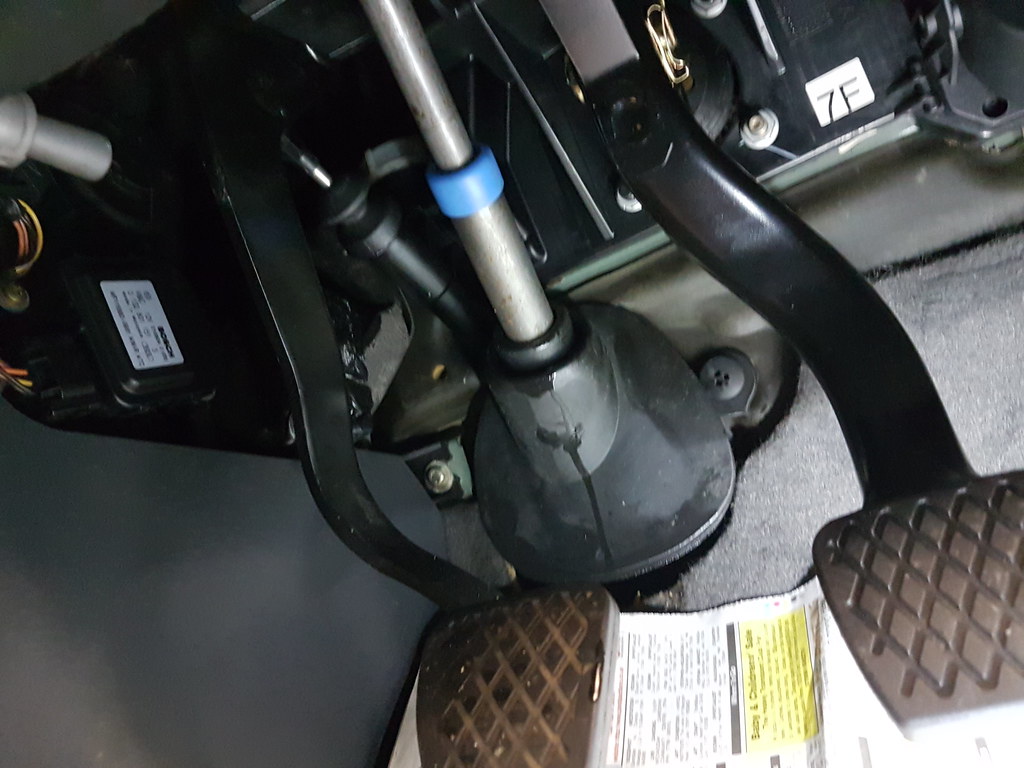
Access is dreadful, so out comes the lower dash trim after two screw and some unclippage:
 20180526_135107 by Clifton Tausberger, on Flickr
Many, many paper towels and newspaper should be installed in the footwell, and gloves worn. This is never fun or clean.
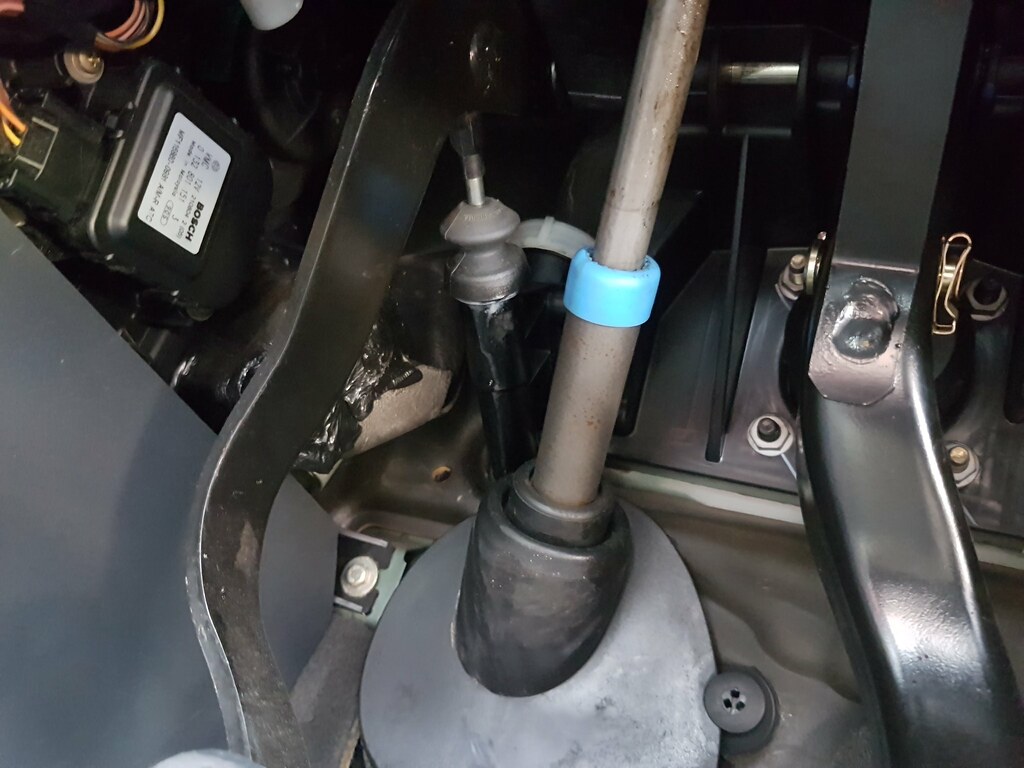
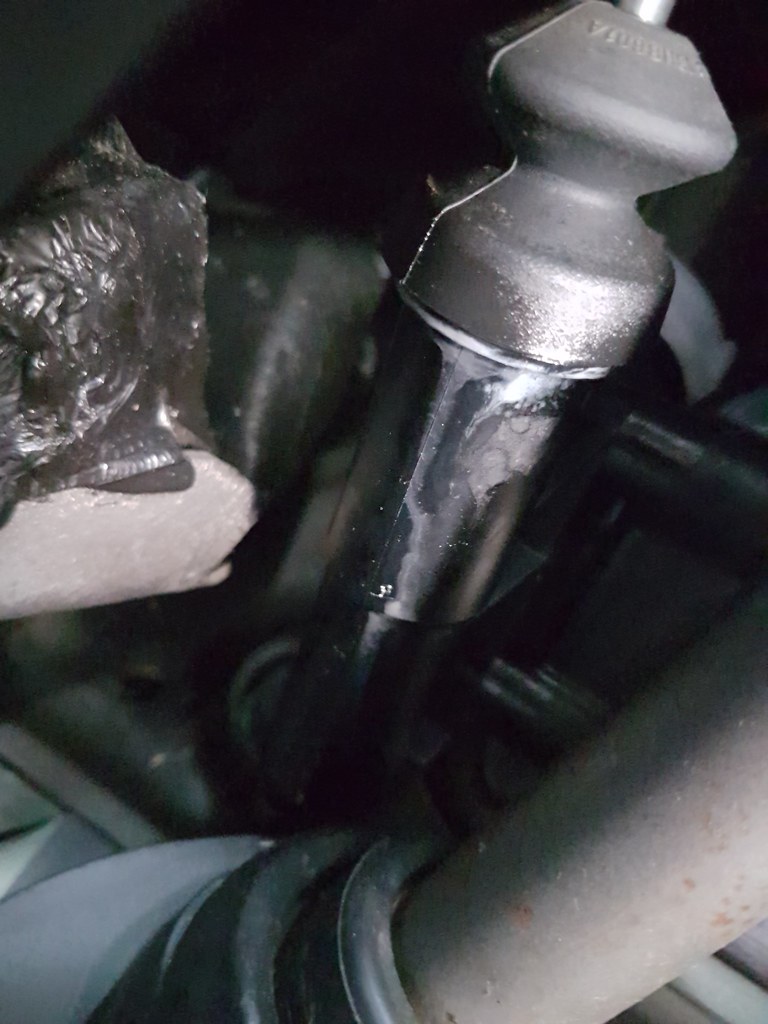
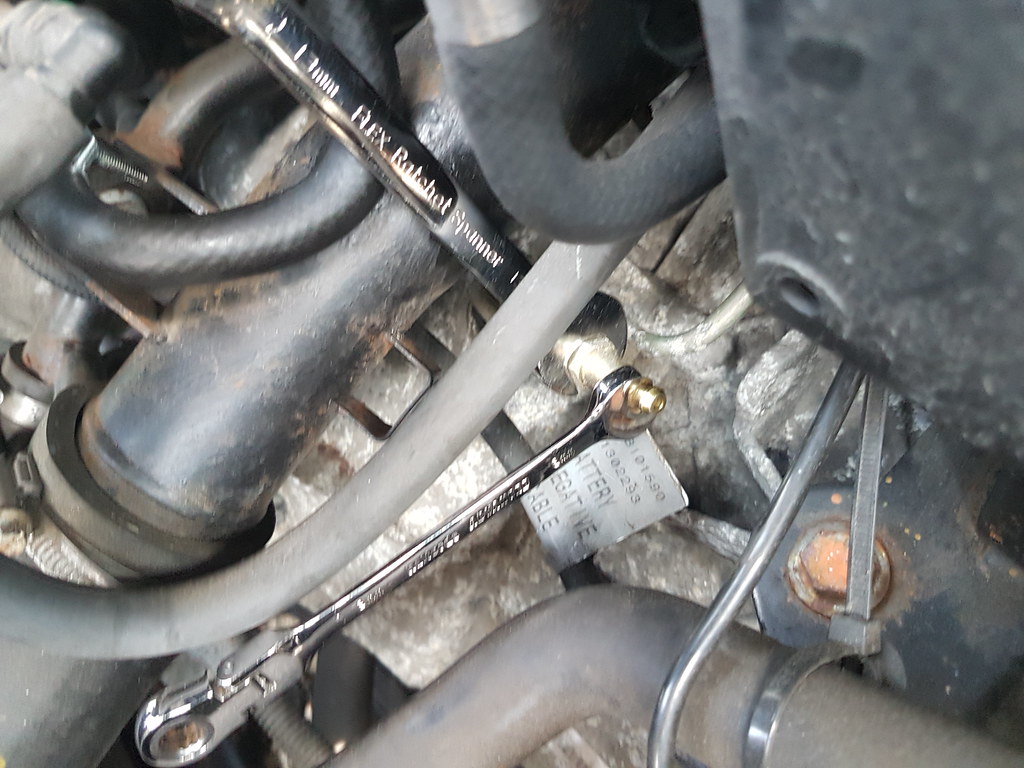
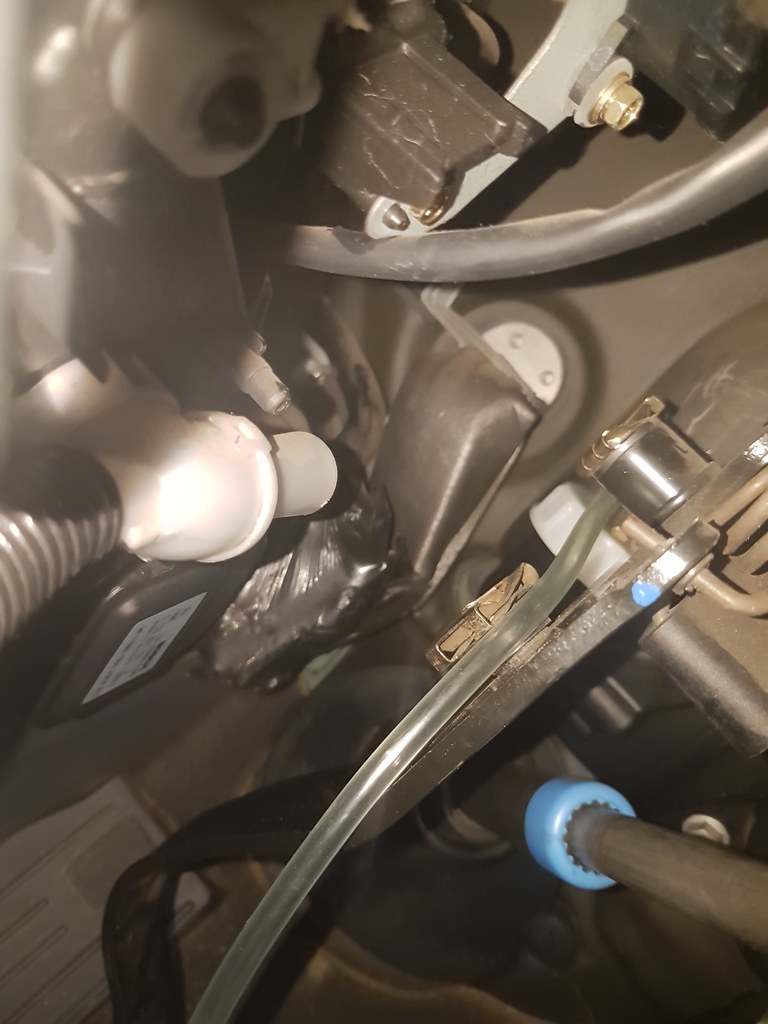
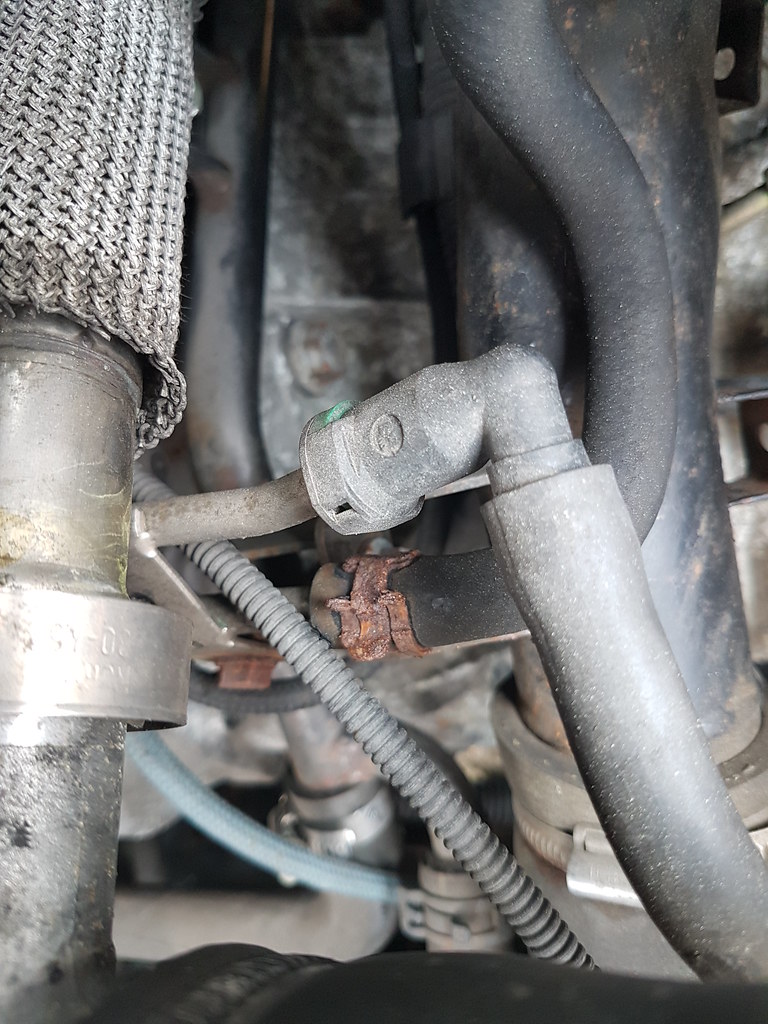
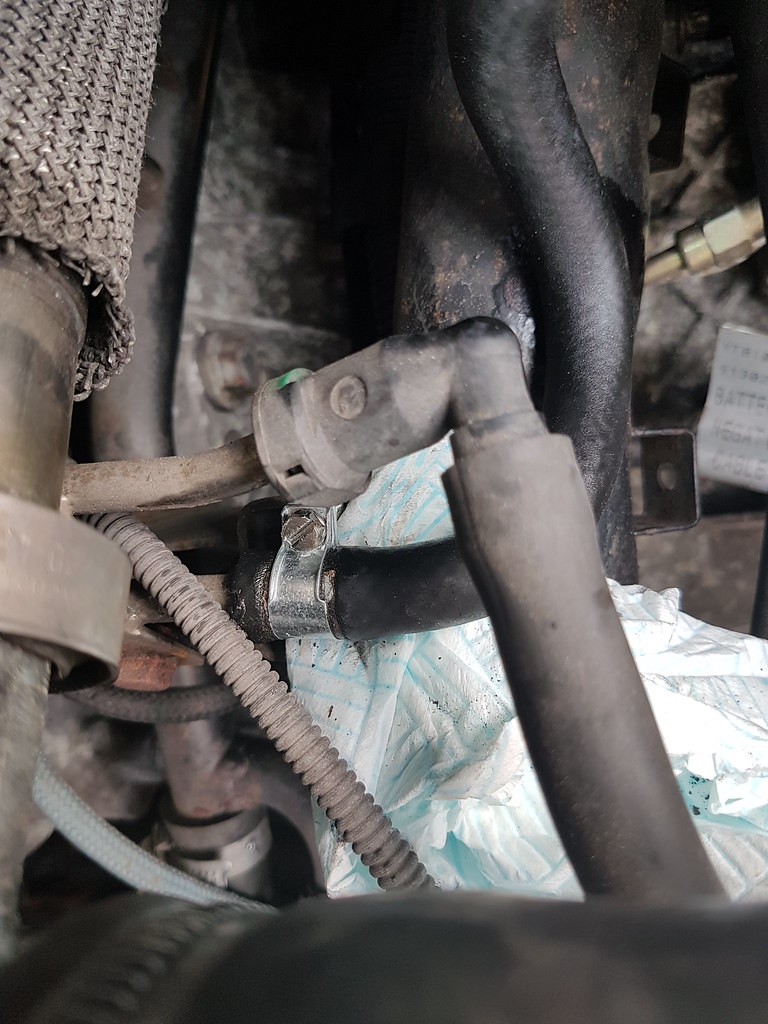
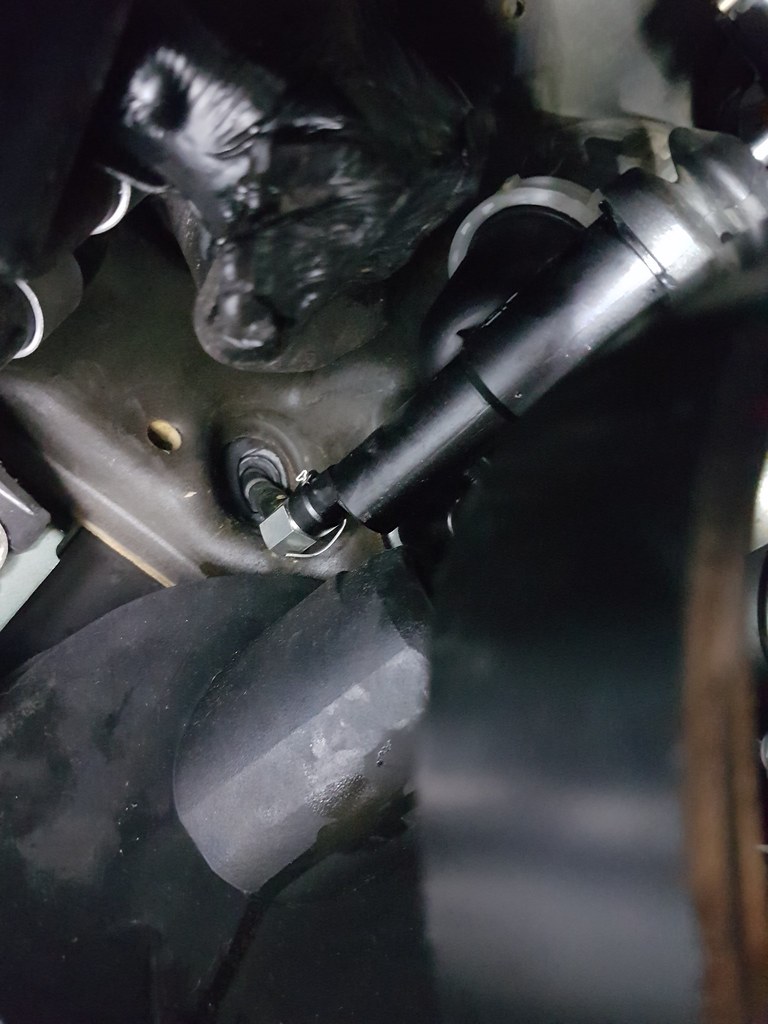
Under the bonnet, the bleed nipple is in front of the battery, and you can get better access by unclipping various pliable hoses in this area. Set up old bottle and hose, add 13mm and 8mm spanners (it may be 12mm on Mk1s)
 20180526_131210 by Clifton Tausberger, on Flickr
 20180526_131304 by Clifton Tausberger, on Flickr
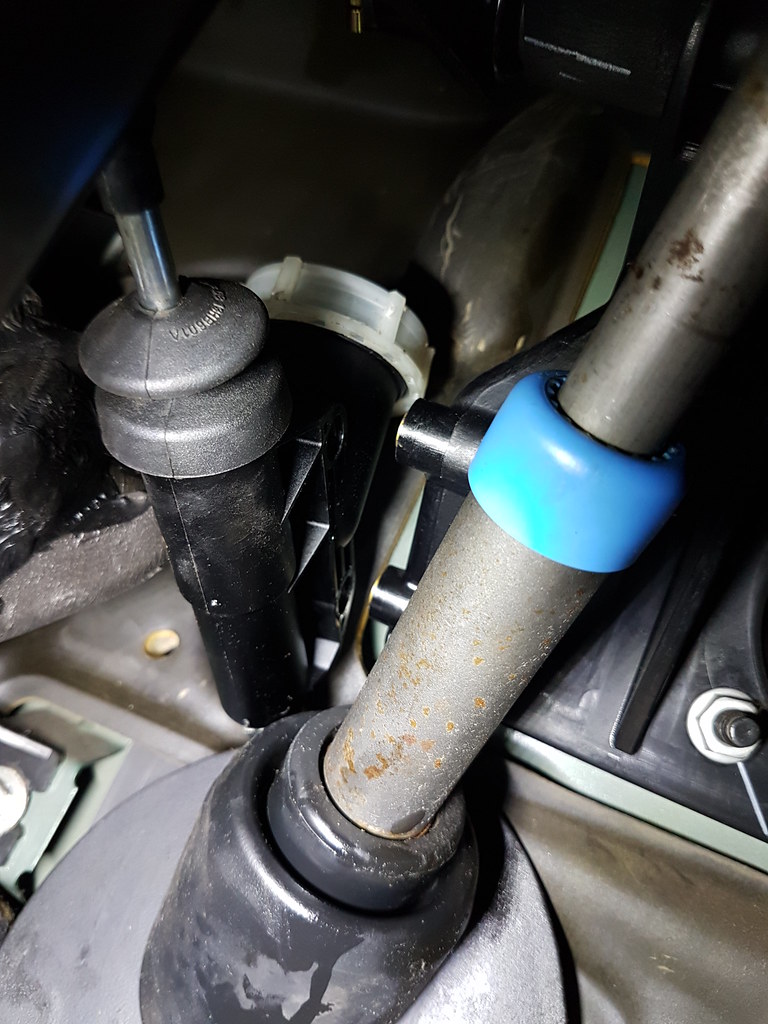
Back in the driver's footwell, a large flat bladed screwdriver can be angled onto the white notches in the master cap to unscrew it. Ow, bleeding fingers. It's easiest to attack it horizontally, looking through the hole left by the trim removed. Cap and weird rubber sock is usually tucked into some other material and must be wrestled free.
 2018-05-28_10-00-49 by Clifton Tausberger, on Flickr
 20180526_133016 by Clifton Tausberger, on Flickr
With all the seals intact, a Gunson kit can be added, air from a spare tyre at 20 psi added and your bleed at your leisure. In this case, I put it down to 12 psi and rushed frantically to get as much liquid as possible in, ensure the leaks were mopped and rush to the bonnet to let some other air and old fluid out.
 20180526_135439 by Clifton Tausberger, on Flickr
This was Not Fun. However, after some stern words with myself, a full bottle of fresh DOT 4 is in, some bizarrely grey liquid out (disintegrated seal evidence?) and the clutch returned to usable levels. Still, time to see what the Rover 75 acolytes have uncovered for a better replacement in the past 2 years.
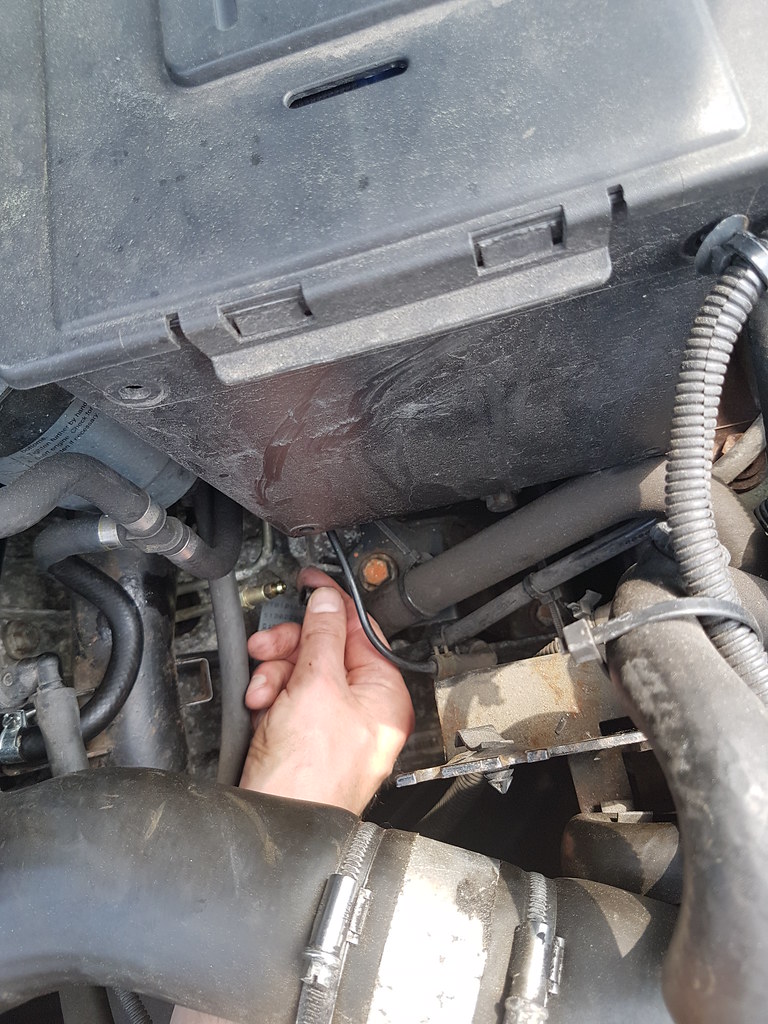
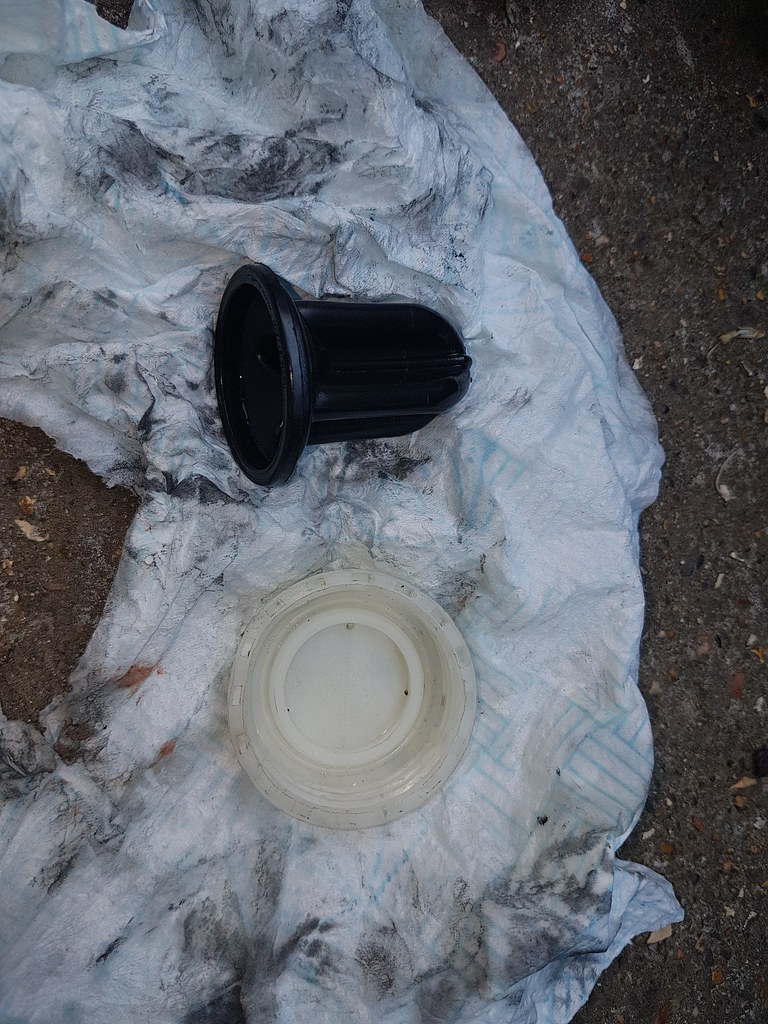
While under the bonnet I noticed a fuel line clip disintegrating:
 20180526_130051 by Clifton Tausberger, on Flickr
Luckily an easy replacement, but the hoses are looking a little old so time to look into some refreshment in the fuel system.
 20180526_130740 by Clifton Tausberger, on Flickr
300 miles fully laden was duly dispatched, and the 75 lazily clicked over 152k.
20180526_124519 by Clifton Tausberger, on Flickr20180526_132325 by Clifton Tausberger, on FlickrThis is one of the primary killers of 75s and ZTTs - bad quality parts, incorrect fitting an the truly awful access to do anything leads to giant quotes, shrugged shoulders and Rovers being scrapped. I am determined this will not be the case with this car.
We really needed the 75 this weekend for a long load-lugging triangle to Bristol, Glastonbury and home so despite the evidence I thought I would try to bleed it and replace lost liquid.
Access is dreadful, so out comes the lower dash trim after two screw and some unclippage:
20180526_135107 by Clifton Tausberger, on FlickrMany, many paper towels and newspaper should be installed in the footwell, and gloves worn. This is never fun or clean.
Under the bonnet, the bleed nipple is in front of the battery, and you can get better access by unclipping various pliable hoses in this area. Set up old bottle and hose, add 13mm and 8mm spanners (it may be 12mm on Mk1s)
20180526_131210 by Clifton Tausberger, on Flickr20180526_131304 by Clifton Tausberger, on FlickrBack in the driver's footwell, a large flat bladed screwdriver can be angled onto the white notches in the master cap to unscrew it. Ow, bleeding fingers. It's easiest to attack it horizontally, looking through the hole left by the trim removed. Cap and weird rubber sock is usually tucked into some other material and must be wrestled free.
2018-05-28_10-00-49 by Clifton Tausberger, on Flickr20180526_133016 by Clifton Tausberger, on FlickrWith all the seals intact, a Gunson kit can be added, air from a spare tyre at 20 psi added and your bleed at your leisure. In this case, I put it down to 12 psi and rushed frantically to get as much liquid as possible in, ensure the leaks were mopped and rush to the bonnet to let some other air and old fluid out.
20180526_135439 by Clifton Tausberger, on FlickrThis was Not Fun. However, after some stern words with myself, a full bottle of fresh DOT 4 is in, some bizarrely grey liquid out (disintegrated seal evidence?) and the clutch returned to usable levels. Still, time to see what the Rover 75 acolytes have uncovered for a better replacement in the past 2 years.
While under the bonnet I noticed a fuel line clip disintegrating:
20180526_130051 by Clifton Tausberger, on FlickrLuckily an easy replacement, but the hoses are looking a little old so time to look into some refreshment in the fuel system.
20180526_130740 by Clifton Tausberger, on Flickr300 miles fully laden was duly dispatched, and the 75 lazily clicked over 152k.
It's one of my most anticipated times of the year - no, not the Revival, though that is a close second, but the annual pilgrimage to Wales to see Rover 75 guru Jules Anderson and poke about the innards of the Tourer. Usually the list I had formulated has to be adjusted upon uncovering higher priority items, reviewing the budget and what parts are actually available. This time was no exception. My planned list:
Front brake inspection, renewal of discs/flexis/pipes.
Rear brake inspection, renewal of discs/pads/flexis.
Gear lever play - replacement cables.
Air con inspection (slight leak).
Inspection of front suspension (see rusty turrets above).
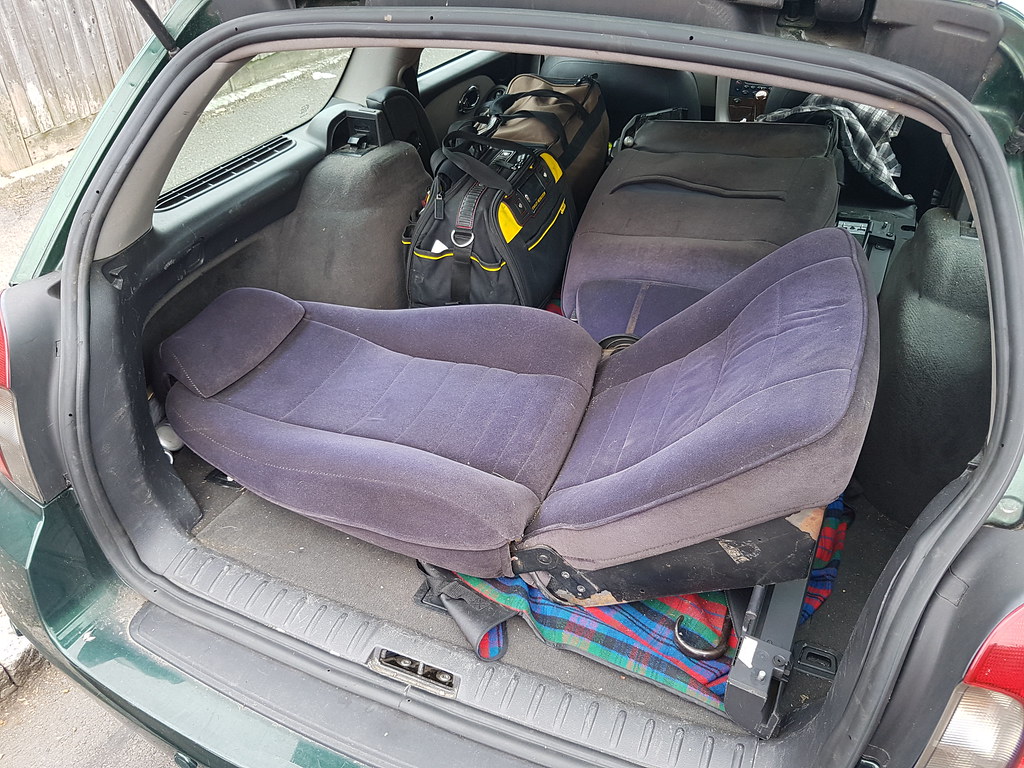
Firstly, I had been helping a friend pull up the floor of his new house when an auction listing for two Saab 900 Turbo seats came up for the incredible sum of £25, just down the road. I couldn't pass these up, so they joined me for the trip to Wales:
 20180904_150400 by Clifton Tausberger, on Flickr
Next up, 250 miles to Colwyn Bay to accommodation. Simply one of the most beautiful places on the planet.
 20180905_085947 by Clifton Tausberger, on Flickr
There's no mistaking the specialty of the guru on the scenic approach.
 20180905_092431 by Clifton Tausberger, on Flickr
 20180905_092512 by Clifton Tausberger, on Flickr
 20180905_092756 by Clifton Tausberger, on Flickr
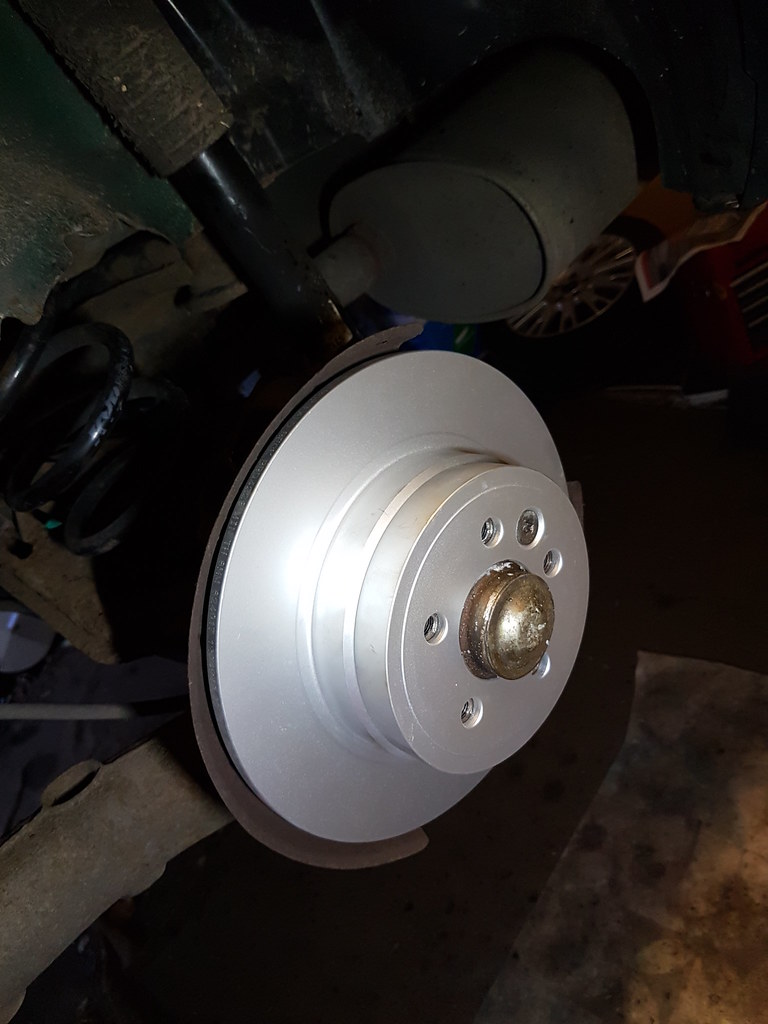
9:30am. Inspection had some good news - with cleaning and testing front brakes are given a good bill of health.
 20180905_101558 by Clifton Tausberger, on Flickr
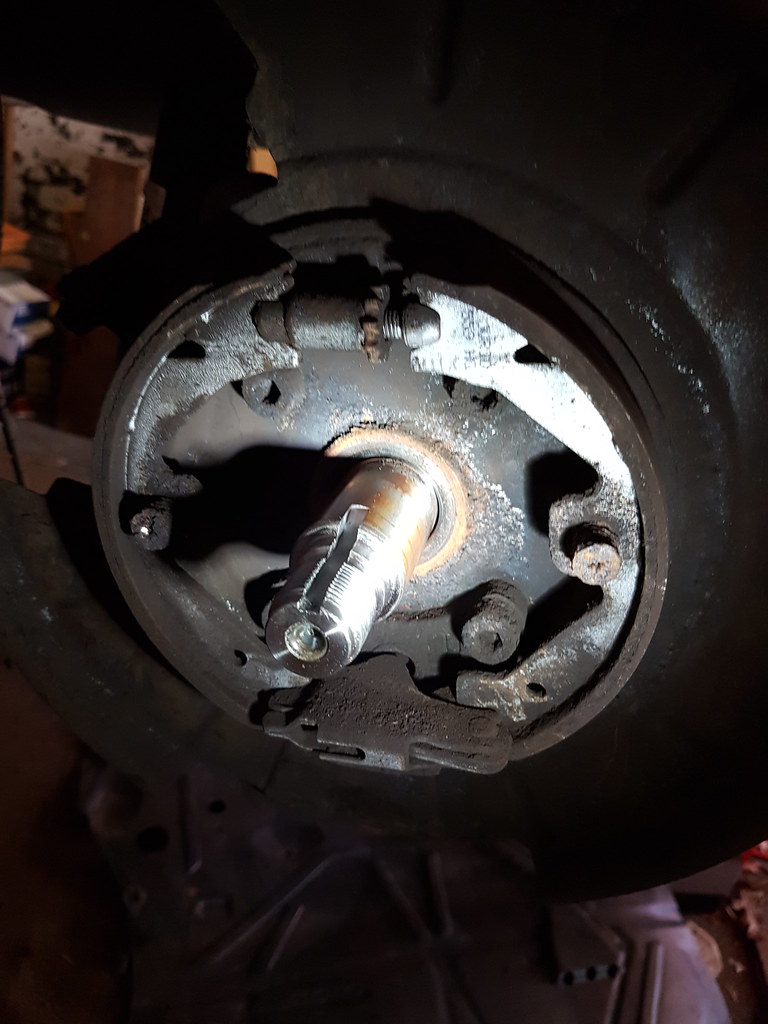
Rear brakes however was a slight bother. Slight pull and vibration down to really only the right side being effective, and although the handbrake held (see previous work on compensator and adjustment), it wasn't perfect on both sides. Hmm.
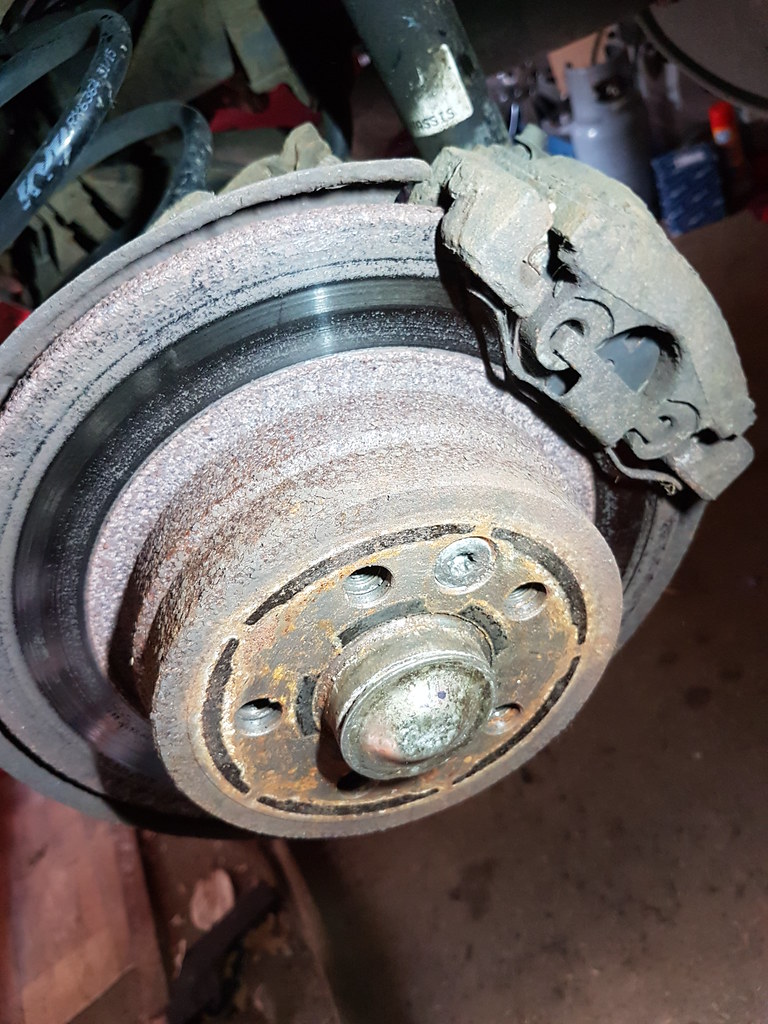 20180905_111338 by Clifton Tausberger, on Flickr
 20180905_112342 by Clifton Tausberger, on Flickr
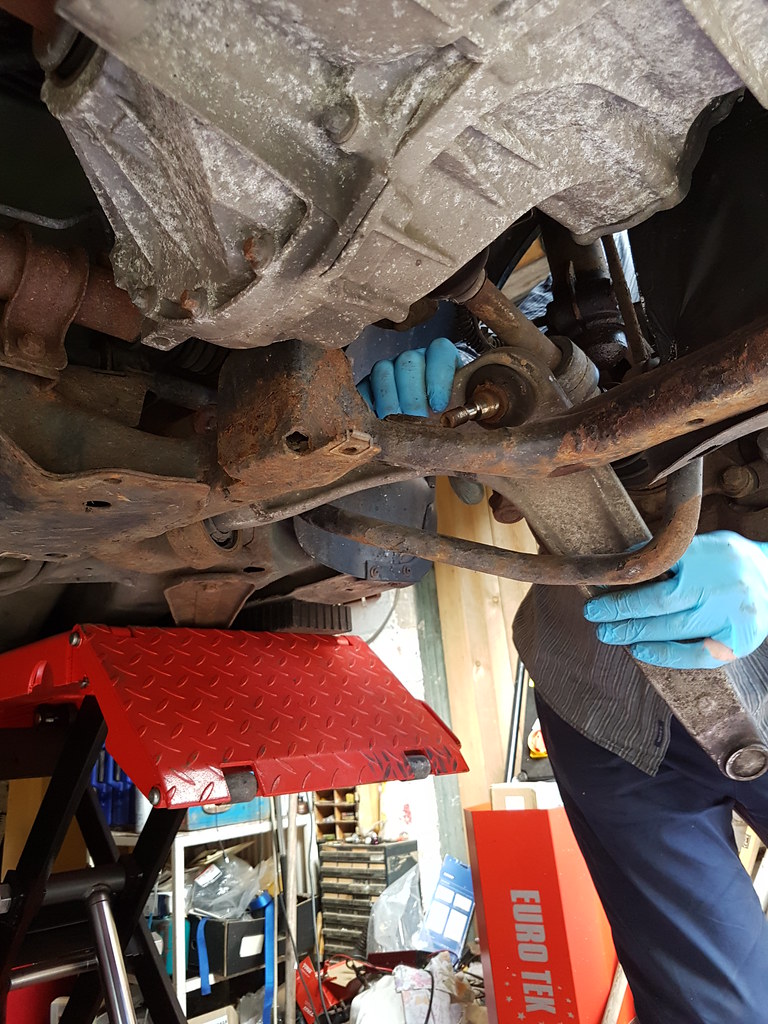
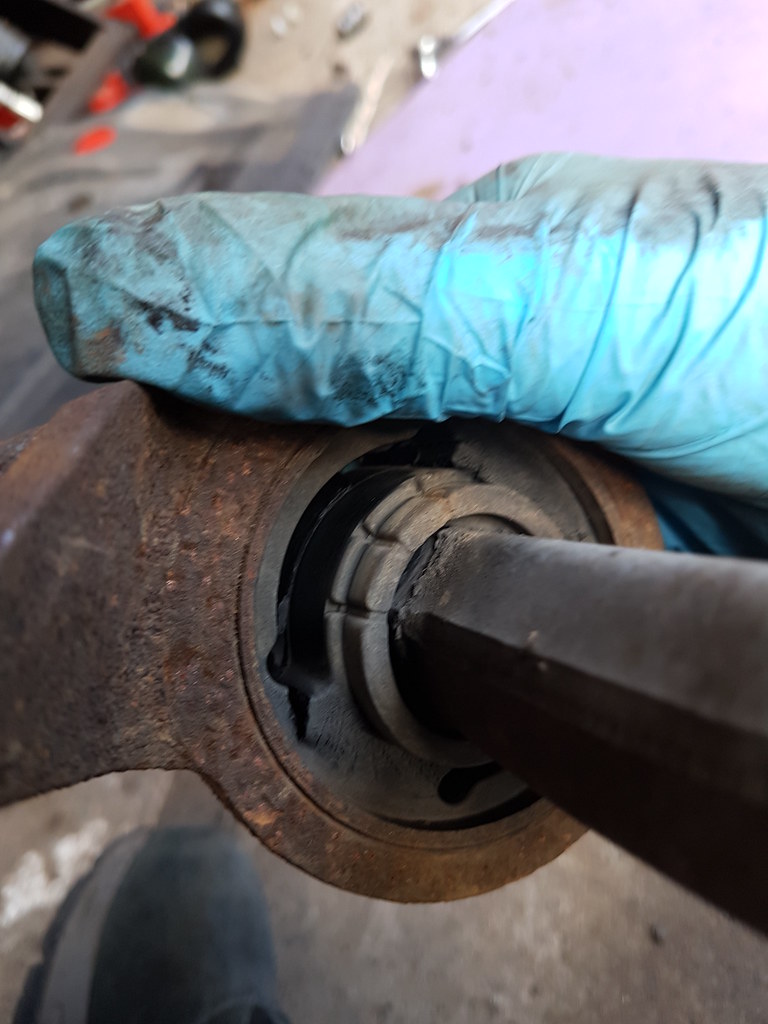
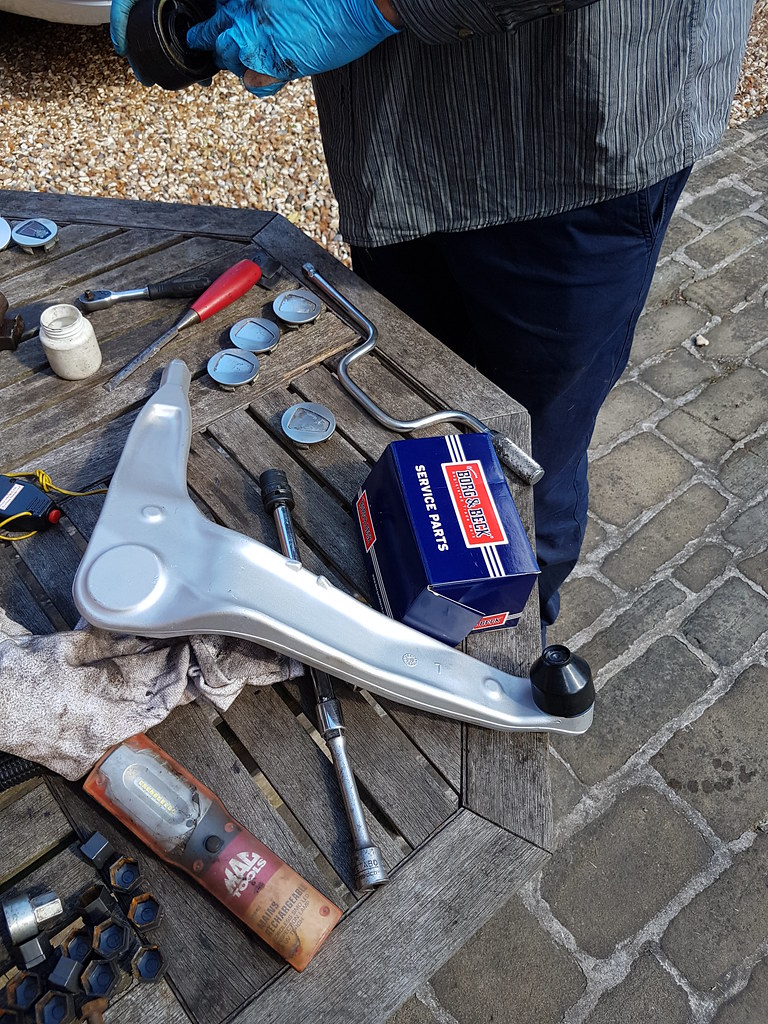
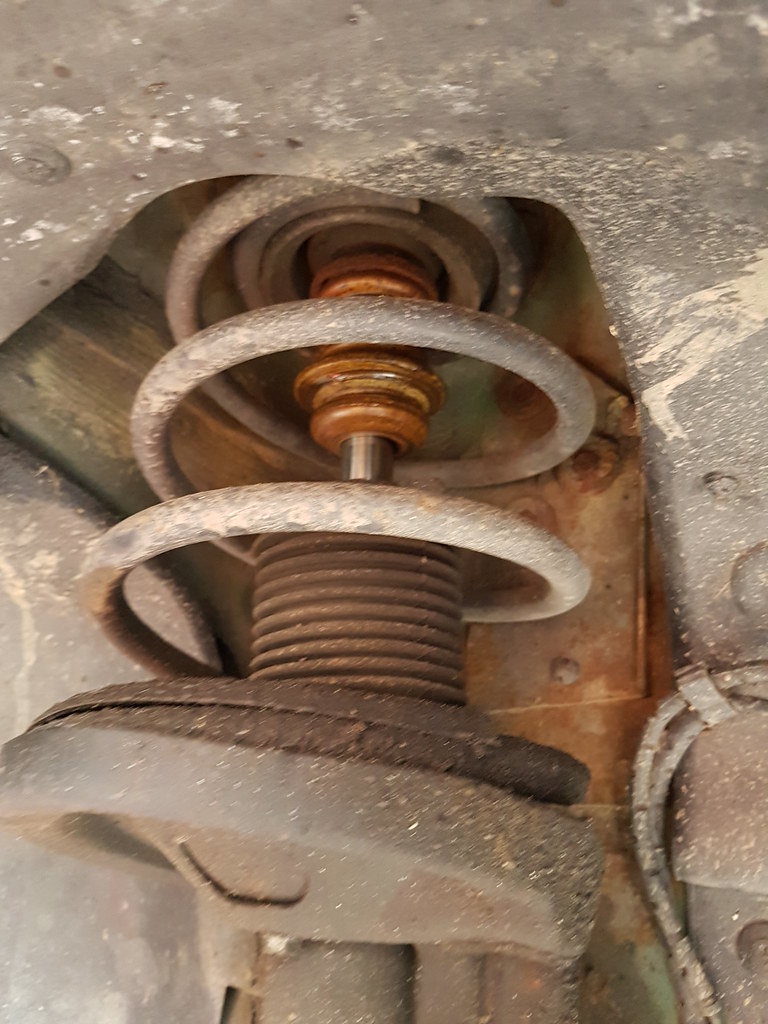
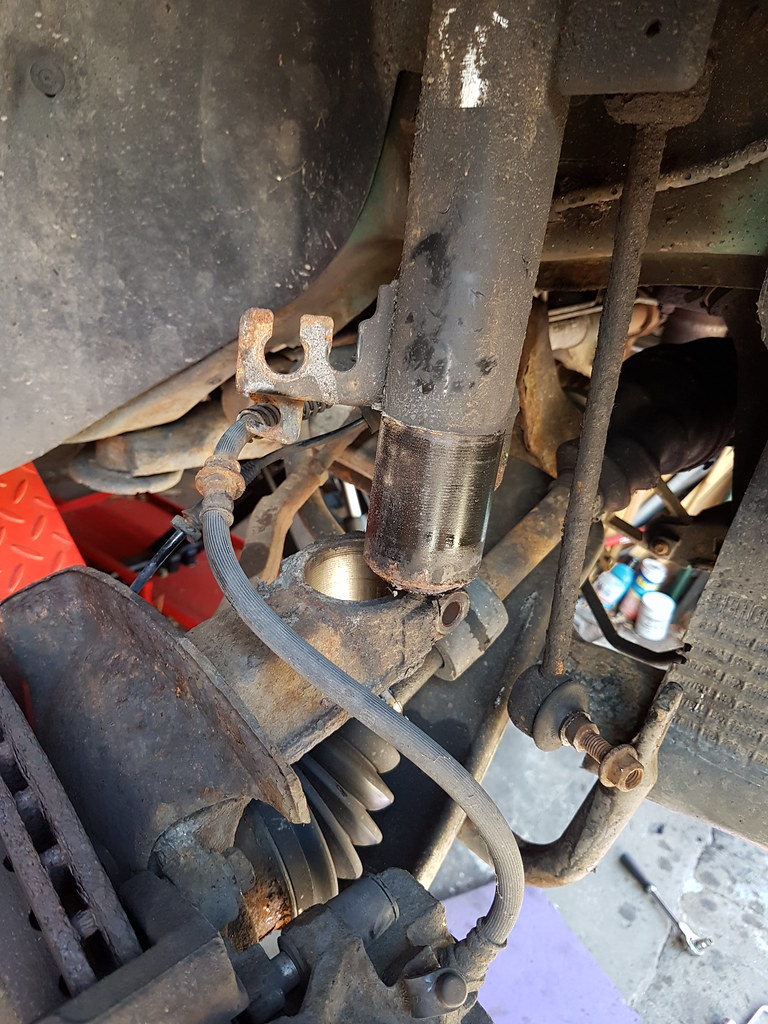
Next up, waggling and prodding revealed play in the front left wishbone bushes, a lower quality part identified so it was to come out. Also the front right damper was leaking and not long for this world. In lieu of front brakes, we tackled both. The lower quality wishbone had been installed with the might of Thor and the care to threads & torque settings of the Hulk. Many hours were spent with wedges and gritted teeth attempting to free it.
Pinch bolt:
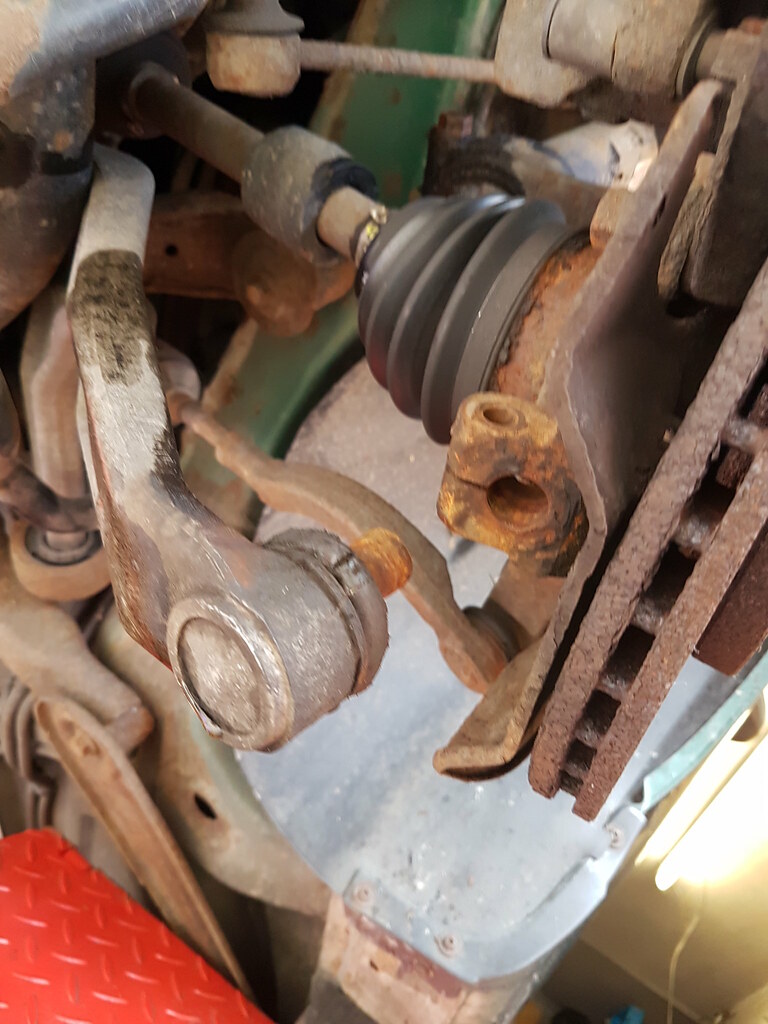 20180905_120908 by Clifton Tausberger, on Flickr
Two 18mm rear bolts and a 22mm centre bolt:
 20180905_131758 by Clifton Tausberger, on Flickr
Nasty splits giving play:
 20180905_131920 by Clifton Tausberger, on Flickr
Shiny TRW part in:
 20180905_133029 by Clifton Tausberger, on Flickr
 20180905_133123 by Clifton Tausberger, on Flickr
Lunchtime. Now, the strut. Luckily Jules has adapted tools and all the knowledge to efficiently swap these out.
 20180905_102134 by Clifton Tausberger, on Flickr
Again, pinch bolts, arms and top bolts undone:
 20180905_143230 by Clifton Tausberger, on Flickr
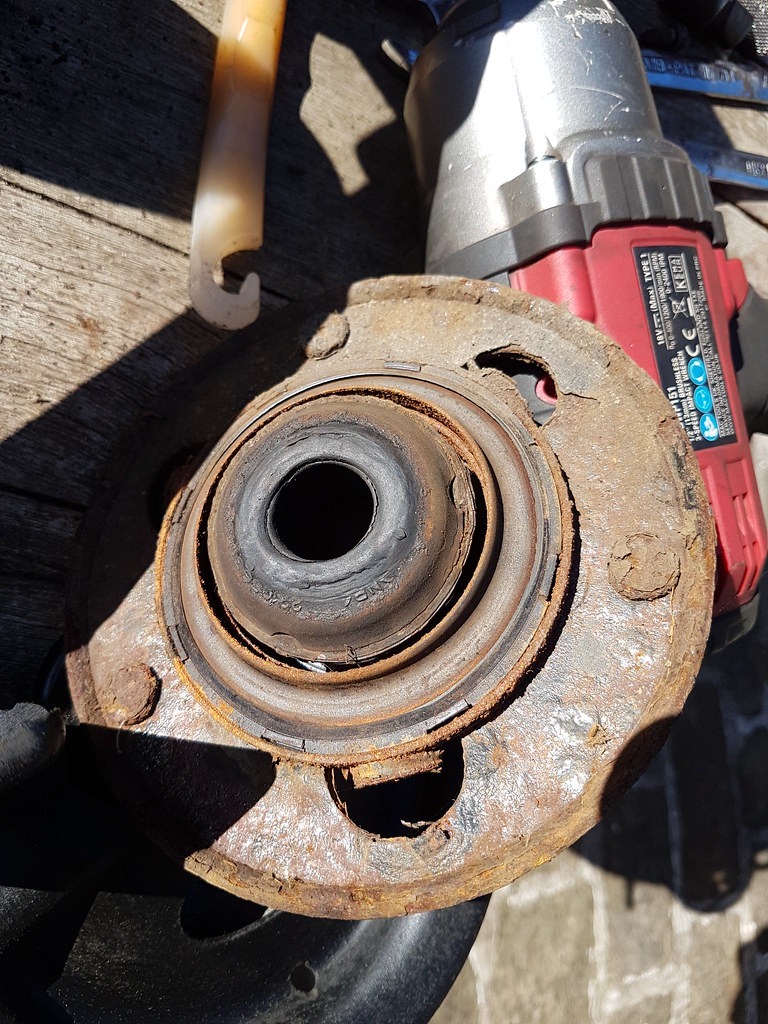
We swapped the damper for a lower mileage item to match the other side, plus the top rusty plate with bearing for a new one.
 20180905_154809 by Clifton Tausberger, on Flickr
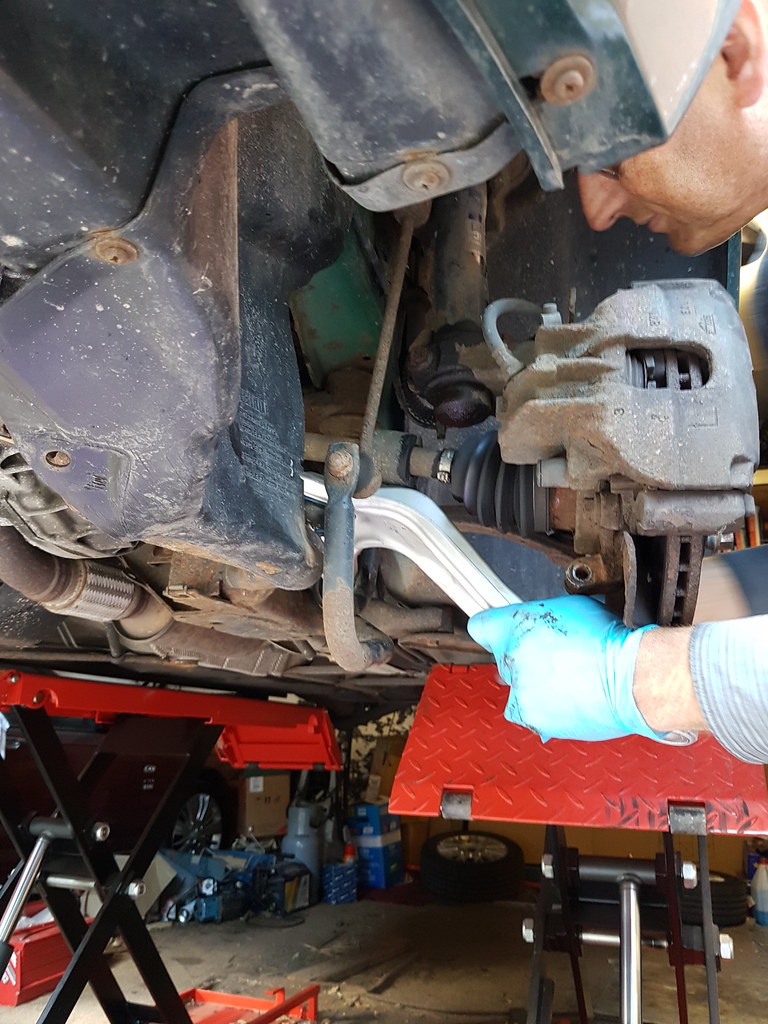
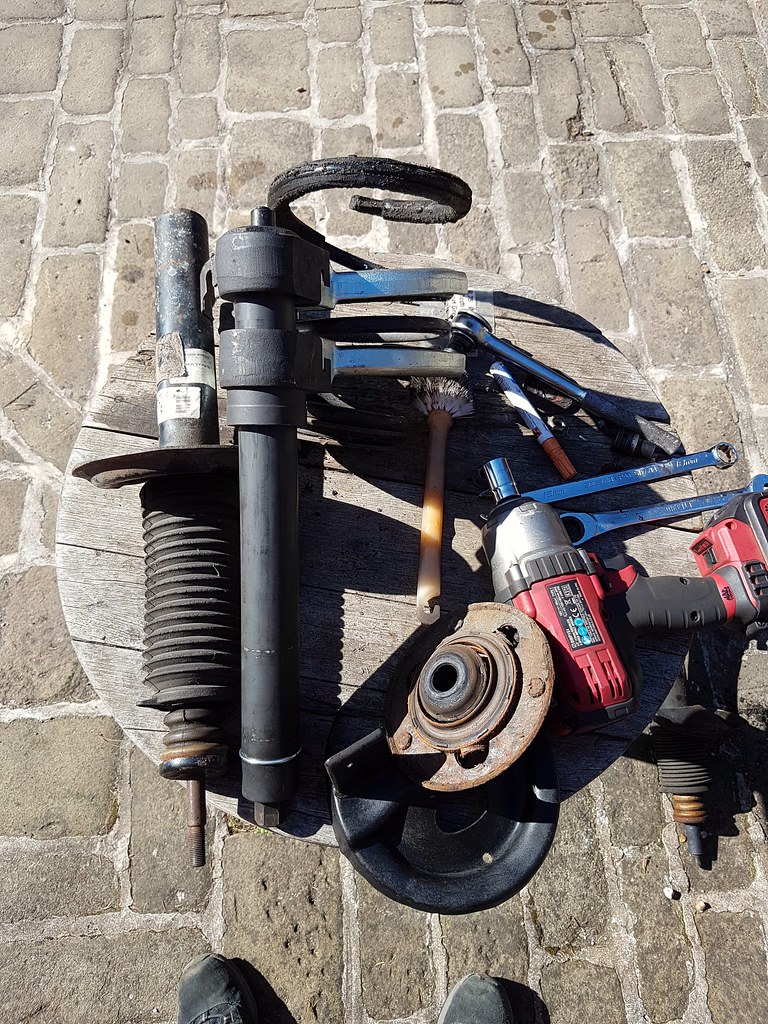
Spring guard, spring and all other components transferred over, with some fettling and jack lifting the assembly it all slipped in nicely.
 2018-09-07_11-04-47 by Clifton Tausberger, on Flickr
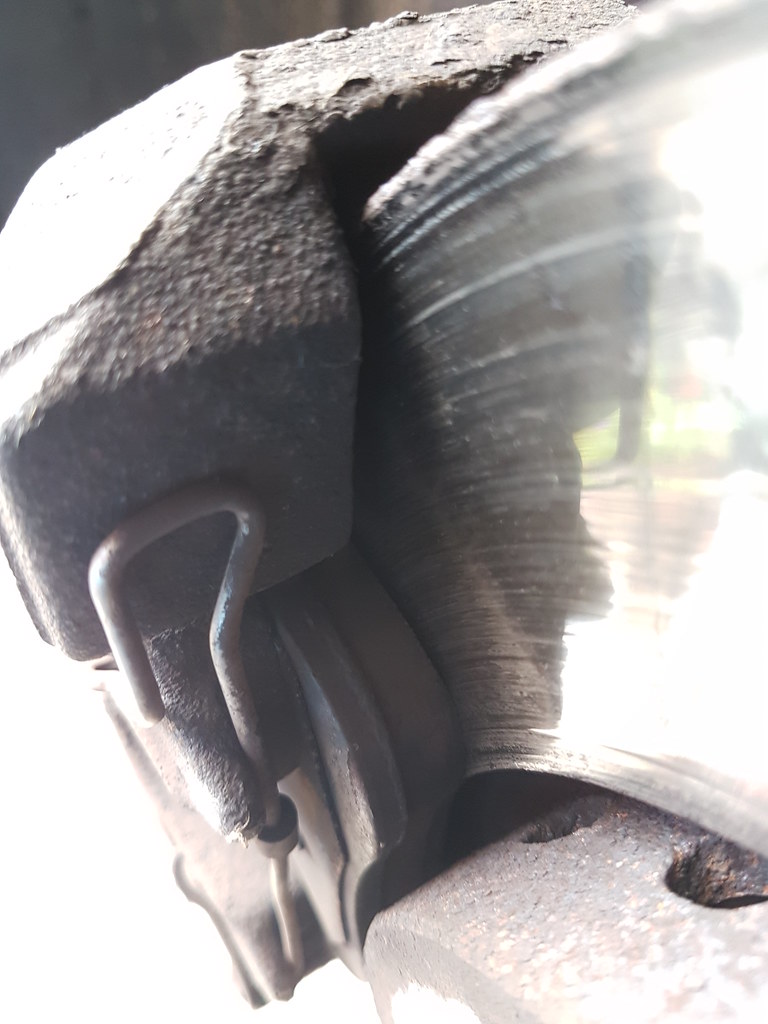
Teatime. Rear brakes now - taking off the discs revealed a clear imbalance. This is the Venn diagram of Rover rear discs - what you know needs replacement, what you don't know needs replacement and a middle of what definitely needs to be replaced.
 20180905_130342 by Clifton Tausberger, on Flickr
The handbrake assembly (springs and screws to hold in the shoes that act on the inside of the discs) on the rear left had disintegrated, and were all resting at the bottom of the discs, like wet rags in a washing machine. This is a narrow escape - nothing had 'stuck on' or interrupted the rotation.
 20180905_140928 by Clifton Tausberger, on Flickr
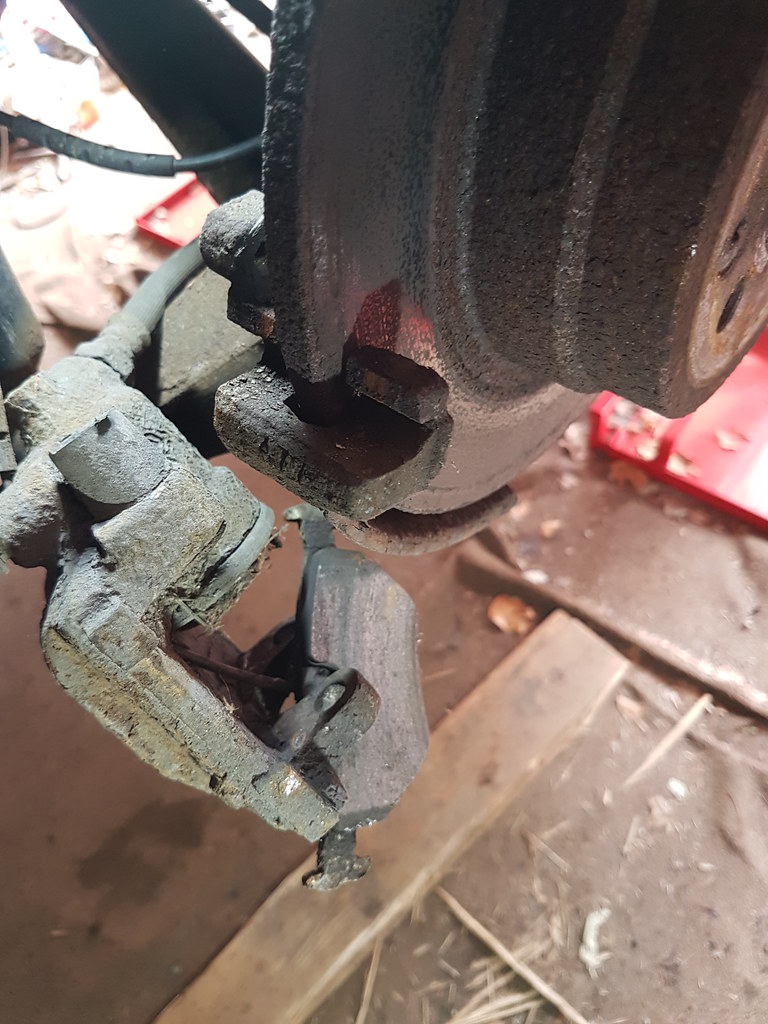
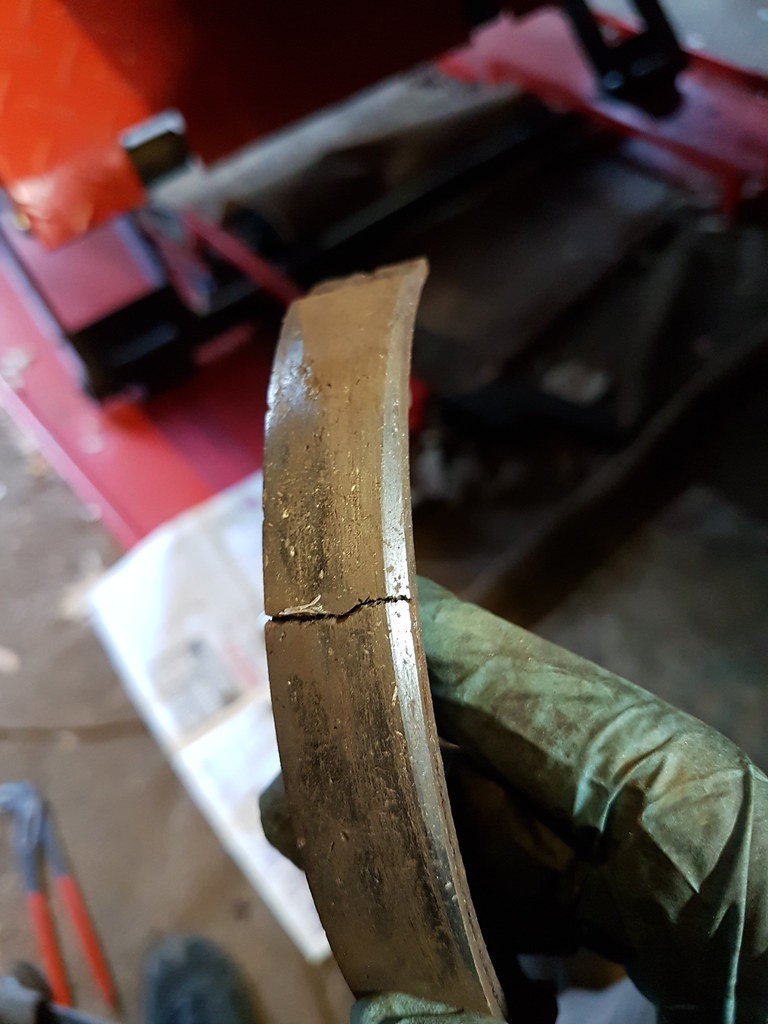
The handbrake still operated somewhat but pushed the shoes out at an angle with limited force, wearing just a corner and cracking them.
 20180905_182352 by Clifton Tausberger, on Flickr
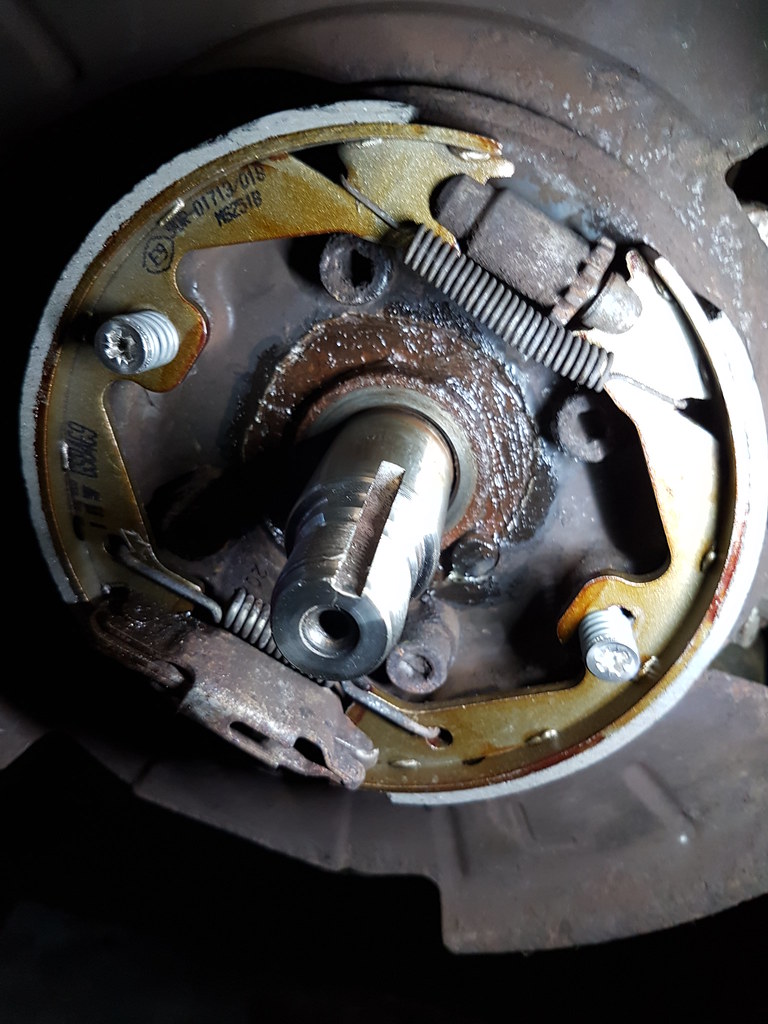
The back plate holes, where the shoes and springs attach, had corroded so Jules has a fix with stainless bolts and nuts. Rusting on the back plates can also expand to push out the other components, so this was chiselled out and treated. Luckily both rear bearings were in good operation (including ABS sensors) and were all cleaned and reused.
 20180905_183055 by Clifton Tausberger, on Flickr
 20180905_184333 by Clifton Tausberger, on Flickr
All this, plus general cleaning and degrunging and adjustments along the way saw us to a 21:00 finish after a brake bleed. The most Rover 75 day I have ever had. Phew.
Next morning, I opted to swap out the clutch master with a NOS cylinder Jules had, as it was still weeping and this was 'a twenty minute job' according to Rover beards on the forums.
 20180906_114615 by Clifton Tausberger, on Flickr
Pinch pin and split pin removed, plus the usual trim and two 8mm bolts holding it in with the worst access imaginable, this can all be done from the cabin:
 20180906_115951 by Clifton Tausberger, on Flickr
Separated with bolts removed:
 20180906_120432 by Clifton Tausberger, on Flickr
New Rover stock master in:
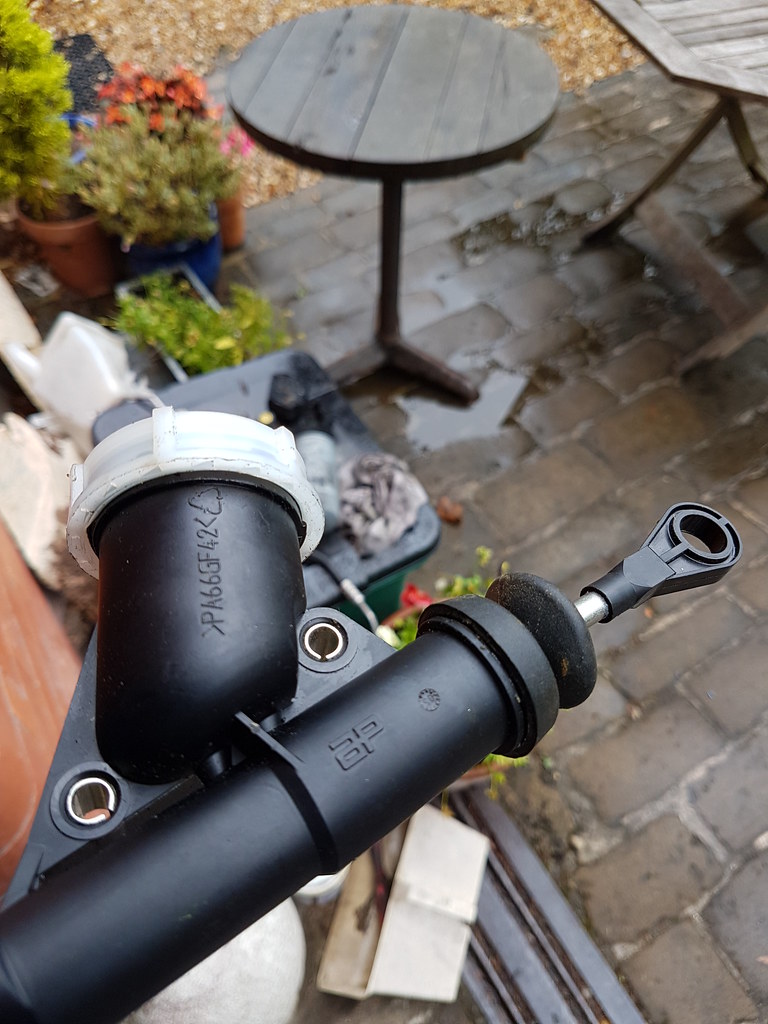 20180906_120720 by Clifton Tausberger, on Flickr
We also reattached a steering grommet that is one of the biggest causes of noise tranferral to the cabin. Four hours in total but no evidence of leaks, and I was on the road and back in London five hours later.
I also couldn't resist two NOS indicators to match my refurbshed headlights...
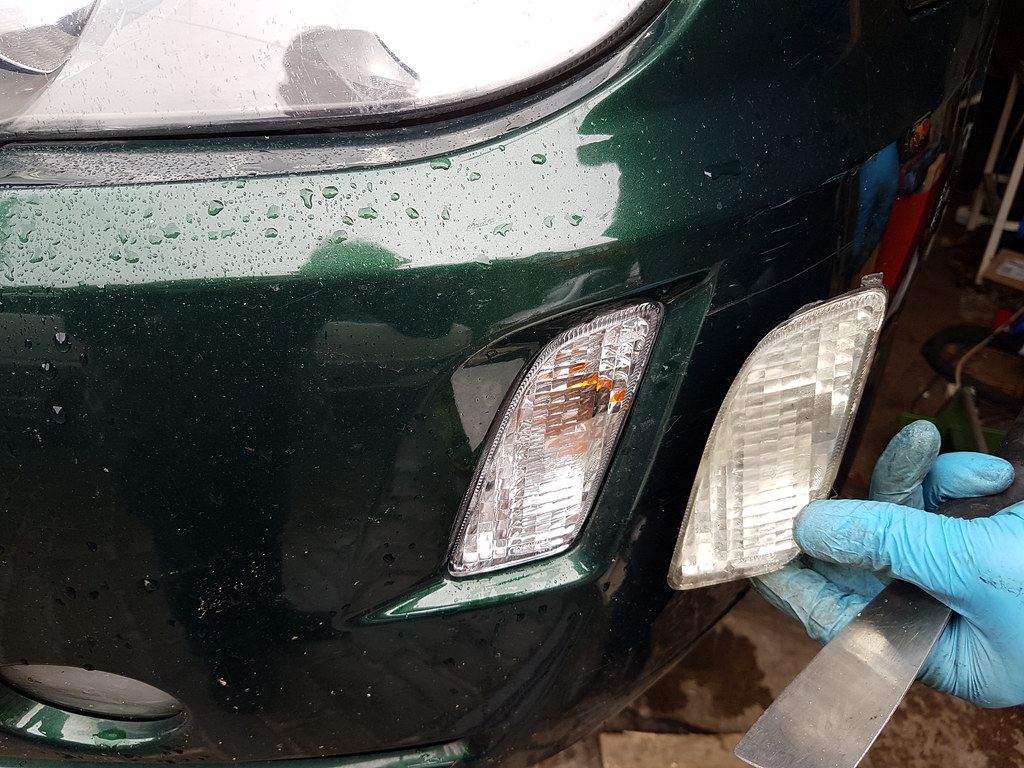 20180906_125924 by Clifton Tausberger, on Flickr
Hopefully this sets the 75 up for another year of happy motoring. The drive home, despite rush hour traffic and the gradual increase in driver aggression as I approached London, was bliss. Vibration and noise was reduced, and it's never ridden so comprehensively over pot holes and rubbish surfaces. Big smile affixed, I crawled out of the cabin into a waiting bath, content in the knowledge it is safe and set for while. The only item left on my list for this year is a thorough scraping and underseal for the undercarriage, but I'll give it a month or so and amass the right products before the roads start getting salted.
Some people go to yoga camps, hike the Peak District or learn yoghurt weaving in Glastonbury. This is my therapy retreat, and again I learnt incalculable amounts from Jules. Highly recommended.
Front brake inspection, renewal of discs/flexis/pipes.
Rear brake inspection, renewal of discs/pads/flexis.
Gear lever play - replacement cables.
Air con inspection (slight leak).
Inspection of front suspension (see rusty turrets above).
Firstly, I had been helping a friend pull up the floor of his new house when an auction listing for two Saab 900 Turbo seats came up for the incredible sum of £25, just down the road. I couldn't pass these up, so they joined me for the trip to Wales:
20180904_150400 by Clifton Tausberger, on FlickrNext up, 250 miles to Colwyn Bay to accommodation. Simply one of the most beautiful places on the planet.
20180905_085947 by Clifton Tausberger, on FlickrThere's no mistaking the specialty of the guru on the scenic approach.
20180905_092431 by Clifton Tausberger, on Flickr20180905_092512 by Clifton Tausberger, on Flickr20180905_092756 by Clifton Tausberger, on Flickr9:30am. Inspection had some good news - with cleaning and testing front brakes are given a good bill of health.
20180905_101558 by Clifton Tausberger, on FlickrRear brakes however was a slight bother. Slight pull and vibration down to really only the right side being effective, and although the handbrake held (see previous work on compensator and adjustment), it wasn't perfect on both sides. Hmm.
20180905_111338 by Clifton Tausberger, on Flickr20180905_112342 by Clifton Tausberger, on FlickrNext up, waggling and prodding revealed play in the front left wishbone bushes, a lower quality part identified so it was to come out. Also the front right damper was leaking and not long for this world. In lieu of front brakes, we tackled both. The lower quality wishbone had been installed with the might of Thor and the care to threads & torque settings of the Hulk. Many hours were spent with wedges and gritted teeth attempting to free it.
Pinch bolt:
20180905_120908 by Clifton Tausberger, on FlickrTwo 18mm rear bolts and a 22mm centre bolt:
20180905_131758 by Clifton Tausberger, on FlickrNasty splits giving play:
20180905_131920 by Clifton Tausberger, on FlickrShiny TRW part in:
20180905_133029 by Clifton Tausberger, on Flickr20180905_133123 by Clifton Tausberger, on FlickrLunchtime. Now, the strut. Luckily Jules has adapted tools and all the knowledge to efficiently swap these out.
20180905_102134 by Clifton Tausberger, on FlickrAgain, pinch bolts, arms and top bolts undone:
20180905_143230 by Clifton Tausberger, on FlickrWe swapped the damper for a lower mileage item to match the other side, plus the top rusty plate with bearing for a new one.
20180905_154809 by Clifton Tausberger, on FlickrSpring guard, spring and all other components transferred over, with some fettling and jack lifting the assembly it all slipped in nicely.
2018-09-07_11-04-47 by Clifton Tausberger, on FlickrTeatime. Rear brakes now - taking off the discs revealed a clear imbalance. This is the Venn diagram of Rover rear discs - what you know needs replacement, what you don't know needs replacement and a middle of what definitely needs to be replaced.
20180905_130342 by Clifton Tausberger, on FlickrThe handbrake assembly (springs and screws to hold in the shoes that act on the inside of the discs) on the rear left had disintegrated, and were all resting at the bottom of the discs, like wet rags in a washing machine. This is a narrow escape - nothing had 'stuck on' or interrupted the rotation.
20180905_140928 by Clifton Tausberger, on FlickrThe handbrake still operated somewhat but pushed the shoes out at an angle with limited force, wearing just a corner and cracking them.
20180905_182352 by Clifton Tausberger, on FlickrThe back plate holes, where the shoes and springs attach, had corroded so Jules has a fix with stainless bolts and nuts. Rusting on the back plates can also expand to push out the other components, so this was chiselled out and treated. Luckily both rear bearings were in good operation (including ABS sensors) and were all cleaned and reused.
20180905_183055 by Clifton Tausberger, on Flickr20180905_184333 by Clifton Tausberger, on FlickrAll this, plus general cleaning and degrunging and adjustments along the way saw us to a 21:00 finish after a brake bleed. The most Rover 75 day I have ever had. Phew.
Next morning, I opted to swap out the clutch master with a NOS cylinder Jules had, as it was still weeping and this was 'a twenty minute job' according to Rover beards on the forums.
20180906_114615 by Clifton Tausberger, on FlickrPinch pin and split pin removed, plus the usual trim and two 8mm bolts holding it in with the worst access imaginable, this can all be done from the cabin:
20180906_115951 by Clifton Tausberger, on FlickrSeparated with bolts removed:
20180906_120432 by Clifton Tausberger, on FlickrNew Rover stock master in:
20180906_120720 by Clifton Tausberger, on FlickrWe also reattached a steering grommet that is one of the biggest causes of noise tranferral to the cabin. Four hours in total but no evidence of leaks, and I was on the road and back in London five hours later.
I also couldn't resist two NOS indicators to match my refurbshed headlights...
20180906_125924 by Clifton Tausberger, on FlickrHopefully this sets the 75 up for another year of happy motoring. The drive home, despite rush hour traffic and the gradual increase in driver aggression as I approached London, was bliss. Vibration and noise was reduced, and it's never ridden so comprehensively over pot holes and rubbish surfaces. Big smile affixed, I crawled out of the cabin into a waiting bath, content in the knowledge it is safe and set for while. The only item left on my list for this year is a thorough scraping and underseal for the undercarriage, but I'll give it a month or so and amass the right products before the roads start getting salted.
Some people go to yoga camps, hike the Peak District or learn yoghurt weaving in Glastonbury. This is my therapy retreat, and again I learnt incalculable amounts from Jules. Highly recommended.
Good to see one of my NOS master cylinders going to a good home... 
The newer ones seem to be built terribly - luckily I still have several hundred of the factory items to keep things ticking over for a while yet.
Not sure I can post who I am in MGR terms on here, but chances are a good few of the bits and pieces you’ve done came from me, or through a company I’ve distributed to in bulk.
Lovely car, and a genuine pleasure seeing one so well looked after. My own ZTT is currently away for what I can only describe as a ‘complete refresh’ after an ABS issue and subsequent investigation found pretty much everything was knackered....
Oh just a quick note - the Borg & Beck Slave isn’t the full metal unit. They have metal pipes with a plastic body - the full metal slave is made by a company called Tazu in Poland, and sold as a Genuine MGR part in the UK.
Edited by mattyprice4004 on Saturday 8th September 01:47
Thanks for the kind words - it's definitely a keeper, for as long as the UK still actually allows diesel cars on the road.
One item I left off were the wheel centre caps - the Mk2 have a neutered viking ship, so I had purchased a set of Mk1s years ago and consistently forgotten to fit them whenever the wheels were off. This time, with an alarm specially set for CENTRE CAPS I finally took them. Of course, they are different sizes:
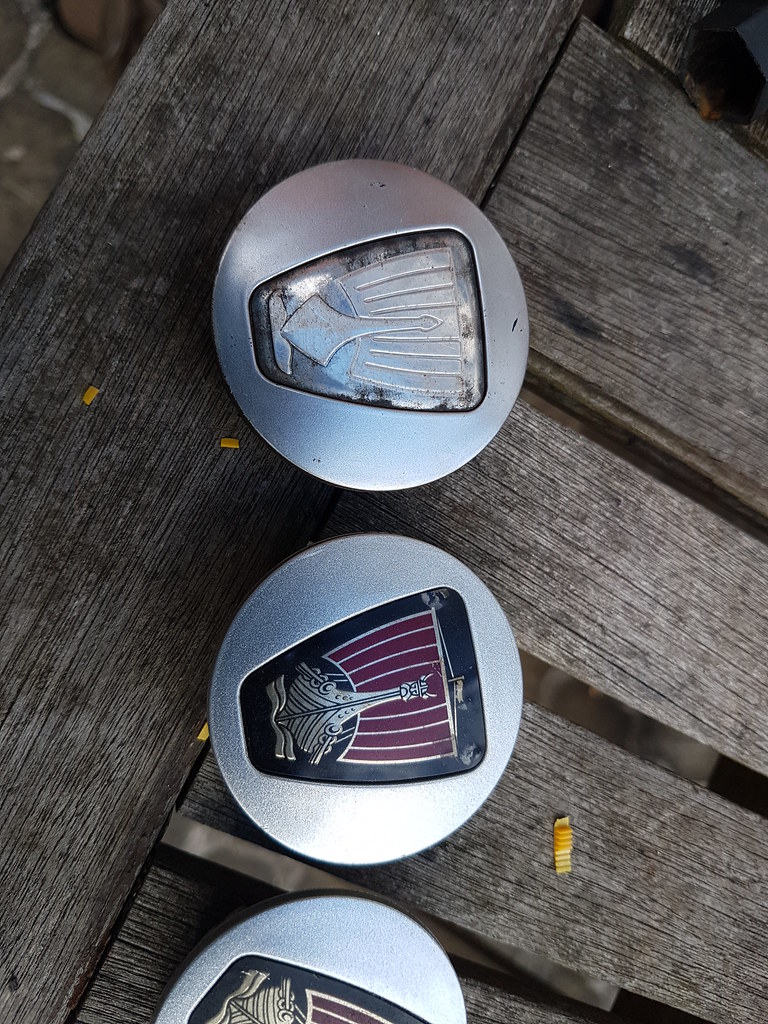 20180905_101827 by Clifton Tausberger, on Flickr
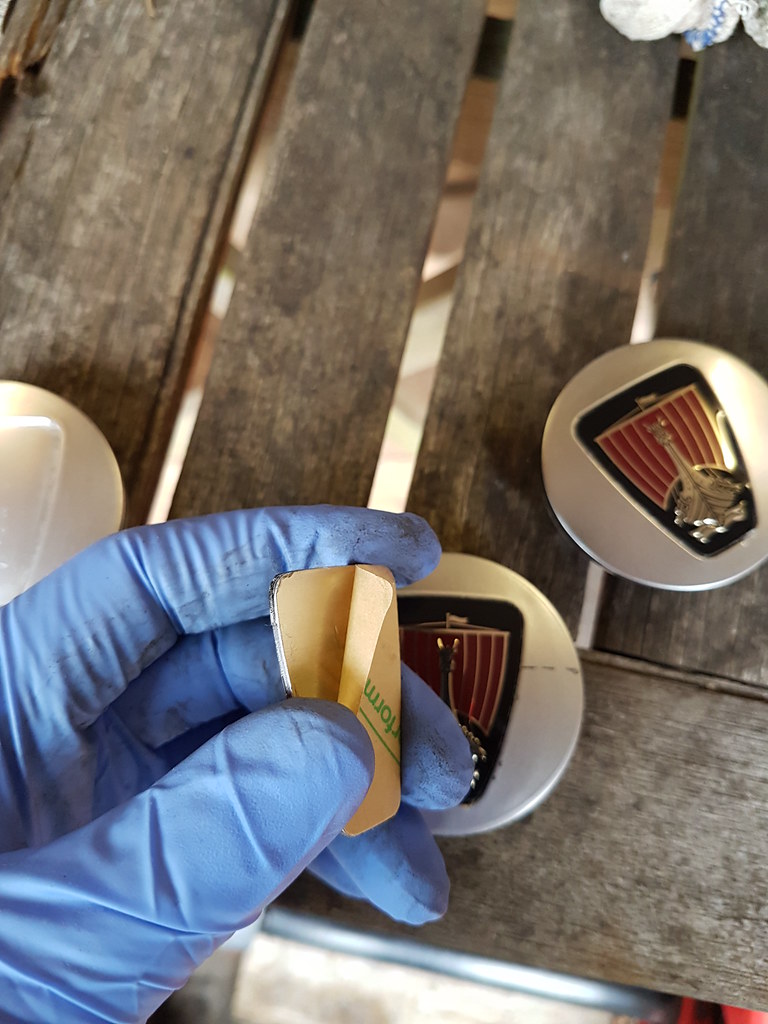
Big sigh. Fortunately, Jules pull a set of adhesive stickers from his stores, and I spent a happy few minutes easing out the old logos with a hair dryer and a chisel.
 20180906_112712 by Clifton Tausberger, on Flickr
MOT passes guaranteed with these installed.
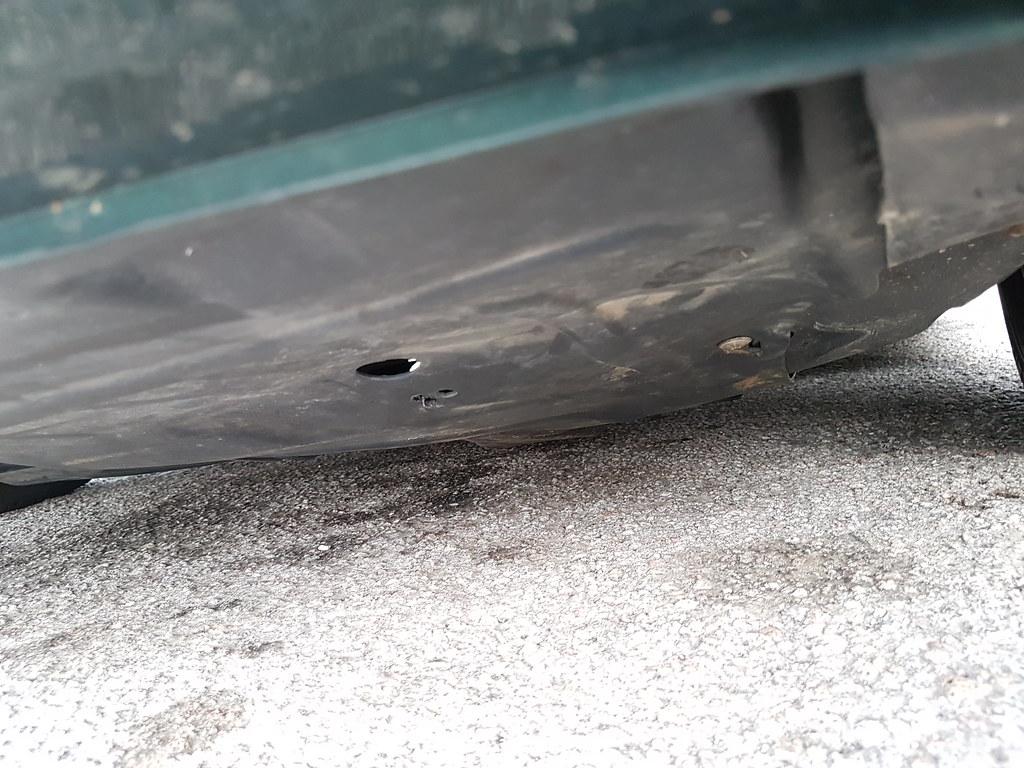
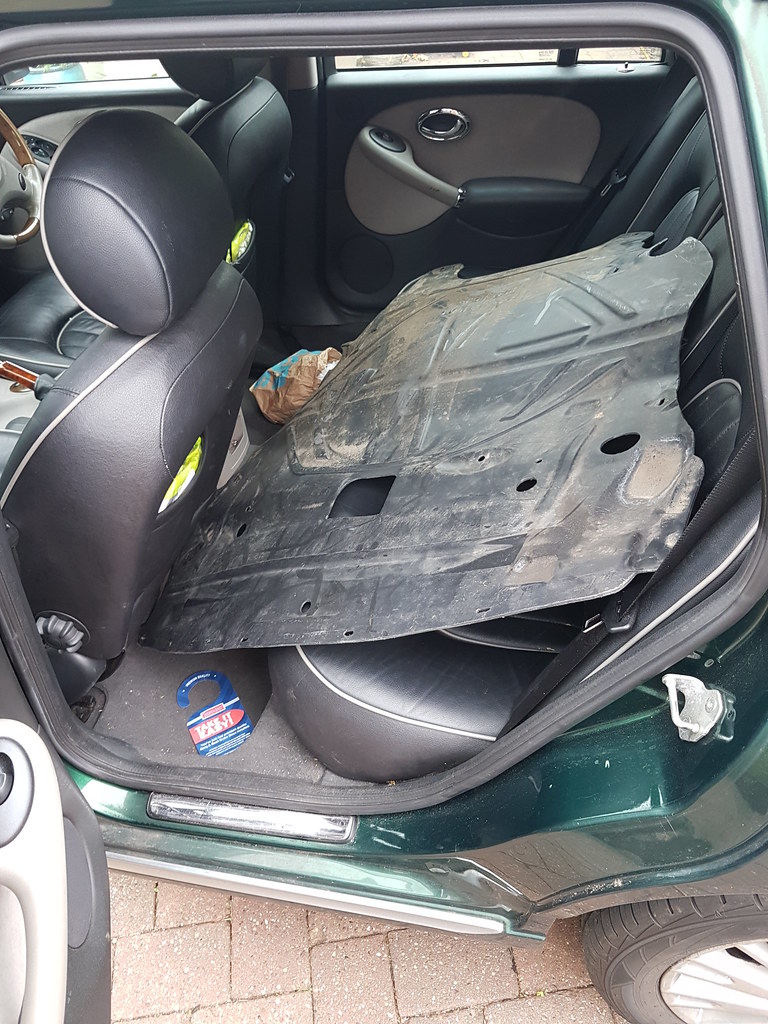
The 75 did another few hundred miles this weekend, taking us to a wedding and riding finely, at least until the aftermarket undertray started the catch on every speed bump. Although fully attached in the right places, it has flexed bizarrely and had to come off. Unfortunately good used items are in short supply, and not easy to ship! Oh well, another item back on the list.
 20180907_163452 by Clifton Tausberger, on Flickr
 20180909_110923 by Clifton Tausberger, on Flickr
mattyprice4004 said:
Good to see one of my NOS master cylinders going to a good home...
My own ZTT is currently away for what I can only describe as a ‘complete refresh’ after an ABS issue and subsequent investigation found pretty much everything was knackered....
Yes that sounds like a similar situation to many - we definitely got lucky with this one, largely as it was one of the last, but Jules is starting to see some proper 'classic' issues now on the early Mk1s. It'll be worth it, especially as you have all the parts!My own ZTT is currently away for what I can only describe as a ‘complete refresh’ after an ABS issue and subsequent investigation found pretty much everything was knackered....
One item I left off were the wheel centre caps - the Mk2 have a neutered viking ship, so I had purchased a set of Mk1s years ago and consistently forgotten to fit them whenever the wheels were off. This time, with an alarm specially set for CENTRE CAPS I finally took them. Of course, they are different sizes:
20180905_101827 by Clifton Tausberger, on FlickrBig sigh. Fortunately, Jules pull a set of adhesive stickers from his stores, and I spent a happy few minutes easing out the old logos with a hair dryer and a chisel.
20180906_112712 by Clifton Tausberger, on FlickrMOT passes guaranteed with these installed.
The 75 did another few hundred miles this weekend, taking us to a wedding and riding finely, at least until the aftermarket undertray started the catch on every speed bump. Although fully attached in the right places, it has flexed bizarrely and had to come off. Unfortunately good used items are in short supply, and not easy to ship! Oh well, another item back on the list.
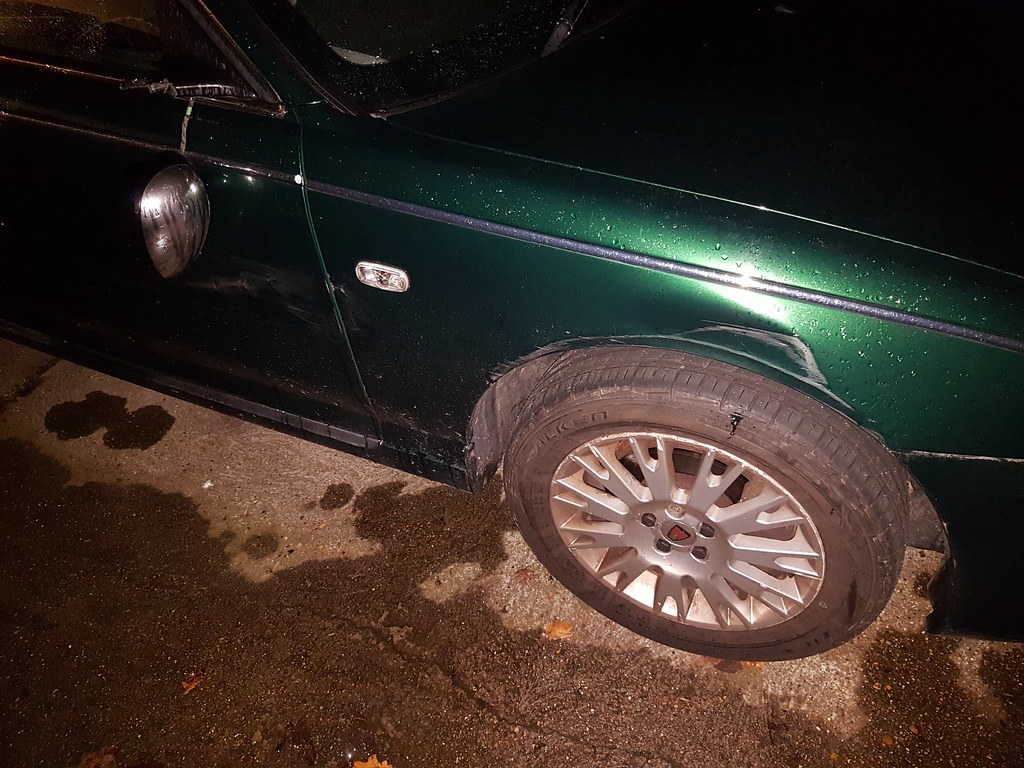
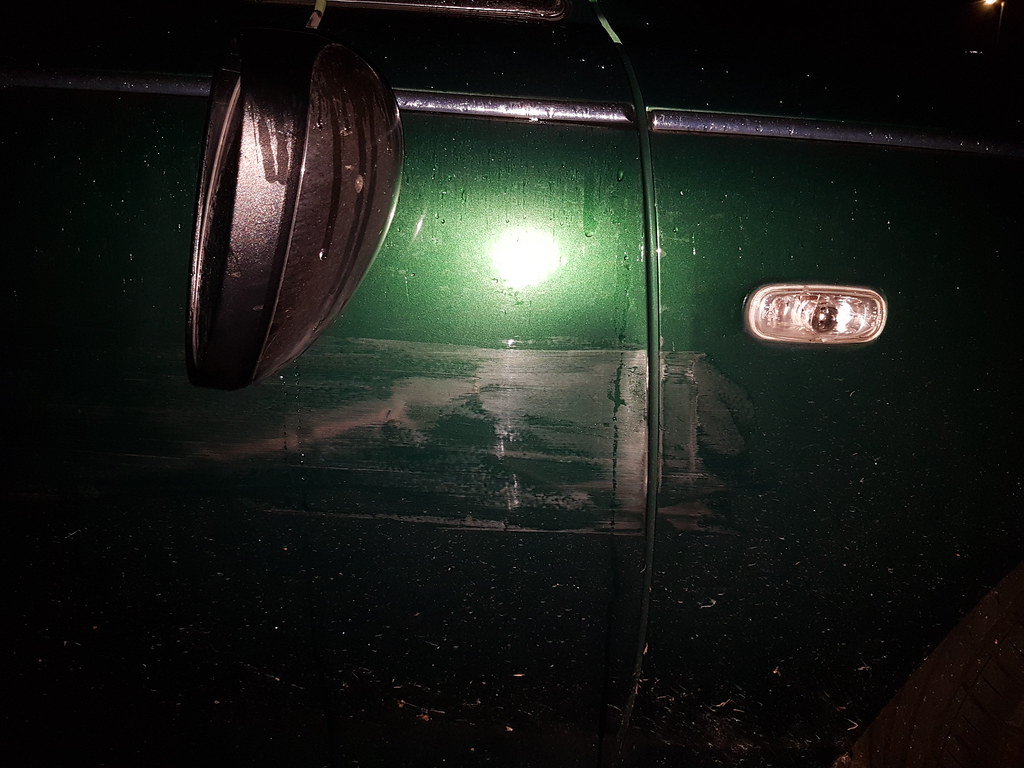
20180907_163452 by Clifton Tausberger, on Flickr20180909_110923 by Clifton Tausberger, on FlickrBad news on the Rover - a van driver sideswiped it on a roundabout, and almost squeezed it into a bollard.
 20181204_211529
 20181204_211602
 20181204_211610
According to my wife, who got him to stop, after much gesticulating he admitted fault at the scene. We'll see how that pans out - I'm most worried about it being written off and her policy/the car's status being impacted as on the books it's not worth a large amount.
Wing mirror broken off.
Side repeater smashed.
OSF wheel arch crinkled and scratched.
Driver's door kinked and heavily scratched.
Passenger door kinked and scratched.
Rear wheelarch slightly scratched.
So a pretty comprehensive driver's side cosmetic demolition.
We're patently not parting with the car under any circumstances, but it will likely be cheaper and easier to source the panels and bits (paint code HFF, if anyone knows one being broken!) and do it ourselves.
Incredible frustrating. Bah.
20181204_21152920181204_21160220181204_211610According to my wife, who got him to stop, after much gesticulating he admitted fault at the scene. We'll see how that pans out - I'm most worried about it being written off and her policy/the car's status being impacted as on the books it's not worth a large amount.
Wing mirror broken off.
Side repeater smashed.
OSF wheel arch crinkled and scratched.
Driver's door kinked and heavily scratched.
Passenger door kinked and scratched.
Rear wheelarch slightly scratched.
So a pretty comprehensive driver's side cosmetic demolition.
We're patently not parting with the car under any circumstances, but it will likely be cheaper and easier to source the panels and bits (paint code HFF, if anyone knows one being broken!) and do it ourselves.
Incredible frustrating. Bah.
Gassing Station | Readers' Cars | Top of Page | What's New | My Stuff