Jaguar xjc 4.2
Discussion


Bobberoo99 said:
It's a nice system, couple of questions though, having such a big distance between the mids/tweeters and front mid bass may upset the balance a little, just a bit too much sound field separation for my liking, secondly is the sub in a sealed enclosure? If not having it ported and the then ported again into the cabin may give you resonance issues due it compressing the bass for a second time.
Regarding the subwoofer, I’m going to build a band pass enclosure. The port will vent into the cabin via the rear shelf. If I fancy leaving the boot open at a show perhaps, then the interior port will be plugged. The boot port can then be unplugged. I might fit a Perspex window in the enclosure to visually give the impression of a sealed type enclosure. Haven’t decided that yet though.The fronts as you say could give issues but I have tried it before in that configuration and it worked very well indeed in a car with original dash mount 4” full range and a door mounted 6” bass driver. No fancy time alignment electronics were used either. Just a pair of Philips dap amplifiers and a simple 5 band Kenwood graphic equaliser. The equaliser did introduce a bit of unwanted noise but was only heard through test equipment.
The head unit I have has the parametric equaliser built into it so should be a bit better.
Below is a picture of the boot install I fitted previously. Just a sealed enclosure that really sounded good, if you sat in the boot lol.
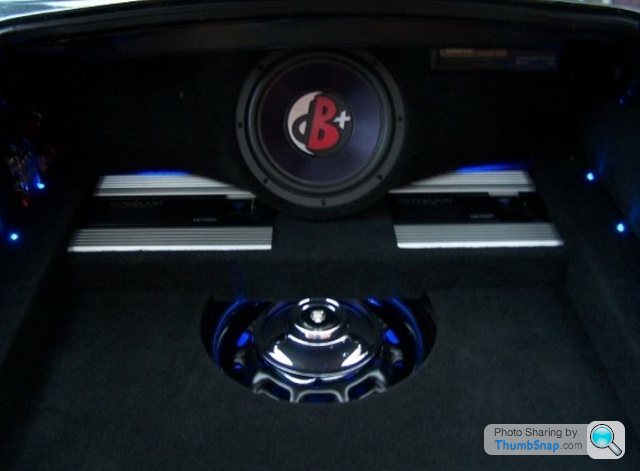
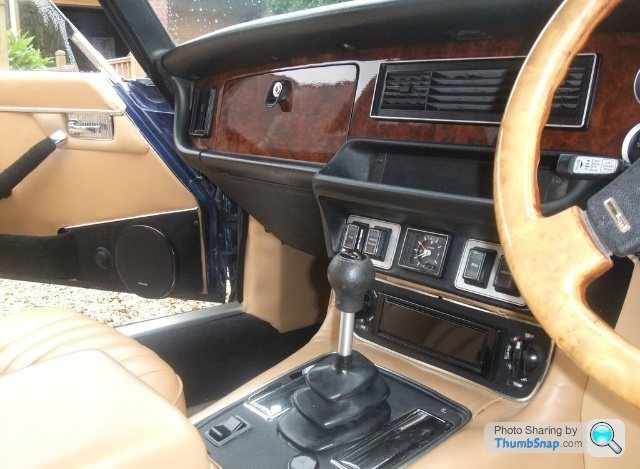
Picture above shows previous door mounted components. Although positioned and angled upwards the sound was still sounding low, hence the small dash and A pillar mounted components.
That's the issue with sealed enclosures, they produce a more natural flat bass but once the boot is shut become quite muted unless vented into the cabin. I can see that the components in the doors would need much more angle to play to the center of the cabin from down there, a lovely tidy set up though!! Re the whole time alignment thing, it only works on channels not on separate speakers, for instance you can use it to delay the fronts to pull the sound stage into the center of the cabin or push the sound stage over to the drivers or passengers side of the vehicle, it works well if you have little or no bass in the front doors due to size restrictions by "pausing the other frequencies" and allowing the sub to start to fire before allowing the other frequencies to fire.
I like the idea of removable plugs for the enclosure, should be a nice set up when done, there are some rubber speaker enclosures available for the doors which are available as either closed or open at the bottom to suit your needs, looking forward to seeing it when the whole things done mate, keep up the good work!!
I like the idea of removable plugs for the enclosure, should be a nice set up when done, there are some rubber speaker enclosures available for the doors which are available as either closed or open at the bottom to suit your needs, looking forward to seeing it when the whole things done mate, keep up the good work!!
Thanks for the advice, always appreciated  .
.
If I’m honest, building the stereo is the part I enjoy most. I have a Sony stereo in the regular car which has a function that lifts the sound if speakers are mounted low in the doors. It works really well. The Kenwood unit I’m using for the Jag doesn’t have that function unfortunately. Basically my plan is build the dash mount components and then power them to actually hear what I’ve got with my amp hpf crossover set at 200hz, Ideally I’d like 500hz but to get that I need to fit a better active crossover. Little 3” mids are so expensive compared to 4” mids? So a bit of ingenuity will be needed fitting 4” mids in the dash top and miss the ventilation heating pipes, that supply the dash vents. I possibly need to angle those 4” mids under the dash top and use the windscreen to help reflect the sound towards the driver and passenger. The door mounted bass speakers should be easier to mount now as the directional frequencies can be removed. A flatter mount in keeping with the 70’s fit flat interior door trim.
That’s the plan but I’m sure adjustments will be needed when tested
. If I’m honest, building the stereo is the part I enjoy most. I have a Sony stereo in the regular car which has a function that lifts the sound if speakers are mounted low in the doors. It works really well. The Kenwood unit I’m using for the Jag doesn’t have that function unfortunately. Basically my plan is build the dash mount components and then power them to actually hear what I’ve got with my amp hpf crossover set at 200hz, Ideally I’d like 500hz but to get that I need to fit a better active crossover. Little 3” mids are so expensive compared to 4” mids? So a bit of ingenuity will be needed fitting 4” mids in the dash top and miss the ventilation heating pipes, that supply the dash vents. I possibly need to angle those 4” mids under the dash top and use the windscreen to help reflect the sound towards the driver and passenger. The door mounted bass speakers should be easier to mount now as the directional frequencies can be removed. A flatter mount in keeping with the 70’s fit flat interior door trim.
That’s the plan but I’m sure adjustments will be needed when tested
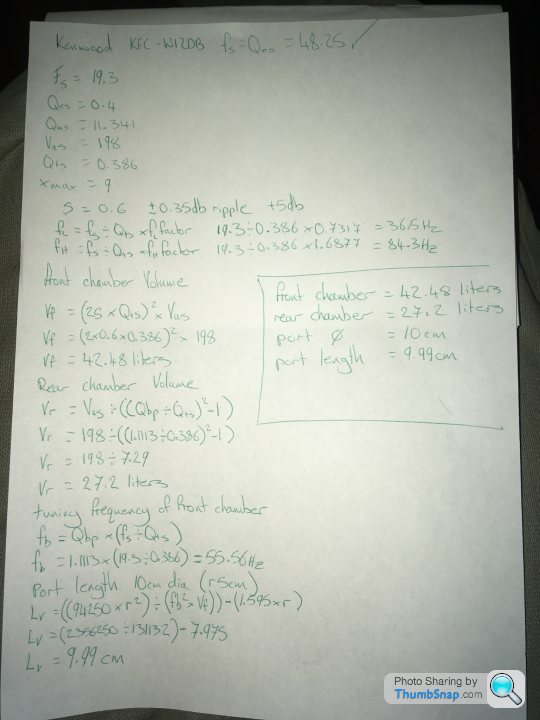
Doing some calcs to build a 4th order bandpass subwoofer enclosure. The equations are readily available on the internet and it’s finding the relevant spec for the subwoofer.
Initial thoughts are that the box volume will be to big for the space I want to use at 69.68 litres. That’s using the 12” kenwood dB+ subwoofer I currently have. A 10” dB+ subwoofer only uses a volume of 34.8 litres with a similar frequency response of between 38hz-93hz with a 4db boost compared to a 36hz-84hz 5db boost of the 12” subwoofer.
Now I’m thinking of using a pair of high excursion 8” subwoofers fitted in a triple chamber enclosure.
On my old XJC I fitted a 10" (or it might have been 12") sub woofer and box in the middle of the boot with the speaker facing straight towards the back panel of the rear seats, and cut a hole in the rear seat back panel for the sounds to pass though into the cabin. A bit of wire mesh affixed over the hole stopped the middle of the rear seat pressing back into boot.
Probable deemed holiganistic abuse of an XJC now, but it did sound superb, could feel the bass in your kidneys!
Probable deemed holiganistic abuse of an XJC now, but it did sound superb, could feel the bass in your kidneys!
RobXjcoupe said:
Doing some calcs to build a 4th order bandpass subwoofer enclosure. The equations are readily available on the internet and it’s finding the relevant spec for the subwoofer.
Initial thoughts are that the box volume will be to big for the space I want to use at 69.68 litres. That’s using the 12” kenwood dB+ subwoofer I currently have. A 10” dB+ subwoofer only uses a volume of 34.8 litres with a similar frequency response of between 38hz-93hz with a 4db boost compared to a 36hz-84hz 5db boost of the 12” subwoofer.
Now I’m thinking of using a pair of high excursion 8” subwoofers fitted in a triple chamber enclosure.
Piersman2 said:
On my old XJC I fitted a 10" (or it might have been 12") sub woofer and box in the middle of the boot with the speaker facing straight towards the back panel of the rear seats, and cut a hole in the rear seat back panel for the sounds to pass though into the cabin. A bit of wire mesh affixed over the hole stopped the middle of the rear seat pressing back into boot.
Probable deemed holiganistic abuse of an XJC now, but it did sound superb, could feel the bass in your kidneys!
When I bought my coupe years ago it had something similar fitted. Now the internet is here, info that was once a bit of work to get hold of mow makes things a little easier to build to spec Probable deemed holiganistic abuse of an XJC now, but it did sound superb, could feel the bass in your kidneys!
CharlesdeGaulle said:
RobXjcoupe said:
Doing some calcs to build a 4th order bandpass subwoofer enclosure. The equations are readily available on the internet and it’s finding the relevant spec for the subwoofer.
Initial thoughts are that the box volume will be to big for the space I want to use at 69.68 litres. That’s using the 12” kenwood dB+ subwoofer I currently have. A 10” dB+ subwoofer only uses a volume of 34.8 litres with a similar frequency response of between 38hz-93hz with a 4db boost compared to a 36hz-84hz 5db boost of the 12” subwoofer.
Now I’m thinking of using a pair of high excursion 8” subwoofers fitted in a triple chamber enclosure.
While the car is in bits the modifications to the rear shelf will be a lot easier hence doing these calcs now.
Hope that explains things a little?
RobXjcoupe said:
Hope that explains things a little?
It does, thanks. I suppose it makes sense to completely re-do the soundz whilst you're doing what you are, but I confess I rarely listen to anything in any of my cars, so I don't really get the obsession with decent audio. Notwithstanding, I really love what you're doing with the car and I hope it works out perfectly.
CharlesdeGaulle said:
RobXjcoupe said:
Hope that explains things a little?
It does, thanks. I suppose it makes sense to completely re-do the soundz whilst you're doing what you are, but I confess I rarely listen to anything in any of my cars, so I don't really get the obsession with decent audio. Notwithstanding, I really love what you're doing with the car and I hope it works out perfectly.
Sometimes the details make the difference and I think building a properly dimensionsed bandpass subwoofer enclosure rather than my previous oversized sealed enclosure will give the sound I’m after.
The stereo components I’m using are mostly second hand or stuff I’ve bought new from 20 years ago lol but were/and are good quality items still.
Stereo systems in classic cars always seem to be frowned apon for some reason? So I’m trying to build a version that is possibly acceptable
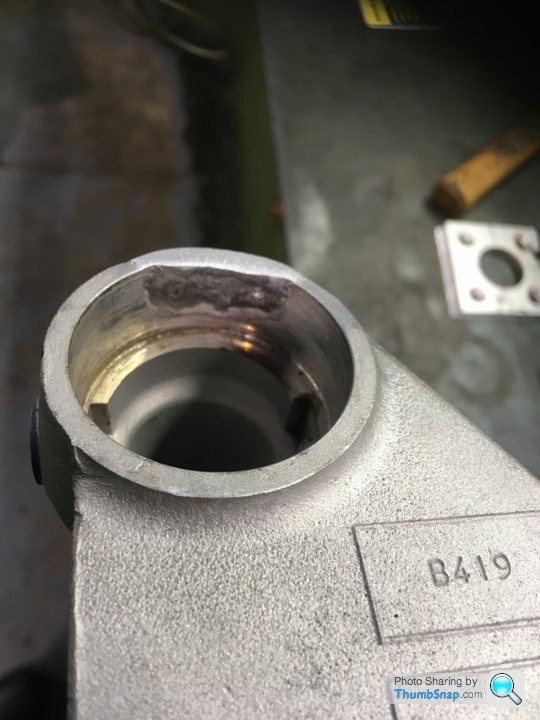
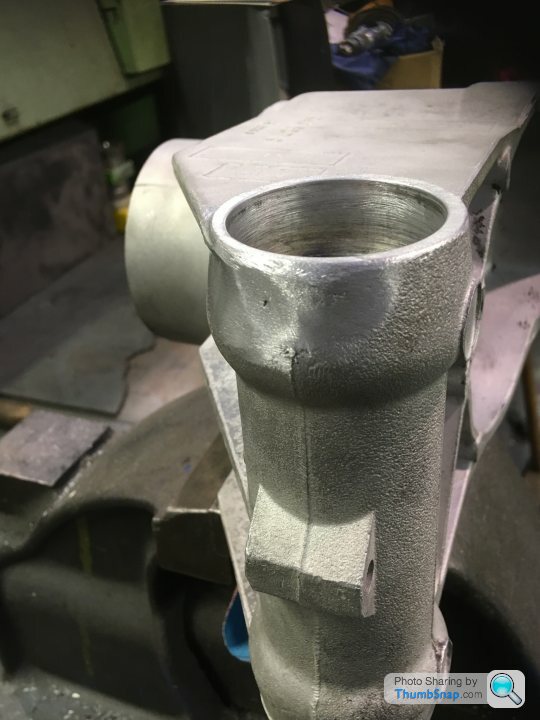
Back to the engineering now. Below are pictures of a small repair to the rear axle aluminium hub carrier. It’s the lower wishbone fulcrum and houses a needle bearing. Part of the casting had broke off leaving a gap for the rubber bearing seal. Tonight it was welded up and finished by hand.

RobXjcoupe said:
I’ve always upgraded my car sound system and it’s something I’ve enjoyed doing since I’ve been driving. Not that I play music really loud and annoyingly but i do like to hear all the sound without a speaker crackling or a door panel rattling. With the info available on the internet now there is a lot less left to chance, pulling bearings or getting a subwoofer port the correct size.
Sometimes the details make the difference and I think building a properly dimensionsed bandpass subwoofer enclosure rather than my previous oversized sealed enclosure will give the sound I’m after.
The stereo components I’m using are mostly second hand or stuff I’ve bought new from 20 years ago lol but were/and are good quality items still.
Stereo systems in classic cars always seem to be frowned apon for some reason? So I’m trying to build a version that is possibly acceptable
Surely can't sound as good as Ali g's classic carSometimes the details make the difference and I think building a properly dimensionsed bandpass subwoofer enclosure rather than my previous oversized sealed enclosure will give the sound I’m after.
The stereo components I’m using are mostly second hand or stuff I’ve bought new from 20 years ago lol but were/and are good quality items still.
Stereo systems in classic cars always seem to be frowned apon for some reason? So I’m trying to build a version that is possibly acceptable


https://youtu.be/efgIm9YPZvE

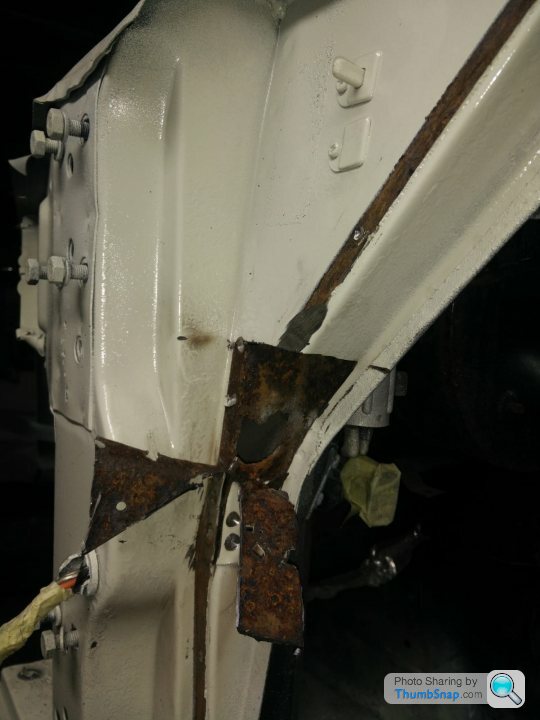
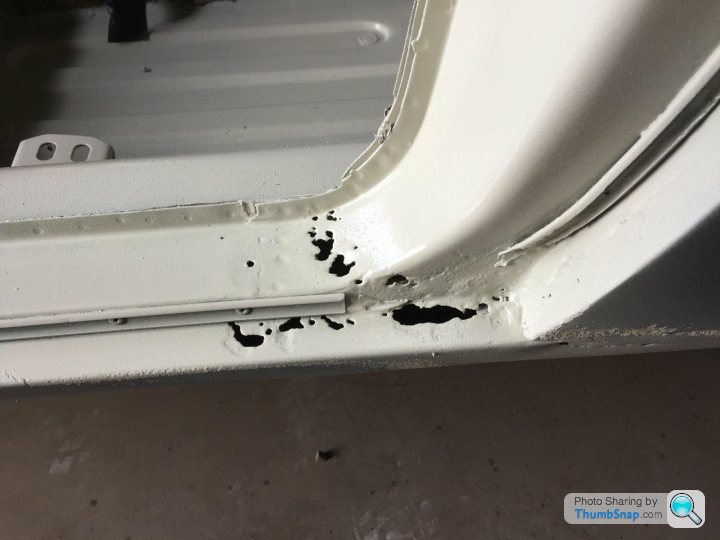
A few pictures of repairs to the body that have taken place
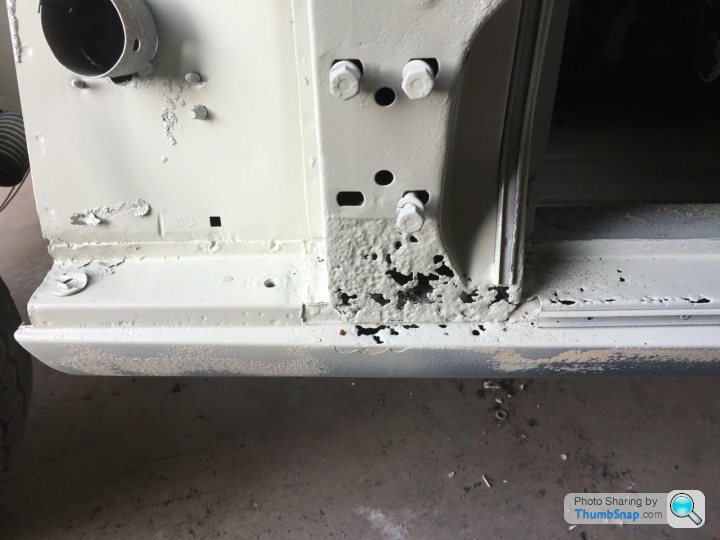
Also repaired but without pictures is the passenger footwell near the inside sill. It had been repaired in 89/90 but wasn’t very pleasing to the eye so has been cut out and done again. The outer sills have been removed to check the quality of the inners. Inners were remarkable good so have been cleaned up and galvanised spray applied. New passenger sill has started to be fitted using the door to check panel shut lines. Well the door had a new skin fitted by xj restorations about 10 years ago. My restorer showed me the quality of fit expecting a straight line for the bottom of the door. Instead was a wavy line with a 5mm deviation at some points. Needless to say that door skin is being removed and replaced rather than try to make good. The deviation was well hidden with the door rubber seals fitted which deceived the eye in thinking it was straight.
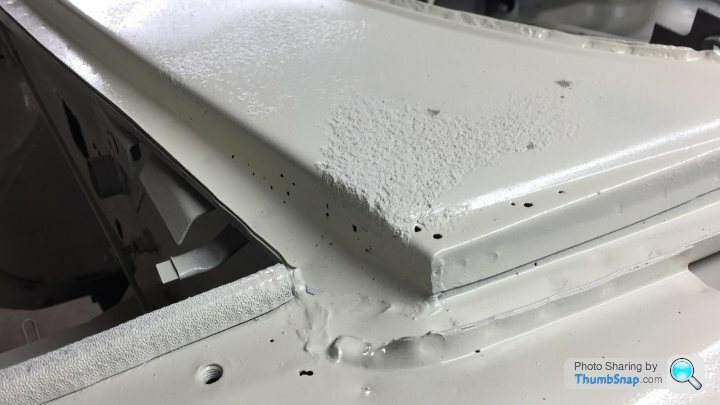
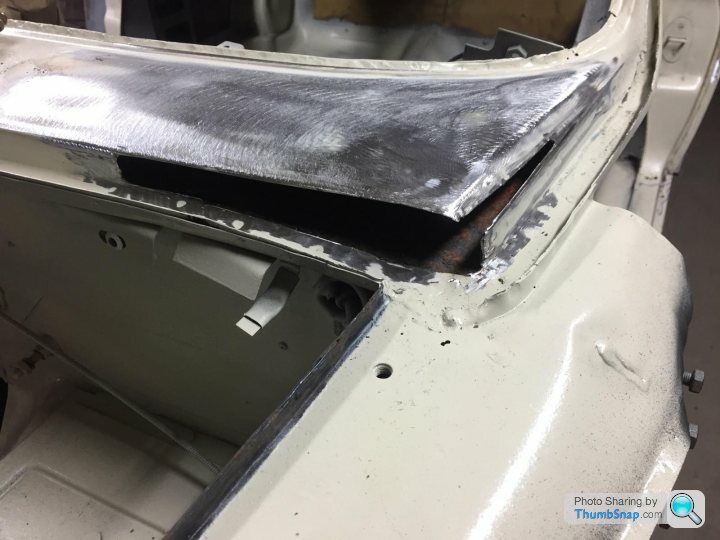
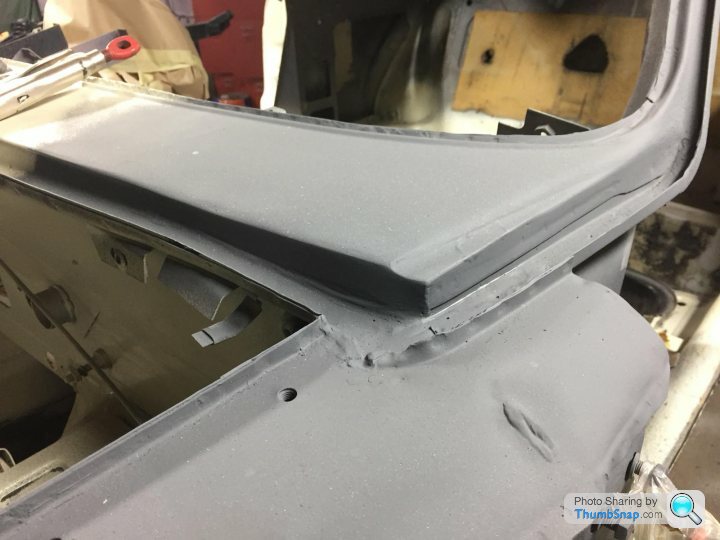
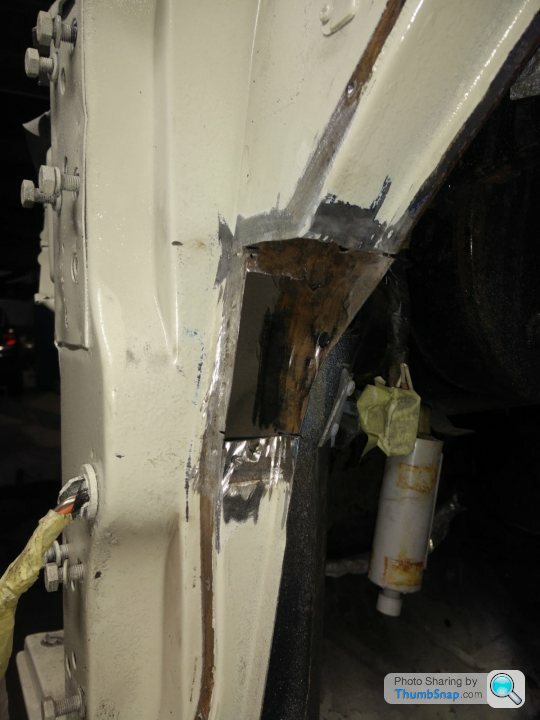
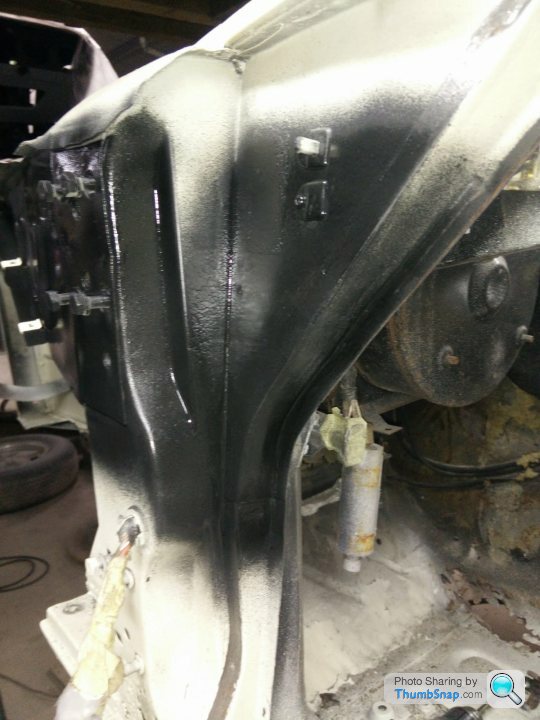
Anyway a slight modification is to remove the flange on the bottom of the quarter panel which produces the style line. This is a rust trap so will be ground back and seam welded front and back to stop any possible corrosion. I’ll lose the style line from the sill to the bottom of the quarter panel to give a nice perfectly fitted quarter flush down to the sill with no worries of that edge blowing again. Hopefully will last my lifetime once inner panel protection applied.
Other areas being cut out is the bottom of the a pillar onto the sill and same bottom area of b pillar/quarter meeting the sill. Pictures show the areas described before the sill was removed.
[url]
 |https://thumbsnap.com/S5WlooXN[/url
That’s about it till the new year picture wise. The body is now being repaired bit by bit. I’ve seen a few of the cars in the restorers garage from knackered shells worse than mine to repaired and painted and the finish is stunning. Looking forward to seeing mine in new paint
The new year has started and I’m back at work with bits of grotty Jag to make good again.
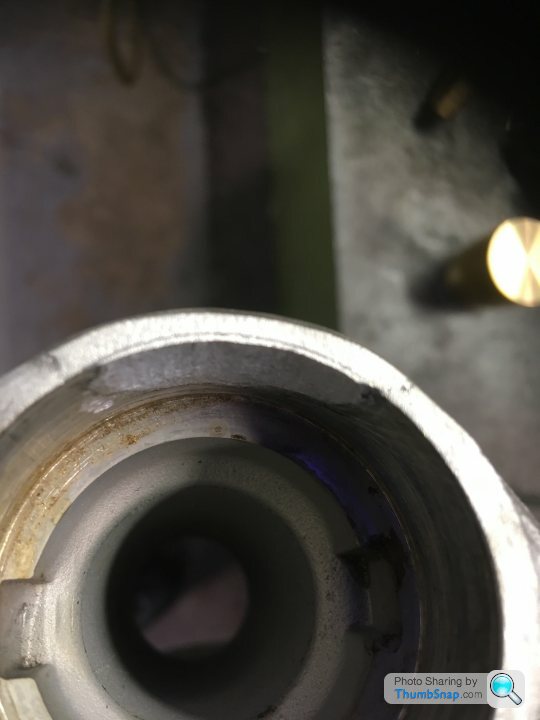
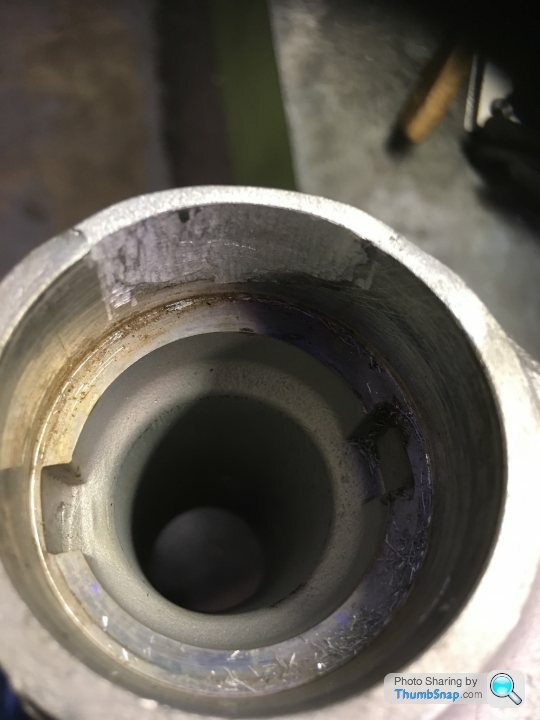
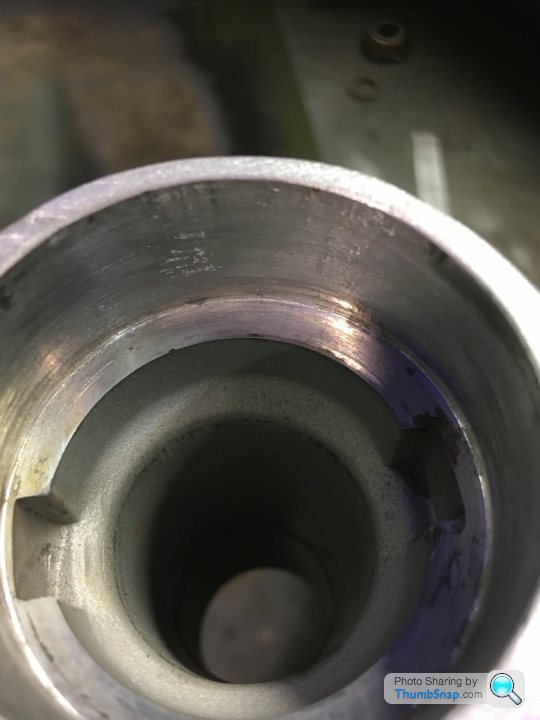
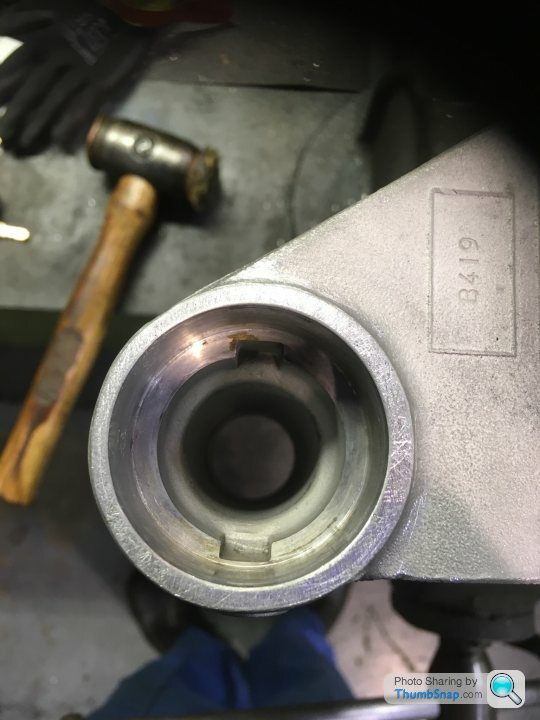
I have a partially stripped down front axle in my garage and below are the front brake calipers. They are not the originals but are the same spec, cast iron 4 pots.
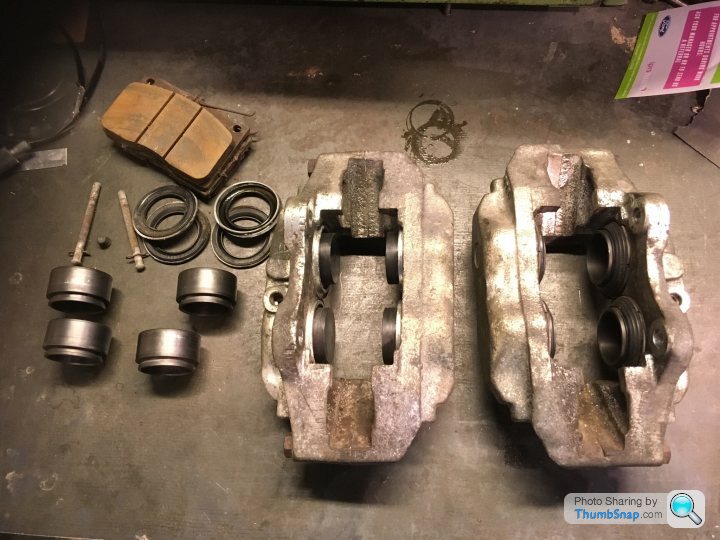
The one on the left of the picture has had the 4 pistons and outer seals removed and 4 dummy nylon pistons fitted ready to shot blast.
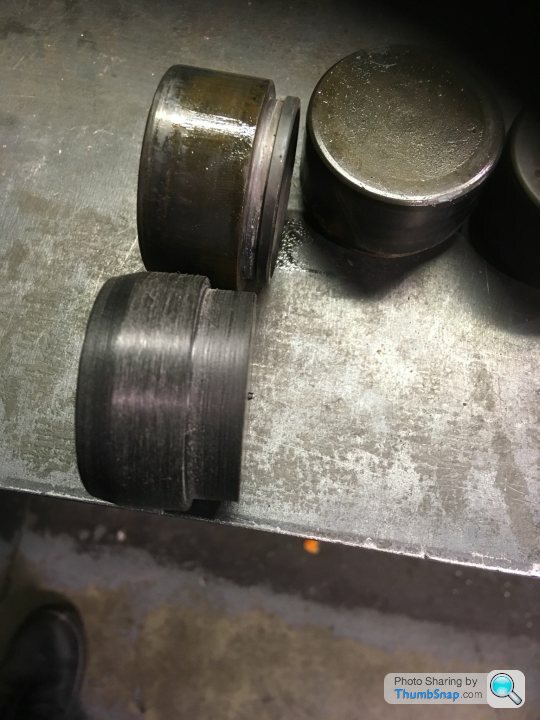
The nylon plugs still have to be a good fit pushing into the inside rubber seal. Bit of a pain getting to diameter of 48.06mm. The actual pistons are all in good condition.

So once the caliper castings have been refurbed to match the rears I just need to replace the rubber inner and outer seals and fit the pistons I removed.
Hopefully end of next week the front calipers will be as good as new again
I have a partially stripped down front axle in my garage and below are the front brake calipers. They are not the originals but are the same spec, cast iron 4 pots.
The one on the left of the picture has had the 4 pistons and outer seals removed and 4 dummy nylon pistons fitted ready to shot blast.
The nylon plugs still have to be a good fit pushing into the inside rubber seal. Bit of a pain getting to diameter of 48.06mm. The actual pistons are all in good condition.
So once the caliper castings have been refurbed to match the rears I just need to replace the rubber inner and outer seals and fit the pistons I removed.
Hopefully end of next week the front calipers will be as good as new again
Working day shifts are usually busier than nights so haven’t had a chance to get the calipers painted so whilst doing some lathe work I fitted in my own work to make a front suspension spring compression tool similar to the original Jaguar version
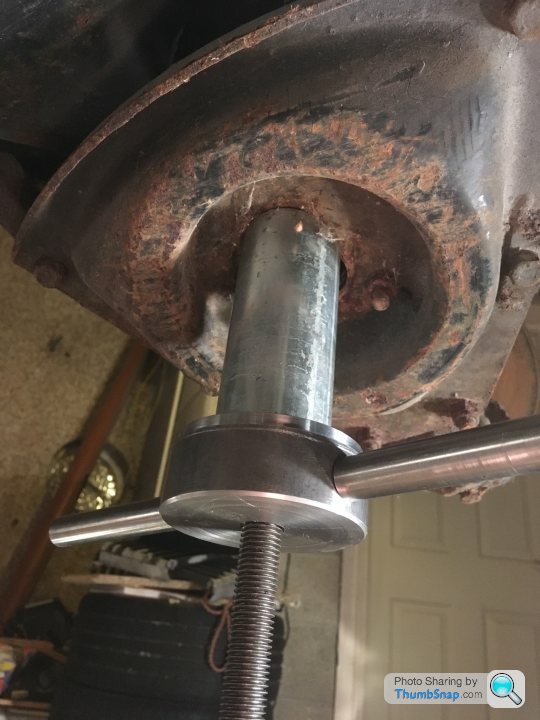
Tried it out this evening and it worked perfectly
Tried it out this evening and it worked perfectly
So front clip or front axle what ever it’s referred to has been totally stripped to its component parts. No horrendous rust or rot was found. Drivers side spring had snapped and both stub axles have too much wear to reuse with new bearings. Ball joints will be replaced as with the wishbone arm rubber bushes. I didn’t take any before and after pictures. Oops! I can do after pictures if interested?
Hoping to arrange the parts to be galvanised soon and then they can be painted and finally put back together better than new.
Hoping to arrange the parts to be galvanised soon and then they can be painted and finally put back together better than new.
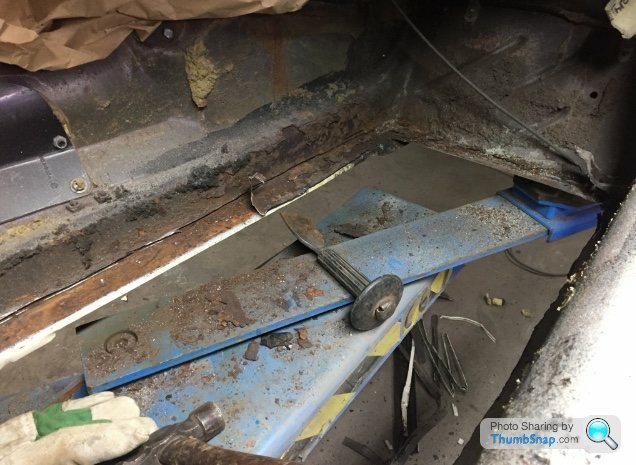
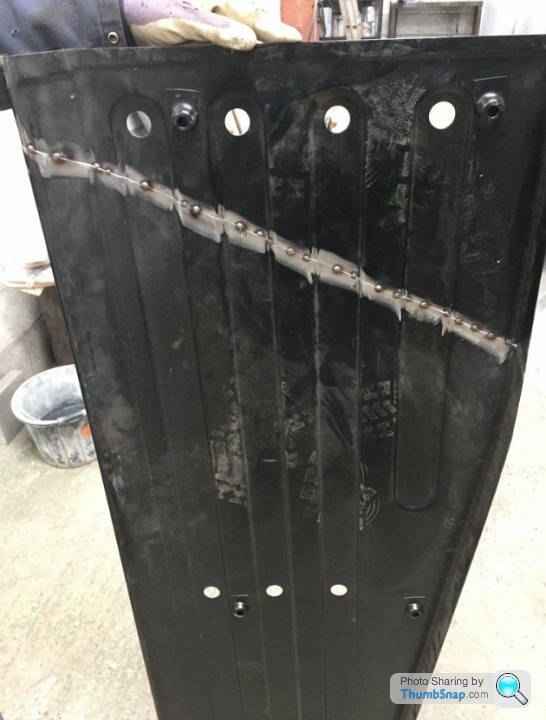
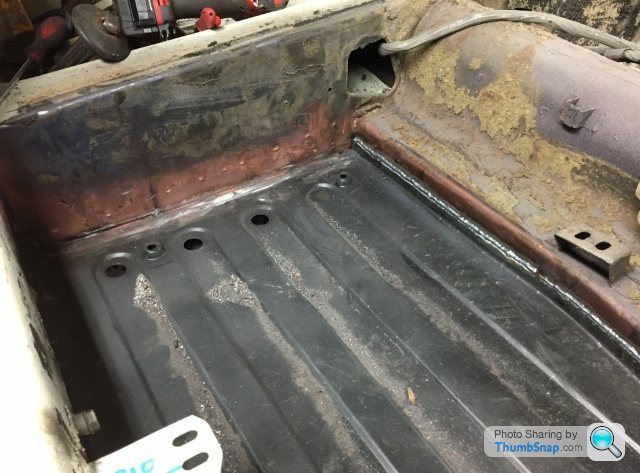
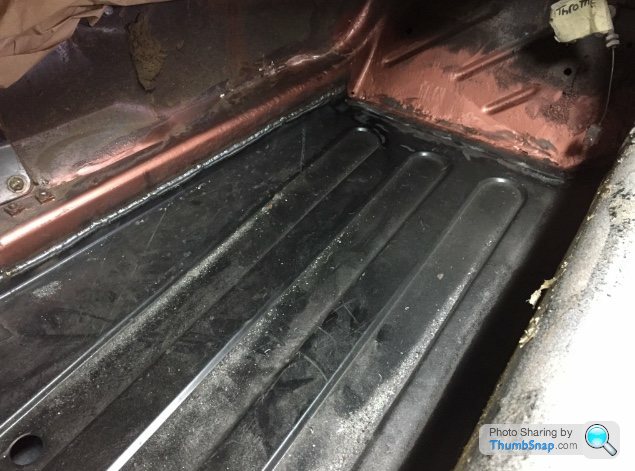
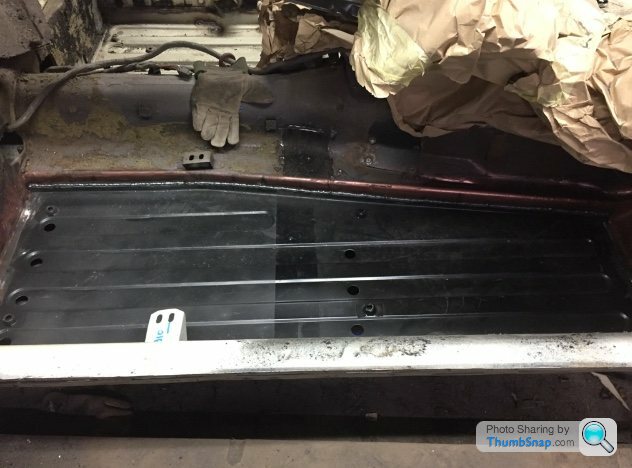
Drivers side floor removed and replaced. Original panel didn’t actually have any holes in it but was a bit thin in places so it was replaced. Panel used was a long wheel base floor which needed to be shortened. A diagonal cut was done to spread the load once butt welded and finished. The panel hasn’t been overlapped. As you can see the join has disappeared with just a thin coat of weld through primer applied. The welder did a fabulous job in my eye
Gassing Station | Readers' Cars | Top of Page | What's New | My Stuff